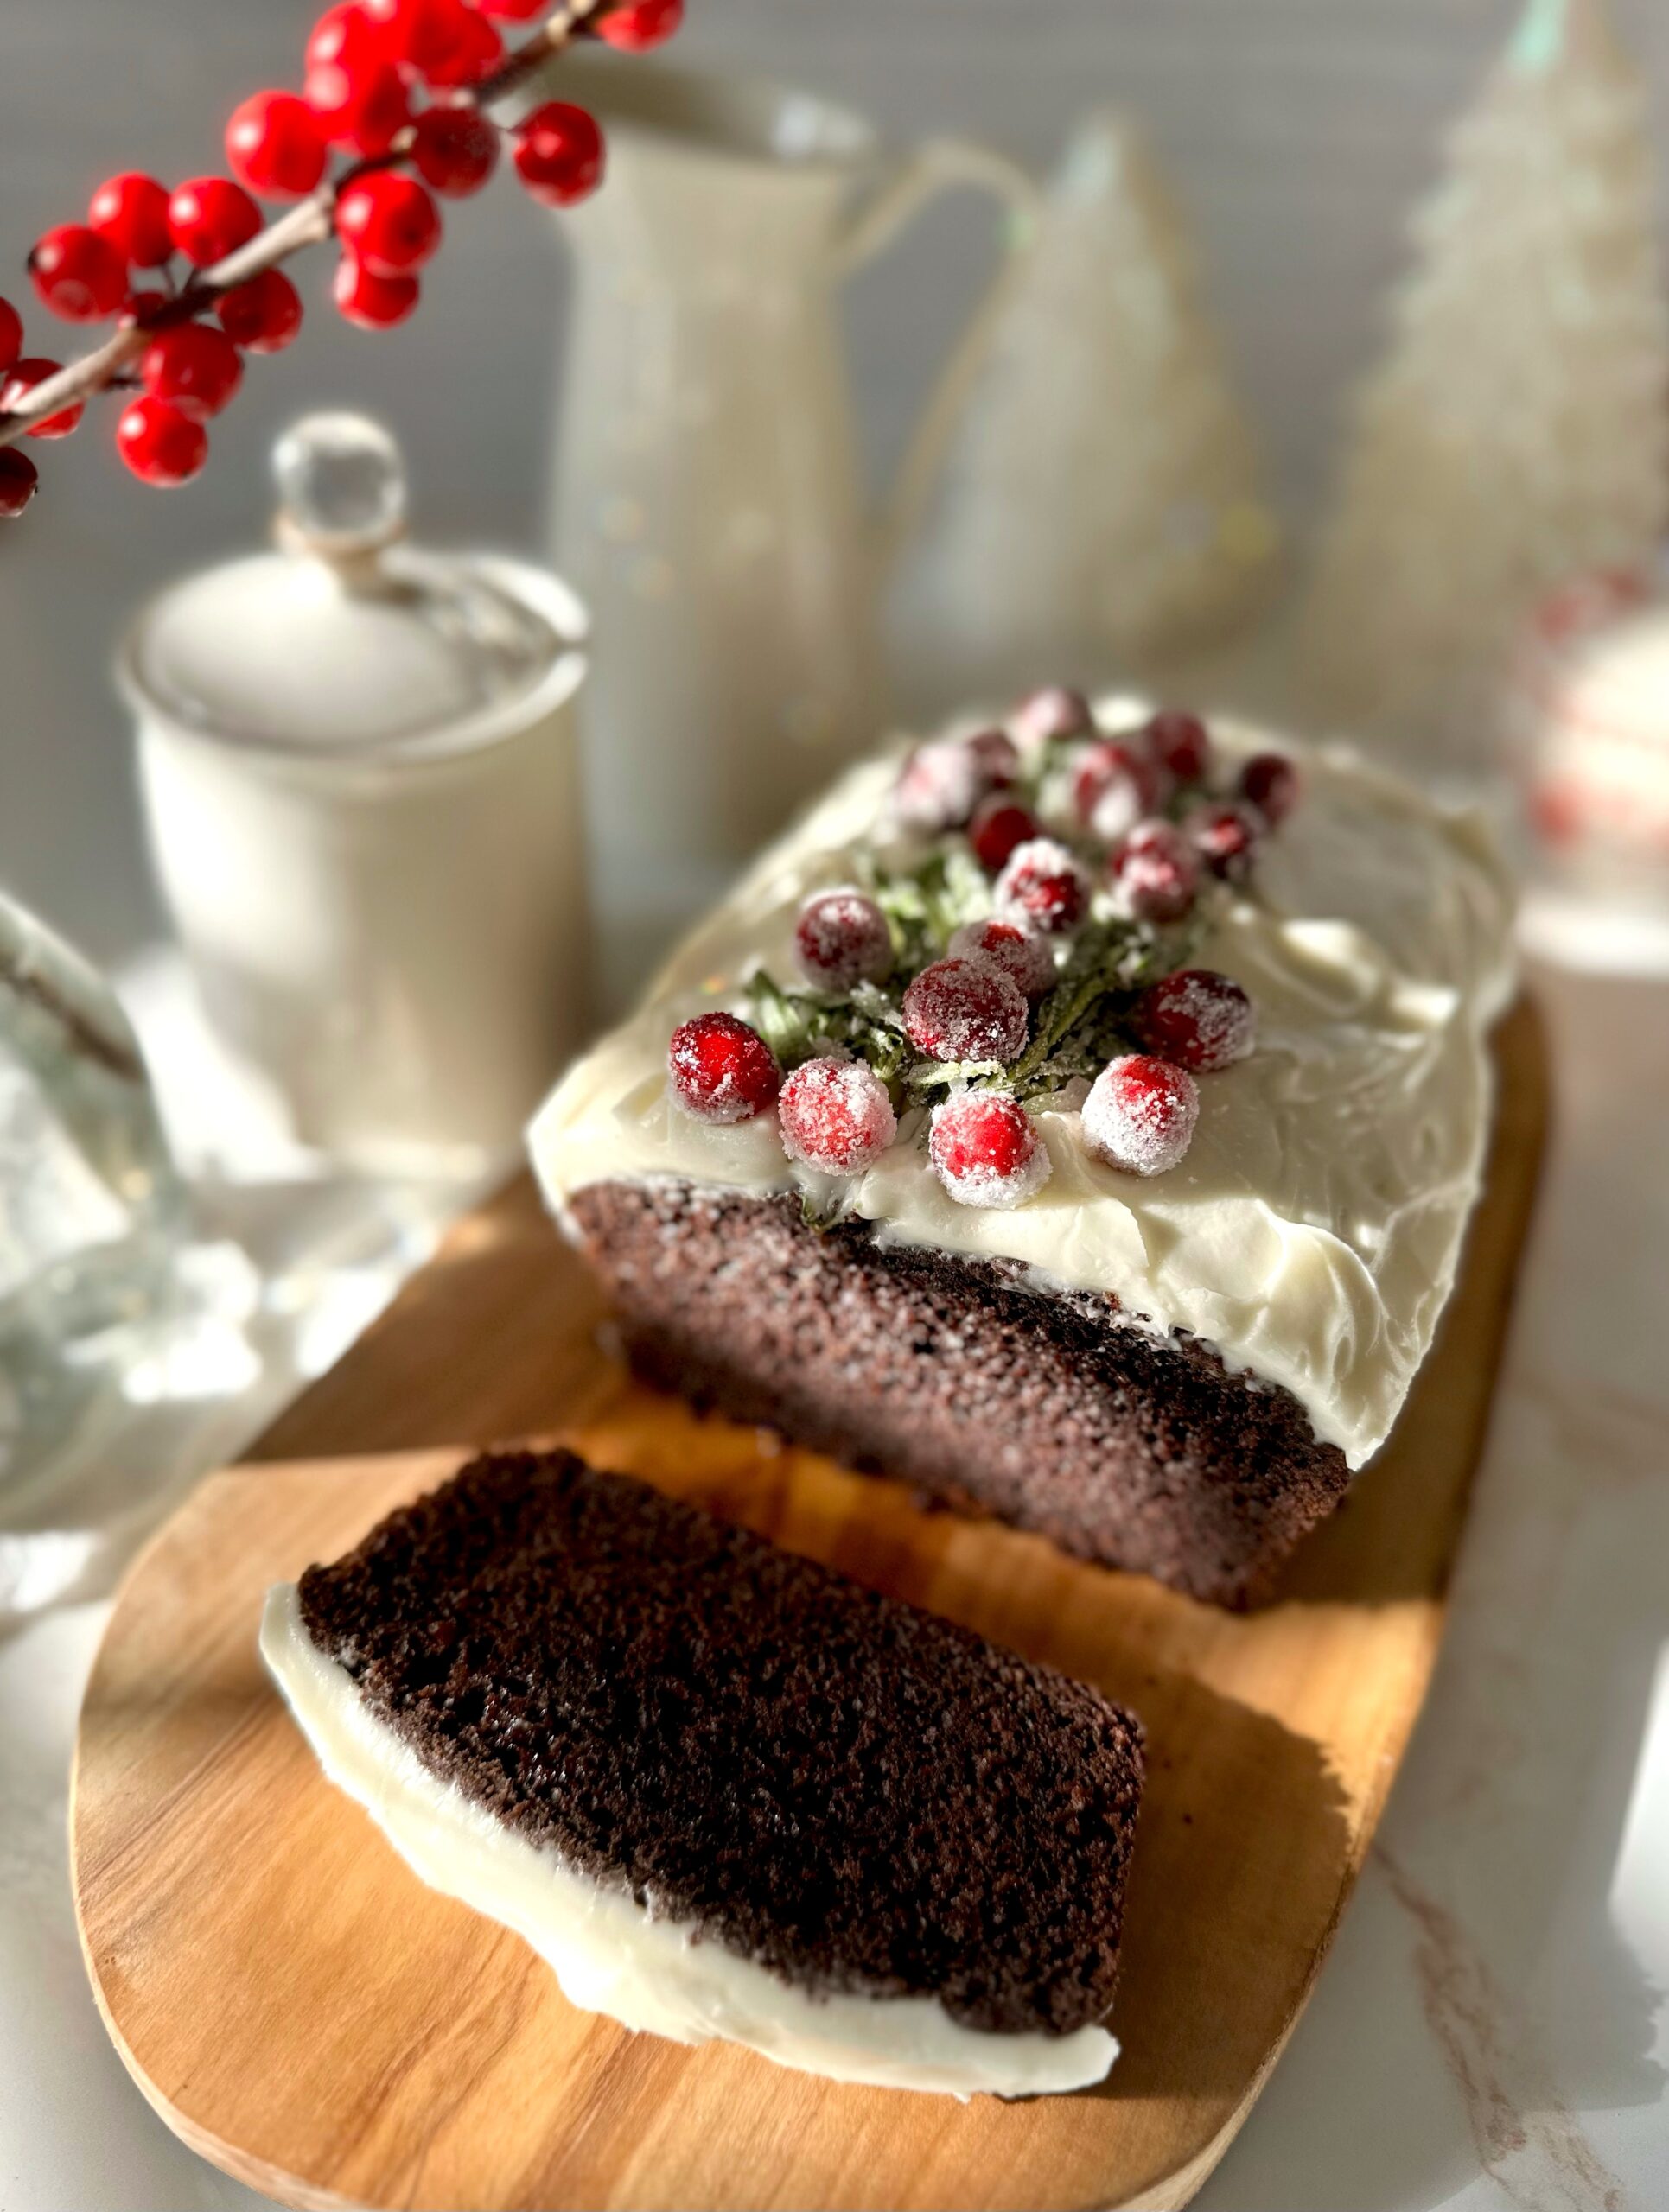
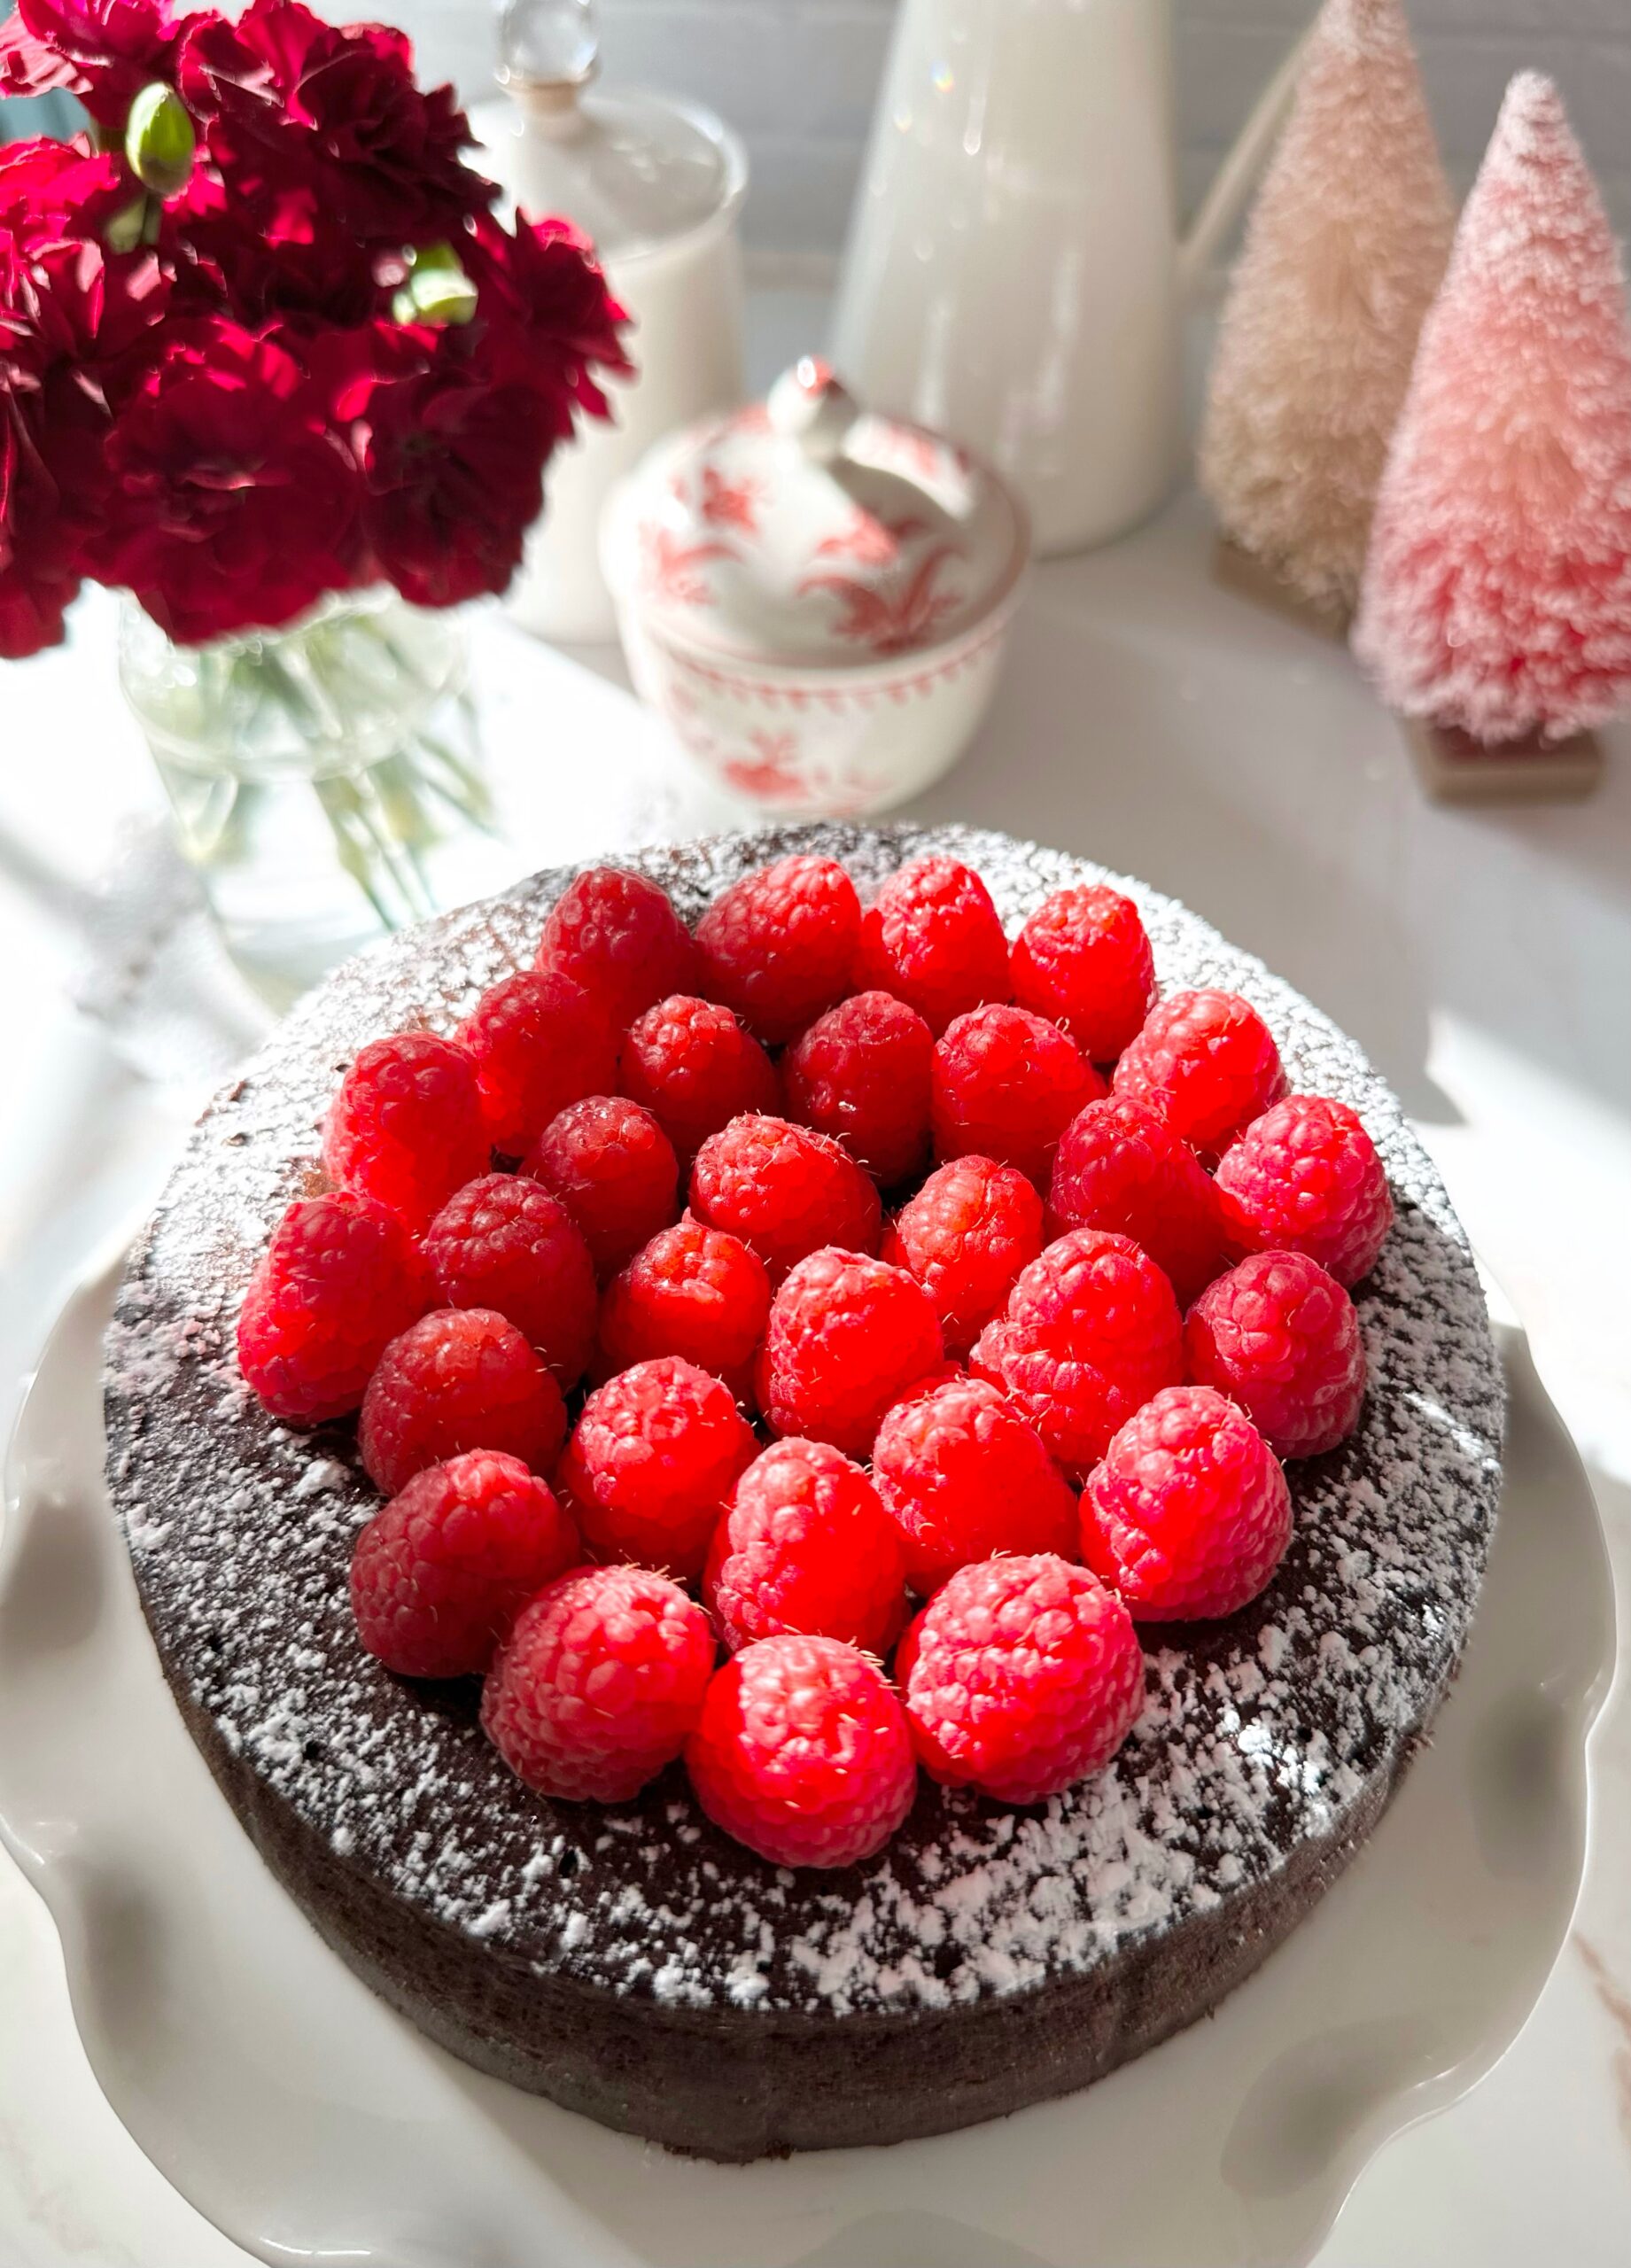
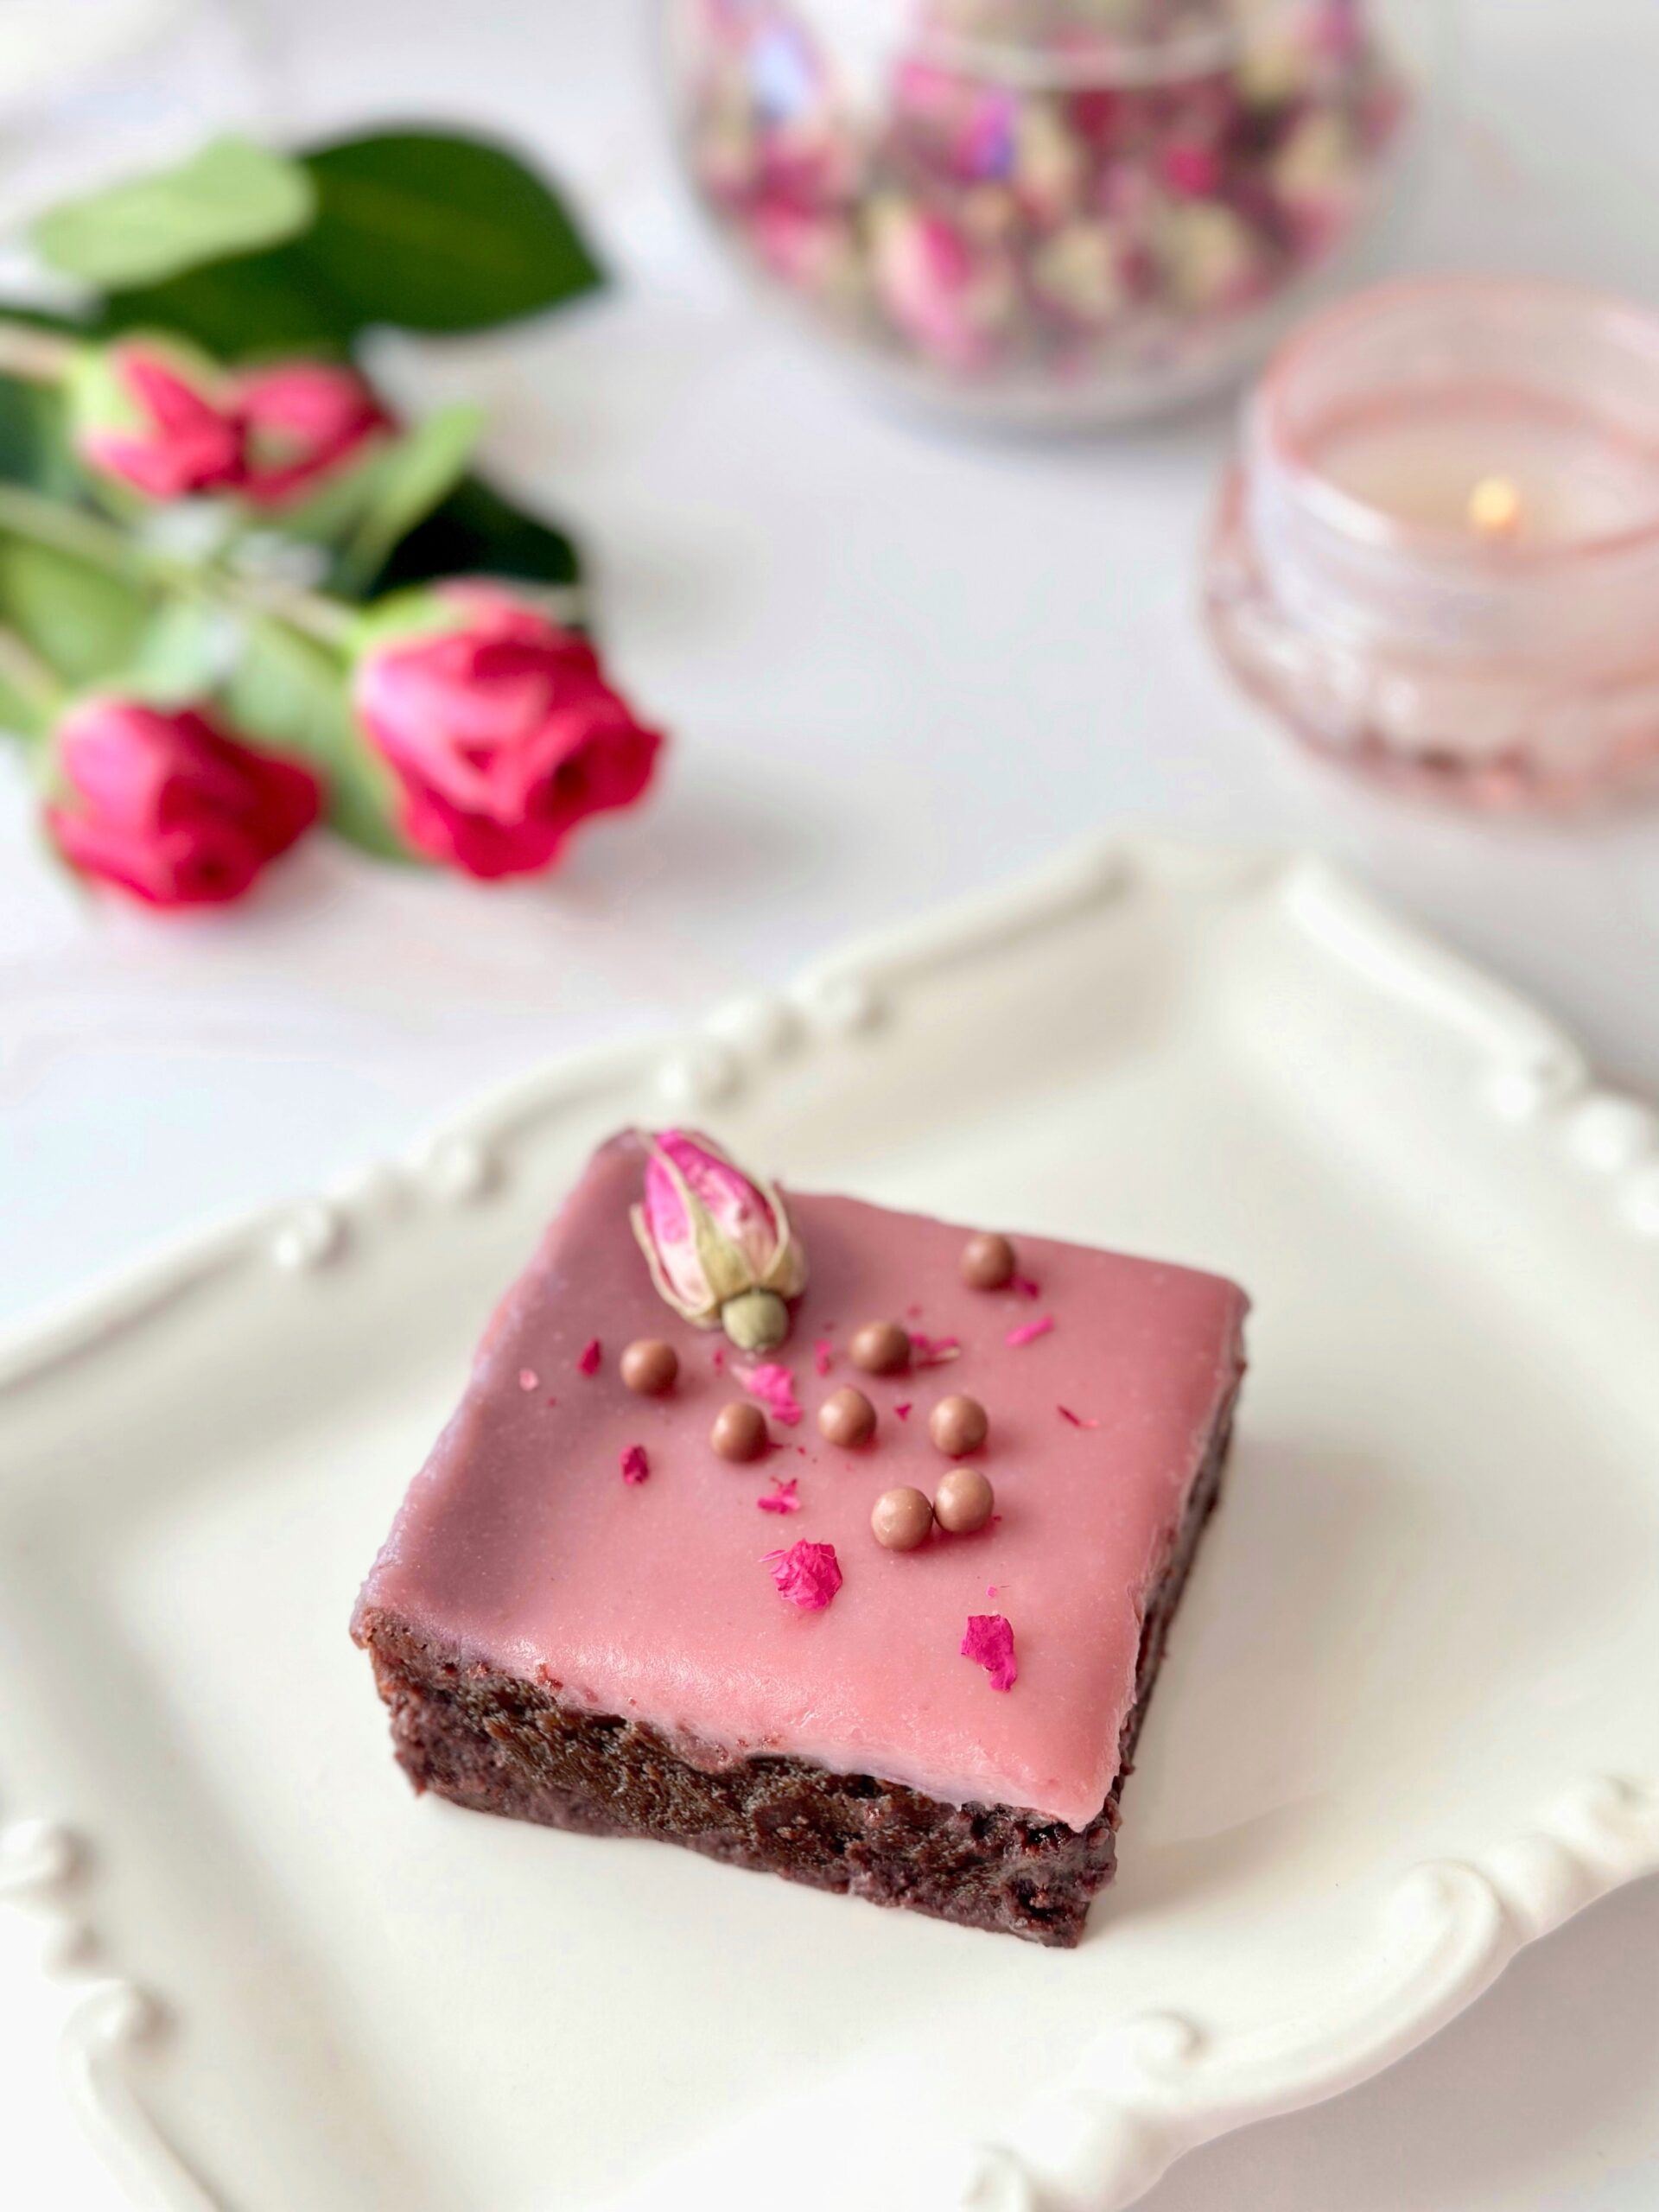
Grandma’s Apple Crumb Cake

Grandma's Apple Crumb Cake

I remember my grandma making coffee cakes and sweet muffins for breakfast, along with eggs, sausages, hot coffee and a big pitcher of milk on the table. Why do most of our grandmothers cook and bake so well? Because they’ve had decades of trial and error to perfect their recipes, tweaking them here and there until they’re approved and loved by their families, neighbors and friends. This cake has had its share of trial and error. She has earned her place as a well-loved, delicious, beautiful queen of coffee cakes.

A classic coffee cake is usually a subtly sweet cake with cinnamon, crumb topping and maybe some icing. They’re called coffee cakes because they go so well with a cup of coffee, not necessarily because they contain coffee. This Apple Crumb Cake has the elements of a classic coffee cake, but so much better! The cake is fluffy and soft, the crumb topping is chunky and plentiful, and the apples are perfectly tender. And don’t get me started about the icing!

Print Recipe
Grandma's Apple Crumb Cake
Tender vanilla cake with generous crumb topping and vanilla icing
Keyword apple, cake
Servings
servings
Ingredients
Apples
Crumb Topping
Cake
Keyword apple, cake
Servings
servings
Ingredients
Apples
Crumb Topping
Cake
Instructions
Apples
  1. In a large skillet, melt the butter over medium heat. Add the apples, sugar and cinnamon.
  2. Cook, stirring occasionally, until the apples are tender, about 7-10 minutes. Transfer the apples to a bowl and let cool to room temperature.
Crumb Topping
  1. In a medium bowl, mix the flour, brown sugar, sugar, cinnamon and salt.
  2. Work in the butter with your fingertips until the mixture looks like wet sand with no large pieces of butter remaining. Press together to make 1/2-inch chunks.
Cake
  1. Preheat the oven to 325ºF (165ºC). Line a 9-inch cake pan with a removable bottom*, or a 9-inch springform pan, with parchment paper. Wrap the bottom of the cake pan with aluminum foil and place pan on a baking sheet.
  2. In a medium bowl, whisk together the flour, baking powder and salt until well blended.
  3. In a large bowl, cream the butter and sugar, with an electric mixer on medium speed, until light and fluffy. Beat the eggs and vanilla into the butter mixture in three separate addition, making sure each addition is incorporated before adding the next.
  4. In a small bowl, whisk the milk and sour cream together. On low speed, beat the flour mixture into batter in three additions, alternating with milk mixture. Mix just until combined.
  5. Transfer the batter to the prepared cake pan. Smooth the top with a spatula. Drain any excess liquid from the apples. Top the cake batter evenly with apples, then the topping mixture.
  6. Bake until a toothpick inserted into the center of the cake comes out clean, about 50-60 minutes. Cool the cake in pan for 10 minutes. Remove the cake from pan and transfer it to a cooling rack to cool completely.
Icing
  1. In a medium bowl, whisk together the powdered sugar, melted butter, vanilla, salt and 2 tablespoons (30ml) of half & half. Add additional half & half until the desired consistency is reached. Drizzle over the cooled cake.
Recipe Notes

*To find the cake pan I used, click here.

Fudge Filled Chocolate Crinkle Cookies

Fudge Filled Chocolate Crinkle Cookies

Chocolate Crinkle Cookies are traditional holiday cookies, probably because of the pretty, crackly powdered sugar covered exterior that reminds us of snow. They always seem to show up on cookie trays at Christmas time and I’ve loved them since I was a child. I decided to take my old favorites to another level by adding a surprise inside! Two years ago, I made some cookies with fudge filling that my family and friends raved over. They’re my Marshmallow Mudslide Cookies. To view the recipe, click here. I used the same concept for these Chocolate Crinkle Cookies. I filled them with a simple, smooth fudge filling that stays soft at room temperature. The results were absolutely delicious!

Print Recipe
Fudge Filled Chocolate Crinkle Cookies
Chocolate crinkle cookies with a smooth fudge filling that stays soft at room temperature
Course Dessert
Keyword chocolate, cookies
Servings
cookies
Ingredients
Fudge Filling
Chocolate Crinkle Cookies
Course Dessert
Keyword chocolate, cookies
Servings
cookies
Ingredients
Fudge Filling
Chocolate Crinkle Cookies
Instructions
Fudge Filling
  1. In a double boiler or in the microwave*, melt chocolate chips and sweetened condensed milk together until smooth. Set aside to cool while preparing cookie dough.
  2. Cover and refrigerate for two hours. Roll filling into 1-inch balls.
Chocolate Crinkle Cookies
  1. In a medium bowl, whisk together flour, cocoa powder, baking powder and salt.
  2. In a large bowl, beat butter with an electric mixer until light and fluffy.
  3. Gradually beat in 2 cups (7 3/4 ounces) of powdered sugar until well combined. Set aside remaining 1/2 cup powdered sugar in a shallow dish.
  4. Beat in eggs and vanilla in three separate additions, until smooth. Stop to scrape bowl as needed.
  5. Beat in melted chocolate until combined. Beat in flour mixture just until combined.
  6. Cover and refrigerate dough for 2 hours. Don't skip this step.
  7. Preheat oven to 350ºF. Line two large baking sheets with parchment paper.
  8. Roll dough into 15 2-inch balls, 1 1/4 ounce each. Flatten each ball into a 3-inch disk. Place a fudge ball in the center of each disk and wrap dough around it, pinching edges together to seal. Roll dough balls generously in remaining powdered sugar.
  9. Place dough balls three inches apart on prepared baking sheets. Bake until cookies puff up and tops are set, about 11-13 minutes. Transfer cookies to a cooling rack.
Recipe Notes

*To melt fudge filling in microwave, heat for 30 seconds. Stir, then microwave for 10 second intervals, stirring until melted.

MAKE AHEAD INSTRUCTIONS: To make cookie dough one day ahead, prepare cookie dough. Cover the surface with plastic wrap and refrigerate in a covered container up to 24 hours. To make fudge filling one day ahead, prepare filling and chill for 1 1/2 to 2 hours. Roll filling into 1-inch balls and place on a parchment lined tray. Cover tightly with plastic wrap and refrigerate up to 24 hours. 

Sweet Cornbread Muffins

These soft, tender, fluffy, sweet cornbread muffins are my favorite version of cornbread ever! No hate to the crumbly, savory cornbread that some people prefer. I like that too! Coincidentally, the latter has fans who leave the most heated comments on my cornbread posts. Maybe their cornbread is making them cranky. This cornbread recipe is delightful and would cheer up anyone, especially when it’s served warm and slathered with butter and honey. Positively divine.

I used a square muffin pan because it makes the muffins look absolutely adorable. The pan is also known as a brownie pan. The pan details are in the recipe notes. Feel fee to use a standard round muffin pan instead.

Print Recipe
Sweet Cornbread Muffins
Soft, tender, fluffy, sweet cornbread muffins
Keyword cornbread, muffins
Servings
square muffins
Ingredients
Keyword cornbread, muffins
Servings
square muffins
Ingredients
Instructions
  1. Preheat oven to 350ºF. Grease and flour a 12-serving square muffin pan, also known as a brownie pan.* (You can also use a traditional round muffin pan. The baking time may be a little shorter.)
  2. In a large bowl, whisk together flour, sugar, cornmeal, baking powder and salt.
  3. In a separate bowl, whisk eggs, sour cream, oil and butter until smooth.
  4. Add egg mixture into the flour mixture and mix just until combined. A few lumps are okay.
  5. Transfer batter to prepared pan, filling wells halfway full. (Fill 2/3 full if using a round muffin pan.)
  6. Bake until edges turn golden brown and a toothpick inserted into center comes out clean, about 17-20 minutes. Do not over bake.
  7. Let cool in pan for 5 minutes them transfer muffins to a cooling rack. Serve warm or room temperature.
Recipe Notes

*I used a Fat Daddio's square muffin pan. It's available at kitchen stores and online.  If you can't find that one, Chefmade also makes a good one. The cavities on that one are a little smaller, so the baking time may be shorter. To find it, click here.

If you're using a dark colored pan, reduce your oven temperature to 325ºF

Melt-in-Your-Mouth Peanut Butter Cookie Sandwiches

Soft Peanut Butter Sandwich Cookies

I never imagined that I’d ever be posting a peanut butter cookie recipe. There are already crunchy peanut butter cookies, soft ones, chewy ones, and those peanut shaped store bought ones out there. I mean, do we even need another peanut butter cookie recipe? After I tasted this one, it’s a resounding YES! These soft, tender cookies combined with a silky, smooth filling are a new peanut butter experience that I had to share.

The key to getting the soft texture in the cookie, without being dry, is cake flour. So don’t substitute it, because it’s vital to achieve the correct texture. Make sure to weigh your flour for the most accurate results. The second important ingredient is heavy whipping cream. Just a little added to the filling gives it a luxurious, silky texture.

This recipe makes sixteen medium size peanut butter cookies, which will give you eight sandwiches. If you want more, you can double the recipe or make the cookies smaller. Smaller cookies will have a shorter baking time.

Print Recipe
Melt-in-Your-Mouth Peanut Butter Cookie Sandwiches
Course Dessert
Servings
cookie sandwiches
Ingredients
Peanut Butter Cookies
Peanut Butter Filling
Course Dessert
Servings
cookie sandwiches
Ingredients
Peanut Butter Cookies
Peanut Butter Filling
Instructions
Peanut Butter Cookies
  1. Preheat oven to 350ºF (180ºC). Line two large baking sheets with parchment paper.
  2. In a medium bowl, whisk together the all purpose flour, cake flour, baking soda and salt. Set aside.
  3. In a large bowl, beat the peanut butter, butter and shortening until smooth.
  4. Beat in the egg and vanilla until well combined.
  5. Set aside 1/4 cup (50g) of the granulated sugar. Beat the peanut butter mixture with brown sugar and remaining granulated sugar, with an electric mixer at medium speed, until light and fluffy.
  6. Add the flour mixture and beat just until combined.
  7. Roll the dough into 1 1/2-inch (3.8cm) diameter balls (about 1 1/4 oz or 35g each). Roll the dough balls in the reserved granulated sugar.
  8. Place the dough balls 3 inches apart onto the prepared baking sheets. Flatten with a fork, making a criss cross pattern.
  9. Bake until the cookies are puffy and start to crack around the edges, about 9-11 minutes.
  10. Let the cookies cool on baking sheet for 1 minute, then carefully transfer them to a cooling rack. The cookies will be fragile, but they will firm up as they cool.
  11. Place a spoonful of filling on the bottoms of half of the cooled cookies. Top with remaining the remaining cookies.
Peanut Butter Filling
  1. In medium bowl, beat the peanut butter and butter together until smooth.
  2. Beat in the powdered sugar, heavy cream, vanilla and salt until smooth.
Recipe Notes

To find my favorite cookie sheet, click here.

Chocolate Trail Mix Oatmeal Cookies

Chocolate Trail Mix Cookies

Many people think of trail mix as a dry, chewy form of nourishment nibbled on during hiking or camping. Let me say that I think of trail mix as a highly customizable luxurious snack. That’s because I love to make my own delicious, personalized trail mixes by choosing my favorite additions. No hate to raisins and peanuts, but gorp is not allowed here. Chocolate covered nuts and fruit, step forward. Almonds, pecans, macadamias, pistachios, and cashews, please enter. Dried cherries and blueberries, welcome friends. White chocolate chips and caramel chips, you made it. Chocolate espresso beans, we’ve been waiting for you.

I took my love of personalized trail mixes to the next level by creating these Chocolate Trail Mix Oatmeal Cookies. Everything I love about those wonderful add-ins is combined in cookie form, then dunked in melted chocolate. They become beautiful when you decorate the tops with the add-ins. I used freeze-dried raspberries for my cookie tops because of the tartness and vibrant red color. Feel free to choose your favorite combination of add-ins and get creative when decorating the tops. Your additions combined, minus the oats, should be about two cups.

Print Recipe
Chocolate Trail Mix Oatmeal Cookies
Servings
cookies
Servings
cookies
Instructions
  1. Preheat the oven to 350ºF (180ºC). Line two large baking sheets with parchment paper.
  2. In a medium bowl, whisk together the flour, cocoa powder, baking soda, salt and cinnamon.
  3. In a large bowl, cream the butter, brown sugar, and sugar together with an electric mixer until light and fluffy.
  4. Beat in the eggs and vanilla in three separate additions, making sure each one is incorporated before adding the next.
  5. On low speed, beat in the flour mixture just until combined.
  6. Fold in the oats, almonds, coconut, cranberries, pistachios and pumpkin seeds.
  7. Place 1 1/4 ounce round portions (about 2 tablespoons) three inches apart on the prepared baking sheets.
  8. Bake until the tops are set and no longer shiny, about 10-12 minutes.
  9. Transfer the cookies to a cooling rack to cool completely.
  10. Combine the melted chocolate and coconut oil in a small deep container, wide enough to fit the width of your widest cookie. Dunk cookies about halfway into chocolate. Top with nuts and seeds.

Butterscotch Bread

What’s better than the smell of chocolate chip cookies baking or of fresh coffee brewing? The aroma of this warm, sweet buttery loaf of Butterscotch Bread is so heavenly that I’m convinced angel grandmothers bake this on a regular basis in heaven. The rich scent is accompanied by a soft, tender bread topped with a silky butterscotch glaze.

It all starts with browning your butter first. It adds a nutty, deep butter flavor. When browning your butter, use a light colored saucepan so you can see the visual clues. You’ll see it start to foam and brown specks will collect on the bottom of the pan. It will smell nutty and fragrant. Keep a close eye on it. It can go from brown to burnt in a quick second. When your brown butter has cooled to room temperature, the rest of the recipe comes together quickly. You can also brown your butter a day ahead and keep it in the refrigerator. Bring it to room temperate before using.

This delightful bread goes well with coffee or tea and is just as delicious the next day. Store covered at room temperature.

Print Recipe
Butterscotch Bread
Servings
loaf
Ingredients
Butterscotch Bread
Butterscotch Glaze
Servings
loaf
Ingredients
Butterscotch Bread
Butterscotch Glaze
Instructions
Butterscotch Bread
  1. In a small saucepan, cook the butter over medium heat until brown and fragrant. When brown specks (not black!) collect at the bottom of the pan, immediately transfer the butter to a small bowl. Let cool to room temperature.
  2. Preheat the oven to 350ºF. Line the bottom of an 8 x 4-inch baking pan with parchment paper. Grease and flour the insides.
  3. In a medium bowl, beat the brown butter, brown sugar, eggs, vanilla and buttermilk until smooth.
  4. Stir in the flour mixture in two additions. Mix just until combined. A few lumps are okay.
  5. Transfer the batter to prepared baking pan. Bake until the top is deep golden brown and q toothpick inserted into center comes out clean, about 38-43 minutes.
  6. Let the bread cool in pan for 10 minutes, them turn it out onto a cooling rack to cool completely. Top with two coats of butterscotch glaze.
Butterscotch Glaze
  1. Melt the butter in a small saucepan over medium heat. Stir in the brown sugar and salt.
  2. Continue stirring over medium heat until the mixture comes to a boil. Boil for two minutes.
  3. Turn the heat down and slowly stir in the heavy cream. Keep stirring until mixture is smooth. Remove from heat and stir in the vanilla extract.
  4. Transfer the butterscotch glaze to a small bowl and let cool until thickened.

Blueberry Crumble Bars

Crumb bars with fruit are classic, rustic bars that are easy to make and so delicious. These Blueberry Crumble Bars happen to be the best I’ve ever tasted! With a tender, almost addicting shortbread crust, the filling is perfectly sweet and blanketed with plenty of crisp crumb topping. They’re perfect to pack in a lunch, take on a family picnic or as an addition to a backyard cookout. Everyone who tries these comes back for seconds!

Print Recipe
Blueberry Crumble Bars
The best Blueberry Crumble Bars ever! Tender shortbread crust topped with sweet blueberry filling and generous crumb topping by Brownie Mischief
Course Dessert
Cuisine American
Servings
Ingredients
Crumb Topping
Crust
Blueberry Filling
Course Dessert
Cuisine American
Servings
Ingredients
Crumb Topping
Crust
Blueberry Filling
Instructions
Crumb Topping
  1. In a medium bowl, whisk together the flour, brown sugar, granulated sugar, cinnamon and salt until well combined. Work the butter into the flour mixture with your fingertips, until it looks like sand, with no large pieces of butter. Press the mixture together to form chunks. Set aside in the refrigerator until ready to use.
Crust
  1. Preheat the oven to 350ºF (180ºC). Line an 8-inch square baking pan with parchment paper, overlapping the ends a couple of inches. These will be handles to lift the bars out of the pan.
  2. In a medium bowl, whisk together the flour, powdered sugar, baking powder and salt until well combined. In a large bowl, beat the butter until smooth. Add the flour mixture and beat just until combined.
  3. Press the dough evenly into the baking pan. Bake until the surface looks light golden brown, about 15-20 more minutes. Meanwhile, prepare the filling.
Blueberry Filling
  1. In a large bowl, toss the blueberries with the lemon juice. Mix in the sugar and cornstarch. Pour the blueberry mixture over the warm crust. Top evenly with the crumb topping. Return the pan to the oven and continue baking until the topping is golden brown and the filling starts to bubble, about 28-33 minutes. Let cool completely before removing the bars from the pan. Sprinkle with powdered sugar.

Caramel Apple Blossoms

Caramel Apple Blossoms by Brownie Mischief

Whether you call them apple blossoms, apple dumplings, apple roses or mini apple pies, these are cute, delicious little apple pastries. I made them because I was craving apple pie, but I didn’t have enough apples to bake one. I didn’t invent them, and I don’t know who did, but I’ve had frozen ones and I’ve seen them on restaurant menus. I thought it would be fun to make them, and it was! I could’ve just put some pie dough in muffin cups and made quick little pies, but flower shaped things automatically get extra points for cuteness. And if you know me, you know I love my cute bakes!

Print Recipe
Caramel Apple Blossoms
Course Dessert
Keyword pastry
Servings
blossoms
Ingredients
Topping
Blossoms
Course Dessert
Keyword pastry
Servings
blossoms
Ingredients
Topping
Blossoms
Instructions
  1. In a medium-size bowl, mix together all of the topping ingredients. Set aside in the refrigerator until ready to use.
  2. In a large bowl, toss the apples with lemon juice. Add the brown sugar, granulated sugar, melted butter, flour, cinnamon and salt to the apples. Stir until well combined.
  3. Line a large baking sheet with parchment paper.
  4. On a lightly floured surface, roll the pie dough to 1/8-inch thickness. Cut out twelve 5-inch blossom shapes*, re-rolling the dough scraps as needed.** Lightly mark a 2-inch circle in the center of each blossom. Make cuts between the petals to separate them, just up to the edge of the center circle. Top each blossom with about 2 generous tablespoons of apples.
  5. Brush the dough petals with egg wash. Form blossoms by lifting and overlapping each petal 1/2-inch in a spiral pattern similar to a rose. Tuck the last petal under. Press the petals together to seal so the filling won't leak.
  6. Top each blossom with a spoonful of topping. Place in the refrigerator to chill for 30 minutes to 1 hour. Don't skip this step. This will help the blossoms keep their shape.
  7. Preheat oven to 375ºF (190ºC). Brush the blossom dough all over with egg wash. Wipe any drips off of the parchment paper. Bake until the crust is golden brown and filling is starting to bubble, about 23-28 minutes. Transfer the blossoms to a cooling rack to cool for a few minutes before serving warm or serve at room temperature. Drizzle the blossoms with caramel sauce.
Recipe Notes

*I used a 5-inch blossom cutter. To find a blossom cutter, click here.

**If you need to  re-roll your  pie dough scraps, press the scraps together, cover and let rest in the refrigerator for several minutes to help avoid shrinkage.

Maple Brown Sugar Madeleines

Maple Brown Sugar Madeleines

I had tea with with a well mannered hedgehog once on a crisp fall day. He brought me a tiny bouquet of flowers, which I placed in a small jam jar filled with water. He said the delightful maple scent of these Madeleines reminded him of his time in the woods, as a young hoglet. When he had his fill of the delicate little cakes, I wrapped some in a tea towel for his journey home.

As cooler weather approaches, I’m always looking for a little something to enjoy with a warm drink and a good book. Although traditional Madeleines typically remind me of spring, these Maple Brown Sugar Madeleines have a cozy fall feeling. They go well with coffee, tea or hot cocoa. If you want to make them for a friend, make the batter and keep it in the refrigerator. Bake the Madeleines right before your friend arrives.

I used a spherical Madeleine pan to make these maple scented little cakes. The Madeleines made in this pan are a little thicker and fluffier than those made in a traditional oval pan. To find the Madeleine pan I used, click here. You can certainly use a traditional pan if you prefer. Keep in mind that the baking time will be shorter and you will end up with about twice as many.

Print Recipe
Maple Brown Sugar Madeleines
Course Dessert
Cuisine French
Keyword madeleines, maple
Servings
Ingredients
Maple Brown Sugar Madeleines
Maple Icing
Course Dessert
Cuisine French
Keyword madeleines, maple
Servings
Ingredients
Maple Brown Sugar Madeleines
Maple Icing
Instructions
Maple Brown Sugar Madeleines
  1. In a medium bowl, sift together the flour, baking powder and salt.
  2. In a large bowl, beat the eggs, brown sugar and maple extract, on medium-high speed with an electric mixer, until the batter is voluminous, light in color and holds its shape when you lift the beater, about 8-10 minutes.
  3. Combine the melted butter and maple syrup.
  4. Gently fold the the flour mixture into the egg mixture in three additions, alternating with the melted butter. Fold just until combined, being careful not to deflate the batter. Make sure to scrape the bottom of the bowl to ensure that all of the flour is combined.
  5. Cover and refrigerate for 30-45 minutes.
  6. Preheat the oven to 350ºF (177ºC). Grease a spherical Madeleine pan* with nonstick spray or melted butter. Dust the pan with a light coating of flour. Tap out the excess flour.
  7. Fill the wells of the Madeleine pan with batter 3/4 full, about 2 tablespoons each, using a scoop**or a spoon. (If you're using a traditional oval Madeleine pan, fill 3/4 full, about a generous tablespoon of batter in each.)
  8. Bake until golden brown around the edges and puffed in the center, about 10-12 minutes. (Baking time for oval Madeleine pan will be about 7-8 minutes.) Do not over bake.
  9. Cool in the pan for one minute then turn Madeleines out onto a cooling rack to cool completely.
Maple Icing
  1. In a small bowl, whisk together the powdered sugar, melted butter, maple extract and one tablespoon of milk. Add additional milk as needed until your desired consistency is reached, Stir in a pinch of salt to taste.
  2. Brush icing onto the Madeleines with a pastry brush. Apply nuts to the edges of Madeleines. Serve immediately. Madeleines are best served the day they're baked.
Recipe Notes

*To find the Madeleine pan I used, click here.

**To find the scoop I used, click here.

Blackberry Honey Butter


Print Recipe


Blackberry Honey Butter

Servings


Ingredients

Servings


Ingredients


Instructions
  1. Place the blackberries in a small bowl. Sprinkle with sugar. Let the blackberries macerate at least 30 min. then smash them with a fork. Drain off any excess liquid.

  2. In a medium-size bowl, beat the butter and honey together until smooth and well combined. Add salt to taste. Fold the blackberries into honey butter. Transfer the blackberry butter to a covered storage container or spread it on plastic wrap and form it into a log. Refrigerate until ready to use. Store in the refrigerator for up to one week or freeze for up to three months.

Blackberry Cornbread

This sweet Blackberry Cornbread is super easy to make. It makes a delicious breakfast, brunch or side dish. It’s so good served with Blackberry Honey Butter. I love baking my cornbread in a cast iron skillet. It gives the cornbread a crisp, rustic crust. You can also use a cake pan if you prefer. (The baking time may vary.) Make sure not to over bake your cornbread since overtaking will dry it out. Use fresh, ripe blackberries when they’re in season. You can also use frozen blackberries or fresh or frozen blueberries. Skip the macerating step if you’re using blueberries or frozen berries.

Print Recipe
Blackberry Cornbread
Sweet cornbread studded with ripe blackberries
Cuisine American
Servings
Ingredients
Cuisine American
Servings
Ingredients
Instructions
  1. Preheat the oven to 350°F (180°C). Grease an 8” cast iron skillet* or an 8” round cake pan.
  2. In a large bowl, whisk together the flour, sugar, cornmeal, baking powder and salt.
  3. In a separate bowl, whisk together the eggs, sour cream, oil and melted butter until smooth. Add the egg mixture to the flour mixture. Mix just until combined. A few lumps are okay. In a small bowl, gently toss one 1 cup (136g) of the blackberries with 1 tsp of flour. Gently fold the berries into the batter.
  4. Transfer the batter to the skillet. Top with the remaining blackberries. Bake until the top is golden brown and toothpick inserted into the center comes out clean, about 35-43 min. Let cool in the pan 10 min. Serve with Blackberry Honey Butter** or honey if desired
Recipe Notes

*To find an 8-inch cast iron skillet, click here.  

**To find the Blackberry Honey Butter Recipe, click here.


Perfect Pumpkin Cake

Pumpkin Cake

This Perfect Pumpkin cake brings back memories. The tender, moist texture reminds me of the pumpkin cake bars I used to make in junior high. I got the treasured bar recipe from an old children’s cookbook. I lent the cookbook to a neighbor and never saw the book or the recipe again. Through trial and error, I came up with this perfectly spiced, soft fluffy cake, which I think is even better! It’s so delicious it doesn’t need frosting, but the classic pairing with cream cheese frosting takes it over the top.

Print Recipe
Perfect Pumpkin Cake
Course Dessert
Keyword cake, pumpkin
Servings
Ingredients
Pumpkin Cake
Cream Cheese Frosting
Course Dessert
Keyword cake, pumpkin
Servings
Ingredients
Pumpkin Cake
Cream Cheese Frosting
Instructions
Pumpkin Cake
  1. Preheat the oven to 325ºF (165ºC). Line the bottom of an 8-inch round cake pan* with parchment paper**. Grease and flour the insides.
  2. In a medium-size bowl, whisk together the flour, baking powder, baking soda, salt, cinnamon, ginger and nutmeg until well combined.
  3. In a large bowl, beat the sugar, oil, eggs, vanilla and pumpkin purée with an electric mixer or by hand with a whisk, until smooth and well blended. Stir in the flour mixture, just until combined.
  4. Transfer the batter to the prepared cake pan. Bake until a toothpick inserted into the center of the cake comes out clean, about 38-43 minutes. Cool the cake in pan for 10 minutes. Remove the cake from pan and transfer to a cooling rack.
Cream Cheese Frosting
  1. In a large bowl, beat the cream cheese and butter together with an electric mixer, until creamy. Beat in the vanilla extract and salt until well combined. On low speed, beat in the powdered sugar. Keeping the mixture at low speed, beat in the heavy cream a little at a time until your desired consistency is reached. Stir with a spatula to smooth out any bubbles.
Recipe Notes

*To find the cake pan I used, click here.

**To find the parchment rounds I used, click here.