Little Chocolate Donuts

Little Chocolate Donuts with pink icing

Little chocolate donuts are a fun, nostalgic treat from my childhood. I’m talking about the ones at the local market that come in a plastic sleeve. I remember sharing the waxy little donuts with a friend, and at the time we thought they were delicious. Now that I’m an adult, I realize that homemade ones taste soo much better and they’re surprisingly quick and easy to make. They’re delicious with either naturally pink strawberry icing or chocolate glaze. I shared the recipe for both options below.

For Valentine’s Day, I used a heart-shaped mini donut pan for the donuts shown in the photo, but a standard round mini donut pan works too. A sprinkle of pink sparkling sugar makes them extra special, especially for Galentine’s Day.

Print Recipe
Little Chocolate Donuts
Servings
mini donuts
Ingredients
Little Chocolate Donuts
Pink Strawberry Icing
Chocolate Glaze
Servings
mini donuts
Ingredients
Little Chocolate Donuts
Pink Strawberry Icing
Chocolate Glaze
Instructions
Little Chocolate Donuts
  1. Preheat the oven to 350ºF (180ºC). Spray a mini donut pan with nonstick spray. (I used a heart-shaped mini donut pan** but a standard round mini donut pan***works too.)
  2. In a medium-size bowl, whisk together the flour, cocoa powder, salt, baking powder and baking soda until well combined.
  3. In a large bowl, whisk together the brown sugar, oil, egg, buttermilk and vanilla until smooth. Add the flour mixture and stir just until combined.
  4. Transfer the batter to the donut pan, using a piping bag or a plastic food storage bag with the corner cut off. Bake until a toothpick inserted into the centers of the donuts comes out clean, about 6-8 minutes. Do not over bake or the donuts will dry out. Transfer the donuts to a cooling rack. Clean the pan and repeat with the remaining batter.
Strawberry Icing
  1. In a medium-size bowl, whisk together the powdered sugar, pureéd strawberries, melted butter, salt and 1 tablespoon (15ml) of milk until well combined. Add additional milk as needed to reach your desired consistency. Whisk until smooth. Dunk the top surface of the cooled donuts into the icing.
Chocolate Glaze
  1. In a heat safe bowl set over a pan of barely simmering water, melt the butter, chocolate and corn syrup together, stirring occasionally, until smooth. Remove from heat and set aside to cool slightly. Dunk the top surface of the cooled donuts into the glaze or spoon it over the tops.
Recipe Notes

*To find pink sparkling sugar, click here.

**To find the heart-shaped mini donut pan I used, click here.

***To find a standard mini donut pan, click here.


Fudgy Chocolate Crumb Cake

Fudgy Chocolate Crumb Cake

This moist, fudgy chocolate cake with a generous amount of melt-in-your-mouth chocolate crumb topping and powdered sugar snow is perfect for frosty mornings with a cup of hot coffee or tea. It’s also perfect for a holiday breakfast or brunch served with fresh raspberries and/or raspberry sauce.*

Print Recipe
Fudgy Chocolate Crumb Cake
Rich, moist, fudgy chocolate cake with melt-in-your mouth crumb topping and sprinkled with powdered sugar.
Cuisine American
Keyword cake, chocolate, crumb
Servings
servings
Ingredients
Crumb Topping
Cake
Cuisine American
Keyword cake, chocolate, crumb
Servings
servings
Ingredients
Crumb Topping
Cake
Instructions
Crumb Topping
  1. In a medium-size bowl, whisk together the flour, granulated sugar, brown sugar, cocoa powder and salt until well combined. Work the butter into the flour mixture with your fingertips until it looks like dirt, with no large pieces of butter remaining. Press the mixture together to form chunks. Set aside in the refrigerator until ready to use.
Cake
  1. Preheat the oven to 350ºF (180ºC). Line an 8-inch square cake pan** with parchment paper, leaving a couple of inches of overhang to serve as handles to lift the cake out of the pan. If you want to serve the cake directly from the pan, you can skip the parchment paper and simply spray the pan with nonstick spray.
  2. In a medium-size bowl, whisk the flour, cocoa powder, baking powder, baking soda and salt together until well combined.
  3. In a large bowl, beat the butter, granulated sugar and brown sugar together, with an electric mixer at medium speed, until light and fluffy. Beat in the oil until combined. Beat in the egg, egg yolk, and vanilla in 3 separate additions, making sure each one is incorporated before adding the next.
  4. On low speed, beat the flour mixture into the batter in 2 additions, alternating with half of the sour cream after each addition. Beat just until combined. Gradually beat in the hot coffee just until smooth and well combined. Fold in the mini chocolate chips.
  5. Transfer the batter to the prepared cake pan. Top the batter evenly with the crumb topping. Bake until a toothpick inserted into the center of the cake comes with a few moist crumbs attached (not wet batter), about 28-37 minutes.
  6. Cool the cake in the pan for 15 minutes, then remove the cake from the pan and continue cooling on a cooling rack. Sprinkle powdered sugar over the cooled cake.
Recipe Notes

*To find my raspberry sauce recipe, click here.

**To find my favorite 8-inch square cake pan, click here.


Sweet Potato Cake with Marshmallow Cream Cheese Frosting and Salted Caramel

This incredibly easy-to-make cake is like a sleeper that takes you by surprise. The two-ingredient frosting is an unlikely winner, but will end up pleasantly surprising you, especially when the salted caramel is added as a finishing touch. The combination of sweet potatoes and marshmallows is a classic pairing that will remind you of a sweet potato casserole in cake form. My family adores it and I think you will too. If you’re not a fan of marshmallows you can frost this cake with my silky cream cheese frosting instead. Click here for the recipe.

Print Recipe
Sweet Potato Cake with Marshmallow Cream Cheese Frosting and Salted Caramel
Soft moist, single layer sweet potato cake topped with a luscious 2-ingredient frosting and drizzled with salted caramel
Course Dessert
Keyword cake, sweet potato
Servings
servings
Ingredients
Sweet Potato Cake
Marshmallow Cream Cheese Frosting
Course Dessert
Keyword cake, sweet potato
Servings
servings
Ingredients
Sweet Potato Cake
Marshmallow Cream Cheese Frosting
Instructions
Sweet Potato Cake
  1. Preheat the oven to 350ºF (180ºC). Line the bottom of an 8-inch square cake pan with parchment paper. Grease and flour the insides.
  2. In a medium bowl, whisk together the flour, cinnamon, baking powder, baking soda, salt, ginger and nutmeg until well combined.
  3. In a large bowl, beat the granulated sugar, brown sugar, oil, eggs and vanilla, with an electric mixer or whisk by hand until smooth and well combined. Stir in the sweet potatoes until incorporated. Mix in the flour mixture just until combined.
  4. Transfer the batter to the prepared cake pan. Bake until a toothpick inserted into the center of the cake comes out clean, about 23-28 minutes. Let the cake cool in the pan for 10 minutes then remove the cake from the pan and transfer it to a cooling rack.
Marshmallow Cream Cheese Frosting
  1. In a large bowl, stir the cream cheese with a spatula until smooth. Add the Marshmallow Fluff and beat with an electric mixer just until smooth and well combined. Don't over beat. Over beating can cause the cream cheese to curdle.
  2. Spread the frosting over the cooled cake. Drizzle the caramel over the top of the cake or top each piece of cake with a spoonful of caramel.
Recipe Notes

*It's okay to use canned sweet potatoes if you don't have fresh ones. Make sure to rinse them before using.

Soot Sprite Treats

Spirited Away Soot Sprite Treats

If you’re a fan of Ghibli movies, you may remember the cute Susuwatari or Soot Sprites from Spirited Away and My Neighbor Totoro. These easy-to-make chocolate covered treats are also known as haystacks or tumbleweeds. They’re often made with shredded coconut or chow main noodles. I love using potato stick snacks for a delicious, crunchy salty-sweet snack.

In Spirited Away, the cute sprites are fed handfuls of Japanese konpietō candy. If you aren’t able to find it, candy star sprinkles are a nice substitute for decorating your Soot Sprites. (See the links below.)

Print Recipe
Soot Sprite Treats
Chocolate covered potato stick snacks shaped like the beloved Spirited Away Soot Sprites
Instructions
  1. Line 2 large baking sheets with parchment paper or wax paper. In an extra-large bowl, combine the potato sticks and nuts.
  2. In a medium microwave-safe bowl, combine the chocolate chips, butterscotch chips and the oil. Heat in the microwave for 20 second bursts, stirring gently between each burst, until melted and smooth. Stir in the food coloring if using.
  3. Pour the melted chocolate mixture over the potato stick mixture. Stir gently with a spatula until the mix is completely coated with the melted chocolate.
  4. Scoop or spoon rounded 2-tbs-size portions of the mixture onto the baking sheets. Add candy eyes and stars. Refrigerate until set, about 20 minutes.
Recipe Notes

*To find black oil based food coloring, click here.

**To find candy eyes, click here.

***To find Konpieto candy, click here.

****To find pastel star candy sprinkles, click here.


Apple Cinnamon Mini Muffins

Apple Cinnamon Mini Muffins

These delicious little two-bite muffins are the apple version of my viral Pumpkin Cinnamon Mini Muffins. They have fresh apples in the batter which helps to make them soft and moist. They’re rolled in cinnamon sugar after baking, which gives them a subtle crunch on the outside. These delightful mini muffins have the flavor and texture of cake donuts. They’re perfect on their own, but I love to serve them with caramel sauce for dipping which takes them over the top.

Print Recipe
Apple Cinnamon Mini Muffins
Soft, tender apple mini muffins rolled in cinnamon sugar
Cuisine American
Keyword apple, cinnamon, muffins
Servings
muffins
Ingredients
Muffins
Cinnamon Sugar
Cuisine American
Keyword apple, cinnamon, muffins
Servings
muffins
Ingredients
Muffins
Cinnamon Sugar
Instructions
Muffins
  1. Preheat the oven to 350ºF (180ºC). Grease and flour a 24-serving mini muffin pan.* Do not use muffin liners. (The muffins need to form an outer crust. This prevents them from absorbing too much melted butter in the last step.)
  2. In a medium-size bowl, whisk together the flour, baking powder, salt, cinnamon, ginger and nutmeg.
  3. In a large bowl, whisk the granulated sugar, brown sugar, oil, egg and vanilla extract together until smooth and well combined. Stir in the puréed apples. Stir in the flour mixture just until combined. The batter will be thick.
  4. Transfer the batter to prepared pan, filling the muffin cups about 2/3 full. Bake until a toothpick inserted into the center of the muffins comes out clean, about 9-11 minutes. Do not over bake! Be diligent, since over baking can happen very quickly with mini muffins. Let the muffins cool in the pan for 5 minutes. Turn the muffins out and place on a cooling rack.
Cinnamon Sugar
  1. Whisk the cinnamon and granulated sugar together in a shallow bowl until well combined. Briefly dunk the warm muffins in the melted butter, then roll them in the cinnamon sugar.
Recipe Notes

*To find the mini muffin pan I used, click here.

**If your applesauce is very watery, drain the excess liquid before measuring.

Raspberry Iced Pistachio Loaf

Raspberry Iced Pistachio Loaf

This lovely Raspberry Iced Pistachio Loaf is one of the many delicious recipes I shared in my cookbook, “Enchanted Baking.” I’m happy to announce that the cookbook is officially out today! Click here to order. I’m sharing the recipe here on my website as a preview for you to enjoy.

The vibrant colors of this cake look like something out of a fairy tale. Pistachio flour gives a nutty flavor to the cake and the fresh raspberry icing is the perfect sweet-tart addition. This charming loaf is a delightful summer dessert. It’s also a perfect accompaniment to your afternoon tea, whether it’s hot or iced tea.

Print Recipe
Raspberry Iced Pistachio Loaf
A soft pistachio loaf cake topped with fresh raspberry icing
Course Dessert
Keyword cake
Servings
9 x 5-inch loaf
Ingredients
Raspberry Icing
Course Dessert
Keyword cake
Servings
9 x 5-inch loaf
Ingredients
Raspberry Icing
Instructions
  1. Preheat the oven to 350ºF (180ºC). Line the bottom of 9 x 5-inch loaf pan with parchment paper. Grease and flour the inside.
  2. In a large bowl, whisk together the flour, pistachio flour, baking powder, baking soda and salt.
  3. In a separate large bowl, cream the butter, granulated sugar and lemon zest with an electric mixer at medium speed, until the mixture is light and fluffy. Beat in the oil gradually until it's well combined. Beat in the eggs in three separate additions, making sure each one is fully incorporated before adding the next. Beat in the extracts. Then, if using, beat in the food coloring a little at a time until your desired shade is reached.
  4. On low speed, mix in the flour mixture in two additions, alternating with half of the sour cream after each addition. Mix just until combined. Transfer the batter to the prepared baking pan. Bake until a toothpick inserted into the center of the loaf comes out clean, about 42-47 minutes. Cool the loaf in the pan for 10 minutes, then turn it out onto a cooling rack to cool completely.
  5. To make the fresh raspberry icing, purée the raspberries together with the lemon juice in a blender or small food processor. Strain the raspberries through a sieve. In a medium-size bowl, whisk together the raspberry purée, powdered sugar, melted butter and a pinch of salt. Spoon the icing over the cooled loaf, letting the icing drip down the sides. Sprinkle with chopped pistachios. Decorate the top with edible flowers or fresh raspberries.
Recipe Notes

*To find my favorite pistachio flour, click here.

Chocolate Hazelnut Crunch Cake

Chocolate Hazelnut Crunch Cake

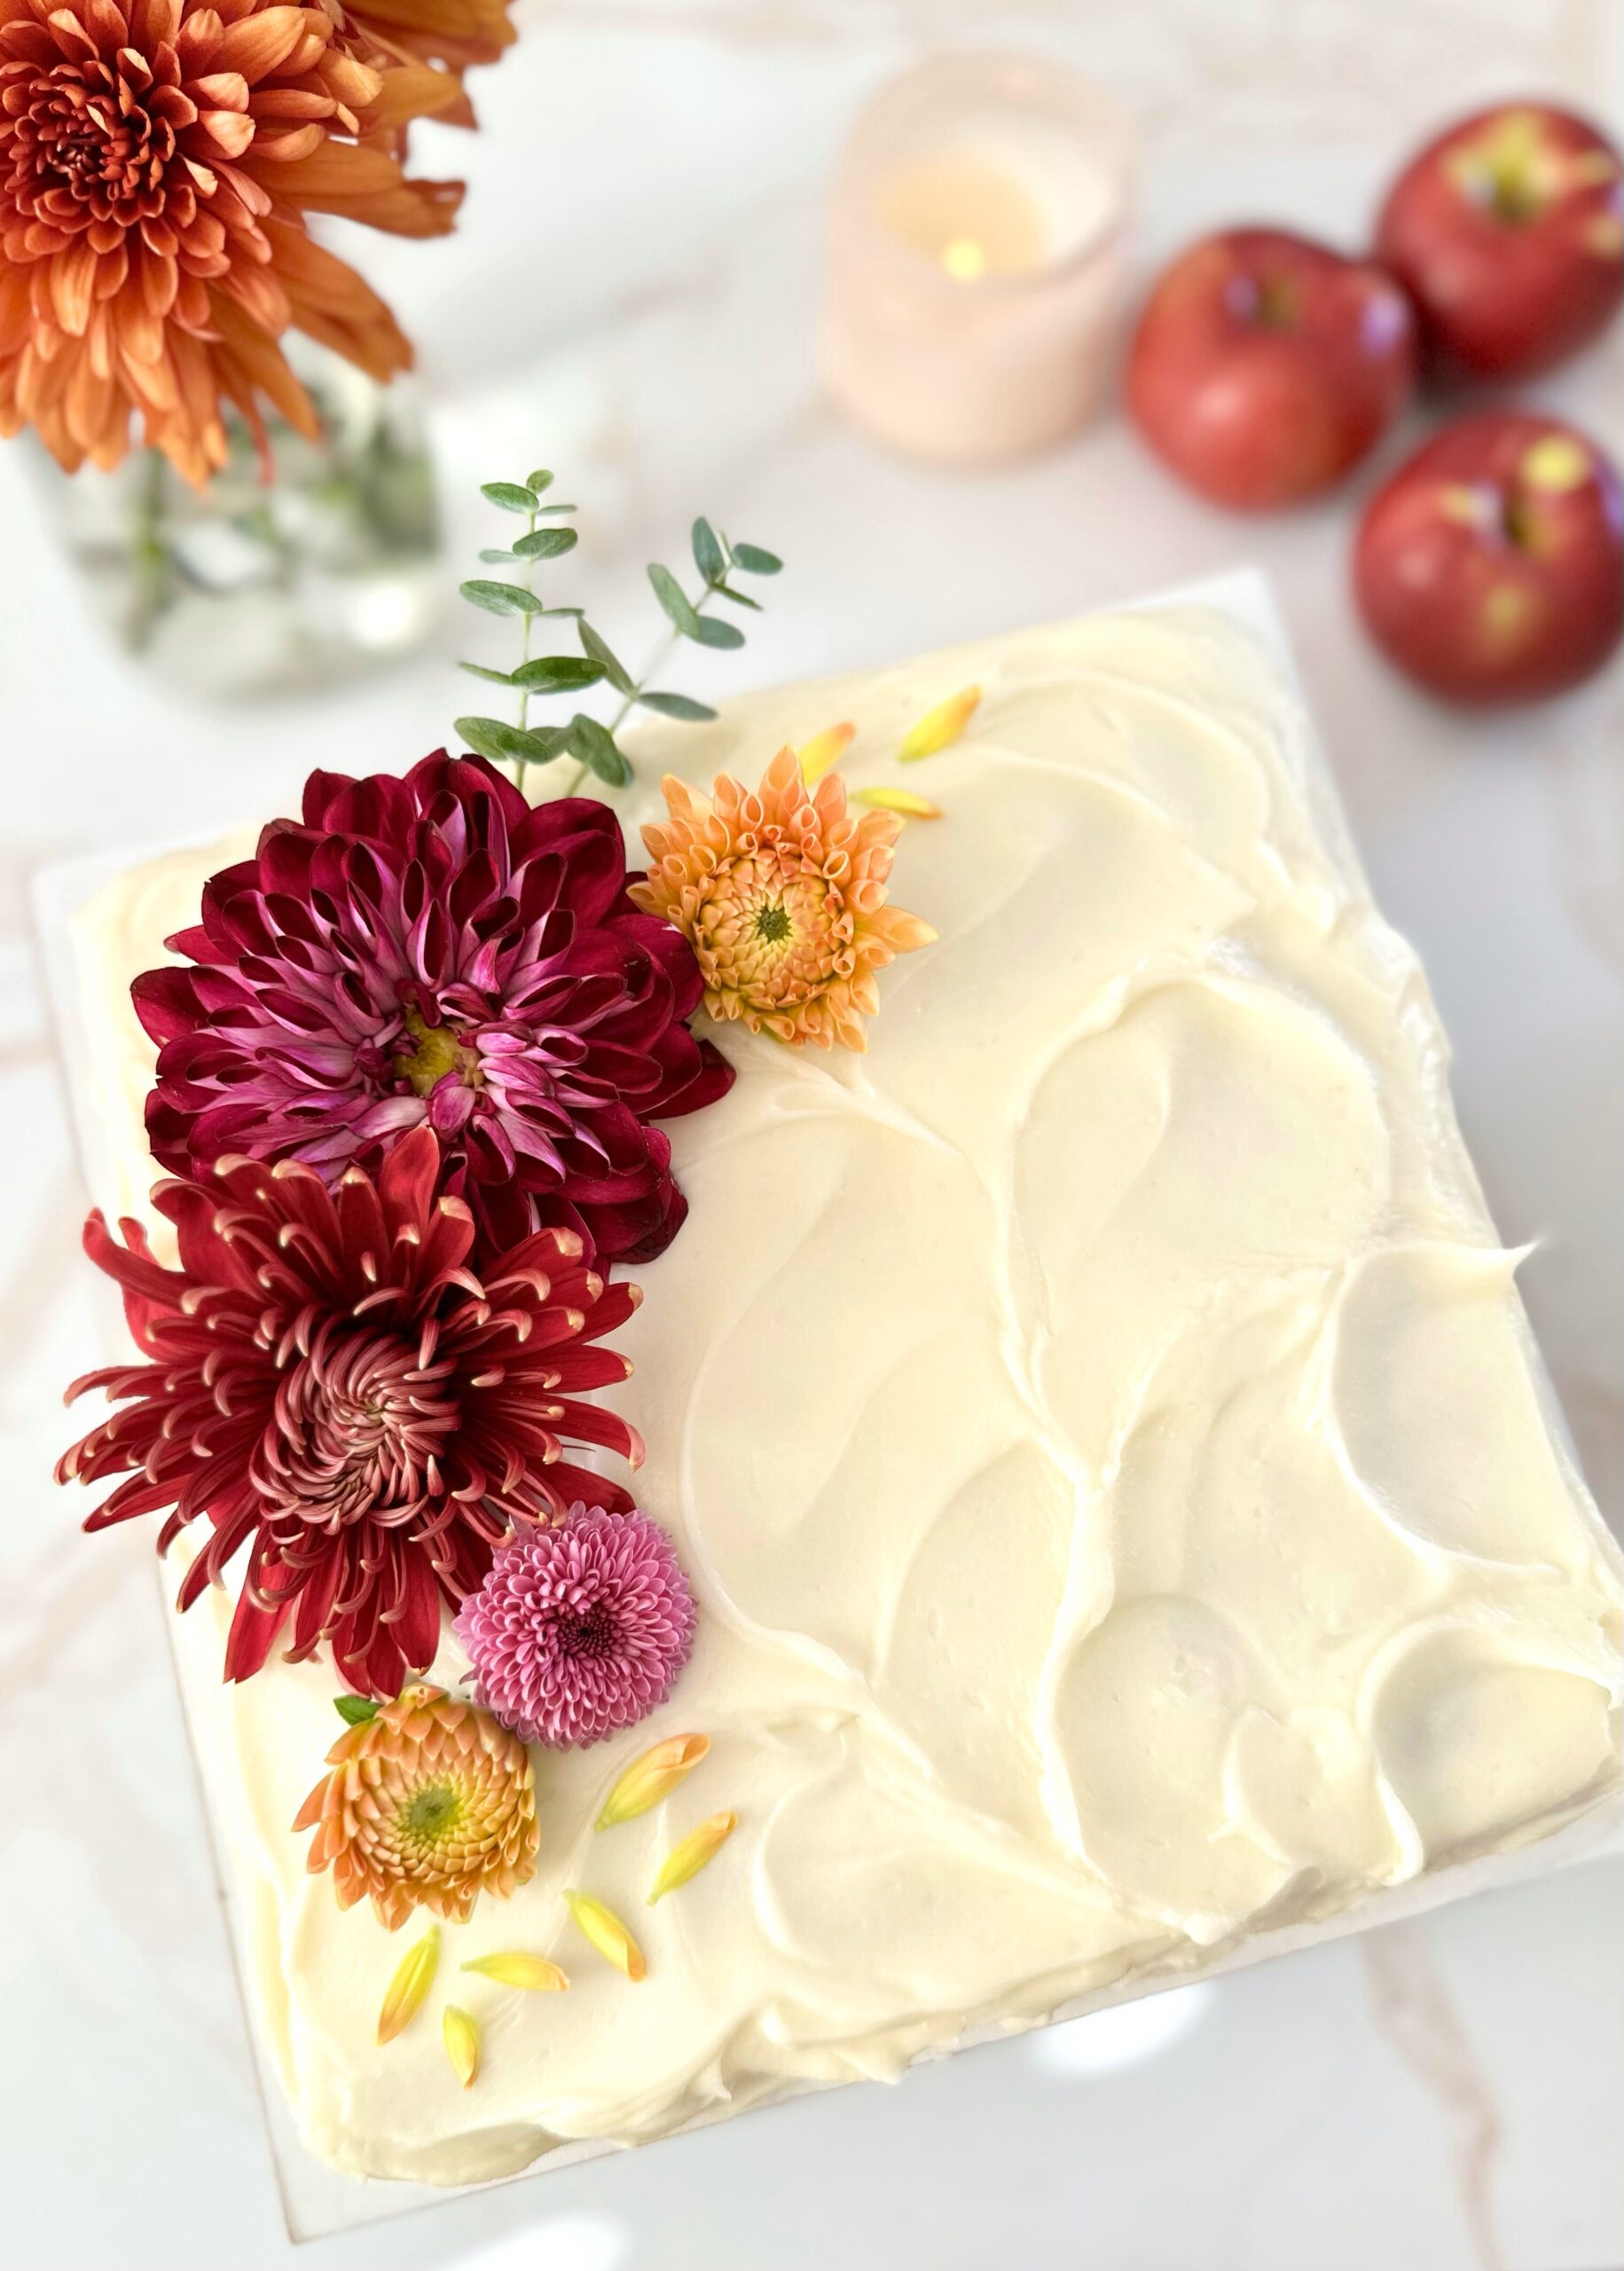
Baking is considered to be a form of therapy for many people, myself included. It can help relieve stress and help you refocus your mind. Using your senses in a positive way can increase endorphins and we’ve all heard about the way chocolate is known to improve your mood. This Chocolate Hazelnut Crunch Cake is the ultimate baking therapy. Chopping the hazelnut chocolates for this recipe is extremely satisfying. Spreading this luxurious buttercream is so therapeutic. Don’t you love cakes like this, where you can swirl the frosting to your heart’s content?

The contrasting textures of the silky, smooth Nutella buttercream and the crunchy chopped hazelnut chocolates are divine. This soft, moist cake already stands on it’s own, but all of these delicious elements combined take it over the top!

Print Recipe
Chocolate Hazelnut Crunch Cake
Soft, moist chocolate sheet cake with silky Nutella buttercream, topped with chopped hazelnut chocolates and toasted hazelnuts
Course Dessert
Keyword cake, chocolate
Servings
servings
Ingredients
Chocolate Cake
Nutella Swiss Meringue Buttercream
Topping
Course Dessert
Keyword cake, chocolate
Servings
servings
Ingredients
Chocolate Cake
Nutella Swiss Meringue Buttercream
Topping
Instructions
Chocolate Cake
  1. Preheat the oven to 350°F (180°C). Line a 9-inch square baking pan* with parchment paper.
  2. In a large bowl, whisk together the flour, cocoa powder, cornstarch, baking powder, baking soda, and salt until well combined. Stir in the granulated sugar and brown sugar.
  3. n a medium-size bowl, whisk together the oil, egg, egg yolk, vanilla extract and sour cream. Add this mixture to the dry ingredients. Beat until combined, then gradually mix in the hot coffee until the batter is smooth. Transfer the batter to the baking pan.
  4. Bake until a toothpick inserted into the center comes out mostly clean or with a few moist crumbs attached, about 18-23 minutes. Cool in the pan for 10 minutes, then remove the cake and carefully transfer it to a cooling rack. Frost the cooled cake. Top with the chopped chocolates and hazelnuts right before serving.
Nutella Swiss Meringue Buttercream
  1. Combine the egg whites and sugar in a large heatproof bowl set over a pan of gently simmering water, making sure the water doesn’t touch the bottom of the bowl. Whisk constantly until the sugar is dissolved reaches temperature of 160ºF (71°C)

  2. Transfer the mixture to the bowl of a stand mixer with a whisk attachment. Whisk on low speed until frothy, gradually increasing to medium-high speed. Whisk until glossy, stiff peaks form and the mixture reaches room temperature.

  3. Turn the mixer to medium-low speed. Add butter, a few pieces at a time, allowing the butter to fully incorporate before adding more. Turn the mixer up to medium speed. If the mixture looks curdled, keep mixing and it will correct itself. 

  4. When the buttercream is smooth and well combined, switch to a paddle attachment. On low speed, mix in the vanilla extract, salt. Gradually mix in the Nutella. Continue mixing on low speed for a few minutes until smooth.

Recipe Notes

*To find my favorite 9-inch square baking pan, click here.

Strawberry Swirl Cake

Strawberry Swirl Cake

This soft, incredibly moist cake is a happy experiment that successfully combines my favorite strawberry cake with cinnamon roll cake. Instead of cinnamon sugar, it has a swirl of strawberry sugar. It’s bursting with fresh strawberry flavor and it’s so good it doesn’t even need frosting. But of course, I added strawberry cream cheese icing, in the tradition of cinnamon roll cake, which takes it over the top.

Print Recipe
Strawberry Swirl Cake
Fresh strawberry cake with a strawberry sugar swirl and strawberry cream cheese icing
Course Dessert
Keyword cake, strawberry
Servings
servings
Ingredients
Strawberry Swirl
Strawberry Cake
Strawberry Cream Cheese Icing
Course Dessert
Keyword cake, strawberry
Servings
servings
Ingredients
Strawberry Swirl
Strawberry Cake
Strawberry Cream Cheese Icing
Instructions
Strawberry Swirl
  1. In a small food processor or a clean spice grinder, pulse the freeze dried strawberries to break them up a bit. Add the sugar and process to a fine consistency. Strain the sugar mixture through a sieve into a bowl. Mix in the flour, melted butter, salt and lemon juice until well combined.
  2. Transfer the mixture to a piping bag fitted with a medium round tip. I used an Ateco #12 tip.** Alternately, you can snip the corner off a disposable piping bag or food storage bag, creating a 3/8-inch wide opening.
Strawberry Cake
  1. In a small saucepan over medium-low heat, simmer the puréed strawberries until reduced by half. Set aside to cool to room temperature.
  2. Preheat the oven to 350ºF (180ºC). Line the bottom of an 8-inch round cake pan*** with parchment paper. Grease and flour the inside.
  3. In a medium bowl, whisk together the flour, baking powder, baking soda and salt.
  4. In a large bowl, beat the sugar, oil, egg, egg white, and extracts, with an electric mixer at medium speed, until smooth. Alternately, you can whisk the mixture together by hand until smooth. Stir in 1/3 cup of the cooled strawberry reduction and the food coloring. (Reserve the remaining strawberry reduction for the icing.)
  5. Stir the flour mixture into the batter, in 2 additions, alternating with the sour cream. Mix just until combined. Transfer the batter to the cake pan.
  6. Pipe the strawberry swirl mixture onto the batter in a spiral pattern. Bake until a toothpick inserted into the center of the cake comes out clean, about 25-30 minutes.
  7. Let the cake cool in the pan for 10 minutes, then transfer it to a cooling rack.
Strawberry Cream Cheese Icing
  1. In a small bowl, beat the cream cheese and butter together until smooth. Add the powdered sugar and strawberry reduction and beat until smooth and well combined. Whisk in the buttermilk a little at a time until your desired consistency is reached. Drizzle over the cooled cake.
Recipe Notes

*To find the food coloring I used, click here.

**To find the piping tip I used, click here.

***To find the cake pan I used, click here.

Lemon White Chocolate Chip Cookies

Lemon White Chocolate Chip Cookies

It’s nearly impossible to feel blue while you’re eating one of these cheerful Lemon White Chocolate Chip Cookies! They’re lemony, buttery and so delicious. I tested these over and over until I got the best lemon flavor and the perfect texture. You’ll love the crisp edges and soft, chewy centers. They don’t require any chilling time, but if your cookies spread too much, you can chill the dough balls for 20-30 minutes before baking. Weigh your ingredients for the best results.

For extra cuteness, I added small yellow chocolate flowers. I used melted white chocolate chips, but candy melts work too. The candy mold I used makes 1/2-inch to 3/4-inch flowers. To find the mold I used, click here. If you use that mold or a similar one, I recommend buying more than one so you can make more chocolate flowers at one time. If you want to skip the white chocolate flowers, then add a few white chocolate chips to the top of each cookie before baking.

Print Recipe
Lemon White Chocolate Chip Cookies
Lemony cookies with white chocolate chips, crisp edges and soft, chewy centers, topped with white chocolate flowers
Course Dessert
Keyword cookies, lemon
Servings
cookies
Ingredients
Lemon White Chocolate Chip Cookies
Course Dessert
Keyword cookies, lemon
Servings
cookies
Ingredients
Lemon White Chocolate Chip Cookies
Instructions
White Chocolate Flowers
  1. Prep silicone candy flower molds by brushing a small amount of luster dust into the cavities with a small food safe brush. This step is optional, but it gives your chocolate flowers a sheen and helps them to release from the mold.
  2. In a heat safe bowl, melt the white chocolate chips together with the vegetable oil over a pan of barely simmering water, making sure the water doesn't touch the bottom of the bowl. Alternately, you can melt your white chocolate chips with short bursts in the microwave. Stir gently until smooth. Stir in the food coloring a little at a time until your desired shade is achieved.
  3. Transfer the melted chocolate to a piping bag with a narrow round tip or snip the tip off of a disposable piping bag. Alternately, you can use a food grade squeeze bottle with a narrow tip. Fill the cavities of the flower mold. Scrape off any excess chocolate with a small offset spatula. Place the mold in the freezer for a few minutes until set. Turn the mold over and bend it slightly to release the flowers. Repeat the steps until you have about 24-36 flowers.
Lemon White Chocolate Chip Cookies
  1. Preheat the oven to 350ºF (180ºC). Line two large cookie sheets with parchment paper.
  2. In a medium bowl, whisk together the flour, cake flour, salt and baking soda.
  3. In a large bowl, beat the butter, granulated sugar, brown sugar and lemon zest, with an electric mixer at medium speed, until light and fluffy. Beat in the egg and egg yolk in separate additions until well incorporated. Beat in the extracts until combined.
  4. On low speed, beat in the flour mixture just until combined. Fold in the white chocolate chips.
  5. Place 1/4 cup size portions of cookie dough onto the prepared cookie sheet, about 3 inches apart. I used a #20 portion scoop* and I placed 6 cookies on each cookie sheet. Bake one cookie sheet at a time. Bake until the tops of the cookies are set and the bottom edges begin to turn light golden brown, about 10-11 minutes. Do not over bake. Transfer the cookies to a cooling rack to cool completely.
  6. Apply the white chocolate flowers to the cooled cookies with a dab of melted white chocolate.
Recipe Notes

To find the flower mold I used, click here.

To find the portion scoop I used, click here.

Lemon Bundt Cakes with Blueberry Cream Cheese Icing

Lemon Bundt Cakes with Blueberry Cream Cheese Icing

Say hello to springtime in cake form. These soft, fluffy, little lemon bundt cakes are bursting with lemon flavor and topped with a beautiful, delicious blueberry cream cheese icing. The icing gets it’s natural beauty from fresh blueberries. The colors and flavors of these cakes remind me of sunshine and spring blooms. I decorated my cakes with tiny blue violas from my garden. They would also look pretty topped with fresh chamomile flowers.

I used a bundtlette pan with six 1-cup servings. To find the pan I used, click here. This recipe also works as cupcakes using a standard muffin pan. The baking time will be a bit shorter. If you’re not a fan of blueberry icing, you can glaze the cakes with lemon icing instead. To find my lemon icing recipe, click here.

Print Recipe
Lemon Bundt Cakes with Blueberry Cream Cheese Icing
Soft, fluffy lemon bundtlette cakes topped with blueberry cream cheese icing
Course Dessert
Keyword cake, lemon bundts
Servings
Bundtlette cakes
Ingredients
Lemon Bundt Cakes
Blueberry Cream Cheese Frosting
Course Dessert
Keyword cake, lemon bundts
Servings
Bundtlette cakes
Ingredients
Lemon Bundt Cakes
Blueberry Cream Cheese Frosting
Instructions
Lemon Simple Syrup
  1. In a small saucepan, combine the sugar, lemon juice, and water over medium-low heat. Cook and stir gently just until the sugar is dissolved. Set aside to cool.
Lemon Bundt Cakes
  1. Preheat the oven to 350ºF (180ºC). Grease and flour a bundtlette pan with six 1-cup servings. Make sure to thoroughly grease and flour all of the crevices. (To find the pan I used, see note below.*)
  2. In a medium bowl, whisk together the flour, baking powder, baking soda and salt.
  3. In a large bowl whisk together the sugar and lemon zest until well combined. Add the oil, eggs, and vanilla extract and whisk until smooth and well combined.
  4. In a small bowl, whisk together the milk and sour cream. Stir the flour mixture into the batter in 2 additions, followed by half of the milk mixture after each addition. Stir just until combined.
  5. Fill the cake pan wells half full with the batter. (If using a standard muffin pan, fill the wells 2/3 full.) Bake until the tops are springy and a toothpick inserted in the centers of the cakes comes out clean or with a few crumbs attached, about 14-16 minutes. Check for doneness a couple of minutes early to avoid over baking. (Baking time is shorter for a standard muffin pan.) Cool the cakes in the pan for 8 minutes, then turn the cakes out onto a cooling rack. Brush the warm cakes generously with lemon simple syrup.
Blueberry Cream Cheese Icing
  1. In a small saucepan, combine the blueberries, sugar and lemon juice. Stir occasionally over medium heat, until the blueberries start to soften and the mixture starts to bubble. Smash the blueberries with a potato masher or the back of a spoon. Let the mixture simmer gently until thickened to a jam consistency, about 2-3 minutes. Strain the cooked blueberries through a mesh sieve for a smooth consistency. You can skip this step if you prefer a chunky consistency. Set aside to cool to room temperature.
  2. In a medium bowl, beat the cream cheese and butter together until smooth. Don't over beat. Cream cheese tends to curdle if beaten too much.
  3. Add the powdered sugar, vanilla and 2 tablespoons of milk and beat until smooth and well combined. Stir in the cooled blueberries until combined. Stir in more milk as needed to achieve your desired consistency. Spoon or drizzle the icing onto the cooled lemon cakes.
Recipe Notes

To find the bundt cake pan I used, click here.

Blueberry Cornmeal Tea Cakes with Honey Butter Icing

Blueberry Cornmeal Tea Cakes with Honey Butter Icing

If you’re looking forward to spring as much as I am, you’ll love these tender, fluffy Blueberry Cornmeal Tea Cakes. They taste like soft, sweet cornbread with the added freshness of juicy blueberries. The Honey Butter Icing adds the perfect, sweet finish. Who doesn’t love cornbread slathered with honey and butter? It’s a match made in heaven and it works so well on these delightful tea cakes.

I placed them upside down because they look more pretty and elegant that way. I added some fresh, pesticide free violas to the tops. They would also be cute decorated with fresh blueberries or chamomile flowers.

This versatile recipe can also be made into muffins by filling the muffin pan cups 2/3 full instead of 1/2 full. The baking time may be a little longer. Place the muffins right side up on the cooling rack.

To see the inside of the tea cakes, watch the TikTok video. Click here.

Print Recipe
Blueberry Cornmeal Tea Cakes with Honey Butter Icing
Sweet, soft cornbread cakes with blueberries, topped with honey butter icing
Servings
Ingredients
Blueberry Cornmeal Tea Cakes
Honey Butter Icing
Servings
Ingredients
Blueberry Cornmeal Tea Cakes
Honey Butter Icing
Instructions
Blueberry Cornmeal Tea Cakes
  1. Preheat the oven to 350ºF (180ºC). Grease and flour a 12-serving muffin pan*.
  2. In a large bowl, whisk together the flour, sugar, cornmeal, baking powder and salt.
  3. In a medium bowl, whisk together the eggs, sour cream, oil, butter, vanilla and lemon zest until smooth.
  4. Stir the wet ingredients into the dry ingredients until combined. Don't over mix. A few lumps are okay. Fold in the blueberries.
  5. Fill the muffin cups half full. Bake until the tops of the cakes are light golden, the tops are springy and a toothpick inserted into the center of the cakes comes out clean, about 14-16 minutes.
  6. Cool the cakes in the pan for 5 minutes, then remove them from the pan and place them upside down on a cooling rack. Top the cooled cakes with Honey Butter Icing.
Honey Butter Icing
  1. In a medium bowl, whisk together the powdered sugar, butter, honey, salt and 1 tablespoon of milk. Add additional milk as needed to achieve your desired consistency. Whisk until smooth.
Recipe Notes

To find the muffin pan I used, click here.

White Velvet Snowflake Cakes


Print Recipe


White Velvet Snowflake Cakes

Soft, plush vanilla mini cakes with vanilla icing

Course Dessert
Keyword cake, white velvet

Servings
cakes


Ingredients
Snowflake Cakes

Course Dessert
Keyword cake, white velvet

Servings
cakes


Ingredients
Snowflake Cakes


Instructions
Snowflake Cakes
  1. Preheat the oven to 350ºF (177ºC). Spray a 6-serving silicone snowflake mini cake mold* with nonstick spray. Use a small pastry brush to brush the spray into all of the crevices. Tap out any excess spray. Place the mold on a baking sheet.

  1. In a large bowl, whisk together the cake flour, baking powder and salt. Add the sugar and whisk to combine. Add the butter and beat, with an electric mixer on low speed, until the butter is evenly distributed and the mixture looks like crumbs with no large chunks.

  2. In a medium bowl, whisk together the milk, egg whites, oil and vanilla. Slowly add the milk mixture to the flour mixture and continue beating on low until smooth, about 1-2 minutes.

  3. Transfer the batter to the prepared pan, evenly distributing the batter and filling the cavities a little more than half full. Bake until the tops of the cakes are light golden and a toothpick inserted into the centers of the cakes comes out clean, about 18-22 minutes. Be careful not to over bake. Let the cakes cool in the pan for about 7 minutes then turn the cakes out onto a cooling rack to cool completely.

  4. Brush one or two coats of vanilla icing on the tops and sides of the cakes. Decorate as desired. I used fine opal sanding sugar, candy snowflakes and candy pearls.

Vanilla Icing
  1. In a medium bowl, whisk together the powdered sugar, butter, vanilla, salt and 1 tablespoon of milk until smooth. Add additional milk as need to achieve your desired consistency.


Recipe Notes

I used a 6-serving silicone mold with 3-inch diameter, 1-inch deep cavities.