Mini Pumpkin Bear Muffins

Mini Pumpkin Bear Muffins

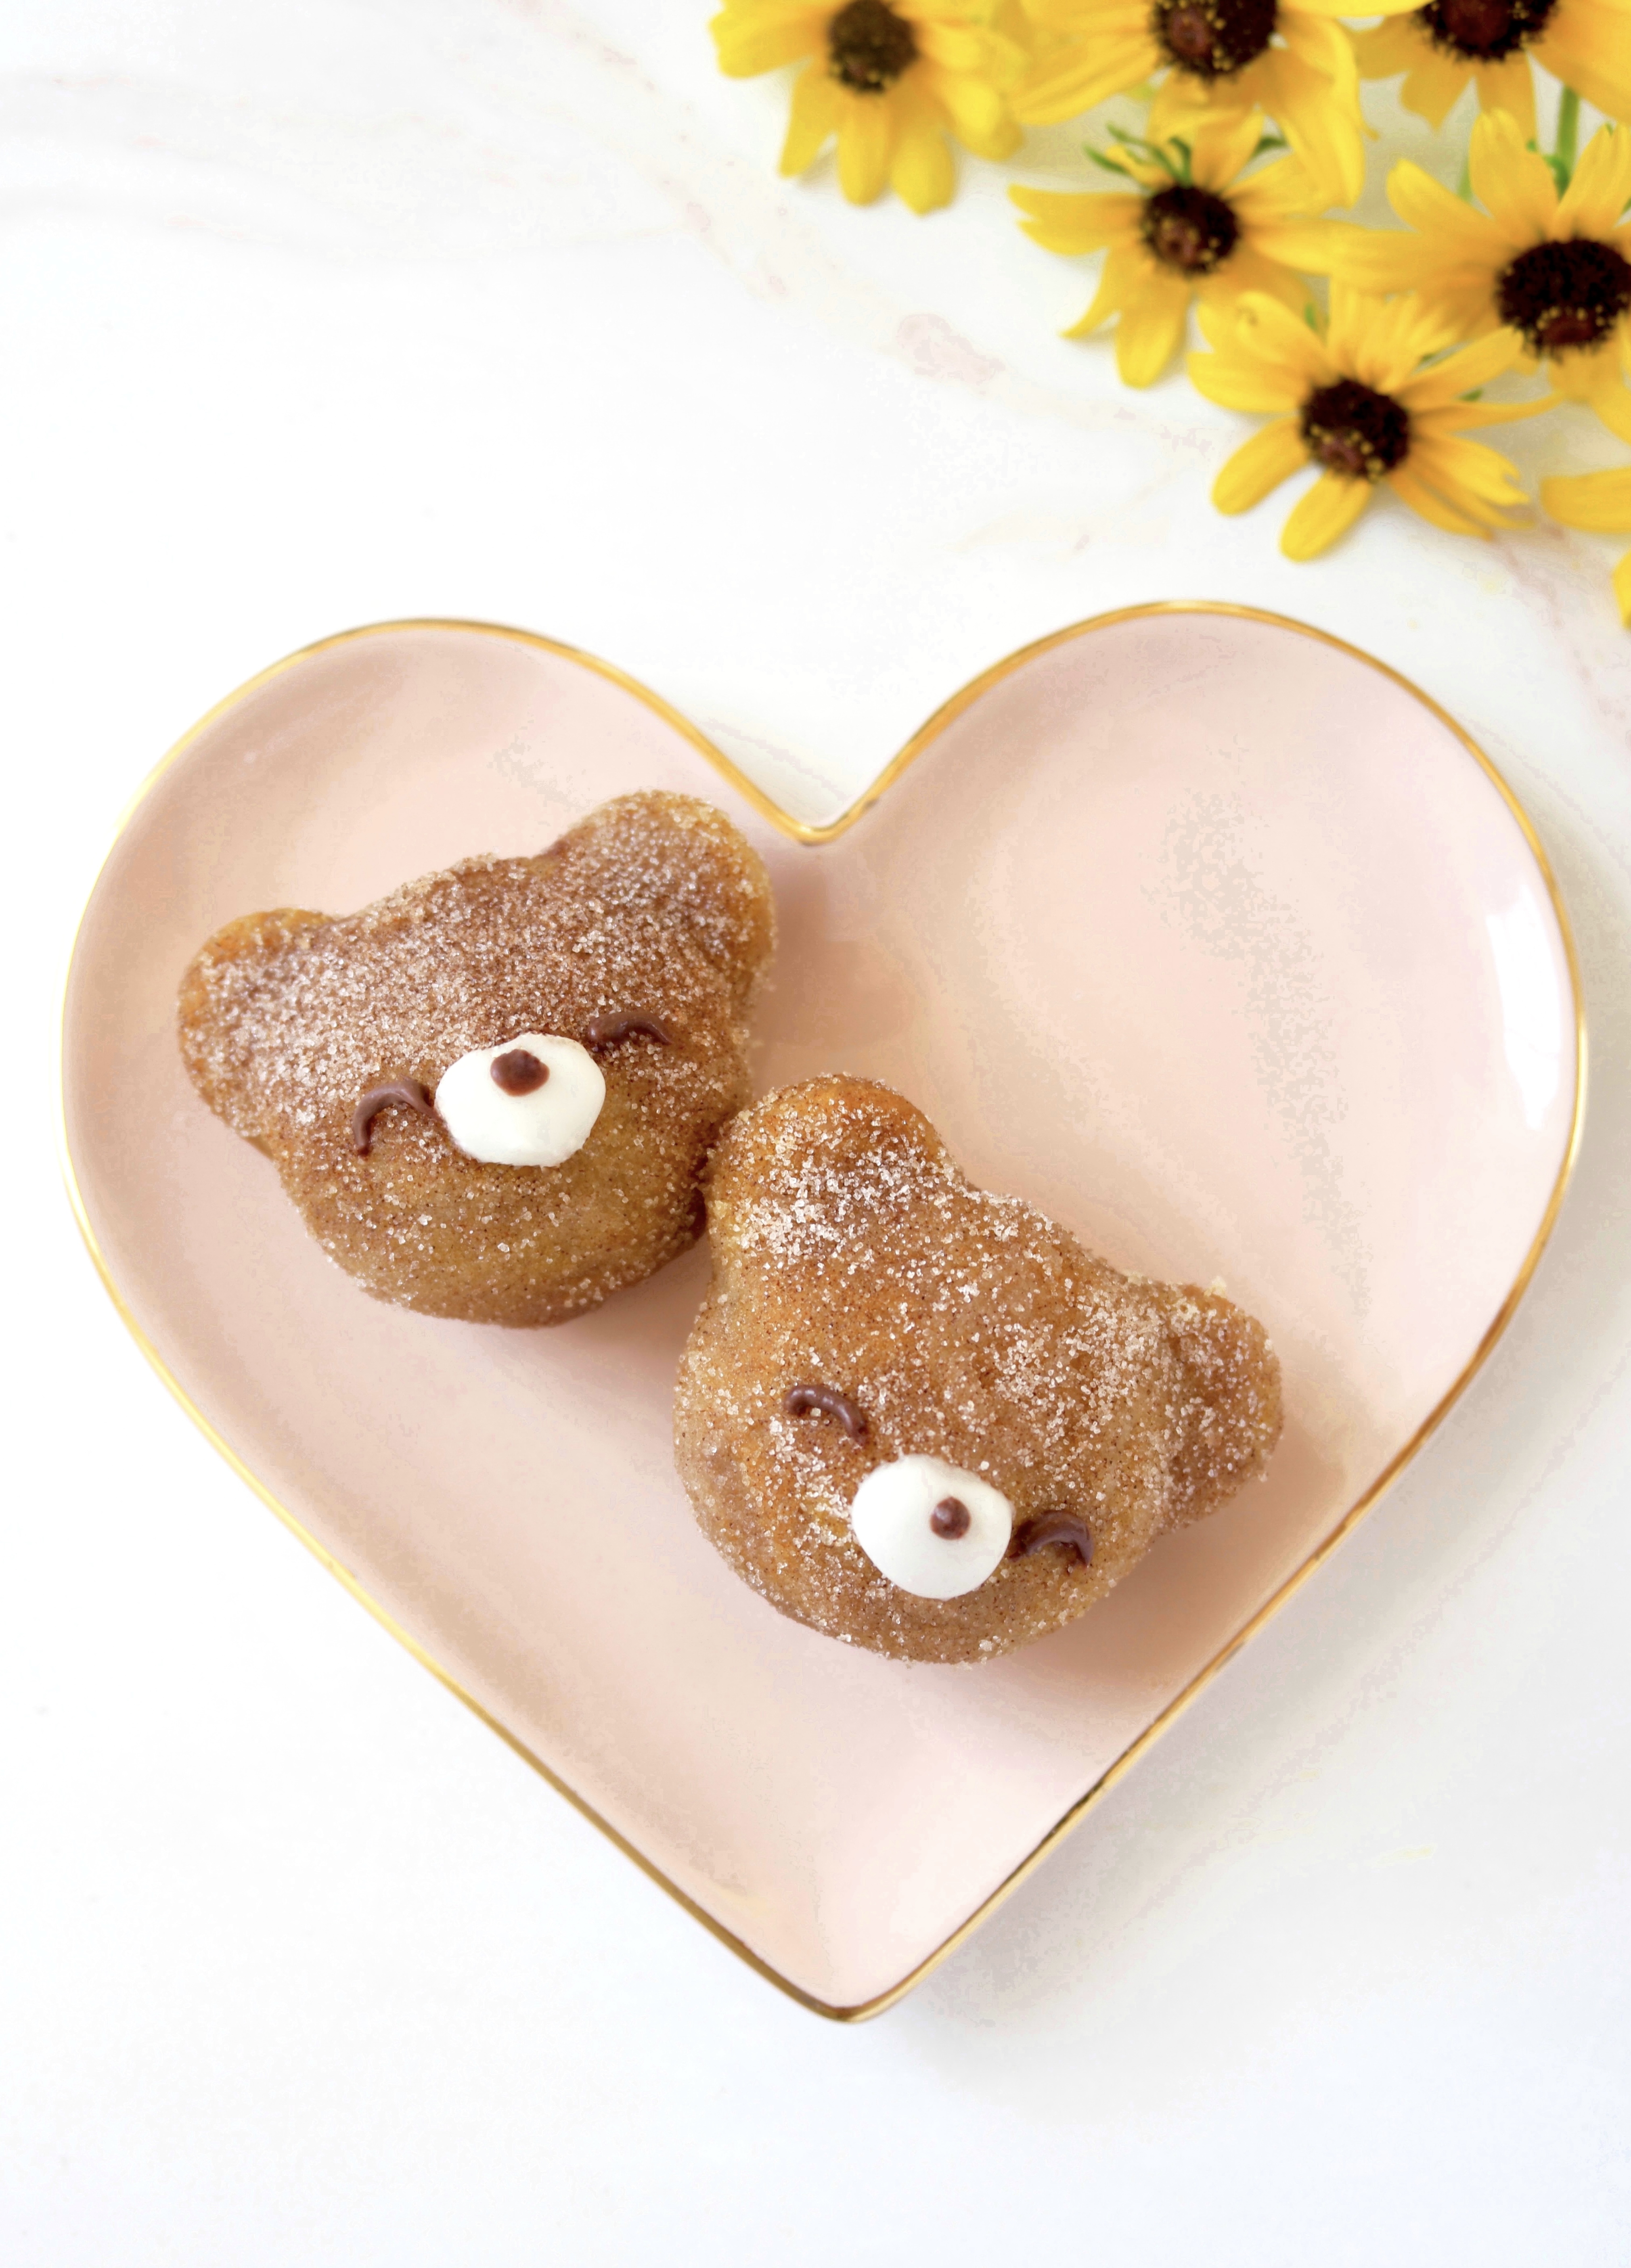
These cute little bear-shaped pumpkin muffins are almost too cute to eat. But if you try one, it’ll be gobbled up without hesitation because they’re so moist, fluffy and delicious! The cinnamon sugar coating gives them the perfect fall flavor and a subtle crunch. I used cream cheese icing to form the snouts and melted chocolate for the eyes and noses. You can also use melted chocolate chips or candy melts to decorate their faces if you prefer. I used a bear-shaped mini muffin pan, which is also called a Madeleine pan or a financier pan. To find a bear mini muffin pan, click here. A standard mini muffin pan will also work, but the muffins won’t be bear-shaped. If you end up using a standard mini muffin pan, you can add round, flat candies to form the ears.

To watch the TikTok video of Mini Pumpkin Bear Muffins being made, click here.

To watch the Instagram video of Mini Pumpkin Bear Muffins being made, click here.

Print Recipe
Mini Pumpkin Bear Muffins
Moist, fluffy bear-shaped pumpkin mini muffins with cream cheese icing snouts
Course Breakfast, Brunch
Keyword muffins, pumpkin
Servings
mini muffins
Ingredients
Mini Pumpkin Bear Muffins
Cinnamon Sugar
Bear Faces
Course Breakfast, Brunch
Keyword muffins, pumpkin
Servings
mini muffins
Ingredients
Mini Pumpkin Bear Muffins
Cinnamon Sugar
Bear Faces
Instructions
Mini Pumpkin Bear Muffins
  1. Preheat the oven to 325ºF (165ºC). Grease and flour a bear-shaped mini muffin pan. (This recipe also works in a mini muffin pan but the muffins won't be bear shaped.)
  2. In a medium bowl, whisk together the flour, baking powder, baking soda, salt, cinnamon, ginger and nutmeg.
  3. In a large bowl, whisk together the brown sugar, oil and egg until smooth and well combined. Mix in the pumpkin purée until incorporated. Stir in the flour mixture just until combined.
  4. Scoop or pipe the batter into the muffin pan, filling the cups 2/3 full (about 3/4 oz or 21g in each). Use a small offset spatula to smooth the top of the batter, making sure to get batter into the ears.
  5. Bake until a toothpick inserted into the center of the muffins comes out clean, about 9-11 minutes. Let the muffins cool in the pan for 5 minutes then remove them from the pan and transfer to a cooling rack.
  6. Clean the pan and repeat with the remaining batter.
Cinnamon Sugar
  1. In a small bowl, whisk together the sugar and cinnamon until well combined. Brush the warm muffins with with melted butter using a small pastry brush. Coat them with the cinnamon sugar mixture.
Bear Faces
  1. In a small bowl, beat the butter, cream cheese, powdered sugar and 1/2 teaspoon of milk until smooth. Add more milk as needed.
  2. Transfer the icing to a piping bag fitted with a medium round tip or snip off the end of the piping bag making a 1/4-inch wide opening. Pipe a small blob of icing onto each bear's face to form the snouts.
  3. Transfer the melted chocolate to a piping bag fitted with a small round tip or snip off the end of the piping bag making a 1/16-inch wide opening. Pipe dots of chocolate onto the snouts to make the noses. Pipe dots or curved lines to make the eyes. Alternately you can apply the melted chocolate dots with the tip of a toothpick
Recipe Notes

*To find a bear-shaped mini muffin pan, click here.

Creamy Lemon Tarts

Creamy Lemon Tarts

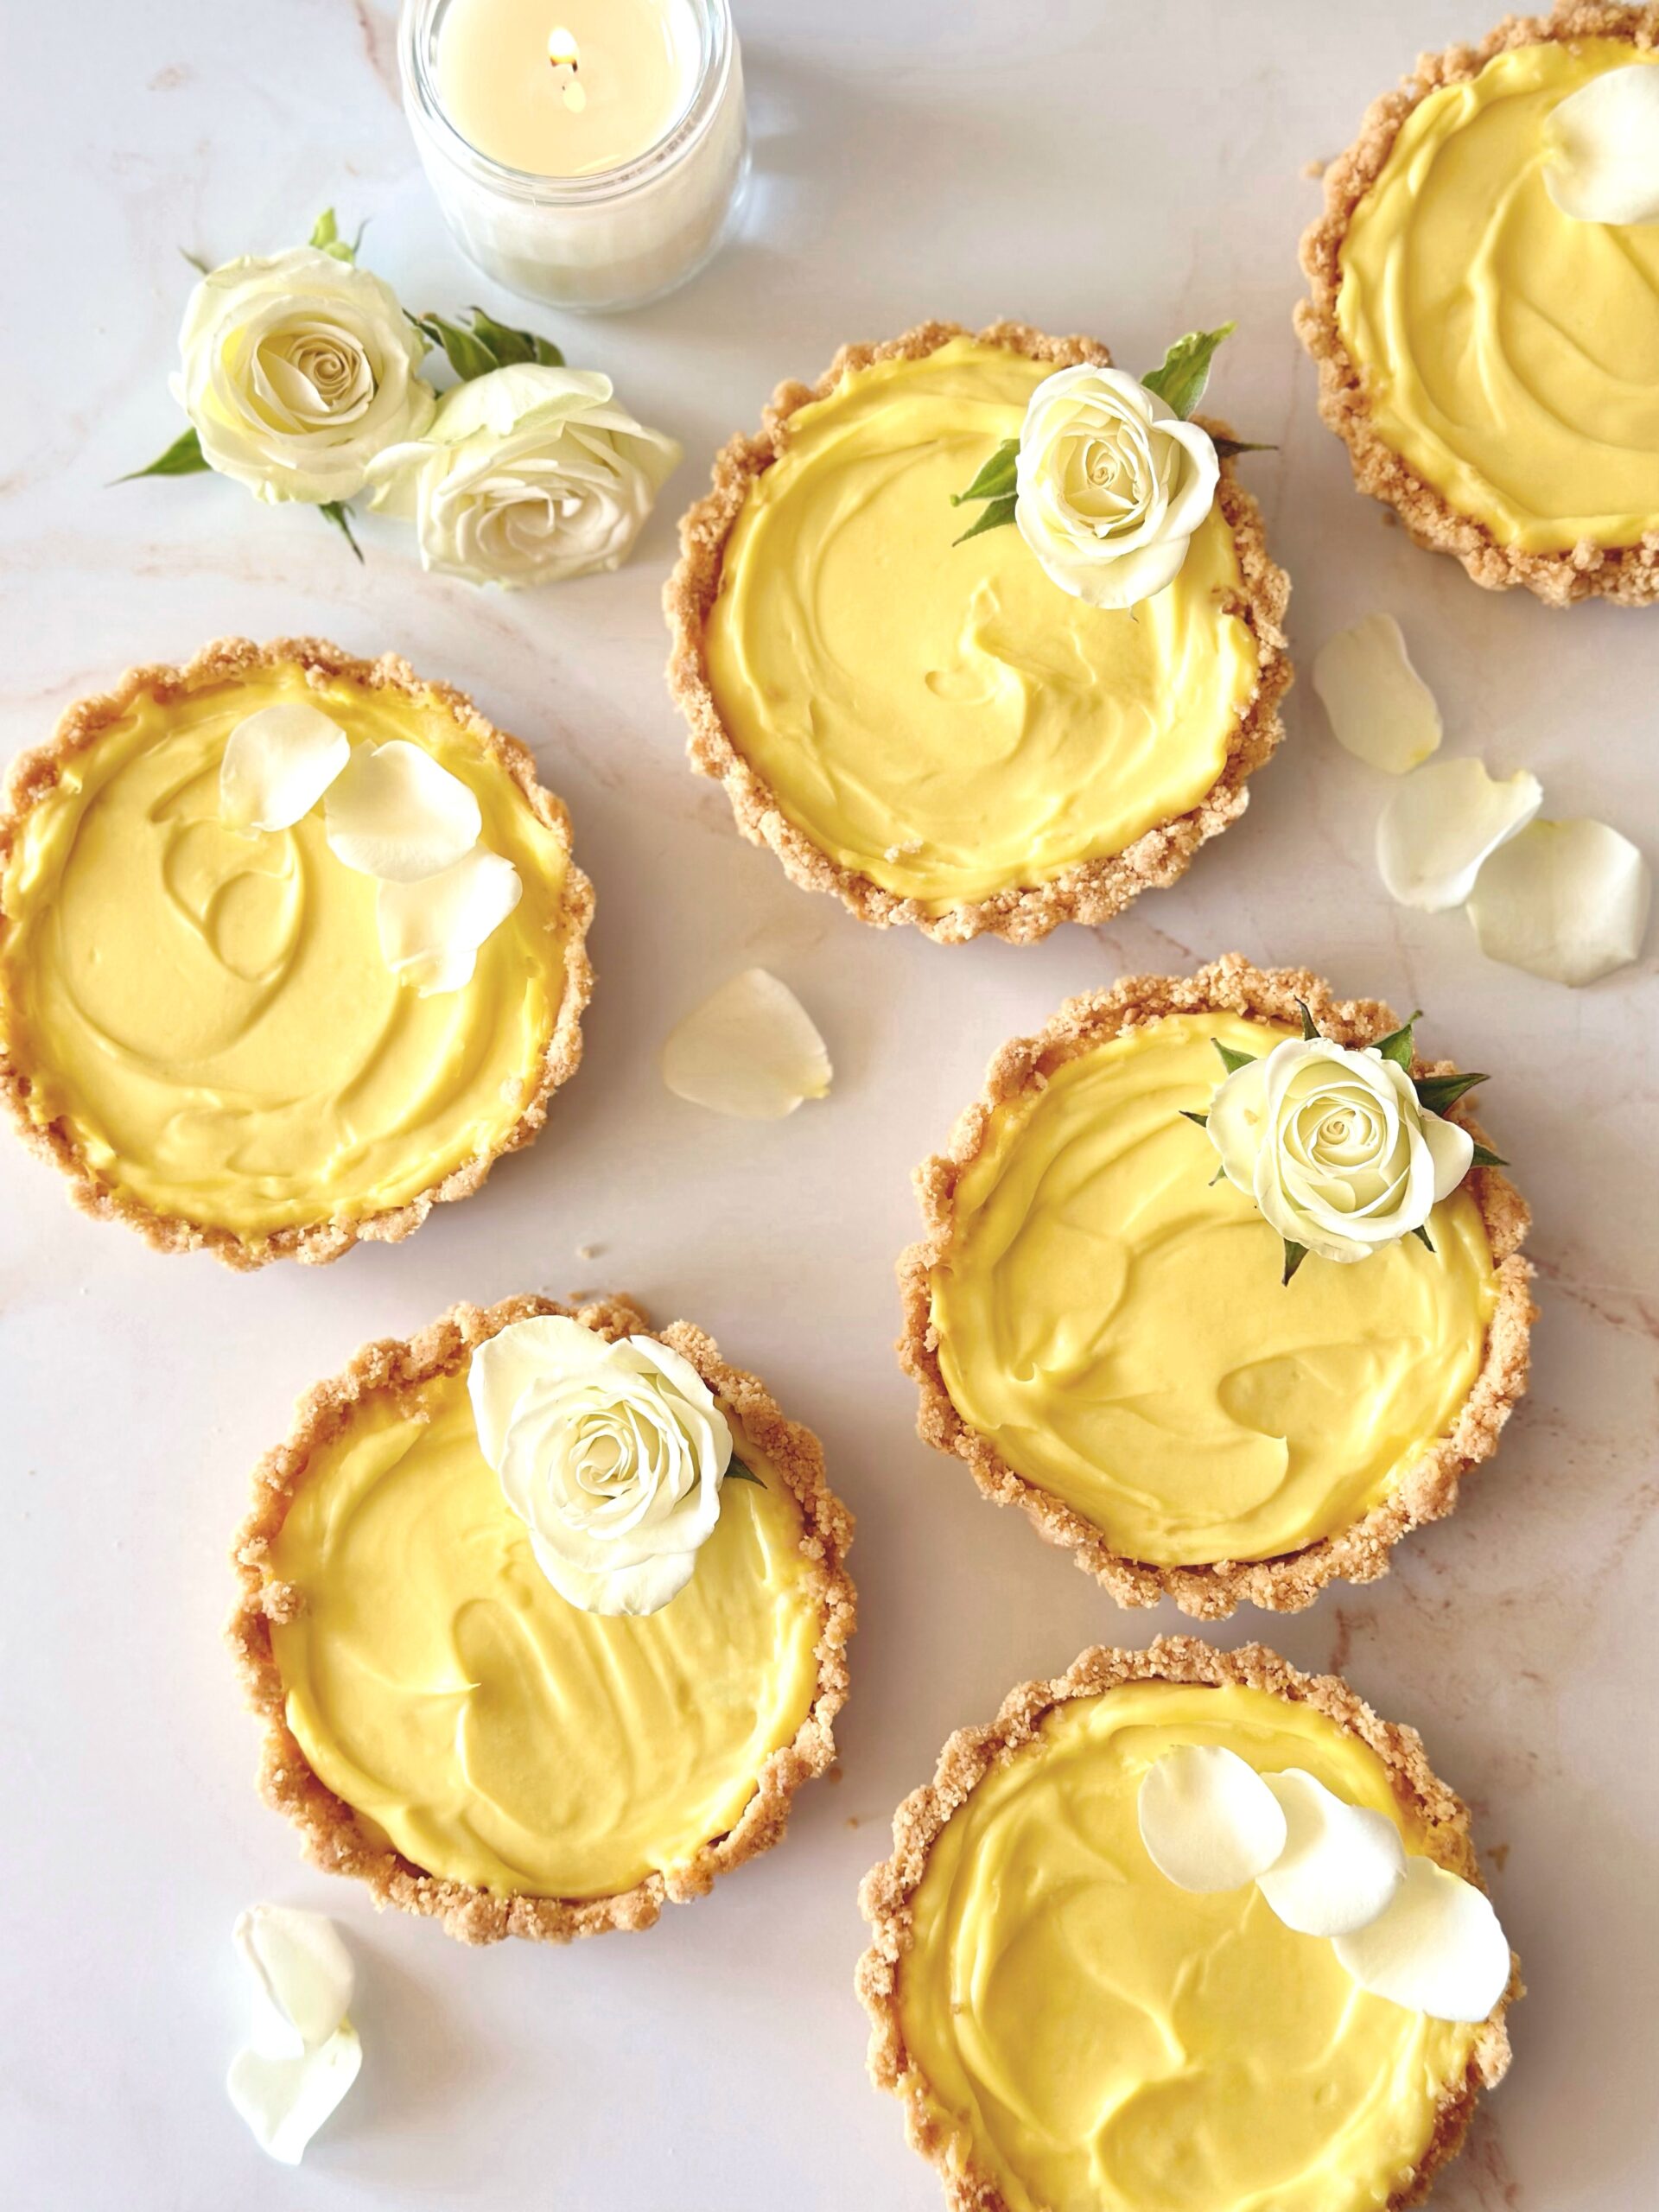
One of the reasons I love baking is because of the joy it brings. In this case it’s joy and sunshine. These vibrant, lemon tarts are pure sunshine. With only four ingredients, they’re so easy to make that you’ll be surprised at how silky and delicious they are.

Print Recipe
Creamy Lemon Tarts
Course Dessert
Keyword lemon, tarts
Servings
tarts
Ingredients
Course Dessert
Keyword lemon, tarts
Servings
tarts
Ingredients
Instructions
  1. Preheat oven to 350ºF. Place six 4-inch tart pans with removable bottoms* on a baking sheet.
  2. In a medium bowl, mix crushed cookies with melted butter until well combined.
  3. Press crumb mixture firmly into tart pans with the back of a spoon or the bottom of a small cup. It's important to press firmly, especially on the sides.
  4. Bake tart shells for 8 minutes. Let cool completely.
  5. In a medium bowl, stir mascarpone cheese with a spatula until smooth. Fold in lemon curd until well combined.
  6. Fill cooled tart shells with mascarpone mixture. Refrigerate tarts until set, about 2 hours.
  7. Carefully remove tarts from tart pans. Serve with a dollop of whipped cream if desired.
Recipe Notes

To find 4-inch tart pans, click here.

Glazed Lemon Muffins

Glazed Lemon Muffins

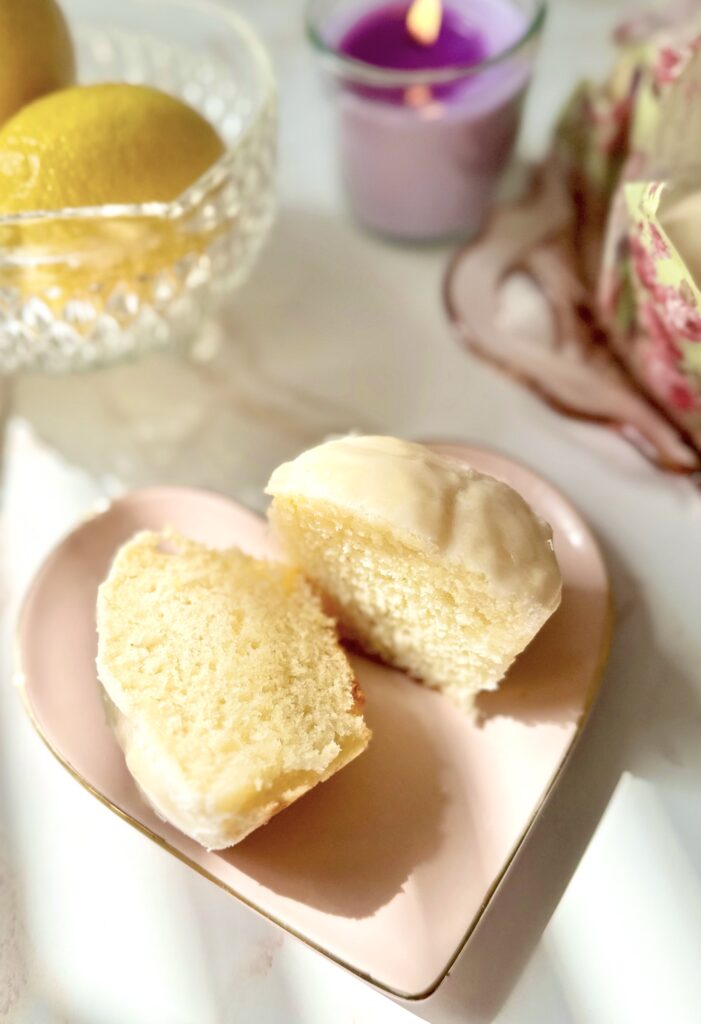
However your day is going today, it’s about to get better. I can confidently say these lemon muffins are some of the best you will ever taste. Follow the recipe exactly, weigh your ingredients and you’ll be enjoying these soft, tender muffins in no time.

These delightful muffins are perfect for breakfast, brunch or an anytime snack. I love enjoying one with a cup of strawberry or chamomile tea.

Print Recipe
Glazed Lemon Muffins
Soft, tender lemon muffins glazed with lemon icing
Course Breakfast, Brunch
Keyword lemon, muffins
Servings
muffins
Ingredients
Muffins
Icing
Course Breakfast, Brunch
Keyword lemon, muffins
Servings
muffins
Ingredients
Muffins
Icing
Instructions
Muffins
  1. Preheat the oven to 375ºF. Line a 12-serving muffin pan with tulip baking liners.* (You can also use standard muffin liners. They hold less batter so you may end up with a couple of extra muffins.)
  2. In a medium bowl, whisk together the flour, baking powder, baking soda and salt.
  3. In a large bowl, cream the butter, sugar and lemon zest, with an electric mixer, until light and fluffy.
  4. Add the eggs one at a time and beat until well combined.
  5. Add extracts and beat until combined.
  6. On low speed, mix in flour mixture in two additions, alternating with half of sour cream after each addition. Mix just until combined. Batter will be thick.
  7. Divide batter evenly into muffin liners. (If using standard muffin liners, fill 3/4 full.)
  8. Bake at 375ºF for 5 minutes. Turn the oven heat down to 350ºF and continue baking the muffins until a toothpick inserted into the centers comes out clean, about 12-16 more minutes. Do not over bake.
  9. Transfer muffins to a cooling rack to cool completely. Brush icing onto muffin tops with a small pastry brush.
Icing
  1. Whisk the powdered sugar, melted butter, and 1 tablespoon of lemon juice together until smooth. Add additional lemon juice until your desired consistency is reached.
Recipe Notes

*To find  tulip muffin liners, click here.

To find floral tulip muffin liners, click here.

Cinnamon Crumble Scones

The weeks following the winter holidays always feel peaceful to me. The rush is over and it’s time to catch my breath and rest. When it’s chilly and raining outside, I love spending time at home curled up in my coziest fluffy pajama bottoms and fuzzy socks. Give me a blanket, 75 pillows, a warm cup of tea and these Cinnamon Crumble Scones for ultimate coziness!

The crumb topping on these scones will remind you of a cinnamon crumb cake, which makes them extra nostalgic and comforting. The technique of folding the dough over itself gives them a flaky layered texture. For the tenderest scones, make sure not to over work your dough.

To watch Instagram reel, click here. To watch extended TikTok video showing baking process, click here.

Print Recipe
Cinnamon Crumble Scones
Course Breakfast, Brunch
Keyword cinnamon, scones
Servings
scones
Ingredients
Crumb Topping
Cinnamon Filling
Scones
Icing
Course Breakfast, Brunch
Keyword cinnamon, scones
Servings
scones
Ingredients
Crumb Topping
Cinnamon Filling
Scones
Icing
Instructions
Crumb Topping
  1. In a medium bowl, combine flour, brown sugar, sugar cinnamon and salt.
  2. Work in butter with your fingertips until it looks like wet sand. Press together to make dime size chunks.
  3. Set aside in refrigerator until ready to use.
Cinnamon Filling
  1. In a small bowl, mix filling ingredients together until well combined.
Scones
  1. Preheat oven to 375ºF. Line a large baking sheet with parchment paper.
  2. In a large bowl, whisk together flour, baking powder and salt.
  3. Work butter into flour mixture with your fingertips or with a pastry blender until pea sized pieces are formed.
  4. In a small bowl, whisk together heavy cream, sour cream and vanilla extract.
  5. Stir cream mixture into flour mixture a little at a time until dough comes together. If your dough is too dry add 1-2 more teaspoons of heavy cream.
  6. Turn dough out onto a lightly floured surface. Fold dough over onto itself a couple of times.
  7. Pat dough into an approximately 9 x 5-inch oval. Spread cinnamon filling on half of the dough to within 1/2-inch from the edges. Fold dough in half bringing short ends together. Press edges to seal.
  8. Shape dough into a 7-inch round, about 3/4-inch thickness. Cut into 8 wedges. (Or 6 wedges if you prefer larger scones.)
  9. Pinch the pointed tip of the wedges and tuck under to seal. This helps to prevent the top layer from sliding off while baking. Place wedges about 2-inches apart onto prepared baking sheet.
  10. Brush tops of scones with heavy cream. Top with crumb topping. Bake until light golden brown, about 18-22 minutes.
  11. Transfer scones to a cooling rack to cool. Drizzle with icing.
Icing
  1. In a small bowl, whisk together powdered sugar, butter, 1 tablespoon of milk and vanilla. Add additional milk until desired consistency is reached.

Pumpkin Cinnamon Mini Muffins

My mom had a cupboard in the kitchen containing a few old cookbooks that she rarely used. As a child, I used to enjoy perusing them and looking at the baked treats. Some of the cookbooks were so old, they had black and white photos or even just drawings of the food. The ones with drawings interested me because they depicted smiling children enjoying the treats.

When I started learning to bake, I found a recipe for French Breakfast Puffs in one of those old books. The title sounded so fancy, but they were really just simple muffins dunked in butter and rolled in cinnamon sugar. I have no idea what the name of the cookbook was or what happened to it, but the delicious muffin recipe stuck around for a while. I’ve tweaked the recipe so many times over the years, and most recently, I added pumpkin to it. These Pumpkin Cinnamon Mini Muffins are one of the best versions I’ve created. The inside texture of the muffins is soft and moist and it contrasts nicely with the slight crunch you get from the cinnamon sugar on the outside. They look so cute too, like little pumpkins, and they definitely make children smile!

To watch the TikTok video of these mini muffins being made, click here.

Print Recipe
Pumpkin Cinnamon Mini Muffins
Servings
mini muffins
Ingredients
Muffins
Topping
Servings
mini muffins
Ingredients
Muffins
Topping
Instructions
Muffins
  1. Preheat oven to 350ºF. Grease and flour a 24-serving *mini muffin pan.
  2. In a medium bowl, whisk together flour, baking powder, salt, cinnamon, ginger and nutmeg.
  3. In a large bowl, beat sugar, oil, egg and pumpkin purée until smooth.
  4. Stir in flour mixture just until combined. A few lumps are okay. Batter will be thick.
  5. Transfer batter to prepared pan, about a scant 2 tablespoons of batter in each muffin cup.
  6. Bake until toothpick inserted into muffins comes out clean, about 11-13 minutes. Do not over bake! Be diligent, since over baking can happen very quickly with mini muffins.
  7. Let muffins cool in pan for 5 minutes. Turn muffins out onto a cooling rack.
Topping
  1. Combine sugar and cinnamon in a shallow bowl.
  2. Dunk warm muffins in melted butter, then roll in cinnamon sugar.
Recipe Notes

To find the mini muffin pan I used, click here.

Cheddar Ham Biscuits

Have you ever had one of those mornings where you wake up starving? It typically happens to me when I skip dinner the night before. So one morning that happened. My family and I were really hungry, there was a bit of leftover holiday ham in the fridge and these fluffy, satisfying biscuits were born. I think these biscuits need to be included in all lumberjack breakfasts from now on.

If you love ham and cheese anything, you’ll love these biscuits. You can also add fresh chives or swap out the ham for bacon if you like. I love baking them in a cast iron skillet because of the rustic, crispy sides and bottoms you get from the high heat conductivity of cast iron. To find the cast iron pan I used, click here. You can also bake them in a 9-inch cake pan or pie plate.

Print Recipe
Cheddar Ham Biscuits
Course Breakfast, Brunch
Servings
biscuits
Ingredients
Course Breakfast, Brunch
Servings
biscuits
Ingredients
Instructions
  1. Preheat oven to 425ºF. Butter a 9-inch cast iron skillet*
  2. In a large bowl, sift together flour, baking powder, sugar and salt.
  3. Work butter into flour mixture with your fingertips, until flat dime size pieces are formed.
  4. Gently stir in cheese and ham.
  5. Stir in buttermilk a little at a time until a shaggy dough is formed.
  6. Turn dough out onto a lightly floured surface.
  7. Fold dough over onto itself a few times. Form dough into a 7-inch diameter 3/4-inch thick round.
  8. Using a 2 1/2-inch biscuit cutter, cut dough into seven biscuits. Press the scraps together and cut one more biscuit. If dough becomes warm at any point, chill in the refrigerator for 10-15 minutes, then proceed with recipe.
  9. Transfer biscuits to prepared pan. Brush with melted butter.
  10. Bake until biscuits are puffy and tops are golden brown, about 22-25 minutes.
  11. Serve immediately.
Recipe Notes

To find the skillet I used, click here.

Raspberry Lemonade Brownies

Raspberry Lemonade Brownies by Brownie Mischief

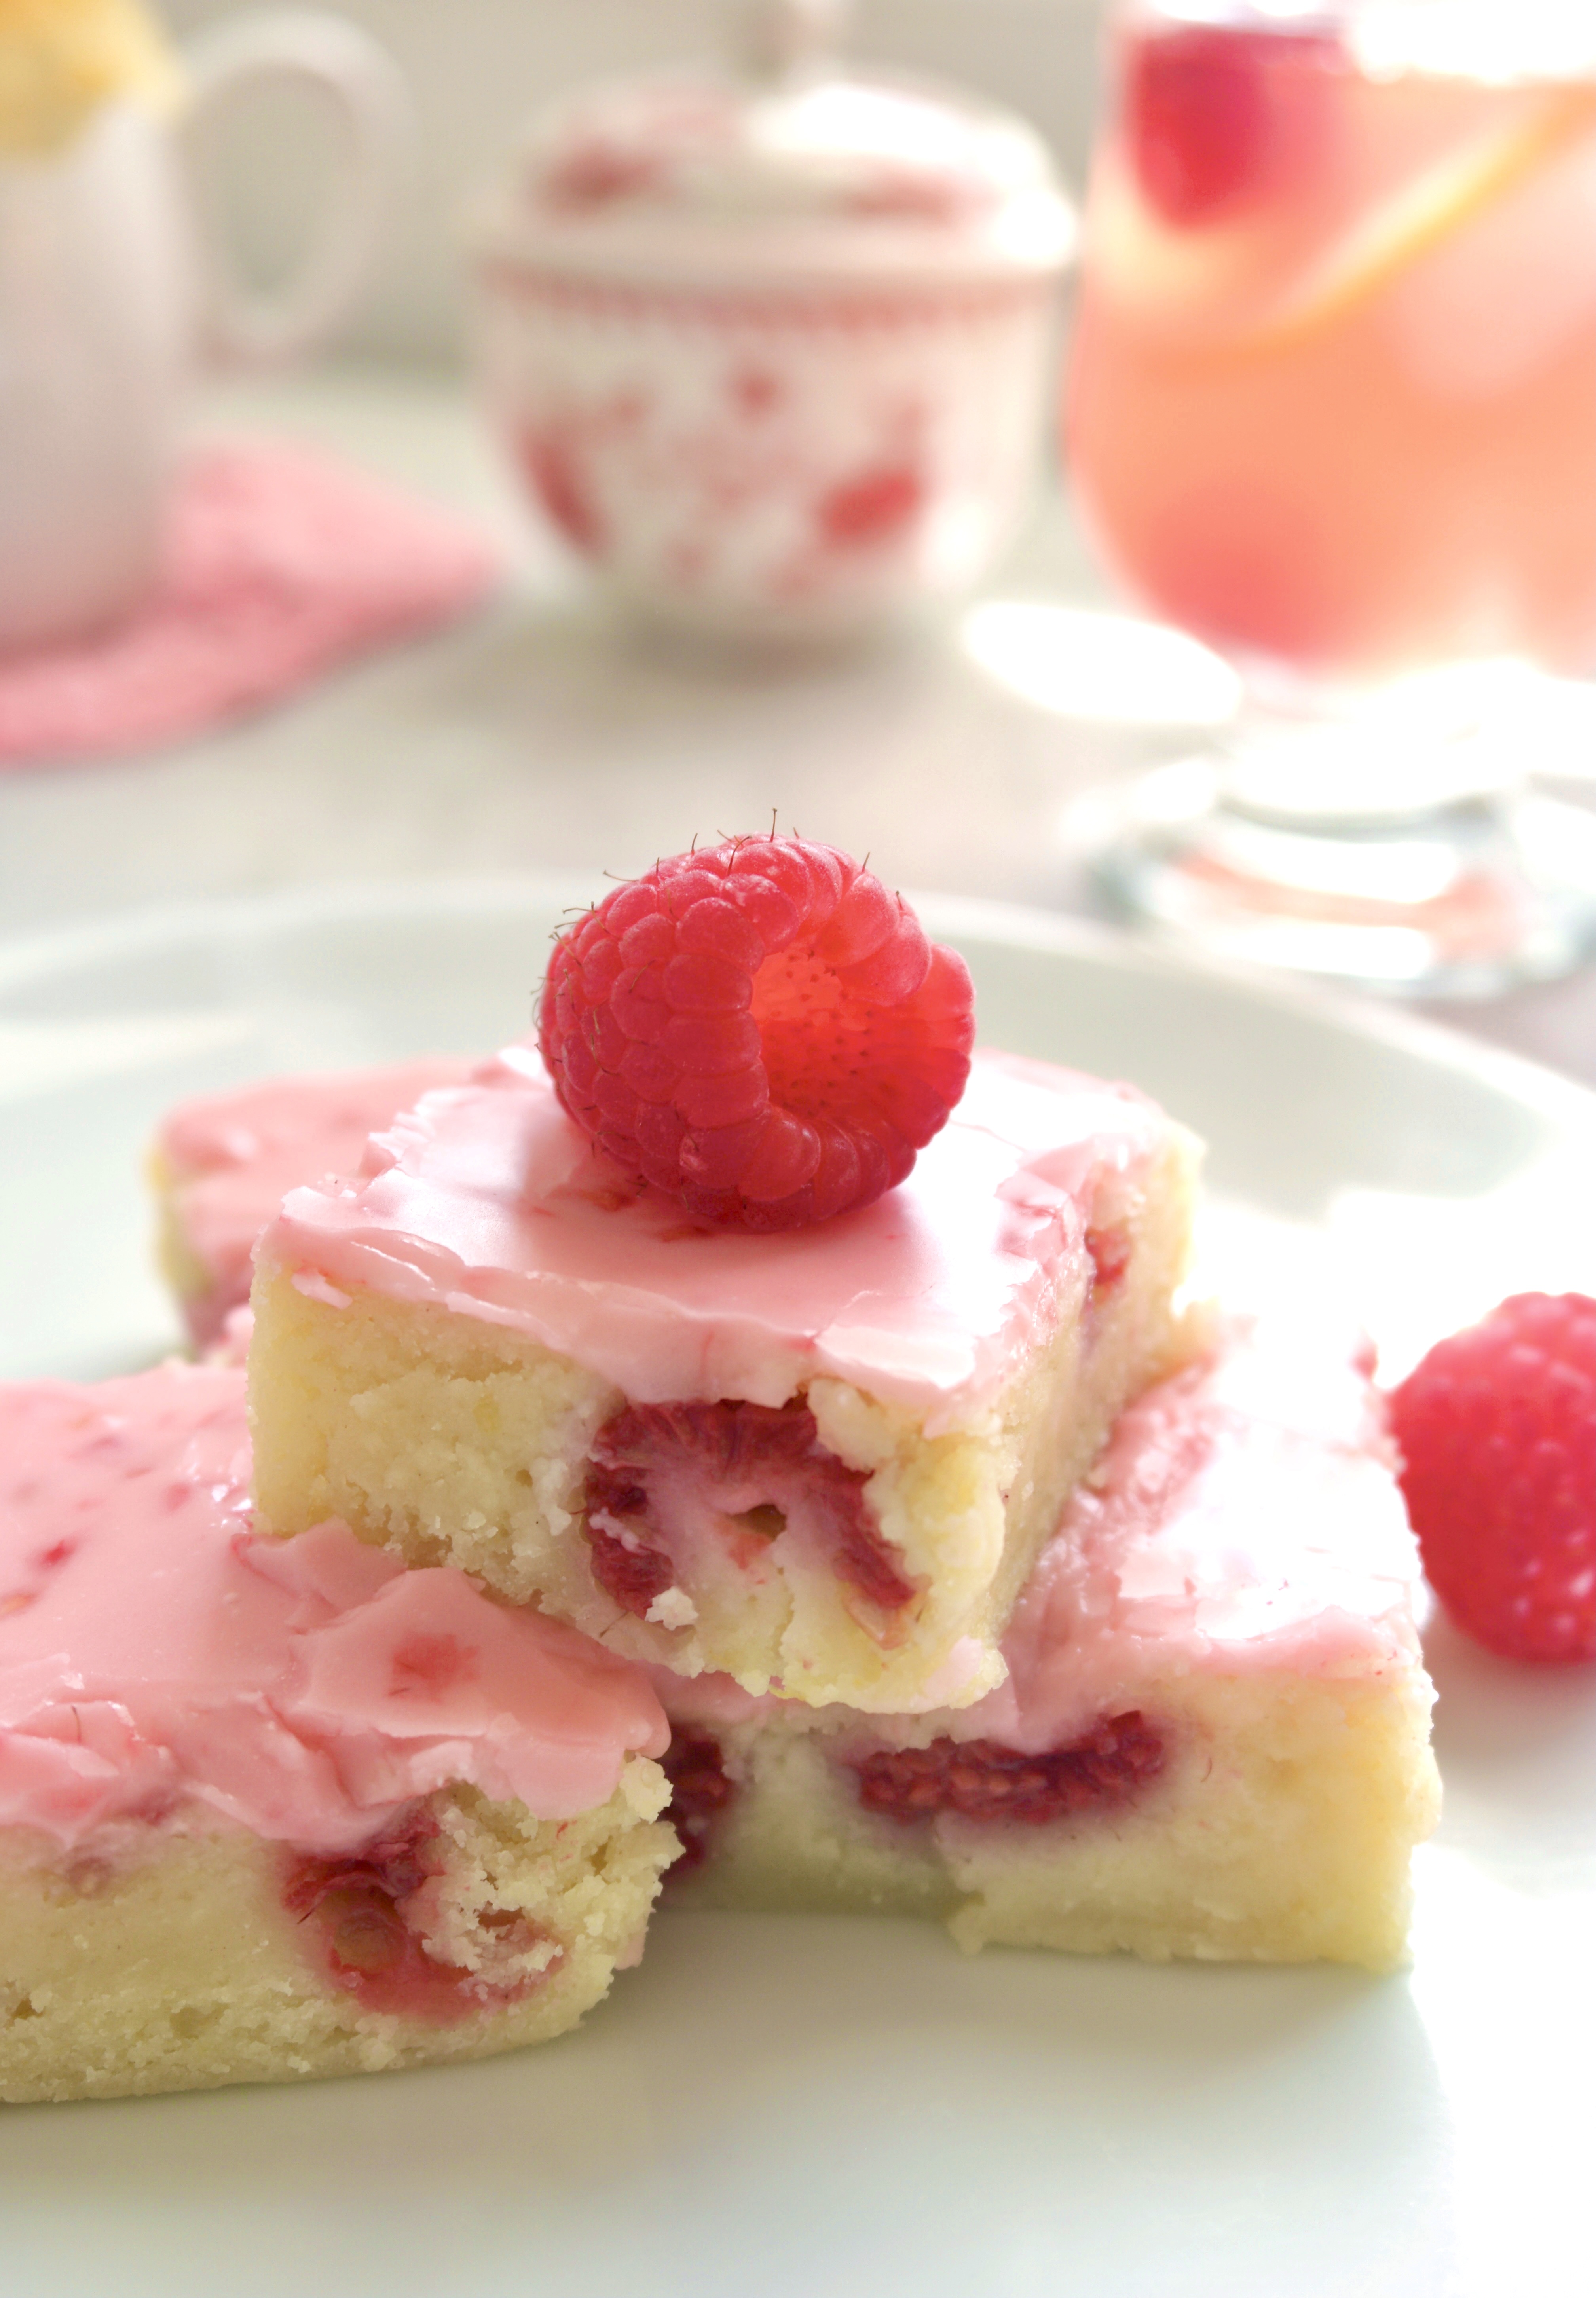
This is my new and improved Raspberry Lemonade Brownie recipe. The previous recipe was inspired by some lemon brownies I saw on Pinterest. I transformed them into Raspberry Lemonade Brownies and they were very good. But I knew I could improve them. I started over and after some experimentation, I came up with an even better version. I love the sweet-tart burst of flavor and color from the fresh raspberries. The icing contains no food coloring. Just three raspberries will give you that luscious shade of pink!

I want to clarify that lemon brownies are not lemon bars. We all know what a lemon bar is. The one we all know and love has a lemon curd filling on a shortbread crust, possibly drizzled with lemon icing or sprinkled with powdered sugar. The lemon brownie is a whole different animal. Don’t mistake lemon brownies for lemon cake either. Lemon brownies contain white chocolate which gives them a rich, fudgy texture like their chocolate cousins. We may be tempted to call them blondies, but blondies have a butterscotch flavor and typically don’t contain chocolate. Now that we got that straightened out, we can sleep peacefully tonight.

Print Recipe
Raspberry Lemonade Brownies
Course Dessert
Servings
bars
Ingredients
Raspberry Lemonade Bownies
Raspberry Lemonade Icing
Course Dessert
Servings
bars
Ingredients
Raspberry Lemonade Bownies
Raspberry Lemonade Icing
Instructions
Raspberry Lemonade Bownies
  1. Preheat the oven to 325ºF (165ºC). Line an 8-inch square baking pan* with parchment paper.
  2. In a medium microwaveable bowl, heat the white chocolate and butter in the microwave for 20 second intervals until melted. Alternately, melt the white chocolate and butter on the stove in a large heat safe bowl set over a pan of barely simmering water. Stir gently until smooth.
  3. In a large bowl, whisk together the sugar, eggs, egg yolk, lemon juice, zest and salt until smooth and well combined. Stir in the melted white chocolate mixture with a rubber spatula. Add the flour and stir just until combined.
  4. Gently fold in the raspberries.
  5. Transfer the batter to the prepared baking pan. Bake until the top is set, the edges are light golden brown and a toothpick inserted into the center comes out with a few moist crumbs on it, about 23-28 minutes.
  6. Let cool completely. Top with Raspberry Lemonade Icing.
Raspberry Lemonade Icing
  1. In a small bowl, smash the raspberries with a fork.
  2. Add the powdered sugar, melted butter and 1 tablespoon of lemon juice. Whisk until smooth, adding more lemon juice as needed.
  3. Spread the icing over cooled brownies.
  4. Cut into 2-inch squares and serve with additional raspberries, if desired.
Recipe Notes

*To find the 8 x 8 inch pan I used, click here.


Orange Vanilla Bean Donut Holes

When I was a child, my parents used to love taking our family to a smorgasbord. The owner would always come out from the kitchen and say hello to my parents. He made delicious fried donut holes that my brother and I looked forward to at the end of our meal. At home we duplicated the donut holes using a recipe from an old cookbook. Unfortunately the cookbook is lost, but this recipe is pretty close to the original. Tossing the little donuts in vanilla sugar makes them even more fragrant and delicious. The vanilla sugar can be used immediately, but for the best flavor, make it in advance.

The original recipe had vanilla and nutmeg in it, which are classic cake donut flavors. The addition of fresh orange zest and juice makes them vibrant and flavorful. I love making different flavors of these donut holes. To view Blueberry Donut Holes, click here.

To watch the Orange Vanilla Bean Donut Holes video, click here.

Print Recipe
Orange Vanilla Bean Donut Holes
Servings
donut holes
Ingredients
Donut Holes
Vanilla Sugar
Servings
donut holes
Ingredients
Donut Holes
Vanilla Sugar
Instructions
Donut Holes
  1. In a medium bowl, whisk together flour, baking powder and salt.
  2. In a large bowl, beat eggs, sugar, orange zest, melted butter, orange juice and vanilla bean paste until well combined.
  3. Add flour mixture and mix just until combined. Do not over mix. A few small lumps are okay.
  4. In a heavy saucepan, heat 1 1/2 inches of oil to 340ºF. Place vanilla sugar in a medium bowl.
  5. Drop tablespoon size portions of batter into hot oil. I used a #60 portion scoop** leveled. Don't over crowd the pan.
  6. Cook donut holes until golden brown on all sides, about 2-4 minutes, flipping halfway through. If donut holes cook too quickly on the outside, turn heat down.
  7. Briefly drain donut holes on paper towels, then toss warm donut holes in vanilla sugar.
Vanilla Sugar
  1. With the dull side of a knife, scrape the seeds out of the vanilla bean.
  2. In a small bowl, whisk vanilla seeds together with sugar, breaking up any clumps. Use immediately or make in advance and let flavor develop 1-2 weeks in a covered container.
Recipe Notes

**To find vanilla beans, click here.

*To find the scoop I used, click here.

This recipe was updated on March 12, 2023