Blueberry Lemon Crumb Cakes

Blueberry Lemon Crumb Cakes

Do you ever feel like a three year old child who doesn’t want to share? That’s how I feel about this crumb cake. I didn’t want to share so I made six 4-inch personal crumb cakes. You’ll understand once you taste the soft, fluffy lemon scented cake with juicy blueberries, a ton of sweet crumb topping and a lemony cream cheese icing. You’ll want every bite for yourself! I was also hesitant to share the recipe. But I was taught to share recipes by my two grandmothers who were amazing cooks and bakers. They shared their knowledge and recipes with anyone who asked. Recipes are a legacy that should be passed on to family and friends. If you’re reading this, I consider you a friend. So enjoy this recipe that’s especially dear to me because it’s based on my Grandma’s Apple Crumb Cake recipe.

I used a six serving shallow jumbo muffin pan to bake the cakes. The muffin cups are 4 inches across by 1 inch deep. To find the pan, click here. A hamburger bun pan for 4-inch buns will work too. If you happen to have six 4-inch cake pans, those work nicely. I used jumbo muffin liners to line the muffin cups, which fit perfectly by pressing them in around the inside bottom edges.

Print Recipe
Blueberry Lemon Crumb Cakes
Fluffy, soft lemon cakes with blueberries, crumb topping and lemon cream cheese icing
Servings
4-inch crumb cakes
Ingredients
Crumb Topping
Crumb Cakes
Cream Cheese Icing
Servings
4-inch crumb cakes
Ingredients
Crumb Topping
Crumb Cakes
Cream Cheese Icing
Instructions
Crumb Topping
  1. In a medium bowl, whisk flour, sugar, brown sugar and salt together.
  2. Work in butter with your fingertips until the mixture looks like the consistency of wet sand. Press together to make chunks. Set aside in the refrigerator until ready to use.
Crumb Cakes
  1. Preheat oven to 350ºF (180ºC). Line a 6-serving shallow jumbo muffin pan* with jumbo muffin liners.** Jumbo muffin liners will fit by pressing them around the inside bottom edges.
  2. In a medium bowl, whisk together the flour, baking powder and salt.
  3. In a large bowl, cream the butter, sugar and lemon zest with an electric mixer on medium speed, until light and fluffy.
  4. Beat the egg, egg yolk and extracts into the butter mixture in 3 separate additions, making sure each addition is incorporated before adding the next.
  5. In a small bowl, whisk the milk and sour cream together.
  6. On low speed, mix the flour mixture into the batter in two additions alternating with half of the milk mixture after each addition. Beat just until combined.
  7. Transfer batter to the prepared baking pan, evenly distributing the batter and filling the cups about half full.
  8. In a medium bowl, toss the blueberries with 1 teaspoon of flour and place them into the cups on top of the batter, about 1 ounce (28g) in each. Top each one with crumb topping.
  9. Bake until a toothpick inserted into the center of the cakes comes out clean, about 25-30 minutes. Let cakes cool in the pan for 5 minutes, then transfer to a cooling rack to cool completely.
Cream Cheese Icing
  1. In a medium bowl, whisk together the cream cheese, melted butter, powdered sugar, salt and 1 tablespoon of lemon juice. Add additional lemon juice, a little at a time until the desired consistency is reached. Drizzle over the cooled cakes.
Recipe Notes

*To find the muffin pan I used, click here.

**To find jumbo muffin liners, click here. To find 4-inch cake pans, click here.

Cinnamon Crumble Scones

The weeks following the winter holidays always feel peaceful to me. The rush is over and it’s time to catch my breath and rest. When it’s chilly and raining outside, I love spending time at home curled up in my coziest fluffy pajama bottoms and fuzzy socks. Give me a blanket, 75 pillows, a warm cup of tea and these Cinnamon Crumble Scones for ultimate coziness!

The crumb topping on these scones will remind you of a cinnamon crumb cake, which makes them extra nostalgic and comforting. The technique of folding the dough over itself gives them a flaky layered texture. For the tenderest scones, make sure not to over work your dough.

To watch Instagram reel, click here. To watch extended TikTok video showing baking process, click here.

Print Recipe
Cinnamon Crumble Scones
Course Breakfast, Brunch
Keyword cinnamon, scones
Servings
scones
Ingredients
Crumb Topping
Cinnamon Filling
Scones
Icing
Course Breakfast, Brunch
Keyword cinnamon, scones
Servings
scones
Ingredients
Crumb Topping
Cinnamon Filling
Scones
Icing
Instructions
Crumb Topping
  1. In a medium bowl, combine flour, brown sugar, sugar cinnamon and salt.
  2. Work in butter with your fingertips until it looks like wet sand. Press together to make dime size chunks.
  3. Set aside in refrigerator until ready to use.
Cinnamon Filling
  1. In a small bowl, mix filling ingredients together until well combined.
Scones
  1. Preheat oven to 375ºF. Line a large baking sheet with parchment paper.
  2. In a large bowl, whisk together flour, baking powder and salt.
  3. Work butter into flour mixture with your fingertips or with a pastry blender until pea sized pieces are formed.
  4. In a small bowl, whisk together heavy cream, sour cream and vanilla extract.
  5. Stir cream mixture into flour mixture a little at a time until dough comes together. If your dough is too dry add 1-2 more teaspoons of heavy cream.
  6. Turn dough out onto a lightly floured surface. Fold dough over onto itself a couple of times.
  7. Pat dough into an approximately 9 x 5-inch oval. Spread cinnamon filling on half of the dough to within 1/2-inch from the edges. Fold dough in half bringing short ends together. Press edges to seal.
  8. Shape dough into a 7-inch round, about 3/4-inch thickness. Cut into 8 wedges. (Or 6 wedges if you prefer larger scones.)
  9. Pinch the pointed tip of the wedges and tuck under to seal. This helps to prevent the top layer from sliding off while baking. Place wedges about 2-inches apart onto prepared baking sheet.
  10. Brush tops of scones with heavy cream. Top with crumb topping. Bake until light golden brown, about 18-22 minutes.
  11. Transfer scones to a cooling rack to cool. Drizzle with icing.
Icing
  1. In a small bowl, whisk together powdered sugar, butter, 1 tablespoon of milk and vanilla. Add additional milk until desired consistency is reached.
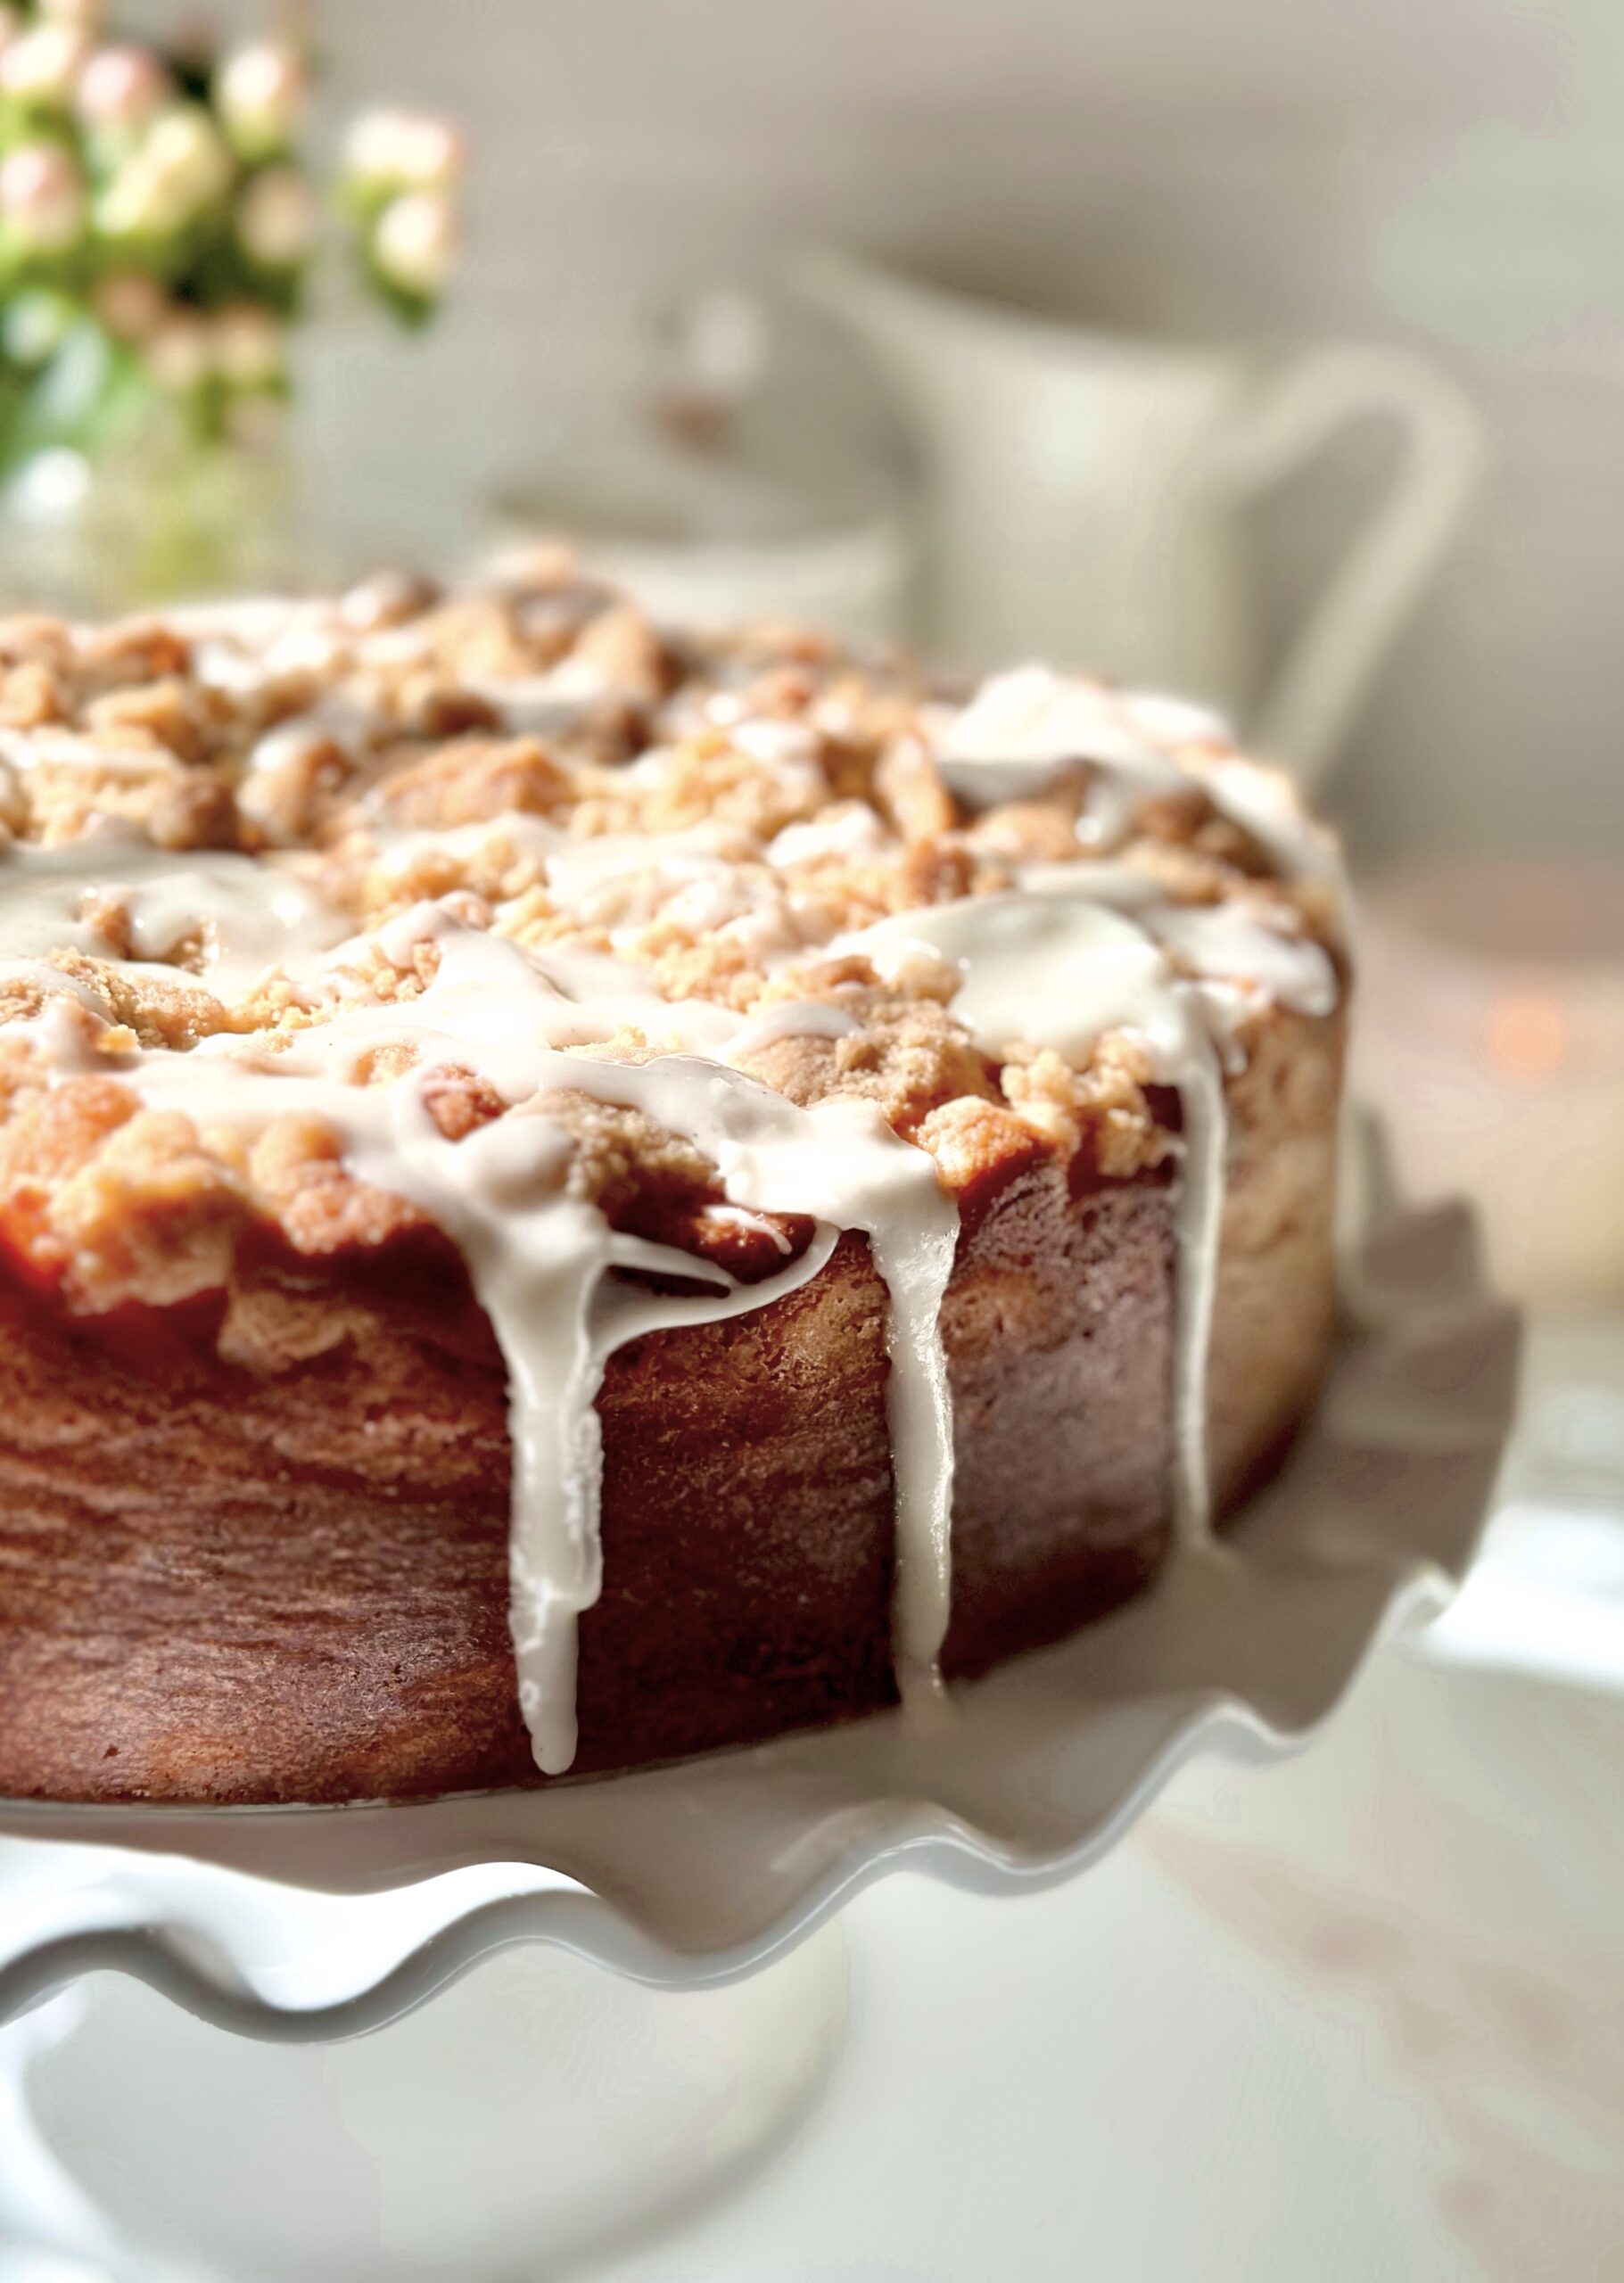
Grandma’s Apple Crumb Cake

Grandma's Apple Crumb Cake

I remember my grandma making coffee cakes and sweet muffins for breakfast, along with eggs, sausages, hot coffee and a big pitcher of milk on the table. The older generation really loved their coffee cakes. I’ve noticed that many Millennials and Gen Z’s think coffee cake contains coffee. Maybe some coffee cake does contain coffee, but in general, coffee cake is called that because it’s typically eaten with coffee. A classic coffee cake is usually a subtly sweet cake with cinnamon, crumb topping and maybe some icing. The Apple Crumb Cake recipe I’m sharing with you has the elements of a classic coffee cake, but so much better! The cake is fluffy and soft, the crumb topping is chunky and plentiful, and the apples are perfectly tender. And don’t get me started about the icing!

Why do most of our grandmothers cook and bake so well? Because they’ve had decades of trial and error to perfect their recipes, tweaking them here and there until they’re approved and loved by their families, neighbors and friends. This cake has had its share of trial and error. She has earned her place as a well-loved, delicious, beautiful queen of coffee cakes.

Print Recipe
Grandma's Apple Crumb Cake
Keyword apple, cake
Servings
servings
Ingredients
Apples
Crumb Topping
Cake
Keyword apple, cake
Servings
servings
Ingredients
Apples
Crumb Topping
Cake
Instructions
Apples
  1. In a large skillet, melt the butter over medium heat. Add the apples, sugar and cinnamon.
  2. Cook, stirring occasionally, until the apples are tender, about 10 minutes. Transfer the apples to a bowl and let cool to room temperature.
Crumb Topping
  1. In a medium bowl, mix the flour, brown sugar, sugar, cinnamon and salt.
  2. Work in the butter with your fingertips until the mixture looks like wet sand. Press together to make 1/2-inch chunks.
Cake
  1. Preheat the oven to 325ºF. Line a 9-inch cake pan with a removable bottom*, or a 9-inch springform pan, with parchment paper. Wrap the bottom of the cake pan with aluminum foil and place pan on a baking sheet.
  2. In a medium bowl, whisk together the flour, baking powder and salt.
  3. In a large bowl, cream the butter and sugar, with an electric mixer on medium speed, until light and fluffy.
  4. Beat the eggs and vanilla into the butter mixture in three separate addition, making sure each addition is incorporated before adding the next.
  5. In a small bowl, whisk the milk and sour cream together.
  6. On low speed, beat the flour mixture into batter in three separate additions, alternating with milk mixture. Mix just until combined.
  7. Transfer the batter to the prepared baking pan. Smooth the top with a spatula.
  8. Drain any excess liquid from the apples. Top the cake batter evenly with apples, then the topping mixture.
  9. Bake until a toothpick inserted into the center of the cake comes out clean, about 50-60 minutes. Cool the cake in pan for 10 minutes. Remove the cake from pan and transfer it to a cooling rack to cool completely.
Icing
  1. In a medium bowl, whisk together the powdered sugar, melted butter, vanilla, salt and 2 tablespoons of cream. Add additional cream until desired consistency is reached. Drizzle over the cooled cake.
Recipe Notes

*To find the cake pan I used, click here.

Butterscotch Bread

What’s better than the smell of chocolate chip cookies baking or of fresh coffee brewing? The aroma of this warm, sweet buttery loaf of Butterscotch Bread is so heavenly that I’m convinced angel grandmothers bake this on a regular basis in heaven. The rich scent is accompanied by a soft, tender bread topped with a silky butterscotch glaze.

It all starts with browning your butter first. It adds a nutty, deep butter flavor. When browning your butter, use a light colored saucepan so you can see the visual clues. You’ll see it start to foam and brown specks will collect on the bottom of the pan. It will smell nutty and fragrant. Keep a close eye on it. It can go from brown to burnt in a quick second. When your brown butter has cooled to room temperature, the rest of the recipe comes together quickly. You can also brown your butter a day ahead and keep it in the refrigerator. Bring it to room temperate before using.

This delightful bread goes well with coffee or tea and is just as delicious the next day. Store covered at room temperature.

Print Recipe
Butterscotch Bread
Servings
loaf
Ingredients
Butterscotch Bread
Butterscotch Glaze
Servings
loaf
Ingredients
Butterscotch Bread
Butterscotch Glaze
Instructions
Butterscotch Bread
  1. In a small saucepan, cook the butter over medium heat until brown and fragrant. When brown specks (not black!) collect at the bottom of the pan, immediately transfer the butter to a small bowl. Let cool to room temperature.
  2. Preheat the oven to 350ºF. Line the bottom of an 8 x 4-inch baking pan with parchment paper. Grease and flour the insides.
  3. In a medium bowl, beat the brown butter, brown sugar, eggs, vanilla and buttermilk until smooth.
  4. Stir in the flour mixture in two additions. Mix just until combined. A few lumps are okay.
  5. Transfer the batter to prepared baking pan. Bake until the top is deep golden brown and q toothpick inserted into center comes out clean, about 38-43 minutes.
  6. Let the bread cool in pan for 10 minutes, them turn it out onto a cooling rack to cool completely. Top with two coats of butterscotch glaze.
Butterscotch Glaze
  1. Melt the butter in a small saucepan over medium heat. Stir in the brown sugar and salt.
  2. Continue stirring over medium heat until the mixture comes to a boil. Boil for two minutes.
  3. Turn the heat down and slowly stir in the heavy cream. Keep stirring until mixture is smooth. Remove from heat and stir in the vanilla extract.
  4. Transfer the butterscotch glaze to a small bowl and let cool until thickened.

Caramel Apple Blossoms

Caramel Apple Blossoms by Brownie Mischief

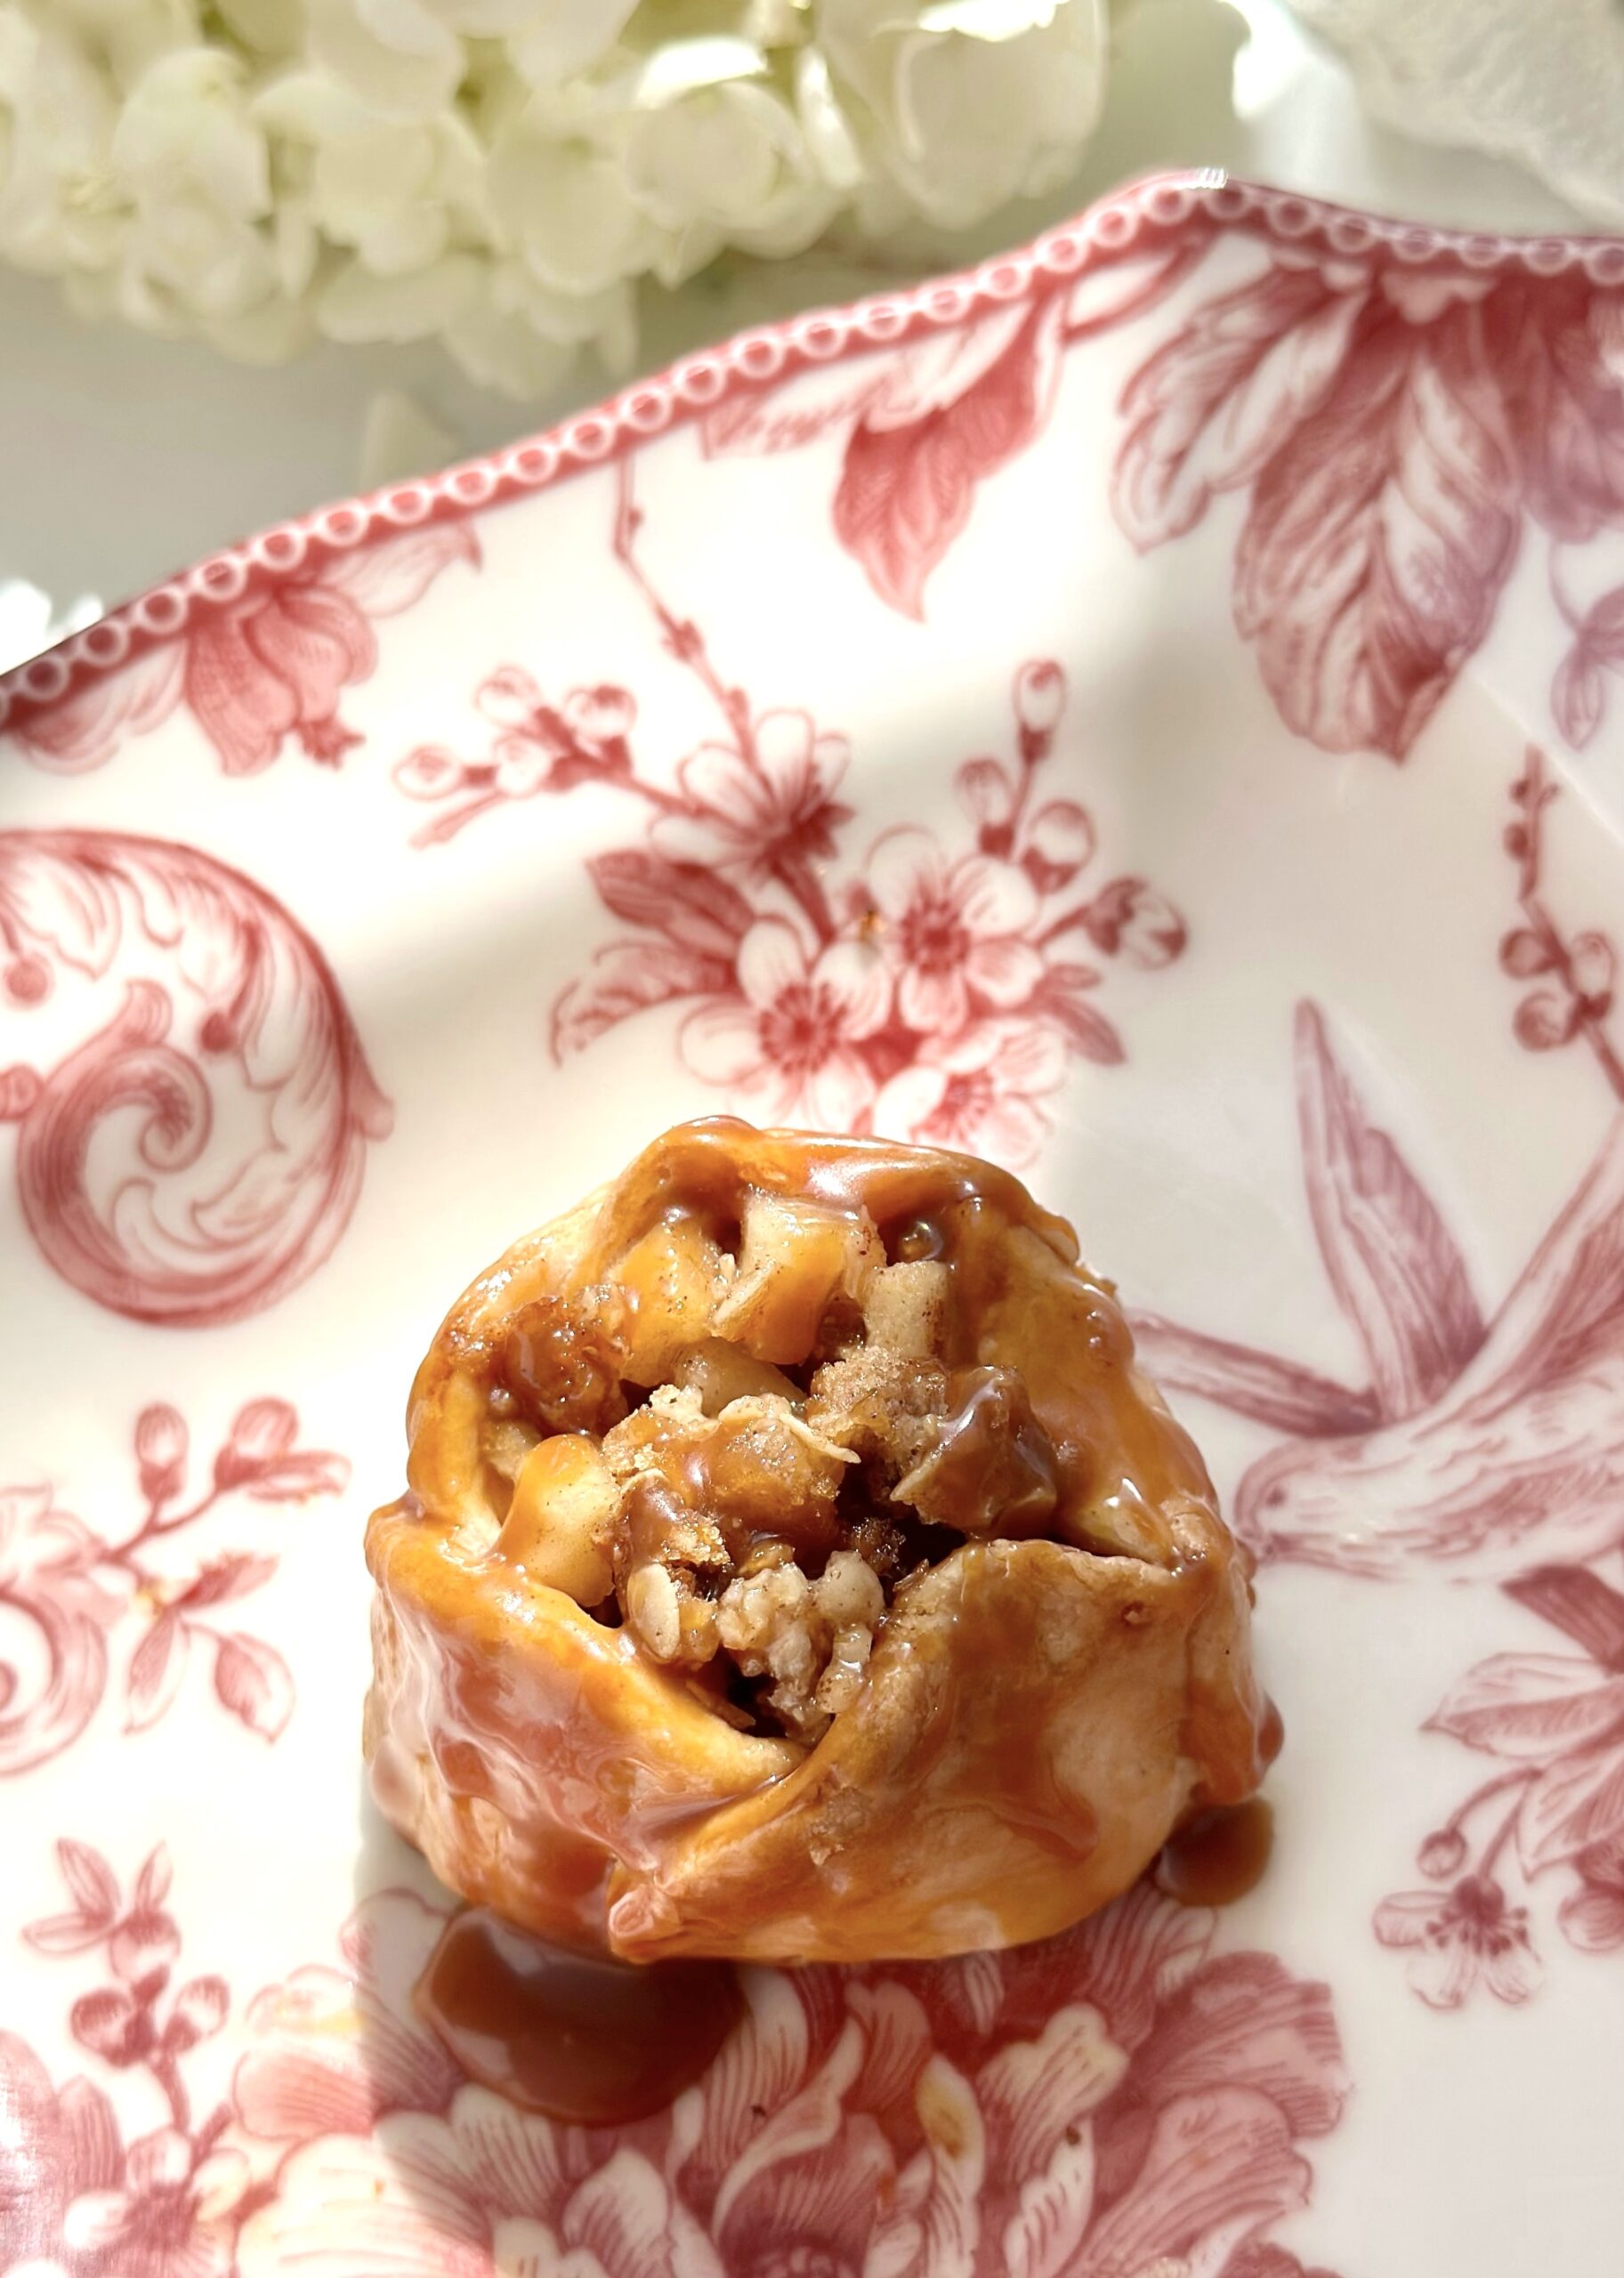
Whether you call them apple blossoms, apple dumplings or apple fussbudgets, (which are named after your great grandfather’s second wife’s cousin), these are cute little apple pastries. I made them because I was craving apple pie, but I didn’t have enough apples to bake one. I didn’t invent them, and I don’t know who did, but I’ve had frozen ones and I’ve seen them on restaurant menus. I thought it would be fun to make them, and it was! I could’ve just put some pie dough in muffin cups and made quick little pies, but flower shaped things automatically get extra points for cuteness. And if you know me, you know I love my cute bakes!

Print Recipe
Caramel Apple Blossoms
Course Dessert
Keyword pastry
Servings
blossoms
Ingredients
Topping
Course Dessert
Keyword pastry
Servings
blossoms
Ingredients
Topping
Instructions
  1. In a large bowl, toss apples with lemon juice until combined.
  2. Add brown sugar, sugar, melted butter, flour, cinnamon and salt to apples. Stir until combined.
  3. In a medium bowl, mix together all topping ingredients. Set aside.
  4. Line a large baking sheet with parchment paper.
  5. On a lightly floured surface, roll pie dough to 1/8-inch thickness.
  6. Cut out 12 5-inch blossom shapes, re-rolling dough as necessary.*
  7. Lightly mark a 2-inch circle in the center of each blossom. Make cuts between the petals to separate them, just up to the edge of the center circle.
  8. Top each blossom with about 2 generous tablespoons of apples.
  9. Brush dough petals with egg wash. Form blossoms by lifting and overlapping each petal 1/2-inch in a spiral pattern similar to a rose. Tuck the last petal under. Press petals together to seal so filling won't leak out.
  10. Top each with a spoonful of topping. Place in refrigerator to chill for 30 minutes. Don't skip this step. This will help blossoms keep their shape.
  11. Preheat oven to 375ºF. Brush blossom dough all over with egg wash. Wipe any drips off of parchment paper. Bake until crust is golden brown and filling is starting to bubble, about 23-28 minutes.
  12. Drizzle blossoms with caramel sauce.
Recipe Notes

*When re-rolling pie dough, cover and let rest for several minutes to help avoid shrinkage.

Dark Chocolate Strawberry Marble Cookies

Dark Chocolate Strawberry Marble Cookies

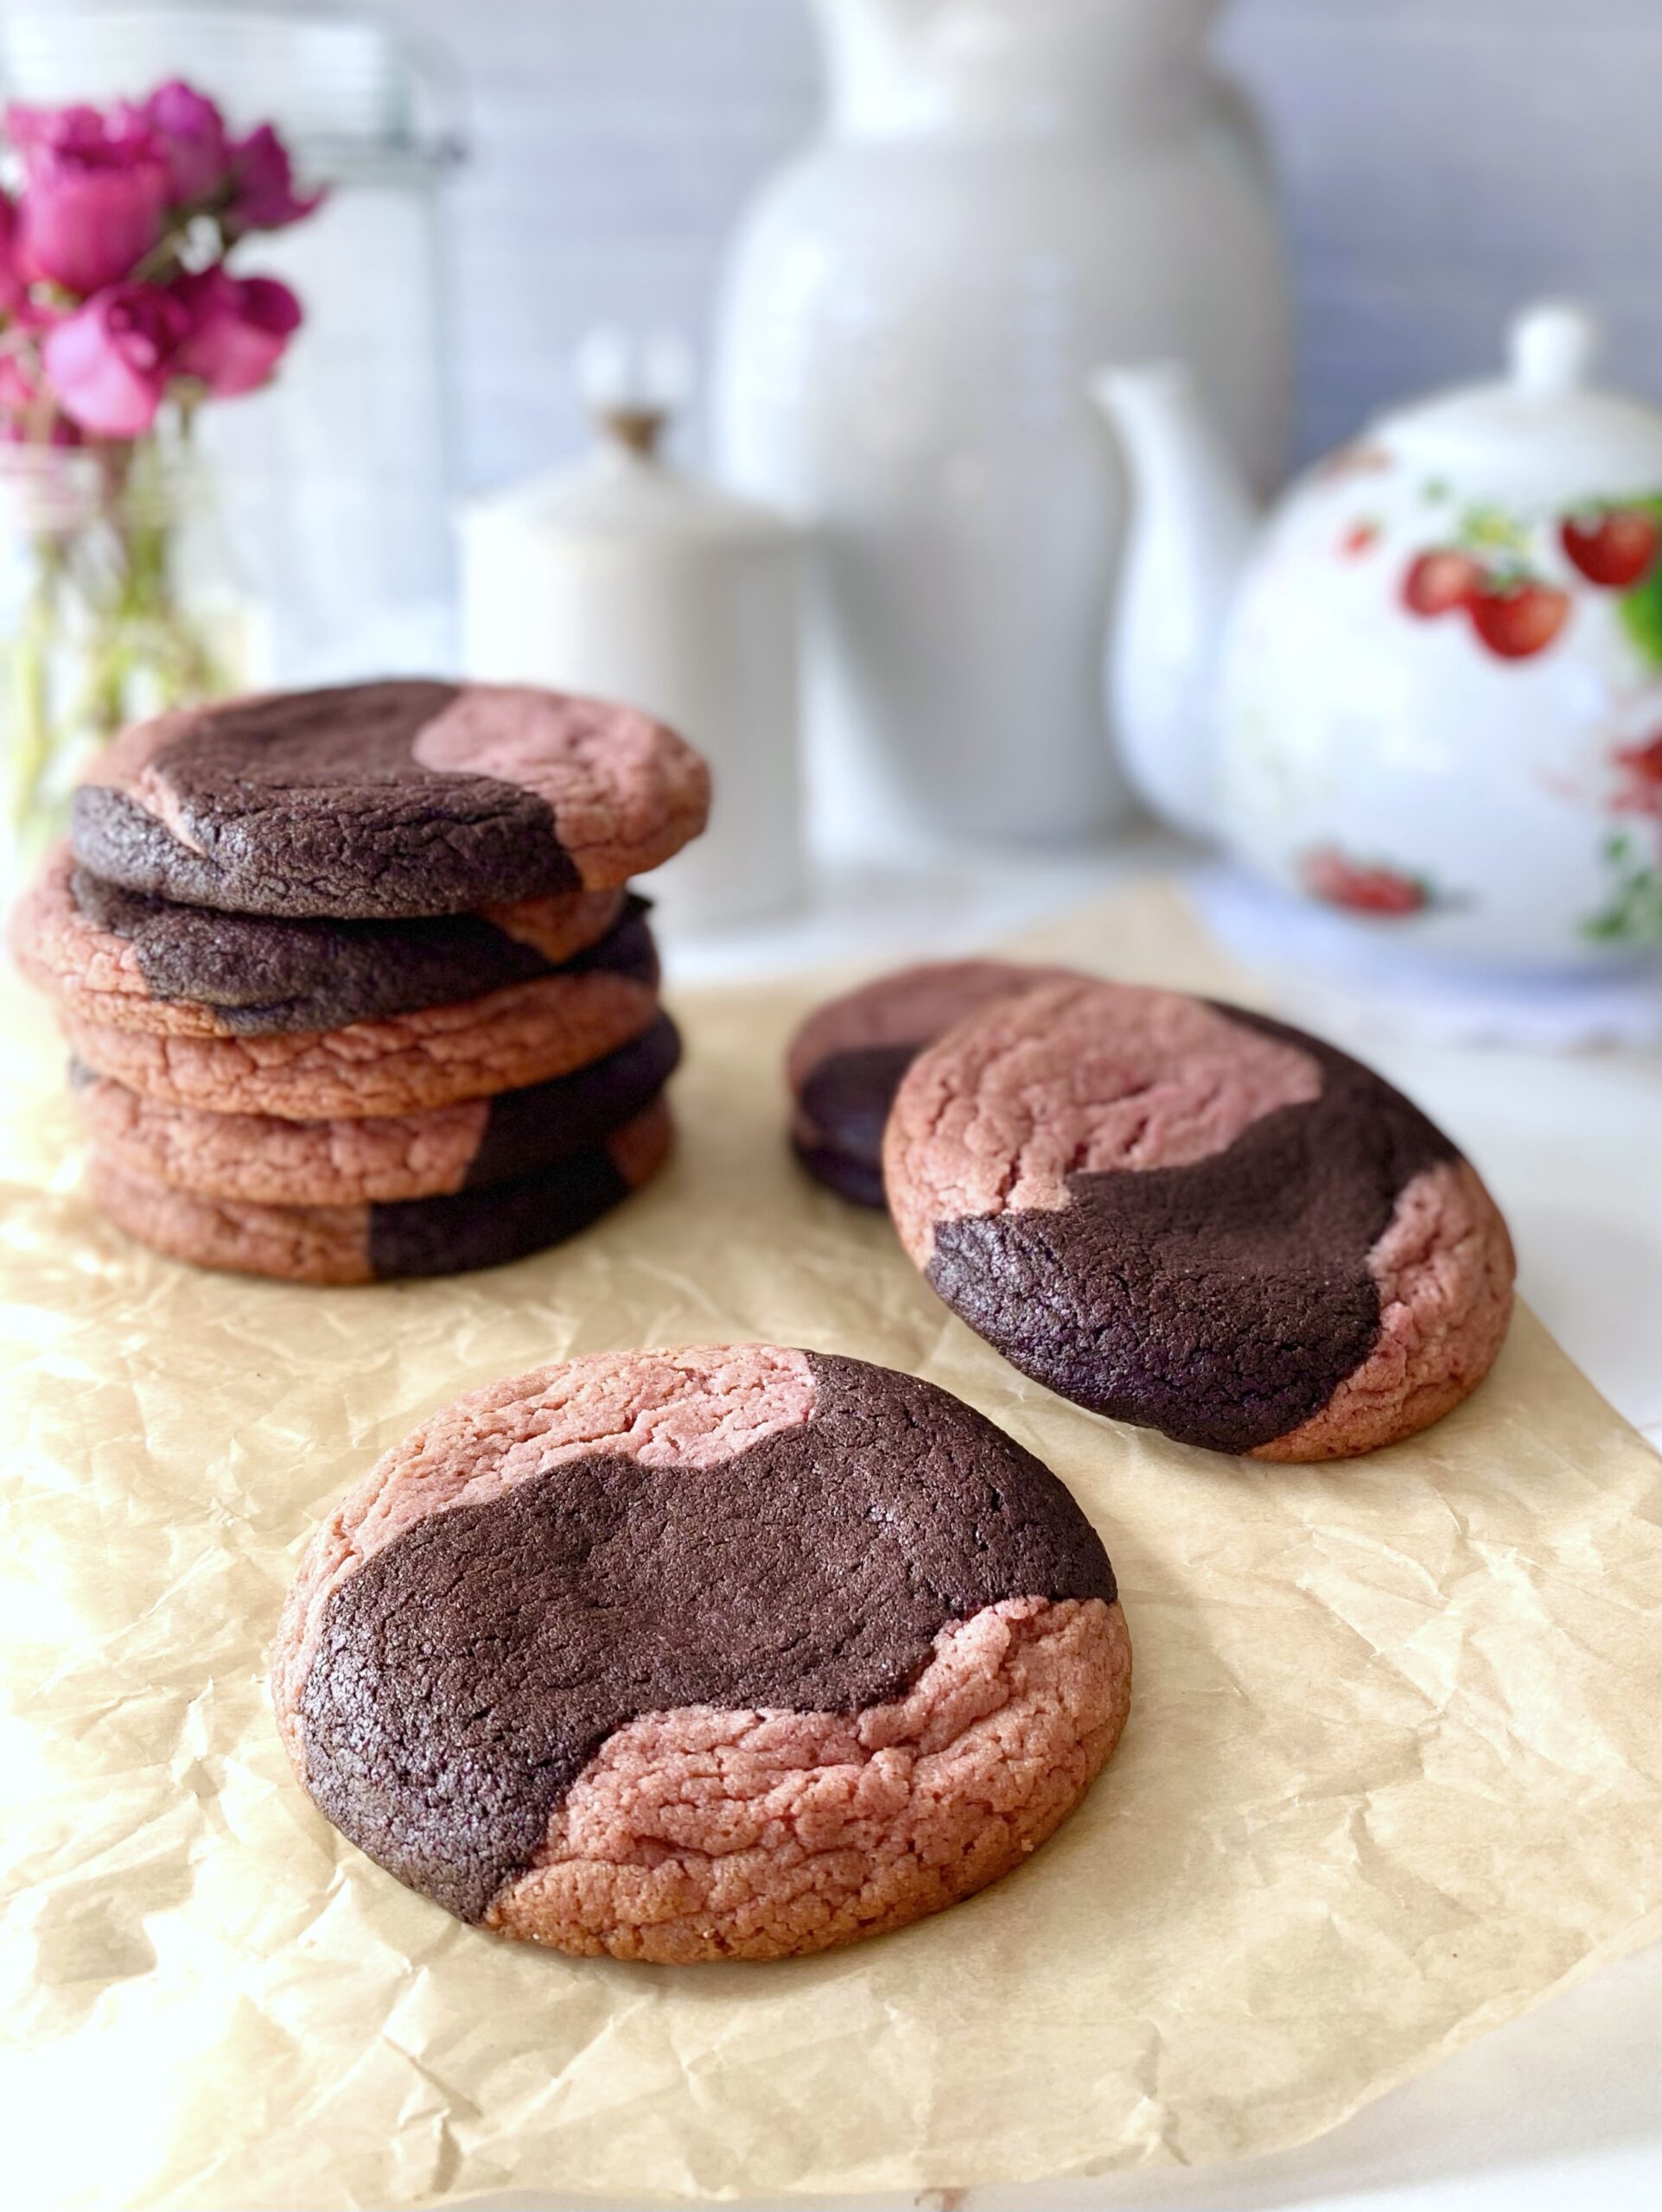
To the indecisive German baker who invented marble cake, I thank you! Marble cake, sampler platters and tasting flights are the perfect solution for those times when you just can’t decide. Let’s take one more decision off the table. No longer will we have to decide between chocolate and strawberry cookies. These marble cookies are the best of both worlds. Chocolate and strawberry are opposites in many ways, but complement each other so well. After all, who doesn’t love chocolate covered strawberries?

The dark chocolate cocoa powder gives these cookies a deep chocolate flavor. Freeze dried strawberries provide the sweet strawberry flavor and color. I crushed the strawberries with a mini food processor, but you can also use a mortar and pestle, a clean spice grinder or a sturdy plastic bag and a rolling pin. When you crush the 1 1/2 cups of freeze dried strawberries called for in the recipe, you’ll end up with about 1/3 cup of strawberry powder. To find freeze dried strawberries, click here.

This recipe makes about eighteen cookies but you can also make nine large cookies. Follow the instructions in parentheses for large cookies.

Print Recipe
Dark Chocolate Strawberry Marble Cookies
Servings
cookies
Ingredients
Servings
cookies
Ingredients
Instructions
  1. In a medium bowl, whisk together flour, baking soda and salt. Set aside.
  2. In a large bowl, cream butter, sugar and brown sugar with an electric mixer until light and fluffy.
  3. Beat in eggs and vanilla in three separate additions, until well combined.
  4. On low speed, mix in flour mixture just until combined.
  5. Divide dough in half. Leave half of dough in the bowl and place the other half in a separate bowl.
  6. Add freeze dried strawberries to half of the dough and mix just until combined
  7. Add cocoa powder to the other half of the dough and mix just until combined.
  8. Roll dough into 1 1/2 teaspoon size balls. (For large cookies, roll dough into tablespoon size balls.)
  9. To form cookies, place two chocolate dough balls and two strawberry dough balls in your hand in a checkerboard pattern. Roll into a ball.
  10. Repeat with remaining dough balls and refrigerate for 30 minutes.
  11. Preheat oven to 350ºF.
  12. Line two large cookie sheets with parchment paper.
  13. Place dough two inches apart on prepared cookie sheets.
  14. Bake 10-12 minutes, until cookies are set and edges are golden. (For large cookies, bake 14-15 minutes.)
  15. Transfer to cooling rack. (For large cookies, cool on cookie sheet one minute, then transfer to cooling rack.

Maple Pecan Brownies

maple pecan brownies

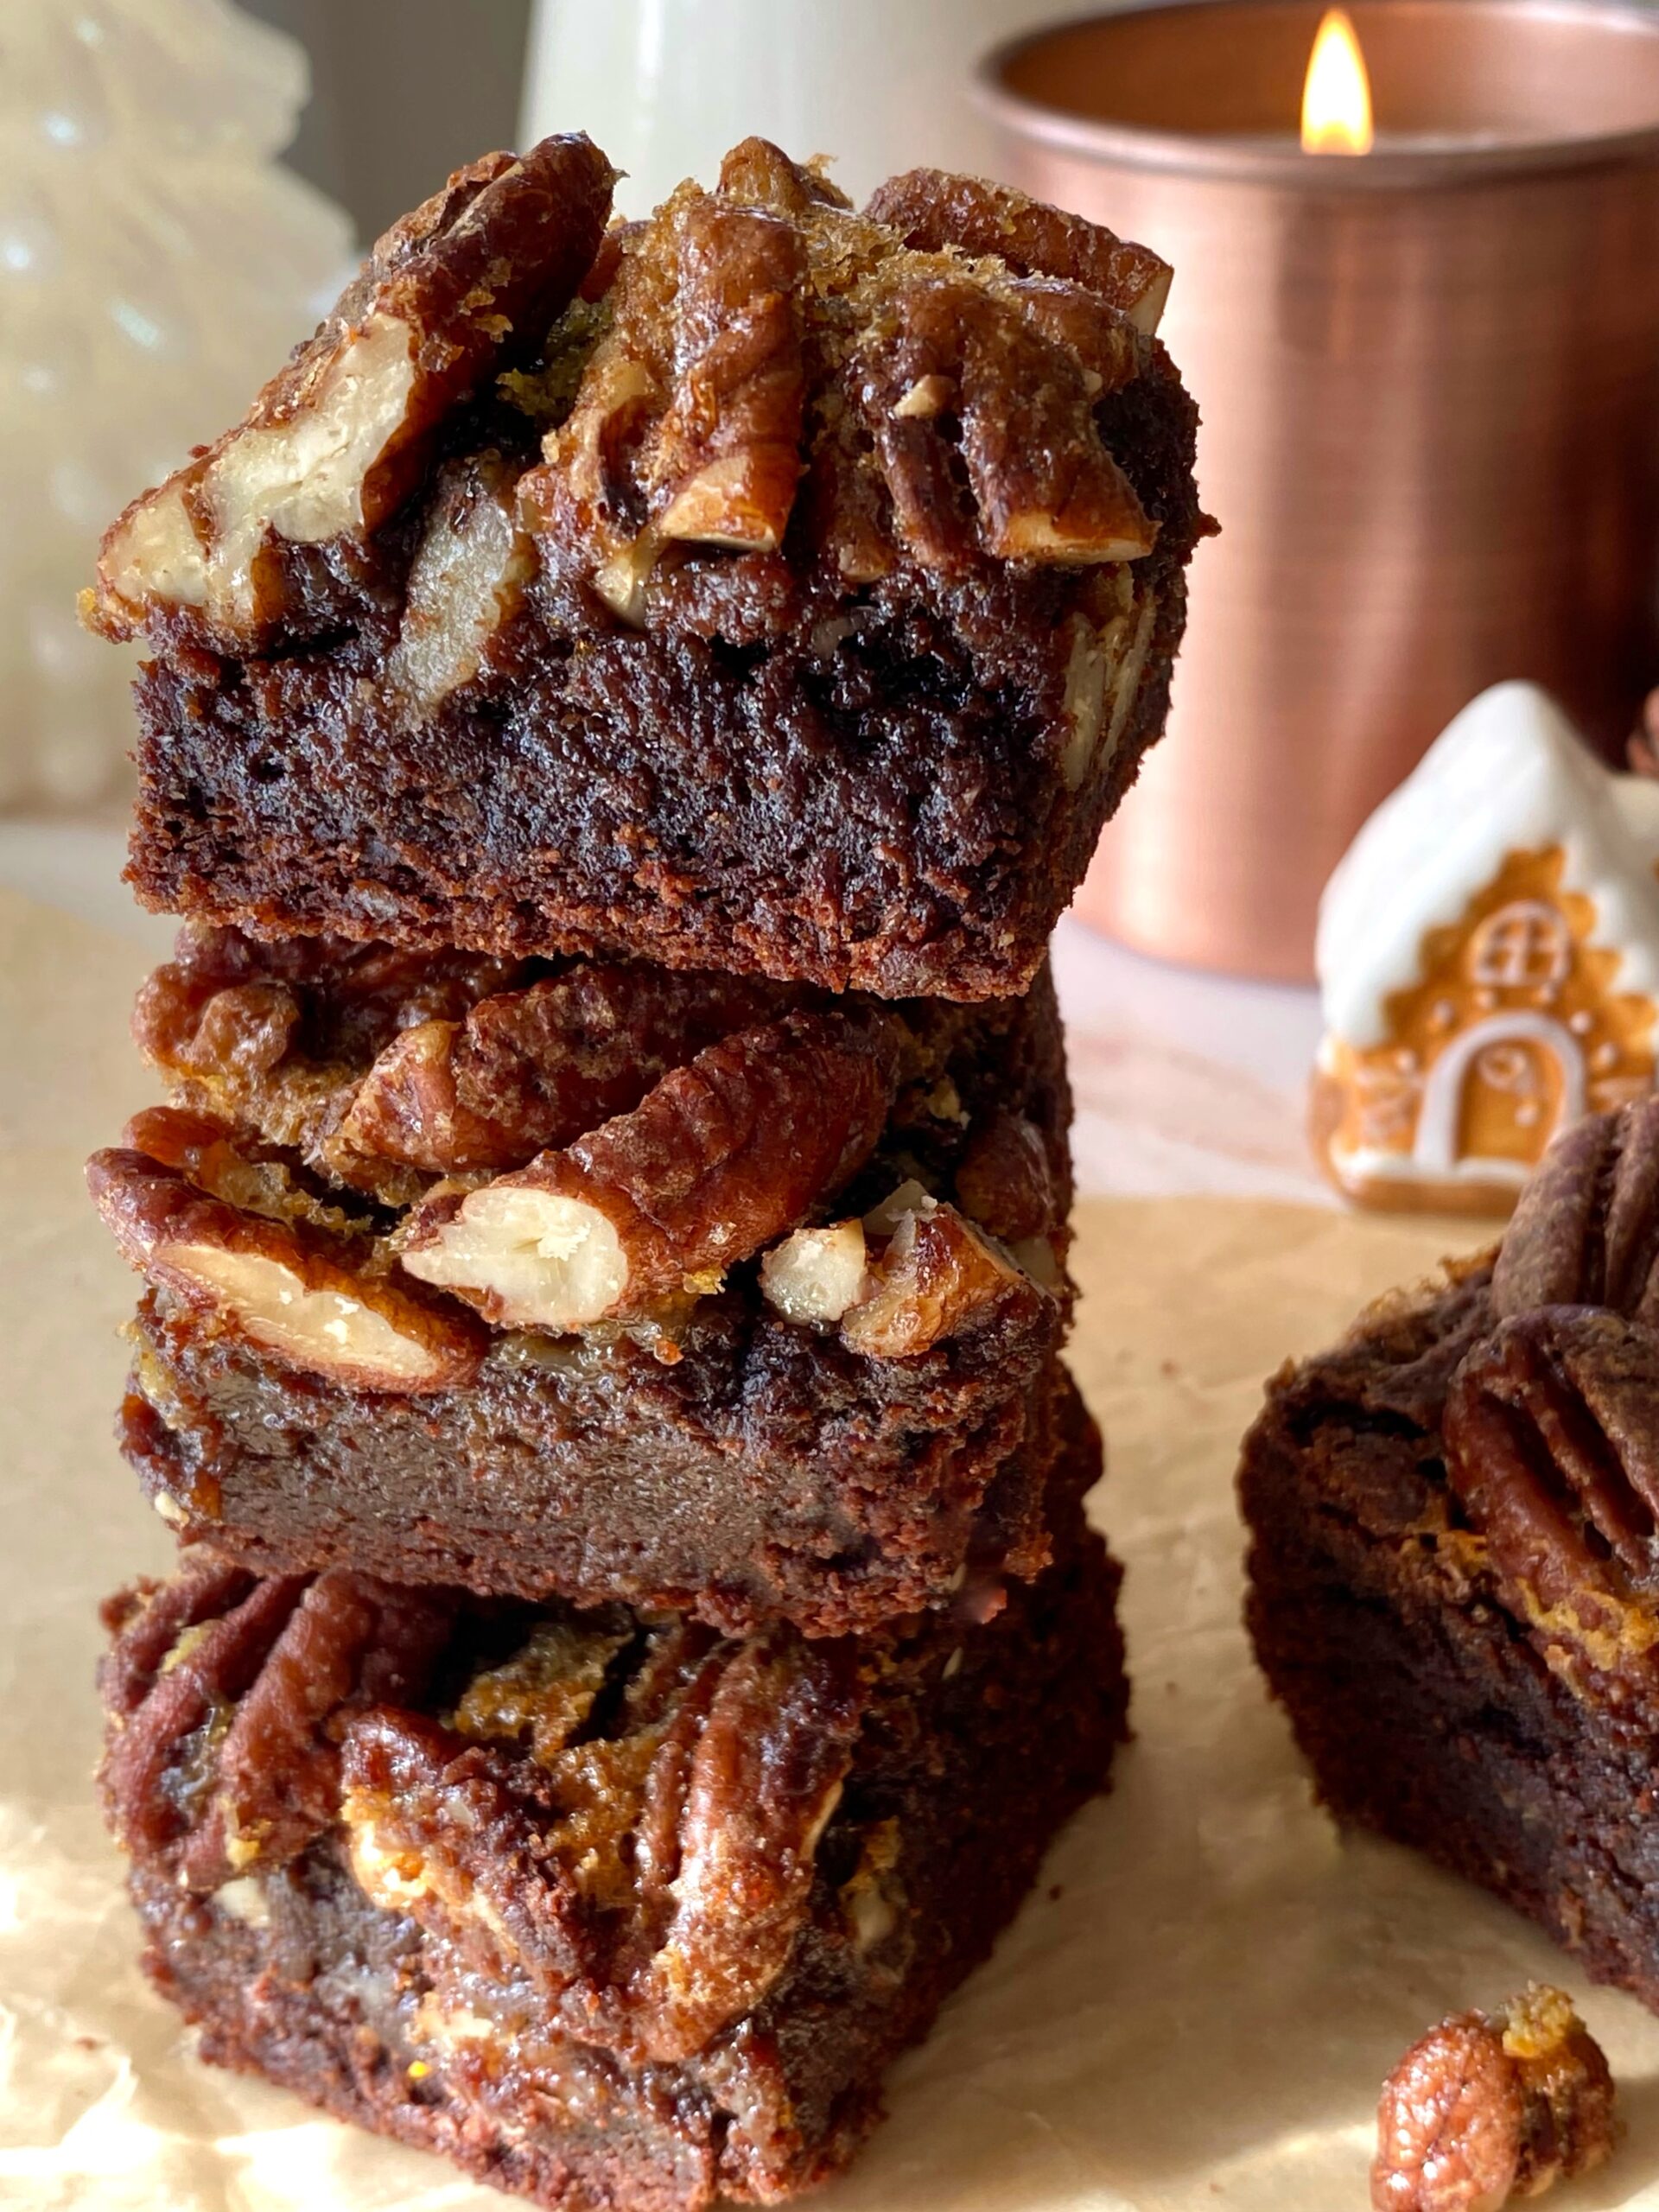
Pecan pie was my mom’s favorite, but she didn’t bake pies, so I always used to bake her one for Thanksgiving. One year, I made a chocolate version. It was delicious, but let’s just say it wasn’t user friendly. It was gooey and hard to serve. Over the years, it eventually morphed into these Maple Pecan Brownies. The brownie version is still delicious, rich and gooey with toasty pecans, but much more user friendly.

Enjoying Maple Pecan Brownies with a glass of milk or a cup of coffee is a must. Thinking of it brings back memories. I can practically smell my dad brewing the coffee to go with these brownies.

Print Recipe
Maple Pecan Brownies
Rich, gooey brownies topped with pecan pie filling
Servings
brownies
Ingredients
Brownies
Pecan Topping
Servings
brownies
Ingredients
Brownies
Pecan Topping
Instructions
Brownies
  1. Preheat oven to 350ºF. Line a 9-inch square baking pan with parchment paper, overlapping the sides an inch or two. Spray parchment paper with nonstick cooking spray.
  2. In a large bowl, stir together melted butter, granulated sugar and brown sugar until well combined.
  3. Mix in eggs and vanilla, one at a time, until well combined.
  4. Mix in cocoa powder, baking soda and salt until well combined.
  5. Stir in flour just until combined.
  6. Spread batter into prepared baking pan. Bake just until top is set, about 25 minutes.
  7. Meanwhile, prepare pecan topping.
  8. When brownie top is set, remove from oven. Gently pour pecan topping around the outer perimeter of brownies, to avoid making brownies sink in the middle. Evenly distribute the pecan topping over the top gently with a spoon.
  9. Return the brownies to the oven and continue baking until the topping is set, about 20-25 minutes. Brownies will stop jiggling and topping will look deep golden brown. Toothpick inserted inside will have a few moist crumbs on it. (If your topping starts to brown too much on the edges before the inside is done, apply aluminum foil around the edges as you would with a pie.)
  10. Remove from oven and cool completely before cutting, about 2- 2 1/2 hours.
  11. Cut into squares, wiping knife between cuts.
Pecan Topping
  1. In a medium bowl, stir together maple syrup, butter, brown sugar, egg, maple extract and salt until well combined.
  2. Stir in pecans until well coated with maple syrup mixture.
  3. Set aside until brownies are partially baked.

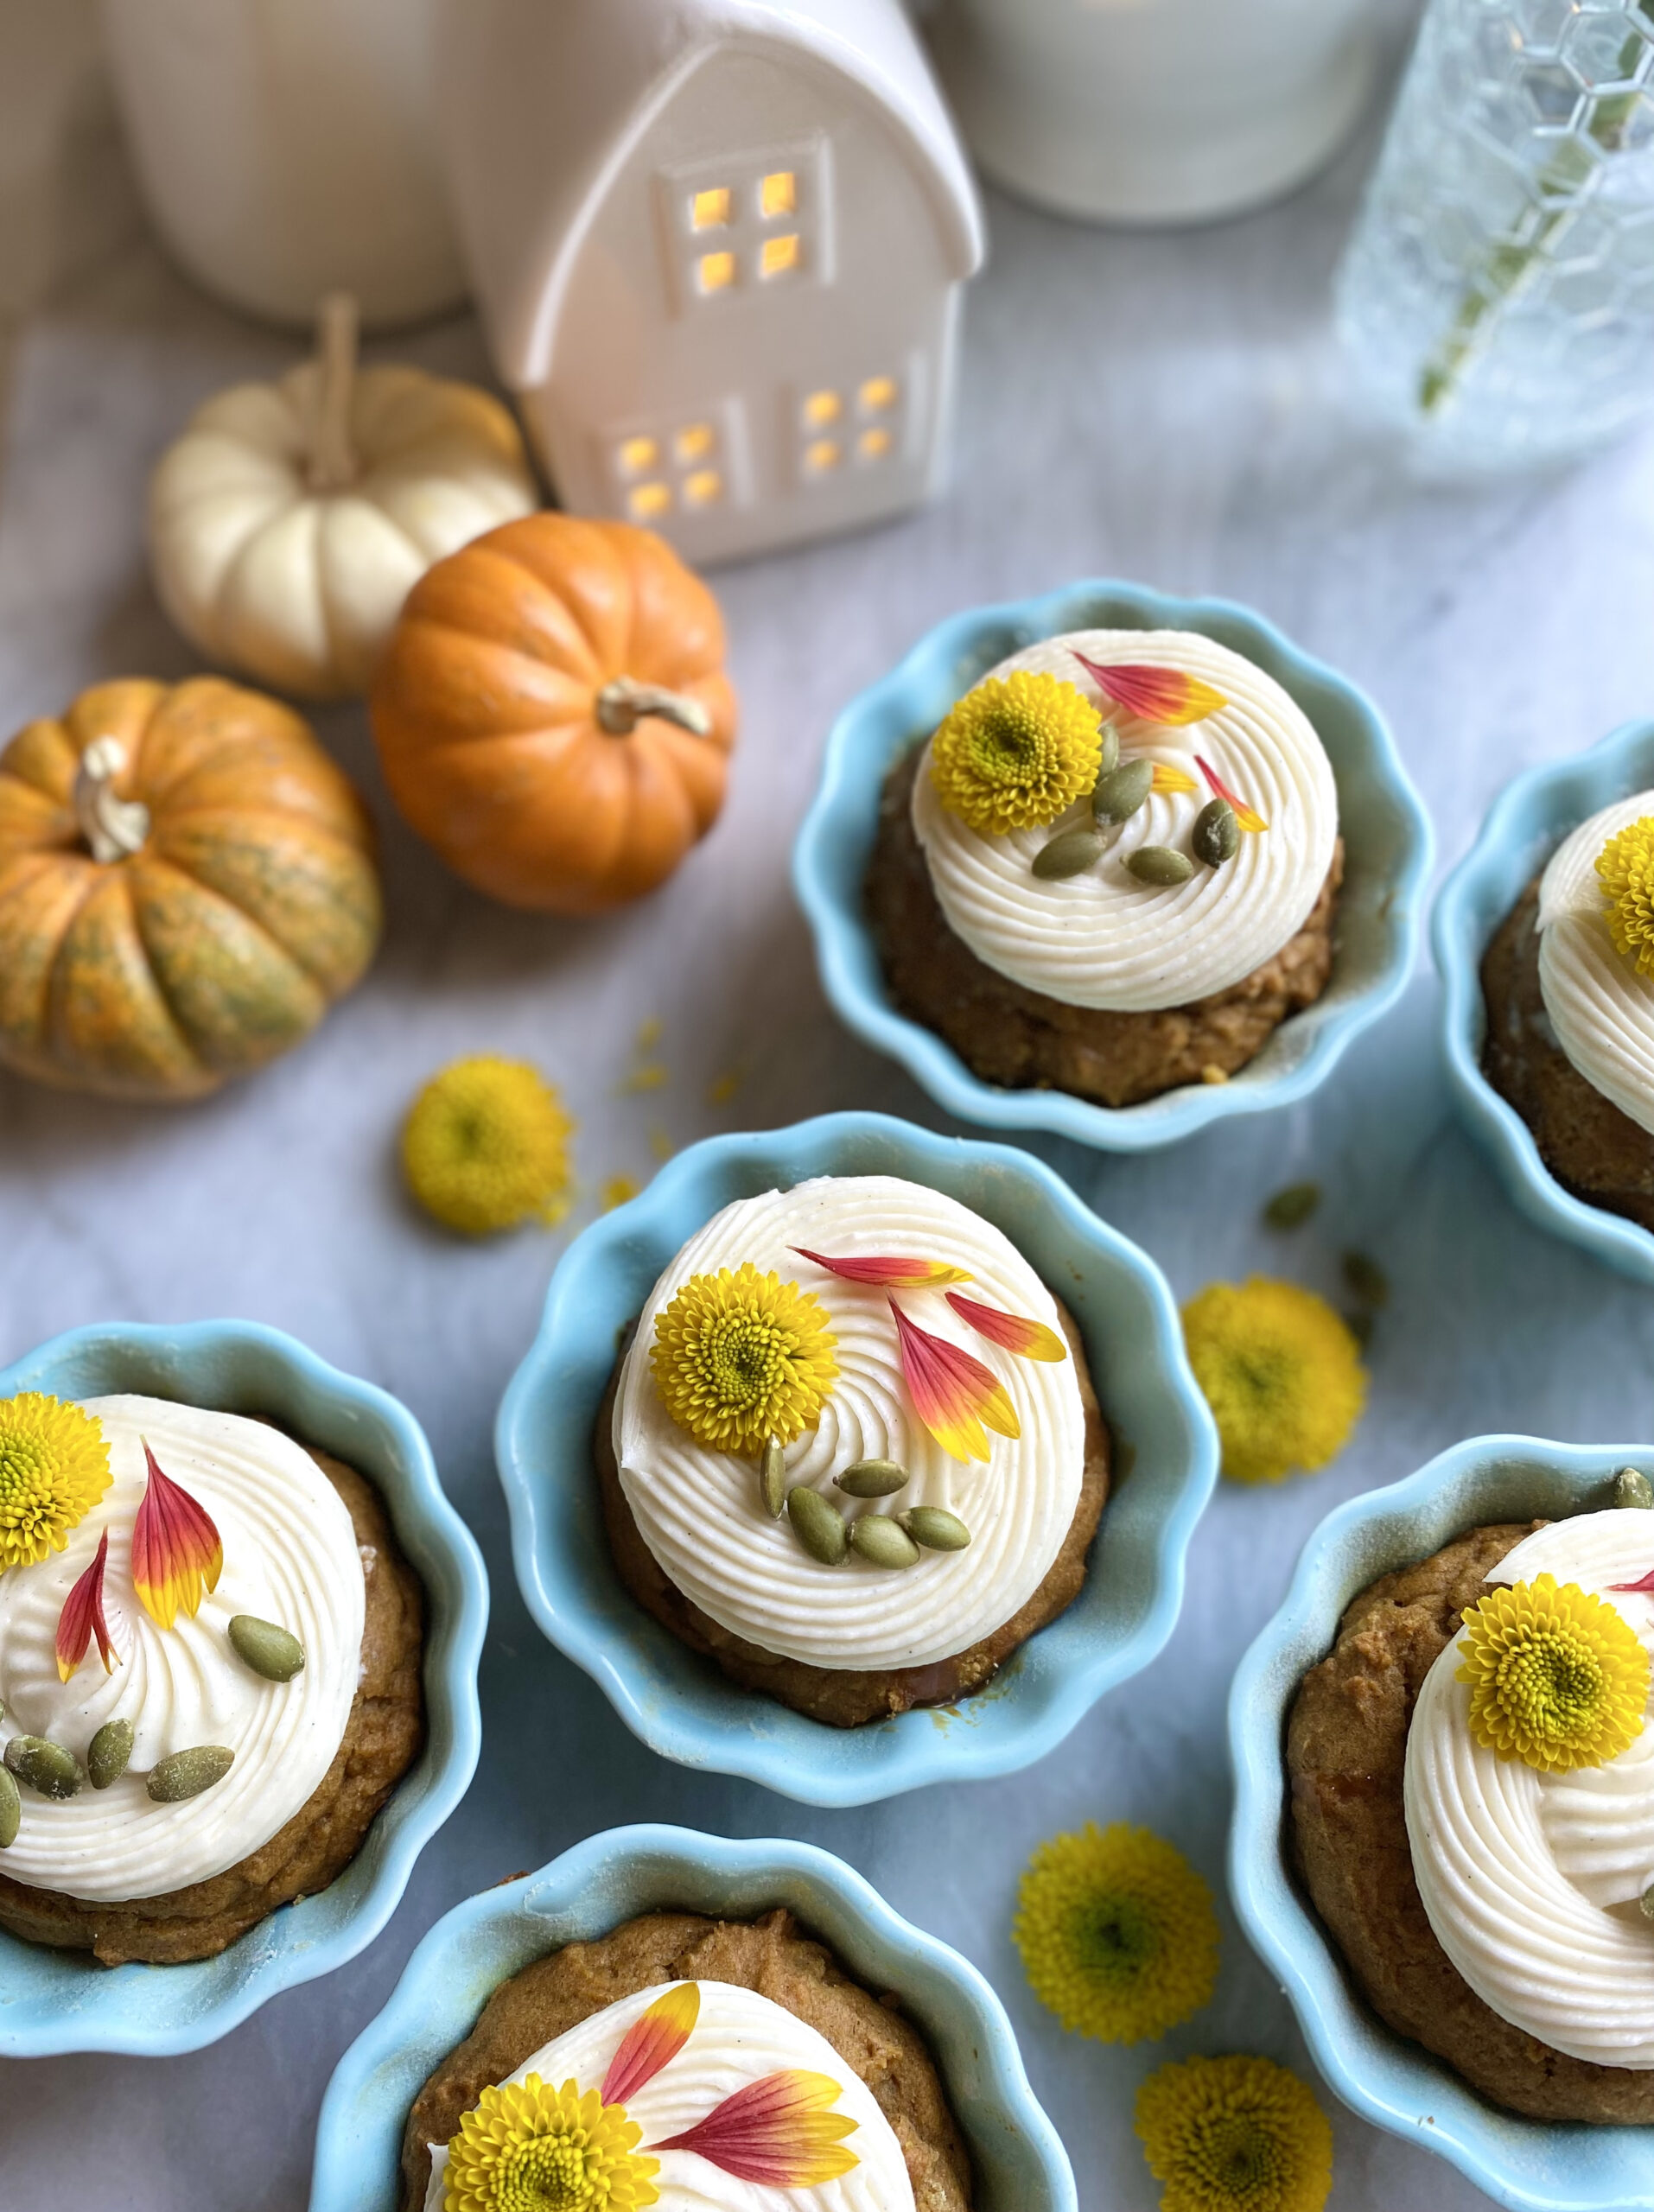
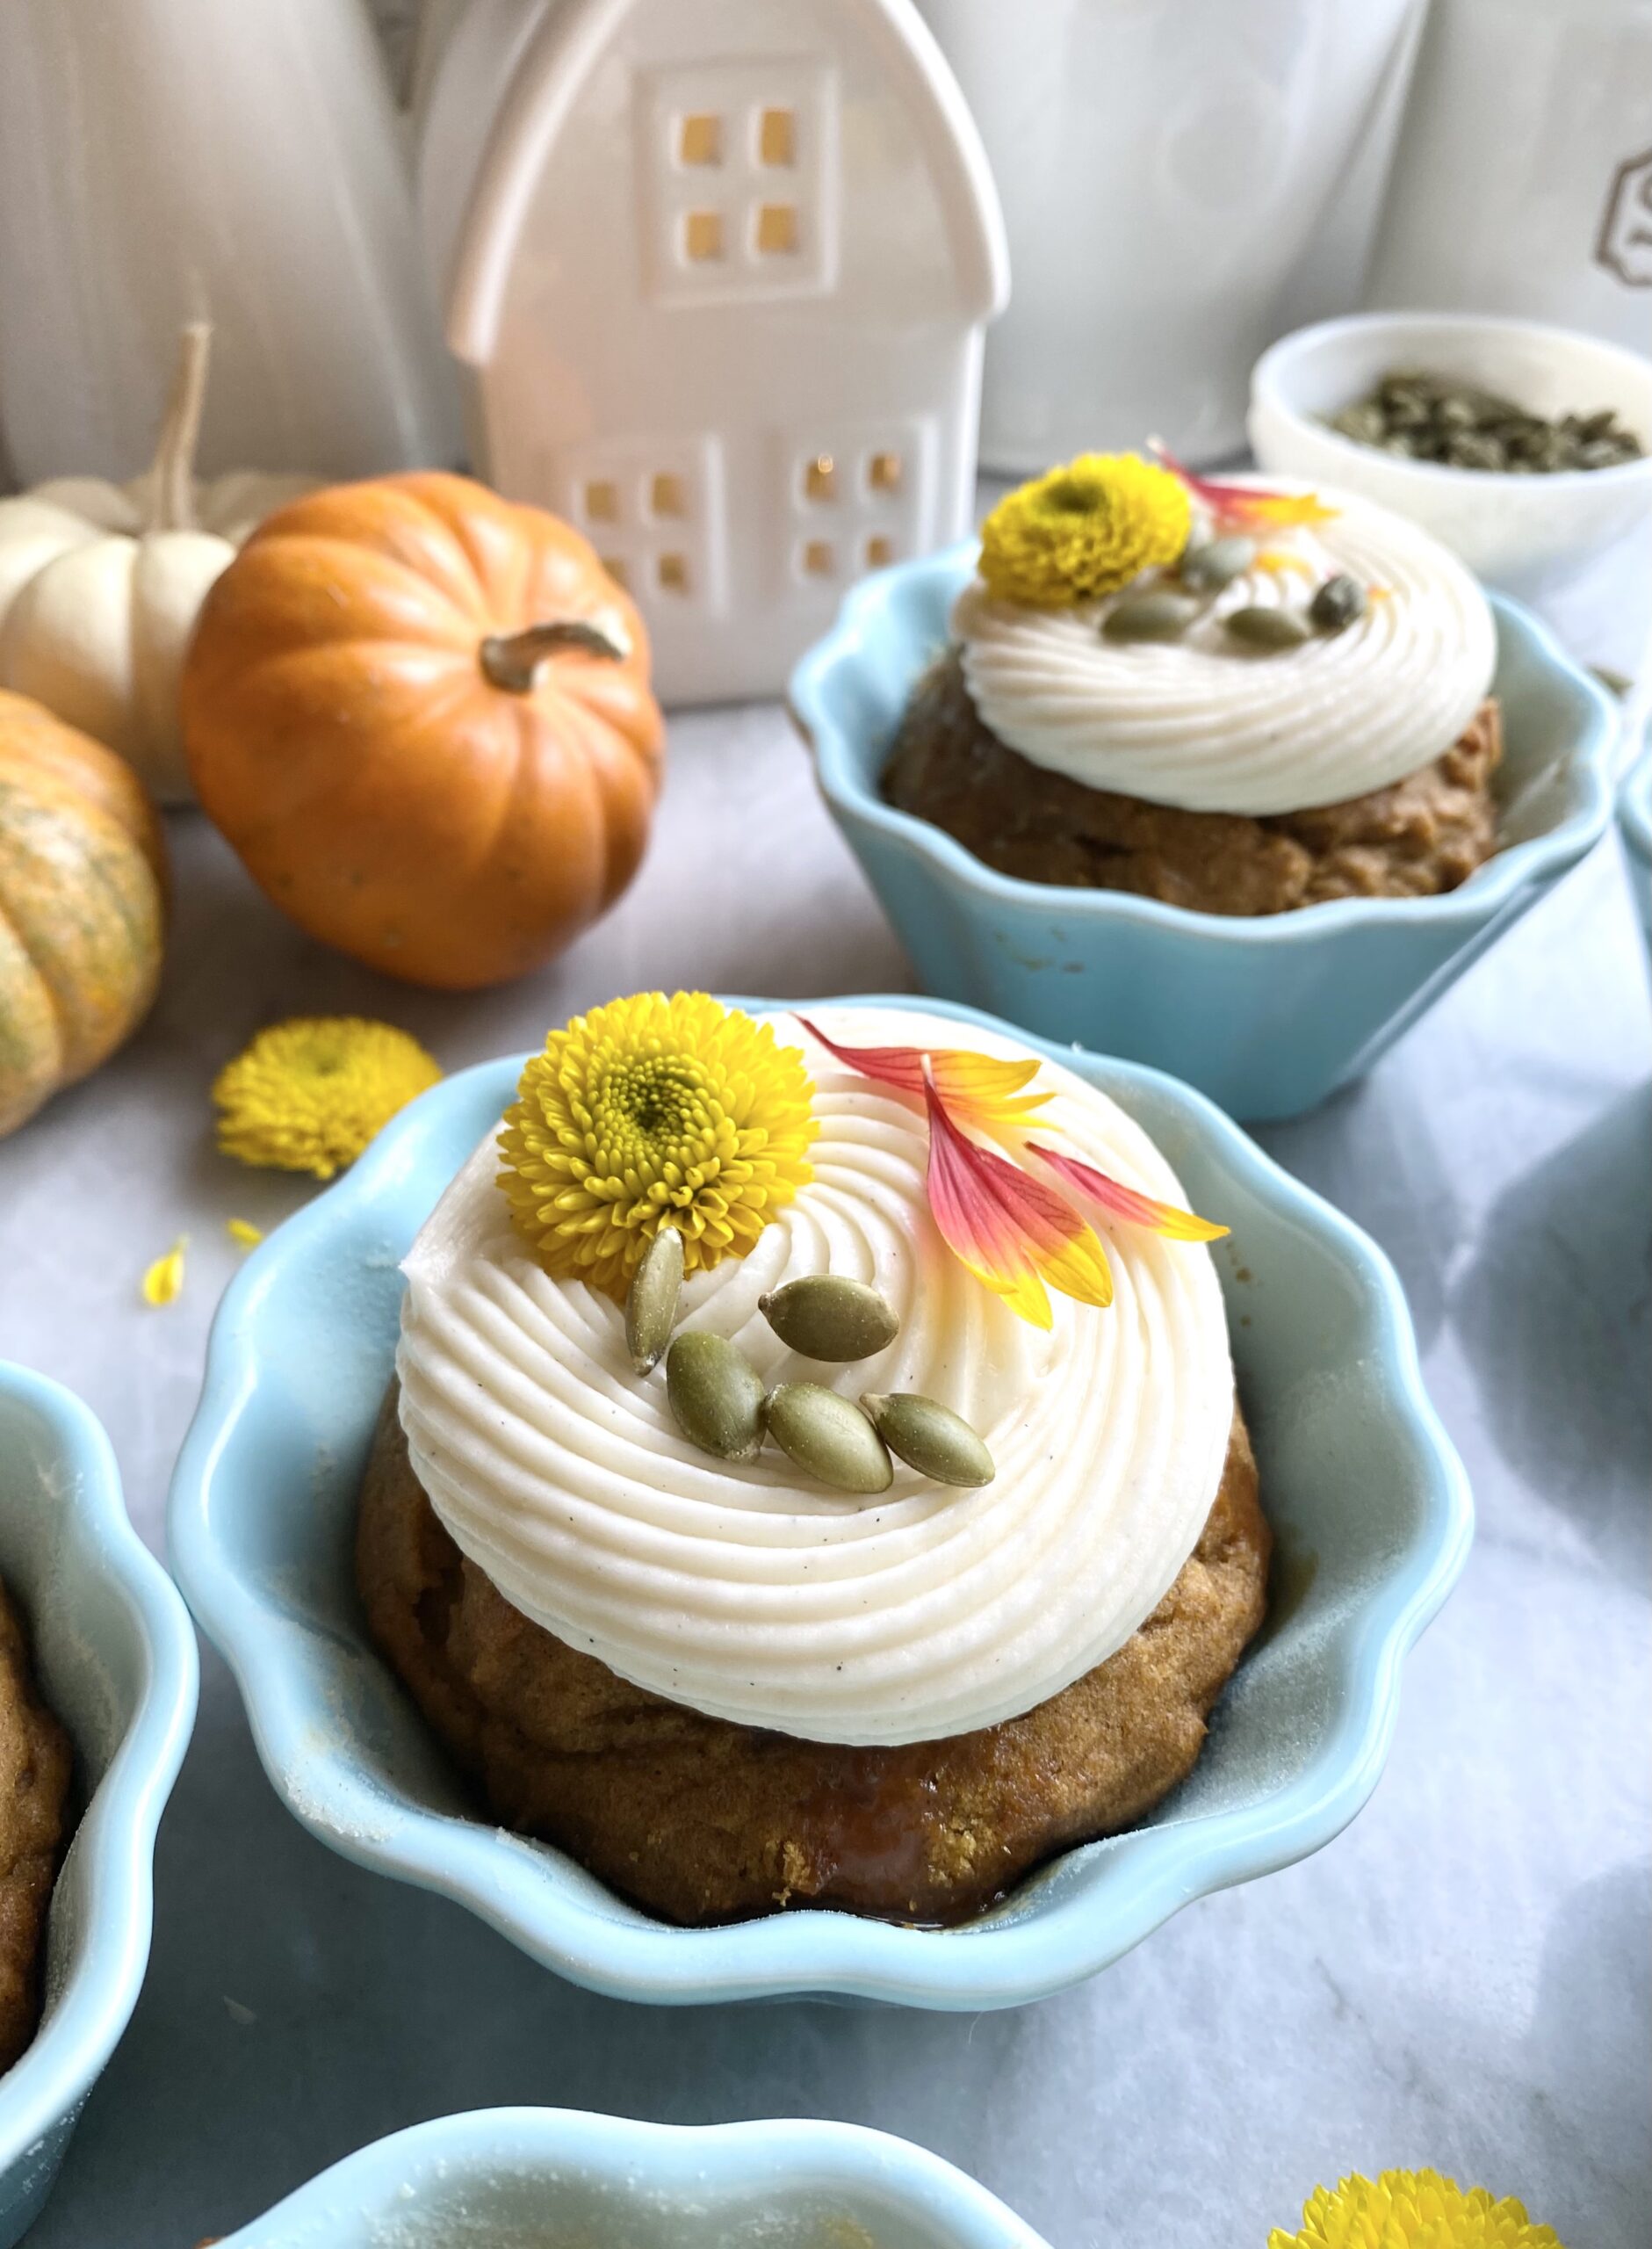
Pumpkin Spice Mini Loaves with Caramel Filling

pumpkin spices mini loaves with caramel filling

In early September, I saw someone announce the fall season on social media. In addition to people pointing out that it was too early for the announcement, the word police corrected the person with the word autumn. Since both terms are correct, we can call the season whatever we prefer. I think autumn is a pretty sounding word, so I’ll use it for the rest of this post. Whatever you call it, these Pumpkin Spice Mini Loaves are a perfect little celebration of the season. They have just the right amount of pumpkin spices, making them so fragrant that your kitchen will smell like cozy autumn heaven.

pumpkin spices mini loaves with caramel filling

I call them loaves because I originally made them in mini loaf pans. They’re so cute and delicious that I often give them as holiday gifts. This year I decided to try them in ramekins and I loved the results! I used 6-ounce ramekins, but you can use 8-ounce ramekins, any size mini loaf pans, a muffin pan or even an 8 or 9-inch loaf pan. Keep in mind that baking times will differ. To find the ramekins I used, click here.

Print Recipe
Pumpkin Spice Mini Loaves with Caramel Filling
Mini loaves of tender pumpkin bread with caramel filling and luscious cream cheese frosting
Servings
mini loaves
Ingredients
Pumpkin Spice Mini Loaves
Cream Cheese Frosting
Servings
mini loaves
Ingredients
Pumpkin Spice Mini Loaves
Cream Cheese Frosting
Instructions
Pumpkin Spice Mini Loaves
  1. Preheat oven to 350ºF. Grease and flour seven 6-ounce ramekins or six 8-ounce ramekins or any loaf pans of your choice.
  2. In a large bowl, sift together flour, cinnamon, baking powder, baking soda, salt, ginger, nutmeg and cloves. Set aside.
  3. In a separate large bowl, cream butter and brown sugar together with an electric mixer until light and fluffy.
  4. Beat in eggs, one at a time, until well combined.
  5. Beat in pumpkin and vanilla until combined.
  6. Stir in flour mixture just until combined.
  7. Divide batter evenly into prepared ramekins. Bake for 20-25 minutes or until golden brown and toothpick inserted in center comes out clean. Do not overbake. (Mini loaves or muffins bake for 15-25 minutes, depending on size. 8 or 9-inch loaf bakes for 40-50 minutes)
  8. Cool completely if serving in ramekins or remove from pans after cooling for 10 minutes. Continue to cool on wire rack.
  9. Make 3/4-inch well in the center of each loaf. Fill with caramel sauce. (For an 8 or 9-inch loaf, poke multiple holes with a skewer. Fill with caramel sauce.)
  10. Top with cream cheese frosting and pumpkin seeds
Cream Cheese Frosting
  1. In a large bowl, beat cream cheese and butter together with an electric mixer until smooth.
  2. Add vanilla extract and salt and beat until combined.
  3. Gradually add powdered sugar and beat at medium speed until combined.
  4. Add heavy cream and beat at low speed until combined.

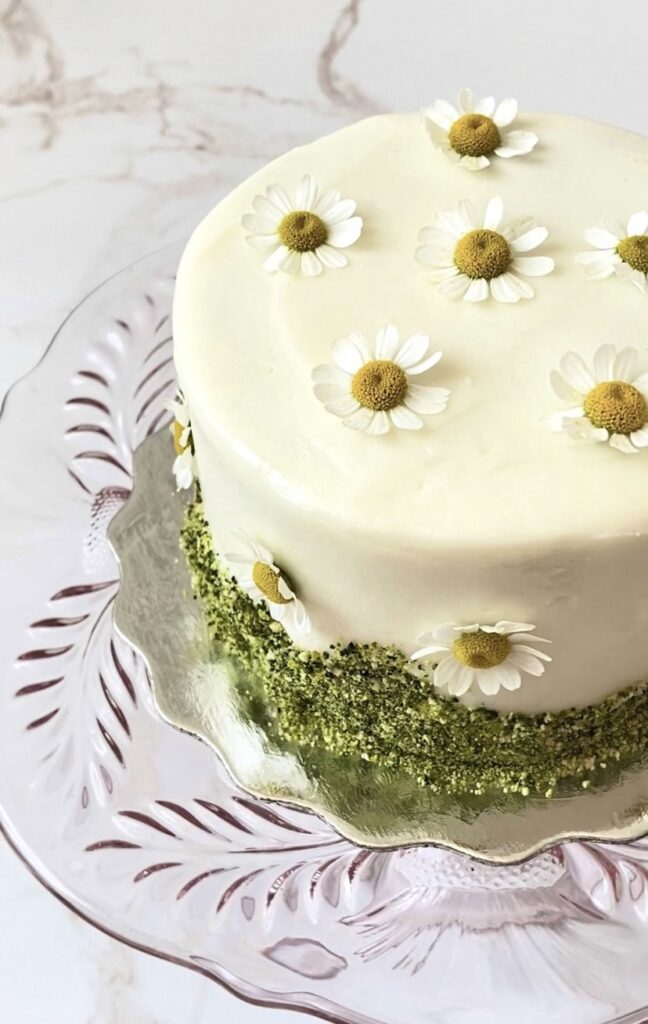
Mini Hummingbird Cake

Mini Hummingbird Cake

If you haven’t noticed already, I love little cakes. Mini cakes are not only cute and charming, they’re likely to make you very popular. This recipe makes two darling Mini Hummingbird Cakes, one to keep and one to share. Hummingbird Cake is a delightful way to use your ripe bananas. The version I’m sharing here also contains pineapple, pecans and coconut. This fruity, nutty combination reminds me of spring and would be perfect for Easter or a spring picnic.

Print Recipe
Mini Hummingbird Cake
Hummingbird Cakes filled with bananas, pineapple, pecans and coconut, topped with cream cheese frosting and decorated with graham cracker crumb moss and fresh chamomile flowers.
Course Dessert
Keyword cake, hummingbird
Servings
4-inch 2-layer cakes
Ingredients
Hummingbird Cakes
Cream Cheese Frosting
Optional Decor
Course Dessert
Keyword cake, hummingbird
Servings
4-inch 2-layer cakes
Ingredients
Hummingbird Cakes
Cream Cheese Frosting
Optional Decor
Instructions
Hummingbird Cakes
  1. Preheat oven to 350ºF. Line the bottoms of four 4-inch cake pans**** with parchment paper. Grease and flour the insides.
  2. In a medium bowl, whisk together flour, baking soda, salt and cinnamon. Set aside.
  3. In a large bowl, beat butter, sugar and brown sugar, with an electric mixer, until light and fluffy.
  4. Beat in egg, egg yolk, and vanilla in three separate additions, making sure each one is incorporated before adding the next.
  5. Stir in bananas, pineapple, pecans and coconut until well combined
  6. Transfer batter to prepared cake pans, about 1 cup of batter in each pan. Place filled cake pans on a baking sheet.
  7. Bake until toothpick inserted in centers comes out clean, about 25-28 minutes. Cool cakes in pans 10 minutes then turn cakes out onto a cooling rack to cool.
  8. Trim cakes to 1-inch thickness. Fill, stack and frost cakes with cream cheese frosting.
Cream Cheese Frosting
  1. In a large bowl, beat butter with an electric mixer until smooth and pale.
  2. Beat 1 tablespoon heavy cream, vanilla and salt into butter until well combined.
  3. On low speed, beat in powdered sugar a half cup at a time, until well combined.
  4. In a medium bowl, mix cream cheese with remaining 1 tablespoon heavy cream until smooth.
  5. On low speed, beat cream cheese mixture into butter mixture until smooth and well combined.
Decor
  1. To make graham cracker crumb moss: In two small bowls, dilute 1/8 teaspoon of each gel food color with a few drops of vodka. (Vodka will dissipate as crumbs dry.) Place graham cracker crumbs in a plastic zip bag. Add diluted food colors a little at a time and seal bag. Shake bag and gently massage to distribute color. Add more diluted food color as needed until desired shade of green is reached. Spread crumbs out onto a parchment lined baking sheet to dry. Apply crumbs to bottom edges of frosted cakes.
Recipe Notes

*Chop the coconut flakes to achieve a finer texture. This step is optional.

**To find the avocado green food color gel I used, click here.

***To find the lemon yellow food color gel I used, click here.

****To find the 4-inch cake pans I used, click here.

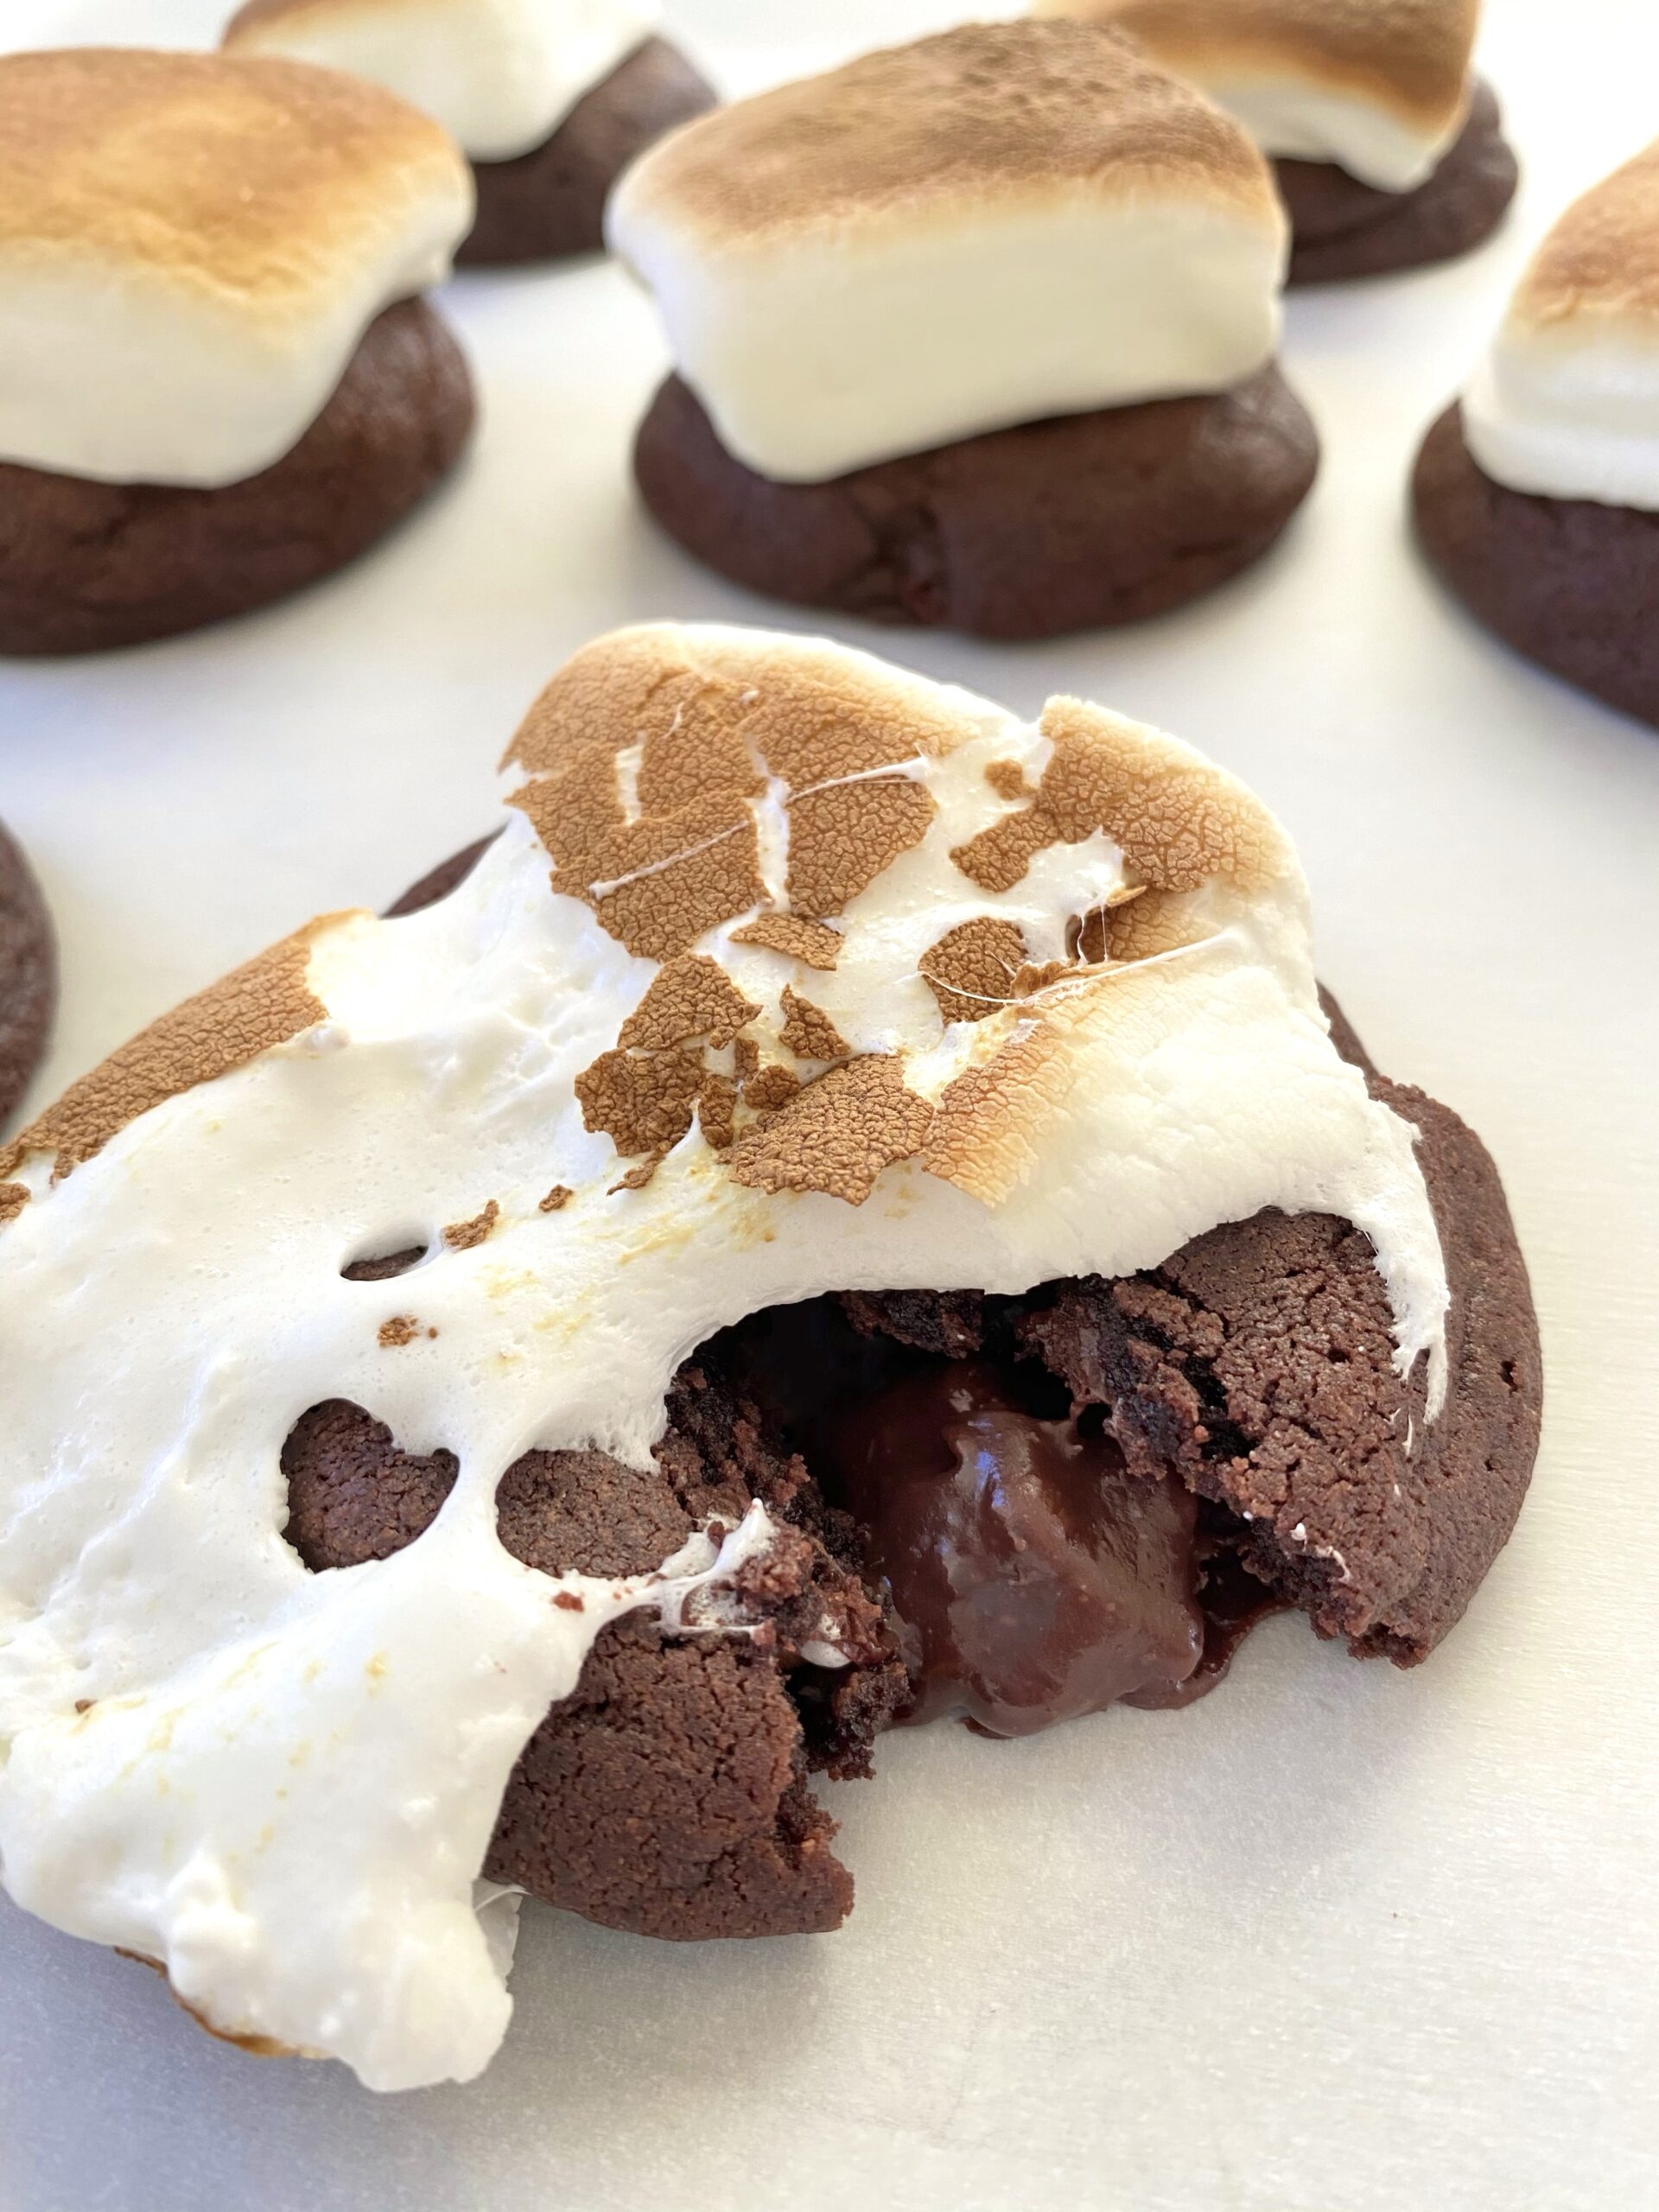
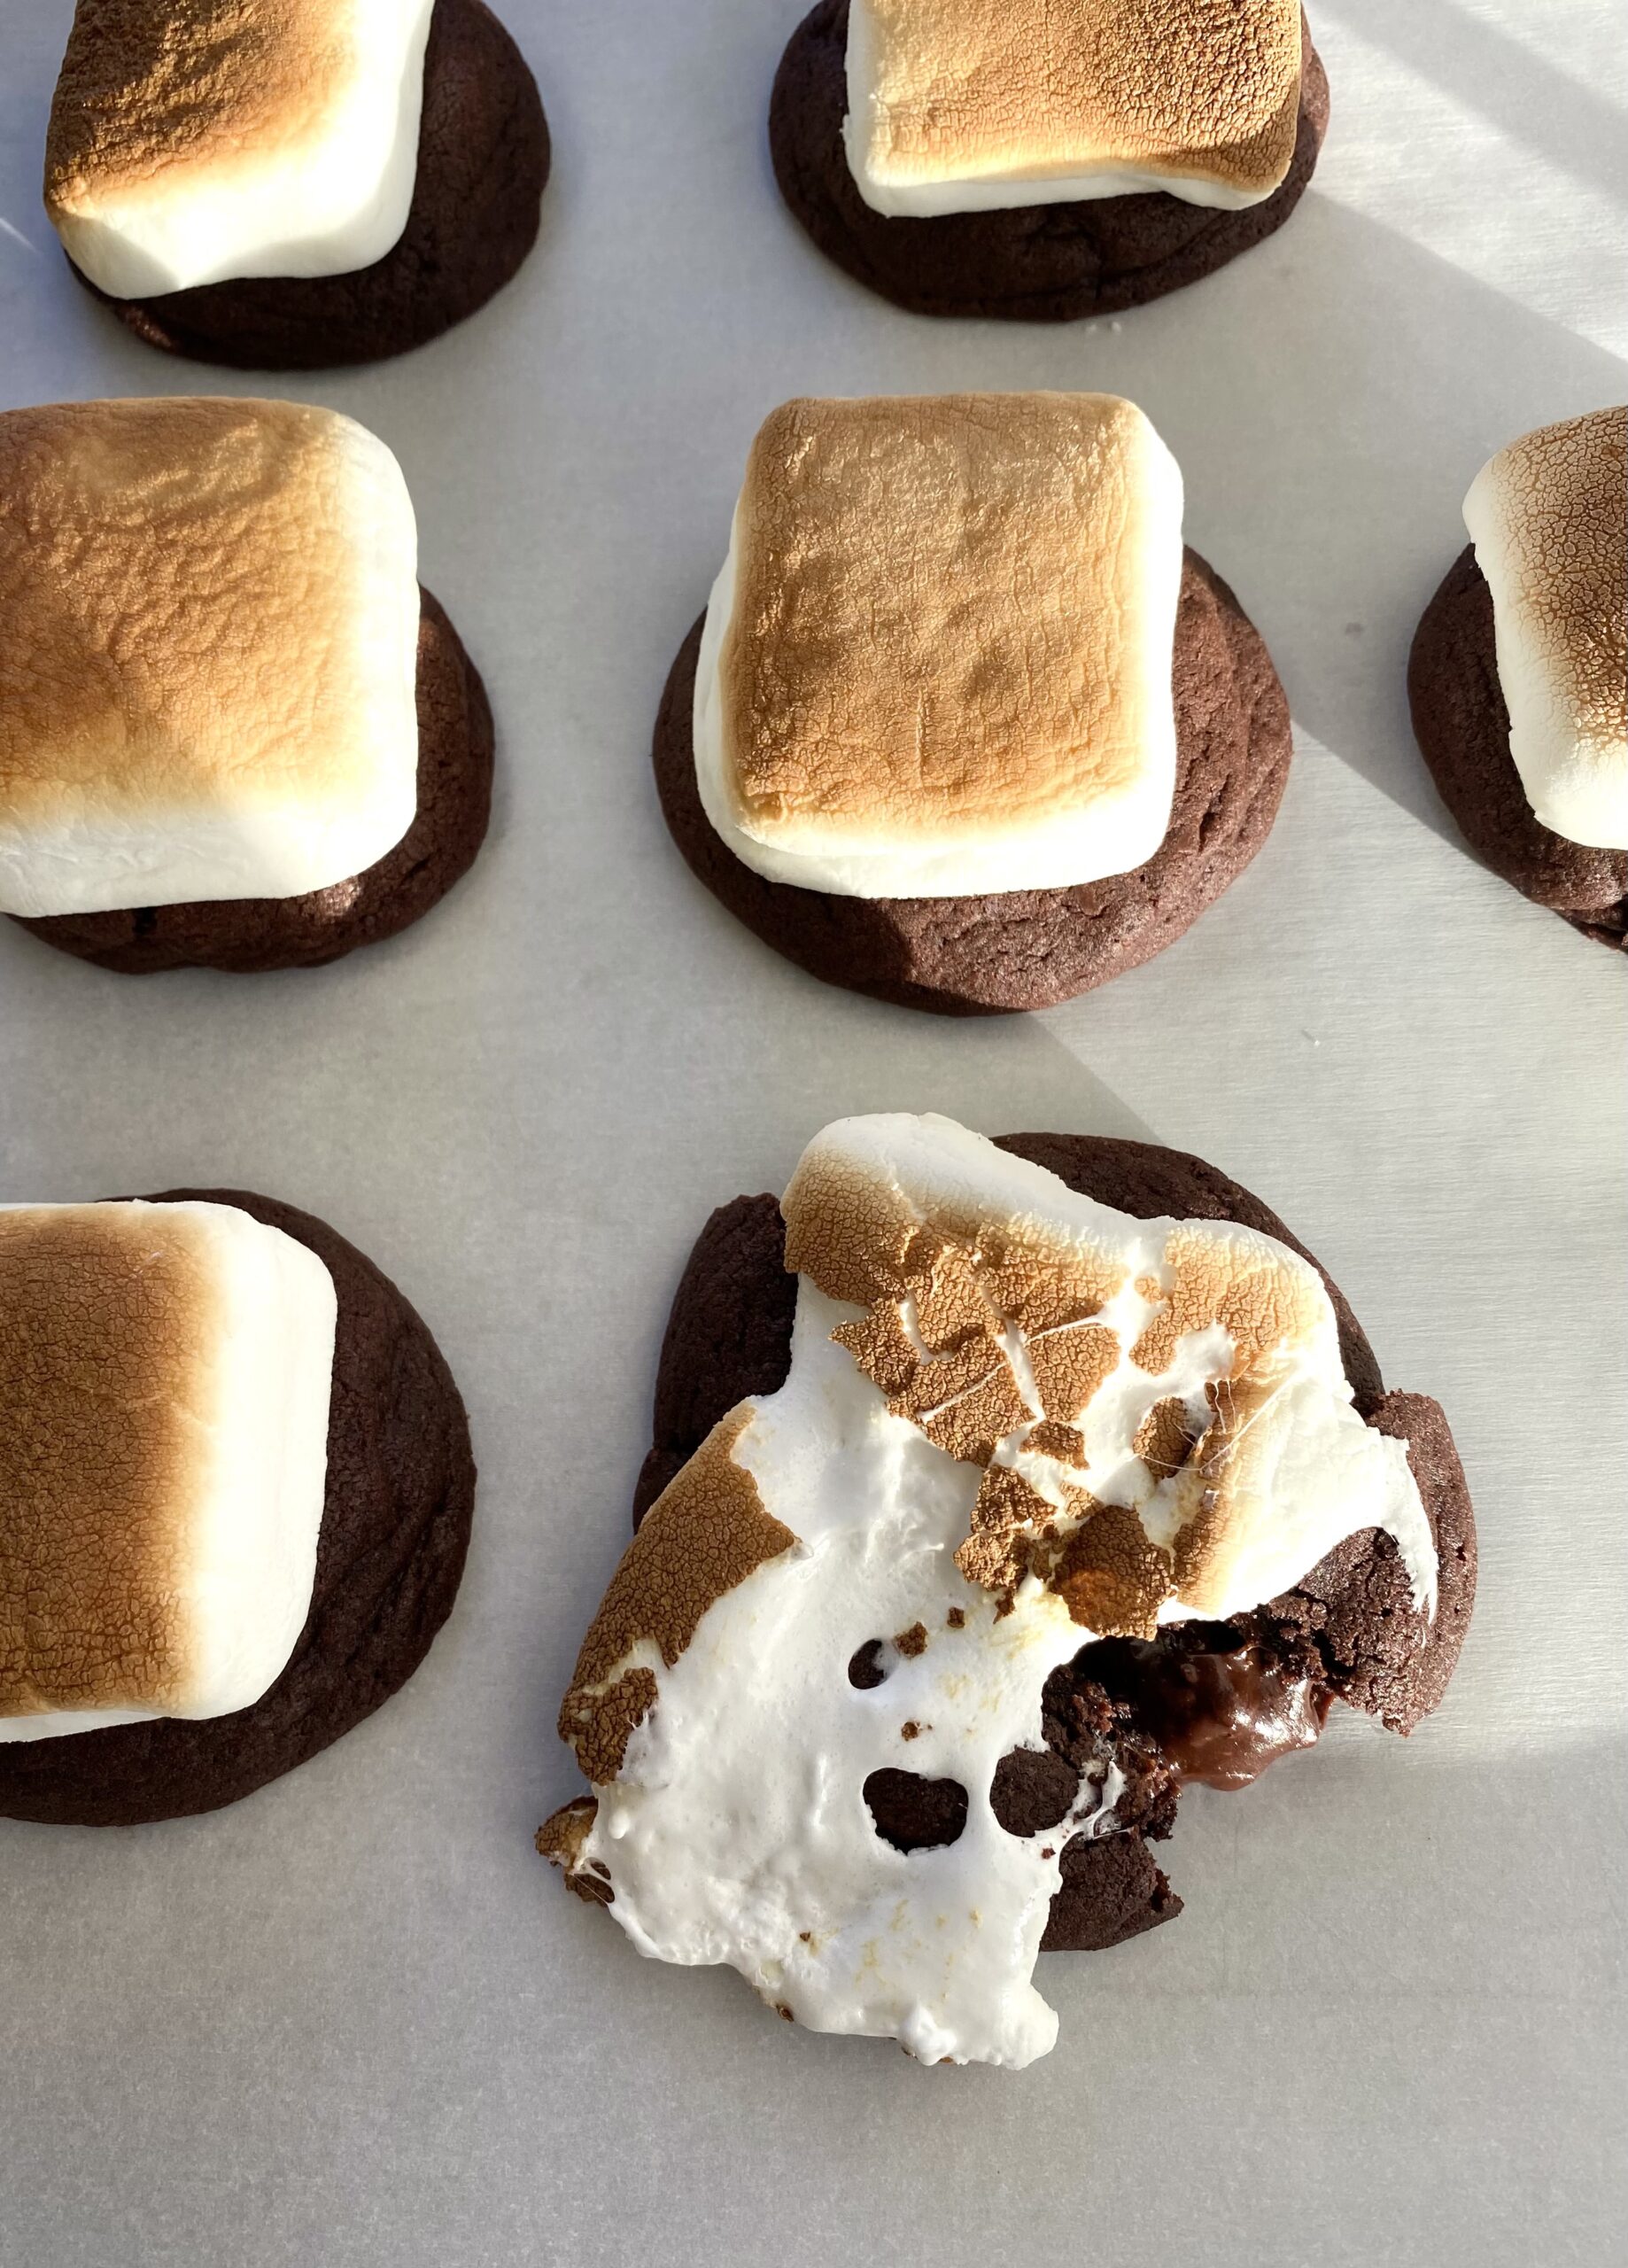
Marshmallow Mudslide Cookies

marshmallow mudslide cookies

Have you ever had mudslide cake? It’s a deliciously messy chocolate cake with chocolate frosting and marshmallows, also known as Mississippi mud cake. I saw one covered in a layer of marshmallow fluff and it made its way into my dreams. I woke up with the inspiration to make a cookie version of the gooey mudslide cake.

I saw a few mudslide cookie recipes out there that used standard size marshmallows and chocolate chips mixed into the cookie dough. If you’ve ever baked with marshmallows, you know that they nearly disappear during the baking process. Chocolate chips melt beautifully into little pools of chocolate, but then harden once cooled to room temperature. I happily volunteered to address these challenges! After some trial and error, I created a satisfying cookie with plenty of gooey marshmallow goodness and a rich fudge filling that stays soft at room temperature. Dreams do come true!

marshmallow mudslide cookies

Print Recipe
Marshmallow Mudslide Cookies
Chocolate fudge-filled cookies topped with toasted marshmallows
Course Dessert
Keyword chocolate, cookies
Servings
cookies
Ingredients
Fudge filling
Cookies
Course Dessert
Keyword chocolate, cookies
Servings
cookies
Ingredients
Fudge filling
Cookies
Instructions
Fudge filling
  1. Melt chocolate chips and sweetened condensed milk together in a double boiler or in the **microwave in a medium microwave safe bowl.
  2. Stir in chopped nuts. Set aside to cool to room temperature.
Cookies
  1. Heat oven to 350º.
  2. In a medium bowl, sift together flour, cocoa powder, baking powder, baking soda, and salt. Set aside.
  3. In a large bowl, cream butter with an electric mixer.
  4. Add granulated sugar and brown sugar and mix on medium speed until light and fluffy.
  5. Add eggs one at a time and mix until well combined.
  6. Add vanilla and mix until combined.
  7. Add dry ingredients in two increments, mixing just until combined.
  8. Roll fudge filling into tablespoon sized balls
  9. Roll cookie dough into 1/8 cup balls then flatten into a disc with your fingers and place a ball of fudge filling in the middle of each disc. Wrap the cookie dough around the ball of filling, sealing it completely.
  10. Place cookies about 2 inches apart on large baking sheets.
  11. Bake for 10 minutes. Remove from oven.
  12. Turn on broiler.
  13. Place a marshmallow on top of each cookie.
  14. Broil cookies until marshmallows are toasted. This takes about 1 minute. CAUTION Watch cookies carefully when broiling! They can go from done to burnt in the blink of an eye!
Recipe Notes

*I used Kraft Jet-Puffed S'moreMallows, but if you're unable to find them, use jumbo marshmallows. Cut them in half lengthwise with kitchen shears. Place on cookies cut side down.

**To melt fudge filling in microwave, heat for 30 seconds. Stir, then microwave for 10 second intervals, stirring until melted.

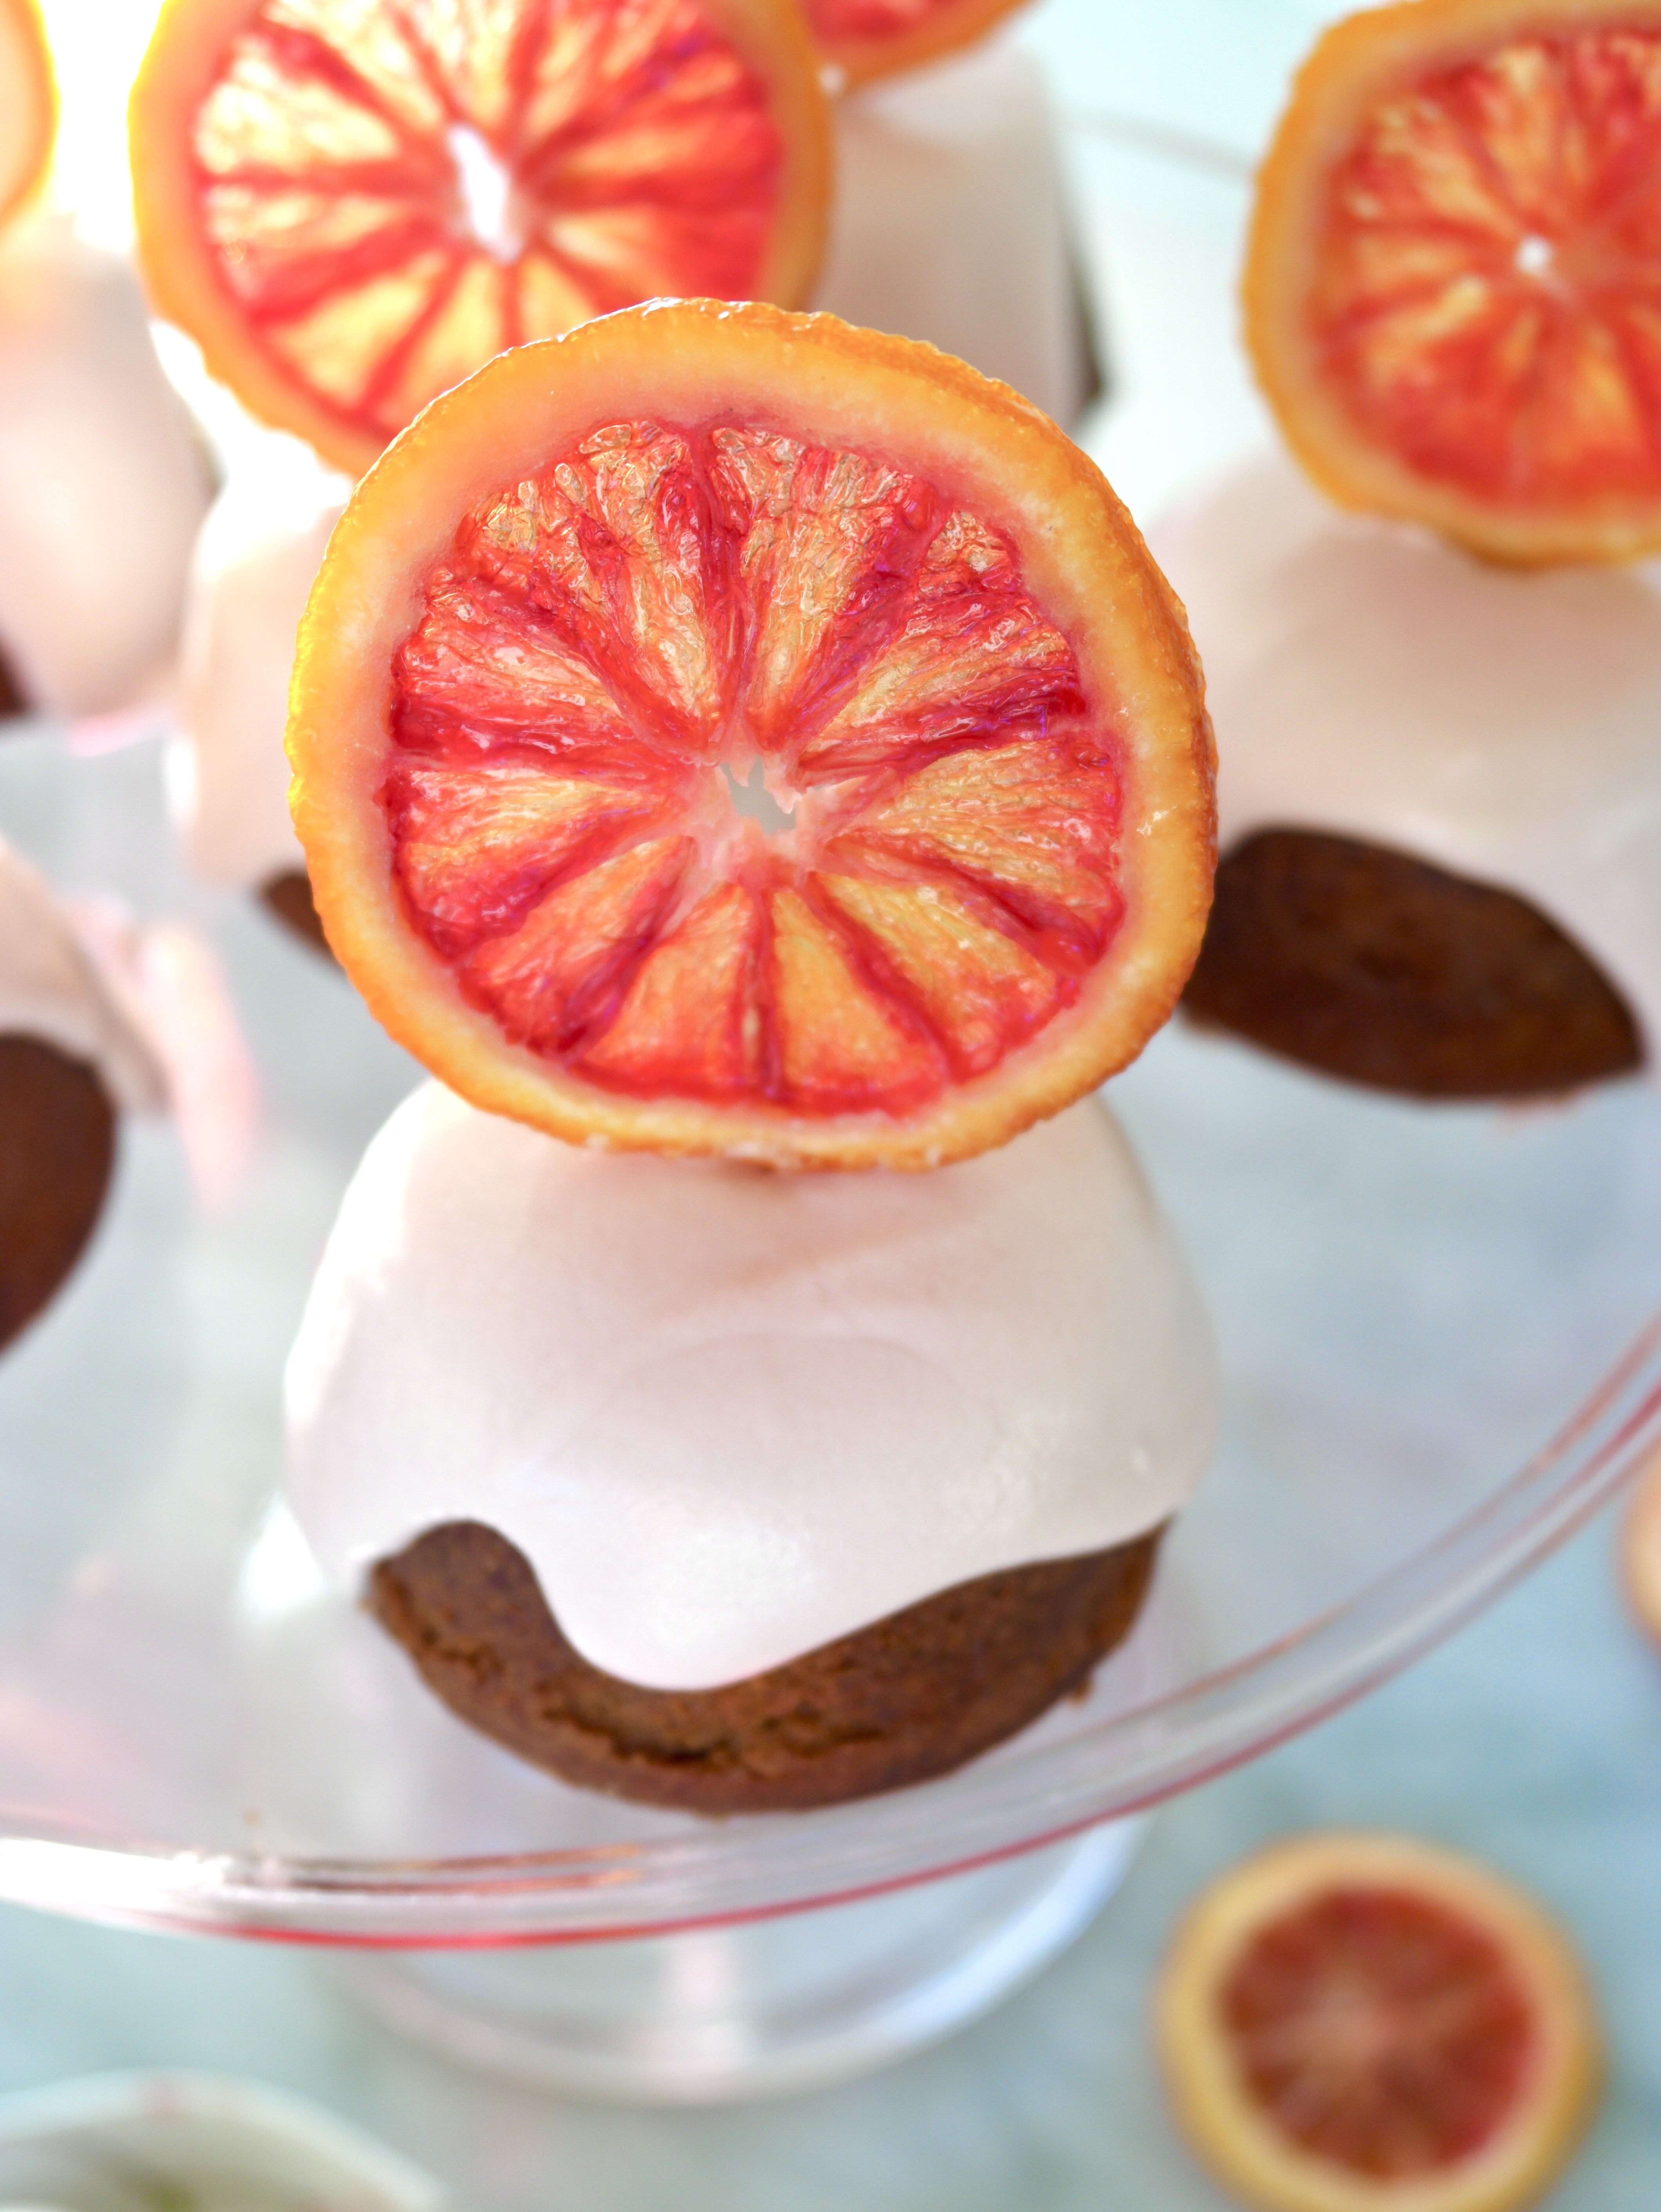
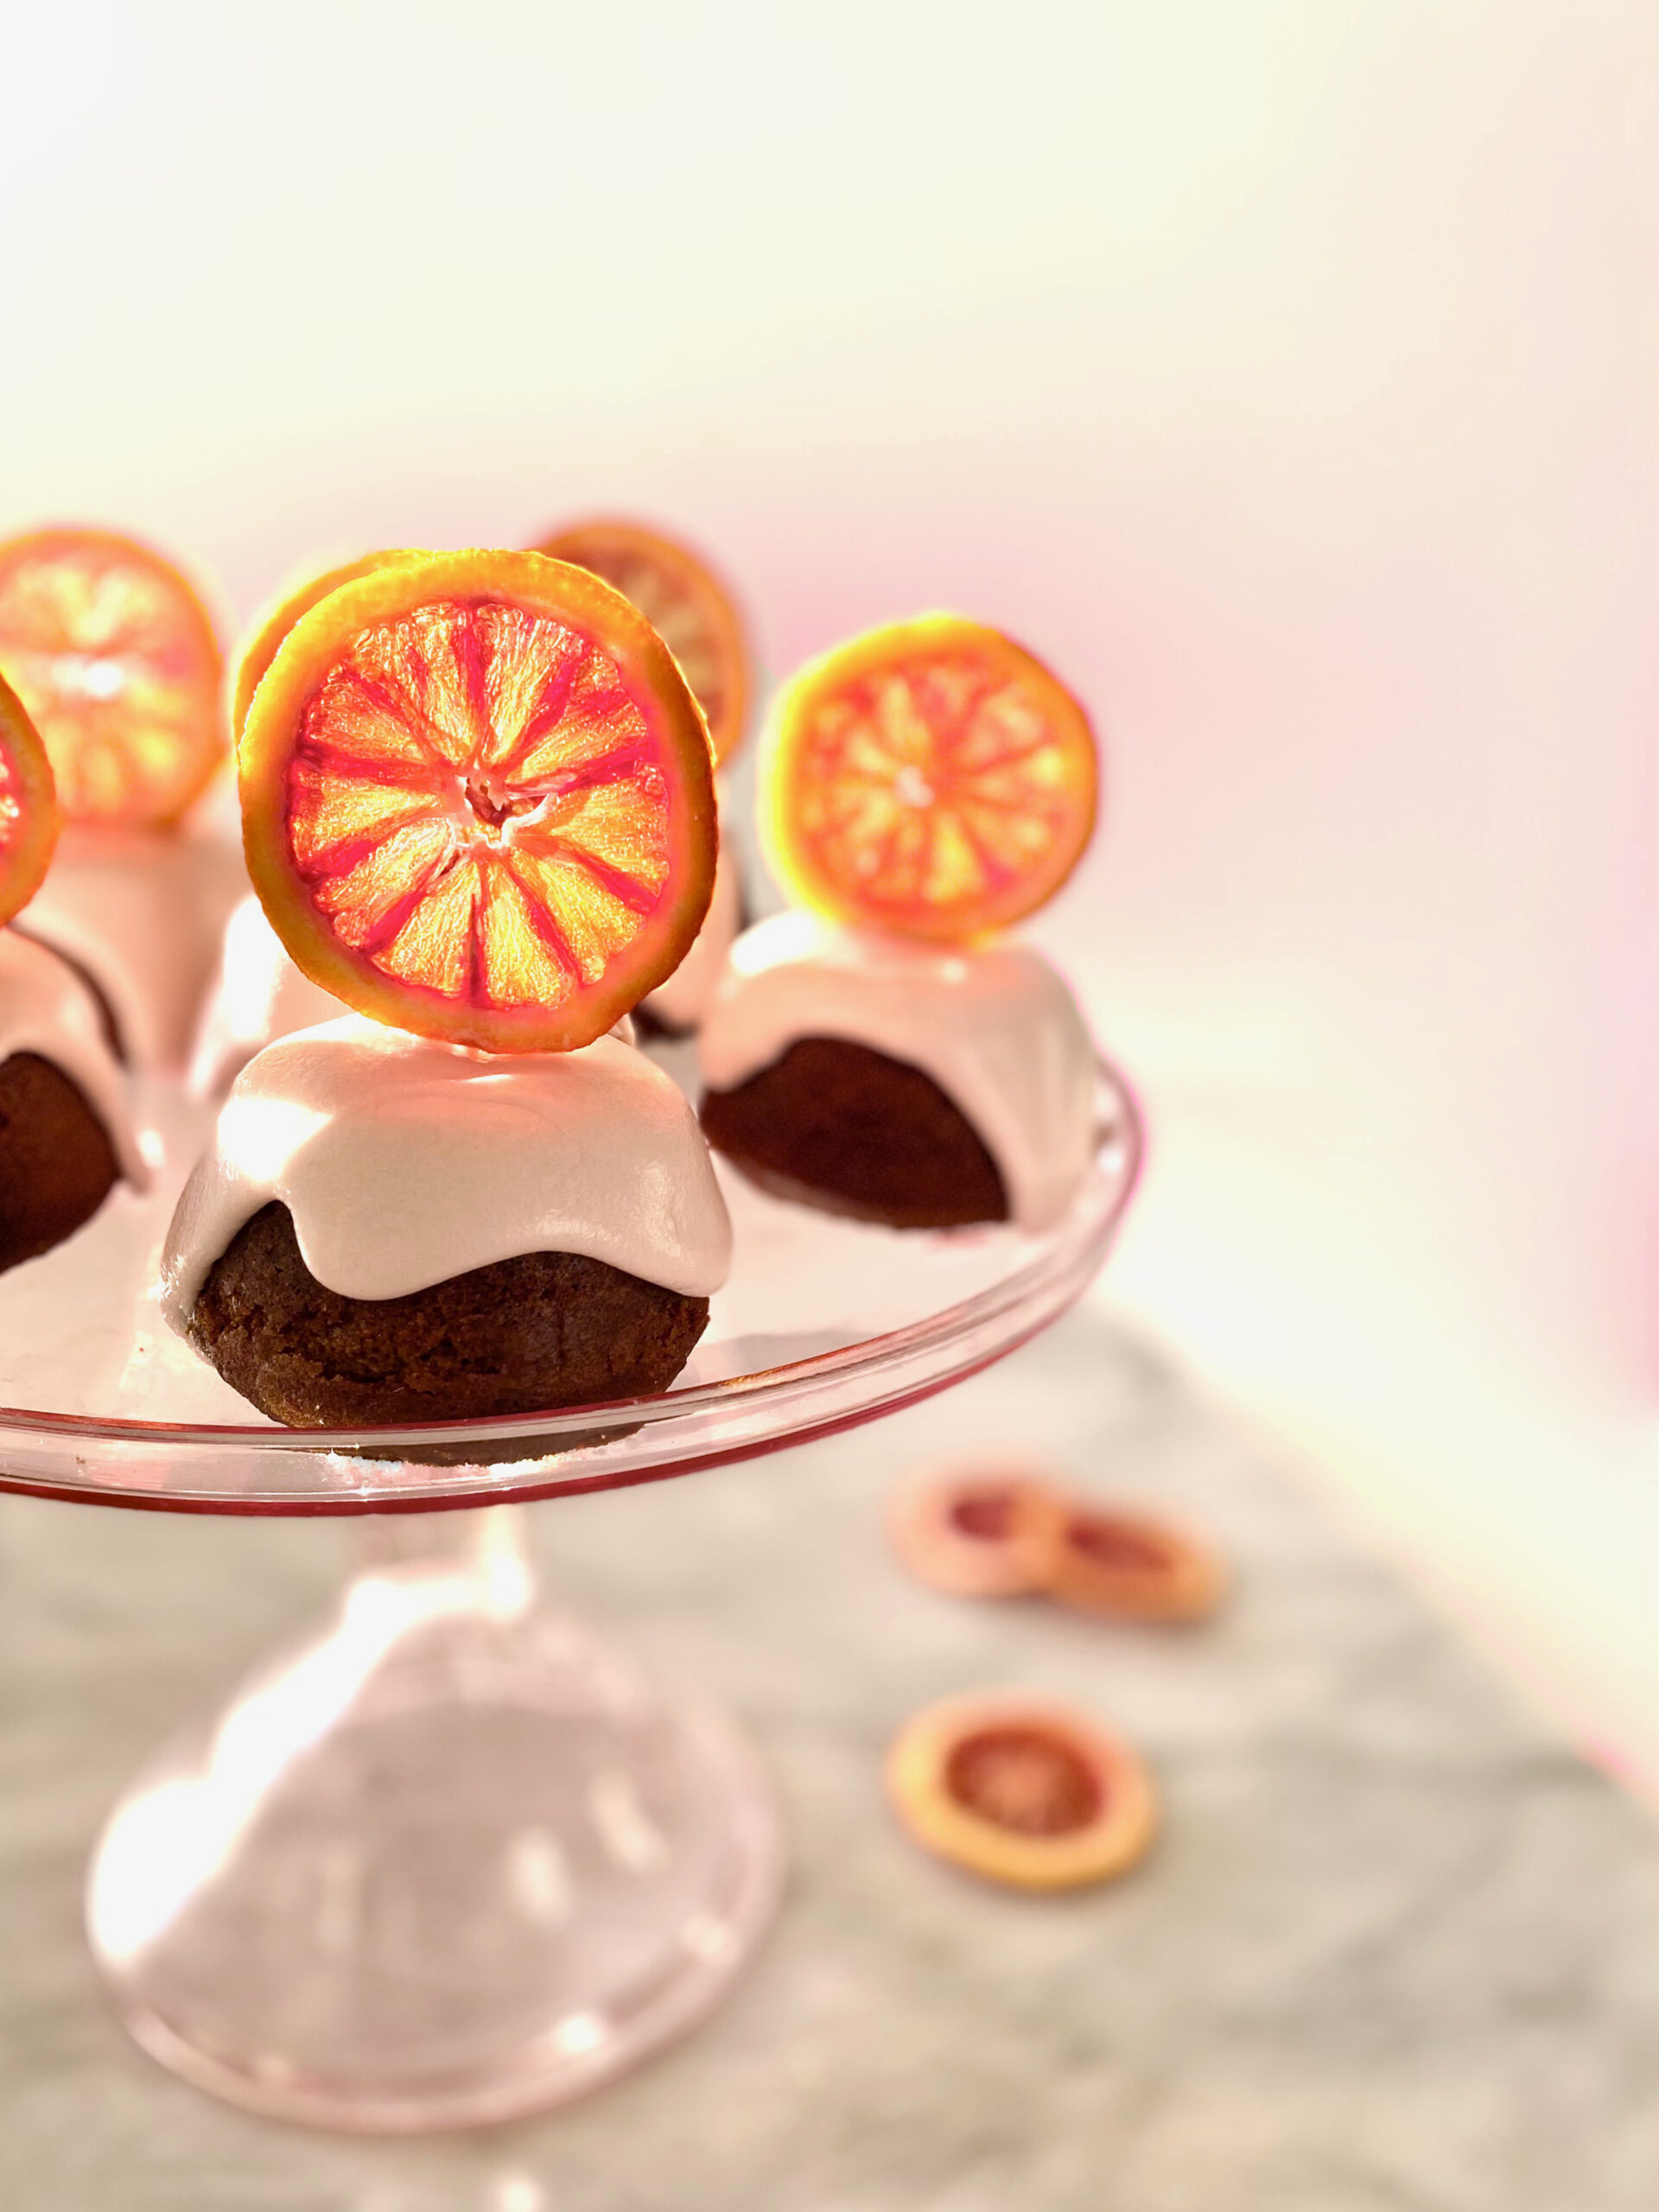
Gingerbread Cupcakes with Blood Orange Cream Cheese Icing and Candied Blood Orange Slices

Gingerbread Cupcakes with Blood Orange Cream Cheese Icing and Candied Blood Oranges

Every winter, when blood oranges come back in season, I start keeping an eye out for them at grocery stores and farmers markets. This year was different. I’ve been at home, having my groceries delivered instead of perusing the local produce aisles. If you’ve been entrusting strangers to do your shopping like I have, then you know delivery produce selections are hit and miss. So I was elated when a bag of perfectly beautiful, ripe blood oranges landed on my doorstep. This simple joy made my day. There was no choice. I had to make something worthy of the gorgeous red beauties!

I didn’t get enough of gingerbread this holiday season, so I decided to make a gingerbread cupcake recipe that I created a few years ago when I was experimenting with blood oranges. I used blood orange zest in the cupcake batter and brushed the warm cupcakes with the blood orange syrup left over from making the candied oranges. If you don’t make the candied oranges, you can easily make a batch of the syrup* or skip this step altogether. They will still be delicious. I topped the cupcakes with cream cheese icing made with more orange zest and some blood orange juice mixed in. The juice makes the icing turns a soft shade of pink.

Gingerbread Cupcakes with Blood Orange Cream Cheese Icing and Candied Blood Oranges

Candied blood orange slices are so stunning, that I can’t bring myself to just lay them on top of a dessert. They remind me of stained glass windows. I like to place them on toothpicks so they can stand up in regal style! Many recipes out there will instruct you to boil the orange slices, then let them air dry. This is perfectly fine if you don’t mind floppy candied oranges. For this recipe, boiling the slices, then letting them dry in the oven on low heat will give them enough stiffness to stand up.

If you can’t find blood oranges where you live, here’s a link to get blood oranges shipped to you. This recipe will also work with other types of oranges. You won’t get the deep scarlet color and the flavor will have a bit more tartness, but it will still be beautiful and delicious!

Print Recipe
Gingerbread Cupcakes with Blood Orange Cream Cheese Icing
Servings
12-14 cupcakes
Ingredients
Gingerbread Cupcakes
Blood Orange Cream Cheese Icing
Candied Blood Orange Slices
Servings
12-14 cupcakes
Ingredients
Gingerbread Cupcakes
Blood Orange Cream Cheese Icing
Candied Blood Orange Slices
Instructions
Gingerbread Cupcakes
  1. Preheat oven to 350º. Spray the wells of a muffin tin with non-stick spray.
  2. In a medium bowl, whisk together flour, cinnamon, ginger, allspice, baking soda and salt. Set aside.
  3. In a large bowl, beat butter with an electric mixer at medium speed, until smooth.
  4. Add brown sugar and orange zest and beat until light and fluffy.
  5. Add molasses and beat until combined.
  6. Add eggs one at a time and beat until combined.
  7. Mix in dry ingredients in two additions, alternating with buttermilk. Beat just until combined.
  8. Scoop the batter into prepared muffin tin, filling wells 2/3 full. (If you have any remaining batter, prepare an additional muffin tin.)
  9. Bake for 15-18 minutes until toothpick inserted in center of cupcake comes out clean.
  10. Allow to cool in pan 10 minutes, then remove cupcakes from pan.
  11. Place cupcakes upside down on cooling rack and brush generously with orange simple syrup. Allow cupcakes to cool completely before frosting.
Blood Orange Cream Cheese Icing
  1. In a large bowl, beat cream cheese at medium speed, until smooth.
  2. Add butter, orange zest and salt and beat until combined.
  3. Add powdered sugar. Beat at low speed until powdered sugar is incorporated. Increase speed to medium and beat until smooth.
  4. Add blood orange juice and beat, one tablespoon at a time until desired consistency is reached.
Candied Blood Orange Slices
  1. Slice oranges into thin 1/4 inch slices.
  2. Combine sugar and water in a shallow saucepan and bring to a simmer.
  3. Add orange slices to saucepan. Simmer for 10 minutes.
  4. Drain oranges, reserving syrup.
  5. Heat oven to 175ºF. Place on a large baking sheet lined with a baking mat in a single layer and bake until orange slices begin to stiffen, about 2 hours.
  6. Remove from oven and let cool on baking sheet. If desired, insert toothpicks when slices are cool enough to handle. The slices will continue to stiffen as they cool.
Recipe Notes

*To make orange simple syrup,  combine the juice of one orange with enough water to make 1/2 cup. Combine mixture with the zest of one orange and 1/2 cup sugar in a small saucepan over medium heat. Stir until sugar is dissolved. Let cool and transfer to a glass container. Refrigerate until ready to use.

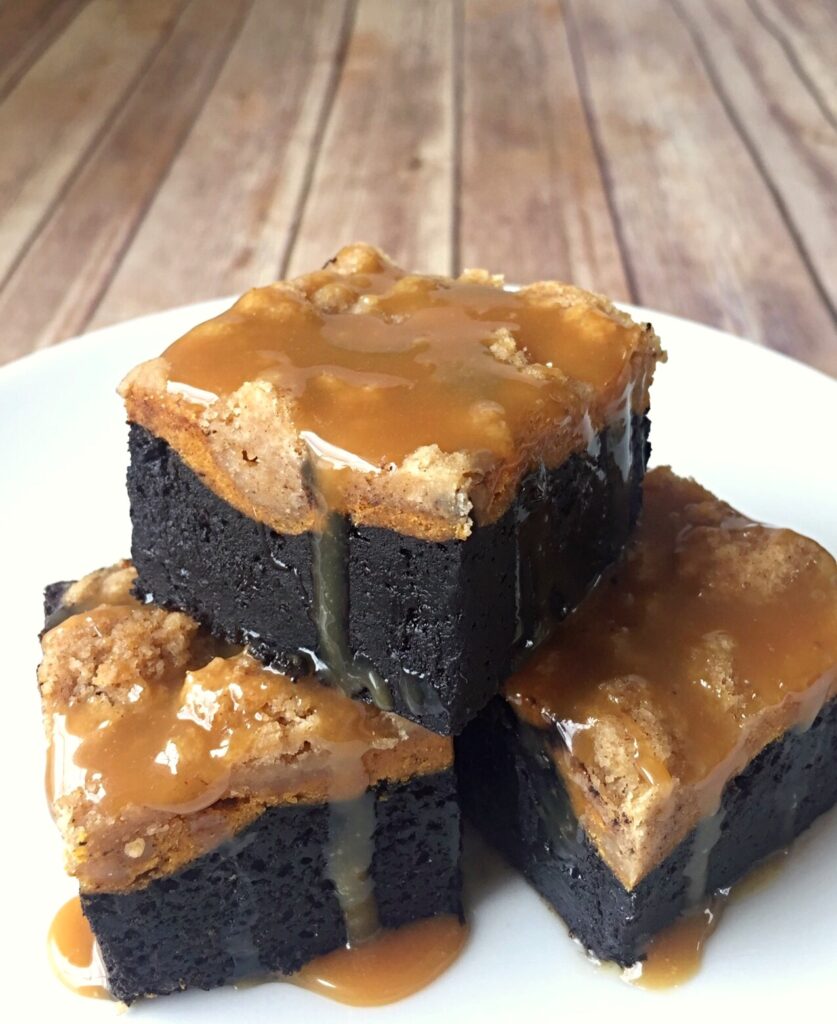
Pumpkin Cheesecake Crumble Brownies

pumpkin cheesecake crumble brownies

It’s Fall 2020. We need chocolate! We need pumpkin spice! And we need it drenched with caramel! These satisfying brownies check all of the boxes with multiple layers of comfort. A rich chocolate brownie is the base. The next layer is heavenly pumpkin cheesecake. The topping is a buttery crumble that rivals the best crumb cake. Finally, as if that isn’t enough, it’s drizzled with caramel sauce!

If it sounds complicated, don’t worry, it’s not. Each layer is super easy to make. You can use your favorite store bought caramel sauce to top it with. Vanilla ice cream and/or whipped cream are optional, but highly recommended toppings also. Just saying.

The layers go unexpectedly well together and make the perfect dessert for Halloween or Thanksgiving. I’m even going to add these beauties to my Christmas dessert table this year. Enjoy! You deserve it.

Print Recipe
Pumpkin Cheesecake Crumble Brownies
Chocolate brownies with pumpkin cheesecake and crumb topping, topped with caramel sauce.
Course Dessert
Servings
Ingredients
Crumb Topping
Pumpkin Cheesecake Layer
Brownie Layer
Course Dessert
Servings
Ingredients
Crumb Topping
Pumpkin Cheesecake Layer
Brownie Layer
Instructions
Crumb Topping
  1. In a medium bowl, combine flour, brown sugar, cinnamon and salt.
  2. Cut in butter using a pastry blender or your fingers until well-combined and crumbles are pea-sized. Press crumbles together to make large quarter-sized chunks.
  3. Set aside in refrigerator.
Pumpkin Cheesecake Layer
  1. Preheat oven to 350º. Line a 9-inch square baking pan with parchment paper.
  2. In a medium bowl, beat cream cheese with an electric mixer until smooth.
  3. Add pumpkin, eggs, sugar, cinnamon, ginger and nutmeg and beat until well combined. Set aside.
Brownie Layer
  1. Melt 1 stick of butter in a large microwaveable bowl.
  2. Stir in sugar until combined
  3. Stir in cocoa powder, vanilla, baking powder and salt.
  4. Add the eggs and beat until smooth
  5. Add the flour and mix until just combined.
  6. Spread brownie batter into prepared baking pan. Smooth with a spatula.
  7. Spread pumpkin cheesecake batter over the top of brownie batter. Smooth with a spatula.
  8. Sprinkle crumb topping evenly over the top of pumpkin cheesecake layer.
  9. Bake for 40-50 minutes until a toothpick inserted into pumpkin cheesecake layer comes out clean.
  10. Let cool completely. Cut into squares and serve with caramel sauce.