Fudge Filled Chocolate Crinkle Cookies

Fudge Filled Chocolate Crinkle Cookies

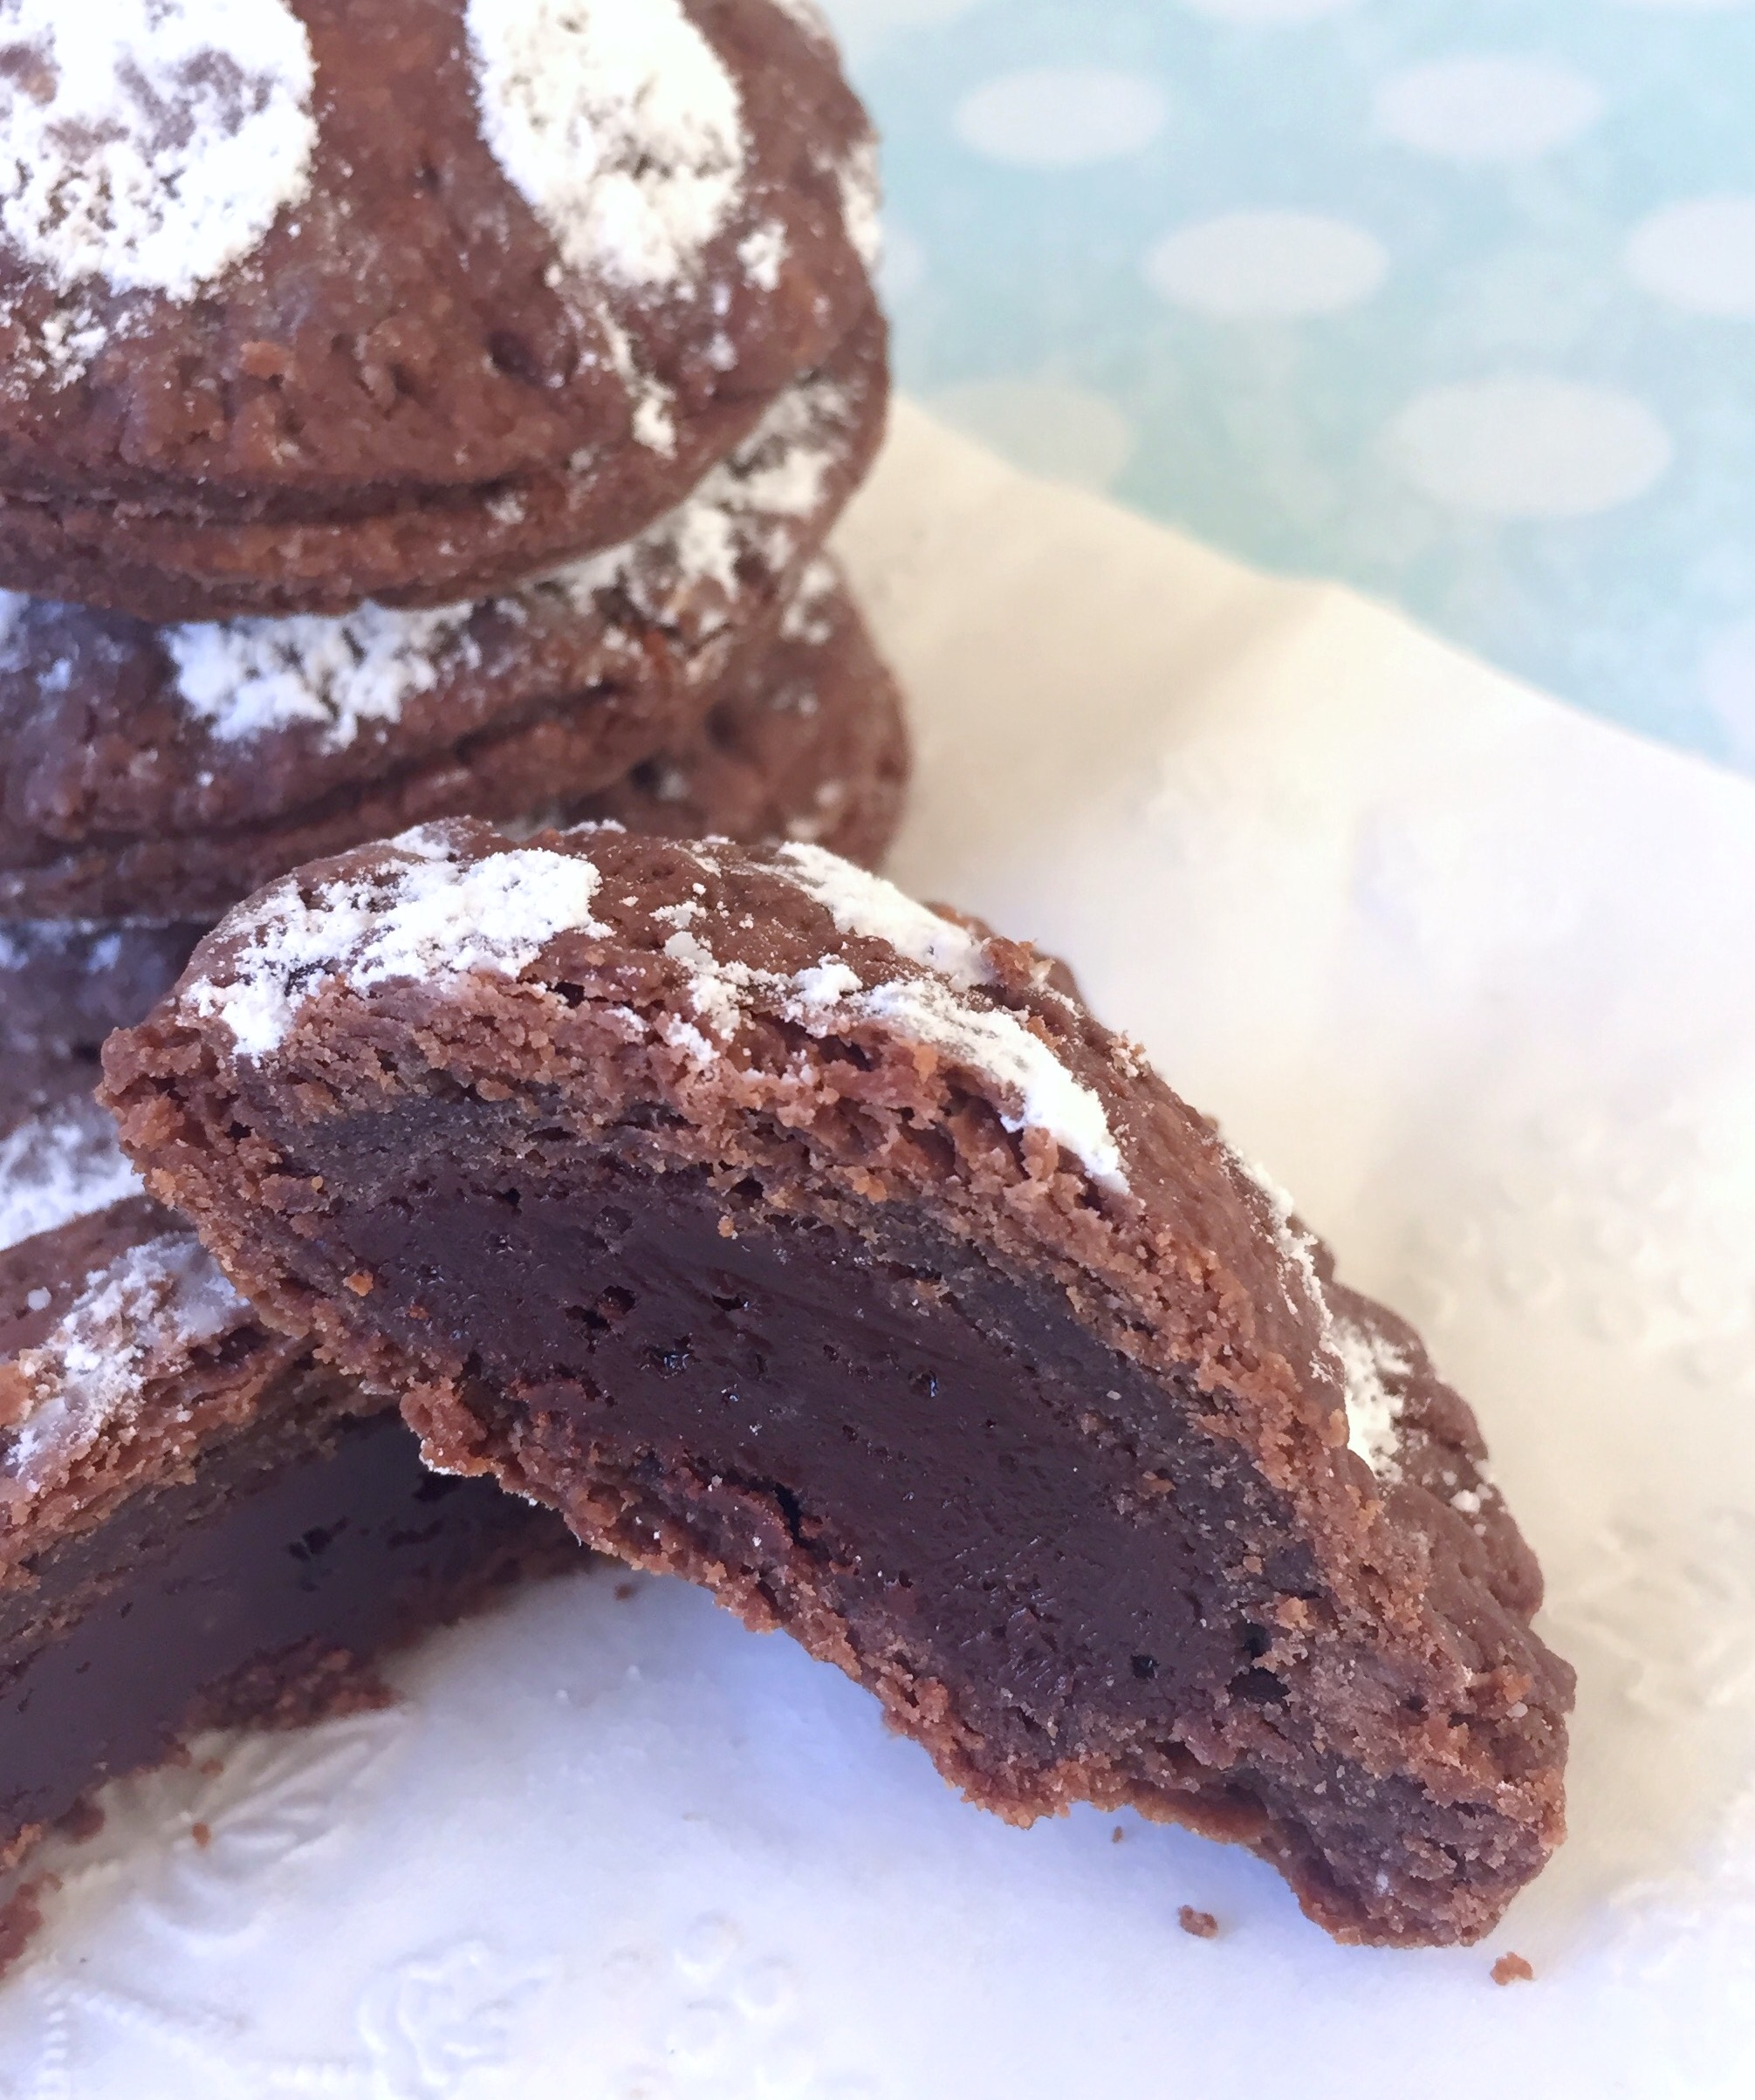
Chocolate Crinkle Cookies are traditional holiday cookies, probably because of the pretty, crackly powdered sugar covered exterior that reminds us of snow. They always seem to show up on cookie trays at Christmas time and I’ve loved them since I was a child. I decided to take my old favorites to another level by adding a surprise inside! Two years ago, I made some cookies with fudge filling that my family and friends raved over. They’re my Marshmallow Mudslide Cookies. To view the recipe, click here. I used the same concept for these Chocolate Crinkle Cookies. I filled them with a simple, smooth fudge filling that stays soft at room temperature. The results were absolutely delicious!

Print Recipe
Fudge Filled Chocolate Crinkle Cookies
Chocolate crinkle cookies with a smooth fudge filling that stays soft at room temperature
Course Dessert
Keyword chocolate, cookies
Servings
cookies
Ingredients
Fudge Filling
Chocolate Crinkle Cookies
Course Dessert
Keyword chocolate, cookies
Servings
cookies
Ingredients
Fudge Filling
Chocolate Crinkle Cookies
Instructions
Fudge Filling
  1. In a double boiler or in the microwave*, melt chocolate chips and sweetened condensed milk together until smooth. Set aside to cool while preparing cookie dough.
  2. Cover and refrigerate for two hours. Roll filling into 1-inch balls.
Chocolate Crinkle Cookies
  1. In a medium bowl, whisk together flour, cocoa powder, baking powder and salt.
  2. In a large bowl, beat butter with an electric mixer until light and fluffy.
  3. Gradually beat in 2 cups (7 3/4 ounces) of powdered sugar until well combined. Set aside remaining 1/2 cup powdered sugar in a shallow dish.
  4. Beat in eggs and vanilla in three separate additions, until smooth. Stop to scrape bowl as needed.
  5. Beat in melted chocolate until combined. Beat in flour mixture just until combined.
  6. Cover and refrigerate dough for 2 hours. Don't skip this step.
  7. Preheat oven to 350ºF. Line two large baking sheets with parchment paper.
  8. Roll dough into 15 2-inch balls, 1 1/4 ounce each. Flatten each ball into a 3-inch disk. Place a fudge ball in the center of each disk and wrap dough around it, pinching edges together to seal. Roll dough balls generously in remaining powdered sugar.
  9. Place dough balls three inches apart on prepared baking sheets. Bake until cookies puff up and tops are set, about 11-13 minutes. Transfer cookies to a cooling rack.
Recipe Notes

*To melt fudge filling in microwave, heat for 30 seconds. Stir, then microwave for 10 second intervals, stirring until melted.

MAKE AHEAD INSTRUCTIONS: To make cookie dough one day ahead, prepare cookie dough. Cover the surface with plastic wrap and refrigerate in a covered container up to 24 hours. To make fudge filling one day ahead, prepare filling and chill for 1 1/2 to 2 hours. Roll filling into 1-inch balls and place on a parchment lined tray. Cover tightly with plastic wrap and refrigerate up to 24 hours. 

Marshmallow Mudslide Cookies

marshmallow mudslide cookies

Have you ever had mudslide cake? It’s a deliciously messy chocolate cake with chocolate frosting and marshmallows, also known as Mississippi mud cake. I saw one covered in a layer of marshmallow fluff and it made its way into my dreams. I woke up with the inspiration to make a cookie version of the gooey mudslide cake.

I saw a few mudslide cookie recipes out there that used standard size marshmallows and chocolate chips mixed into the cookie dough. If you’ve ever baked with marshmallows, you know that they nearly disappear during the baking process. Chocolate chips melt beautifully into little pools of chocolate, but then harden once cooled to room temperature. I happily volunteered to address these challenges! After some trial and error, I created a satisfying cookie with plenty of gooey marshmallow goodness and a rich fudge filling that stays soft at room temperature. Dreams do come true!

marshmallow mudslide cookies

Print Recipe
Marshmallow Mudslide Cookies
Chocolate fudge-filled cookies topped with toasted marshmallows
Course Dessert
Keyword chocolate, cookies
Servings
cookies
Ingredients
Fudge filling
Cookies
Course Dessert
Keyword chocolate, cookies
Servings
cookies
Ingredients
Fudge filling
Cookies
Instructions
Fudge filling
  1. Melt chocolate chips and sweetened condensed milk together in a double boiler or in the **microwave in a medium microwave safe bowl.
  2. Stir in chopped nuts. Set aside to cool to room temperature.
Cookies
  1. Heat oven to 350º.
  2. In a medium bowl, sift together flour, cocoa powder, baking powder, baking soda, and salt. Set aside.
  3. In a large bowl, cream butter with an electric mixer.
  4. Add granulated sugar and brown sugar and mix on medium speed until light and fluffy.
  5. Add eggs one at a time and mix until well combined.
  6. Add vanilla and mix until combined.
  7. Add dry ingredients in two increments, mixing just until combined.
  8. Roll fudge filling into tablespoon sized balls
  9. Roll cookie dough into 1/8 cup balls then flatten into a disc with your fingers and place a ball of fudge filling in the middle of each disc. Wrap the cookie dough around the ball of filling, sealing it completely.
  10. Place cookies about 2 inches apart on large baking sheets.
  11. Bake for 10 minutes. Remove from oven.
  12. Turn on broiler.
  13. Place a marshmallow on top of each cookie.
  14. Broil cookies until marshmallows are toasted. This takes about 1 minute. CAUTION Watch cookies carefully when broiling! They can go from done to burnt in the blink of an eye!
Recipe Notes

*I used Kraft Jet-Puffed S'moreMallows, but if you're unable to find them, use jumbo marshmallows. Cut them in half lengthwise with kitchen shears. Place on cookies cut side down.

**To melt fudge filling in microwave, heat for 30 seconds. Stir, then microwave for 10 second intervals, stirring until melted.

Mini Chocolate Hand Pies for Pi Day

Mini Chocolate Hand Pies by Brownie Mischief

Pi Day is a day to celebrate mathematics, or more specifically, the ratio of a circle’s circumference to it’s diameter. While I do appreciate math for it’s precision, I also feel a bit peeved at math for making my brain hurt! Ok, I’m sorry math. I forgive you. I do need you! How would I bake without you? So today I will celebrate math (and also my love for puns) with these tender, fudgy mini hand pies!

Mini Chocolate Hand Pies by Brownie Mischief

Since pi is all about circles, I used a 2 3/4-inch circle cutter to make round pies, but you can cut them into any shape you like. You could cut larger circles, fold them in half and call them empanadas. Rectangles are very popular with Pop Tart fans and you don’t need a special cutter, but a ruler would be helpful. I think squares would be cute, too! Whatever your shape of choice, my buddy math can hook you up!

I used a stencil to add some powdered sugar polka dots to my mini pies. I may have gone a little overboard with my circles, but who’s going to stop me? I think they look pretty cute, but If you don’t have a stencil, a sprinkle or two of powdered sugar will do just fine! Alternately, you could drizzle them with some melted white chocolate. I had a bit of white chocolate on hand, so I can confidently say, that version is yummy too!


Print Recipe


Mini Chocolate Hand Pies

Mini chocolate pies with fudgy filling and a tender chocolate crust.

Course Dessert

Prep Time 45 minutes
Cook Time 25 minutes
Passive Time 1 1/2 hours

Servings


Ingredients
Crust

Filling

Finishing Touches

Course Dessert

Prep Time 45 minutes
Cook Time 25 minutes
Passive Time 1 1/2 hours

Servings


Ingredients
Crust

Filling

Finishing Touches


Instructions
Crust
  1. In a large bowl, sift together the flour, cocoa powder, sugar, salt and baking powder.

  2. Use a pastry cutter or your fingers to work the butter and cream cheese into the flour mixture until it resembles pea-sized crumbs.

  3. Add 2 tablespoons of the cold water to the mixture. Stir gently just until the dough comes together.

  4. Turn the dough out onto a lightly floured surface. Fold the dough over onto itself a couple of times. Form the dough into a disk. Cover with plastic wrap and chill for at least 1 hour.

Filling
  1. In a small microwavable bowl, melt the chocolate chips and sweetened condensed milk in the microwave. Heat for 10 second intervals, stirring until smooth.

  2. Set aside to cool to room temperature.

Assembly
  1. Preheat the oven to 375ºF. Line a large baking sheet with parchment paper.

  2. In a small bowl, whisk together the egg and remaining 1 tablespoon water.

  3. On lightly floured surface, roll the dough to 1/8-inch thickness.

  4. Cut out 20 rounds with a 2 3/4-inch circle cutter (or cut into desired shapes of your choice).

  5. Place 10 dough rounds about 1 inch apart onto prepared baking sheet. Top each with 1 tablespoon of filling.
    Mini Chocolate Hand Pies

  6. With a small pastry brush or your finger, brush egg mixture around the perimeter of each of the filled dough circles.

  7. Top each with the 10 remaining dough circles. Crimp the edges together with a fork. Brush the pies with the remaining egg mixture.
    Mini Chocolate Hand Pies

  8. Bake until the crust is crisp and browned, about 15-20 minutes.

  9. Transfer to a cooling rack. Sprinkle the cooled pies with powdered sugar or drizzle with melted white chocolate.
    Mini Chocolate Hand Pies


Recipe Notes

*The chocolate chips you use depends on personal preference. Bittersweet chocolate chips give a more intense chocolate flavor, while semi-sweet chocolate chips yield a slightly sweeter finished product.

To find my favorite circle cutters click here.                                                                                  To find the polka-dot stencil click here.