Pink Lemonade Cookie Bars

Pink Lemonade Cookie Bars

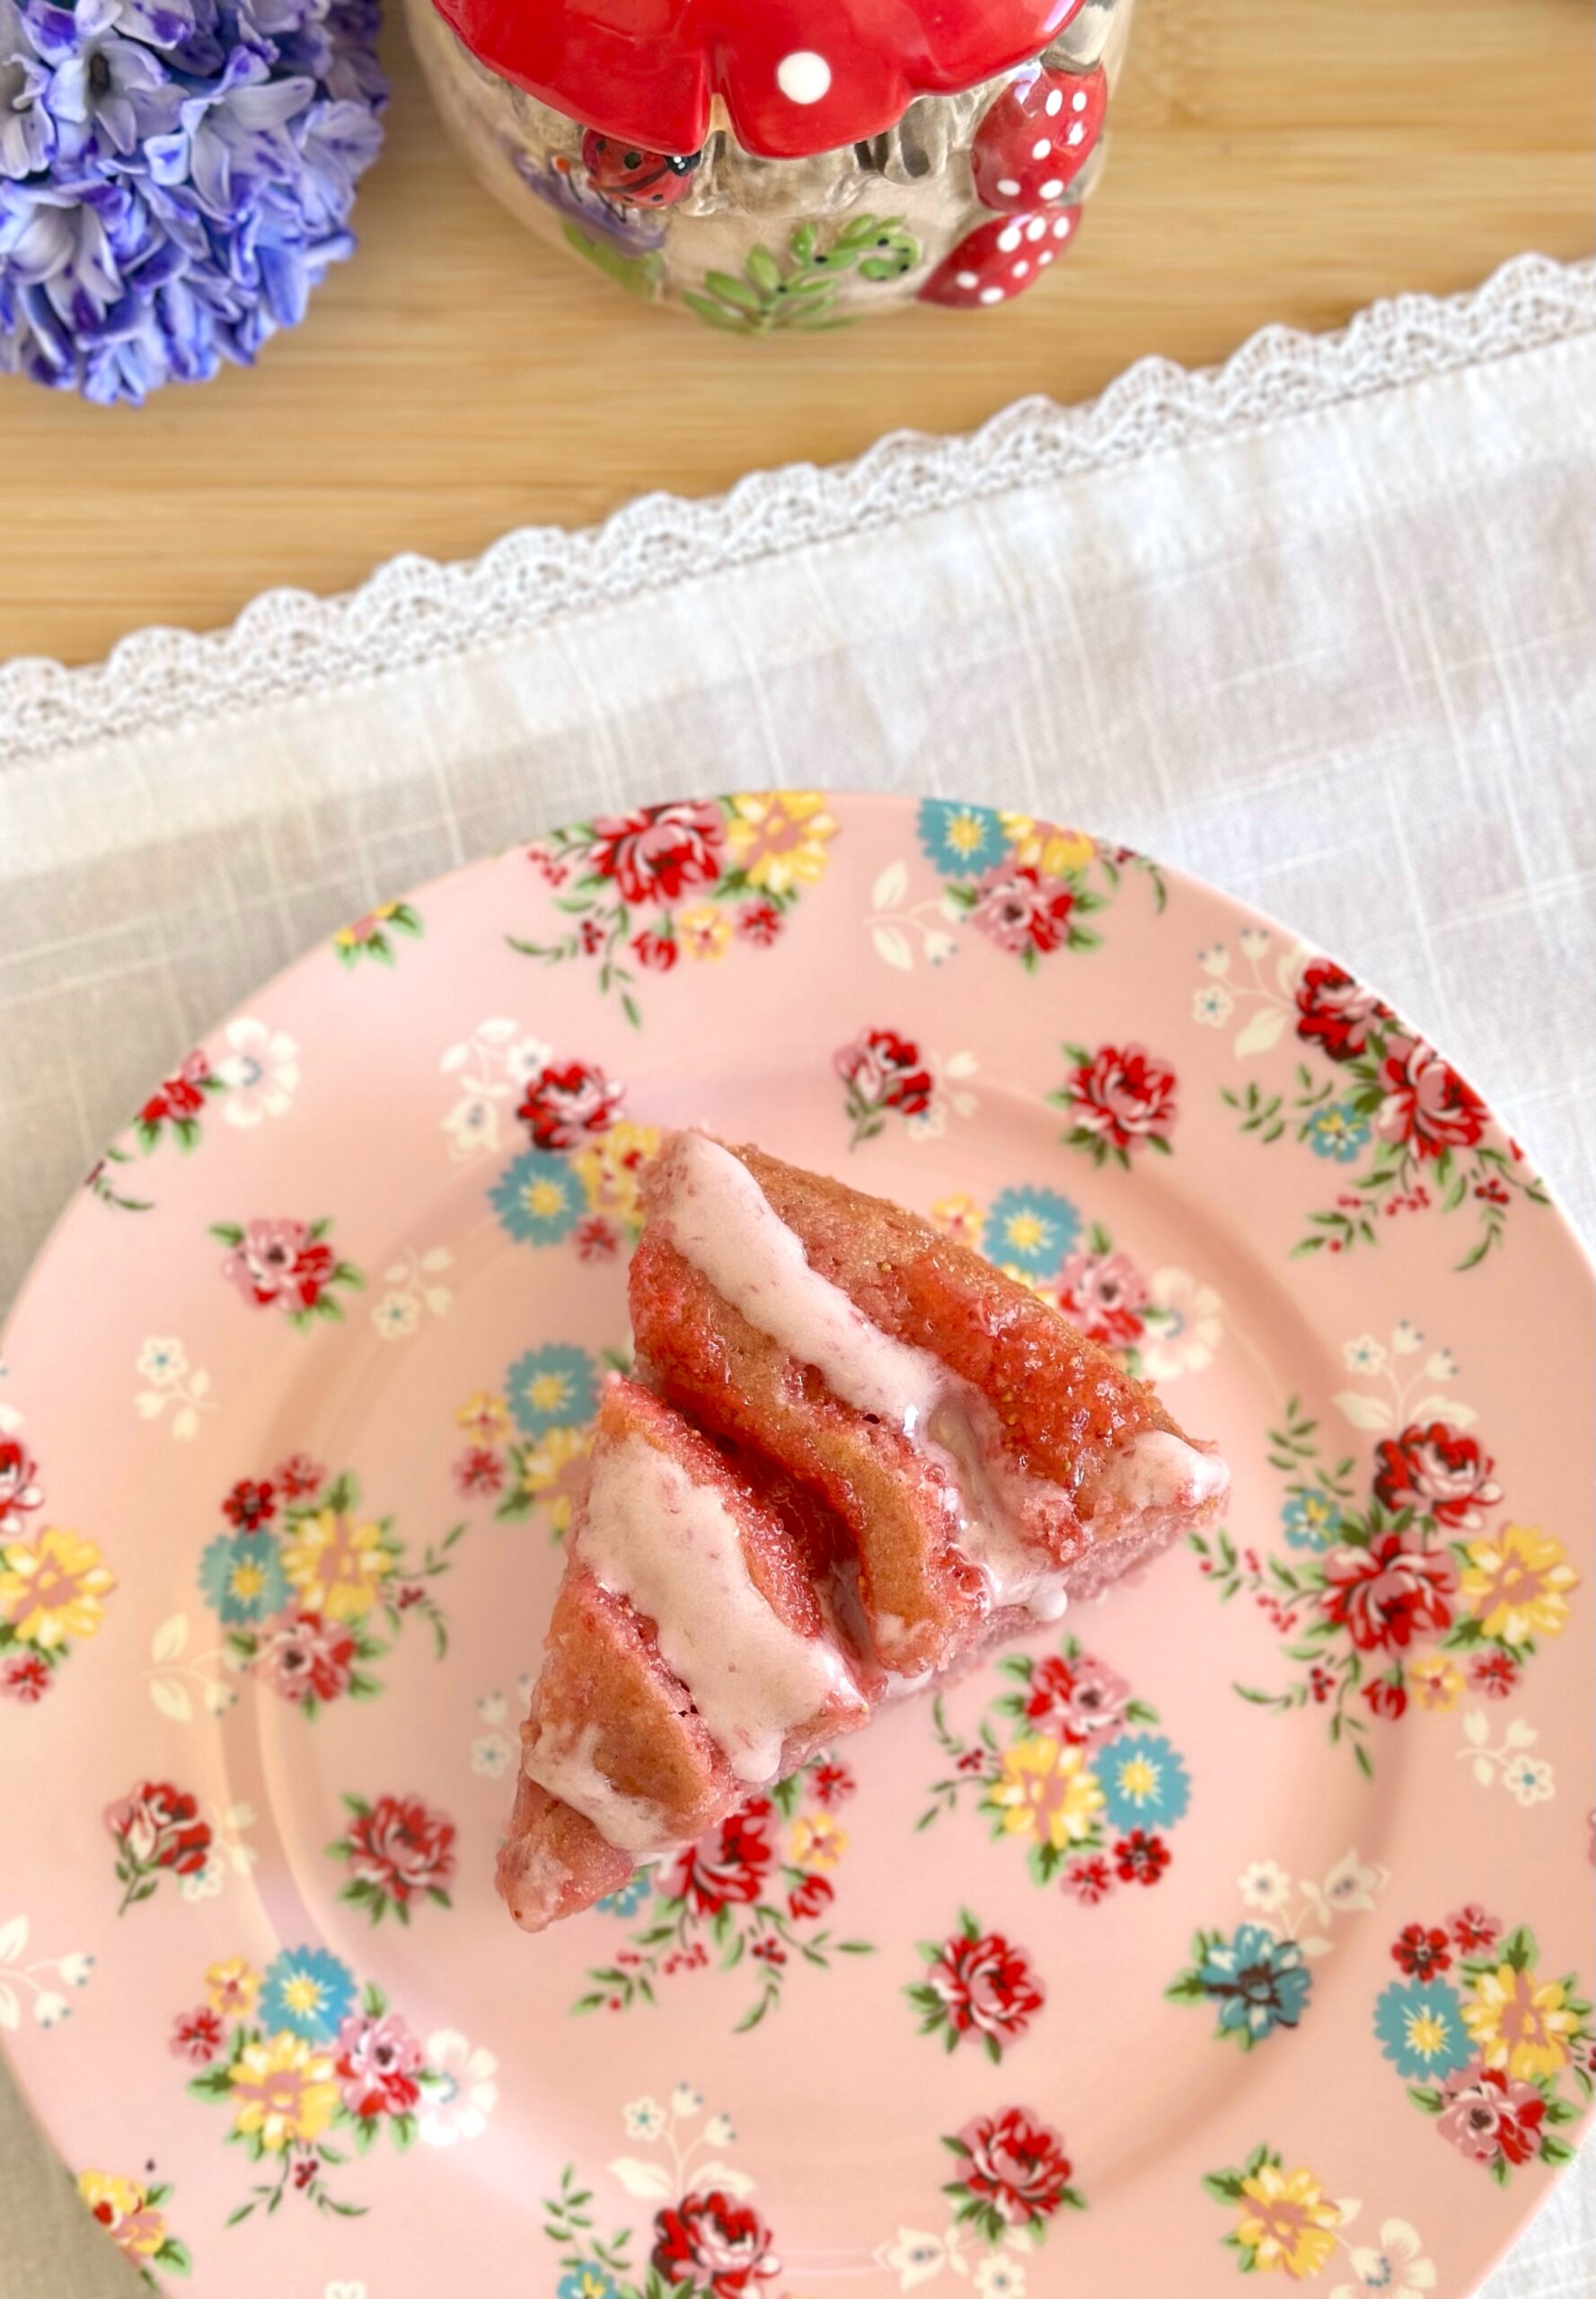
These cheerful Pink Lemonade Cookie Bars are sweet, summery and nostalgic. They remind me of the pink lemonade cake my elderly neighbor used to make. She shared her recipe when I was about 10 years old. It was so easy and it was one of the first things I baked on my own. These cookie bars have that same delicious, vibrant flavor, but in the form of a soft, tender cookie and they’re just as easy to make.

Print Recipe
Pink Lemonade Cookie Bars
Soft, lemony cookie bars topped with silky, smooth pink lemonade frosting and pink sprinkles
Servings
2-inch bars
Ingredients
Frosting
Servings
2-inch bars
Ingredients
Frosting
Instructions
Frosting
  1. In a medium bowl, beat the butter and cream cheese together just until smooth and combined. Add the powdered sugar, lemon juice, cherry extract and salt. Beat until smooth. Mix in the food coloring a little at a time, with the tip of a toothpick, until your desired shade of pink is achieved.
Recipe Notes

*To find the pink gel food coloring I used, click here.

Raspberry White Chocolate Cookies

Raspberry White Chocolate Cookies

These cookies were inspired by my viral Raspberry White Chocolate Scones. The flavors work so well together and the pretty pink sparkling sugar adds a nice crunchy texture, so I thought they would make excellent cookies too. And I was right! These cookies are everything I was dreaming about. In the scones, fresh raspberries were added directly into the dough. In this recipe, instead, I made a quick raspberry jam to fold into the cookies. Make sure to fold it in gently because if you over mix it, the dough will become too wet, which can lead to excess spreading. I also broke the chocolate into pieces, rather than chopping it. Chopping the chocolate makes too many small chards of chocolate which can also cause excess spreading.

Print Recipe
Raspberry White Chocolate Cookies
Cookies with white chocolate pieces and fresh raspberry jam swirled into the dough and topped with pink sparkling sugar
Servings
cookies
Ingredients
Servings
cookies
Ingredients
Instructions
  1. Set aside 1/2 cup of raspberries. In a small saucepan over medium heat, combine the remaining 1 cup of raspberries with 2 tablespoons of sugar, the lemon juice and the cornstarch. Bring to a boil, stirring occasionally. Boil for 1 minute, then turn the heat down to low and simmer until thickened to a jam consistency, about 4-6 minutes. Stir in the reserved raspberries. Transfer the mixture to a bowl and set aside to cool to room temprature.
  2. Preheat the oven to 350ºF (180ºC). Line two large cookie sheets with parchment paper.
  3. In a medium bowl, whisk together the all purpose flour, the cake flour, salt and baking soda until well combined.
  4. In a large bowl, beat the butter, the remains 3/4 cup of sugar, and the brown sugar, with an electric mixer at medium speed, until light and fluffy. Beat in the egg and the egg yolk in two separate additions until well incorporated. Beat in the extracts.
  5. Mix the flour mixture into the batter, just until combined. Stir in the white chocolate pieces. Fold in the cooled raspberry mixture very gently. Do not over mix! You want to see raspberry swirls. Over mixing will change the texture of the cookies.
  6. Place 2-tablespoon size portions of cookie dough about 3 inches apart onto the prepare cookie sheets. I used a #30 portion scoop.* Top each cookie with a piece of white chocolate and sprinkle with coarse sugar. Bake until the tops of the cookies are set and the edges turn light golden brown, about 10-14 minutes. Transfer to a cooling rack.
Recipe Notes

If your cookies spread too much, you can try refrigerating the dough balls for 10-15 minutes before baking. Don't refrigerate the dough longer or your dough may become discolored. For best results, weigh your ingredients.

*To find the portion scoop I used, click here.  

Deluxe Cinnamon Swirl Bread

This dreamy Cinnamon Swirl Bread is a perfectly soft, tender loaf with two layers of brown sugar cinnamon. It was already delicious on its own, but I’m sure Grandma wouldn’t mind that I upgraded it with a generous amount of crumb topping and a drizzle of cream cheese icing. This versatile loaf is enjoyable year round. During spring, it’s delightful served with a cup of blueberry tea. On summer mornings, it’s perfect with a glass of peach iced tea. And of course, during fall and winter, this comforting loaf is cozy served with a mug of hot coffee or cocoa.

To watch the Instagram video, click here.

Print Recipe
Deluxe Cinnamon Swirl Bread
Soft, tender vanilla loaf cake with two layers of brown sugar-cinnamon swirl, topped with crumb topping and cream cheese icing
Course Breakfast, Brunch
Keyword cinnamon swirl, loaf
Servings
loaf
Ingredients
Crumb Topping
Cinnamon Swirl Bread
Cream Cheese Icing
Course Breakfast, Brunch
Keyword cinnamon swirl, loaf
Servings
loaf
Ingredients
Crumb Topping
Cinnamon Swirl Bread
Cream Cheese Icing
Instructions
Crumb Topping
  1. In a medium bowl, stir together the flour, brown sugar, sugar, cinnamon and salt until well combined. With your fingertips, work the butter into the flour mixture until it looks like wet sand with no large pieces of butter. Press the mixture together to form chunks. Set aside in the refrigerator until ready to use.
Cinnamon Swirl Bread
  1. Preheat the oven to 350ºF (180ºC). Line a 9 x 5-inch loaf pan with parchment paper.
  2. In medium bowl, stir together 1/2 cup (100g) of brown sugar and the cinnamon until well combined. Set aside.
  3. In a separate medium bowl, whisk together the flour, baking powder, baking soda and salt until well combined.
  4. In a large bowl, beat the butter, granulated sugar and the remaining 1/4 cup (50g) of brown sugar, with an electric mixer at medium speed, until light and fluffy. Beat in the eggs one at a time, making sure each one is fully incorporated. Beat in the vanilla extract.
  5. In a small bowl or a glass measuring cup, whisk the milk and sour cream together. On low speed, beat the flour mixture into the batter in two additions, followed by half of the milk mixture after each addition. Mix just until combined.
  6. Transfer half of the batter to the prepared loaf pan. Sprinkle half of the brown sugar-cinnamon mixture over the batter. Swirl with a skewer. Add the remaining batter and repeat with the remaining brown sugar-cinnamon mixture. Sprinkle the crumb topping on evenly.
  7. Bake until a toothpick inserted into the center of the loaf comes out clean, about 50-60 minutes. (The toothpick may have some brown sugar or crumb topping on it, but not wet batter.) Let the loaf cool in the pan for 10 minutes, then transfer it to a cooling rack.
Cream Cheese Icing
  1. In a small bowl, whisk together the cream cheese, butter, powdered sugar, vanilla extract, salt and 1 tablespoon (30ml) of milk until smooth. Whisk in additional milk if needed to achieve your desired consistency. Drizzle the icing over the cooled loaf.
Recipe Notes

*To find my favorite cinnamon, click here.

Strawberry Swirl Cake

Strawberry Swirl Cake

This soft, incredibly moist cake is a happy experiment that successfully combines my favorite strawberry cake with cinnamon roll cake. Instead of cinnamon sugar, it has a swirl of strawberry sugar. It’s bursting with fresh strawberry flavor and it’s so good it doesn’t even need frosting. But of course, I added strawberry cream cheese icing, in the tradition of cinnamon roll cake, which takes it over the top.

Print Recipe
Strawberry Swirl Cake
Fresh strawberry cake with a strawberry sugar swirl and strawberry cream cheese icing
Course Dessert
Keyword cake, strawberry
Servings
servings
Ingredients
Strawberry Swirl
Strawberry Cake
Strawberry Cream Cheese Icing
Course Dessert
Keyword cake, strawberry
Servings
servings
Ingredients
Strawberry Swirl
Strawberry Cake
Strawberry Cream Cheese Icing
Instructions
Strawberry Swirl
  1. In a small food processor or a clean spice grinder, pulse the freeze dried strawberries to break them up a bit. Add the sugar and process to a fine consistency. Strain the sugar mixture through a sieve into a bowl. Mix in the flour, melted butter, salt and lemon juice until well combined.
  2. Transfer the mixture to a piping bag fitted with a medium round tip. I used an Ateco #12 tip.** Alternately, you can snip the corner off a disposable piping bag or food storage bag, creating a 3/8-inch wide opening.
Strawberry Cake
  1. In a small saucepan over medium-low heat, simmer the puréed strawberries until reduced by half. Set aside to cool to room temperature.
  2. Preheat the oven to 350ºF (180ºC). Line the bottom of an 8-inch round cake pan*** with parchment paper. Grease and flour the inside.
  3. In a medium bowl, whisk together the flour, baking powder, baking soda and salt.
  4. In a large bowl, beat the sugar, oil, egg, egg white, and extracts, with an electric mixer at medium speed, until smooth. Alternately, you can whisk the mixture together by hand until smooth. Stir in 1/3 cup of the cooled strawberry reduction and the food coloring. (Reserve the remaining strawberry reduction for the icing.)
  5. Stir the flour mixture into the batter, in 2 additions, alternating with the sour cream. Mix just until combined. Transfer the batter to the cake pan.
  6. Pipe the strawberry swirl mixture onto the batter in a spiral pattern. Bake until a toothpick inserted into the center of the cake comes out clean, about 25-30 minutes.
  7. Let the cake cool in the pan for 10 minutes, then transfer it to a cooling rack.
Strawberry Cream Cheese Icing
  1. In a small bowl, beat the cream cheese and butter together until smooth. Add the powdered sugar and strawberry reduction and beat until smooth and well combined. Whisk in the buttermilk a little at a time until your desired consistency is reached. Drizzle over the cooled cake.
Recipe Notes

*To find the food coloring I used, click here.

**To find the piping tip I used, click here.

***To find the cake pan I used, click here.

Lemon White Chocolate Chip Cookies

Lemon White Chocolate Chip Cookies

It’s nearly impossible to feel blue while you’re eating one of these cheerful Lemon White Chocolate Chip Cookies! They’re lemony, buttery and so delicious. I tested these over and over until I got the best lemon flavor and the perfect texture. You’ll love the crisp edges and soft, chewy centers. They don’t require any chilling time, but if your cookies spread too much, you can chill the dough balls for 20-30 minutes before baking. Weigh your ingredients for the best results.

For extra cuteness, I added small yellow chocolate flowers. I used melted white chocolate chips, but candy melts work too. The candy mold I used makes 1/2-inch to 3/4-inch flowers. To find the mold I used, click here. If you use that mold or a similar one, I recommend buying more than one so you can make more chocolate flowers at one time. If you want to skip the white chocolate flowers, then add a few white chocolate chips to the top of each cookie before baking.

Print Recipe
Lemon White Chocolate Chip Cookies
Lemony cookies with white chocolate chips, crisp edges and soft, chewy centers, topped with white chocolate flowers
Course Dessert
Keyword cookies, lemon
Servings
cookies
Ingredients
Lemon White Chocolate Chip Cookies
Course Dessert
Keyword cookies, lemon
Servings
cookies
Ingredients
Lemon White Chocolate Chip Cookies
Instructions
White Chocolate Flowers
  1. Prep silicone candy flower molds by brushing a small amount of luster dust into the cavities with a small food safe brush. This step is optional, but it gives your chocolate flowers a sheen and helps them to release from the mold.
  2. In a heat safe bowl, melt the white chocolate chips together with the vegetable oil over a pan of barely simmering water, making sure the water doesn't touch the bottom of the bowl. Alternately, you can melt your white chocolate chips with short bursts in the microwave. Stir gently until smooth. Stir in the food coloring a little at a time until your desired shade is achieved.
  3. Transfer the melted chocolate to a piping bag with a narrow round tip or snip the tip off of a disposable piping bag. Alternately, you can use a food grade squeeze bottle with a narrow tip. Fill the cavities of the flower mold. Scrape off any excess chocolate with a small offset spatula. Place the mold in the freezer for a few minutes until set. Turn the mold over and bend it slightly to release the flowers. Repeat the steps until you have about 24-36 flowers.
Lemon White Chocolate Chip Cookies
  1. Preheat the oven to 350ºF (180ºC). Line two large cookie sheets with parchment paper.
  2. In a medium bowl, whisk together the flour, cake flour, salt and baking soda.
  3. In a large bowl, beat the butter, granulated sugar, brown sugar and lemon zest, with an electric mixer at medium speed, until light and fluffy. Beat in the egg and egg yolk in separate additions until well incorporated. Beat in the extracts until combined.
  4. On low speed, beat in the flour mixture just until combined. Fold in the white chocolate chips.
  5. Place 1/4 cup size portions of cookie dough onto the prepared cookie sheet, about 3 inches apart. I used a #20 portion scoop* and I placed 6 cookies on each cookie sheet. Bake one cookie sheet at a time. Bake until the tops of the cookies are set and the bottom edges begin to turn light golden brown, about 10-11 minutes. Do not over bake. Transfer the cookies to a cooling rack to cool completely.
  6. Apply the white chocolate flowers to the cooled cookies with a dab of melted white chocolate.
Recipe Notes

To find the flower mold I used, click here.

To find the portion scoop I used, click here.

Miffy Inspired Coconut Shortbread Cookies

Spring is finally here and Easter is around the corner, so I couldn’t resist making these cute Miffy inspired bunny cookies. They’re made of tender coconut shortbread topped with icing and sprinkled with coconut flakes. Coconut bunnies make perfect Easter treats. I happened to have a Miffy cookie cutter, but any 3-inch (7.6cm) bunny cookie cutter works too.* You can also use a pattern to cut out the cookies with a small paring knife. Click here for a Miffy-inspired cookie pattern. Coconut bunnies make perfect Easter treats. This shortbread recipe also works beautifully as vanilla flavor. If you prefer vanilla, refer to the notes below.**

Print Recipe
Miffy Inspired Coconut Shortbread Cookies
Tender bunny shaped coconut shortbread cookies with icing and coconut flakes
Servings
cookies
Ingredients
Coconut Shortbread Cookies
Coconut Icing
Servings
cookies
Ingredients
Coconut Shortbread Cookies
Coconut Icing
Instructions
Coconut Shortbread Cookies
  1. In a large bowl, beat the butter, powdered sugar, and salt with an electric mixer on medium speed, until smooth and light in color. Beat in the extracts and coconut flakes until well combined. On low speed beat in the flour, just until combined.
  2. Form the dough into 2 disks. Wrap with plastic wrap and refrigerate for 2 hours or up to overnight.
  3. Line 2 large baking sheets with parchment paper. On a lightly floured surface, roll the dough to a scant 1/4-inch thick. Cut out the cookies using a 3-inch (7.6cm) bunny cookie cutter. If you don't have a cookie cutter you can use a pattern and cut the cookies out with a small paring knife. Place the cut cookies about 2 inches (5cm) apart onto the prepared baking sheets. Freeze the cookies for 10 minutes.
  4. Meanwhile, preheat the oven to 350ºF (180ºC). Bake the cookies until set and light golden, about 9-11 minutes. Let the cookies cool on the baking sheet for 2 minutes, then transfer them to a cooling rack to cool completely.
Coconut Icing
  1. In a medium bowl, whisk together the powdered sugar, 2 tablespoons of half & half, the coconut extract and salt until smooth. Whisk in additional half & half as needed to achieve your desired consistency.
  2. Apply the icing to the cookies by dipping the tops of the cookies in the icing or by spreading the icing on with a small offset spatula. Sprinkle with coconut flakes.
  3. To make the Miffy or bunny faces, melt the chocolate ships in a small heat safe bowl, in the microwave. Transfer the melted chocolate to a piping bag fitted with a narrow round tip. For the Miffy faces, pipe an x for the mouth and dots for the eyes. For Easter bunnies, pipe eyes, noses and mouths. You can also use small candies for the noses.
Recipe Notes

*To find bunny cookie cutters, click here.

**To make vanilla shortbread cookies, omit the vanilla extract, coconut flavoring and the coconut flakes. Replace with 1 1/2 teaspoons vanilla bean paste. To make vanilla icing, replace the coconut flavoring with pure vanilla extract

***To find the coconut flavoring I used, click here.

Confetti Crumb Cake Cookies

Just when you thought confetti cookies couldn’t get any more fun and cute, Confetti Crumb Cake Cookies have arrived! I took confetti cookies, also known as birthday cake cookies, over the top by adding confetti crumb topping and a drizzle of pale pink icing. For top level fun, I finished them with edible glitter.

Print Recipe
Confetti Crumb Cake Cookies
Vanilla cookies with white chocolate chips, rainbow sprinkles, crumb topping and icing drizzle
Servings
cookies
Ingredients
Confetti Crumb Topping
Confetti Cookies
Icing
Servings
cookies
Ingredients
Confetti Crumb Topping
Confetti Cookies
Icing
Instructions
Confetti Crumb Topping
  1. In a medium bowl, whisk together the flour, sugar and salt. Work the butter into the flour mixture with your fingertips until it looks like sand with no large chunks of butter. Stir in the sprinkles. Press the mixture together to form chunks. Set aside in the refrigerator while you make the cookie dough.
Confetti Cookies
  1. Preheat the oven to 350ºF (180ºC). Line 2 large cookies sheets with parchment paper.
  2. In a medium bowl, whisk together the flour, baking powder and salt.
  3. In a large bowl, beat the butter, sugar and brown sugar, with an electric mixer at medium speed, until light and fluffy. Beat in the egg and egg yolk in two additions, making sure each one is incorporated before adding the next. Beat in the extracts.
  4. On low speed, beat in the flour mixture into the batter, just until combined. Stir in the white chocolate chips and the sprinkles.
  5. Form the cookie dough into 2-tablespoon size balls. Place them about 3 inches apart onto the cookie sheets. Flatten the dough balls slightly. Top each one generously with the crumb topping.
  6. Bake until the cookies are set and the edges start to turn light golden, about 11-13 minutes. (Be careful not to over bake to avoid drying out your cookies.) Let the cookies cool on the baking sheet for 1 minute, then transfer them to a cooling rack.
Icing
  1. In a small bowl, whisk together the powdered sugar, butter, vanilla and 1 tablespoon of milk. Add additional milk as needed to achieve your desired consistency. Using the tip of a toothpick, gradually add a tiny bit of food coloring and whisk until incorporated.
  2. Drizzle over the cooled cookies. Top with edible glitter if desired.
Recipe Notes

If your cookies spread too much, chill the dough for 20-30  minutes, then proceed with the recipe.

Lemon Bundt Cakes with Blueberry Cream Cheese Icing

Lemon Bundt Cakes with Blueberry Cream Cheese Icing

Say hello to springtime in cake form. These soft, fluffy, little lemon bundt cakes are bursting with lemon flavor and topped with a beautiful, delicious blueberry cream cheese icing. The icing gets it’s natural beauty from fresh blueberries. The colors and flavors of these cakes remind me of sunshine and spring blooms. I decorated my cakes with tiny blue violas from my garden. They would also look pretty topped with fresh chamomile flowers.

I used a bundtlette pan with six 1-cup servings. To find the pan I used, click here. This recipe also works as cupcakes using a standard muffin pan. The baking time will be a bit shorter. If you’re not a fan of blueberry icing, you can glaze the cakes with lemon icing instead. To find my lemon icing recipe, click here.

Print Recipe
Lemon Bundt Cakes with Blueberry Cream Cheese Icing
Soft, fluffy lemon bundtlette cakes topped with blueberry cream cheese icing
Course Dessert
Keyword cake, lemon bundts
Servings
Bundtlette cakes
Ingredients
Lemon Bundt Cakes
Blueberry Cream Cheese Frosting
Course Dessert
Keyword cake, lemon bundts
Servings
Bundtlette cakes
Ingredients
Lemon Bundt Cakes
Blueberry Cream Cheese Frosting
Instructions
Lemon Simple Syrup
  1. In a small saucepan, combine the sugar, lemon juice, and water over medium-low heat. Cook and stir gently just until the sugar is dissolved. Set aside to cool.
Lemon Bundt Cakes
  1. Preheat the oven to 350ºF (180ºC). Grease and flour a bundtlette pan with six 1-cup servings. Make sure to thoroughly grease and flour all of the crevices. (To find the pan I used, see note below.*)
  2. In a medium bowl, whisk together the flour, baking powder, baking soda and salt.
  3. In a large bowl whisk together the sugar and lemon zest until well combined. Add the oil, eggs, and vanilla extract and whisk until smooth and well combined.
  4. In a small bowl, whisk together the milk and sour cream. Stir the flour mixture into the batter in 2 additions, followed by half of the milk mixture after each addition. Stir just until combined.
  5. Fill the cake pan wells half full with the batter. (If using a standard muffin pan, fill the wells 2/3 full.) Bake until the tops are springy and a toothpick inserted in the centers of the cakes comes out clean or with a few crumbs attached, about 14-16 minutes. Check for doneness a couple of minutes early to avoid over baking. (Baking time is shorter for a standard muffin pan.) Cool the cakes in the pan for 8 minutes, then turn the cakes out onto a cooling rack. Brush the warm cakes generously with lemon simple syrup.
Blueberry Cream Cheese Icing
  1. In a small saucepan, combine the blueberries, sugar and lemon juice. Stir occasionally over medium heat, until the blueberries start to soften and the mixture starts to bubble. Smash the blueberries with a potato masher or the back of a spoon. Let the mixture simmer gently until thickened to a jam consistency, about 2-3 minutes. Strain the cooked blueberries through a mesh sieve for a smooth consistency. You can skip this step if you prefer a chunky consistency. Set aside to cool to room temperature.
  2. In a medium bowl, beat the cream cheese and butter together until smooth. Don't over beat. Cream cheese tends to curdle if beaten too much.
  3. Add the powdered sugar, vanilla and 2 tablespoons of milk and beat until smooth and well combined. Stir in the cooled blueberries until combined. Stir in more milk as needed to achieve your desired consistency. Spoon or drizzle the icing onto the cooled lemon cakes.
Recipe Notes

To find the bundt cake pan I used, click here.

Chai Spice Honey Butter


Print Recipe


Chai Spice Honey Butter

Servings


Ingredients

Servings


Ingredients


Instructions
  1. Beat all ingredients together until smooth and creamy. For best flavor, cover and refrigerate overnight.

Strawberry Crumb Cake

Print Recipe
Strawberry Crumb Cake
Tender vanilla crumb cake topped with fresh strawberries, plenty of crumb topping and fresh strawberry icing
Keyword cake, strawberry
Servings
Ingredients
Crumb Topping
Cake
Fresh Strawberry Icing
Keyword cake, strawberry
Servings
Ingredients
Crumb Topping
Cake
Fresh Strawberry Icing
Instructions
Crumb Topping
  1. In a medium bowl, whisk the flour, sugar , brown sugar and salt together.
  2. Work in the butter with your fingertips until the mixture looks like wet sand. Press it together to form chunks. Set aside in the refrigerator until ready to use.
Cake
  1. Preheat the oven to 350ºF (180ºC). Line the bottom of an 8-inch cake pan with a removable bottom or an 8-inch springform pan, with parchment paper. Grease and flour the insides or line with a strip of parchment paper.
  2. In a medium bowl, whisk together the flour, baking powder and salt. Set aside.
  3. In a large bowl, cream the butter and sugar with an electric mixer on medium speed, until light and fluffy.
  4. Beat the egg, egg yolk and vanilla into the butter mixture in 3 separate additions, making sure each addition is incorporated before adding the next.
  5. In a small bowl, whisk the milk and sour cream together. On low speed, mix the flour mixture into the batter in two additions alternating with half of the milk mixture. Beat just until combined.
  6. Transfer the batter to the prepared pan. Smooth the batter with a spatula. Place the strawberries evenly on top of the batter. Sprinkle the crumb topping over the top.
  7. Bake until the topping is golden brown and a toothpick inserted into the center of the cake comes out clean, about 48-55 minutes. Do not over bake. Let the cake cool in the pan for 10 minutes, then remove it from the pan and transfer it to a cooling rack.
Fresh Strawberry Icing
  1. In a medium bowl, whisk together the powdered sugar and puréed strawberries. Add the half & half a little at a time until your desired consistency is achieved. Whisk until smooth. Drizzle over the cooled cake.
Recipe Notes

To find the cake pan I used, click here.

Chocolate Love Potion Cookies

Chocolate Love Potion Cookies

You’ll fall in love with these bewitching double chocolate cookies with pistachios and rose petals. As if the chocolate chips weren’t enough, I topped them with pieces of dark chocolate which melt into heavenly little pools of deliciousness. You may have heard that chocolate is considered to be an aphrodisiac because it contains tryptophan and phenelethylamine. Tryptophen increases the mood booster serotonin in the brain. Phenelethylamine is released by the brain when you fall in love. Pistachios are also considered to be natural aphrodisiacs and these cookies contain plenty of pistachios! The rose petals add a touch of romance to finish off the perfect love potion cookies.

If you’re not a fan of pistachios, feel free to substitute your favorite toasted nuts. If you want to skip the nuts all together, make sure to replace them with another add-in, because the nuts provide structure to the cookies. I recommend dried cherries or white chocolate chips as a nice alternative.

Print Recipe
Chocolate Love Potion Cookies
Double chocolate cookies with chocolate chips and pistachios topped with pools of melted chocolate, chopped pistachios and dried rose petals
Servings
cookies
Ingredients
Servings
cookies
Ingredients
Instructions
  1. Line 2 large cookie sheets with parchment paper.
  2. In a large bowl, whisk together the flour, cocoa powder, baking soda and salt.
  3. In a separate large bowl, cream the butter, brown sugar and granulated sugar, with an electric mixer at medium speed, until light and fluffy.
  4. Add the egg, egg yolk and vanilla in 3 separate additions and beat until incorporated. Beat in the flour mixture just until combined.
  5. Fold in the chocolate chips and pistachios.
  6. Form the dough into 18 2-tablespoon size portions, about 2 ounces (57g) each. Form the portions into 2-inch heart shapes. (They don't have to be perfect, because the cookies are going to spread as they bake.) Place the heart shapes on a tray. Cover and refrigerate for 20-30 minutes.
  7. Meanwhile, preheat the oven to 350ºF (180ºC). Place 6 heart shapes on each cookie sheet, about 3 inches apart. Top each one with a piece of chocolate bar. I placed my chocolate pieces on the upper left of each cookie. Bake the cookies until the tops look set, about 10-11 minutes. Be careful not to over bake the cookies or they'll be more difficult to shape into hearts.
  8. Remove the cookies from the oven and immediately use a large, metal heart-shaped cookie cutter to shape the hot cookies. Place the cookie cutter onto the cookie sheet over each cookie and slide it up and down a couple of times, then slide it side to side a couple of times. Work quickly before the cookies set. Let the cookies cool on the pan for 2-3 minutes, then transfer them to a cooling rack. Top the cookies with chopped pistachios and rose petals before the melted chocolate sets.
Recipe Notes

To find culinary rose petals, click here.

To find the cookie cutter I used, click here.

Apple Cake with Cream Cheese Frosting

Apple Cake with Cream Cheese Frosting

An easy to make 8-inch square cake, typically unfrosted, is what my family would consider a snacking cake when I was growing up. This easy-to-make apple cake can definitely qualify as a snacking cake because it stands on its own as a delicious cake, unfrosted. BUT…if you add the silky cream cheese frosting, then you have yourself something a little more special. This cake could easily appear at a Thanksgiving meal and upstage the pies.

I used fresh puréed apples that I picked recently when I went apple picking. If you don’t have fresh apples on hand, you can substitute with unsweetened applesauce.* I used French vanilla compound, which gives it an exceptionally lovely flavor, but you can also use vanilla bean paste or pure vanilla extract.

Print Recipe
Apple Cake with Cream Cheese Frosting
A soft, moist apple cake with silky cream cheese frosting.
Course Dessert
Keyword apple, cake
Servings
servings
Ingredients
Apple Cake
Cream Cheese Frosting
Course Dessert
Keyword apple, cake
Servings
servings
Ingredients
Apple Cake
Cream Cheese Frosting
Instructions
Apple Cake
  1. Preheat the oven to 350ºF (177ºC). Line the bottom of an 8-inch square cake pan** with parchment paper. Grease and flour the insides.
  2. In a medium bowl, whisk together the flour, baking powder, baking soda, salt, cinnamon, ginger and nutmeg.
  3. In a large bowl, whisk together the brown sugar, sugar, eggs, vegetable oil, and vanilla until well combined. Stir in the puréed apples until incorporated. Stir in the flour mixture just until combined.
  4. Transfer the batter to the prepared cake pan. Bake until a toothpick inserted into the center of the cake comes out clean, about 28-33 minutes
Cream Cheese Frosting
  1. In a large bowl, stir the cream cheese with a spatula until smooth. Beat in the butter, with an electric mixer on low speed, until smooth and well combined.
  2. Beat in the powdered sugar, vanilla, salt and heavy cream until smooth and well combined. Stir slowly with a spatula to smooth the frosting and remove bubbles.
Recipe Notes

*If you're using applesauce and your applesauce is watery, drain off excess water before measuring.

**To find my favorite 8-inch square cake pan, click here.