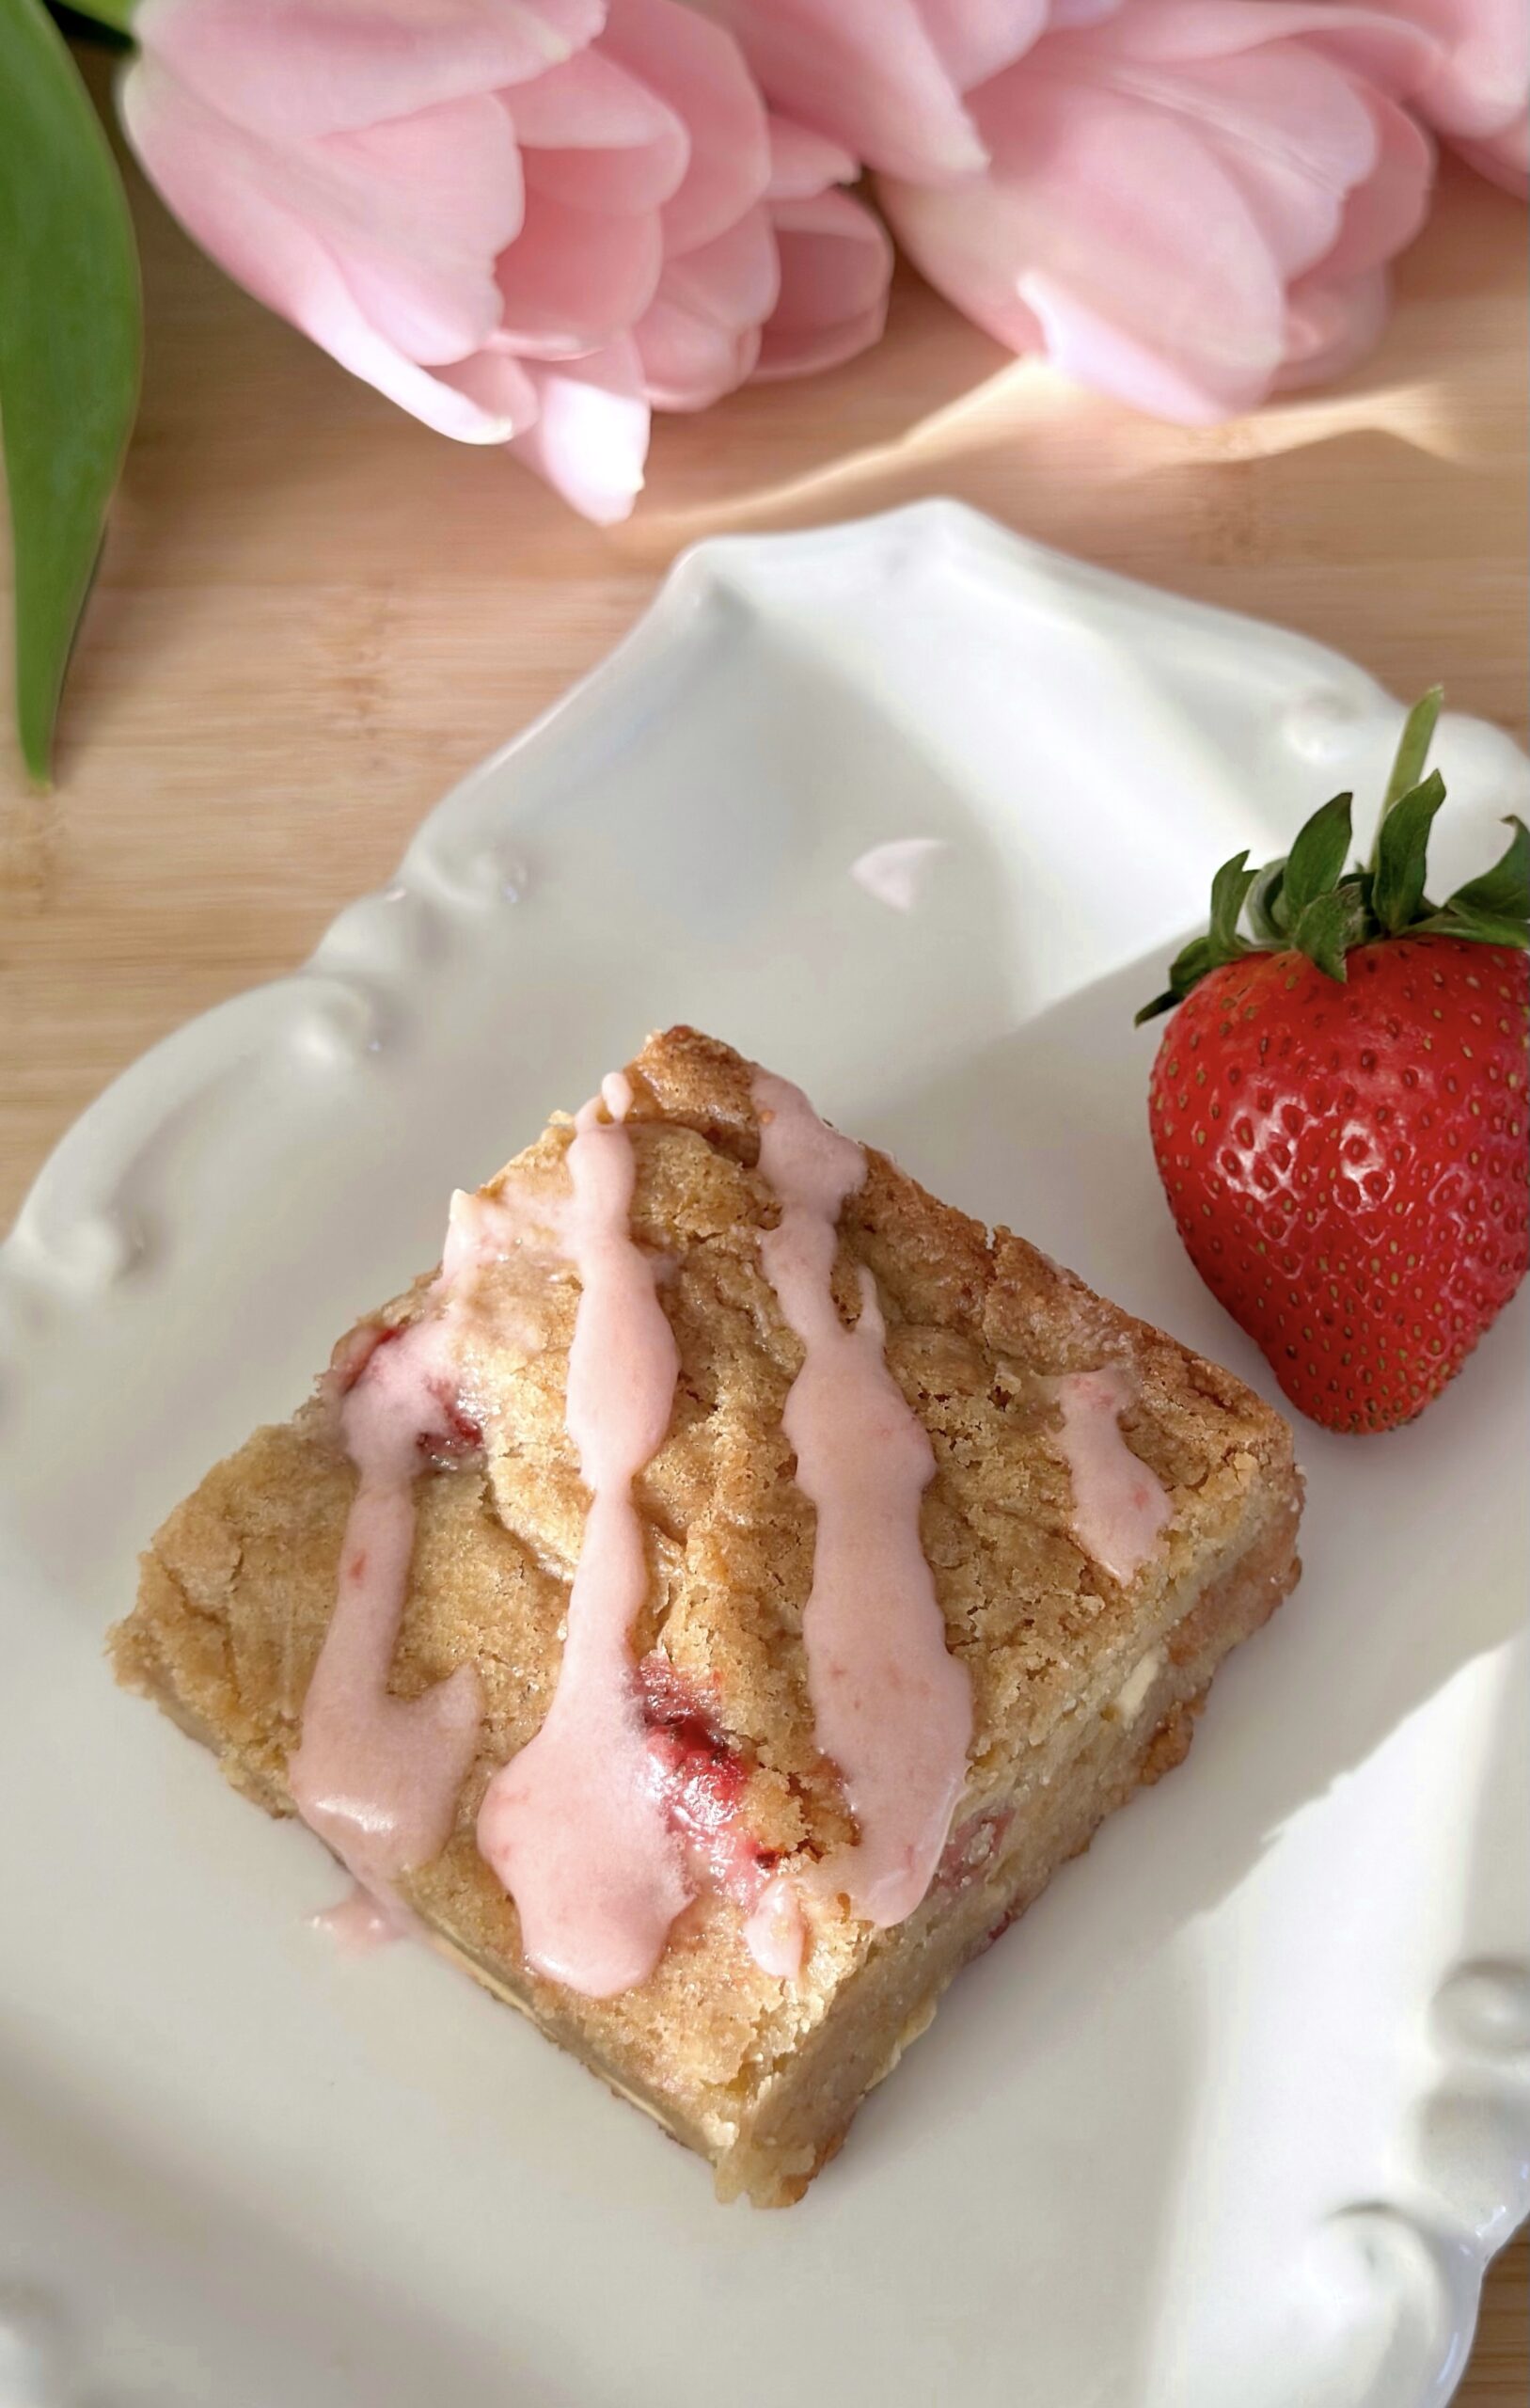
White Chocolate Peach Muffins

I have strong opinions about muffins. Maybe a little controversial too. When baked correctly, muffins should be soft, fluffy and tender. I get a little sad and disappointed when I buy a big, domed bakery muffin and the inside is rubbery. Many of the pretty muffins I see on social media are painfully rubbery too, as the creators break open a muffin in a dramatic moment of triumph. The muffin recipe I’m sharing here is tender and delicious if baked correctly.

One of the most important ways to achieve tender muffins is by not over mixing your batter once the flour is added. Muffins are technically cake, not bread, so we don’t want gluten formation. Another way to get tender muffins is to use an acidic ingredient such as sour cream, yogurt or buttermilk. Lastly, and very importantly, don’t over bake or under bake your muffins. Baking times in recipes are a guide and not necessarily exact because everyone’s ovens and baking pans are different. Keep an eye on your muffins and test them for doneness with a cake tester or a toothpick. My grandma used to say that when you start to smell them, they’re probably done or close to being done.

Soggy muffins also make me run the other way. Muffins loaded with too much fruit or fruit that hasn’t been macerated can make your muffins soggy or dense. In this recipe, I macerated the peaches to draw out some of the moisture, so it helps to avoid creating soggy spots in your muffins. The waiting time goes by fast as you prep the rest of your ingredients.

Print Recipe
White Chocolate Peach Muffins
Tender muffins with white chocolate chips and chunks of fresh peaches.
Servings
muffins
Ingredients
Macerated Peaches
Crumb Topping
Muffins
Servings
muffins
Ingredients
Macerated Peaches
Crumb Topping
Muffins
Instructions
Macerated Peaches
  1. In a medium bowl, toss the peaches with lemon juice. Add the brown sugar and cinnamon and stir to combine. Let stand 30 minutes.
  2. Drain the peaches well and toss with flour. Reserve 1/4 cup of peaches for the muffin tops.
Crumb Topping
  1. In a medium bowl, whisk together the flour, sugar, brown sugar, cinnamon and salt.
  2. With a pastry blender, or with your fingertips, work the butter into the flour mixture until it looks like wet sand. Press together to form chunks. Set aside in the refrigerator until ready to use.
Muffins
  1. Preheat the oven to 375ºF (190ºC). Line a 12-serving muffin pan with tulip muffin liners.* (Tulip muffin liners are preferable because they hold more batter, but you can also use standard muffin liners.)
  2. In a medium bowl, whisk together the flour, baking powder, baking soda, salt, cinnamon and nutmeg.
  3. In a large bowl, beat the butter and sugar together until light and fluffy. Beat in the eggs and extracts in 3 separate additions, making sure each one is incorporated before adding the next.
  4. Mix in the flour mixture with a wooden spoon or spatula, in two additions, followed by half of the sour cream after each addition. Mix just until combined. The batter will be thick.
  5. Toss the white chocolate chips with flour, then fold them into the batter. Gently fold in the drained peaches.
  6. Transfer batter to the prepared muffin pan, equally dividing the batter among the muffin cups. (If you're using standard muffin liners, fill them 2/3 full.) Top with the reserved peaches and the crumb topping. Optional: Top each muffin with a piece of white chocolate.
  7. Bake muffins for 5 minutes. Turn down the oven heat to 350ºF (180ºC). Continue baking until the muffins are light golden brown and a toothpick inserted into the centers of the muffins comes out clean, about 15-20 more minutes. Cool in the pan for 5 minutes, then remove the muffins from the pan and continue cooling on a cooling rack.
Recipe Notes

*To find tulip muffin liners, click here.


Pink Velvet Cookies

Pink Velvet Cookies

Whenever I walk into a bakery, my eyes are always drawn to anything pink. Pink cupcakes, cookies, donuts or anything with pink icing will inevitably come home with me. This probably started in childhood. Most bakeries back then, including the bakery my aunt always took me to, had pink boxes, so I associate it with delicious, freshly baked treats. Maybe pink desserts do taste better or maybe our minds just tell us that. Either way, if you love pink treats, you’ll love these cookies.

Pink velvet is similar to red velvet, but without the cocoa powder and red food color. The texture should be somewhat velvety, like red velvet cake. I have yet to taste a velvety red velvet cookie, but I think the texture of these cookies is pretty velvety as long as they’re not over baked. Pink velvet desserts are typically vanilla flavored. I upgraded the flavor by adding a touch of cherry flavoring. It’s not enough to give you cherry flavored cookies, but it will add depth to vanilla flavored treats. It’s an old bakery trick that I learned years ago that adds a fruity note in the background.

For best baking results, I recommend using a scale to weigh your ingredients, especially your dry ingredients. If you love baking, you should invest in a food scale if you don’t already have one.

To watch the Pink Velvet Cookies TikTok video, click here. To watch the Pink Velvet Cookies Instagram video, click here.

Print Recipe
Pink Velvet Cookies
Pink vanilla flavored crinkle cookies with chewy exteriors and soft, velvety centers
Course Dessert
Keyword cookies, pink velvet
Servings
cookies
Ingredients
Optional
Course Dessert
Keyword cookies, pink velvet
Servings
cookies
Ingredients
Optional
Instructions
  1. Preheat oven to 350ºF. Line two large cookie sheets with parchment paper.
  2. In a medium bowl, whisk together flour, cornstarch, baking powder, and salt.
  3. In a large bowl, cream butter, sugar and oil until light and fluffy.
  4. Beat egg whites into butter mixture in two addition, until well combined.
  5. Beat in extracts until well combined.
  6. Add gel food color, a little at a time with a toothpick, until desired shade of pink is reached. (Adding remaining ingredients will lighten the color slightly.) Beat until evenly distributed.
  7. Add flour mixture to batter and beat just until combined. Mix in white chocolate chips if using.
  8. Roll dough into balls, about 2 tablespoons each. I used a #30 portion scoop.*** Roll dough very generously in powdered sugar. Place two inches apart onto prepared cookie sheets.
  9. Bake until cookies are puffed and tops are set, about 11-13 minutes. Transfer cookies to a cooling rack.
Recipe Notes

*The cherry flavoring in this recipe is not intended to make a cherry flavored cookie. The addition of cherry flavoring adds a subtle fruity note. You can also use pure cherry extract. Use a bit less (scant 1/2 teaspoon)  because extracts tend to be stronger than flavorings. DO NOT use imitation cherry extract. It has a medicinal flavor that will disappoint you. If you want your cookies to be cherry or strawberry flavor, reduce vanilla extract to 1/2 teaspoon and  use 1- 1 1/2 teaspoons of natural cherry or strawberry flavoring.

**To find the pink gel food color I used, click here.

***To find the portion scoop I used, click here.

This recipe was updated on 2/14/23.