Blueberry Carrot Cake

Blueberry Carrot Cake

Spring is here and it’s the season to eat carrot cake! Many people have strong opinions about which add-ins are best to use in carrot cake. Some popular ones, besides the carrots themselves, include nuts, pineapple, raisins, and even coconut. My Blueberry Carrot Cake came about when I was thinking about making a breakfast carrot cake. I replaced the typical add-ins with blueberries and the results were so delicious. I originally made this cake with a maple-butter glaze which was perfect for a breakfast cake. For Easter brunch, I opted to dress up the cake with Blueberry Cream Cheese Frosting, fresh blueberries and lilacs. This combination is magical.

Print Recipe
Blueberry Carrot Cake
Moist, subtly spiced carrot cake studded with blueberries and topped with blueberry cream cheese icing by Brownie Mischief
Cuisine American
Keyword blueberry, cake, carrot
Servings
Ingredients
Blueberry Carrot Cake
Blueberry Cream Cheese Frosting
Cuisine American
Keyword blueberry, cake, carrot
Servings
Ingredients
Blueberry Carrot Cake
Blueberry Cream Cheese Frosting
Instructions
Blueberry Carrot Cake
  1. Preheat the oven to 350ºF (180ºC). Line the bottom of an 8-inch round cake pan with parchment paper. Grease and flour the insides.
  2. In a medium-size bowl, whisk together the flour, baking powder, baking soda, cinnamon, salt, ginger and nutmeg until well combined.
  3. In a large bowl, beat the granulated sugar, brown sugar and oil together until well combined. Beat in the eggs and vanilla, with an electric mixer at medium speed, until smooth and well incorporated. Stir in the carrots. Add the flour mixture and stir just until combined.
  4. In a small bowl, toss the blueberries with 1 teaspoon of flour. Fold the blueberries into the batter. Transfer the batter to the cake pan. Bake until a toothpick inserted into the center of the cake comes out clean, about 37-43 minutes. Let the cake cool in the pan for 10 minutes, then turn the cake out onto a cooling rack.
Blueberry Cream Cheese Frosting
  1. Smash the blueberries with a fork and press through a sieve into a small bowl.
  2. In a medium-size bowl, stir the cream cheese with a spatula until smooth. Add the butter and beat, with an electric mixer on low speed, until smooth.
  3. Gradually mix in the powdered sugar. Add the vanilla, salt and 1 tablespoon (15 ml) of the smashed blueberries and beat until smooth. Add milk, if needed, until the desired consistency is reached. Stir with a spatula to smooth out any bubbles.
Recipe Notes

To use fresh blueberries for the frosting, place the blueberries in a small saucepan with a teaspoon of sugar and 1/2 teaspoon of lemon juice or water. Cook over medium-low heat until the sugar is dissolved and the blueberries start to soften. Smash the blueberries with a potato masher. Press this mixture through a sieve into a small bowl and let cool to room temperature.

Orange Vanilla Bean Loaf Cake

Orange Vanilla Bean Loaf Cake

If you search loaf cakes on the internet, you’ll find an abundance of “copycat” recipes. For some reason, everyone is trying to copy a loaf cake from a popular coffee shop. Maybe it’s just me, but I’m not a fan of the rubbery neon slice. I’d rather have a slice of soft, fluffy cake with a burst of fresh citrus flavor and buttery frosting. If that sounds good to you too, you’ll love this recipe. I used the reverse creaming method to make this cake, which produces a soft, velvety crumb. Brushing the cake with orange simple syrup keeps it moist and flavorful. This recipe is for an orange-vanilla bean cake but it can also be made into a lemon version. See the notes below.

Print Recipe
Orange Vanilla Bean Loaf Cake
Soft, fluffy vanilla bean and orange scented loaf cake topped with silky vanilla cream cheese frosting by Brownie Mischief
Keyword cake, orange
Servings
Ingredients
Orange Simple Syrup
Orange Vanilla Bean Loaf Cake
Vanilla Bean Cream Cheese Frosting
Keyword cake, orange
Servings
Ingredients
Orange Simple Syrup
Orange Vanilla Bean Loaf Cake
Vanilla Bean Cream Cheese Frosting
Instructions
Orange Simple Syrup
  1. Combine the orange juice, lemon juice and sugar in a small saucepan over medium heat. Stir occasionally until the sugar is dissolved. Remove from heat and set aside.
Orange Vanilla Bean Loaf Cake
  1. Preheat the oven to 350ºF (180ºC). Line the bottom of an 8 x 4-inch loaf pan with parchment paper. Grease and flour the insides.
  2. In a medium-size bowl, whisk together the flour, baking powder and salt until well combined.
  3. In a large bowl, mix the sugar and orange zest, with an electric mixer or by hand, until incorporated. Add the flour mixture and beat until well combined. On low speed, beat in the butter until the mixture looks like sand.
  4. In a separate medium-size bowl, whisk together the sour cream, milk, eggs, vanilla bean paste and orange extract together until smooth and well combined. On low speed, gradually beat this mixture into the sugar mixture until incorporated. Beat at medium speed until smooth, about 1 minute. Do not over mix.
  5. Transfer the batter to the loaf pan. Bake until a toothpick inserted into the center of the cake comes out clean, about 45-50 minutes. Do not over bake. Let the cake cool in the pan for 10 minutes, then turn the cake out onto a cooling rack. Brush the warm cake all over with orange simple syrup. Let the cake cool completely, then frost with Vanilla Bean Cream Cheese Frosting.
Vanilla Bean Cream Cheese Frosting
  1. In a medium-size bowl, stir the cream cheese with a spatula until smooth. Add the butter and beat, with an electric mixer on low speed, until smooth.
  2. Gradually mix in the powdered sugar. Add the vanilla, salt and 1 tablespoon (15 ml) of milk and beat until smooth. Add additional milk, if needed, until the desired consistency is reached. Stir with a spatula to smooth out any bubbles.
Recipe Notes

To find an 8 x 4-inch loaf pan, click here

To make a lemon version of this cake, replace the orange zest with lemon zest. Replace the vanilla bean paste with 1/2 teaspoon of pure vanilla extract and replace the orange extract with 1 teaspoon of pure lemon extract. For the simple syrup, replace the orange juice with lemon juice.

Little Chocolate Donuts

Little Chocolate Donuts with pink icing

Little chocolate donuts are a fun, nostalgic treat from my childhood. I’m talking about the ones at the local market that come in a plastic sleeve. I remember sharing the waxy little donuts with a friend, and at the time we thought they were delicious. Now that I’m an adult, I realize that homemade ones taste soo much better and they’re surprisingly quick and easy to make. They’re delicious with either naturally pink strawberry icing or chocolate glaze. I shared the recipe for both options below.

For Valentine’s Day, I used a heart-shaped mini donut pan for the donuts shown in the photo, but a standard round mini donut pan works too. A sprinkle of pink sparkling sugar makes them extra special, especially for Galentine’s Day.

Print Recipe
Little Chocolate Donuts
Servings
mini donuts
Ingredients
Little Chocolate Donuts
Pink Strawberry Icing
Chocolate Glaze
Servings
mini donuts
Ingredients
Little Chocolate Donuts
Pink Strawberry Icing
Chocolate Glaze
Instructions
Little Chocolate Donuts
  1. Preheat the oven to 350ºF (180ºC). Spray a mini donut pan with nonstick spray. (I used a heart-shaped mini donut pan** but a standard round mini donut pan***works too.)
  2. In a medium-size bowl, whisk together the flour, cocoa powder, salt, baking powder and baking soda until well combined.
  3. In a large bowl, whisk together the brown sugar, oil, egg, buttermilk and vanilla until smooth. Add the flour mixture and stir just until combined.
  4. Transfer the batter to the donut pan, using a piping bag or a plastic food storage bag with the corner cut off. Bake until a toothpick inserted into the centers of the donuts comes out clean, about 6-8 minutes. Do not over bake or the donuts will dry out. Transfer the donuts to a cooling rack. Clean the pan and repeat with the remaining batter.
Strawberry Icing
  1. In a medium-size bowl, whisk together the powdered sugar, pureéd strawberries, melted butter, salt and 1 tablespoon (15ml) of milk until well combined. Add additional milk as needed to reach your desired consistency. Whisk until smooth. Dunk the top surface of the cooled donuts into the icing.
Chocolate Glaze
  1. In a heat safe bowl set over a pan of barely simmering water, melt the butter, chocolate and corn syrup together, stirring occasionally, until smooth. Remove from heat and set aside to cool slightly. Dunk the top surface of the cooled donuts into the glaze or spoon it over the tops.
Recipe Notes

*To find pink sparkling sugar, click here.

**To find the heart-shaped mini donut pan I used, click here.

***To find a standard mini donut pan, click here.


Fudgy Chocolate Crumb Cake

Fudgy Chocolate Crumb Cake

This moist, fudgy chocolate cake with a generous amount of melt-in-your-mouth chocolate crumb topping and powdered sugar snow is perfect for frosty mornings with a cup of hot coffee or tea. It’s also perfect for a holiday breakfast or brunch served with fresh raspberries and/or raspberry sauce.*

Print Recipe
Fudgy Chocolate Crumb Cake
Rich, moist, fudgy chocolate cake with melt-in-your mouth crumb topping and sprinkled with powdered sugar.
Cuisine American
Keyword cake, chocolate, crumb
Servings
servings
Ingredients
Crumb Topping
Cake
Cuisine American
Keyword cake, chocolate, crumb
Servings
servings
Ingredients
Crumb Topping
Cake
Instructions
Crumb Topping
  1. In a medium-size bowl, whisk together the flour, granulated sugar, brown sugar, cocoa powder and salt until well combined. Work the butter into the flour mixture with your fingertips until it looks like dirt, with no large pieces of butter remaining. Press the mixture together to form chunks. Set aside in the refrigerator until ready to use.
Cake
  1. Preheat the oven to 350ºF (180ºC). Line an 8-inch square cake pan** with parchment paper, leaving a couple of inches of overhang to serve as handles to lift the cake out of the pan. If you want to serve the cake directly from the pan, you can skip the parchment paper and simply spray the pan with nonstick spray.
  2. In a medium-size bowl, whisk the flour, cocoa powder, baking powder, baking soda and salt together until well combined.
  3. In a large bowl, beat the butter, granulated sugar and brown sugar together, with an electric mixer at medium speed, until light and fluffy. Beat in the oil until combined. Beat in the egg, egg yolk, and vanilla in 3 separate additions, making sure each one is incorporated before adding the next.
  4. On low speed, beat the flour mixture into the batter in 2 additions, alternating with half of the sour cream after each addition. Beat just until combined. Gradually beat in the hot coffee just until smooth and well combined. Fold in the mini chocolate chips.
  5. Transfer the batter to the prepared cake pan. Top the batter evenly with the crumb topping. Bake until a toothpick inserted into the center of the cake comes with a few moist crumbs attached (not wet batter), about 28-37 minutes.
  6. Cool the cake in the pan for 15 minutes, then remove the cake from the pan and continue cooling on a cooling rack. Sprinkle powdered sugar over the cooled cake.
Recipe Notes

*To find my raspberry sauce recipe, click here.

**To find my favorite 8-inch square cake pan, click here.


Orange Chocolate Chip Scones

Orange Chocolate Chip Scones

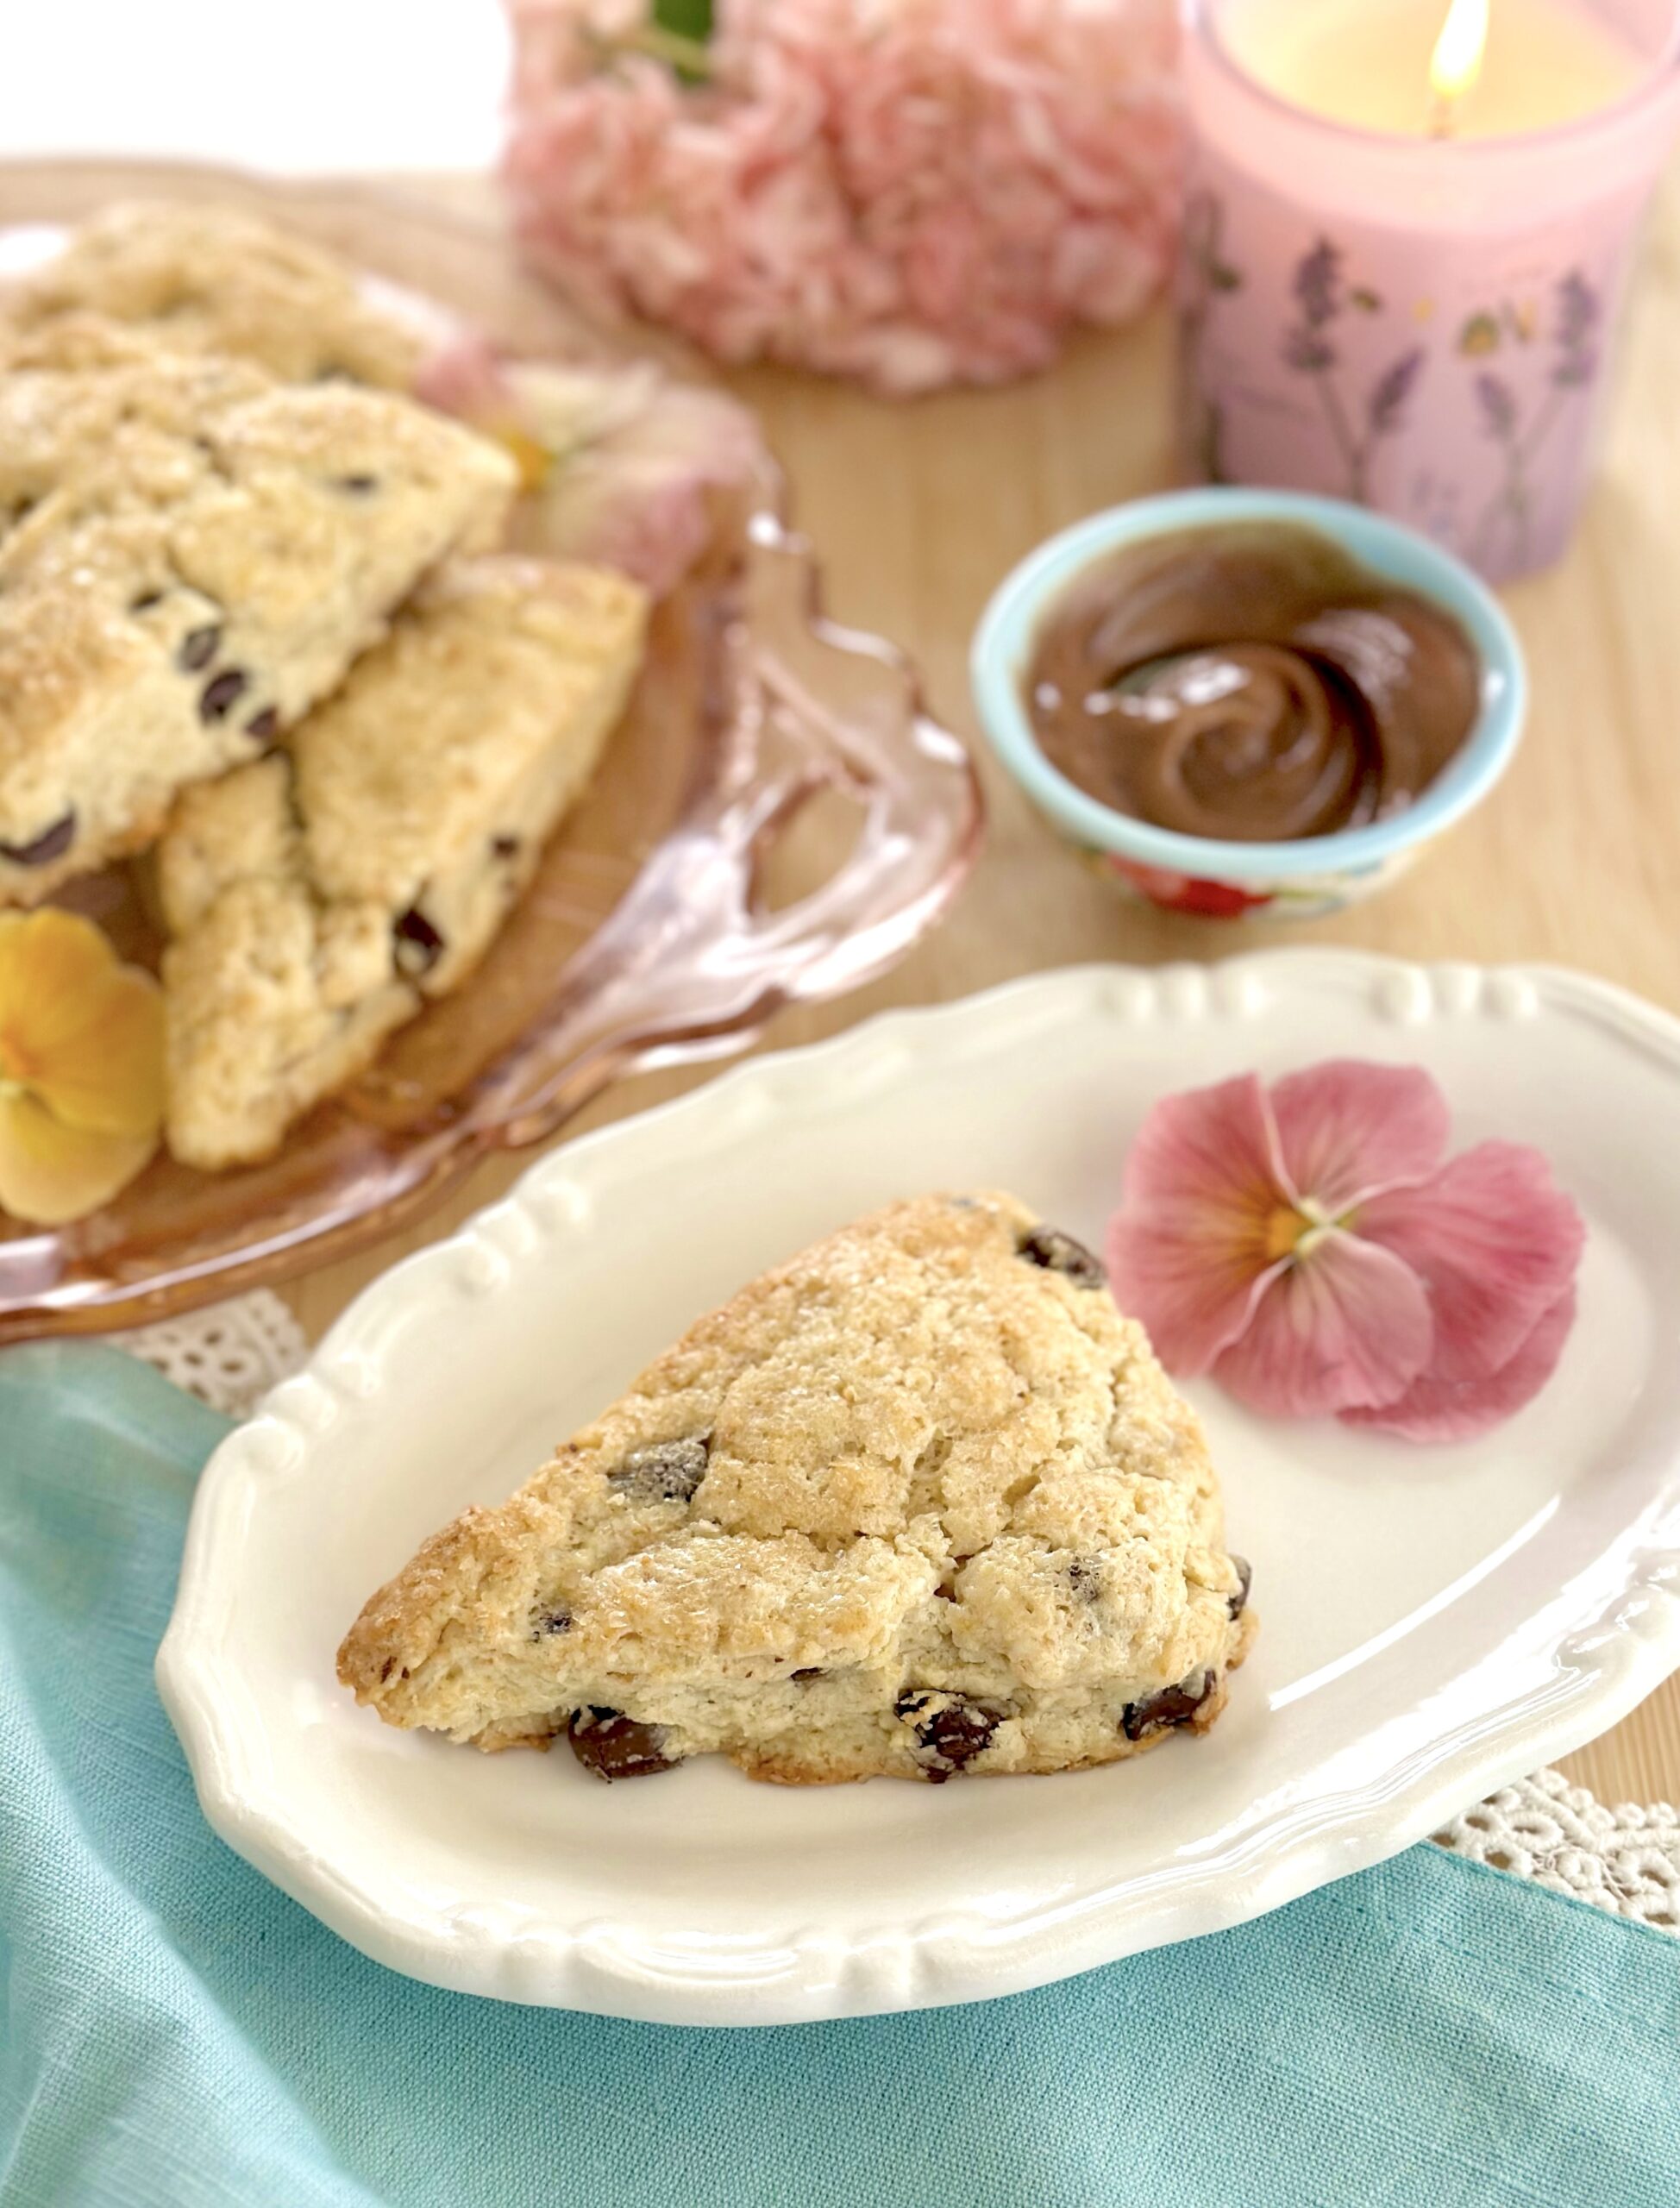
These Orange Chocolate Chip scones have everything I love in a scone. They have buttery, crisp edges and soft, tender centers. Plenty of mini chocolate chips are enhanced with the vibrant flavor of fresh orange zest. These melt-in-your-mouth scones are perfectly delicious on their own, but I went ahead and added some tangy orange icing which took them over the top. They’re so good you won’t be able to eat just one!

Print Recipe
Orange Chocolate Chip Scones
Tender orange-scented scones studded with mini chocolate chips and topped with a tangy orange icing
Servings
scones
Ingredients
Scones
Icing
Servings
scones
Ingredients
Scones
Icing
Instructions
Scones
  1. Preheat the oven to 375ºF (190ºC). Line a large baking sheet with parchment paper.
  2. In a large bowl, whisk together the flour, sugar, baking powder and salt until well combined. Work the butter and the orange zest into the flour mixture with your fingertips or with a pastry blender until pea sized pieces are formed. Stir in the mini chocolate chips.
  3. In a small bowl, whisk together the sour cream, heavy cream, orange juice and vanilla extract.
  4. Stir the sour cream mixture into the flour mixture just until a shaggy dough is formed and there are no dry bits of flour left. Do not over mix.
  5. Scoop** 1/4 cup size rounded portions of dough and place them about 2 inches apart onto the prepared baking sheet. (If your dough has become a bit warm, refrigerate the dough portions for 15 minutes, then proceed with the recipe. This will prevent excess spreading.) Brush the tops of the scones with heavy cream. Bake until golden brown, about 20-25 minutes. Transfer the scones to a cooling rack.
Icing
  1. In a medium-size bowl, whisk together the powdered sugar, melted butter, salt, lemon juice, and 1 tablespoon of orange juice until well combined. Add additional orange juice as needed to achieve your desired consistency. Whisk until smooth.
  2. Brush the icing onto the cooled scones with a small pastry brush or drizzle the icing onto the scones if you prefer. Serve the scones warm or at room temperature.
Recipe Notes

* If you want your scones to be more golden brown, you can brush them with egg wash instead of heavy cream before baking. To make egg wash, whisk together 1 egg with 1 tablespoon of water.

**To find the portion scoop I used, click here.

Maple Blueberry Buckle

Maple Blueberry Buckle

A “buckle” is a single layer cake made with fruit. It often has a crumb topping similar to a crumb cake or a coffee cake. My version of a buckle is made with blueberries and maple icing. Although blueberry desserts are typically made when blueberries are in season, this delicious cake can be made year around, because the recipe also works well with frozen blueberries. The maple flavor pairs beautifully with the blueberries and brown sugar in the cake and gives it a cozy autumn feeling.

Print Recipe
Maple Blueberry Buckle
Tender maple brown sugar cake topped with blueberries, crumb topping and maple icing
Servings
servings
Ingredients
Crumb Topping
Cake
Icing
Servings
servings
Ingredients
Crumb Topping
Cake
Icing
Instructions
Crumb Topping
  1. n a medium-size bowl, mix the flour, brown sugar, cinnamon and salt. Work in the butter with your fingertips until the mixture looks like wet sand with no large pieces of butter remaining. Press together to make 1/2-inch chunks. Set aside in the refrigerator until ready to use.
Cake
  1. Preheat the oven to 350ºF (180ºC). Line a 9-inch square cake pan* with parchment paper, leaving a couple of inches of overhang.
  2. In a medium-size bowl, whisk together the flour, baking powder, salt, cinnamon and nutmeg until well blended.
  3. In a large bowl, cream the butter, brown sugar and granulated sugar, with an electric mixer on medium speed, until light and fluffy. Beat the eggs into the butter mixture in two separate additions, making sure each one is incorporated before adding the next. Beat in the extracts until combined.
  4. In a small bowl, whisk the milk and sour cream together. On low speed, beat the flour mixture into the batter in three additions, alternating with the milk mixture. Mix just until combined.
  5. Transfer the batter to the prepared pan. Smooth the top with a spatula. Set aside 1/4 cup (38g) of blueberries. Top the cake batter evenly with the remaining blueberries, then the topping mixture. Top with the reserved blueberries. Bake until a toothpick inserted into the center of the cake comes out clean, about 25-30 minutes. Do not over bake. Cool the cake in the pan. Remove the cake from pan and transfer it to a serving platter.**
Icing
  1. In a small bowl, whisk together the powdered sugar, maple syrup, butter, maple extract, salt and 1 tablespoon (15 ml) of milk until well combined. Add additional milk as needed to reach the desired consistency. Whisk until smooth. Drizzle the icing over the cooled cake.
Recipe Notes

*To find the 9-inch square cake pan I used, click here.

**To remove the cake from the pan, tilt the cake pan and lift one end of the cake using the parchment paper as a handle. Gently slide the cake onto a serving platter or cutting board. You can also serve the cake directly out of the pan if you prefer.

Apple Cinnamon Mini Muffins

Apple Cinnamon Mini Muffins

These delicious little two-bite muffins are the apple version of my viral Pumpkin Cinnamon Mini Muffins. They have fresh apples in the batter which helps to make them soft and moist. They’re rolled in cinnamon sugar after baking, which gives them a subtle crunch on the outside. These delightful mini muffins have the flavor and texture of cake donuts. They’re perfect on their own, but I love to serve them with caramel sauce for dipping which takes them over the top.

Print Recipe
Apple Cinnamon Mini Muffins
Soft, tender apple mini muffins rolled in cinnamon sugar
Cuisine American
Keyword apple, cinnamon, muffins
Servings
muffins
Ingredients
Muffins
Cinnamon Sugar
Cuisine American
Keyword apple, cinnamon, muffins
Servings
muffins
Ingredients
Muffins
Cinnamon Sugar
Instructions
Muffins
  1. Preheat the oven to 350ºF (180ºC). Grease and flour a 24-serving mini muffin pan.* Do not use muffin liners. (The muffins need to form an outer crust. This prevents them from absorbing too much melted butter in the last step.)
  2. In a medium-size bowl, whisk together the flour, baking powder, salt, cinnamon, ginger and nutmeg.
  3. In a large bowl, whisk the granulated sugar, brown sugar, oil, egg and vanilla extract together until smooth and well combined. Stir in the puréed apples. Stir in the flour mixture just until combined. The batter will be thick.
  4. Transfer the batter to prepared pan, filling the muffin cups about 2/3 full. Bake until a toothpick inserted into the center of the muffins comes out clean, about 9-11 minutes. Do not over bake! Be diligent, since over baking can happen very quickly with mini muffins. Let the muffins cool in the pan for 5 minutes. Turn the muffins out and place on a cooling rack.
Cinnamon Sugar
  1. Whisk the cinnamon and granulated sugar together in a shallow bowl until well combined. Briefly dunk the warm muffins in the melted butter, then roll them in the cinnamon sugar.
Recipe Notes

*To find the mini muffin pan I used, click here.

**If your applesauce is very watery, drain the excess liquid before measuring.

Morning Glory Cake

You may have tasted Morning Glory Muffins at your local bakery or coffee shop. They date back to the 1970’s and originated at Nantucket’s Morning Glory Cafe. The original muffins contained carrots, apples, coconut, raisins and nuts. Over the years I’ve tasted many versions of the hearty breakfast muffins with countless variations of nutritious add-ins. I was inspired to make a cake version using fall harvest ingredients. I replaced the coconut with zucchini and omitted the nuts. But you can certainly add in your favorite toasted chopped nuts, such as pecans or walnuts. Whether or not you like raisins, you’ll love the golden raisins I used in this recipe. They’re soaked in juice prior to baking and they taste like juicy little jewels, nothing like traditional raisins. I also added a brown sugar glaze, but the cake is equally delicious without the glaze.

Print Recipe
Morning Glory Cake
Moist tender single layer spice cake with carrots, apples, zucchini and golden raisins topped with brown sugar glaze
Cuisine American
Keyword apple, cake, carrot, zucchini
Servings
servings
Ingredients
Morning Glory Cake
Brown Sugar Glaze
Cuisine American
Keyword apple, cake, carrot, zucchini
Servings
servings
Ingredients
Morning Glory Cake
Brown Sugar Glaze
Instructions
Morning Glory Cake
  1. Preheat the oven to 350ºF (180ºC). Line the bottom of an 8-inch round cake pan** with parchment paper. Grease and flour the insides.
  2. In a small heat proof bowl, combine the raisins and apple juice, making sure the raisins are submerged. Heat in the microwave for 10-15 seconds until the raisins are plump and hydrated. Set aside to cool to room temperature, then drain the raisins.
  3. In a medium-size bowl, whisk together the flour, baking powder, baking soda, salt, cinnamon, ginger and nutmeg until well combined.
  4. In a large bowl, whisk together the brown sugar, granulated sugar, orange zest, oil, eggs and vanilla until smooth and well combined. Stir in the flour mixture just until combined. Fold in the carrots, apples, zucchini and the drained raisins.
  5. Transfer the batter to the prepared cake pan. Bake until the top is deep golden brown and a toothpick inserted into the center of the cake comes out clean, about 28-35 minutes. Cool the cake in the pan for 10 minutes then turn the cake out and transfer it to a cooling rack.
Brown Sugar Glaze
  1. In a small saucepan over medium-low heat, melt the butter and brown sugar together, stirring until the sugar dissolves and the mixture starts to bubble. Let it bubble gently for 30 seconds, then remove it from the heat. Stir in the heavy cream and salt until smooth. Whisk in the powdered sugar until smooth and well combined. Spread the glaze over the cooled cake.
Recipe Notes

*Wrap the shredded zucchini  in a clean kitchen towel or a sturdy paper towel and squeeze out the excess liquid.

**To find my favorite 8-inch cake pans, click here.

To find parchment cake rounds, click here.

Mocha Pumpkin Spice Bread

Mocha Pumpkin Spice Bread

It wouldn’t be fall without PSL’s and pumpkin bread. This ultra moist, deluxe version of pumpkin bread has mocha batter swirled though it and a rich chocolate glaze that takes it over the top. It’s dangerously delicious and nearly impossible to eat just one slice. I think this will become your new favorite fall baking recipe.

Print Recipe
Mocha Pumpkin Spice Bread
Soft, ultra moist pumpkin spice bread, swirled with mocha and topped with a shiny chocolate glaze
Servings
loaf
Ingredients
Mocha Pumpkin Spice Bread
Chocolate Glaze
Servings
loaf
Ingredients
Mocha Pumpkin Spice Bread
Chocolate Glaze
Instructions
  1. Preheat the oven to 350ºF (180ºC). Line the bottom of a 9 x 5-inch loaf pan with parchment paper. Grease and flour the insides with a mixture of equal parts unsweetened cocoa powder and flour.
  2. In a medium-size bowl, whisk together the flour, pumpkin pie spice, baking powder, baking soda and salt until well combined.
  3. Set aside one tablespoon (15ml) of the oil. In a large bowl, beat the remaining oil, the sugar, brown sugar, eggs, evaporated milk and vanilla extract until smooth and well combined. Beat in the pumpkin purée until incorporated. Stir in the flour mixture just until combined.
  4. Place one cup (237g) of the batter in a separate medium-size bowl. Add the cocoa powder, espresso powder and the reserved one tablespoon of oil. Mix until incorporated.
  5. Place half of the pumpkin batter into the baking pan. Scoop the mocha batter into the pan, alternating with scoops of the remaining pumpkin batter. Swirl the batter with a skewer. Bake until a toothpick inserted into the center comes out clean or with a few moist crumbs attached (not wet batter), about 35-45 minutes. Let the loaf cool in the pan for 10 minutes, then turn the loaf out and continue cooling on a cooling rack.
Chocolate Glaze
  1. Melt the butter, chocolate, and corn syrup together in a medium-size heatproof bowl set over a pan of barely simmering water, making sure the water doesn't touch the bottom of the bowl. Stir gently until smooth. Set aside to cool slightly then spoon the glaze over the cooled loaf and let it drip down the sides.
Recipe Notes

To find the 9 x 5 inch loaf pan I used, click here.

Cherry Lemon Muffins

Cherry Lemon Muffins

Blueberry and lemon are a classic muffin flavor combination, but have you tried cherry and lemon? They complement each other beautifully in lemonade, so why not muffins? Cherries are plentiful at the moment so I came up with these pretty and delicious Cherry Lemon Muffins that are perfect for summer breakfast, brunch or picnics. They have a lovely soft, moist crumb that’s the quintessential muffin texture. Although I’ve been baking muffins since childhood, I learned to refine my muffins in culinary school. Here are a few helpful tips:

~ Muffins with big hole or tunneling may have too much leavening or it wasn’t mixed in evenly. Whisk the leavening agent into the flour thoroughly. Tunnels can also be caused by mixing the batter too aggressively.

~ Dry muffins were likely over baked or have too much flour.

~ Rubbery muffins were likely over mixed.

~ Soggy or gummy muffins were either underbaked or too much wet fruit was added. Try macerating the fruit first to release excess juices. This helps to prevent soggy spots in your muffins.

~ If you want tall, domed muffins, keep in mind that, although they look nice, domed muffins tend to be chewier and less tender. To get domes, try letting the batter rest a few minutes before baking if the muffins contain baking powder. You can also try giving the muffins a boost of high heat by starting them out with a higher temperature 400ºF (200ºC) then drop the temperature to 350ºF (180ºC) after a few minutes.

~ To keep crumble topping from sinking, make sure to work the cold butter into the flour mixture thoroughly, until it looks like wet sand and no large pieces of butter remain. Press the mixture together to form chunks, then chill it in the refrigerator before topping the muffins.

~ To keep fruit from sinking, lightly coat it with flour. Thick, voluminous batter is best for adding fruit.

Print Recipe
Cherry Lemon Muffins
Tender, moist lemon muffins studded with fresh cherries, topped with crumb topping and pink cherry-lemon icing
Servings
muffins
Ingredients
Crumb Topping
Cherry Lemon Muffins
Icing
Servings
muffins
Ingredients
Crumb Topping
Cherry Lemon Muffins
Icing
Instructions
Crumb Topping
  1. In a medium bowl, whisk the flour, sugar, and salt together. Work in the butter with your fingertips until the mixture looks like the consistency of wet sand with no large pieces of butter. Press the mixture together to make chunks. Set aside in the refrigerator until ready to use.
Muffins
  1. In a medium bowl, combine the cherries and 1 tablespoon (13g) of sugar. Let stand 30 minutes, then drain the cherries, reserving the juice.
  2. Preheat the oven to 375ºF (190ºC). Line a 12-serving muffin pan with tulip muffin liners.* (You can also use standard muffin liners. They hold less batter so you'll end up with a couple of extra muffins.)
  3. In a medium bowl, whisk the flour, baking powder, baking soda and salt together until well combined.
  4. In a large bowl, beat the butter, 1 cup (200g) of sugar and lemon zest with an electric mixer at medium speed, until light and fluffy. Beat in the eggs, one at a time, until incorporated. Beat in the extracts. On low speed, mix in the flour mixture in two additions, followed by half of the sour cream after each addition. Beat just until combined. Do not over mix. Reserve a couple of tablespoons of the chopped cherries. Coat the remaining cherries with 2 teaspoons of flour, then gently fold them into the batter.
  5. Divide the batter evenly into muffin liners. (If using standard muffin liners, fill 3/4 full.) Top with the reserved cherries and the crumb topping. Bake at 375ºF (190ºC) for 5 minutes. Turn the oven heat down to 350ºF (180ºC) and continue baking the muffins until a toothpick inserted into the centers comes out clean, about 12-17 more minutes. Do not over bake.
  6. Transfer the muffins to a cooling rack to cool completely. Drizzle with icing and top with cherries if desired.
Icing
  1. In a small bowl, whisk the powdered sugar, cherry juice, heavy cream, and 1 tablespoon of lemon juice together until smooth. Add additional lemon juice, if needed, until your desired consistency is reached.
Recipe Notes

*To find  tulip muffin liners, click here. To find floral tulip muffin liners, click here.

Sour Cream & Chive Biscuits

Sour Cream & Chive Biscuits

These soft, fluffy biscuits with buttery, golden edges are prefect for summer picnics and cookouts. I served them with grilled chicken, salad and peach iced tea. They also make delightful biscuit breakfast sandwiches.

Print Recipe
Sour Cream & Chive Biscuits
Servings
biscuits
Ingredients
Servings
biscuits
Ingredients
Instructions
  1. In a large bowl, whisk together the flour, sugar, baking powder and salt.
  2. Work the butter into the flour mixture with your fingertips until flat dime size pieces are formed. Stir in the chives.
  3. In a small bowl, whisk together the sour cream and the heavy cream. Stir this mixture into the flour mixture a little at a time until a shaggy dough is formed. Turn the dough out onto a lightly floured surface. Fold the dough over onto itself a few times. Do not overwork the dough. Form the dough into a 6-inch wide by 1-inch tall square. Cover and refrigerate for 30 minutes or freeze for 15 minutes. This will make the dough easier to cut.
  4. Meanwhile, preheat the oven to 400ºF (200ºC). Line a large baking sheet with parchment paper. Cut the dough square into nine 2-inch squares. Place the biscuits about 2 inches apart onto the prepared baking sheet. Brush the tops with heavy cream. Bake until golden brown, about 18-22 minutes. Transfer the biscuits to a cooling rack and immediately brush with melted butter. Apply the chive blossoms to the tops, if using.
Recipe Notes

*I used a microwave flower press kit to press the chive blossoms.  To see the press I used, click here.  Alternately, you can press the chive blossoms  between sheets of wax paper or parchment paper and weigh them down with a heavy book overnight.

Blueberry Muffin Upside Down Cake

Upside down cakes are so much fun and slightly exciting when you flip the pan over and cross your fingers. This blueberry version tastes like a soft, moist blueberry muffin in cake form. It’s heavenly served warm from the oven with vanilla ice cream or whipped cream on top.

Print Recipe
Blueberry Muffin Upside Down Cake
Servings
Ingredients
Servings
Ingredients
Instructions
  1. Preheat the oven to 350ºF (180ºC). Spray an 8-inch round cake pan* with nonstick spray.
  2. In a small saucepan, melt 6 tablespoons (85g) of the butter with the brown sugar and a pinch of salt. Simmer for 1 minute, then transfer the mixture to the cake pan. Arrange the blueberries on top.
  3. In a medium bowl, whisk together the flour, baking powder, cinnamon, nutmeg and 1/2 teaspoon of salt.
  4. In a medium bowl, beat the remaining 10 tablespoons (142g) of butter and the granulated sugar, with an electric mixer at medium speed, until light and fluffy. Beat in the eggs and the egg yolk in 3 separate additions, making sure each one is incorporated before adding the next. Beat in the vanilla extract until well combined. On low speed, beat in the flour mixture in 2 separate additions, followed by half of the milk after each addition. Beat unit combined.
  5. Gently spoon the batter into the cake pan over the top of the blueberries. Smooth the top with a spatula. Bake until the top is golden brown and a knife inserted into the center of the cake comes out nearly clean, about 45-50 minutes. You don't want to see raw batter on the knife, but a little moisture is okay. Let the cake cool in the pan for 5 minutes. Run a knife around the perimeter and invert the cake onto a serving platter. Serve warm or at room temperature.
Recipe Notes

To find my favorite  8-inch round cake pan, click here.