Cinnamon Crumble Scones

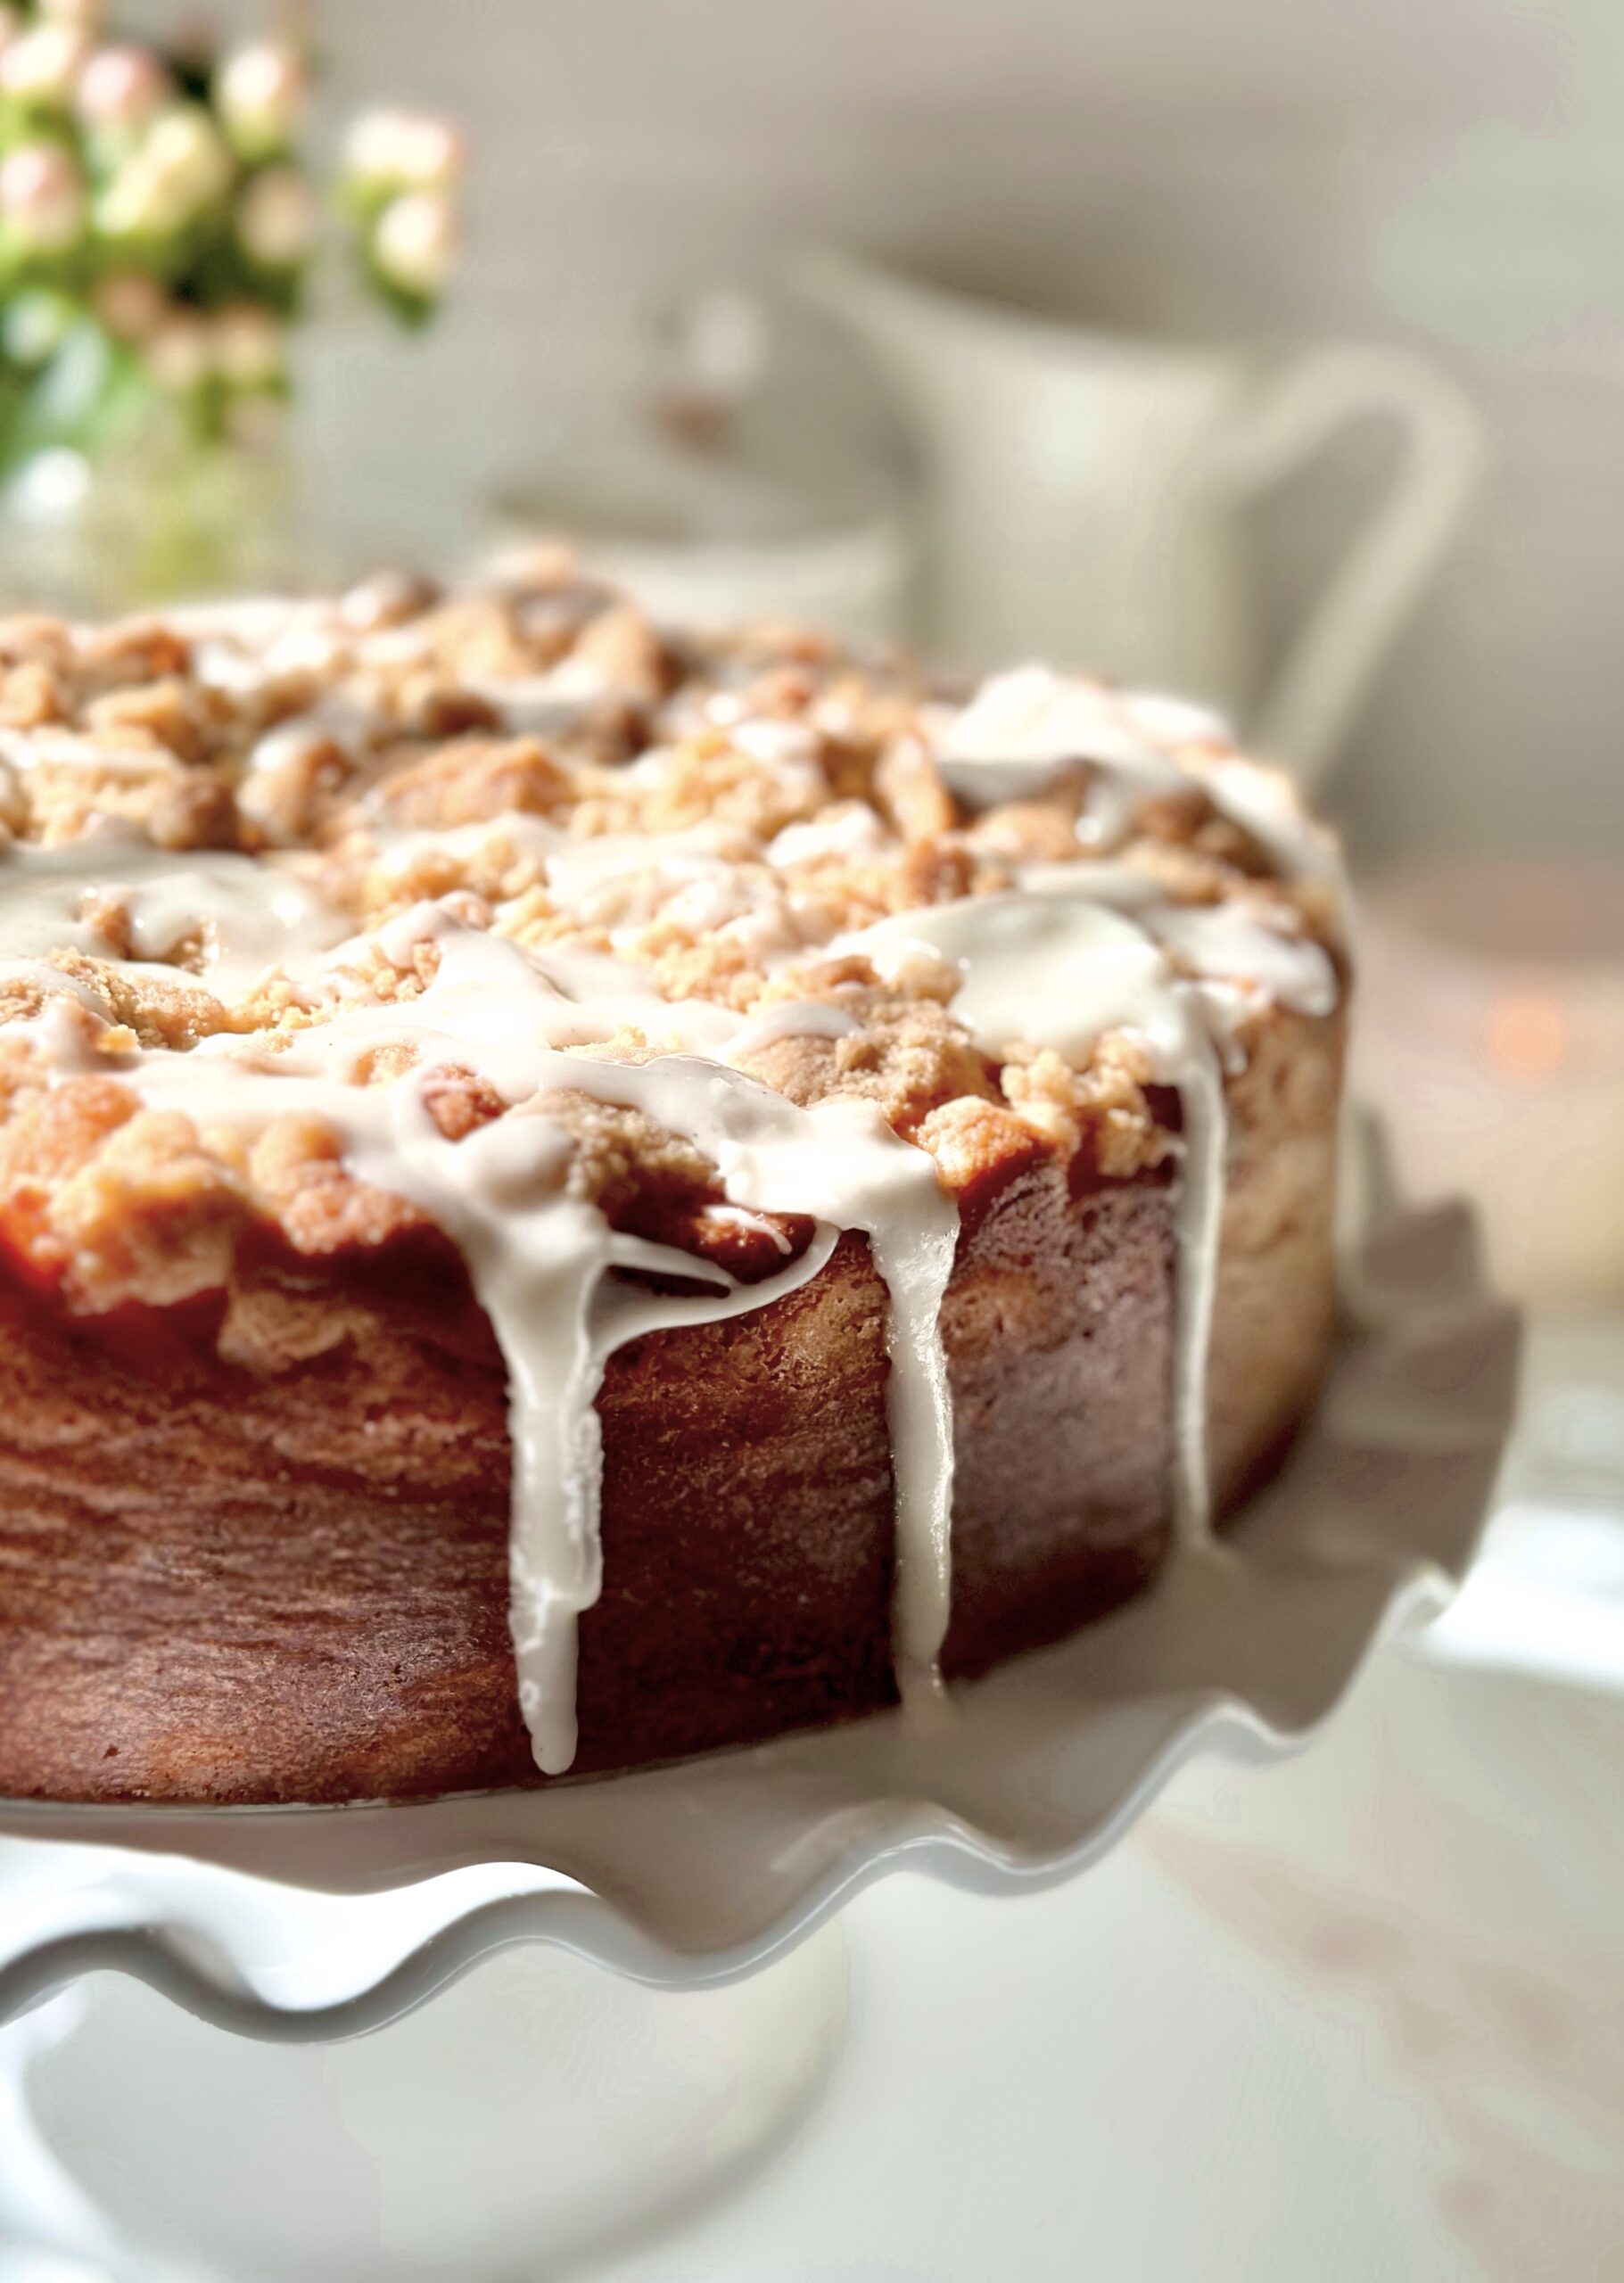
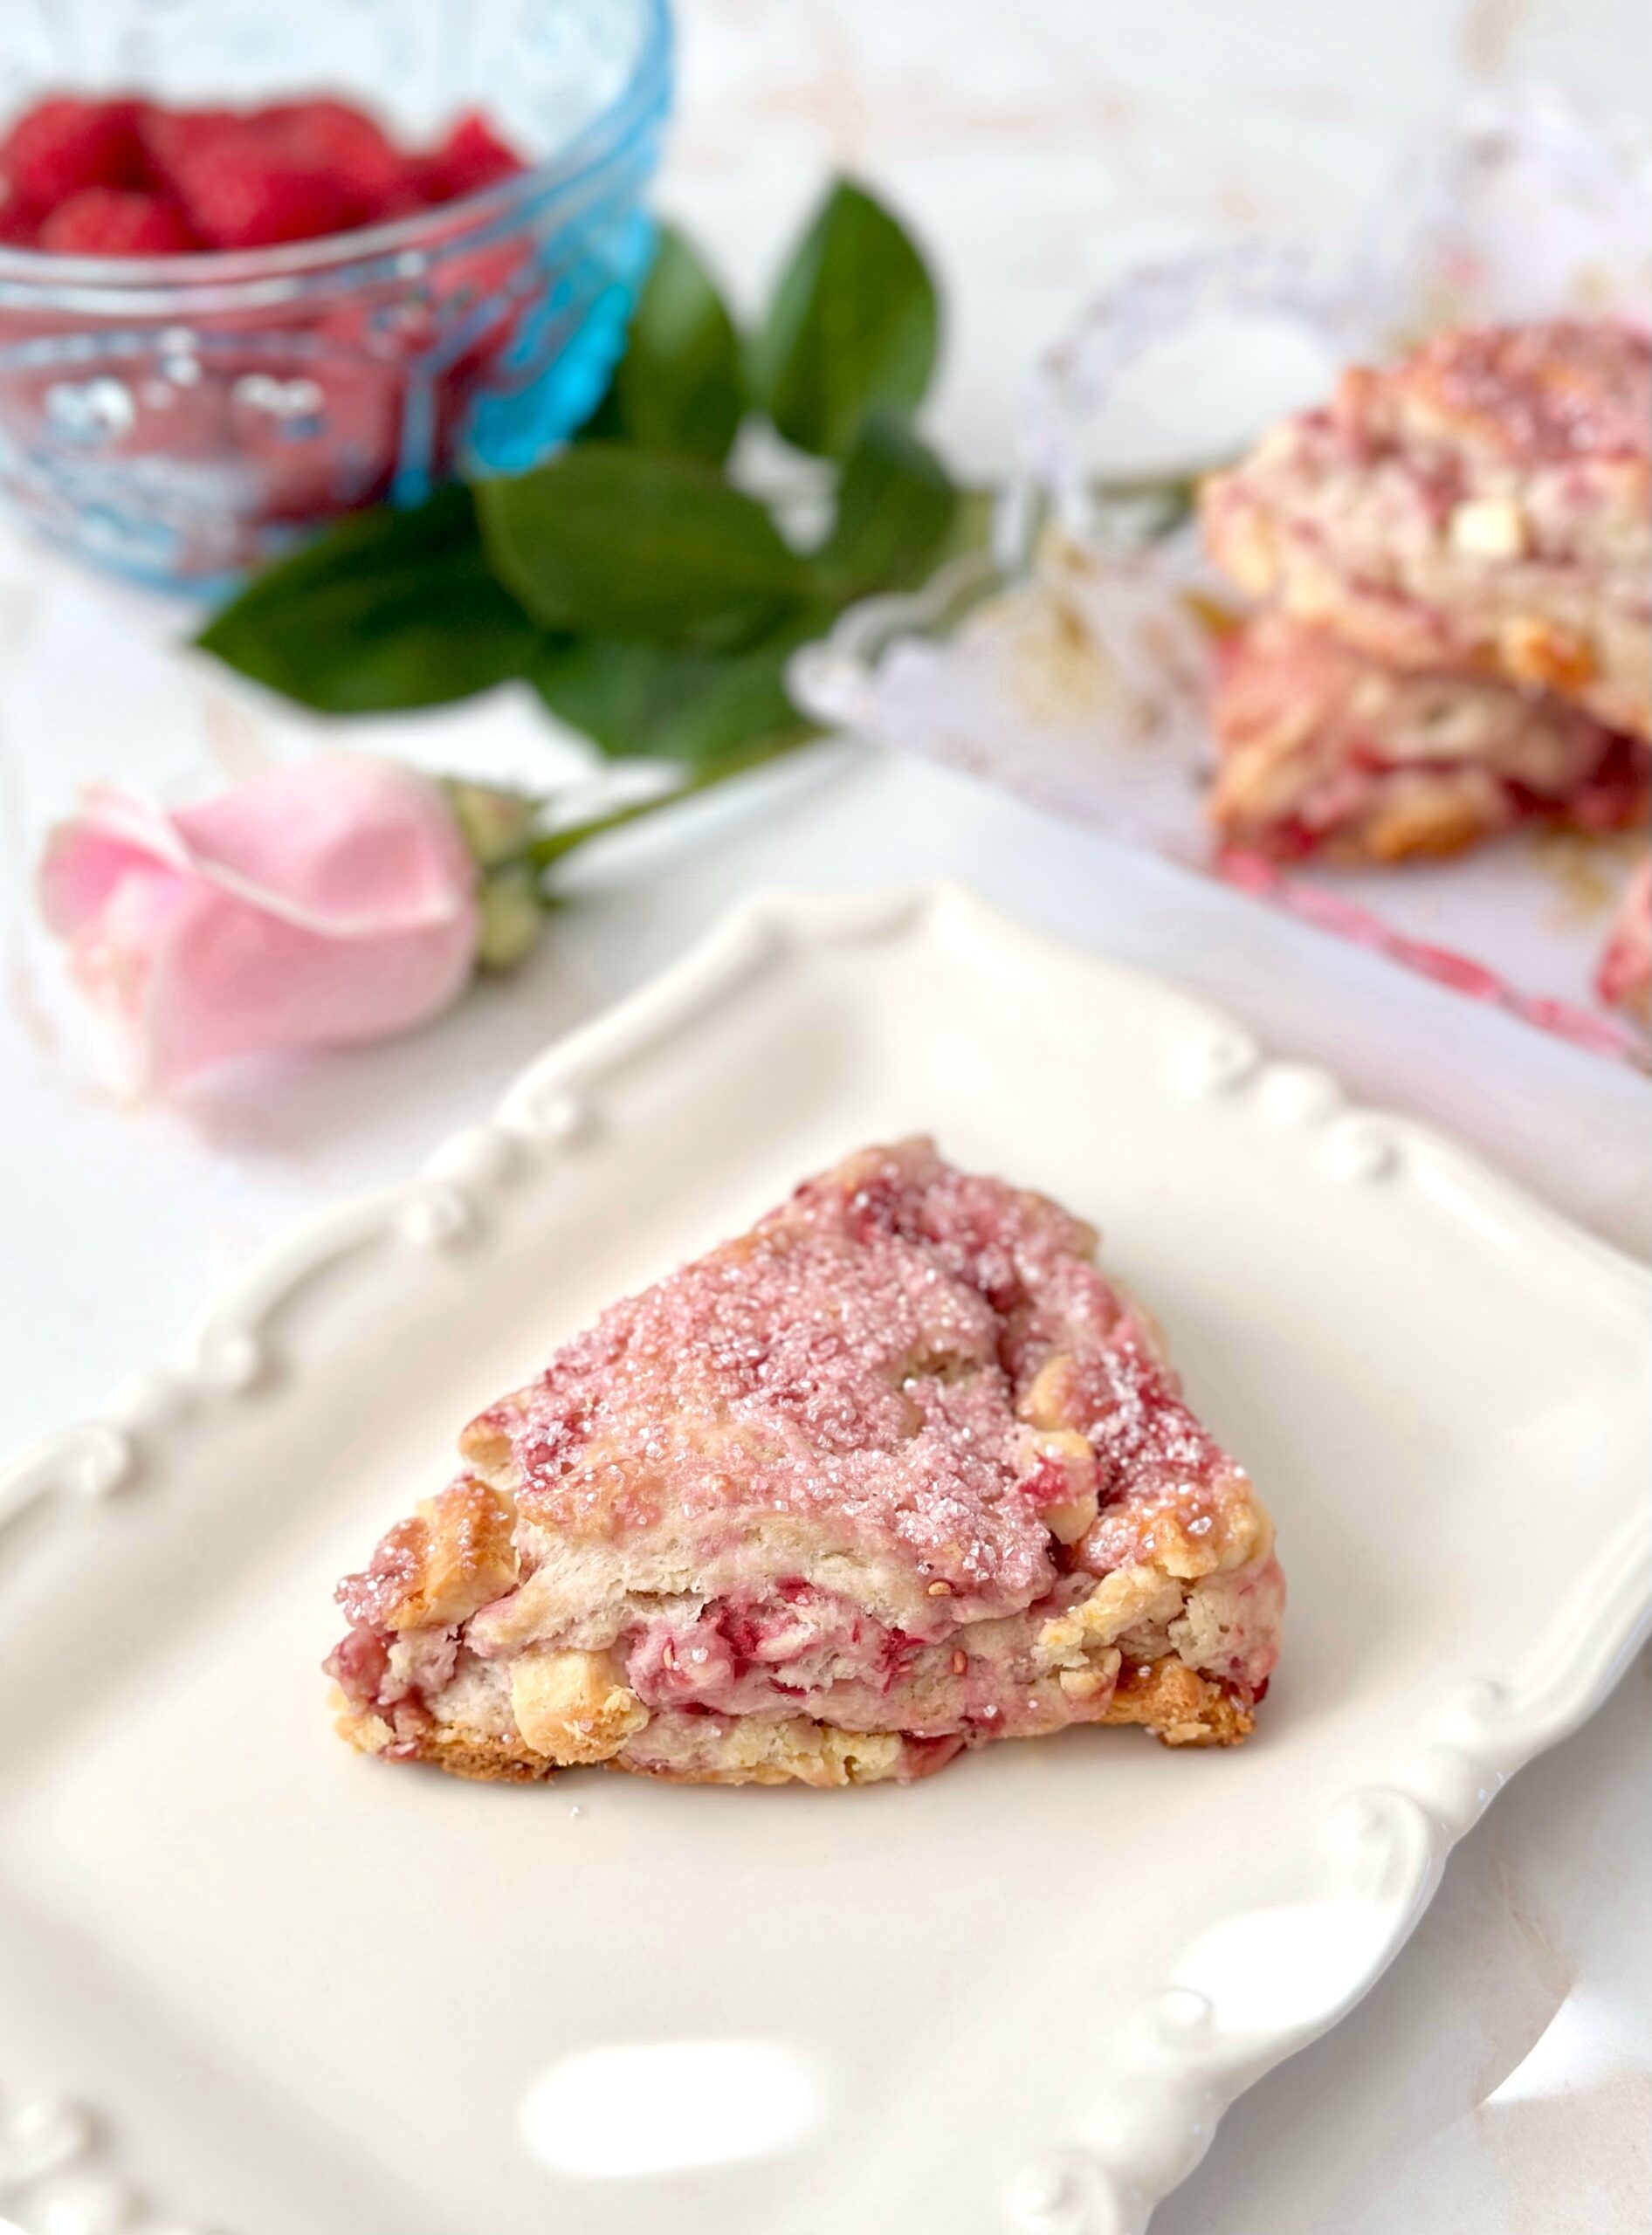
The weeks following the winter holidays always feel peaceful to me. The rush is over and it’s time to catch my breath and rest. When it’s chilly and raining outside, I love spending time at home curled up in my coziest fluffy pajama bottoms and fuzzy socks. Give me a blanket, 75 pillows, a warm cup of tea and these Cinnamon Crumble Scones for ultimate coziness!

The crumb topping on these scones will remind you of a cinnamon crumb cake, which makes them extra nostalgic and comforting. The technique of folding the dough over itself gives them a flaky layered texture. For the tenderest scones, make sure not to over work your dough.

To watch Instagram reel, click here. To watch extended TikTok video showing baking process, click here.

Print Recipe
Cinnamon Crumble Scones
Course Breakfast, Brunch
Keyword cinnamon, scones
Servings
scones
Ingredients
Crumb Topping
Cinnamon Filling
Scones
Icing
Course Breakfast, Brunch
Keyword cinnamon, scones
Servings
scones
Ingredients
Crumb Topping
Cinnamon Filling
Scones
Icing
Instructions
Crumb Topping
  1. In a medium bowl, combine flour, brown sugar, sugar cinnamon and salt.
  2. Work in butter with your fingertips until it looks like wet sand. Press together to make dime size chunks.
  3. Set aside in refrigerator until ready to use.
Cinnamon Filling
  1. In a small bowl, mix filling ingredients together until well combined.
Scones
  1. Preheat oven to 375ºF. Line a large baking sheet with parchment paper.
  2. In a large bowl, whisk together flour, baking powder and salt.
  3. Work butter into flour mixture with your fingertips or with a pastry blender until pea sized pieces are formed.
  4. In a small bowl, whisk together heavy cream, sour cream and vanilla extract.
  5. Stir cream mixture into flour mixture a little at a time until dough comes together. If your dough is too dry add 1-2 more teaspoons of heavy cream.
  6. Turn dough out onto a lightly floured surface. Fold dough over onto itself a couple of times.
  7. Pat dough into an approximately 9 x 5-inch oval. Spread cinnamon filling on half of the dough to within 1/2-inch from the edges. Fold dough in half bringing short ends together. Press edges to seal.
  8. Shape dough into a 7-inch round, about 3/4-inch thickness. Cut into 8 wedges. (Or 6 wedges if you prefer larger scones.)
  9. Pinch the pointed tip of the wedges and tuck under to seal. This helps to prevent the top layer from sliding off while baking. Place wedges about 2-inches apart onto prepared baking sheet.
  10. Brush tops of scones with heavy cream. Top with crumb topping. Bake until light golden brown, about 18-22 minutes.
  11. Transfer scones to a cooling rack to cool. Drizzle with icing.
Icing
  1. In a small bowl, whisk together powdered sugar, butter, 1 tablespoon of milk and vanilla. Add additional milk until desired consistency is reached.

Grandma’s Apple Crumb Cake

Grandma's Apple Crumb Cake

I remember my grandma making coffee cakes and sweet muffins for breakfast, along with eggs, sausages, hot coffee and a big pitcher of milk on the table. The older generation really loved their coffee cakes. I’ve noticed that many Millennials and Gen Z’s think coffee cake contains coffee. Maybe some coffee cake does contain coffee, but in general, coffee cake is called that because it’s typically eaten with coffee. A classic coffee cake is usually a subtly sweet cake with cinnamon, crumb topping and maybe some icing. The Apple Crumb Cake recipe I’m sharing with you has the elements of a classic coffee cake, but so much better! The cake is fluffy and soft, the crumb topping is chunky and plentiful, and the apples are perfectly tender. And don’t get me started about the icing!

Why do most of our grandmothers cook and bake so well? Because they’ve had decades of trial and error to perfect their recipes, tweaking them here and there until they’re approved and loved by their families, neighbors and friends. This cake has had its share of trial and error. She has earned her place as a well-loved, delicious, beautiful queen of coffee cakes.

Print Recipe
Grandma's Apple Crumb Cake
Keyword apple, cake
Servings
servings
Ingredients
Apples
Crumb Topping
Cake
Keyword apple, cake
Servings
servings
Ingredients
Apples
Crumb Topping
Cake
Instructions
Apples
  1. In a large skillet, melt the butter over medium heat. Add the apples, sugar and cinnamon.
  2. Cook, stirring occasionally, until the apples are tender, about 10 minutes. Transfer the apples to a bowl and let cool to room temperature.
Crumb Topping
  1. In a medium bowl, mix the flour, brown sugar, sugar, cinnamon and salt.
  2. Work in the butter with your fingertips until the mixture looks like wet sand. Press together to make 1/2-inch chunks.
Cake
  1. Preheat the oven to 325ºF. Line a 9-inch cake pan with a removable bottom*, or a 9-inch springform pan, with parchment paper. Wrap the bottom of the cake pan with aluminum foil and place pan on a baking sheet.
  2. In a medium bowl, whisk together the flour, baking powder and salt.
  3. In a large bowl, cream the butter and sugar, with an electric mixer on medium speed, until light and fluffy.
  4. Beat the eggs and vanilla into the butter mixture in three separate addition, making sure each addition is incorporated before adding the next.
  5. In a small bowl, whisk the milk and sour cream together.
  6. On low speed, beat the flour mixture into batter in three separate additions, alternating with milk mixture. Mix just until combined.
  7. Transfer the batter to the prepared baking pan. Smooth the top with a spatula.
  8. Drain any excess liquid from the apples. Top the cake batter evenly with apples, then the topping mixture.
  9. Bake until a toothpick inserted into the center of the cake comes out clean, about 50-60 minutes. Cool the cake in pan for 10 minutes. Remove the cake from pan and transfer it to a cooling rack to cool completely.
Icing
  1. In a medium bowl, whisk together the powdered sugar, melted butter, vanilla, salt and 2 tablespoons of cream. Add additional cream until desired consistency is reached. Drizzle over the cooled cake.
Recipe Notes

*To find the cake pan I used, click here.

Butterscotch Bread

What’s better than the smell of chocolate chip cookies baking or of fresh coffee brewing? The aroma of this warm, sweet buttery loaf of Butterscotch Bread is so heavenly that I’m convinced angel grandmothers bake this on a regular basis in heaven. The rich scent is accompanied by a soft, tender bread topped with a silky butterscotch glaze.

It all starts with browning your butter first. It adds a nutty, deep butter flavor. When browning your butter, use a light colored saucepan so you can see the visual clues. You’ll see it start to foam and brown specks will collect on the bottom of the pan. It will smell nutty and fragrant. Keep a close eye on it. It can go from brown to burnt in a quick second. When your brown butter has cooled to room temperature, the rest of the recipe comes together quickly. You can also brown your butter a day ahead and keep it in the refrigerator. Bring it to room temperate before using.

This delightful bread goes well with coffee or tea and is just as delicious the next day. Store covered at room temperature.

Print Recipe
Butterscotch Bread
Servings
loaf
Ingredients
Butterscotch Bread
Butterscotch Glaze
Servings
loaf
Ingredients
Butterscotch Bread
Butterscotch Glaze
Instructions
Butterscotch Bread
  1. In a small saucepan, cook the butter over medium heat until brown and fragrant. When brown specks (not black!) collect at the bottom of the pan, immediately transfer the butter to a small bowl. Let cool to room temperature.
  2. Preheat the oven to 350ºF. Line the bottom of an 8 x 4-inch baking pan with parchment paper. Grease and flour the insides.
  3. In a medium bowl, beat the brown butter, brown sugar, eggs, vanilla and buttermilk until smooth.
  4. Stir in the flour mixture in two additions. Mix just until combined. A few lumps are okay.
  5. Transfer the batter to prepared baking pan. Bake until the top is deep golden brown and q toothpick inserted into center comes out clean, about 38-43 minutes.
  6. Let the bread cool in pan for 10 minutes, them turn it out onto a cooling rack to cool completely. Top with two coats of butterscotch glaze.
Butterscotch Glaze
  1. Melt the butter in a small saucepan over medium heat. Stir in the brown sugar and salt.
  2. Continue stirring over medium heat until the mixture comes to a boil. Boil for two minutes.
  3. Turn the heat down and slowly stir in the heavy cream. Keep stirring until mixture is smooth. Remove from heat and stir in the vanilla extract.
  4. Transfer the butterscotch glaze to a small bowl and let cool until thickened.

Spinach Bacon Soufflés

If you’ve ever gotten up early enough to grab one of those delicious breakfast soufflés at that bakery that starts with a P, then you might just love this recipe. There are plenty of copycat versions online, mostly using refrigerated crescent rolls. I love crescent rolls and you can make a pretty close copy of the originals with them, but why not take them up a notch? In my humble opinion, using puff pastry makes them so much better! These pretty little soufflés will puff up and get golden brown and crispy. You can also personalize each one. Try swapping out the spinach and bacon for your favorite omelet ingredients, such as chopped ham, chives, jalapeños or whatever you like.

Print Recipe
Spinach Bacon Soufflés
Course Breakfast, Brunch
Servings
Ingredients
Course Breakfast, Brunch
Servings
Ingredients
Instructions
  1. Preheat oven to 425ºF. Grease four 8-ounce mini pie dishes* or ramekins.
  2. On a lightly floured surface, roll puff pastry sheet to a 10-inch square. Cut into four 5-inch squares. Place one square in each prepared dish. Dock the bottom of each one by poking holes with a fork.
  3. In a small saucepan, melt butter over medium heat. Add onions and red peppers and cook until softened, about 1 minute. Sprinkle with flour and cook 1-2 minutes more.
  4. Slowly stir in milk. Use a whisk if sauce seems lumpy. Cook until edges start to bubble and sauce thickens. Stir in salt. Remove from heat.
  5. In a medium bowl, beat eggs. Set aside 1 tablespoon of beaten eggs in a small bowl. Add about a third of the sauce mixture into the medium bowl of eggs and whisk until combined. Add the egg mixture back into the saucepan and whisk until smooth.
  6. Stir in Colby-Jack cheese, half of the parmesan cheese and spinach.
  7. Ladle egg mixture evenly into the prepared dishes. Top with bacon and remaining parmesan cheese.
  8. Fold pointed ends toward the center. Brush folded pastry edges gently with reserved beaten egg.
  9. Bake until golden brown and puffy, about 25-30 minutes.
  10. You can serve the soufflés warm in the pie dishes or remove them from the dishes and transfer to a cooling rack.
Recipe Notes

To find the mini pie dishes I used click here.

Pumpkin Cinnamon Mini Muffins

My mom had a cupboard in the kitchen containing a few old cookbooks that she rarely used. As a child, I used to enjoy perusing them and looking at the baked treats. Some of the cookbooks were so old, they had black and white photos or even just drawings of the food. The ones with drawings interested me because they depicted smiling children enjoying the treats.

When I started learning to bake, I found a recipe for French Breakfast Puffs in one of those old books. The title sounded so fancy, but they were really just simple muffins dunked in butter and rolled in cinnamon sugar. I have no idea what the name of the cookbook was or what happened to it, but the delicious muffin recipe stuck around for a while. I’ve tweaked the recipe so many times over the years, and most recently, I added pumpkin to it. These Pumpkin Cinnamon Mini Muffins are one of the best versions I’ve created. The inside texture of the muffins is soft and moist and it contrasts nicely with the slight crunch you get from the cinnamon sugar on the outside. They look so cute too, like little pumpkins, and they definitely make children smile!

To watch the TikTok video of these mini muffins being made, click here.

Print Recipe
Pumpkin Cinnamon Mini Muffins
Servings
mini muffins
Ingredients
Muffins
Topping
Servings
mini muffins
Ingredients
Muffins
Topping
Instructions
Muffins
  1. Preheat oven to 350ºF. Grease and flour a 24-serving *mini muffin pan.
  2. In a medium bowl, whisk together flour, baking powder, salt, cinnamon, ginger and nutmeg.
  3. In a large bowl, beat sugar, oil, egg and pumpkin purée until smooth.
  4. Stir in flour mixture just until combined. A few lumps are okay. Batter will be thick.
  5. Transfer batter to prepared pan, about a scant 2 tablespoons of batter in each muffin cup.
  6. Bake until toothpick inserted into muffins comes out clean, about 11-13 minutes. Do not over bake! Be diligent, since over baking can happen very quickly with mini muffins.
  7. Let muffins cool in pan for 5 minutes. Turn muffins out onto a cooling rack.
Topping
  1. Combine sugar and cinnamon in a shallow bowl.
  2. Dunk warm muffins in melted butter, then roll in cinnamon sugar.
Recipe Notes

To find the mini muffin pan I used, click here.

Peaches and Cream Loaf Cake

Every peach season, I get excited by the abundance of peaches at my local farmers market and I end up buying way too many. So if you’re like me and you have ripe peaches sitting on your counter, turn them into peach purée. I love adding peach purée to my iced tea or adding it to desserts like this moist, tender cake. This is one of my most popular cake recipes on social media, and for good reason. It does not disappoint! To watch the TikTok video, click here.

Print Recipe
Peaches and Cream Loaf Cake
Moist, tender peach cake with peach cream cheese icing
Keyword cake, peach
Servings
loaf
Ingredients
Cake
Icing
Keyword cake, peach
Servings
loaf
Ingredients
Cake
Icing
Instructions
Cake
  1. Preheat oven to 350ºF. Line the bottom of an 8 x 4-inch loaf pan with parchment paper. Grease and flour the sides.
  2. In a medium bowl, whisk together flour, baking powder, baking soda, salt, cinnamon and nutmeg.
  3. Set aside 2 tablespoons peach purée for icing.
  4. In a large bowl, beat sugar, oil, eggs, remaining peach purée and extracts until smooth.
  5. Add flour mixture and beat just until combined.
  6. Transfer batter to prepared baking pan. Bake until toothpick inserted into center comes out clean, about 38-45 minutes.
  7. Let cake cool in pan for 10 minutes, then turn out onto a cooling rack to cool completely. Spread icing on cooled cake.
Icing
  1. In a medium bowl, beat cream cheese and butter together until smooth.
  2. Add powdered sugar, salt, vanilla extract and 1 tablespoon of peach purée. Beat until smooth. Add additional peach purée, if needed, until desired consistency is reached. Fold in diced peaches.

Lemon Scones

Lemon Scones

Yellow is the color of happiness and sunshine. These adorable Lemon Scones will bring you a burst of lemony brightness even on the grayest day. The pretty, vibrant yellow sparkling sugar adds a pleasant crunch to the tops. It’s a nice contrast to the soft, tender interior of the scones. These little gems would shine on any breakfast or brunch table. I served them with blueberry jam and green tea, which was so delightful, I’m still smiling.

Print Recipe
Lemon Scones
Course Breakfast, Brunch
Keyword lemon, scones
Servings
scones
Ingredients
Lemon Scones
Icing
Course Breakfast, Brunch
Keyword lemon, scones
Servings
scones
Ingredients
Lemon Scones
Icing
Instructions
Lemon Scones
  1. Preheat the oven to 375ºF (190ºC). Line a baking sheet with parchment paper.
  2. In a large bowl, whisk together the flour, baking powder, salt and sugar.
  3. Work the butter and lemon zest into the flour mixture with your fingers or with a pastry blender until pea size chunks form.
  4. Stir in the heavy cream and lemon juice until a shaggy dough is formed. If your dough seems too dry, you can add 1-2 more teaspoons of heavy cream.
  5. Turn the dough out onto a lightly floured surface. Knead briefly, by folding dough over onto itself a few times. Do not overwork the dough.
  6. Pat or roll the dough into an 8-inch round, about 3/4-inch thick. Cut out rounds using a 2" or 2 1/4" inch round cutter.**
  7. Place scones about 2 inches apart on prepared baking sheet. Brush scones with heavy cream. Sprinkle generously with sparkling sugar.
  8. Bake until edges are golden brown, about 16-19 minutes.
  9. Cool completely on a wire rack. Decorate with icing.
Icing
  1. In a small bowl, whisk together the powdered sugar, heavy cream and enough lemon juice to form a stiff icing.
  2. Transfer icing to a piping bag or a plastic zip bag. Snip off the tip of the bag. Pipe lines in a spoke pattern onto the scones.
Recipe Notes

*To find the sparkling sugar I used, click here.

**To find the cutter I used, click here.

Blueberry Donut Holes with Homemade Blueberry Sugar

Blueberry Donut Holes with Homemade Blueberry Sugar

If you landed here from one of my social media accounts, welcome! I’m really glad you’re here. I love to create fun, pretty and sweet treats like these delicious blueberry donut holes! The thing that really makes these special is the homemade blueberry sugar, which adds a burst of blueberry flavor. Freeze dried blueberries are combined with sugar to create a beautiful, flavorful sugar that you can use for many other things. It can also be used in tea, lattes, lemonade, cocktails or sprinkled on cookies or scones. Keep in mind that freeze dried blueberries are not the same as dried blueberries. Dried blueberries still contain some moisture, so they won’t work for this purpose.

The donut hole batter comes together quickly and easily. The most challenging part for me is frying them. I found that using a thermometer and testing one donut hole first, helps you determine the perfect oil temperature. Using a small portion scoop helps you get uniform donut holes. Make sure the outside of the scoop is clean between each donut to help them keep the round shape and avoid pointy tails.

Print Recipe
Blueberry Donut Holes with Homemade Blueberry Sugar
Course Breakfast, Dessert
Servings
donut holes
Ingredients
Blueberry Sugar
Blueberry Donut Holes
Course Breakfast, Dessert
Servings
donut holes
Ingredients
Blueberry Sugar
Blueberry Donut Holes
Instructions
Blueberry Sugar
  1. Process freeze dried blueberries and sugar in a food processor or a clean spice grinder until finely ground. Be careful not to over process or you may end up with powdered sugar.
Blueberry Donut Holes
  1. In a medium bowl, whisk together flour, baking powder, nutmeg and salt. Set aside.
  2. In a large bowl, beat sugar, eggs, melted butter, milk and vanilla extract until well combined.
  3. Add flour mixture and mix just until combined. Do not over mix. A few lumps are okay.
  4. Fold in chopped blueberries.
  5. In a heavy saucepan, heat 1 1/2 inches of oil to 340ºF.
  6. Drop tablespoon size portions of batter into hot oil. I used a #60 portion scoop.** Don't overcrowd the pan.
  7. Cook donut holes until golden brown on all sides, about 2-4 minutes, flipping halfway through. If donut holes cook too quickly on the outside, turn heat down.
  8. Briefly drain donut holes on paper towels, then toss warm donut holes in blueberry sugar. Serve immediately.
Recipe Notes

Success tips: Use a small ice cream scoop sprayed with nonstick spray to drop donut holes into oil. Make sure the outside of scoop is clean between each donut hole to keep the round shape and avoid tails on your donut holes.

*To find freeze dried blueberries, click here.

**To find the portion scoop I used, click here.

Raspberry White Chocolate Scones

Raspberry White Chocolate Scones

A good scone has a way of making you feel elegant, especially if you pronounce it ‘skon’ instead of ‘skōne’. I went to a lovely tea recently where scones were served, along with an array of dainty tea sandwiches and desserts. The scones were round with pink sugar sprinkled on top. Pretty pink food is always so promising. Unfortunately, the scones were hard, dry and bland. No amount of clotted cream slathered on them could help. There’s nothing elegant about a dry, hard bite of a scone that you have to struggle to choke down. Scones should be dense and slightly dry and crumbly, but there’s no reason we can’t make them more delicious. It’s fun to add fruit, chocolate, herbs, nuts or whatever you like to make them more delightful. These Raspberry White Chocolate Scones are tender and buttery with bursts of flavor from the fresh raspberries and white chocolate. I added pink sparkling sugar for texture and, of course, to make them look pretty!

Print Recipe
Raspberry White Chocolate Scones
Tender scones with fresh raspberries and white chocolate, topped with crunchy sparkling sugar.
Servings
scones
Ingredients
Servings
scones
Ingredients
Instructions
  1. Line a large baking sheet with parchment paper.
  2. In a large bowl, whisk the flour, baking powder and salt together. Work the butter into the flour mixture with your fingertips or with a pastry blender until pea size pieces form.
  3. In a small bowl, whisk together the heavy cream, sour cream and vanilla.
  4. Stir the cream mixture into the flour mixture until a shaggy dough forms.
  5. Gently fold in the white chocolate and raspberries.
  6. Turn the dough out onto a lightly floured surface. Form the dough into a 1-inch thick round, about 6 1/2 inches in diameter. Cut the dough into 8 wedges.
  7. Place scones 2 inches apart on the prepared baking sheet. Chill the scones in the refrigerator for 20 minutes.
  8. Heat oven to 375ºF (190ºC). Brush the tops of the scones with heavy cream. Sprinkle with coarse sugar.
  9. Bake until the edges look golden brown, about 20-24 minutes. Transfer the scones to a cooling rack.
Recipe Notes

*To find pink sparkling sugar, click here.  

This recipe was updated on 3/23/2023.

Cheddar Ham Biscuits

Have you ever had one of those mornings where you wake up starving? It typically happens to me when I skip dinner the night before. So one morning that happened. My family and I were really hungry, there was a bit of leftover holiday ham in the fridge and these fluffy, satisfying biscuits were born. I think these biscuits need to be included in all lumberjack breakfasts from now on.

If you love ham and cheese anything, you’ll love these biscuits. You can also add fresh chives or swap out the ham for bacon if you like. I love baking them in a cast iron skillet because of the rustic, crispy sides and bottoms you get from the high heat conductivity of cast iron. To find the cast iron pan I used, click here. You can also bake them in a 9-inch cake pan or pie plate.

Print Recipe
Cheddar Ham Biscuits
Course Breakfast, Brunch
Servings
biscuits
Ingredients
Course Breakfast, Brunch
Servings
biscuits
Ingredients
Instructions
  1. Preheat oven to 425ºF. Butter a 9-inch cast iron skillet*
  2. In a large bowl, sift together flour, baking powder, sugar and salt.
  3. Work butter into flour mixture with your fingertips, until flat dime size pieces are formed.
  4. Gently stir in cheese and ham.
  5. Stir in buttermilk a little at a time until a shaggy dough is formed.
  6. Turn dough out onto a lightly floured surface.
  7. Fold dough over onto itself a few times. Form dough into a 7-inch diameter 3/4-inch thick round.
  8. Using a 2 1/2-inch biscuit cutter, cut dough into seven biscuits. Press the scraps together and cut one more biscuit. If dough becomes warm at any point, chill in the refrigerator for 10-15 minutes, then proceed with recipe.
  9. Transfer biscuits to prepared pan. Brush with melted butter.
  10. Bake until biscuits are puffy and tops are golden brown, about 22-25 minutes.
  11. Serve immediately.
Recipe Notes

To find the skillet I used, click here.

Pumpkin Spice Mini Loaves with Caramel Filling

pumpkin spices mini loaves with caramel filling

In early September, I saw someone announce the fall season on social media. In addition to people pointing out that it was too early for the announcement, the word police corrected the person with the word autumn. Since both terms are correct, we can call the season whatever we prefer. I think autumn is a pretty sounding word, so I’ll use it for the rest of this post. Whatever you call it, these Pumpkin Spice Mini Loaves are a perfect little celebration of the season. They have just the right amount of pumpkin spices, making them so fragrant that your kitchen will smell like cozy autumn heaven.

pumpkin spices mini loaves with caramel filling

I call them loaves because I originally made them in mini loaf pans. They’re so cute and delicious that I often give them as holiday gifts. This year I decided to try them in ramekins and I loved the results! I used 6-ounce ramekins, but you can use 8-ounce ramekins, any size mini loaf pans, a muffin pan or even an 8 or 9-inch loaf pan. Keep in mind that baking times will differ. To find the ramekins I used, click here.

Print Recipe
Pumpkin Spice Mini Loaves with Caramel Filling
Mini loaves of tender pumpkin bread with caramel filling and luscious cream cheese frosting
Servings
mini loaves
Ingredients
Pumpkin Spice Mini Loaves
Cream Cheese Frosting
Servings
mini loaves
Ingredients
Pumpkin Spice Mini Loaves
Cream Cheese Frosting
Instructions
Pumpkin Spice Mini Loaves
  1. Preheat oven to 350ºF. Grease and flour seven 6-ounce ramekins or six 8-ounce ramekins or any loaf pans of your choice.
  2. In a large bowl, sift together flour, cinnamon, baking powder, baking soda, salt, ginger, nutmeg and cloves. Set aside.
  3. In a separate large bowl, cream butter and brown sugar together with an electric mixer until light and fluffy.
  4. Beat in eggs, one at a time, until well combined.
  5. Beat in pumpkin and vanilla until combined.
  6. Stir in flour mixture just until combined.
  7. Divide batter evenly into prepared ramekins. Bake for 20-25 minutes or until golden brown and toothpick inserted in center comes out clean. Do not overbake. (Mini loaves or muffins bake for 15-25 minutes, depending on size. 8 or 9-inch loaf bakes for 40-50 minutes)
  8. Cool completely if serving in ramekins or remove from pans after cooling for 10 minutes. Continue to cool on wire rack.
  9. Make 3/4-inch well in the center of each loaf. Fill with caramel sauce. (For an 8 or 9-inch loaf, poke multiple holes with a skewer. Fill with caramel sauce.)
  10. Top with cream cheese frosting and pumpkin seeds
Cream Cheese Frosting
  1. In a large bowl, beat cream cheese and butter together with an electric mixer until smooth.
  2. Add vanilla extract and salt and beat until combined.
  3. Gradually add powdered sugar and beat at medium speed until combined.
  4. Add heavy cream and beat at low speed until combined.

Peaches & Cream Scones with Caramel Icing


Print Recipe


Peaches & Cream Scones with Caramel Icing

Tender scones with fresh peaches, topped with a quick caramel icing

Course Breakfast, Brunch
Keyword peach, scones

Servings


Ingredients
Scones

Icing

Course Breakfast, Brunch
Keyword peach, scones

Servings


Ingredients
Scones

Icing


Instructions
  1. Preheat the oven to 375ºF. Line a large baking sheet with parchment paper.

  2. In a large bowl, whisk together the flour, baking powder, salt and cinnamon.

  3. Work the butter into the flour mixture with a pastry blender or with your fingertips until pea size pieces form.

  4. In a medium bowl, whisk together the sour cream, heavy cream and vanilla.

  5. Mix the sour cream mixture into the flour mixture until a shaggy dough forms. Fold in the peaches.

  6. Turn dough out onto a lightly floured surface. Press the dough together and fold it over onto itself a couple of times.

  7. Pat or roll dough into a 7-inch round. Cut dough into 8 wedges. Transfer to the prepared baking pan. Brush the scones lightly with egg wash or heavy cream.

  8. Bake until golden brown, about 18-22 minutes. Transfer the scones to a cooling rack.

Caramel Icing
  1. Melt the butter a small saucepan over medium heat. Whisk in the brown sugar until smooth, about 2 minutes.

  2. Whisk in the heavy cream and heat until bubbly. Remove from heat. Set aside to cool slightly. Drizzle or spoon the icing over the cooled scones.