Iced Almond Brownies

Iced Almond Brownies

If you like almond desserts, you’ll love these Iced Almond Brownies. They have the base ingredients of frangipane or almond cream, but in brownie form. The addition of white chocolate gives them a fudgy texture and the toasted almonds add a satisfying crunch.

Print Recipe
Iced Almond Brownies
Fudgy almond brownies made with white chocolate, topped with almond icing and toasted almonds
Course Dessert
Keyword almond, bars, brownies
Servings
2-inch brownies
Ingredients
Almond Brownies
Almond Icing
Course Dessert
Keyword almond, bars, brownies
Servings
2-inch brownies
Ingredients
Almond Brownies
Almond Icing
Instructions
Almond Brownies
  1. Preheat the oven to 350ºF (180ºC). Line an 8-inch square baking pan** with parchment paper, leaving a couple of inches of overhang.
  2. Melt the butter, white chocolate and heavy cream together in a large heat safe bowl set over a pan of simmering water, making sure the water doesn't touch the bottom of the bowl. Stir gently until smooth. Set aside to cool slightly.
  3. In a medium bowl, whisk the together the all purpose flour, almond flour and salt.
  4. In a large bowl, whisk together the sugar, eggs, egg yolk, and extracts until smooth and well combined. Stir in the white chocolate mixture until well combined. Stir in the flour mixture just until combined.
  5. Transfer the batter to the prepared baking pan. Bake until a toothpick inserted into the center of the brownies has a few moist combs attached, about 18-23 minutes. Don't over bake. Let the brownies cool in the pan. Remove the brownies from the pan. Top with almond icing and toasted almonds.
Almond Icing
  1. In a small bowl, whisk together the powdered sugar, heavy cream, 1 tablespoon (15ml) of milk and the almond extract until smooth. Add additional milk as needed to achieve your desired consistency.
Recipe Notes

*To toast sliced almonds, preheat the oven to 350ºF (180ºC).  Line a baking sheet with parchment paper or aluminum foil. Spread the almonds out onto the baking sheet in a single layer. Bake until lightly toasted, about 4-5 minutes. **To find the 8-inch baking pan I used, click here.

Easy Apricot Pastries

Easy Apricot Pastries

These cheerful apricot pastries are guaranteed to bring you some sunshine. They’re so cute and easy to make! They remind me of sunny-side-up-eggs. They’re perfect for a summer breakfast or brunch.

Print Recipe
Easy Apricot Pastries
Instructions
Apricot Pastries
  1. In a medium bowl, beat the cream cheese, sugar, egg yolk, heavy cream and vanilla together until smooth.
  2. Line 2 baking sheets with parchment paper. Place a puff pastry sheet on a lightly floured surface. Cut out for 4 1/2-inch rounds using a cookie cutter or trace a bowl using a paring knife. Score a border about 1/2 inch from the edge, making sure not to cut all the way through. I used a 3 1/2 inch cookie cutter for the border. Transfer the cut pastry to the baking sheets. Repeat with the 2nd pastry sheet. Refrigerate the dough rounds for 15 minutes. Meanwhile, preheat the oven to 400ºF (200ºC).
  3. Spoon or pipe the cream cheese filling within the border of each pastry round. Top each one with an apricot half. Brush the borders with egg wash. Bake until puffed and golden brown, about 17-20 minutes. Transfer to a cooling rack.
  4. In a small bowl, whisk the apricot preserves with 1 tablespoon (15ml) of water Brush this mixture over the warm pastries. Once the pastries are cool, drizzle them with icing.
Icing
  1. In a small bowl, whisk together the powdered sugar, heavy cream and 1 tablespoon (15ml) of milk until smooth. Add additional milk as needed to achieve your desired consistency. Add the almond extract and whisk until smooth.

Raspberry White Chocolate Cookies

Raspberry White Chocolate Cookies

These cookies were inspired by my viral Raspberry White Chocolate Scones. The flavors work so well together and the pretty pink sparkling sugar adds a nice crunchy texture, so I thought they would make excellent cookies too. And I was right! These cookies are everything I was dreaming about. In the scones, fresh raspberries were added directly into the dough. In this recipe, instead, I made a quick raspberry jam to fold into the cookies. Make sure to fold it in gently because if you over mix it, the dough will become too wet, which can lead to excess spreading. I also broke the chocolate into pieces, rather than chopping it. Chopping the chocolate makes too many small chards of chocolate which can also cause excess spreading.

Print Recipe
Raspberry White Chocolate Cookies
Cookies with white chocolate pieces and fresh raspberry jam swirled into the dough and topped with pink sparkling sugar
Servings
cookies
Ingredients
Servings
cookies
Ingredients
Instructions
  1. Set aside 1/2 cup of raspberries. In a small saucepan over medium heat, combine the remaining 1 cup of raspberries with 2 tablespoons of sugar, the lemon juice and the cornstarch. Bring to a boil, stirring occasionally. Boil for 1 minute, then turn the heat down to low and simmer until thickened to a jam consistency, about 4-6 minutes. Stir in the reserved raspberries. Transfer the mixture to a bowl and set aside to cool to room temprature.
  2. Preheat the oven to 350ºF (180ºC). Line two large cookie sheets with parchment paper.
  3. In a medium bowl, whisk together the all purpose flour, the cake flour, salt and baking soda until well combined.
  4. In a large bowl, beat the butter, the remains 3/4 cup of sugar, and the brown sugar, with an electric mixer at medium speed, until light and fluffy. Beat in the egg and the egg yolk in two separate additions until well incorporated. Beat in the extracts.
  5. Mix the flour mixture into the batter, just until combined. Stir in the white chocolate pieces. Fold in the cooled raspberry mixture very gently. Do not over mix! You want to see raspberry swirls. Over mixing will change the texture of the cookies.
  6. Place 2-tablespoon size portions of cookie dough about 3 inches apart onto the prepare cookie sheets. I used a #30 portion scoop.* Top each cookie with a piece of white chocolate and sprinkle with coarse sugar. Bake until the tops of the cookies are set and the edges turn light golden brown, about 10-14 minutes. Transfer to a cooling rack.
Recipe Notes

If your cookies spread too much, you can try refrigerating the dough balls for 10-15 minutes before baking. Don't refrigerate the dough longer or your dough may become discolored. For best results, weigh your ingredients.

*To find the portion scoop I used, click here.  

Confetti Crumb Cake Cookies

Just when you thought confetti cookies couldn’t get any more fun and cute, Confetti Crumb Cake Cookies have arrived! I took confetti cookies, also known as birthday cake cookies, over the top by adding confetti crumb topping and a drizzle of pale pink icing. For top level fun, I finished them with edible glitter.

Print Recipe
Confetti Crumb Cake Cookies
Vanilla cookies with white chocolate chips, rainbow sprinkles, crumb topping and icing drizzle
Servings
cookies
Ingredients
Confetti Crumb Topping
Confetti Cookies
Icing
Servings
cookies
Ingredients
Confetti Crumb Topping
Confetti Cookies
Icing
Instructions
Confetti Crumb Topping
  1. In a medium bowl, whisk together the flour, sugar and salt. Work the butter into the flour mixture with your fingertips until it looks like sand with no large chunks of butter. Stir in the sprinkles. Press the mixture together to form chunks. Set aside in the refrigerator while you make the cookie dough.
Confetti Cookies
  1. Preheat the oven to 350ºF (180ºC). Line 2 large cookies sheets with parchment paper.
  2. In a medium bowl, whisk together the flour, baking powder and salt.
  3. In a large bowl, beat the butter, sugar and brown sugar, with an electric mixer at medium speed, until light and fluffy. Beat in the egg and egg yolk in two additions, making sure each one is incorporated before adding the next. Beat in the extracts.
  4. On low speed, beat in the flour mixture into the batter, just until combined. Stir in the white chocolate chips and the sprinkles.
  5. Form the cookie dough into 2-tablespoon size balls. Place them about 3 inches apart onto the cookie sheets. Flatten the dough balls slightly. Top each one generously with the crumb topping.
  6. Bake until the cookies are set and the edges start to turn light golden, about 11-13 minutes. (Be careful not to over bake to avoid drying out your cookies.) Let the cookies cool on the baking sheet for 1 minute, then transfer them to a cooling rack.
Icing
  1. In a small bowl, whisk together the powdered sugar, butter, vanilla and 1 tablespoon of milk. Add additional milk as needed to achieve your desired consistency. Using the tip of a toothpick, gradually add a tiny bit of food coloring and whisk until incorporated.
  2. Drizzle over the cooled cookies. Top with edible glitter if desired.
Recipe Notes

If your cookies spread too much, chill the dough for 20-30  minutes, then proceed with the recipe.

Pistachio Rose Croissants

Filled croissants are gaining more popularity due to social media. Bakeries and coffee shops offer croissants filled with fun and interesting fillings, but they can be pricey and hard to get. Have you ever stood in line at a popular bakery only to discover that the croissant you wanted was sold out? This recipe is a fun and easy way to duplicate a fancy bakery croissant using store bought croissants. This pistachio rose version is elegant and delicious!

Print Recipe
Pistachio Rose Croissants
Croissants brushed with rose syrup, filled with buttery pistachio filling and topped with white chocolate, toasted pistachios and rose petals
Servings
Ingredients
Servings
Ingredients
Instructions
  1. Start by making the rose syrup. In a small saucepan combine 1/4 cup of the sugar with 1/4 cup of water over medium-low heat. Stir occasionally, just until the sugar dissolves. Remove from heat and stir in the rose water to taste.
  2. Preheat the oven to 350ºF. (180ºC). Line a baking sheet with parchment paper.
  3. In a medium bowl, beat the butter with the remaining 1/4 cup of sugar and the salt together by hand or with an eclectic mixer, until well combined. Beat in the egg, extracts, pistachio flour and all purpose flour until well combined.
  4. Split the croissants in half with a serrated knife. Place the croissants on the prepared baking sheet, cut side up. Brush the croissants with the rose syrup. Spread the pistachio mixture on the bottom half of each croissant. Place the tops on the croissants.
  5. Bake until the filling is set, about 25-30 minutes. If your croissants start to brown too much, cover them with aluminum foil tents during the last few minutes of baking. Transfer the croissants to a cooling rack.
  6. Melt the white chocolate and oil together in a heat safe pan set over a pan of barely simmering water. Stir gently until smooth. Remove from heat. Stir in food coloring a little at a time until your desired shade is achieved. Drizzle the pink chocolate over the cooled croissants. Top with chopped pistachios and rose petals.
Recipe Notes

*To find rose water, click here.  If you don't like rose flavor, substitute the rose water with 1/2 teaspoon pure vanilla extract or 1/4 teaspoon pure almond extract.

**To find culinary rose petals, click here.


White Chocolate Peach Muffins

I have strong opinions about muffins. Maybe a little controversial too. When baked correctly, muffins should be soft, fluffy and tender. I get a little sad and disappointed when I buy a big, domed bakery muffin and the inside is rubbery. Many of the pretty muffins I see on social media are painfully rubbery too, as the creators break open a muffin in a dramatic moment of triumph. The muffin recipe I’m sharing here is tender and delicious if baked correctly.

One of the most important ways to achieve tender muffins is by not over mixing your batter once the flour is added. Muffins are technically cake, not bread, so we don’t want gluten formation. Another way to get tender muffins is to use an acidic ingredient such as sour cream, yogurt or buttermilk. Lastly, and very importantly, don’t over bake or under bake your muffins. Baking times in recipes are a guide and not necessarily exact because everyone’s ovens and baking pans are different. Keep an eye on your muffins and test them for doneness with a cake tester or a toothpick. My grandma used to say that when you start to smell them, they’re probably done or close to being done.

Soggy muffins also make me run the other way. Muffins loaded with too much fruit or fruit that hasn’t been macerated can make your muffins soggy or dense. In this recipe, I macerated the peaches to draw out some of the moisture, so it helps to avoid creating soggy spots in your muffins. The waiting time goes by fast as you prep the rest of your ingredients.

Print Recipe
White Chocolate Peach Muffins
Tender muffins with white chocolate chips and chunks of fresh peaches.
Servings
muffins
Ingredients
Macerated Peaches
Crumb Topping
Muffins
Servings
muffins
Ingredients
Macerated Peaches
Crumb Topping
Muffins
Instructions
Macerated Peaches
  1. In a medium bowl, toss the peaches with lemon juice. Add the brown sugar and cinnamon and stir to combine. Let stand 30 minutes.
  2. Drain the peaches well and toss with flour. Reserve 1/4 cup of peaches for the muffin tops.
Crumb Topping
  1. In a medium bowl, whisk together the flour, sugar, brown sugar, cinnamon and salt.
  2. With a pastry blender, or with your fingertips, work the butter into the flour mixture until it looks like wet sand. Press together to form chunks. Set aside in the refrigerator until ready to use.
Muffins
  1. Preheat the oven to 375ºF (190ºC). Line a 12-serving muffin pan with tulip muffin liners.* (Tulip muffin liners are preferable because they hold more batter, but you can also use standard muffin liners.)
  2. In a medium bowl, whisk together the flour, baking powder, baking soda, salt, cinnamon and nutmeg.
  3. In a large bowl, beat the butter and sugar together until light and fluffy. Beat in the eggs and extracts in 3 separate additions, making sure each one is incorporated before adding the next.
  4. Mix in the flour mixture with a wooden spoon or spatula, in two additions, followed by half of the sour cream after each addition. Mix just until combined. The batter will be thick.
  5. Toss the white chocolate chips with flour, then fold them into the batter. Gently fold in the drained peaches.
  6. Transfer batter to the prepared muffin pan, equally dividing the batter among the muffin cups. (If you're using standard muffin liners, fill them 2/3 full.) Top with the reserved peaches and the crumb topping. Optional: Top each muffin with a piece of white chocolate.
  7. Bake muffins for 5 minutes. Turn down the oven heat to 350ºF (180ºC). Continue baking until the muffins are light golden brown and a toothpick inserted into the centers of the muffins comes out clean, about 15-20 more minutes. Cool in the pan for 5 minutes, then remove the muffins from the pan and continue cooling on a cooling rack.
Recipe Notes

*To find tulip muffin liners, click here.


Peaches and Cream Loaf Cake

Every peach season, I get excited by the abundance of peaches at my local farmers market and I end up buying way too many. So if you’re like me and you have ripe peaches sitting on your counter, turn them into peach purée. I love adding peach purée to my iced tea or adding it to desserts like this moist, tender cake. This is one of my most popular cake recipes on social media, and for good reason. It does not disappoint! To watch the TikTok video, click here.

Print Recipe
Peaches and Cream Loaf Cake
Moist, tender peach cake with peach cream cheese icing
Keyword cake, peach
Servings
loaf
Ingredients
Cake
Icing
Keyword cake, peach
Servings
loaf
Ingredients
Cake
Icing
Instructions
Cake
  1. Preheat oven to 350ºF. Line the bottom of an 8 x 4-inch loaf pan with parchment paper. Grease and flour the sides.
  2. In a medium bowl, whisk together flour, baking powder, baking soda, salt, cinnamon and nutmeg.
  3. Set aside 2 tablespoons peach purée for icing.
  4. In a large bowl, beat sugar, oil, eggs, remaining peach purée and extracts until smooth.
  5. Add flour mixture and beat just until combined.
  6. Transfer batter to prepared baking pan. Bake until toothpick inserted into center comes out clean, about 38-45 minutes.
  7. Let cake cool in pan for 10 minutes, then turn out onto a cooling rack to cool completely. Spread icing on cooled cake.
Icing
  1. In a medium bowl, beat cream cheese and butter together until smooth.
  2. Add powdered sugar, salt, vanilla extract and 1 tablespoon of peach purée. Beat until smooth. Add additional peach purée, if needed, until desired consistency is reached. Fold in diced peaches.

Fairy Tale Meringue Cookies

Fairy tale meringue cookies

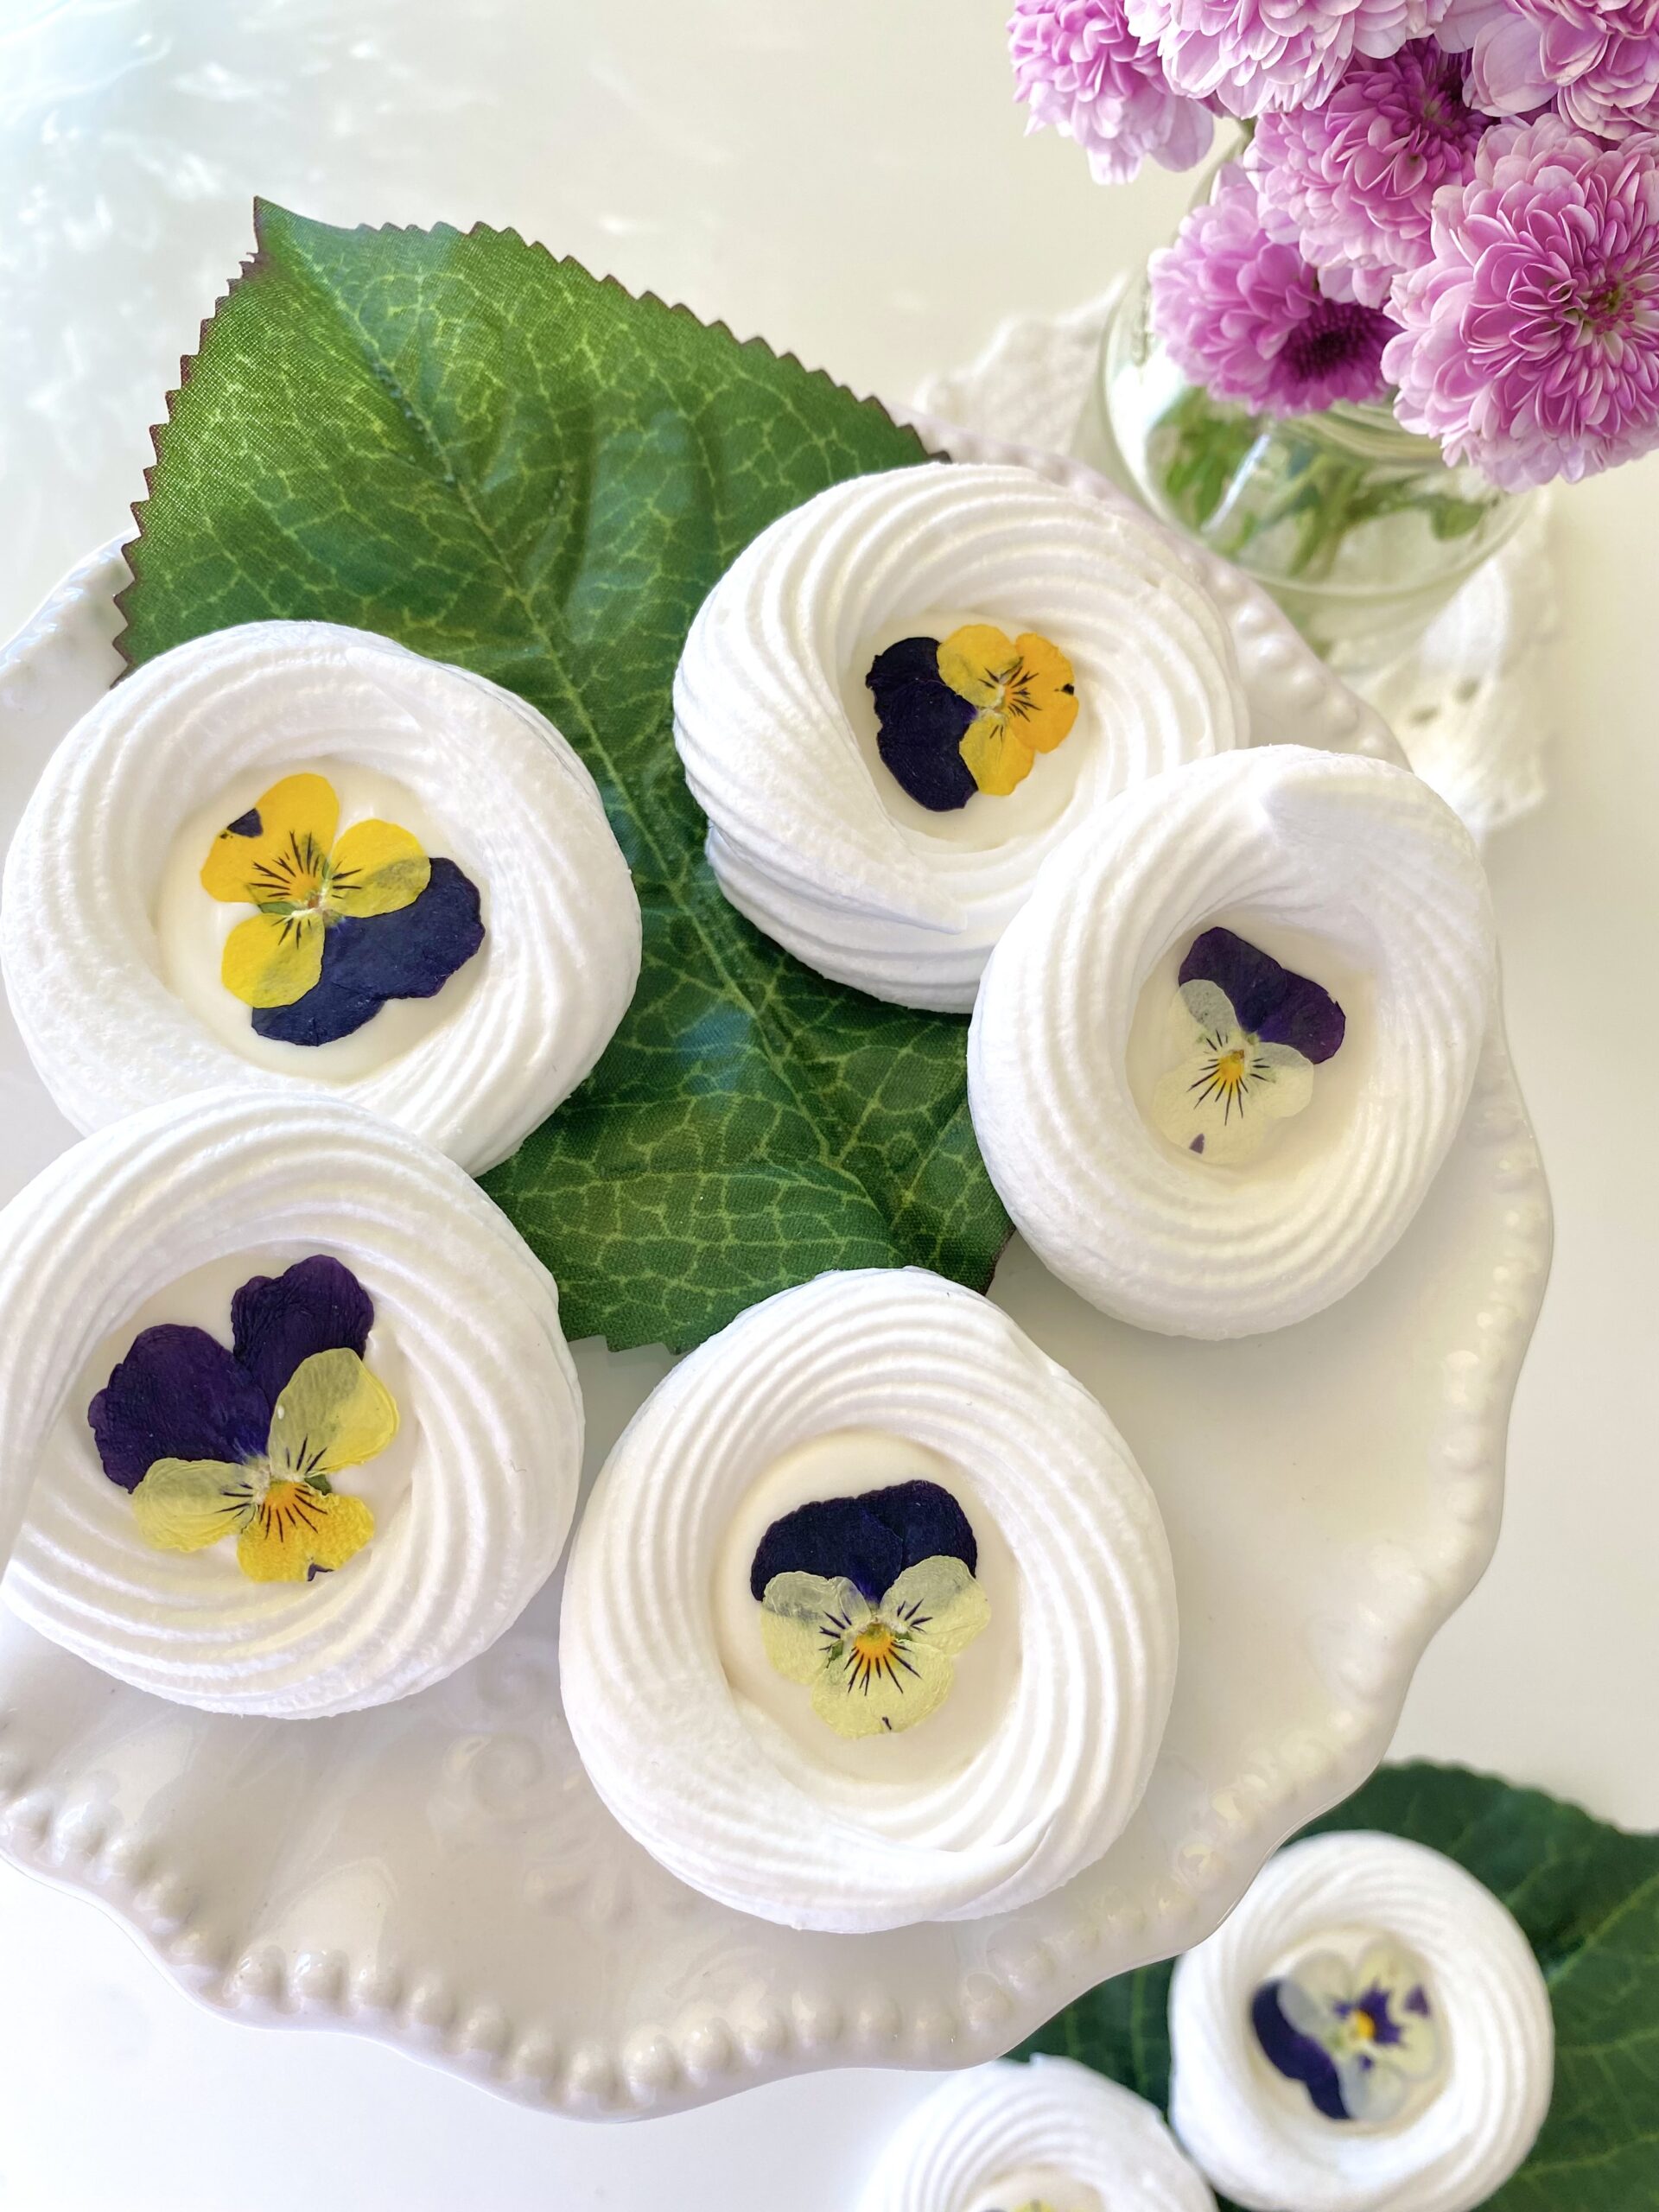
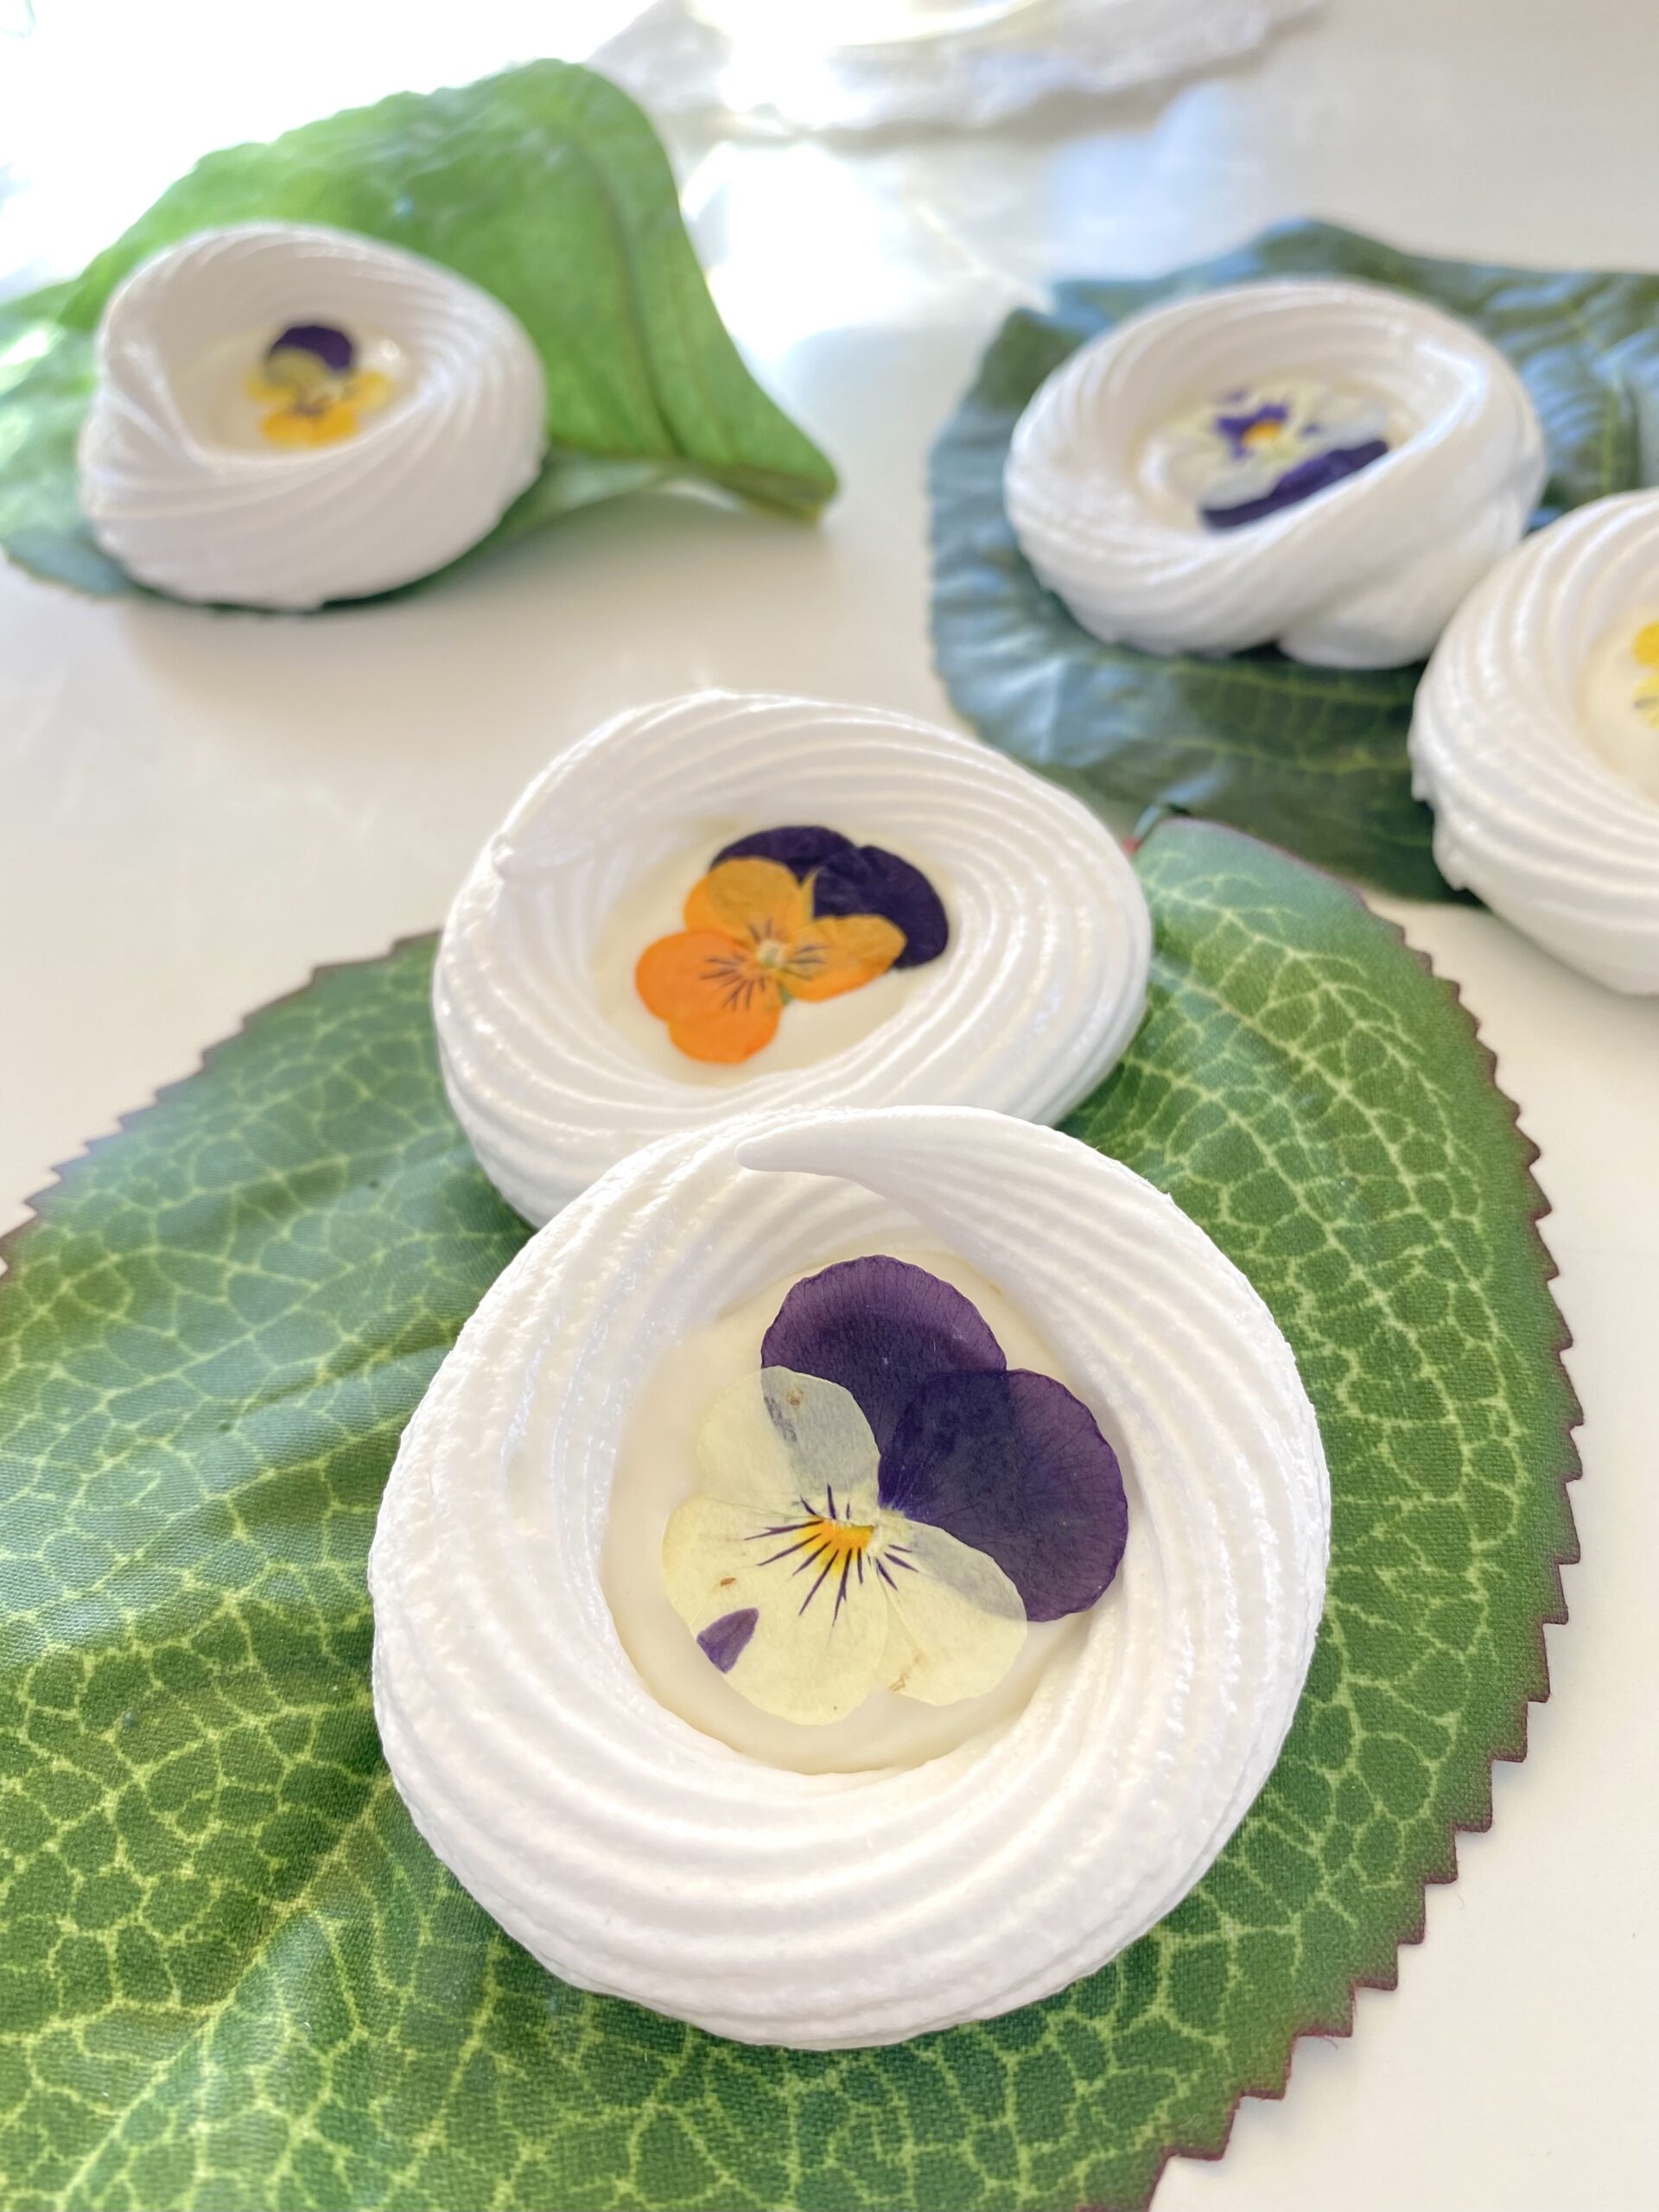
Sometimes we need a little magic in our lives. These pretty, dainty meringue cookies sparked a bit of magic in my life that I want to share with you. It started when I washed some beautiful little violas. Watching them float in a bowl of clear water was positively therapeutic. After pressing and weighing them down with a heavy book overnight, the reveal of perfectly flat, delicate blossoms was so satisfying. The process of making meringue is also very satisfying for me. I love the moment when the frothy egg and sugar mixture magically turns to glossy, billowy sweetness.

Piping the meringue circles was fun! I traced circles on the bottom of the parchment paper to use as a guide for stress-free piping. I used white chocolate to fill the center of the meringue circles, but you can also use white chocolate chips or candy melts. You can use any small edible flowers or flower petals. Feel free to express your creativity! Try using sprinkles, edible glitter or tint the meringue mixture with a few drops of gel food color.

fairy tale meringue cookies

Print Recipe
Fairy Tale Meringue Cookies
Meringue cookies filled with white chocolate and topped with pressed edible flowers
Keyword cookies
Servings
cookies
Ingredients
Pressed edible flowers
Meringue cookies
Keyword cookies
Servings
cookies
Ingredients
Pressed edible flowers
Meringue cookies
Instructions
Pressed edible flowers
  1. Gently wash edible flowers. Pat dry with paper towels.
  2. Press between parchment paper. Weigh down with a heavy book for at least 24 hours.
Meringue cookies
  1. Beat egg whites with an electric mixer at medium speed until frothy.
  2. Add cream of tartar and beat to soft peaks.
  3. Continue beating and gradually add sugar and almond extract.
  4. Turn mixer to high speed and beat to glossy, stiff peaks.
  5. Preheat oven to 200ºF. Line two large baking sheets with parchment paper.
  6. Transfer meringue to a piping bag fitted with a large star tip. *I used Ateco #864
  7. Pipe two-inch circles about an inch apart onto prepared baking sheets.
  8. Bake for one hour. Turn off oven and let meringues cool in oven.
  9. In a microwave safe container, microwave white chocolate for 10 second intervals until melted or melt on the stovetop in a double boiler.
  10. Transfer melted white chocolate to a squeeze bottle or a piping bag. Fill holes of meringue circles with white chocolate. Top each with a pressed flower.
  11. Let chocolate set at room temperature. Do not refrigerate.
Recipe Notes

*To find Ateco tip #864, click here.

Cherry Blossom Cookies

cherry blossom cookies

Each spring, I look forward to the sight and fragrance of beautiful botanical blooms, especially cherry blossoms. We often think of cherry blossoms as something unique to Washington D.C. or Japan, but cherry blossoms can be found in many regions of the United States. Georgia has many thousands of the beautiful pink trees. They can also be found in my home state, California. Here in California we also have many other types of beautiful blossoming fruit trees.

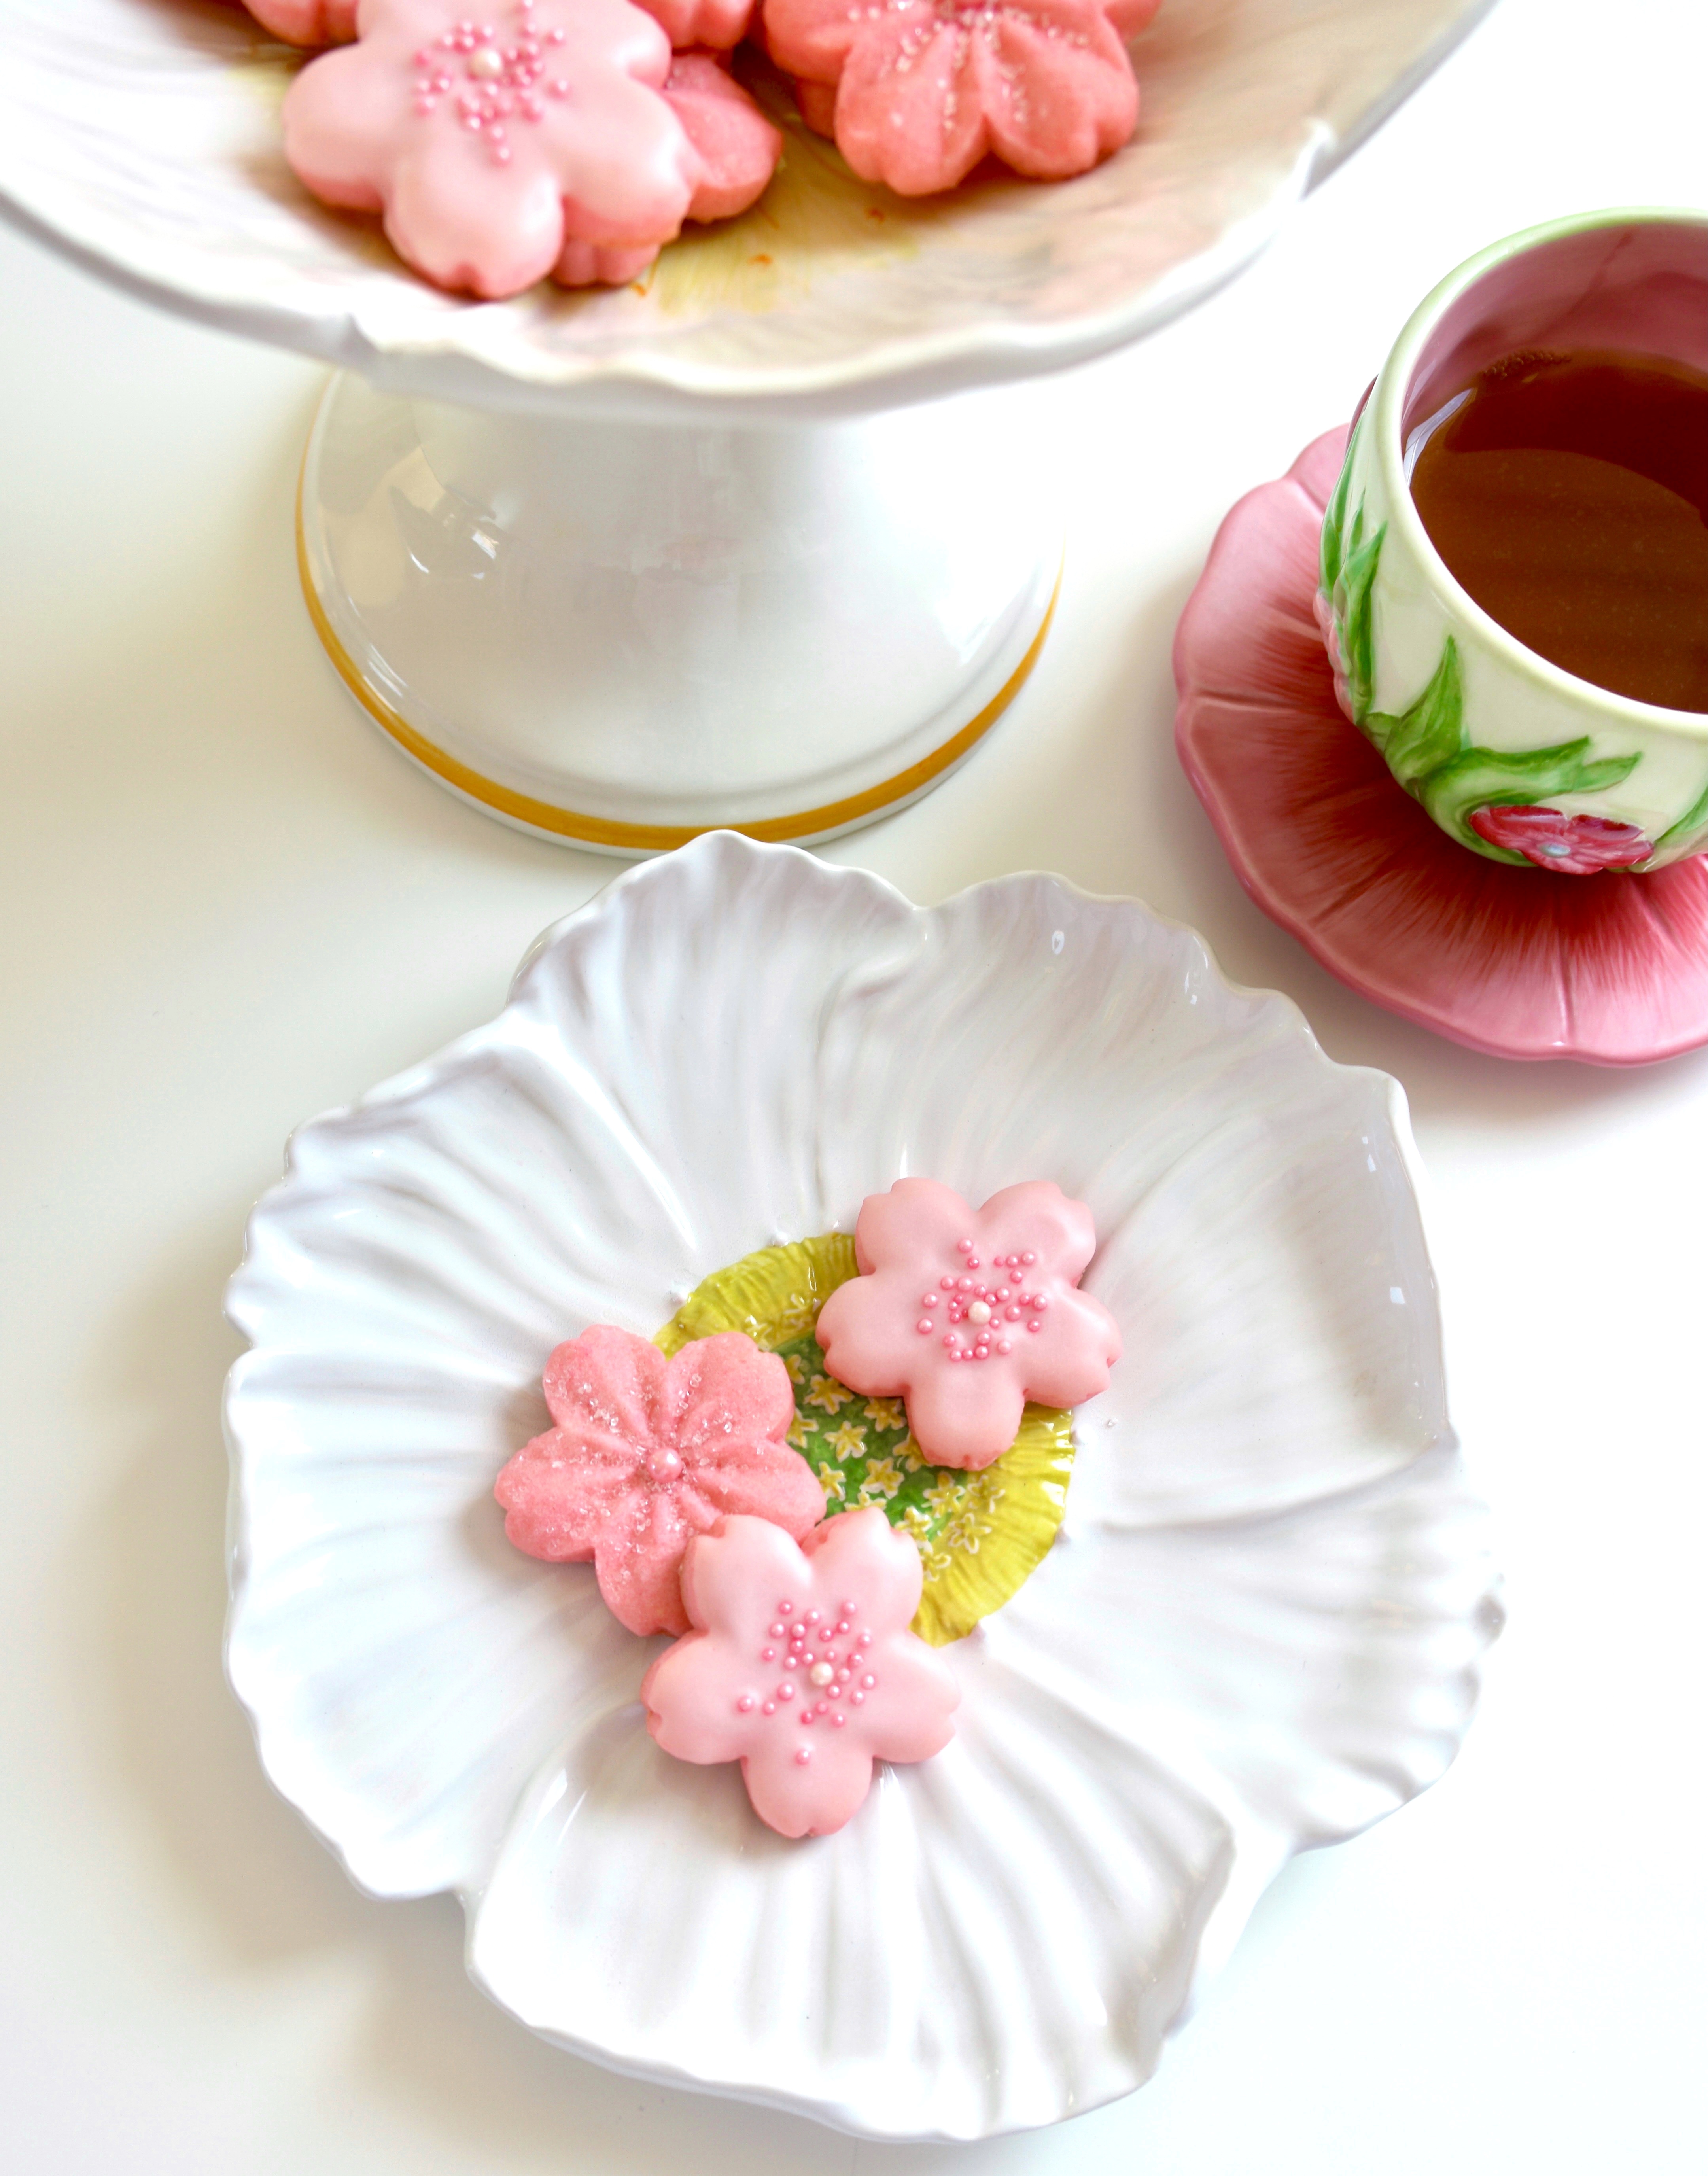
Inspired by the beautiful pink blossoms, I baked some cherry blossom cookies. There are many varieties of the blossoming pink trees. The Yoshino variety that we love to admire is not the same as the trees that produce cherries that we typically eat, but I decided to make the cookies cherry flavor anyway. Cherry extract is more accessible, but it’s also possible to make the cookies sakura blossom flavor if you prefer. You can purchase culinary sakura blossoms or sakura powder and flavor the cookies with it.

These perfectly pretty, pink cookies are easy to make and fun to decorate. You can sprinkle sparkling sugar on them before baking and call it a day or you can make some pink cherry icing and add sugar pearls or sprinkles. Either way, they look beautiful and taste delicious!

Print Recipe
Cherry Blossom Cookies
Pink cherry flavored sugar cookies with cherry icing
Servings
dozen
Ingredients
Cherry Blossom Cookies
Cherry Icing
Servings
dozen
Ingredients
Cherry Blossom Cookies
Cherry Icing
Instructions
Cherry Blossom Cookies
  1. In a large bowl, beat butter and cream cheese together with an electric mixer on medium speed, until smooth.
  2. Add sugar and salt. Beat on medium speed until light and fluffy.
  3. Add egg and extracts. Beat on medium speed until well combined.
  4. Add flour in two additions. Mix on low speed just until combined.
  5. Mix in food color on low speed, a tiny bit at a time, until desired shade is achieved.
  6. Divide dough into two discs. Wrap in plastic wrap and refrigerate until firm, about 2 hours or up to overnight.
  7. Preheat oven to 375ºF. Line two large cookie sheets with parchment paper.
  8. On a lightly floured surface, roll dough to 1/8" thickness.
  9. Cut out cookies with 2-inch blossom cutter. ***See note below.
  10. Transfer to prepared baking sheets. Sprinkle with sparkling sugar if using.
  11. Bake for 7-9 minutes until bottom edges are lightly browned.
  12. Remove from oven and transfer to cooling rack.
  13. Cool completely then ice with cherry icing, if desired.
  14. Decorate with sugar pearls or sprinkles before icing sets.
Cherry Icing
  1. In a small bowl, whisk together powdered sugar, salt, 3 tablespoons of milk and cherry extract. Add additional milk until desired consistency is reached. Whisk together until smooth.
  2. Mix in pink gel food color, a tiny bit at a time, until desired shade is achieved.
Recipe Notes

*Do not use imitation cherry flavoring or extract. Imitation extracts may make your cookies taste medicinal. 

** I used Wilton gel food color in shade rose. Click here to find it. 

*** Use your favorite blossom cookie cutter or click here to find the blossom cutters I used.

Peaches & Cream Profiteroles

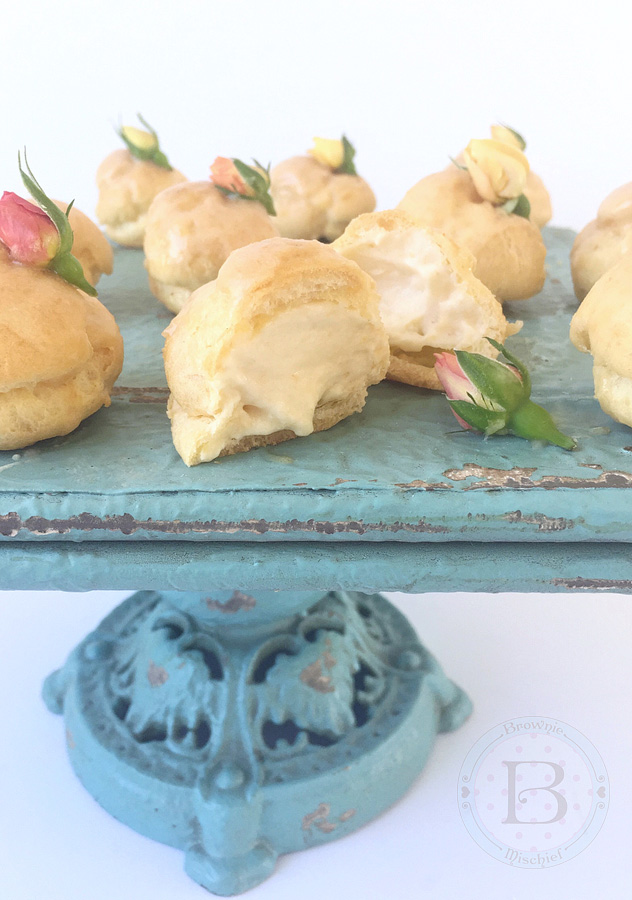
Peaches & Cream Profiteroles by Brownie Mischief

Summer is nearly over, and after the recent heatwave here in Southern California, I’m more than ready to welcome fall weather. But before I put on my fluffy sweater and dive into pumpkin spice everything, I want to enjoy the tail end of peach season, don’t you? Farmer’s markets and stores near my home are still brimming over with fresh peaches, so I picked up some peaches and decided to give them a proper goodbye and send them off in style.

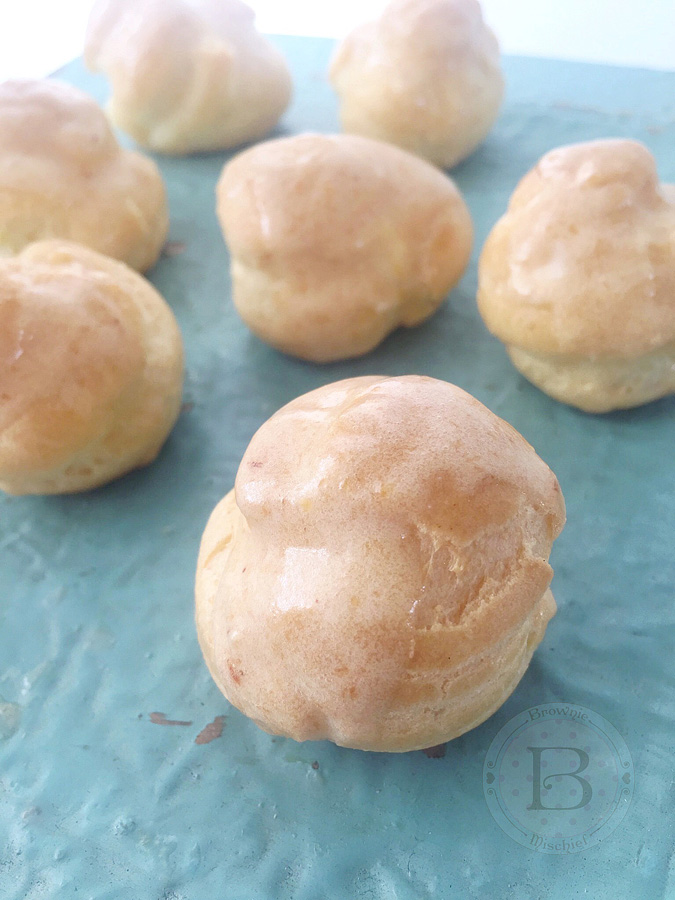
Peaches & Cream Profiteroles by Brownie Mischief

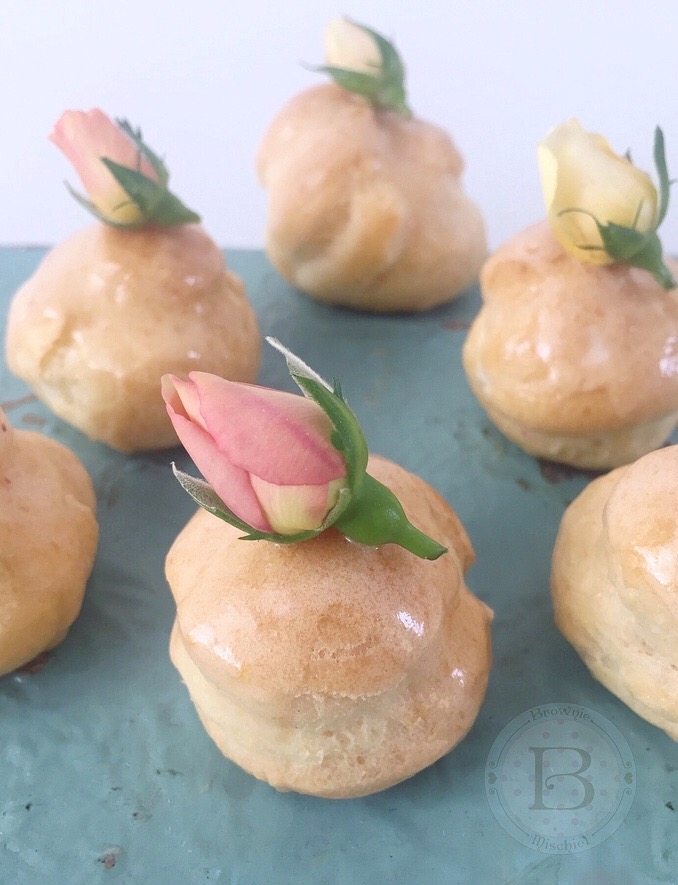
I created some luscious peaches and cream filled, bite-size puffs of choux pastry, called profiteroles. They’re like cream puffs, only smaller. The filling is creamy, but so light and airy that I’m convinced that these profiteroles have no calories! The recipe I’m sharing with you uses fresh peaches, but feel free to substitute frozen peaches if fresh peaches aren’t available. There are a lot of steps to this recipe, but the steps are done in stages and are very easy to do.

Peaches & Cream Profiteroles by Brownie Mischief

I decorated my profiteroles with fresh, pesticide-free miniature rosebuds, also known as spray roses. If you can’t find miniature rosebuds, pesticide-free rose petals would be a good substitute. You may not get a chance to embellish these little beauties. They have a way of popping into people’s mouths even before you can decorate them!


Print Recipe


Peaches & Cream Profiteroles

Bite-sized puffs of choux pastry filled with a creamy, fresh peach filling and topped with fresh peach icing.

Course Dessert
Cuisine French

Servings


Ingredients
Peach Purée

Peaches & Cream Filling

Profiteroles

Peach Icing

Course Dessert
Cuisine French

Servings


Ingredients
Peach Purée

Peaches & Cream Filling

Profiteroles

Peach Icing


Instructions
Peach Purée
  1. Purée peaches in a blender or food processor. Strain puréed peaches through a sieve. Stir in lemon juice.

  2. Place puréed peaches in a small saucepan. Bring to a boil over medium heat.

  3. Reduce heat and simmer until peach purée is reduced by half.

  4. Remove from heat. Stir in peach flavoring and set aside to cool completely.

Peaches and Cream Filling
  1. Bring milk to a boil in a small saucepan over medium heat.

  2. Meanwhile, whisk sugar, cornstarch and salt together in a medium bowl. Add the egg and whisk until smooth.

  3. When milk starts to boil, remove from heat and pour 1/3 of the hot milk into the egg mixture and whisk to combine.

  4. Pour the egg mixture into the remaining hot milk and cook over medium heat, stirring continuously, until the mixture comes to a boil and thickens.

  5. Remove from heat. Stir in butter and extracts.

  6. Pour mixture through a sieve placed over a bowl. Cover the surface of pastry cream with plastic wrap. Let cool.

  7. Set aside 2 tablespoons of cooled peach purée. Add remaining peach purée to cooled pastry cream and stir to combine. Chill in refrigerator.

  8. In a medium bowl, whip heavy cream to stiff peaks with an electric mixer at high speed. Fold whipped cream into peach pastry cream mixture. Set aside in refrigerator.

Profiteroles
  1. Preheat oven to 400ºF. Line two large baking sheets with parchment paper.

  2. Combine water, butter and salt in a medium saucepan and bring to a boil over medium heat.

  3. Reduce heat. Add flour and stir vigorously with a wooden spoon until mixture pulls away from sides of the pan and forms a ball.

  4. Transfer mixture to the bowl of a stand mixer. Mix on low speed until steam dissipates and mixture cools to lukewarm.

  5. Add eggs one at a time and beat with an electric mixer at medium speed, until smooth, stopping to scrape down bowl.

  6. Transfer mixture to a piping bag, fitted with a large round tip. (**I used Ateco tip 808.)

  7. Pipe 1 1/4 inch mounds, about 2 inches apart onto prepared baking sheets. Smooth tops with a wet finger.

  8. Bake for 15 minutes, then turn oven temperature down to 350ºF and continue baking until golden brown, about 8-10 more minutes. Using a toothpick or skewer poke a small hole in each profiterole to let steam escape. Place on a wire rack to cool completely.

  9. Using the tip of a paring knife, poke a pilot hole in the bottom of each profiterole.

  10. Place peaches and cream filling into a piping bag fitted with a medium round piping tip. (***I used Wilton tip 12.)

  11. Place piping tip into the pilot holes and fill each profiterole with filling.

Peach Icing
  1. In a small bowl, whisk all icing ingredients together and spoon over filled profiteroles. Refrigerate until ready to serve.


Recipe Notes

*To make peaches easy to peel, blanch them  in boiling water for about 30 seconds, then dunk  in ice water.

**To find Ateco tip 808, click here. ***To find Wilton tip 12, click here.