Iced Almond Brownies

Iced Almond Brownies

If you like almond desserts, you’ll love these Iced Almond Brownies. They have the base ingredients of frangipane or almond cream, but in brownie form. The addition of white chocolate gives them a fudgy texture and the toasted almonds add a satisfying crunch.

Print Recipe
Iced Almond Brownies
Fudgy almond brownies made with white chocolate, topped with almond icing and toasted almonds
Course Dessert
Keyword almond, bars, brownies
Servings
2-inch brownies
Ingredients
Almond Brownies
Almond Icing
Course Dessert
Keyword almond, bars, brownies
Servings
2-inch brownies
Ingredients
Almond Brownies
Almond Icing
Instructions
Almond Brownies
  1. Preheat the oven to 350ºF (180ºC). Line an 8-inch square baking pan** with parchment paper, leaving a couple of inches of overhang.
  2. Melt the butter, white chocolate and heavy cream together in a large heat safe bowl set over a pan of simmering water, making sure the water doesn't touch the bottom of the bowl. Stir gently until smooth. Set aside to cool slightly.
  3. In a medium bowl, whisk the together the all purpose flour, almond flour and salt.
  4. In a large bowl, whisk together the sugar, eggs, egg yolk, and extracts until smooth and well combined. Stir in the white chocolate mixture until well combined. Stir in the flour mixture just until combined.
  5. Transfer the batter to the prepared baking pan. Bake until a toothpick inserted into the center of the brownies has a few moist combs attached, about 18-23 minutes. Don't over bake. Let the brownies cool in the pan. Remove the brownies from the pan. Top with almond icing and toasted almonds.
Almond Icing
  1. In a small bowl, whisk together the powdered sugar, heavy cream, 1 tablespoon (15ml) of milk and the almond extract until smooth. Add additional milk as needed to achieve your desired consistency.
Recipe Notes

*To toast sliced almonds, preheat the oven to 350ºF (180ºC).  Line a baking sheet with parchment paper or aluminum foil. Spread the almonds out onto the baking sheet in a single layer. Bake until lightly toasted, about 4-5 minutes. **To find the 8-inch baking pan I used, click here.
Chocolate Olive Oil Cakes

Chocolate Olive Oil Cakes

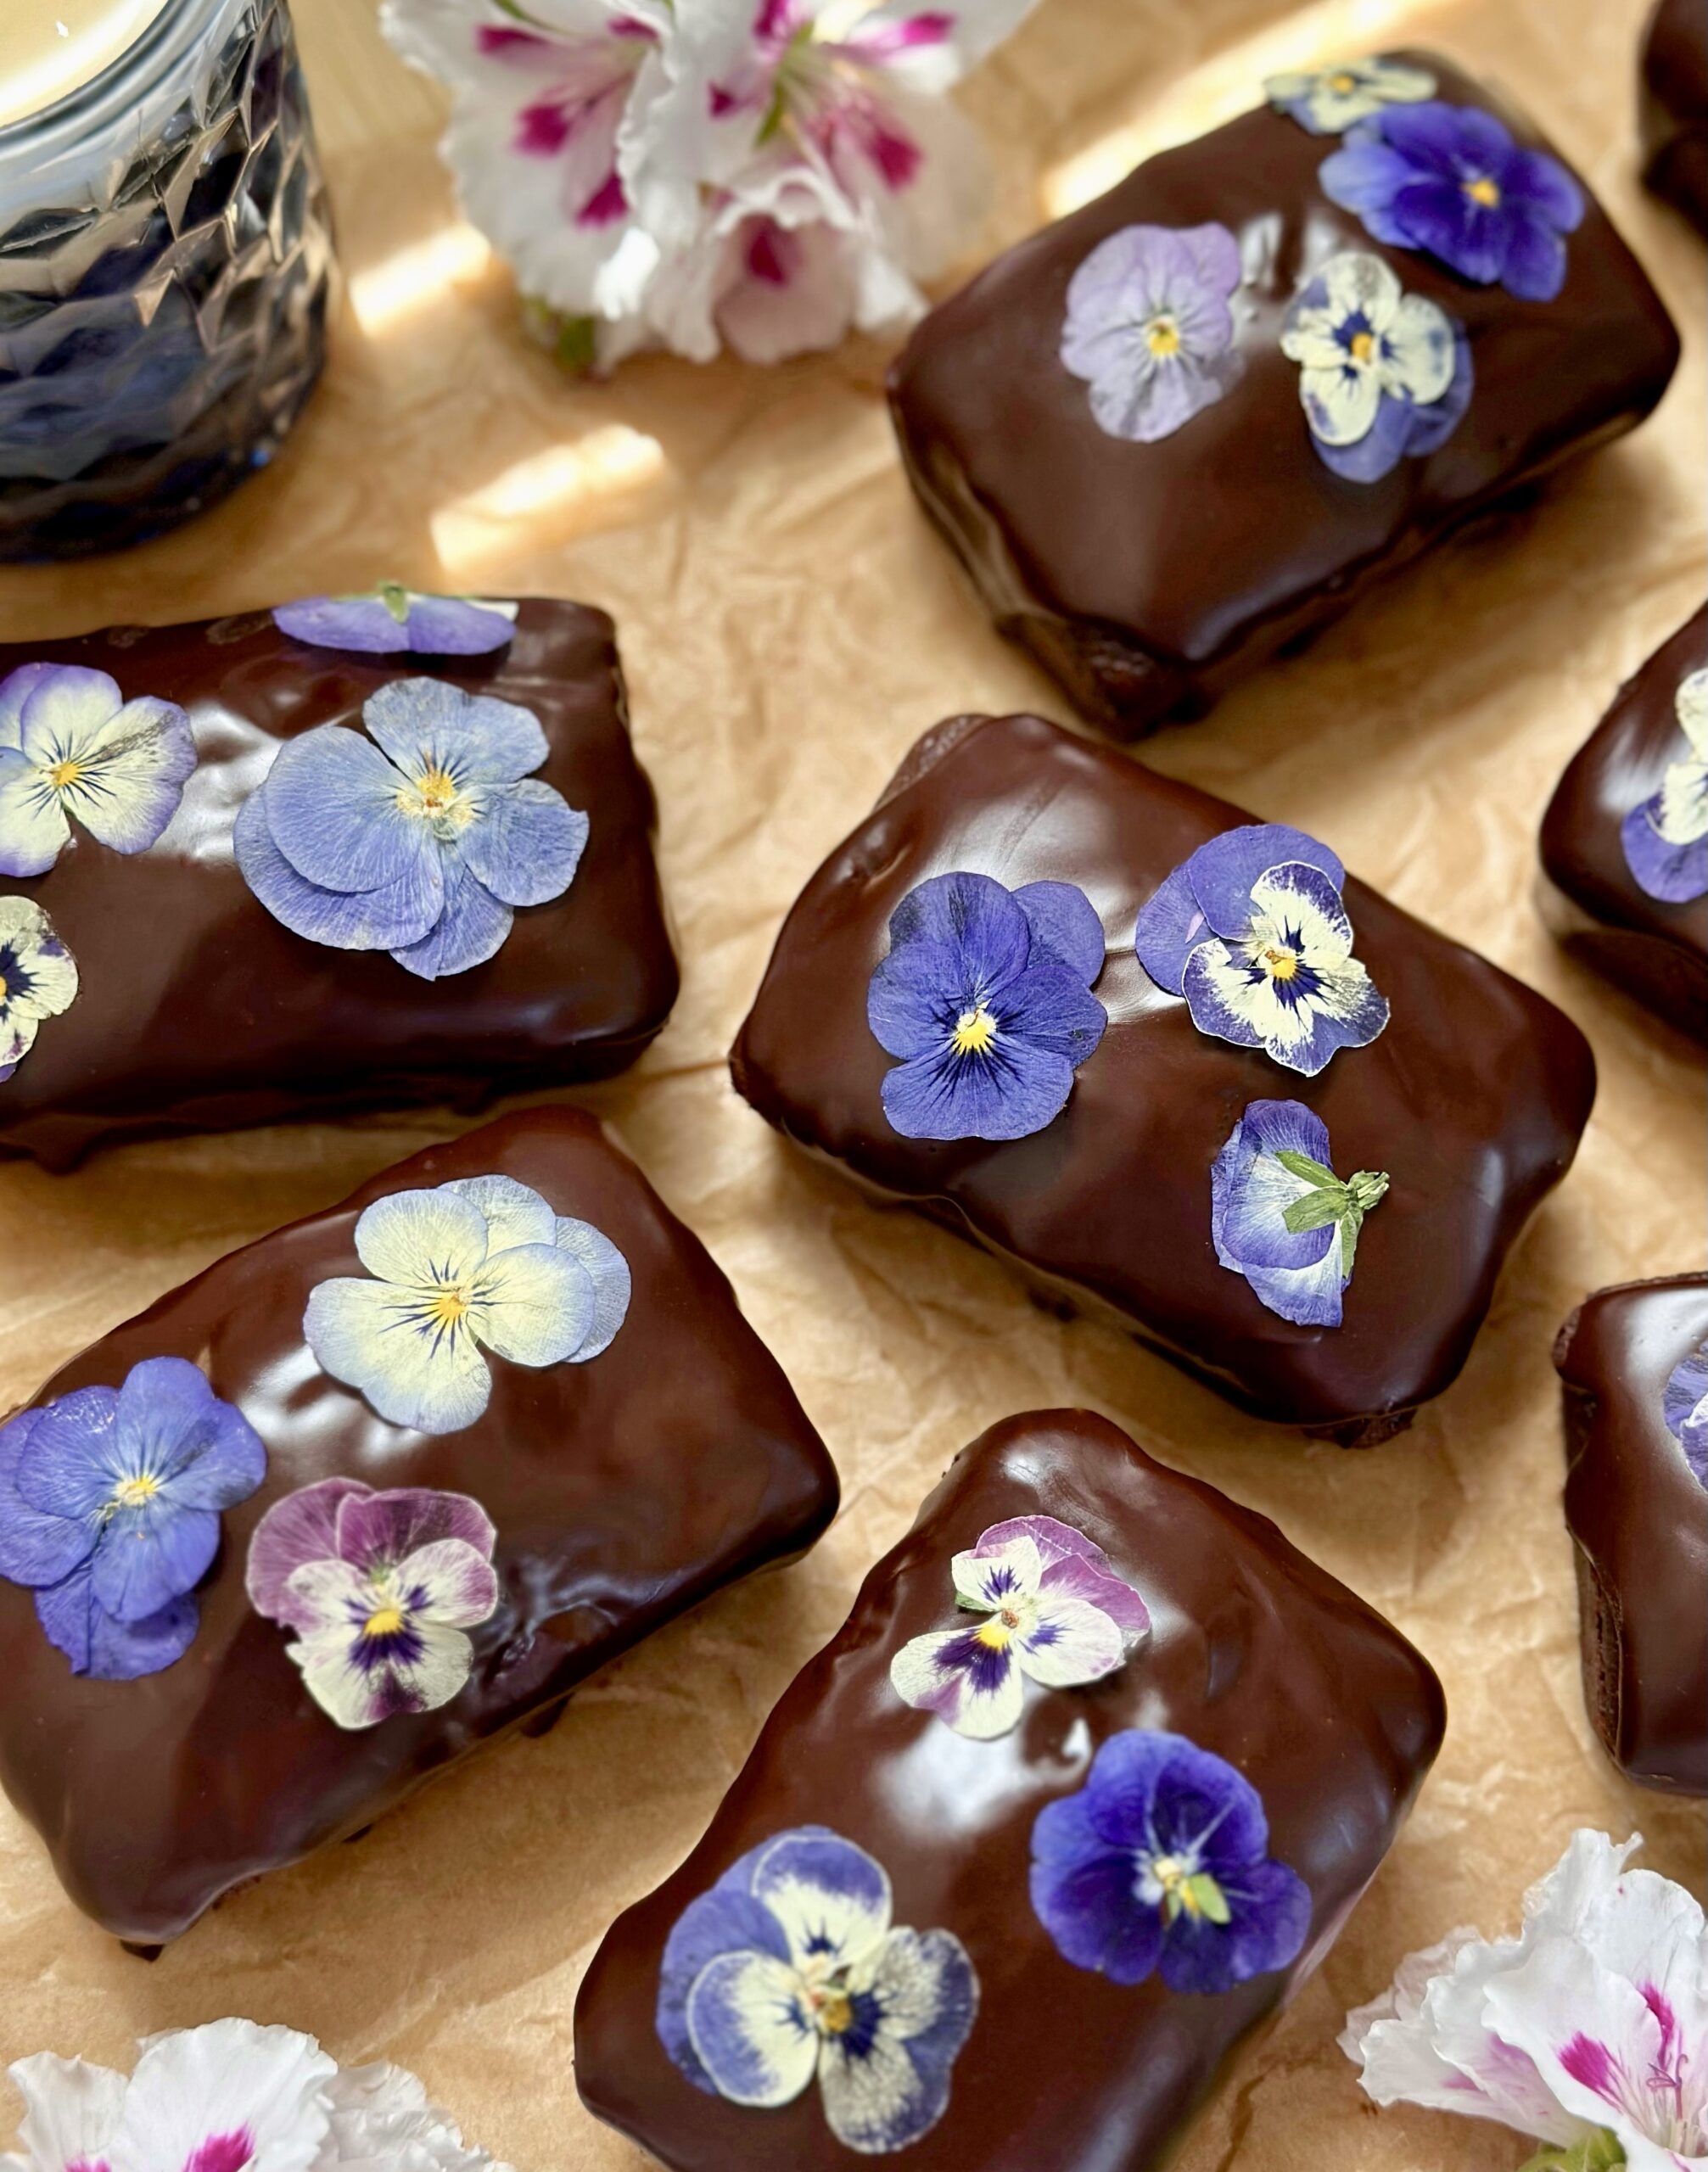
These soft, plush mini chocolate loaf cakes with a silky chocolate glaze are perfect for fairy picnics. They also make adorable Mother’s Day treats for moms who love chocolate. They’re easy to make and don’t require a mixer. I garnished them with edible pressed flowers for a magical finishing touch.

Print Recipe
Chocolate Olive Oil Cakes
Chocolate olive oil mini loaf cakes with silky chocolate icing
Course Dessert
Servings
mini loaf cakes
Ingredients
Chocolate Olive Oil Cakes
Chocolate Glaze
Course Dessert
Servings
mini loaf cakes
Ingredients
Chocolate Olive Oil Cakes
Chocolate Glaze
Instructions
Chocolate Olive Oil Cakes
  1. Preheat the oven to 350ºF (180ºC). Grease and flour the cavities of an 8-serving mini loaf pan,** I use a mixture of equal parts flour and cocoa powder to flour them. It's also helpful to line the bottoms of the cavities with parchment paper. I used a pan with eight 2 1/4-inch by 3 1/2-inch cavities.
  2. In a medium bowl, whisk together the flour, cocoa powder, almond flour, baking powder, baking soda and salt until well combined.
  3. In a large bowl, whisk together the sugar, brown sugar, oil, eggs and vanilla extract until smooth and well combined.
  4. In a small bowl, whisk together the milk and sour cream.
  5. Stir the flour mixture into the batter in two additions, followed by half of the milk mixture after each addition. Beat just until combined.
  6. Transfer the batter to the prepared pan, filling the cavities half full. Bake until a toothpick inserted into the center of the cakes comes out clean or with a few moist crumbs attached, about 13-17 minutes. Be diligent and avoid over baking the cakes.
  7. Cool the cakes in the pan for 7 minutes, then transfer to a cooling rack to cool.
Chocolate Glaze
  1. Melt the butter, chocolate and corn syrup together in a large heatproof bowl set over a pan of barely simmering water, making sure the water doesn't touch the bottom of the bowl. Stir occasionally until smooth. Remove from heat and let cool slightly.
  2. Spoon the glaze over the cooled cakes. When the glaze is almost set, garnish with edible pressed flowers if desired.
Recipe Notes

*  I use a microwave flower press to make edible pressed flowers quickly. To find it, click here.

**To find a mini loaf pan, click here.

Mini Orange Olive Oil Cakes

mini orange olive oil cakes

Ever since a certain celebrity cut a hole from the middle of her favorite olive oil cake back in 2020, the internet has been obsessed with olive oil cakes. I must confess that I was a fan of olive oil cakes long before that. I first tasted one at a restaurant years ago and fell in love. The flavor and texture was so delightful, that all it needed was a dusting of powdered sugar on top. Now that the dust has settled, I’m sharing my favorite orange olive oil cake recipe. Not because it’s trendy, but because it’s a really delicious recipe that tastes like spring.

I made cute little orange scented, personal cakes that are really just elegant cupcakes. The recipe is easily adapted to your tastes. You can switch up the orange flavor and substitute with lemon or any citrus of your choice. Even if you don’t like olive oil, you’ll still like these little cakes. I used light olive oil, rather than extra virgin olive oil, for a more subtle olive oil flavor. It’s also able to withstand higher temperatures. Feel free to use your favorite olive oil or replace it with the oil you prefer. Grape seed, avocado, canola and vegetable oil are some examples of oils you can use as a replacement.

This recipe contains almond flour. It helps with texture and flavor, so it’s a necessary ingredient. Almond flour can be pricey, but it’s good to have on hand. Adding it to your baked goods will make them more moist and tender. To find almond flour click here,

Print Recipe
Mini Orange Olive Oil Cakes
Course Dessert
Keyword cake, olive oil, orange
Servings
mini cakes
Ingredients
Mini Orange Olive Oil Cakes
Orange Simple Syrup
Course Dessert
Keyword cake, olive oil, orange
Servings
mini cakes
Ingredients
Mini Orange Olive Oil Cakes
Orange Simple Syrup
Instructions
Mini Orange Olive Oil Cakes
  1. Heat the oven to 350ºF (180ºC). Grease and flour a 12 serving muffin pan.
  2. In a medium bowl, whisk together the cake flour, almond flour, baking powder, baking soda and salt. Set aside.
  3. In a large bowl, beat the sugar, eggs, orange zest and vanilla extract together until smooth.
  4. Gradually mix in the olive oil and beat until well combined.
  5. Stir in the dry ingredients in two additions, alternating with the milk and orange juice. Stir just until combined. Do not over mix.
  6. Fill the prepared muffin pan cups 2/3 full with batter. Do not overfill or cakes will be more difficult to remove.
  7. Bake for 10-12 minutes or until the tops look light golden, but still moist and a toothpick inserted comes out clean. They bake very quickly, so check them a few minutes early to avoid over baking.
  8. Cool the cakes in pan for 5 minutes. Remove them from pan and transfer to a cooling rack.
  9. Brush the warm cakes with orange simple syrup and allow to cool completely.
  10. When the cakes have cooled, dust with powdered sugar.
Orange Simple Syrup
  1. In a small saucepan, stir together the sugar, orange juice, lemon juice, and orange zest.
  2. Cook over low heat, stirring occasionally, just until the sugar is dissolved.
  3. Remove from heat and set aside to cool.