Iced Almond Brownies

Iced Almond Brownies

If you like almond desserts, you’ll love these Iced Almond Brownies. They have the base ingredients of frangipane or almond cream, but in brownie form. The addition of white chocolate gives them a fudgy texture and the toasted almonds add a satisfying crunch.

Print Recipe
Iced Almond Brownies
Fudgy almond brownies made with white chocolate, topped with almond icing and toasted almonds
Course Dessert
Keyword almond, bars, brownies
Servings
2-inch brownies
Ingredients
Almond Brownies
Almond Icing
Course Dessert
Keyword almond, bars, brownies
Servings
2-inch brownies
Ingredients
Almond Brownies
Almond Icing
Instructions
Almond Brownies
  1. Preheat the oven to 350ºF (180ºC). Line an 8-inch square baking pan** with parchment paper, leaving a couple of inches of overhang.
  2. Melt the butter, white chocolate and heavy cream together in a large heat safe bowl set over a pan of simmering water, making sure the water doesn't touch the bottom of the bowl. Stir gently until smooth. Set aside to cool slightly.
  3. In a medium bowl, whisk the together the all purpose flour, almond flour and salt.
  4. In a large bowl, whisk together the sugar, eggs, egg yolk, and extracts until smooth and well combined. Stir in the white chocolate mixture until well combined. Stir in the flour mixture just until combined.
  5. Transfer the batter to the prepared baking pan. Bake until a toothpick inserted into the center of the brownies has a few moist combs attached, about 18-23 minutes. Don't over bake. Let the brownies cool in the pan. Remove the brownies from the pan. Top with almond icing and toasted almonds.
Almond Icing
  1. In a small bowl, whisk together the powdered sugar, heavy cream, 1 tablespoon (15ml) of milk and the almond extract until smooth. Add additional milk as needed to achieve your desired consistency.
Recipe Notes

*To toast sliced almonds, preheat the oven to 350ºF (180ºC).  Line a baking sheet with parchment paper or aluminum foil. Spread the almonds out onto the baking sheet in a single layer. Bake until lightly toasted, about 4-5 minutes. **To find the 8-inch baking pan I used, click here.
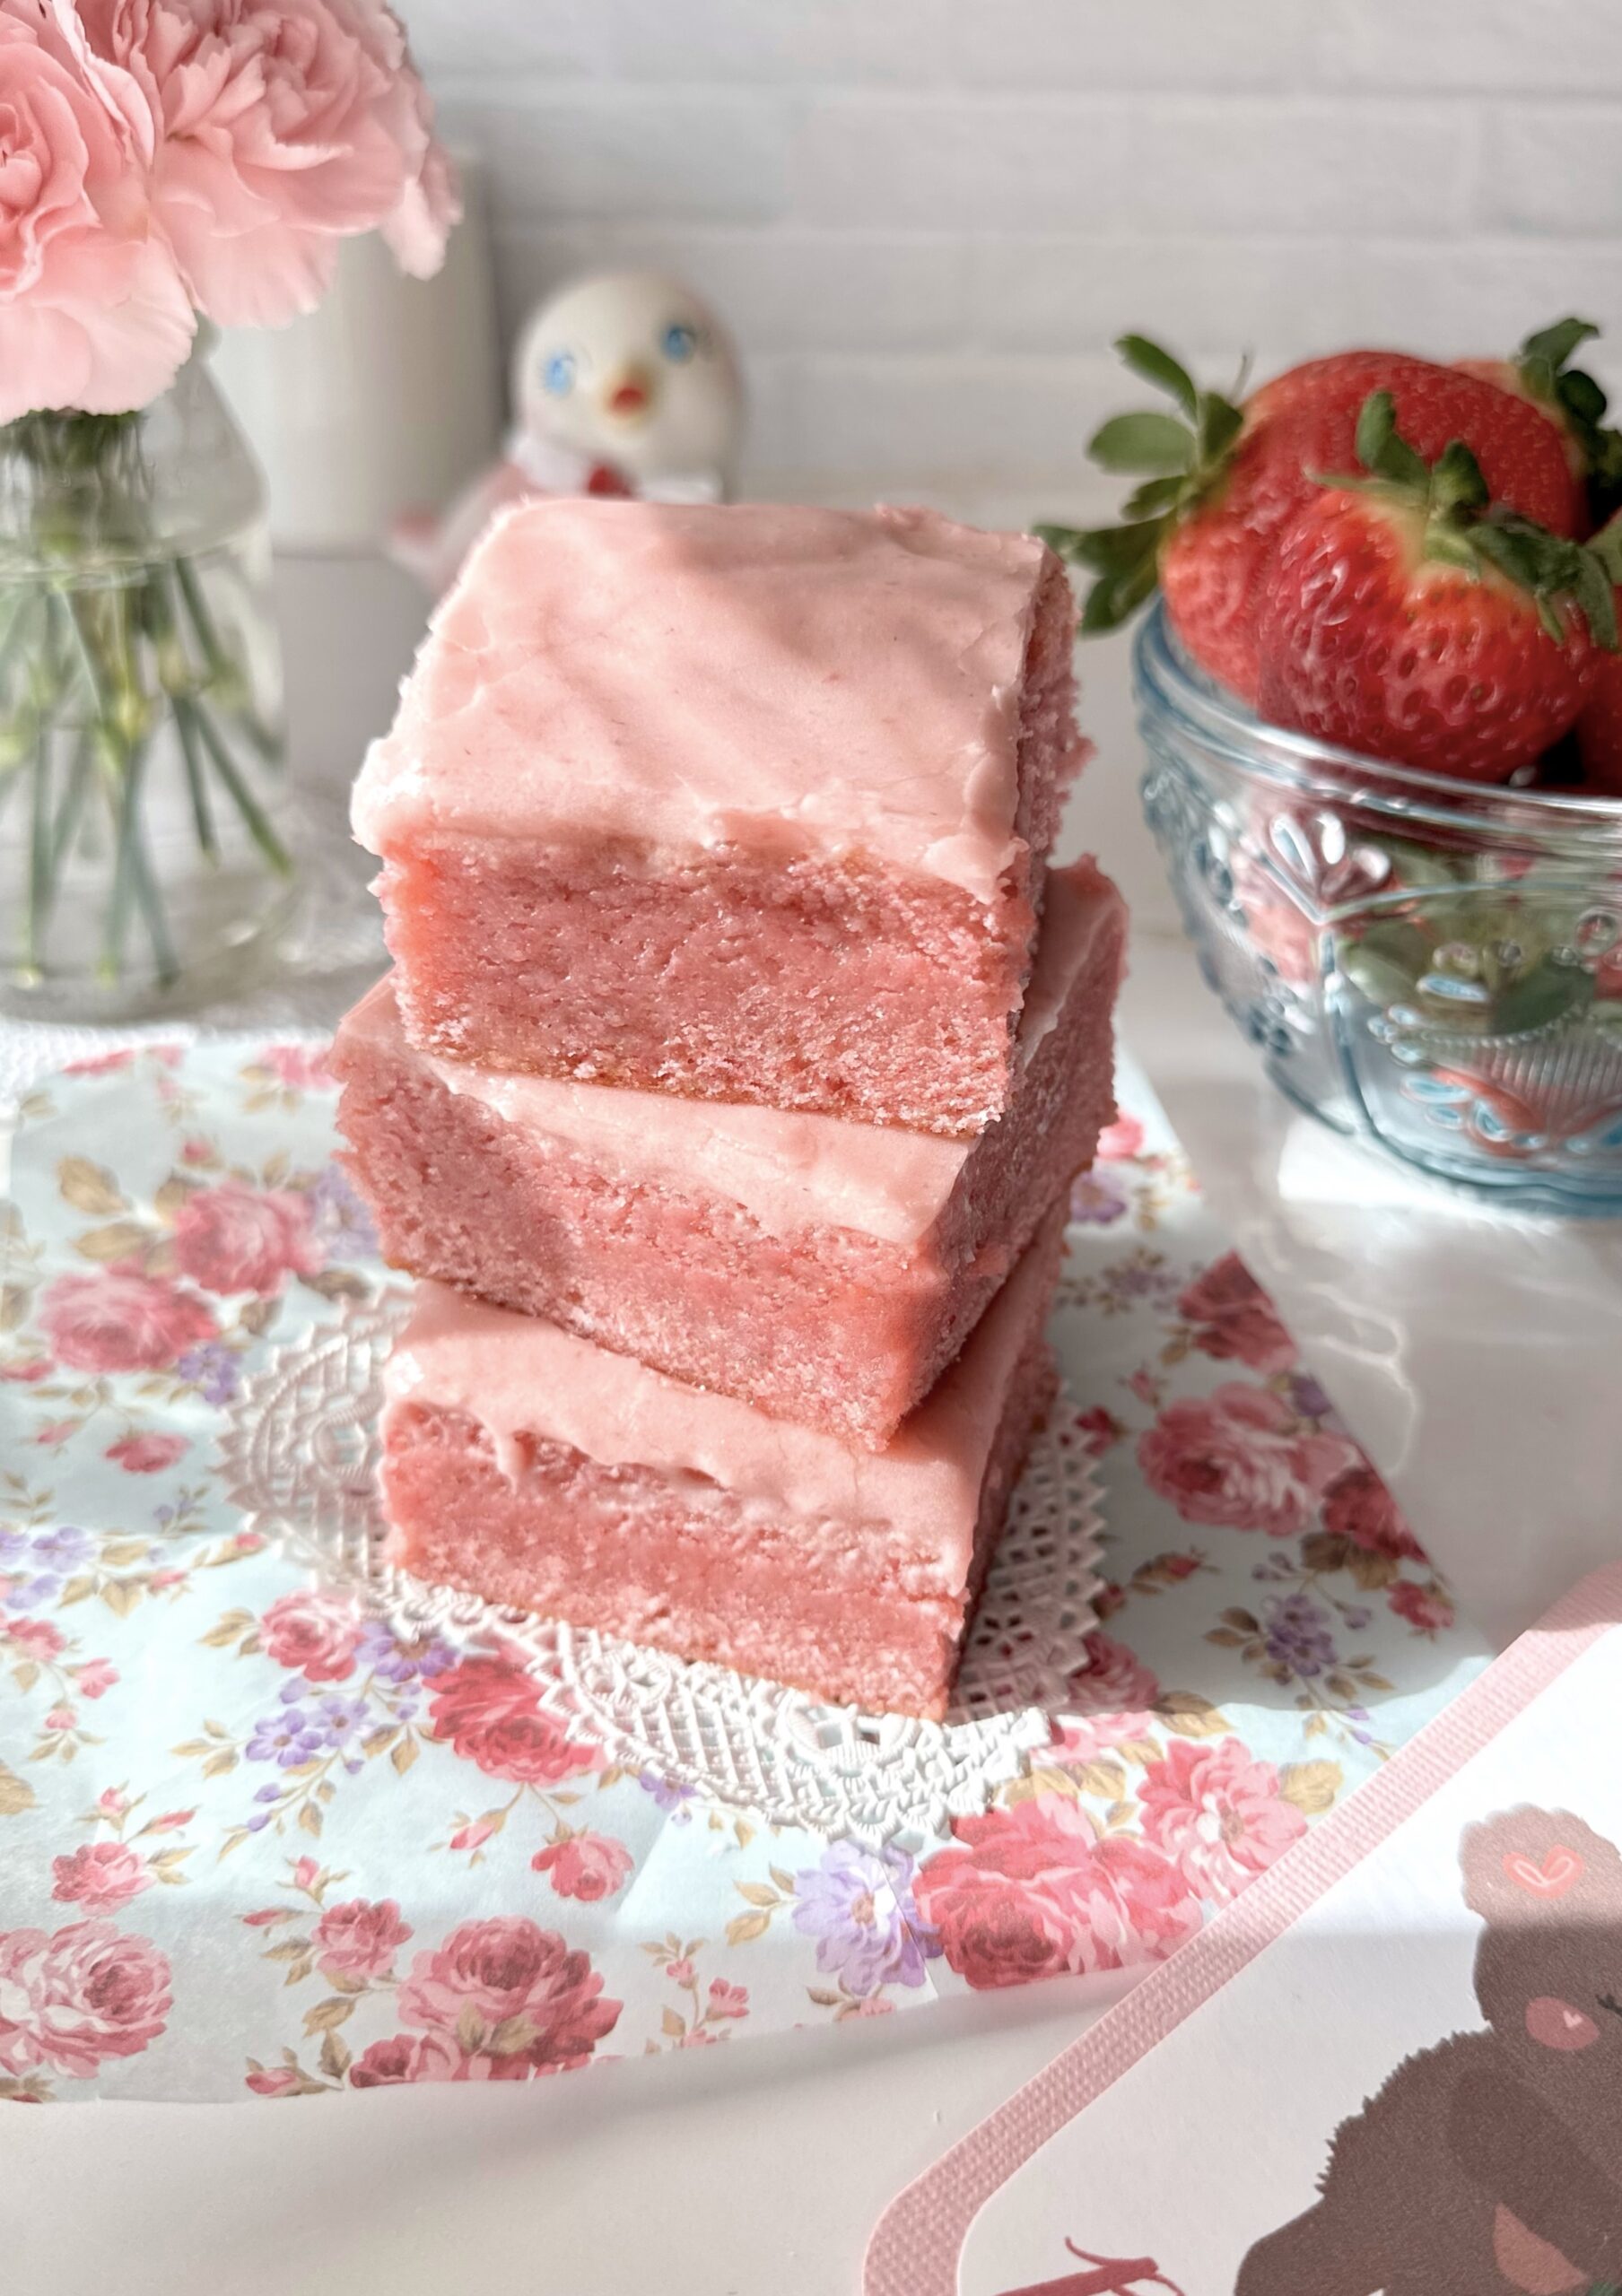
Strawberry Sweetheart Brownies

Strawberry Sweetheart Brownies

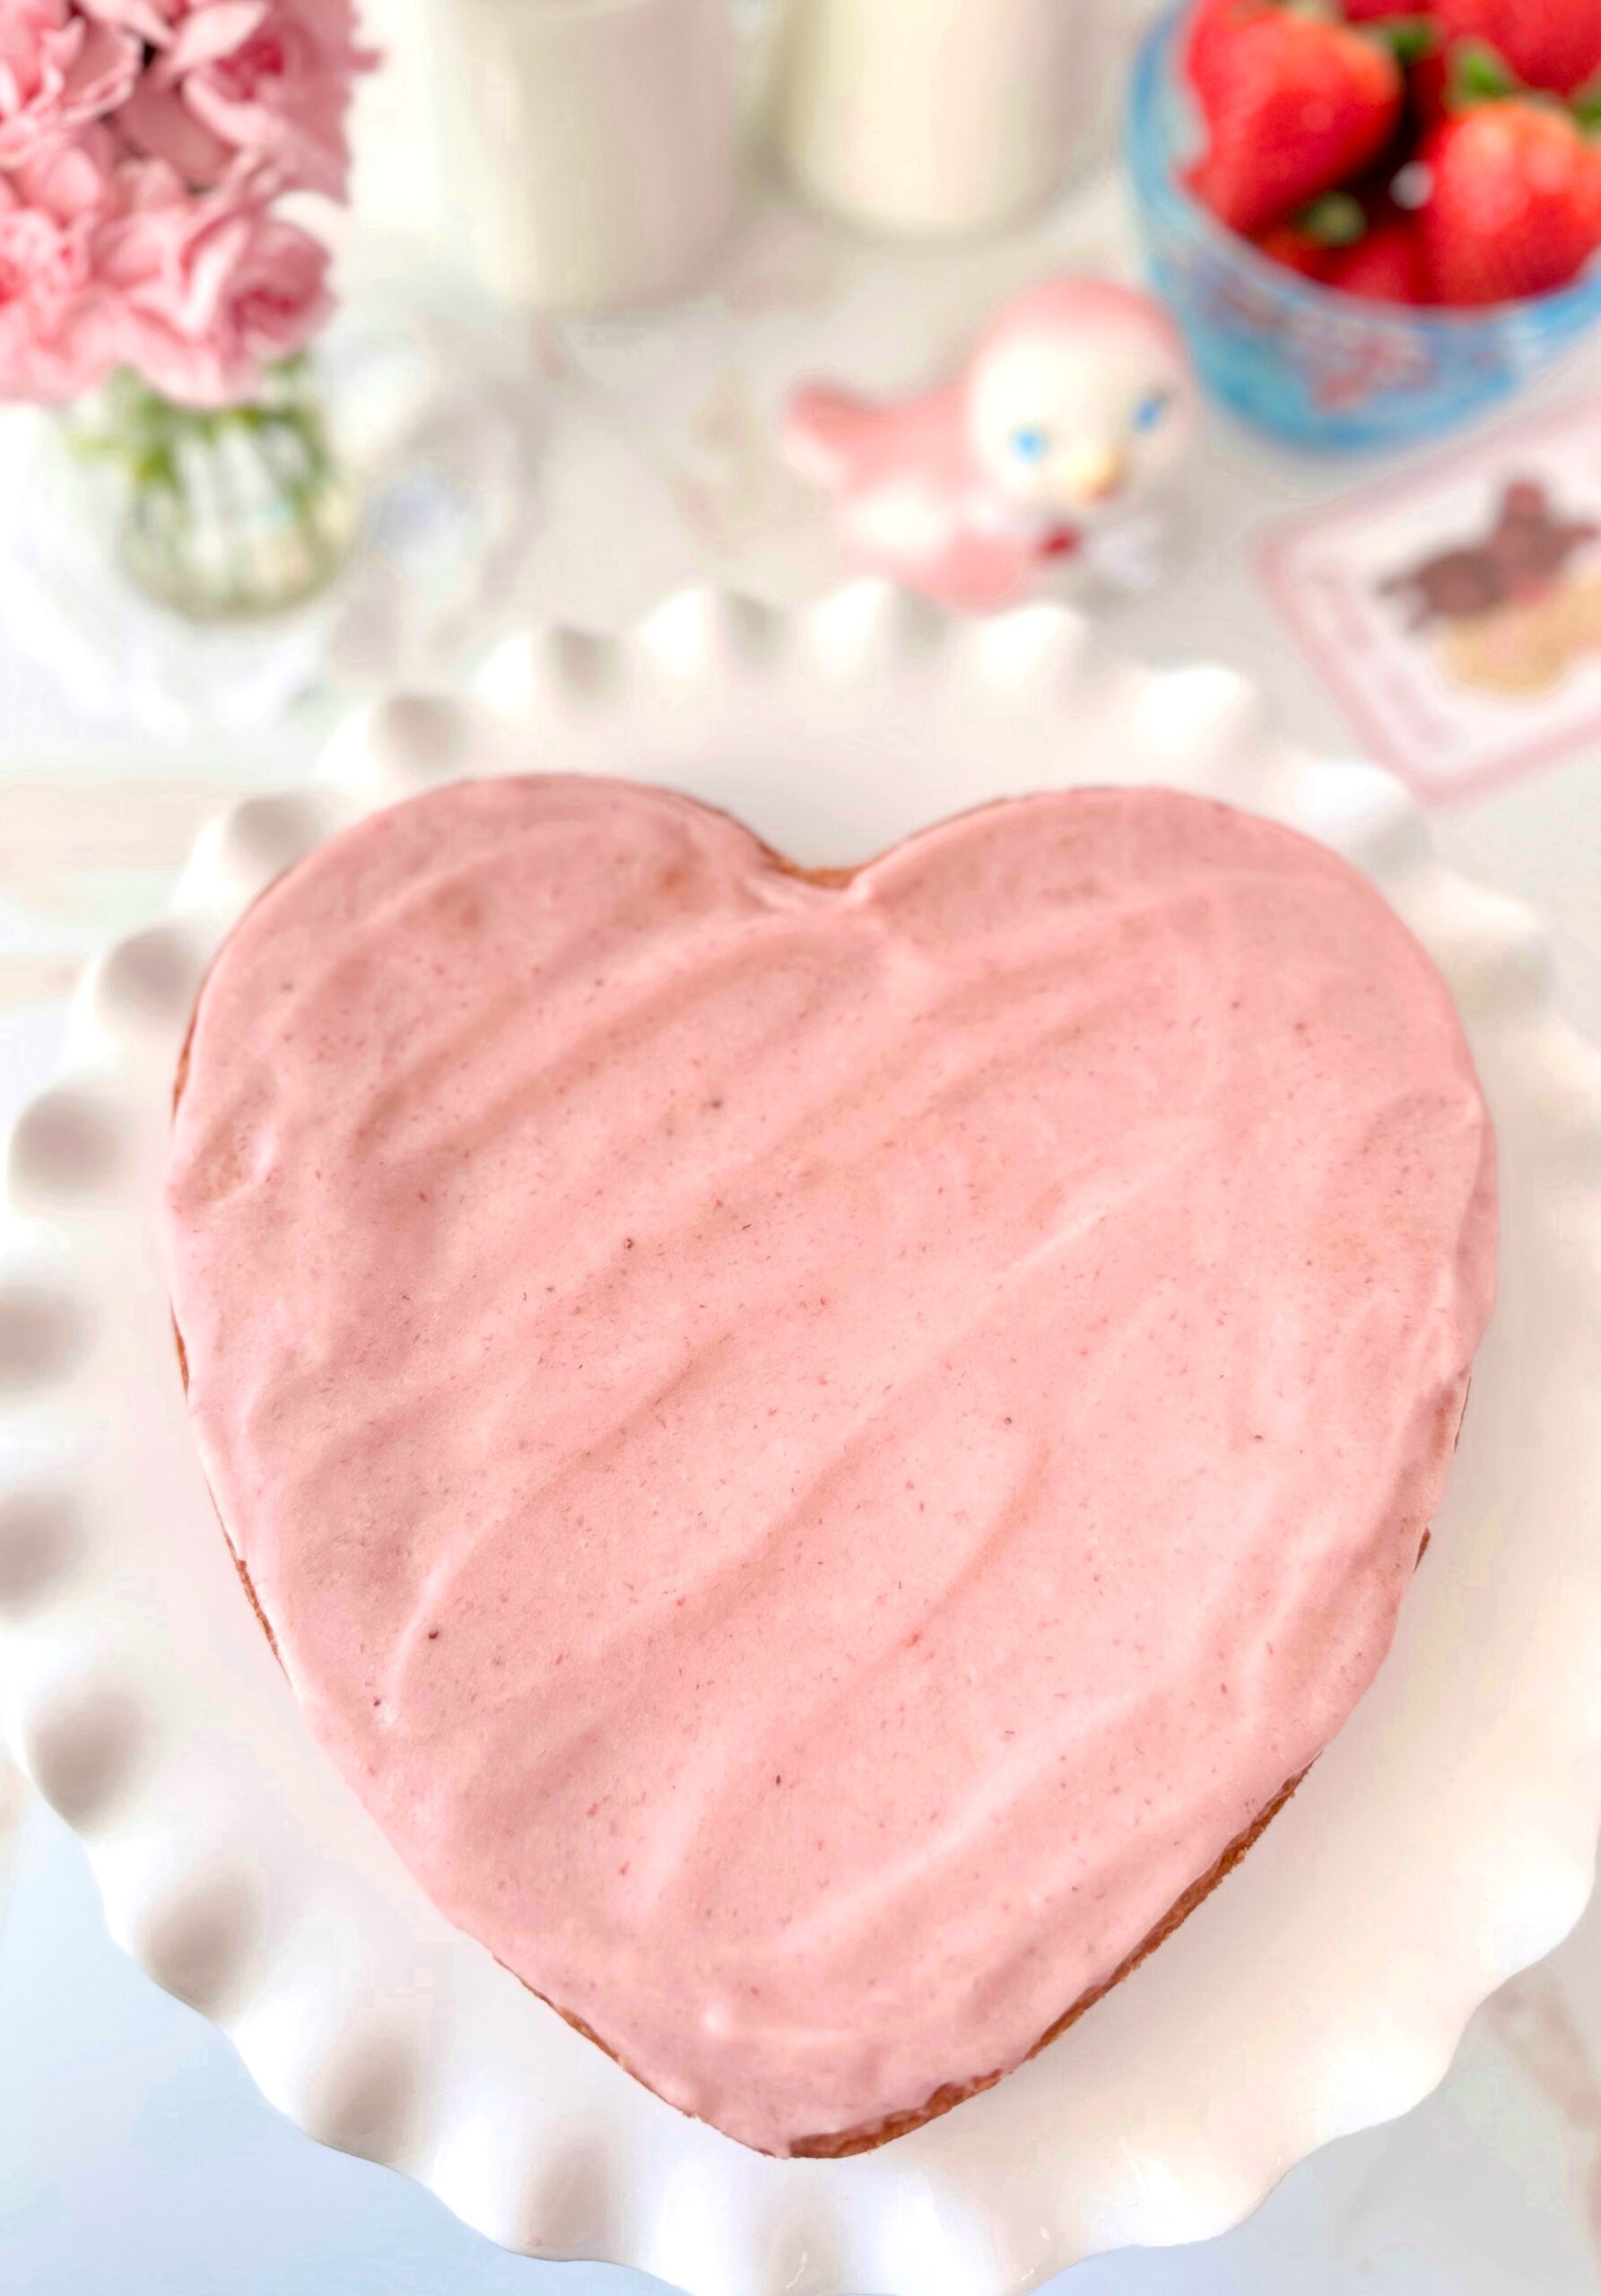
At the Brownie Mischief website, all types of brownies are welcome. We all know and love chocolate brownies. But there are other less common brownies in the universe, that deserve to shine too. Let me introduce you to Strawberry Sweetheart Brownies. These lovely pink creations aren’t strawberry cake or strawberry blondies. They contain white chocolate and they’re made with the same baking method as brownies. When you bake chocolate brownies, you want to be careful not to over bake them, to achieve the rich, fudgy texture. The same is true for these strawberry brownies. When you test for doneness, the toothpick should have a few moist crumbs attached to it. If the toothpick is clean, the brownies have baked too long and will likely be a little dry and cakey, although still edible. So make sure to test for doneness well before the end of the baking time!

The baking temperature for this recipe is 325ºF. I noticed that when baking in a heart shaped cake pan, things tend to bake unevenly because of the shape. So I used a lower temperature to help with even baking. If you don’t have an 8-inch heart shaped cake pan, you can also use an 8-inch round cake pan. To find the cake pan I used, click here.

Strawberry Sweetheart Brownies

To watch the Strawberry Sweetheart Brownies Instagram video, click here.

Print Recipe
Strawberry Sweetheart Brownies
A heart shaped strawberry brownie made with fresh strawberries topped with strawberry icing.
Course Dessert
Keyword brownies, strawberry
Servings
Ingredients
Strawberry Brownies
Strawberry Icing
Course Dessert
Keyword brownies, strawberry
Servings
Ingredients
Strawberry Brownies
Strawberry Icing
Instructions
Strawberry Brownies
  1. Preheat oven to 325ºF. Line the bottom of an 8-inch heart shaped cake pan*** with parchment paper. Spray the insides with nonstick spray.
  2. In a large heat safe bowl, melt butter and white chocolate together on the stovetop over a pan of barely simmering water or in the microwave for 20 seconds at time, stirring at each interval. White chocolate overheats easily, so be vigilant.
  3. Add the sugar and salt to the butter mixture and mix until well combined.
  4. Add egg and egg yolks. Whisk until smooth.
  5. Pass strawberry purée through a sieve to remove seeds. Set aside 2 tablespoons of strawberry purée for icing. Add remaining purée to batter. Mix until well combined.
  6. Add extracts and food color. Mix until combined.
  7. Stir in flour until combined, scraping bowl as needed.
  8. Transfer batter to prepared pan. Bake until toothpick inserted in center has a few moist crumbs on it, (not batter), about 25-30 minutes. Do not over bake. Let cool in pan. Remove from pan and top with strawberry icing.
Strawberry Icing
  1. Whisk all icing ingredients together until smooth and well combined.
Recipe Notes

*To make strawberry purée:   Purée clean, hulled and quartered strawberries in a blender or food processor. **To find the food color I used, click here. **To find the heart cake pan I used, click here.

This recipe was updated on January 24th, 2023

Raspberry Truffle Brownies

Raspberry Truffle Brownies

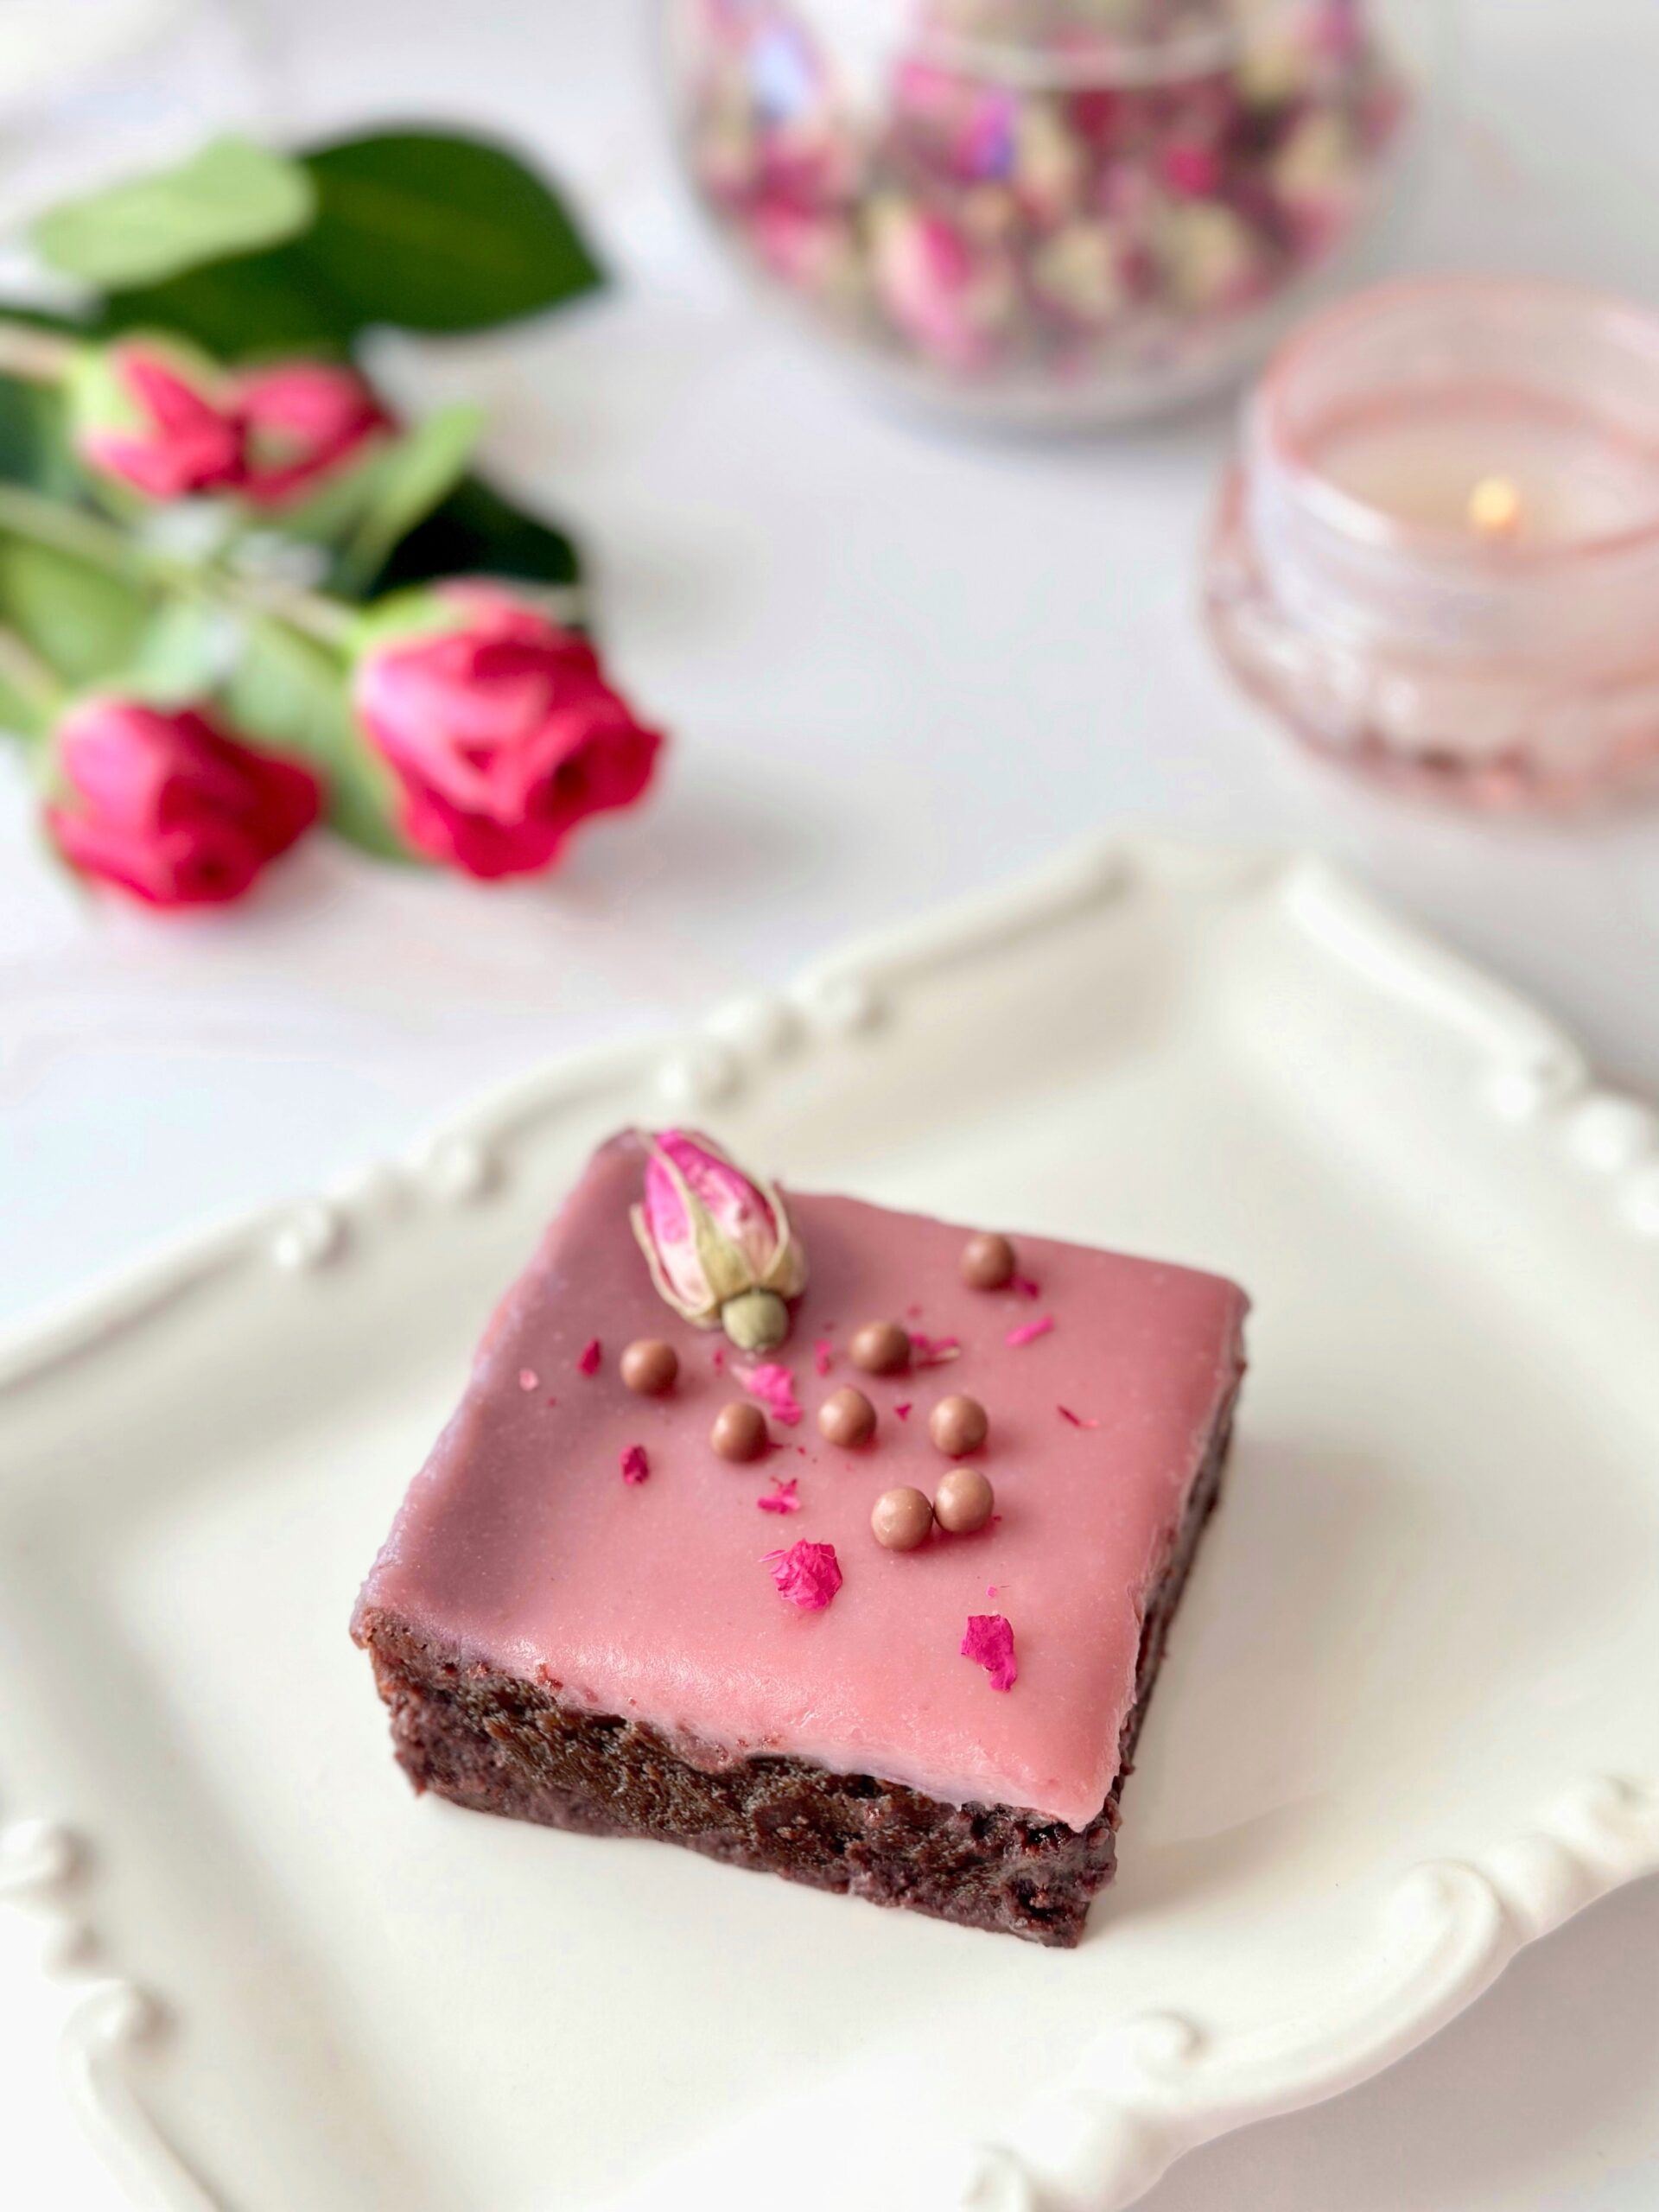
Who else loves those heart shaped boxes of chocolates we see at Valentine’s Day? That adventurous first bite of chocolate, when you don’t know which flavor you’re getting, is so much fun! I adore the fruit ganache filled chocolate bon bons. If you love bon bons too, you’ll love these brownies. They’re rich, fudgy and topped with a silky raspberry ganache that makes you feel like you’re biting into a raspberry truffle. The ganache adds an elegant touch to these brownies, so dried rose buds, rose petals and crispy chocolate pearls were my toppings of choice.

This isn’t the first time I’ve created elegant brownies. I displayed beautifully decorated brownies at two previous cookie conventions and they were well received. Elevated brownies are unexpected, but they’re definitely appreciated!

To watch the Raspberry Truffle Brownie Instagram video, click here.

Print Recipe
Raspberry Truffle Brownies
Servings
Ingredients
Servings
Ingredients
Instructions
  1. Preheat oven to 325ºF (165ºC). Line an 8-inch square baking pan with parchment paper, leaving a couple of inches of overhang.
  2. In a medium bowl, sift together the flour, cocoa powder and salt.
  3. In a large heat safe bowl set over a pot of barely simmering water, melt the butter and chocolate together, stirring occasionally, until smooth.
  4. Beat the sugar into butter and chocolate mixture until well combined.
  5. Add the eggs, egg yolk and vanilla to the chocolate mixture and whisk until smooth.
  6. Fold in the flour mixture until combined.
  7. Transfer the batter to the prepared baking pan. Bake until a toothpick inserted in the center comes out with moist crumbs on it, about 25-30 minutes. Do not over bake. Let cool completely.
  8. Place the white chocolate in a medium bowl.
  9. In a small saucepan over medium-low heat, simmer raspberry purée until reduced by half. Combine heavy cream with the reduced purée in saucepan. Heat until bubbles start to form around the edges. Do not boil.
  10. Pour the hot cream mixture over the white chocolate, making sure its completely submerged, and let stand 5 minutes. Stir until smooth and well combined. Spread over the cooled brownies.
Recipe Notes

To find dried rosebuds, click here.

To find dried rose petals, click here.


Raspberry Rose Shortbread Cookies

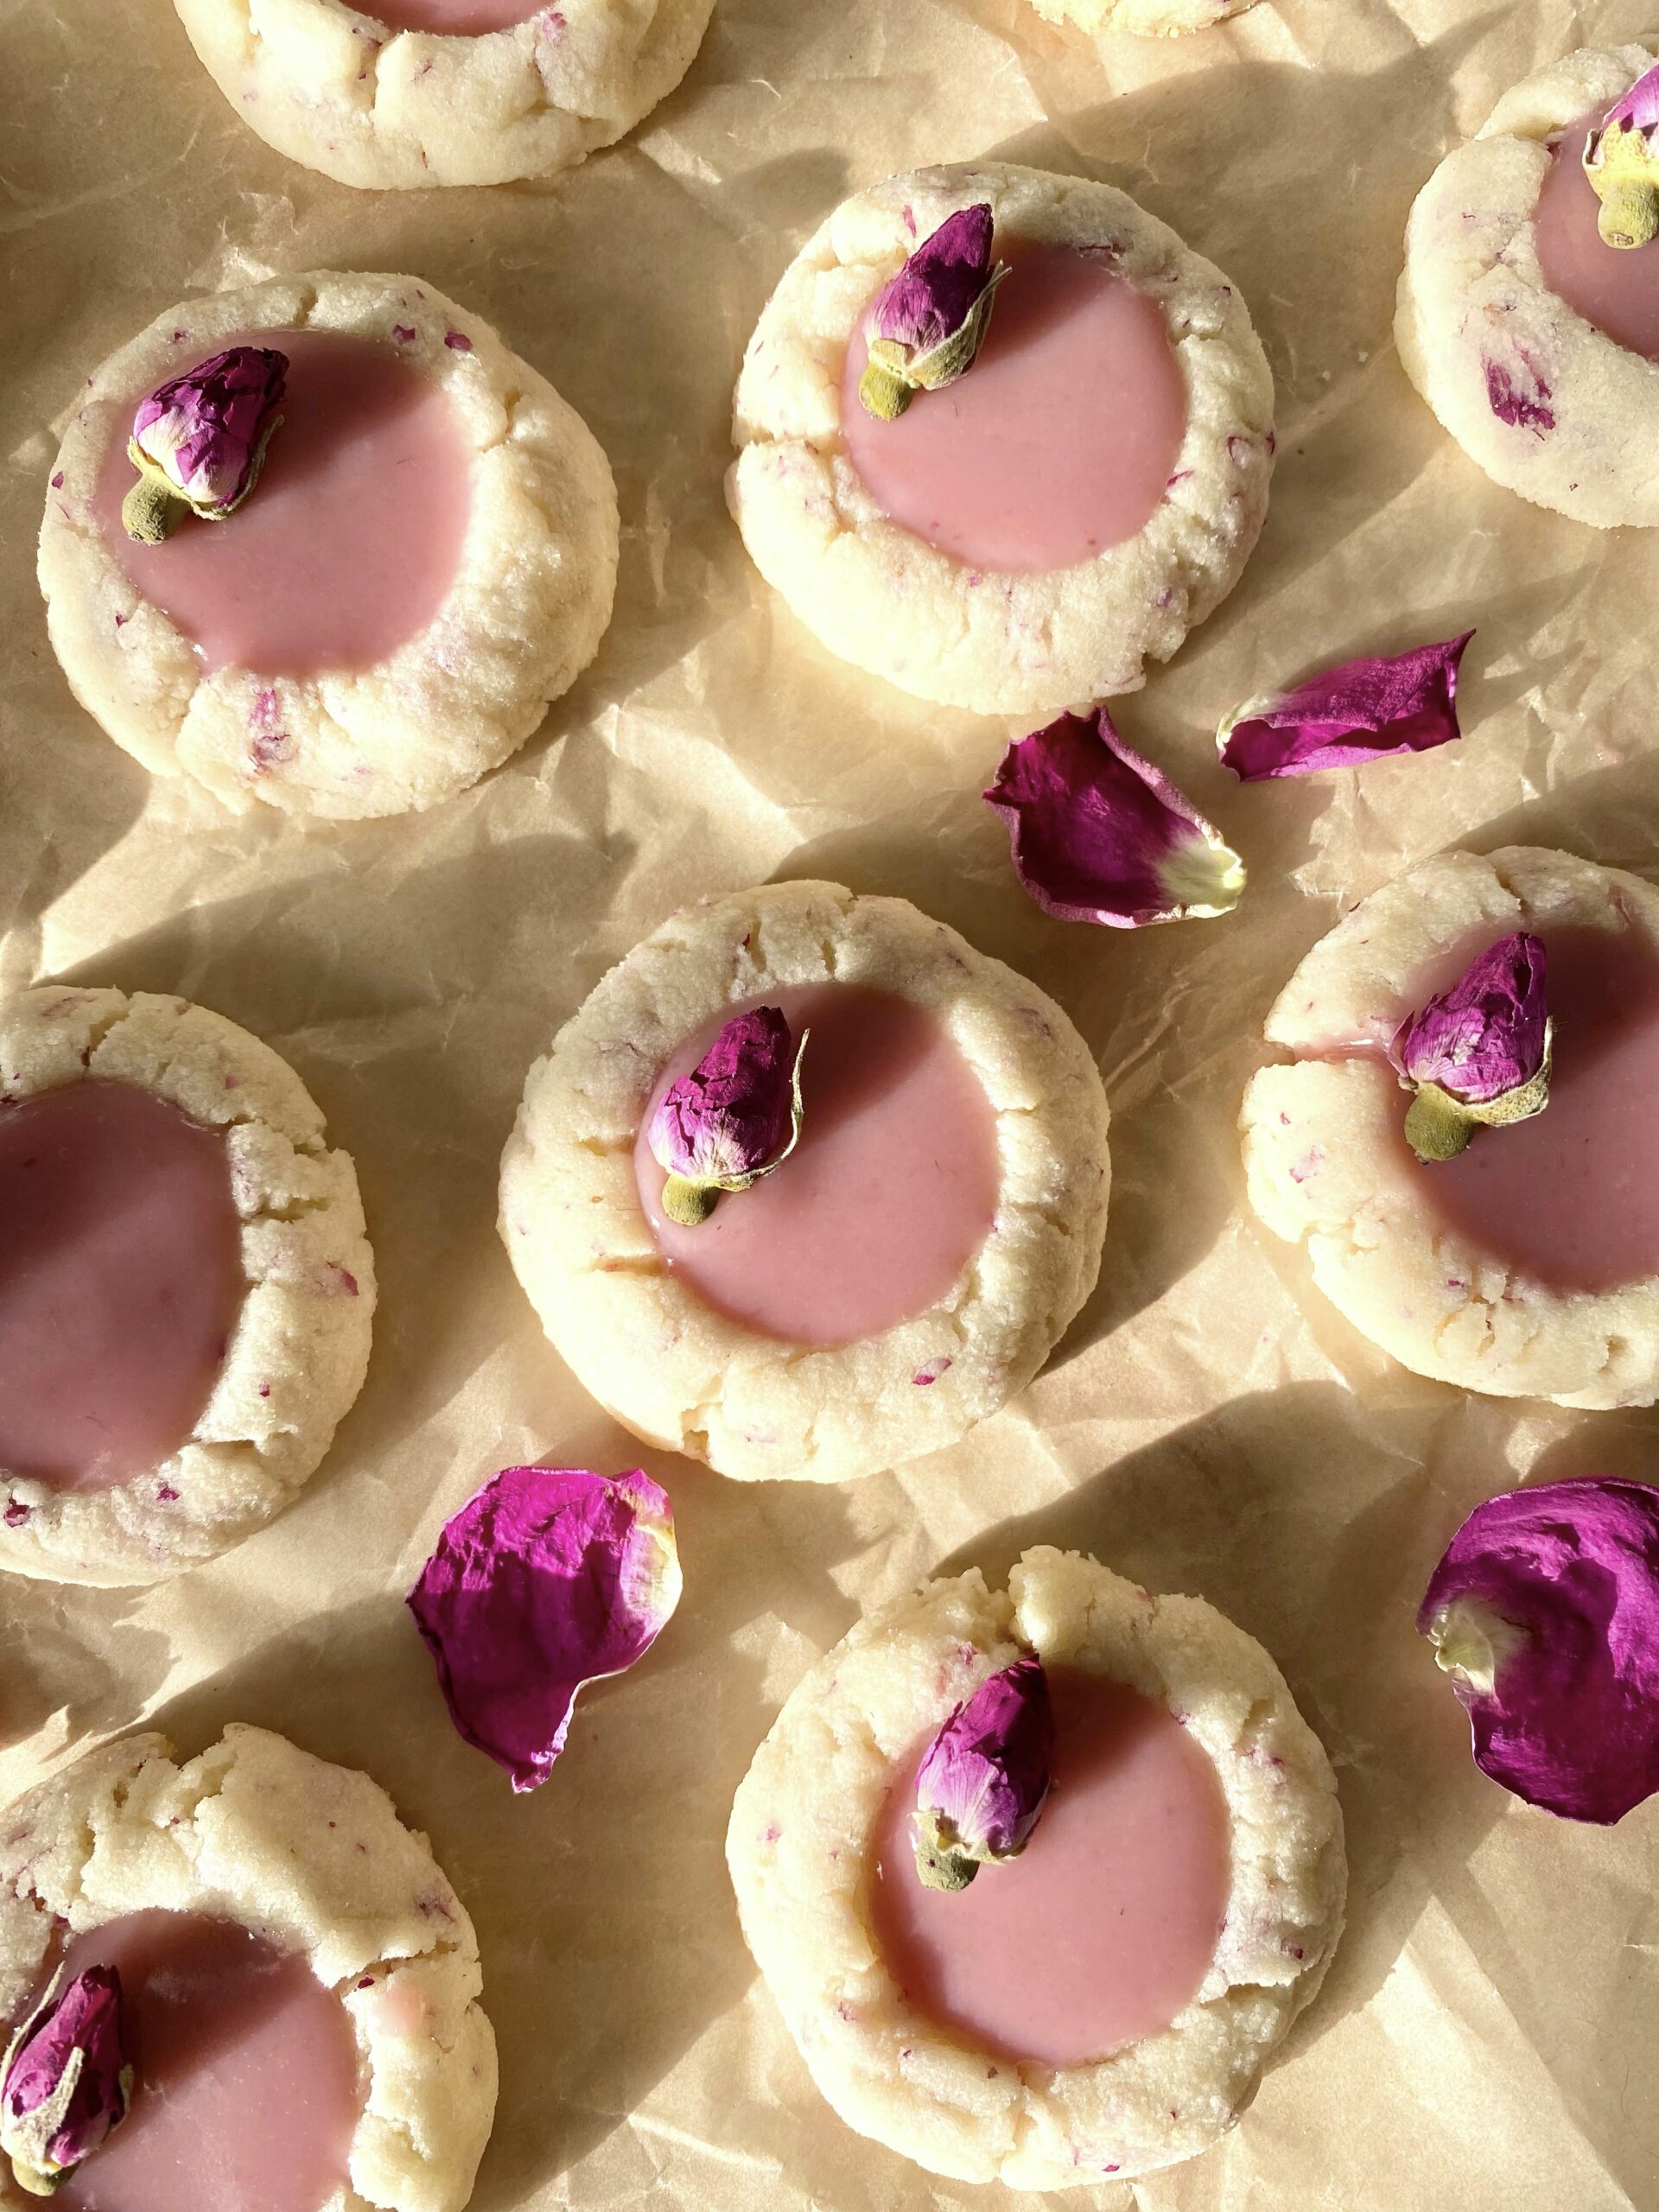
I don’t think I’ve ever created a recipe that delighted all of my senses as much as these cookies. If you decide to embark on this journey, you’ll start with your sense of smell. Whether you purchase dried rose petals or make them yourself, they’re pleasantly fragrant. I used dried rosebuds, but you can also use dried rose petals. To find dried rose petals, click here. To find dried rosebuds, click here. I pinched the calyx and stem off of the rosebuds to avoid large crunchy bits in the cookies, then I crushed the roses with a mortar and pestle. You can also place them in a plastic bag and roll over them gently with a rolling pin. Your sense of hearing will be satisfied with the crunching of the delicate, dried rose petals. Next, you’ll use your sense of touch to experience the fun rolling cookie dough into balls and maybe even trigger some childhood memories.

The finished cookies have a rustic, almost shabby chic look with their cracks, rose-speckled dough and beautifully imperfect dried roses. You’ll gaze at your beautiful handiwork. And of course, you’ll sample a warm cookie, before you’re supposed to. The cookies will taste tender and slightly sweet with a hint of rose. I like a more subtle rose flavor in my baked goods. But if you prefer a stronger rose flavor, feel free to add a small amount of rose water to your dough. Start with 1/8 teaspoon or 1/4 teaspoon, because a little goes a long way.

If you’re like me, you’ll taste a spoonful of the raspberry ganache because you can and should. Speaking of the raspberry ganache, please use a good quality white chocolate! In some recipes, it’s fine to use white chocolate chips or candy melts if you prefer, but NOT this one. In my humble, yet educated opinion, you should never use chocolate chips to make ganache. I studied chocolate in culinary school with a master chocolatier. I never use chocolate chips for ganache because they contain stabilizers that keep them from melting completely, which prevents you from having the smoothest ganache possible. They also contain less cocoa butter and tend to have a waxy mouth feel.

For this recipe, when it comes to butter, you should also be a little bit picky for successful baking. Low quality butter tends to contain more water and your cookies may spread too much. So make sure to use good butter. Your butter should be room temperature, but not warm. If the butter is shiny, it’s too warm. Don’t try to speed up the softening of butter with your microwave. That’s not a hack, in spite of what you may hear on the internet. Microwaves heat unevenly and will potentially melt your butter. The best way to speed up the softening of your butter is to simply cut it into cubes. By the time you get the rest of your ingredients ready, the butter should be soft enough to use. My last, but most important success tip, is to weigh your ingredients. U.S. Imperial weights are shown in parenthesis on the recipe.

Print Recipe
Raspberry Rose Shortbread Cookies
Rose petal shortbread cookies filled with white chocolate raspberry ganache
Course Dessert
Servings
cookies
Ingredients
Cookies
Filling
Course Dessert
Servings
cookies
Ingredients
Cookies
Filling
Instructions
Cookies
  1. Preheat the oven to 350ºF (180ºC). Line two large baking sheets with parchment paper
  2. In a large bowl, beat the butter, with an electric mixer on medium speed, until smooth. Add the rose petals and beat on low speed until combined.
  3. Add the powdered sugar, vanilla extract and salt. Beat until well combined.
  4. On low speed, mix in the flour in two additions. Beat just until combined.
  5. Roll the dough into 1 1/4-inch balls, about 1/2 ounce (14g) each. Place the dough balls about 2 inches apart onto the prepared baking sheets.
  6. Bake for 7 minutes, then remove from the oven. Press indentations into each cookie with a 1-inch diameter pastry tamper or with the flat top of a 1-inch diameter bottle cap.
  7. Return the cookies to the oven and continue baking until the edges are light golden brown, about 5-6 more minutes.
  8. If the indentations in your cookies lose definition, press again with the tamper or bottle cap while the cookies are still hot on the baking sheet.
  9. Transfer the cookies to a cooling rack to cool completely.
Filling
  1. In a small saucepan, bring the pureéd raspberries to a simmer over medium heat. Simmer until the purée is reduced by half, about 5 minutes. Transfer the raspberry reduction to a small bowl and set aside.
  2. Place the white chocolate in a medium heat safe bowl and set aside.
  3. In a small saucepan over medium heat, bring the heavy cream to a simmer, just until bubbles form around the edges. Do not boil. Stir in the raspberry reduction and heat just to a simmer again. Do not boil.
  4. Pour the hot cream mixture over the white chocolate, making sure all of the white chocolate is submerged. Let it sit for 2 minutes, then stir with a spatula until smooth.
  5. Let the ganache cool until slightly thickened. Spoon about 1/2 teaspoon into the indentation of each cookie. The ganache will continue to firm up as it sits.
  6. When the ganache in the cookies has firmed up, decorate with dried rosebud or rose petals, if desired.
Recipe Notes

*To find dried rose petals, click here.

**To find dried rosebuds, click here.

Raspberry Lemonade Brownies

Raspberry Lemonade Brownies by Brownie Mischief

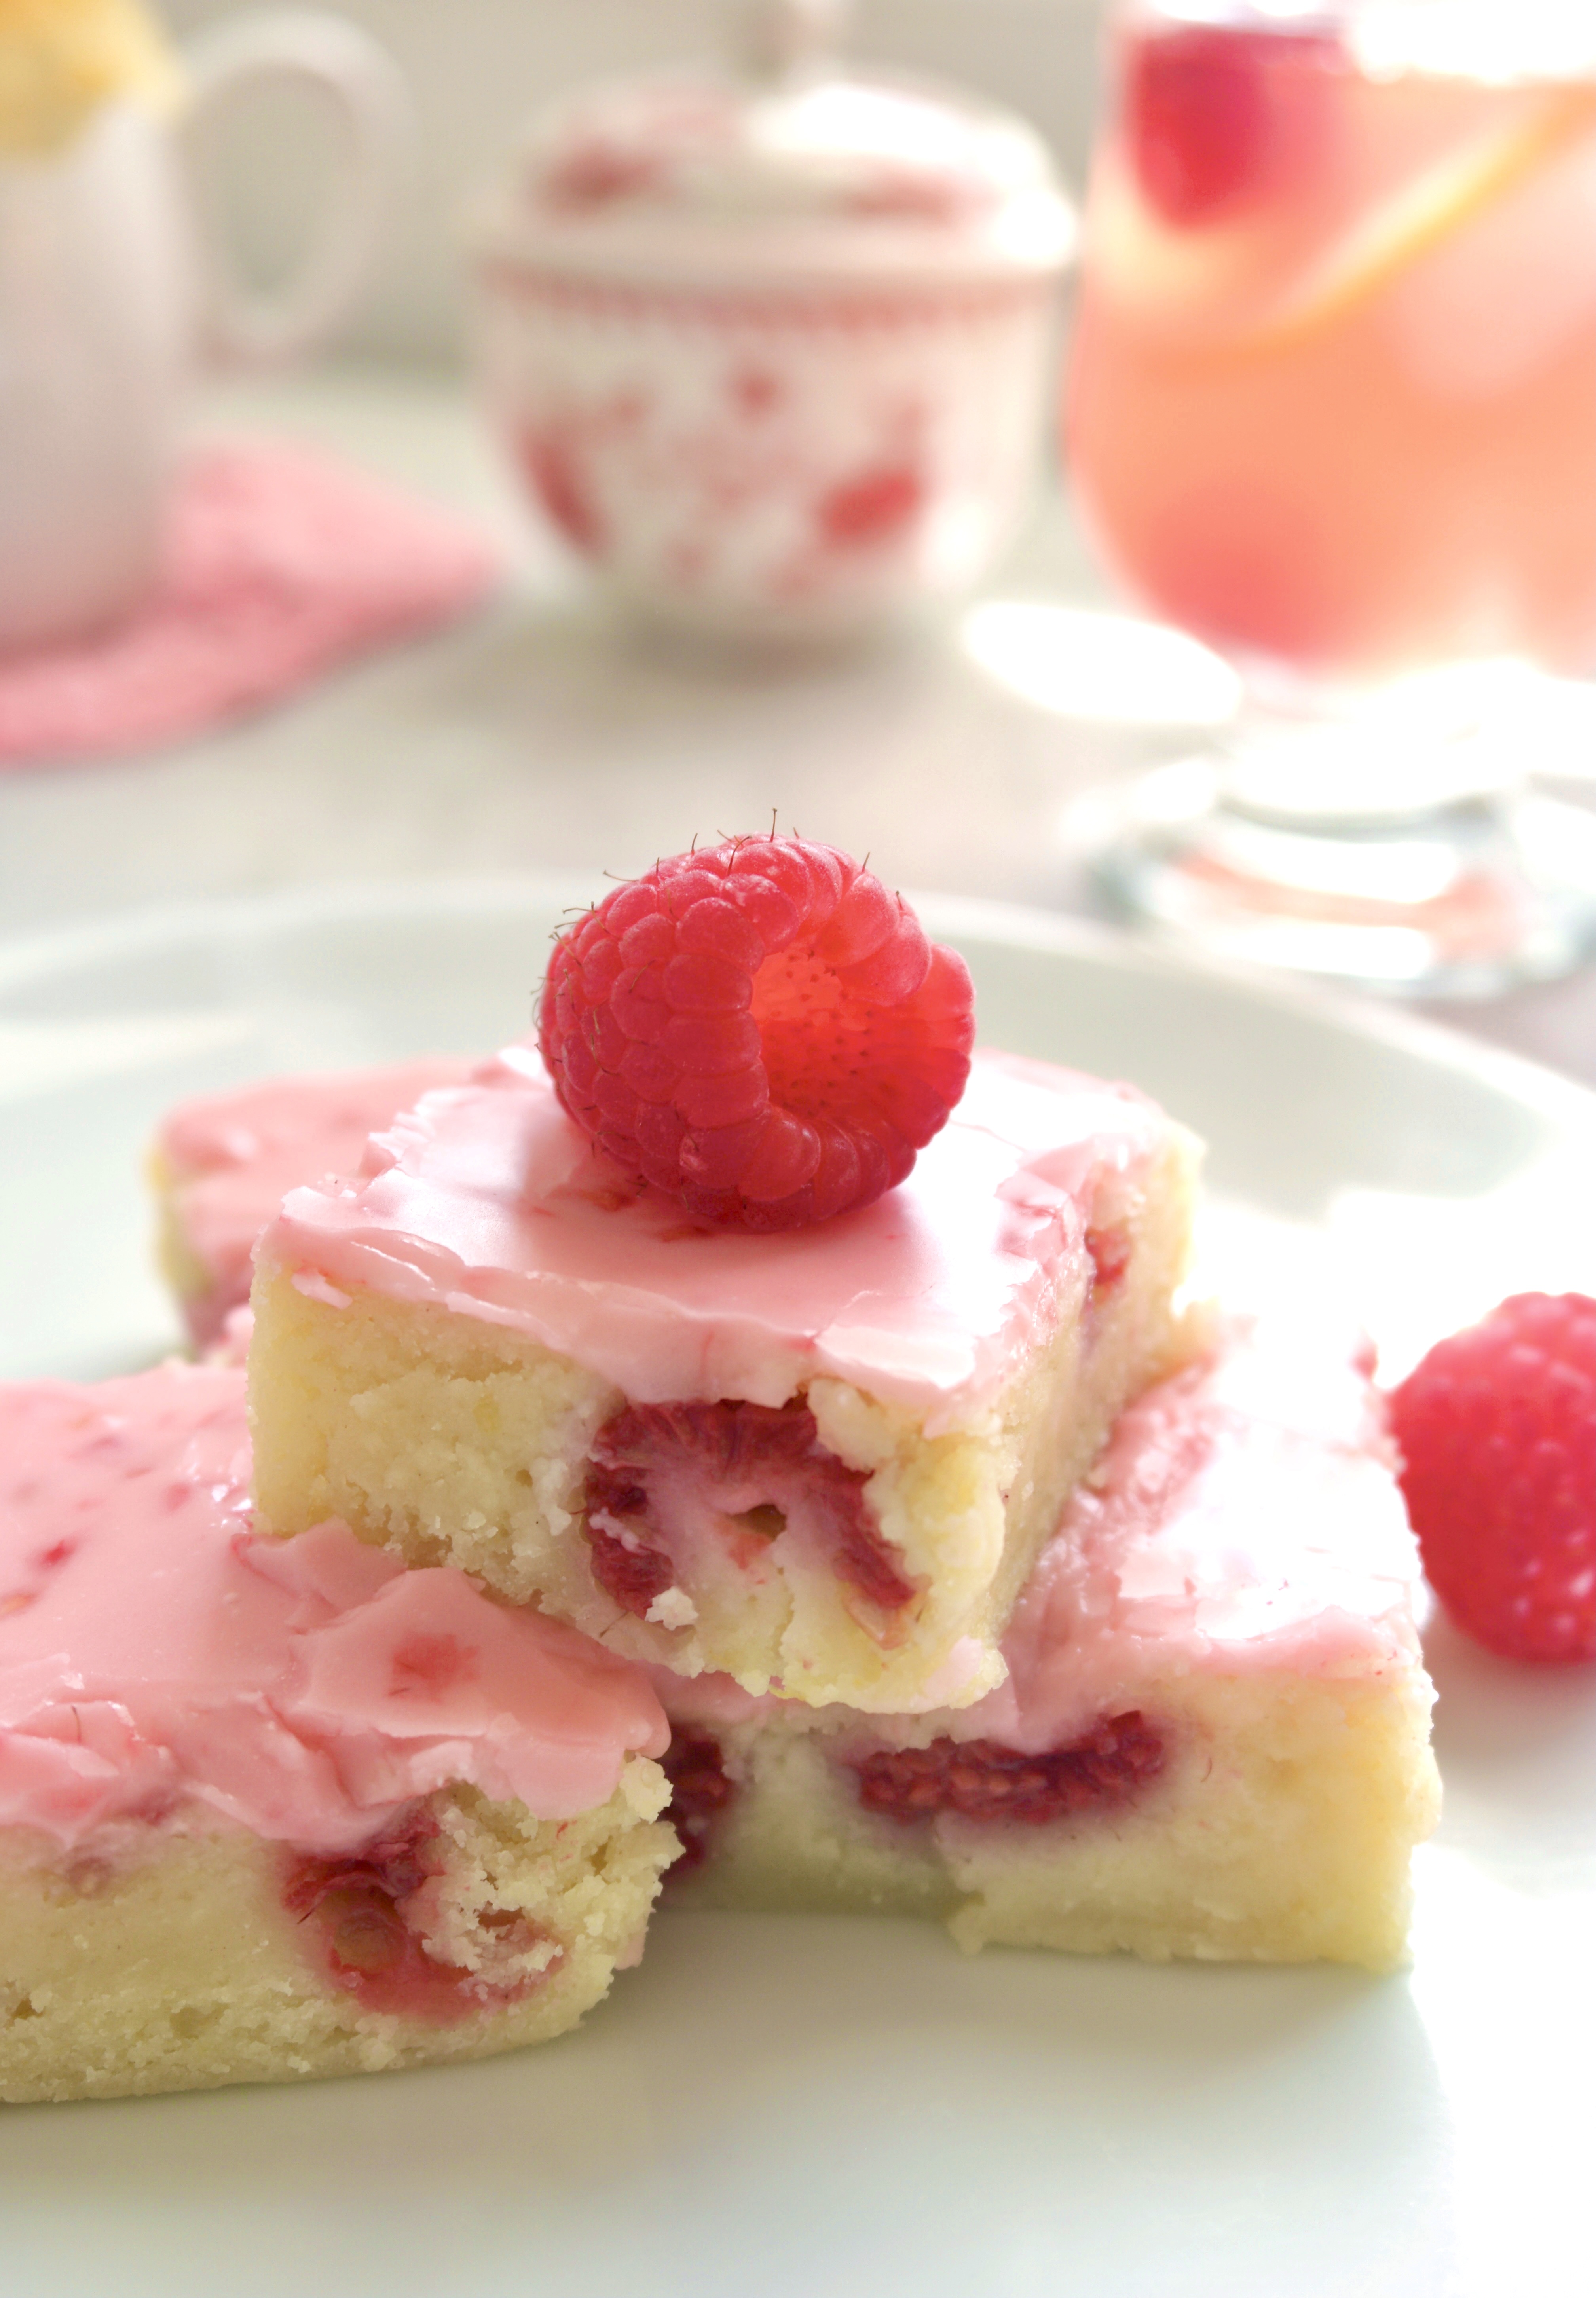
This is my new and improved Raspberry Lemonade Brownie recipe. The previous recipe was inspired by some lemon brownies I saw on Pinterest. I transformed them into Raspberry Lemonade Brownies and they were very good. But I knew I could improve them. I started over and after some experimentation, I came up with an even better version. I love the sweet-tart burst of flavor and color from the fresh raspberries. The icing contains no food coloring. Just three raspberries will give you that luscious shade of pink!

I want to clarify that lemon brownies are not lemon bars. We all know what a lemon bar is. The one we all know and love has a lemon curd filling on a shortbread crust, possibly drizzled with lemon icing or sprinkled with powdered sugar. The lemon brownie is a whole different animal. Don’t mistake lemon brownies for lemon cake either. Lemon brownies contain white chocolate which gives them a rich, fudgy texture like their chocolate cousins. We may be tempted to call them blondies, but blondies have a butterscotch flavor and typically don’t contain chocolate. Now that we got that straightened out, we can sleep peacefully tonight.

Print Recipe
Raspberry Lemonade Brownies
Course Dessert
Servings
bars
Ingredients
Raspberry Lemonade Bownies
Raspberry Lemonade Icing
Course Dessert
Servings
bars
Ingredients
Raspberry Lemonade Bownies
Raspberry Lemonade Icing
Instructions
Raspberry Lemonade Bownies
  1. Preheat the oven to 325ºF (165ºC). Line an 8-inch square baking pan* with parchment paper.
  2. In a medium microwaveable bowl, heat the white chocolate and butter in the microwave for 20 second intervals until melted. Alternately, melt the white chocolate and butter on the stove in a large heat safe bowl set over a pan of barely simmering water. Stir gently until smooth.
  3. In a large bowl, whisk together the sugar, eggs, egg yolk, lemon juice, zest and salt until smooth and well combined. Stir in the melted white chocolate mixture with a rubber spatula. Add the flour and stir just until combined.
  4. Gently fold in the raspberries.
  5. Transfer the batter to the prepared baking pan. Bake until the top is set, the edges are light golden brown and a toothpick inserted into the center comes out with a few moist crumbs on it, about 23-28 minutes.
  6. Let cool completely. Top with Raspberry Lemonade Icing.
Raspberry Lemonade Icing
  1. In a small bowl, smash the raspberries with a fork.
  2. Add the powdered sugar, melted butter and 1 tablespoon of lemon juice. Whisk until smooth, adding more lemon juice as needed.
  3. Spread the icing over cooled brownies.
  4. Cut into 2-inch squares and serve with additional raspberries, if desired.
Recipe Notes

*To find the 8 x 8 inch pan I used, click here.