Brown Butter Chocolate Chip Scones are the perfect spring transition bake. They’re cozy enough for rainy days with a cup of hot coffee or tea, but light enough to serve at a spring brunch. The brown butter gives them a fragrant, nuttiness which makes them so much more delicious than most other chocolate chip scones. I used extra large chocolate chips, but feel free to use your favorite chips.
Print Recipe
Brown Butter Chocolate Chip Scones
Tender scones made with brown butter, studded with chocolate chips and topped with crunchy coarse sugar.
In a small light colored saucepan over medium heat, melt the butter and cook its until it's deep golden and fragrant. When brown specks begin to appear, remove it from heat and immediately transfer it to a small bowl. Cover and refrigerate the brown butter until firm, about 2-3 hours or overnight. When the butter has firmed up, cut it into cubes.
Preheat the oven to 375ºF (190ºC). Line a large baking sheet* with parchment paper.
In a large bowl, whisk together the flour, baking powder and salt. Whisk in the brown sugar.
Work the brown butter into the flour mixture with your fingertips or with a pastry blender until pea size pieces are formed.
In a small bowl, whisk together the heavy cream, sour cream, egg yolk and vanilla. Pure this mixture into the flour mixture. Stir just until a shaggy dough forms. Fold in the chocolate chips.
Turn the dough out onto a lightly floured surface. Fold the dough over onto itself a couple of times. Do not overwork the dough. Form the dough into a 7-inch wide, 1-inch thick round. Cut it into 8 wedges.
Place the scones onto the prepared baking sheet. Brush the tops of the scones with heavy cream and sprinkle with coarse sugar. Bake until the scones are golden brown, about 15-18 minutes. Serve warm.
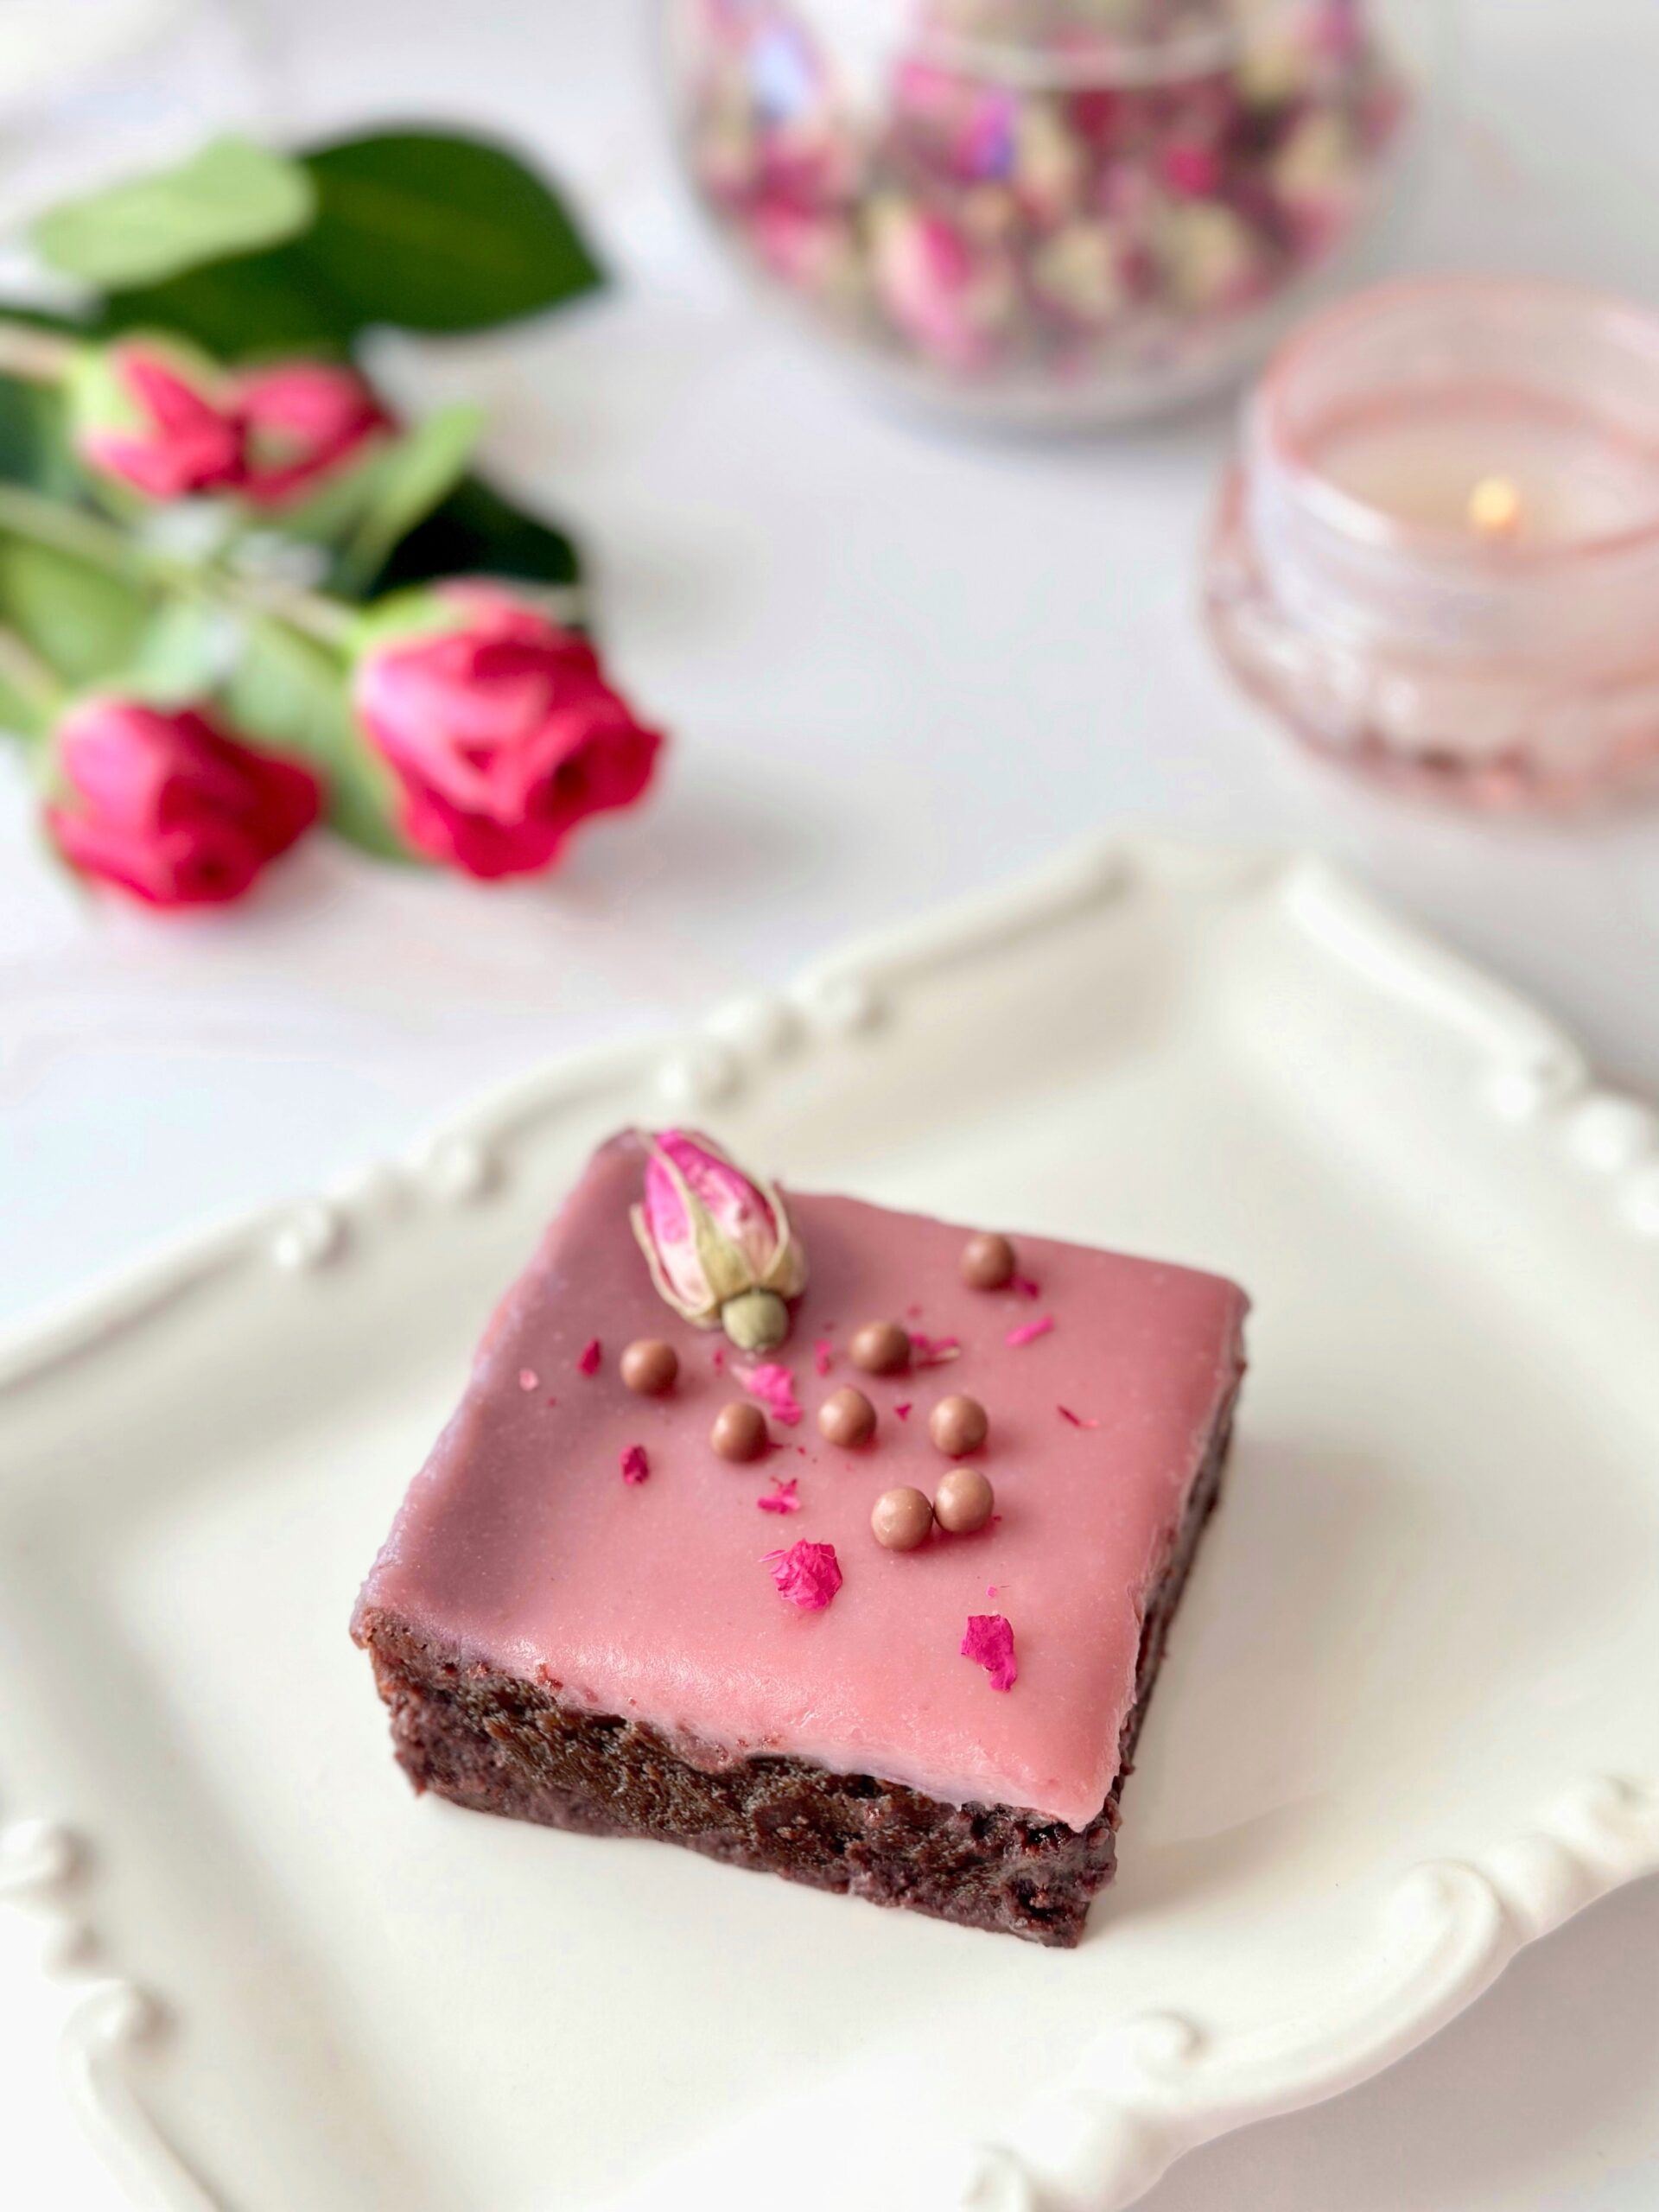
Who else loves those heart shaped boxes of chocolates we see at Valentine’s Day? That adventurous first bite of chocolate, when you don’t know which flavor you’re getting, is so much fun! I adore the fruit ganache filled chocolate bon bons. If you love bon bons too, you’ll love these brownies. They’re rich, fudgy and topped with a silky raspberry ganache that makes you feel like you’re biting into a raspberry truffle. The ganache adds an elegant touch to these brownies, so dried rose buds, rose petals and crispy chocolate pearls were my toppings of choice.
This isn’t the first time I’ve created elegant brownies. I displayed beautifully decorated brownies at two previous cookie conventions and they were well received. Elevated brownies are unexpected, but they’re definitely appreciated!
To watch the Raspberry Truffle Brownie Instagram video, click here.
Preheat oven to 325ºF (165ºC). Line an 8-inch square baking pan with parchment paper, leaving a couple of inches of overhang.
In a medium bowl, sift together the flour, cocoa powder and salt.
In a large heat safe bowl set over a pot of barely simmering water, melt the butter and chocolate together, stirring occasionally, until smooth.
Beat the sugar into butter and chocolate mixture until well combined.
Add the eggs, egg yolk and vanilla to the chocolate mixture and whisk until smooth.
Fold in the flour mixture until combined.
Transfer the batter to the prepared baking pan. Bake until a toothpick inserted in the center comes out with moist crumbs on it, about 25-30 minutes. Do not over bake. Let cool completely.
Place the white chocolate in a medium bowl.
In a small saucepan over medium-low heat, simmer raspberry purée until reduced by half. Combine heavy cream with the reduced purée in saucepan. Heat until bubbles start to form around the edges. Do not boil.
Pour the hot cream mixture over the white chocolate, making sure its completely submerged, and let stand 5 minutes. Stir until smooth and well combined. Spread over the cooled brownies.
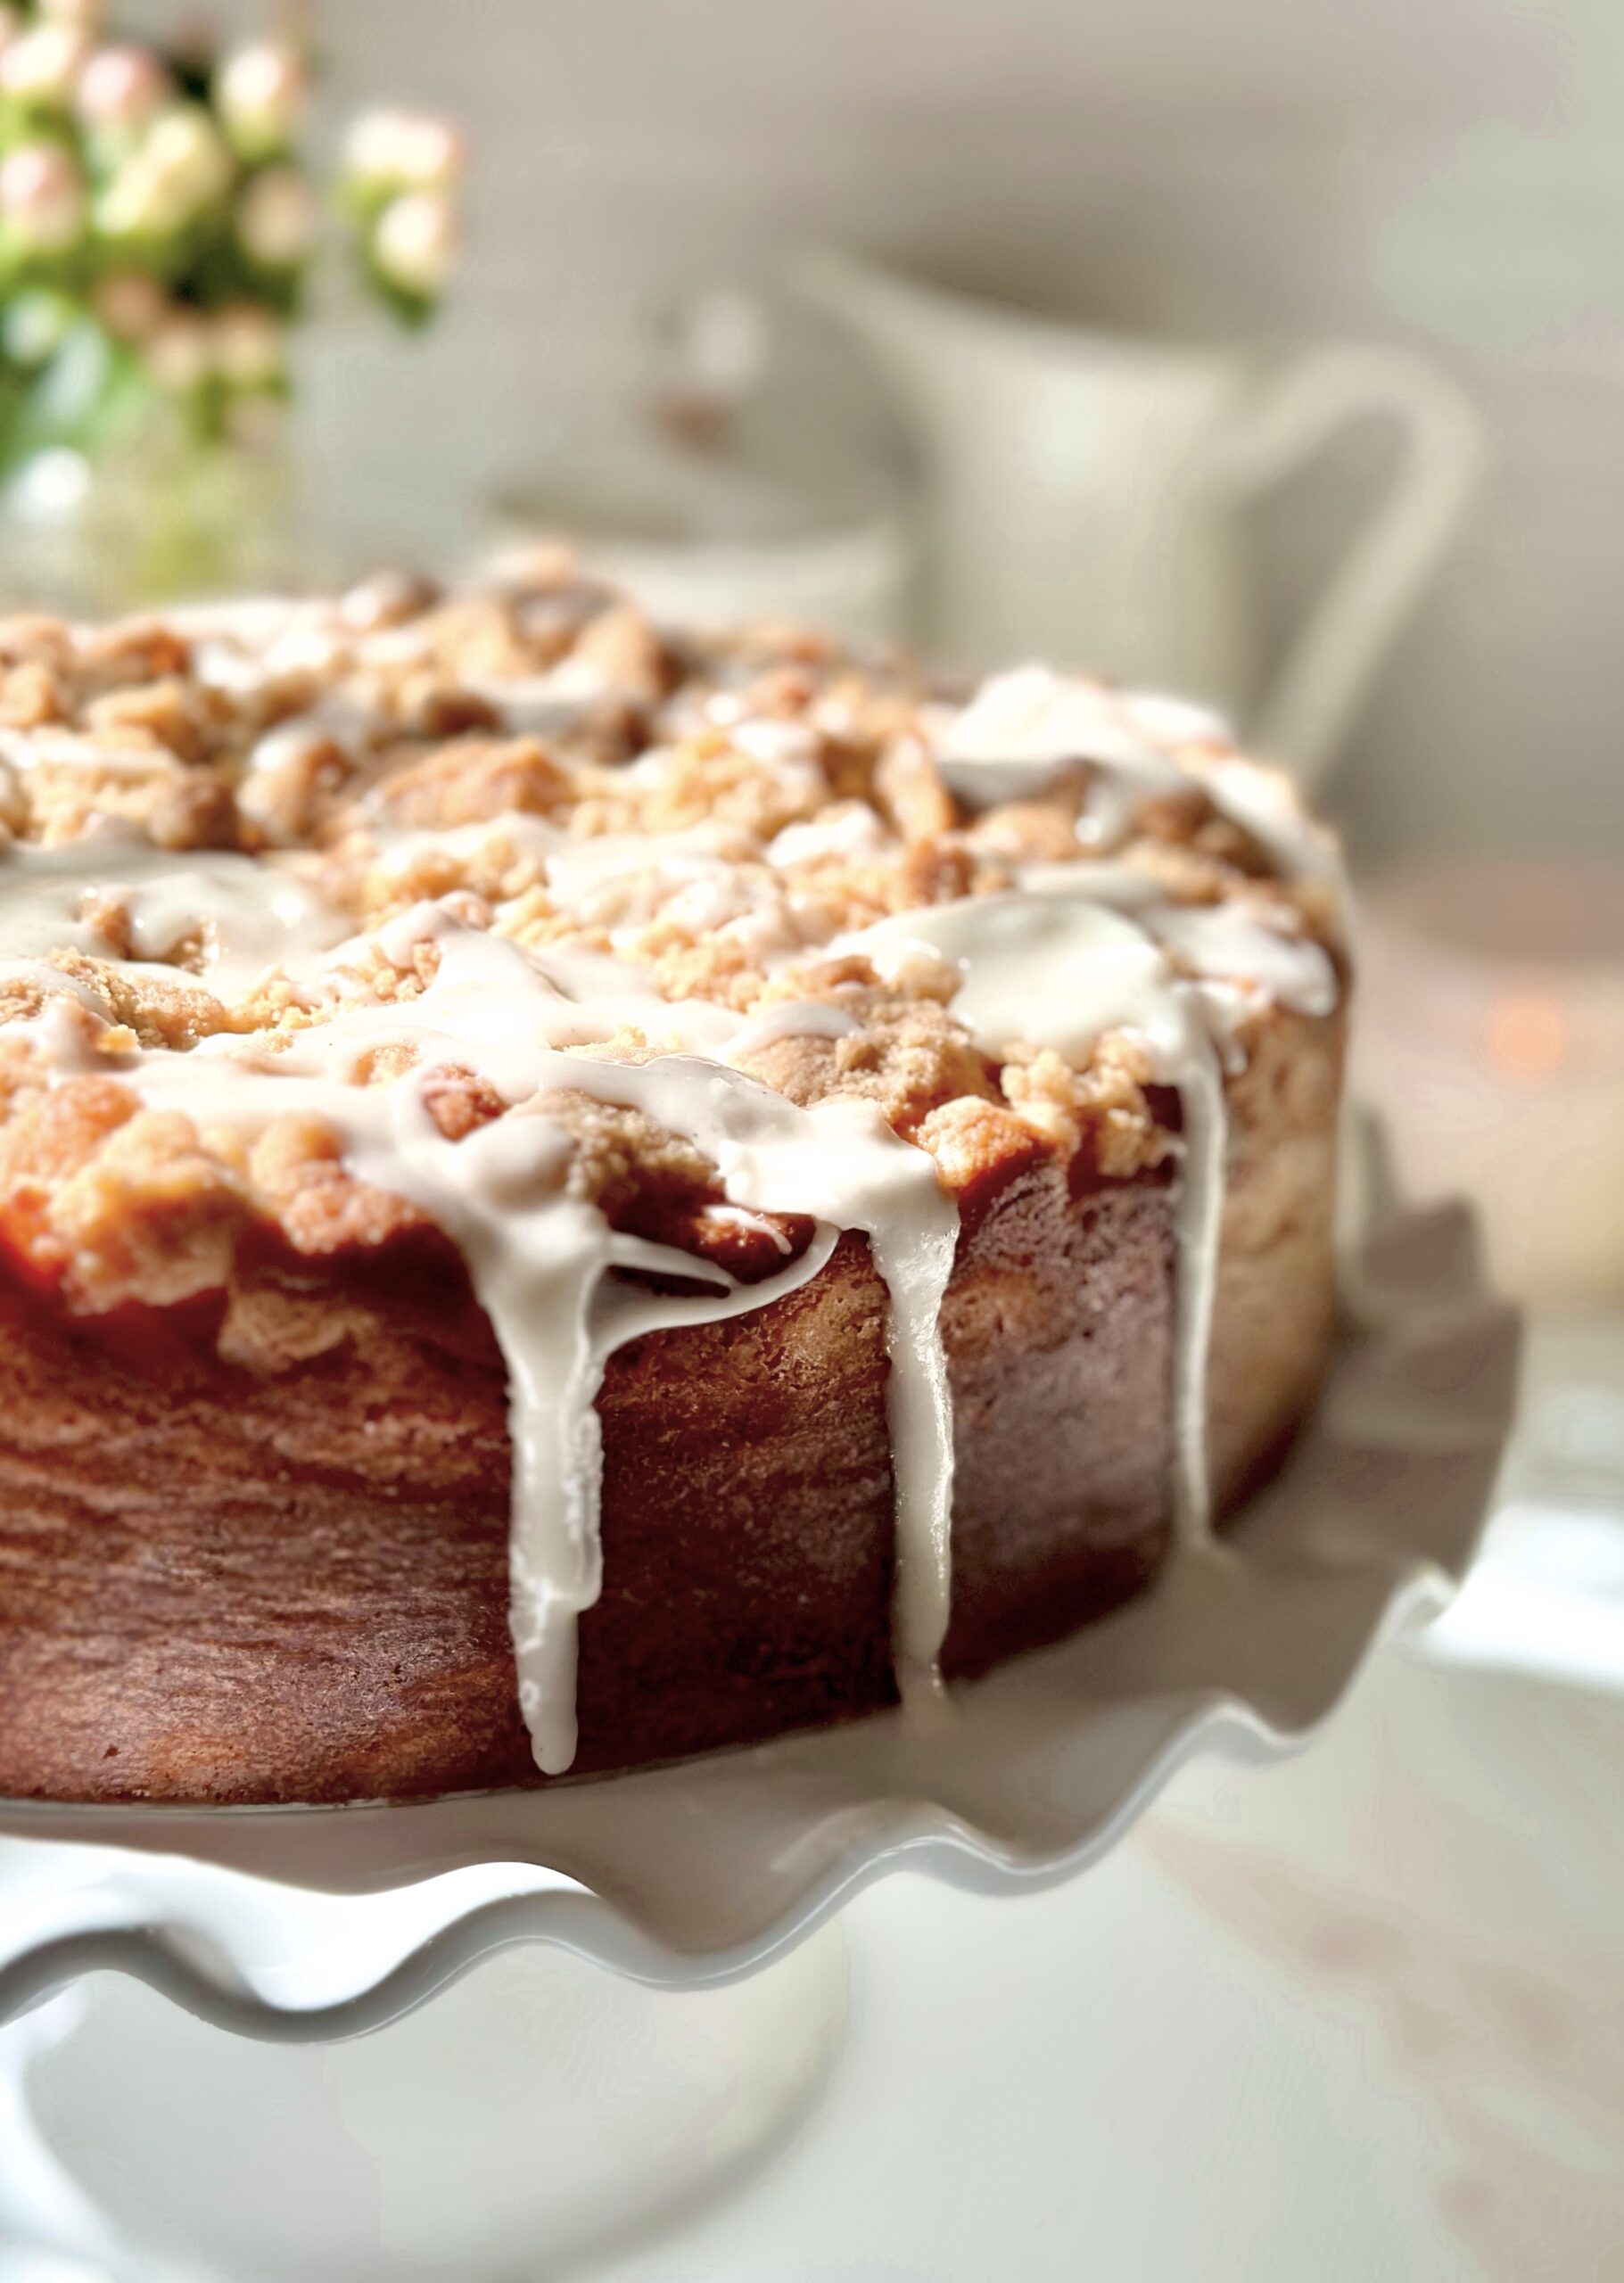
I remember my grandma making coffee cakes and sweet muffins for breakfast, along with eggs, sausages, hot coffee and a big pitcher of milk on the table. The older generation really loved their coffee cakes. I’ve noticed that many Millennials and Gen Z’s think coffee cake contains coffee. Maybe some coffee cake does contain coffee, but in general, coffee cake is called that because it’s typically eaten with coffee. A classic coffee cake is usually a subtly sweet cake with cinnamon, crumb topping and maybe some icing. The Apple Crumb Cake recipe I’m sharing with you has the elements of a classic coffee cake, but so much better! The cake is fluffy and soft, the crumb topping is chunky and plentiful, and the apples are perfectly tender. And don’t get me started about the icing!
Why do most of our grandmothers cook and bake so well? Because they’ve had decades of trial and error to perfect their recipes, tweaking them here and there until they’re approved and loved by their families, neighbors and friends. This cake has had its share of trial and error. She has earned her place as a well-loved, delicious, beautiful queen of coffee cakes.
In a large skillet, melt the butter over medium heat. Add the apples, sugar and cinnamon.
Cook, stirring occasionally, until the apples are tender, about 10 minutes. Transfer the apples to a bowl and let cool to room temperature.
Crumb Topping
In a medium bowl, mix the flour, brown sugar, sugar, cinnamon and salt.
Work in the butter with your fingertips until the mixture looks like wet sand. Press together to make 1/2-inch chunks.
Cake
Preheat the oven to 325ºF. Line a 9-inch cake pan with a removable bottom*, or a 9-inch springform pan, with parchment paper. Wrap the bottom of the cake pan with aluminum foil and place pan on a baking sheet.
In a medium bowl, whisk together the flour, baking powder and salt.
In a large bowl, cream the butter and sugar, with an electric mixer on medium speed, until light and fluffy.
Beat the eggs and vanilla into the butter mixture in three separate addition, making sure each addition is incorporated before adding the next.
In a small bowl, whisk the milk and sour cream together.
On low speed, beat the flour mixture into batter in three separate additions, alternating with milk mixture. Mix just until combined.
Transfer the batter to the prepared baking pan. Smooth the top with a spatula.
Drain any excess liquid from the apples. Top the cake batter evenly with apples, then the topping mixture.
Bake until a toothpick inserted into the center of the cake comes out clean, about 50-60 minutes. Cool the cake in pan for 10 minutes. Remove the cake from pan and transfer it to a cooling rack to cool completely.
Icing
In a medium bowl, whisk together the powdered sugar, melted butter, vanilla, salt and 2 tablespoons of cream. Add additional cream until desired consistency is reached. Drizzle over the cooled cake.
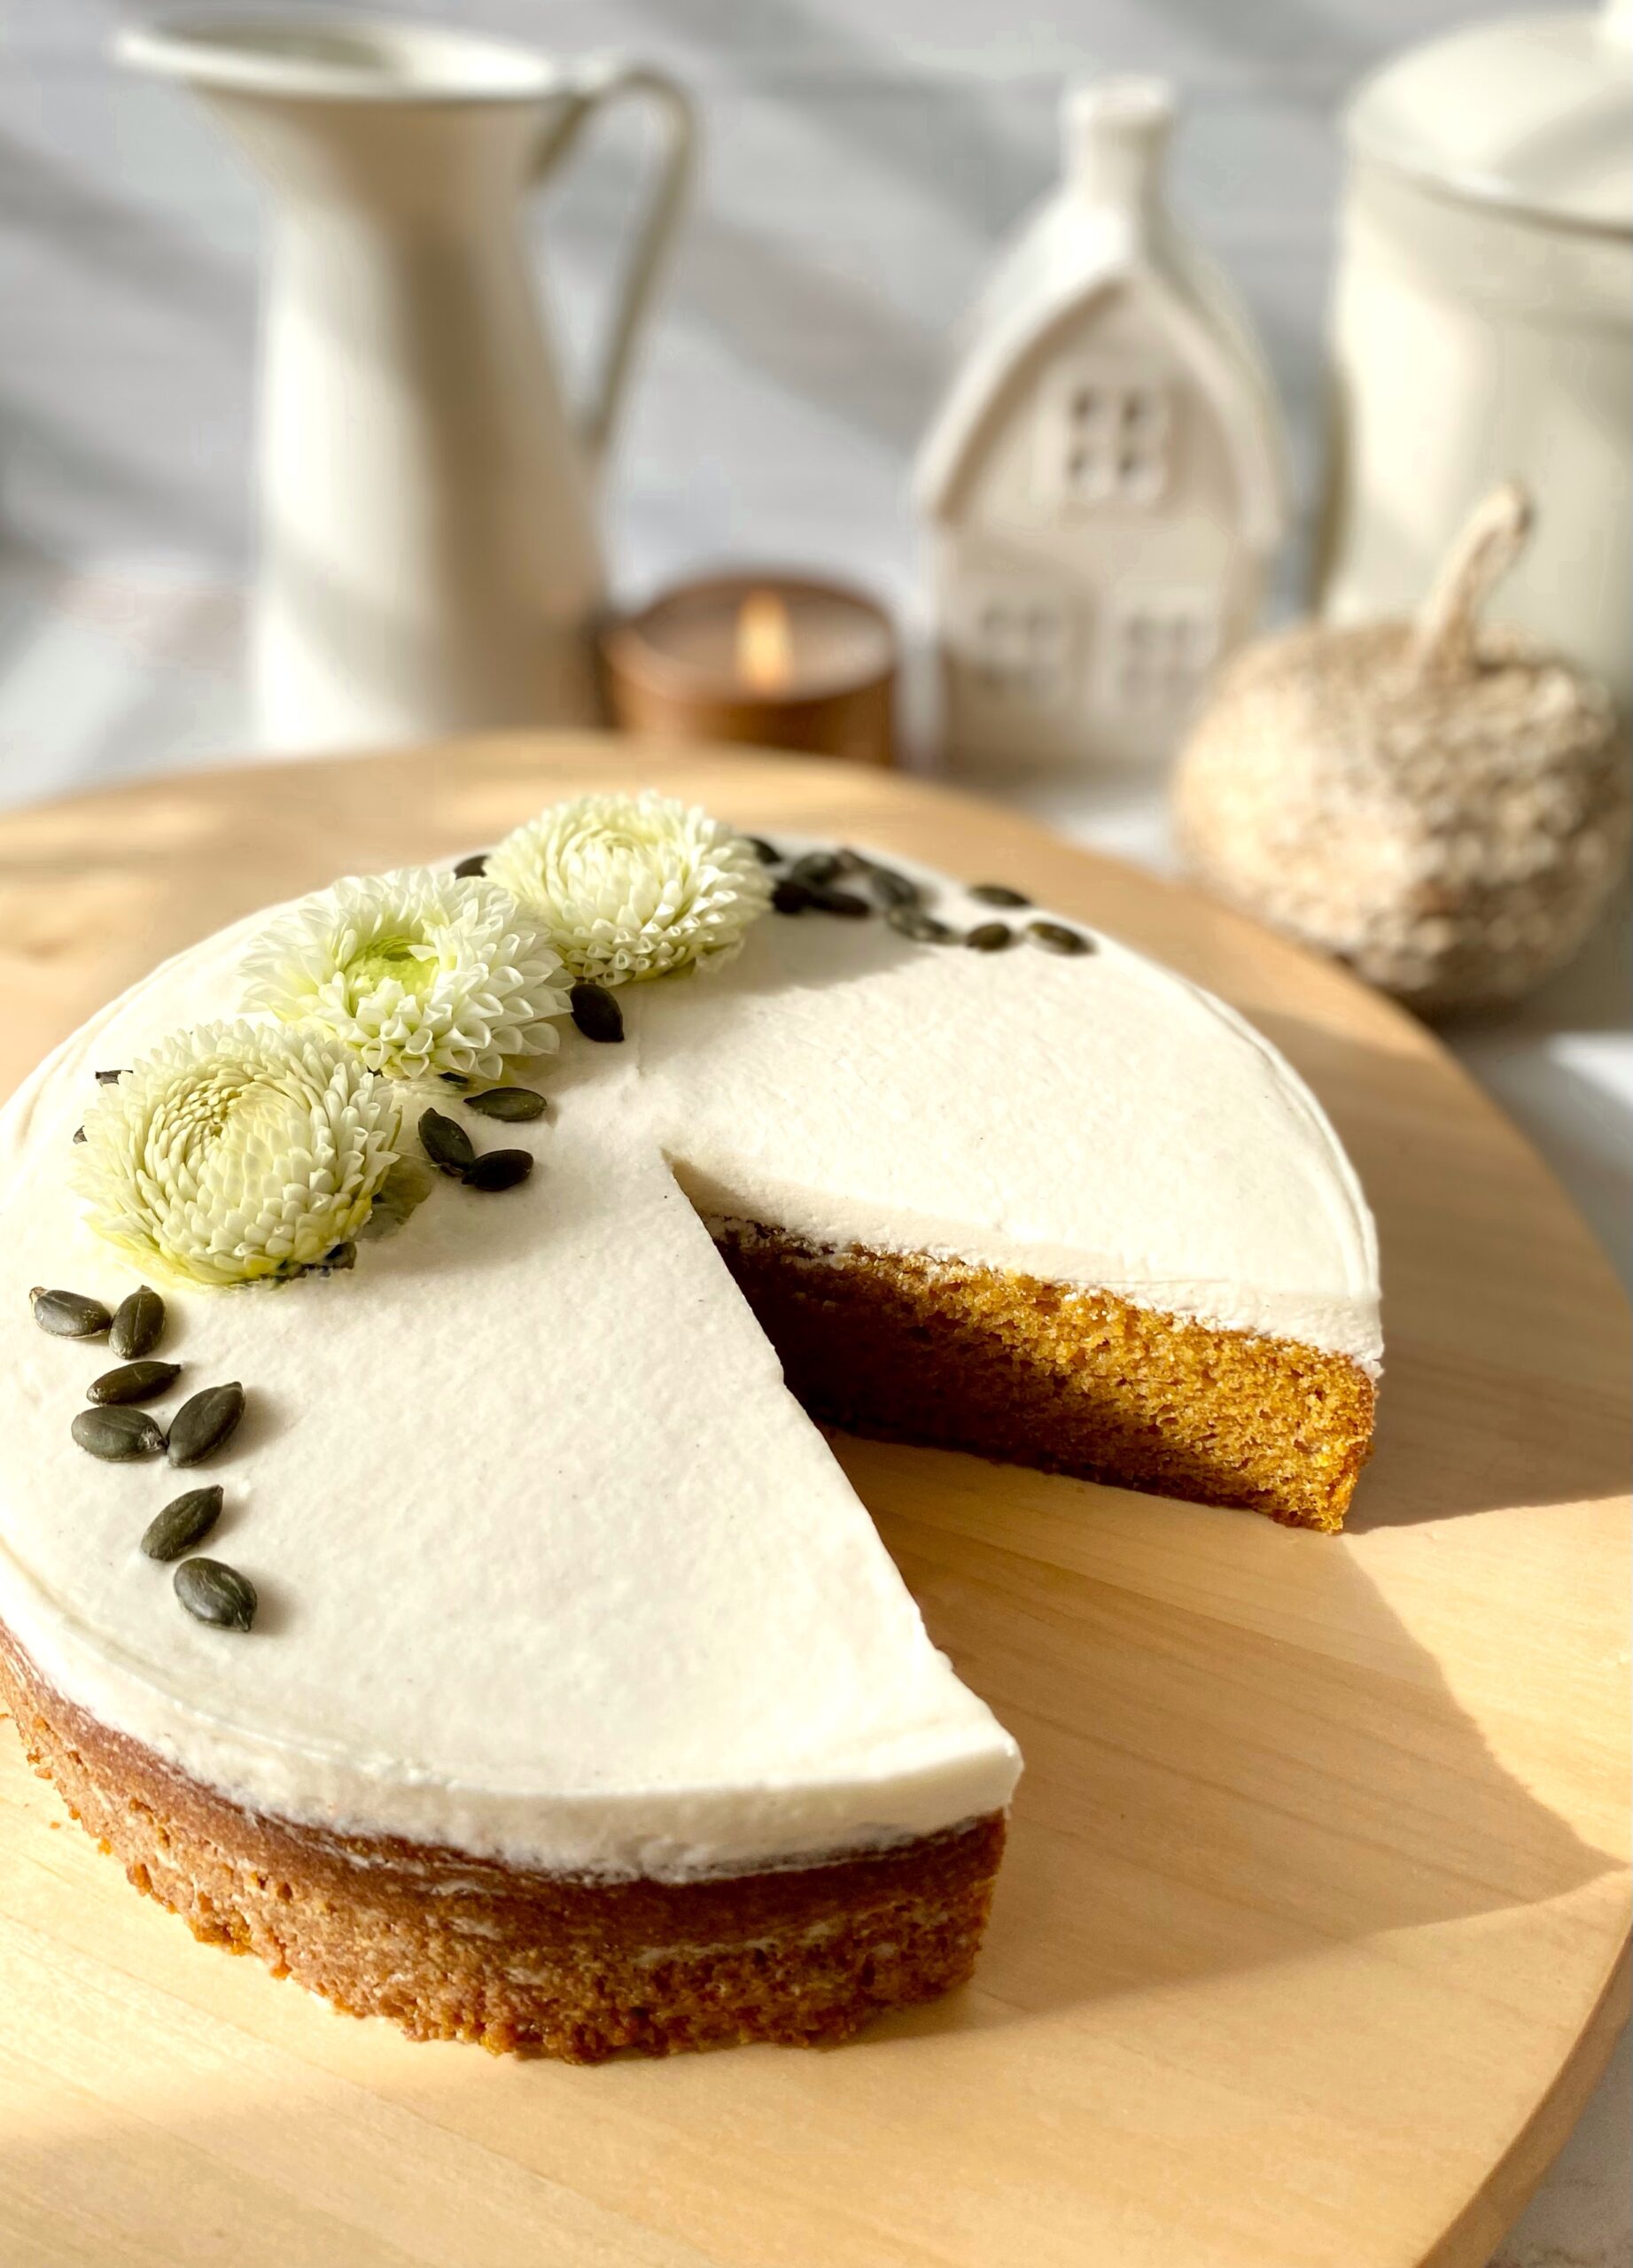
This perfect pumpkin cake brings back memories. The tender, moist texture reminds me of the pumpkin cake bars I used to make in junior high. I got the treasured bar recipe from an old children’s cookbook. I lent the cookbook to a neighbor and never saw the book or the recipe again. Through trial and error, I came up with this cake, which I think is even better! It’s so delicious it doesn’t need frosting, but the classic pairing with cream cheese frosting takes it over the top.
Once upon a time, there was a little black bear who woke up from a long nap. As she stretched, she felt her tummy growl. She ventured into the morning sunshine and smelled something sweet. She sniffed the air, following the sweet fragrance until she came upon a beautiful purple tree. She climbed up to a comfy branch and ate the tender, purple blossoms to her heart’s content.
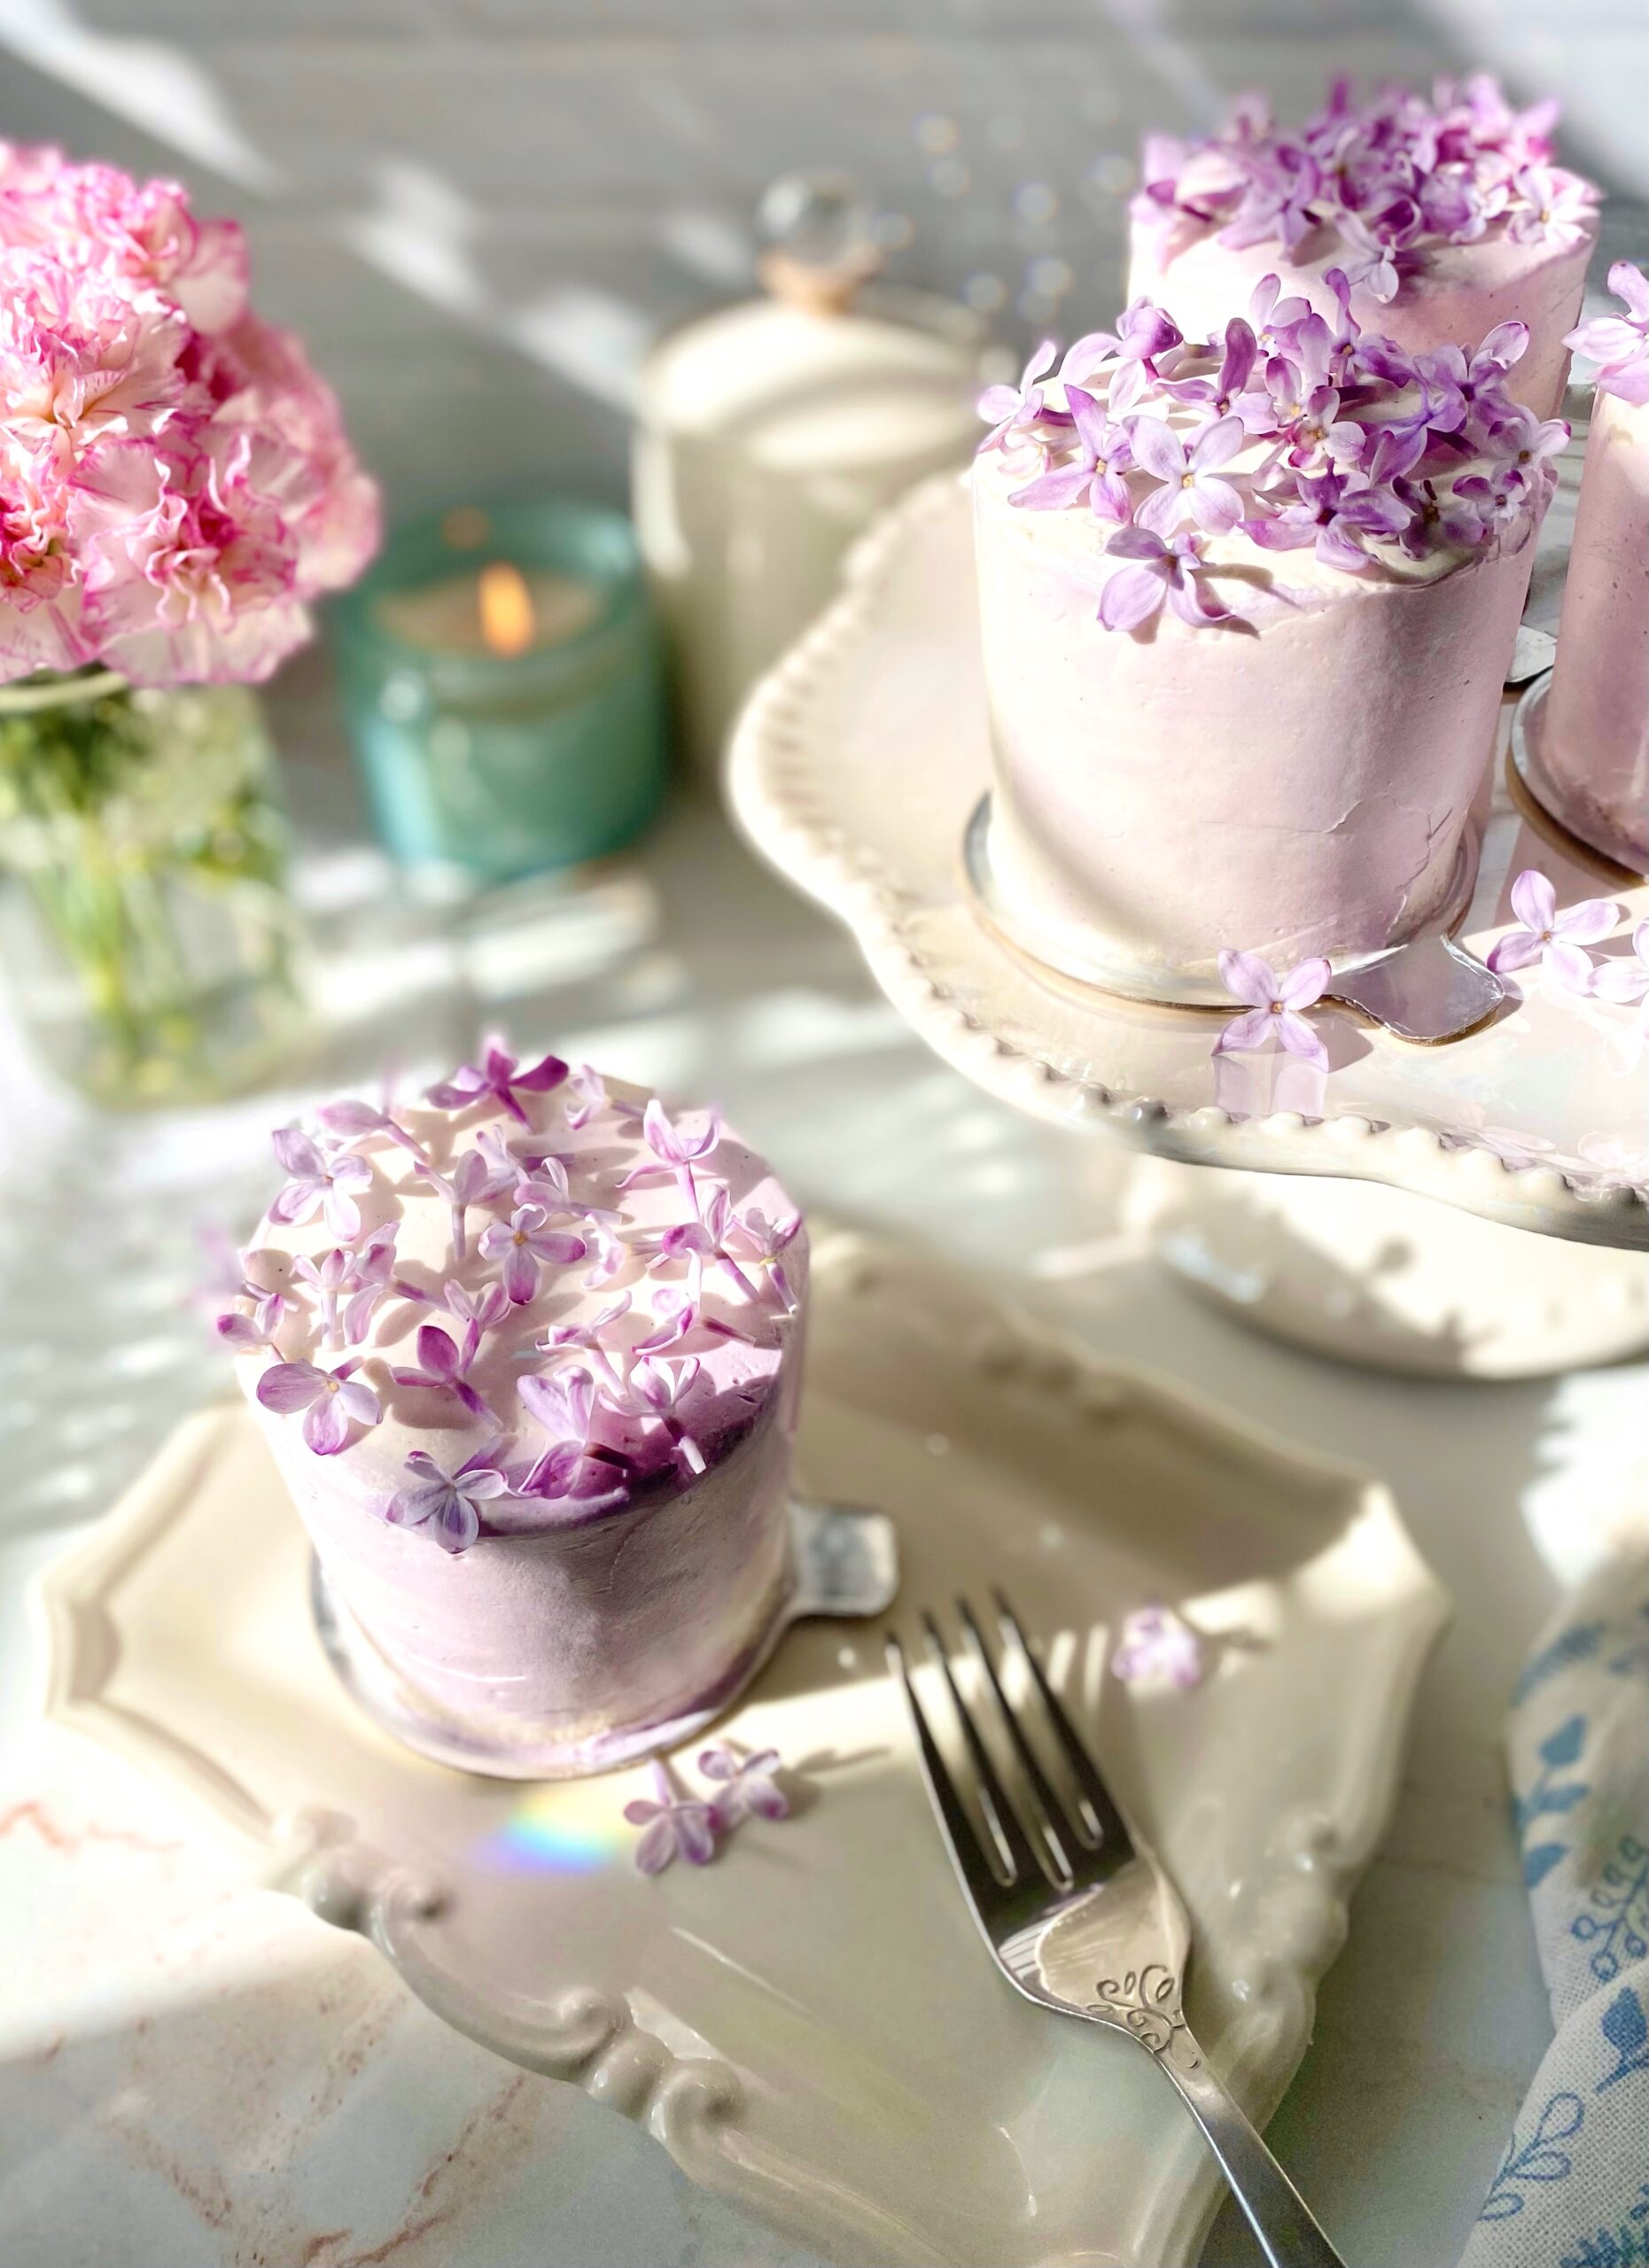
Bears, butterflies and bees know something good when they see it. We humans can also enjoy lilacs. I knew lilacs were edible, but I hadn’t tasted them until recently. The flavor reminds me of beets, slightly sweet with a vegetable aftertaste. I really wanted to try lilac syrup after seeing so many photos of pretty purple syrup online. I discovered that lilac syrup is not purple. It’s more of a dull, brownish blue-green. Many people use food coloring or blueberries to color their syrup. I also discovered that lilac syrup will turn a pretty shade of mauve by adding a small amount of lemon juice to the finished syrup. Since I would be using my lilac syrup inside of cake layers, I let it remain its natural color. I made a simple syrup with lilac blossoms and let them steep for a couple of hours. It was just long enough to give a subtle lilac flavor without being too floral. If you want a stronger lilac flavor, I suggest using more lilac blossoms rather than steeping longer to avoid bitterness.
I paired the lilac syrup with this soft, fluffy vanilla cake and silky Swiss meringue buttercream. If you aren’t a fan of lilac syrup, feel free to use vanilla simple syrup instead and just use the lilac blossoms to decorate your cakes. They look stunning on any cake or cupcakes.
Print Recipe
Lilac Vanilla Mini Cakes
Soft, fluffy mini white vanilla cakes with lilac syrup and vanilla Swiss meringue buttercream, topped with lilac blossoms
In a small saucepan combine sugar and water. Bring to a boil over medium heat, stirring gently to dissolve sugar. Add the lilac blossoms and stir gently.
Turn down heat and simmer for 5 minutes.
Remove from heat and allow lilac blossoms to steep for 2 hours. Pass lilac syrup through a mesh sieve.
White Vanilla Cake
Preheat oven to 350ºF. Grease and flour two 9-inch cake pans and line the bottoms with parchment paper.
In a medium bowl, whisk together cake flour, baking powder and salt. Set aside.
In a large bowl, beat butter, sugar, oil and vanilla bean paste with an electric mixer at medium speed, until light and fluffy, about 3 minutes.
On medium speed, beat in egg whites in two additions, then beat in egg until well combined.
On low speed, beat in one third of the flour mixture, then beat in sour cream just until combined.
Beat in the remaining flour in two additions, alternating with milk. Beat just until combined.
Transfer batter to prepared cake pans. Bake for 28-33 minutes, or until top is light golden brown and toothpick inserted in center comes out clean. Do not over bake.
Allow cakes to cool in pans for 10 minutes, then remove from pans and continue cooling on a wire rack.
Cut cakes into twelve 2 3/4-inch rounds using a cookie or biscuit cutter.
Using a pastry brush, brush mini cakes generously with lilac syrup or vanilla simple syrup.
Swiss Meringue Buttercream
Combine egg whites and sugar in a large heatproof bowl. Set over a pan of simmering water.
Whisk constantly until sugar is dissolved and temperature of 160ºF is reached.
Transfer mixture to the bowl of a stand mixer with a whisk attachment. Whisk on low speed, gradually increasing to medium-high speed. Whisk until glossy, stiff peaks form and mixture reaches room temperature.
Turn mixer to medium-low speed. Add butter, a few pieces at a time, allowing butter to fully incorporate before adding more. If mixture looks curdled, keep mixing and it will correct itself.
Switch to a paddle attachment. On low speed, mix in vanilla bean paste and salt. Continue mixing on low speed for a few minutes until smooth.
Remove about 3/4 cup of frosting and transfer to a small bowl. Using a toothpick, place two tiny drops of lilac gel food color and one tiny drop of violet gel food color into the bowl. Mix with a spatula until well combined.
Assembly
Smear a bit of frosting on each mini cake board. Top with a cake round, frosting, then a second cake round. Frost with a crumb coat if desired. Refrigerate 15 minutes. Frost mini cakes with white Swiss meringue buttercream, then smear small amounts of lilac Swiss meringue buttercream around the sides and top. Smooth frosting with a bench scraper and smooth the tops with a small offset spatula. Decorate with lilac blossoms.
Vanilla Simple Syrup (optional)
Combine 1/2 cup sugar and 1/2 cup water in a small saucepan. Bring to a boil over medium heat, stirring to dissolve sugar. When sugar has dissolved, remove from heat and stir in 1 teaspoon vanilla bean paste or pure vanilla extract.
Recipe Notes
*If you can't find ultra fine granulated sugar, it's okay to substitute with regular granulated sugar.
**To find the lilac gel food color I used, click here.
***To find the violet gel food color I used, click here.
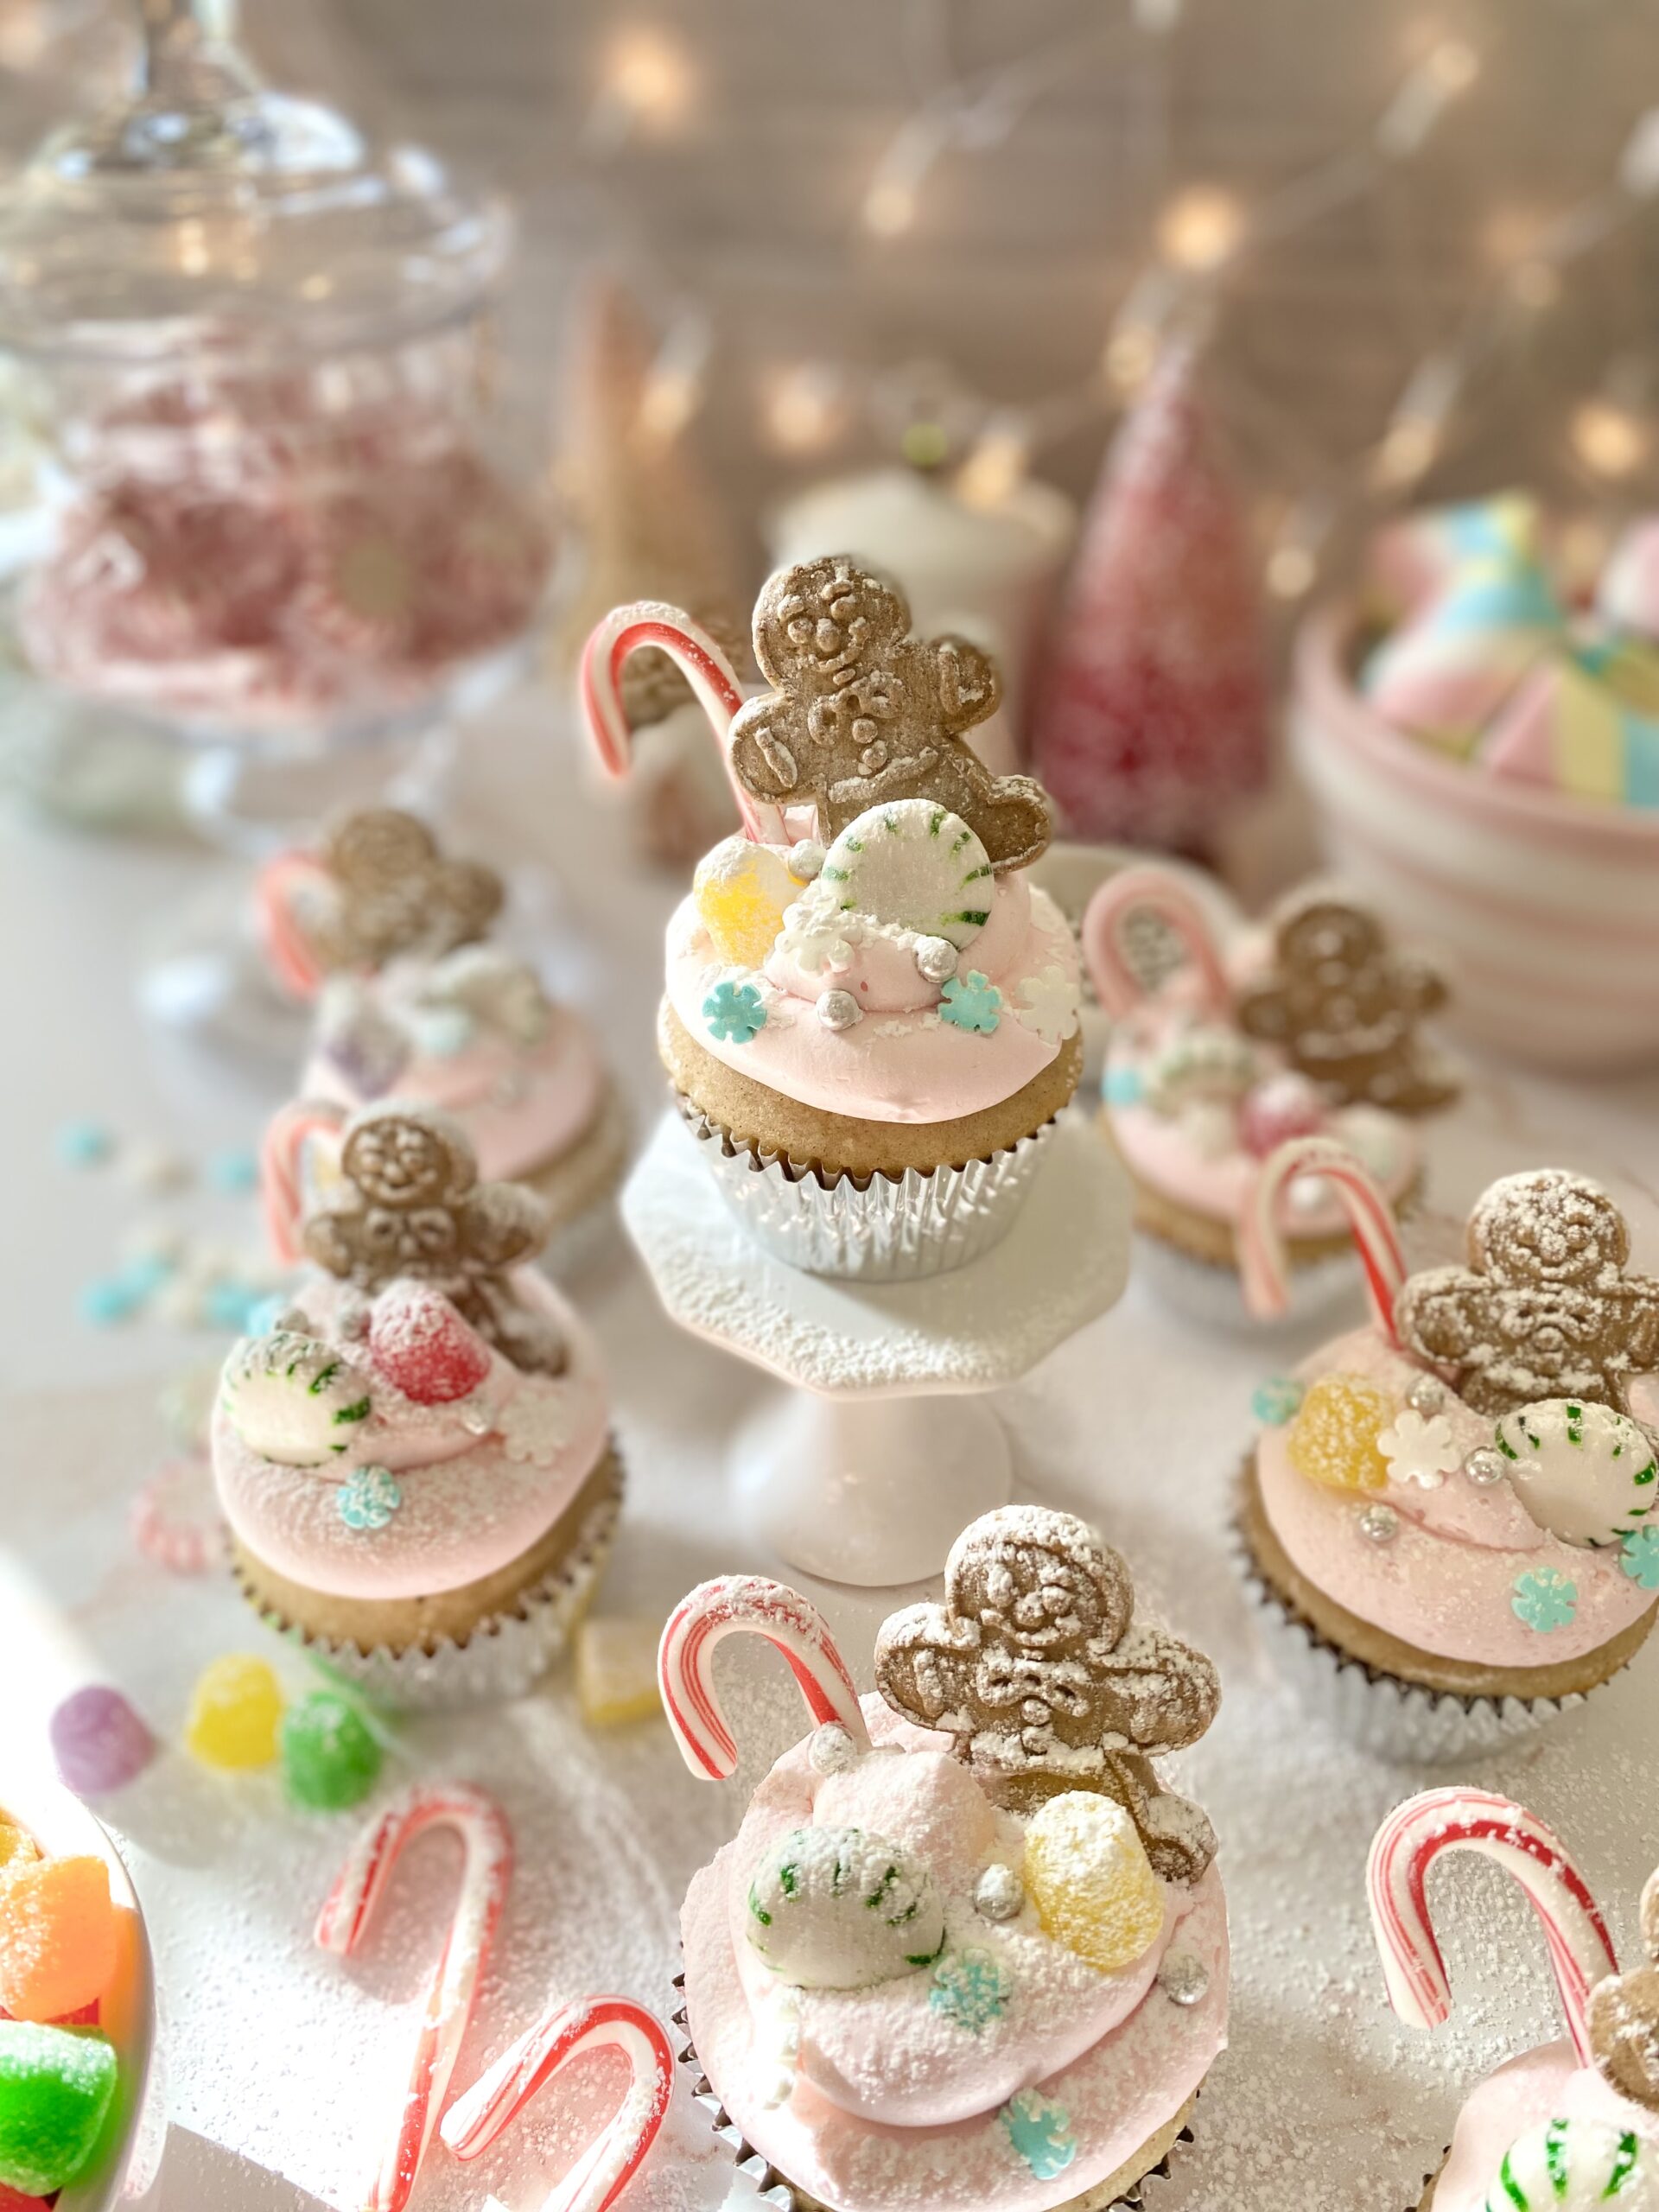
The tradition of enjoying the Nutcracker Ballet at Christmastime has been in my family for over 20 years. The Nutcracker Land of Sweets is a magical theme that has me mesmerized. Gingerbread, candy canes, gumdrops and billowy clouds of pink frosting are what dreams are made of. And that’s exactly what these dreamy cupcakes are made of. The cupcake flavor is a subtle spice cake. The recipe is adapted from a Martha Stewart cake recipe I made last summer. The original cake was paired with blackberry jam, but I knew plum jam would be perfect for these cupcakes. I topped them with a mildly sweet, fluffy Swiss meringue buttercream.
Part of the fun of making these cupcakes began at the store as I collected the sweets to decorate the cupcakes. Another perk of the job is taste testing the candy. I discovered that purple spice drops are licorice flavored and red spice drops are cinnamon. Who knew?
You might also like my Nutcracker Land of Sweets inspired candy bark. It’s a delightful holiday bark I designed that is often imitated. To view it, click here.
Print Recipe
The Nutcracker Land of Sweets Cupcakes
Spice cupcakes filled with plum jam, topped with fluffy pink frosting, gingerbread men and Christmas candy, and dusted with sugar snow
Combine egg whites and sugar in a heatproof bowl. Set over a pan of gently simmering water.
Whisk constantly until sugar is dissolved and temperature of 160ºF is reached.
Transfer mixture to the bowl of a stand mixture with a whisk attachment. Whisk on low speed, gradually increasing to medium-high speed. Whisk until glossy, stiff peaks form and mixture reaches room temperature.
Turn mixer to medium-low speed. Add butter, a few pieces at a time, allowing the butter to fully incorporate each time before adding more.
Switch to paddle attachment. On low speed, mix in vanilla, salt and food color. Continue mixing on low speed for a few minutes until smooth.
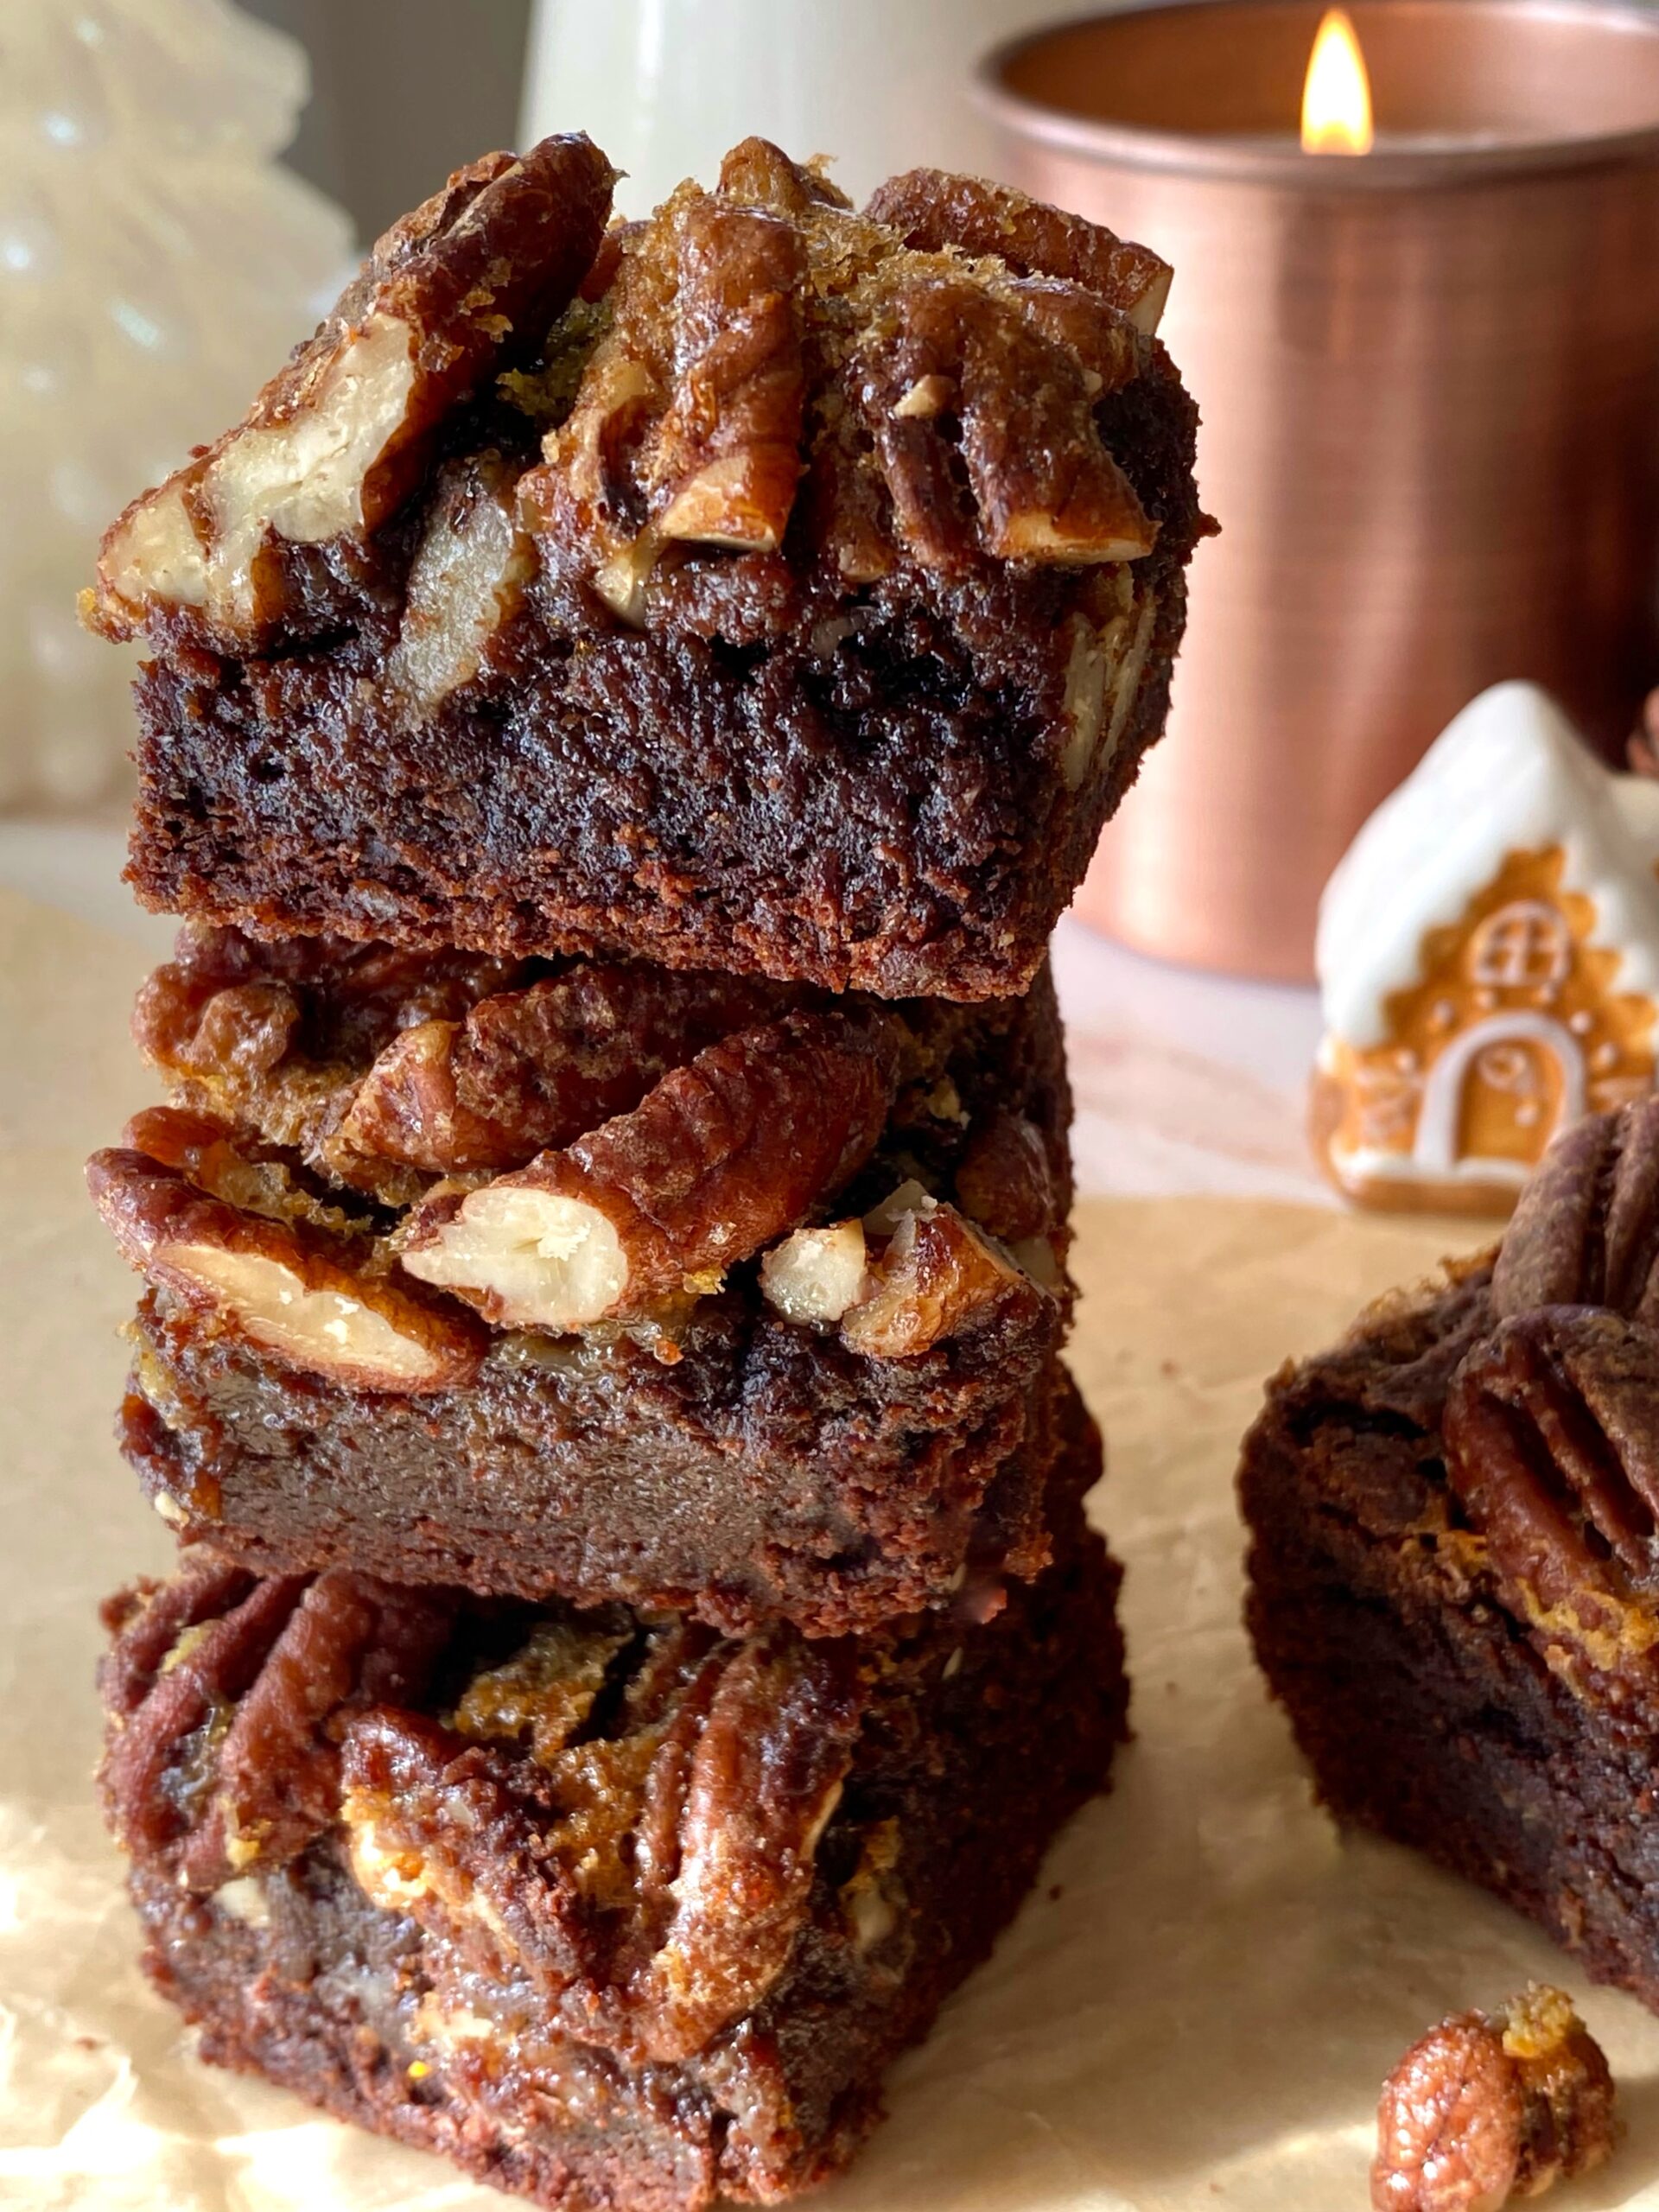
Pecan pie was my mom’s favorite, but she didn’t bake pies, so I always used to bake her one for Thanksgiving. One year, I made a chocolate version. It was delicious, but let’s just say it wasn’t user friendly. It was gooey and hard to serve. Over the years, it eventually morphed into these Maple Pecan Brownies. The brownie version is still delicious, rich and gooey with toasty pecans, but much more user friendly.
Enjoying Maple Pecan Brownies with a glass of milk or a cup of coffee is a must. Thinking of it brings back memories. I can practically smell my dad brewing the coffee to go with these brownies.
Print Recipe
Maple Pecan Brownies
Rich, gooey brownies topped with pecan pie filling
Preheat oven to 350ºF. Line a 9-inch square baking pan with parchment paper, overlapping the sides an inch or two. Spray parchment paper with nonstick cooking spray.
In a large bowl, stir together melted butter, granulated sugar and brown sugar until well combined.
Mix in eggs and vanilla, one at a time, until well combined.
Mix in cocoa powder, baking soda and salt until well combined.
Stir in flour just until combined.
Spread batter into prepared baking pan. Bake just until top is set, about 25 minutes.
Meanwhile, prepare pecan topping.
When brownie top is set, remove from oven. Gently pour pecan topping around the outer perimeter of brownies, to avoid making brownies sink in the middle. Evenly distribute the pecan topping over the top gently with a spoon.
Return the brownies to the oven and continue baking until the topping is set, about 20-25 minutes. Brownies will stop jiggling and topping will look deep golden brown. Toothpick inserted inside will have a few moist crumbs on it. (If your topping starts to brown too much on the edges before the inside is done, apply aluminum foil around the edges as you would with a pie.)
Remove from oven and cool completely before cutting, about 2- 2 1/2 hours.
Cut into squares, wiping knife between cuts.
Pecan Topping
In a medium bowl, stir together maple syrup, butter, brown sugar, egg, maple extract and salt until well combined.
Stir in pecans until well coated with maple syrup mixture.