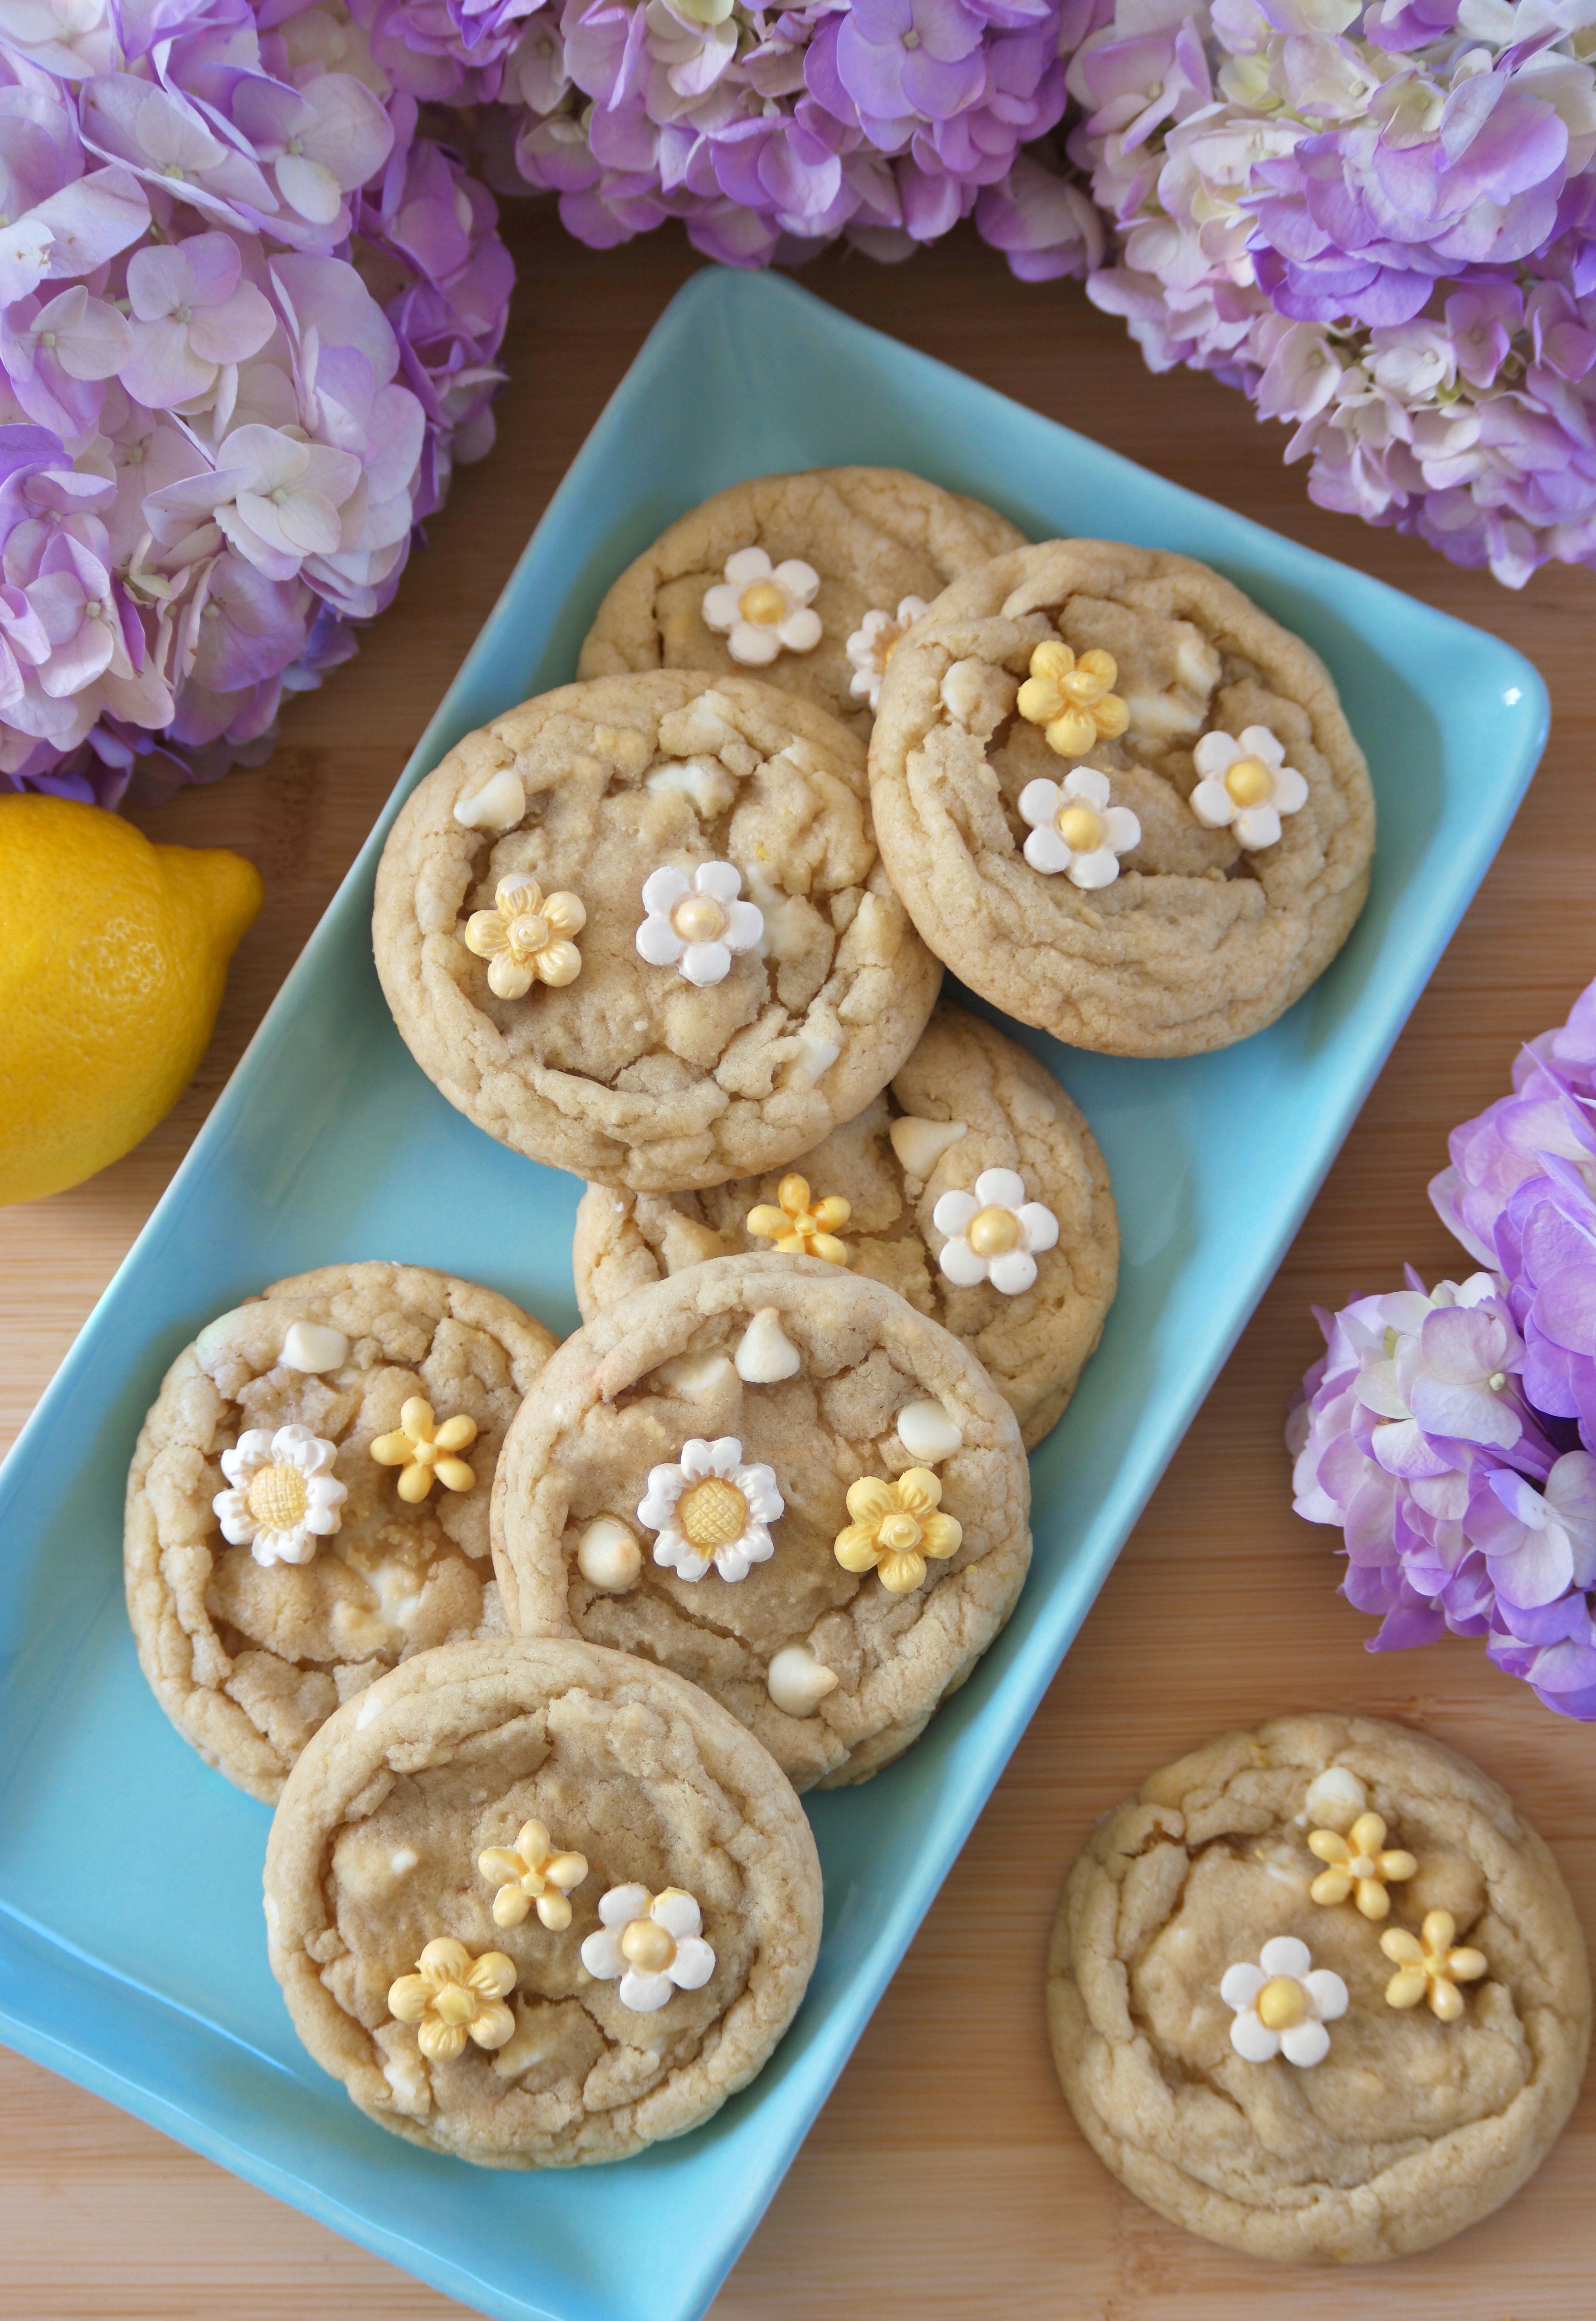
Lemon White Chocolate Chip Cookies

Lemon White Chocolate Chip Cookies

It’s nearly impossible to feel blue while you’re eating one of these cheerful Lemon White Chocolate Chip Cookies! They’re lemony, buttery and so delicious. I tested these over and over until I got the best lemon flavor and the perfect texture. You’ll love the crisp edges and soft, chewy centers. They don’t require any chilling time, but if your cookies spread too much, you can chill the dough balls for 20-30 minutes before baking. Weigh your ingredients for the best results.

For extra cuteness, I added small yellow chocolate flowers. I used melted white chocolate chips, but candy melts work too. The candy mold I used makes 1/2-inch to 3/4-inch flowers. To find the mold I used, click here. If you use that mold or a similar one, I recommend buying more than one so you can make more chocolate flowers at one time. If you want to skip the white chocolate flowers, then add a few white chocolate chips to the top of each cookie before baking.

Print Recipe
Lemon White Chocolate Chip Cookies
Lemony cookies with white chocolate chips, crisp edges and soft, chewy centers, topped with white chocolate flowers
Course Dessert
Keyword cookies, lemon
Servings
cookies
Ingredients
Lemon White Chocolate Chip Cookies
Course Dessert
Keyword cookies, lemon
Servings
cookies
Ingredients
Lemon White Chocolate Chip Cookies
Instructions
White Chocolate Flowers
  1. Prep silicone candy flower molds by brushing a small amount of luster dust into the cavities with a small food safe brush. This step is optional, but it gives your chocolate flowers a sheen and helps them to release from the mold.
  2. In a heat safe bowl, melt the white chocolate chips together with the vegetable oil over a pan of barely simmering water, making sure the water doesn't touch the bottom of the bowl. Alternately, you can melt your white chocolate chips with short bursts in the microwave. Stir gently until smooth. Stir in the food coloring a little at a time until your desired shade is achieved.
  3. Transfer the melted chocolate to a piping bag with a narrow round tip or snip the tip off of a disposable piping bag. Alternately, you can use a food grade squeeze bottle with a narrow tip. Fill the cavities of the flower mold. Scrape off any excess chocolate with a small offset spatula. Place the mold in the freezer for a few minutes until set. Turn the mold over and bend it slightly to release the flowers. Repeat the steps until you have about 24-36 flowers.
Lemon White Chocolate Chip Cookies
  1. Preheat the oven to 350ºF (180ºC). Line two large cookie sheets with parchment paper.
  2. In a medium bowl, whisk together the flour, cake flour, salt and baking soda.
  3. In a large bowl, beat the butter, granulated sugar, brown sugar and lemon zest, with an electric mixer at medium speed, until light and fluffy. Beat in the egg and egg yolk in separate additions until well incorporated. Beat in the extracts until combined.
  4. On low speed, beat in the flour mixture just until combined. Fold in the white chocolate chips.
  5. Place 1/4 cup size portions of cookie dough onto the prepared cookie sheet, about 3 inches apart. I used a #20 portion scoop* and I placed 6 cookies on each cookie sheet. Bake one cookie sheet at a time. Bake until the tops of the cookies are set and the bottom edges begin to turn light golden brown, about 10-11 minutes. Do not over bake. Transfer the cookies to a cooling rack to cool completely.
  6. Apply the white chocolate flowers to the cooled cookies with a dab of melted white chocolate.
Recipe Notes

To find the flower mold I used, click here.

To find the portion scoop I used, click here.

Lemon Bundt Cakes with Blueberry Cream Cheese Icing

Lemon Bundt Cakes with Blueberry Cream Cheese Icing

Say hello to springtime in cake form. These soft, fluffy, little lemon bundt cakes are bursting with lemon flavor and topped with a beautiful, delicious blueberry cream cheese icing. The icing gets it’s natural beauty from fresh blueberries. The colors and flavors of these cakes remind me of sunshine and spring blooms. I decorated my cakes with tiny blue violas from my garden. They would also look pretty topped with fresh chamomile flowers.

I used a bundtlette pan with six 1-cup servings. To find the pan I used, click here. This recipe also works as cupcakes using a standard muffin pan. The baking time will be a bit shorter. If you’re not a fan of blueberry icing, you can glaze the cakes with lemon icing instead. To find my lemon icing recipe, click here.

Print Recipe
Lemon Bundt Cakes with Blueberry Cream Cheese Icing
Soft, fluffy lemon bundtlette cakes topped with blueberry cream cheese icing
Course Dessert
Keyword cake, lemon bundts
Servings
Bundtlette cakes
Ingredients
Lemon Bundt Cakes
Blueberry Cream Cheese Frosting
Course Dessert
Keyword cake, lemon bundts
Servings
Bundtlette cakes
Ingredients
Lemon Bundt Cakes
Blueberry Cream Cheese Frosting
Instructions
Lemon Simple Syrup
  1. In a small saucepan, combine the sugar, lemon juice, and water over medium-low heat. Cook and stir gently just until the sugar is dissolved. Set aside to cool.
Lemon Bundt Cakes
  1. Preheat the oven to 350ºF (180ºC). Grease and flour a bundtlette pan with six 1-cup servings. Make sure to thoroughly grease and flour all of the crevices. (To find the pan I used, see note below.*)
  2. In a medium bowl, whisk together the flour, baking powder, baking soda and salt.
  3. In a large bowl whisk together the sugar and lemon zest until well combined. Add the oil, eggs, and vanilla extract and whisk until smooth and well combined.
  4. In a small bowl, whisk together the milk and sour cream. Stir the flour mixture into the batter in 2 additions, followed by half of the milk mixture after each addition. Stir just until combined.
  5. Fill the cake pan wells half full with the batter. (If using a standard muffin pan, fill the wells 2/3 full.) Bake until the tops are springy and a toothpick inserted in the centers of the cakes comes out clean or with a few crumbs attached, about 14-16 minutes. Check for doneness a couple of minutes early to avoid over baking. (Baking time is shorter for a standard muffin pan.) Cool the cakes in the pan for 8 minutes, then turn the cakes out onto a cooling rack. Brush the warm cakes generously with lemon simple syrup.
Blueberry Cream Cheese Icing
  1. In a small saucepan, combine the blueberries, sugar and lemon juice. Stir occasionally over medium heat, until the blueberries start to soften and the mixture starts to bubble. Smash the blueberries with a potato masher or the back of a spoon. Let the mixture simmer gently until thickened to a jam consistency, about 2-3 minutes. Strain the cooked blueberries through a mesh sieve for a smooth consistency. You can skip this step if you prefer a chunky consistency. Set aside to cool to room temperature.
  2. In a medium bowl, beat the cream cheese and butter together until smooth. Don't over beat. Cream cheese tends to curdle if beaten too much.
  3. Add the powdered sugar, vanilla and 2 tablespoons of milk and beat until smooth and well combined. Stir in the cooled blueberries until combined. Stir in more milk as needed to achieve your desired consistency. Spoon or drizzle the icing onto the cooled lemon cakes.
Recipe Notes

To find the bundt cake pan I used, click here.

White Velvet Snowflake Cakes


Print Recipe


White Velvet Snowflake Cakes

Soft, plush vanilla mini cakes with vanilla icing

Course Dessert
Keyword cake, white velvet

Servings
cakes


Ingredients
Snowflake Cakes

Vanilla Icing

Course Dessert
Keyword cake, white velvet

Servings
cakes


Ingredients
Snowflake Cakes

Vanilla Icing


Instructions
Snowflake Cakes
  1. Preheat the oven to 350ºF (177ºC). Spray a 6-serving silicone snowflake mini cake mold* with nonstick spray. Use a small pastry brush to brush the spray into all of the crevices. Tap out any excess spray. Place the mold on a baking sheet.

  1. In a large bowl, whisk together the cake flour, baking powder and salt. Add the sugar and whisk to combine. Add the butter and beat, with an electric mixer on low speed, until the butter is evenly distributed and the mixture looks like crumbs with no large chunks.

  2. In a medium bowl, whisk together the milk, egg whites, oil and vanilla. Slowly add the milk mixture to the flour mixture and continue beating on low until smooth, about 1-2 minutes.

  3. Transfer the batter to the prepared pan, evenly distributing the batter and filling the cavities a little more than half full. Bake until the tops of the cakes are light golden and a toothpick inserted into the centers of the cakes comes out clean, about 18-22 minutes. Be careful not to over bake. Let the cakes cool in the pan for about 7 minutes then turn the cakes out onto a cooling rack to cool completely.

  4. Brush one or two coats of vanilla icing on the tops and sides of the cakes. Decorate as desired. I used fine opal sanding sugar, candy snowflakes and candy pearls.

Vanilla Icing
  1. In a medium bowl, whisk together the powdered sugar, butter, vanilla, salt and 1 tablespoon of milk until smooth. Add additional milk as need to achieve your desired consistency.


Recipe Notes

I used a 6-serving silicone mold with 3-inch diameter, 1-inch deep cavities.


Little Strawberry Heart Cake

A cute little, stress-free, perfectly pink heart cake is my gift to you for Valentine’s Day. The vanilla cake is soft and fluffy. The frosting is super easy and delicious, with only two ingredients. It all comes together with fresh strawberries and it’s so good, you won’t want to share.

Print Recipe
Little Strawberry Heart Cake
A six inch heart shaped vanilla cake with fresh strawberries and two-ingredient frosting
Course Dessert
Keyword cake, strawberry
Servings
Ingredients
Course Dessert
Keyword cake, strawberry
Servings
Ingredients
Instructions
  1. In a small bowl, combine strawberries and 2 teaspoons sugar. Set aside to macerate for about 30 minutes.
  2. Preheat oven to 350ºF. Line the bottom of a 6-inch heart shaped cake pan*** with parchment paper. Grease and flour the sides.
  3. In a medium bowl, whisk together flour, baking powder and salt.
  4. In a large bowl, cream butter, sugar and oil with an electric mixer, until light and fluffy.
  5. Beat in egg and vanilla in two separate additions until well combined.
  6. In a small bowl, whisk together milk and sour cream.
  7. Beat flour mixture into batter in two additions, alternating with milk mixture.
  8. Transfer batter to prepared cake pan. Bake until toothpick inserted in the center comes out clean, about 25-30 minutes. Let cake cool in pan 10 minutes then turn out onto a cooling rack to cool.
  9. In a large bowl, stir cream cheese with a spatula to smooth out lumps.
  10. Add marshmallow fluff and beat until well combined. Add food gel color with a toothpick and beat until evenly distributed.
  11. Split cake into two layers. Top the bottom layer with frosting. Drain strawberries and spoon onto cake. Top with second layer, then more frosting.
Optional Decor
  1. To make sugared strawberries, mix 1 part meringue powder with 3 parts water. Dip strawberries in meringue mixture, cover with sugar, then let dry. Alternately you can dip the strawberries in pasteurized egg whites, cover with sugar, then let dry.
Recipe Notes

*To find the gel food color I used, click here.

**To find meringue powder, click here.

***To find the heart cake pan I used, click here.


Melt-in-Your-Mouth Peanut Butter Cookie Sandwiches

Soft Peanut Butter Sandwich Cookies

I never imagined that I’d ever be posting a peanut butter cookie recipe. There are already crunchy peanut butter cookies, soft ones, chewy ones, and those peanut shaped store bought ones out there. I mean, do we even need another peanut butter cookie recipe? After I tasted this one, it’s a resounding YES! These soft, tender cookies combined with a silky, smooth filling are a new peanut butter experience that I had to share.

The key to getting the soft texture in the cookie, without being dry, is cake flour. So don’t substitute it, because it’s vital to achieve the correct texture. Make sure to weigh your flour for the most accurate results. The second important ingredient is heavy whipping cream. Just a little added to the filling gives it a luxurious, silky texture.

This recipe makes sixteen medium size peanut butter cookies, which will give you eight sandwiches. If you want more, you can double the recipe or make the cookies smaller. Smaller cookies will have a shorter baking time.

Print Recipe
Melt-in-Your-Mouth Peanut Butter Cookie Sandwiches
Course Dessert
Servings
cookie sandwiches
Ingredients
Peanut Butter Cookies
Peanut Butter Filling
Course Dessert
Servings
cookie sandwiches
Ingredients
Peanut Butter Cookies
Peanut Butter Filling
Instructions
Peanut Butter Cookies
  1. Preheat oven to 350ºF (180ºC). Line two large baking sheets with parchment paper.
  2. In a medium bowl, whisk together the all purpose flour, cake flour, baking soda and salt. Set aside.
  3. In a large bowl, beat the peanut butter, butter and shortening until smooth.
  4. Beat in the egg and vanilla until well combined.
  5. Set aside 1/4 cup (50g) of the granulated sugar. Beat the peanut butter mixture with brown sugar and remaining granulated sugar, with an electric mixer at medium speed, until light and fluffy.
  6. Add the flour mixture and beat just until combined.
  7. Roll the dough into 1 1/2-inch (3.8cm) diameter balls (about 1 1/4 oz or 35g each). Roll the dough balls in the reserved granulated sugar.
  8. Place the dough balls 3 inches apart onto the prepared baking sheets. Flatten with a fork, making a criss cross pattern.
  9. Bake until the cookies are puffy and start to crack around the edges, about 9-11 minutes.
  10. Let the cookies cool on baking sheet for 1 minute, then carefully transfer them to a cooling rack. The cookies will be fragile, but they will firm up as they cool.
  11. Place a spoonful of filling on the bottoms of half of the cooled cookies. Top with remaining the remaining cookies.
Peanut Butter Filling
  1. In medium bowl, beat the peanut butter and butter together until smooth.
  2. Beat in the powdered sugar, heavy cream, vanilla and salt until smooth.
Recipe Notes

To find my favorite cookie sheet, click here.

Lilac Vanilla Mini Cakes

Lilac Vanilla Mini Cakes

Once upon a time, there was a little black bear who woke up from a long nap. As she stretched, she felt her tummy growl. She ventured into the morning sunshine and smelled something sweet. She sniffed the air, following the sweet fragrance until she came upon a beautiful purple tree. She climbed up to a comfy branch and ate the tender, purple blossoms to her heart’s content.

Bears, butterflies and bees know something good when they see it. We humans can also enjoy lilacs. I knew lilacs were edible, but I hadn’t tasted them until recently. The flavor reminds me of beets, slightly sweet with a vegetable aftertaste. I really wanted to try lilac syrup after seeing so many photos of pretty purple syrup online. I discovered that lilac syrup is not purple. It’s more of a dull, brownish blue-green. Many people use food coloring or blueberries to color their syrup. I also discovered that lilac syrup will turn a pretty shade of mauve by adding a small amount of lemon juice to the finished syrup. Since I would be using my lilac syrup inside of cake layers, I let it remain its natural color. I made a simple syrup with lilac blossoms and let them steep for a couple of hours. It was just long enough to give a subtle lilac flavor without being too floral. If you want a stronger lilac flavor, I suggest using more lilac blossoms rather than steeping longer to avoid bitterness.

I paired the lilac syrup with this soft, fluffy vanilla cake and silky Swiss meringue buttercream. If you aren’t a fan of lilac syrup, feel free to use vanilla simple syrup instead and just use the lilac blossoms to decorate your cakes. They look stunning on any cake or cupcakes.

Print Recipe
Lilac Vanilla Mini Cakes
Soft, fluffy mini white vanilla cakes with lilac syrup and vanilla Swiss meringue buttercream, topped with lilac blossoms
Course Dessert
Servings
mini cakes
Ingredients
Lilac Syrup
White Vanilla Cake
Swiss Meringue Buttercream
Course Dessert
Servings
mini cakes
Ingredients
Lilac Syrup
White Vanilla Cake
Swiss Meringue Buttercream
Instructions
Lilac Syrup
  1. In a small saucepan combine sugar and water. Bring to a boil over medium heat, stirring gently to dissolve sugar. Add the lilac blossoms and stir gently.
  2. Turn down heat and simmer for 5 minutes.
  3. Remove from heat and allow lilac blossoms to steep for 2 hours. Pass lilac syrup through a mesh sieve.
White Vanilla Cake
  1. Preheat oven to 350ºF. Grease and flour two 9-inch cake pans and line the bottoms with parchment paper.
  2. In a medium bowl, whisk together cake flour, baking powder and salt. Set aside.
  3. In a large bowl, beat butter, sugar, oil and vanilla bean paste with an electric mixer at medium speed, until light and fluffy, about 3 minutes.
  4. On medium speed, beat in egg whites in two additions, then beat in egg until well combined.
  5. On low speed, beat in one third of the flour mixture, then beat in sour cream just until combined.
  6. Beat in the remaining flour in two additions, alternating with milk. Beat just until combined.
  7. Transfer batter to prepared cake pans. Bake for 28-33 minutes, or until top is light golden brown and toothpick inserted in center comes out clean. Do not over bake.
  8. Allow cakes to cool in pans for 10 minutes, then remove from pans and continue cooling on a wire rack.
  9. Cut cakes into twelve 2 3/4-inch rounds using a cookie or biscuit cutter.
  10. Using a pastry brush, brush mini cakes generously with lilac syrup or vanilla simple syrup.
Swiss Meringue Buttercream
  1. Combine egg whites and sugar in a large heatproof bowl. Set over a pan of simmering water.
  2. Whisk constantly until sugar is dissolved and temperature of 160ºF is reached.
  3. Transfer mixture to the bowl of a stand mixer with a whisk attachment. Whisk on low speed, gradually increasing to medium-high speed. Whisk until glossy, stiff peaks form and mixture reaches room temperature.
  4. Turn mixer to medium-low speed. Add butter, a few pieces at a time, allowing butter to fully incorporate before adding more. If mixture looks curdled, keep mixing and it will correct itself.
  5. Switch to a paddle attachment. On low speed, mix in vanilla bean paste and salt. Continue mixing on low speed for a few minutes until smooth.
  6. Remove about 3/4 cup of frosting and transfer to a small bowl. Using a toothpick, place two tiny drops of lilac gel food color and one tiny drop of violet gel food color into the bowl. Mix with a spatula until well combined.
Assembly
  1. Smear a bit of frosting on each mini cake board. Top with a cake round, frosting, then a second cake round. Frost with a crumb coat if desired. Refrigerate 15 minutes. Frost mini cakes with white Swiss meringue buttercream, then smear small amounts of lilac Swiss meringue buttercream around the sides and top. Smooth frosting with a bench scraper and smooth the tops with a small offset spatula. Decorate with lilac blossoms.
Vanilla Simple Syrup (optional)
  1. Combine 1/2 cup sugar and 1/2 cup water in a small saucepan. Bring to a boil over medium heat, stirring to dissolve sugar. When sugar has dissolved, remove from heat and stir in 1 teaspoon vanilla bean paste or pure vanilla extract.
Recipe Notes

*If you can't find ultra fine granulated sugar, it's okay to substitute with regular granulated sugar.

**To find the lilac gel food color I used, click here.

***To find the violet gel food color I used, click here.

****To find 3-inch mini cake boards, click here.

Mini Orange Olive Oil Cakes

mini orange olive oil cakes

Ever since a certain celebrity cut a hole from the middle of her favorite olive oil cake back in 2020, the internet has been obsessed with olive oil cakes. I must confess that I was a fan of olive oil cakes long before that. I first tasted one at a restaurant years ago and fell in love. The flavor and texture was so delightful, that all it needed was a dusting of powdered sugar on top. Now that the dust has settled, I’m sharing my favorite orange olive oil cake recipe. Not because it’s trendy, but because it’s a really delicious recipe that tastes like spring.

I made cute little orange scented, personal cakes that are really just elegant cupcakes. The recipe is easily adapted to your tastes. You can switch up the orange flavor and substitute with lemon or any citrus of your choice. Even if you don’t like olive oil, you’ll still like these little cakes. I used light olive oil, rather than extra virgin olive oil, for a more subtle olive oil flavor. It’s also able to withstand higher temperatures. Feel free to use your favorite olive oil or replace it with the oil you prefer. Grape seed, avocado, canola and vegetable oil are some examples of oils you can use as a replacement.

This recipe contains almond flour. It helps with texture and flavor, so it’s a necessary ingredient. Almond flour can be pricey, but it’s good to have on hand. Adding it to your baked goods will make them more moist and tender. To find almond flour click here,

Print Recipe
Mini Orange Olive Oil Cakes
Course Dessert
Keyword cake, olive oil, orange
Servings
mini cakes
Ingredients
Mini Orange Olive Oil Cakes
Orange Simple Syrup
Course Dessert
Keyword cake, olive oil, orange
Servings
mini cakes
Ingredients
Mini Orange Olive Oil Cakes
Orange Simple Syrup
Instructions
Mini Orange Olive Oil Cakes
  1. Heat the oven to 350ºF (180ºC). Grease and flour a 12 serving muffin pan.
  2. In a medium bowl, whisk together the cake flour, almond flour, baking powder, baking soda and salt. Set aside.
  3. In a large bowl, beat the sugar, eggs, orange zest and vanilla extract together until smooth.
  4. Gradually mix in the olive oil and beat until well combined.
  5. Stir in the dry ingredients in two additions, alternating with the milk and orange juice. Stir just until combined. Do not over mix.
  6. Fill the prepared muffin pan cups 2/3 full with batter. Do not overfill or cakes will be more difficult to remove.
  7. Bake for 10-12 minutes or until the tops look light golden, but still moist and a toothpick inserted comes out clean. They bake very quickly, so check them a few minutes early to avoid over baking.
  8. Cool the cakes in pan for 5 minutes. Remove them from pan and transfer to a cooling rack.
  9. Brush the warm cakes with orange simple syrup and allow to cool completely.
  10. When the cakes have cooled, dust with powdered sugar.
Orange Simple Syrup
  1. In a small saucepan, stir together the sugar, orange juice, lemon juice, and orange zest.
  2. Cook over low heat, stirring occasionally, just until the sugar is dissolved.
  3. Remove from heat and set aside to cool.

The Nutcracker Land of Sweets Cupcakes

Nutcracker Land of Sweets Cupcakes

The tradition of enjoying the Nutcracker Ballet at Christmastime has been in my family for over 20 years. The Nutcracker Land of Sweets is a magical theme that has me mesmerized. Gingerbread, candy canes, gumdrops and billowy clouds of pink frosting are what dreams are made of. And that’s exactly what these dreamy cupcakes are made of. The cupcake flavor is a subtle spice cake. The recipe is adapted from a Martha Stewart cake recipe I made last summer. The original cake was paired with blackberry jam, but I knew plum jam would be perfect for these cupcakes. I topped them with a mildly sweet, fluffy Swiss meringue buttercream.

Part of the fun of making these cupcakes began at the store as I collected the sweets to decorate the cupcakes. Another perk of the job is taste testing the candy. I discovered that purple spice drops are licorice flavored and red spice drops are cinnamon. Who knew?

You might also like my Nutcracker Land of Sweets inspired candy bark. It’s a delightful holiday bark I designed that is often imitated. To view it, click here.

Print Recipe
The Nutcracker Land of Sweets Cupcakes
Spice cupcakes filled with plum jam, topped with fluffy pink frosting, gingerbread men and Christmas candy, and dusted with sugar snow
Course Dessert
Keyword cupcakes
Servings
cupcakes
Ingredients
Spice cupcakes
Pink Vanilla Swiss Meringue Buttercream
Course Dessert
Keyword cupcakes
Servings
cupcakes
Ingredients
Spice cupcakes
Pink Vanilla Swiss Meringue Buttercream
Instructions
Spice Cupcakes
  1. Preheat oven to 350ºF. Line a 12 serving muffin pan with disposable baking cups. (I used silver foil liners.)
  2. In a medium bowl, whisk together flours, baking powder, spices and salt. Set aside.
  3. In a large bowl, cream butter and sugar together with an electric mixer until light and fluffy.
  4. Add egg, egg white, and vanilla, one at a time, mixing until well combined.
  5. Add flour mixture in two additions, alternating with milk. Mix until combined.
  6. Divide batter evenly into wells of prepared muffin pan, filling about 2/3 full.
  7. Bake until light golden and toothpick inserted comes out clean, about 16-18 minutes.
  8. Let cool in muffin pan for 5 minutes. Gently transfer cupcakes to cooling rack to cool completely.
  9. Core the center of each cupcake, removing a 3/4-inch deep circle. Fill with jam and replace the circle top.
  10. Frost cupcakes with pink Swiss meringue buttercream. Decorate with cookies and candies. Lightly sprinkle with powdered sugar.
Pink Vanilla Swiss Meringue Buttercreamgue Buttercream
  1. Combine egg whites and sugar in a heatproof bowl. Set over a pan of gently simmering water.
  2. Whisk constantly until sugar is dissolved and temperature of 160ºF is reached.
  3. Transfer mixture to the bowl of a stand mixture with a whisk attachment. Whisk on low speed, gradually increasing to medium-high speed. Whisk until glossy, stiff peaks form and mixture reaches room temperature.
  4. Turn mixer to medium-low speed. Add butter, a few pieces at a time, allowing the butter to fully incorporate each time before adding more.
  5. Switch to paddle attachment. On low speed, mix in vanilla, salt and food color. Continue mixing on low speed for a few minutes until smooth.
Recipe Notes

Recipe adapted from Martha Stewart Spice Cake

Lemon Buttermilk Donuts with Honey Cream Cheese Icing

Lemon Buttermilk Donuts with Honey Cream Cheese Icing by Brownie Mischief

I was seriously happy when I started seeing donuts appearing at weddings, bridal showers and occasions other than work meetings. I’ve always felt those sweet, fluffy rings of dough had a higher calling. They had such potential! And honestly who doesn’t love donuts? They’re delicious, but they can also be beautiful. These Lemon Buttermilk Donuts could certainly win a beauty contest. They would make a gorgeous edition to any breakfast, brunch or dessert table. The fresh lemon zest and the earthy flavor of honey will bring springtime right into your kitchen.

Lemon Buttermilk Donuts with Honey Cream Cheese Frosting by Brownie Mischief

If you’re on the lookout for a Mother’s Day recipe, any mom will love these pretty, fragrant treats. This is a very easy recipe and the donuts bake up quickly, so you’ll have time to fix mom a cup of her favorite tea. If you don’t have a donut pan, and you’ve been reluctant to buy one, I can honestly say I love mine. It was very affordable and I’m pleased with the performance and ease of clean up with the pan I purchased. To find the donut pan click here.

In keeping with the springtime feel, I decorated my donuts with pesticide-free edible flowers. I used pansies, but if you’re unable to find them, you can substitute pesticide-free rose petals. I found these edible pansies at my local food market in the produce department, near the fresh herbs. You can also find edible flowers at farmers’ markets and online. For a list of edible flowers, click here.  Note:  The above pictured orange ranunculus flowers on the table are not edible.  

Lemon Buttermilk Donuts with Honey Cream Cheese Icing by Brownie Mischief


Print Recipe


Lemon Buttermilk Donuts with Honey Cream Cheese Icing

Prep Time 20 minutes
Cook Time 7 minutes

Servings


Ingredients
Lemon Buttermilk Donuts

Honey Cream Cheese Icing

Prep Time 20 minutes
Cook Time 7 minutes

Servings


Ingredients
Lemon Buttermilk Donuts

Honey Cream Cheese Icing


Instructions
Lemon Buttermilk Donuts
  1. Preheat oven to 375ºF. Spray the wells of a ***donut pan with non-stick cooking spray.

  2. In a medium bowl, whisk together cake flour, sugar, baking powder and salt.

  3. In a small bowl, whisk buttermilk, egg, melted butter, and lemon zest together. Add to flour mixture and stir until combined.

  4. Transfer batter to a piping bag or plastic zip bag. Snip off the tip of the bag and pipe batter into prepared donut pan, filling the wells 2/3 full.

  5. Bake for 7-8 minutes or until toothpick inserted into donuts comes out clean. Let cool in pan for 5 minutes, then remove donuts to a rack to cool completely.

  6. Prepare Honey Cream Cheese Icing while donuts are cooling.

  7. Dip tops of donuts into icing and decorate as desired. Serve immediately.

Honey Cream Cheese Icing
  1. In a medium bowl, beat cream cheese and butter with an electric mixer at medium speed until smooth.

  2. Add vanilla extract and salt. Mix until combined.

  3. Add powdered sugar and mix on low speed until moistened. Turn mixer up to medium speed and mix until combined.

  4. Add honey and beat on medium speed until smooth. Add milk, a little at a time until desired consistency is reached. Beat until smooth.
    Lemon Buttermilk Donuts with Honey Cream Cheese Frosting by Brownie Mischief

Baby Bunny Coconut Cakes

Baby Bunny Coconut Cakes


Spring is the time for blue skies, flowers blooming, bunnies scampering around and Easter celebrations. What better time to make cute Baby Bunny Coconut Cakes? I wanted to make them look like newborn bunnies curled up peacefully for a nap, so I decided to use a hemisphere pan.

When I was shopping around for hemisphere pans, also know as ball pans, I considered metal pans and silicone pans. In general, I prefer metal pans for baking cakes, but I decided on silicone, hoping to get more use out them. I plan on using them for frozen and refrigerated desserts as well. You can find hemisphere pans at kitchen stores, craft stores, baking supply stores and online. To find the pan I chose, click here.

My next dilemma was whether or not to coat the pans before baking. From what I’ve read, many people seem to have trouble getting their baked goods out of silicone pans, even though the majority of these pans claim to be non-stick. I decided to experiment, trying three different ways. I coated some of the wells with grease and flour, some with only grease, and some were left uncoated. I found that when I inverted the pan, the cakes released effortlessly from the coated wells. The cakes in the uncoated wells took a slight amount of prodding and a bit of residue was left behind, but the cakes were in tact. All three ways seem to work fine, but I decided that, for my own peace of mind, I will grease all of the wells in the future.

Decorating these bunny cakes is fun and easy, so this would make a great project for the little ones. You can use the candies of your choice to make eyes and noses. I used white candy pearls for the noses and colored them pink with edible petal dust. I made sleepy eyes out of black fondant. Black fondant is difficult to make, so I always buy it. It’s available for purchase in small quantities. I used edible wafer paper to make the bunny ears, but fondant would also work. A little puff of cotton candy makes a sweet tail. So many possibilities! Whether you make Baby Bunny Coconut Cakes for Easter, a child’s birthday party, a baby shower or simply to celebrate spring.


Baby Bunny Coconut Cakes
Print Recipe
Baby Bunny Coconut Cakes
Fluffy, moist mini hemisphere coconut cakes with coconut buttercream frosting, topped with shredded coconut.
Course Dessert
Servings
mini cakes
Ingredients
Mini Coconut Cakes
Coconut Buttercream
Course Dessert
Servings
mini cakes
Ingredients
Mini Coconut Cakes
Coconut Buttercream
Instructions
Mini Coconut Cakes
  1. Preheat oven to 325ºF (165ºC). Grease 2 silicone 6-serving mini hemisphere pans. Place the pans on large baking sheet.
  2. In a medium bowl, sift together the flour, baking powder and salt. Set aside.
  3. In a large bowl, beat the butter, sugar and oil together with an electric mixer at medium speed, until light and fluffy. Beat in coconut extract. Gradually beat in egg whites, until mixture is well combined, stopping to scrape the sides of the bowl.
  4. On low speed, beat in the flour mixture in three additions, alternating with the coconut milk, stopping to scrape the sides of the bowl as needed.
  5. Fill the hemisphere pan wells, 2/3 full with batter. Bake for 20-24 minutes, until a toothpick inserted into the center of cakes comes out clean.
  6. Place the silicone pans on a cooling rack to cool for 10 minutes. Invert the pans to remove mini cakes and place on cooling racks to cool completely.
Coconut Buttercream
  1. In a large bowl, beat the the butter with an electric mixer on medium speed, until light and fluffy.
  2. Add the powdered sugar and mix on low speed until smooth and well combined.
  3. Add the coconut extract and salt. Beat until combined.
  4. Add the coconut milk a little at a time until desired consistency is reached. Beat at low speed until the buttercream is smooth.
  5. Frost the domed tops of the mini cakes with a small offset spatula. Cover with shredded coconut, pressing lightly to adhere. Decorate as desired.
Finishing Touches
  1. To make bunny ears, cut twenty-four 1 1/2-inch by 1-inch rectangles out of edible wafer paper. Cut each rectangle into a long football shape, flat at one end. Cut a 1/2-inch slit at the flat end. With a small paint brush, dab a bit of piping gel on one side of the slit. Overlap the cut ends of the slit and press together with your fingers. Let dry. Brush pink luster dust into the center of the ears. Skip this step if you are using floral wafer paper. Cut small slits into the bunny cakes and insert the ears.
    Baby Bunny Coconut Cakes Tutorial
  2. To make sleepy eyes, roll out a bit of black fondant to 1/16-inch thickness. Cut circles using the small end of a #12 piping tip. Cut thin crescent shapes from the circles using the small end of the piping tip. For easier handling, let eyes dry for a few minutes. If the coconut on your bunny cakes is still moist and tacky, the eyes will stick. If not, brush them with a small bit of water or piping gel.
    Baby Bunny Coconut Cakes Tutorial
  3. To make noses, use the candy of your choice, such as candy pearls or candy hearts. I used white candy pearls, brushed with edible pink luster dust.
  4. To make tails, you can use cotton candy or mini marshmallows attached with a bit of buttercream. If using cotton candy, keep in mind that it melts when exposed to air, so it's best applied right before serving.
Recipe Notes

*Do not substitute all-purpose flour. For best results, weigh your dry ingredients.

**For best results, use natural coconut extract. Imitation coconut flavorings may give your baked goods an unpleasant flavor.

***If your coconut milk is separated when you open the can, simply place it in a blender to emulsify it before using.

To find the hemisphere pan I used, click here.

To find white edible wafer paper,  click here. Floral wafer paper can be found on Etsy.

To find black fondant, click here.