
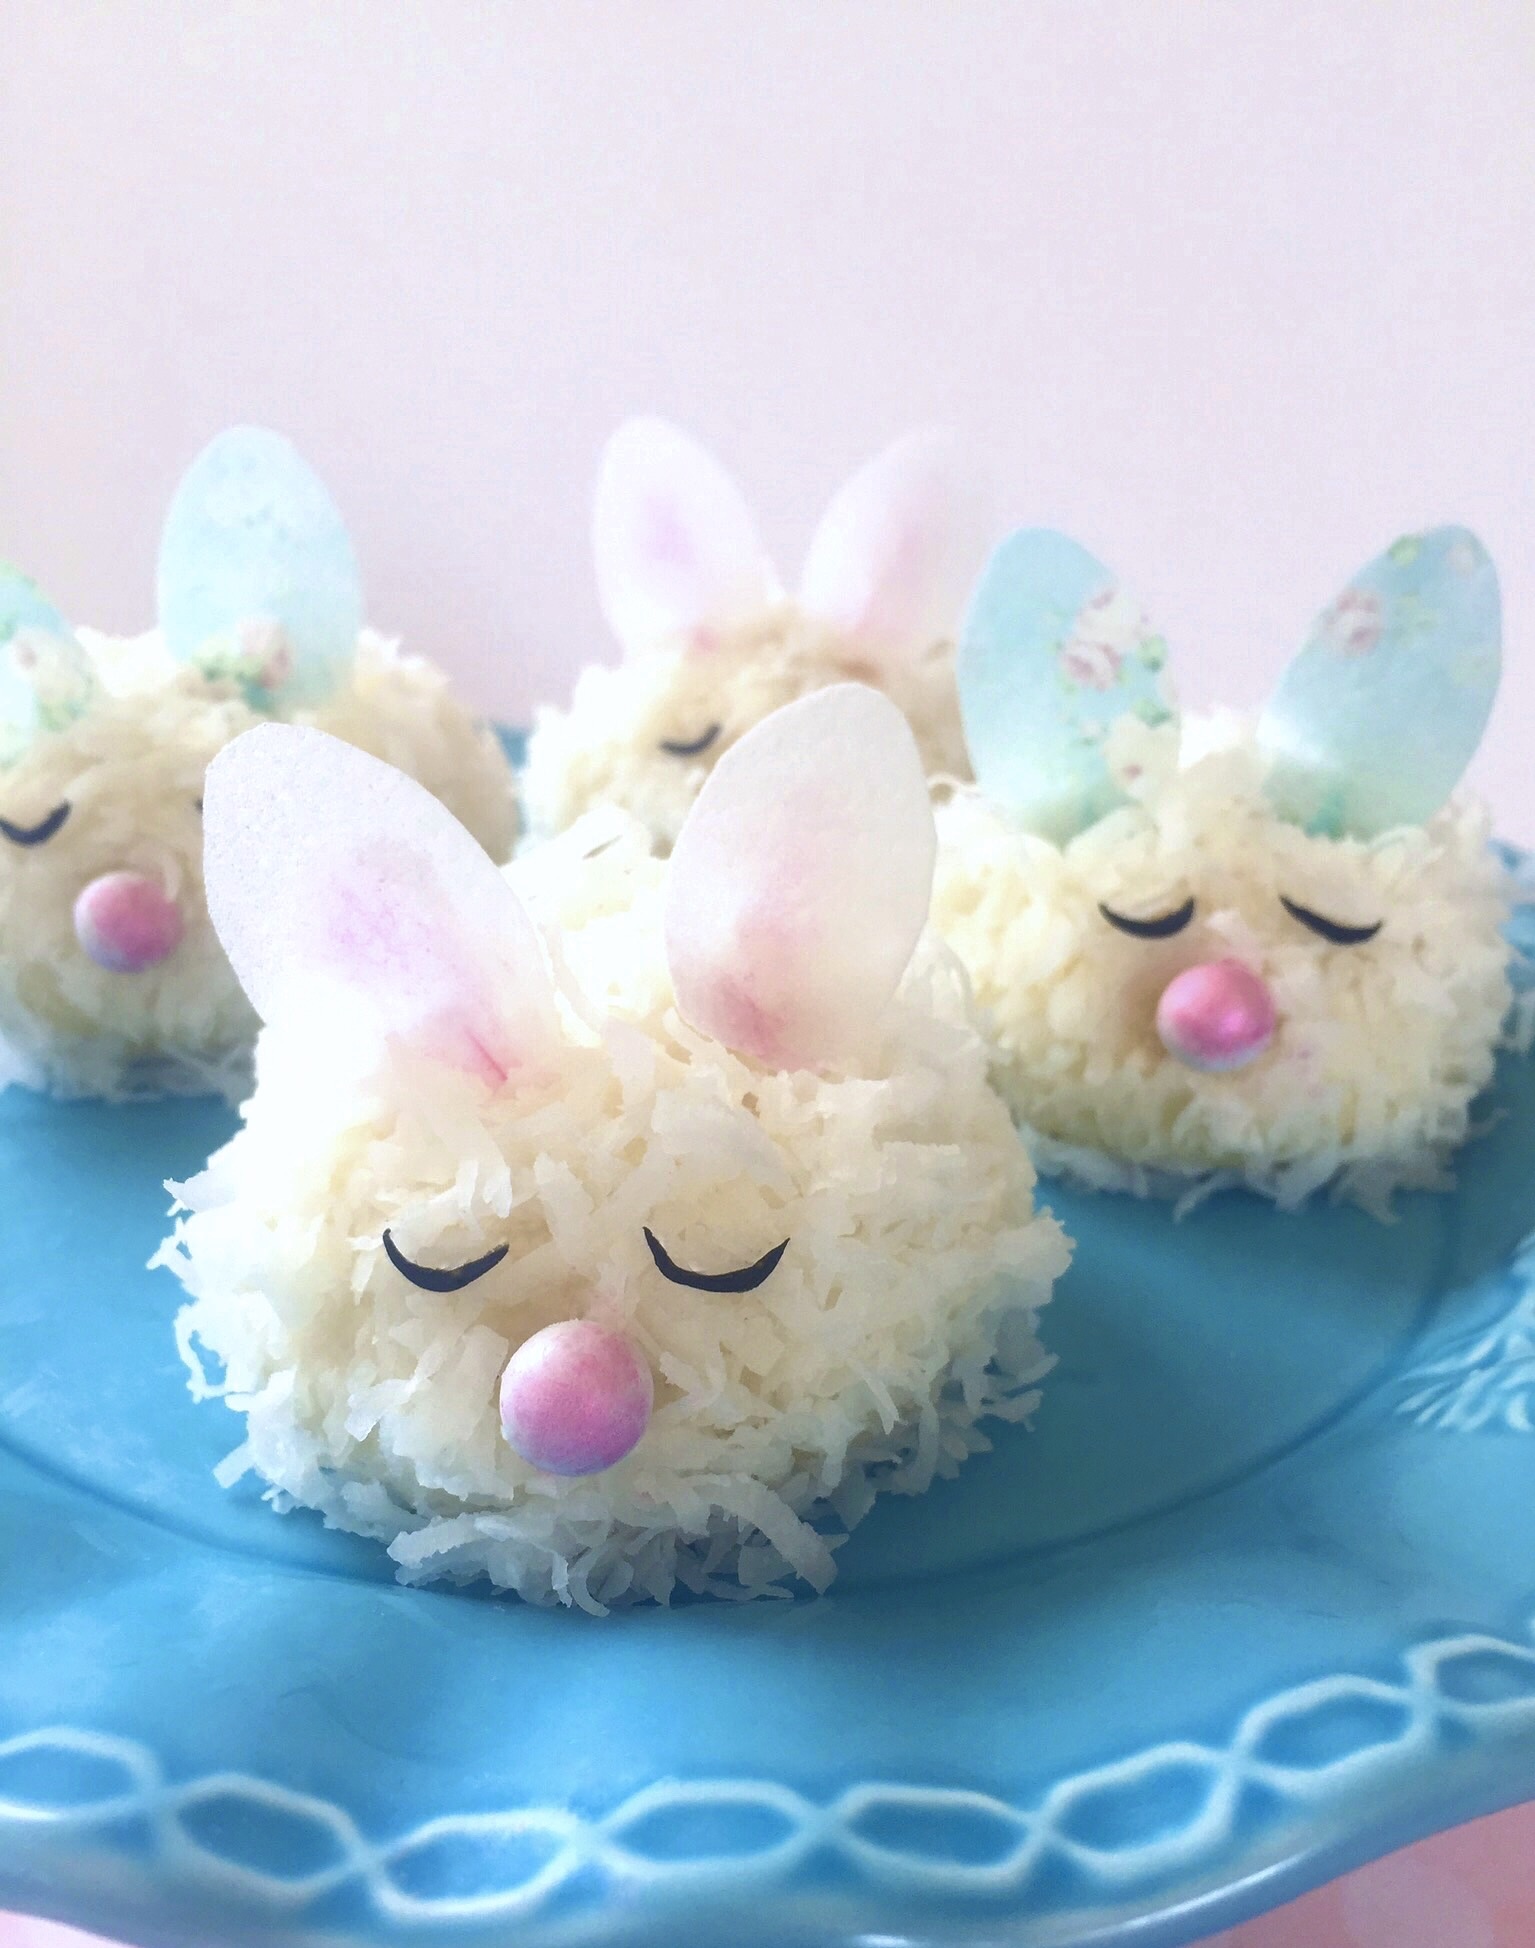
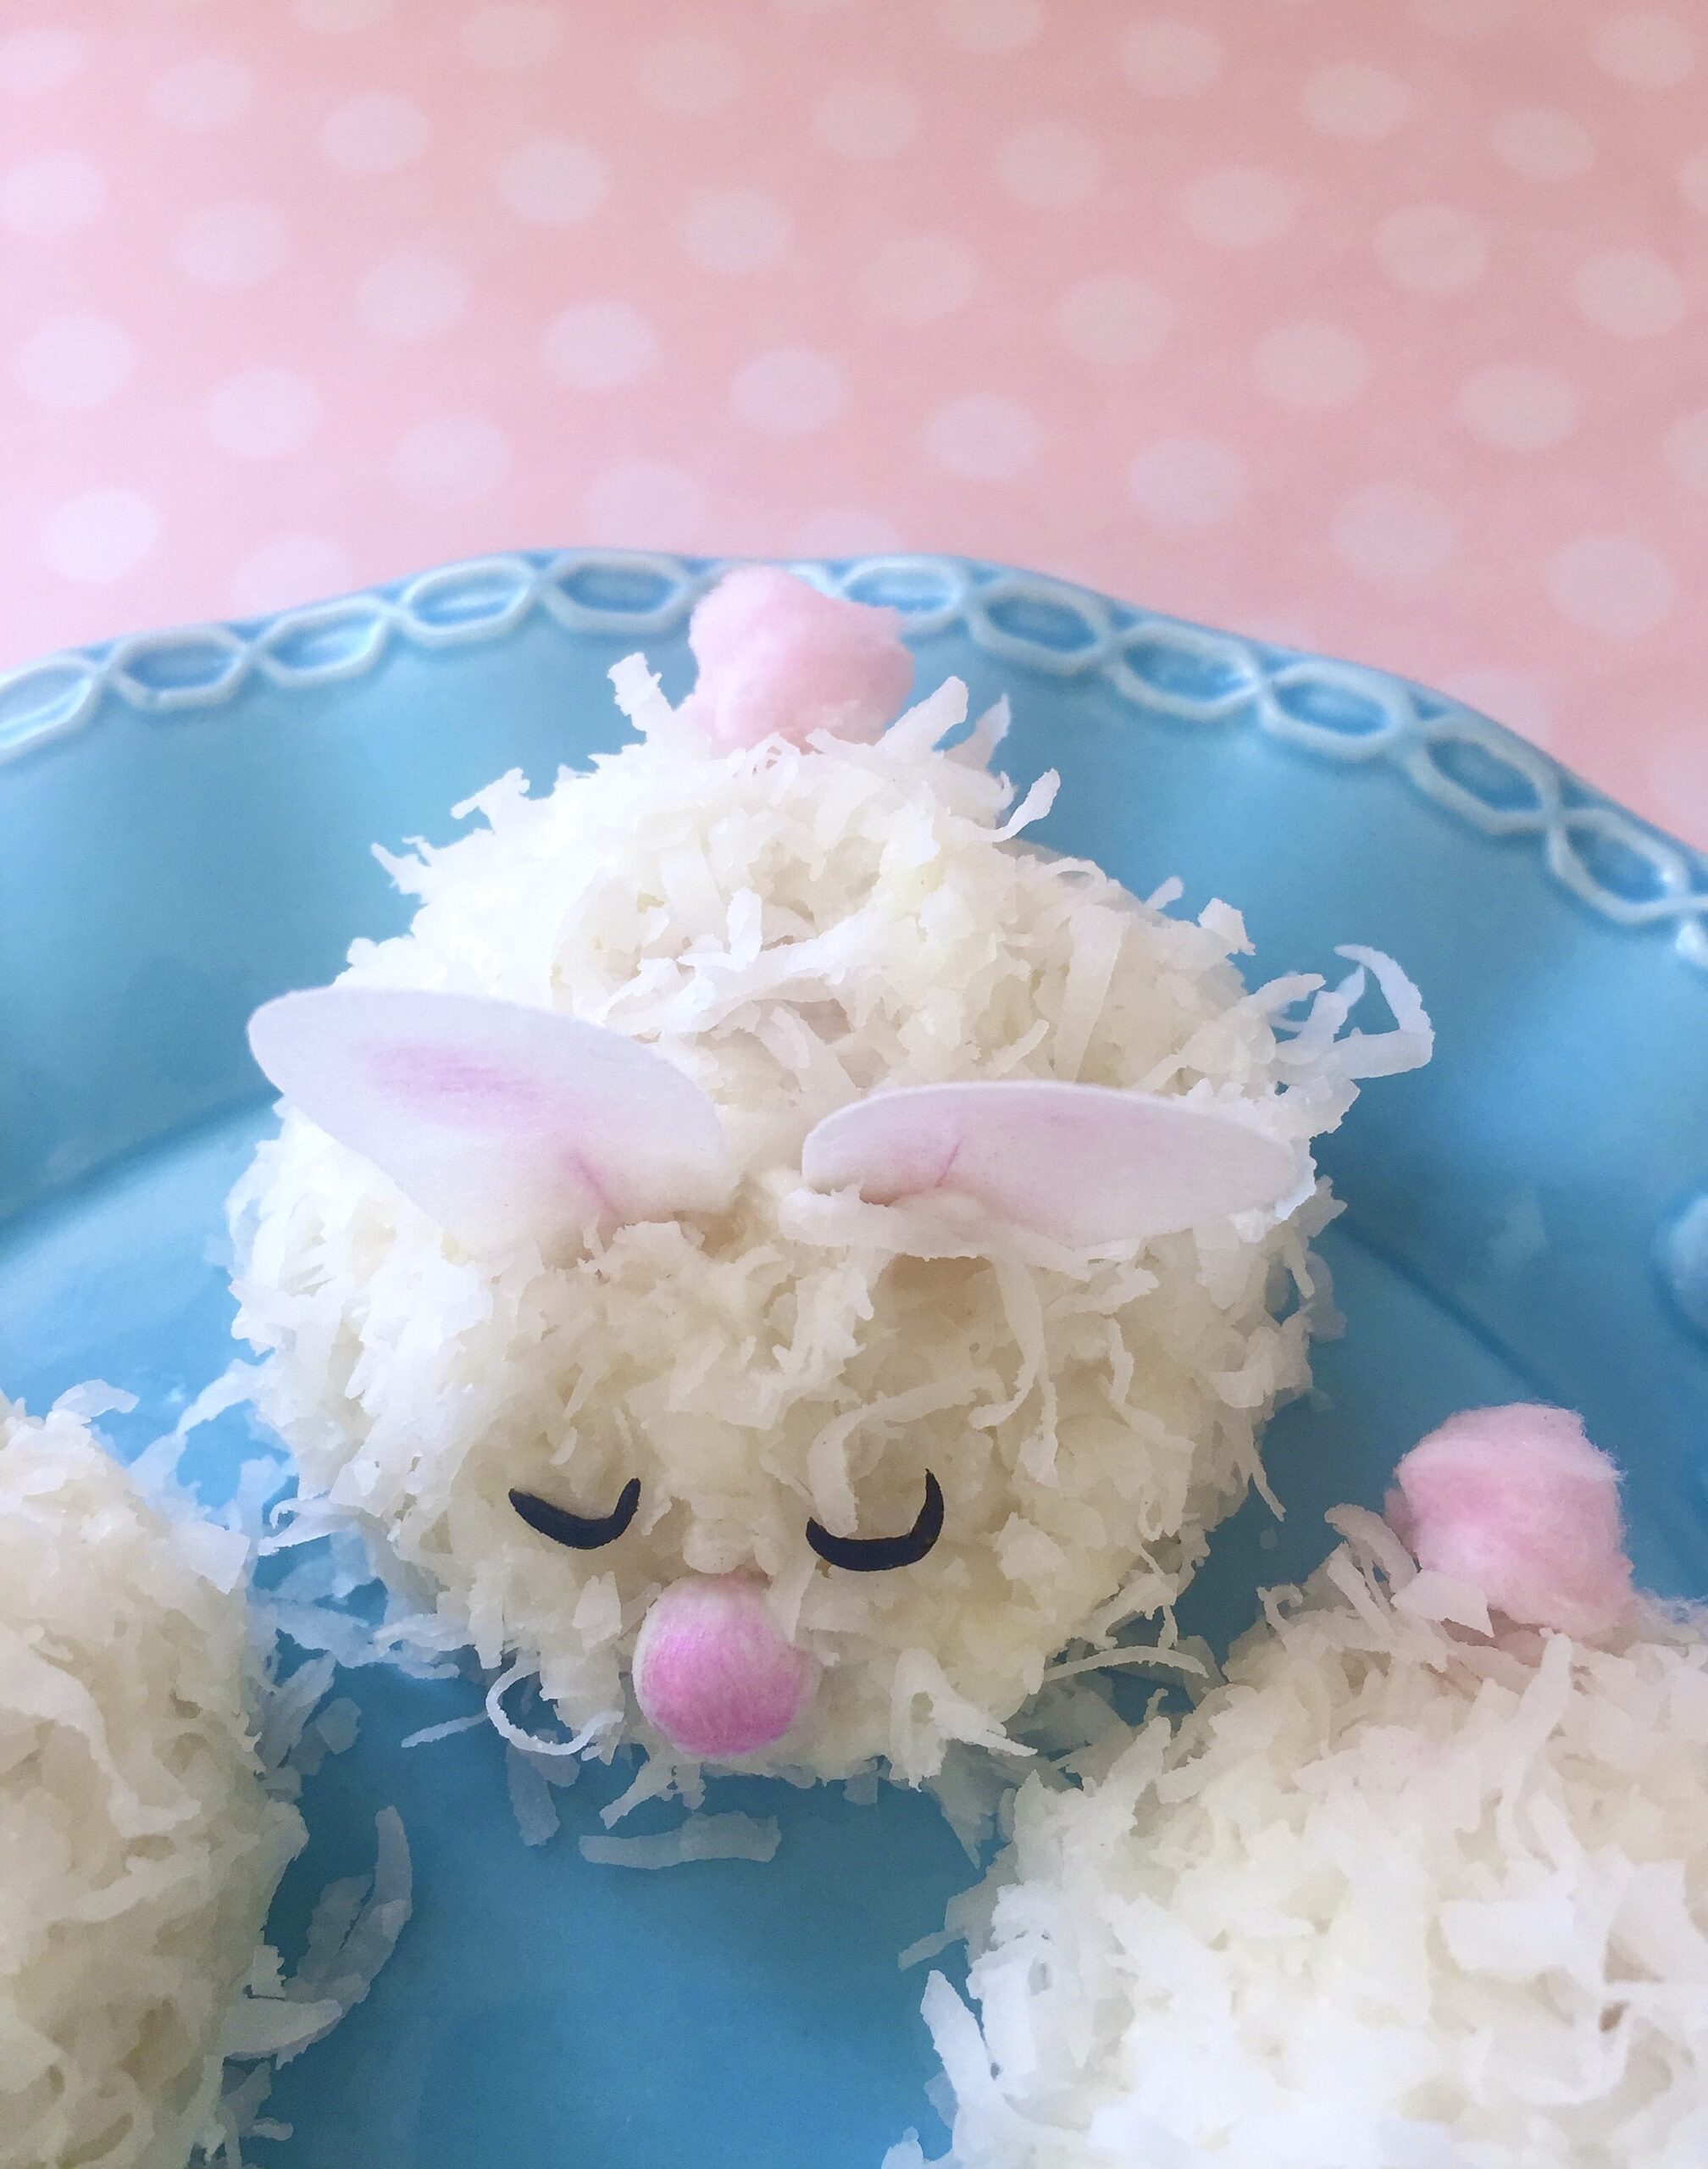
Spring is the time for blue skies, flowers blooming, bunnies scampering around and Easter celebrations. What better time to make cute Baby Bunny Coconut Cakes? I wanted to make them look like newborn bunnies curled up peacefully for a nap, so I decided to use a hemisphere pan.
When I was shopping around for hemisphere pans, also know as ball pans, I considered metal pans and silicone pans. In general, I prefer metal pans for baking cakes, but I decided on silicone, hoping to get more use out them. I plan on using them for frozen and refrigerated desserts as well. You can find hemisphere pans at kitchen stores, craft stores, baking supply stores and online. To find the pan I chose, click here.
My next dilemma was whether or not to coat the pans before baking. From what I’ve read, many people seem to have trouble getting their baked goods out of silicone pans, even though the majority of these pans claim to be non-stick. I decided to experiment, trying three different ways. I coated some of the wells with grease and flour, some with only grease, and some were left uncoated. I found that when I inverted the pan, the cakes released effortlessly from the coated wells. The cakes in the uncoated wells took a slight amount of prodding and a bit of residue was left behind, but the cakes were in tact. All three ways seem to work fine, but I decided that, for my own peace of mind, I will grease all of the wells in the future.
Decorating these bunny cakes is fun and easy, so this would make a great project for the little ones. You can use the candies of your choice to make eyes and noses. I used white candy pearls for the noses and colored them pink with edible petal dust. I made sleepy eyes out of black fondant. Black fondant is difficult to make, so I always buy it. It’s available for purchase in small quantities. I used edible wafer paper to make the bunny ears, but fondant would also work. A little puff of cotton candy makes a sweet tail. So many possibilities! Whether you make Baby Bunny Coconut Cakes for Easter, a child’s birthday party, a baby shower or simply to celebrate spring.
| Servings |
mini cakes
|
- 1 1/3 cups (5 3/4 oz or 165g) cake flour, sifted
- 1 teaspoon baking powder
- 1/2 teaspoon fine sea salt
- 4 tablespoons (2 oz or 57g) unsalted butter, softened
- 3/4 cup plus 2 tablespoons (6 1/8 oz or 175g) sugar
- 2 tablespoons vegetable oil
- 1 teaspoon natural coconut extract
- 3 large egg whites
- 3/4 cup (5 1/4 oz or 155ml) canned light coconut milk
- 1/2 cup (4 oz or 113g) unsalted butter, softened
- 2 cups (8 1/4 oz or 240g) powdered sugar, sifted
- 1/4 teaspoon natural coconut extract
- 1 pinch fine sea salt
- 3 tablespoons canned light coconut milk
Ingredients
Mini Coconut Cakes
Coconut Buttercream
Finishing Touches
|
|
- Preheat oven to 325ºF (165ºC). Grease 2 silicone 6-serving mini hemisphere pans. Place the pans on large baking sheet.
- In a medium bowl, sift together the flour, baking powder and salt. Set aside.
- In a large bowl, beat the butter, sugar and oil together with an electric mixer at medium speed, until light and fluffy. Beat in coconut extract. Gradually beat in egg whites, until mixture is well combined, stopping to scrape the sides of the bowl.
- On low speed, beat in the flour mixture in three additions, alternating with the coconut milk, stopping to scrape the sides of the bowl as needed.
- Fill the hemisphere pan wells, 2/3 full with batter. Bake for 20-24 minutes, until a toothpick inserted into the center of cakes comes out clean.
- Place the silicone pans on a cooling rack to cool for 10 minutes. Invert the pans to remove mini cakes and place on cooling racks to cool completely.
- In a large bowl, beat the the butter with an electric mixer on medium speed, until light and fluffy.
- Add the powdered sugar and mix on low speed until smooth and well combined.
- Add the coconut extract and salt. Beat until combined.
- Add the coconut milk a little at a time until desired consistency is reached. Beat at low speed until the buttercream is smooth.
- Frost the domed tops of the mini cakes with a small offset spatula. Cover with shredded coconut, pressing lightly to adhere. Decorate as desired.
- To make bunny ears, cut twenty-four 1 1/2-inch by 1-inch rectangles out of edible wafer paper. Cut each rectangle into a long football shape, flat at one end. Cut a 1/2-inch slit at the flat end. With a small paint brush, dab a bit of piping gel on one side of the slit. Overlap the cut ends of the slit and press together with your fingers. Let dry. Brush pink luster dust into the center of the ears. Skip this step if you are using floral wafer paper. Cut small slits into the bunny cakes and insert the ears.

- To make sleepy eyes, roll out a bit of black fondant to 1/16-inch thickness. Cut circles using the small end of a #12 piping tip. Cut thin crescent shapes from the circles using the small end of the piping tip. For easier handling, let eyes dry for a few minutes. If the coconut on your bunny cakes is still moist and tacky, the eyes will stick. If not, brush them with a small bit of water or piping gel.

- To make noses, use the candy of your choice, such as candy pearls or candy hearts. I used white candy pearls, brushed with edible pink luster dust.
- To make tails, you can use cotton candy or mini marshmallows attached with a bit of buttercream. If using cotton candy, keep in mind that it melts when exposed to air, so it's best applied right before serving.
*Do not substitute all-purpose flour. For best results, weigh your dry ingredients.
**For best results, use natural coconut extract. Imitation coconut flavorings may give your baked goods an unpleasant flavor.
***If your coconut milk is separated when you open the can, simply place it in a blender to emulsify it before using.
To find the hemisphere pan I used, click here.
To find white edible wafer paper, click here. Floral wafer paper can be found on Etsy.
To find black fondant, click here.