Triple Berry Crumble Cheesecake Bars

Triple Berry Crumble Cheesecake Bars

Snacking on fresh summer berries is a treat I look forward to every year. Making desserts with berries is even more anticipated! So I decided to share my dreamy Triple Berry Crumble Cheesecake bars. The cheesecake filling is so creamy and silky. I used a combination of blackberries, blueberries and raspberries with plenty of crumb topping. Feel free to use any combination of berries you like. If you use strawberries, just cut them into chunks. The raspberry sauce is a bonus. You can also make the sauce using strawberries instead if you like. These cheesecake bars are so stress-free. There’s no water bath required and you don’t have to worry about cracking.

Print Recipe
Triple Berry Crumble Cheesecake Bars
A creamy cheesecake filling on a graham cracker base, topped with berries and a generous crumb topping. Served with raspberry sauce.
Course Dessert
Servings
servings
Ingredients
Berries
Crumb Topping
Graham Cracker Crust
Filling
Raspberry Sauce
Course Dessert
Servings
servings
Ingredients
Berries
Crumb Topping
Graham Cracker Crust
Filling
Raspberry Sauce
Instructions
Berries
  1. Combine the berries, sugar and lemon juice in a medium bowl. Let stand 30 minutes, then drain the juices.
Crumb Topping
  1. In a medium bowl, whisk together the flour, granulated sugar, brown sugar and salt.
  2. Work the butter in with your fingertips until it looks like wet sand and no large pieces of butter remain. Press the mixture together to form chunks. Set aside in the refrigerator until ready to use.
Graham Cracker Crust
  1. Preheat the oven to 350ºF (180ºC). Spray an 8-inch (20.3cm) square baking dish with nonstick spray. (I used a ceramic baking dish.*)
  2. In a medium bowl, mix the crumbs, sugar and cinnamon together until well combined. Stir in the melted butter until evenly distributed. Press this mixture into the baking pan. Bake until set, about 5 minutes.
Filling and Assembly
  1. Turn the oven temperature down to 325ºF (165ºC).
  2. In a large bowl, beat the cream cheese with the sugar and salt until well combined. Gradually beat in the heavy cream, then the vanilla extract. Beat in the eggs one at a time, just until smooth and combined. Don't over beat.
  3. Pour the batter into the baking dish over the crust. Spoon the drained berries over the batter. Sprinkle on the crumb topping. Bake until the topping is golden brown and the cheesecake center is wobbly but not runny, about 45-50 minutes. The internal temperature should be 145º-150ºF (63º-66ºC).
  4. Run a small offset spatula or a knife along the perimeter edges of the cheesecake to separate it from the pan. Let the cheesecake cool to room temperature, about 1 1/2 hours. Chill in the refrigerator for at least 2 hours. Cut into squares and serve with raspberry sauce.
Raspberry Sauce
  1. Purée the raspberries n a blender or small food processor. Pass the purée through a mesh sieve.
  2. Place the raspberries, sugar and 1/2 cup (118ml) of water in a medium saucepan over medium heat. Bring to a boil, then turn the heat down to low and simmer for 10 minutes.
  3. In a small bowl, whisk together the cornstarch with 1 tablespoon (15ml) of water. Add this mixture to the saucepan and whisk until smooth. Continue cooking until thickened, about 2-3 more minutes. Remove from heat. Transfer the raspberry sauce to a bowl. Cover and refrigerate until ready to use. The sauce will thicken a bit as it cools.
Recipe Notes

*To find an 8-inch ceramic baking dish, click here.

Mini Baklava Cheesecakes

Mini Baklava Cheesecakes

These Mini Baklava Cheesecakes are so cute and incredibly delicious that they actually made me mad! I’d been thinking about making them for awhile, so I was mad at myself for not making them sooner. They’re much quicker and easier to make than a full size cheesecake. The phyllo dough is par-baked, then topped with a nut mixture. I used a combination of pistachios and almonds, but you can use any combination of pistachios, almonds or walnuts of your choice. After the cheesecakes are baked, the phyllo shells are soaked with honey syrup.

I topped them with little nests made of kataifi, which are so cute and perfect for Easter. Kataifi is thinly shredded phyllo pastry. You can find it in the freezer section of supermarkets and international markets. Toasted coconut makes a good substitute if you can’t find kataifi. These cute cheesecakes are also pretty topped with edible flowers or rose petals, which would be perfect for Mother’s Day or any springtime celebration.

Print Recipe
Mini Baklava Cheesecakes
Mini cheesecakes with a baklava base, topped with kataifi nests
Course Dessert
Keyword baklava, cheesecake
Servings
mini cheesecakes
Ingredients
Honey Syrup
Kataifi Nests
Course Dessert
Keyword baklava, cheesecake
Servings
mini cheesecakes
Ingredients
Honey Syrup
Kataifi Nests
Instructions
Honey Syrup
  1. In a medium saucepan over medium heat, cook the sugar, water, honey and lemon juice, stirring occasionally until the sugar is dissolved. Remove from heat and stir in the vanilla extract.
Mini Cheesecakes
  1. Preheat the oven to 350ºF (180ºC). Brush the insides of a 12-serving muffin pan with melted butter.
  2. Place a sheet of phyllo dough on your work surface. Brush it lightly with melted butter. Place another sheet of phyllo dough on top of the first one and brush it lightly with melted butter. Repeat this process until you have 5 sheets. Using a pastry wheel or a sharp knife, cut the phyllo into 6 squares, measuring about 4 1/2 x 4 1/2 inches each. Repeat this process with the five remaining phyllo sheets. Make sure to keep your unused phyllo sheets covered while you work to prevent them from drying out.
  3. Place the phyllo squares into the cups of the muffin pan. Press them in with a pastry tamper or with the flat bottom of a small shot glass. Prick the bottoms of the phyllo with a fork. Bake until light golden brown, about 14-17 minutes.
  4. Meanwhile, combine the nuts, 2 tablespoons of sugar, 2 tablespoons of melted butter and the cinnamon in a small bowl. Mix until well combined.
  5. Turn the oven heat down to 325ºF (165ºF). Place about a tablespoon of the nut mixture into the baked pyllo shells and press lightly with the back of a spoon.
  6. To make the cheesecake filling, in a large bowl, beat the cream cheese with an electric mixer on low speed, until smooth. Add the remaining 6 tablespoons of sugar, the egg, heavy cream and vanilla extract. Beat until smooth and well combined, but do not over beat.
  7. Ladle the cheesecake mixture into the phyllo shells over the nuts. Fill them almost to the top. Bake until the cheesecakes are set, but still slightly jiggly in the centers, about 13-15 minutes.
  8. Using a small offset spatula, gently loosen the cheesecakes from the muffin pan. Drizzle honey syrup generously along the perimeter of the outside of the cheesecakes, letting the syrup drip down the sides of the phyllo pastry. Let the cheesecakes cool in the pan. When the cheesecakes have cooled and the syrup has absorbed, transfer the cheesecakes to the refrigerator to chill for at least 1 hour.
Kataifi Nests
  1. Turn the oven temperature up to 350ºF (180ºC). Brush an 8 x 8-inch or a 9 x 7-inch baking dish with melted butter. Roll clusters of kataifi stands into twelve 2-inch wide spiral shapes to form the nests. Place them in the baking dish. Drizzle the nests with melted butter. Gently brush more melted butter over the surface of the nests. Bake until golden brown, about 25-35 minutes. Immediately drizzle with honey syrup. Let the nests cool in the baking pan.
  2. Place the nests onto the cheesecakes. Fill the nests with candy eggs.
Recipe Notes

To find the muffin pan I used, click here.

Melt-in-Your-Mouth Peanut Butter Cookie Sandwiches

Soft Peanut Butter Sandwich Cookies

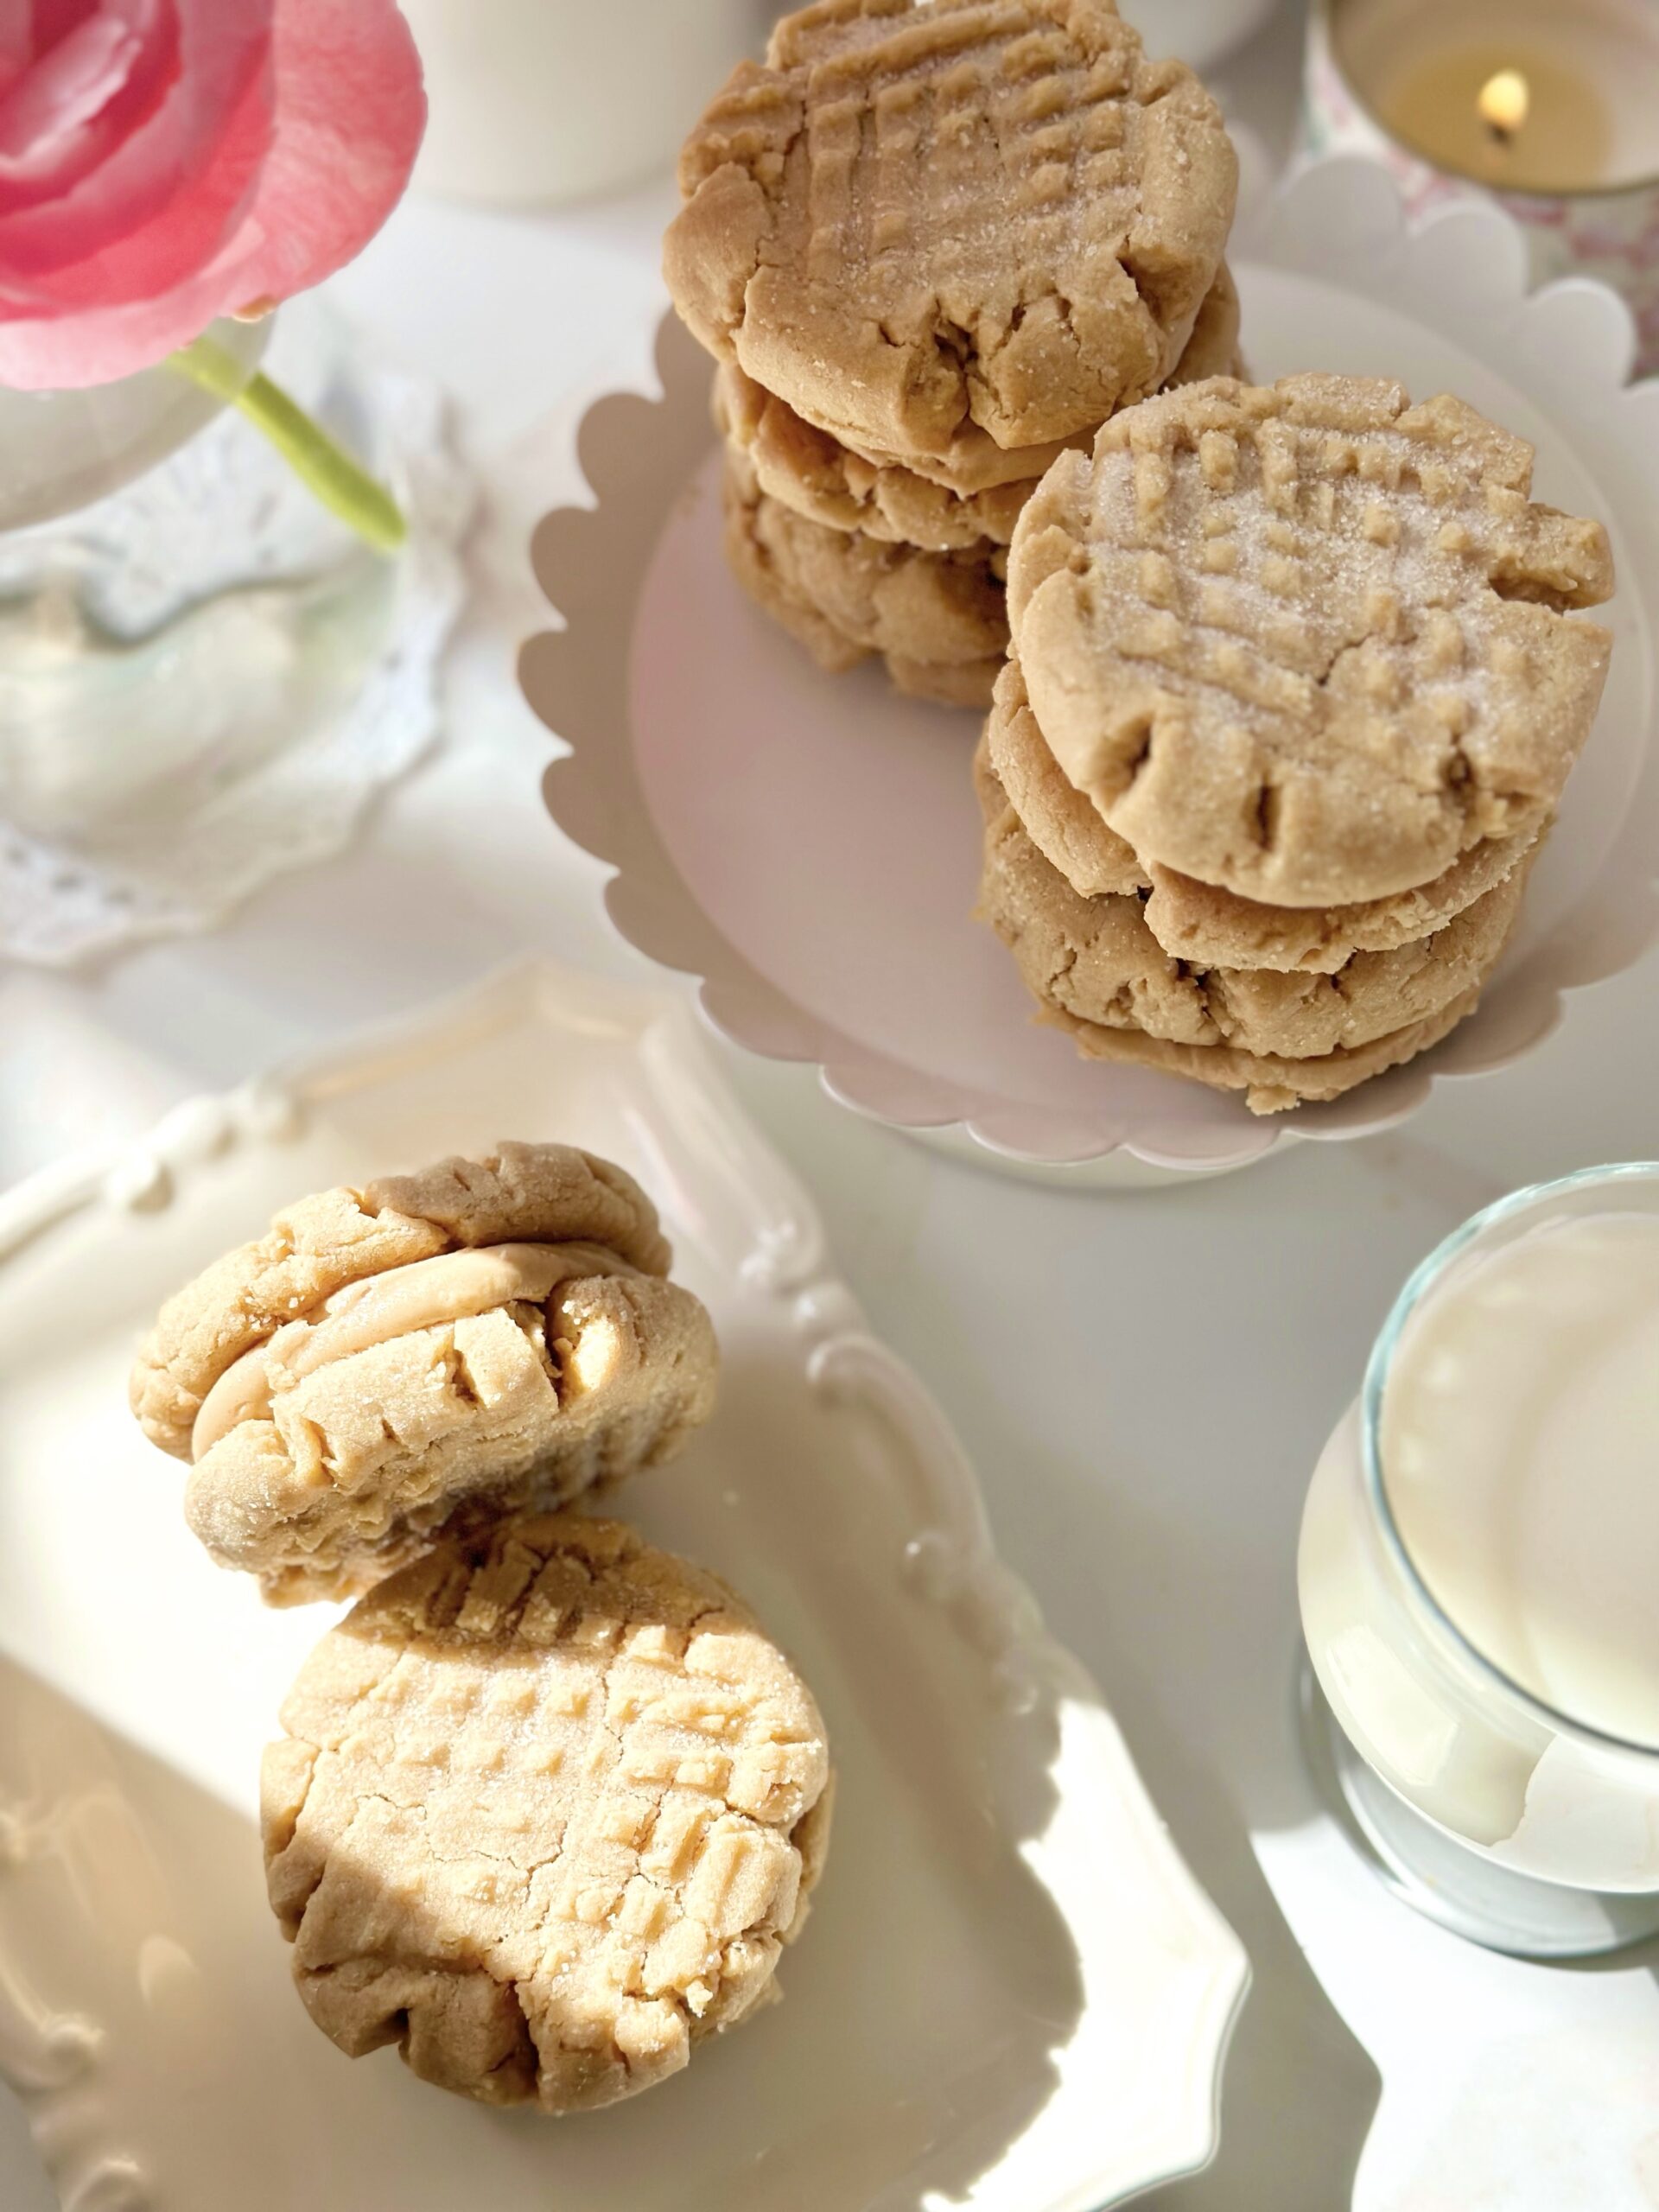
I never imagined that I’d ever be posting a peanut butter cookie recipe. There are already crunchy peanut butter cookies, soft ones, chewy ones, and those peanut shaped store bought ones out there. I mean, do we even need another peanut butter cookie recipe? After I tasted this one, it’s a resounding YES! These soft, tender cookies combined with a silky, smooth filling are a new peanut butter experience that I had to share.

The key to getting the soft texture in the cookie, without being dry, is cake flour. So don’t substitute it, because it’s vital to achieve the correct texture. Make sure to weigh your flour for the most accurate results. The second important ingredient is heavy whipping cream. Just a little added to the filling gives it a luxurious, silky texture.

This recipe makes sixteen medium size peanut butter cookies, which will give you eight sandwiches. If you want more, you can double the recipe or make the cookies smaller. Smaller cookies will have a shorter baking time.

Print Recipe
Melt-in-Your-Mouth Peanut Butter Cookie Sandwiches
Course Dessert
Servings
cookie sandwiches
Ingredients
Peanut Butter Cookies
Peanut Butter Filling
Course Dessert
Servings
cookie sandwiches
Ingredients
Peanut Butter Cookies
Peanut Butter Filling
Instructions
Peanut Butter Cookies
  1. Preheat oven to 350ºF (180ºC). Line two large baking sheets with parchment paper.
  2. In a medium bowl, whisk together the all purpose flour, cake flour, baking soda and salt. Set aside.
  3. In a large bowl, beat the peanut butter, butter and shortening until smooth.
  4. Beat in the egg and vanilla until well combined.
  5. Set aside 1/4 cup (50g) of the granulated sugar. Beat the peanut butter mixture with brown sugar and remaining granulated sugar, with an electric mixer at medium speed, until light and fluffy.
  6. Add the flour mixture and beat just until combined.
  7. Roll the dough into 1 1/2-inch (3.8cm) diameter balls (about 1 1/4 oz or 35g each). Roll the dough balls in the reserved granulated sugar.
  8. Place the dough balls 3 inches apart onto the prepared baking sheets. Flatten with a fork, making a criss cross pattern.
  9. Bake until the cookies are puffy and start to crack around the edges, about 9-11 minutes.
  10. Let the cookies cool on baking sheet for 1 minute, then carefully transfer them to a cooling rack. The cookies will be fragile, but they will firm up as they cool.
  11. Place a spoonful of filling on the bottoms of half of the cooled cookies. Top with remaining the remaining cookies.
Peanut Butter Filling
  1. In medium bowl, beat the peanut butter and butter together until smooth.
  2. Beat in the powdered sugar, heavy cream, vanilla and salt until smooth.
Recipe Notes

To find my favorite cookie sheet, click here.