Mini Baklava Cheesecakes

Mini Baklava Cheesecakes

These Mini Baklava Cheesecakes are so cute and incredibly delicious that they actually made me mad! I’d been thinking about making them for awhile, so I was mad at myself for not making them sooner. They’re much quicker and easier to make than a full size cheesecake. The phyllo dough is par-baked, then topped with a nut mixture. I used a combination of pistachios and almonds, but you can use any combination of pistachios, almonds or walnuts of your choice. After the cheesecakes are baked, the phyllo shells are soaked with honey syrup.

I topped them with little nests made of kataifi, which are so cute and perfect for Easter. Kataifi is thinly shredded phyllo pastry. You can find it in the freezer section of supermarkets and international markets. Toasted coconut makes a good substitute if you can’t find kataifi. These cute cheesecakes are also pretty topped with edible flowers or rose petals, which would be perfect for Mother’s Day or any springtime celebration.

Print Recipe
Mini Baklava Cheesecakes
Mini cheesecakes with a baklava base, topped with kataifi nests
Course Dessert
Keyword baklava, cheesecake
Servings
mini cheesecakes
Ingredients
Honey Syrup
Kataifi Nests
Course Dessert
Keyword baklava, cheesecake
Servings
mini cheesecakes
Ingredients
Honey Syrup
Kataifi Nests
Instructions
Honey Syrup
  1. In a medium saucepan over medium heat, cook the sugar, water, honey and lemon juice, stirring occasionally until the sugar is dissolved. Remove from heat and stir in the vanilla extract.
Mini Cheesecakes
  1. Preheat the oven to 350ºF (180ºC). Brush the insides of a 12-serving muffin pan with melted butter.
  2. Place a sheet of phyllo dough on your work surface. Brush it lightly with melted butter. Place another sheet of phyllo dough on top of the first one and brush it lightly with melted butter. Repeat this process until you have 5 sheets. Using a pastry wheel or a sharp knife, cut the phyllo into 6 squares, measuring about 4 1/2 x 4 1/2 inches each. Repeat this process with the five remaining phyllo sheets. Make sure to keep your unused phyllo sheets covered while you work to prevent them from drying out.
  3. Place the phyllo squares into the cups of the muffin pan. Press them in with a pastry tamper or with the flat bottom of a small shot glass. Prick the bottoms of the phyllo with a fork. Bake until light golden brown, about 14-17 minutes.
  4. Meanwhile, combine the nuts, 2 tablespoons of sugar, 2 tablespoons of melted butter and the cinnamon in a small bowl. Mix until well combined.
  5. Turn the oven heat down to 325ºF (165ºF). Place about a tablespoon of the nut mixture into the baked pyllo shells and press lightly with the back of a spoon.
  6. To make the cheesecake filling, in a large bowl, beat the cream cheese with an electric mixer on low speed, until smooth. Add the remaining 6 tablespoons of sugar, the egg, heavy cream and vanilla extract. Beat until smooth and well combined, but do not over beat.
  7. Ladle the cheesecake mixture into the phyllo shells over the nuts. Fill them almost to the top. Bake until the cheesecakes are set, but still slightly jiggly in the centers, about 13-15 minutes.
  8. Using a small offset spatula, gently loosen the cheesecakes from the muffin pan. Drizzle honey syrup generously along the perimeter of the outside of the cheesecakes, letting the syrup drip down the sides of the phyllo pastry. Let the cheesecakes cool in the pan. When the cheesecakes have cooled and the syrup has absorbed, transfer the cheesecakes to the refrigerator to chill for at least 1 hour.
Kataifi Nests
  1. Turn the oven temperature up to 350ºF (180ºC). Brush an 8 x 8-inch or a 9 x 7-inch baking dish with melted butter. Roll clusters of kataifi stands into twelve 2-inch wide spiral shapes to form the nests. Place them in the baking dish. Drizzle the nests with melted butter. Gently brush more melted butter over the surface of the nests. Bake until golden brown, about 25-35 minutes. Immediately drizzle with honey syrup. Let the nests cool in the baking pan.
  2. Place the nests onto the cheesecakes. Fill the nests with candy eggs.
Recipe Notes

To find the muffin pan I used, click here.
Blueberry Lavender Cookies

Blueberry Lavender Cookies

Blueberry cookies remind me of a time when I was little. Every year my family would take a road trip up to Northern California. My parents loved stopping at roadside stands to buy fresh produce on the way back. One year my dad bought an enormous box of blueberries. When we got home, for the next couple of weeks, we ate far too many blueberry pancakes. My dad also used the blueberries in his famous cobbler, which was delightful. Then he made biscuits which turned out like rocks and we all laughed. My favorite blueberry creations that year were the blueberry shortcake and blueberry cookies. I’m sharing my version of the blueberry cookies, with the addition of lavender to make them a little more special.

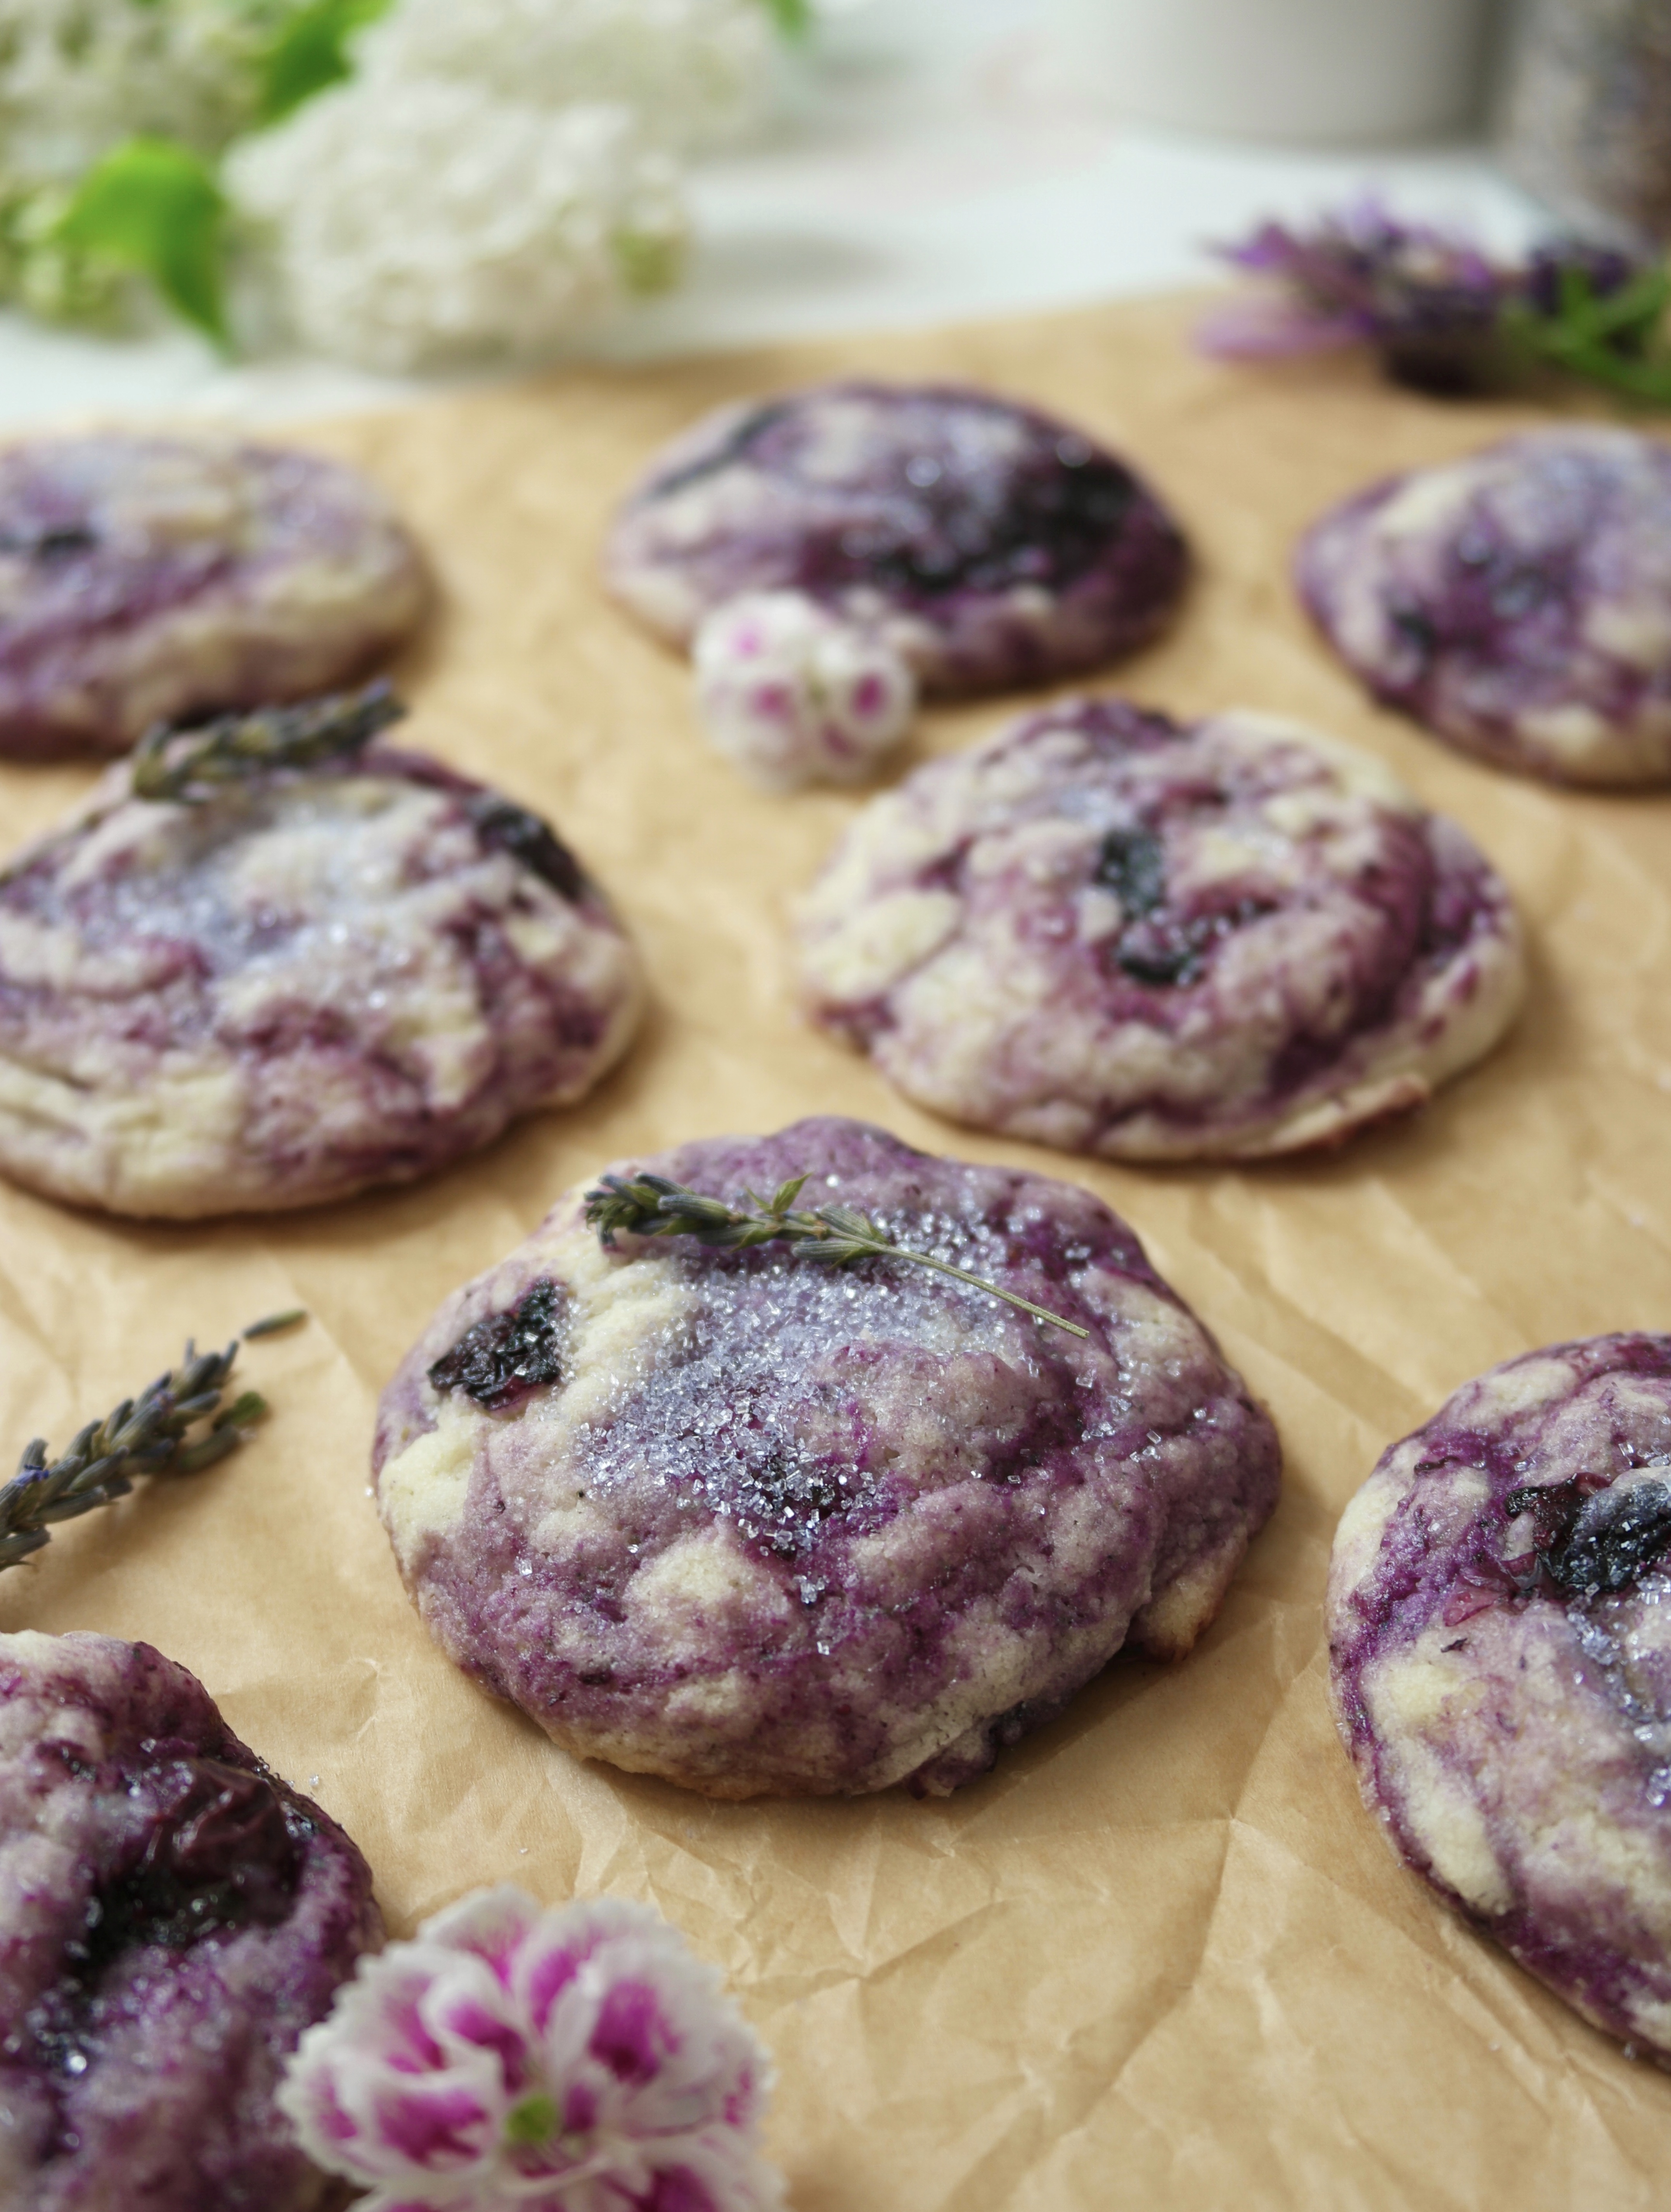
My Blueberry Lavender Cookies start with butter and homemade lavender sugar. The original cookies had fresh blueberries plopped into the dough, which is perfectly fine if you’re making muffins. To reduce the soggy spots that form as the fruit releases its juices while baking, I typically macerate or cook fruit before it’s added to many of my recipes. The extra step makes a big difference. A quick, cooked blueberry compote is folded into the batter of these cookies, making pretty blueberry swirls. I finished these cookies with a sprinkle of sparkly sanding sugar in a lilac shade. This is optional, but very pretty. You can also make extra lavender sugar to use for sprinkling on your cookies. Sprinkle the sugar on before baking or after the cookies bake, while they’re still warm.

Print Recipe
Blueberry Lavender Cookies
Chewy lavender scented sugar cookies with crisp exteriors and swirls of blueberry compote.
Servings
cookies
Ingredients
Blueberry Compote
Lavender Sugar
Blueberry Lavender Cookies
Servings
cookies
Ingredients
Blueberry Compote
Lavender Sugar
Blueberry Lavender Cookies
Instructions
Blueberry Compote
  1. In a small bowl, whisk together the cornstarch with 1 tablespoon of water.
  2. In a small saucepan over medium heat, combine the blueberries, lemon juice and remaining 1 tablespoon of water, stirring until the blueberries soften and start to release their juices. Smash the blueberries slightly with the back of the spoon. Stir in cornstarch mixture. Turn the heat down to low. Simmer until thickened to a jam consistency, about 1-2 minutes.
  3. Transfer the blueberry compote to a small bowl and set aside to cool to room temperature.
Lavender Sugar
  1. In a small food processor or a clean spice grinder, combine 1/4 cup of the sugar with the lavender. Pulse a few times to chop the lavender into smaller bits. Add the remaining sugar and pulse a few more times to combine.
Blueberry Lavender Cookies
  1. Preheat your oven to 350ºF (180ºC) Line two large baking sheets with parchment paper.
  2. In a medium bowl, whisk together the flour, cornstarch, baking powder and salt.
  3. In a large bowl, beat the butter and lavender sugar with an electric mixer, until light and fluffy.
  4. Add the the egg white and vanilla and beat until well combined.
  5. On low speed, add the flour mixture in two additions and mix just until combined.
  6. Add dollops of the blueberry compote to the batter. Fold in gently, but don't completely combine it. You want to see swirls of blueberry.
  7. Place 2-tablespoon size portions of dough about 2 inches apart onto prepared baking sheets. I used a #30 portion scoop.*** Sprinkle with decorative sugar if desired.
  8. Bake until tops of cookies are set and bottom edges turn light golden brown, about 10-14 minutes. Transfer the cookies to a cooling rack. Do not over bake. Test one cookie before baking the entire batch if you are unsure about how to determine the doneness of cookies.
Recipe Notes

*To find culinary lavender, click here.

**To find the decorative sanding sugar I used, click here.

***To find the scoop I used, click here.

Flourless Chocolate Cake with Raspberry Sauce

Flourless Chocolate Cake with Raspberry Sauce

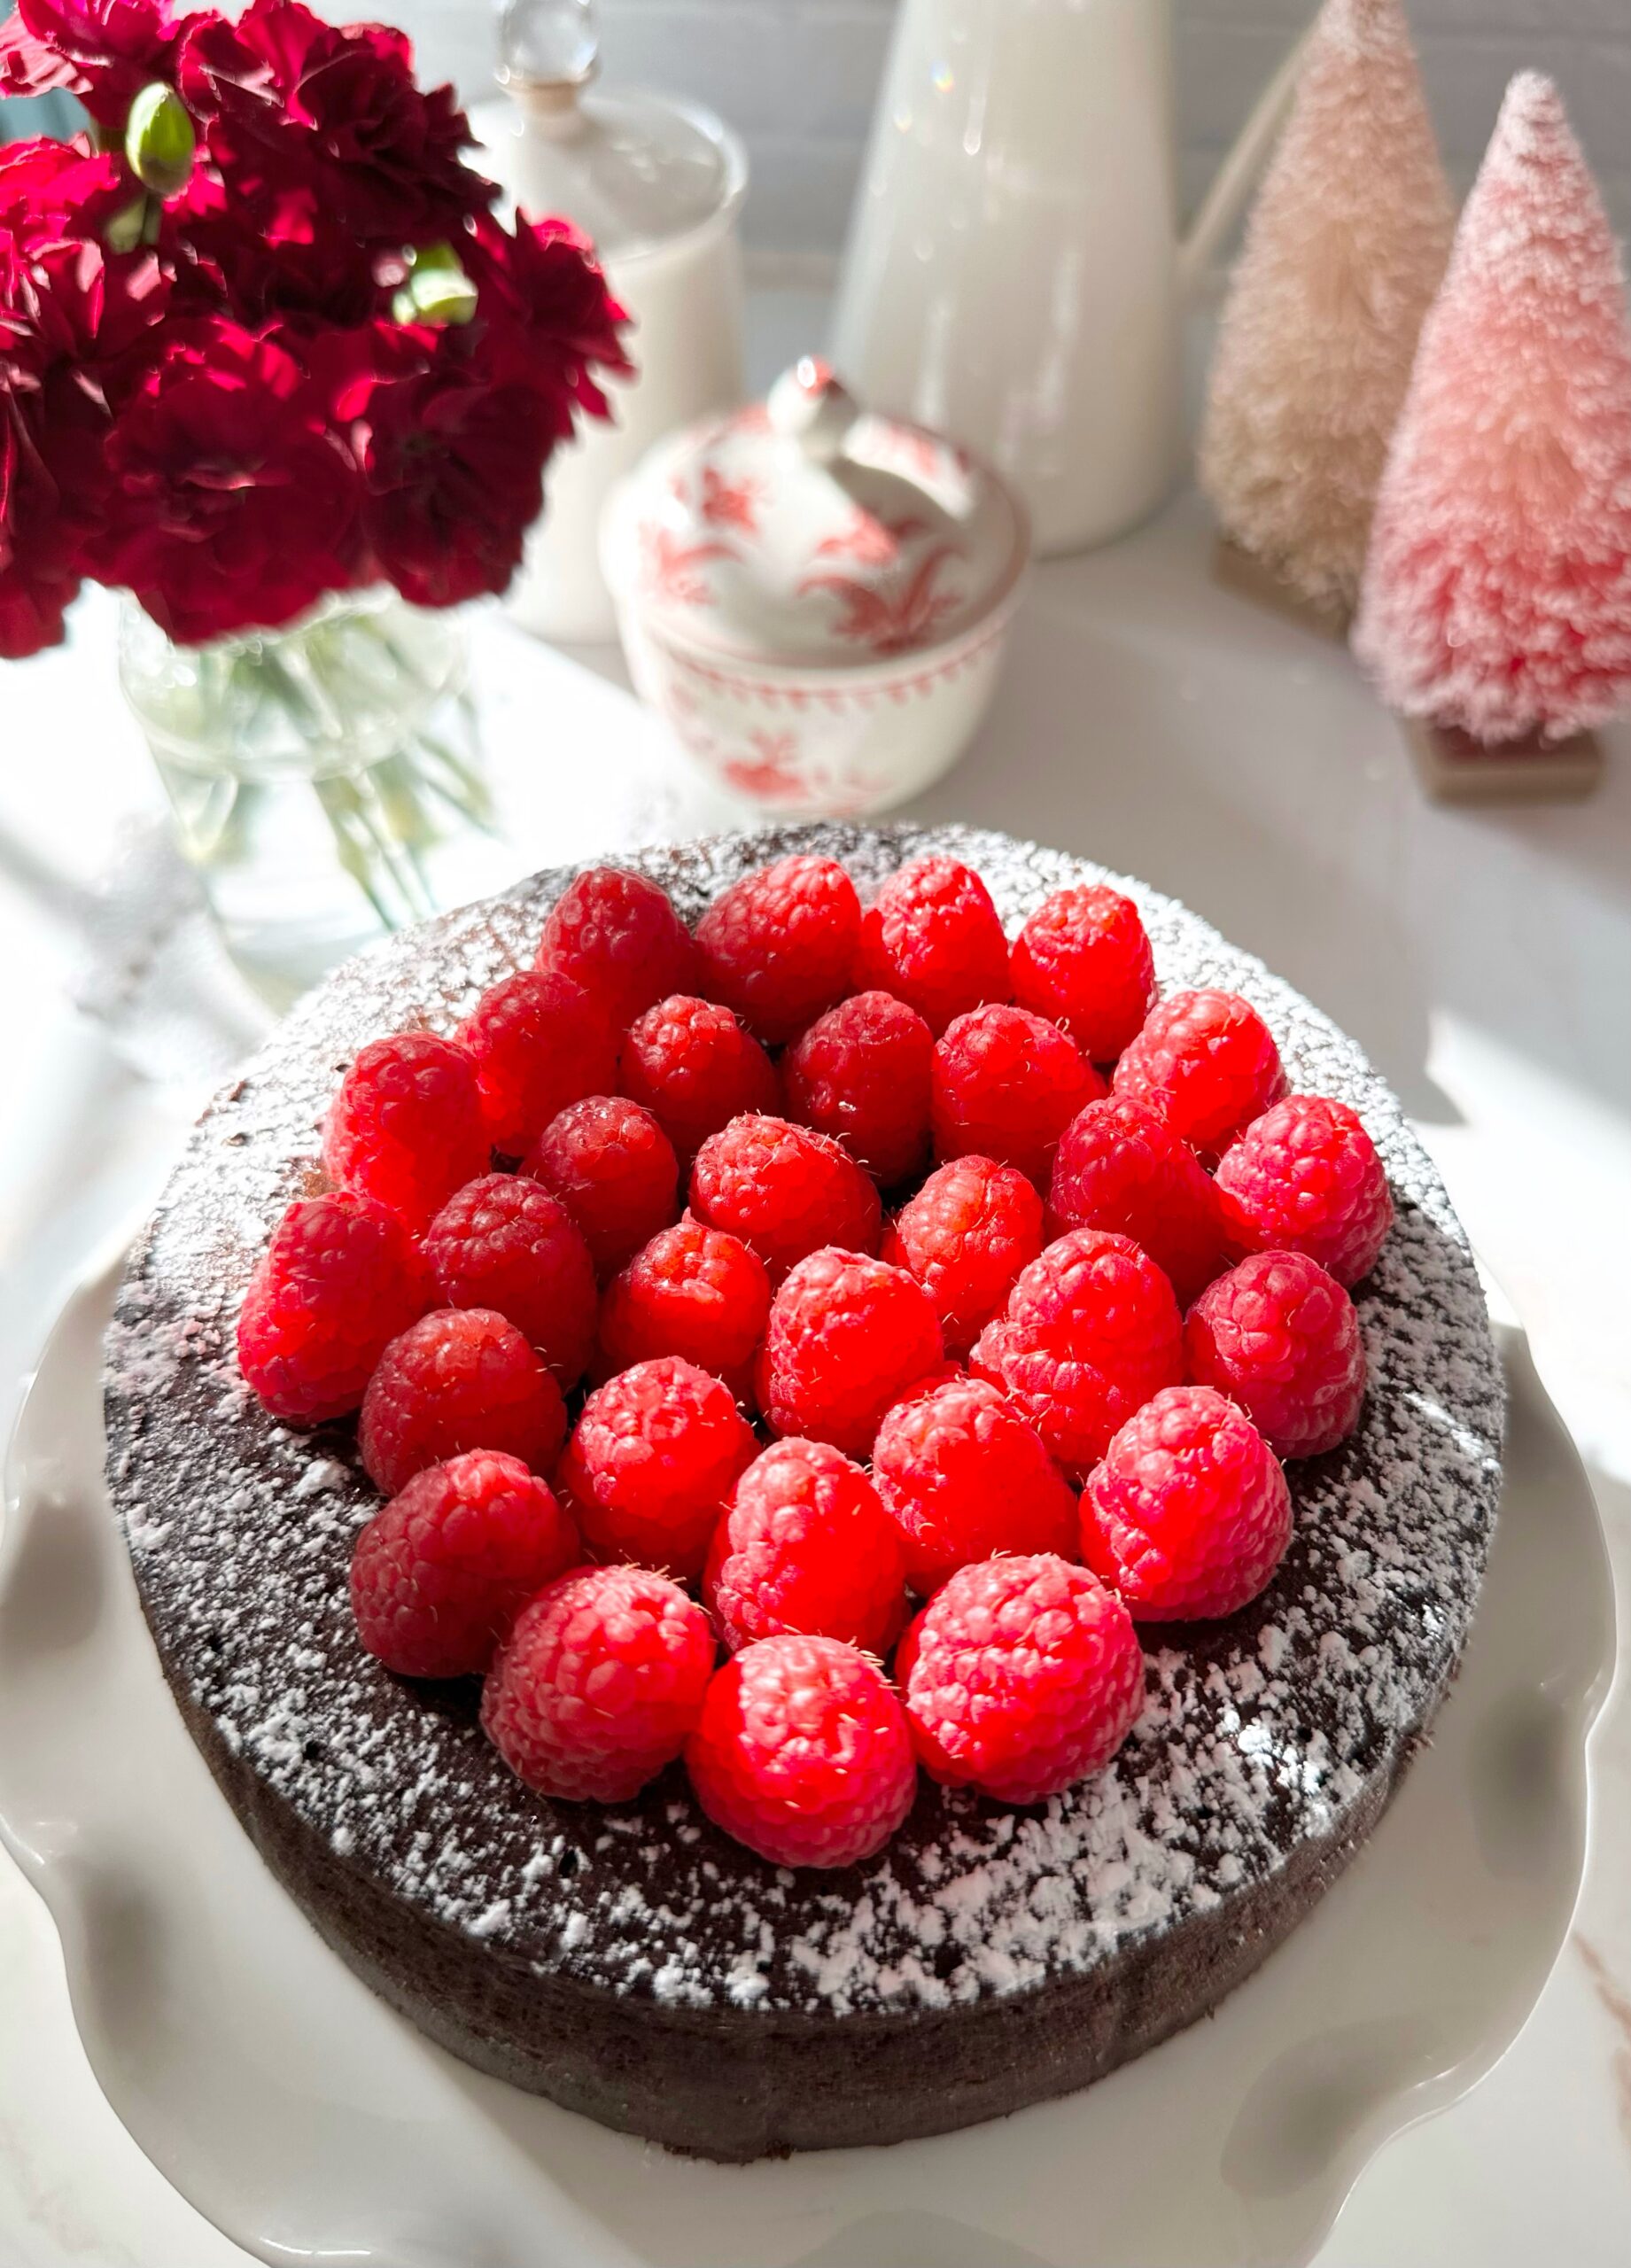
This cake story has a happy ending. Once, many years ago, someone gave my grandparents’ neighbor a flourless chocolate cake. The neighbor had a slice and couldn’t finish it because it was too rich. She brought the cake over to my grandparents and they each had a slice and couldn’t finish them, because they were too rich. I had a slice and I couldn’t finish mine either and, well…you can guess why. So my grandparents, not wanting to be wasteful, put the cake in the freezer and forgot about it for a very long time. Whenever I opened the freezer and saw it, I wondered why none of us could eat more than a few bites of that rich cake. Although I don’t know for sure, it was probably because the ratio of chocolate to butter was off. But I do know that serving it with something acidic, like berries or raspberry sauce, would have helped immensely.

The happy ending to this story is that this flourless chocolate cake was created to be enjoyed to the last bite. It’s decadent, but not overly rich. It has a good balance, not too sweet or too bitter. The raspberry sauce and fresh raspberries compliment it perfectly. This luscious cake is also delicious with strawberries or any combination of berries you like. It’s also delicious served with salted caramel sauce. I wish my grandparents were still around to give my version of a flourless chocolate cake a try. I think they would have loved this cake and finished every last bite!

Print Recipe
Flourless Chocolate Cake with Raspberry Sauce
Keyword cake, chocolate
Servings
Ingredients
Raspberry Sauce
Keyword cake, chocolate
Servings
Ingredients
Raspberry Sauce
Instructions
Flourless Chocolate Cake
  1. Preheat oven to 325ºF. Line a 6-inch springform pan** with parchment paper. Spray the parchment paper with nonstick spray. Wrap the bottom two inches of the pan tightly with aluminum foil. Set pan in a baking pan.
  2. Combine chocolate and butter in a large stainless steel bowl set over a pot of barely simmering water. Stir until melted and smooth. Remove bowl from heat.
  3. In a large bowl, beat eggs with an electric mixer until doubled in size, about 5 minutes. Beat in vanilla extract and salt.
  4. With a large spatula, gently fold beaten eggs into chocolate mixture in three additions until no streaks of egg remain. Transfer batter to prepared pan. Smooth top of batter with a small offset spatula.
  5. Pour 1 1/2 inches of boiling water into baking pan. Bake until top is set and internal temperature*** reaches 140ºF, about 28-37 minutes.
  6. Remove cake pan from water bath. Cool to room temperature then cover and refrigerate for at least 4 hours (or up to overnight, but cake is best served the day it's made).
  7. Remove cake from pan when chilled and set. Top with powdered sugar and fresh raspberries.
  8. To serve, remove cake from refrigerator at least 30 minutes before serving and serve at room temperature for best texture. Serve with raspberry sauce.
Raspberry Sauce
  1. Purée raspberries in blender or food processor. Pass purée through a fine mesh sieve**** to remove seeds.
  2. In a small bowl, whisk together water and cornstarch.*****
  3. In a small saucepan, heat raspberry purée with sugar and cornstarch slurry to a boil over medium heat. Turn heat down to low and simmer until slightly thickened, about 2-3 minutes.
Recipe Notes

*Chalazae are the opaque chords of egg white. Removing them is optional, but they do show up as white spots in the cake after baking.

**To find the 6-inch springform pan I used, click here.

***To find an instant read thermometer, click here.

****To find a fine mesh sieve, click here.

*****To find a mini whisk for whisking small amounts, click here.

Little Strawberry Charlotte

Little Strawberry Charlotte

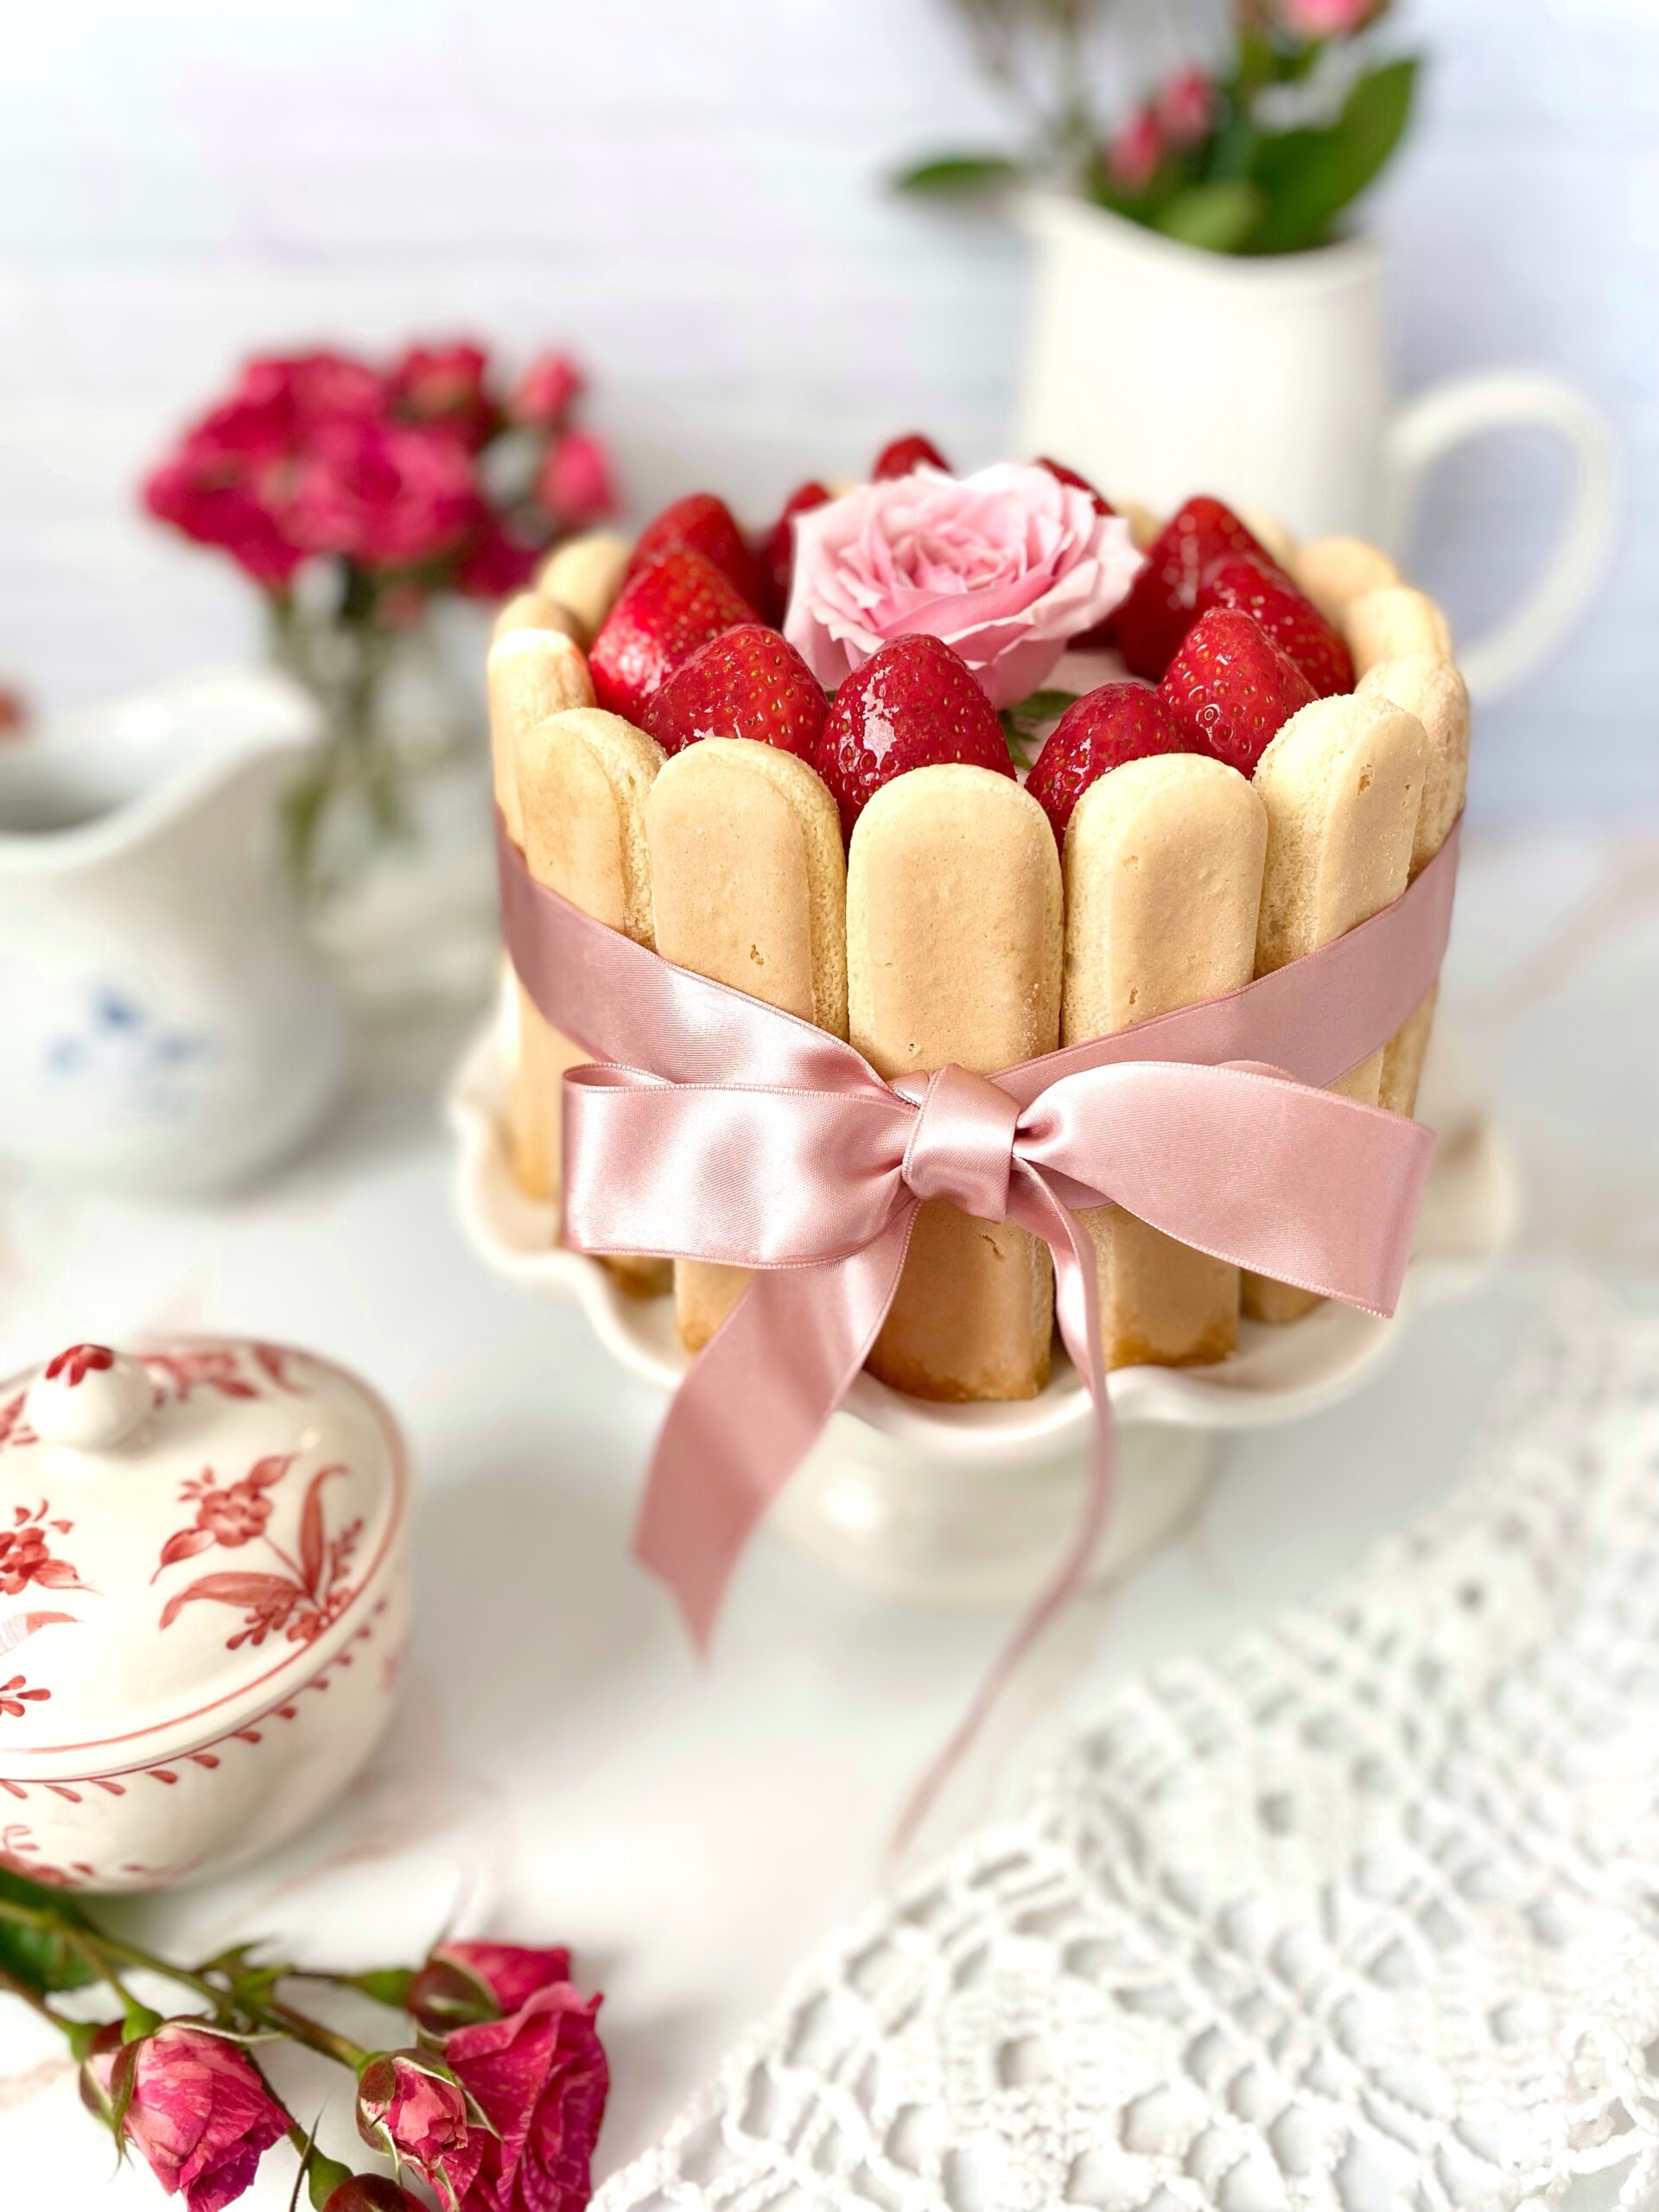
Meet Little Strawberry Charlotte. She brings romance with her wherever she goes. Whether it’s a tea party, a birthday celebration or a romantic dinner, you’ll gaze at her beauty and sigh. This lovely Charlotte has luscious strawberry mascarpone cream filling layered with lady fingers and topped with fresh strawberries. I used store bought lady fingers to make life easier but you can certainly bake your own if you wish. I typically make this in spring or summer when the weather is warm and strawberries are plentiful. But since my local stores start carrying an abundance of strawberries around Valentine’s Day, I thought it would be a perfect time to make this pretty little Charlotte.

Print Recipe
Little Strawberry Charlotte
A pretty no-bake dessert layered with strawberry mascarpone cream filling and lady fingers and topped with fresh strawberries.
Course Dessert
Keyword cake, strawberry
Servings
Ingredients
Simple Syrup
Strawberry Charlottte
Course Dessert
Keyword cake, strawberry
Servings
Ingredients
Simple Syrup
Strawberry Charlottte
Instructions
Simple Syrup
  1. Combine sugar and water in a small saucepan over medium-low heat.
  2. Heat and stir until sugar is dissolved. Do not boil.
  3. Remove from heat and transfer to a small shallow bowl or dish wide enough to dip ladyfingers. Stir in extract.
Strawberry Charlotte
  1. In a blender or food processor, puree strawberries. Pass through a mesh sieve to strain out seeds.
  2. In a medium saucepan, combine strawberry puree and sugar. Cook over medium heat until sugar is dissolved, about 3-5 minutes. Remove from heat.
  3. Set aside two tablespoons of strawberry puree mixture. Cover and refrigerate until ready to use.
  4. Place water in a small bowl and sprinkle with gelatin powder. Whisk together and let sit until dissolved, about 5 minutes.
  5. Add gelatin mixture to warm strawberry puree and whisk until thoroughly combined. Set aside to cool.
  6. In a large bowl, beat mascarpone cheese with an electric mixer on medium speed, until smooth. Add strawberry puree and and extracts. Beat until well combined.
  7. In a separate large bowl, whip heavy cream with an electric mixer on medium-high speed until medium peaks form. Be careful not to over whip the cream or it will look curdled.
  8. Fold whipped cream into mascarpone mixture.
  9. Optional: Line the bottom of your springform pan with a cake board if you don't want to serve it on the pan base.
  10. Slice the round end off of 16 ladyfingers. Dunk them briefly in the simple syrup then line them up along the inner sides of a 7-inch by 3 inch deep *springform pan. (Typically you would line them smooth side in facing the filling, but I placed mine smooth side out because I wanted a smooth look on the outside and it makes removal from the pan easier.)
  11. Line the bottom snuggly with ladyfingers, cutting to fit where necessary.
  12. Top with half of the filling mixture, about 2 cups. Then top with a layer of ladyfingers, cutting to fit as with the bottom layer.
  13. Top with remaining filling. Smooth the top with a small offset spatula.
  14. Cove with plastic wrap and chill in refrigerator at least 4 hours.
  15. Carefully remove the springform pan ring from the base. Separate the base from the cake board, if using. Garnish with fresh strawberries. Brush strawberries with reserved strawberry puree mixture. Tie a clean ribbon around the finished Charlotte.
Recipe Notes

*To find a 7-inch springform pan, click here.

Lilac Vanilla Mini Cakes

Lilac Vanilla Mini Cakes

Once upon a time, there was a little black bear who woke up from a long nap. As she stretched, she felt her tummy growl. She ventured into the morning sunshine and smelled something sweet. She sniffed the air, following the sweet fragrance until she came upon a beautiful purple tree. She climbed up to a comfy branch and ate the tender, purple blossoms to her heart’s content.

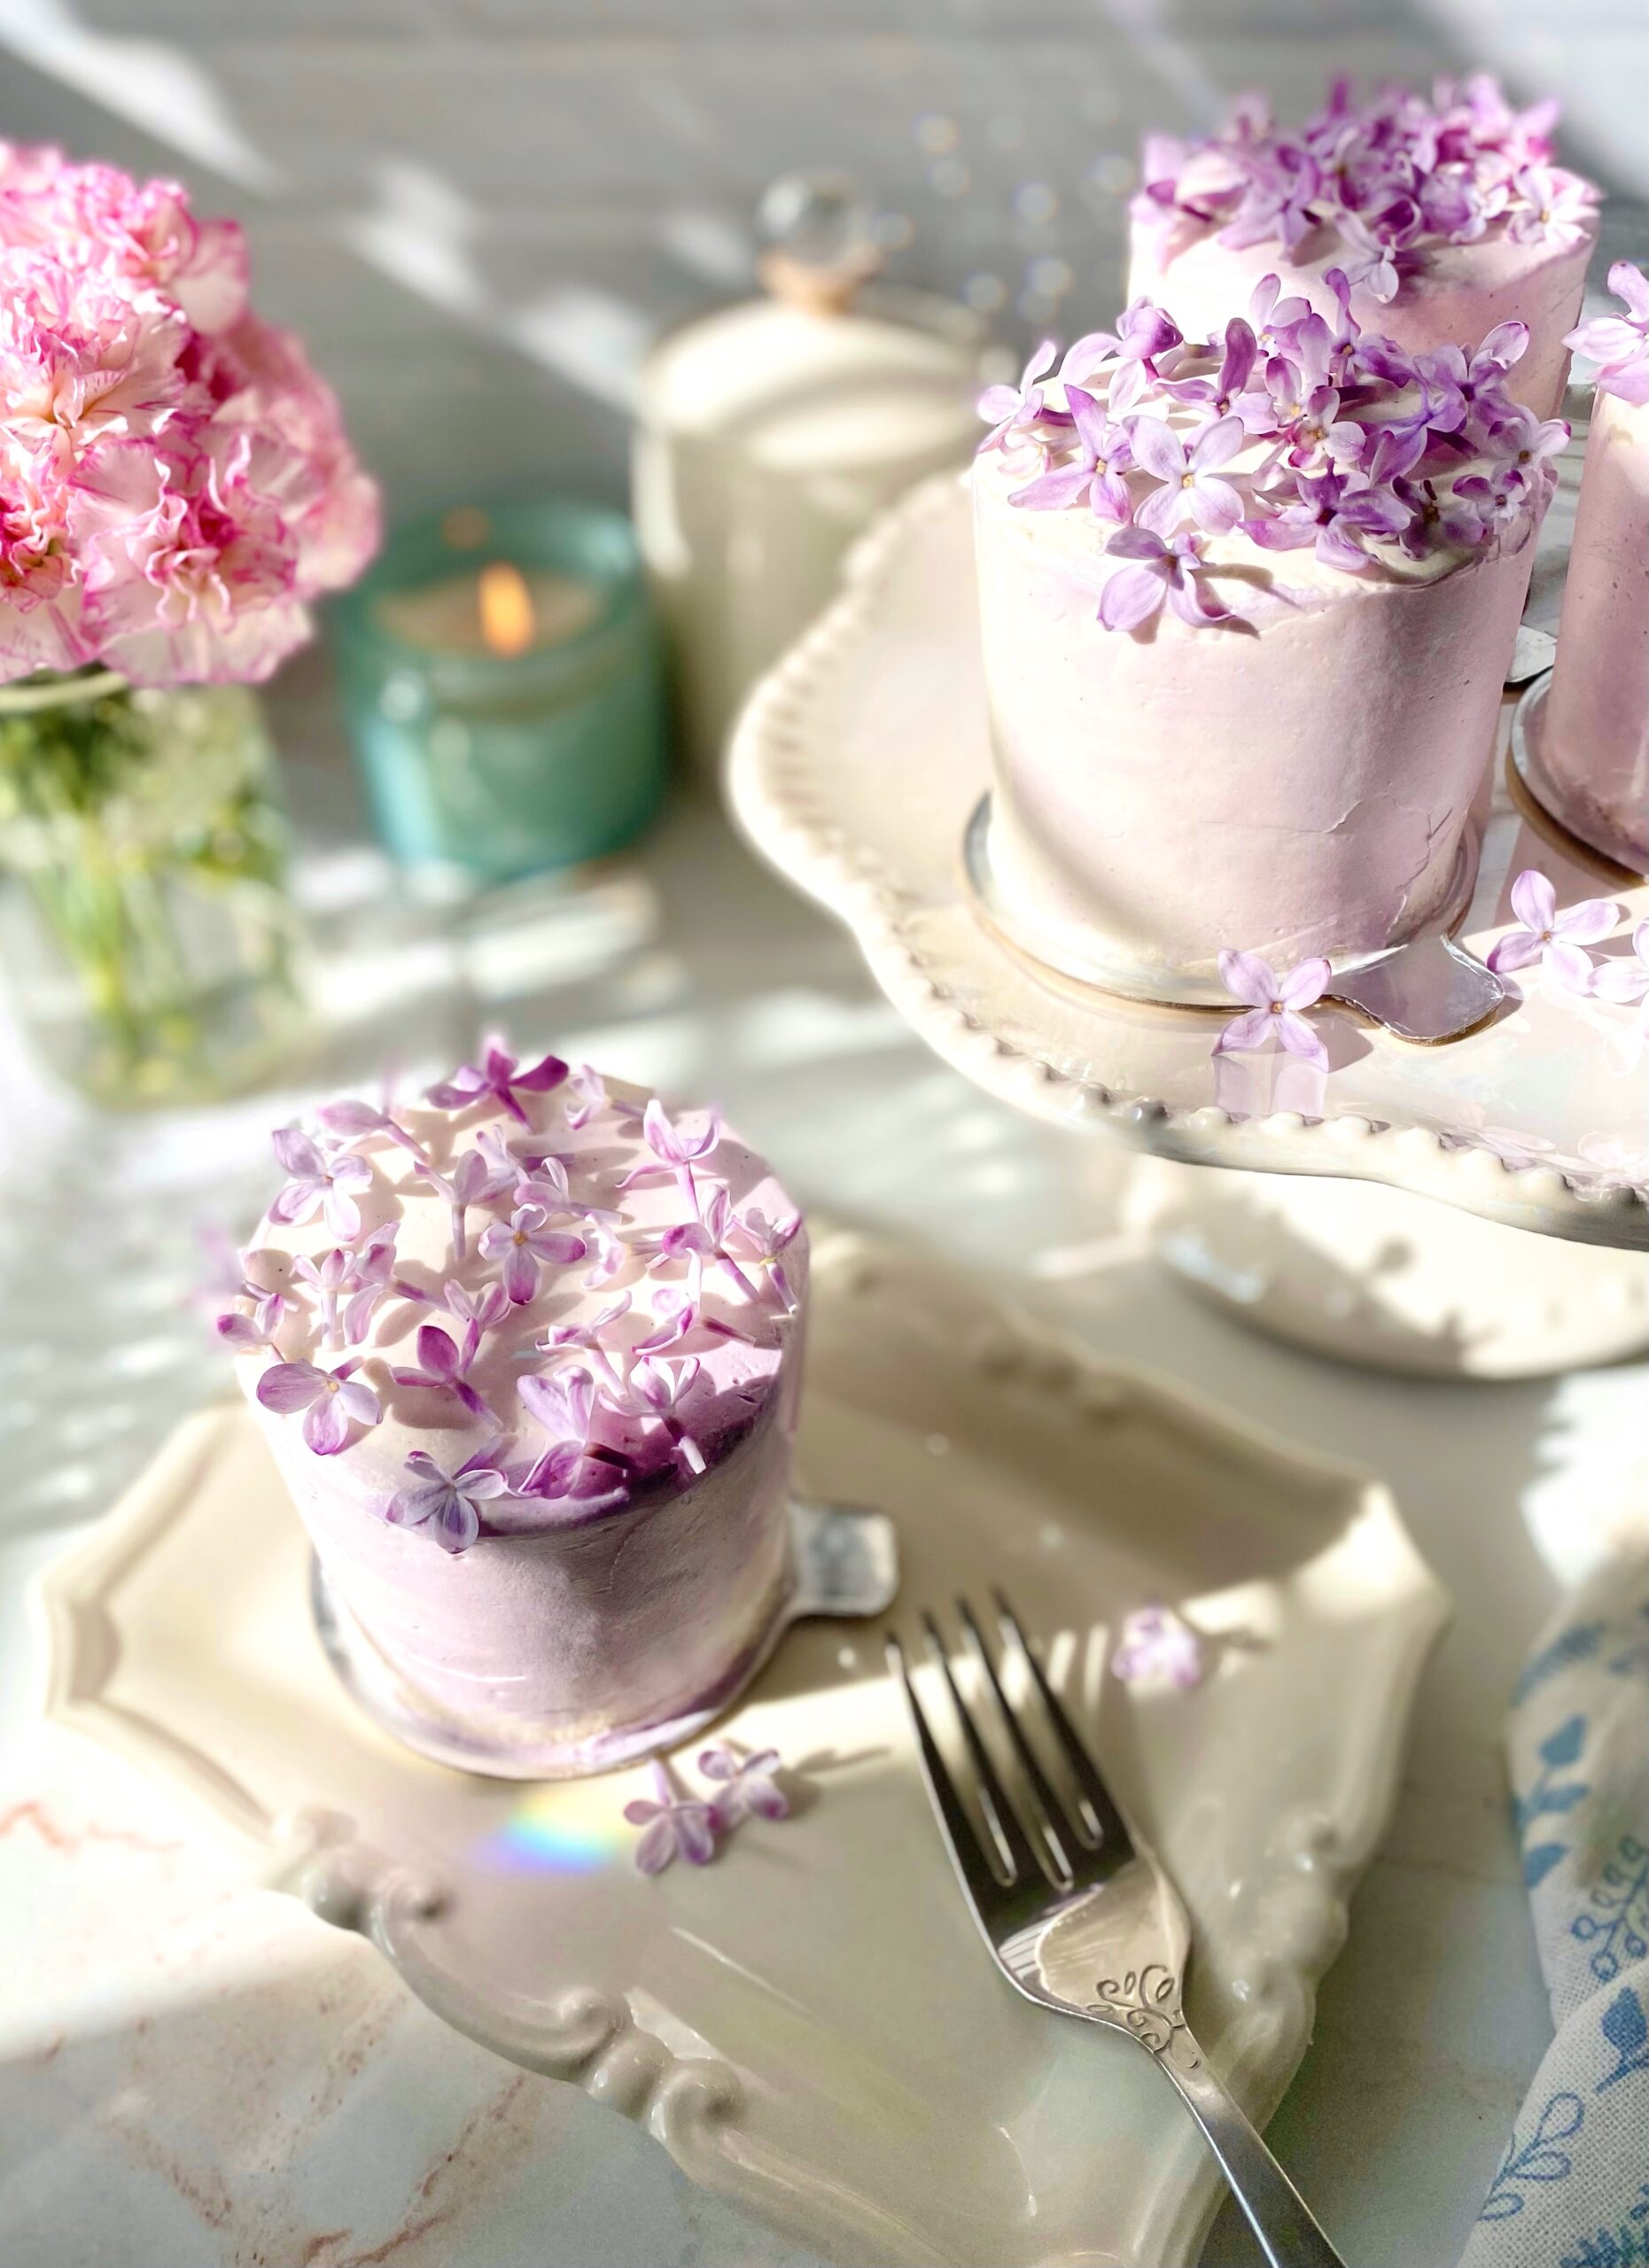
Bears, butterflies and bees know something good when they see it. We humans can also enjoy lilacs. I knew lilacs were edible, but I hadn’t tasted them until recently. The flavor reminds me of beets, slightly sweet with a vegetable aftertaste. I really wanted to try lilac syrup after seeing so many photos of pretty purple syrup online. I discovered that lilac syrup is not purple. It’s more of a dull, brownish blue-green. Many people use food coloring or blueberries to color their syrup. I also discovered that lilac syrup will turn a pretty shade of mauve by adding a small amount of lemon juice to the finished syrup. Since I would be using my lilac syrup inside of cake layers, I let it remain its natural color. I made a simple syrup with lilac blossoms and let them steep for a couple of hours. It was just long enough to give a subtle lilac flavor without being too floral. If you want a stronger lilac flavor, I suggest using more lilac blossoms rather than steeping longer to avoid bitterness.

I paired the lilac syrup with this soft, fluffy vanilla cake and silky Swiss meringue buttercream. If you aren’t a fan of lilac syrup, feel free to use vanilla simple syrup instead and just use the lilac blossoms to decorate your cakes. They look stunning on any cake or cupcakes.

Print Recipe
Lilac Vanilla Mini Cakes
Soft, fluffy mini white vanilla cakes with lilac syrup and vanilla Swiss meringue buttercream, topped with lilac blossoms
Course Dessert
Servings
mini cakes
Ingredients
Lilac Syrup
White Vanilla Cake
Swiss Meringue Buttercream
Course Dessert
Servings
mini cakes
Ingredients
Lilac Syrup
White Vanilla Cake
Swiss Meringue Buttercream
Instructions
Lilac Syrup
  1. In a small saucepan combine the sugar and water. Bring to a boil over medium heat, stirring gently to dissolve the sugar. Add the the lilac blossoms and stir gently.
  2. Turn the heat down and simmer for 5 minutes.
  3. Remove from heat and allow the lilac blossoms to steep for 2 hours. Pass the lilac syrup through a mesh sieve.
White Vanilla Cake
  1. Preheat the oven to 350ºF (180ºC). Grease and flour two 9-inch round cake pans and line the bottoms with parchment paper.
  2. In a medium-size bowl, whisk together the cake flour, baking powder and salt until well combined. Set aside.
  3. In a large bowl, beat the butter, sugar, oil and vanilla bean paste with an electric mixer at medium speed, until light and fluffy, about 3 minutes.
  4. On medium speed, beat in the egg whites in two additions, then beat in the egg until well combined.
  5. On low speed, beat in one third of the flour mixture, then beat in the sour cream just until combined.
  6. Beat in the remaining flour in two additions, alternating with milk. Beat just until combined.
  7. Transfer the batter to prepared cake pans. Bake for 28-33 minutes, or until the tops of the cakes are light golden brown and a toothpick inserted in center comes out clean. Do not over bake.
  8. Allow the cakes to cool in the pans for 10 minutes, then remove from the pans and continue cooling on a wire rack.
  9. Cut each cake into four 2 3/4-inch rounds using a cookie or biscuit cutter.
  10. Using a pastry brush, brush the mini cakes generously with lilac syrup or vanilla simple syrup.
Swiss Meringue Buttercream
  1. Combine the egg whites and sugar in a large heatproof bowl. Set over a pan of gently simmering water, making sure the water doesn't touch the bottom of the bowl.
  2. Whisk constantly until the sugar is dissolved and a temperature of 160ºF (71ºC) is reached.
  3. Transfer the mixture to the bowl of a stand mixer with a whisk attachment. Whisk on low speed, gradually increasing to medium-high speed. Whisk until glossy, stiff peaks form and the mixture reaches room temperature.
  4. Turn the mixer to medium-low speed. Add the butter, a few pieces at a time, allowing it to fully incorporate before adding more. If the mixture looks curdled, keep mixing and it will correct itself.
  5. Switch to a paddle attachment. On low speed, mix in the vanilla bean paste and salt. Continue mixing on low speed for a few minutes until smooth.
  6. Remove about 3/4 cup of frosting and transfer it to a small bowl. Using a toothpick, place two tiny drops of lilac gel food color and one tiny drop of violet gel food color into the bowl. Mix with a spatula until well combined.
Assembly
  1. Smear a bit of frosting on each mini cake board. Top each one with a cake round, a layer of frosting, then a second cake round. Frost with a crumb coat if desired. Refrigerate of 15 minutes. Frost the mini cakes with white Swiss meringue buttercream, then smear small amounts of lilac Swiss meringue buttercream around the sides and top. Smooth frosting with a bench scraper and smooth the tops with a small offset spatula. Decorate with lilac blossoms.
Vanilla Simple Syrup (optional)
  1. Combine 1/2 cup sugar and 1/2 cup water in a small saucepan. Bring to a boil over medium heat, stirring gently to dissolve the sugar. When the sugar has dissolved, remove from heat and stir in 1 teaspoon vanilla bean paste or pure vanilla extract.
Recipe Notes

*If you can't find ultra fine granulated sugar, it's okay to substitute with regular granulated sugar.

**To find the lilac gel food color I used, click here.

***To find the violet gel food color I used, click here.

****To find 3-inch mini cake boards, click here.

Strawberries and Cream Profiteroles

Strawberries & Cream Profiteroles

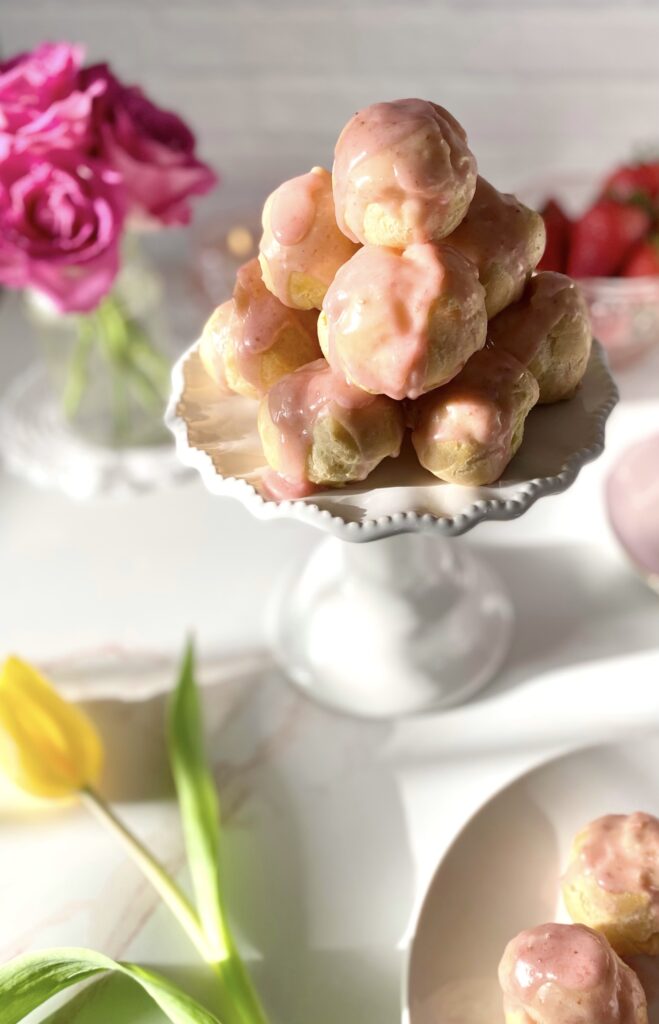
Imagine you’re in a beautiful room, reclining on a plush velvet chaise lounge. There’s a dainty table nearby. On the table is a cake pedestal with a little pyramid of small, perfectly plump, pink pastries. They’re filled with sweet, luscious strawberry cream. And they’re all yours. This Strawberries & Cream Profiteroles recipe can make that dream come true. Maybe not the velvet chaise lounge, but really any comfortable chair will do while you indulge in these delicious little gems. Profiteroles have a way of making you feel regal and majestic. I think princesses and princes snack on them. Most of us don’t have a personal pastry chef or the budget to order from a French bakery every day, but we can certainly follow a recipe and make one of the easiest pastry doughs there is. Choux pastry or pate à choux is used to make profiteroles, cream puffs, eclairs, churros and other pastries. Once you get the hang of it, the possibilities are endless.

This recipe features fresh strawberries, but frozen strawberries will work too. You can also substitute raspberries or peaches. To find the recipe for Peaches & Cream Profiteroles, click here. The strawberry purée can be made a day or two ahead and stored in the refrigerator. To make it easy on myself, I like to make the strawberry purée on day one, the pastry cream on day two, then make the profiteroles and strawberry icing and assemble on day three. It’s also helpful to practice the French culinary style of prep, mise en place, which means to have all of your ingredients and equipment in place before you begin. Everything will go much smoother and prevent you from feeling overwhelmed.

Print Recipe
Strawberries and Cream Profiteroles
Bite sized choux pastry puffs filled with fresh strawberries and cream filling and topped with fresh strawberry icing
Course Dessert
Cuisine French
Servings
profiteroles
Ingredients
Strawberry Pureé
Strawberries and Cream Filling
Profiteroles
Strawberry Icing
Course Dessert
Cuisine French
Servings
profiteroles
Ingredients
Strawberry Pureé
Strawberries and Cream Filling
Profiteroles
Strawberry Icing
Instructions
Strawberry Purée
  1. Purée strawberries in a blender or food processor. Strain puréed strawberries through a sieve.
  2. Transfer strawberry purée to a small saucepan. Stir in lemon juice.
  3. Bring to a boil over medium heat. Reduce heat and simmer until strawberry purée is reduced by half.
  4. Remove from heat. Stir in strawberry extract. Set aside to cool completey.
Strawberries and Cream Filling
  1. Bring milk to a boil in a small saucepan over medium heat.
  2. Meanwhile, whisk sugar, cornstarch and salt together in a medium bowl. Add the egg and whisk until smooth.
  3. When milk starts to boil, remove from heat and pour 1/3 of the hot milk into the egg mixture and whisk to combine.
  4. Pour the egg mixture back into the remaining hot milk and cook over medium heat, whisking continuously, until the mixture comes to a boil and thickens.
  5. Remove from heat. Stir in butter and vanilla extract.
  6. Pour mixture through a sieve placed over a bowl. Cover the surface with plastic wrap and let cool completely.
  7. Set aside 2 tablespoons of strawberry purée. Add remaining strawberry purée to cooled pastry cream and stir to combine. Cover strawberry pastry cream and chill in refrigerator.
  8. In a medium bowl, whip heavy cream to stiff peaks with an electric mixer at high speed. Fold whipped cream into cooled strawberry pastry cream. Set aside in refrigerator.
Profiteroles
  1. Preheat oven to 400ºF. Line 2 large baking sheets with parchment paper,
  2. Combine water, butter and salt in a medium saucepan. Bring to a boil over medium heat.
  3. Reduce heat. Add flour and stir vigorously with a wooden spoon until mixture pulls away from sides of pan and forms a ball.
  4. Transfer mixture to the bowl of a stand mixer. Mix on low speed until steam dissipates and mixture cools to lukewarm.
  5. Add eggs one at a time and beat on medium speed until smooth, stopping to scrape down bowl.
  6. Transfer mixture to a piping bag fitted with a large round tip. (I used *Ateco tip 808)
  7. Pipe 1 1/4-inch mounds, about 2 inches apart, on prepared baking sheets. Smooth tops with a wet finger.
  8. Bake 15 minutes, then turn down the oven heat to 350ºF and continue baking until golden brown, about 8-10 more minutes. Using a toothpick or skewer, prick a small hole in each profiterole to allow steam to escape. Place on a wire rack to cool completely.
  9. Use the tip of a paring knife to make a pilot hole in the bottom of each profiterole.
  10. Place strawberries and cream filling into a piping bag fitted with a medium round piping tip. (I used **Wilton tip 12)
  11. Place tip into the pilot holes and fill each profiterole with filling.
Strawberry Icing
  1. In a medium bowl, whisk all icing ingredients together until smooth. Spoon over filled profiteroles. Refrigerate profiteroles until ready to serve.
Recipe Notes

*To find Ateco tip 808 click here.

**To find Wilton tip 12 click here.

Vintage Chocolate Cake

Dark Chocolate Cake with the Best Chocolate Frosting

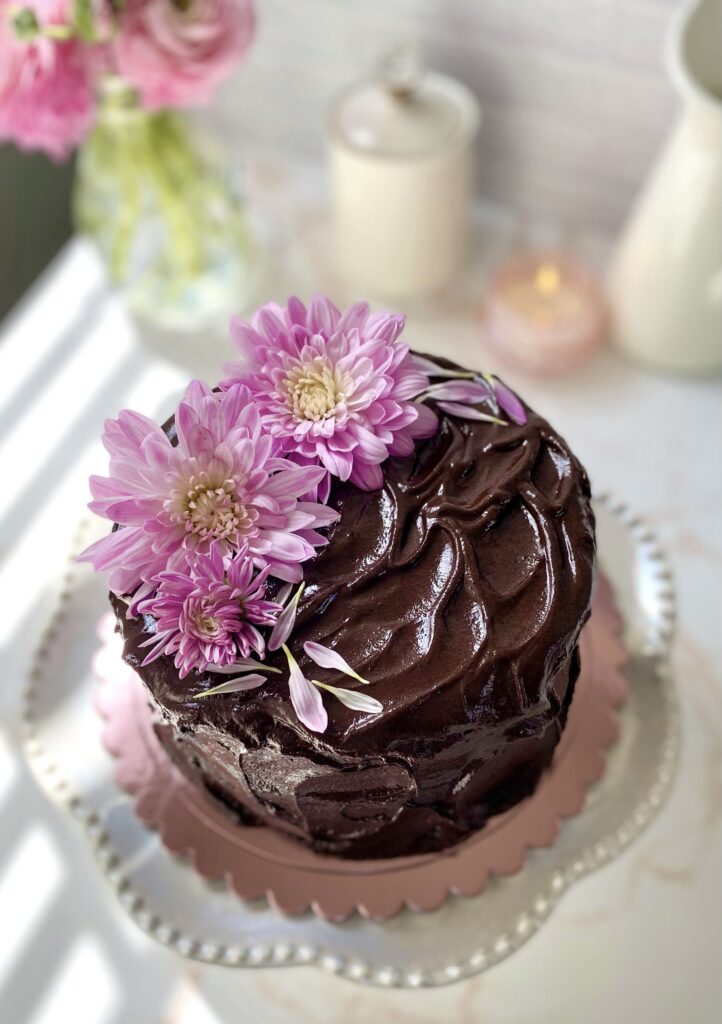
If you love chocolate cake, this is the post for you! Chocolate cake is one of the best comfort foods there is. I’ve tasted many over the years, but my all time favorite was one I had growing up. I’ve spent years trying to duplicate the moist, nostalgic cake from my childhood. I noticed that nearly every chocolate cake recipe on the internet is a variation of the century-old recipe from the Hershey’s Cocoa tin. I think many people have passed it down as a family recipe, each grandmother adding her own personal touch. Even some celebrity chefs have claimed it as their own. It’s an easy, delicious, moist recipe and its popularity is well deserved. You can tweak the flavor additions a bit to make it your own too. It’s a recipe that’s hard to mess up.

This cake is topped with the ultimate silky, smooth, deeply chocolate frosting. I developed this recipe mostly because I couldn’t find a chocolate frosting recipe that didn’t taste gritty and/or look speckled from the cocoa powder. Swiss meringue buttercream with melted chocolate added is one alternative. But, while it is smooth, silky and perfect for piping, it’s missing that deep chocolate richness. Another option is chocolate ganache. It looks rich and creamy in those viral videos, but it’s a little too rich and overpowering to use as frosting in my opinion.

I think this frosting is the one! It has the best of both worlds, velvety but not too rich. You’ll notice that this frosting contains maple syrup. The syrup gives it a very subtle maple flavor in the background, but mostly, it helps to make the frosting silky and gives it shine. You can adjust the sweetness level of the frosting by choosing the chocolate you prefer. I used bittersweet chocolate, which I think is just right. This recipe makes enough frosting to frost a 2-layer 6-inch cake. You can easily double the recipe for larger cakes.

Print Recipe
Vintage Chocolate Cake
Course Dessert
Keyword cake, chocolate
Servings
2 layer 6-inch cake
Ingredients
Chocolate Cake
Chocolate Buttercream Frosting
Course Dessert
Keyword cake, chocolate
Servings
2 layer 6-inch cake
Ingredients
Chocolate Cake
Chocolate Buttercream Frosting
Instructions
Chocolate Cake
  1. Preheat the oven to 350ºF (180ºC). Line the bottoms of two 6-inch cake pans with parchment paper. Grease the insides and dust with a mixture of equal parts flour and cocoa powder. Wrap the cake pans with damp cake strips if you have them.
  2. Sift the flour, cocoa powder, baking powder, baking soda and salt together in a medium bowl. Add the sugar and stir util well combined.
  3. Combine the the egg, egg yolk, buttermilk, vegetable oil and vanilla extract in a small bowl. Whisk lightly to combine.
  4. Add the egg mixture to the dry ingredients and mix on low speed with an electric mixer, until combined. Stop the mixer. Scrape the sides and the bottom of the bowl with a spatula. Turn the mixer up to medium speed and beat for 30 seconds.
  5. Add the hot coffee and stir until well combined.
  6. Pour the batter into the prepared cake pans, dividing batter evenly between the pans. Bake until a toothpick inserted into the center of the cakes comes out clean, about 25-28 minutes without cake strips or about 28-32 minutes with cake strips.
  7. Let the cakes cool in the pans for 10 minutes then remove the cakes from the pans and transfer to a cooling rack.
  8. Trim the cake layers to your desired thickness, from 1-inch to 1 1/2-inches thick. Fill and frost with chocolate buttercream frosting.
Chocolate Buttercream Frosting
  1. In a small saucepan over low heat, whisk together the maple syrup, water, cocoa powder and espresso powder until smooth. Set aside to cool to room temperature.
  2. Melt the chocolate in a medium bowl set over a pan of gently simmering water, making sure the water doesn't touch the bottom of the bowl. Remove from heat and set aside to cool to lukewarm.
  3. In a large bowl, beat the butter with an electric mixer at medium speed, until smooth and light in color. Add the powdered sugar and salt and continue beating until smooth and well combined.
  4. Gradually add the the cooled maple syrup mixture and beat on low speed until combined.
  5. Stir in the melted chocolate until well combined. Smooth out any air bubbles by stirring gently with a rubber spatula.
Recipe Notes

*For smoothest results, use chopped bar chocolate and make sure chocolate is completely melted.  Do not use chocolate chips. Chocolate chips do not melt completely and can make your frosting lumpy.


The Best Chocolate Buttercream Frosting

Dark Chocolate Cake with the Best Chocolate Frosting

If you’ve landed here from Instagram, welcome! You’ll notice that this is an ad-free website with no annoying pop-ups. I work very hard creating and testing delicious recipes to share with you. So if you like this recipe or any of my other popular recipes, make sure to follow me on Instagram and/or TikTok.

This is the ultimate silky, smooth, deeply chocolate frosting. I developed this recipe mostly because I couldn’t find a chocolate frosting recipe that didn’t taste gritty and/or look speckled from the cocoa powder. Swiss meringue buttercream with melted chocolate added is one alternative. But, while it is smooth, silky and perfect for piping, it’s missing that deep chocolate richness. Another option is chocolate ganache. It looks rich and creamy in those viral videos, but it’s a little too rich and overpowering to use as frosting in my opinion.

I think this frosting is the one! It has the best of both worlds, velvety but not too rich. You’ll notice that this frosting contains maple syrup. The syrup gives it a very subtle maple flavor in the background, but mostly, it helps to make the frosting silky and gives it shine. You can adjust the sweetness level of the frosting by choosing the chocolate you prefer. I used bittersweet chocolate, which I think is just right. This recipe makes enough frosting to frost a 2-layer 6-inch cake. You can easily double the recipe for larger cakes.

Print Recipe
The Best Chocolate Buttercream Frosting
Silky smooth chocolate frosting with an intense chocolate flavor
Course Dessert
Servings
servings
Ingredients
Course Dessert
Servings
servings
Ingredients
Instructions
  1. In a small saucepan over low heat, whisk together the maple syrup, water, cocoa powder, and espresso powder until smooth. Set aside to cool to room temperature.
  2. Melt the chocolate in a medium bowl set over a pan of barely simmering water, making sure the water doesn't touch the bottom of the bowl. Stir gently until smooth. Remove from heat and set aside to cool to lukewarm.
  3. In a large bowl, beat the butter with an electric mixer at medium speed, until smooth and light in color. Add the powdered sugar and salt and continue beating until smooth and well combined.
  4. Gradually add the cooled maple syrup mixture and beat on low speed until combined.
  5. Stir in the melted chocolate until well combined. Smooth out any air bubbles by stirring gently with a rubber spatula.
Recipe Notes

*To find my favorite Dutch process cocoa powder, click here.

**For the smoothest results, use chopped bar chocolate and make sure chocolate is completely melted.  Do not use chocolate chips. They contain an ingredient which prevents them from melting completely and may make your frosting lumpy.


Strawberry Sugar Hearts

strawberry sugar hearts
To watch the Strawberry Sugar Hearts video, click here.

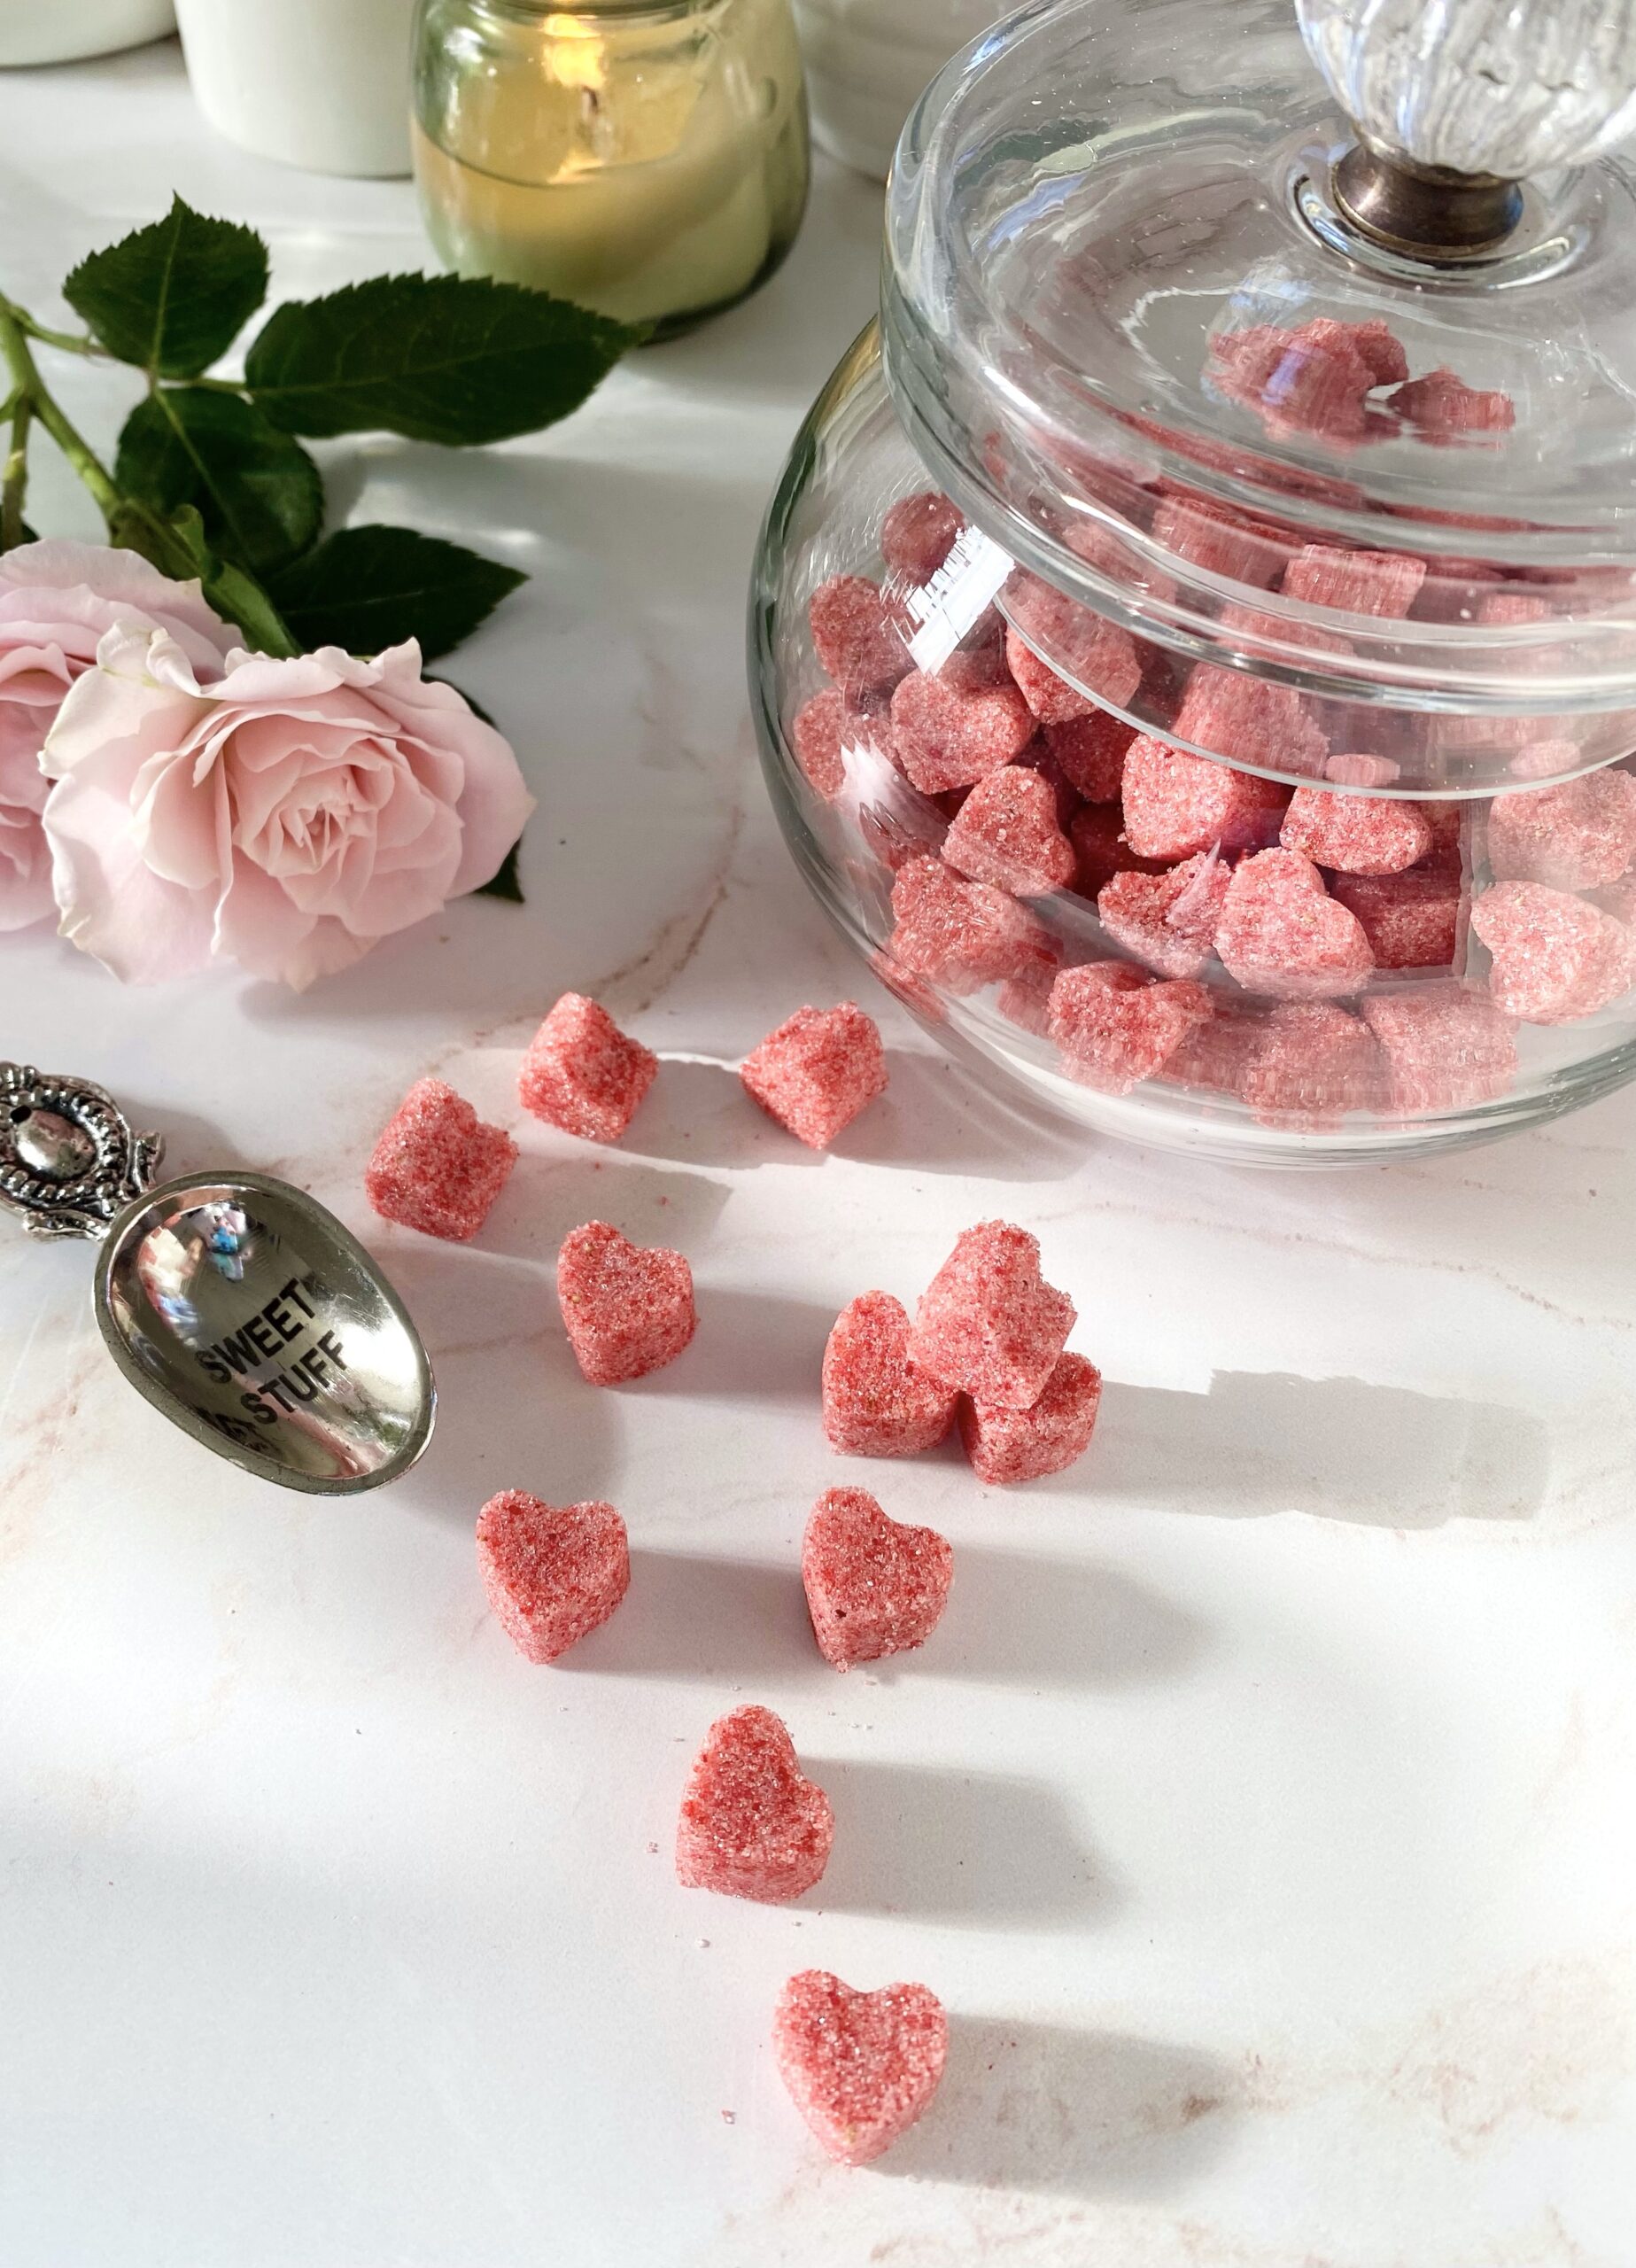
I’ve always been enamored by sugar cubes. You can’t help but feel fancy dropping a lump of sugar or two into your teacup. Flavored sugar formed into cute shapes is so fancy, I may faint. Someone please get the smelling salts! Pardon me while I google “what exactly are smelling salts?” In the mean time please enjoy these sweet, dainty, positively precious Strawberry Sugar Hearts. Pop them into tea, lattes, lemonade, cocktails or sparkling water.

These cuties are fragrant, delicious and easy to make. The most tedious part is filling the molds. Make sure to fill them completely and press firmly for the most defined shape. It’s also important to use enough water. Think of building a sand castle at the beach. You want enough water to dampen the sugar, but not turn it to slush. I live in a dry climate so I used 3 teaspoons, but you may need less depending on your climate.

Feel free to use the freeze dried fruit of your choice. Most grocery stores carry freeze dried fruit and you can always find it online. The most interesting one I saw was an apple-cherry combination. I might try that next!

Print Recipe
Strawberry Sugar Hearts
Servings
batch 1/2" sugar hearts
Servings
batch 1/2" sugar hearts
Instructions
  1. Process freeze-dried strawberries in a small food processor or a clean spice grinder until a powdered consistency is reached.
  2. Pass powdered strawberries through a sieve to strain out seeds.
  3. In a medium bowl, whisk together powdered strawberries and sugar.
  4. Add water, one teaspoon at a time, until the mixture is the consistency of wet sand. Climate will effect how much water is needed.
  5. Press mixture firmly into *silicone heart molds or any shape silicone molds of your choice. Brush off excess sugar.
  6. Let dry, uncovered, at least 24 hours.
  7. Remove sugar hearts from molds and store in a covered container
Recipe Notes

*To find the silicone heart molds I used, click here

Raspberry Sauce


Print Recipe


Raspberry Sauce

Course Dessert
Keyword raspberry, sauce

Servings
cup


Ingredients

Course Dessert
Keyword raspberry, sauce

Servings
cup


Ingredients


Instructions
  1. Purée raspberries with lemon juice in a blender or food processor. Pass purée through a fine mesh sieve* to remove seeds.

  2. In a small bowl, whisk together water and cornstarch.**

  3. In a small saucepan, heat raspberry purée with sugar and cornstarch slurry to a boil over medium heat. Turn heat down to low and simmer until slightly thickened, about 2-3 minutes.


Recipe Notes

*To find a fine mesh sieve, click here.

**To find a mini whisk for whisking small amounts, click here.

Strawberries & Cream Tarts

Strawberries & Cream Tarts

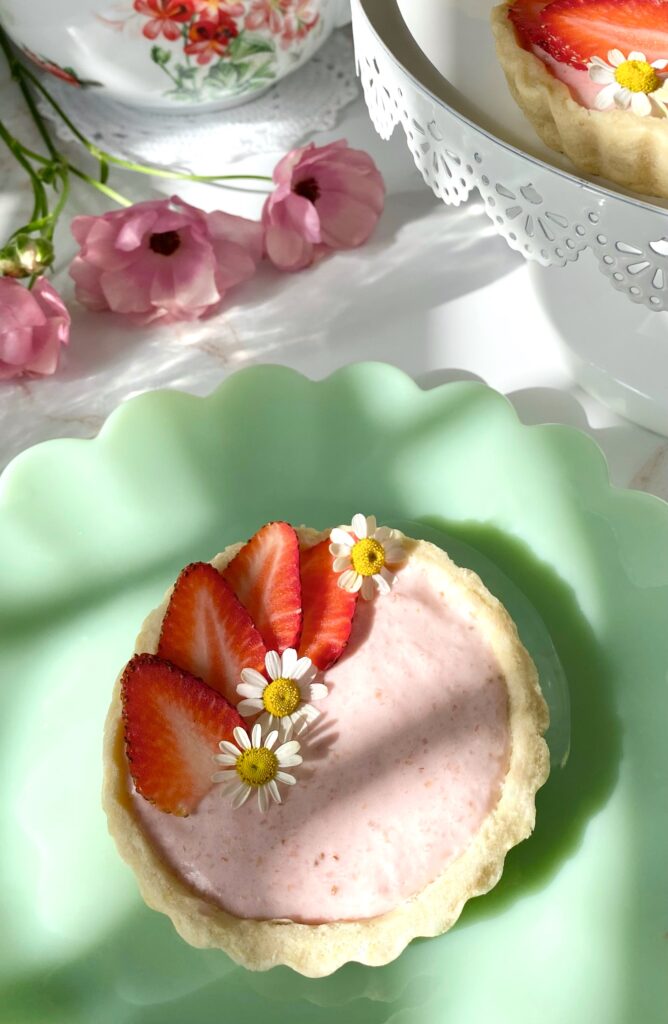
May is when I get to pull out all of my summery recipes. These pretty little Strawberries & Cream Tarts remind me of a summer day. The kind of day when you’re outside enjoying the sunshine and you’re craving a cool, refreshing dessert. This strawberry cream filling alone is so delicious that I could just eat the entire bowl with a spoon. But since I’m extra, I had to create an aesthetic dessert with it.

I used my favorite tart shells for this recipe, but this would also be delicious with those little pre-made graham cracker pie crusts if you want to take a shortcut. The reason I love this tart crust recipe so much though, is that it actually tastes delicious. Once, a few years ago, I purchased a beautiful, small fruit tart from a famous bakery. The fruit was vibrant and glistening and the pastry cream filling was sweet and silky. Now we need the sound of a mic drop, because the tart crust was hard and flavorless, like cardboard! Ever since then, I knew I would settle for nothing less than a delicious tart crust.

Print Recipe
Strawberries & Cream Tarts
Course Dessert
Keyword strawberry, tarts
Servings
4-inch tarts
Ingredients
Tart Crust
Strawberry Cream Filling
Course Dessert
Keyword strawberry, tarts
Servings
4-inch tarts
Ingredients
Tart Crust
Strawberry Cream Filling
Instructions
Tart Crust
  1. In a bowl, whisk together flour, powdered sugar and salt. Set aside.
  2. Work in butter and egg yolk with a pastry blender or with your fingers, until pea size pieces are formed.
  3. Add ice water, one tablespoon at a time, until dough comes together.
  4. Form dough into a disc. Wrap in plastic and refrigerate for one hour.
  5. On a lightly floured surface, roll dough to a scant 1/4-inch thickness
  6. Cut dough into six 5-inch rounds. Press rounds into six 4-inch or 4 1/4-inch tart pans.*
  7. Dock the bottoms of pie crusts with a fork. Freeze for 30 minutes.
  8. Heat oven to 375ºF. Place tart pans on a large baking sheet.
  9. Line tart shells with six 6-inch parchment rounds. Fill with pie weights. (You can use dried beans or rice if you don't have pie weights.)
  10. Bake tart shells for 12 minutes. Remove parchment paper and pie weights. Continue baking until tart shells are light golden brown, about 4-6 more minutes.
  11. Transfer to cooling rack to cool completely.
Strawberry Cream Filling
  1. Pass the strawberry purée through a mesh sieve to remove large seeds.
  2. In a medium saucepan, simmer the strawberry purée until it's reduced by half. Stir in the sugar and continue cooking over medium heat, until the sugar is dissolved. Transfer to a medium bowl.
  3. Meanwhile, place 3 tablespoons of water into a small bowl. Sprinkle gelatin powder over the top of water. Let sit until water is absorbed, about 5 minutes.
  4. Pour the gelatin mixture into the warm strawberry reduction mixture and stir until fully incorporated.
  5. In a large bowl, beat cream cheese on low speed with an electric mixer until smooth.
  6. Add extracts and beat until combined.
  7. Add the strawberry reduction mixture to the cream cheese a little at time. Beat until well combined.
  8. In a medium bowl, beat heavy whipping cream with an electric mixer at high speed until stiff peaks form.
  9. Fold whipped cream into strawberry mixture.
  10. Spoon into cooled tart shells. Smooth tops with a small offset spatula. Refrigerate for two hours. Garnish with sliced, fresh strawberries.
Recipe Notes

*To find the tart pans I used, click here.

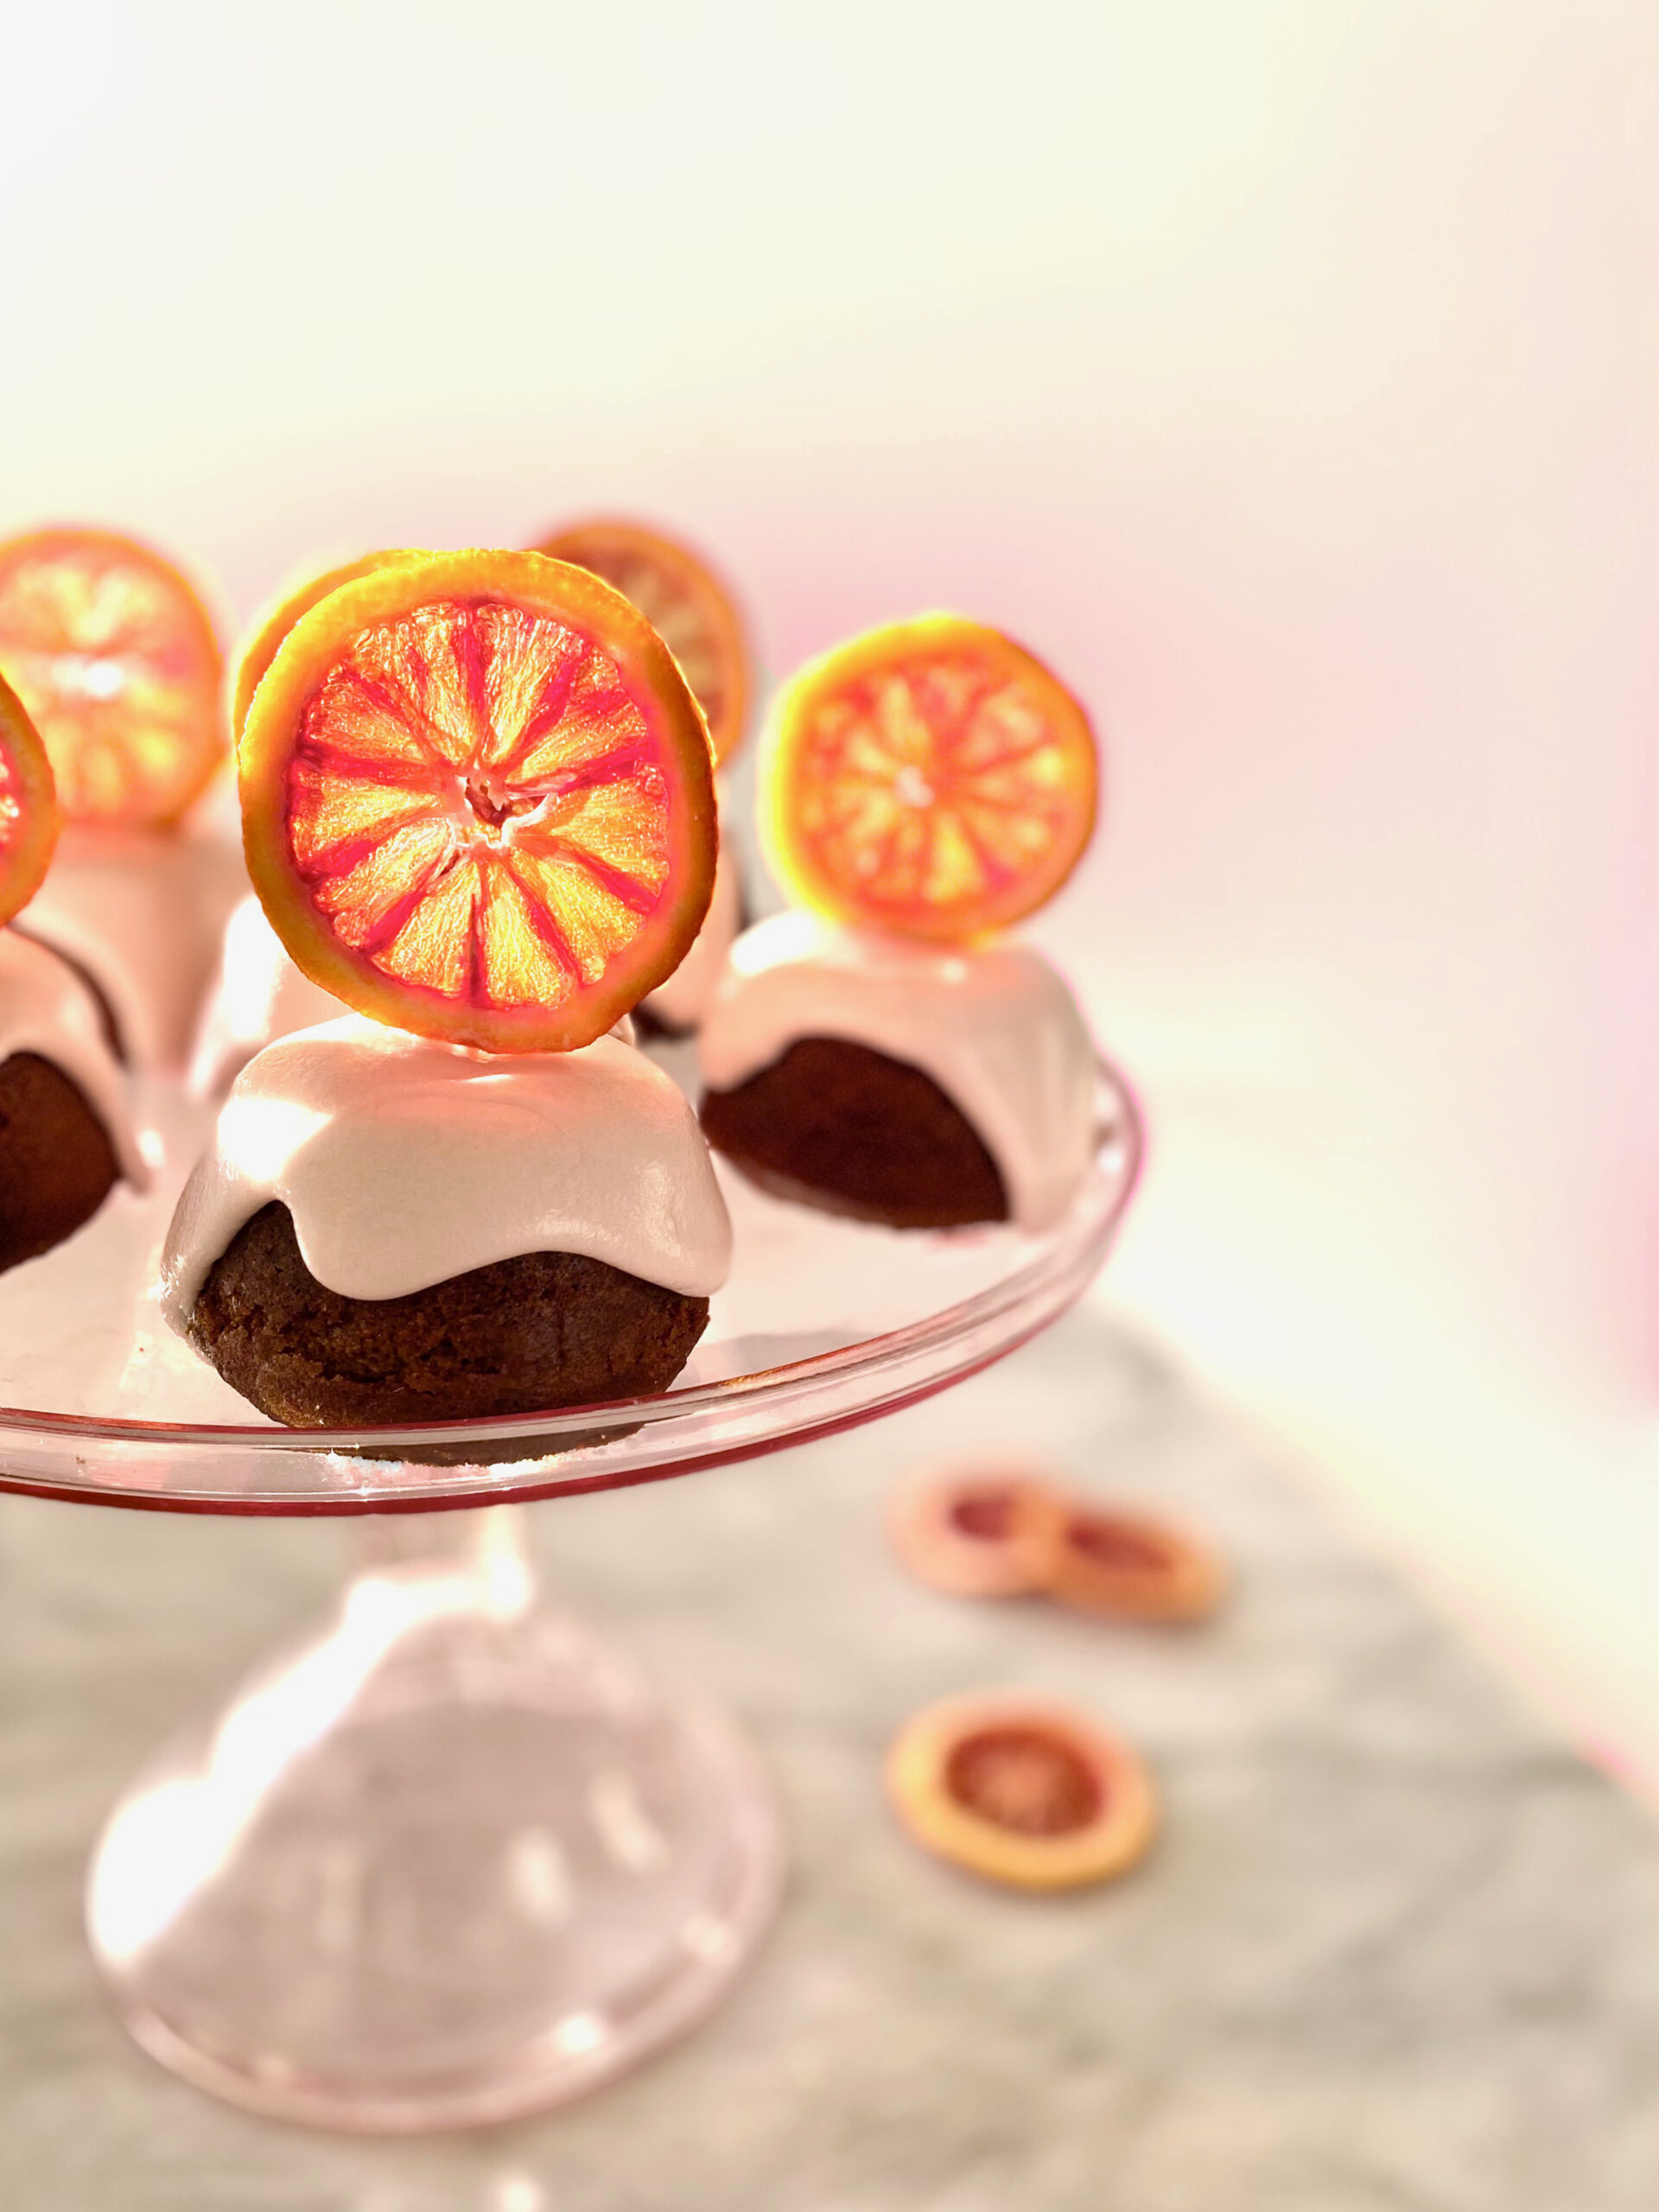
Gingerbread Cupcakes with Blood Orange Cream Cheese Icing and Candied Blood Orange Slices

Gingerbread Cupcakes with Blood Orange Cream Cheese Icing and Candied Blood Oranges

Every winter, when blood oranges come back in season, I start keeping an eye out for them at grocery stores and farmers markets. This year was different. I’ve been at home, having my groceries delivered instead of perusing the local produce aisles. If you’ve been entrusting strangers to do your shopping like I have, then you know delivery produce selections are hit and miss. So I was elated when a bag of perfectly beautiful, ripe blood oranges landed on my doorstep. This simple joy made my day. There was no choice. I had to make something worthy of the gorgeous red beauties!

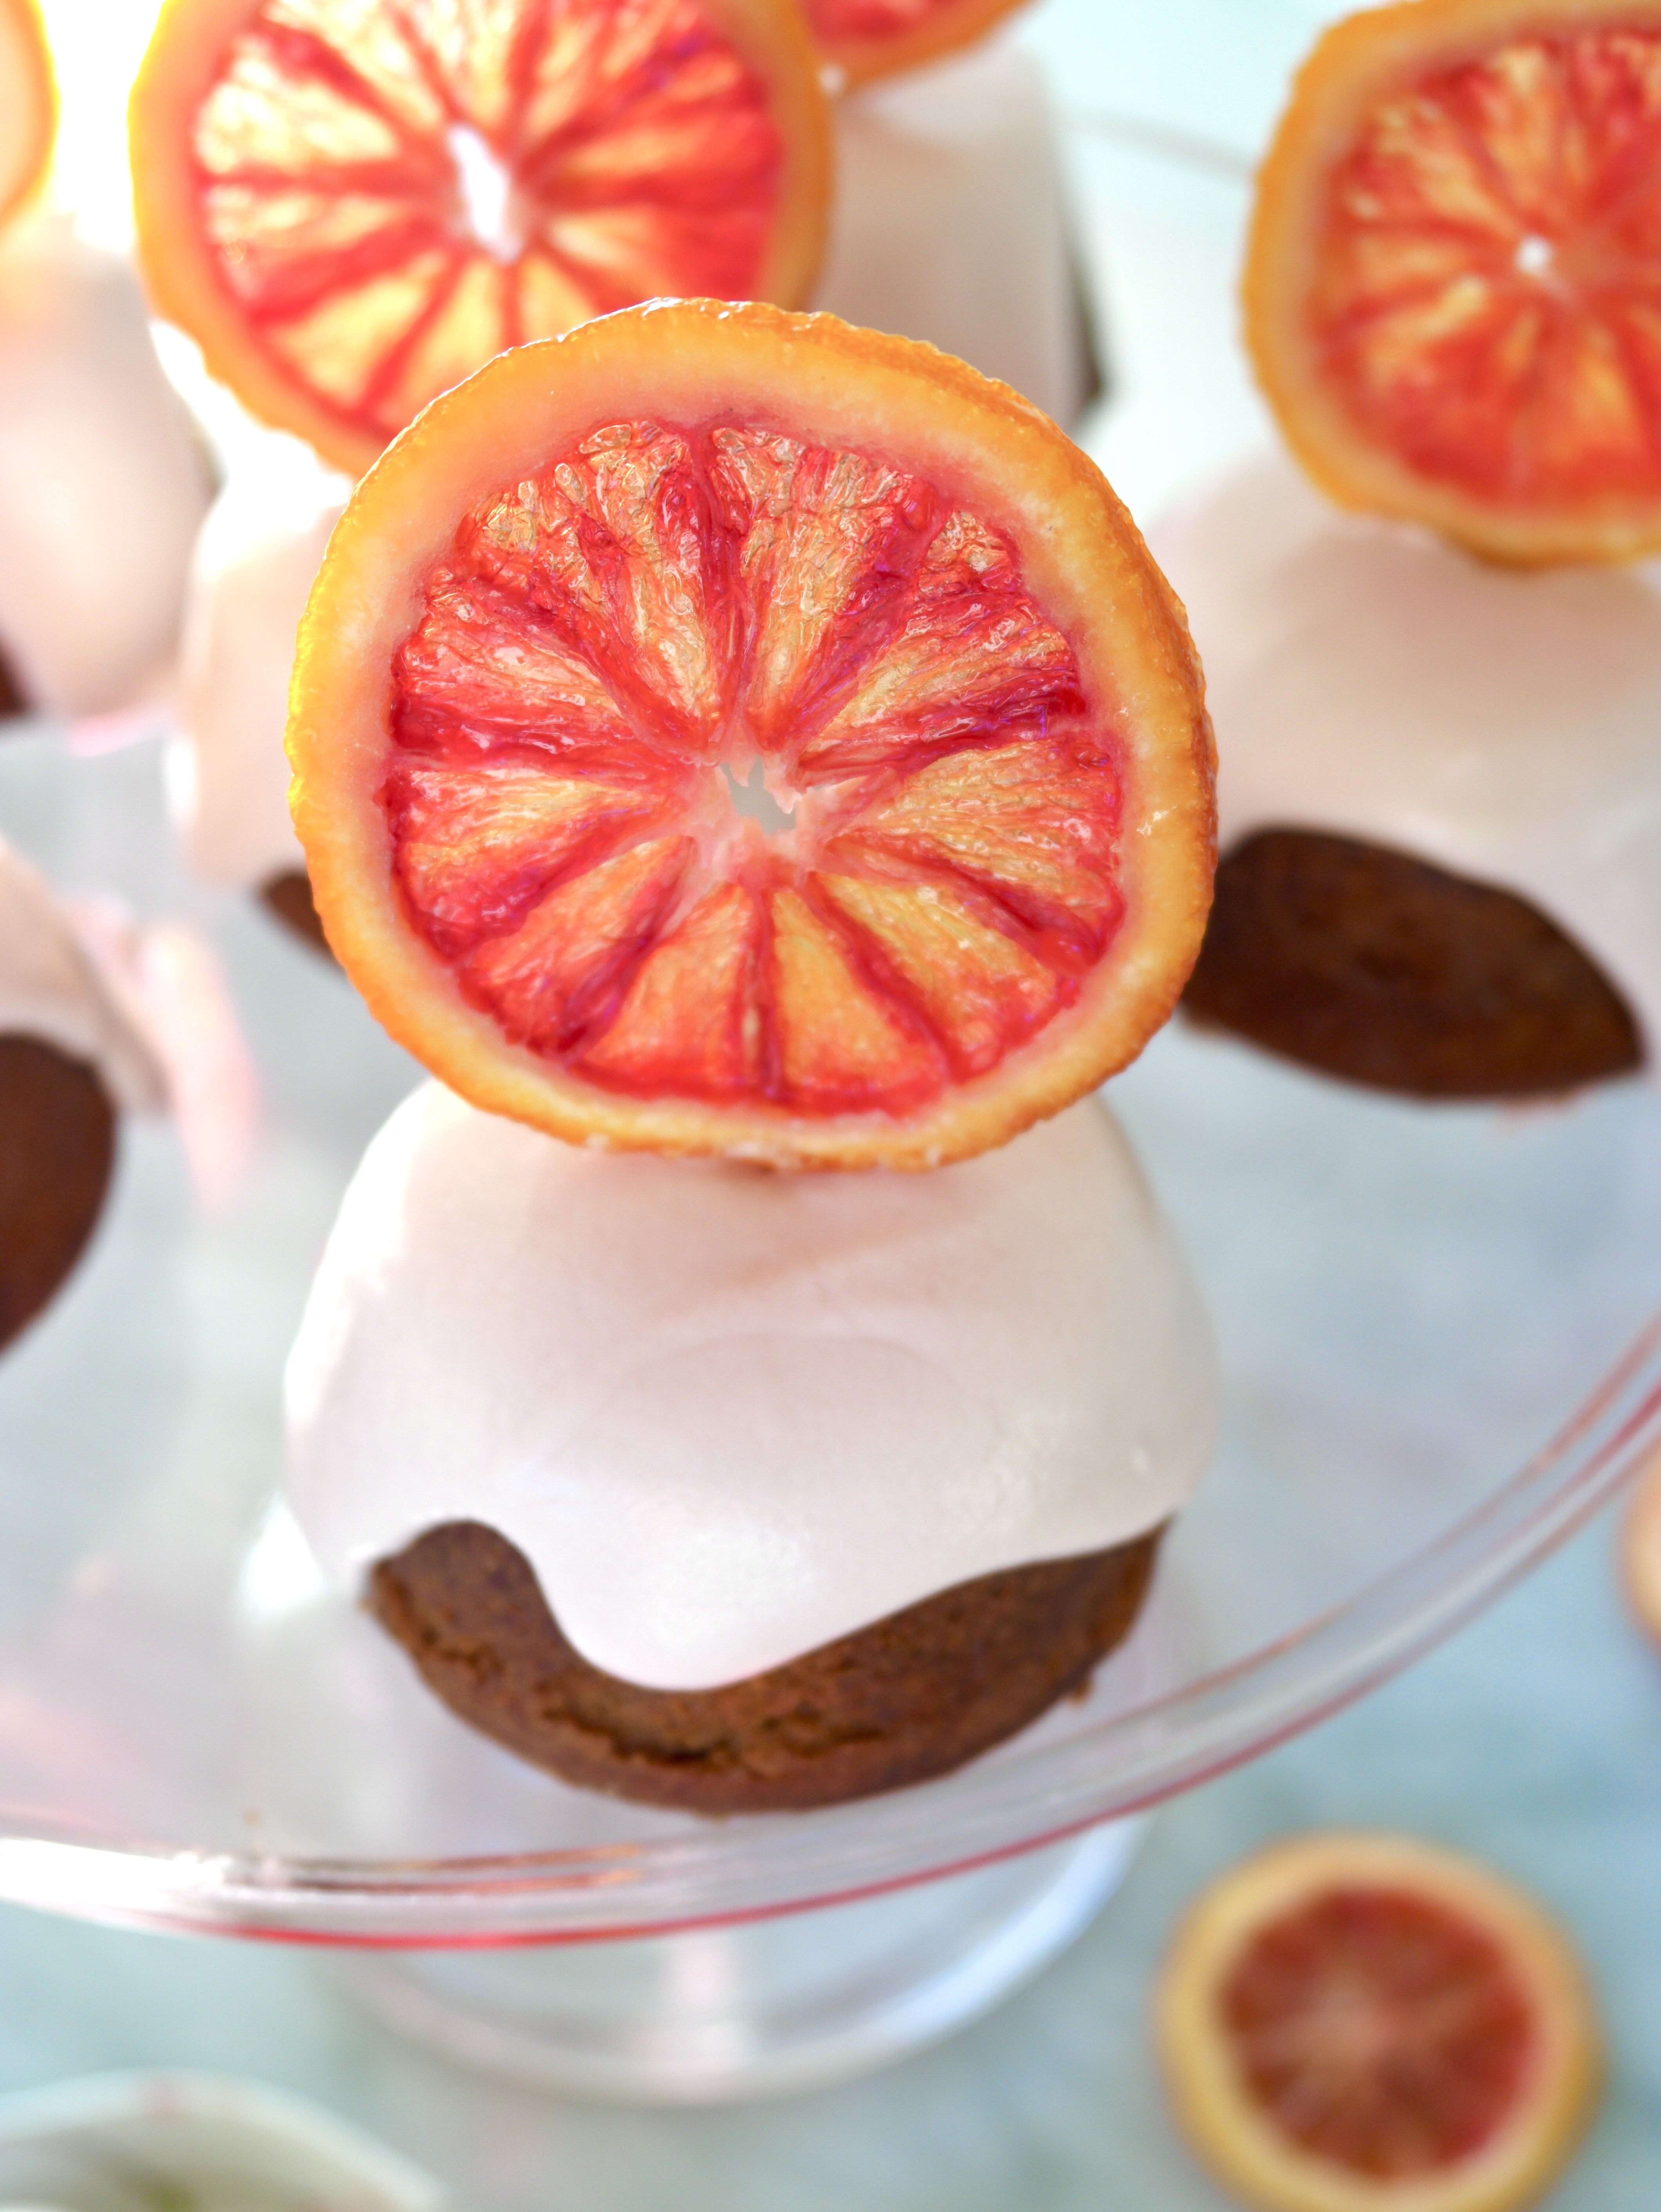
I didn’t get enough of gingerbread this holiday season, so I decided to make a gingerbread cupcake recipe that I created a few years ago when I was experimenting with blood oranges. I used blood orange zest in the cupcake batter and brushed the warm cupcakes with the blood orange syrup left over from making the candied oranges. If you don’t make the candied oranges, you can easily make a batch of the syrup* or skip this step altogether. They will still be delicious. I topped the cupcakes with cream cheese icing made with more orange zest and some blood orange juice mixed in. The juice makes the icing turns a soft shade of pink.

Gingerbread Cupcakes with Blood Orange Cream Cheese Icing and Candied Blood Oranges

Candied blood orange slices are so stunning, that I can’t bring myself to just lay them on top of a dessert. They remind me of stained glass windows. I like to place them on toothpicks so they can stand up in regal style! Many recipes out there will instruct you to boil the orange slices, then let them air dry. This is perfectly fine if you don’t mind floppy candied oranges. For this recipe, boiling the slices, then letting them dry in the oven on low heat will give them enough stiffness to stand up.

If you can’t find blood oranges where you live, here’s a link to get blood oranges shipped to you. This recipe will also work with other types of oranges. You won’t get the deep scarlet color and the flavor will have a bit more tartness, but it will still be beautiful and delicious!

Print Recipe
Gingerbread Cupcakes with Blood Orange Cream Cheese Icing
Servings
12-14 cupcakes
Ingredients
Gingerbread Cupcakes
Blood Orange Cream Cheese Icing
Candied Blood Orange Slices
Servings
12-14 cupcakes
Ingredients
Gingerbread Cupcakes
Blood Orange Cream Cheese Icing
Candied Blood Orange Slices
Instructions
Gingerbread Cupcakes
  1. Preheat oven to 350º. Spray the wells of a muffin tin with non-stick spray.
  2. In a medium bowl, whisk together flour, cinnamon, ginger, allspice, baking soda and salt. Set aside.
  3. In a large bowl, beat butter with an electric mixer at medium speed, until smooth.
  4. Add brown sugar and orange zest and beat until light and fluffy.
  5. Add molasses and beat until combined.
  6. Add eggs one at a time and beat until combined.
  7. Mix in dry ingredients in two additions, alternating with buttermilk. Beat just until combined.
  8. Scoop the batter into prepared muffin tin, filling wells 2/3 full. (If you have any remaining batter, prepare an additional muffin tin.)
  9. Bake for 15-18 minutes until toothpick inserted in center of cupcake comes out clean.
  10. Allow to cool in pan 10 minutes, then remove cupcakes from pan.
  11. Place cupcakes upside down on cooling rack and brush generously with orange simple syrup. Allow cupcakes to cool completely before frosting.
Blood Orange Cream Cheese Icing
  1. In a large bowl, beat cream cheese at medium speed, until smooth.
  2. Add butter, orange zest and salt and beat until combined.
  3. Add powdered sugar. Beat at low speed until powdered sugar is incorporated. Increase speed to medium and beat until smooth.
  4. Add blood orange juice and beat, one tablespoon at a time until desired consistency is reached.
Candied Blood Orange Slices
  1. Slice oranges into thin 1/4 inch slices.
  2. Combine sugar and water in a shallow saucepan and bring to a simmer.
  3. Add orange slices to saucepan. Simmer for 10 minutes.
  4. Drain oranges, reserving syrup.
  5. Heat oven to 175ºF. Place on a large baking sheet lined with a baking mat in a single layer and bake until orange slices begin to stiffen, about 2 hours.
  6. Remove from oven and let cool on baking sheet. If desired, insert toothpicks when slices are cool enough to handle. The slices will continue to stiffen as they cool.
Recipe Notes

*To make orange simple syrup,  combine the juice of one orange with enough water to make 1/2 cup. Combine mixture with the zest of one orange and 1/2 cup sugar in a small saucepan over medium heat. Stir until sugar is dissolved. Let cool and transfer to a glass container. Refrigerate until ready to use.