Wild Blueberry & Maple Breakfast Cake

Wild Blueberry & Maple Breakfast Cake

My personal eating philosophy is to eat everything in moderation. As you may know, I love enjoying desserts on occasion, but in my daily life I try to eat a variety of foods, mostly plants. One of my favorite plant foods, which happen to be loaded with antioxidants, are blueberries. Wild blueberries are especially rich in antioxidants. Wild blueberry season is during the summer, but luckily the frozen ones are available year around. I can happily eat a handful of blueberries, but it’s so much fun to make blueberry recipes too! I reached for my bag of frozen wild blueberries to make this subtly sweet breakfast cake. It reminds me of blueberry muffins or fluffy blueberry pancakes. For this recipe, I topped the cake with whipped cream and homemade Blueberry Maple Syrup, which is perfect for a weekend breakfast or brunch. For a more simple, cozy breakfast, try this cake served warm with butter and maple syrup. So delicious and comforting!

Wild Blueberry & Maple Breakfast Cake

Subtly sweet, rustic wild blueberry and maple cake, topped with whipped cream and homemade blueberry maple syrup by Brownie Mischief
Course Breakfast, Brunch, Dessert
Servings 9

Ingredients
  

Cake

  • 1 â…” cups (212g) all purpose flour, sifted
  • 1 ¾ teaspoons baking powder
  • ½ teaspoon fine sea salt
  • ½ teaspoon cinnamon
  • ¼ teaspoon ground nutmeg
  • ½ cup (113g) unsalted butter, softened
  • ¾ cup (150g) packed brown sugar
  • ¼ cup (50g) granulated sugar
  • 2 large eggs, room temperature
  • 2 teaspoons pure maple extract or natural maple flavoring
  • ½ cup (118ml) whole milk, room temperature
  • â…“ cup (75g) sour cream, room temperature
  • 1 cup (142g) wild blueberries, fresh or frozen See note below*

Blueberry Maple Syrup

  • 1 cup (142g) wild blueberries, fresh or frozen
  • ¼ cup (60ml) real maple syrup
  • 1 pinch fine sea salt
  • â…“ cup (78ml) plus 1 tablespoon (15ml) water, divided
  • 2 teaspoons cornstarch

Sweetened Whipped Cream

  • ¾ cup (177ml) cold heavy whipping cream
  • 2 tablespoons (15g) powdered sugar, sifted
  • ¼ teaspoon pure vanilla extract

Instructions
 

Cake

  • Preheat the oven to 350ºF (180ºC). Line the bottom of an 8-inch square cake pan with parchment paper. Grease and flour the insides.
  • In a medium-sized bowl, whisk together the flour, baking powder, salt, cinnamon and nutmeg until well blended.
  • In a large bowl, beat the butter, brown sugar and granulated sugar together, with an electric mixer on medium speed, until pale and fluffy. Beat in the eggs and maple extract in three additions, making sure each one is incorporated before adding the next.
  • In a small bowl, whisk together the milk and sour cream until well blended. Stir the flour mixture into the batter by hand, in two additions, followed by half of the milk mixture after each addition. Mix just until combined. Do not over mix. Gently stir in the blueberries.
  • Transfer the batter to the prepared cake pan. Smooth the top with a spatula. Bake until a toothpick inserted into the center comes out clean, about 25-30 minutes. Do not over bake. Let the cake cool in the pan for 10 minutes, then remove the cake from the pan and transfer it to a cooling rack. Serve warm or at room temperature.

Blueberry Maple Syrup

  • In a small saucepan over medium heat, cook the blueberries, maple syrup, salt and 1/3 cup (78ml) of water until the blueberries are softened, about 3-4 minutes. In a small bowl, create a slurry by whisking together the cornstarch with the remaining 1 tablespoon (15ml) of water. Stir the slurry into the blueberry mixture. Continue cooking and stirring until thickened, about 1-2 more minutes. Remove from heat and set aside to cool.

Sweetened Whipped Cream

  • In a large bowl, whip the heavy whipping cream, with an electric mixer at medium speed, until frothy. Add the powdered sugar and vanilla. Continue whipping, at medium-high speed, until medium peaks form. Do not over whip. Cover and refrigerate until ready to use.

Notes

*If you're using frozen blueberries, there's no need to defrost them first. Just gently pat them dry with paper towels before adding them to your batter. If your blueberries are very icy, rinse them with cold water, then gently pat them dry with paper towels.
Keyword blueberry, cake

Chocolate Chip Strawberry Shortcakes

Chocolate Chip Strawberry Shortcakes

Did you know that classic strawberry shortcakes have a tender biscuit-like texture? If you like vintage-style strawberry shortcake, you’ll love my grandma’s Chocolate Chip Strawberry Shortcakes. The addition of chocolate chips makes them extra delicious! Top them with a cloud of fresh homemade whipped cream and you’ll have the most delightful dessert to share with family and friends. They’re perfect for a spring or summer brunch and they make a delightful, refreshing dessert.


Chocolate Chip Strawberry Shortcakes

by Mari Vasseur
Soft, tender chocolate chip shortcakes topped with fresh sweetened strawberries and homemade whipped cream.
Course Breakfast, Brunch, Dessert
Cuisine American
Servings 6 shortcakes

Ingredients
  

Macerated Strawberries

  • 4 cups (567g) strawberries, hulled and sliced
  • ¼ cup (50g) granulated sugar

Chocolate Chip Shortcakes

  • 1 ¾ cups (223g) all purpose flour, sifted
  • 3 tablespoons (38g) granulated sugar
  • 1 tablespoon baking powder
  • ½ teaspoon fine sea salt
  • 6 tablespoons (85g) cold, unsalted butter, cubed
  • ¾ cup (177ml) cold buttermilk
  • 1 teaspoon pure vanilla extract
  • ½ cup (85g) mini semisweet chocolate chips
  • Heavy cream or buttermilk for the tops of the shortcakes
  • Coarse sugar for the tops of the shortcakes

Whipped Cream

  • 1 cup (237ml) cold heavy whipping cream
  • ½ teaspoon pure vanilla extract
  • 2 tablespoons (15g) powdered sugar

Instructions
 

Macerated Strawberries

  • In a medium-sized bowl, stir the strawberries and sugar together. Cover and refrigerate at least 30 minutes or up to a few hours.

Chocolate Chip Shortcakes

  • Preheat the oven to 375°F (190°C). Line a baking sheet with parchment paper.
  • In a large bowl, whisk the flour, sugar, baking powder and salt together until well blended. Work the butter into the flour mixture with a pastry blender or with your fingertips until small pea-size pieces are formed. Stir in the mini chocolate chips.
  • In a small bowl, whisk the buttermilk and vanilla extract together. Stir this mixture into the dry ingredients just until a shaggy dough forms.
  • Turn the dough out into a lightly floured surface. Fold the dough over into itself a few times. Do not overwork the dough. Form the dough into a 1-inch thick, 6-inch diameter round. Cut out 6 rounds with a 2 3/4-inch floured biscuit cutter. Place them about 1 inch apart on the baking sheet. (It’s important to keep the dough cold. If your kitchen is warm, freeze the rounds for 5-10 min. before baking.)
  • Brush the shortcakes with heavy cream & sprinkle with coarse sugar. Bake until golden, about 17-22 minutes. Immediately transfer the shortcakes to a cooling rack. Split the cooled shortcakes and top with strawberries and whipped cream.

Whipped Cream

  • In a large bowl, mix the heavy cream and vanilla, with an electric mixer on low speed. Sift the powdered sugar into the heavy cream and mix until combined. Turn the speed up to medium-high and beat until medium peaks form. Refrigerate until ready to use.
Keyword chocolate chip, shortcakes, strawberry

Chocolate Biscoff® Cake

If you’re craving a rich, gooey piece of chocolate cake that’s so good you can’t stop eating it until you stuff yourself into a food coma, then this is the cake for you. The soft, moist chocolate cake is topped with a light silky Biscoff® mousse that’s so good, you may be tempted to eat it with a spoon straight out of the bowl. You can drizzle on the chocolate glaze or be like me and go all in by spreading the glaze all over the top. If you’re a true cookie butter fan, feel free to top your cake with more drizzles of Biscoff® and some Biscoff® cookies for crunch.


Chocolate Biscoff® Cake

Soft, moist single layer chocolate cake topped with light, silky Biscoff® mousse and rich chocolate glaze by Brownie Mischief
Course Dessert
Servings 9

Ingredients
  

Chocolate Cake

  • 1 cup (128g) all purpose flour, sifted
  • ½ cup (45g) Dutch process unsweetened cocoa powder, sifted
  • 2 tablespoons (20g) corn starch
  • 1 teaspoon baking powder
  • ½ teaspoon baking soda
  • ½ teaspoon fine sea salt
  • 1 cup (200g) granulated sugar
  • â…“ cup (66g) packed brown sugar
  • â…“ cup (74ml) vegetable oil or neutral oil of your choice
  • 1 large egg
  • 1 large egg yolk
  • 1 teaspoon pure vanilla extract
  • â…” cup (150g) sour cream
  • â…” cup (156ml) hot coffee or espresso

Biscoff® Mousse

  • ½ cup (148g) Biscoff® creamy cookie butter spread
  • 2 tablespoons (28g) cream cheese, softened
  • ¾ cup (177ml) cold heavy whipping cream

Chocolate Glaze

  • 3 ounces (85g) semisweet chocolate, chopped
  • 4 ½ tablespoons (63g) unsalted butter, cubed
  • 1 ½ teaspoons corn syrup

Garnishes

  • Extra Biscoff® creamy cookie butter spread, melted slightly optional
  • 9 Biscoff® cookies optional

Instructions
 

Chocolate Cake

  • Preheat the oven to 350ºF (180ºC). Line a 9-inch square baking pan with parchment paper, leaving a couple of inches of overhang. (If you would like to serve the cake directly out of the pan, skip the parchment paper and grease the inside of the pan, then sprinkle with a mixture of equal parts flour and cocoa powder. Tap out the excess.)
  • In large bowl, whisk the flour, cocoa powder, cornstarch, baking powder, baking soda and salt together until well blended. Stir in the granulated sugar and brown sugar.
  • In a medium-sized bowl, whisk together the oil, egg, egg yolk, vanilla extract and sour cream until smooth and well blended. Add this mixture to the dry ingredients and beat, with an electric mixer at medium speed, until combined. Gradually mix in the hot coffee and and beat until the batter is smooth.
  • Transfer the batter to the baking pan. Bake until a toothpick inserted into the center of the cake comes out mostly clean or with a few moist crumbs attached, about 18-25 minutes. Cool the cake in the pan for 15 minutes, then remove the cake and transfer it to a cooling rack.

Biscoff® Mousse

  • In a medium-sized bowl, beat the Biscoff® and cream cheese together until well blended. Do not over beat. Gradually beat in the heavy cream, stopping to scrape the sides of the bowl. Continue beating until the mixture is smooth, fluffy and reaches medium peaks, being careful not to over beat.

Chocolate Glaze

  • Melt the chocolate and butter together in a heat-safe bowl set over a pan of barely simmering water, making sure the water doesn't touch the bottom of the bowl. Stir occasionally until melted and smooth. Remove from heat and set aside to cool slightly.

Assembly

  • Spread the Biscoff® mousse over the top of the cake. Chill in the refrigerator for 20 minutes to set up the mousse. Meanwhile prepare the chocolate glaze. Spoon or drizzle the chocolate glaze over the top of the cake. Drizzle on melted cooke butter and add Biscoff® cookies if desired.
Keyword Biscoff®, cake, chocolate

Caramel Latte Brownies

These rich, fudgy, coffee scented brownies, with caramel and whipped cream topping are inspired by one of my favorite coffee shop drinks, a caramel latte. I was thinking about how to get the caramel inside the brownies. With some methods, the caramel ends up over baked and chewy. Then I remembered poke cakes from my childhood. You poke holes all over a baked cake and pour whatever you like on top to soak into the holes. It worked beautifully with these brownies. To finish them off, I topped them with fluffy cream cheese whipped cream and a drizzle of caramel.

Caramel Latte Brownies

Rich, moist coffee scented brownies soaked with caramel, topped with fluffy cream cheese whipped cream and drizzled with more caramel.
Course Dessert
Servings 9

Ingredients
  

  • ¾ cup (6 oz or 170g) unsalted butter, cubed
  • 6 oz (170g) bittersweet chocolate (70-72%), finely chopped
  • 2 tablespoons unsweetened cocoa powder, preferably Dutch process or dark
  • 2 tablespoons hot water
  • 1 tablespoon espresso powder
  • 1 ½ cups (10 1/2 oz or 300g) sugar
  • ½ teaspoon fine sea salt
  • 3 large eggs
  • 1 large egg yolk
  • 1 ½ teaspoons pure vanilla extract, divided
  • 1 cup (4 1/2 oz or 128g) all purpose flour, sifted
  • â…“ cup (3 5/8 oz or 107ml) caramel sauce, purchased or homemade
  • 3 oz (85g) cream cheese, softened
  • 6 tablespoons (1 1/2 oz or 46g) powdered sugar, sifted
  • ¾ cup (6 oz or 177ml) cold heavy whipping cream

Instructions
 

  • Preheat your oven to 325ºF. Line an 8-inch square baking pan with parchment paper, leaving a couple of inches of overhang.
  • In a large heat safe bowl, melt the butter together with the chocolate, in the microwave or on the stovetop over a pan of barely simmering water. Stir until smooth.
  • In a small bowl, whisk together the cocoa powder, hot water and espresso powder until smooth.
  • Whisk the cocoa powder mixture, sugar and salt into the warm melted chocolate mixture until well combined.
  • Add the eggs, egg yolk and 1 teaspoon of vanilla to the chocolate mixture and whisk until smooth.
  • Stir in the flour just until combined, scraping the bottom of the bowl as needed.
  • Transfer the batter to the prepared baking pan. Bake until a toothpick inserted into the center of the brownies comes out with moist crumbs on it, about 25-28 minutes. Do not over bake. Let cool completely.
  • Once cool, remove the brownies from the pan and place on a serving platter. Using a chopstick, poke holes in the brownies, about 1 inch apart, to within 1 inch from the edges.
  • Spread caramel sauce over the surface of the brownies with a small offset spatula.
  • In a large bowl, beat the cream cheese, powdered sugar and 1/2 teaspoon of vanilla, with an electric mixer, until smooth. Gradually add the heavy cream and beat to stiff peaks.
  • Spread or pipe the whipped cream onto the brownies. Drizzle with additional caramel sauce.
Keyword brownies, caramel latte, chocolate

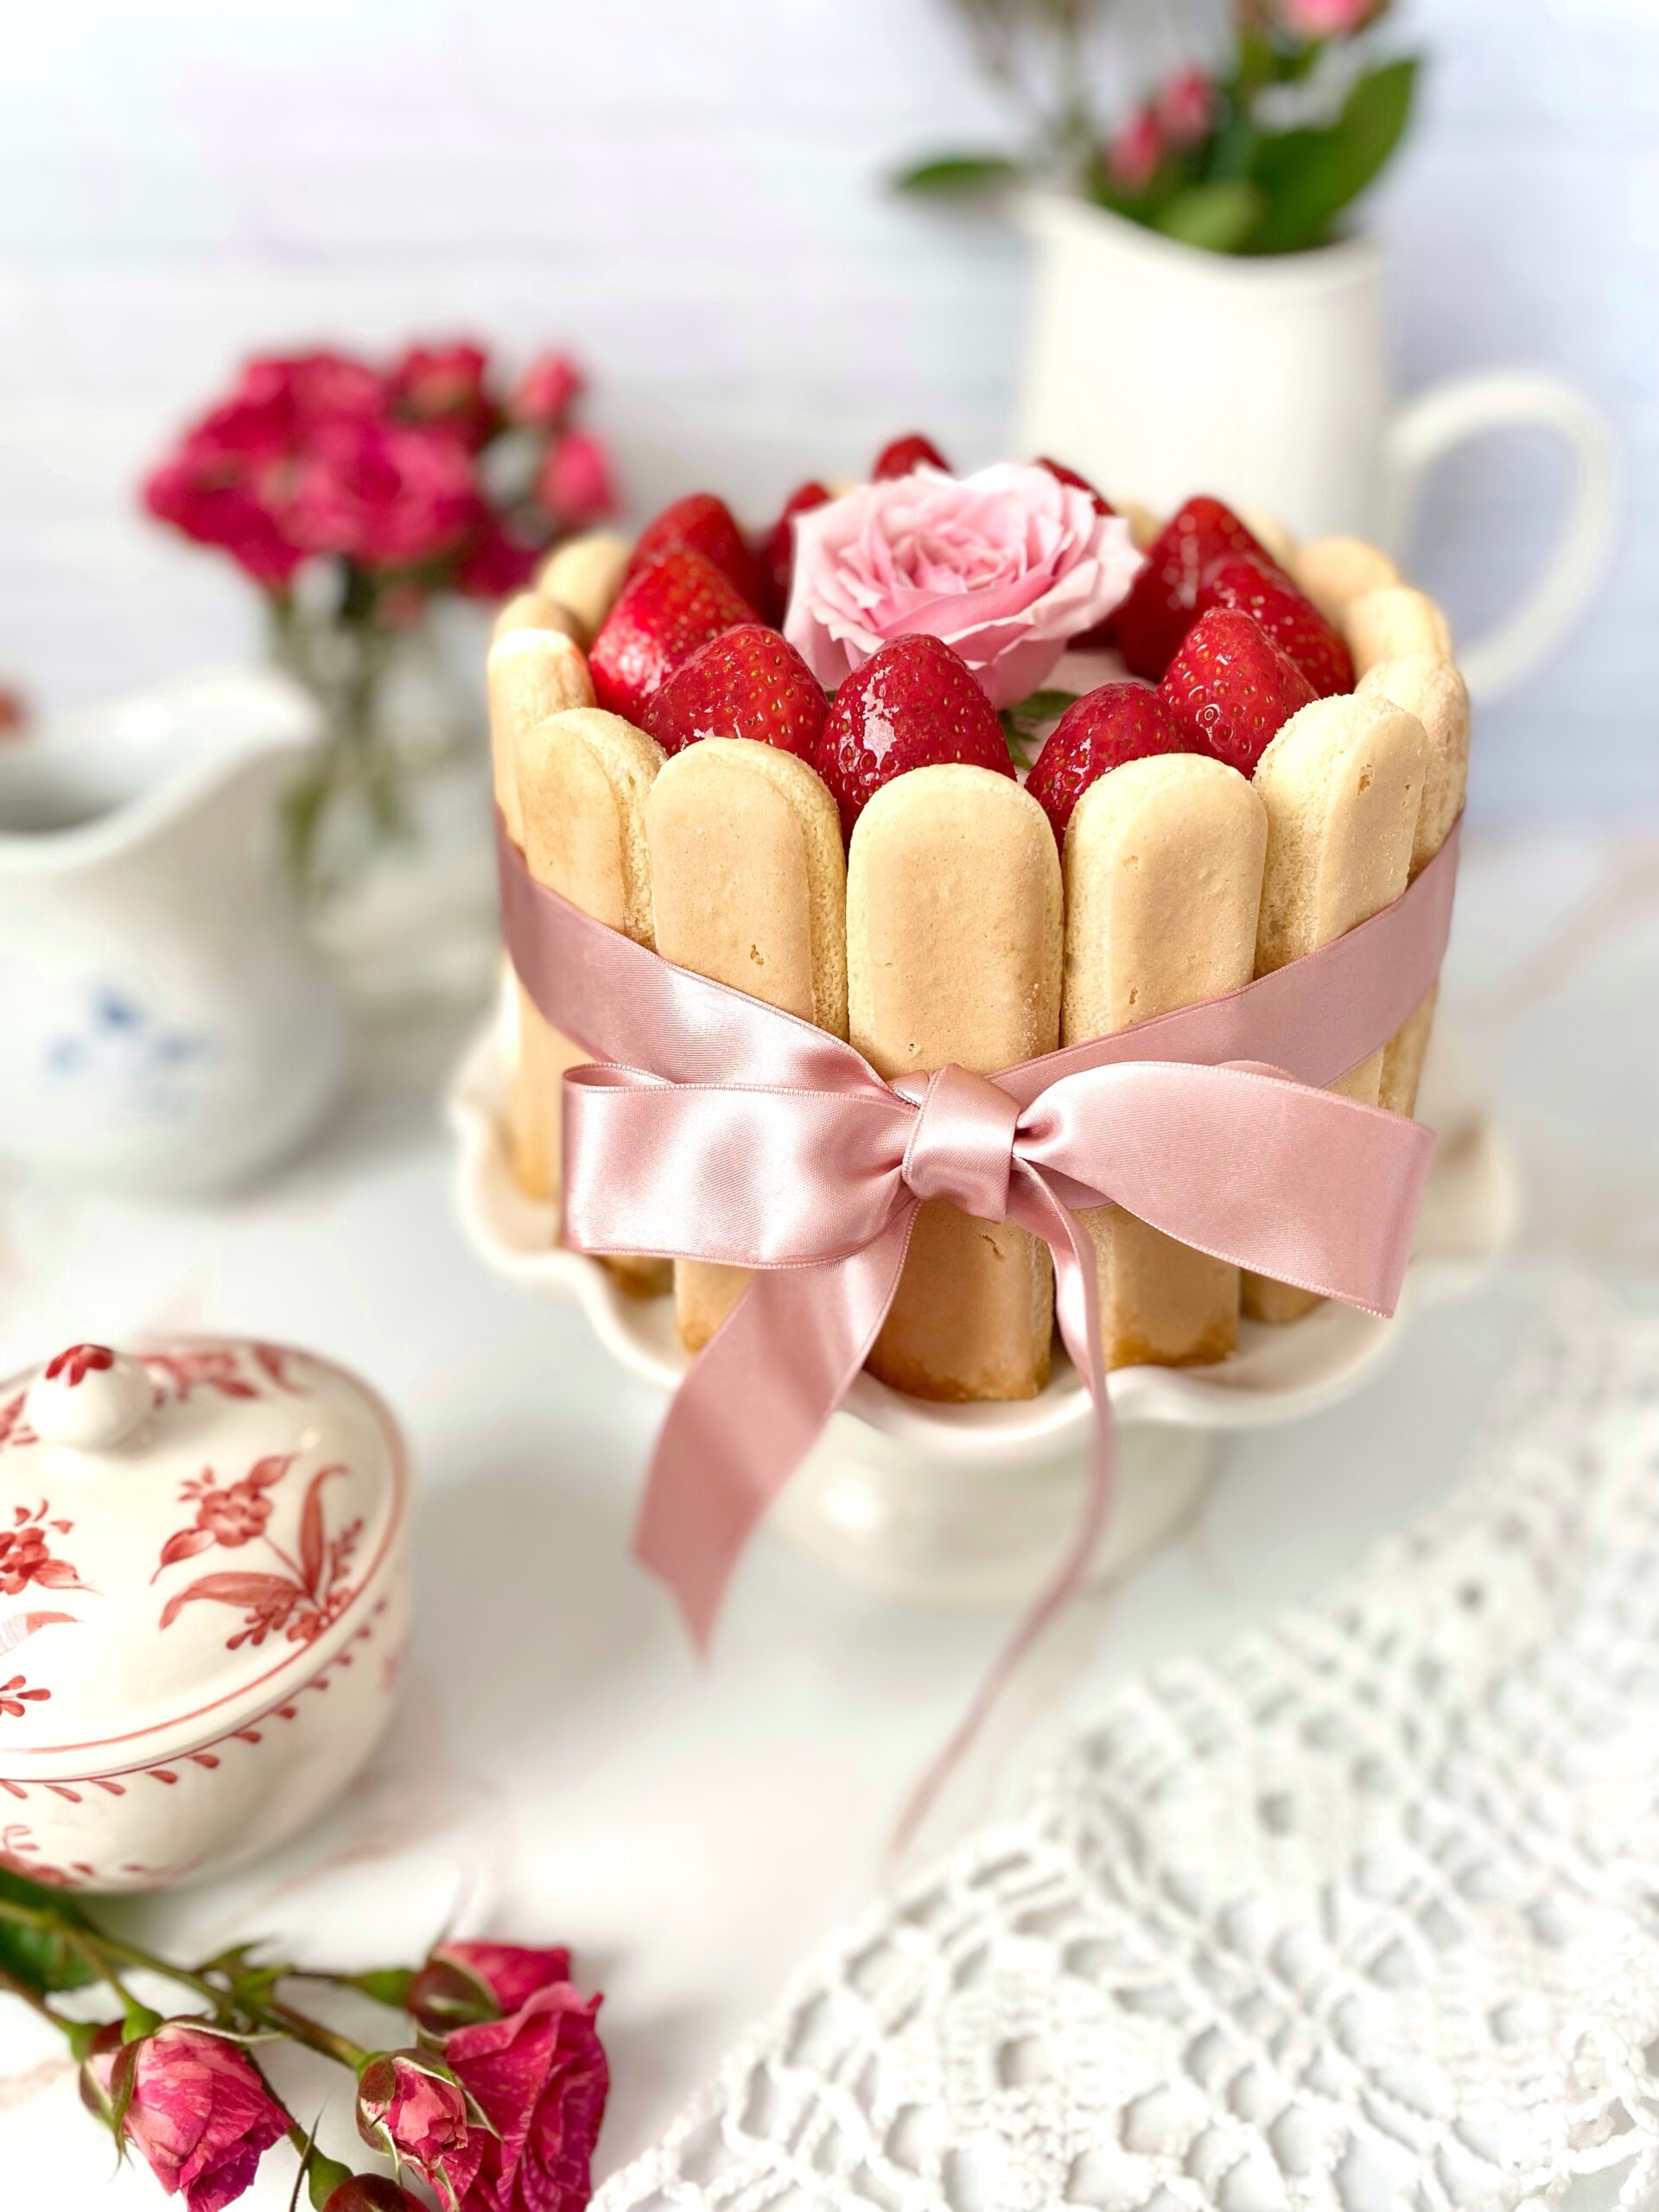
Little Strawberry Charlotte

Little Strawberry Charlotte

Meet Little Strawberry Charlotte. She brings romance with her wherever she goes. Whether it’s a tea party, a birthday celebration or a romantic dinner, you’ll gaze at her beauty and sigh. This lovely Charlotte has luscious strawberry mascarpone cream filling layered with lady fingers and topped with fresh strawberries. I used store bought lady fingers to make life easier but you can certainly bake your own if you wish. I typically make this in spring or summer when the weather is warm and strawberries are plentiful. But since my local stores start carrying an abundance of strawberries around Valentine’s Day, I thought it would be a perfect time to make this pretty little Charlotte.

Little Strawberry Charlotte

A pretty no-bake dessert layered with strawberry mascarpone cream filling and lady fingers and topped with fresh strawberries.
Course Dessert
Servings 6

Ingredients
  

Simple Syrup

  • â…“ cup (67g) granulated sugar
  • â…“ cup (78ml) water
  • ½ teaspoon strawberry or vanilla extract

Strawberry Charlottte

  • 12 ounces (340g) strawberries, hulled and sliced about 2 cups after slicing
  • ¾ cup (150g)) granulated sugar
  • ¼ cup (59ml) cold water
  • 1 tablespoon unsweetened gelatin powder
  • 1 teaspoon pure strawberry extract
  • ½ teaspoon pure vanilla extract
  • 1 ¾ cups (397g) mascarpone cheese, softened
  • â…” cup (156ml) cold heavy whipping cream
  • 28 ladyfingers
  • 10-12 fresh strawberries for garnish
  • Clean pesticide free rose for garnish optional
  • Clean ribbon for garnish

Instructions
 

Simple Syrup

  • Combine the sugar and water in a small saucepan over medium-low heat. Heat and stir until sugar is dissolved. Do not boil.
  • Remove from heat and transfer to a small shallow bowl or dish wide enough to dip the ladyfingers. Stir in the extract.

Strawberry Charlotte

  • In a blender or food processor, purée the strawberries. Pass through a mesh sieve to strain out the seeds.
  • In a medium-size saucepan, combine the strawberry puree and sugar. Cook over medium heat until the sugar is dissolved, about 3-5 minutes. Remove from heat. Set aside two tablespoons of the strawberry purée mixture then cover it and refrigerate until ready to use.
  • Place the water in a small bowl and sprinkle with gelatin powder. Whisk together and let sit until dissolved, about 5 minutes. Add the gelatin mixture to the warm strawberry purée mixture and whisk until thoroughly combined. Set aside to cool.
  • In a large bowl, beat the mascarpone cheese with an electric mixer on low speed, until smooth. Add the strawberry purée mixture and the extracts. Beat just until well combined.
  • In a separate large bowl, whip the heavy cream with an electric mixer on medium-high speed until medium peaks form, being careful not to over whip. Fold the whipped cream into mascarpone mixture.
  • Slice one round end off of 16 ladyfingers. Dunk them briefly in the simple syrup then line them up along the inner sides of a 7-inch by 3 inch deep springform pan.* Typically you would line them smooth side in facing the filling, but I placed mine smooth side out which gives a smooth look on the outside and it makes removal from the pan easier. (You can also line the bottom of the pan with a cake board** if you don't want to serve the dessert from the base.)
  • Line the bottom snuggly with ladyfingers, cutting to fit where necessary. Top with half of the filling, about 2 cups. Then top with a layer of ladyfingers, cutting to fit. Top with the remaining filling. Smooth the top with a small offset spatula. Cover with plastic wrap and chill in refrigerator at least 4 hours.
  • Carefully remove the springform pan ring from the base. Separate the base from the cake board, if using. Garnish with fresh strawberries. Brush the strawberries with reserved strawberry purée mixture. Tie the ribbon around the finished Charlotte.

Notes

*To find a 7-inch springform pan, click here.
**To find a 7-inch cake board, click here.
Keyword cake, strawberry

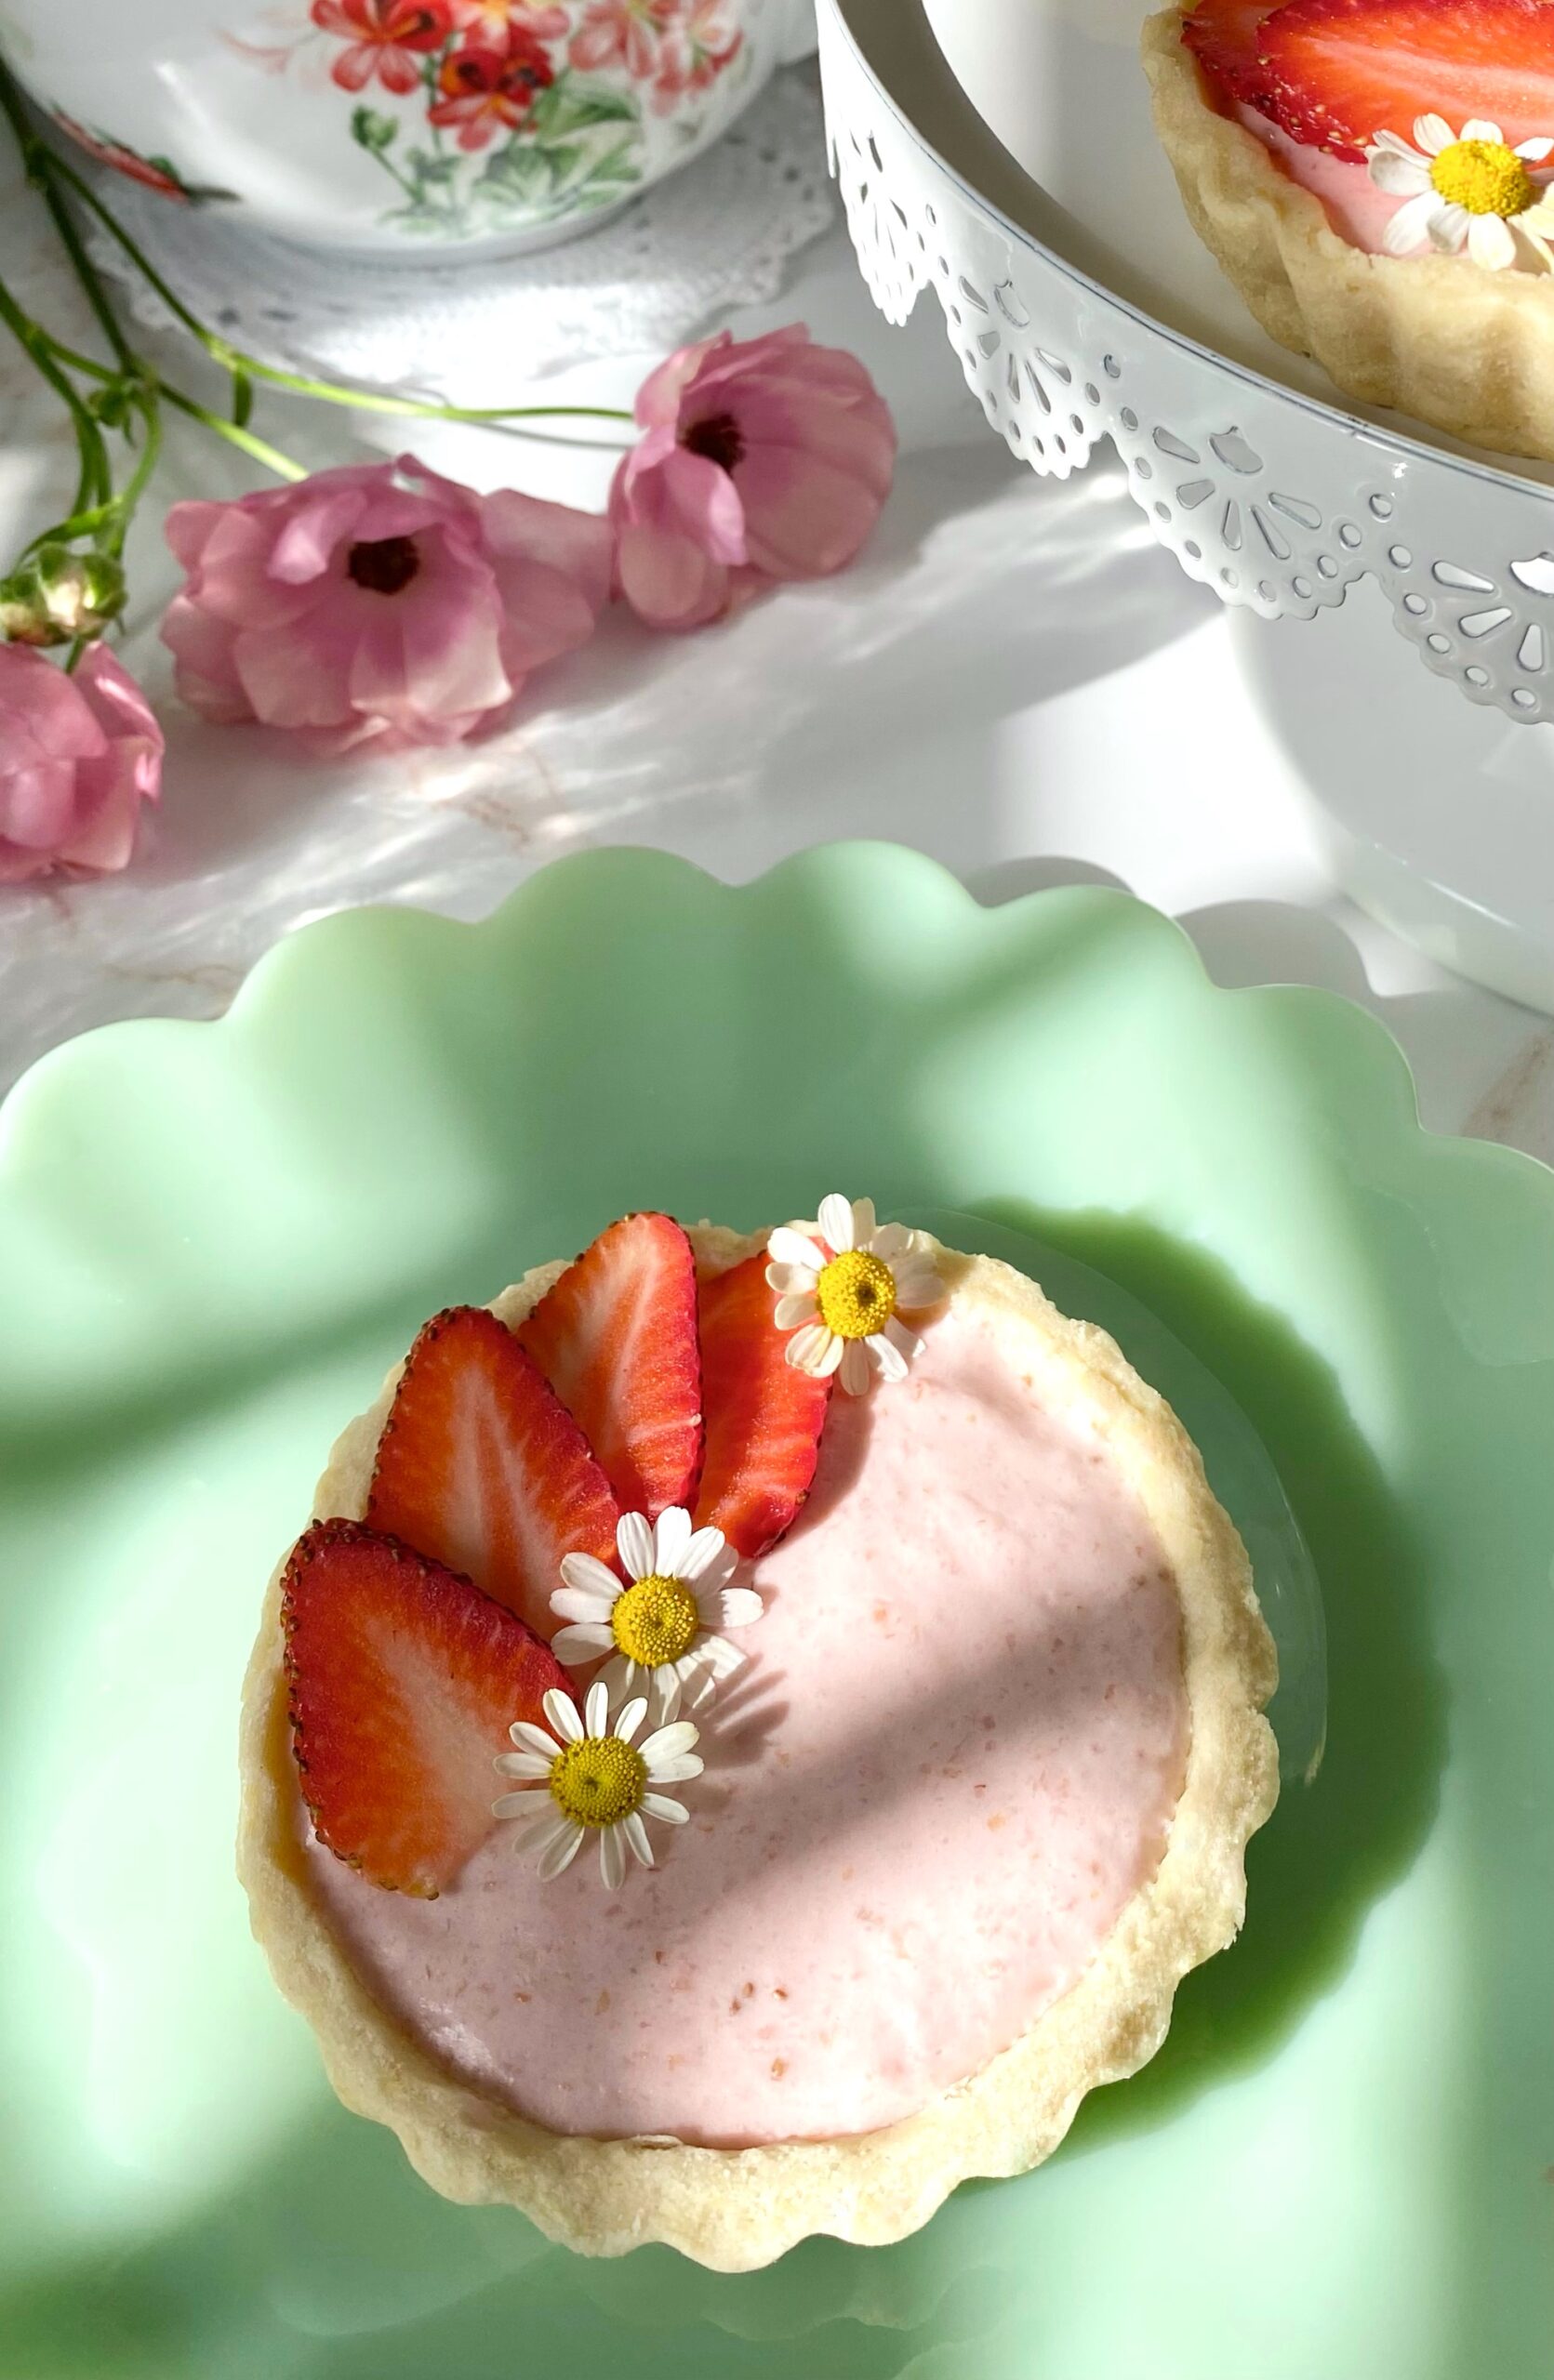
Strawberries & Cream Tarts

Strawberries & Cream Tarts

May is when I get to pull out all of my summery recipes. These pretty little Strawberries & Cream Tarts remind me of a summer day. The kind of day when you’re outside enjoying the sunshine and you’re craving a cool, refreshing dessert. This strawberry cream filling alone is so delicious that I could just eat the entire bowl with a spoon. But since I’m extra, I had to create an aesthetic dessert with it.

I used my favorite tart shells for this recipe, but this would also be delicious with those little pre-made graham cracker pie crusts if you want to take a shortcut. The reason I love this tart crust recipe so much though, is that it actually tastes delicious. Once, a few years ago, I purchased a beautiful, small fruit tart from a famous bakery. The fruit was vibrant and glistening and the pastry cream filling was sweet and silky. Now we need the sound of a mic drop, because the tart crust was hard and flavorless, like cardboard! Ever since then, I knew I would settle for nothing less than a delicious tart crust.

Strawberries & Cream Tarts

Course Dessert
Servings 6 4-inch tarts

Ingredients
  

Tart Crust

  • 1 ½ cups (6.75 ounces) all purpose flour, sifted
  • ¼ cup (1 ounce) powdered sugar, sifted
  • ¼ teaspoon fine sea salt
  • ½ cup (4 ounces) cold, unsalted butter, cubed
  • 1 egg yolk
  • 1-2 tablespoons ice water

Strawberry Cream Filling

  • 2 cups (16 ounces) strawberry puree Plus more for garnish
  • ½ cup (3.5 ounces) granulated sugar
  • 3 tablespoons water
  • 2 teaspoons unflavored gelatin powder
  • ½ cup (4 ounces) cream cheese, softened
  • ½ teaspoon strawberry extract
  • ½ teaspoon vanilla extract
  • ½ cup (4 ounces) cold heavy whipping cream

Instructions
 

Tart Crust

  • In a bowl, whisk together flour, powdered sugar and salt. Set aside.
  • Work in butter and egg yolk with a pastry blender or with your fingers, until pea size pieces are formed.
  • Add ice water, one tablespoon at a time, until dough comes together.
  • Form dough into a disc. Wrap in plastic and refrigerate for one hour.
  • On a lightly floured surface, roll dough to a scant 1/4-inch thickness
  • Cut dough into six 5-inch rounds. Press rounds into six 4-inch or 4 1/4-inch tart pans.*
  • Dock the bottoms of pie crusts with a fork. Freeze for 30 minutes.
  • Heat oven to 375ºF. Place tart pans on a large baking sheet.
  • Line tart shells with six 6-inch parchment rounds. Fill with pie weights. (You can use dried beans or rice if you don't have pie weights.)
  • Bake tart shells for 12 minutes. Remove parchment paper and pie weights. Continue baking until tart shells are light golden brown, about 4-6 more minutes.
  • Transfer to cooling rack to cool completely.

Strawberry Cream Filling

  • Pass the strawberry purée through a mesh sieve to remove large seeds.
  • In a medium saucepan, simmer the strawberry purée until it's reduced by half. Stir in the sugar and continue cooking over medium heat, until the sugar is dissolved. Transfer to a medium bowl.
  • Meanwhile, place 3 tablespoons of water into a small bowl. Sprinkle gelatin powder over the top of water. Let sit until water is absorbed, about 5 minutes.
  • Pour the gelatin mixture into the warm strawberry reduction mixture and stir until fully incorporated.
  • In a large bowl, beat cream cheese on low speed with an electric mixer until smooth.
  • Add extracts and beat until combined.
  • Add the strawberry reduction mixture to the cream cheese a little at time. Beat until well combined.
  • In a medium bowl, beat heavy whipping cream with an electric mixer at high speed until stiff peaks form.
  • Fold whipped cream into strawberry mixture.
  • Spoon into cooled tart shells. Smooth tops with a small offset spatula. Refrigerate for two hours. Garnish with sliced, fresh strawberries.

Notes

*To find the tart pans I used, click here.
Keyword strawberry, tarts