Chocolate Chip Cookie Bread

Chocolate Chip Cookie Bread

This is the ultimate chocolate chip bread! There are no cookies in this recipe, but it tastes so much like freshly baked chocolate chip cookies that Chocolate Chip Cookie Bread is the perfect name for it. Brown sugar, vanilla and jumbo chocolate chips really help to mimic that beloved chocolate chip cookie flavor. I love the big pockets of chocolate that come from using jumbo chocolate chips, but of course you can substitute regular or mini chocolate chips if you prefer.

I typically wait until a loaf is cooled off before slicing it, but in this case, I wanted to capture the melted pools of chocolate for the video. The fresh baked chocolate chip aroma was so heavenly, that it took all of my willpower not to immediately devour the entire loaf! It’s easier to slice a fresh baked loaf when it’s cooled off. But if you want to experience the melty chocolate chips, warm your slice in the microwave for 10 seconds.

To watch the TikTok video, click here.

Print Recipe
Chocolate Chip Cookie Bread
A moist, tender loaf cake with brown sugar and chocolate chips that tastes just like chocolate chip cookies
Servings
loaf
Ingredients
Servings
loaf
Ingredients
Instructions
  1. Preheat oven to 375ºF. Line the bottom of a 9 x 5-inch loaf pan with parchment paper. Grease and flour the insides.
  2. In a medium bowl, whisk together the 1 3/4 cups flour, baking powder, baking soda and salt.
  3. In a large bowl, cream butter and brown sugar until fluffy and well combined.
  4. Beat in egg, egg yolk and vanilla in 3 separate additions, making sure each one is fully incorporated before adding the next.
  5. In a small bowl, whisk milk and sour cream together.
  6. Add flour mixture to batter in two additions, alternating with half of milk mixture after each addition. Beat just until combined. Do not over mix.
  7. Set aside a handful of chocolate chips for top of loaf. In a small bowl, toss remaining chips with 1 teaspoon flour, making sure to coat them all, then fold them into the batter. This will help to prevent them from sinking.
  8. Transfer batter to prepared baking pan. Top with reserved chocolate chips.
  9. Bake for 10 minutes. Turn oven heat down to 325ºF and continue baking until loaf is golden brown and toothpick inserted in center comes out clean, about 45-50 more minutes.
  10. Cool loaf in pan for 10 minutes then turn loaf out onto a cooling rack.
Recipe Notes

*If you want to use mini chocolate chips, use one cup (6 oz or 170g)

Little Strawberry Heart Cake

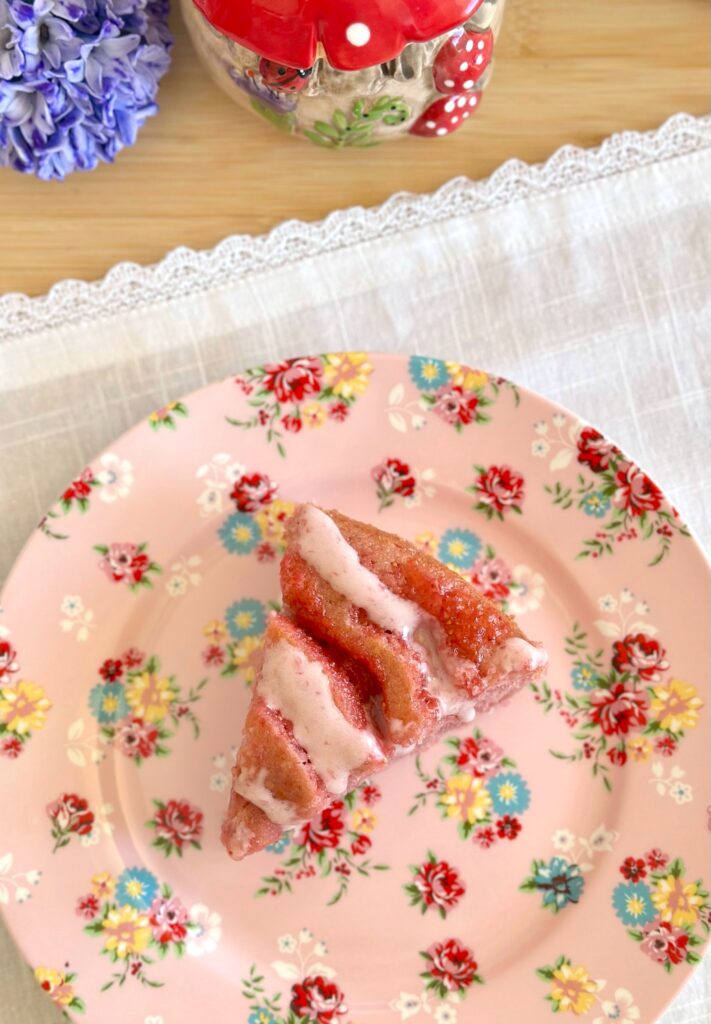
A cute little, stress-free, perfectly pink heart cake is my gift to you for Valentine’s Day. The vanilla cake is soft and fluffy. The frosting is super easy and delicious, with only two ingredients. It all comes together with fresh strawberries and it’s so good, you won’t want to share.

Print Recipe
Little Strawberry Heart Cake
A six inch heart shaped vanilla cake with fresh strawberries and two-ingredient frosting
Course Dessert
Keyword cake, strawberry
Servings
Ingredients
Course Dessert
Keyword cake, strawberry
Servings
Ingredients
Instructions
  1. In a small bowl, combine strawberries and 2 teaspoons sugar. Set aside to macerate for about 30 minutes.
  2. Preheat oven to 350ºF. Line the bottom of a 6-inch heart shaped cake pan*** with parchment paper. Grease and flour the sides.
  3. In a medium bowl, whisk together flour, baking powder and salt.
  4. In a large bowl, cream butter, sugar and oil with an electric mixer, until light and fluffy.
  5. Beat in egg and vanilla in two separate additions until well combined.
  6. In a small bowl, whisk together milk and sour cream.
  7. Beat flour mixture into batter in two additions, alternating with milk mixture.
  8. Transfer batter to prepared cake pan. Bake until toothpick inserted in the center comes out clean, about 25-30 minutes. Let cake cool in pan 10 minutes then turn out onto a cooling rack to cool.
  9. In a large bowl, stir cream cheese with a spatula to smooth out lumps.
  10. Add marshmallow fluff and beat until well combined. Add food gel color with a toothpick and beat until evenly distributed.
  11. Split cake into two layers. Top the bottom layer with frosting. Drain strawberries and spoon onto cake. Top with second layer, then more frosting.
Optional Decor
  1. To make sugared strawberries, mix 1 part meringue powder with 3 parts water. Dip strawberries in meringue mixture, cover with sugar, then let dry. Alternately you can dip the strawberries in pasteurized egg whites, cover with sugar, then let dry.
Recipe Notes

*To find the gel food color I used, click here.

**To find meringue powder, click here.

***To find the heart cake pan I used, click here.


Chocolate Gingerbread

Chocolate Gingerbread

Chocolate gingerbread is gingerbread’s elegant sister. It has the warm spices we love in gingerbread combined with the earthy depth of chocolate. Topping this rich, tender loaf with silky cream cheese frosting is the best possible choice to take it over the top. It’s a lovely loaf to enjoy during the holiday season and beyond. Enjoy it with a hot drink for a cozy, comforting winter treat.

Print Recipe
Chocolate Gingerbread
Servings
loaf
Ingredients
Chocolate Gingerbread
Cream Cheese Frosting
Servings
loaf
Ingredients
Chocolate Gingerbread
Cream Cheese Frosting
Instructions
Chocolate Gingerbread
  1. Preheat oven go 350ºF. Line the bottom of a 9 x 5-inch loaf pan with parchment paper. Grease the insides and dust with cocoa powder.
  2. In a medium bowl, whisk together, flour, cocoa powder, cinnamon, ginger, baking powder, baking soda, salt, allspice, nutmeg, and cloves.
  3. In a large bowl, beat brown sugar, oil, eggs and vanilla until smooth.
  4. In a small bowl, whisk together sour cream and milk.
  5. Add flour mixture to egg mixture in two additions, alternating with milk mixture, beating just until combined.
  6. Transfer batter to prepared pan. Bake until toothpick inserted in center comes out clean, about 38-45 minutes.
  7. Cool in pan 10 minutes, then turn loaf out onto a cooling rack to cool completely. Frost with cream cheese frosting.
Cream Cheese Frosting
  1. In a medium bowl, beat butter and cream cheese together until smooth.
  2. Add powdered sugar, 2 tablespoons of milk, vanilla and salt. Beat until smooth. Add additional milk, if needed, until desired consistency is reached.

Flourless Chocolate Cake with Raspberry Sauce

Flourless Chocolate Cake with Raspberry Sauce

This cake story has a happy ending. Once, many years ago, someone gave my grandparents’ neighbor a flourless chocolate cake. The neighbor had a slice and couldn’t finish it because it was too rich. She brought the cake over to my grandparents and they each had a slice and couldn’t finish them, because they were too rich. I had a slice and I couldn’t finish mine either and, well…you can guess why. So my grandparents, not wanting to be wasteful, put the cake in the freezer and forgot about it for a very long time. Whenever I opened the freezer and saw it, I wondered why none of us could eat more than a few bites of that rich cake. Although I don’t know for sure, it was probably because the ratio of chocolate to butter was off. But I do know that serving it with something acidic, like berries or raspberry sauce, would have helped immensely.

The happy ending to this story is that this flourless chocolate cake was created to be enjoyed to the last bite. It’s decadent, but not overly rich. It has a good balance, not too sweet or too bitter. The raspberry sauce and fresh raspberries compliment it perfectly. This luscious cake is also delicious with strawberries or any combination of berries you like. It’s also delicious served with salted caramel sauce. I wish my grandparents were still around to give my version of a flourless chocolate cake a try. I think they would have loved this cake and finished every last bite!

Print Recipe
Flourless Chocolate Cake with Raspberry Sauce
Keyword cake, chocolate
Servings
Ingredients
Raspberry Sauce
Keyword cake, chocolate
Servings
Ingredients
Raspberry Sauce
Instructions
Flourless Chocolate Cake
  1. Preheat oven to 325ºF. Line a 6-inch springform pan** with parchment paper. Spray the parchment paper with nonstick spray. Wrap the bottom two inches of the pan tightly with aluminum foil. Set pan in a baking pan.
  2. Combine chocolate and butter in a large stainless steel bowl set over a pot of barely simmering water. Stir until melted and smooth. Remove bowl from heat.
  3. In a large bowl, beat eggs with an electric mixer until doubled in size, about 5 minutes. Beat in vanilla extract and salt.
  4. With a large spatula, gently fold beaten eggs into chocolate mixture in three additions until no streaks of egg remain. Transfer batter to prepared pan. Smooth top of batter with a small offset spatula.
  5. Pour 1 1/2 inches of boiling water into baking pan. Bake until top is set and internal temperature*** reaches 140ºF, about 28-37 minutes.
  6. Remove cake pan from water bath. Cool to room temperature then cover and refrigerate for at least 4 hours (or up to overnight, but cake is best served the day it's made).
  7. Remove cake from pan when chilled and set. Top with powdered sugar and fresh raspberries.
  8. To serve, remove cake from refrigerator at least 30 minutes before serving and serve at room temperature for best texture. Serve with raspberry sauce.
Raspberry Sauce
  1. Purée raspberries in blender or food processor. Pass purée through a fine mesh sieve**** to remove seeds.
  2. In a small bowl, whisk together water and cornstarch.*****
  3. In a small saucepan, heat raspberry purée with sugar and cornstarch slurry to a boil over medium heat. Turn heat down to low and simmer until slightly thickened, about 2-3 minutes.
Recipe Notes

*Chalazae are the opaque chords of egg white. Removing them is optional, but they do show up as white spots in the cake after baking.

**To find the 6-inch springform pan I used, click here.

***To find an instant read thermometer, click here.

****To find a fine mesh sieve, click here.

*****To find a mini whisk for whisking small amounts, click here.

Grandma’s Apple Crumb Cake

Grandma's Apple Crumb Cake

I remember my grandma making coffee cakes and sweet muffins for breakfast, along with eggs, sausages, hot coffee and a big pitcher of milk on the table. The older generation really loved their coffee cakes. I’ve noticed that many Millennials and Gen Z’s think coffee cake contains coffee. Maybe some coffee cake does contain coffee, but in general, coffee cake is called that because it’s typically eaten with coffee. A classic coffee cake is usually a subtly sweet cake with cinnamon, crumb topping and maybe some icing. The Apple Crumb Cake recipe I’m sharing with you has the elements of a classic coffee cake, but so much better! The cake is fluffy and soft, the crumb topping is chunky and plentiful, and the apples are perfectly tender. And don’t get me started about the icing!

Why do most of our grandmothers cook and bake so well? Because they’ve had decades of trial and error to perfect their recipes, tweaking them here and there until they’re approved and loved by their families, neighbors and friends. This cake has had its share of trial and error. She has earned her place as a well-loved, delicious, beautiful queen of coffee cakes.

Print Recipe
Grandma's Apple Crumb Cake
Keyword apple, cake
Servings
servings
Ingredients
Apples
Crumb Topping
Cake
Keyword apple, cake
Servings
servings
Ingredients
Apples
Crumb Topping
Cake
Instructions
Apples
  1. In a large skillet, melt butter over medium heat. Add apples, sugar and cinnamon.
  2. Cook, stirring occasionally, until apples are tender, about 10 minutes. Transfer apples to a bowl and let cool to room temperature.
Crumb Topping
  1. In a medium bowl, mix flour, brown sugar, sugar, cinnamon and salt.
  2. Work in butter with your fingertips until mixture looks like wet sand. Press together to make 1/2-inch chunks.
Cake
  1. Preheat oven to 325ºF. Line a 9-inch cake pan with a removable bottom*, or a 9-inch springform pan, with parchment paper. Wrap the bottom of cake pan with aluminum foil and place pan on a baking sheet.
  2. In a medium bowl, whisk together flour, baking powder and salt.
  3. In a large bowl, cream butter and sugar, with an electric mixer on medium speed, until light and fluffy.
  4. Beat eggs and vanilla into butter mixture in three separate addition, making sure each addition is incorporated before adding the next.
  5. In a small bowl, whisk milk and sour cream together.
  6. On low speed, mix flour mixture into batter in three separate additions, alternating with milk mixture. Beat just until combined.
  7. Transfer batter to prepared baking pan. Smooth top with a spatula.
  8. Drain any excess liquid from apples. Top cake batter evenly with apples, then topping mixture.
  9. Bake until toothpick inserted into center of cake comes out clean, about 50-60 minutes. Cool cake in pan for 10 minutes. Remove cake from pan and continue cooling.
Icing
  1. In a medium bowl, whisk together powdered sugar, melted butter, vanilla, salt and 2 tablespoons of cream. Add additional cream until desired consistency is reached. Drizzle over cooled cake.
Recipe Notes

*To find the cake pan I used, click here.

Butterscotch Bread

What’s better than the smell of chocolate chip cookies baking or the smell of fresh coffee brewing? The smell of a warm, sweet buttery loaf of this Butterscotch Bread! The aroma is so heavenly that I’m convinced angel grandmothers bake this on a regular basis in heaven. The rich scent is accompanied by a soft, tender bread topped with a silky butterscotch glaze.

It all starts with browning your butter first. It adds a nutty, deep butter flavor. When browning your butter, use a light colored saucepan so you can see the visual clues. You’ll see it start to foam and brown specks will collect on the bottom of the pan. It will smell nutty and fragrant. Keep a close eye on it. It can go from brown to burnt in a quick second. When your brown butter has cooled to room temperature, the rest of the recipe comes together quickly. You can also brown your butter a day ahead and keep it in the refrigerator. Bring it to room temperate before using.

This delightful bread goes well with coffee or tea and is just as delicious the next day. Store covered at room temperature.

Print Recipe
Butterscotch Bread
Servings
loaf
Ingredients
Butterscotch Bread
Butterscotch Glaze
Servings
loaf
Ingredients
Butterscotch Bread
Butterscotch Glaze
Instructions
Butterscotch Bread
  1. In a small saucepan, cook butter over medium heat until brown and fragrant. When brown specks (not black!) collect at the bottom of the pan, immediately transfer butter to a small bowl. Let cool to room temperature.
  2. Preheat oven to 350ºF. Line the bottom of an 8 x 4-inch baking pan with parchment paper. Grease and flour the insides.
  3. In a medium bowl, beat brown butter, brown sugar, eggs, vanilla and buttermilk until smooth.
  4. Stir in flour mixture in two additions. Mix just until combined. A few lumps are okay.
  5. Transfer batter to prepared baking pan. Bake until top is deep golden brown and toothpick inserted into center comes out clean, about 38-43 minutes.
  6. Let bread cool in pan for 10 minutes, them turn out onto a cooling rack to cool completely. Top with two coats of butterscotch glaze.
Butterscotch Glaze
  1. Melt butter in a small saucepan over medium heat. Stir in brown sugar and salt.
  2. Continue stirring over medium heat until mixture comes to a boil. Boil for two minutes.
  3. Turn heat down and slowly stir in heavy cream. Keep stirring until mixture is smooth. Remove from heat and stir in vanilla extract.
  4. Transfer mixture to a small bowl and let cool until thickened.

Pumpkin Cake

Pumpkin Cake

This perfect pumpkin cake brings back so many memories. The tender, moist texture reminds me of the pumpkin cake bars I used to make in junior high. I got the treasured bar recipe from an old children’s cookbook. I lent the cookbook to a neighbor and never saw the book or the recipe again. Through trial and error, I came up with this cake, which I think is even better! It’s so delicious it doesn’t need frosting, but the classic pairing with cream cheese frosting takes it over the top.

Print Recipe
Pumpkin Cake
Course Dessert
Keyword cake, pumpkin
Servings
Ingredients
Pumpkin Cake
Cream Cheese Frosting
Course Dessert
Keyword cake, pumpkin
Servings
Ingredients
Pumpkin Cake
Cream Cheese Frosting
Instructions
Pumpkin Cake
  1. Preheat oven to 325ºF. Line the bottom of an *8-inch round cake pan with **parchment paper. Grease and flour the sides.
  2. In a medium bowl, whisk together flour, baking powder, baking soda, salt, cinnamon, ginger and nutmeg.
  3. In a large bowl, beat sugar, oil, eggs, vanilla and pumpkin purée with an electric mixer, until smooth, about 1 minute.
  4. Slowly add flour mixture. Stir just until combined.
  5. Transfer batter to prepared cake pan. Bake until toothpick inserted in center comes out clean, about 40-45 minutes.
  6. Cool cake in pan for 10 minutes. Remove cake from pan and transfer to a wire rack to cool.
Cream Cheese Frosting
  1. In a large bowl, beat cream cheese and butter together with an electric mixer, until creamy.
  2. Beat in vanilla extract and salt until well combined.
  3. On low speed, beat in powdered sugar.
  4. Beat in heavy cream a little at a time until desired consistency is reached. Stir with a spatula to smooth out any bubbles.
Recipe Notes

*To find the cake pan I used, click here. **To find the parchment rounds I used, click here.

Peaches and Cream Loaf Cake

Every peach season, I get excited by the abundance of peaches at my local farmers market and I end up buying way too many. So if you’re like me and you have ripe peaches sitting on your counter, turn them into peach purée. I love adding peach purée to my iced tea or adding it to desserts like this moist, tender cake. This is one of my most popular cake recipes on social media, and for good reason. It does not disappoint! To watch the TikTok video, click here.

Print Recipe
Peaches and Cream Loaf Cake
Moist, tender peach cake with peach cream cheese icing
Keyword cake, peach
Servings
loaf
Ingredients
Cake
Icing
Keyword cake, peach
Servings
loaf
Ingredients
Cake
Icing
Instructions
Cake
  1. Preheat oven to 350ºF. Line the bottom of an 8 x 4-inch loaf pan with parchment paper. Grease and flour the sides.
  2. In a medium bowl, whisk together flour, baking powder, baking soda, salt, cinnamon and nutmeg.
  3. Set aside 2 tablespoons peach purée for icing.
  4. In a large bowl, beat sugar, oil, eggs, remaining peach purée and extracts until smooth.
  5. Add flour mixture and beat just until combined.
  6. Transfer batter to prepared baking pan. Bake until toothpick inserted into center comes out clean, about 38-45 minutes.
  7. Let cake cool in pan for 10 minutes, then turn out onto a cooling rack to cool completely. Spread icing on cooled cake.
Icing
  1. In a medium bowl, beat cream cheese and butter together until smooth.
  2. Add powdered sugar, salt, vanilla extract and 1 tablespoon of peach purée. Beat until smooth. Add additional peach purée, if needed, until desired consistency is reached. Fold in diced peaches.

Little Strawberry Charlotte

Little Strawberry Charlotte

Meet Little Strawberry Charlotte. She brings romance with her wherever she goes. Whether it’s a tea party, a birthday celebration or a romantic dinner, you’ll gaze at her beauty and sigh. This lovely Charlotte has luscious strawberry mascarpone cream filling layered with lady fingers and topped with fresh strawberries. I used store bought lady fingers to make life easier but you can certainly bake your own if you wish. I typically make this in spring or summer when the weather is warm and strawberries are plentiful. But since my local stores start carrying an abundance of strawberries around Valentine’s Day, I thought it would be a perfect time to make this pretty little Charlotte.

Print Recipe
Little Strawberry Charlotte
A pretty no-bake dessert layered with strawberry mascarpone cream filling and lady fingers and topped with fresh strawberries.
Course Dessert
Keyword cake, strawberry
Servings
Ingredients
Simple Syrup
Strawberry Charlottte
Course Dessert
Keyword cake, strawberry
Servings
Ingredients
Simple Syrup
Strawberry Charlottte
Instructions
Simple Syrup
  1. Combine sugar and water in a small saucepan over medium-low heat.
  2. Heat and stir until sugar is dissolved. Do not boil.
  3. Remove from heat and transfer to a small shallow bowl or dish wide enough to dip ladyfingers. Stir in extract.
Strawberry Charlotte
  1. In a blender or food processor, puree strawberries. Pass through a mesh sieve to strain out seeds.
  2. In a medium saucepan, combine strawberry puree and sugar. Cook over medium heat until sugar is dissolved, about 3-5 minutes. Remove from heat.
  3. Set aside two tablespoons of strawberry puree mixture. Cover and refrigerate until ready to use.
  4. Place water in a small bowl and sprinkle with gelatin powder. Whisk together and let sit until dissolved, about 5 minutes.
  5. Add gelatin mixture to warm strawberry puree and whisk until thoroughly combined. Set aside to cool.
  6. In a large bowl, beat mascarpone cheese with an electric mixer on medium speed, until smooth. Add strawberry puree and and extracts. Beat until well combined.
  7. In a separate large bowl, whip heavy cream with an electric mixer on medium-high speed until medium peaks form. Be careful not to over whip the cream or it will look curdled.
  8. Fold whipped cream into mascarpone mixture.
  9. Optional: Line the bottom of your springform pan with a cake board if you don't want to serve it on the pan base.
  10. Slice the round end off of 16 ladyfingers. Dunk them briefly in the simple syrup then line them up along the inner sides of a 7-inch by 3 inch deep *springform pan. (Typically you would line them smooth side in facing the filling, but I placed mine smooth side out because I wanted a smooth look on the outside and it makes removal from the pan easier.)
  11. Line the bottom snuggly with ladyfingers, cutting to fit where necessary.
  12. Top with half of the filling mixture, about 2 cups. Then top with a layer of ladyfingers, cutting to fit as with the bottom layer.
  13. Top with remaining filling. Smooth the top with a small offset spatula.
  14. Cove with plastic wrap and chill in refrigerator at least 4 hours.
  15. Carefully remove the springform pan ring from the base. Separate the base from the cake board, if using. Garnish with fresh strawberries. Brush strawberries with reserved strawberry puree mixture. Tie a clean ribbon around the finished Charlotte.
Recipe Notes

*To find a 7-inch springform pan, click here.

Mini Orange Olive Oil Cakes

mini orange olive oil cakes

Ever since a certain celebrity cut a hole from the middle of her favorite olive oil cake back in 2020, the internet has been obsessed with olive oil cakes. I must confess that I was a fan of olive oil cakes long before that. I first tasted one at a restaurant years ago and fell in love. The flavor and texture was so delightful, that all it needed was a dusting of powdered sugar on top. Now that the dust has settled, I’m sharing my favorite orange olive oil cake recipe. Not because it’s trendy, but because it’s a really delicious recipe that tastes like spring.

I made cute little orange scented, personal cakes that are really just elegant cupcakes. The recipe is easily adapted to your tastes. You can switch up the orange flavor and substitute with lemon or any citrus of your choice. Even if you don’t like olive oil, you’ll still like these little cakes. I used light olive oil, rather than extra virgin olive oil, for a more subtle olive oil flavor. It’s also able to withstand higher temperatures. Feel free to use your favorite olive oil or replace it with the oil you prefer. Grape seed, avocado, canola and vegetable oil are some examples of oils you can use as a replacement.

This recipe contains almond flour. It helps with texture and flavor, so it’s a necessary ingredient. Almond flour can be pricey, but it’s good to have on hand. Adding it to your baked goods will make them more moist and tender. To find almond flour click here,

Print Recipe
Mini Orange Olive Oil Cakes
Course Dessert
Keyword cake, olive oil, orange
Servings
mini cakes
Ingredients
Mini Orange Olive Oil Cakes
Orange Simple Syrup
Course Dessert
Keyword cake, olive oil, orange
Servings
mini cakes
Ingredients
Mini Orange Olive Oil Cakes
Orange Simple Syrup
Instructions
Mini Orange Olive Oil Cakes
  1. Heat oven to 350ºF. Grease and flour a 12 serving muffin pan.
  2. In a medium bowl, whisk together cake flour, almond flour, baking powder, baking soda and salt. Set aside.
  3. In a large bowl, beat sugar, eggs, orange zest and vanilla extract together until smooth.
  4. Gradually mix in olive oil and beat until well combined.
  5. Stir in dry ingredients in two additions, alternating with milk and orange juice. Stir just until combined. Do not over mix.
  6. Fill prepared muffin pan cups 2/3 full with batter. Do not overfill or cakes will be more difficult to remove.
  7. Bake for 10-12 minutes or until tops look light golden, but still moist and a toothpick inserted comes out clean. They bake very quickly, so check them a few minutes early to avoid over baking.
  8. Cool cakes in pan for 5 minutes. Remove from pan and transfer to a wire rack.
  9. Brush warm cakes with orange simple syrup and allow to cool completely.
  10. When cakes have cooled, dust with powdered sugar.
Orange Simple Syrup
  1. In a small saucepan, stir together sugar, orange juice, lemon juice, and orange zest.
  2. Heat over low heat, stirring occasionally, just until sugar is dissolved.
  3. Remove from heat and set aside to cool.

Vintage Chocolate Cake with the Best Chocolate Frosting

Dark Chocolate Cake with the Best Chocolate Frosting

If you love chocolate cake, this is the post for you! Chocolate cake is one of the best comfort foods there is. I’ve tasted many over the years, but my all time favorite was one I had growing up. I’ve spent years trying to duplicate it. Most cookbook recipes were either too dry, too dense or too spongey. Some books have some velvety, butter based recipes that use the reverse creaming method, but they don’t have the moist, nostalgic texture I was looking for. I noticed that nearly every chocolate cake recipe on the internet is a variation of the century-old recipe from the Hershey’s Cocoa tin. I think many people have passed it down as a family recipe, each grandmother adding her own personal touch. Even some celebrity chefs have claimed it as their own. It’s an easy, delicious, moist recipe and its popularity is well deserved. You can tweak the flavor additions a bit to make it your own too. It’s a recipe that’s hard to mess up.

The recipe I’m sharing here is my version of the vintage original, adapted over time by my family. I like to use dark cocoa powder in this recipe, which makes a rich, dark chocolate cake. The chocolate frosting recipe is one I developed, mostly because I couldn’t find a chocolate frosting recipe that didn’t taste gritty and/or look speckled from the cocoa powder. Swiss meringue buttercream with melted chocolate added is one alternative, but, while it is smooth, silky and perfect for piping, it’s missing that deep chocolate richness. Another option is chocolate ganache. It looks rich and creamy in those viral videos, but it’s a little too rich and overpowering to use as frosting in my opinion.

I think this frosting recipe is the one! it has the best of both worlds and is perfect for a classic chocolate cake. You’ll notice this frosting contains maple syrup. It gives a subtle maple note in the background, but mostly, it helps make the frosting silky and gives it shine.

Print Recipe
Vintage Chocolate Cake with the Best Chocolate Frosting
Course Dessert
Keyword cake, chocolate
Servings
2 layer 6-inch cake
Ingredients
Chocolate Cake
Chocolate Frosting
Course Dessert
Keyword cake, chocolate
Servings
2 layer 6-inch cake
Ingredients
Chocolate Cake
Chocolate Frosting
Instructions
Chocolate Cake
  1. Preheat oven to 350ºF. Grease two 6-inch cake pans and dust with cocoa powder. Line the bottoms with parchment paper.
  2. Sift flour, cocoa powder, baking powder, baking soda and salt together in a medium bowl. Add sugar and stir to combine.
  3. Combine egg, egg yolk, buttermilk, vegetable oil and vanilla extract in a small bowl. Whisk lightly to combine.
  4. Add egg mixture to dry ingredients and mix on low speed with a handheld electric mixer, until combined. Stop mixer. Scrape sides of bowl with spatula. Turn mixer up to medium speed and beat for 1 minute.
  5. Add hot coffee and stir to combine.
  6. Pour batter into prepared cake pans, dividing batter evenly between the pans. Bake for 25-28 minutes or until a toothpick inserted into the center of the cake comes out clean.
Chocolate Frosting
  1. In a small saucepan over low heat, whisk together maple syrup, water, cocoa powder and espresso powder until smooth. Set aside to cool.
  2. In a large bowl, beat butter, powdered sugar and salt until smooth with an electric mixer
  3. Gradually add cooled maple syrup mixture and beat until combined.
  4. Stir in melted chocolate until well combined.
Recipe Notes

*For smoothest results, use chopped bar chocolate and make sure chocolate is completely melted.  Do not use chocolate chips


Fairy Puffs

Fairy Puffs sugared mini muffins wtih edible flowers

My dad used to take me on walks in the woods to look for fairy rings when I was a child. I wanted to see a real fairy so badly! I read a book about fairies, hoping to learn more about them. Fairies love little cakes, milk, honey and butter so I’m sure these Fairy Puffs would be fairy approved.

My Fairy Puffs recipe is loosely based on an old favorite mini muffin recipe. I tweaked it quite a bit, including the addition of pink dragonfruit powder. Dragonfruit has a subtle flavor, so the bright fuchsia powder is mostly for color. But oh what a beautiful color it is! You can find dragonfruit powder in healthy food stores or online. To find the dragonfruit powder, also known as pink pitaya powder, I used, click here.

fairy puff muffins

Decorating these little cuties was so entertaining! After sampling multiple variations of sparkling sugar and cinnamon sugar, I decided that dipping the bottoms of the muffins in butter and cinnamon sugar, then dipping the tops in butter and sparkling sugar gave them the perfect balance of sugar and spice. I had purchased some edible flowers a couple of days prior, and they added a pretty, magical touch. The flowers I used are called bachelor’s buttons and I got them at a local gourmet flower seller.

sugared mini muffins with edible flowers

Print Recipe
Fairy Puffs
Course Breakfast, Brunch
Keyword cake, muffins
Servings
mini muffins
Ingredients
Fairy Puffs
Topping
Course Breakfast, Brunch
Keyword cake, muffins
Servings
mini muffins
Ingredients
Fairy Puffs
Topping
Instructions
Fairy Puffs
  1. Preheat oven to 350ºF. Grease and flour a 24 serving mini muffin pan.
  2. In a medium bowl, whisk together flour, dragonfruit powder, baking powder, salt and nutmeg. Set aside.
  3. In a large bowl, cream butter and sugar with an electric mixer until light and fluffy.
  4. Add egg and beat until smooth.
  5. Add flour mixture and milk alternately in two additions and mix just until combined.
  6. Transfer batter to prepared muffin pan, filling muffin cups about 3/4 full.
  7. Bake until toothpick inserted in center of muffins comes out clean, about 12-14 minutes. (Be careful not to over bake. Check a few minutes early. Small muffins can dry out easily.)
  8. Let cool in pan for 5 minutes. Remove puffs from pan and transfer to cooling rack. (Loosen puffs with a small offset spatula or butter knife if necessary.)
Topping
  1. Combine granulated sugar and cinnamon in a shallow bowl.
  2. Place colored sparkling sugar crystals in another shallow bowl.
  3. Dip the bottoms of each puff in melted butter, then into cinnamon sugar mixture.
  4. Dip the tops of each puff in melted butter, then into sparkling sugar.
  5. Decorate with edible flowers if desired.
Recipe Notes

*To purchase dragonfruit powder, click here.

 **To purchase pink sparkling sugar crystals, click here.