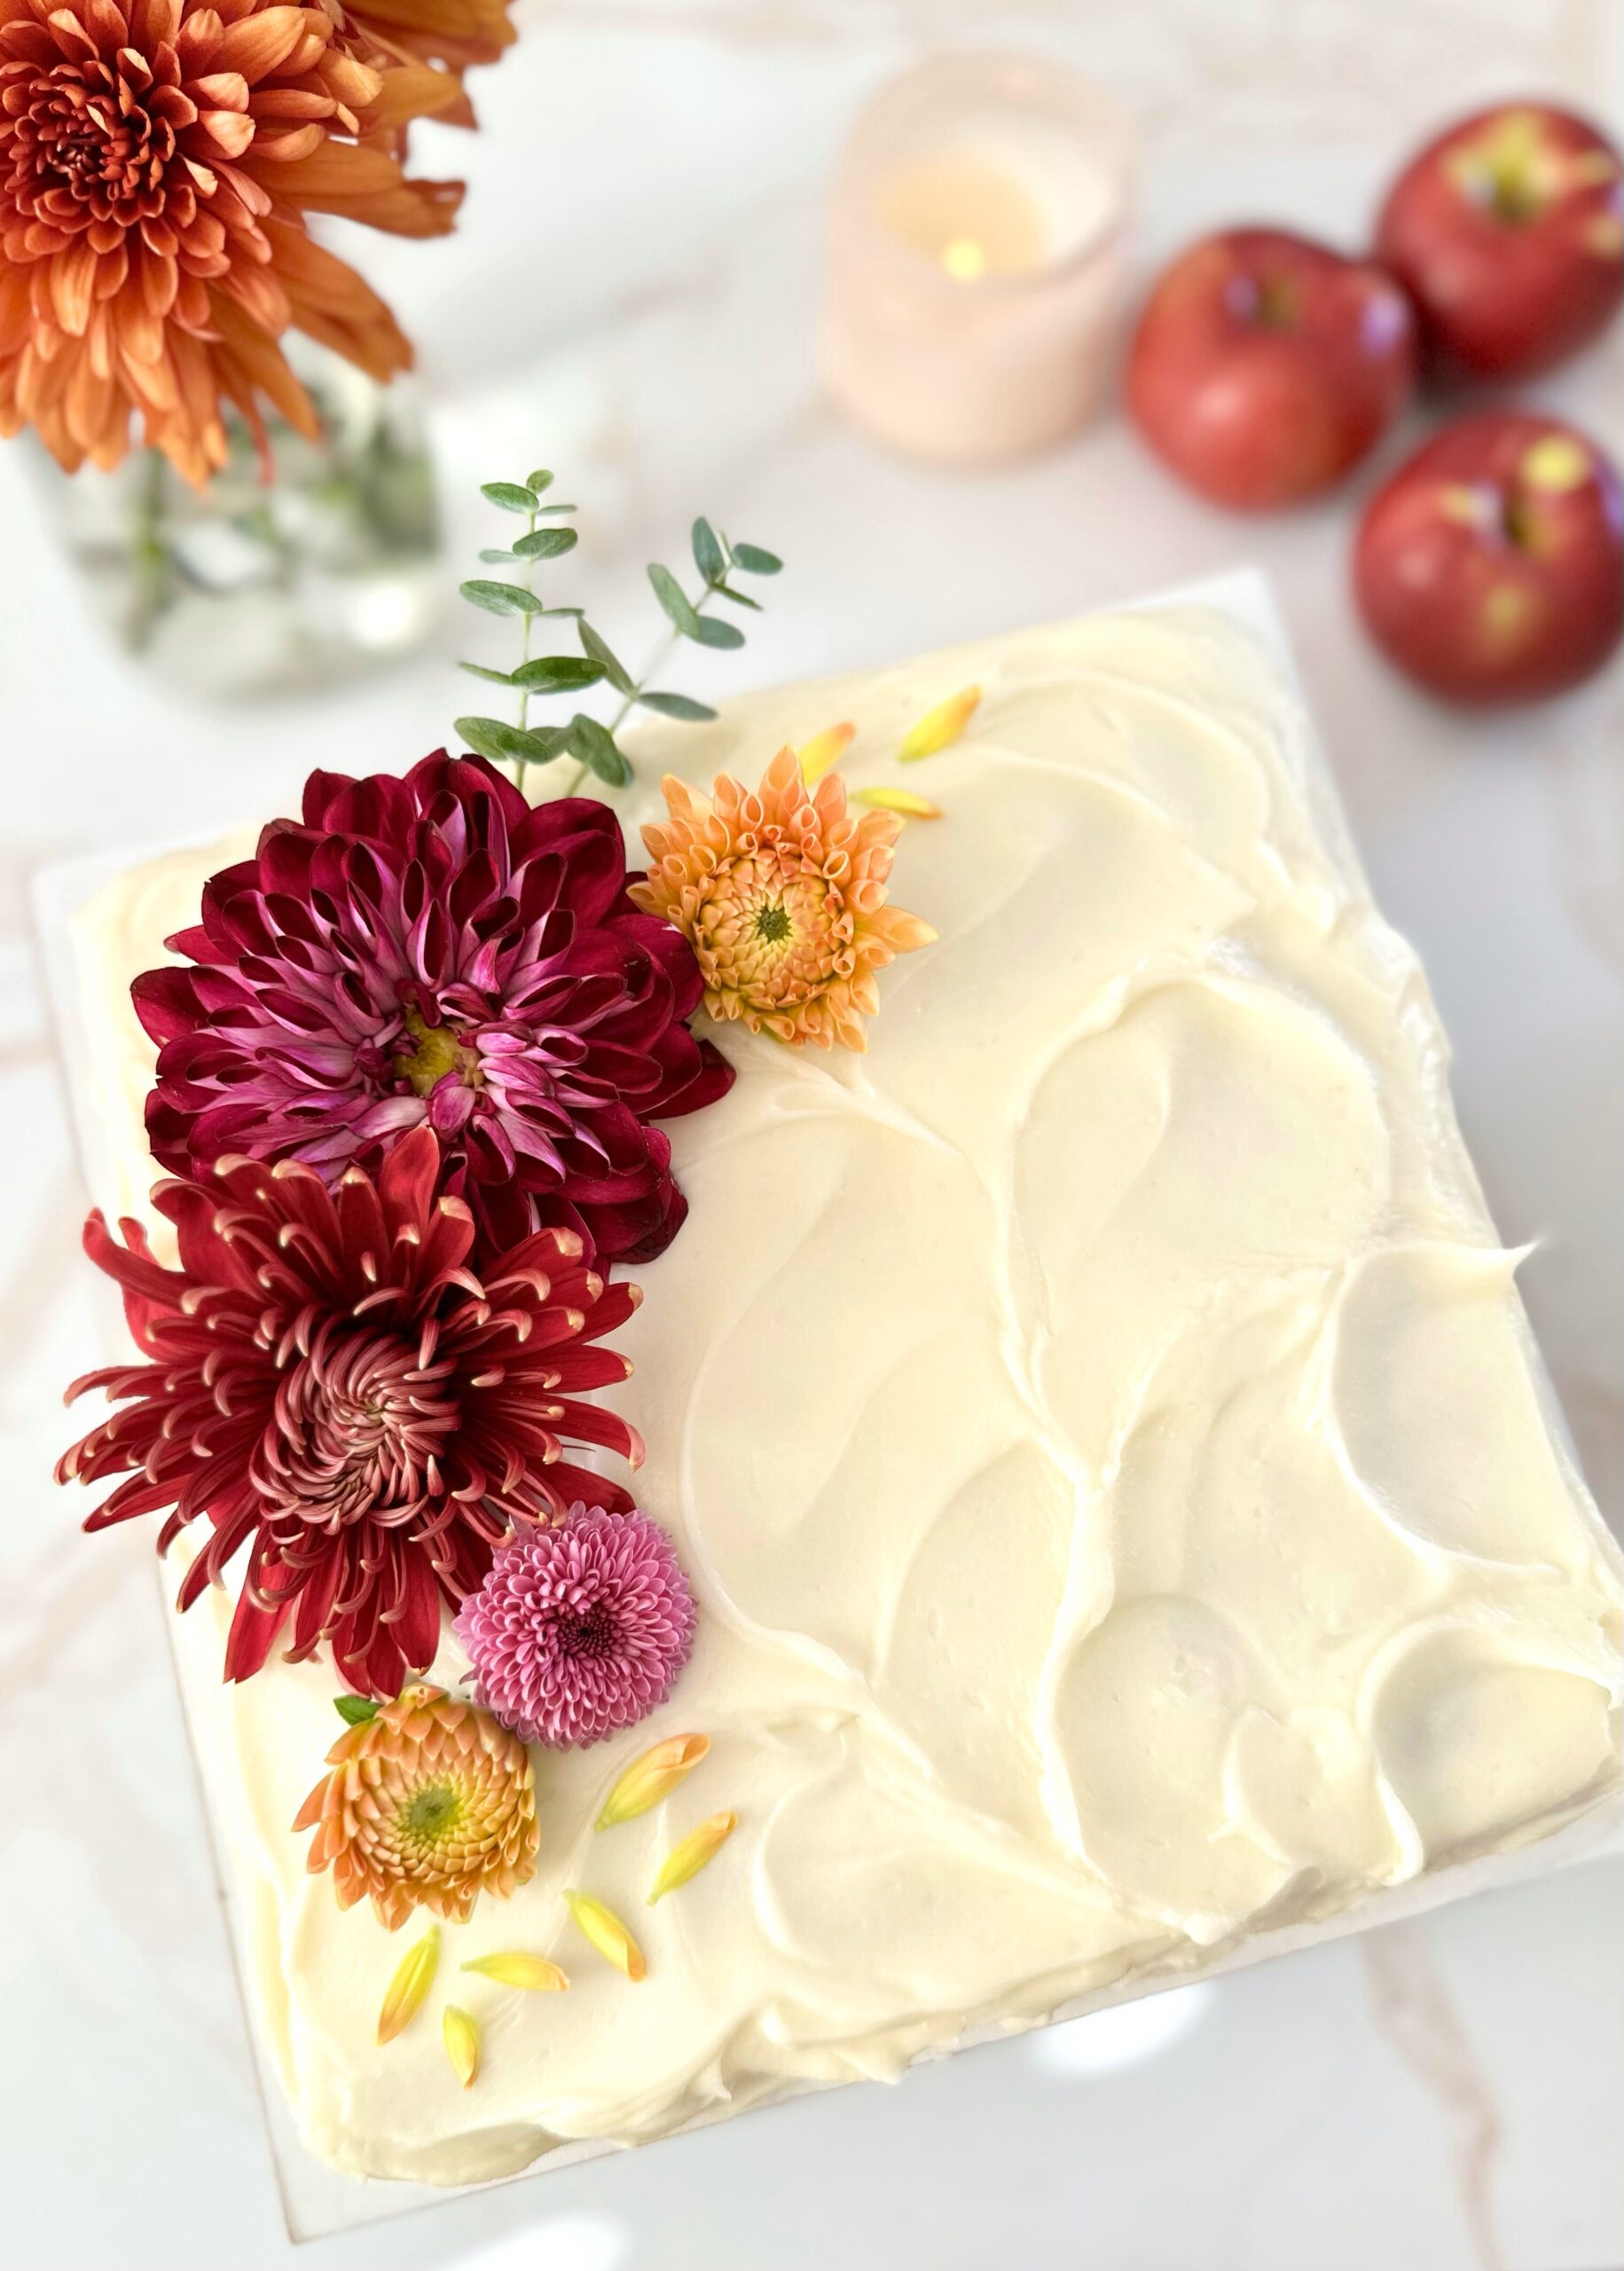
An easy to make 8-inch square cake, typically unfrosted, is what my family would consider a snacking cake when I was growing up. This easy-to-make apple cake can definitely qualify as a snacking cake because it stands on its own as a delicious cake, unfrosted. BUT…if you add the silky cream cheese frosting, then you have yourself something a little more special. This cake could easily appear at a Thanksgiving meal and upstage the pies.
I used fresh puréed apples that I picked recently when I went apple picking. If you don’t have fresh apples on hand, you can substitute with unsweetened applesauce.* I used French vanilla compound, which gives it an exceptionally lovely flavor, but you can also use vanilla bean paste or pure vanilla extract.
Print Recipe
Apple Cake with Cream Cheese Frosting
A soft, moist apple cake with silky cream cheese frosting.
Preheat the oven to 350ºF (177ºC). Line the bottom of an 8-inch square cake pan** with parchment paper. Grease and flour the insides.
In a medium bowl, whisk together the flour, baking powder, baking soda, salt, cinnamon, ginger and nutmeg.
In a large bowl, whisk together the brown sugar, sugar, eggs, vegetable oil, and vanilla until well combined. Stir in the puréed apples until incorporated. Stir in the flour mixture just until combined.
Transfer the batter to the prepared cake pan. Bake until a toothpick inserted into the center of the cake comes out clean, about 28-33 minutes
Cream Cheese Frosting
In a large bowl, stir the cream cheese with a spatula until smooth. Beat in the butter, with an electric mixer on low speed, until smooth and well combined.
Beat in the powdered sugar, vanilla, salt and heavy cream until smooth and well combined. Stir slowly with a spatula to smooth the frosting and remove bubbles.
Recipe Notes
*If you're using applesauce and your applesauce is watery, drain off excess water before measuring.
**To find my favorite 8-inch square cake pan, click here.
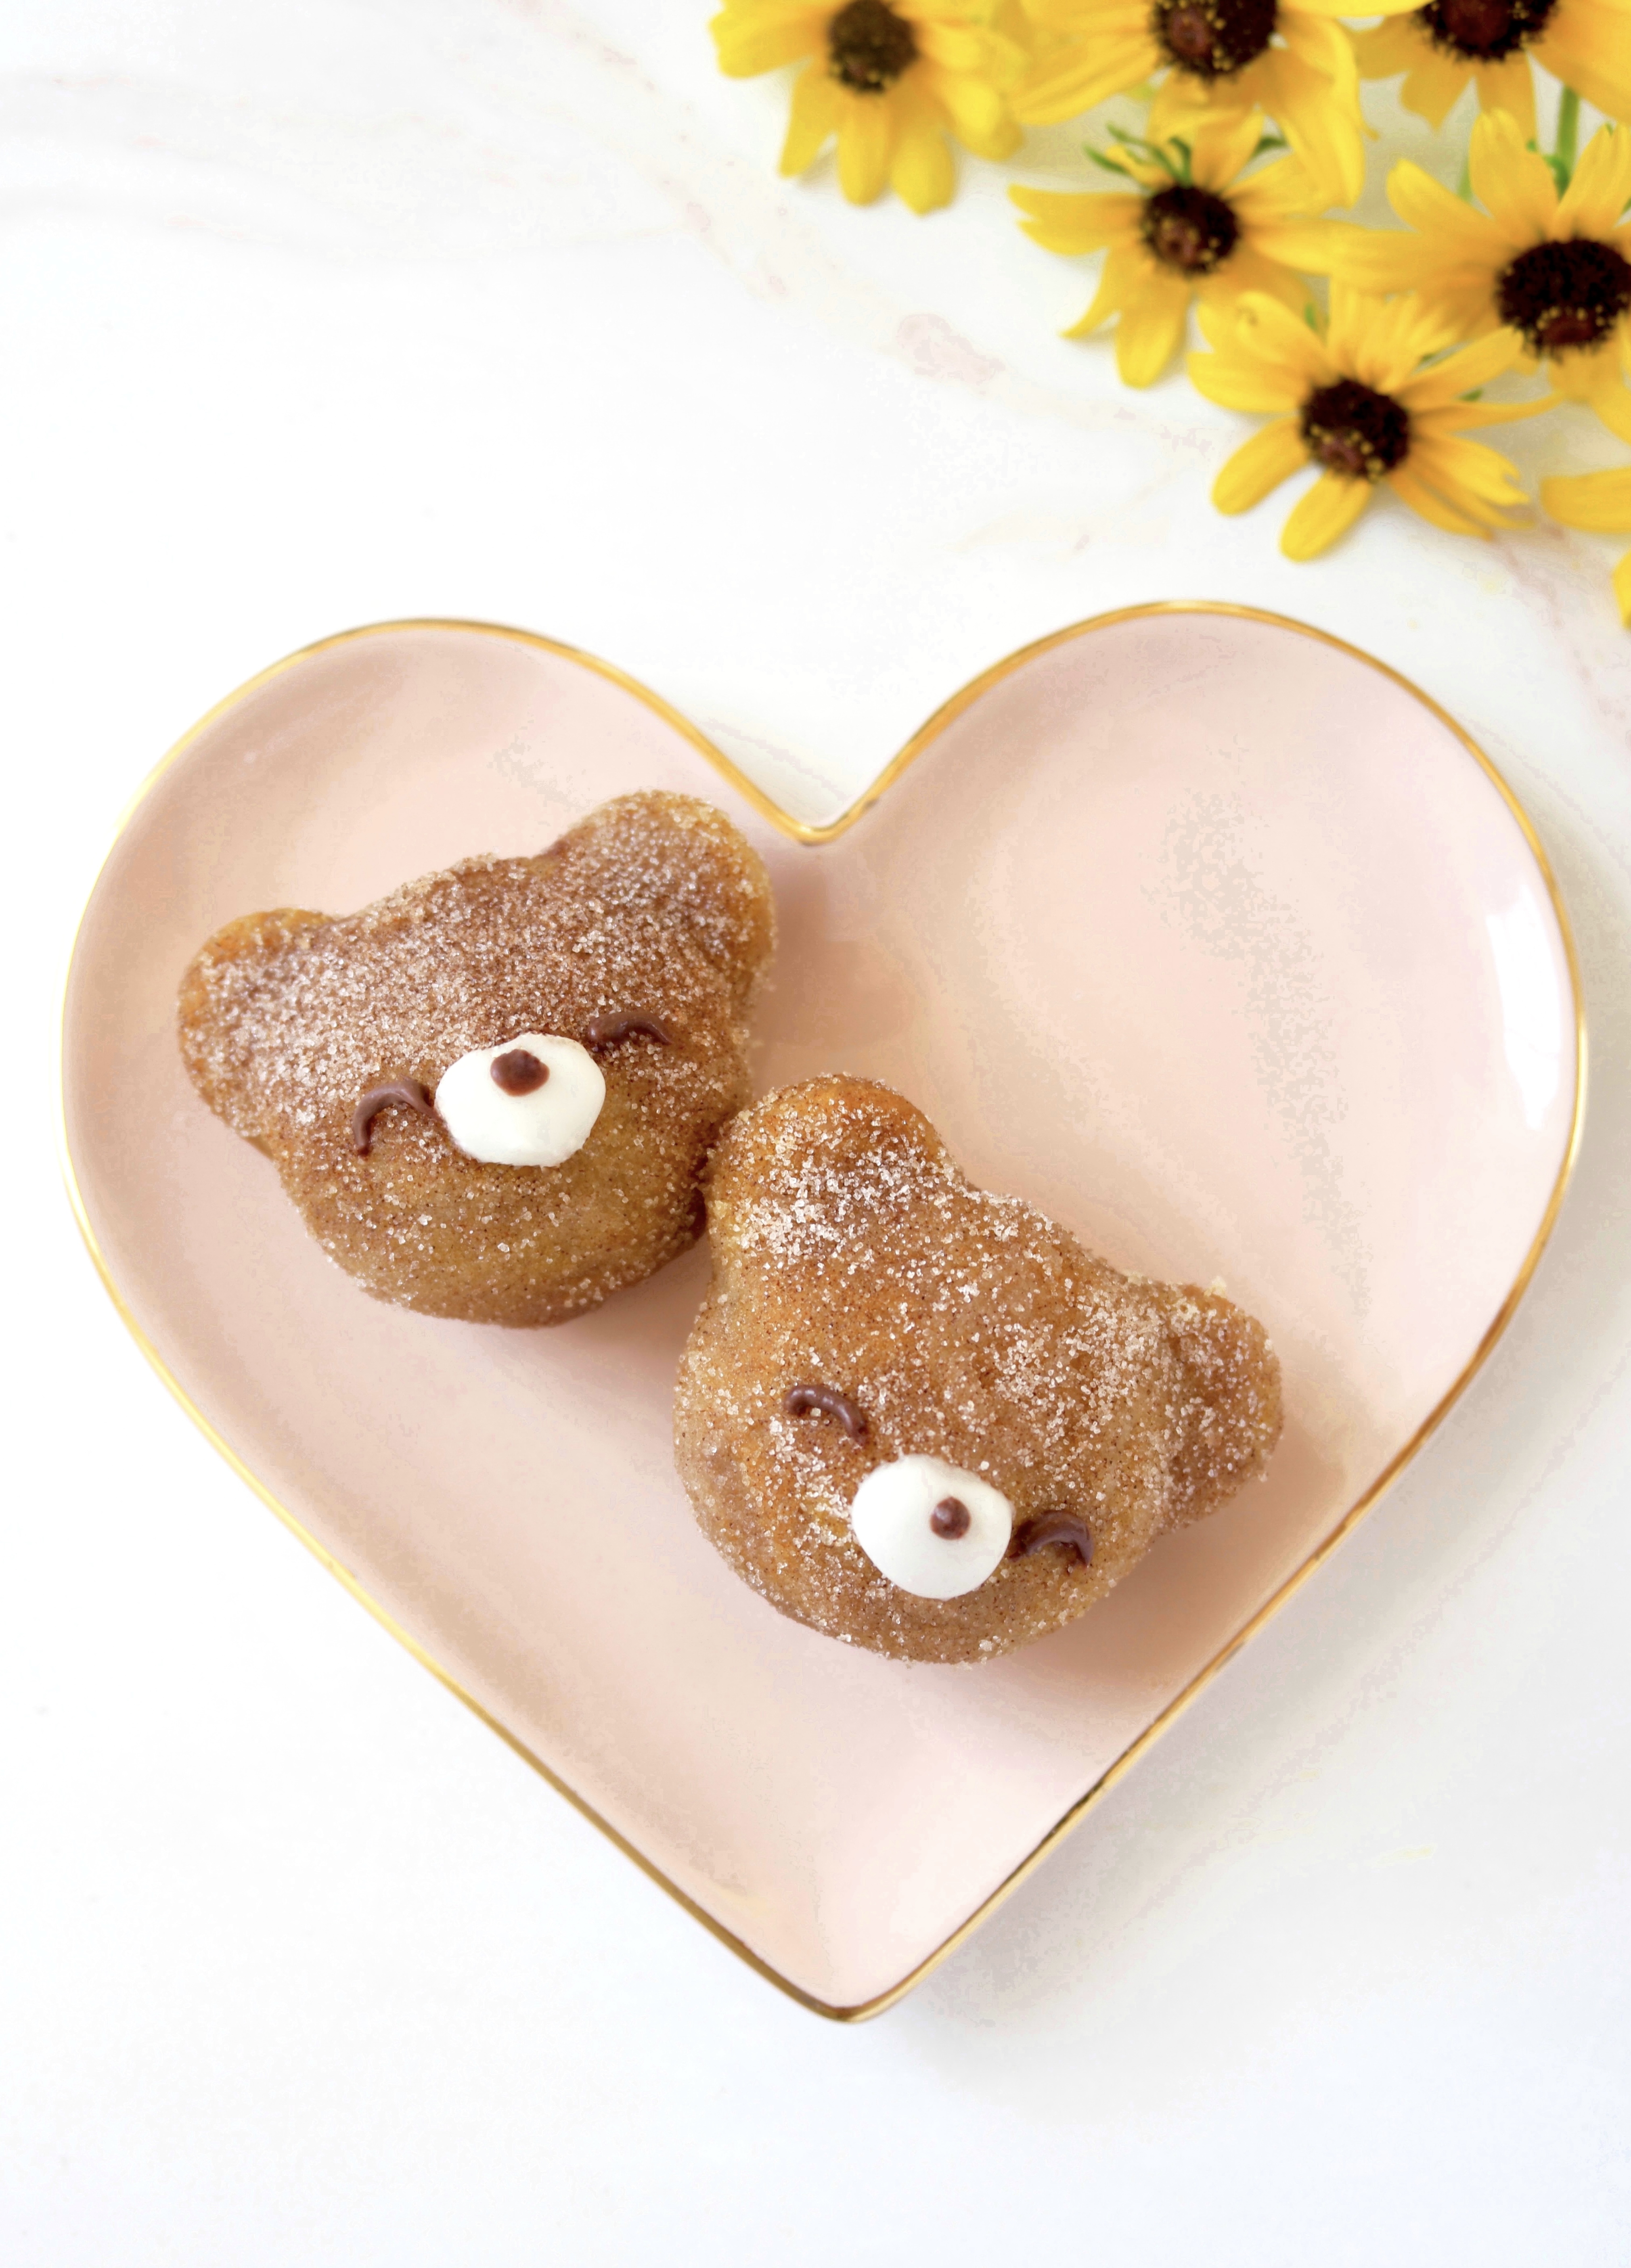
These cute little bear-shaped pumpkin muffins are almost too cute to eat. But if you try one, it’ll be gobbled up without hesitation because they’re so moist, fluffy and delicious! The cinnamon sugar coating gives them the perfect fall flavor and a subtle crunch. I used cream cheese icing to form the snouts and melted chocolate for the eyes and noses. You can also use melted chocolate chips or candy melts to decorate their faces if you prefer. I used a bear-shaped mini muffin pan, which is also called a Madeleine pan or a financier pan. To find a bear mini muffin pan, click here. A standard mini muffin pan will also work, but the muffins won’t be bear-shaped. If you end up using a standard mini muffin pan, you can add round, flat candies to form the ears.
To watch the TikTok video of Mini Pumpkin Bear Muffins being made, click here.
To watch the Instagram video of Mini Pumpkin Bear Muffins being made, click here.
Print Recipe
Mini Pumpkin Bear Muffins
Moist, fluffy bear-shaped pumpkin mini muffins with cream cheese icing snouts
Preheat the oven to 325ºF (165ºC). Grease and flour a bear-shaped mini muffin pan. (This recipe also works in a mini muffin pan but the muffins won't be bear shaped.)
In a medium bowl, whisk together the flour, baking powder, baking soda, salt, cinnamon, ginger and nutmeg.
In a large bowl, whisk together the brown sugar, oil and egg until smooth and well combined. Mix in the pumpkin purée until incorporated. Stir in the flour mixture just until combined.
Scoop or pipe the batter into the muffin pan, filling the cups 2/3 full (about 3/4 oz or 21g in each). Use a small offset spatula to smooth the top of the batter, making sure to get batter into the ears.
Bake until a toothpick inserted into the center of the muffins comes out clean, about 9-11 minutes. Let the muffins cool in the pan for 5 minutes then remove them from the pan and transfer to a cooling rack.
Clean the pan and repeat with the remaining batter.
Cinnamon Sugar
In a small bowl, whisk together the sugar and cinnamon until well combined. Brush the warm muffins with with melted butter using a small pastry brush. Coat them with the cinnamon sugar mixture.
Bear Faces
In a small bowl, beat the butter, cream cheese, powdered sugar and 1/2 teaspoon of milk until smooth. Add more milk as needed.
Transfer the icing to a piping bag fitted with a medium round tip or snip off the end of the piping bag making a 1/4-inch wide opening. Pipe a small blob of icing onto each bear's face to form the snouts.
Transfer the melted chocolate to a piping bag fitted with a small round tip or snip off the end of the piping bag making a 1/16-inch wide opening. Pipe dots of chocolate onto the snouts to make the noses. Pipe dots or curved lines to make the eyes. Alternately you can apply the melted chocolate dots with the tip of a toothpick
Recipe Notes
*To find a bear-shaped mini muffin pan, click here.
Summer was such a happy season for me as a child that I didn’t want it to end. I still love summer, but now that I’m an adult, I begin to anticipate fall right around the time when I’m tired of harsh, hot temperatures, rumbling air conditioners and flies buzzing around at cookouts. Now is that time for me. It’s so hot where I live right now, that I’m welcoming the cool, crisp fall weather and all it brings.
The beautiful warm flavors of fall are perfectly captured in these Pumpkin Cinnamon Roll Cakes. The moist, perfectly spiced cakes are topped with a cinnamon swirl which is basically cinnamon roll filling. I topped them with Vanilla Bean Icing, but you can also make it cream cheese icing by swapping out 1 tablespoon of the melted butter for 1 tablespoon of softened cream cheese, if you prefer. The optional addition of meringue powder helps the icing set up and gives it that crunch we love on glazed donuts. To find meringue powder, click here.
I used a shallow jumbo muffin pan to make these cakes. The muffin cups are 4 inches wide and 1 inch deep. A hamburger bun pan for 4-inch buns or six 4-inch cake pans will also work. To find the pan I used, click here.
To watch the Instagram video of the finished Pumpkin Cinnamon Roll Cakes, click here.
Print Recipe
Pumpkin Cinnamon Roll Cakes
Moist pumpkin cakes with cinnamon swirls and vanilla bean icing
Preheat the oven to 350ºF (180ºC). Line a 6-serving shallow jumbo muffin pan with jumbo muffin liners.* (The jumbo muffin liners will fit by pressing them in around the inside bottom edges.) The muffin pan I used has cups that are 4-inches across by 1-inch deep. A hamburger bun pan for 4-inch buns or six 4-inch cake pans will also work.
In a medium bowl, whisk together the flour, baking powder, baking soda, salt, cinnamon, ginger and nutmeg.
In a large bowl, whisk together the sugar, oil, eggs and vanilla until smooth and well combined. Mix in the pumpkin purée. Stir in the flour in two additions, just until combined.
Transfer the batter to the muffin cups, evenly dividing the batter among the cups. Pipe the cinnamon swirl mixture in a spiral on the top of the batter of each one.
Bake until a toothpick inserted into the center of the cake part comes out clean, about 23-27 minutes. Let the cakes cool in the pan for 5 minutes, then transfer to a cooling rack.
Cinnamon Swirl
In a small bowl, whisk together the brown sugar, flour, cinnamon and salt. Add the melted butter and whisk until well combined.
Transfer the mixture to a piping bag fitted with a 1/4-inch wide round tip.
Vanilla Bean Icing
In a small bowl, whisk together the butter, vanilla bean paste, powdered sugar, meringue powder, salt and 1 tablespoon of milk until well combined. Whisk in more milk as needed to reach your desired consistency.
Brush the icing on the cooled cakes with a small pastry brush or make the icing a little thinner and drizzle the icing on if you prefer.
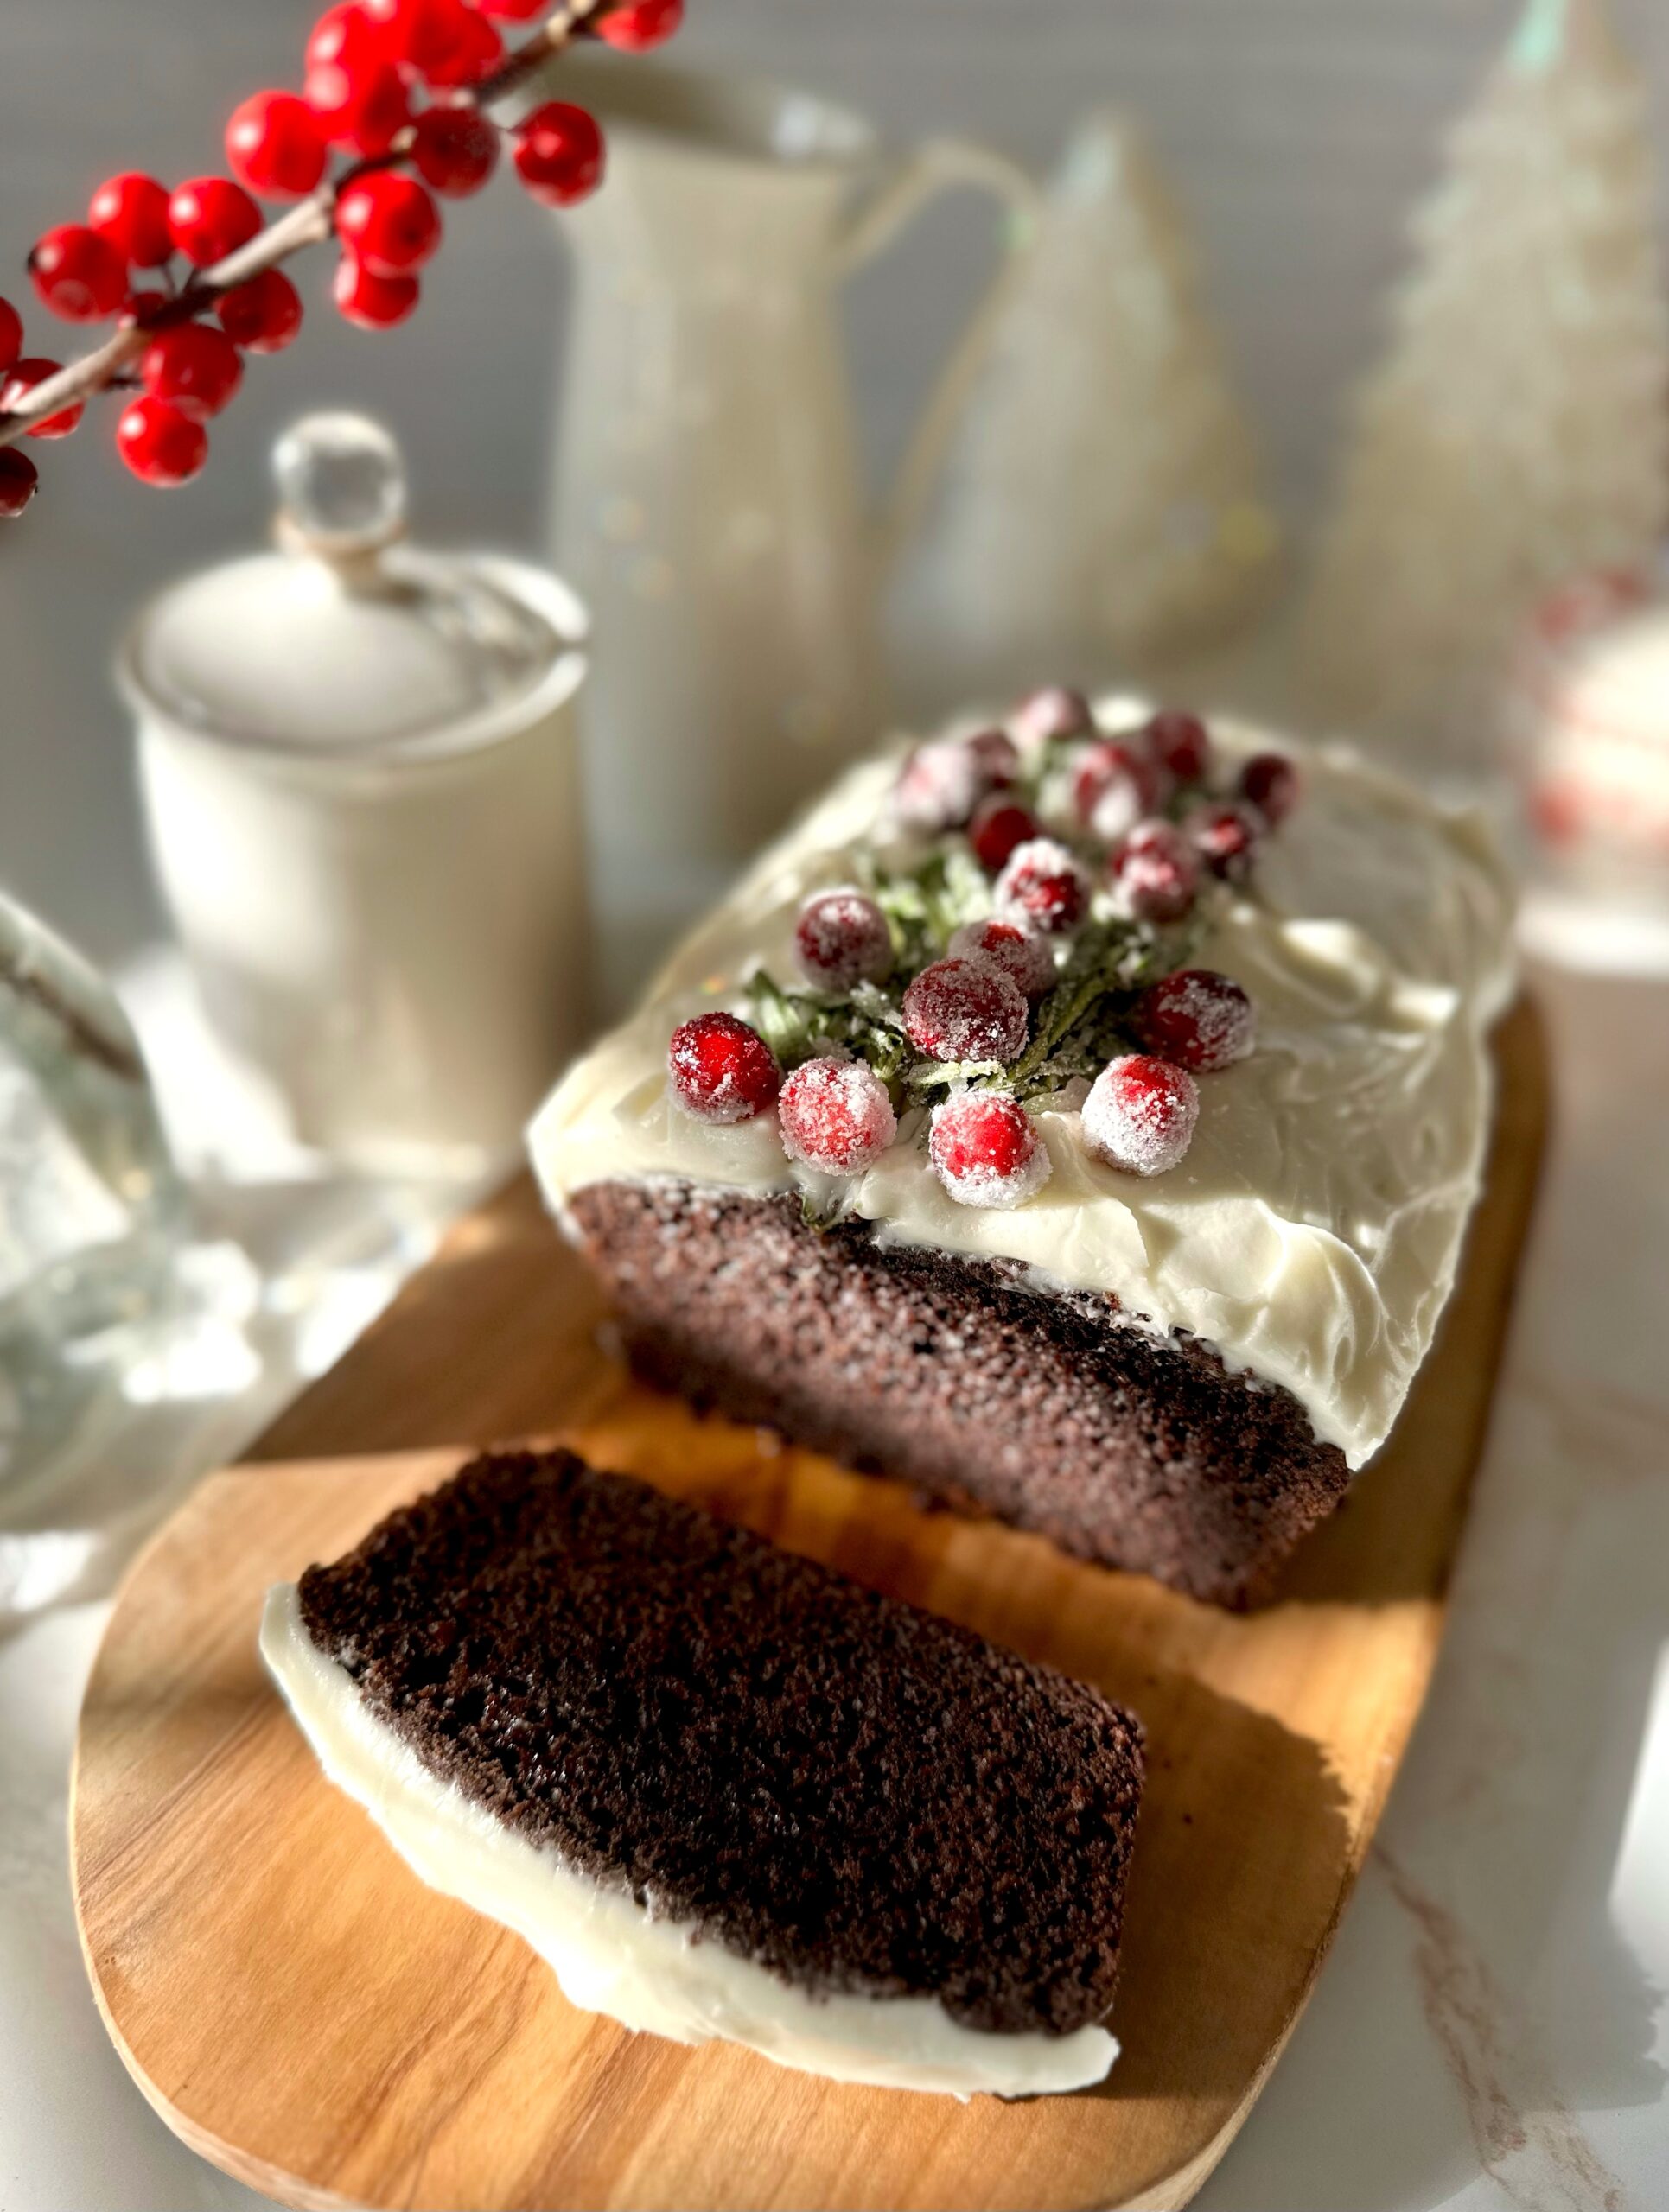
Chocolate gingerbread is gingerbread’s elegant sister. It has the warm spices we love in gingerbread combined with the earthy depth of chocolate. Topping this rich, tender loaf with silky cream cheese frosting is the best possible choice to take it over the top. It’s a lovely loaf to enjoy during the holiday season and beyond. Enjoy it with a hot drink for a cozy, comforting winter treat.
Make sure to check out my method for making sugared cranberries below. No raw eggs required!
Preheat oven go 350ºF (180ºC). Line the bottom of a 9 x 5-inch loaf pan with parchment paper. Grease the insides and dust with a mixture of equal parts flour and cocoa powder.
In a medium bowl, whisk together the flour, cocoa powder, cinnamon, ginger, baking powder, baking soda, salt, nutmeg, and cloves.
In a large bowl, beat the brown sugar, oil, eggs and vanilla together until smooth.
In a small bowl, whisk together the sour cream and milk.
Add flour the mixture to the batter in two additions, alternating with the milk mixture, beating just until combined.
Transfer the batter to the prepared pan. Bake until a toothpick inserted into the center comes out clean, about 38-45 minutes.
Cool the loaf in the pan for 10 minutes, then turn the loaf out onto a cooling rack to cool completely. Frost with cream cheese frosting.
Cream Cheese Frosting
In a medium bowl, beat the butter and cream cheese together until smooth.
Add the powdered sugar, 2 tablespoons (30 ml) of milk, the vanilla and salt. Beat until smooth. Add additional milk, if needed, until your desired consistency is reached.
Recipe Notes
To make sugared cranberries and rosemary for garnish: Mix 1 teaspoon of meringue powder* with 1 tablespoon of water. Place 1 cup of fresh cranberries in a bowl and coat them in the meringue powder mixture. Drain any excess liquid then coat the cranberries with granulated sugar. Place them on a parchment lined baking sheet to dry at room temperature for at least 1 hour. Use the same method for sprigs of rosemary.
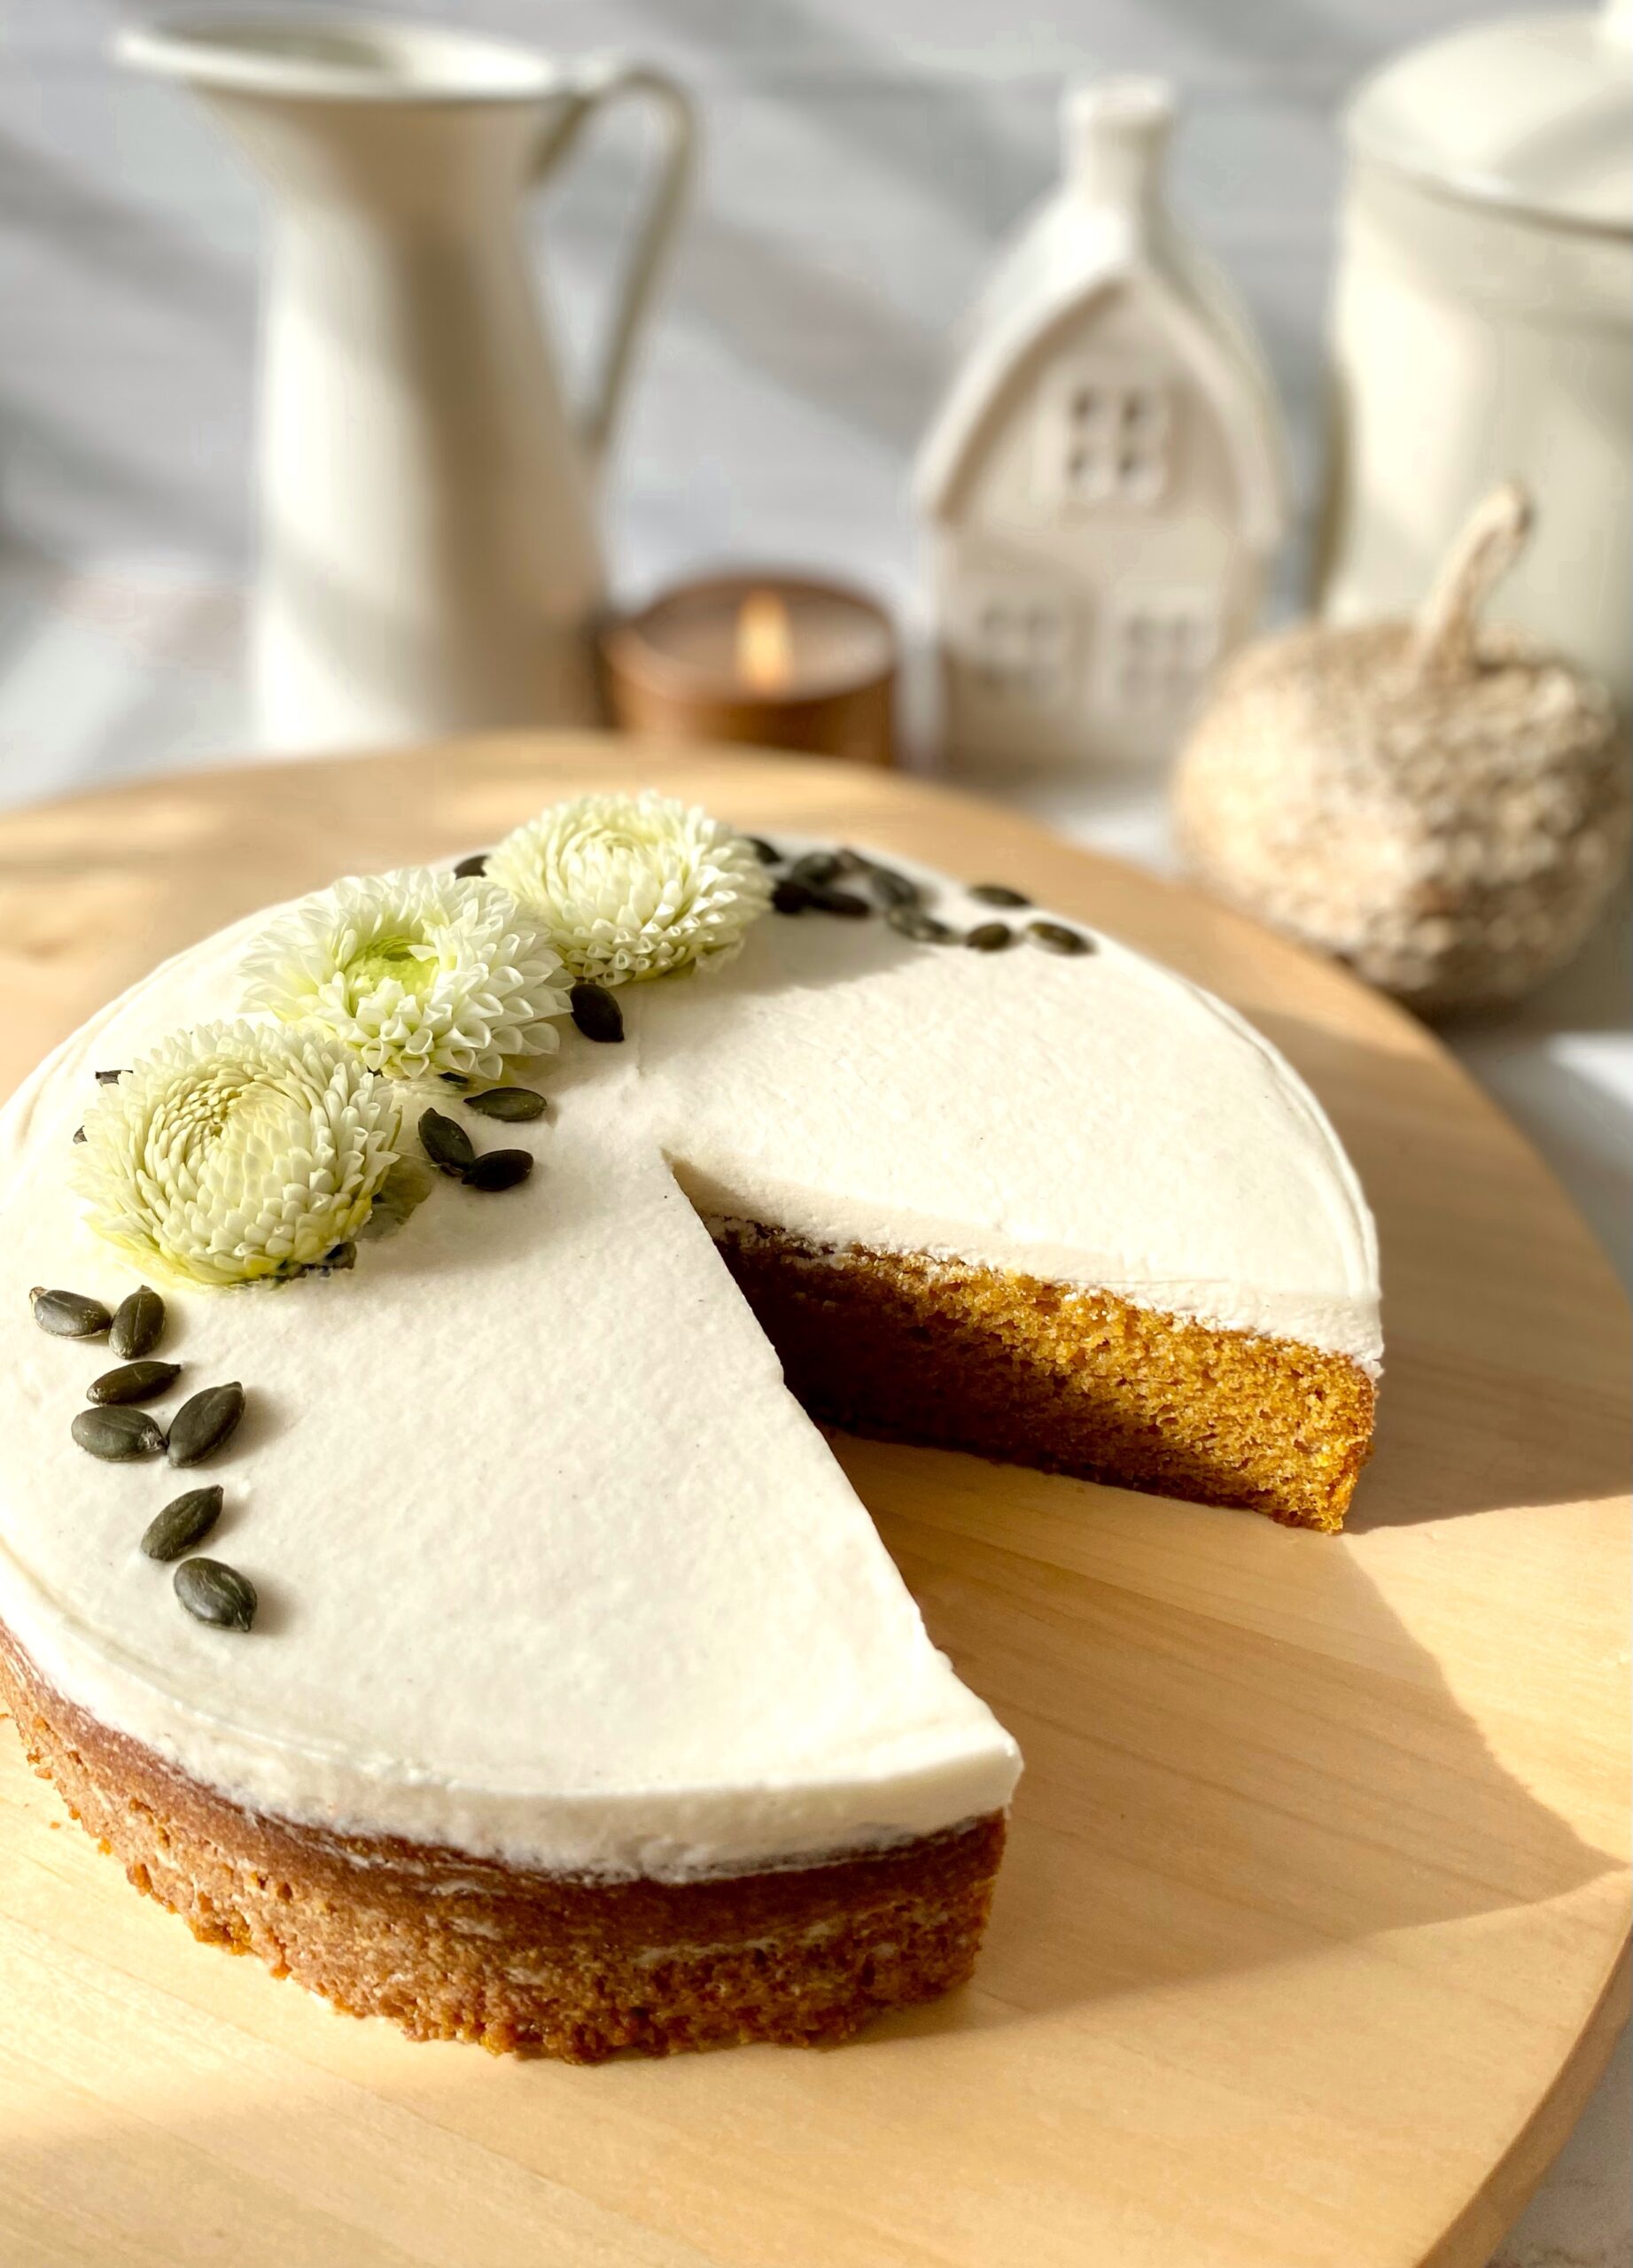
This perfect pumpkin cake brings back memories. The tender, moist texture reminds me of the pumpkin cake bars I used to make in junior high. I got the treasured bar recipe from an old children’s cookbook. I lent the cookbook to a neighbor and never saw the book or the recipe again. Through trial and error, I came up with this cake, which I think is even better! It’s so delicious it doesn’t need frosting, but the classic pairing with cream cheese frosting takes it over the top.
Even though the weather is warm where I live at the moment, I’m dreaming about all the delicious fall treats I’ll be baking this year. Let’s look forward to cool, crisp weather, the smell of pumpkin or apples baking, and sipping a warm mug of something spicy while we wait for our bakes to come out of the oven.
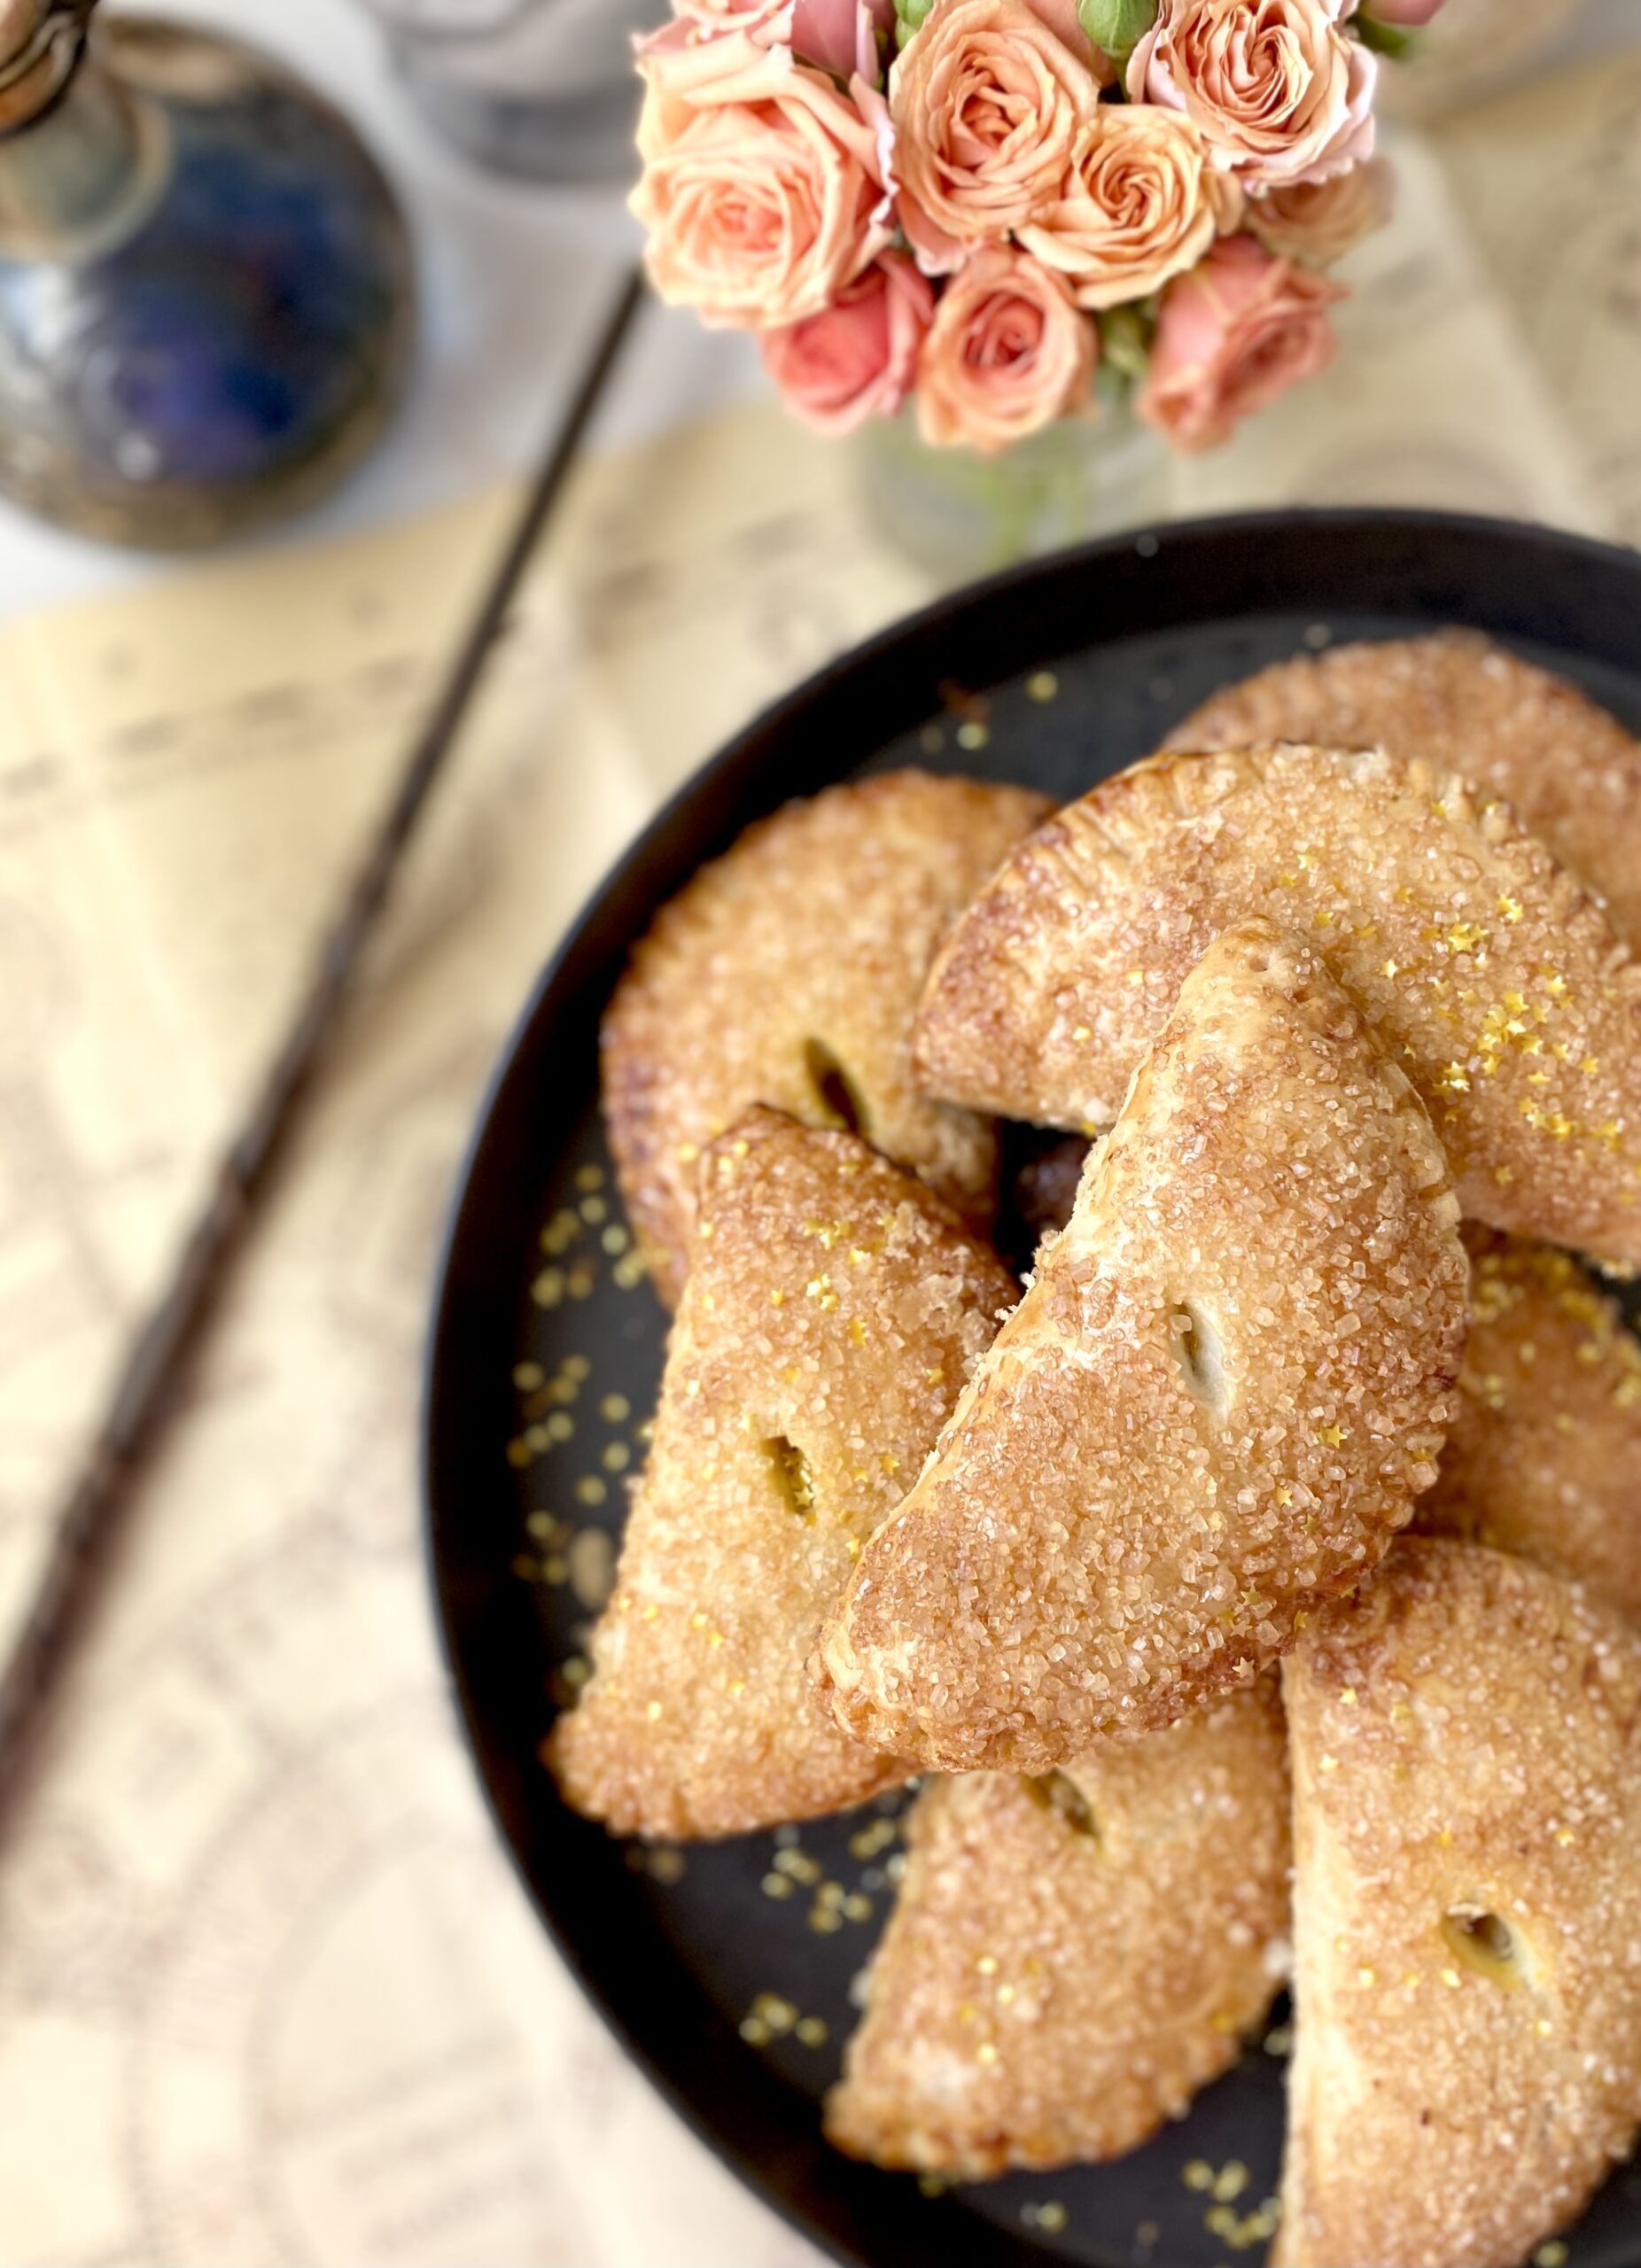
Inevitably, every fall, the Harry Potter movies come on at my house and it’s nice to have some popcorn and sweet treats to enjoy while watching the movies. And these Harry Potter Inspired Pumpkin Pasties are perfect for that! If you’ve read the Harry Potter books, you may remember the Pumpkin Pasties being mentioned. There are many interpretations out there, but I imagined them to be crispy and flaky on the outside with a sweet pumpkin filling. I included a delicious flaky pie crust recipe here, but feel free to use store bought pie dough if you want to streamline the process. I sprinkled mine with raw turbinado sugar before baking which provides a sweet delicious crunch. You can also use maple sugar or sparkling sugar. To find the sugar I used, click here. And as a magical touch, I added some edible gold star glitter. To find the edible gold stars, click here.
Print Recipe
Pumpkin Pasties
Harry Potter inspired sweet pumpkin filled hand pies
In a large bowl, whisk together the flour, sugar and salt. Work the shortening into the flour mixture with your fingertips until evenly dispersed throughout.
Work the butter into the flour mixture with your fingertips, creating flat dime size pieces.
Mix the ice water and vinegar together. Sprinkle over the flour mixture a little at a time, stirring until dough comes together. You may not need all of the water depending on your climate.
Turn the dough out onto a lightly floured surface. Fold the dough over onto itself a few times. Do not overwork the dough! Form the dough into two disks. Cover with plastic wrap and refrigerate at least one hour or up to overnight.
Pumpkin Filling
In a medium bowl, mix together the pumpkin purée, sugar, egg, heavy cream, cinnamon, ginger and nutmeg until well combined.
Assembly
Preheat oven to 400ºF. (200ºC). Line two baking sheets with parchment paper.
On a lightly floured surface, roll dough to 1/8-inch thickness. Cut dough into 12 5-inch rounds, re-rolling scraps as needed. Place dough rounds on prepared baking sheets.
Place 2 tablespoons of filling on each round, leaving a half-inch border. Apply egg wash to edges of rounds.
Fold the dough over and press the edges together. Crimp the edges with a fork. If any filling oozes out, wipe it up with a paper towel or it will burn.
Brush the pasties with egg wash. Cut a half-inch slit into the top of each pastie. Sprinkle with coarse sugar.
Bake until golden brown, about 18-20 minutes. Transfer to a cooling rack.
My mom had a cupboard in the kitchen containing a few old cookbooks that she rarely used. As a child, I used to enjoy perusing them and looking at the baked treats. Some of the cookbooks were so old, they had black and white photos or even just drawings of the food. The ones with drawings interested me because they depicted smiling children enjoying the treats.
When I started learning to bake, I found a recipe for French Breakfast Puffs in one of those old books. The title sounded so fancy, but they were really just simple muffins dunked in butter and rolled in cinnamon sugar. I have no idea what the name of the cookbook was or what happened to it, but the delicious muffin recipe stuck around for a while. I’ve tweaked the recipe so many times over the years, and most recently, I added pumpkin to it. These Pumpkin Cinnamon Mini Muffins are one of the best versions I’ve created. The inside texture of the muffins is soft and moist and it contrasts nicely with the slight crunch you get from the cinnamon sugar on the outside. They look so cute too, like little pumpkins, and they definitely make children smile!
To watch the TikTok video of these mini muffins being made, click here.
Preheat oven to 350ºF. Grease and flour a 24-serving *mini muffin pan.
In a medium bowl, whisk together flour, baking powder, salt, cinnamon, ginger and nutmeg.
In a large bowl, beat sugar, oil, egg and pumpkin purée until smooth.
Stir in flour mixture just until combined. A few lumps are okay. Batter will be thick.
Transfer batter to prepared pan, about a scant 2 tablespoons of batter in each muffin cup.
Bake until toothpick inserted into muffins comes out clean, about 11-13 minutes. Do not over bake! Be diligent, since over baking can happen very quickly with mini muffins.
Let muffins cool in pan for 5 minutes. Turn muffins out onto a cooling rack.
Topping
Combine sugar and cinnamon in a shallow bowl.
Dunk warm muffins in melted butter, then roll in cinnamon sugar.
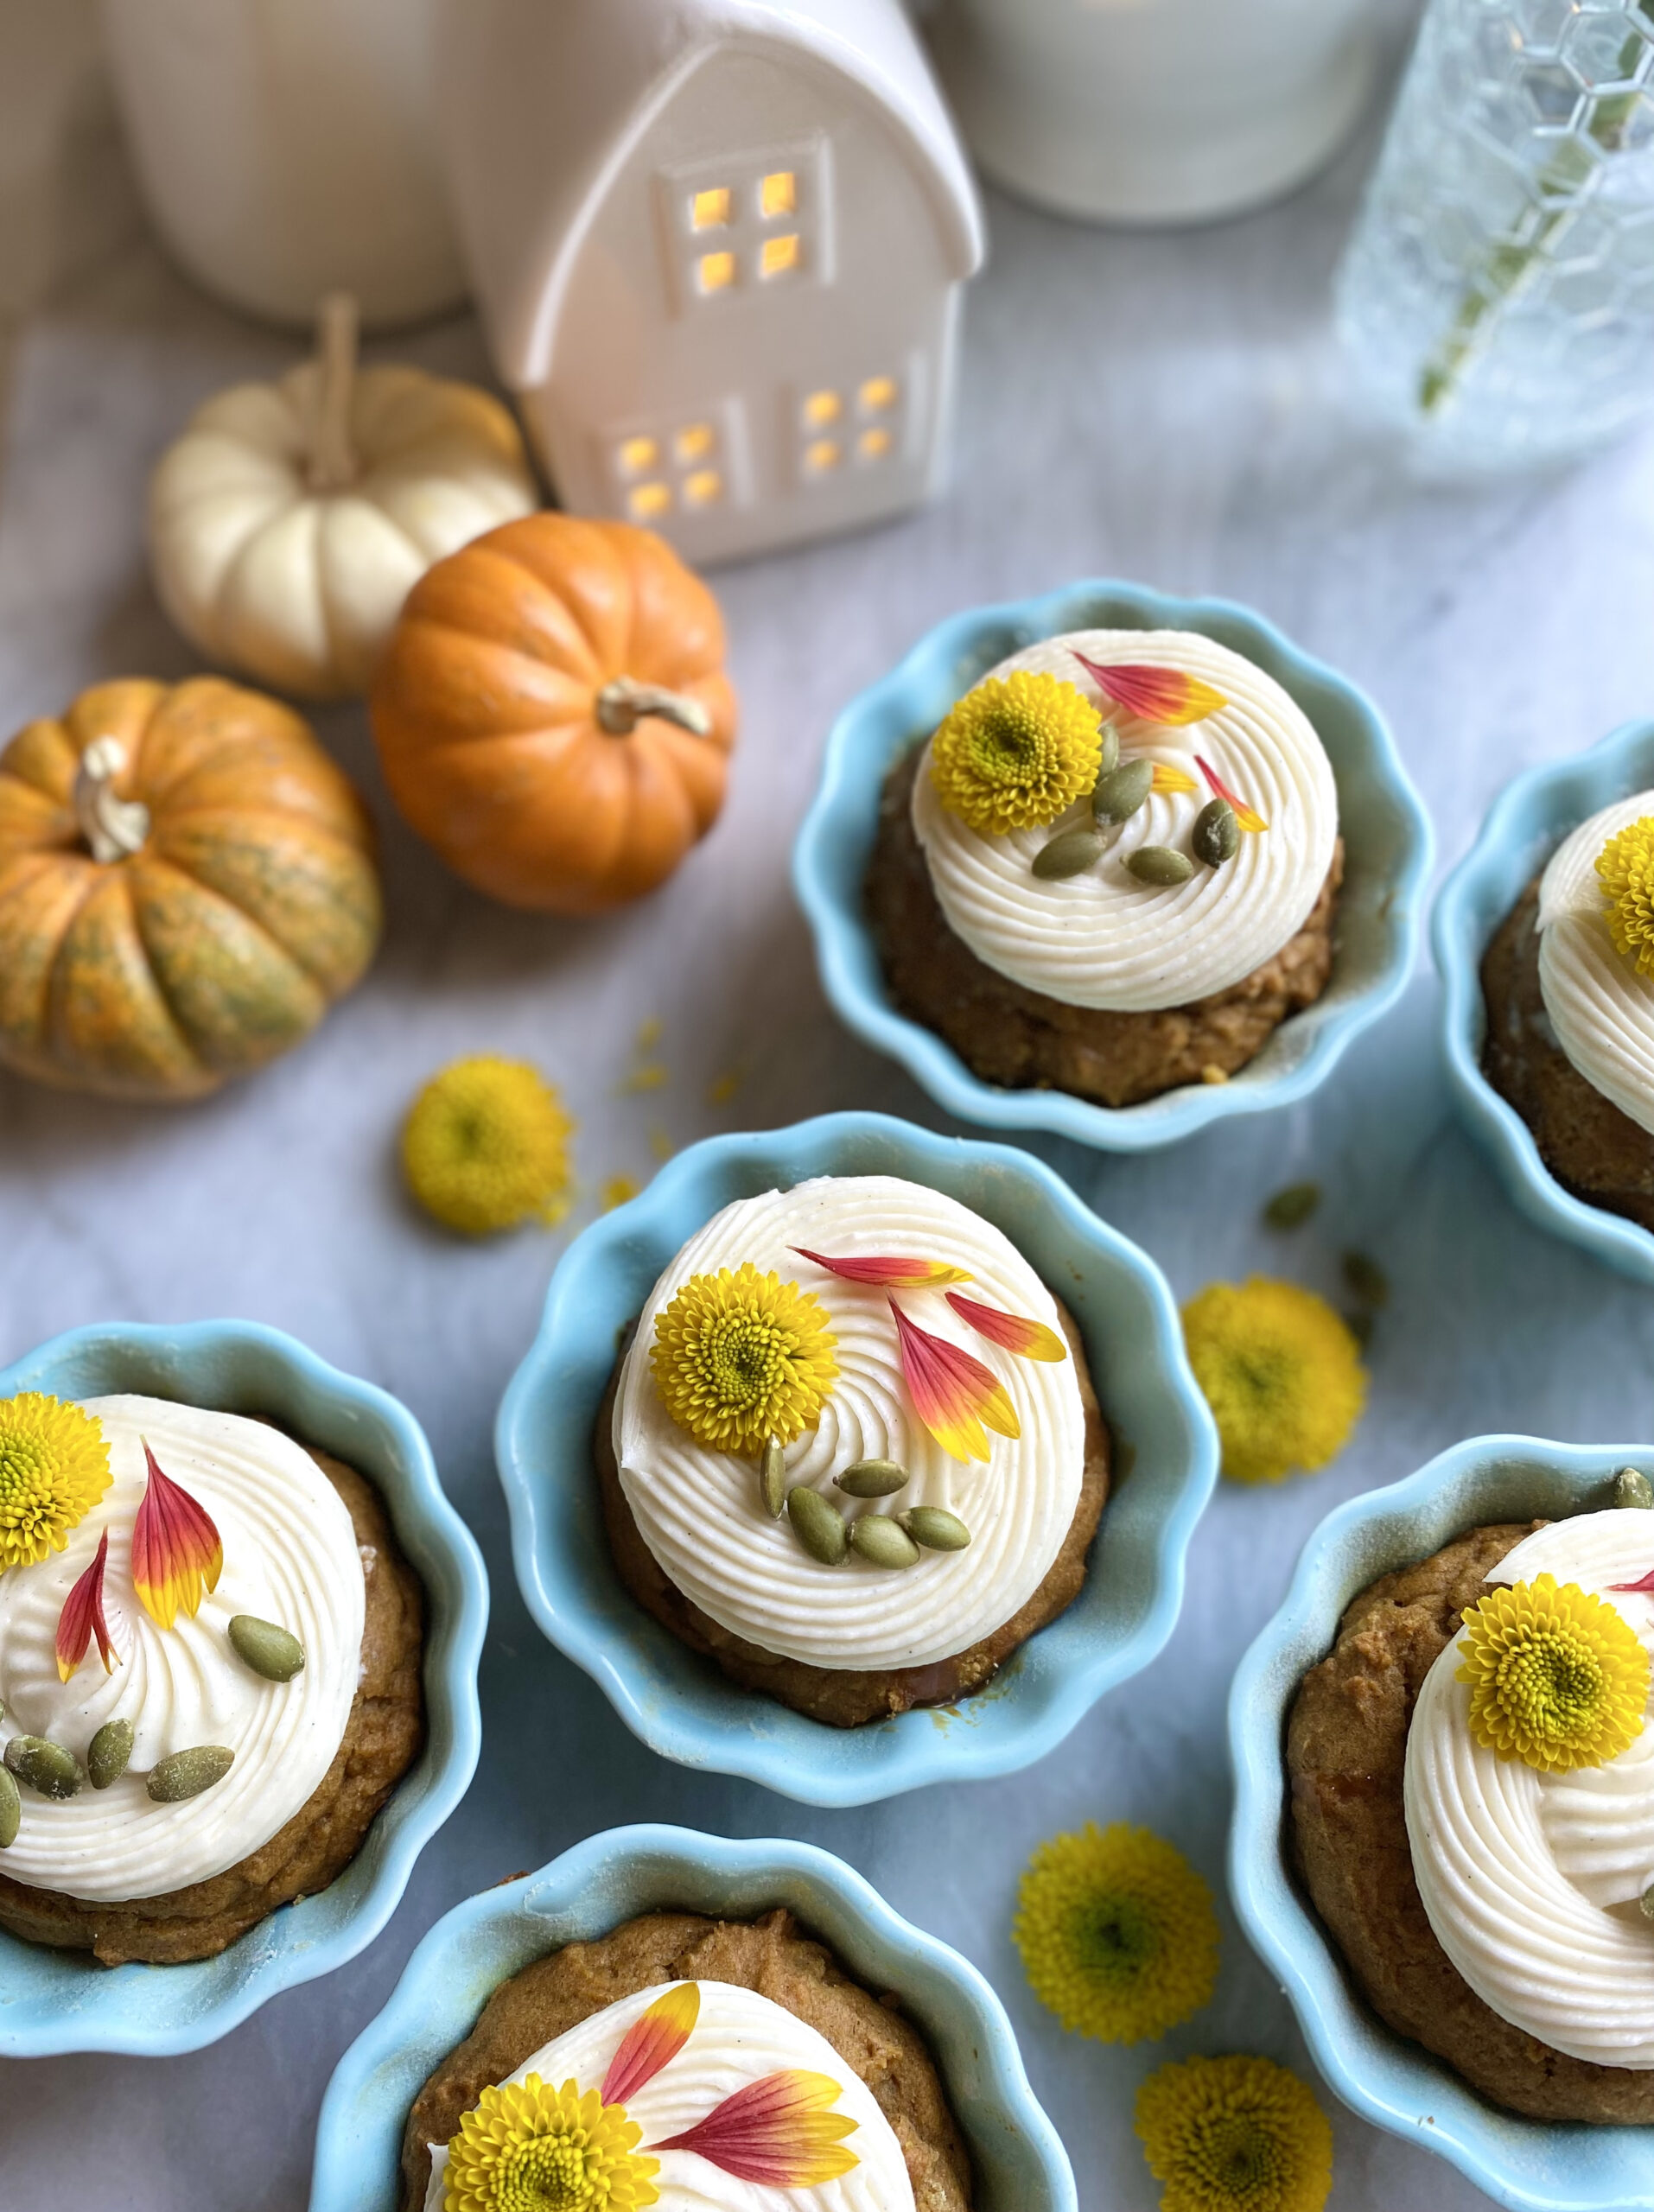
In early September, I saw someone announce the fall season on social media. In addition to people pointing out that it was too early for the announcement, the word police corrected the person with the word autumn. Since both terms are correct, we can call the season whatever we prefer. I think autumn is a pretty sounding word, so I’ll use it for the rest of this post. Whatever you call it, these Pumpkin Spice Mini Loaves are a perfect little celebration of the season. They have just the right amount of pumpkin spices, making them so fragrant that your kitchen will smell like cozy autumn heaven.
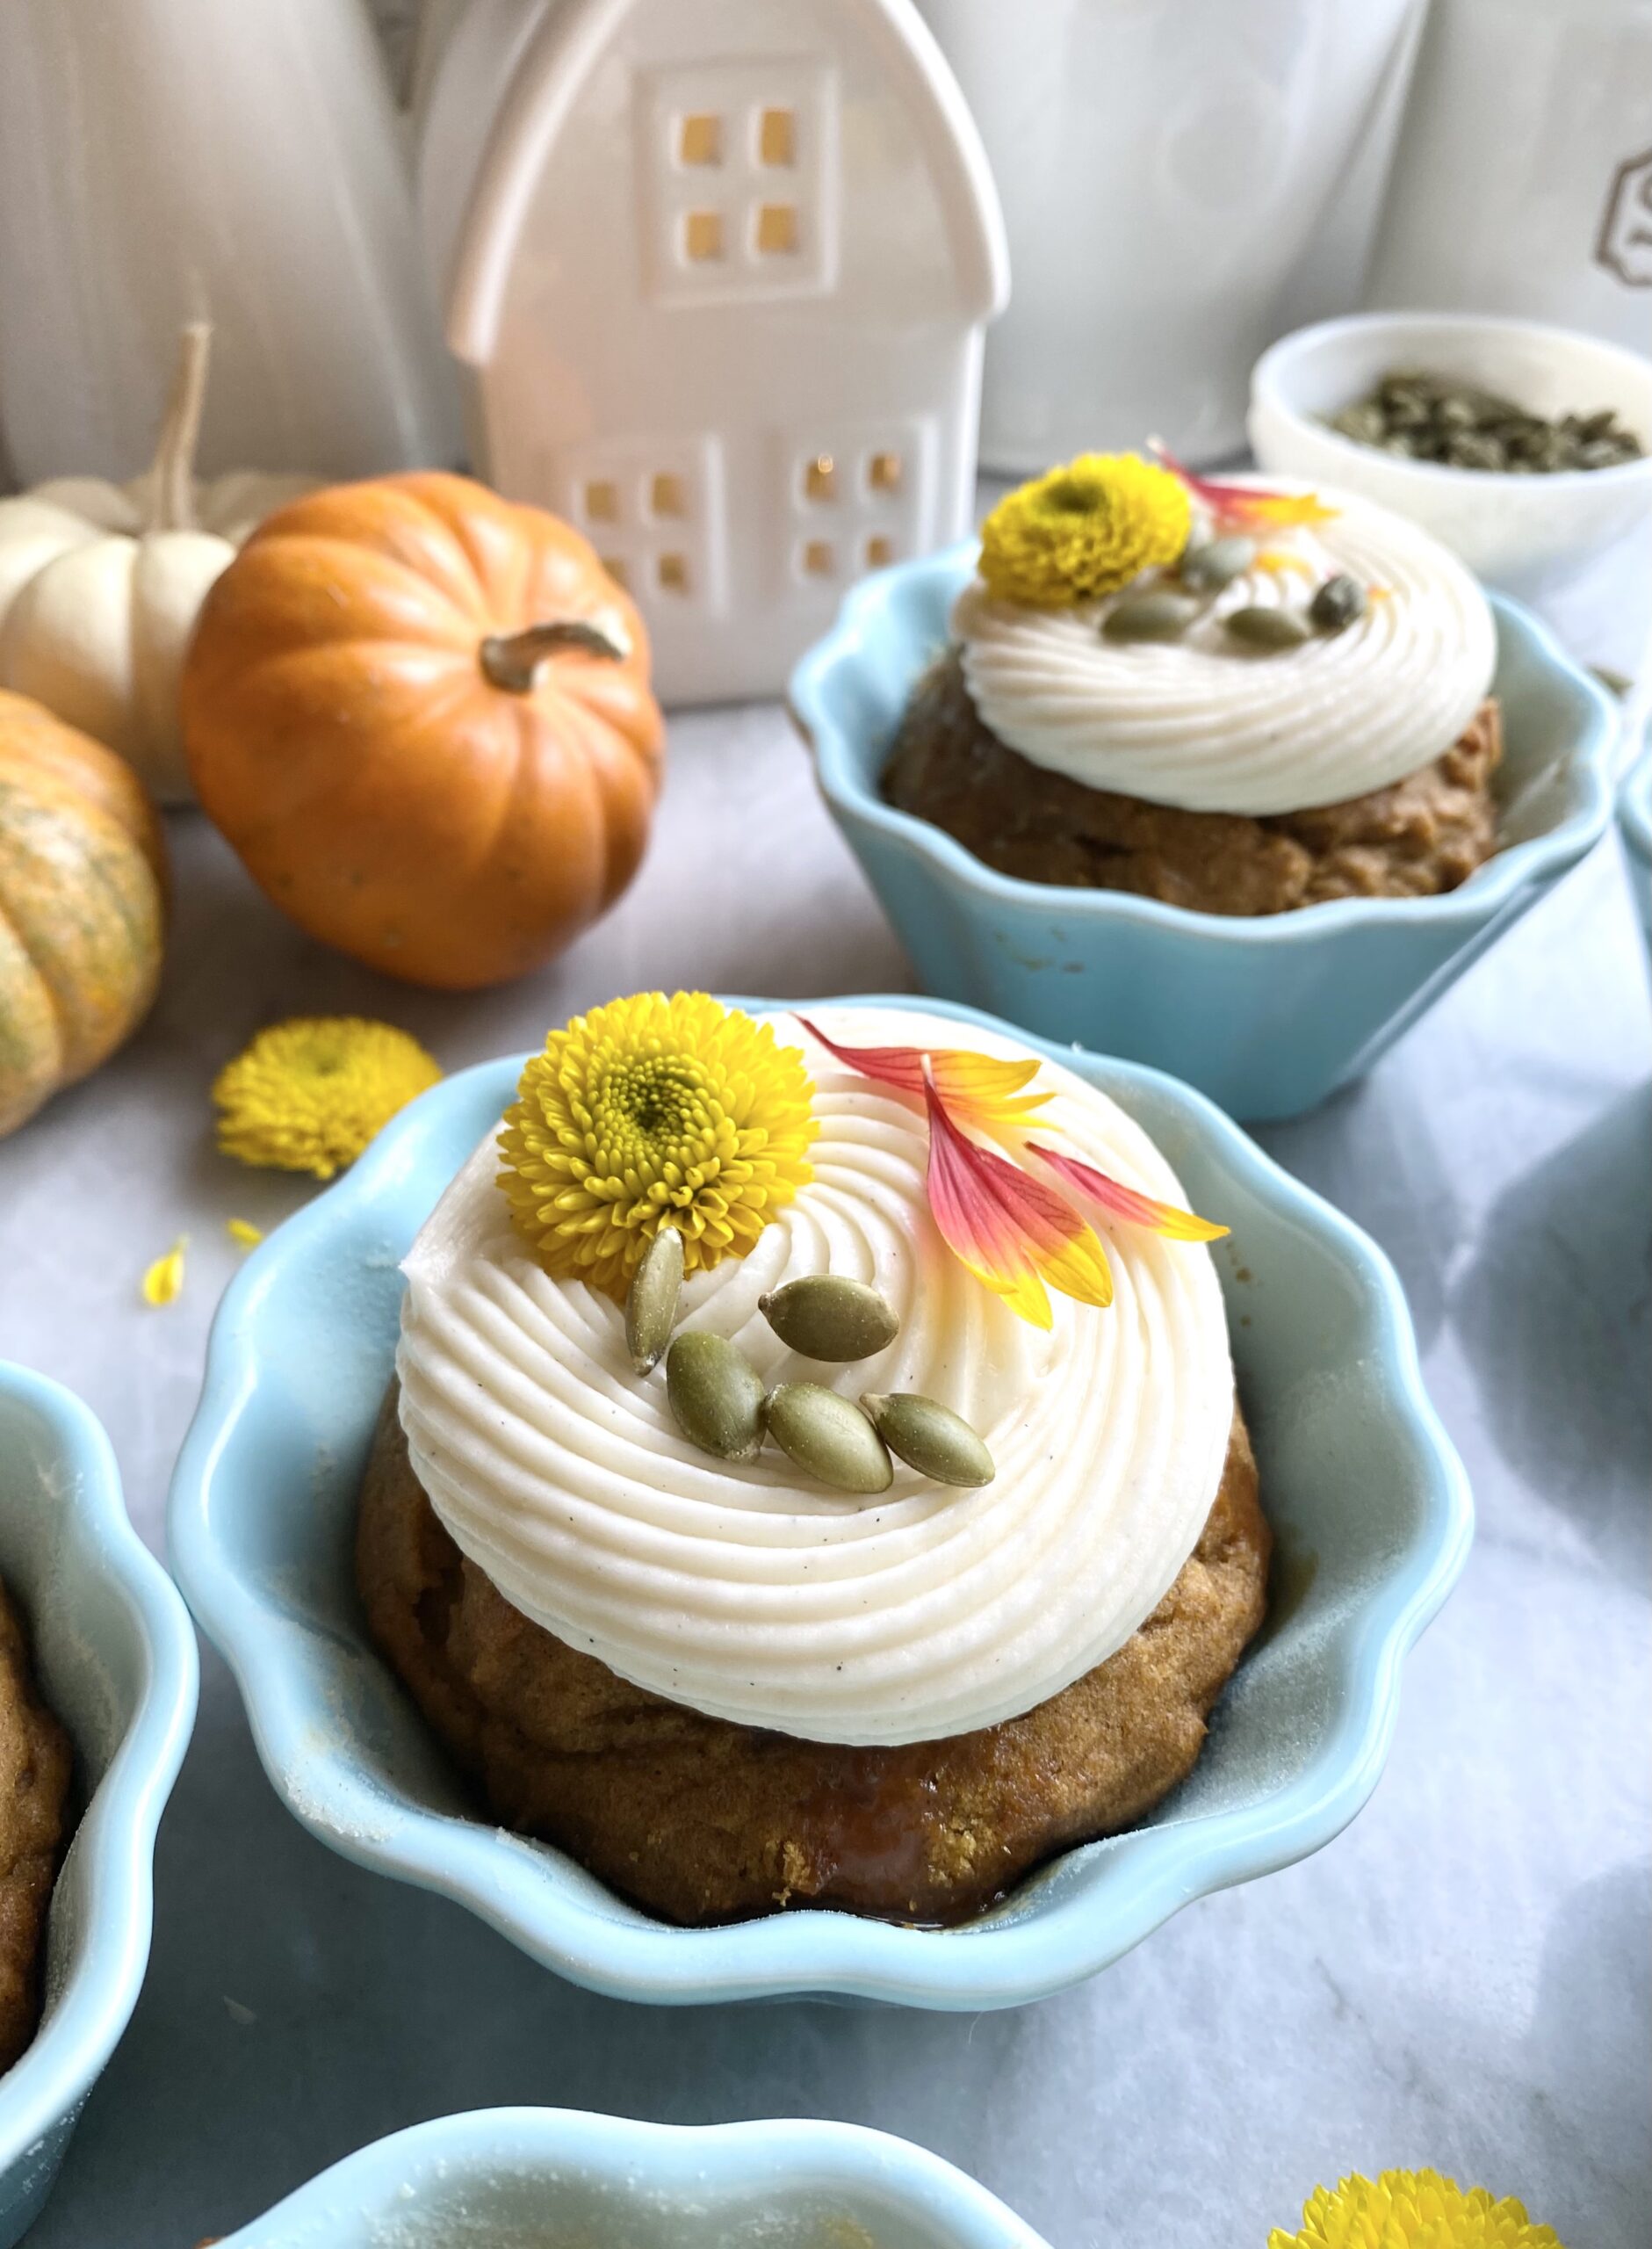
I call them loaves because I originally made them in mini loaf pans. They’re so cute and delicious that I often give them as holiday gifts. This year I decided to try them in ramekins and I loved the results! I used 6-ounce ramekins, but you can use 8-ounce ramekins, any size mini loaf pans, a muffin pan or even an 8 or 9-inch loaf pan. Keep in mind that baking times will differ. To find the ramekins I used, click here.
Print Recipe
Pumpkin Spice Mini Loaves with Caramel Filling
Mini loaves of tender pumpkin bread with caramel filling and luscious cream cheese frosting
Preheat oven to 350ºF. Grease and flour seven 6-ounce ramekins or six 8-ounce ramekins or any loaf pans of your choice.
In a large bowl, sift together flour, cinnamon, baking powder, baking soda, salt, ginger, nutmeg and cloves. Set aside.
In a separate large bowl, cream butter and brown sugar together with an electric mixer until light and fluffy.
Beat in eggs, one at a time, until well combined.
Beat in pumpkin and vanilla until combined.
Stir in flour mixture just until combined.
Divide batter evenly into prepared ramekins. Bake for 20-25 minutes or until golden brown and toothpick inserted in center comes out clean. Do not overbake. (Mini loaves or muffins bake for 15-25 minutes, depending on size. 8 or 9-inch loaf bakes for 40-50 minutes)
Cool completely if serving in ramekins or remove from pans after cooling for 10 minutes. Continue to cool on wire rack.
Make 3/4-inch well in the center of each loaf. Fill with caramel sauce. (For an 8 or 9-inch loaf, poke multiple holes with a skewer. Fill with caramel sauce.)
Top with cream cheese frosting and pumpkin seeds
Cream Cheese Frosting
In a large bowl, beat cream cheese and butter together with an electric mixer until smooth.
Add vanilla extract and salt and beat until combined.
Gradually add powdered sugar and beat at medium speed until combined.
Add heavy cream and beat at low speed until combined.
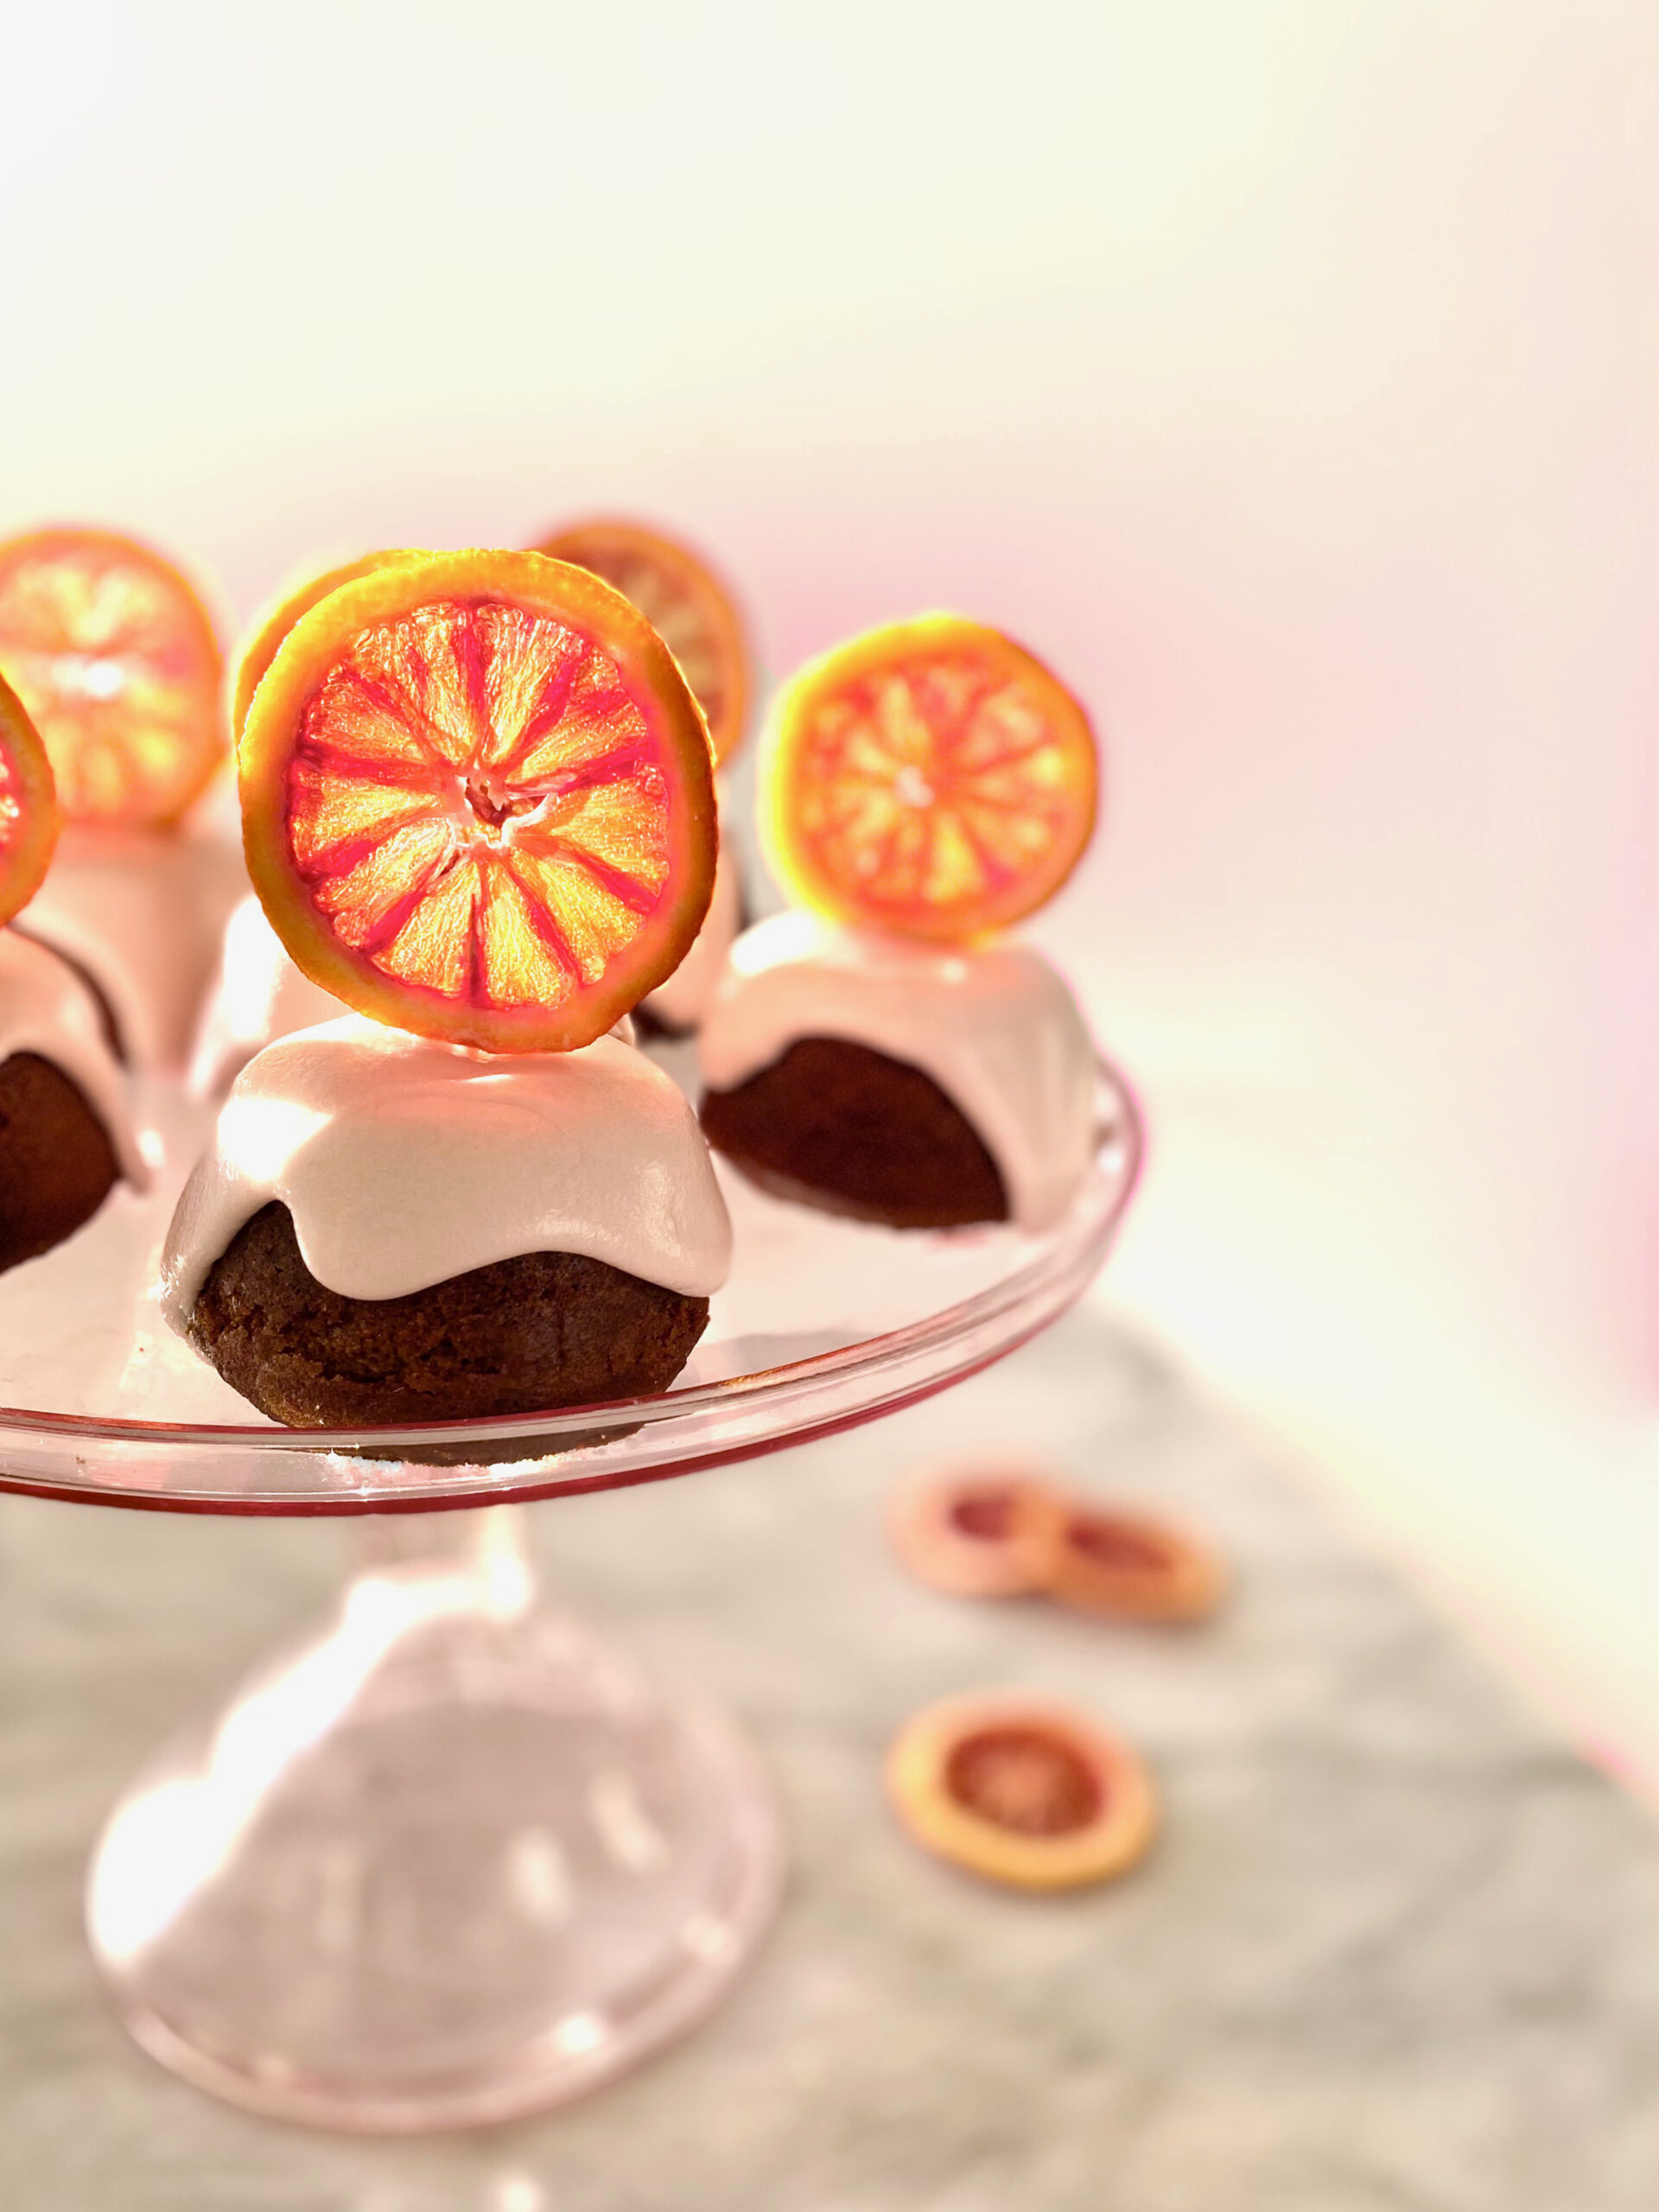
Every winter, when blood oranges come back in season, I start keeping an eye out for them at grocery stores and farmers markets. This year was different. I’ve been at home, having my groceries delivered instead of perusing the local produce aisles. If you’ve been entrusting strangers to do your shopping like I have, then you know delivery produce selections are hit and miss. So I was elated when a bag of perfectly beautiful, ripe blood oranges landed on my doorstep. This simple joy made my day. There was no choice. I had to make something worthy of the gorgeous red beauties!
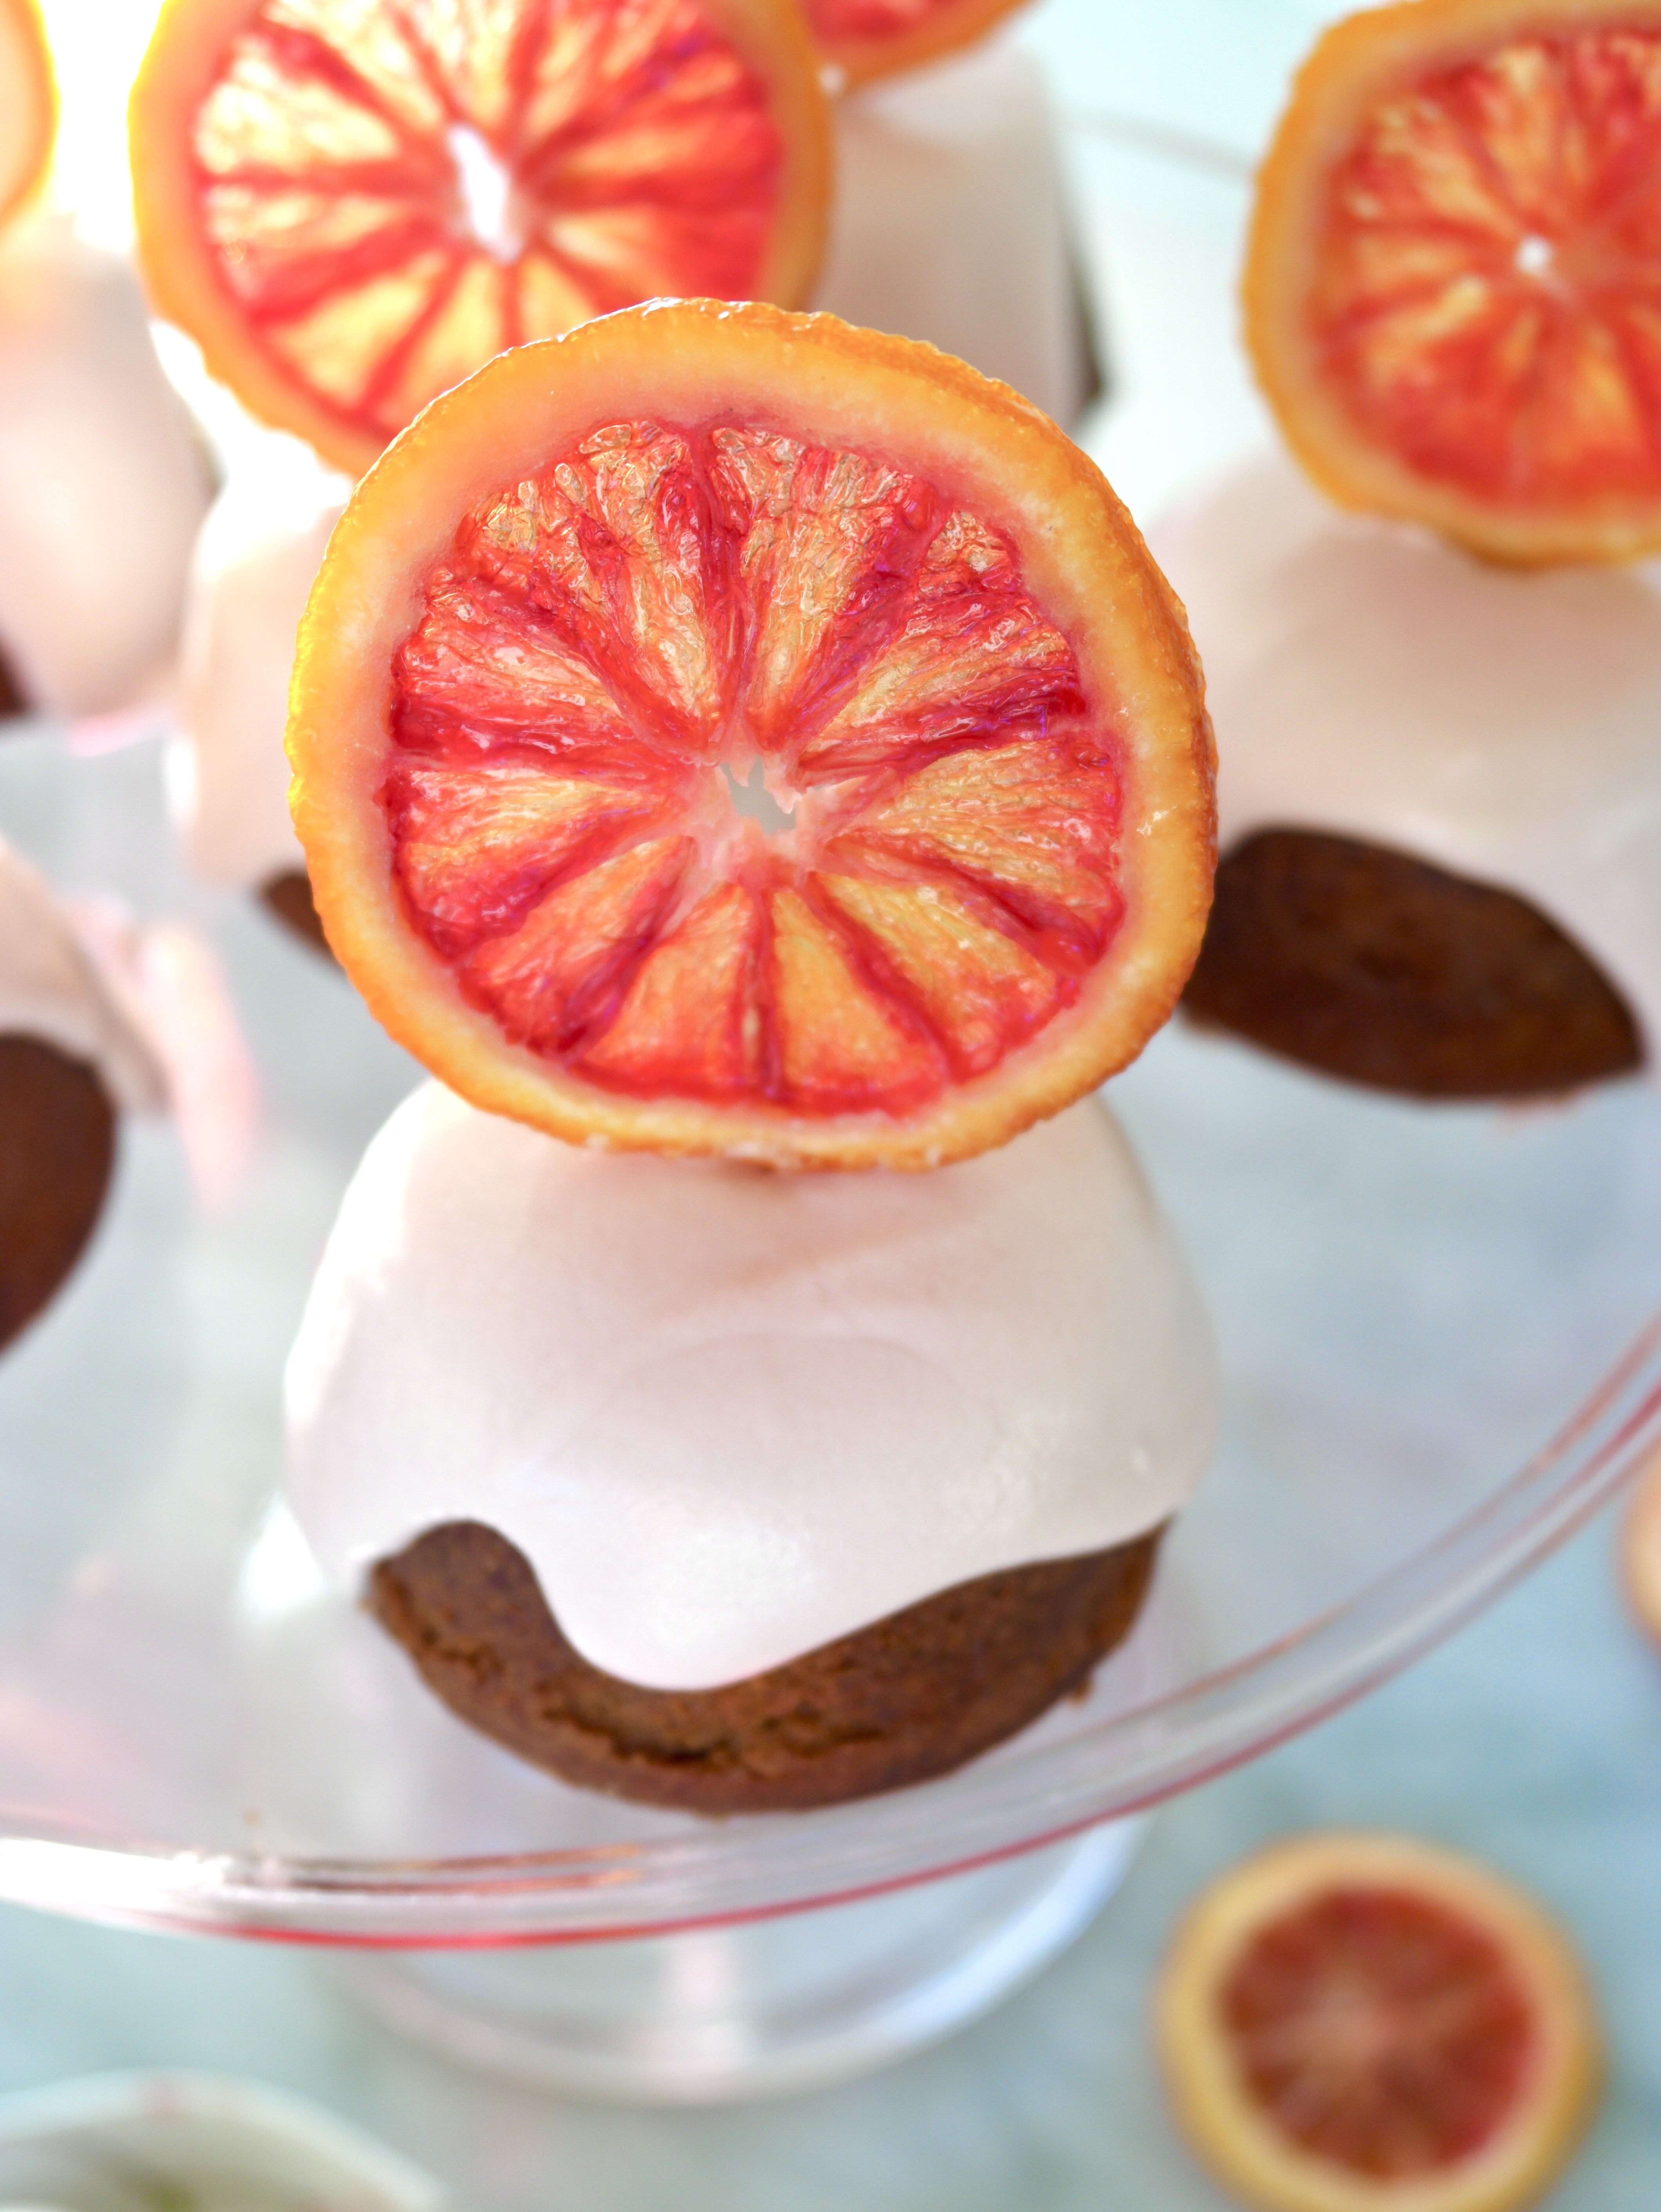
I didn’t get enough of gingerbread this holiday season, so I decided to make a gingerbread cupcake recipe that I created a few years ago when I was experimenting with blood oranges. I used blood orange zest in the cupcake batter and brushed the warm cupcakes with the blood orange syrup left over from making the candied oranges. If you don’t make the candied oranges, you can easily make a batch of the syrup* or skip this step altogether. They will still be delicious. I topped the cupcakes with cream cheese icing made with more orange zest and some blood orange juice mixed in. The juice makes the icing turns a soft shade of pink.
Candied blood orange slices are so stunning, that I can’t bring myself to just lay them on top of a dessert. They remind me of stained glass windows. I like to place them on toothpicks so they can stand up in regal style! Many recipes out there will instruct you to boil the orange slices, then let them air dry. This is perfectly fine if you don’t mind floppy candied oranges. For this recipe, boiling the slices, then letting them dry in the oven on low heat will give them enough stiffness to stand up.
If you can’t find blood oranges where you live, here’s a link to get blood oranges shipped to you. This recipe will also work with other types of oranges. You won’t get the deep scarlet color and the flavor will have a bit more tartness, but it will still be beautiful and delicious!
Print Recipe
Gingerbread Cupcakes with Blood Orange Cream Cheese Icing
Preheat oven to 350º. Spray the wells of a muffin tin with non-stick spray.
In a medium bowl, whisk together flour, cinnamon, ginger, allspice, baking soda and salt. Set aside.
In a large bowl, beat butter with an electric mixer at medium speed, until smooth.
Add brown sugar and orange zest and beat until light and fluffy.
Add molasses and beat until combined.
Add eggs one at a time and beat until combined.
Mix in dry ingredients in two additions, alternating with buttermilk. Beat just until combined.
Scoop the batter into prepared muffin tin, filling wells 2/3 full. (If you have any remaining batter, prepare an additional muffin tin.)
Bake for 15-18 minutes until toothpick inserted in center of cupcake comes out clean.
Allow to cool in pan 10 minutes, then remove cupcakes from pan.
Place cupcakes upside down on cooling rack and brush generously with orange simple syrup. Allow cupcakes to cool completely before frosting.
Blood Orange Cream Cheese Icing
In a large bowl, beat cream cheese at medium speed, until smooth.
Add butter, orange zest and salt and beat until combined.
Add powdered sugar. Beat at low speed until powdered sugar is incorporated. Increase speed to medium and beat until smooth.
Add blood orange juice and beat, one tablespoon at a time until desired consistency is reached.
Candied Blood Orange Slices
Slice oranges into thin 1/4 inch slices.
Combine sugar and water in a shallow saucepan and bring to a simmer.
Add orange slices to saucepan. Simmer for 10 minutes.
Drain oranges, reserving syrup.
Heat oven to 175ºF. Place on a large baking sheet lined with a baking mat in a single layer and bake until orange slices begin to stiffen, about 2 hours.
Remove from oven and let cool on baking sheet. If desired, insert toothpicks when slices are cool enough to handle. The slices will continue to stiffen as they cool.
Recipe Notes
*To make orange simple syrup, combine the juice of one orange with enough water to make 1/2 cup. Combine mixture with the zest of one orange and 1/2 cup sugar in a small saucepan over medium heat. Stir until sugar is dissolved. Let cool and transfer to a glass container. Refrigerate until ready to use.
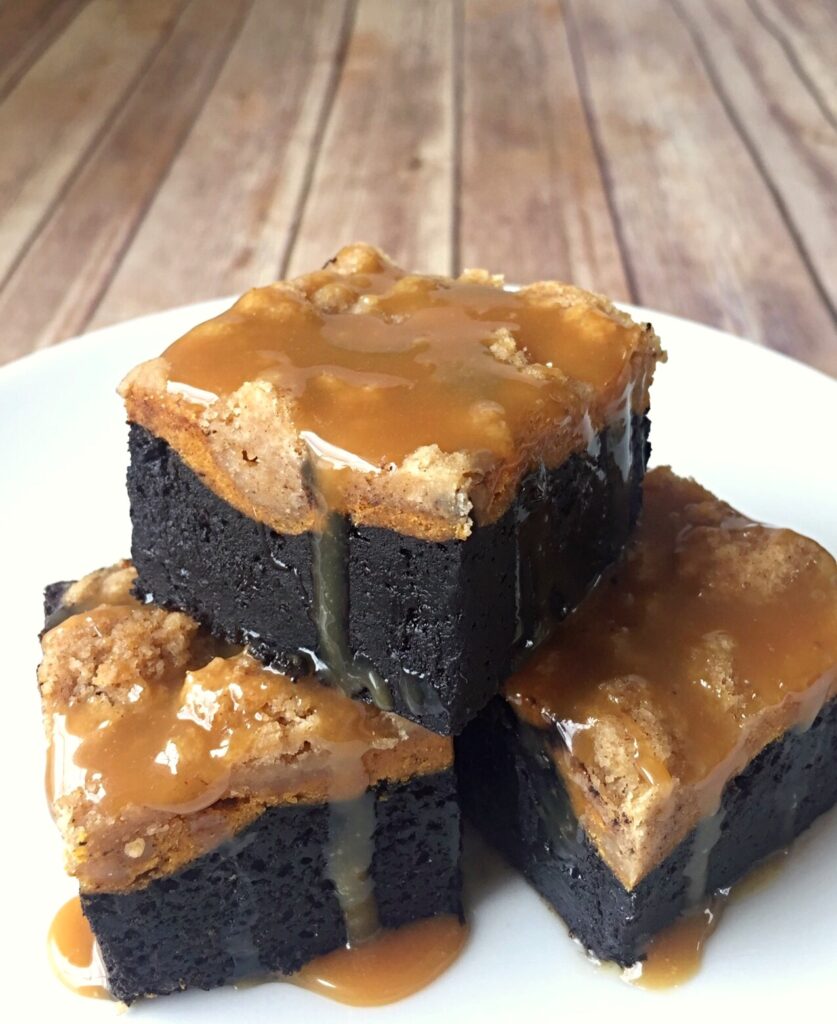
It’s Fall 2020. We need chocolate! We need pumpkin spice! And we need it drenched with caramel! These satisfying brownies check all of the boxes with multiple layers of comfort. A rich chocolate brownie is the base. The next layer is heavenly pumpkin cheesecake. The topping is a buttery crumble that rivals the best crumb cake. Finally, as if that isn’t enough, it’s drizzled with caramel sauce!
If it sounds complicated, don’t worry, it’s not. Each layer is super easy to make. You can use your favorite store bought caramel sauce to top it with. Vanilla ice cream and/or whipped cream are optional, but highly recommended toppings also. Just saying.
The layers go unexpectedly well together and make the perfect dessert for Halloween or Thanksgiving. I’m even going to add these beauties to my Christmas dessert table this year. Enjoy! You deserve it.
Print Recipe
Pumpkin Cheesecake Crumble Brownies
Chocolate brownies with pumpkin cheesecake and crumb topping, topped with caramel sauce.
In a medium bowl, combine flour, brown sugar, cinnamon and salt.
Cut in butter using a pastry blender or your fingers until well-combined and crumbles are pea-sized. Press crumbles together to make large quarter-sized chunks.
Set aside in refrigerator.
Pumpkin Cheesecake Layer
Preheat oven to 350º. Line a 9-inch square baking pan with parchment paper.
In a medium bowl, beat cream cheese with an electric mixer until smooth.
Add pumpkin, eggs, sugar, cinnamon, ginger and nutmeg and beat until well combined. Set aside.
Brownie Layer
Melt 1 stick of butter in a large microwaveable bowl.
Stir in sugar until combined
Stir in cocoa powder, vanilla, baking powder and salt.
Add the eggs and beat until smooth
Add the flour and mix until just combined.
Spread brownie batter into prepared baking pan. Smooth with a spatula.
Spread pumpkin cheesecake batter over the top of brownie batter. Smooth with a spatula.
Sprinkle crumb topping evenly over the top of pumpkin cheesecake layer.
Bake for 40-50 minutes until a toothpick inserted into pumpkin cheesecake layer comes out clean.
Let cool completely. Cut into squares and serve with caramel sauce.