Morning Glory Cake

You may have tasted Morning Glory Muffins at your local bakery or coffee shop. They date back to the 1970’s and originated at Nantucket’s Morning Glory Cafe. The original muffins contained carrots, apples, coconut, raisins and nuts. Over the years I’ve tasted many versions of the hearty breakfast muffins with countless variations of nutritious add-ins. I was inspired to make a cake version using fall harvest ingredients. I replaced the coconut with zucchini and omitted the nuts. But you can certainly add in your favorite toasted chopped nuts, such as pecans or walnuts. Whether or not you like raisins, you’ll love the golden raisins I used in this recipe. They’re soaked in juice prior to baking and they taste like juicy little jewels, nothing like traditional raisins. I also added a brown sugar glaze, but the cake is equally delicious without the glaze.

Print Recipe
Morning Glory Cake
Moist tender single layer spice cake with carrots, apples, zucchini and golden raisins topped with brown sugar glaze
Cuisine American
Keyword apple, cake, carrot, zucchini
Servings
servings
Ingredients
Morning Glory Cake
Brown Sugar Glaze
Cuisine American
Keyword apple, cake, carrot, zucchini
Servings
servings
Ingredients
Morning Glory Cake
Brown Sugar Glaze
Instructions
Morning Glory Cake
  1. Preheat the oven to 350ºF (180ºC). Line the bottom of an 8-inch round cake pan** with parchment paper. Grease and flour the insides.
  2. In a small heat proof bowl, combine the raisins and apple juice, making sure the raisins are submerged. Heat in the microwave for 10-15 seconds until the raisins are plump and hydrated. Set aside to cool to room temperature, then drain the raisins.
  3. In a medium-size bowl, whisk together the flour, baking powder, baking soda, salt, cinnamon, ginger and nutmeg until well combined.
  4. In a large bowl, whisk together the brown sugar, granulated sugar, orange zest, oil, eggs and vanilla until smooth and well combined. Stir in the flour mixture just until combined. Fold in the carrots, apples, zucchini and the drained raisins.
  5. Transfer the batter to the prepared cake pan. Bake until the top is deep golden brown and a toothpick inserted into the center of the cake comes out clean, about 28-35 minutes. Cool the cake in the pan for 10 minutes then turn the cake out and transfer it to a cooling rack.
Brown Sugar Glaze
  1. In a small saucepan over medium-low heat, melt the butter and brown sugar together, stirring until the sugar dissolves and the mixture starts to bubble. Let it bubble gently for 30 seconds, then remove it from the heat. Stir in the heavy cream and salt until smooth. Whisk in the powdered sugar until smooth and well combined. Spread the glaze over the cooled cake.
Recipe Notes

*Wrap the shredded zucchini  in a clean kitchen towel or a sturdy paper towel and squeeze out the excess liquid.

**To find my favorite 8-inch cake pans, click here.

To find parchment cake rounds, click here.

Brownie Cheesecake Cookies

Brownie Cheesecake Cookies

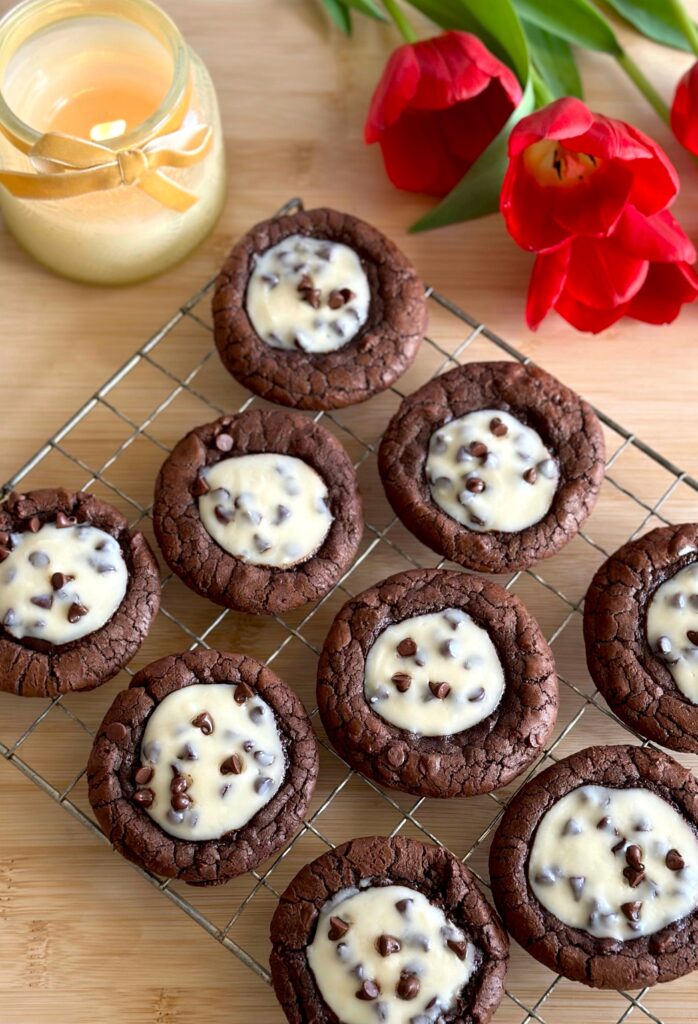
If you love chocolate chip cheesecake, you’ll adore these Brownie Cheesecake Cookies. I took my favorite elements from brownies and chocolate chip cheesecake and combined them into a cookie. The brownie batter cookies are soft and chewy on the inside and crispy on the edges. The cheesecake filling is creamy and smooth and dotted with mini chocolate chips.

The cookie dough should be refrigerated for a few minutes to help make the dough easier to work with. A short amount of chilling time worked best for me. I had minimal spreading during baking, but If your cookies spread to much, you can form the dough balls, add the indentations and refrigerate them for 20-30 minutes, then proceed with the recipe.

Since it’s so close to St. Patrick’s Day, I also made a version with Irish cream filling. See the notes below.*

Print Recipe
Brownie Cheesecake Cookies
Brownie cookies with soft, chewy centers and crisp edges, filled with creamy cheesecake filling and mini chocolate chips.
Servings
cookies
Ingredients
Filling
Cookies
Servings
cookies
Ingredients
Filling
Cookies
Instructions
Filling
  1. In a small bowl, mix the cream cheese, sugar, heavy cream and vanilla extract together until smooth. Set aside 1 tablespoon of mini chocolate chips. Stir the remaining mini chocolate chips into the cream cheese mixture. Set aside in the refrigerator while you make the cookie dough.
Cookies
  1. Melt the chopped chocolate and butter together in a large bowl set over a pan of barely simmering water, making sure the water doesn't touch the bottom of the bowl. Stir gently until smooth. Set aside to cool slightly. (Alternately, you can melt the chocolate in the microwave with short bursts.)
  2. In a medium bowl, whisk together the flour, cocoa powder, baking powder and salt.
  3. In a large bowl, whisk together the sugar, brown sugar, eggs and vanilla until smooth. Stir in the melted chocolate. Stir in the flour mixture just until combined. Fold in the mini chocolate chips.
  4. Refrigerate the cookie dough for 10-15 minutes to make it easier to work with. Preheat the oven to 350ºF (180ºC). Line 2 large cookie sheets with parchment paper.
  5. Roll 2-tablespoon (40g) size portions of cookie dough into balls. Place them onto the cookie sheet, about 3 inches apart. Press a 1-inch wide indentation into each cookie dough ball using a pastry tamper, the flat top of a bottle cap or with your thumbs. Spoon a generous 1 teaspoon of filling into each indentation. Sprinkle with the reserved mini chocolate chips.
  6. Bake until the edges are set and beginning to crack, about 9-11 minutes. Cool the cookies on the cookie sheet for 1-2 minutes, then transfer them to a cooling rack.
Recipe Notes

To make the Irish cream version of the filling, replace the heavy cream and vanilla extract with 2 teaspoons of Bailey's Irish cream liqueur.

Blueberry Pecan Banana Bread

This banana bread was a happy accident. One morning, I started to make banana bread. My recipe called for three over-ripe bananas, but I realized that I only had two. So I changed my recipe, and then I added blueberries, toasted pecans, a pecan crumb topping and a brown sugar cinnamon glaze. The results were so tender, moist and delicious that I can confidently say this is the best banana bread I’ve ever tasted. And I’ve tasted a lot of banana bread. I’ve tried many different recipes and tasted loaves baked by other people. I also like picking up a slice of banana bread at bakeries and coffee shops sometimes, alongside my coffee or tea.

The three biggest problems I typically see with banana bread are rubbery texture, dry texture or bland flavor. Over mixing can cause a rubbery loaf, so when you add your dry ingredients to the batter, mix it just until the flour is incorporated, to avoid excess gluten formation. To avoid a dry loaf, make sure not to over bake it. Test it before you think it might be done. When measuring your dry ingredients, weigh them for the best results. Sometimes people inadvertently add too much or too little flour when using measuring cups.

For the best flavor and sweetness, make sure to use very ripe bananas when making banana bread. I like to use bananas that are soft and covered with brown spots. I avoid the black, oozing bananas, even though you may see people on social media recommending them for use. These are technically rotten bananas and can give your banana bread an unpleasant fermented flavor. The toasted pecans in this recipe add texture and a rustic nutty flavor. Even people who don’t like nuts tend to appreciate them in this banana bread. But if you have a nut allergy you can certainly leave them out. The addition of cinnamon, nutmeg and vanilla also add lovely flavor to this loaf. This banana bread is quite delicious on its own, but the crumb topping and brown sugar glaze take it over the top!

To watch the Blueberry Pecan Banana Bread Instagram video, click here.

Print Recipe
Blueberry Pecan Banana Bread
Moist tender banana bread with blueberries and toasted pecans, topped with pecan crumb topping and brown sugar cinnamon glaze.
Servings
loaf
Ingredients
Crumb Topping
Blueberry Pecan Banana Bread
Brown Sugar Cinnamon Glaze
Servings
loaf
Ingredients
Crumb Topping
Blueberry Pecan Banana Bread
Brown Sugar Cinnamon Glaze
Instructions
Crumble Topping
  1. In a medium bowl, combine the flour, brown sugar, cinnamon and salt. Work in the butter with your fingertips until the mixture looks like wet sand. Mix in the pecans. Press the mixture to together to form chunks. Set aside in the refrigerator until ready to use.
Blueberry Pecan Banana Bread
  1. Preheat the oven to 325ºF (165ºC). Line the bottom a 9 x 5-inch loaf pan* with parchment paper. Grease and flour the insides.
  2. In a medium bowl, whisk together the flour, baking powder, baking soda, salt, cinnamon and nutmeg.
  3. In a large bowl, whisk together the brown sugar, oil, eggs, sour cream and vanilla until smooth and well combined. Stir in the bananas until incorporated. Mix in the flour mixture just until combined. Do not over mix. Stir in the pecans.
  4. In a small bowl, gently toss the blueberries with the lemon juice, then toss them with 2 teaspoons of flour. Fold 3/4 of the blueberries into the batter. Transfer the batter to the prepared loaf pan. Top with the remaining blueberries, then the crumb topping.
  5. Bake until a toothpick inserted into the center of the loaf comes out clean, about 55-60 minutes. Cool in the pan for 10 minutes, then remove the loaf from the pan and transfer to a cooling rack to cool completely.
Brown Sugar Cinnamon Glaze
  1. In a small saucepan, whisk the brown sugar, butter, cinnamon and salt together over medium heat until the sugar dissolves and the edges start to bubble. Remove from heat and whisk in the heavy cream, vanilla and powdered sugar until smooth. Set aside to cool slightly. Drizzle over the cooled banana bread.
Recipe Notes

*To find the loaf pan I used, click here.

Pineapple Coconut Cake Bars

Pineapple Coconut Cake

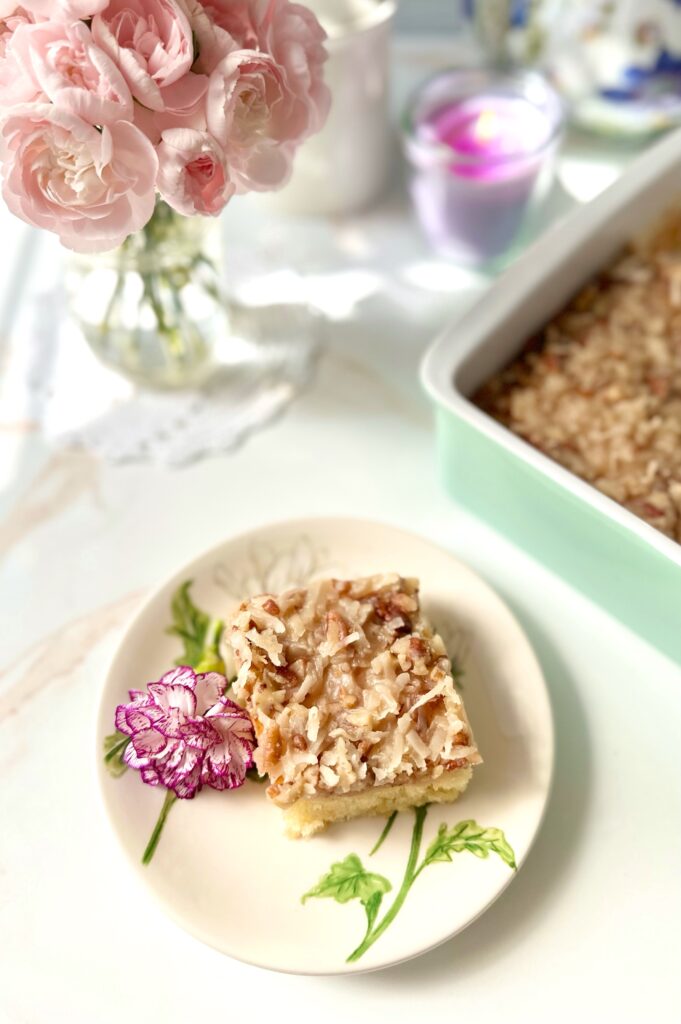
If you like tropical flavors, you’ll love this spring dessert from my childhood. We used to call it Pineapple Coconut Snack Cake, but I would consider it more of a bar, so I changed the name to Pineapple Coconut Cake Bars. We would enjoy it on Easter or Mother’s Day because it was my mom’s favorite. It’s buttery, moist and rich. It’s also kind of addicting, because everyone always asks for seconds. You can double the recipe if you need to.

Print Recipe
Pineapple Coconut Cake Bars
Course Dessert
Servings
Ingredients
Cake
Topping
Course Dessert
Servings
Ingredients
Cake
Topping
Instructions
Cake
  1. Preheat oven to 350ºF. Grease an 8-inch square baking pan.
  2. In a medium bowl, whisk together flour, baking powder and salt.
  3. In a large bowl, whisk melted butter, sugar, egg, egg yolk and vanilla until smooth.
  4. Stir in pineapple until well combined. Stir in flour mixture just until combined.
  5. Transfer batter to prepared baking pan. Bake until top is golden brown and toothpick inserted into center of cake comes out clean, about 20-25 minutes.
Topping
  1. In a medium saucepan over medium heat, melt butter with sugar, brown sugar and salt. Whisk in heavy cream.
  2. When mixture starts to bubble, turn heat down to low and simmer until thickened, about 3 minutes.
  3. Remove from heat and stir in coconut, pecans and vanilla. Spread over warm cake. Let cool at least 15 minutes before cutting cake.

Butterscotch Bread

What’s better than the smell of chocolate chip cookies baking or of fresh coffee brewing? The aroma of this warm, sweet buttery loaf of Butterscotch Bread is so heavenly that I’m convinced angel grandmothers bake this on a regular basis in heaven. The rich scent is accompanied by a soft, tender bread topped with a silky butterscotch glaze.

It all starts with browning your butter first. It adds a nutty, deep butter flavor. When browning your butter, use a light colored saucepan so you can see the visual clues. You’ll see it start to foam and brown specks will collect on the bottom of the pan. It will smell nutty and fragrant. Keep a close eye on it. It can go from brown to burnt in a quick second. When your brown butter has cooled to room temperature, the rest of the recipe comes together quickly. You can also brown your butter a day ahead and keep it in the refrigerator. Bring it to room temperate before using.

This delightful bread goes well with coffee or tea and is just as delicious the next day. Store covered at room temperature.

Print Recipe
Butterscotch Bread
Servings
loaf
Ingredients
Butterscotch Bread
Butterscotch Glaze
Servings
loaf
Ingredients
Butterscotch Bread
Butterscotch Glaze
Instructions
Butterscotch Bread
  1. In a small saucepan, cook the butter over medium heat until brown and fragrant. When brown specks (not black!) collect at the bottom of the pan, immediately transfer the butter to a small bowl. Let cool to room temperature.
  2. Preheat the oven to 350ºF. Line the bottom of an 8 x 4-inch baking pan with parchment paper. Grease and flour the insides.
  3. In a medium bowl, beat the brown butter, brown sugar, eggs, vanilla and buttermilk until smooth.
  4. Stir in the flour mixture in two additions. Mix just until combined. A few lumps are okay.
  5. Transfer the batter to prepared baking pan. Bake until the top is deep golden brown and q toothpick inserted into center comes out clean, about 38-43 minutes.
  6. Let the bread cool in pan for 10 minutes, them turn it out onto a cooling rack to cool completely. Top with two coats of butterscotch glaze.
Butterscotch Glaze
  1. Melt the butter in a small saucepan over medium heat. Stir in the brown sugar and salt.
  2. Continue stirring over medium heat until the mixture comes to a boil. Boil for two minutes.
  3. Turn the heat down and slowly stir in the heavy cream. Keep stirring until mixture is smooth. Remove from heat and stir in the vanilla extract.
  4. Transfer the butterscotch glaze to a small bowl and let cool until thickened.

Skillet Chicken Pot Pie with Herb Crust

Pot pies belong to everyone. They date back to ancient times and many cultures worldwide have various versions of savory pies. It’s a very popular comfort food dish here in the U.S. and many people already have a favorite recipe. The recipe I’m sharing here isn’t the only way to make a pot pie, but it’s one way to do it that happens to be delicious! I usually bake pot pies in a casserole dish, and you can certainly bake this one in a casserole dish if you want to. But I thought it would be nice to save a step and try baking one in a skillet. I love baking other things, such as cornbread, in a skillet so I had a feeling it would be good. I used an 8-inch cast iron skillet. Click here to find the skillet I used.

I had a ton of fresh herbs on hand, so they ended up in my pie crust on a whim. I was very pleased with the results. Feel free to switch up the herbs and use your favorites. Typically when you bake or roast something with fresh herbs, they tend to turn black and crispy. But don’t worry, they’ll be safely nestled inside the crust. And speaking of the crust, this one is tender and flaky due to my grandmother’s method of working the fat into the dough with your fingertips. You want to end up with flat dime size pieces throughout. A little vegetable shortening helps to add structure and flakiness and the butter makes it taste good. A touch of vinegar helps to inhibit gluten formation, so you’ll have a tender, flaky crust rather than a chewy one. And if you’re one of those people who tends to over work your dough, the vinegar can help with that. But please do yourself a favor and don’t over work your dough!!

Now I’m going to give you the best piece of cooking advice my grandmother ever gave me: Taste as you go! Taste everything as you are preparing it, not just when it’s done. So when you’re making your filling for this pot pie, add the herbs, salt, pepper and sage a little bit at a time until it tastes good to you.

Print Recipe
Skillet Chicken Pot Pie with Herb Crust
Skillet chicken pot pie with fresh herbs baked into the crust
Course Main Dish
Servings
Ingredients
Herb Crust
Filling
Course Main Dish
Servings
Ingredients
Herb Crust
Filling
Instructions
Herb Crust
  1. In a large bowl, whisk together flour, sugar and salt. Work shortening into the flour mixture with your fingertips until evenly dispersed throughout.
  2. Work butter and herbs into the flour mixture with your fingertips, creating flat dime size pieces.
  3. Mix ice water and vinegar together. Sprinkle over flour mixture a little at a time, stirring until dough comes together. You may not need all of the water depending on your climate.
  4. Turn dough out onto a lightly floured surface. Knead dough briefly by folding dough over onto itself a few times. Do not over work dough! Form dough into a disk. Cover with plastic wrap and refrigerate at least one hour or up to overnight.
Filling
  1. In an 8-inch cast iron skillet, heat butter over medium heat. Sauté onions, celery and carrots until onions are translucent, stirring occasionally. Sprinkle with flour and cook one to two more minutes, stirring frequently.
  2. Stir in chicken broth slowly. If your sauce seems lumpy, use a whisk and vigorously whisk until smooth. Simmer on low until thickened. Stir in heavy cream. Add herbs and seasonings to taste. Add a splash of chicken broth if your sauce seems too thick.
  3. Mix in chicken and peas. Remove form heat. Set aside until skillet is cool enough to handle.
Assembly
  1. Preheat oven to 400ºF.
  2. On a lightly floured surface, roll dough out to a 10-inch round. Place dough over filling, tucking ends under and crimping with your fingers or with a fork. Brush pie with egg wash. Cut a 1-inch X in the center of pie to allow steam to escape.
  3. Bake until golden brown, about 40 minutes. Cover edges of crust with strips of foil if they start to brown too fast.

Blackberry Oatmeal Cookies

Blackberry Oatmeal Cookies by Brownie Mischief

We’ve all heard our parents telling their childhood stories of walking miles to school and suffering worse hardships than we ever had to. My mom used to tell me stories like that, but she had a sense of humor, so her stories were always fun to listen to. She used to tell me about her friend’s mother, who would make big, delicious oatmeal cookies. My mom would trade her baloney sandwich nearly every day to get one of those cookies from her friend. She reminisced about those cookies so much, that I set out to make her some when I learned to bake. She and my grandmother would taste test batch after batch of my cookies over the years. I have probably baked enough oatmeal cookies to circle the earth. Okay that’s an exaggeration, but seriously I have baked quite a few. Of all the oatmeal cookies I’ve baked, these are one of my favorites!

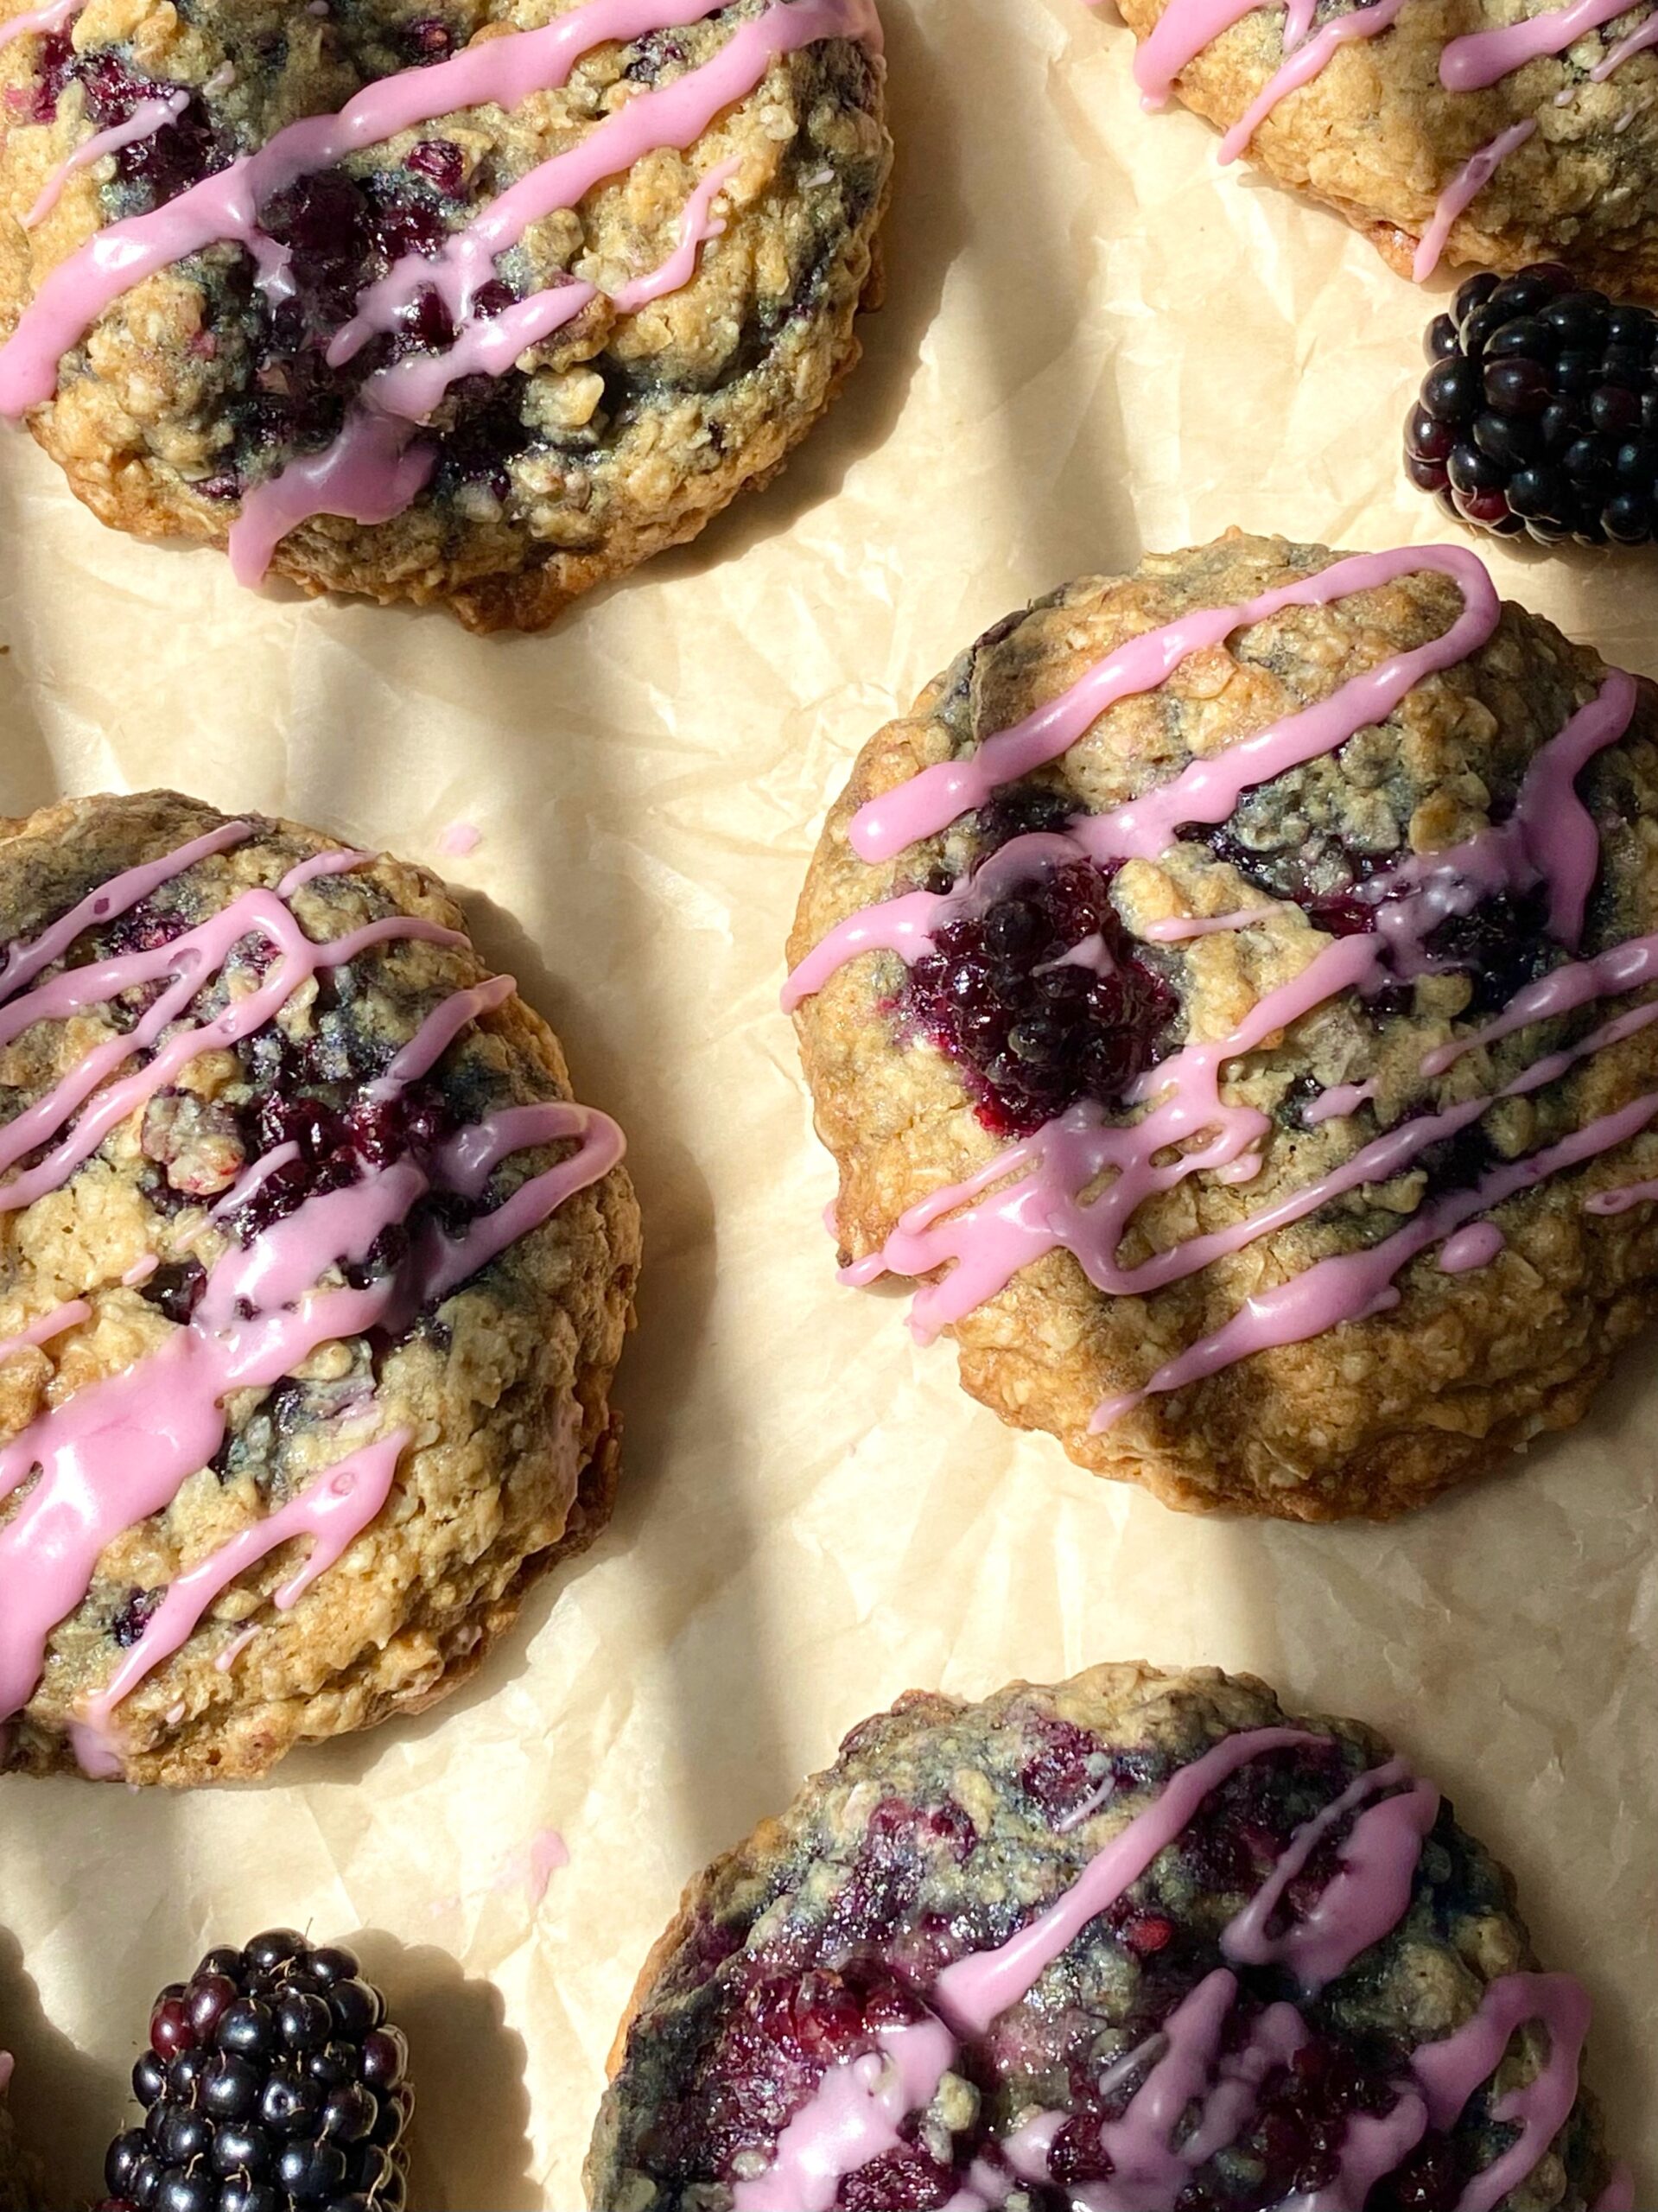
Most of the time when you see fruit added to an oatmeal cookie, it’s dried fruit, like raisins or cranberries. That’s mostly because if you just dump fruit into your cookie dough, the fruit releases water, leaving soggy spots in your cookies. To solve that issue, for this recipe, I macerate the blackberries before baking. The purple blackberry juice that’s released from the berries is used to make a beautiful lilac icing to drizzle over the cookies.

Print Recipe
Blackberry Oatmeal Cookies
Course Dessert
Keyword blackberry, cookies
Servings
cookies
Ingredients
Brown Butter
Macerated Berries
Oatmeal Cookies
Icing
Course Dessert
Keyword blackberry, cookies
Servings
cookies
Ingredients
Brown Butter
Macerated Berries
Oatmeal Cookies
Icing
Instructions
  1. In a small, light colored saucepan, melt 1/2 cup (4 oz or 113g) of butter over medium heat, stirring occasionally, until deep golden and fragrant. Keep a close eye on it. It can go from toasted to burned very quickly. When you see brown particles form, remove from heat and immediately transfer the butter, including the particles, to a small bowl. Refrigerate until solid, about one hour.
  2. Place the blackberries in a medium-size bowl. Sprinkle with granulated sugar and toss to coat. Let sit for 30 minutes until the berries release their juices.
  3. Drain the blackberries and reserve the juices.
  4. Preheat oven to 350ºF (180ºC). Line two large cookie sheets with parchment paper.
  5. In a separate medium-size bowl, whisk together the flour, baking soda, salt and cinnamon. Set aside.
  6. In a large bowl, beat the brown butter, softened butter and brown sugar until light and fluffy.
  7. Add the eggs and vanilla extract in three separate additions and beat until well combined.
  8. Stir in the flour mixture just until combined. Stir in the oats just until combined. Gently fold in the blackberries.
  9. Scoop 1/4 cup sized portions of dough, about 2 inches apart, onto the prepared cookie sheets. *I used a #16 2-ounce scoop.
  10. Bake until the cookie tops are set and the edges are golden brown, about 13-15 minutes. Transfer the cookies to a cooling rack to cool completely.
  11. Pass reserved blackberry juice through a sieve to remove the seeds.
  12. In a small bowl, whisk together the powdered sugar, heavy cream and one tablespoon of the reserved blackberry juice until smooth. Add more blackberry juice, a little at a time, until the desired consistency is reached. Drizzle the icing over the cooled cookies.
Recipe Notes

*To find the portion scoop I used, click here.

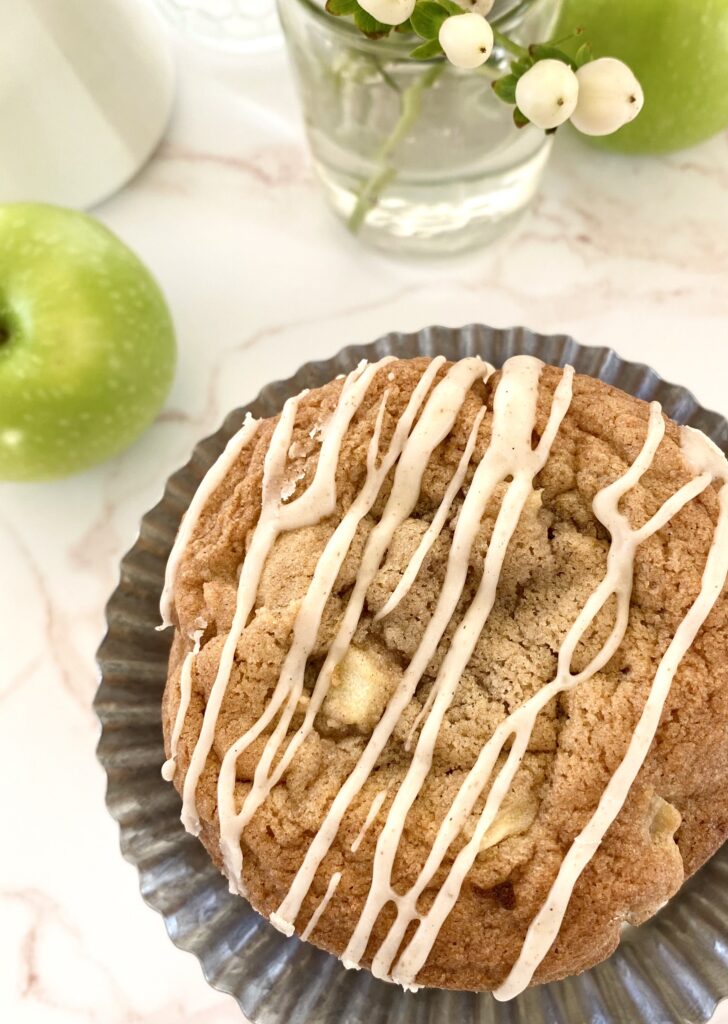
Apple Spice Cookies with Brown Butter Icing

Apple Spice Cookies with Brown Butter Icing

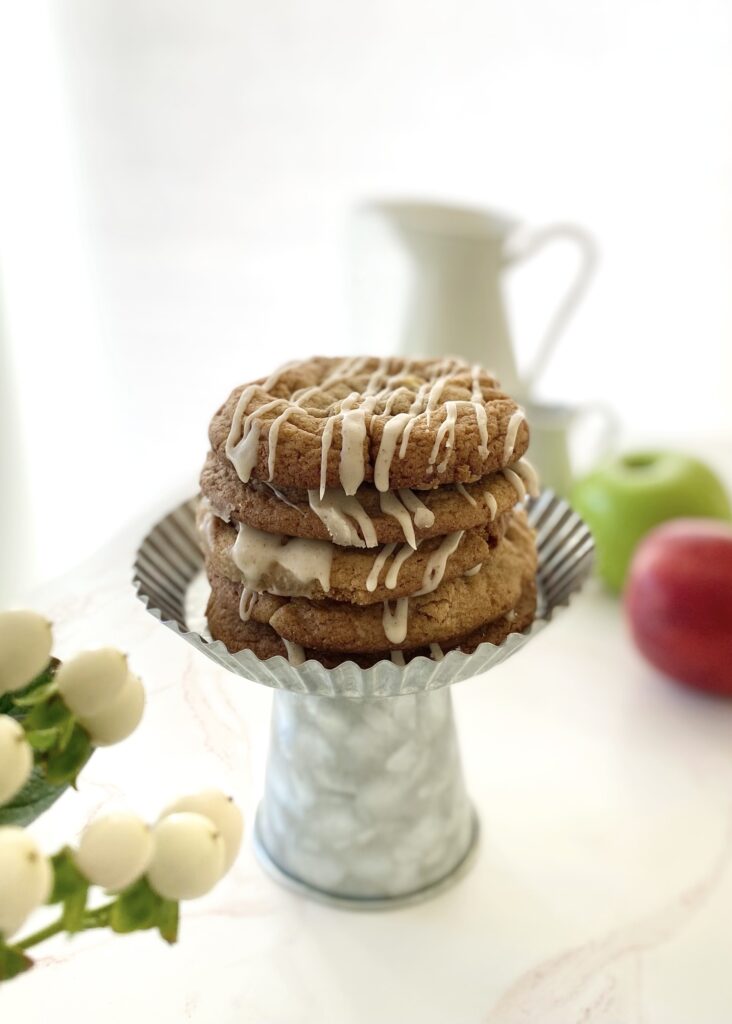
These Apple Spice Cookies were one of my most popular cookies last fall so I decided to bring them back a little early this year. The combination of cinnamon, nutmeg and vanilla in this cookie dough will remind you of cinnamon rolls and apple pie and inspire you look forward to fall.

The apples in this recipe are cooked briefly on the stovetop to bring out the flavor and create the perfect texture. Dropping raw apple chunks into cookie dough or cake batter is usually not a good idea. If you’ve ever baked an apple pie, you know that apples release liquid as they cook and that liquid will end up in your baked cookies, creating soggy spots. So definitely don’t skip this step!

These gorgeous, golden brown cookies are perfectly delicious on their own, but extra credit goes to the Brown Butter Icing for taking them over the top!

apple spice cookies with brown butter icing

Make sure to head over to Instagram to watch the video of these Apple Spice Cookies being created: Click here

Print Recipe
Apple Spice Cookies with Brown Butter Icing
Spice cookies with fresh apples and brown butter icing
Course Dessert
Servings
cookies
Ingredients
Cooked Apples
Brown Butter Icing
Course Dessert
Servings
cookies
Ingredients
Cooked Apples
Brown Butter Icing
Instructions
Cooked Apples
  1. Melt the butter in a small skillet over medium heat. Add apples, sugar and cinnamon to the skillet.
  2. Cook, stirring occasionally, until the apples are tender, about 4-5 minutes.
  3. Remove from heat and let cool completely. Drain any excess liquid from the cooled apples.
Apple Spice Cookies
  1. Preheat the oven to 375ºF (190ºC). Line two large baking sheets with parchment paper.
  2. In a medium bowl, whisk together the flour, baking soda, salt, cinnamon and nutmeg. Set aside.
  3. In a large bowl, beat the butter and brown sugar with an electric mixer at medium speed until light and fluffy.
  4. Beat in the egg, egg yolk and vanilla extract, one at a time, until well combined
  5. Stir in the flour mixture, just until combined.
  6. Fold the the cooled apples into the cookie dough.
  7. Divide the dough into 12 equal golf ball size portions and place them 3 inches apart on the prepared baking sheets.
  8. Bake until golden brown, about 11-13 minutes. Let cool 1 minute on the baking sheet, then transfer to a cooling rack to cool completely.
Brown Butter Icing
  1. In a small saucepan, cook the butter over medium heat until golden brown and fragrant. When brown specks start to form in the bottom of the pan, remove from heat.
  2. Immediately transfer the browned butter to a small bowl. Whisk in the the powdered sugar, vanilla extract, salt and 1 tablespoon milk. Add more milk as needed to reach desired consistency.
  3. Drizzle the icing over the cooled cookies.
Recipe Notes

NOTE:  If your cookies spread too much when baking, refrigerate dough for 30 minutes, then bake as directed.

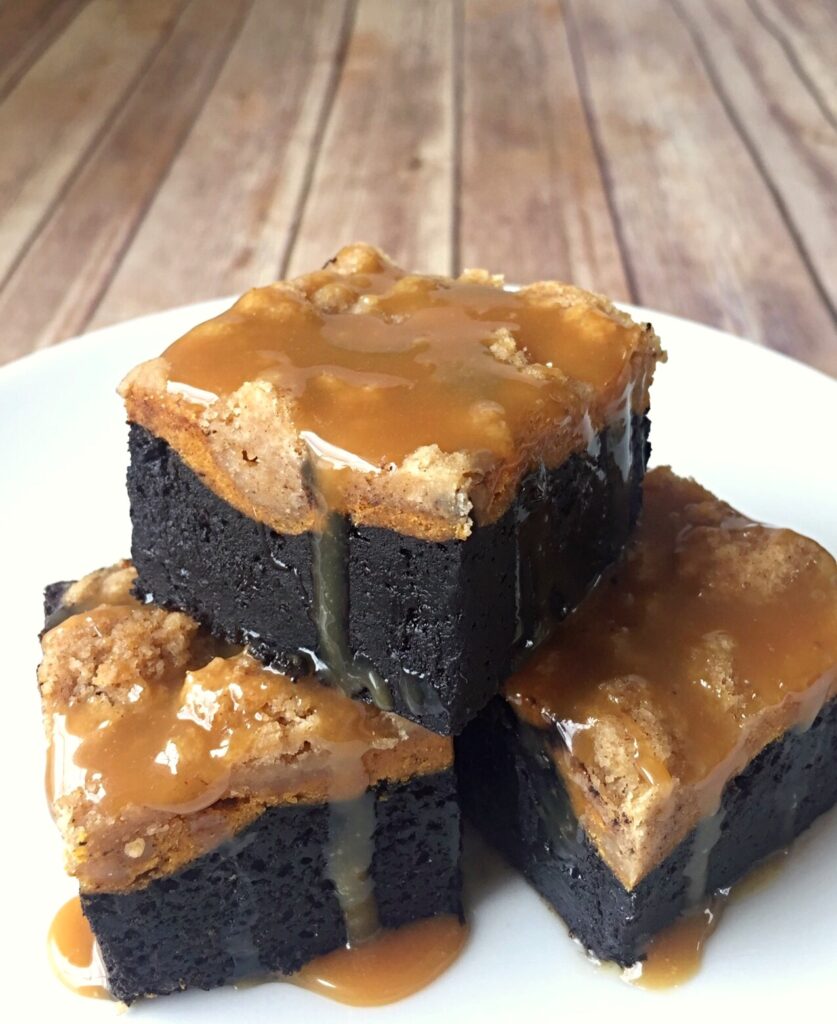
Pumpkin Cheesecake Crumble Brownies

pumpkin cheesecake crumble brownies

It’s Fall 2020. We need chocolate! We need pumpkin spice! And we need it drenched with caramel! These satisfying brownies check all of the boxes with multiple layers of comfort. A rich chocolate brownie is the base. The next layer is heavenly pumpkin cheesecake. The topping is a buttery crumble that rivals the best crumb cake. Finally, as if that isn’t enough, it’s drizzled with caramel sauce!

If it sounds complicated, don’t worry, it’s not. Each layer is super easy to make. You can use your favorite store bought caramel sauce to top it with. Vanilla ice cream and/or whipped cream are optional, but highly recommended toppings also. Just saying.

The layers go unexpectedly well together and make the perfect dessert for Halloween or Thanksgiving. I’m even going to add these beauties to my Christmas dessert table this year. Enjoy! You deserve it.

Print Recipe
Pumpkin Cheesecake Crumble Brownies
Chocolate brownies with pumpkin cheesecake and crumb topping, topped with caramel sauce.
Course Dessert
Servings
Ingredients
Crumb Topping
Pumpkin Cheesecake Layer
Brownie Layer
Course Dessert
Servings
Ingredients
Crumb Topping
Pumpkin Cheesecake Layer
Brownie Layer
Instructions
Crumb Topping
  1. In a medium bowl, combine flour, brown sugar, cinnamon and salt.
  2. Cut in butter using a pastry blender or your fingers until well-combined and crumbles are pea-sized. Press crumbles together to make large quarter-sized chunks.
  3. Set aside in refrigerator.
Pumpkin Cheesecake Layer
  1. Preheat oven to 350º. Line a 9-inch square baking pan with parchment paper.
  2. In a medium bowl, beat cream cheese with an electric mixer until smooth.
  3. Add pumpkin, eggs, sugar, cinnamon, ginger and nutmeg and beat until well combined. Set aside.
Brownie Layer
  1. Melt 1 stick of butter in a large microwaveable bowl.
  2. Stir in sugar until combined
  3. Stir in cocoa powder, vanilla, baking powder and salt.
  4. Add the eggs and beat until smooth
  5. Add the flour and mix until just combined.
  6. Spread brownie batter into prepared baking pan. Smooth with a spatula.
  7. Spread pumpkin cheesecake batter over the top of brownie batter. Smooth with a spatula.
  8. Sprinkle crumb topping evenly over the top of pumpkin cheesecake layer.
  9. Bake for 40-50 minutes until a toothpick inserted into pumpkin cheesecake layer comes out clean.
  10. Let cool completely. Cut into squares and serve with caramel sauce.

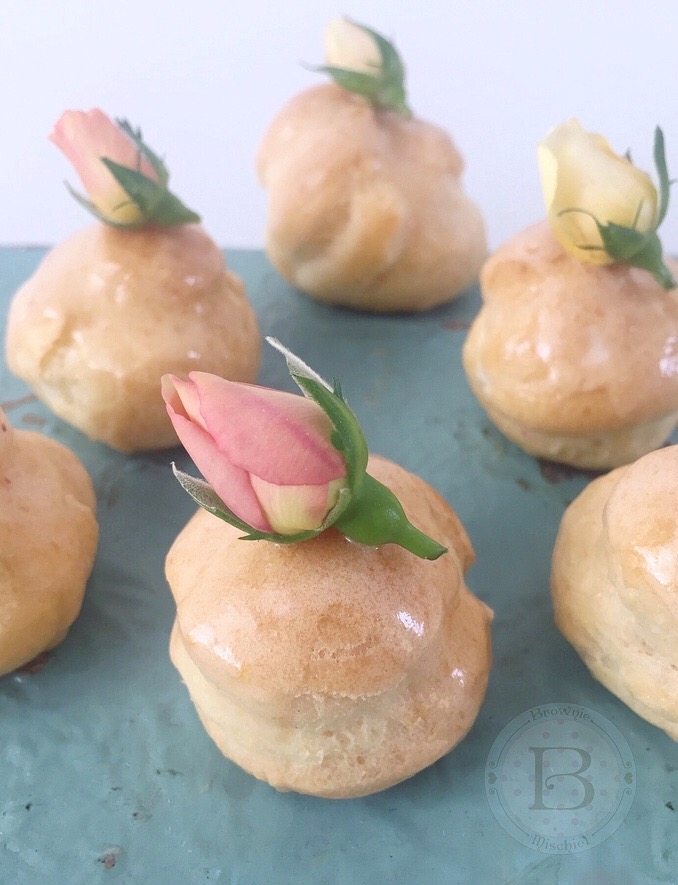
Peaches & Cream Profiteroles

Peaches & Cream Profiteroles by Brownie Mischief

Summer is nearly over, and after the recent heatwave here in Southern California, I’m more than ready to welcome fall weather. But before I put on my fluffy sweater and dive into pumpkin spice everything, I want to enjoy the tail end of peach season, don’t you? Farmer’s markets and stores near my home are still brimming over with fresh peaches, so I picked up some peaches and decided to give them a proper goodbye and send them off in style.

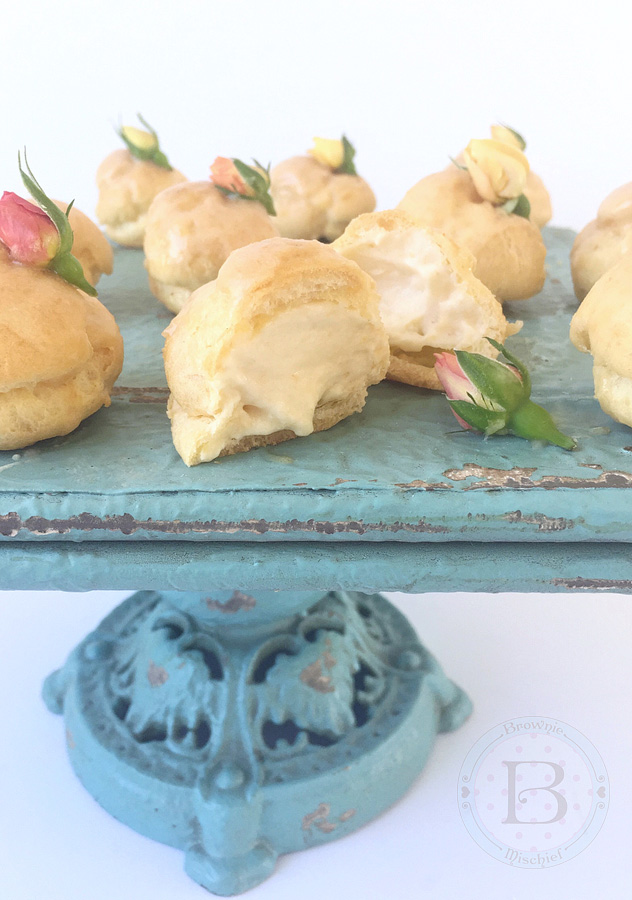
Peaches & Cream Profiteroles by Brownie Mischief

I created some luscious peaches and cream filled, bite-size puffs of choux pastry, called profiteroles. They’re like cream puffs, only smaller. The filling is creamy, but so light and airy that I’m convinced that these profiteroles have no calories! The recipe I’m sharing with you uses fresh peaches, but feel free to substitute frozen peaches if fresh peaches aren’t available. There are a lot of steps to this recipe, but the steps are done in stages and are very easy to do.

Peaches & Cream Profiteroles by Brownie Mischief

I decorated my profiteroles with fresh, pesticide-free miniature rosebuds, also known as spray roses. If you can’t find miniature rosebuds, pesticide-free rose petals would be a good substitute. You may not get a chance to embellish these little beauties. They have a way of popping into people’s mouths even before you can decorate them!


Print Recipe


Peaches & Cream Profiteroles

Bite-sized puffs of choux pastry filled with a creamy, fresh peach filling and topped with fresh peach icing.

Course Dessert
Cuisine French

Servings


Ingredients
Peach Purée

Peaches & Cream Filling

Profiteroles

Peach Icing

Course Dessert
Cuisine French

Servings


Ingredients
Peach Purée

Peaches & Cream Filling

Profiteroles

Peach Icing


Instructions
Peach Purée
  1. Purée peaches in a blender or food processor. Strain puréed peaches through a sieve. Stir in lemon juice.

  2. Place puréed peaches in a small saucepan. Bring to a boil over medium heat.

  3. Reduce heat and simmer until peach purée is reduced by half.

  4. Remove from heat. Stir in peach flavoring and set aside to cool completely.

Peaches and Cream Filling
  1. Bring milk to a boil in a small saucepan over medium heat.

  2. Meanwhile, whisk sugar, cornstarch and salt together in a medium bowl. Add the egg and whisk until smooth.

  3. When milk starts to boil, remove from heat and pour 1/3 of the hot milk into the egg mixture and whisk to combine.

  4. Pour the egg mixture into the remaining hot milk and cook over medium heat, stirring continuously, until the mixture comes to a boil and thickens.

  5. Remove from heat. Stir in butter and extracts.

  6. Pour mixture through a sieve placed over a bowl. Cover the surface of pastry cream with plastic wrap. Let cool.

  7. Set aside 2 tablespoons of cooled peach purée. Add remaining peach purée to cooled pastry cream and stir to combine. Chill in refrigerator.

  8. In a medium bowl, whip heavy cream to stiff peaks with an electric mixer at high speed. Fold whipped cream into peach pastry cream mixture. Set aside in refrigerator.

Profiteroles
  1. Preheat oven to 400ºF. Line two large baking sheets with parchment paper.

  2. Combine water, butter and salt in a medium saucepan and bring to a boil over medium heat.

  3. Reduce heat. Add flour and stir vigorously with a wooden spoon until mixture pulls away from sides of the pan and forms a ball.

  4. Transfer mixture to the bowl of a stand mixer. Mix on low speed until steam dissipates and mixture cools to lukewarm.

  5. Add eggs one at a time and beat with an electric mixer at medium speed, until smooth, stopping to scrape down bowl.

  6. Transfer mixture to a piping bag, fitted with a large round tip. (**I used Ateco tip 808.)

  7. Pipe 1 1/4 inch mounds, about 2 inches apart onto prepared baking sheets. Smooth tops with a wet finger.

  8. Bake for 15 minutes, then turn oven temperature down to 350ºF and continue baking until golden brown, about 8-10 more minutes. Using a toothpick or skewer poke a small hole in each profiterole to let steam escape. Place on a wire rack to cool completely.

  9. Using the tip of a paring knife, poke a pilot hole in the bottom of each profiterole.

  10. Place peaches and cream filling into a piping bag fitted with a medium round piping tip. (***I used Wilton tip 12.)

  11. Place piping tip into the pilot holes and fill each profiterole with filling.

Peach Icing
  1. In a small bowl, whisk all icing ingredients together and spoon over filled profiteroles. Refrigerate until ready to serve.


Recipe Notes

*To make peaches easy to peel, blanch them  in boiling water for about 30 seconds, then dunk  in ice water.

**To find Ateco tip 808, click here. ***To find Wilton tip 12, click here.

Chocolate Lovers’ Valentine Cake for Two

Chocolate Lovers' Valentine Drip Cake for Two

My relationship with Valentine’s Day has transformed over the years. When I was a child, I joyfully skipped home from school with my bounty of tiny Valentine cards, candy hearts and a cupcake someone’s mother baked. As I grew older, I was hot and cold towards Valentine’s Day, depending on the state of my love life at the time. After having kids, Valentine’s Day became about red construction paper, doily hearts and glue sticks. I happily cleaned up sprinkles and kissed chubby, frosting-stained cheeks. Now I think of Valentine’s Day as simply a day to celebrate love. I embrace Valentine’s Day and all the hearts, roses and chocolates that go with it! Show your loved ones that you love them on Valentine’s Day, but more importantly, show them throughout the year, by loving, respecting and accepting them for who they are every day.

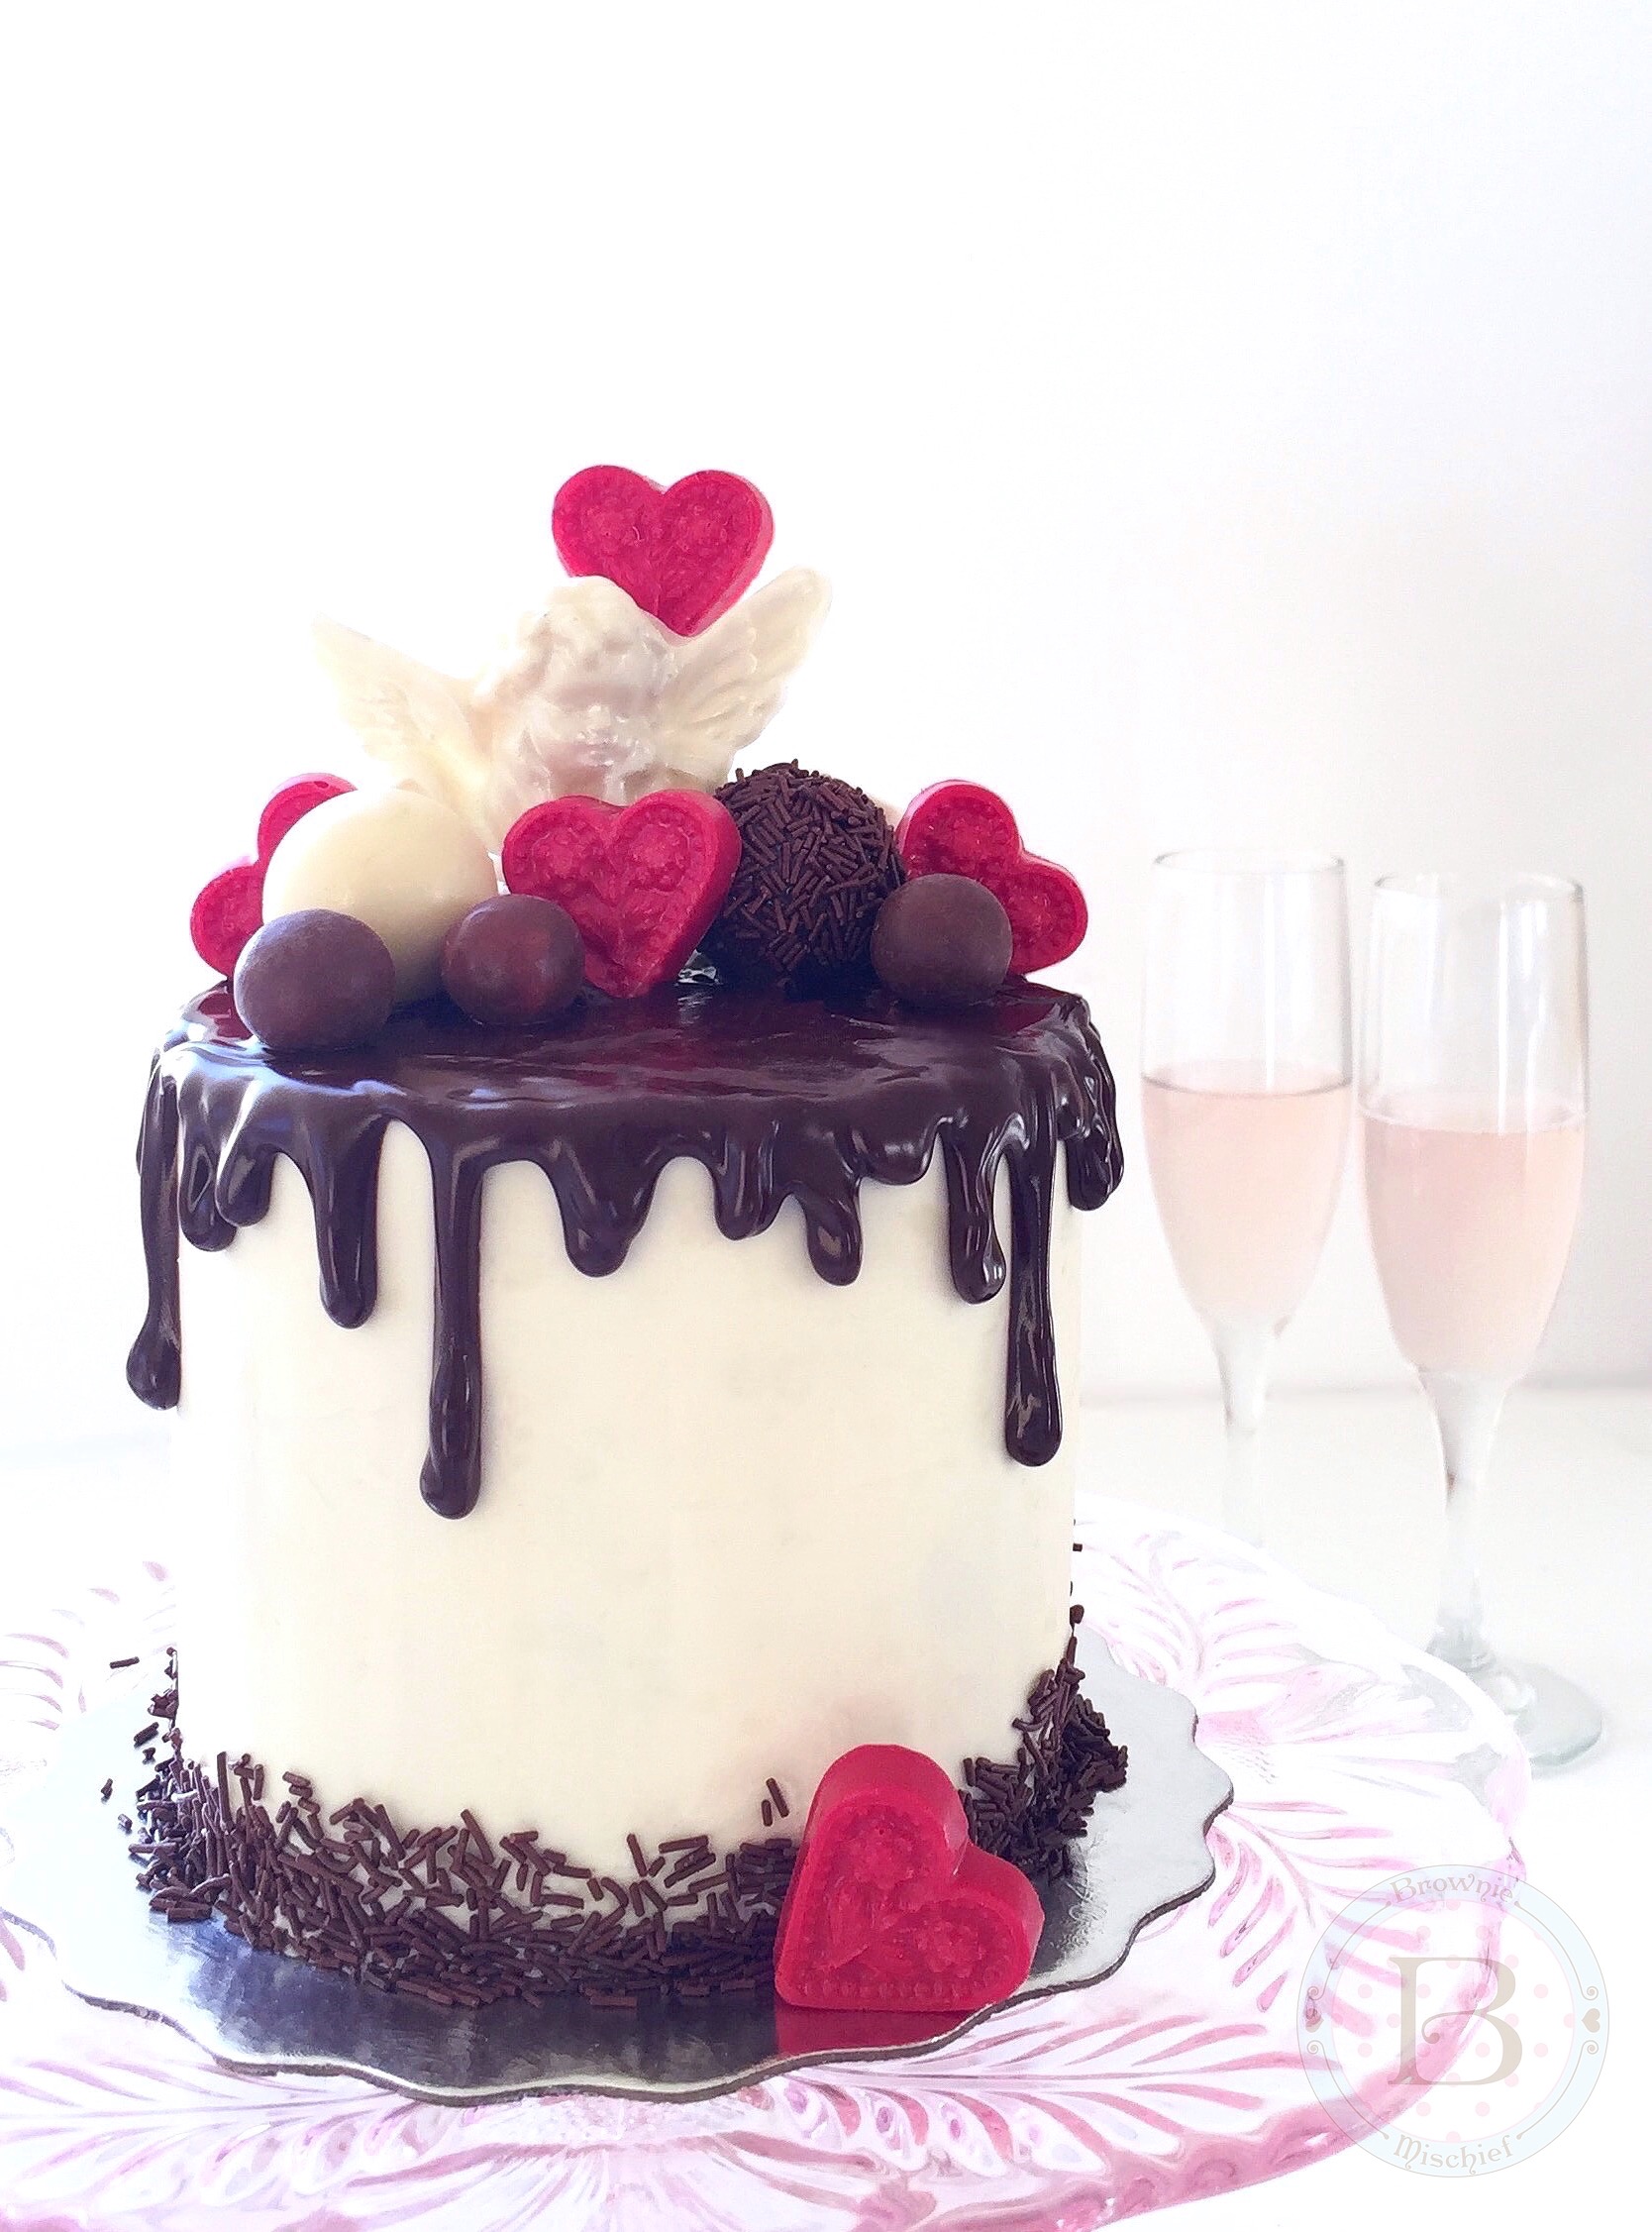
If your heart beats for a chocolate lover, then this Valentine cake for two will have them swooning. It’s small in size, but grand in chocolate indulgence. It has three layers of moist chocolate cake, rich, white chocolate buttercream and a silky chocolate glaze. As if that isn’t enough, I loaded the top with chocolate candy! Some of the candy is store bought and some I made with candy melts and chocolate molds. Click here to find the cherub mold. Click here to find the heart mold.
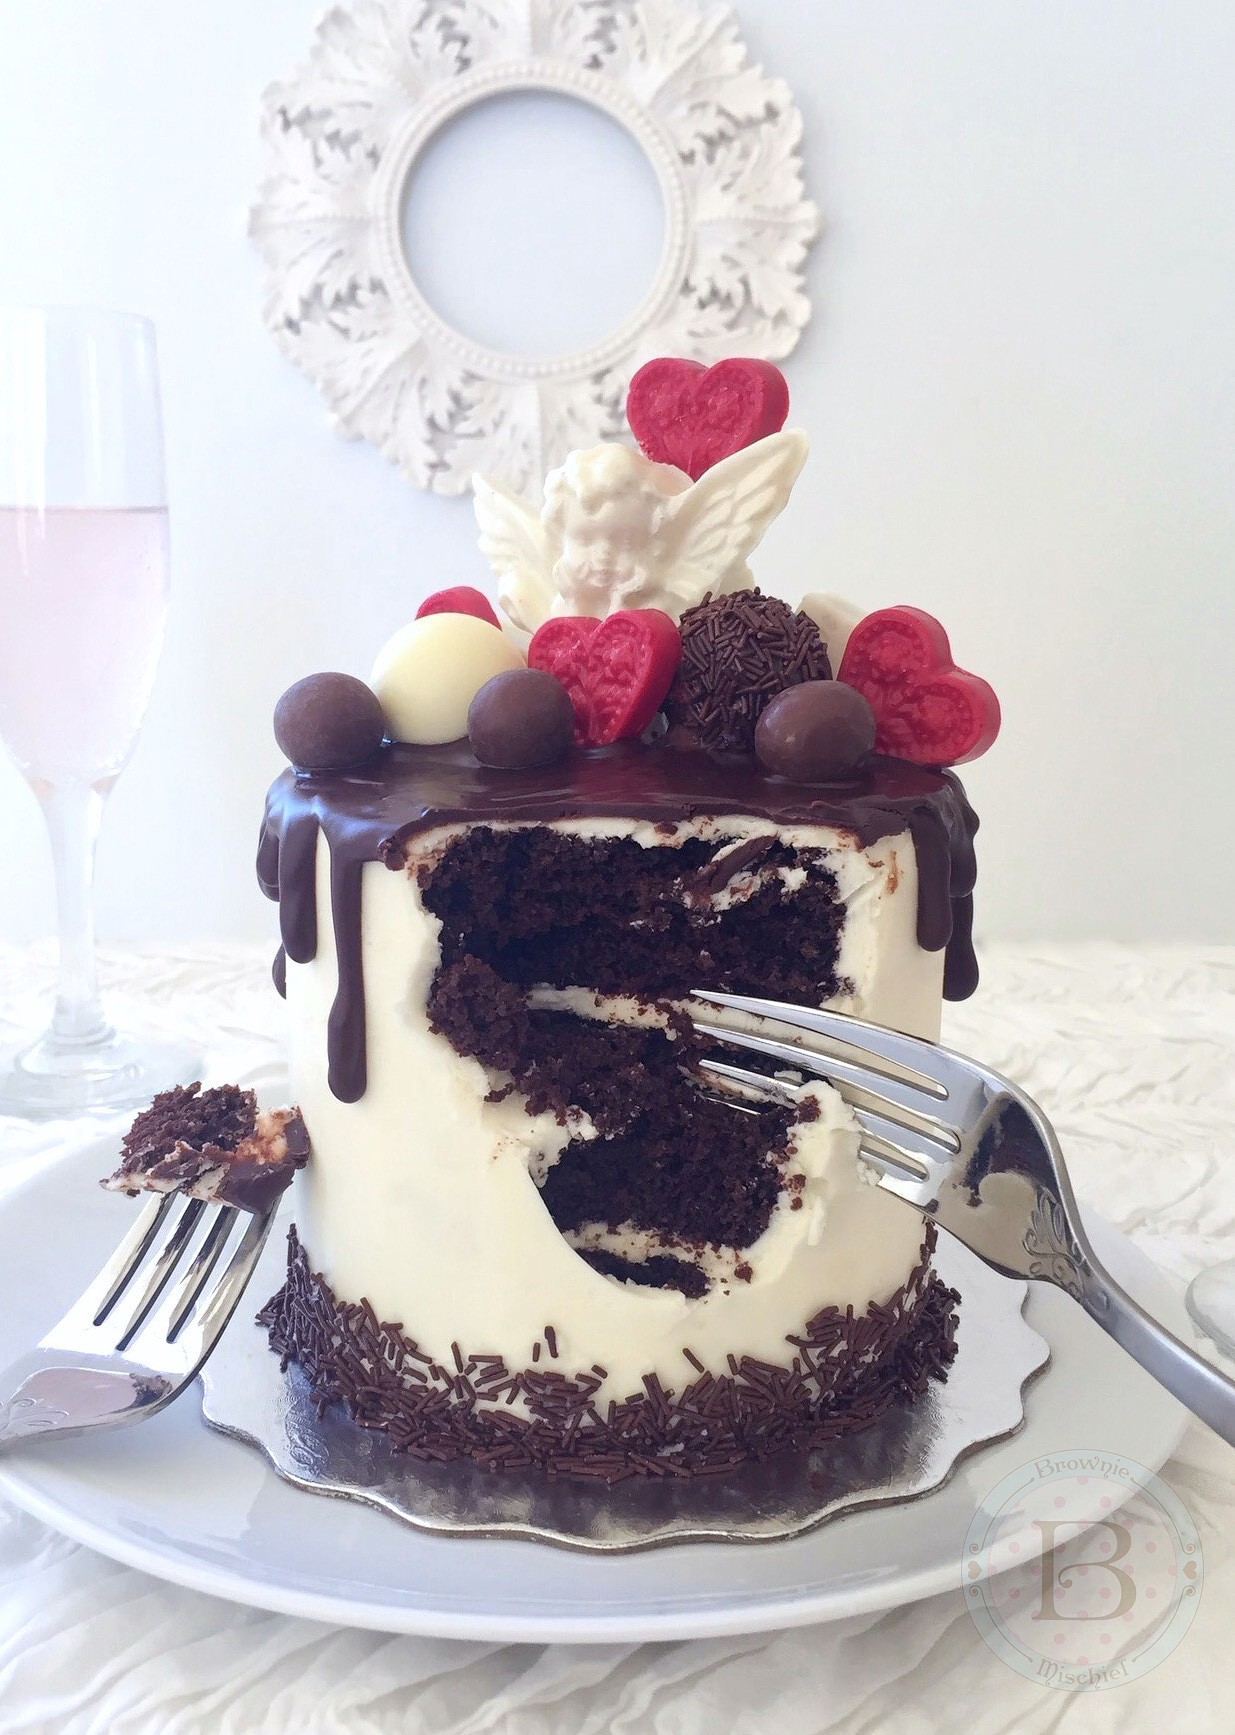
Chocolate Lovers' Valentine Drip Cake for Two

I hope you share this Valentine cake with someone you love! However you celebrate the day and whoever you love, have a happy one!

Print Recipe
Chocolate Lovers' Valentine Cake for Two
A mini chocolate cake with white chocolate buttercream, topped with chocolate glaze and chocolate Valentine candy. Perfect for sharing!
Course Dessert
Prep Time 1 hour
Cook Time 30 minutes
Passive Time 1 1/2 hours
Servings
Ingredients
Chocolate Cake for Two
White Chocolate Buttercream
Chocolate Drip Glaze
Course Dessert
Prep Time 1 hour
Cook Time 30 minutes
Passive Time 1 1/2 hours
Servings
Ingredients
Chocolate Cake for Two
White Chocolate Buttercream
Chocolate Drip Glaze
Instructions
Chocolate Cake for Two
  1. Preheat oven to 350°F. Grease & flour three 4-inch cake pans. *See note below.
  2. Sift flour, cocoa powder, baking powder, baking soda and salt together in a medium bowl. Add sugar and stir to combine.
  3. Combine egg, buttermilk, vegetable oil and vanilla extract in a small bowl. Whisk lightly to combine.
  4. Add egg mixture to dry ingredients and mix on low speed with a handheld electric mixer, until combined. Stop mixer. Scrape sides of bowl with spatula. Turn mixer up to medium speed and beat for 1 minute.
  5. Add hot coffee and stir until incorporated.
  6. Pour batter into prepared cake pans, dividing batter evenly between the pans. Bake for 20-25 minutes or until a toothpick inserted into the center of the cake comes out clean.
  7. Cool cakes in pans 10 minutes, then invert onto a wire rack to cool.
White Chocolate Buttercream
  1. Melt white chocolate in a double boiler over gently simmering water. (Alternately, you can melt the white chocolate in the microwave. In a small microwaveable bowl, heat the white chocolate for 30 seconds, then stir. Heat again for 10 second intervals, stirring until melted, being very careful not to overheat it.)
  2. Set white chocolate aside to cool until lukewarm and still soft.
  3. In a medium bowl, beat butter with an electric mixer at medium speed until pale and creamy.
  4. Add vanilla extract, salt and melted white chocolate. Beat at low speed until combined. Stop mixer. Scrape sides of bowl with spatula.
  5. Add powdered sugar. Beat at low speed, until powdered sugar is combined. Beat at medium speed until buttercream is smooth, stopping to scrape the bowl occasionally. Keep covered at room temperature until ready to use.
Cake Assembly
  1. When cakes have cooled completely, trim the cake layers to 1-inch tall.
  2. Attach one of the layers to a cake board with some of the white chocolate buttercream. Apply 1/4-inch thick layer of buttercream to the top of the cake layer, followed by the second cake layer, another 1/4-inch thick layer of buttercream, then the final cake layer.
  3. Apply a crumb coat (thin layer) of buttercream to the cake. Chill the cake in the refrigerator for 20 minutes.
  4. Frost the cake with the remaining buttercream. Apply chocolate sprinkles to the bottom edge of the cake.
  5. Melt chocolate drip glaze ingredients together in a double boiler over gently simmering water. Let cool slightly.
  6. Spoon chocolate glaze into a piping bag. Snip off the end of the bag with kitchen scissors. Drizzle chocolate glaze along the edges of the perimeter of the cake, then fill in the middle. Smooth top with a small offset spatula.
  7. Top cake with assorted chocolate candy. If desired, you can stack some of the candy and adhere them with melted chocolate to give some variation in height.