Strawberry Blondies

Strawberry Blondies

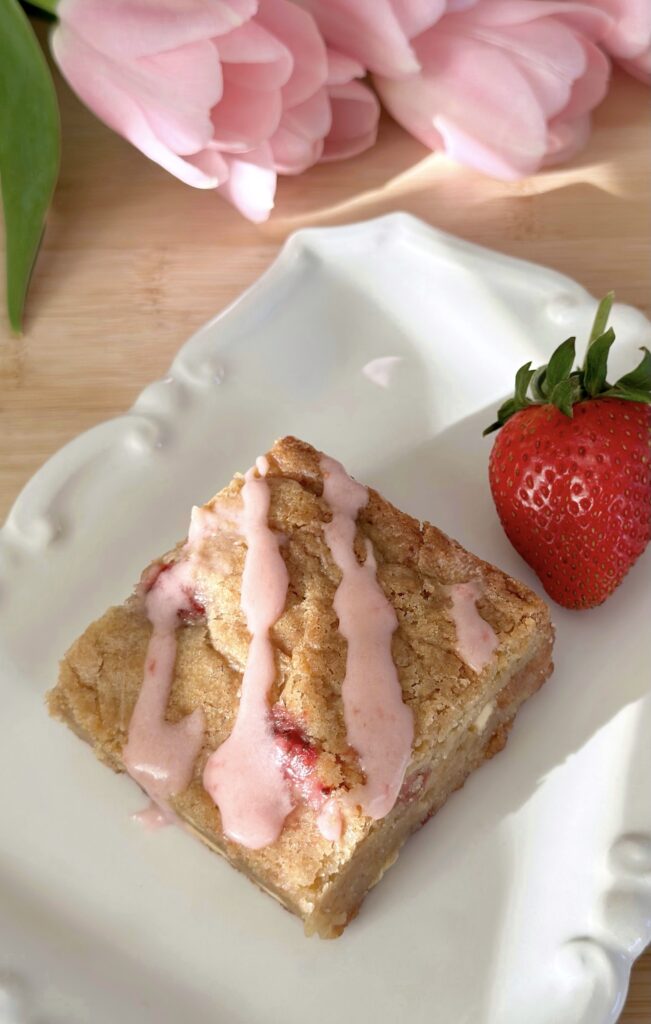
These golden, buttery bars have soft, chewy centers and crisp edges. They’re studded with fresh strawberry chunks and white chocolate chips. They’re perfectly delicious as is, but I drizzled them with fresh strawberry icing, which is the supreme finishing touch. They contain the perfect amount of salt which balances the sweetness of the white chocolate chips. Macerating the strawberries before baking draws out the excess liquid and helps to prevent soggy blondies, so don’t skip this step.

Print Recipe
Strawberry Blondies
Golden, buttery blondies with fresh strawberries and white chocolate chips
Course Dessert
Keyword blondies, strawberry
Servings
2-inch squares
Ingredients
Strawberry Blondies
Strawberry Icing
Course Dessert
Keyword blondies, strawberry
Servings
2-inch squares
Ingredients
Strawberry Blondies
Strawberry Icing
Instructions
Strawberry Blondies
  1. Place the chopped strawberries in a medium bowl. Sprinkle with 2 teaspoons of sugar and mix well. Let stand for 30-45 minutes, then drain the excess juices.
  2. Meanwhile, preheat the oven to 350ºF (180ºC). Line an 8-inch square baking pan with parchment paper, leaving a couple of inches of overhang to serve as handles to lift the blondies out of the pan.
  3. In a separate medium bowl, whisk together the flour, baking powder and salt.
  4. In a large bowl, whisk together the remaining 1/4 cup (50g) of sugar, the brown sugar, melted butter and vanilla until smooth. Add the egg and the egg yolk and whisk until smooth and well combined, about 2-3 minutes. Stir in the flour mixture, just until combined. Fold in the white chocolate chips and the strawberries.
  5. Transfer the batter to the prepared baking pan. Bake until the top looks golden brown all over and a toothpick inserted into the center of the blondies comes out with a few moist crumbs on it, about 28-33 minutes. Let cool completely in the pan.
  6. Remove the cooled blondies from the pan and cut into squares.
Strawberry Icing
  1. Finely chop, then mash the strawberries. Press the mashed strawberries through a sieve, using the back of a spoon or press the strawberries through a food mill. Whisk together the strawberries, powdered sugar, melted butter lemon juice and salt until smooth. Drizzle over the cooled brownies.

Strawberry Swirl Cake

Strawberry Swirl Cake

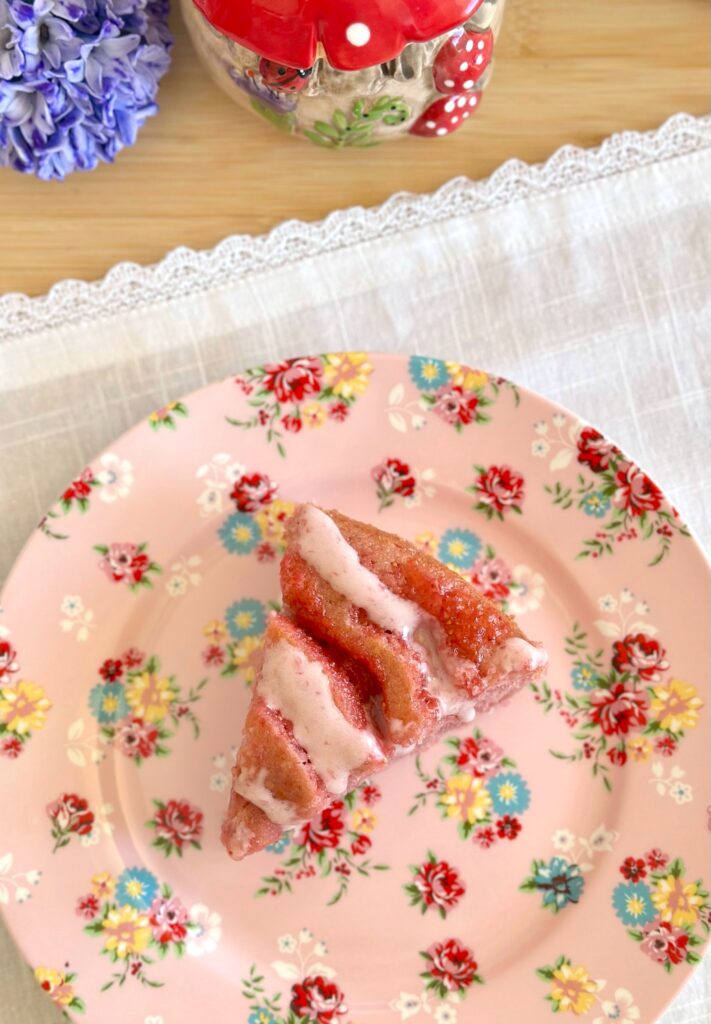
This soft, incredibly moist cake is a happy experiment that successfully combines my favorite strawberry cake with cinnamon roll cake. Instead of cinnamon sugar, it has a swirl of strawberry sugar. It’s bursting with fresh strawberry flavor and it’s so good it doesn’t even need frosting. But of course, I added strawberry cream cheese icing, in the tradition of cinnamon roll cake, which takes it over the top.

Print Recipe
Strawberry Swirl Cake
Fresh strawberry cake with a strawberry sugar swirl and strawberry cream cheese icing
Course Dessert
Keyword cake, strawberry
Servings
servings
Ingredients
Strawberry Swirl
Strawberry Cake
Strawberry Cream Cheese Icing
Course Dessert
Keyword cake, strawberry
Servings
servings
Ingredients
Strawberry Swirl
Strawberry Cake
Strawberry Cream Cheese Icing
Instructions
Strawberry Swirl
  1. In a small food processor or a clean spice grinder, pulse the freeze dried strawberries to break them up a bit. Add the sugar and process to a fine consistency. Strain the sugar mixture through a sieve into a bowl. Mix in the flour, melted butter, salt and lemon juice until well combined.
  2. Transfer the mixture to a piping bag fitted with a medium round tip. I used an Ateco #12 tip.** Alternately, you can snip the corner off a disposable piping bag or food storage bag, creating a 3/8-inch wide opening.
Strawberry Cake
  1. In a small saucepan over medium-low heat, simmer the puréed strawberries until reduced by half. Set aside to cool to room temperature.
  2. Preheat the oven to 350ºF (180ºC). Line the bottom of an 8-inch round cake pan*** with parchment paper. Grease and flour the inside.
  3. In a medium bowl, whisk together the flour, baking powder, baking soda and salt.
  4. In a large bowl, beat the sugar, oil, egg, egg white, and extracts, with an electric mixer at medium speed, until smooth. Alternately, you can whisk the mixture together by hand until smooth. Stir in 1/3 cup of the cooled strawberry reduction and the food coloring. (Reserve the remaining strawberry reduction for the icing.)
  5. Stir the flour mixture into the batter, in 2 additions, alternating with the sour cream. Mix just until combined. Transfer the batter to the cake pan.
  6. Pipe the strawberry swirl mixture onto the batter in a spiral pattern. Bake until a toothpick inserted into the center of the cake comes out clean, about 25-30 minutes.
  7. Let the cake cool in the pan for 10 minutes, then transfer it to a cooling rack.
Strawberry Cream Cheese Icing
  1. In a small bowl, beat the cream cheese and butter together until smooth. Add the powdered sugar and strawberry reduction and beat until smooth and well combined. Whisk in the buttermilk a little at a time until your desired consistency is reached. Drizzle over the cooled cake.
Recipe Notes

*To find the food coloring I used, click here.

**To find the piping tip I used, click here.

***To find the cake pan I used, click here.

Lemon White Chocolate Chip Cookies

Lemon White Chocolate Chip Cookies

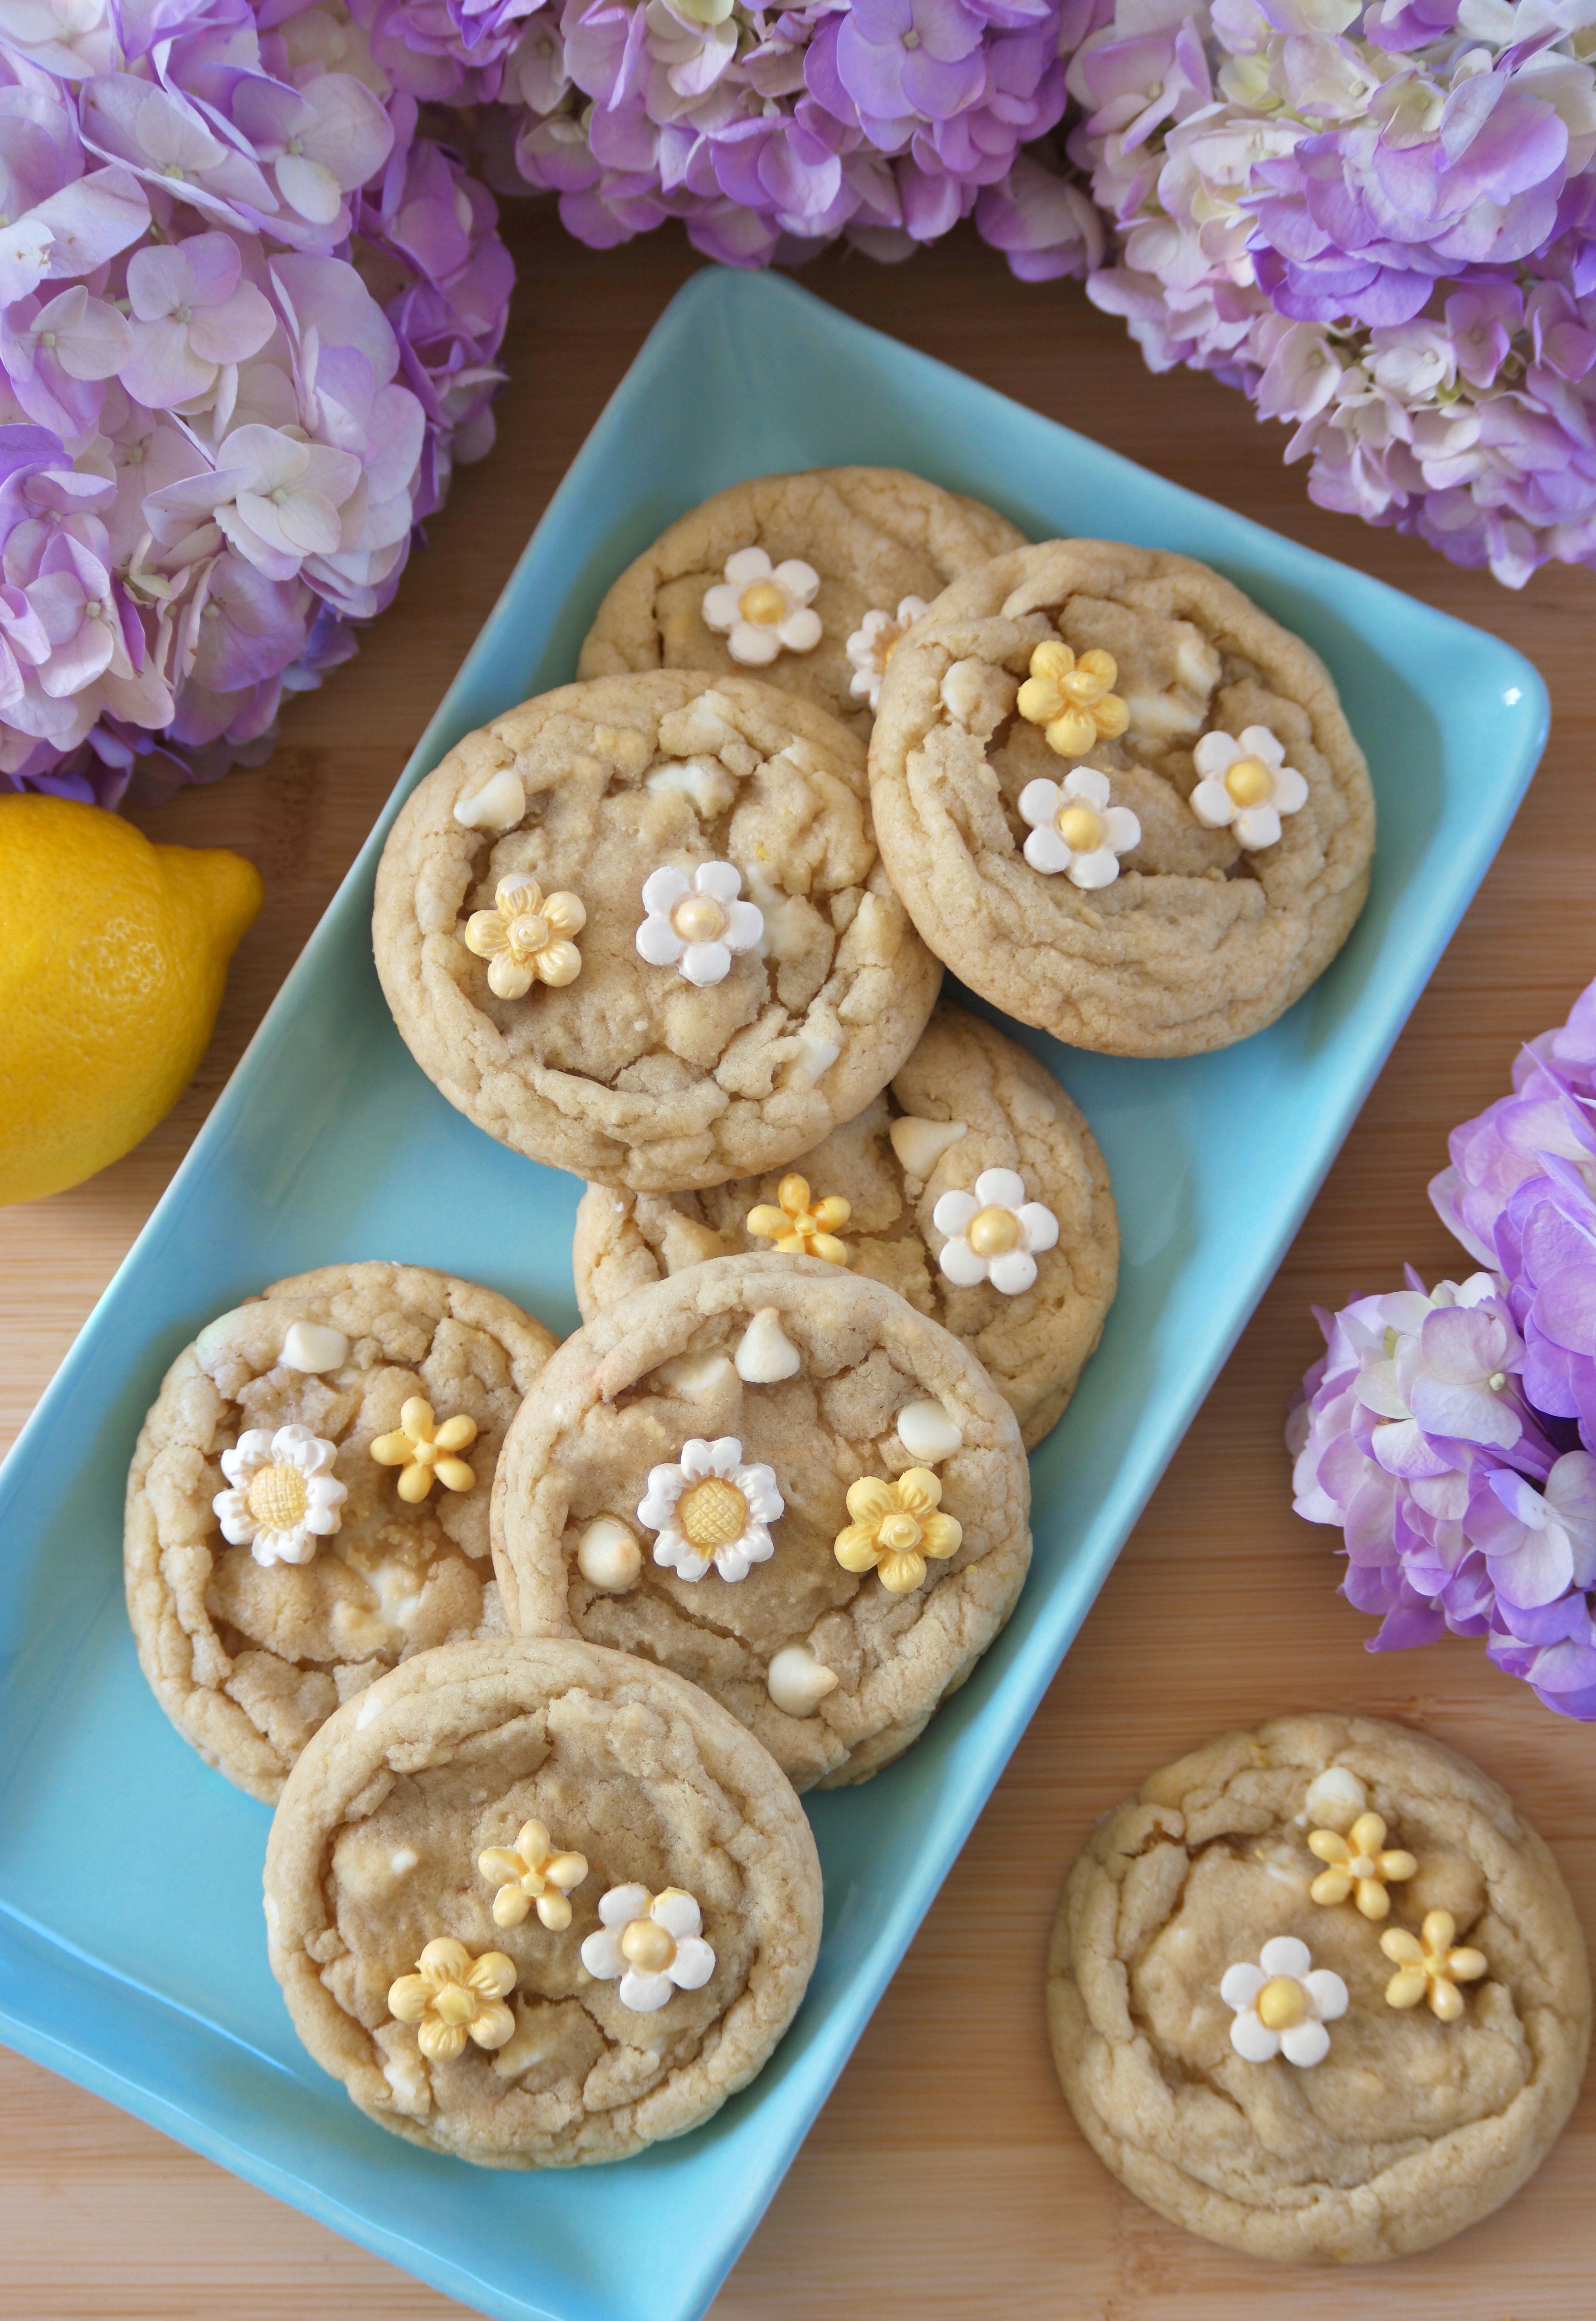
It’s nearly impossible to feel blue while you’re eating one of these cheerful Lemon White Chocolate Chip Cookies! They’re lemony, buttery and so delicious. I tested these over and over until I got the best lemon flavor and the perfect texture. You’ll love the crisp edges and soft, chewy centers. They don’t require any chilling time, but if your cookies spread too much, you can chill the dough balls for 20-30 minutes before baking. Weigh your ingredients for the best results.

For extra cuteness, I added small yellow chocolate flowers. I used melted white chocolate chips, but candy melts work too. The candy mold I used makes 1/2-inch to 3/4-inch flowers. To find the mold I used, click here. If you use that mold or a similar one, I recommend buying more than one so you can make more chocolate flowers at one time. If you want to skip the white chocolate flowers, then add a few white chocolate chips to the top of each cookie before baking.

Print Recipe
Lemon White Chocolate Chip Cookies
Lemony cookies with white chocolate chips, crisp edges and soft, chewy centers, topped with white chocolate flowers
Course Dessert
Keyword cookies, lemon
Servings
cookies
Ingredients
Lemon White Chocolate Chip Cookies
Course Dessert
Keyword cookies, lemon
Servings
cookies
Ingredients
Lemon White Chocolate Chip Cookies
Instructions
White Chocolate Flowers
  1. Prep silicone candy flower molds by brushing a small amount of luster dust into the cavities with a small food safe brush. This step is optional, but it gives your chocolate flowers a sheen and helps them to release from the mold.
  2. In a heat safe bowl, melt the white chocolate chips together with the vegetable oil over a pan of barely simmering water, making sure the water doesn't touch the bottom of the bowl. Alternately, you can melt your white chocolate chips with short bursts in the microwave. Stir gently until smooth. Stir in the food coloring a little at a time until your desired shade is achieved.
  3. Transfer the melted chocolate to a piping bag with a narrow round tip or snip the tip off of a disposable piping bag. Alternately, you can use a food grade squeeze bottle with a narrow tip. Fill the cavities of the flower mold. Scrape off any excess chocolate with a small offset spatula. Place the mold in the freezer for a few minutes until set. Turn the mold over and bend it slightly to release the flowers. Repeat the steps until you have about 24-36 flowers.
Lemon White Chocolate Chip Cookies
  1. Preheat the oven to 350ºF (180ºC). Line two large cookie sheets with parchment paper.
  2. In a medium bowl, whisk together the flour, cake flour, salt and baking soda.
  3. In a large bowl, beat the butter, granulated sugar, brown sugar and lemon zest, with an electric mixer at medium speed, until light and fluffy. Beat in the egg and egg yolk in separate additions until well incorporated. Beat in the extracts until combined.
  4. On low speed, beat in the flour mixture just until combined. Fold in the white chocolate chips.
  5. Place 1/4 cup size portions of cookie dough onto the prepared cookie sheet, about 3 inches apart. I used a #20 portion scoop* and I placed 6 cookies on each cookie sheet. Bake one cookie sheet at a time. Bake until the tops of the cookies are set and the bottom edges begin to turn light golden brown, about 10-11 minutes. Do not over bake. Transfer the cookies to a cooling rack to cool completely.
  6. Apply the white chocolate flowers to the cooled cookies with a dab of melted white chocolate.
Recipe Notes

To find the flower mold I used, click here.

To find the portion scoop I used, click here.

Confetti Crumb Cake Cookies

Just when you thought confetti cookies couldn’t get any more fun and cute, Confetti Crumb Cake Cookies have arrived! I took confetti cookies, also known as birthday cake cookies, over the top by adding confetti crumb topping and a drizzle of pale pink icing. For top level fun, I finished them with edible glitter.

Print Recipe
Confetti Crumb Cake Cookies
Vanilla cookies with white chocolate chips, rainbow sprinkles, crumb topping and icing drizzle
Servings
cookies
Ingredients
Confetti Crumb Topping
Confetti Cookies
Icing
Servings
cookies
Ingredients
Confetti Crumb Topping
Confetti Cookies
Icing
Instructions
Confetti Crumb Topping
  1. In a medium bowl, whisk together the flour, sugar and salt. Work the butter into the flour mixture with your fingertips until it looks like sand with no large chunks of butter. Stir in the sprinkles. Press the mixture together to form chunks. Set aside in the refrigerator while you make the cookie dough.
Confetti Cookies
  1. Preheat the oven to 350ºF (180ºC). Line 2 large cookies sheets with parchment paper.
  2. In a medium bowl, whisk together the flour, baking powder and salt.
  3. In a large bowl, beat the butter, sugar and brown sugar, with an electric mixer at medium speed, until light and fluffy. Beat in the egg and egg yolk in two additions, making sure each one is incorporated before adding the next. Beat in the extracts.
  4. On low speed, beat in the flour mixture into the batter, just until combined. Stir in the white chocolate chips and the sprinkles.
  5. Form the cookie dough into 2-tablespoon size balls. Place them about 3 inches apart onto the cookie sheets. Flatten the dough balls slightly. Top each one generously with the crumb topping.
  6. Bake until the cookies are set and the edges start to turn light golden, about 11-13 minutes. (Be careful not to over bake to avoid drying out your cookies.) Let the cookies cool on the baking sheet for 1 minute, then transfer them to a cooling rack.
Icing
  1. In a small bowl, whisk together the powdered sugar, butter, vanilla and 1 tablespoon of milk. Add additional milk as needed to achieve your desired consistency. Using the tip of a toothpick, gradually add a tiny bit of food coloring and whisk until incorporated.
  2. Drizzle over the cooled cookies. Top with edible glitter if desired.
Recipe Notes

If your cookies spread too much, chill the dough for 20-30  minutes, then proceed with the recipe.

Strawberry Crumb Cake


Print Recipe


Strawberry Crumb Cake

Tender vanilla crumb cake topped with fresh strawberries, plenty of crumb topping and fresh strawberry icing

Keyword cake, strawberry

Servings


Ingredients
Crumb Topping

Cake

Fresh Strawberry Icing

Keyword cake, strawberry

Servings


Ingredients
Crumb Topping

Cake

Fresh Strawberry Icing


Instructions
Crumb Topping
  1. In a medium bowl, whisk the flour, sugar , brown sugar and salt together.

  2. Work in the butter with your fingertips until the mixture looks like wet sand. Press it together to form chunks. Set aside in the refrigerator until ready to use.

Cake
  1. Preheat the oven to 350ºF (180ºC). Line the bottom of an 8-inch cake pan with a removable bottom or an 8-inch springform pan, with parchment paper. Grease and flour the insides or line with a strip of parchment paper.

  2. In a medium bowl, whisk together the flour, baking powder and salt. Set aside.

  3. In a large bowl, cream the butter and sugar with an electric mixer on medium speed, until light and fluffy.

  4. Beat the egg, egg yolk and vanilla into the butter mixture in 3 separate additions, making sure each addition is incorporated before adding the next.

  5. In a small bowl, whisk the milk and sour cream together. On low speed, mix the flour mixture into the batter in two additions alternating with half of the milk mixture. Beat just until combined.

  6. Transfer the batter to the prepared pan. Smooth the batter with a spatula. Place the strawberries evenly on top of the batter. Sprinkle the crumb topping over the top.

  7. Bake until the topping is golden brown and a toothpick inserted into the center of the cake comes out clean, about 48-55 minutes. Do not over bake. Let the cake cool in the pan for 10 minutes, then remove it from the pan and transfer it to a cooling rack.

Fresh Strawberry Icing
  1. In a medium bowl, whisk together the powdered sugar and puréed strawberries. Add the half & half a little at a time until your desired consistency is achieved. Whisk until smooth. Drizzle over the cooled cake.


Recipe Notes

To find the cake pan I used, click here.

Chocolate Love Potion Cookies

Chocolate Love Potion Cookies

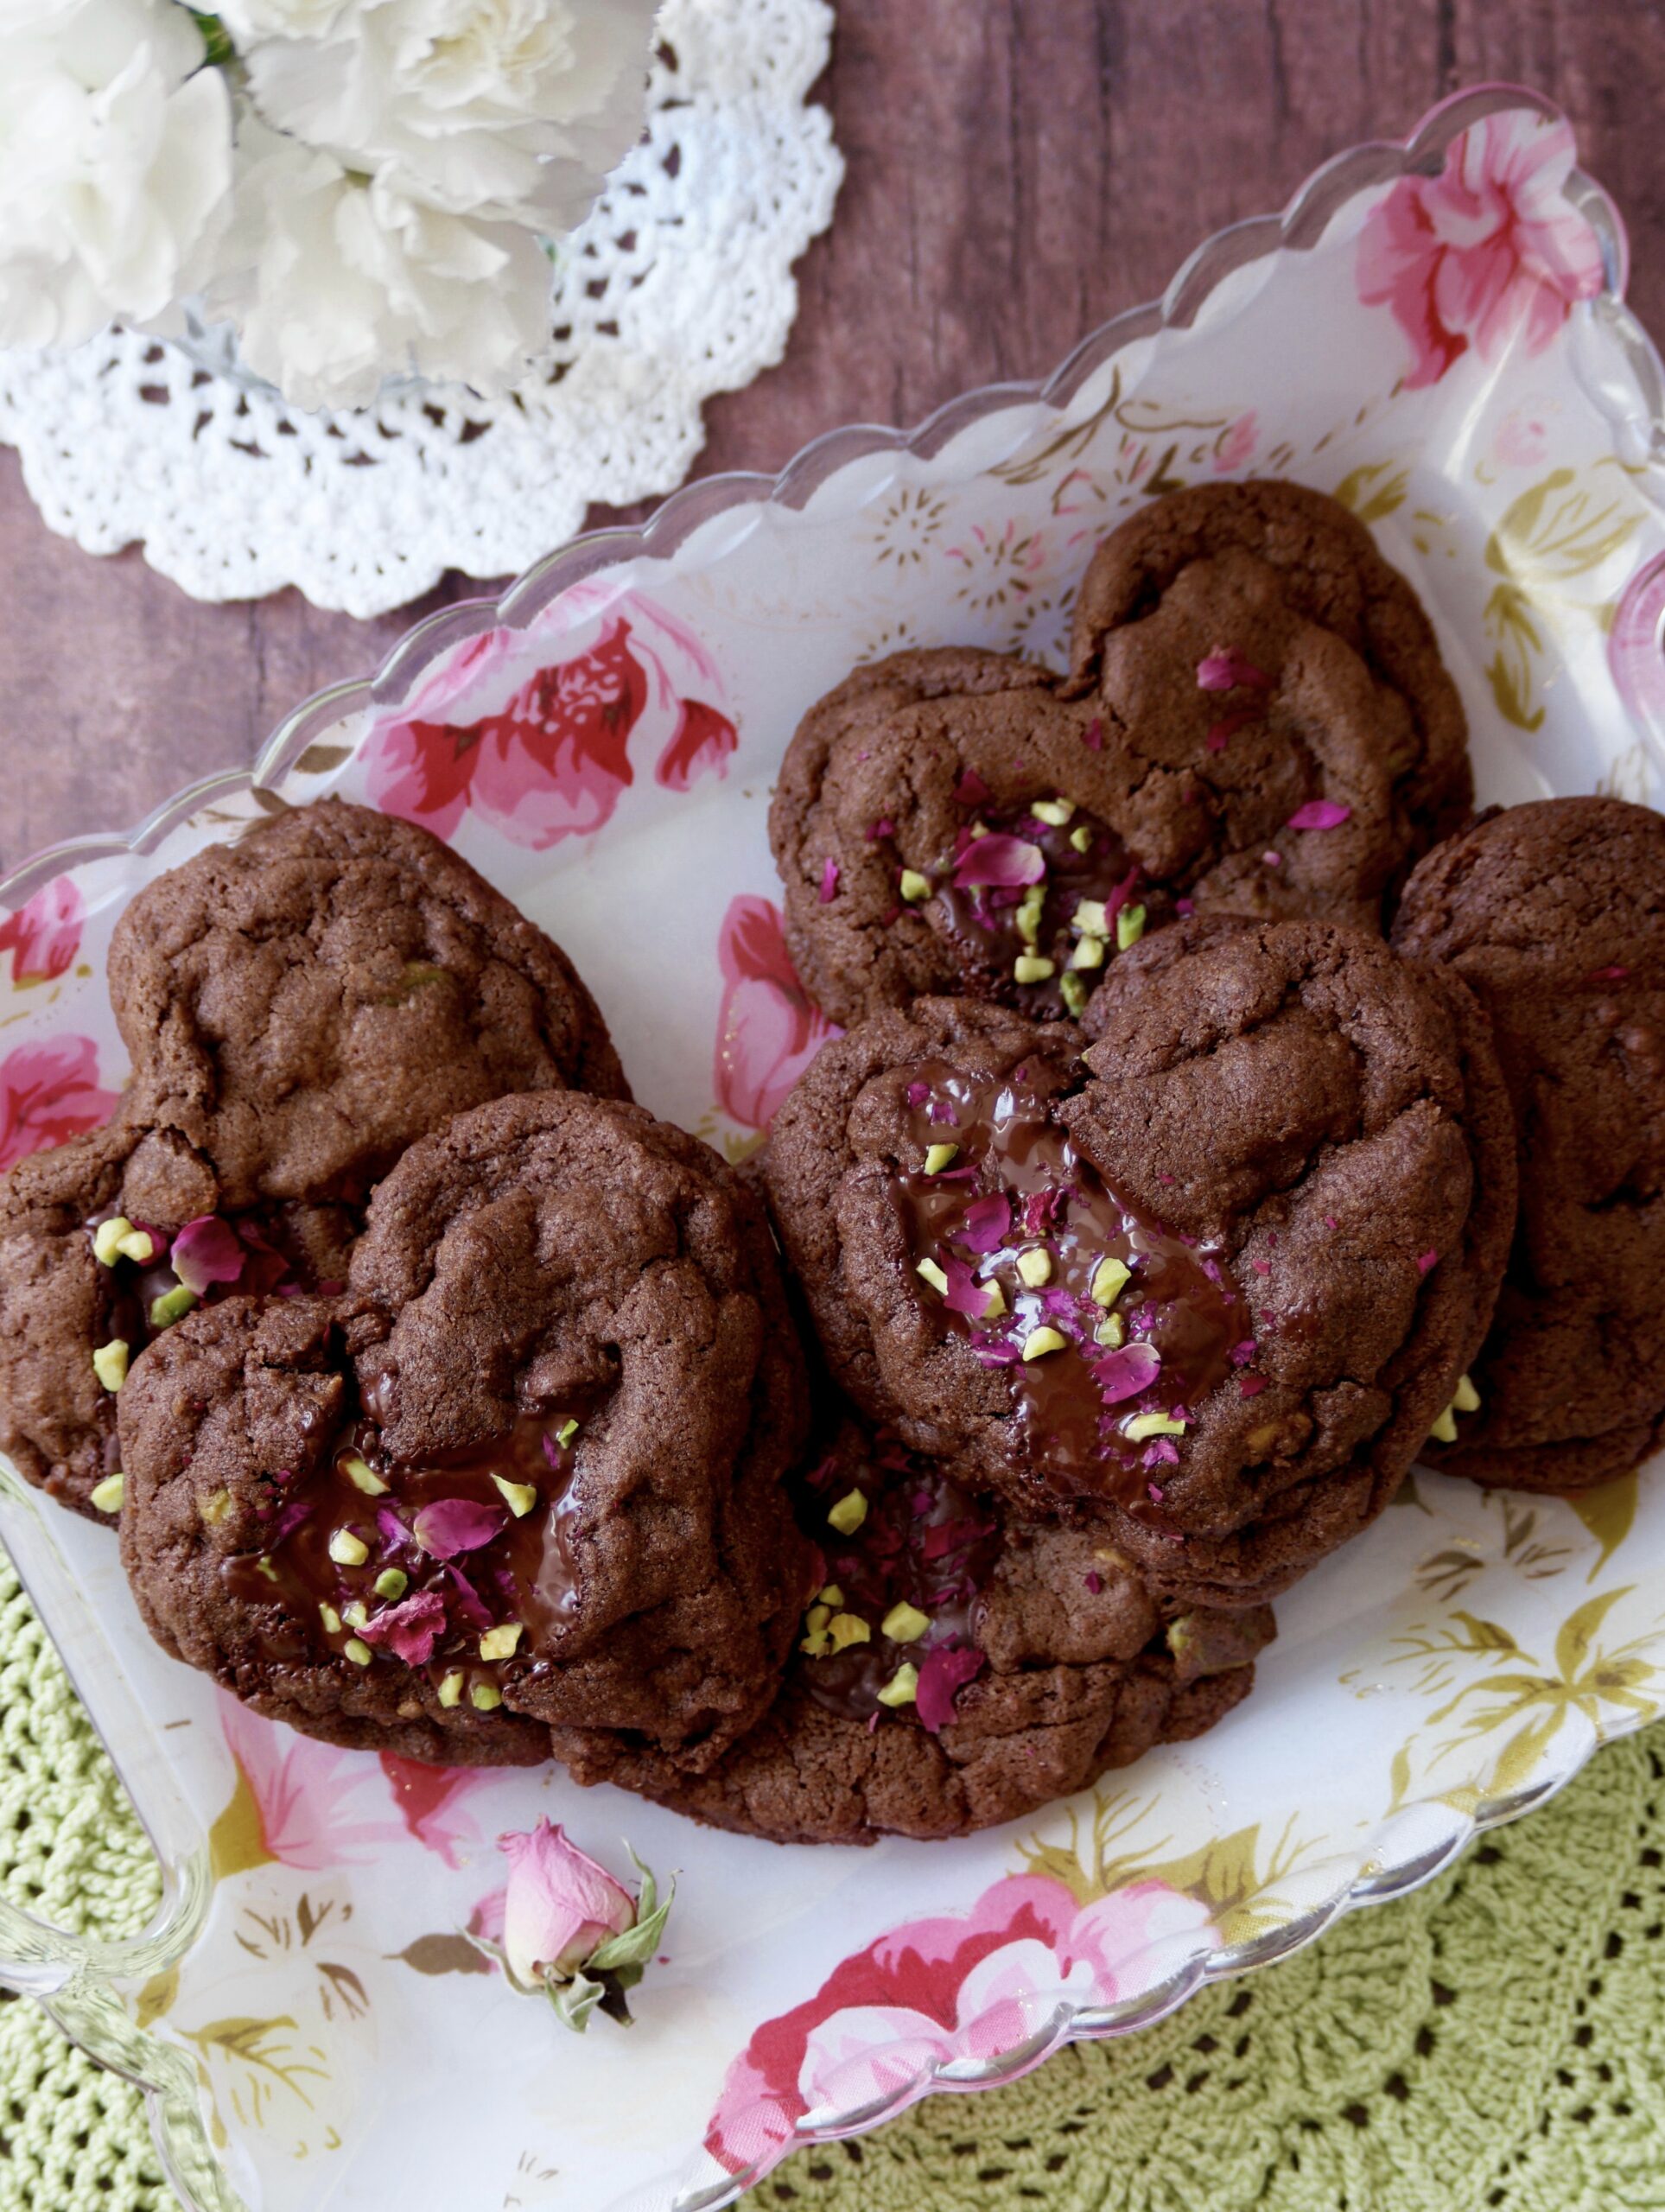
You’ll fall in love with these bewitching double chocolate cookies with pistachios and rose petals. As if the chocolate chips weren’t enough, I topped them with pieces of dark chocolate which melt into heavenly little pools of deliciousness. You may have heard that chocolate is considered to be an aphrodisiac because it contains tryptophan and phenelethylamine. Tryptophen increases the mood booster serotonin in the brain. Phenelethylamine is released by the brain when you fall in love. Pistachios are also considered to be natural aphrodisiacs and these cookies contain plenty of pistachios! The rose petals add a touch of romance to finish off the perfect love potion cookies.

If you’re not a fan of pistachios, feel free to substitute your favorite toasted nuts. If you want to skip the nuts all together, make sure to replace them with another add-in, because the nuts provide structure to the cookies. I recommend dried cherries or white chocolate chips as a nice alternative.

Print Recipe
Chocolate Love Potion Cookies
Double chocolate cookies with chocolate chips and pistachios topped with pools of melted chocolate, chopped pistachios and dried rose petals
Servings
cookies
Ingredients
Servings
cookies
Ingredients
Instructions
  1. Line 2 large cookie sheets with parchment paper.
  2. In a large bowl, whisk together the flour, cocoa powder, baking soda and salt.
  3. In a separate large bowl, cream the butter, brown sugar and granulated sugar, with an electric mixer at medium speed, until light and fluffy.
  4. Add the egg, egg yolk and vanilla in 3 separate additions and beat until incorporated. Beat in the flour mixture just until combined.
  5. Fold in the chocolate chips and pistachios.
  6. Form the dough into 18 2-tablespoon size portions, about 2 ounces (57g) each. Form the portions into 2-inch heart shapes. (They don't have to be perfect, because the cookies are going to spread as they bake.) Place the heart shapes on a tray. Cover and refrigerate for 20-30 minutes.
  7. Meanwhile, preheat the oven to 350ºF (180ºC). Place 6 heart shapes on each cookie sheet, about 3 inches apart. Top each one with a piece of chocolate bar. I placed my chocolate pieces on the upper left of each cookie. Bake the cookies until the tops look set, about 10-11 minutes. Be careful not to over bake the cookies or they'll be more difficult to shape into hearts.
  8. Remove the cookies from the oven and immediately use a large, metal heart-shaped cookie cutter to shape the hot cookies. Place the cookie cutter onto the cookie sheet over each cookie and slide it up and down a couple of times, then slide it side to side a couple of times. Work quickly before the cookies set. Let the cookies cool on the pan for 2-3 minutes, then transfer them to a cooling rack. Top the cookies with chopped pistachios and rose petals before the melted chocolate sets.
Recipe Notes

To find culinary rose petals, click here.

To find the cookie cutter I used, click here.

Mini Pumpkin Bear Muffins

Mini Pumpkin Bear Muffins

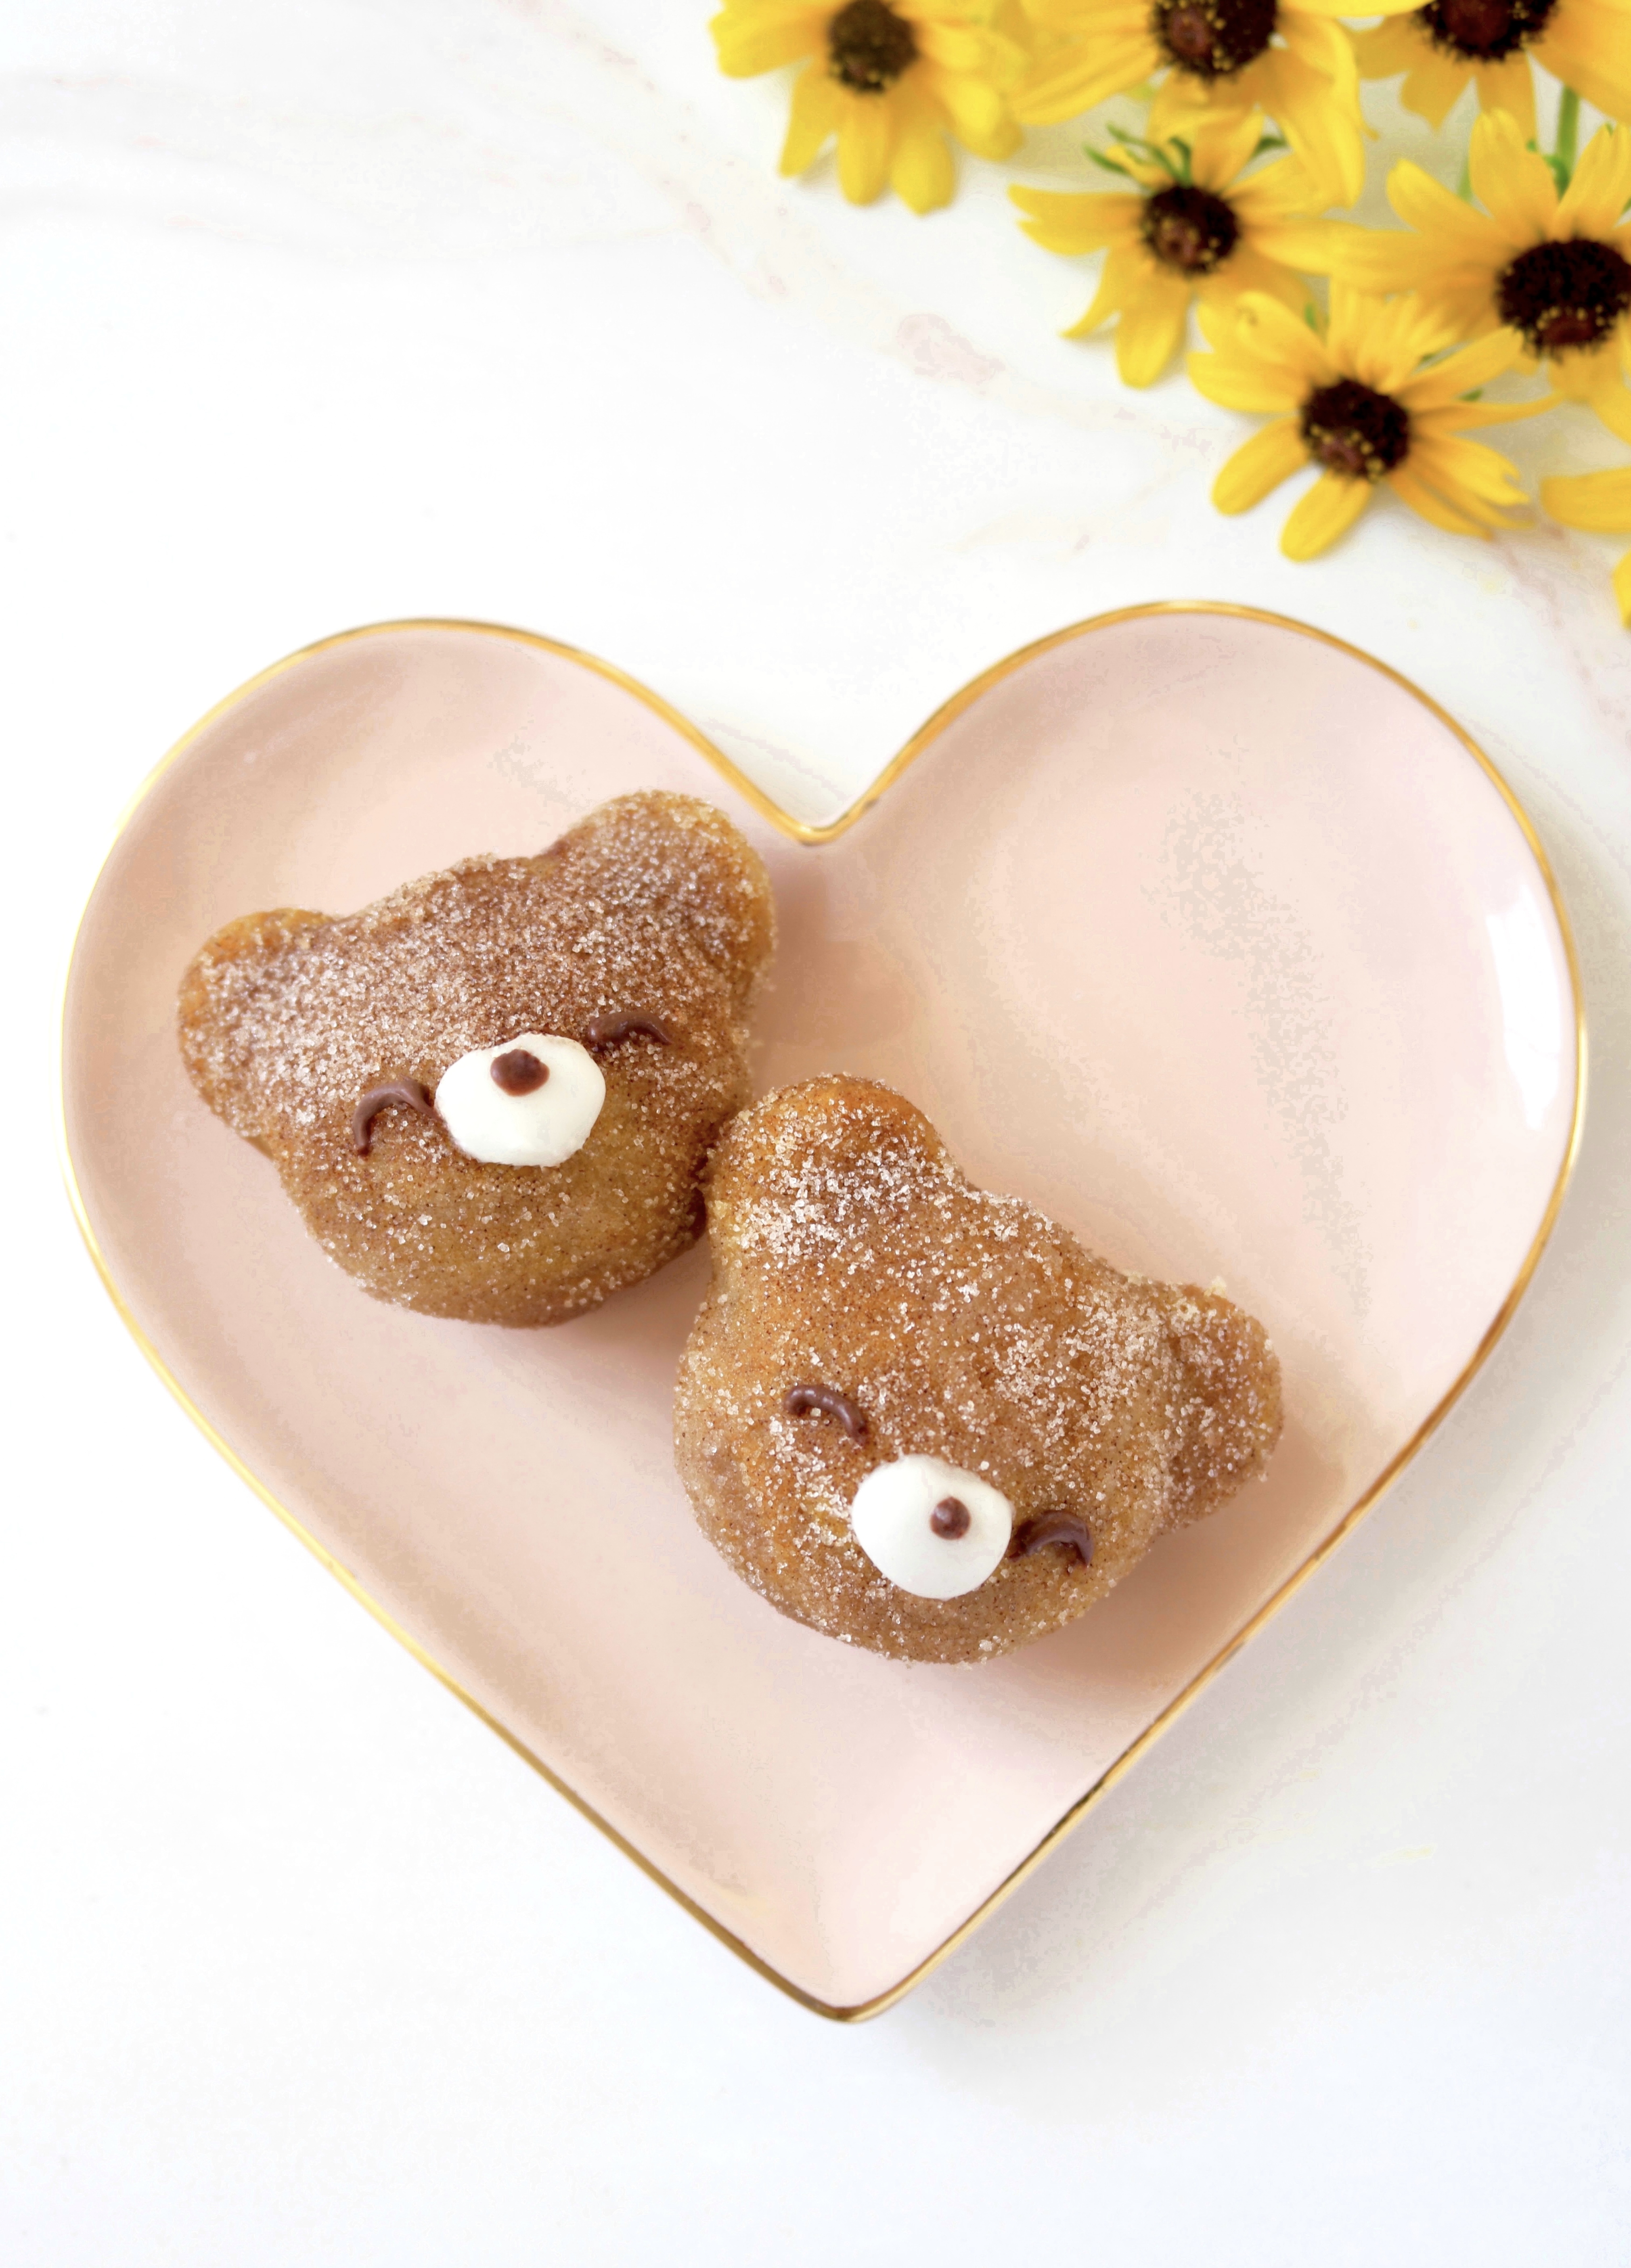
These cute little bear-shaped pumpkin muffins are almost too cute to eat. But if you try one, it’ll be gobbled up without hesitation because they’re so moist, fluffy and delicious! The cinnamon sugar coating gives them the perfect fall flavor and a subtle crunch. I used cream cheese icing to form the snouts and melted chocolate for the eyes and noses. You can also use melted chocolate chips or candy melts to decorate their faces if you prefer. I used a bear-shaped mini muffin pan, which is also called a Madeleine pan or a financier pan. To find a bear mini muffin pan, click here. A standard mini muffin pan will also work, but the muffins won’t be bear-shaped. If you end up using a standard mini muffin pan, you can add round, flat candies to form the ears.

To watch the TikTok video of Mini Pumpkin Bear Muffins being made, click here.

To watch the Instagram video of Mini Pumpkin Bear Muffins being made, click here.

Print Recipe
Mini Pumpkin Bear Muffins
Moist, fluffy bear-shaped pumpkin mini muffins with cream cheese icing snouts
Course Breakfast, Brunch
Keyword muffins, pumpkin
Servings
mini muffins
Ingredients
Mini Pumpkin Bear Muffins
Cinnamon Sugar
Bear Faces
Course Breakfast, Brunch
Keyword muffins, pumpkin
Servings
mini muffins
Ingredients
Mini Pumpkin Bear Muffins
Cinnamon Sugar
Bear Faces
Instructions
Mini Pumpkin Bear Muffins
  1. Preheat the oven to 325ºF (165ºC). Grease and flour a bear-shaped mini muffin pan. (This recipe also works in a mini muffin pan but the muffins won't be bear shaped.)
  2. In a medium bowl, whisk together the flour, baking powder, baking soda, salt, cinnamon, ginger and nutmeg.
  3. In a large bowl, whisk together the brown sugar, oil and egg until smooth and well combined. Mix in the pumpkin purée until incorporated. Stir in the flour mixture just until combined.
  4. Scoop or pipe the batter into the muffin pan, filling the cups 2/3 full (about 3/4 oz or 21g in each). Use a small offset spatula to smooth the top of the batter, making sure to get batter into the ears.
  5. Bake until a toothpick inserted into the center of the muffins comes out clean, about 9-11 minutes. Let the muffins cool in the pan for 5 minutes then remove them from the pan and transfer to a cooling rack.
  6. Clean the pan and repeat with the remaining batter.
Cinnamon Sugar
  1. In a small bowl, whisk together the sugar and cinnamon until well combined. Brush the warm muffins with with melted butter using a small pastry brush. Coat them with the cinnamon sugar mixture.
Bear Faces
  1. In a small bowl, beat the butter, cream cheese, powdered sugar and 1/2 teaspoon of milk until smooth. Add more milk as needed.
  2. Transfer the icing to a piping bag fitted with a medium round tip or snip off the end of the piping bag making a 1/4-inch wide opening. Pipe a small blob of icing onto each bear's face to form the snouts.
  3. Transfer the melted chocolate to a piping bag fitted with a small round tip or snip off the end of the piping bag making a 1/16-inch wide opening. Pipe dots of chocolate onto the snouts to make the noses. Pipe dots or curved lines to make the eyes. Alternately you can apply the melted chocolate dots with the tip of a toothpick
Recipe Notes

*To find a bear-shaped mini muffin pan, click here.

Double Strawberry Mini Muffins

Double Strawberry Mini Muffins

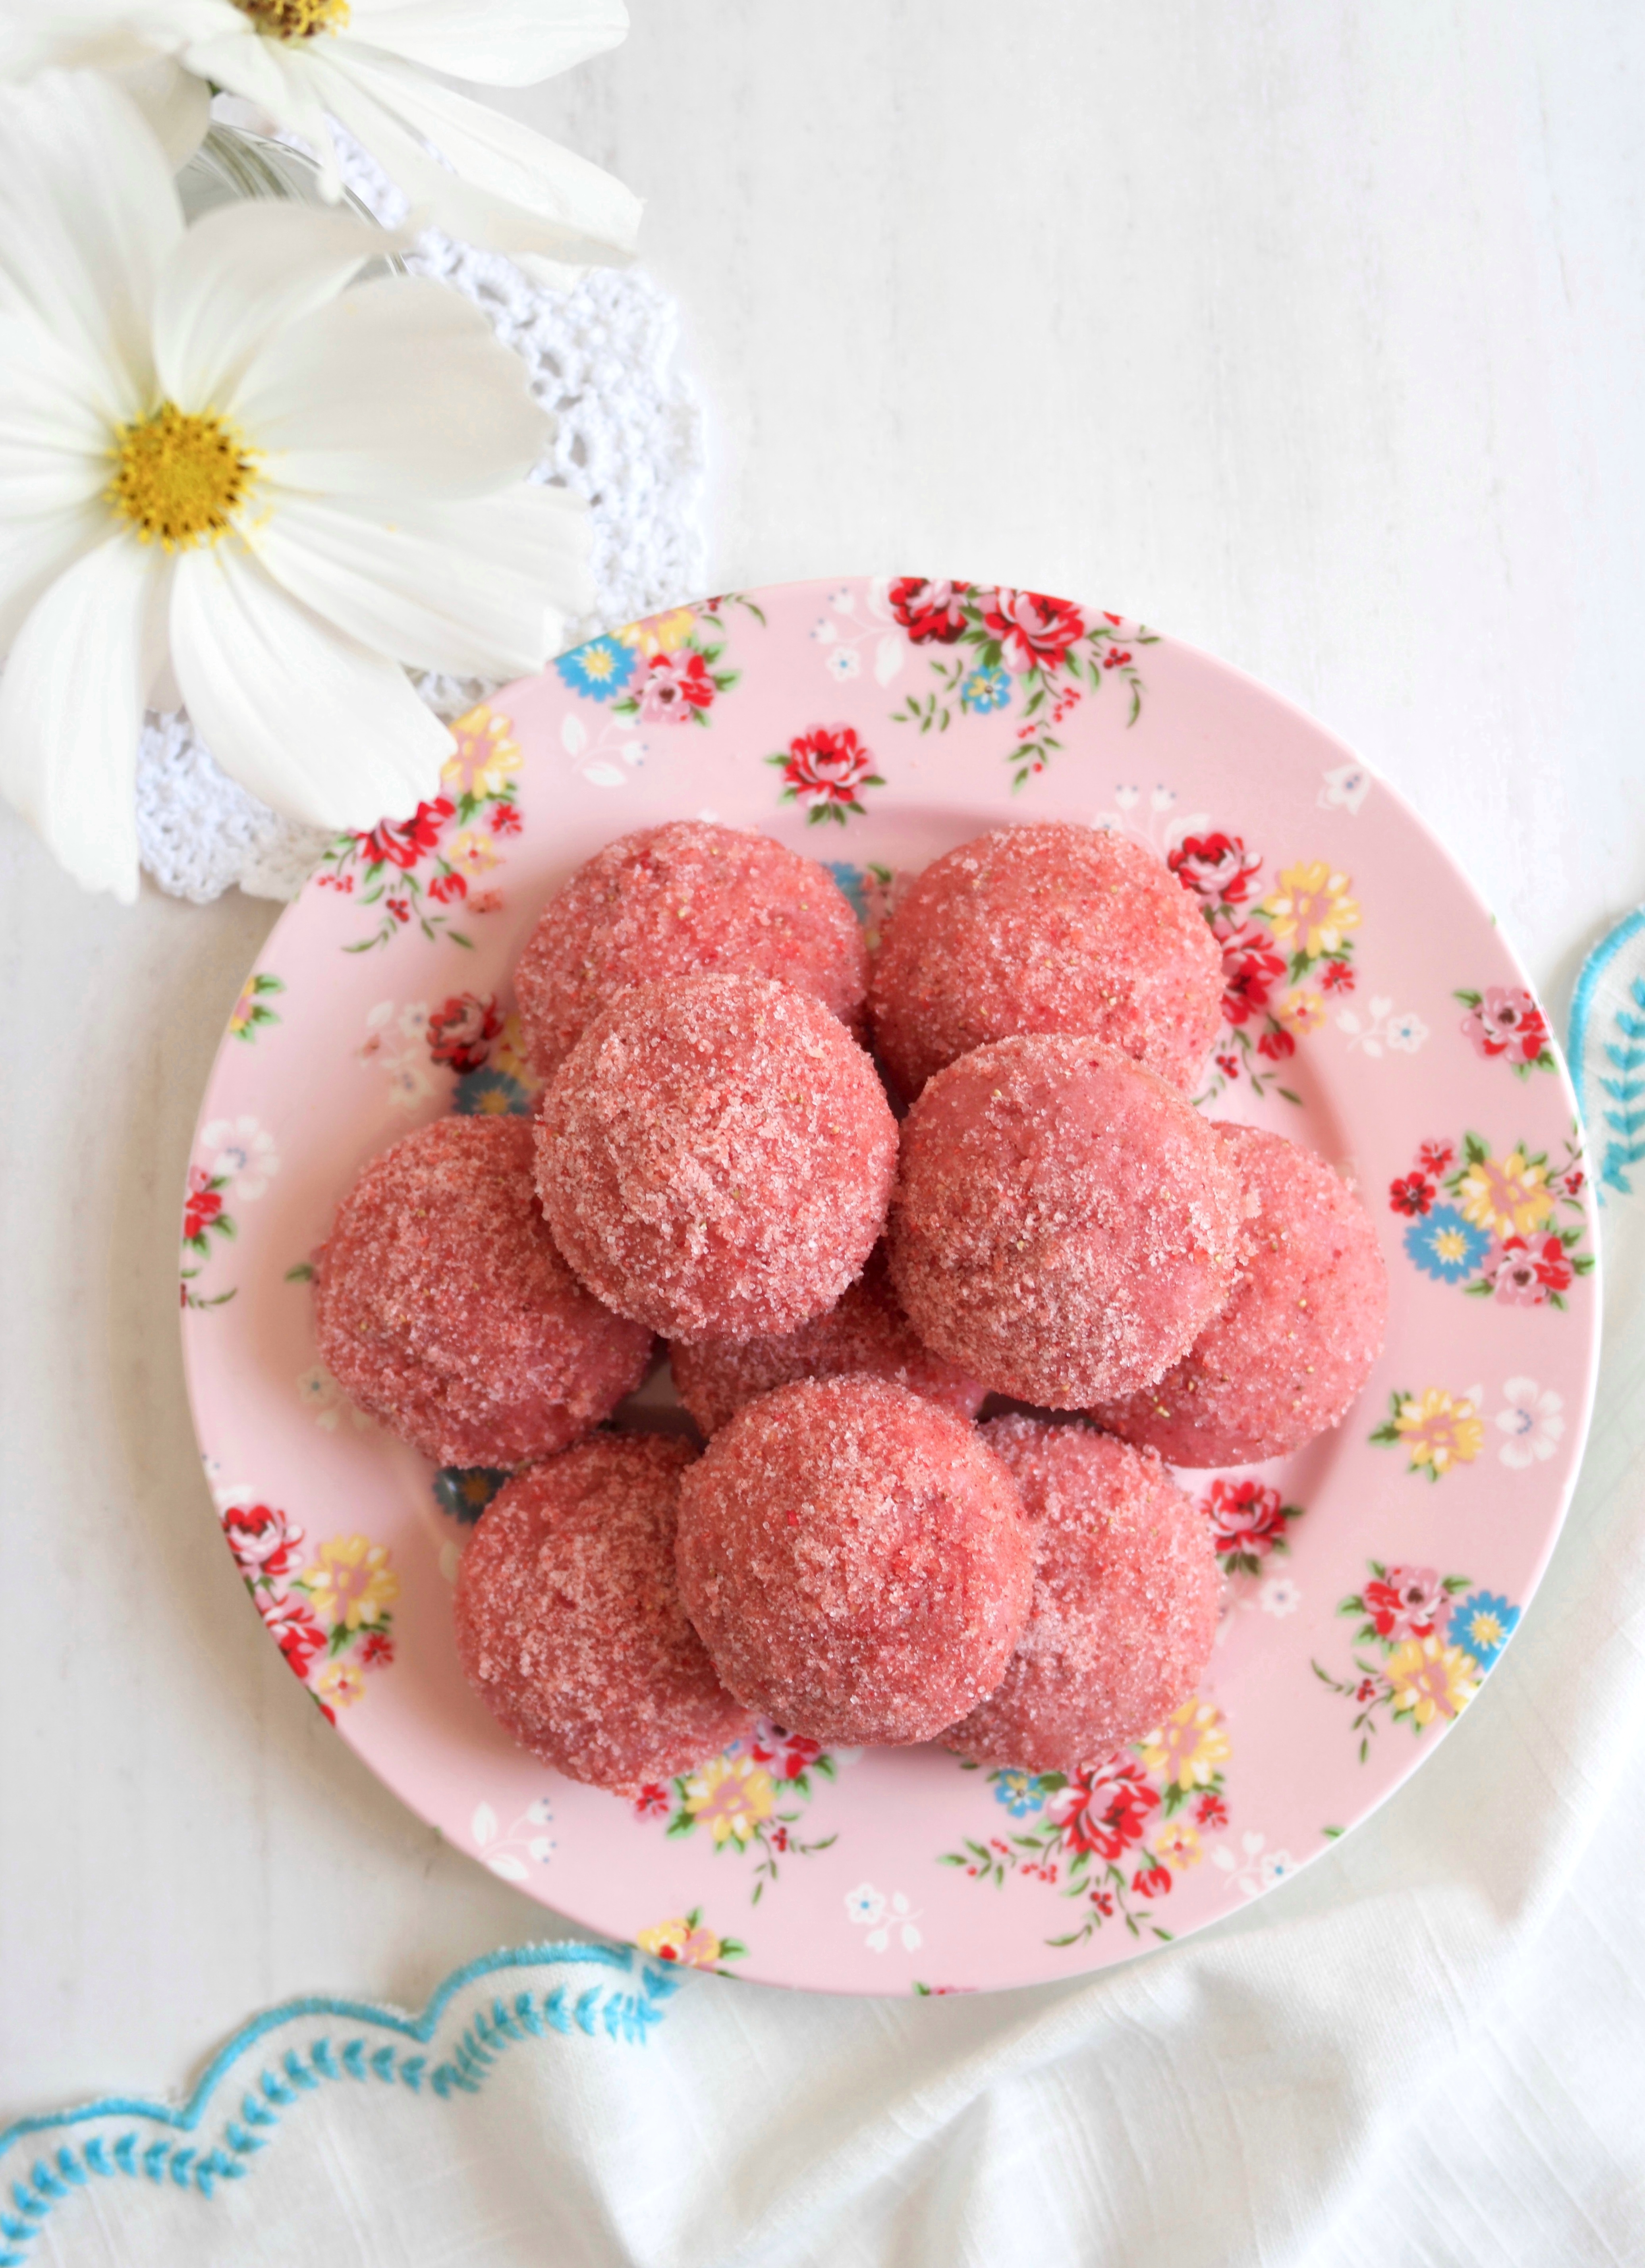
These cute little pink muffins are the strawberriest muffins ever. I had to use a word that’s not even in the dictionary to describe them because these little gems are bursting with strawberry flavor. They’re made with fresh strawberry purée and finished with homemade strawberry sugar. The strawberry purée helps to make the muffins soft and moist on the inside and the strawberry sugar gives a nice crunchy texture and a bright strawberry flavor on the outside.

The strawberry sugar is made by pulverizing freeze dried strawberries together with sugar. Freeze dried strawberries are not the same as dried strawberries. You can find freeze dried strawberries at grocery markets, gourmet stores and online. They’re typically located near the nuts and dried fruit in most markets.

To watch the Instagram video of Double Strawberry Mini Muffins click here.

Print Recipe
Double Strawberry Mini Muffins
Strawberry Mini Muffins Coated in Homemade Strawberry Sugar
Keyword muffins, strawberry
Servings
mini muffins
Ingredients
Keyword muffins, strawberry
Servings
mini muffins
Ingredients
Instructions
  1. Combine the freeze dried strawberries and 2 tablespoons (25g) of sugar in a small food processor or a clean spice grinder. Process until finely ground. Add 1/2 cup (3 1/2 oz or 100g) of sugar and pulse a few times until well combined. Place the strawberry sugar in a shallow bowl and set aside.
  2. Preheat the oven to 350ºF (180ºC). Grease and flour a 24-serving mini muffin pan.** Do not skip this step and do not use liners. The muffins need to form a crust on the outside so they don't soak up too much butter in the final step.
  3. In a medium bowl, whisk together the flour, baking powder and salt
  4. In a large bowl, whisk together the remaining 1/2 cup (100g) of sugar with the oil, egg and extracts until smooth. Whisk in the strawberry purée until well combined.
  5. Stir in the flour mixture with a rubber spatula, just until combined. The batter will be thick.
  6. Transfer the batter evenly into the prepared muffin pan cups.
  7. Bake until a toothpick inserted into the center of the muffins comes out clean, about 10-12 minutes. Do not over bake! Be diligent, since over baking can happen very quickly with mini muffins.
  8. Let the muffins cool in the pan for 5 minutes. Turn the muffins out onto a cooling rack. Place the melted butter in a small bowl. Dunk the warm muffins briefly in the melted butter, then roll them in the strawberry sugar.
Recipe Notes

To find the gel food color I used, click here.

To find the mini muffin pan I used, click here.

Pineapple Coconut Cake Bars

Pineapple Coconut Cake

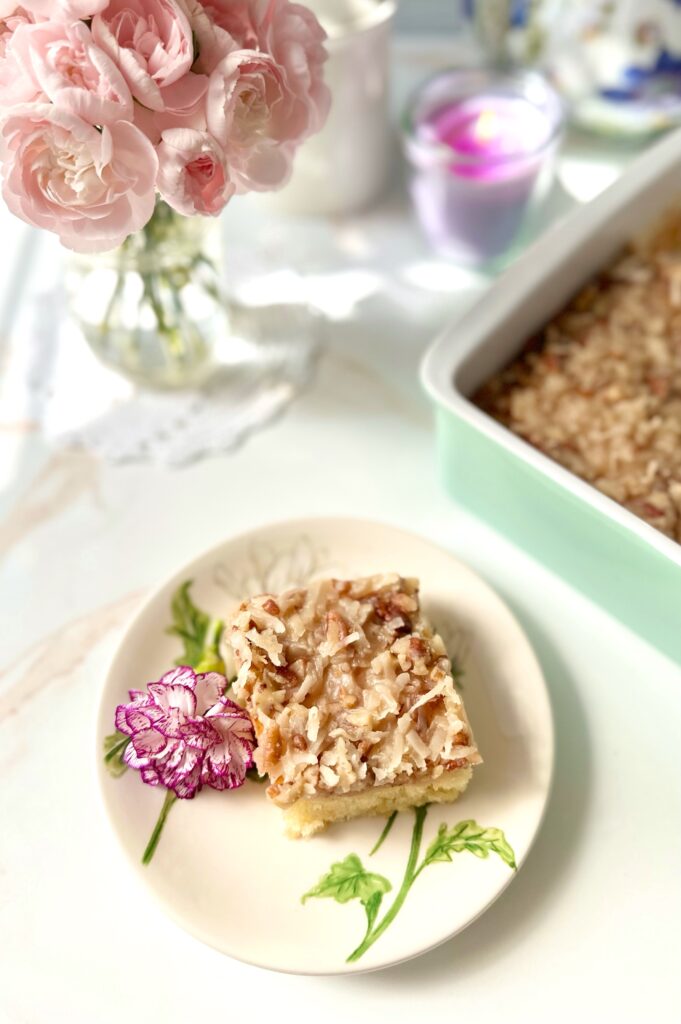
If you like tropical flavors, you’ll love this spring dessert from my childhood. We used to call it Pineapple Coconut Snack Cake, but I would consider it more of a bar, so I changed the name to Pineapple Coconut Cake Bars. We would enjoy it on Easter or Mother’s Day because it was my mom’s favorite. It’s buttery, moist and rich. It’s also kind of addicting, because everyone always asks for seconds. You can double the recipe if you need to.

Print Recipe
Pineapple Coconut Cake Bars
Course Dessert
Servings
Ingredients
Cake
Topping
Course Dessert
Servings
Ingredients
Cake
Topping
Instructions
Cake
  1. Preheat oven to 350ºF. Grease an 8-inch square baking pan.
  2. In a medium bowl, whisk together flour, baking powder and salt.
  3. In a large bowl, whisk melted butter, sugar, egg, egg yolk and vanilla until smooth.
  4. Stir in pineapple until well combined. Stir in flour mixture just until combined.
  5. Transfer batter to prepared baking pan. Bake until top is golden brown and toothpick inserted into center of cake comes out clean, about 20-25 minutes.
Topping
  1. In a medium saucepan over medium heat, melt butter with sugar, brown sugar and salt. Whisk in heavy cream.
  2. When mixture starts to bubble, turn heat down to low and simmer until thickened, about 3 minutes.
  3. Remove from heat and stir in coconut, pecans and vanilla. Spread over warm cake. Let cool at least 15 minutes before cutting cake.

Chocolate Chip Cookie Bread

Chocolate Chip Cookie Bread

This is the ultimate chocolate chip bread! There are no cookies in this recipe, but it tastes so much like freshly baked chocolate chip cookies that Chocolate Chip Cookie Bread is the perfect name for it. Brown sugar, vanilla and jumbo chocolate chips really help to mimic that beloved chocolate chip cookie flavor. I love the big pockets of chocolate that come from using jumbo chocolate chips, but of course you can use regular or mini chocolate chips if you prefer.

I typically wait until a loaf is cooled off before slicing it, but in this case, I wanted to capture the melted pools of chocolate for the video. The fresh baked chocolate chip aroma was so heavenly, that it took all of my willpower not to immediately devour the entire loaf! It’s easier to slice a fresh baked loaf when it’s cooled off. But if you want to experience the melty chocolate chips, warm your slice in the microwave for 10 seconds.

To watch the TikTok video, click here.

Print Recipe
Chocolate Chip Cookie Bread
A moist, tender loaf cake with brown sugar and chocolate chips that tastes just like chocolate chip cookies
Servings
loaf
Ingredients
Servings
loaf
Ingredients
Instructions
  1. Preheat oven to 375ºF (190ºC). Line the bottom of a 9 x 5-inch loaf pan with parchment paper. Grease and flour the insides.
  2. In a medium bowl, whisk together the 1 3/4 cups flour, baking powder, baking soda and salt.
  3. In a large bowl, cream the butter and brown sugar until fluffy and well combined.
  4. Beat in the egg, egg yolk and vanilla in 3 separate additions, making sure each one is fully incorporated before adding the next.
  5. In a small bowl, whisk the milk and sour cream together.
  6. Add the flour mixture to the batter in two additions, alternating with half of the milk mixture after each addition. Beat just until combined. Do not over mix.
  7. Set aside a handful of chocolate chips for the top of the loaf. In a small bowl, toss the remaining chips with 1 teaspoon flour, making sure to coat them all, then fold them into the batter. This will help to prevent them from sinking.
  8. Transfer the batter to the prepared loaf pan. Top with the reserved chocolate chips.
  9. Bake for 10 minutes. Turn the oven temperature down to 325ºF (165ºC) and continue baking until the loaf is golden brown and a toothpick inserted in center comes out clean, about 45-50 more minutes.
  10. Cool the loaf in pan for 10 minutes then turn the loaf out onto a cooling rack.
Recipe Notes

*If you want to use mini chocolate chips, use one cup (6 oz or 170g)

Pink m&m’s Chocolate Cookies


Print Recipe


Pink m&m's Chocolate Cookies

Chocolate cookies with pink m&m's candies

Course Dessert
Keyword chocolate, cookies

Servings
cookies


Ingredients

Course Dessert
Keyword chocolate, cookies

Servings
cookies


Ingredients


Instructions
  1. Preheat oven to 350ºF. Line two cookie sheets with parchment paper.

  2. In a medium bowl, whisk together flour, cocoa powder, baking soda and salt.

  3. In a large bowl, cream butter with sugar and brown sugar until light and fluffy.

  4. Add egg and vanilla in separate additions and beat until well incorporated.

  5. Add flour mixture and beat just until combined.

  6. Gently fold in m&m's.

  7. Place 2-tablespoon size portions, about 2 inches apart, onto prepared cookie sheets. I used a #30 portion scoop.**

  8. Add a few more m&m's to the top of each cookie.

  9. Bake until edges are set and tops puff slightly, about 8-10 minutes. Let cookies cool on cookie sheet for 1 minute, then transfer to cooling rack.


Recipe Notes

*To find pink m&m's, click here.

**To find the portion scoop I used, click here.

Little Strawberry Heart Cake

A cute little, stress-free, perfectly pink heart cake is my gift to you for Valentine’s Day. The vanilla cake is soft and fluffy. The frosting is super easy and delicious, with only two ingredients. It all comes together with fresh strawberries and it’s so good, you won’t want to share.

Print Recipe
Little Strawberry Heart Cake
A six inch heart shaped vanilla cake with fresh strawberries and two-ingredient frosting
Course Dessert
Keyword cake, strawberry
Servings
Ingredients
Course Dessert
Keyword cake, strawberry
Servings
Ingredients
Instructions
  1. In a small bowl, combine strawberries and 2 teaspoons sugar. Set aside to macerate for about 30 minutes.
  2. Preheat oven to 350ºF. Line the bottom of a 6-inch heart shaped cake pan*** with parchment paper. Grease and flour the sides.
  3. In a medium bowl, whisk together flour, baking powder and salt.
  4. In a large bowl, cream butter, sugar and oil with an electric mixer, until light and fluffy.
  5. Beat in egg and vanilla in two separate additions until well combined.
  6. In a small bowl, whisk together milk and sour cream.
  7. Beat flour mixture into batter in two additions, alternating with milk mixture.
  8. Transfer batter to prepared cake pan. Bake until toothpick inserted in the center comes out clean, about 25-30 minutes. Let cake cool in pan 10 minutes then turn out onto a cooling rack to cool.
  9. In a large bowl, stir cream cheese with a spatula to smooth out lumps.
  10. Add marshmallow fluff and beat until well combined. Add food gel color with a toothpick and beat until evenly distributed.
  11. Split cake into two layers. Top the bottom layer with frosting. Drain strawberries and spoon onto cake. Top with second layer, then more frosting.
Optional Decor
  1. To make sugared strawberries, mix 1 part meringue powder with 3 parts water. Dip strawberries in meringue mixture, cover with sugar, then let dry. Alternately you can dip the strawberries in pasteurized egg whites, cover with sugar, then let dry.
Recipe Notes

*To find the gel food color I used, click here.

**To find meringue powder, click here.

***To find the heart cake pan I used, click here.