Cherry Lemon Muffins

Cherry Lemon Muffins

Blueberry and lemon are a classic muffin flavor combination, but have you tried cherry and lemon? They complement each other beautifully in lemonade, so why not muffins? Cherries are plentiful at the moment so I came up with these pretty and delicious Cherry Lemon Muffins that are perfect for summer breakfast, brunch or picnics. They have a lovely soft, moist crumb that’s the quintessential muffin texture. Although I’ve been baking muffins since childhood, I learned to refine my muffins in culinary school. Here are a few helpful tips:

~ Muffins with big hole or tunneling may have too much leavening or it wasn’t mixed in evenly. Whisk the leavening agent into the flour thoroughly. Tunnels can also be caused by mixing the batter too aggressively.

~ Dry muffins were likely over baked or have too much flour.

~ Rubbery muffins were likely over mixed.

~ Soggy or gummy muffins were either underbaked or too much wet fruit was added. Try macerating the fruit first to release excess juices. This helps to prevent soggy spots in your muffins.

~ If you want tall, domed muffins, keep in mind that, although they look nice, domed muffins tend to be chewier and less tender. To get domes, try letting the batter rest a few minutes before baking if the muffins contain baking powder. You can also try giving the muffins a boost of high heat by starting them out with a higher temperature 400ºF (200ºC) then drop the temperature to 350ºF (180ºC) after a few minutes.

~ To keep crumble topping from sinking, make sure to work the cold butter into the flour mixture thoroughly, until it looks like wet sand and no large pieces of butter remain. Press the mixture together to form chunks, then chill it in the refrigerator before topping the muffins.

~ To keep fruit from sinking, lightly coat it with flour. Thick, voluminous batter is best for adding fruit.

Print Recipe
Cherry Lemon Muffins
Tender, moist lemon muffins studded with fresh cherries, topped with crumb topping and pink cherry-lemon icing
Servings
muffins
Ingredients
Crumb Topping
Cherry Lemon Muffins
Icing
Servings
muffins
Ingredients
Crumb Topping
Cherry Lemon Muffins
Icing
Instructions
Crumb Topping
  1. In a medium bowl, whisk the flour, sugar, and salt together. Work in the butter with your fingertips until the mixture looks like the consistency of wet sand with no large pieces of butter. Press the mixture together to make chunks. Set aside in the refrigerator until ready to use.
Muffins
  1. In a medium bowl, combine the cherries and 1 tablespoon (13g) of sugar. Let stand 30 minutes, then drain the cherries, reserving the juice.
  2. Preheat the oven to 375ºF (190ºC). Line a 12-serving muffin pan with tulip muffin liners.* (You can also use standard muffin liners. They hold less batter so you'll end up with a couple of extra muffins.)
  3. In a medium bowl, whisk the flour, baking powder, baking soda and salt together until well combined.
  4. In a large bowl, beat the butter, 1 cup (200g) of sugar and lemon zest with an electric mixer at medium speed, until light and fluffy. Beat in the eggs, one at a time, until incorporated. Beat in the extracts. On low speed, mix in the flour mixture in two additions, followed by half of the sour cream after each addition. Beat just until combined. Do not over mix. Reserve a couple of tablespoons of the chopped cherries. Coat the remaining cherries with 2 teaspoons of flour, then gently fold them into the batter.
  5. Divide the batter evenly into muffin liners. (If using standard muffin liners, fill 3/4 full.) Top with the reserved cherries and the crumb topping. Bake at 375ºF (190ºC) for 5 minutes. Turn the oven heat down to 350ºF (180ºC) and continue baking the muffins until a toothpick inserted into the centers comes out clean, about 12-17 more minutes. Do not over bake.
  6. Transfer the muffins to a cooling rack to cool completely. Drizzle with icing and top with cherries if desired.
Icing
  1. In a small bowl, whisk the powdered sugar, cherry juice, heavy cream, and 1 tablespoon of lemon juice together until smooth. Add additional lemon juice, if needed, until your desired consistency is reached.
Recipe Notes

*To find  tulip muffin liners, click here. To find floral tulip muffin liners, click here.

Lemon Bubble Bread

Lemon Bubble Bread

This fun, summery Lemon Bubble Bread is a soft, sweet, brioche-style pull-apart bread. It’s made in the same way as monkey bread, but with lemon zest instead of cinnamon. Small balls of bread dough are coated in melted butter, rolled in lemon sugar, then baked until golden and fluffy. I like drenching the fluffy puffs of bread in fresh lemon icing which, adds a burst of sweet-tart flavor.

Print Recipe
Lemon Bubble Bread
Soft, sweet lemon brioche-stye pull-apart bread
Servings
Ingredients
Lemon Bubble Bread
Lemon Sugar
Lemon Icing
Servings
Ingredients
Lemon Bubble Bread
Lemon Sugar
Lemon Icing
Instructions
Lemon Bubble Bread
  1. In a small bowl, combine the milk with 1/2 teaspoon of sugar. Stir in the yeast and let it bloom until it's foamy, about 5 minutes.
  2. In the bowl of a stand mixer fitted with a paddle attachment, mix the flour, salt and the remaining sugar until combined.
  3. In a small bowl, lightly whisk the egg, egg yolk and vanilla together. On low speed, gradually add the egg mixture and the milk mixture to the flour. Beat until combined. Switch to the dough hook. On medium speed, add the butter a little at a time, making sure each addition is incorporated before adding the next. Knead with the mixter until the dough is smooth and elastic, about 8-10 minutes. To determine if the dough is ready, pinch off a small piece of dough. It should stretch easily without tearing and look translucent.
  4. Form the dough into a ball and place it in a large oiled bowl. Turn the dough over to coat lightly with oil. Cover and let rise until doubled in size, about 1-1 1/2 hours. Meanwhile butter a 10-inch round baking dish* or a 10-inch cake pan.** (A 9-inch square baking dish also works.) Set aside and make the lemon sugar.
  5. Divide the dough into 20 equal portions and form them into balls. Brush the dough balls all over with melted butter, then roll them in the lemon sugar. Arrange the dough balls in the baking dish. Brush the tops with melted butter and sprinkle with any remaining lemon sugar. Let rise until almost doubled in size, about 20-30 minutes.
  6. Preheat the oven to 350ºF (180ºC). Bake until the top of the bubble bread is golden brown, about 20-25 minutes. Let cool for about 15-20 minutes, then top the warm bread with lemon icing.
Lemon Sugar
  1. Mix the sugar and lemon zest together in a shallow bowl or plate.
Lemon Icing
  1. In a small bowl, whisk the powdered sugar, lemon juice, salt and 1 tablespoon (15ml) of half & half together until smooth. Add additional half & half as needed to reach your desired consistency.
Recipe Notes

*To find a 10-inch round baking dish, click here.

*To find a 10-inch round cake pan, click here.

Double Strawberry Mini Muffins

Double Strawberry Mini Muffins

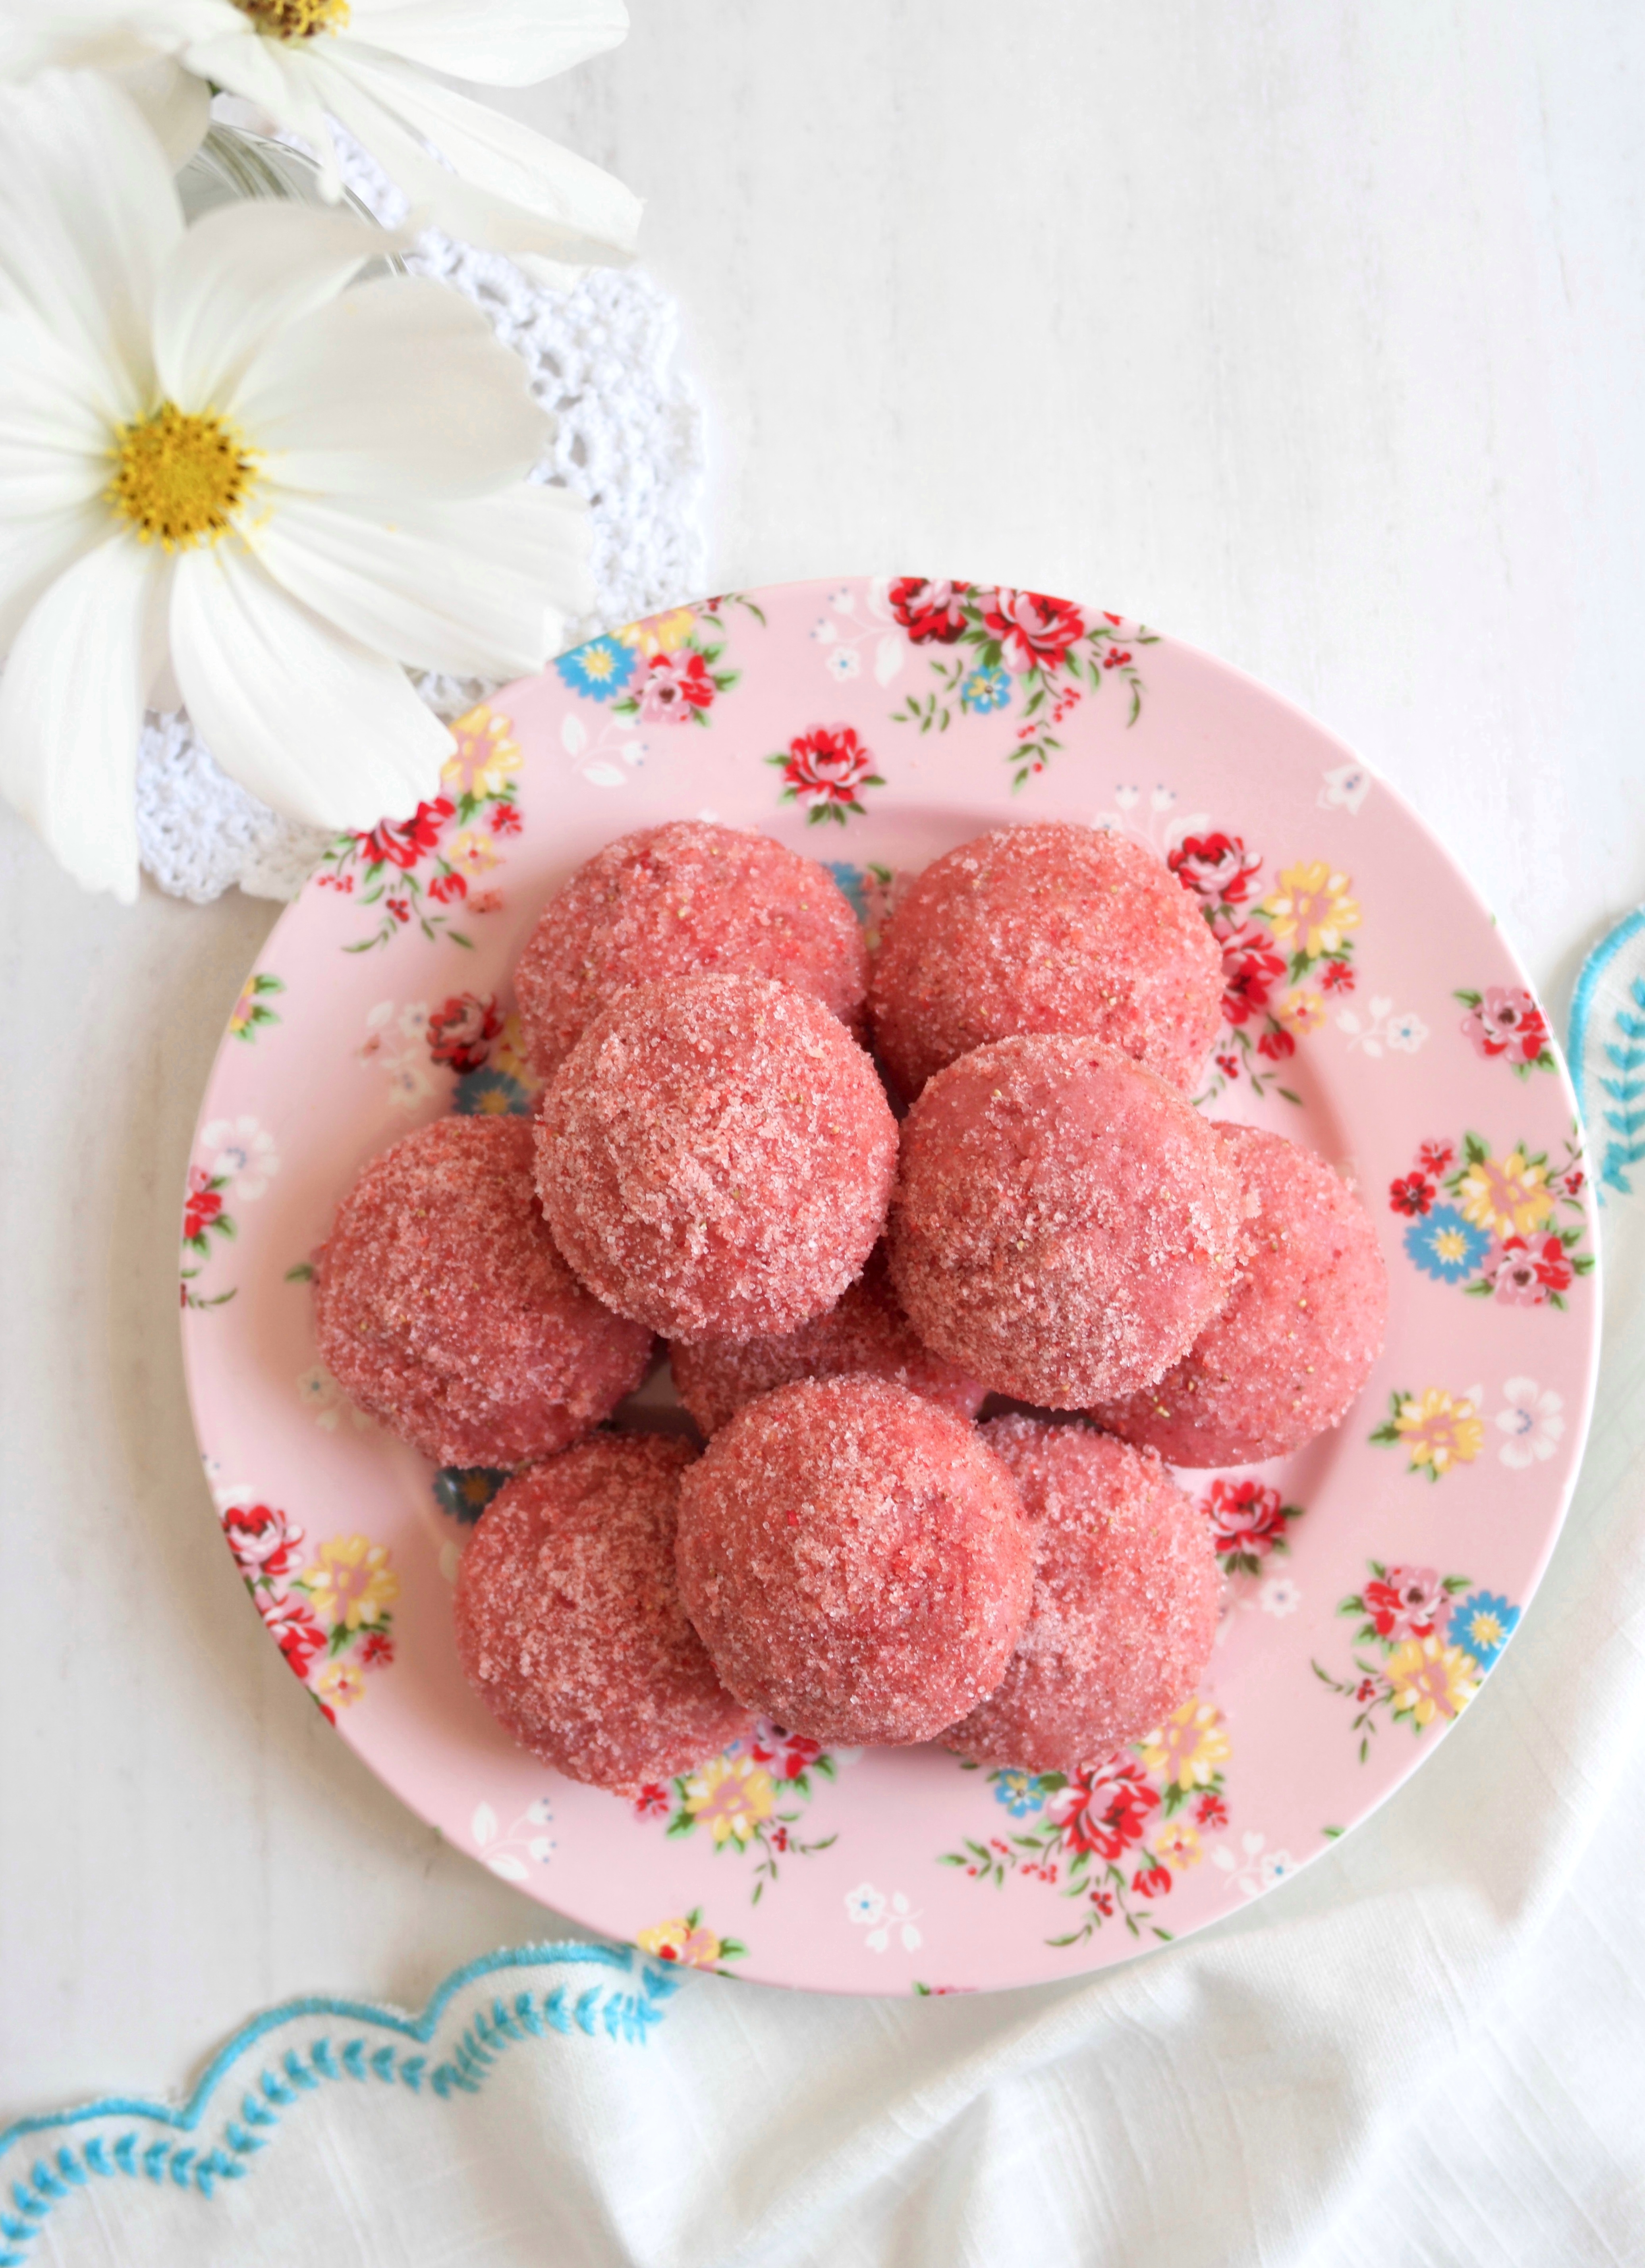
These cute little pink muffins are the strawberriest muffins ever. I had to use a word that’s not even in the dictionary to describe them because these little gems are bursting with strawberry flavor. They’re made with fresh strawberry purée and finished with homemade strawberry sugar. The strawberry purée helps to make the muffins soft and moist on the inside and the strawberry sugar gives a nice crunchy texture and a bright strawberry flavor on the outside.

The strawberry sugar is made by pulverizing freeze dried strawberries together with sugar. Freeze dried strawberries are not the same as dried strawberries. You can find freeze dried strawberries at grocery markets, gourmet stores and online. They’re typically located near the nuts and dried fruit in most markets.

To watch the Instagram video of Double Strawberry Mini Muffins click here.

Print Recipe
Double Strawberry Mini Muffins
Strawberry Mini Muffins Coated in Homemade Strawberry Sugar
Keyword muffins, strawberry
Servings
mini muffins
Ingredients
Keyword muffins, strawberry
Servings
mini muffins
Ingredients
Instructions
  1. Combine the freeze dried strawberries and 2 tablespoons (25g) of sugar in a small food processor or a clean spice grinder. Process until finely ground. Add 1/2 cup (3 1/2 oz or 100g) of sugar and pulse a few times until well combined. Place the strawberry sugar in a shallow bowl and set aside.
  2. Preheat the oven to 350ºF (180ºC). Grease and flour a 24-serving mini muffin pan.** Do not skip this step and do not use liners. The muffins need to form a crust on the outside so they don't soak up too much butter in the final step.
  3. In a medium bowl, whisk together the flour, baking powder and salt
  4. In a large bowl, whisk together the remaining 1/2 cup (100g) of sugar with the oil, egg and extracts until smooth. Whisk in the strawberry purée until well combined.
  5. Stir in the flour mixture with a rubber spatula, just until combined. The batter will be thick.
  6. Transfer the batter evenly into the prepared muffin pan cups.
  7. Bake until a toothpick inserted into the center of the muffins comes out clean, about 10-12 minutes. Do not over bake! Be diligent, since over baking can happen very quickly with mini muffins.
  8. Let the muffins cool in the pan for 5 minutes. Turn the muffins out onto a cooling rack. Place the melted butter in a small bowl. Dunk the warm muffins briefly in the melted butter, then roll them in the strawberry sugar.
Recipe Notes

To find the gel food color I used, click here.

To find the mini muffin pan I used, click here.

Purple Berry Cake with Silky Cream Cheese Frosting

Purple Berry Cake with Silky Cream Cheese Frosting by Brownie Mischief

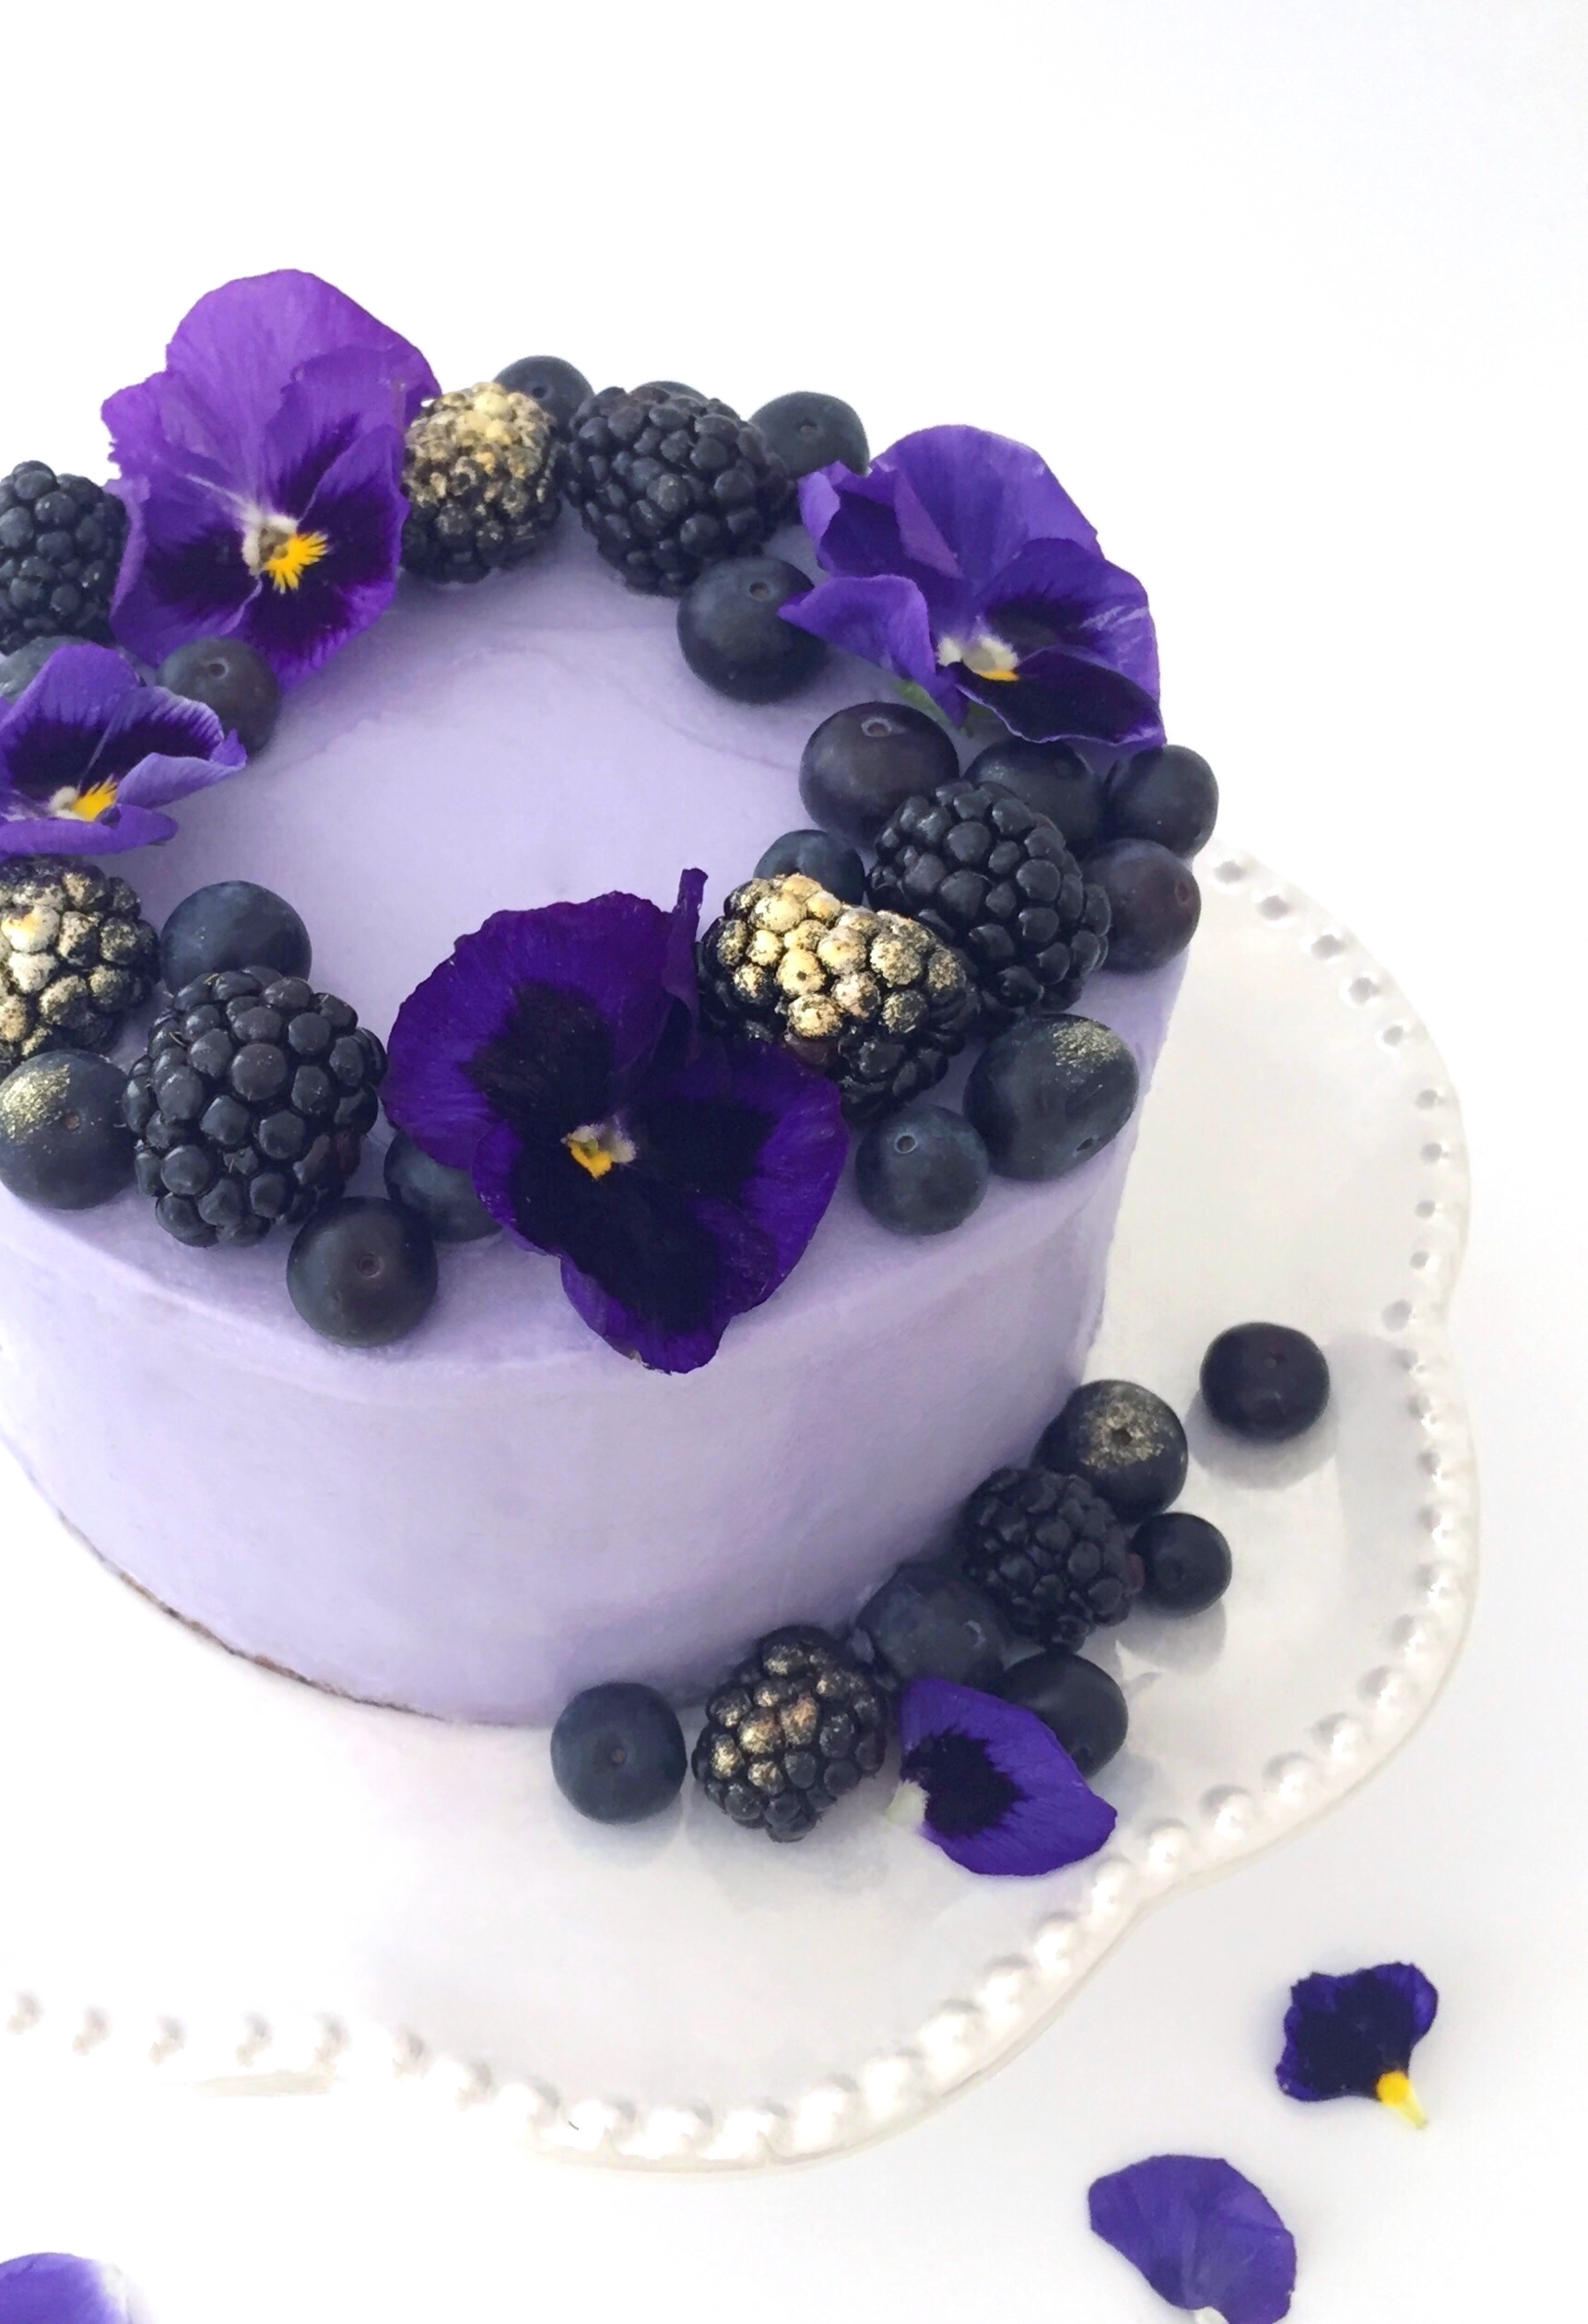
Purple is passionate. It’s mystical. It’s regal. Don’t we all know someone whose favorite color is purple? It’s painfully obvious. They can’t hide it. They don’t want to hide it. They can’t just be friends with purple. They’re in a relationship with purple. The first time I made this Purple Berry Cake, a purple lover I know said that when she saw it, it spoke to her soul. This cake is, what I like to call, a double-take cake. People stare. They can’t resist it’s charismatic charm. Once they stop staring and taste it, they fall hopelessly in love.

Purple Berry Cake with Silky Cream Cheese Frosting by Brownie Mischief

Fresh berry purée is added to the batter, creating a soft, moist cake. The layers are brushed with berry syrup, which helps keeps the cake moist and gives it a nice punch of berry flavor.  I used blackberries and blueberries, but you can use any combination of purple berries that you like. After baking, the color of the cake layers will be a brownish gray with a hint of purple, depending on your berries. I think I need to come up with name for this color. How about Silverberry? You can see tiny flecks of the berries in the cake and I think the color is lovely, especially with the lavender frosting. If you want a more purple cake, feel free to add some gel food color to the batter. I used Wilton Violet gel food color to achieve the pretty lavender cream cheese frosting. The extra butter and the addition of heavy cream makes this frosting silky and spreadable.

Purple Berry Cake with Silky Cream Cheese Icing by Brownie Mishchief

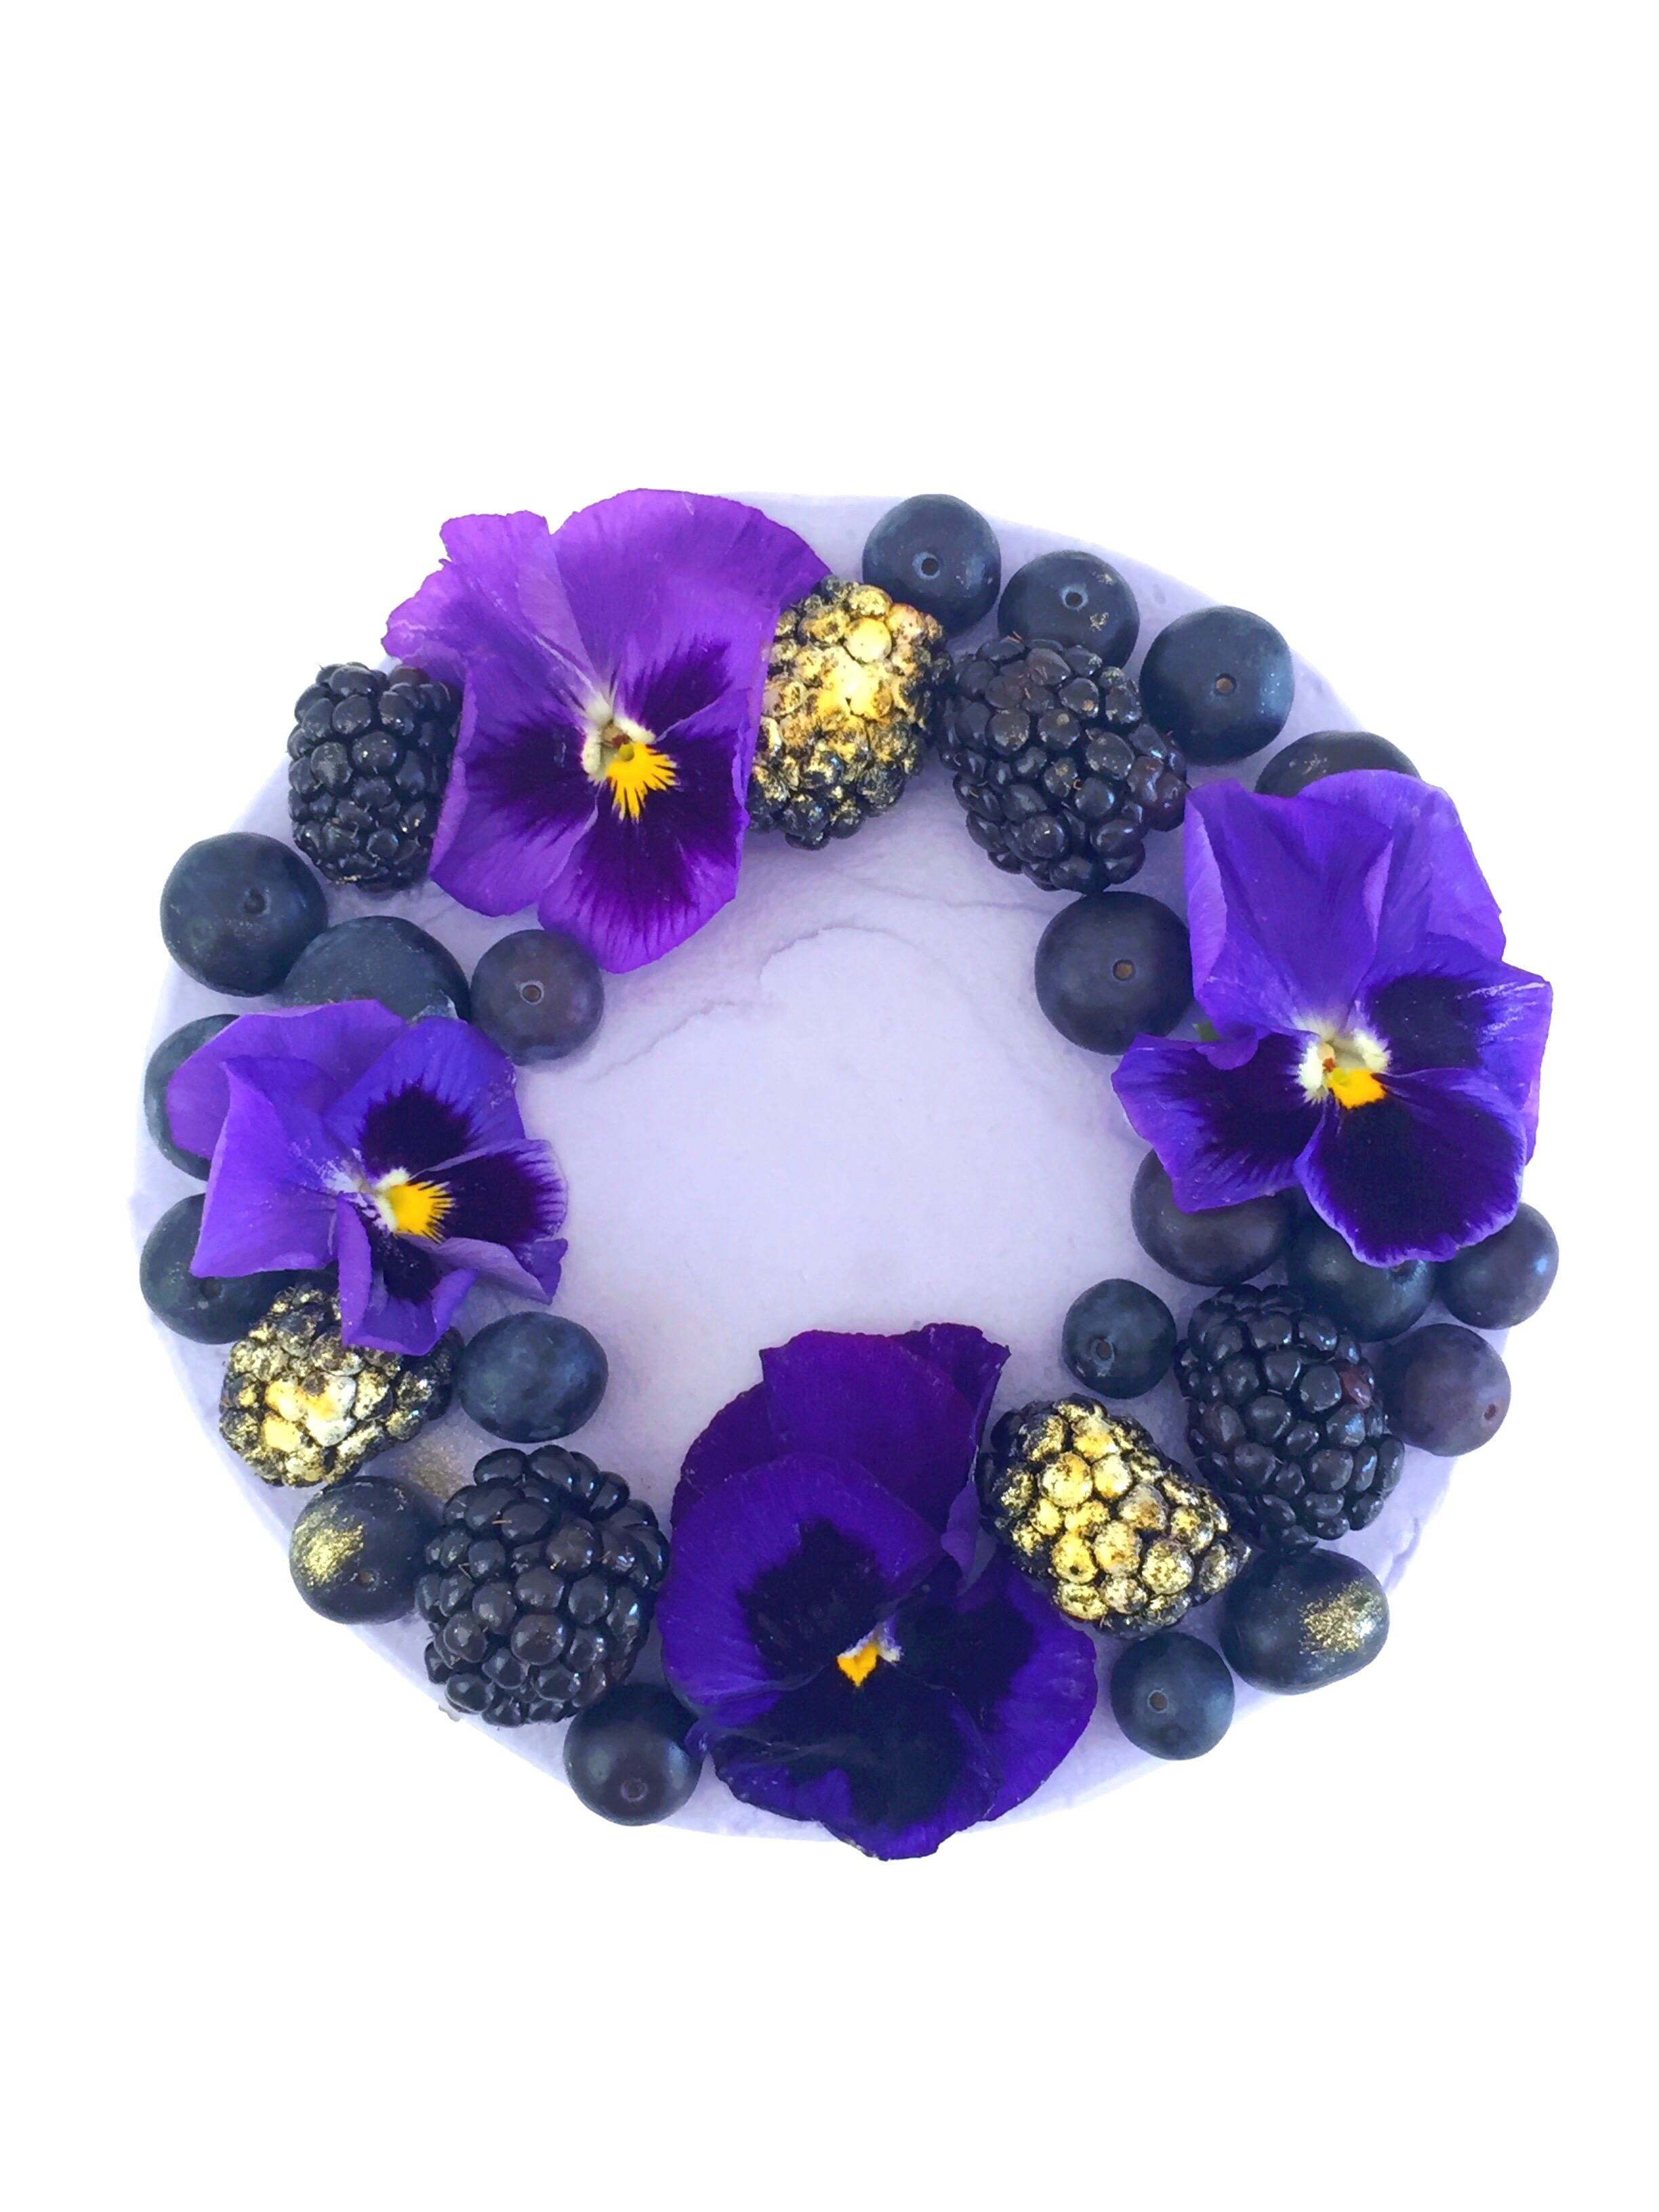
I’m obsessed with edible flowers lately, so I garnish my baked goods with them whenever I can get my hands on some. I found these pansies in the produce department of my local food market. If you can’t find pansies, pesticide free violets or rose petals would also be pretty. Make sure to apply them to your cake right before serving, since they are delicate and will wilt over time. Brush some of your berries with a little dab of edible gold luster dust for an extra regal touch.


Print Recipe


Purple Berry Cake with Silky Cream Cheese Frosting

Course Dessert

Servings
6-inch cake (serves 6)


Ingredients
Purple Berry Cake

Silky Cream Cheese Frosting

Finishing Touches

Course Dessert

Servings
6-inch cake (serves 6)


Ingredients
Purple Berry Cake

Silky Cream Cheese Frosting

Finishing Touches


Instructions
Purple Berry Cake
  1. Preheat oven to 350º F. Spray two 6-inch cake pans with non-stick cooking spray and line with parchment paper circles.

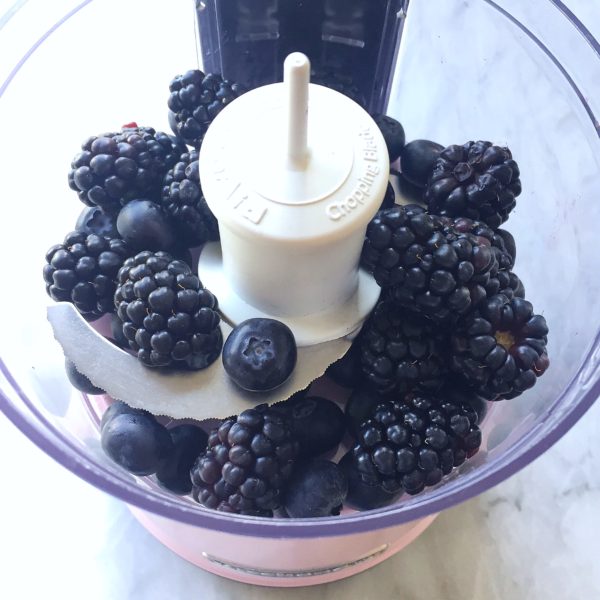
  2. Purée the berries in a blender or small food processor.
    Puree fresh berries.

  3. Strain puréed berries through a sieve. Reserve 2/3 cup berry puree. Set aside remaining puree for syrup.

  4. In a medium bowl, sift together flour, baking powder, baking soda, and salt. Set aside.

  5. In a large bowl, beat 1 1/4 cups (8.75 ounces) sugar, oil, eggs and vanilla extract with an electric mixer on medium speed, until light and fluffy, about 1 minute.

  6. Add flour in two additions, alternating with buttermilk, beating at medium speed just until combined.

  7. Stir in the reserved 2/3 cup berry purée.

  8. Pour batter evenly into the prepared cake pans. Bake until a toothpick inserted into center of cakes comes out clean, about 30-35 minutes.

  9. Cool cakes in pans for 10 minutes. Remove cakes from pans and continue cooling on wire racks.

  10. Meanwhile, make berry syrup. In a small saucepan, heat the remaining berry purée, remaining 1/4 cup sugar (1.75 ounces) and 1/4 cup water over medium-low heat. Stir together and bring to a boil. Cook until sugar is dissolved. Set aside to cool.

  11. Split each cake layer into two and brush with berry syrup. Fill and frost cake with Silky Cream Cheese Frosting.

Silky Cream Cheese Frosting
  1. In a large bowl, beat butter and cream cheese with an electric mixer at medium speed, until smooth.

  2. Add vanilla extract and salt and beat until combined.

  3. Gradually add powdered sugar and beat at medium speed until combined.

  4. Add heavy cream and beat at low speed until smooth and creamy.

  5. Add gel food color with a toothpick, a little at a time, until desired shade is reached. Beat at low speed until well blended.

Finishing Touches
  1. Garnish top of cake with fresh berries. Brush a few of the berries with edible gold luster dust. Garnish with fresh flowers immediately before serving.