Double Strawberry Mini Muffins

Double Strawberry Mini Muffins

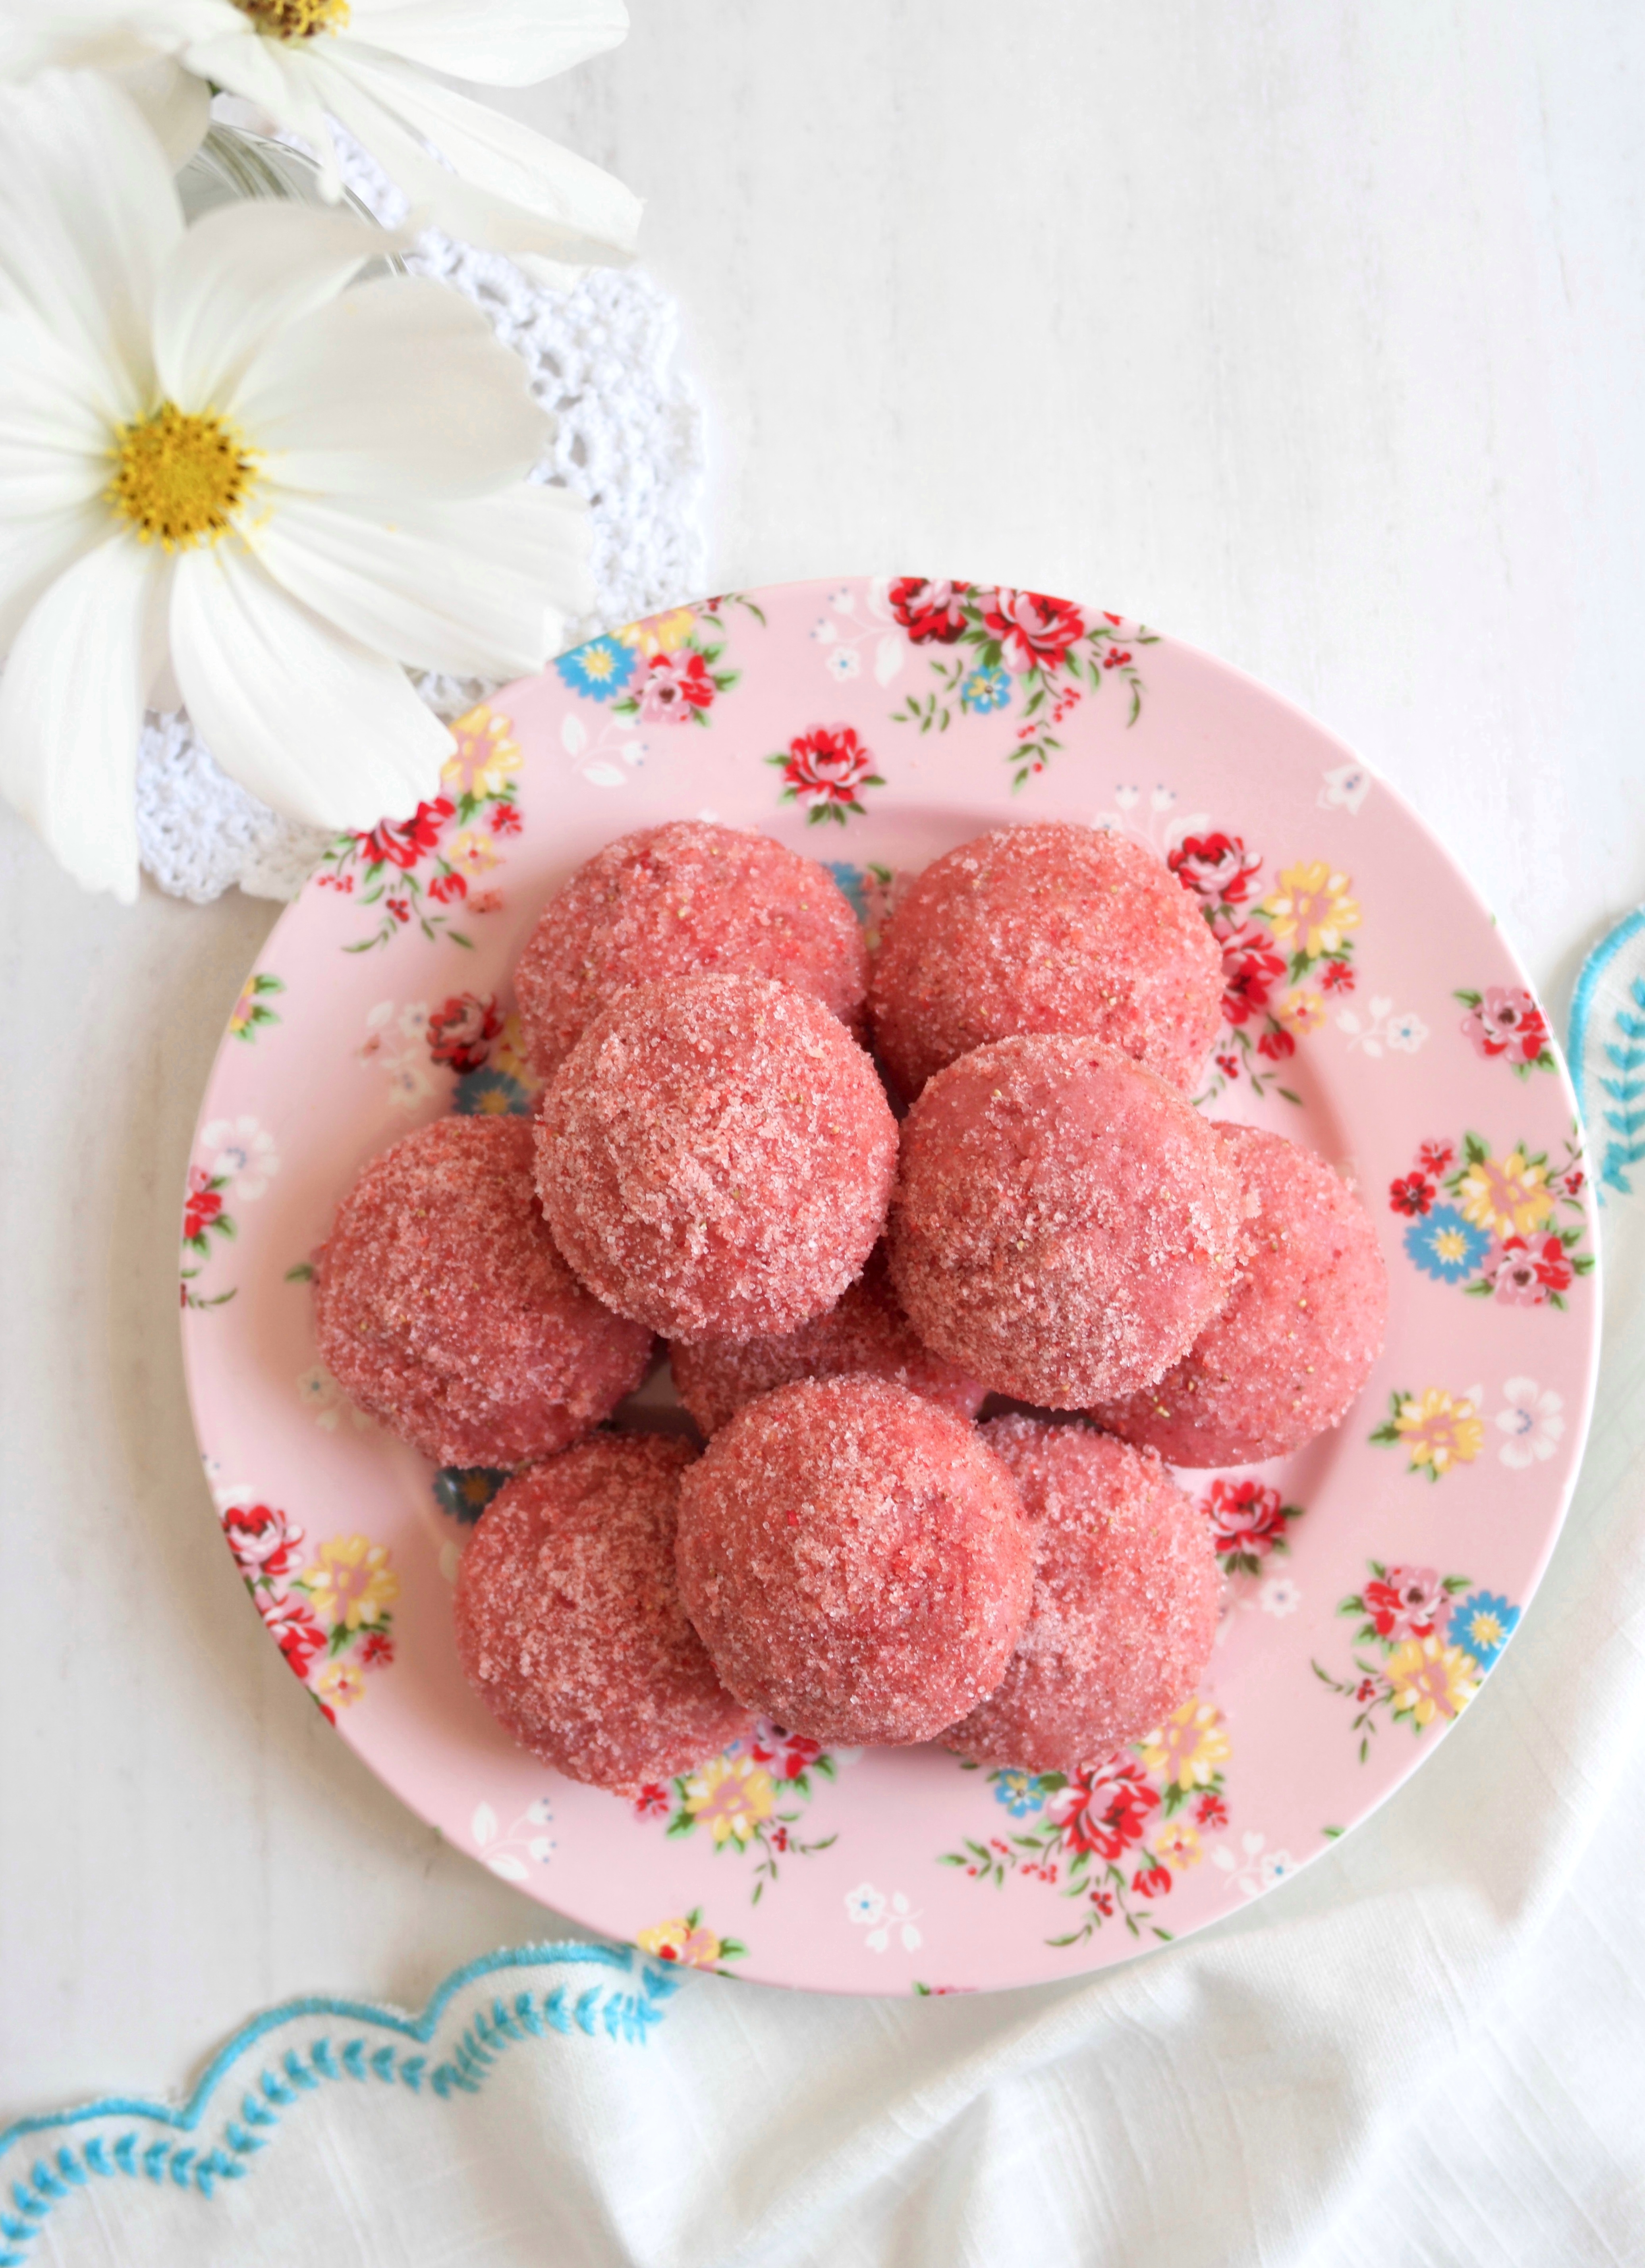
These cute little pink muffins are the strawberriest muffins ever. I had to use a word that’s not even in the dictionary to describe them because these little gems are bursting with strawberry flavor. They’re made with fresh strawberry purée and finished with homemade strawberry sugar. The strawberry purée helps to make the muffins soft and moist on the inside and the strawberry sugar gives a nice crunchy texture and a bright strawberry flavor on the outside.

The strawberry sugar is made by pulverizing freeze dried strawberries together with sugar. Freeze dried strawberries are not the same as dried strawberries. You can find freeze dried strawberries at grocery markets, gourmet stores and online. They’re typically located near the nuts and dried fruit in most markets.

To watch the Instagram video of Double Strawberry Mini Muffins click here.

Print Recipe
Double Strawberry Mini Muffins
Strawberry Mini Muffins Coated in Homemade Strawberry Sugar
Keyword muffins, strawberry
Servings
mini muffins
Ingredients
Keyword muffins, strawberry
Servings
mini muffins
Ingredients
Instructions
  1. Combine the freeze dried strawberries and 2 tablespoons (25g) of sugar in a small food processor or a clean spice grinder. Process until finely ground. Add 1/2 cup (3 1/2 oz or 100g) of sugar and pulse a few times until well combined. Place the strawberry sugar in a shallow bowl and set aside.
  2. Preheat the oven to 350ºF (180ºC). Grease and flour a 24-serving mini muffin pan.** Do not skip this step and do not use liners. The muffins need to form a crust on the outside so they don't soak up too much butter in the final step.
  3. In a medium bowl, whisk together the flour, baking powder and salt
  4. In a large bowl, whisk together the remaining 1/2 cup (100g) of sugar with the oil, egg and extracts until smooth. Whisk in the strawberry purée until well combined.
  5. Stir in the flour mixture with a rubber spatula, just until combined. The batter will be thick.
  6. Transfer the batter evenly into the prepared muffin pan cups.
  7. Bake until a toothpick inserted into the center of the muffins comes out clean, about 10-12 minutes. Do not over bake! Be diligent, since over baking can happen very quickly with mini muffins.
  8. Let the muffins cool in the pan for 5 minutes. Turn the muffins out onto a cooling rack. Place the melted butter in a small bowl. Dunk the warm muffins briefly in the melted butter, then roll them in the strawberry sugar.
Recipe Notes

To find the gel food color I used, click here.

To find the mini muffin pan I used, click here.

Pink Velvet Cookies

Pink Velvet Cookies

Whenever I walk into a bakery, my eyes are always drawn to anything pink. Pink cupcakes, cookies, donuts or anything with pink icing will inevitably come home with me. This probably started in childhood. Most bakeries back then, including the bakery my aunt always took me to, had pink boxes, so I associate it with delicious, freshly baked treats. Maybe pink desserts do taste better or maybe our minds just tell us that. Either way, if you love pink treats, you’ll love these cookies.

Pink velvet is similar to red velvet, but without the cocoa powder and red food color. The texture should be somewhat velvety, like red velvet cake. I have yet to taste a velvety red velvet cookie, but I think the texture of these cookies is pretty velvety as long as they’re not over baked. Pink velvet desserts are typically vanilla flavored. I upgraded the flavor by adding a touch of cherry flavoring. It’s not enough to give you cherry flavored cookies, but it will add depth to vanilla flavored treats. It’s an old bakery trick that I learned years ago that adds a fruity note in the background.

For best baking results, I recommend using a scale to weigh your ingredients, especially your dry ingredients. If you love baking, you should invest in a food scale if you don’t already have one.

To watch the Pink Velvet Cookies TikTok video, click here. To watch the Pink Velvet Cookies Instagram video, click here.

Print Recipe
Pink Velvet Cookies
Pink vanilla flavored crinkle cookies with chewy exteriors and soft, velvety centers
Course Dessert
Keyword cookies, pink velvet
Servings
cookies
Ingredients
Optional
Course Dessert
Keyword cookies, pink velvet
Servings
cookies
Ingredients
Optional
Instructions
  1. Preheat oven to 350ºF. Line two large cookie sheets with parchment paper.
  2. In a medium bowl, whisk together flour, cornstarch, baking powder, and salt.
  3. In a large bowl, cream butter, sugar and oil until light and fluffy.
  4. Beat egg whites into butter mixture in two addition, until well combined.
  5. Beat in extracts until well combined.
  6. Add gel food color, a little at a time with a toothpick, until desired shade of pink is reached. (Adding remaining ingredients will lighten the color slightly.) Beat until evenly distributed.
  7. Add flour mixture to batter and beat just until combined. Mix in white chocolate chips if using.
  8. Roll dough into balls, about 2 tablespoons each. I used a #30 portion scoop.*** Roll dough very generously in powdered sugar. Place two inches apart onto prepared cookie sheets.
  9. Bake until cookies are puffed and tops are set, about 11-13 minutes. Transfer cookies to a cooling rack.
Recipe Notes

*The cherry flavoring in this recipe is not intended to make a cherry flavored cookie. The addition of cherry flavoring adds a subtle fruity note. You can also use pure cherry extract. Use a bit less (scant 1/2 teaspoon)  because extracts tend to be stronger than flavorings. DO NOT use imitation cherry extract. It has a medicinal flavor that will disappoint you. If you want your cookies to be cherry or strawberry flavor, reduce vanilla extract to 1/2 teaspoon and  use 1- 1 1/2 teaspoons of natural cherry or strawberry flavoring.

**To find the pink gel food color I used, click here.

***To find the portion scoop I used, click here.

This recipe was updated on 2/14/23.

Little Strawberry Heart Cake

A cute little, stress-free, perfectly pink heart cake is my gift to you for Valentine’s Day. The vanilla cake is soft and fluffy. The frosting is super easy and delicious, with only two ingredients. It all comes together with fresh strawberries and it’s so good, you won’t want to share.

Print Recipe
Little Strawberry Heart Cake
A six inch heart shaped vanilla cake with fresh strawberries and two-ingredient frosting
Course Dessert
Keyword cake, strawberry
Servings
Ingredients
Course Dessert
Keyword cake, strawberry
Servings
Ingredients
Instructions
  1. In a small bowl, combine strawberries and 2 teaspoons sugar. Set aside to macerate for about 30 minutes.
  2. Preheat oven to 350ºF. Line the bottom of a 6-inch heart shaped cake pan*** with parchment paper. Grease and flour the sides.
  3. In a medium bowl, whisk together flour, baking powder and salt.
  4. In a large bowl, cream butter, sugar and oil with an electric mixer, until light and fluffy.
  5. Beat in egg and vanilla in two separate additions until well combined.
  6. In a small bowl, whisk together milk and sour cream.
  7. Beat flour mixture into batter in two additions, alternating with milk mixture.
  8. Transfer batter to prepared cake pan. Bake until toothpick inserted in the center comes out clean, about 25-30 minutes. Let cake cool in pan 10 minutes then turn out onto a cooling rack to cool.
  9. In a large bowl, stir cream cheese with a spatula to smooth out lumps.
  10. Add marshmallow fluff and beat until well combined. Add food gel color with a toothpick and beat until evenly distributed.
  11. Split cake into two layers. Top the bottom layer with frosting. Drain strawberries and spoon onto cake. Top with second layer, then more frosting.
Optional Decor
  1. To make sugared strawberries, mix 1 part meringue powder with 3 parts water. Dip strawberries in meringue mixture, cover with sugar, then let dry. Alternately you can dip the strawberries in pasteurized egg whites, cover with sugar, then let dry.
Recipe Notes

*To find the gel food color I used, click here.

**To find meringue powder, click here.

***To find the heart cake pan I used, click here.


Pink Lemonade Cake

This cheerful little loaf cake feels like a spring or summer picnic with lemonade and sunshine. It’s similar to a pink lemonade cake that my elderly neighbor used to make when I was growing up. She made it for all the neighborhood kids and we always gobbled it up. When I was about eight years old she taught my friend and me how to make it. She used a yellow cake mix in a large baking pan and poked holes all over the cake, then drenched it in a pink, sugary lemon icing. I transformed that happy pink lemonade memory into a delightful loaf cake made from scratch.

To watch the TikTok video, click here.

Print Recipe
Pink Lemonade Cake
A tender, moist loaf cake that tastes just like pink lemonade
Course Brunch, Dessert
Keyword cake, pink lemonade
Servings
8 x 4-inch loaf
Ingredients
Pink Lemonade Cake
Lemon Syrup
Icing
Course Brunch, Dessert
Keyword cake, pink lemonade
Servings
8 x 4-inch loaf
Ingredients
Pink Lemonade Cake
Lemon Syrup
Icing
Instructions
Pink Lemonade Cake
  1. Preheat oven to 325ºF (163ºC). Line the bottom of an 8 X 4-inch loaf pan with parchment paper. Grease and flour the sides.
  2. In a medium bowl, whisk together the flour, baking powder, salt and baking soda.
  3. In a small bowl, whisk together the milk and sour cream.
  4. In a large bowl, beat the sugar, oil, eggs, lemon zest and strawberry extract until smooth.
  5. Stir in the flour mixture in two additions, alternating with the milk mixture. Stir just until combined. Stir in food color a little at time until your desired shade is achieved.
  6. Transfer the batter to the prepared baking pan. Bake until a toothpick inserted into center of the loaf comes out clean, about 45-50 minutes. Meanwhile, prepare lemon syrup.
  7. Let the cake cool in the pan for 10 minutes, then remove from pan and transfer to a cooling rack. Poke holes all over the top of cake with a skewer.
  8. Brush the warm cake generously with the lemon syrup. Let the cake cool completely, then top with icing.
Lemon Syrup
  1. In a small saucepan, combine the juice of one lemon with enough water to equal 1/4 cup. Add sugar and stir over medium-low heat until sugar is dissolved. Remove from heat.
Icing
  1. In a medium bowl, beat the butter, powdered sugar, 1 tablespoon lemon juice, the strawberry extract and a pinch of salt, until smooth. Add more lemon juice until your desired consistency is reached. Mix in gel food color.
Recipe Notes

*To find the gel food color I used, click here.

The Nutcracker Land of Sweets Cupcakes

Nutcracker Land of Sweets Cupcakes

The tradition of enjoying the Nutcracker Ballet at Christmastime has been in my family for over 20 years. The Nutcracker Land of Sweets is a magical theme that has me mesmerized. Gingerbread, candy canes, gumdrops and billowy clouds of pink frosting are what dreams are made of. And that’s exactly what these dreamy cupcakes are made of. The cupcake flavor is a subtle spice cake. The recipe is adapted from a Martha Stewart cake recipe I made last summer. The original cake was paired with blackberry jam, but I knew plum jam would be perfect for these cupcakes. I topped them with a mildly sweet, fluffy Swiss meringue buttercream.

Part of the fun of making these cupcakes began at the store as I collected the sweets to decorate the cupcakes. Another perk of the job is taste testing the candy. I discovered that purple spice drops are licorice flavored and red spice drops are cinnamon. Who knew?

You might also like my Nutcracker Land of Sweets inspired candy bark. It’s a delightful holiday bark I designed that is often imitated. To view it, click here.

Print Recipe
The Nutcracker Land of Sweets Cupcakes
Spice cupcakes filled with plum jam, topped with fluffy pink frosting, gingerbread men and Christmas candy, and dusted with sugar snow
Course Dessert
Keyword cupcakes
Servings
cupcakes
Ingredients
Spice cupcakes
Pink Vanilla Swiss Meringue Buttercream
Course Dessert
Keyword cupcakes
Servings
cupcakes
Ingredients
Spice cupcakes
Pink Vanilla Swiss Meringue Buttercream
Instructions
Spice Cupcakes
  1. Preheat oven to 350ºF. Line a 12 serving muffin pan with disposable baking cups. (I used silver foil liners.)
  2. In a medium bowl, whisk together flours, baking powder, spices and salt. Set aside.
  3. In a large bowl, cream butter and sugar together with an electric mixer until light and fluffy.
  4. Add egg, egg white, and vanilla, one at a time, mixing until well combined.
  5. Add flour mixture in two additions, alternating with milk. Mix until combined.
  6. Divide batter evenly into wells of prepared muffin pan, filling about 2/3 full.
  7. Bake until light golden and toothpick inserted comes out clean, about 16-18 minutes.
  8. Let cool in muffin pan for 5 minutes. Gently transfer cupcakes to cooling rack to cool completely.
  9. Core the center of each cupcake, removing a 3/4-inch deep circle. Fill with jam and replace the circle top.
  10. Frost cupcakes with pink Swiss meringue buttercream. Decorate with cookies and candies. Lightly sprinkle with powdered sugar.
Pink Vanilla Swiss Meringue Buttercreamgue Buttercream
  1. Combine egg whites and sugar in a heatproof bowl. Set over a pan of gently simmering water.
  2. Whisk constantly until sugar is dissolved and temperature of 160ºF is reached.
  3. Transfer mixture to the bowl of a stand mixture with a whisk attachment. Whisk on low speed, gradually increasing to medium-high speed. Whisk until glossy, stiff peaks form and mixture reaches room temperature.
  4. Turn mixer to medium-low speed. Add butter, a few pieces at a time, allowing the butter to fully incorporate each time before adding more.
  5. Switch to paddle attachment. On low speed, mix in vanilla, salt and food color. Continue mixing on low speed for a few minutes until smooth.
Recipe Notes

Recipe adapted from Martha Stewart Spice Cake

Cherry Blossom Cookies

cherry blossom cookies

Each spring, I look forward to the sight and fragrance of beautiful botanical blooms, especially cherry blossoms. We often think of cherry blossoms as something unique to Washington D.C. or Japan, but cherry blossoms can be found in many regions of the United States. Georgia has many thousands of the beautiful pink trees. They can also be found in my home state, California. Here in California we also have many other types of beautiful blossoming fruit trees.

Inspired by the beautiful pink blossoms, I baked some cherry blossom cookies. There are many varieties of the blossoming pink trees. The Yoshino variety that we love to admire is not the same as the trees that produce cherries that we typically eat, but I decided to make the cookies cherry flavor anyway. Cherry extract is more accessible, but it’s also possible to make the cookies sakura blossom flavor if you prefer. You can purchase culinary sakura blossoms or sakura powder and flavor the cookies with it.

These perfectly pretty, pink cookies are easy to make and fun to decorate. You can sprinkle sparkling sugar on them before baking and call it a day or you can make some pink cherry icing and add sugar pearls or sprinkles. Either way, they look beautiful and taste delicious!

Print Recipe
Cherry Blossom Cookies
Pink cherry flavored sugar cookies with cherry icing
Servings
dozen
Ingredients
Cherry Blossom Cookies
Cherry Icing
Servings
dozen
Ingredients
Cherry Blossom Cookies
Cherry Icing
Instructions
Cherry Blossom Cookies
  1. In a large bowl, beat butter and cream cheese together with an electric mixer on medium speed, until smooth.
  2. Add sugar and salt. Beat on medium speed until light and fluffy.
  3. Add egg and extracts. Beat on medium speed until well combined.
  4. Add flour in two additions. Mix on low speed just until combined.
  5. Mix in food color on low speed, a tiny bit at a time, until desired shade is achieved.
  6. Divide dough into two discs. Wrap in plastic wrap and refrigerate until firm, about 2 hours or up to overnight.
  7. Preheat oven to 375ºF. Line two large cookie sheets with parchment paper.
  8. On a lightly floured surface, roll dough to 1/8" thickness.
  9. Cut out cookies with 2-inch blossom cutter. ***See note below.
  10. Transfer to prepared baking sheets. Sprinkle with sparkling sugar if using.
  11. Bake for 7-9 minutes until bottom edges are lightly browned.
  12. Remove from oven and transfer to cooling rack.
  13. Cool completely then ice with cherry icing, if desired.
  14. Decorate with sugar pearls or sprinkles before icing sets.
Cherry Icing
  1. In a small bowl, whisk together powdered sugar, salt, 3 tablespoons of milk and cherry extract. Add additional milk until desired consistency is reached. Whisk together until smooth.
  2. Mix in pink gel food color, a tiny bit at a time, until desired shade is achieved.
Recipe Notes

*Do not use imitation cherry flavoring or extract. Imitation extracts may make your cookies taste medicinal. 

** I used Wilton gel food color in shade rose. Click here to find it. 

*** Use your favorite blossom cookie cutter or click here to find the blossom cutters I used.

Honeydukes Inspired Pink Coconut Ice Cake

Honeydukes Inspired Pink Coconut Ice Cake by Brownie Mischief

I recently enjoyed a girls’ day out at Universal Studios Hollywood. My daughter is a Harry Potter fan, so of course we beelined straight to the Wizarding World of Harry Potter upon arrival at the theme park. We were spellbound by the ominous looking Hogwart’s Castle and the sparkling snow-topped shops of Hogsmeade. My daughter was in Harry Potter fan heaven, flitting around Hogsmeade, testing out her interactive wand and sipping some refreshing Butter Beer. It’s definitely a must-try

Our favorite shop was Honeydukes sweet shop, where anyone with a sweet tooth can get his or her candy wishes fulfilled. The candy selection was nothing short of magical. We picked up some Chocolate Flies, a Chocolate Frog and some Pink Coconut Ice candy.

Honeydukes Candy                   Pink Coconut Ice Candy

I was most excited to try the Pink Coconut Ice. I’ve been intrigued by the thought of this candy ever since it was mentioned in the book, Harry Potter and the Prisoner of Azkaban by J.K. Rowling. The Pink Coconut Ice candy is similar to a stiff fudge. It’s very sweet, so you can cut it into small squares and have plenty to share with friends.

Pink Coconut Ice Candy

I imagined the “shimmery pink squares” a little differently so, I decided to build on my imagined version of the coconut candy by making a shimmery pink coconut cake. I used my favorite coconut cake recipe and pink coconut buttercream. I tinted my buttercream with Americolor gel food color soft pink. I covered my cake in large flakes of unsweetened coconut. To find unsweetened coconut flakes, click here. I think the large flakes look more whimsical and add texture, but feel free to use whatever kind of coconut you prefer. I colored my coconut a shimmery, soft pink. Click here to see how I colored my coconut flakes.

Honeydukes Inspired Pink Coconut Ice Cake by Brownie Mischief

You don’t have to be a Harry Potter fan to appreciate this pink, fluffy, coconut-covered cake. I can imagine this pretty cake at any party or event with a pink theme. I hope you enjoy this perfectly Pink Coconut Ice Cake as much as we did!


Print Recipe


Pink Coconut Ice Cake

Moist, fluffy coconut cake with pink buttercream and coconut flakes

Course Dessert

Servings
6-inch cake (serves 6)


Ingredients
Coconut Cake

Pink Coconut Buttercream

Pink Coconut Flakes

Course Dessert

Servings
6-inch cake (serves 6)


Ingredients
Coconut Cake

Pink Coconut Buttercream

Pink Coconut Flakes


Instructions
Coconut Cake
  1. Preheat oven to 350º F. Grease three 6-inch cake pans.

  2. In a large bowl, sift together flour, baking powder and salt. Set aside.

  3. In a large bowl, beat butter, sugar and oil together with an electric mixer at medium speed, until light and fluffy, about 2-3 minutes.

  4. Beat in coconut extract. Gradually beat in egg whites until mixture is well combined, stopping to scrape the sides of the bowl.

  5. Beat in flour mixture in three additions, alternating with coconut milk, stopping to scrape the sides of the bowl.

  6. Pour batter into prepared pans, evenly distributing batter between the pans. Bake for 28-32 minutes, until a toothpick inserted into the center of pans comes out clean.

  7. Place pans on wire rack to cool for 10 minutes. Remove cakes from pans and place on rack to cool completely.

Pink Coconut Buttercream
  1. In a large bowl, beat butter with an electric mixer on medium speed, until light and fluffy.

  2. Add salt. Beat until combined.

  3. Turn off mixer. Add powdered sugar. Mix on low speed until sugar is moistened, then turn up to medium speed and beat until combined.

  4. Add coconut milk a little at a time, until desired consistency is reached. Add coconut extract and beat at medium speed until buttercream is smooth.

  5. Add gel food color with a toothpick, a little at a time, until desired consistency is reached. Beat at low speed until well blended.

  6. Fill and frost cake with Pink Coconut Buttercream.

Pink Coconut Flakes
  1. Place powdered sugar in a small bowl. Add a small amount of petal dust. Whisk together with a small whisk. Add additional petal dust until desired color is reached.

  2. Spread coconut flakes out onto a large shallow dish. Sprinkle powdered sugar mixture over coconut with a small sieve. Toss gently with gloved hands.

  3. Place cake on a baking sheet to catch excess coconut. Press colored coconut onto sides and top of cake.


Recipe Notes

*Do not substitute all-purpose flour. For best results weigh your dry ingredients. **For best results, use natural coconut extract. Imitation coconut flavorings may give your baked goods an unpleasant flavor. ***If your coconut milk is separated when you open the can, simply place it in a blender to emulsify before using. To find my favorite 6-inch cake pans, click here. To find the gel food color I used, click here. To find unsweetened coconut flakes, click here. To find the edible pearl dust I used, click here.