Lemon Crinkle Cookies

Lemon Crinkle Cookies by Brownie Mischief
Click here to watch the video

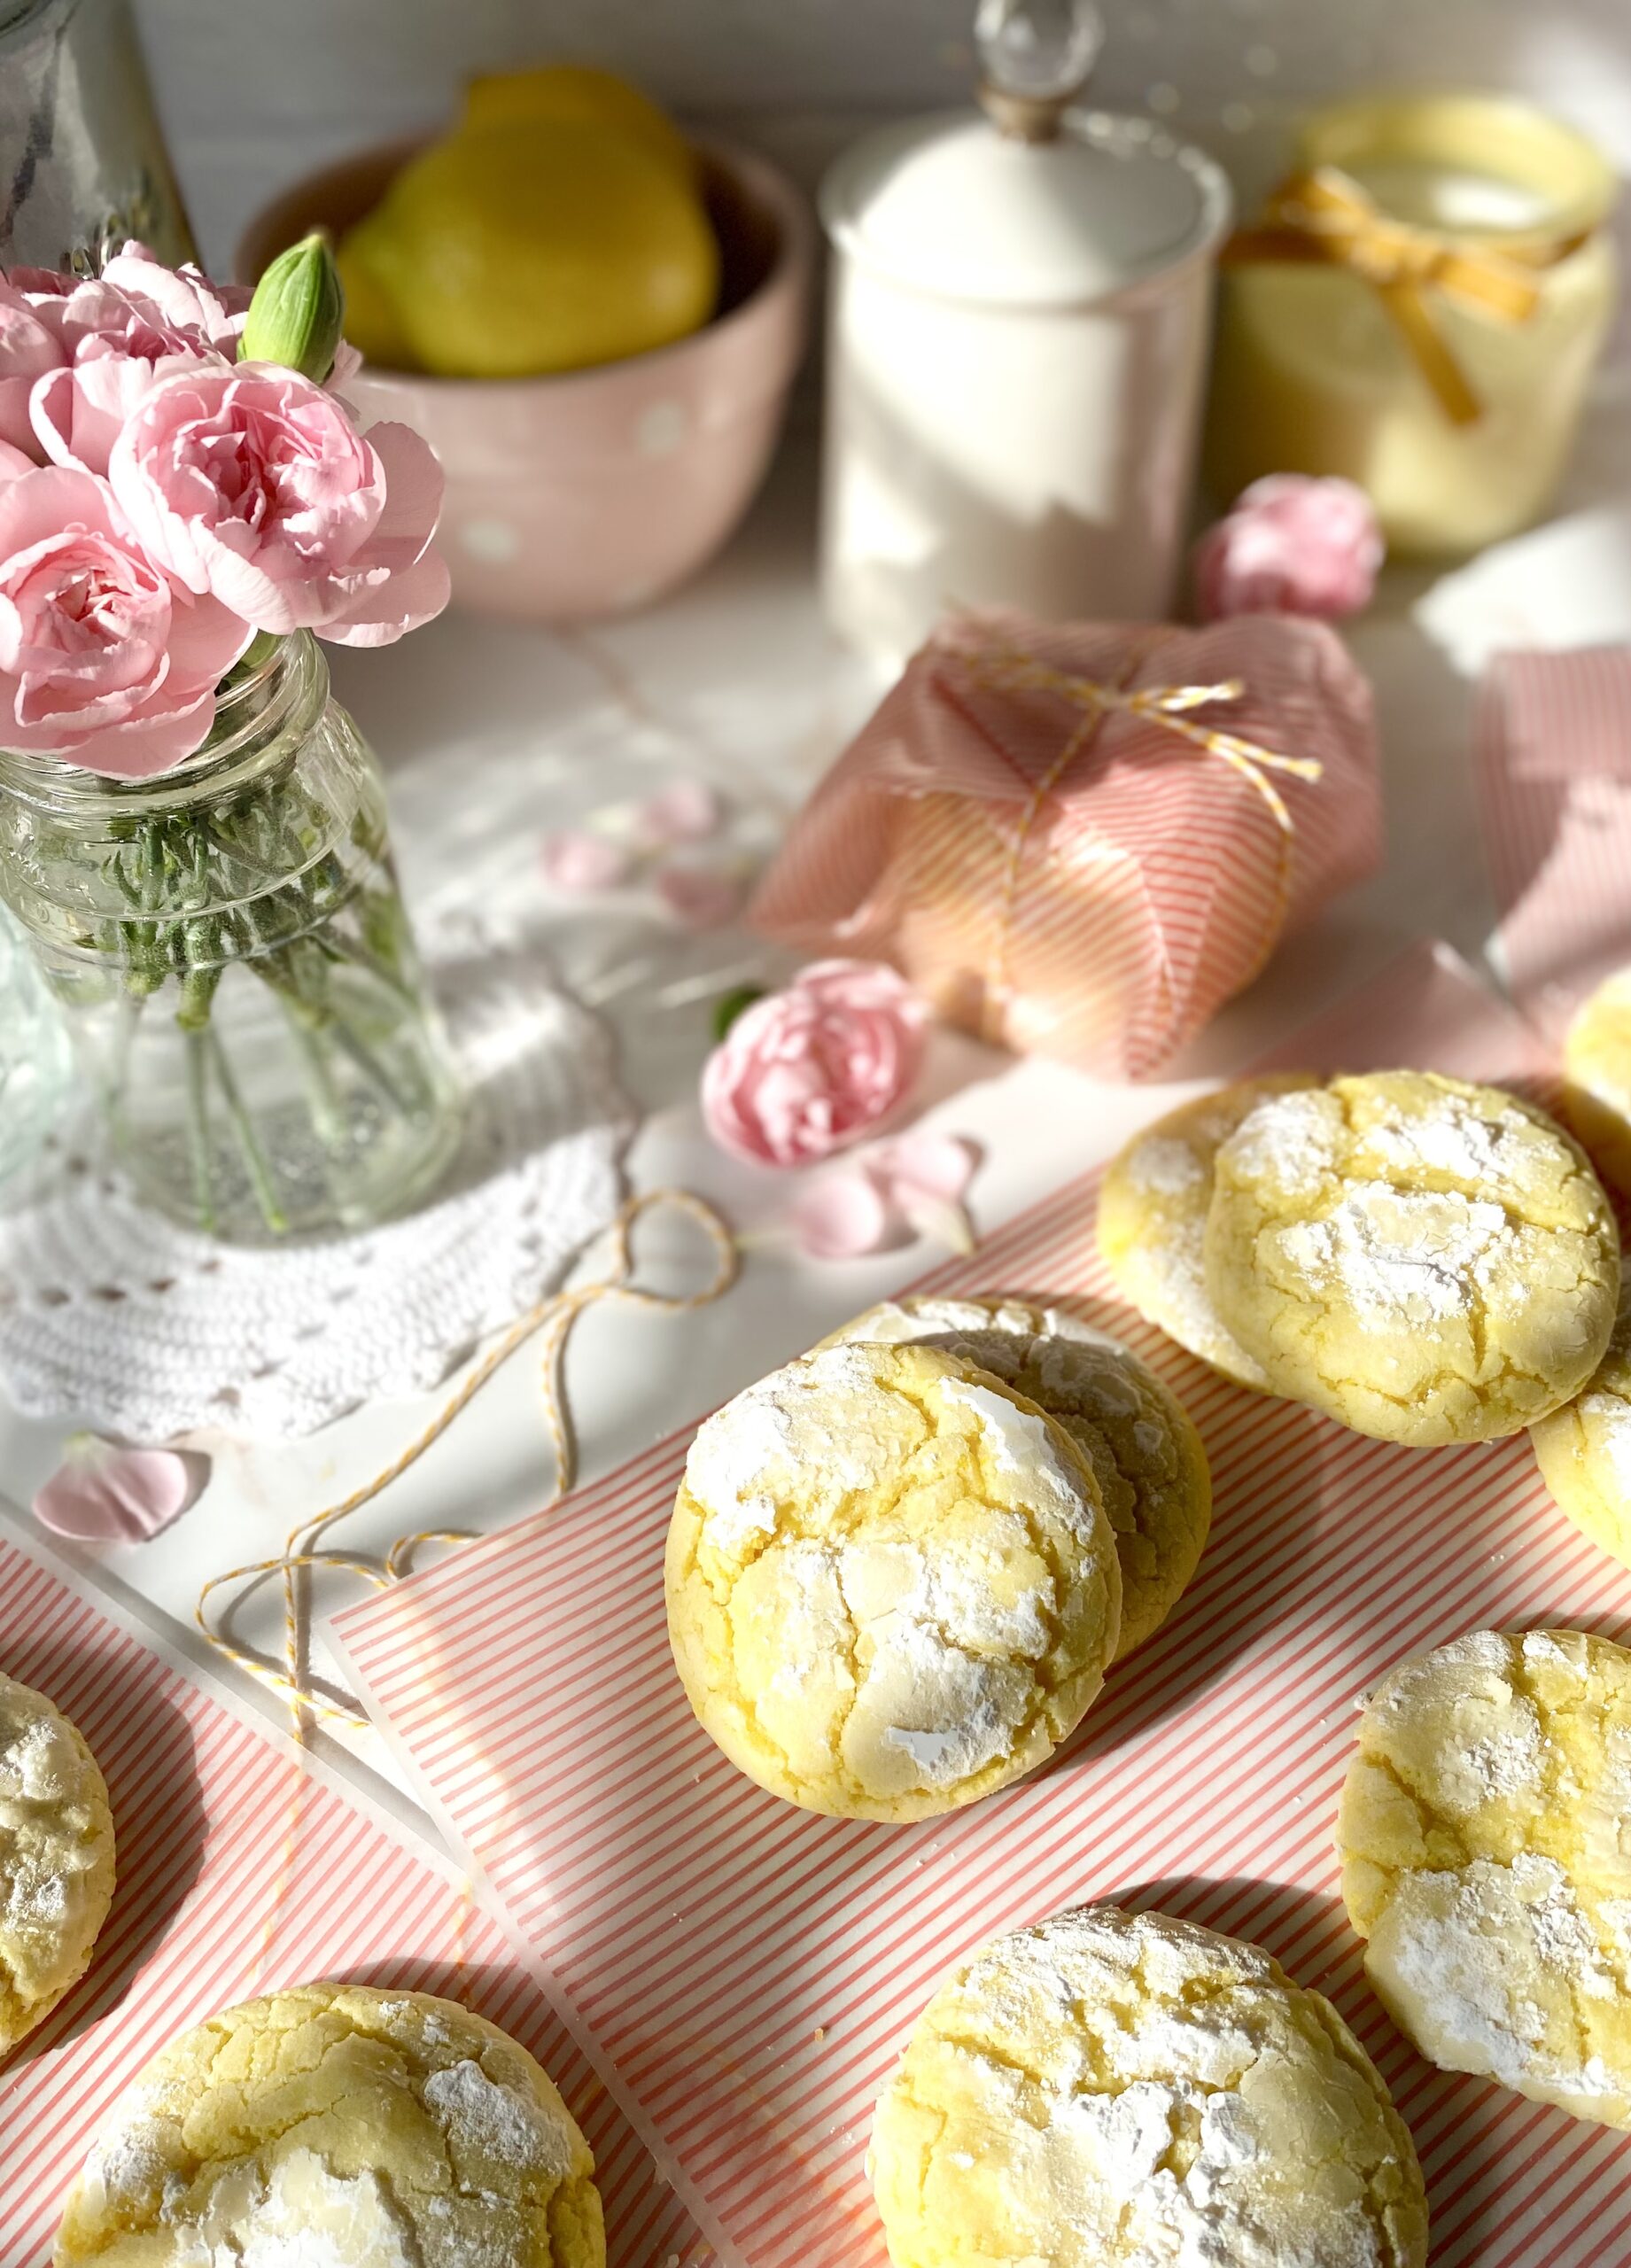
Crinkle cookies, also known as crackle cookies, have been around for a very long time. The pretty, crispy, cracked exterior and the soft, moist interior are what we love about them! There’s definitely no shortage of recipes for crinkles out there, everything from chocolate to red velvet. I even saw an audacious cookie company selling lemon crinkles for twelve dollars each, more money than it will cost for this entire batch! So many of the recipes I tried were disappointing, especially the ones made with cake mix. So I created my own version and I’m sharing it with you. Here’s to making sure delicious lemon crinkle cookies are available for all to enjoy, not just a select few.

This recipe requires a bit of chilling, which I know many people don’t like because they’re impatient. I happen to be one of those people. Old fashioned crinkle cookies require about 3 hours of chilling. My recipe has the addition of cornstarch, which helps prevent spreading and allows for a shorter chilling time. As an added bonus, cornstarch makes the cookies more tender. Win win!

Fresh lemon zest and lemon juice in these cookies is crucial to the best lemon flavor. A bit of pure lemon extract is added to enhance that flavor. Don’t be tempted to use imitation extracts. The flavor will disappoint you. I added two drops of lemon yellow food color, which made them so pretty they look like pure sunshine!

Print Recipe
Lemon Crinkle Cookies
Lemon cookies with a crackled, crispy exterior and a soft, tender interior
Course Dessert
Servings
cookies
Ingredients
Course Dessert
Servings
cookies
Ingredients
Instructions
  1. In a medium bowl, whisk together the flour, cornstarch, baking powder, salt and baking soda.
  2. In a large bowl, cream the butter, sugar and lemon zest together until light and fluffy.
  3. Beat in the egg until well combined.
  4. Mix in the lemon juice, extracts and food coloring until well combined.
  5. Add the flour mixture and mix just until combined.
  6. Refrigerate the cookie dough for 30 minutes to one hour.
  7. Preheat the oven to 350ºF (180ºC). Line two large cookie sheets with parchment paper.
  8. Roll the dough into balls, about 2 tablespoons each. **I used a #30 portion scoop.
  9. Roll the dough balls generously in powdered sugar.
  10. Place two inches apart onto the prepared baking sheets.
  11. Bake for 10-12 minutes. Let cool on the cookie sheet for one minute then transfer to a cooling rack.
Recipe Notes

*To find Americolor lemon yellow gel food color, click here.

**To find a #30 cookie scoop, click here.

To find the striped wax paper pictured above, click here.
 

Mini Orange Olive Oil Cakes

mini orange olive oil cakes

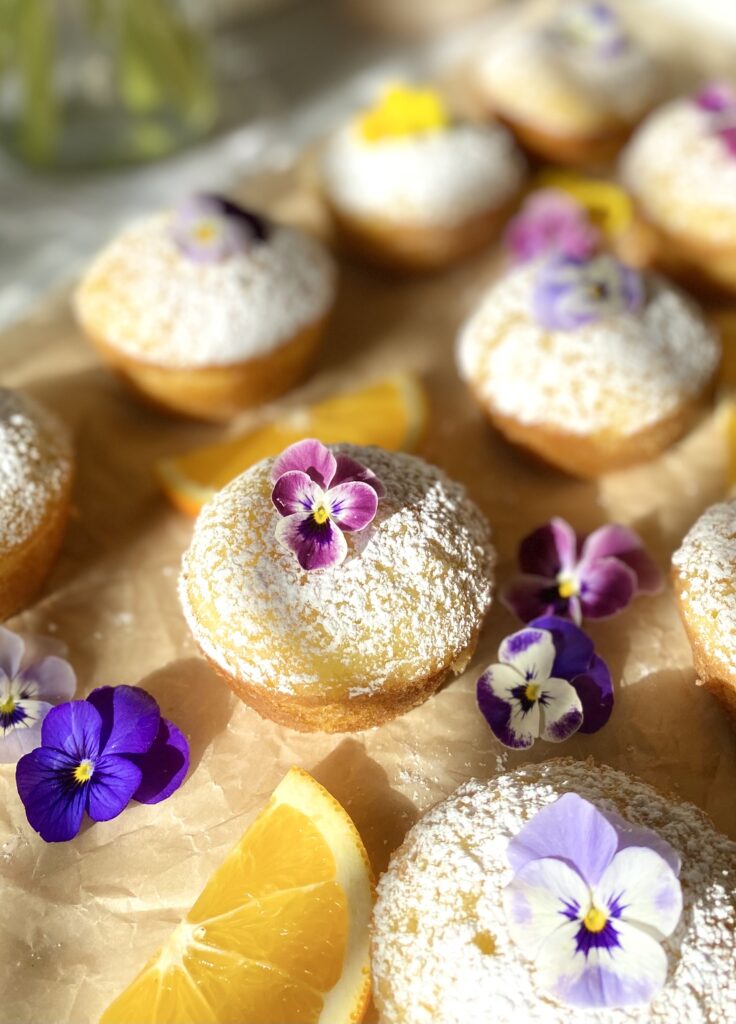
Ever since a certain celebrity cut a hole from the middle of her favorite olive oil cake back in 2020, the internet has been obsessed with olive oil cakes. I must confess that I was a fan of olive oil cakes long before that. I first tasted one at a restaurant years ago and fell in love. The flavor and texture was so delightful, that all it needed was a dusting of powdered sugar on top. Now that the dust has settled, I’m sharing my favorite orange olive oil cake recipe. Not because it’s trendy, but because it’s a really delicious recipe that tastes like spring.

I made cute little orange scented, personal cakes that are really just elegant cupcakes. The recipe is easily adapted to your tastes. You can switch up the orange flavor and substitute with lemon or any citrus of your choice. Even if you don’t like olive oil, you’ll still like these little cakes. I used light olive oil, rather than extra virgin olive oil, for a more subtle olive oil flavor. It’s also able to withstand higher temperatures. Feel free to use your favorite olive oil or replace it with the oil you prefer. Grape seed, avocado, canola and vegetable oil are some examples of oils you can use as a replacement.

This recipe contains almond flour. It helps with texture and flavor, so it’s a necessary ingredient. Almond flour can be pricey, but it’s good to have on hand. Adding it to your baked goods will make them more moist and tender. To find almond flour click here,

Print Recipe
Mini Orange Olive Oil Cakes
Course Dessert
Keyword cake, olive oil, orange
Servings
mini cakes
Ingredients
Mini Orange Olive Oil Cakes
Orange Simple Syrup
Course Dessert
Keyword cake, olive oil, orange
Servings
mini cakes
Ingredients
Mini Orange Olive Oil Cakes
Orange Simple Syrup
Instructions
Mini Orange Olive Oil Cakes
  1. Heat the oven to 350ºF (180ºC). Grease and flour a 12 serving muffin pan.
  2. In a medium bowl, whisk together the cake flour, almond flour, baking powder, baking soda and salt. Set aside.
  3. In a large bowl, beat the sugar, eggs, orange zest and vanilla extract together until smooth.
  4. Gradually mix in the olive oil and beat until well combined.
  5. Stir in the dry ingredients in two additions, alternating with the milk and orange juice. Stir just until combined. Do not over mix.
  6. Fill the prepared muffin pan cups 2/3 full with batter. Do not overfill or cakes will be more difficult to remove.
  7. Bake for 10-12 minutes or until the tops look light golden, but still moist and a toothpick inserted comes out clean. They bake very quickly, so check them a few minutes early to avoid over baking.
  8. Cool the cakes in pan for 5 minutes. Remove them from pan and transfer to a cooling rack.
  9. Brush the warm cakes with orange simple syrup and allow to cool completely.
  10. When the cakes have cooled, dust with powdered sugar.
Orange Simple Syrup
  1. In a small saucepan, stir together the sugar, orange juice, lemon juice, and orange zest.
  2. Cook over low heat, stirring occasionally, just until the sugar is dissolved.
  3. Remove from heat and set aside to cool.

Vintage Chocolate Cake

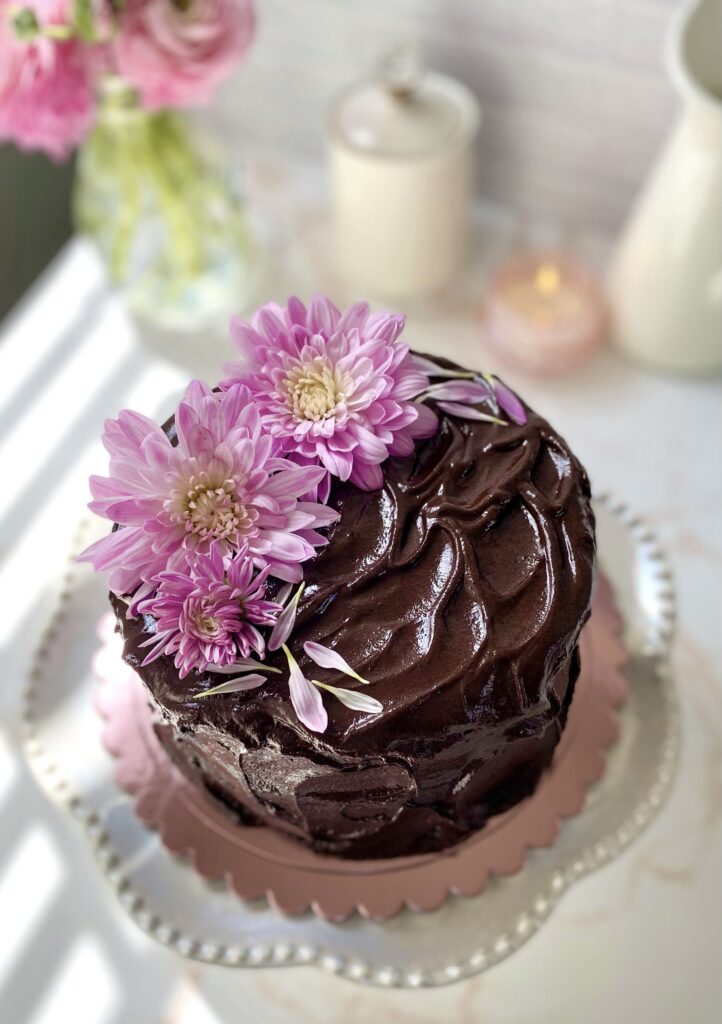
Dark Chocolate Cake with the Best Chocolate Frosting

If you love chocolate cake, this is the post for you! Chocolate cake is one of the best comfort foods there is. I’ve tasted many over the years, but my all time favorite was one I had growing up. I’ve spent years trying to duplicate the moist, nostalgic cake from my childhood. I noticed that nearly every chocolate cake recipe on the internet is a variation of the century-old recipe from the Hershey’s Cocoa tin. I think many people have passed it down as a family recipe, each grandmother adding her own personal touch. Even some celebrity chefs have claimed it as their own. It’s an easy, delicious, moist recipe and its popularity is well deserved. You can tweak the flavor additions a bit to make it your own too. It’s a recipe that’s hard to mess up.

This cake is topped with the ultimate silky, smooth, deeply chocolate frosting. I developed this recipe mostly because I couldn’t find a chocolate frosting recipe that didn’t taste gritty and/or look speckled from the cocoa powder. Swiss meringue buttercream with melted chocolate added is one alternative. But, while it is smooth, silky and perfect for piping, it’s missing that deep chocolate richness. Another option is chocolate ganache. It looks rich and creamy in those viral videos, but it’s a little too rich and overpowering to use as frosting in my opinion.

I think this frosting is the one! It has the best of both worlds, velvety but not too rich. You’ll notice that this frosting contains maple syrup. The syrup gives it a very subtle maple flavor in the background, but mostly, it helps to make the frosting silky and gives it shine. You can adjust the sweetness level of the frosting by choosing the chocolate you prefer. I used bittersweet chocolate, which I think is just right. This recipe makes enough frosting to frost a 2-layer 6-inch cake. You can easily double the recipe for larger cakes.

Print Recipe
Vintage Chocolate Cake
Course Dessert
Keyword cake, chocolate
Servings
2 layer 6-inch cake
Ingredients
Chocolate Cake
Chocolate Buttercream Frosting
Course Dessert
Keyword cake, chocolate
Servings
2 layer 6-inch cake
Ingredients
Chocolate Cake
Chocolate Buttercream Frosting
Instructions
Chocolate Cake
  1. Preheat the oven to 350ºF (180ºC). Line the bottoms of two 6-inch cake pans with parchment paper. Grease the insides and dust with a mixture of equal parts flour and cocoa powder. Wrap the cake pans with damp cake strips if you have them.
  2. Sift the flour, cocoa powder, baking powder, baking soda and salt together in a medium bowl. Add the sugar and stir util well combined.
  3. Combine the the egg, egg yolk, buttermilk, vegetable oil and vanilla extract in a small bowl. Whisk lightly to combine.
  4. Add the egg mixture to the dry ingredients and mix on low speed with an electric mixer, until combined. Stop the mixer. Scrape the sides and the bottom of the bowl with a spatula. Turn the mixer up to medium speed and beat for 30 seconds.
  5. Add the hot coffee and stir until well combined.
  6. Pour the batter into the prepared cake pans, dividing batter evenly between the pans. Bake until a toothpick inserted into the center of the cakes comes out clean, about 25-28 minutes without cake strips or about 28-32 minutes with cake strips.
  7. Let the cakes cool in the pans for 10 minutes then remove the cakes from the pans and transfer to a cooling rack.
  8. Trim the cake layers to your desired thickness, from 1-inch to 1 1/2-inches thick. Fill and frost with chocolate buttercream frosting.
Chocolate Buttercream Frosting
  1. In a small saucepan over low heat, whisk together the maple syrup, water, cocoa powder and espresso powder until smooth. Set aside to cool to room temperature.
  2. Melt the chocolate in a medium bowl set over a pan of gently simmering water, making sure the water doesn't touch the bottom of the bowl. Remove from heat and set aside to cool to lukewarm.
  3. In a large bowl, beat the butter with an electric mixer at medium speed, until smooth and light in color. Add the powdered sugar and salt and continue beating until smooth and well combined.
  4. Gradually add the the cooled maple syrup mixture and beat on low speed until combined.
  5. Stir in the melted chocolate until well combined. Smooth out any air bubbles by stirring gently with a rubber spatula.
Recipe Notes

*For smoothest results, use chopped bar chocolate and make sure chocolate is completely melted.  Do not use chocolate chips. Chocolate chips do not melt completely and can make your frosting lumpy.


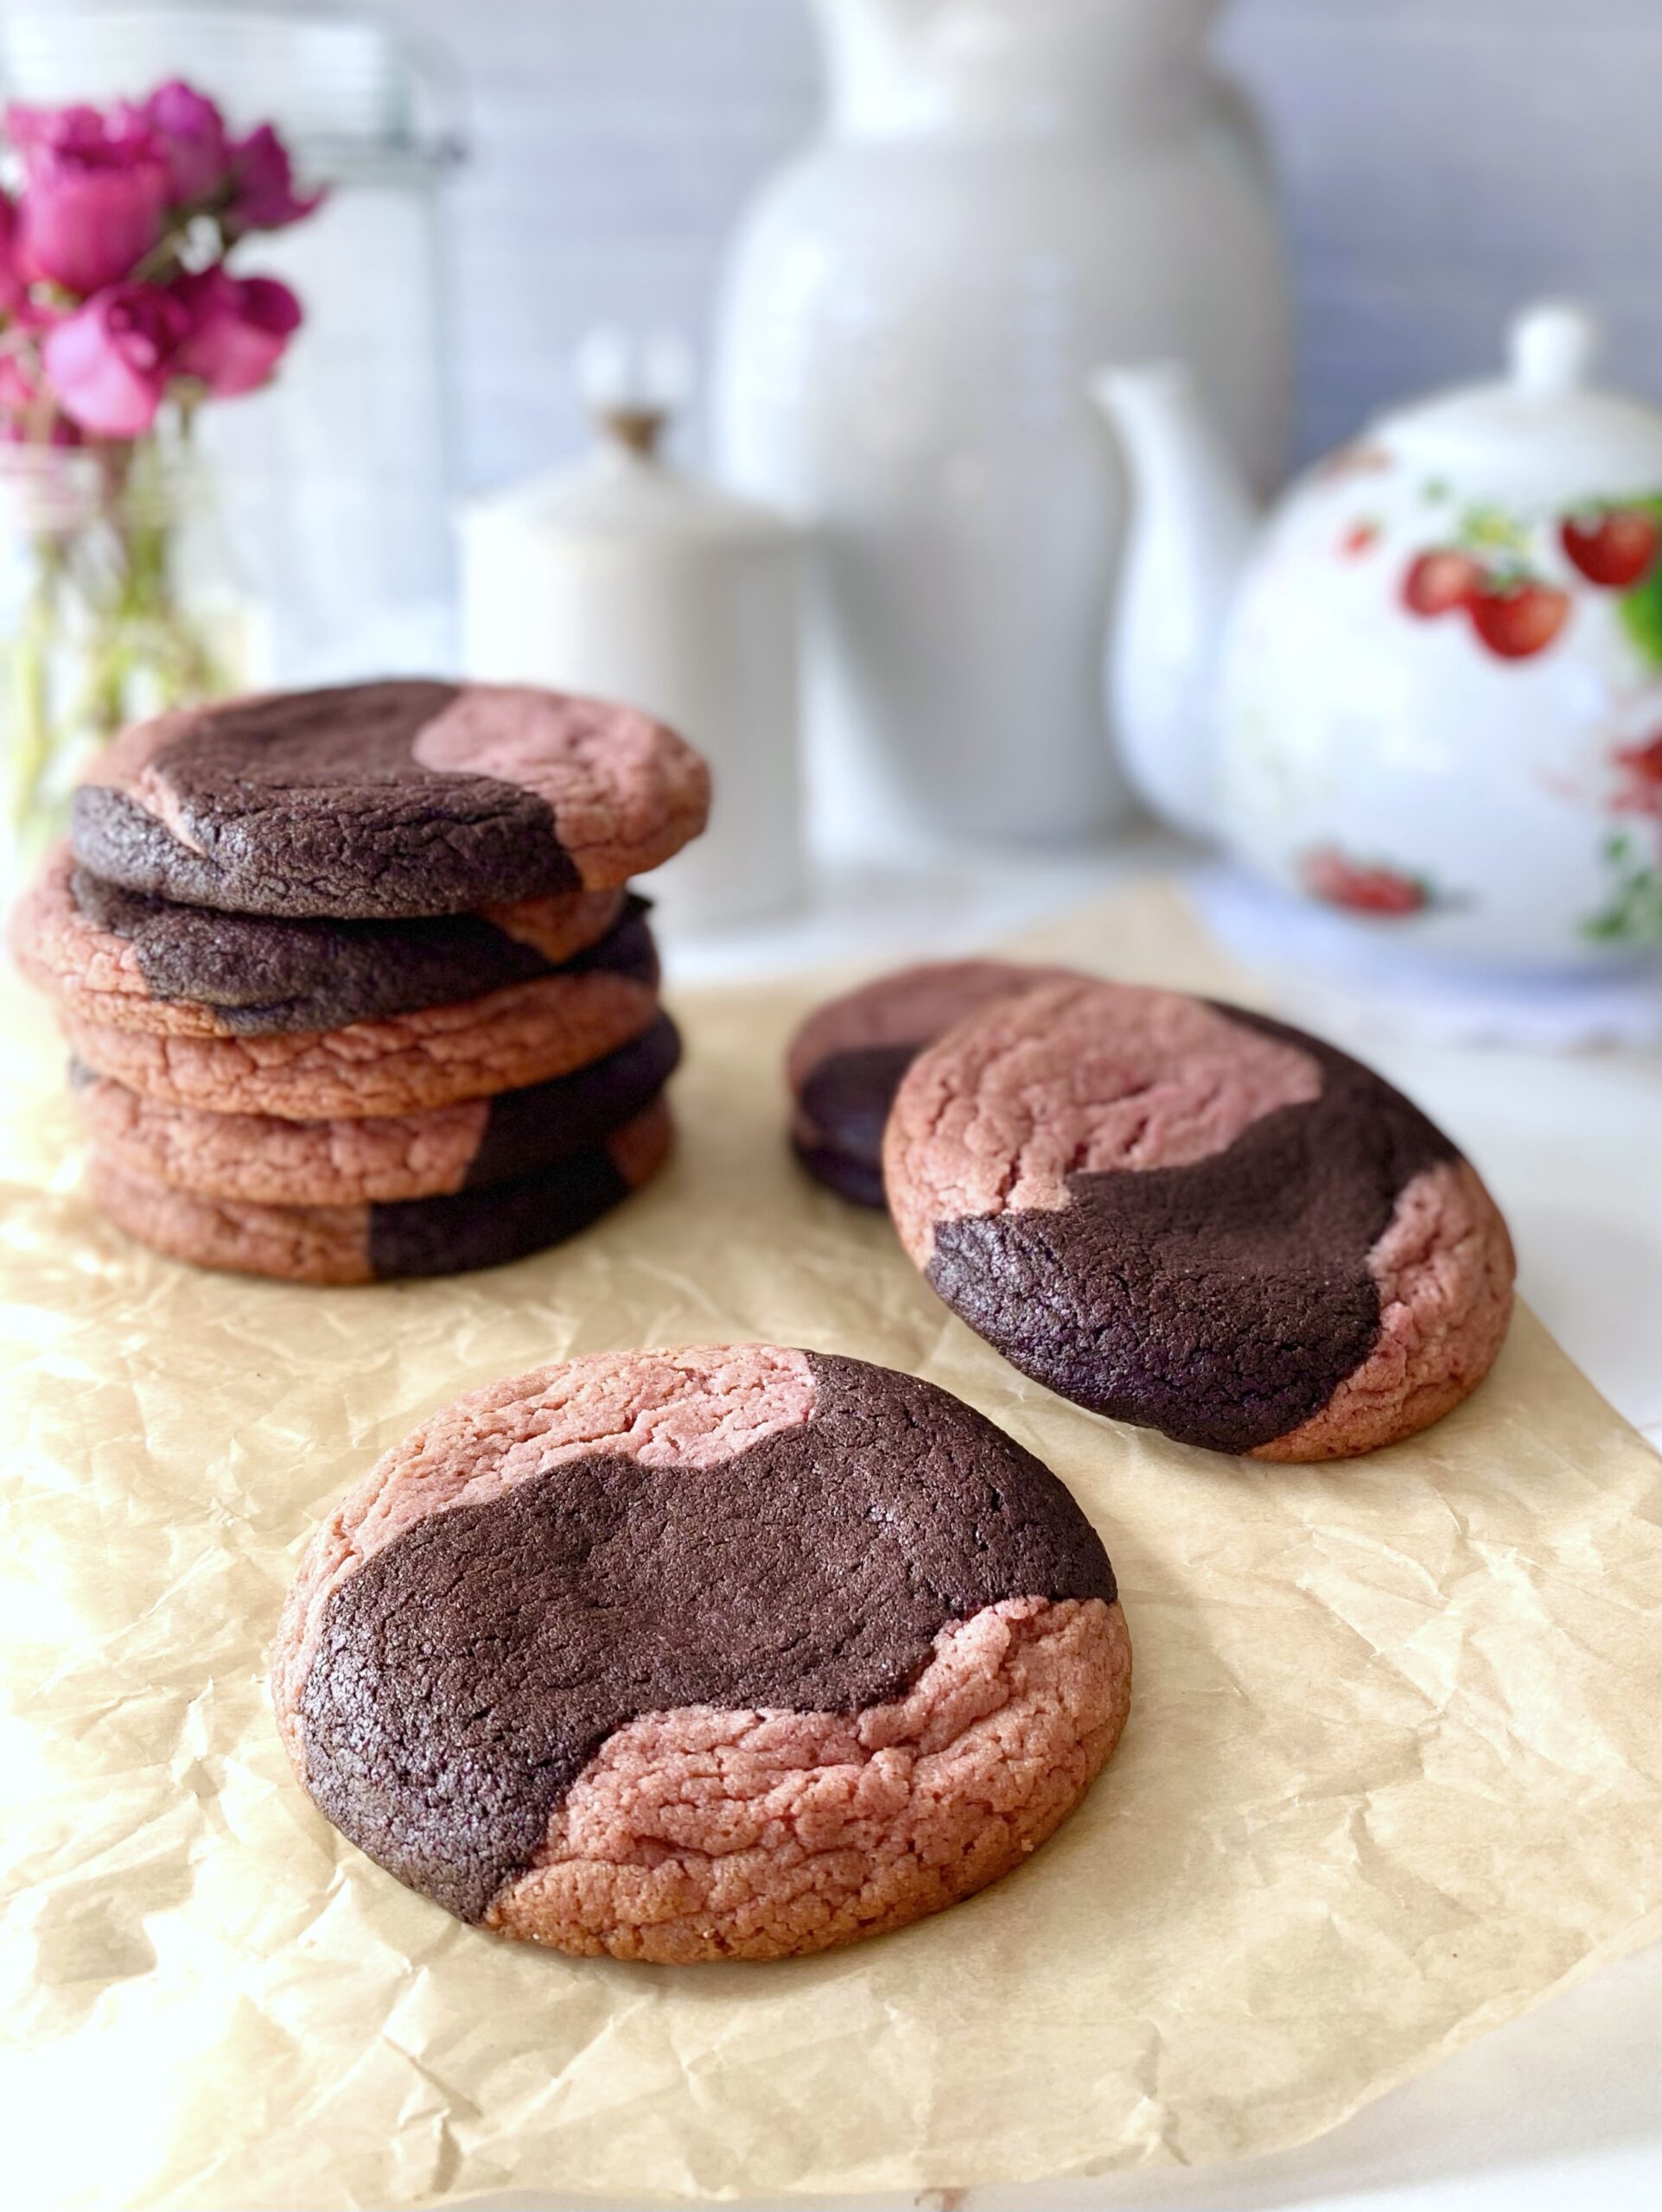
Dark Chocolate Strawberry Marble Cookies

Dark Chocolate Strawberry Marble Cookies

To the indecisive German baker who invented marble cake, I thank you! Marble cake, sampler platters and tasting flights are the perfect solution for those times when you just can’t decide. Let’s take one more decision off the table. No longer will we have to decide between chocolate and strawberry cookies. These marble cookies are the best of both worlds. Chocolate and strawberry are opposites in many ways, but complement each other so well. After all, who doesn’t love chocolate covered strawberries?

The dark chocolate cocoa powder gives these cookies a deep chocolate flavor. Freeze dried strawberries provide the sweet strawberry flavor and color. I crushed the strawberries with a mini food processor, but you can also use a mortar and pestle, a clean spice grinder or a sturdy plastic bag and a rolling pin. When you crush the 1 1/2 cups of freeze dried strawberries called for in the recipe, you’ll end up with about 1/3 cup of strawberry powder. To find freeze dried strawberries, click here.

This recipe makes about eighteen cookies but you can also make nine large cookies. Follow the instructions in parentheses for large cookies.

Print Recipe
Dark Chocolate Strawberry Marble Cookies
Servings
cookies
Ingredients
Servings
cookies
Ingredients
Instructions
  1. In a medium bowl, whisk together flour, baking soda and salt. Set aside.
  2. In a large bowl, cream butter, sugar and brown sugar with an electric mixer until light and fluffy.
  3. Beat in eggs and vanilla in three separate additions, until well combined.
  4. On low speed, mix in flour mixture just until combined.
  5. Divide dough in half. Leave half of dough in the bowl and place the other half in a separate bowl.
  6. Add freeze dried strawberries to half of the dough and mix just until combined
  7. Add cocoa powder to the other half of the dough and mix just until combined.
  8. Roll dough into 1 1/2 teaspoon size balls. (For large cookies, roll dough into tablespoon size balls.)
  9. To form cookies, place two chocolate dough balls and two strawberry dough balls in your hand in a checkerboard pattern. Roll into a ball.
  10. Repeat with remaining dough balls and refrigerate for 30 minutes.
  11. Preheat oven to 350ºF.
  12. Line two large cookie sheets with parchment paper.
  13. Place dough two inches apart on prepared cookie sheets.
  14. Bake 10-12 minutes, until cookies are set and edges are golden. (For large cookies, bake 14-15 minutes.)
  15. Transfer to cooling rack. (For large cookies, cool on cookie sheet one minute, then transfer to cooling rack.

Maple Pecan Brownies

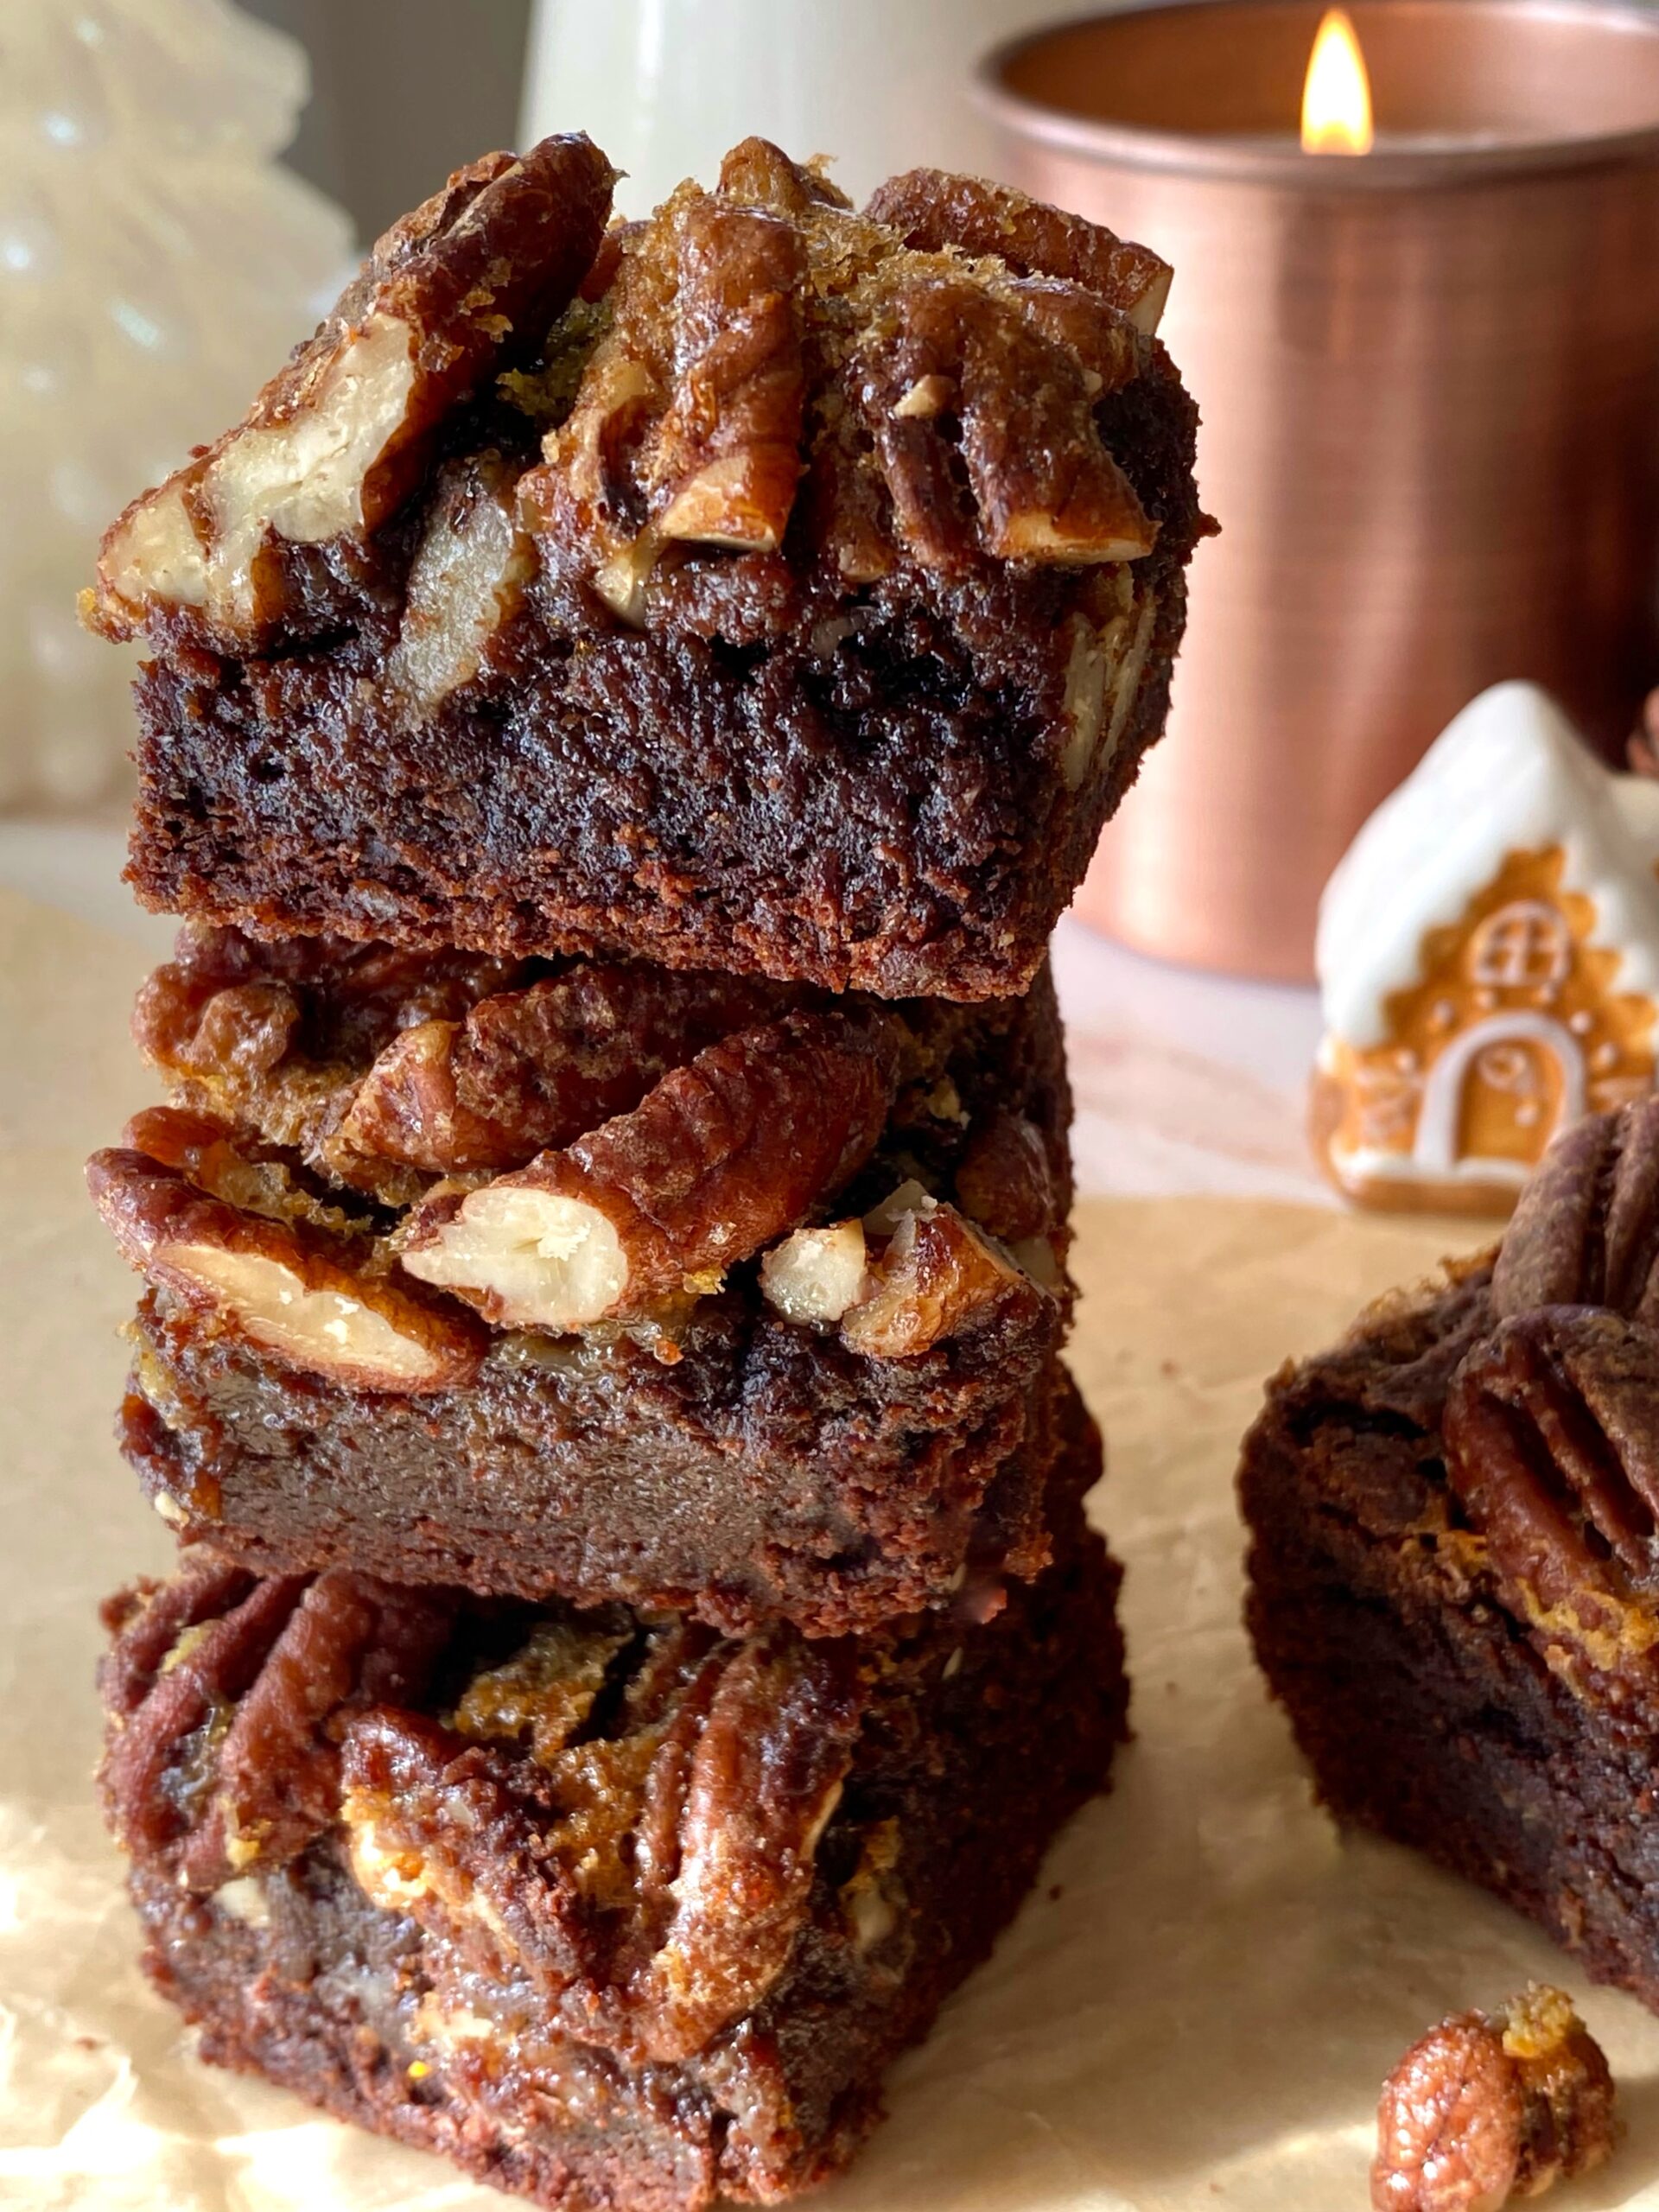
maple pecan brownies

Pecan pie was my mom’s favorite, but she didn’t bake pies, so I always used to bake her one for Thanksgiving. One year, I made a chocolate version. It was delicious, but let’s just say it wasn’t user friendly. It was gooey and hard to serve. Over the years, it eventually morphed into these Maple Pecan Brownies. The brownie version is still delicious, rich and gooey with toasty pecans, but much more user friendly.

Enjoying Maple Pecan Brownies with a glass of milk or a cup of coffee is a must. Thinking of it brings back memories. I can practically smell my dad brewing the coffee to go with these brownies.

Print Recipe
Maple Pecan Brownies
Rich, gooey brownies topped with pecan pie filling
Servings
brownies
Ingredients
Brownies
Pecan Topping
Servings
brownies
Ingredients
Brownies
Pecan Topping
Instructions
Brownies
  1. Preheat oven to 350ºF. Line a 9-inch square baking pan with parchment paper, overlapping the sides an inch or two. Spray parchment paper with nonstick cooking spray.
  2. In a large bowl, stir together melted butter, granulated sugar and brown sugar until well combined.
  3. Mix in eggs and vanilla, one at a time, until well combined.
  4. Mix in cocoa powder, baking soda and salt until well combined.
  5. Stir in flour just until combined.
  6. Spread batter into prepared baking pan. Bake just until top is set, about 25 minutes.
  7. Meanwhile, prepare pecan topping.
  8. When brownie top is set, remove from oven. Gently pour pecan topping around the outer perimeter of brownies, to avoid making brownies sink in the middle. Evenly distribute the pecan topping over the top gently with a spoon.
  9. Return the brownies to the oven and continue baking until the topping is set, about 20-25 minutes. Brownies will stop jiggling and topping will look deep golden brown. Toothpick inserted inside will have a few moist crumbs on it. (If your topping starts to brown too much on the edges before the inside is done, apply aluminum foil around the edges as you would with a pie.)
  10. Remove from oven and cool completely before cutting, about 2- 2 1/2 hours.
  11. Cut into squares, wiping knife between cuts.
Pecan Topping
  1. In a medium bowl, stir together maple syrup, butter, brown sugar, egg, maple extract and salt until well combined.
  2. Stir in pecans until well coated with maple syrup mixture.
  3. Set aside until brownies are partially baked.

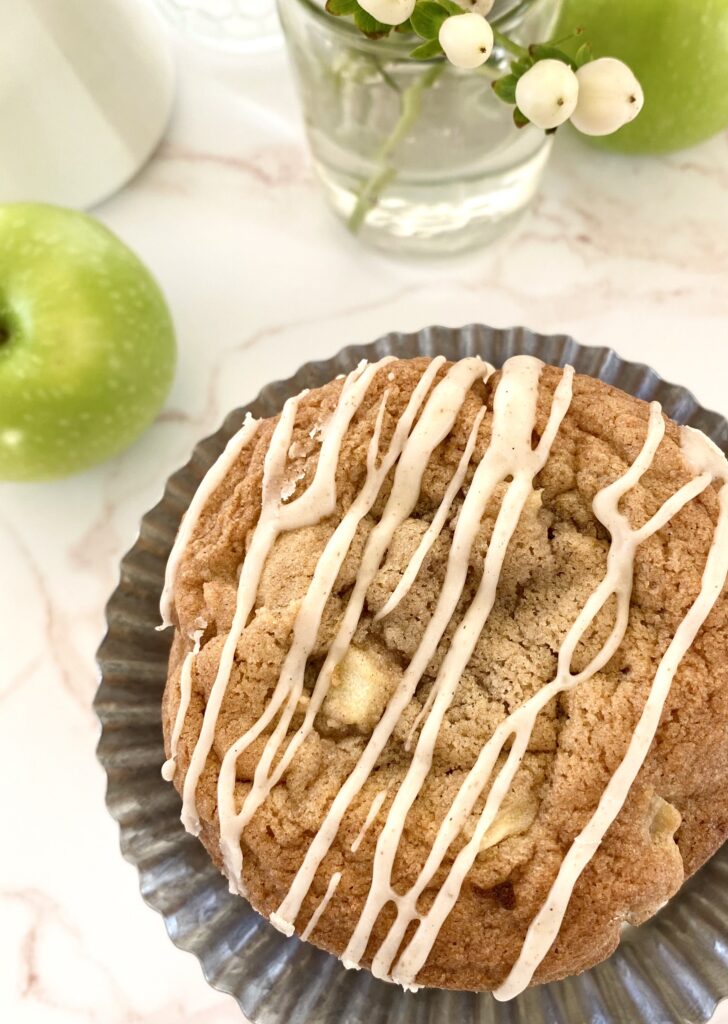
Apple Spice Cookies with Brown Butter Icing

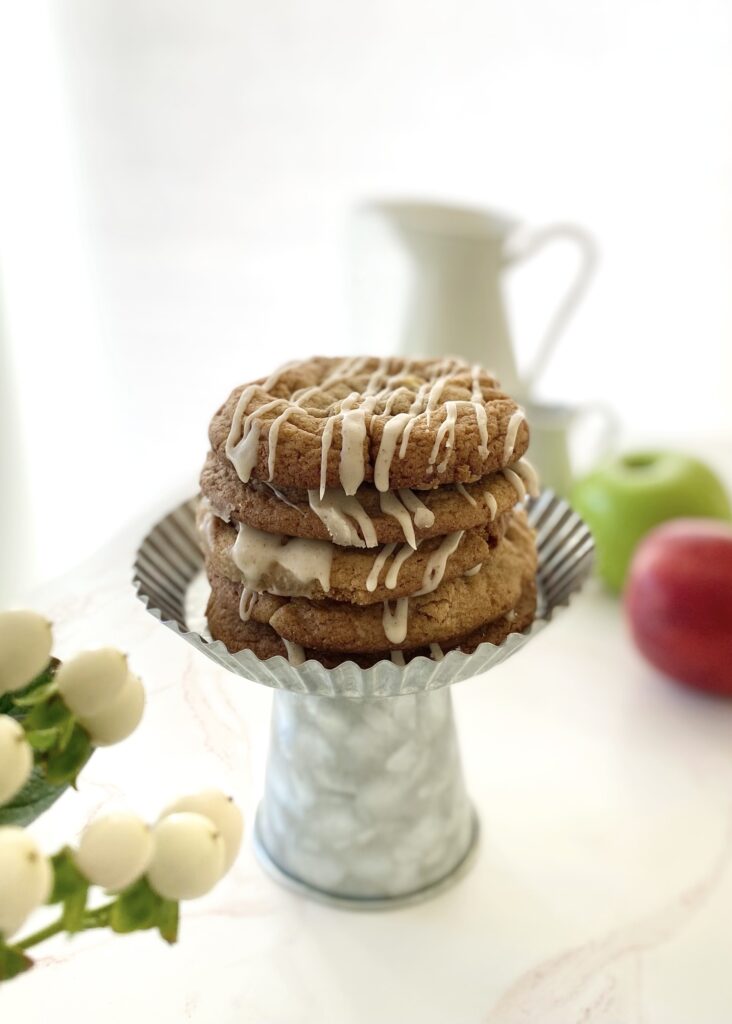
Apple Spice Cookies with Brown Butter Icing

These Apple Spice Cookies were one of my most popular cookies last fall so I decided to bring them back a little early this year. The combination of cinnamon, nutmeg and vanilla in this cookie dough will remind you of cinnamon rolls and apple pie and inspire you look forward to fall.

The apples in this recipe are cooked briefly on the stovetop to bring out the flavor and create the perfect texture. Dropping raw apple chunks into cookie dough or cake batter is usually not a good idea. If you’ve ever baked an apple pie, you know that apples release liquid as they cook and that liquid will end up in your baked cookies, creating soggy spots. So definitely don’t skip this step!

These gorgeous, golden brown cookies are perfectly delicious on their own, but extra credit goes to the Brown Butter Icing for taking them over the top!

apple spice cookies with brown butter icing

Make sure to head over to Instagram to watch the video of these Apple Spice Cookies being created: Click here

Print Recipe
Apple Spice Cookies with Brown Butter Icing
Spice cookies with fresh apples and brown butter icing
Course Dessert
Servings
cookies
Ingredients
Cooked Apples
Brown Butter Icing
Course Dessert
Servings
cookies
Ingredients
Cooked Apples
Brown Butter Icing
Instructions
Cooked Apples
  1. Melt the butter in a small skillet over medium heat. Add apples, sugar and cinnamon to the skillet.
  2. Cook, stirring occasionally, until the apples are tender, about 4-5 minutes.
  3. Remove from heat and let cool completely. Drain any excess liquid from the cooled apples.
Apple Spice Cookies
  1. Preheat the oven to 375ºF (190ºC). Line two large baking sheets with parchment paper.
  2. In a medium bowl, whisk together the flour, baking soda, salt, cinnamon and nutmeg. Set aside.
  3. In a large bowl, beat the butter and brown sugar with an electric mixer at medium speed until light and fluffy.
  4. Beat in the egg, egg yolk and vanilla extract, one at a time, until well combined
  5. Stir in the flour mixture, just until combined.
  6. Fold the the cooled apples into the cookie dough.
  7. Divide the dough into 12 equal golf ball size portions and place them 3 inches apart on the prepared baking sheets.
  8. Bake until golden brown, about 11-13 minutes. Let cool 1 minute on the baking sheet, then transfer to a cooling rack to cool completely.
Brown Butter Icing
  1. In a small saucepan, cook the butter over medium heat until golden brown and fragrant. When brown specks start to form in the bottom of the pan, remove from heat.
  2. Immediately transfer the browned butter to a small bowl. Whisk in the the powdered sugar, vanilla extract, salt and 1 tablespoon milk. Add more milk as needed to reach desired consistency.
  3. Drizzle the icing over the cooled cookies.
Recipe Notes

NOTE:  If your cookies spread too much when baking, refrigerate dough for 30 minutes, then bake as directed.

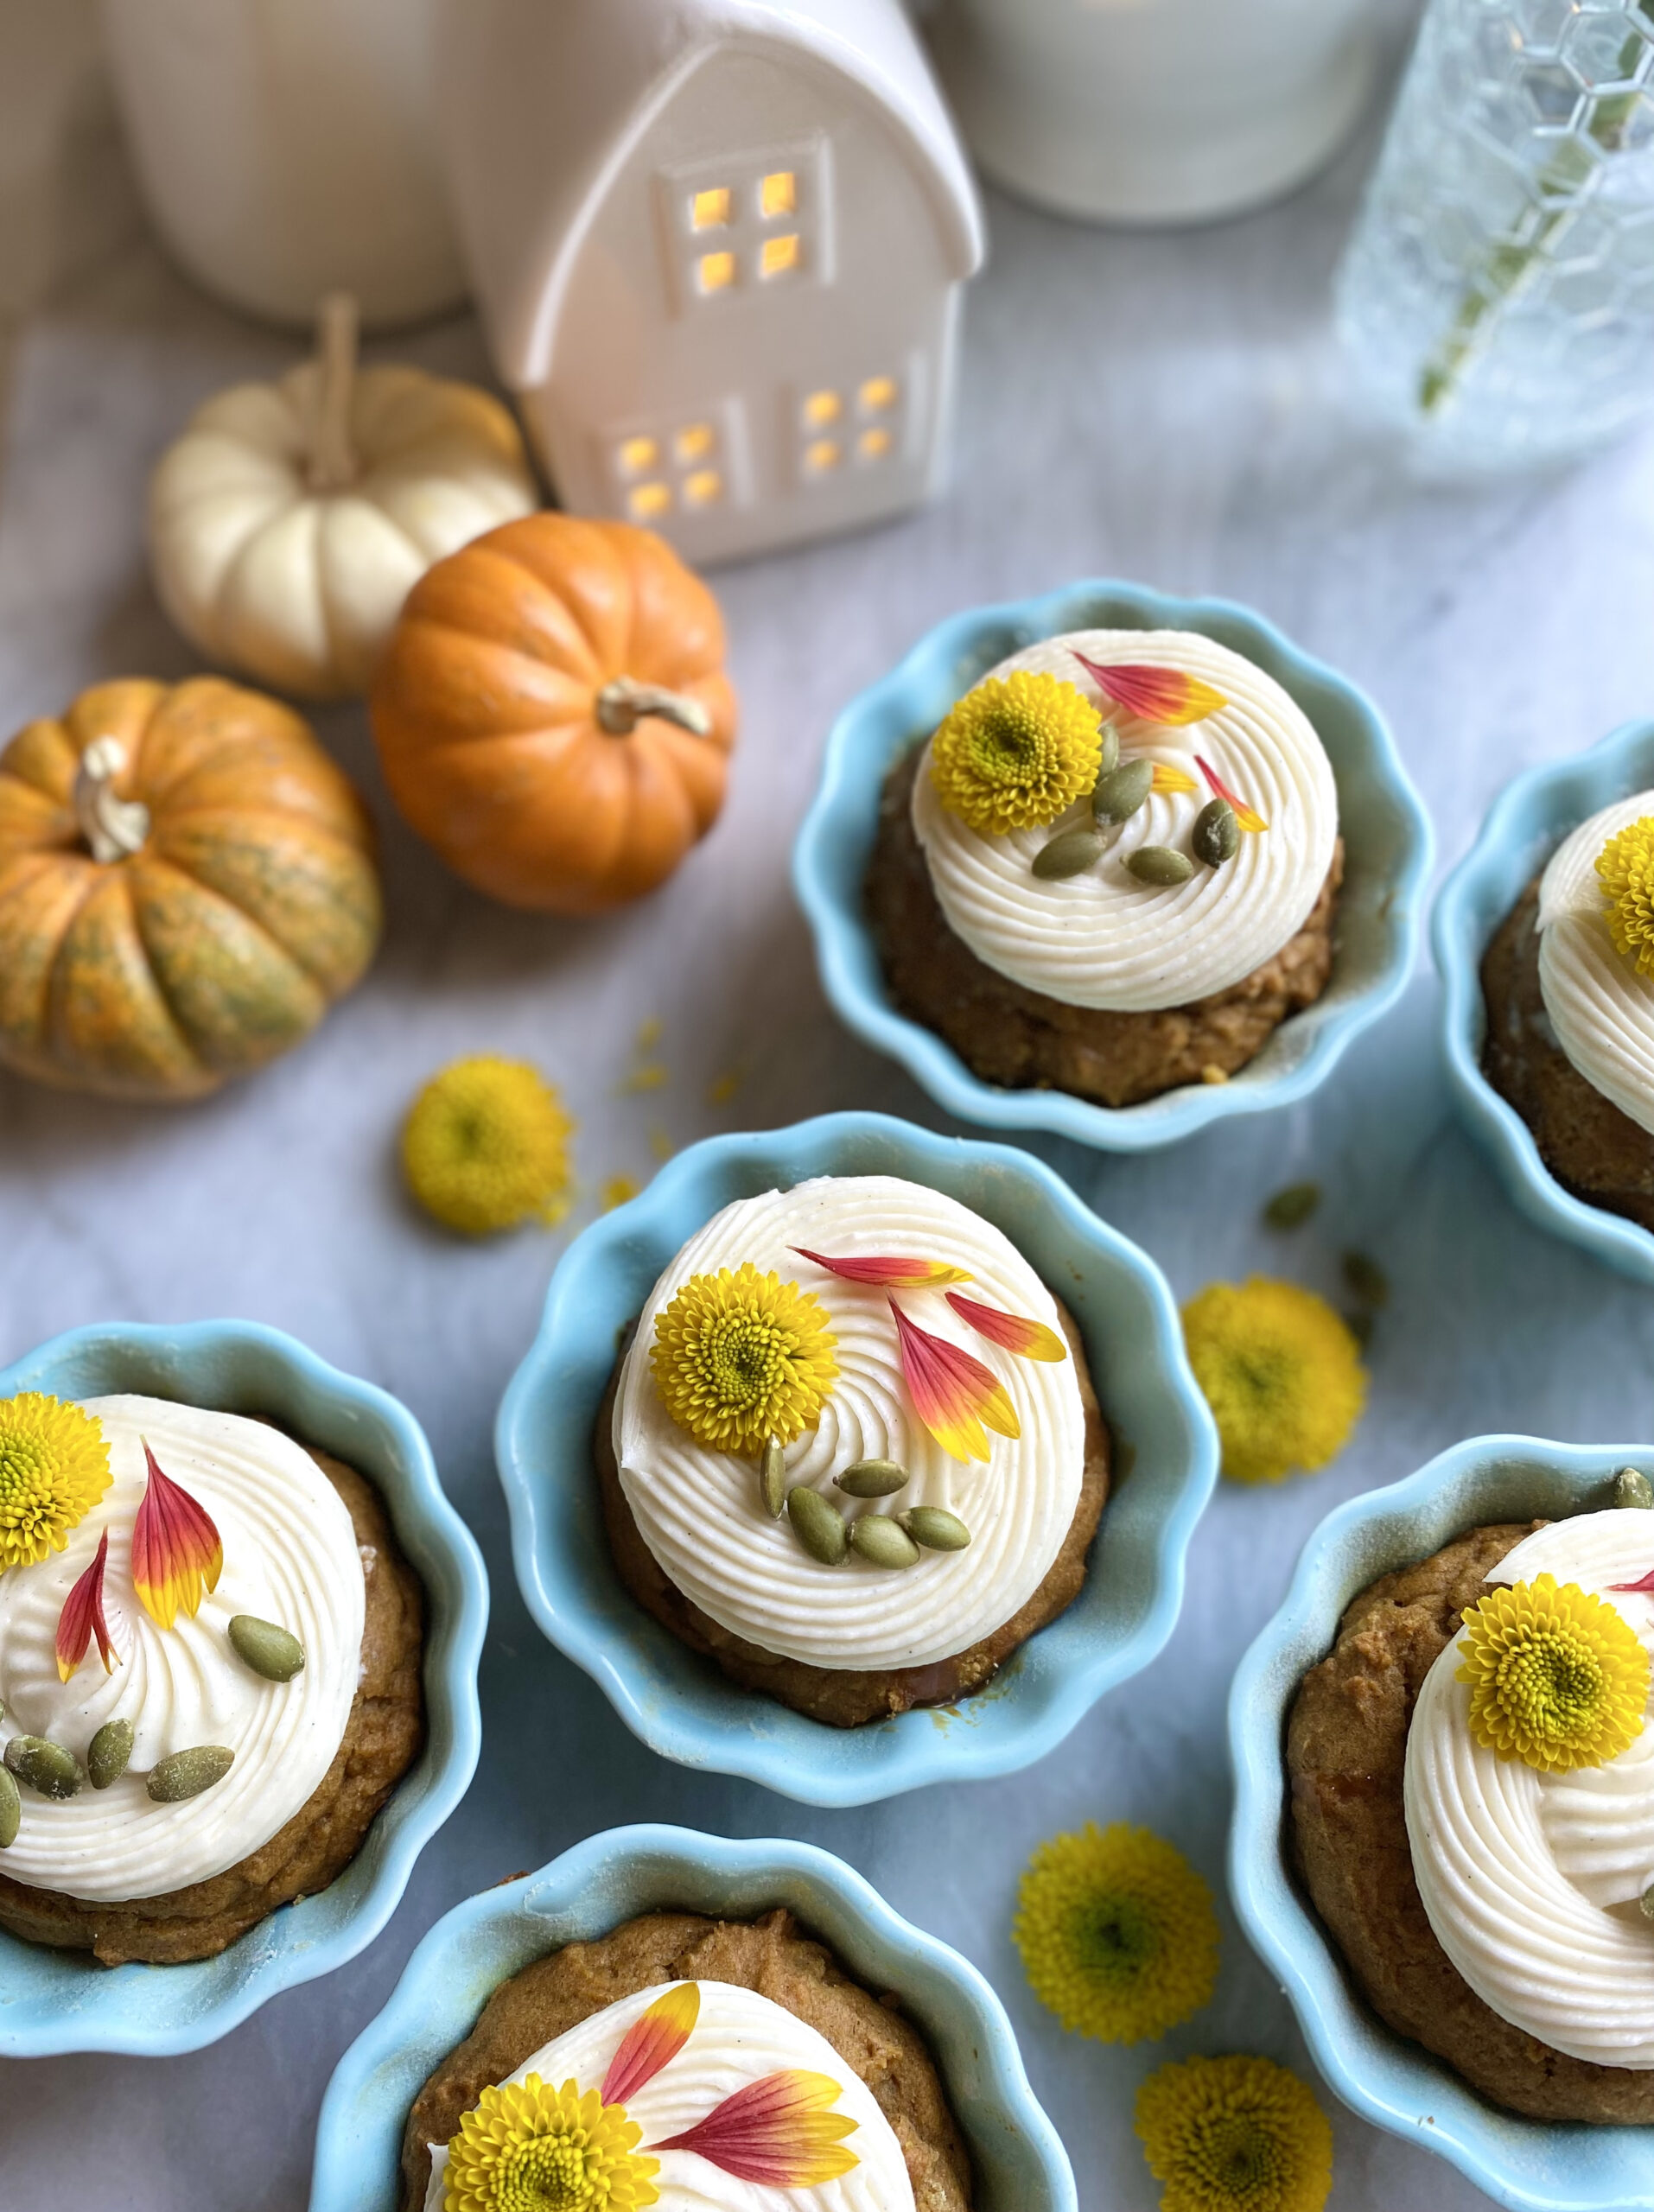
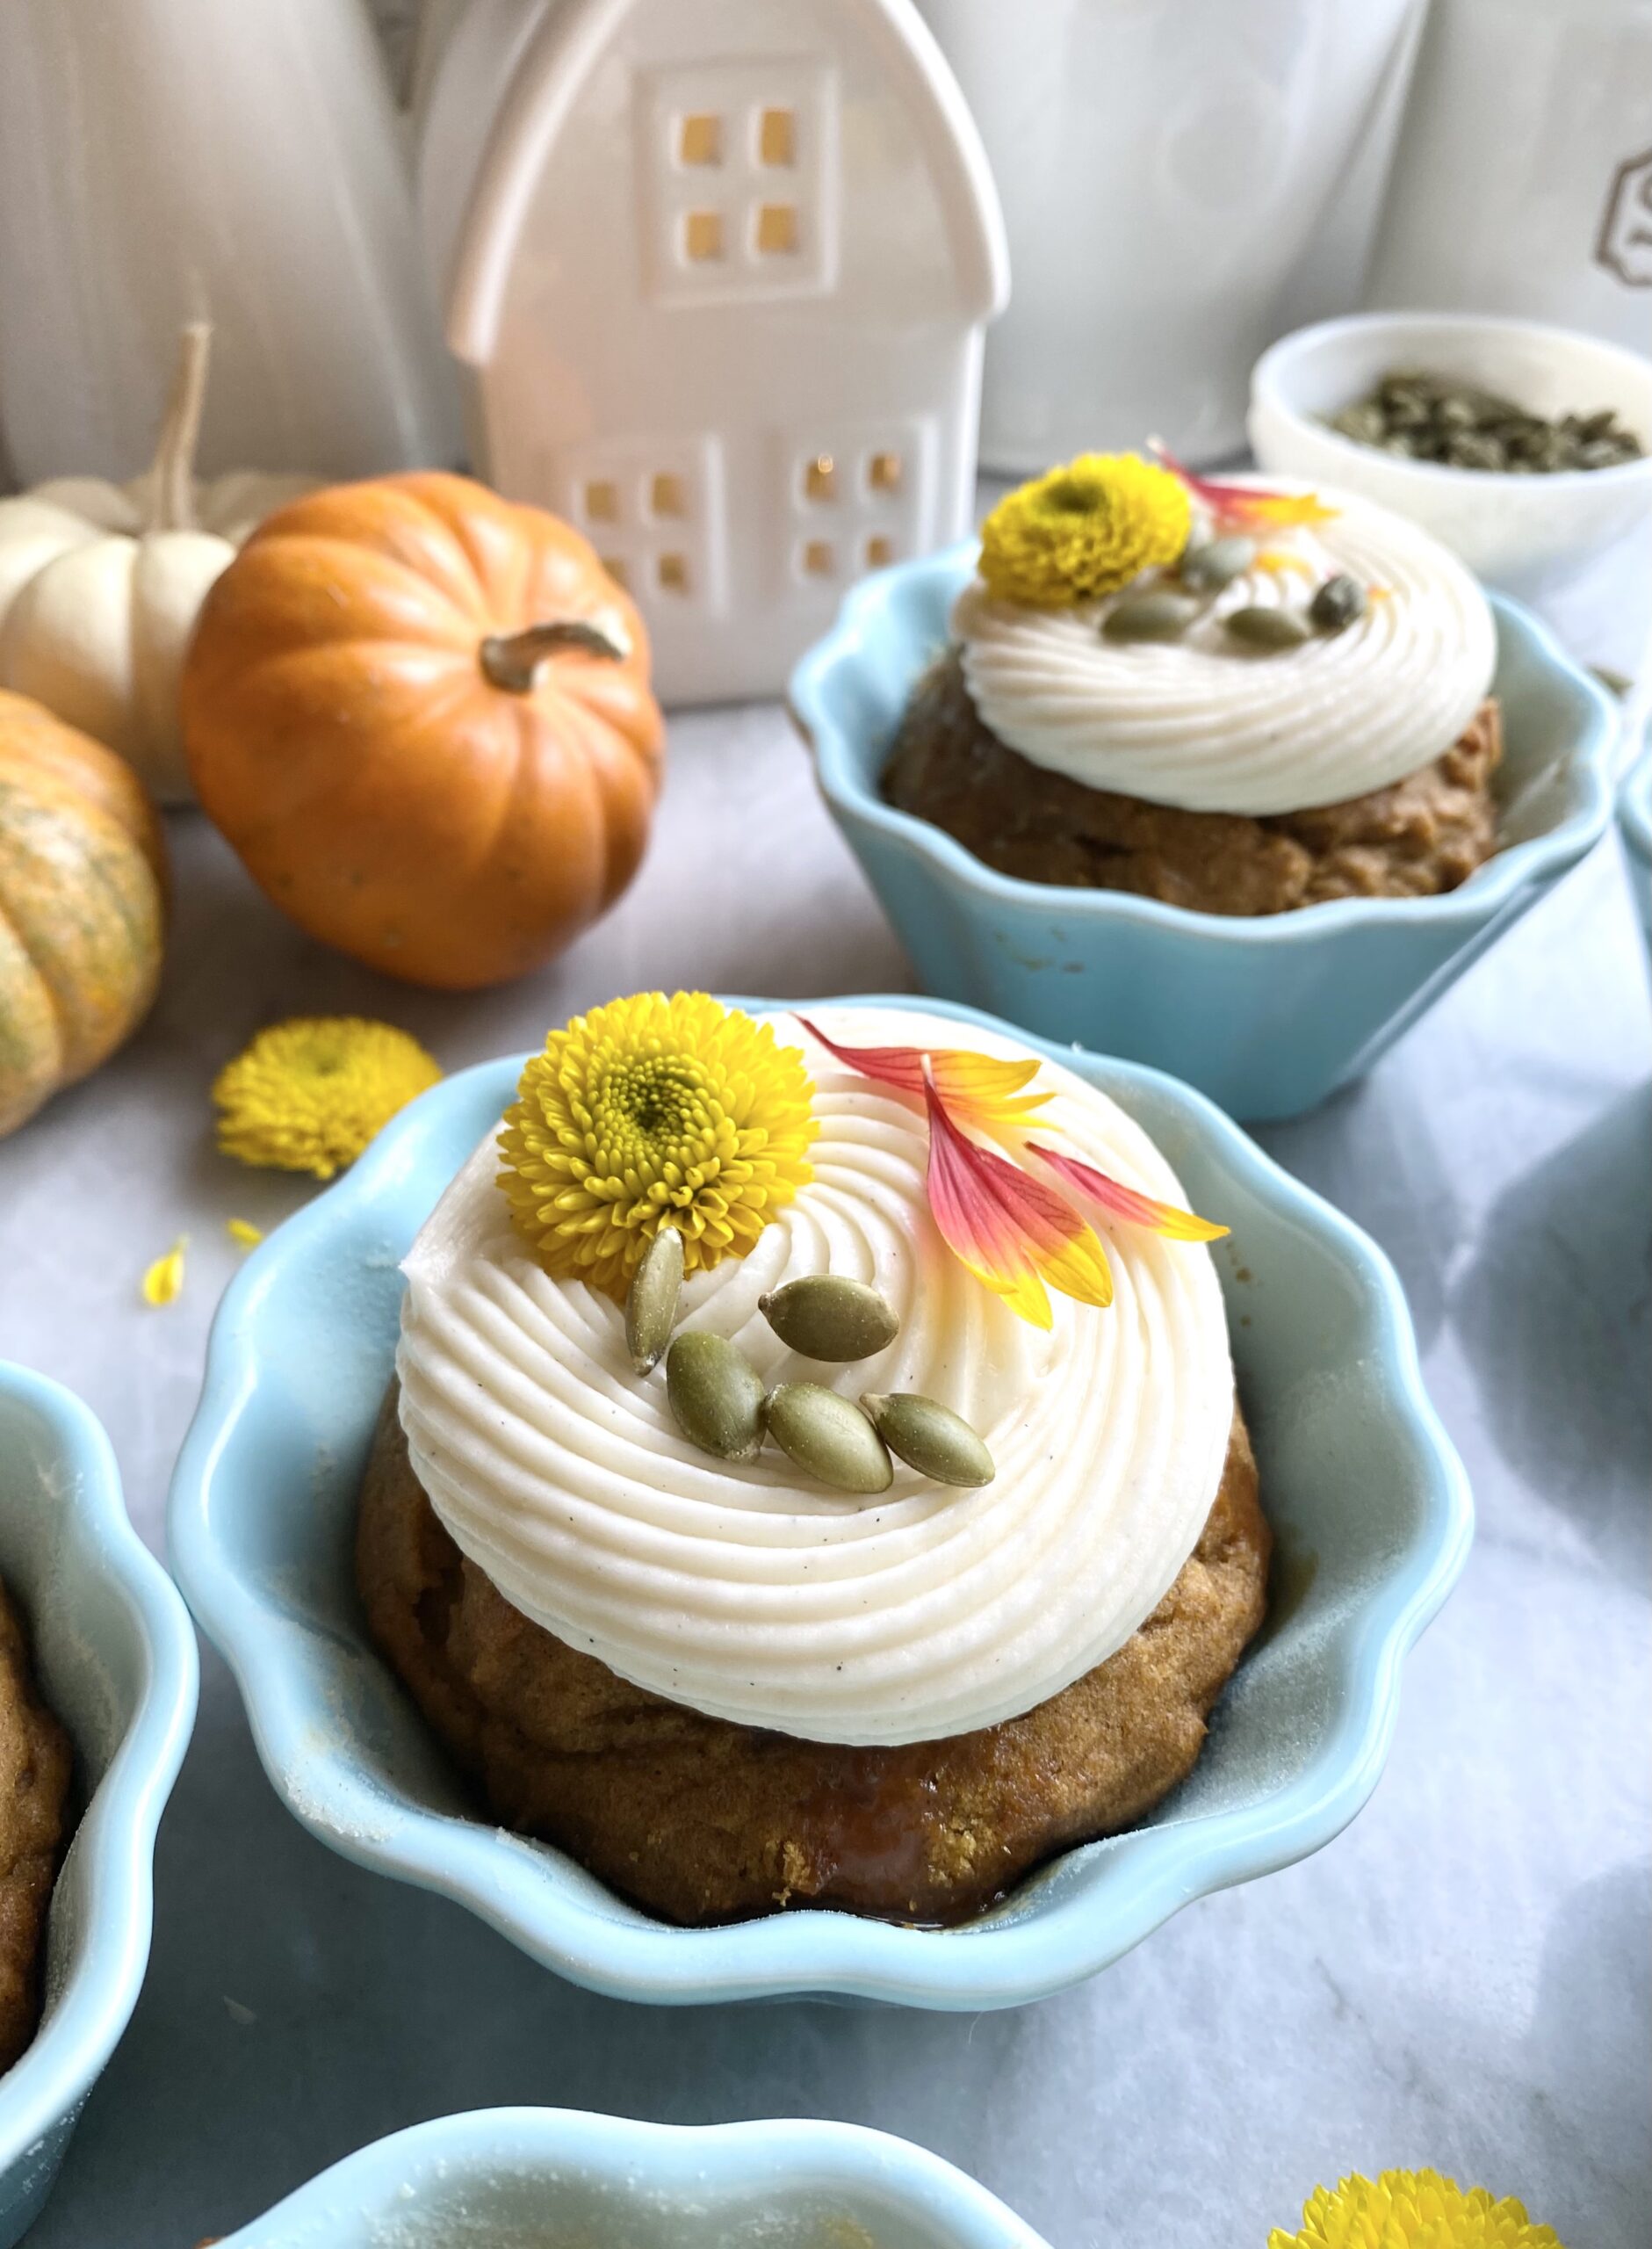
Pumpkin Spice Mini Loaves with Caramel Filling

pumpkin spices mini loaves with caramel filling

In early September, I saw someone announce the fall season on social media. In addition to people pointing out that it was too early for the announcement, the word police corrected the person with the word autumn. Since both terms are correct, we can call the season whatever we prefer. I think autumn is a pretty sounding word, so I’ll use it for the rest of this post. Whatever you call it, these Pumpkin Spice Mini Loaves are a perfect little celebration of the season. They have just the right amount of pumpkin spices, making them so fragrant that your kitchen will smell like cozy autumn heaven.

pumpkin spices mini loaves with caramel filling

I call them loaves because I originally made them in mini loaf pans. They’re so cute and delicious that I often give them as holiday gifts. This year I decided to try them in ramekins and I loved the results! I used 6-ounce ramekins, but you can use 8-ounce ramekins, any size mini loaf pans, a muffin pan or even an 8 or 9-inch loaf pan. Keep in mind that baking times will differ. To find the ramekins I used, click here.

Print Recipe
Pumpkin Spice Mini Loaves with Caramel Filling
Mini loaves of tender pumpkin bread with caramel filling and luscious cream cheese frosting
Servings
mini loaves
Ingredients
Pumpkin Spice Mini Loaves
Cream Cheese Frosting
Servings
mini loaves
Ingredients
Pumpkin Spice Mini Loaves
Cream Cheese Frosting
Instructions
Pumpkin Spice Mini Loaves
  1. Preheat oven to 350ºF. Grease and flour seven 6-ounce ramekins or six 8-ounce ramekins or any loaf pans of your choice.
  2. In a large bowl, sift together flour, cinnamon, baking powder, baking soda, salt, ginger, nutmeg and cloves. Set aside.
  3. In a separate large bowl, cream butter and brown sugar together with an electric mixer until light and fluffy.
  4. Beat in eggs, one at a time, until well combined.
  5. Beat in pumpkin and vanilla until combined.
  6. Stir in flour mixture just until combined.
  7. Divide batter evenly into prepared ramekins. Bake for 20-25 minutes or until golden brown and toothpick inserted in center comes out clean. Do not overbake. (Mini loaves or muffins bake for 15-25 minutes, depending on size. 8 or 9-inch loaf bakes for 40-50 minutes)
  8. Cool completely if serving in ramekins or remove from pans after cooling for 10 minutes. Continue to cool on wire rack.
  9. Make 3/4-inch well in the center of each loaf. Fill with caramel sauce. (For an 8 or 9-inch loaf, poke multiple holes with a skewer. Fill with caramel sauce.)
  10. Top with cream cheese frosting and pumpkin seeds
Cream Cheese Frosting
  1. In a large bowl, beat cream cheese and butter together with an electric mixer until smooth.
  2. Add vanilla extract and salt and beat until combined.
  3. Gradually add powdered sugar and beat at medium speed until combined.
  4. Add heavy cream and beat at low speed until combined.

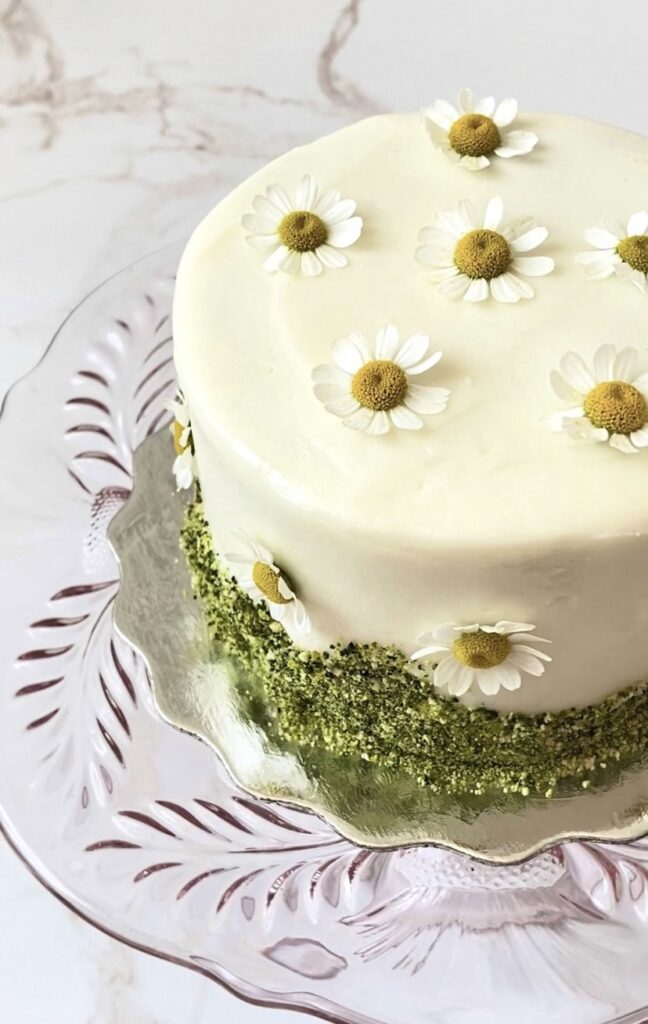
Mini Hummingbird Cake

Mini Hummingbird Cake

If you haven’t noticed already, I love little cakes. Mini cakes are not only cute and charming, they’re likely to make you very popular. This recipe makes two darling Mini Hummingbird Cakes, one to keep and one to share. Hummingbird Cake is a delightful way to use your ripe bananas. The version I’m sharing here also contains pineapple, pecans and coconut. This fruity, nutty combination reminds me of spring and would be perfect for Easter or a spring picnic.

Print Recipe
Mini Hummingbird Cake
Hummingbird Cakes filled with bananas, pineapple, pecans and coconut, topped with cream cheese frosting and decorated with graham cracker crumb moss and fresh chamomile flowers.
Course Dessert
Keyword cake, hummingbird
Servings
4-inch 2-layer cakes
Ingredients
Hummingbird Cakes
Cream Cheese Frosting
Optional Decor
Course Dessert
Keyword cake, hummingbird
Servings
4-inch 2-layer cakes
Ingredients
Hummingbird Cakes
Cream Cheese Frosting
Optional Decor
Instructions
Hummingbird Cakes
  1. Preheat oven to 350ºF. Line the bottoms of four 4-inch cake pans**** with parchment paper. Grease and flour the insides.
  2. In a medium bowl, whisk together flour, baking soda, salt and cinnamon. Set aside.
  3. In a large bowl, beat butter, sugar and brown sugar, with an electric mixer, until light and fluffy.
  4. Beat in egg, egg yolk, and vanilla in three separate additions, making sure each one is incorporated before adding the next.
  5. Stir in bananas, pineapple, pecans and coconut until well combined
  6. Transfer batter to prepared cake pans, about 1 cup of batter in each pan. Place filled cake pans on a baking sheet.
  7. Bake until toothpick inserted in centers comes out clean, about 25-28 minutes. Cool cakes in pans 10 minutes then turn cakes out onto a cooling rack to cool.
  8. Trim cakes to 1-inch thickness. Fill, stack and frost cakes with cream cheese frosting.
Cream Cheese Frosting
  1. In a large bowl, beat butter with an electric mixer until smooth and pale.
  2. Beat 1 tablespoon heavy cream, vanilla and salt into butter until well combined.
  3. On low speed, beat in powdered sugar a half cup at a time, until well combined.
  4. In a medium bowl, mix cream cheese with remaining 1 tablespoon heavy cream until smooth.
  5. On low speed, beat cream cheese mixture into butter mixture until smooth and well combined.
Decor
  1. To make graham cracker crumb moss: In two small bowls, dilute 1/8 teaspoon of each gel food color with a few drops of vodka. (Vodka will dissipate as crumbs dry.) Place graham cracker crumbs in a plastic zip bag. Add diluted food colors a little at a time and seal bag. Shake bag and gently massage to distribute color. Add more diluted food color as needed until desired shade of green is reached. Spread crumbs out onto a parchment lined baking sheet to dry. Apply crumbs to bottom edges of frosted cakes.
Recipe Notes

*Chop the coconut flakes to achieve a finer texture. This step is optional.

**To find the avocado green food color gel I used, click here.

***To find the lemon yellow food color gel I used, click here.

****To find the 4-inch cake pans I used, click here.

Strawberry Shortcake Crumble Muffins

strawberrry shortcake crumble muffins

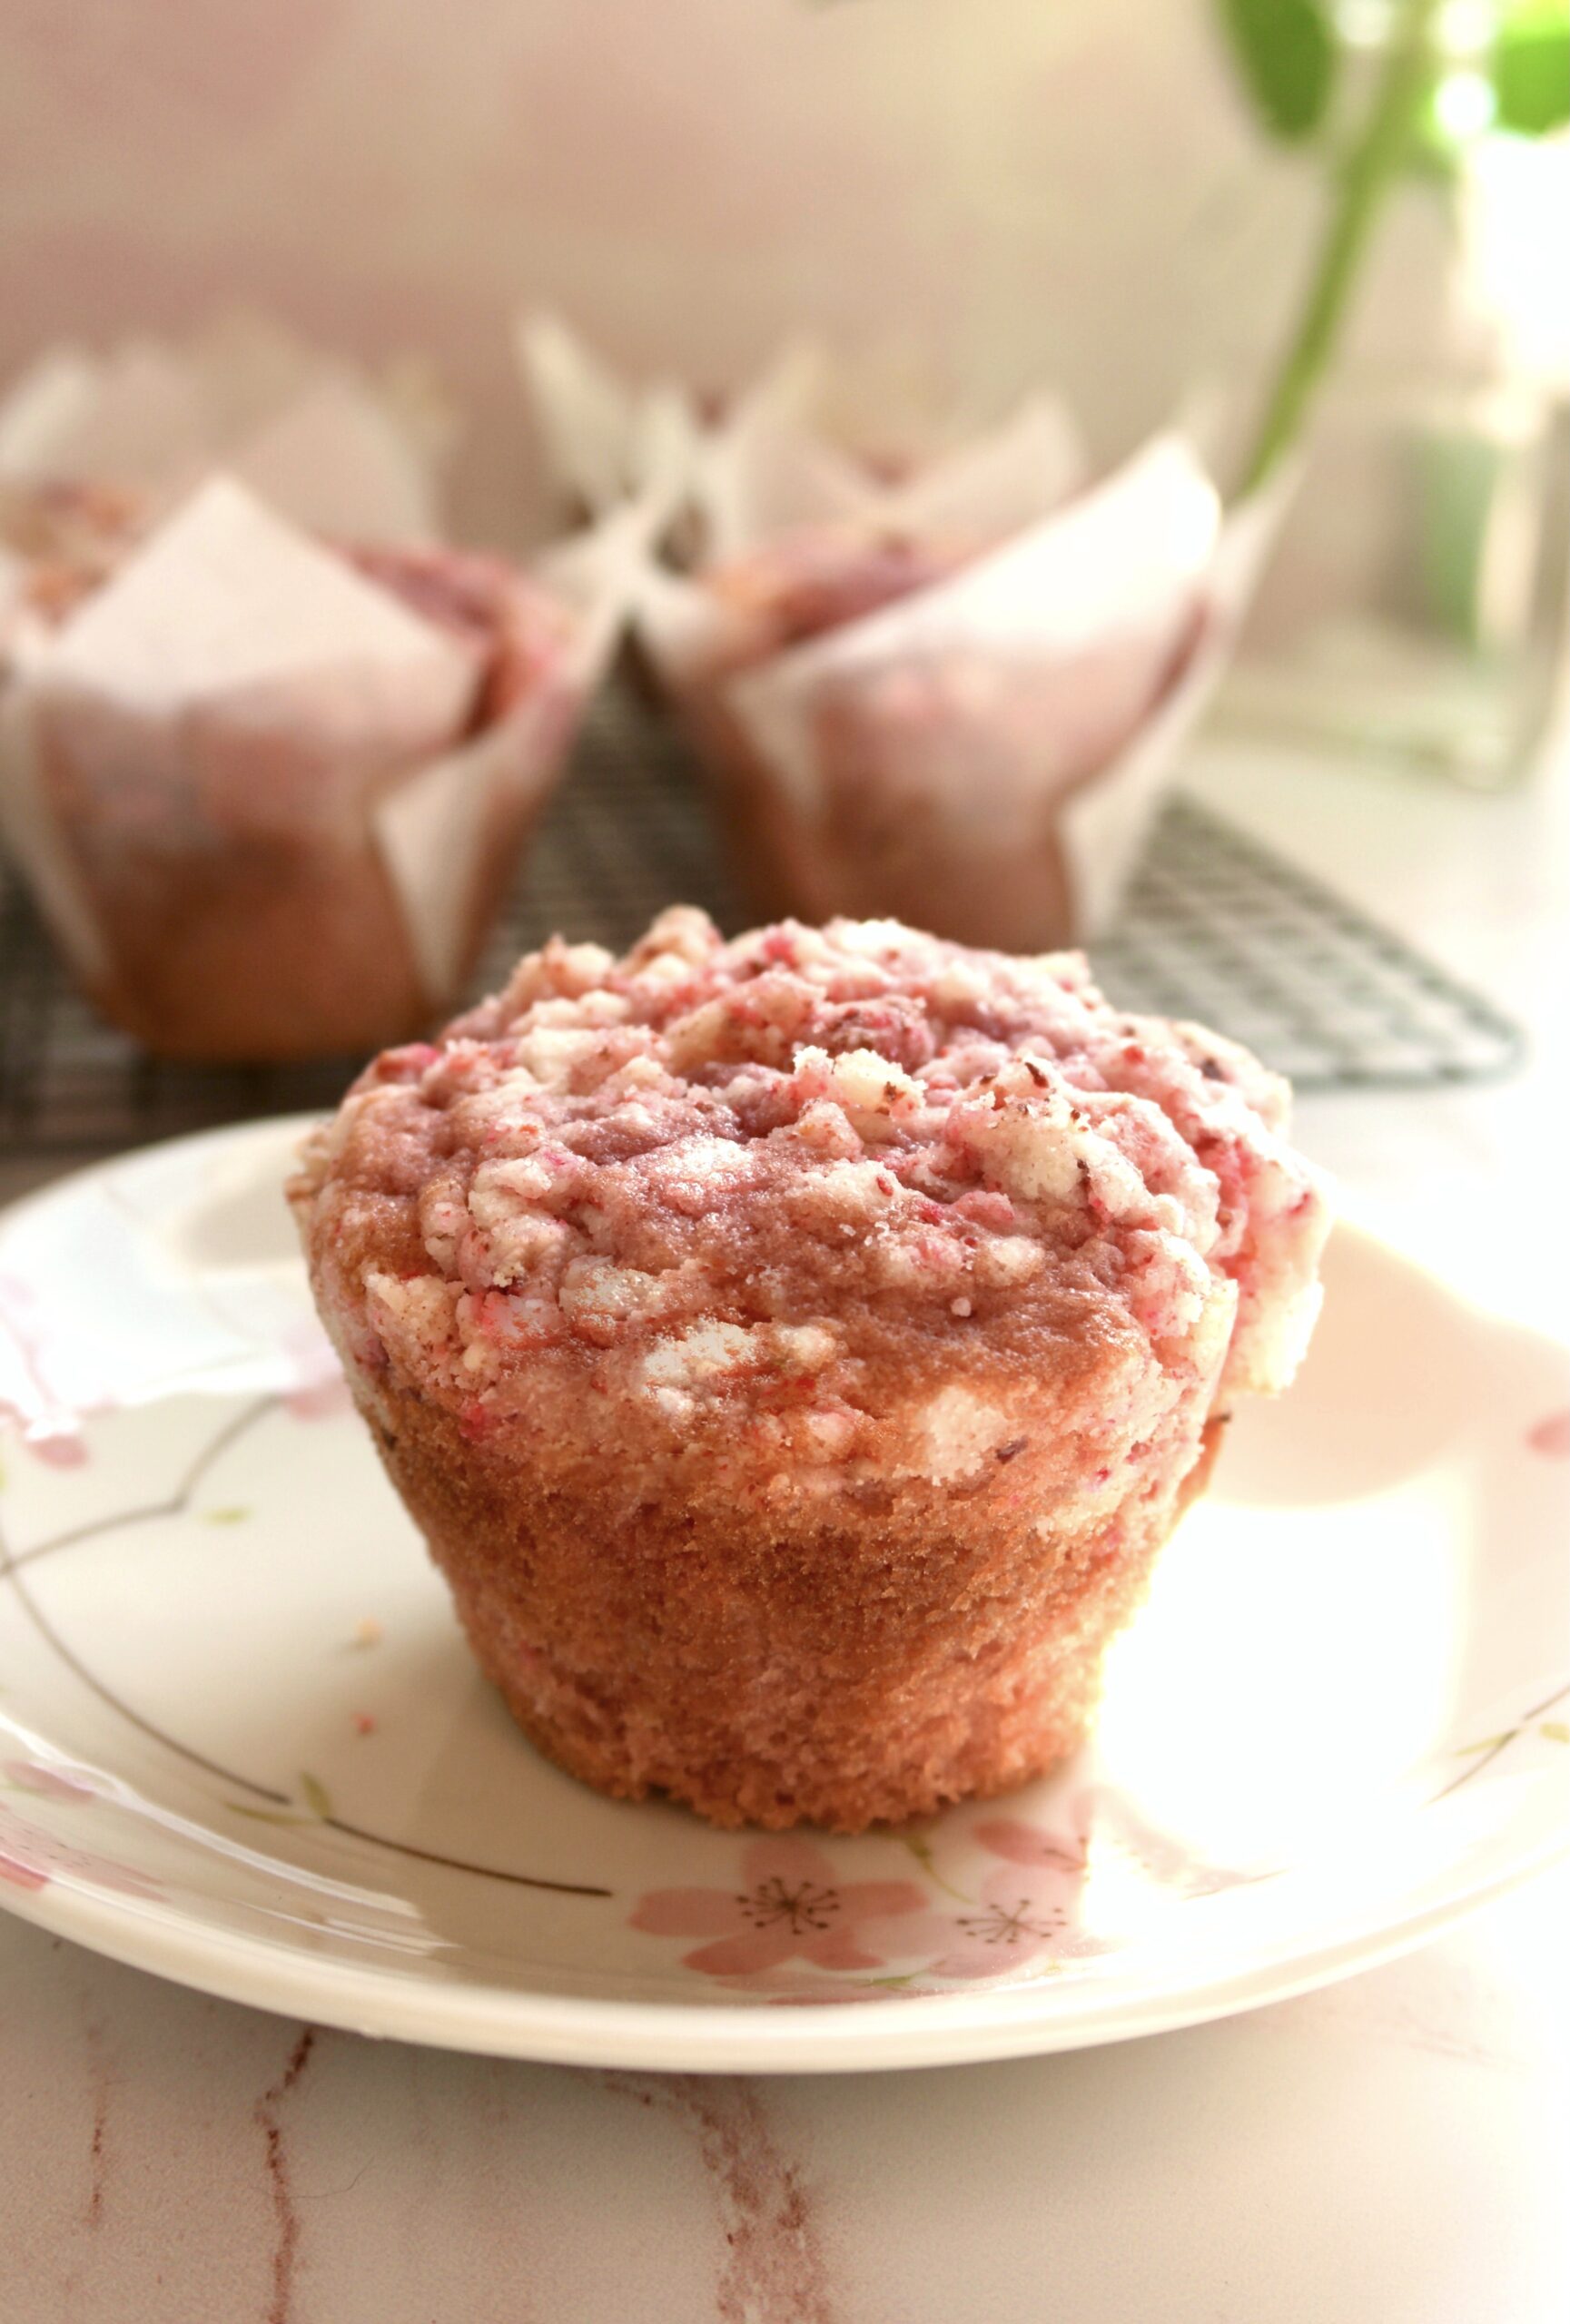
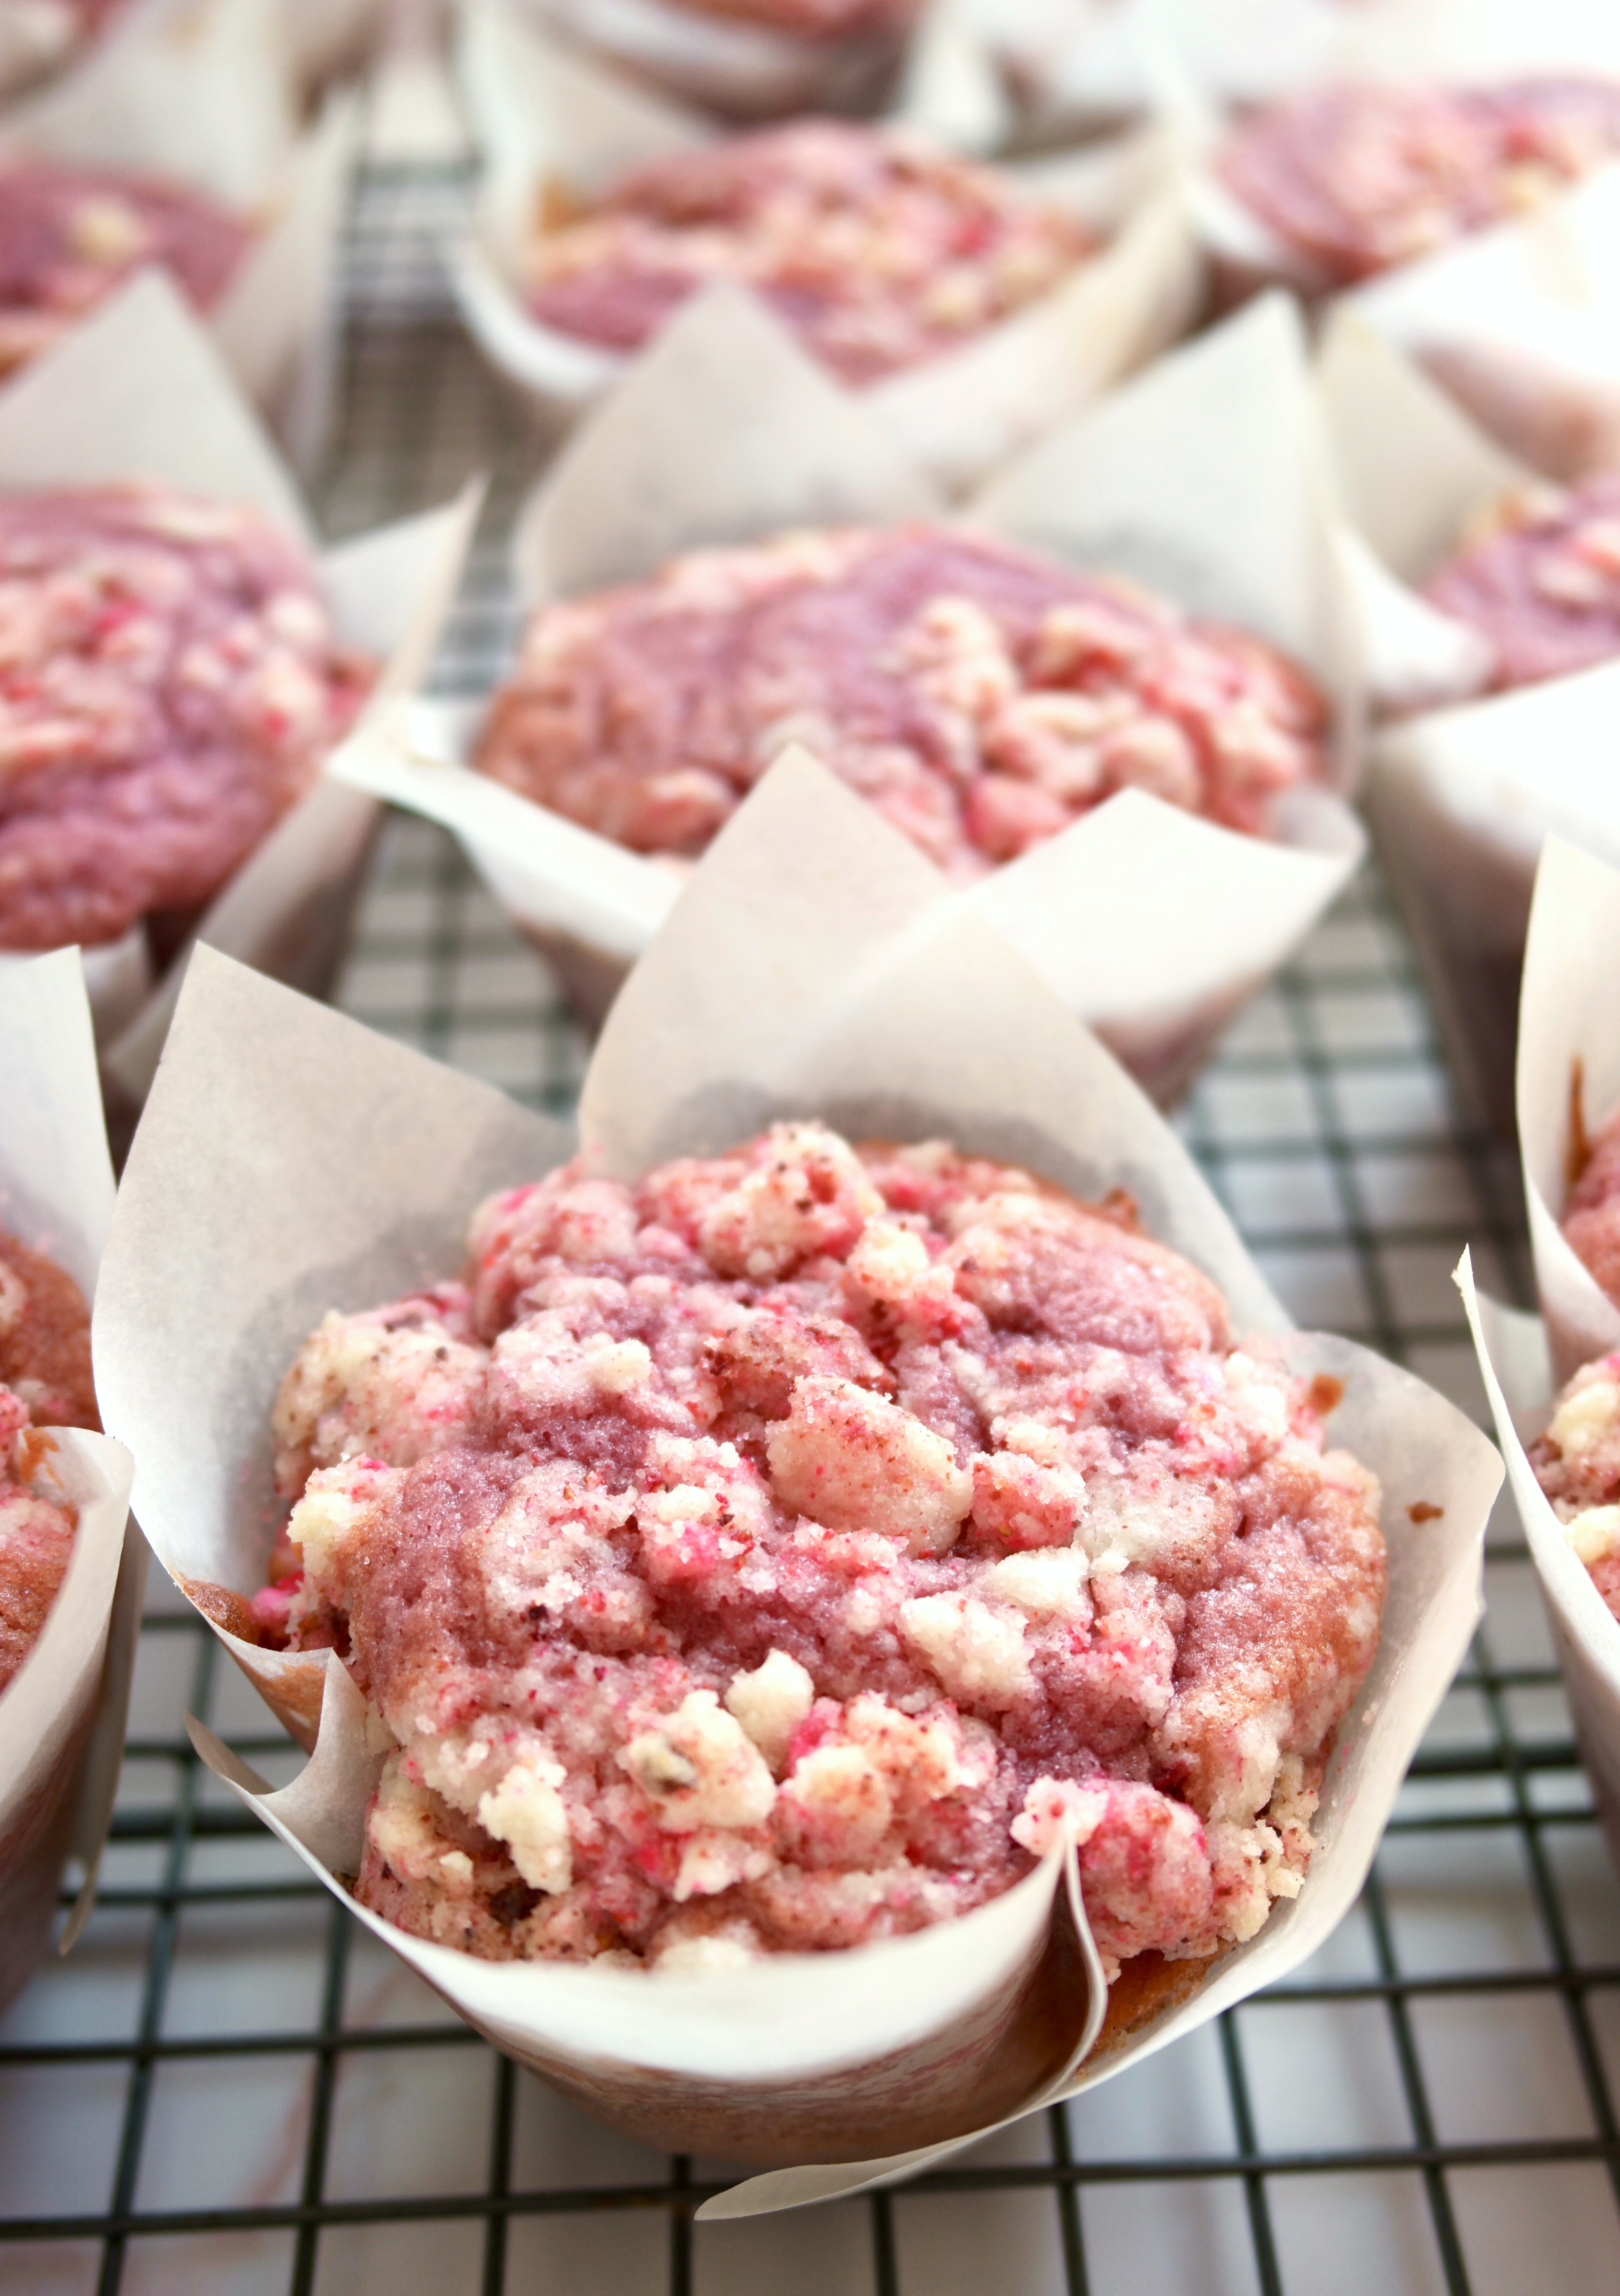
Have you noticed the strawberry shortcake crumble topping trend? I noticed many people sharing various versions of the crumble recipe all over Tiktok. I’ve seen the topping on cake, cupcakes and countless other desserts. Most people seem to make it using strawberry gelatin mix and vanilla pudding mix. The version I’m sharing here uses freeze dried strawberries instead. I’m not opposed to using gelatin mix, I just seriously love the tart, natural flavor of freeze dried strawberries.

This topping is irresistible on these tender strawberry muffins. I wanted to pile on as much crumble topping as possible so I used tulip baking cups. They’re made of grease-proof parchment paper squares. You can buy them online or make them yourself with squares of parchment. You can use the link provided at the end of the recipe to find the ones I used. Keep in mind, if you use standard muffin liners, you’ll use less batter and topping for each muffin, so you’ll end up with a few more muffins.

I used fresh strawberries for the puree in the muffins, but feel free to use frozen, defrosted strawberries if you cant get fresh ones.

Strawberry shortcake crumble muffins

Print Recipe
Strawberry Shortcake Crumble Muffins
Strawberry muffins topped with strawberry shortcake crumble
Servings
muffins
Ingredients
Strawberry Shortcake Crumble Topping
Strawberry Muffins
Servings
muffins
Ingredients
Strawberry Shortcake Crumble Topping
Strawberry Muffins
Instructions
Strawberry Shortcake Crumble Topping
  1. In a medium bowl, combine flour, sugar and salt.
  2. Cut cubed butter into the flour mixture with a pastry blender or with your fingers until it forms pea size pieces.
  3. Place half of crumble mixture into another medium bowl and combine with freeze dried strawberries. Mix well and press together with your fingers to form pea sized pieces.
  4. Gently combine the two bowls of crumble together. Set aside in refrigerator while preparing muffin batter.
Strawberry Muffins
  1. Preheat oven to 375ºF. Line a 12 serving muffin tin with tulip baking liners or parchment squares.
  2. In a medium bowl, combine flour, baking powder, baking soda and salt. Set aside.
  3. In a large bowl, beat butter with an electric mixer on medium speed until smooth. Add sugar and beat until light and fluffy.
  4. Add eggs and extract. Beat until well combined.
  5. Add dry ingredients and beat on low speed, just until combined.
  6. Add buttermilk, strawberry puree and food color. Beat on low speed, just until combined.
  7. Divide batter evenly into muffin liners.
  8. Sprinkle crumble topping evenly over batter.
  9. Bake at 375ºF for 5 minutes, then turn oven temperature down to 350ºF and continue baking until topping is golden and a toothpick inserted in center is clean, about 13-17 more minutes.
Recipe Notes

To find tulip baking cups, click here

To find floral tulip baking cups, as seen on TikTok, click here


Marshmallow Mudslide Cookies

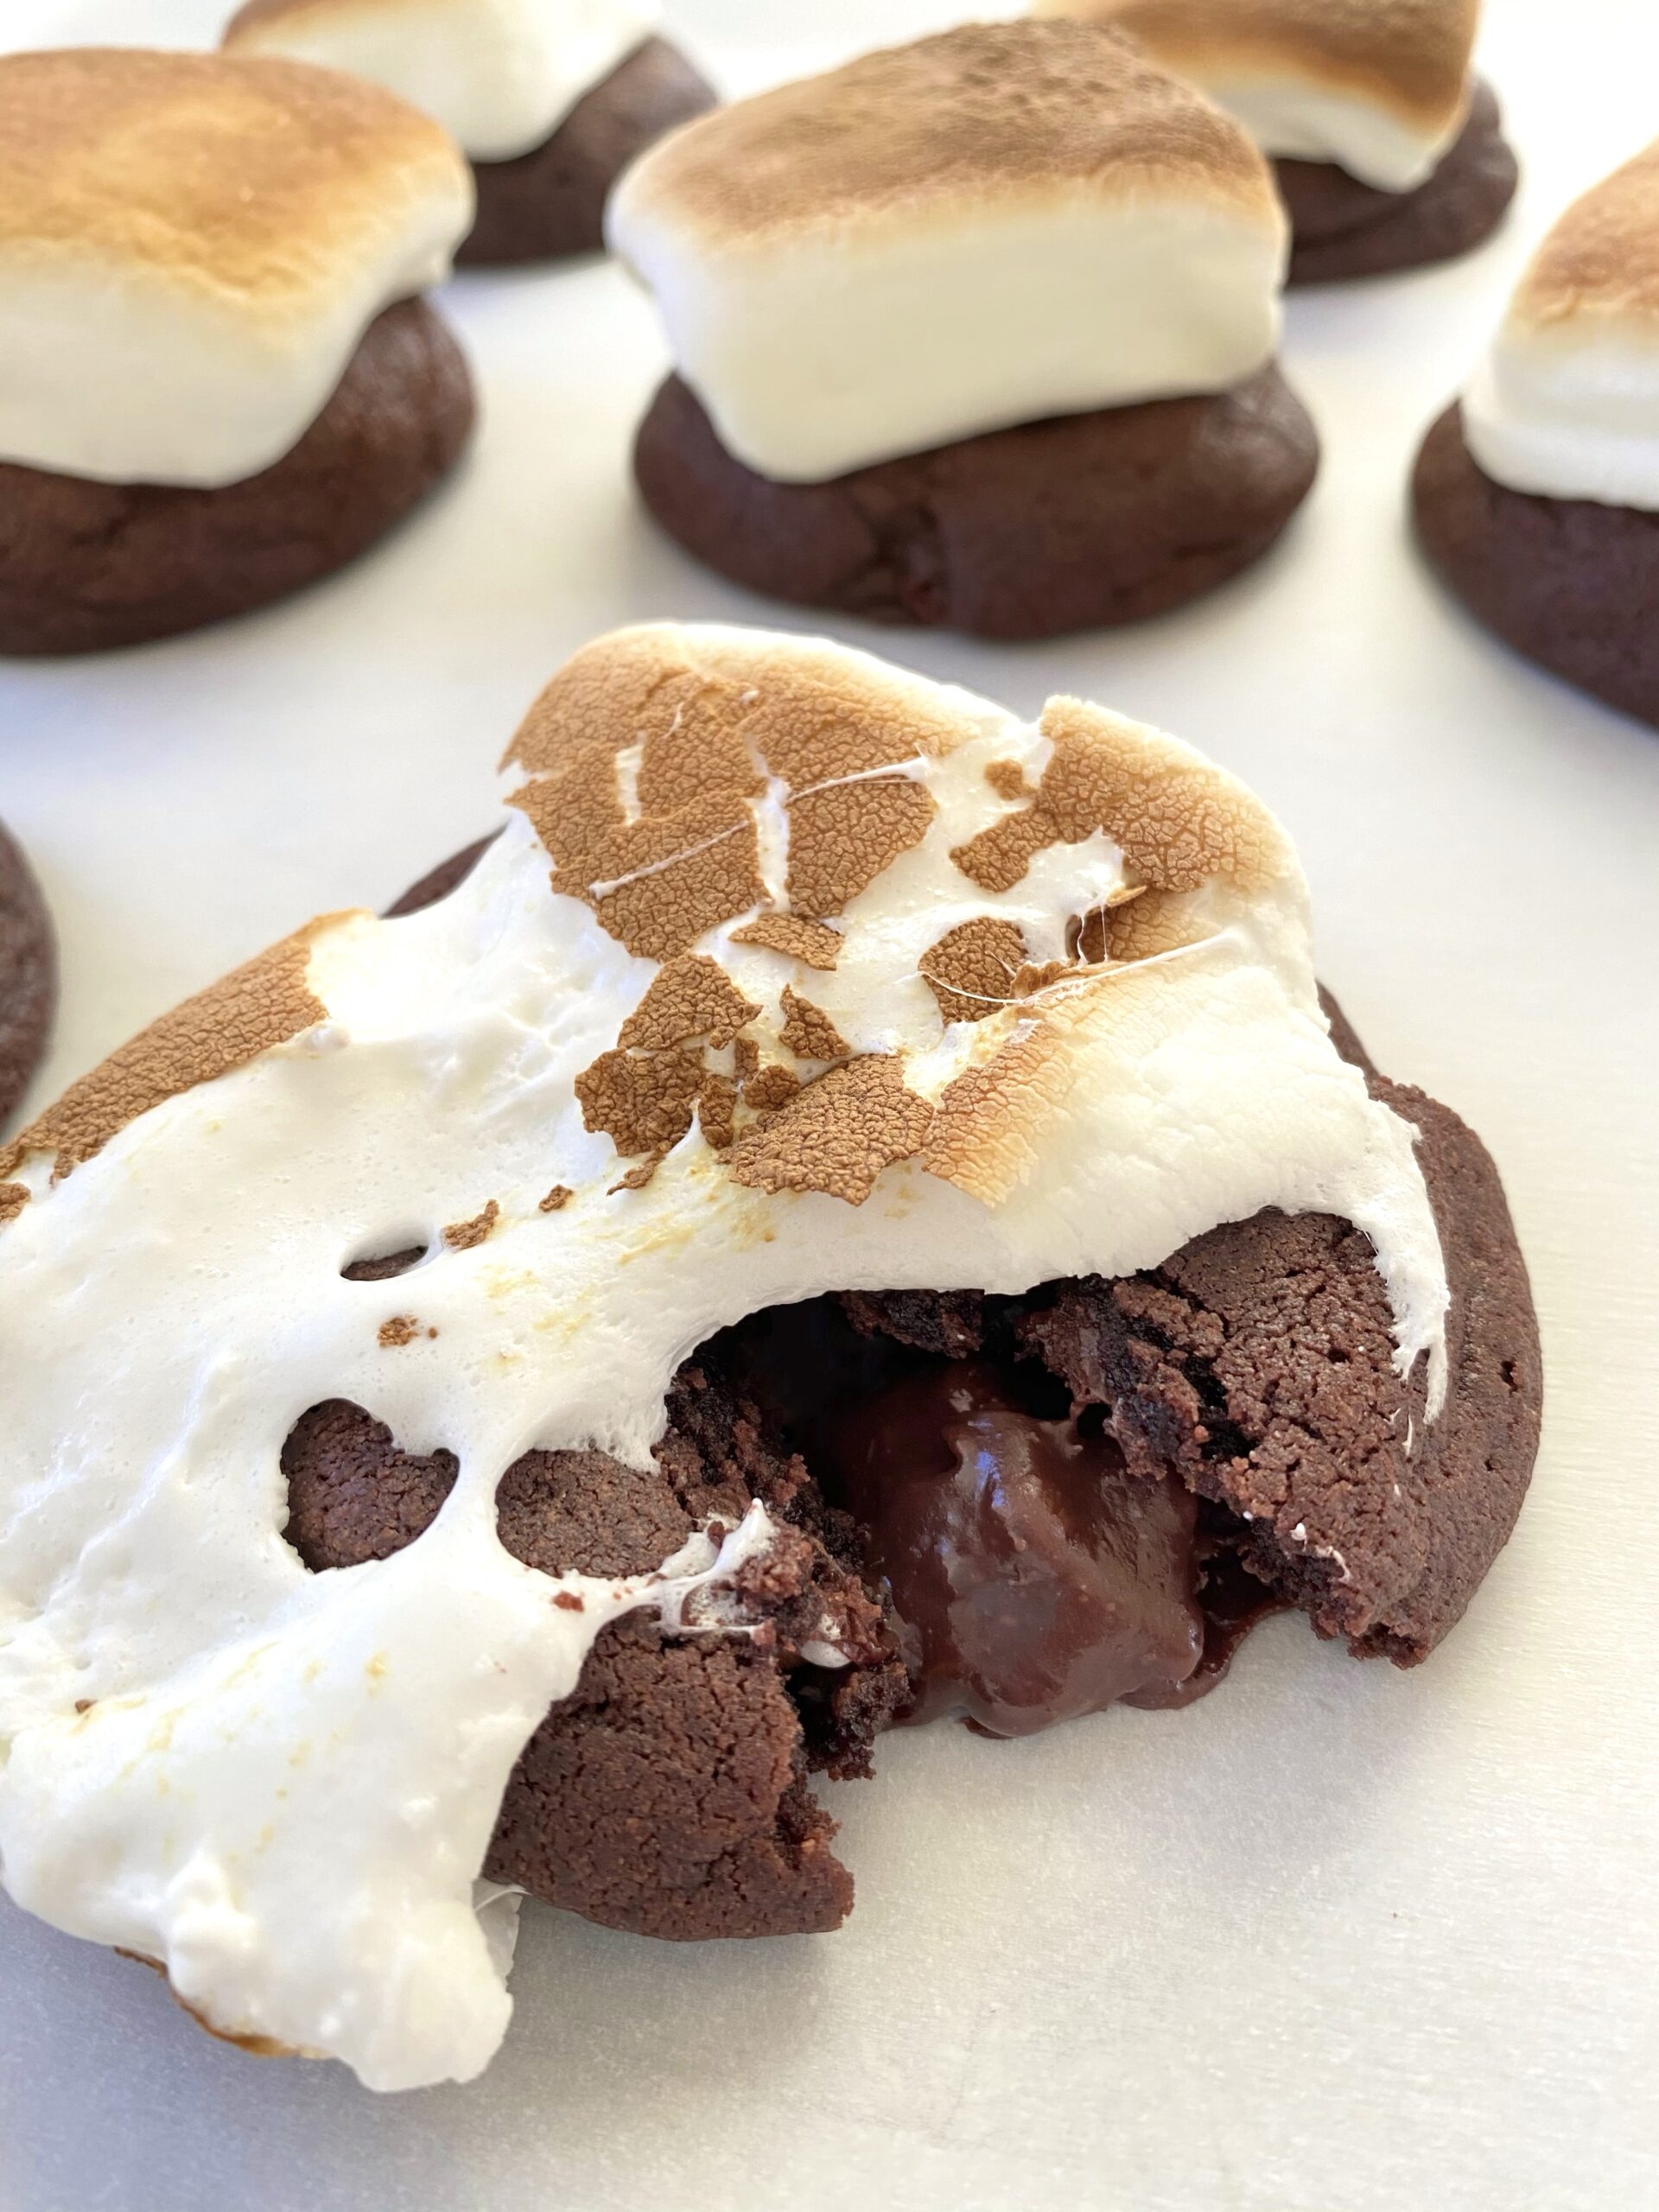
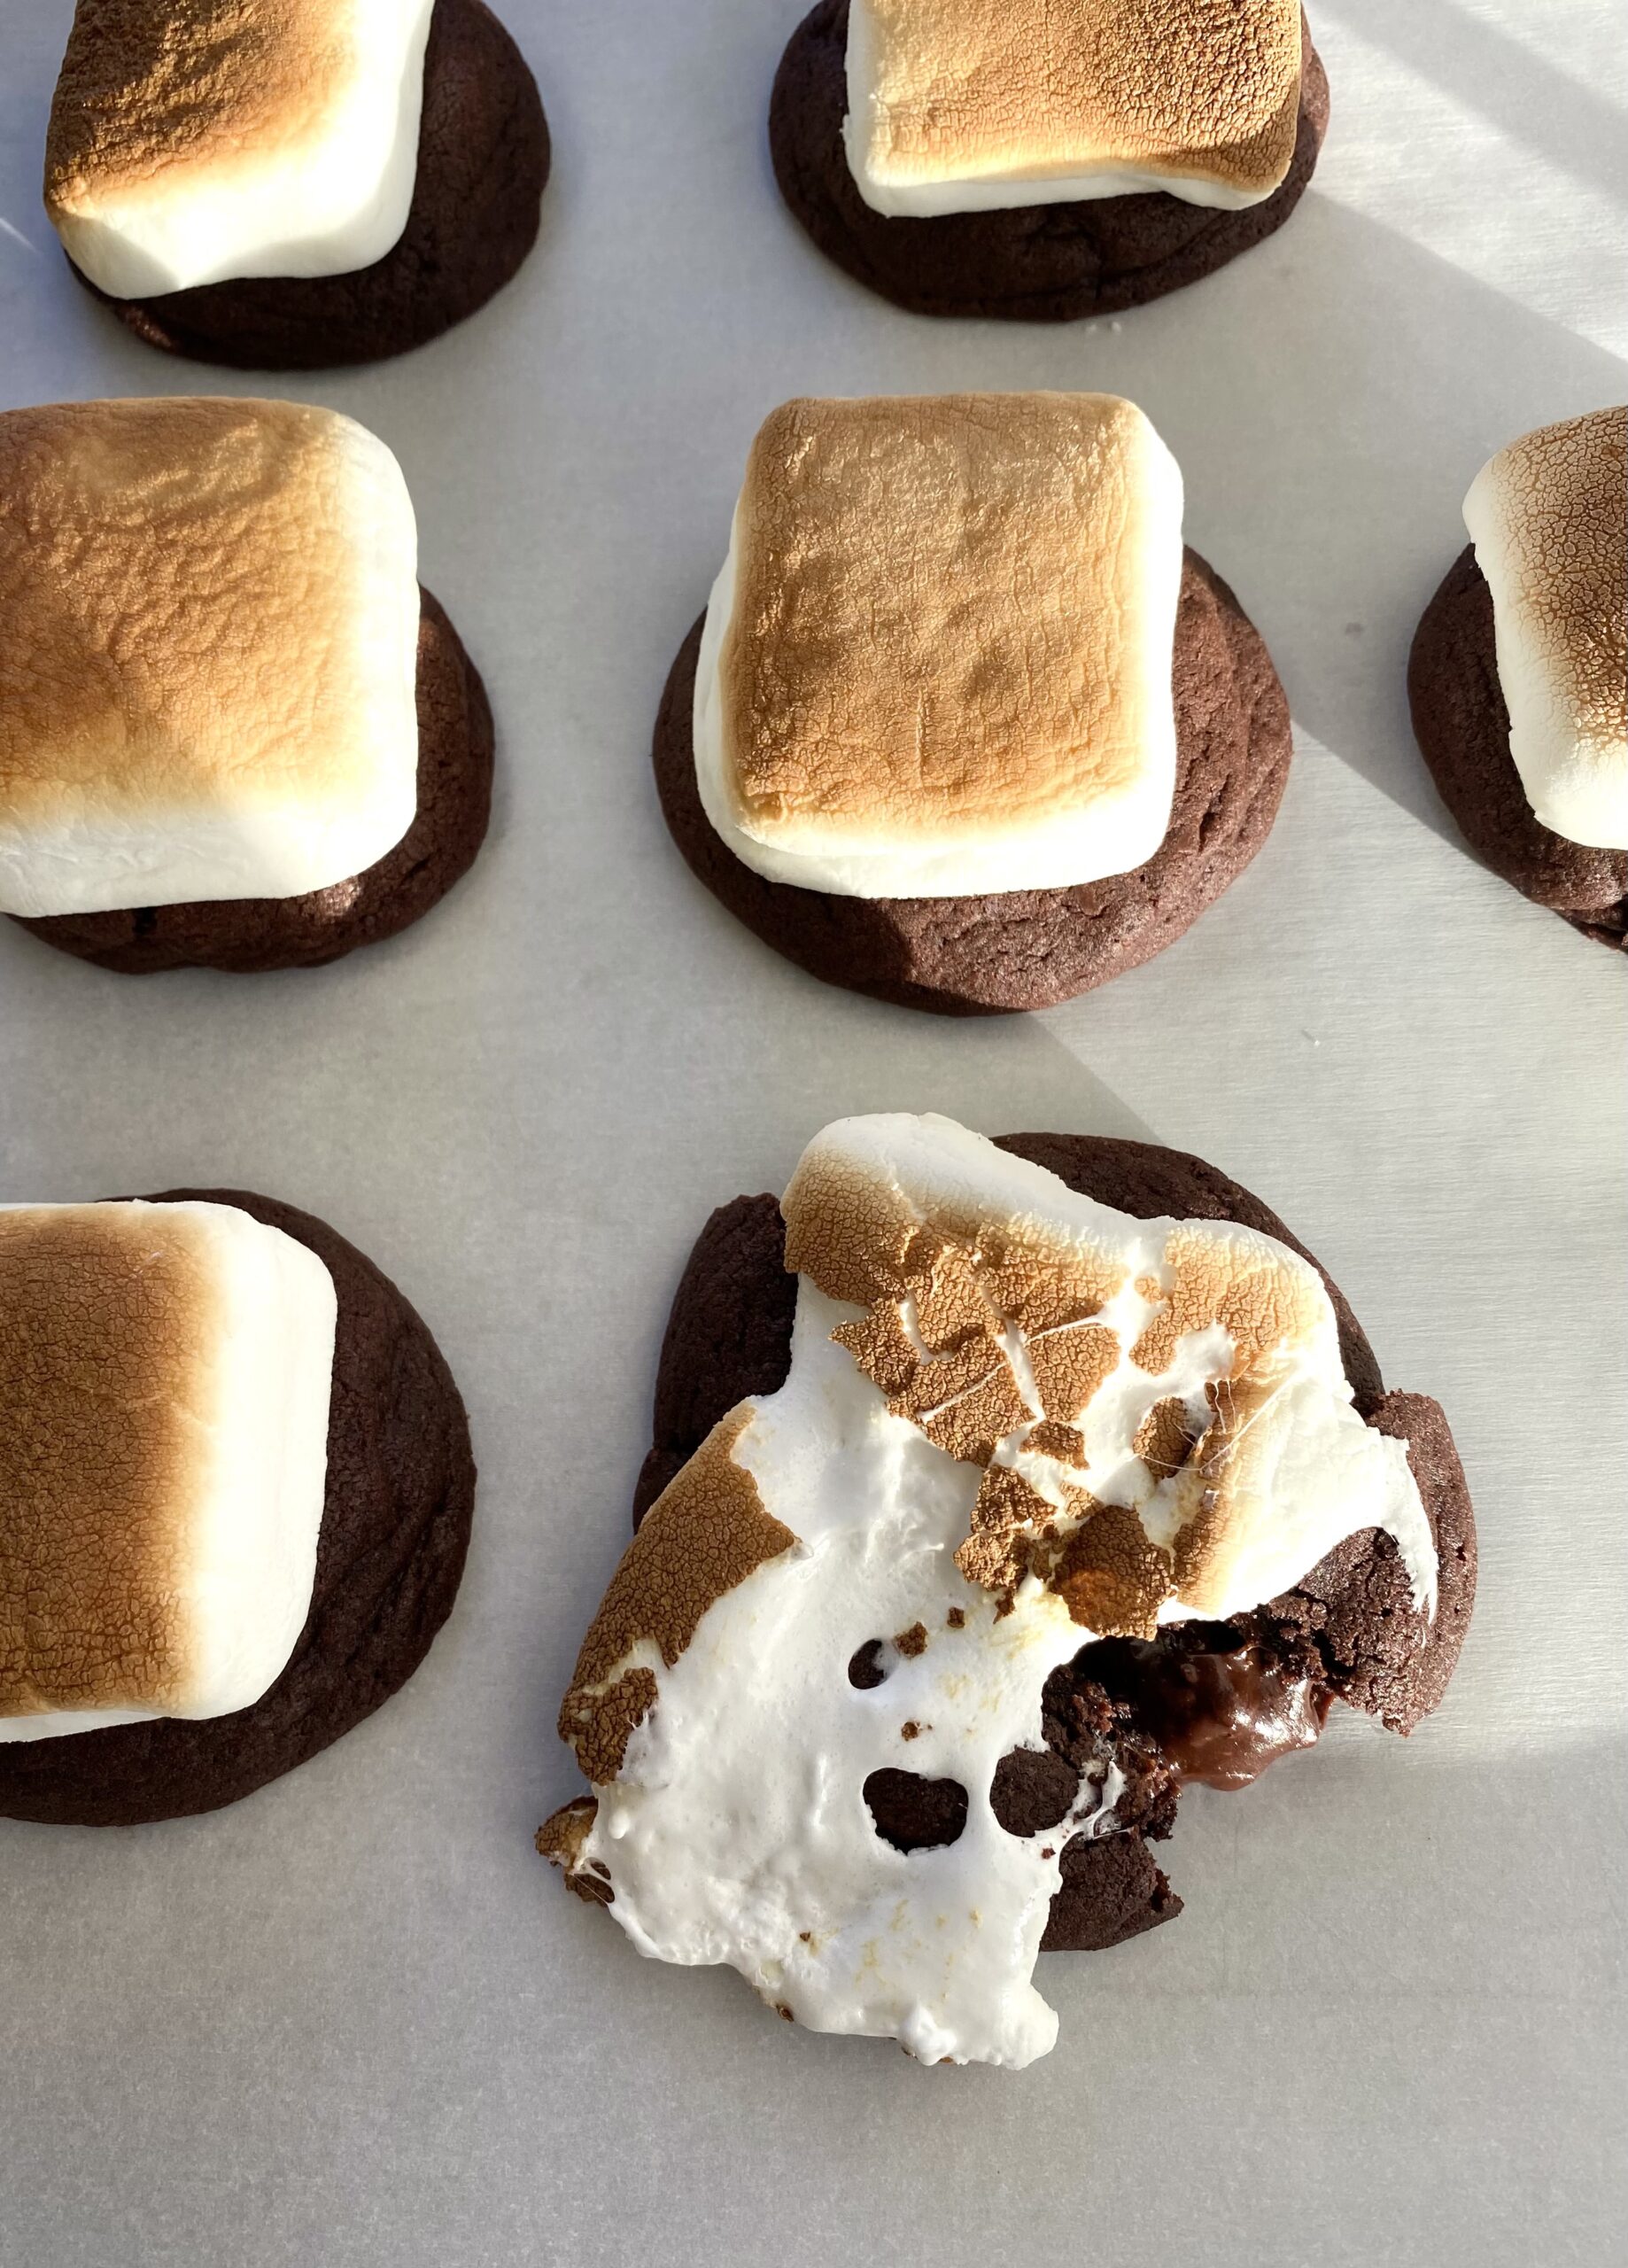
marshmallow mudslide cookies

Have you ever had mudslide cake? It’s a deliciously messy chocolate cake with chocolate frosting and marshmallows, also known as Mississippi mud cake. I saw one covered in a layer of marshmallow fluff and it made its way into my dreams. I woke up with the inspiration to make a cookie version of the gooey mudslide cake.

I saw a few mudslide cookie recipes out there that used standard size marshmallows and chocolate chips mixed into the cookie dough. If you’ve ever baked with marshmallows, you know that they nearly disappear during the baking process. Chocolate chips melt beautifully into little pools of chocolate, but then harden once cooled to room temperature. I happily volunteered to address these challenges! After some trial and error, I created a satisfying cookie with plenty of gooey marshmallow goodness and a rich fudge filling that stays soft at room temperature. Dreams do come true!

marshmallow mudslide cookies

Print Recipe
Marshmallow Mudslide Cookies
Chocolate fudge-filled cookies topped with toasted marshmallows
Course Dessert
Keyword chocolate, cookies
Servings
cookies
Ingredients
Fudge filling
Cookies
Course Dessert
Keyword chocolate, cookies
Servings
cookies
Ingredients
Fudge filling
Cookies
Instructions
Fudge filling
  1. Melt chocolate chips and sweetened condensed milk together in a double boiler or in the **microwave in a medium microwave safe bowl.
  2. Stir in chopped nuts. Set aside to cool to room temperature.
Cookies
  1. Heat oven to 350º.
  2. In a medium bowl, sift together flour, cocoa powder, baking powder, baking soda, and salt. Set aside.
  3. In a large bowl, cream butter with an electric mixer.
  4. Add granulated sugar and brown sugar and mix on medium speed until light and fluffy.
  5. Add eggs one at a time and mix until well combined.
  6. Add vanilla and mix until combined.
  7. Add dry ingredients in two increments, mixing just until combined.
  8. Roll fudge filling into tablespoon sized balls
  9. Roll cookie dough into 1/8 cup balls then flatten into a disc with your fingers and place a ball of fudge filling in the middle of each disc. Wrap the cookie dough around the ball of filling, sealing it completely.
  10. Place cookies about 2 inches apart on large baking sheets.
  11. Bake for 10 minutes. Remove from oven.
  12. Turn on broiler.
  13. Place a marshmallow on top of each cookie.
  14. Broil cookies until marshmallows are toasted. This takes about 1 minute. CAUTION Watch cookies carefully when broiling! They can go from done to burnt in the blink of an eye!
Recipe Notes

*I used Kraft Jet-Puffed S'moreMallows, but if you're unable to find them, use jumbo marshmallows. Cut them in half lengthwise with kitchen shears. Place on cookies cut side down.

**To melt fudge filling in microwave, heat for 30 seconds. Stir, then microwave for 10 second intervals, stirring until melted.

Gingerbread Cupcakes with Blood Orange Cream Cheese Icing and Candied Blood Orange Slices

Gingerbread Cupcakes with Blood Orange Cream Cheese Icing and Candied Blood Oranges

Every winter, when blood oranges come back in season, I start keeping an eye out for them at grocery stores and farmers markets. This year was different. I’ve been at home, having my groceries delivered instead of perusing the local produce aisles. If you’ve been entrusting strangers to do your shopping like I have, then you know delivery produce selections are hit and miss. So I was elated when a bag of perfectly beautiful, ripe blood oranges landed on my doorstep. This simple joy made my day. There was no choice. I had to make something worthy of the gorgeous red beauties!

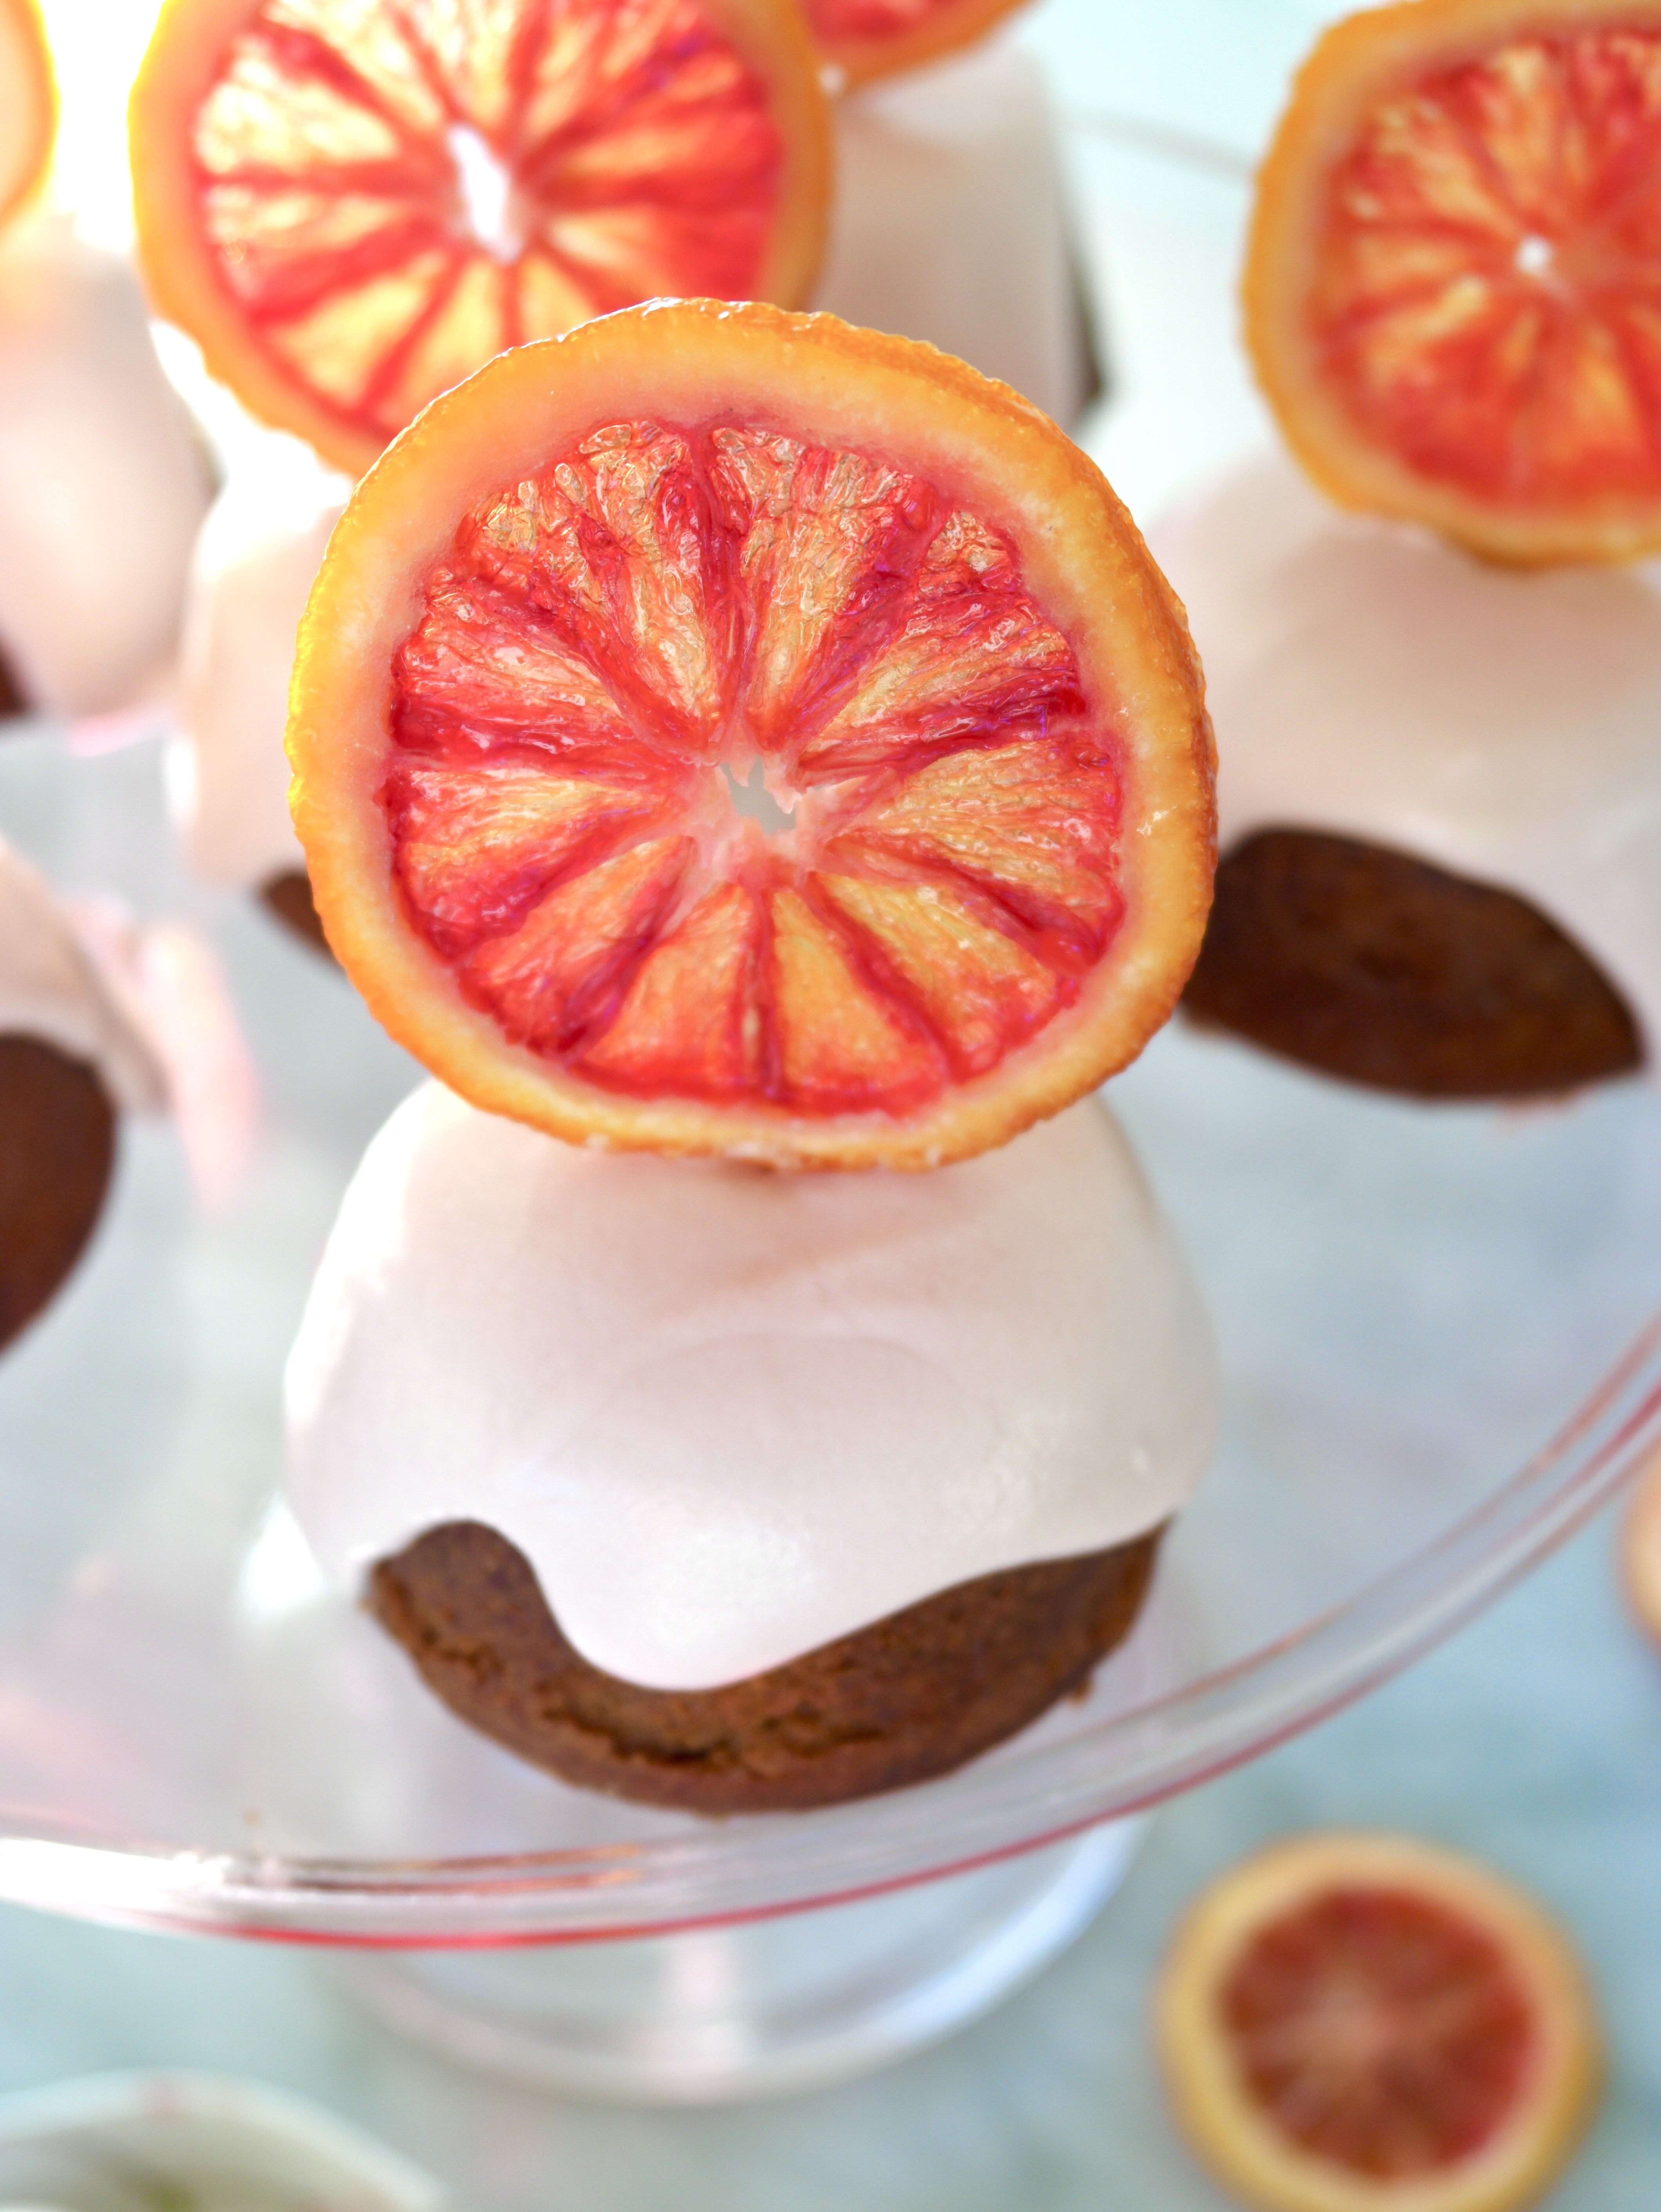
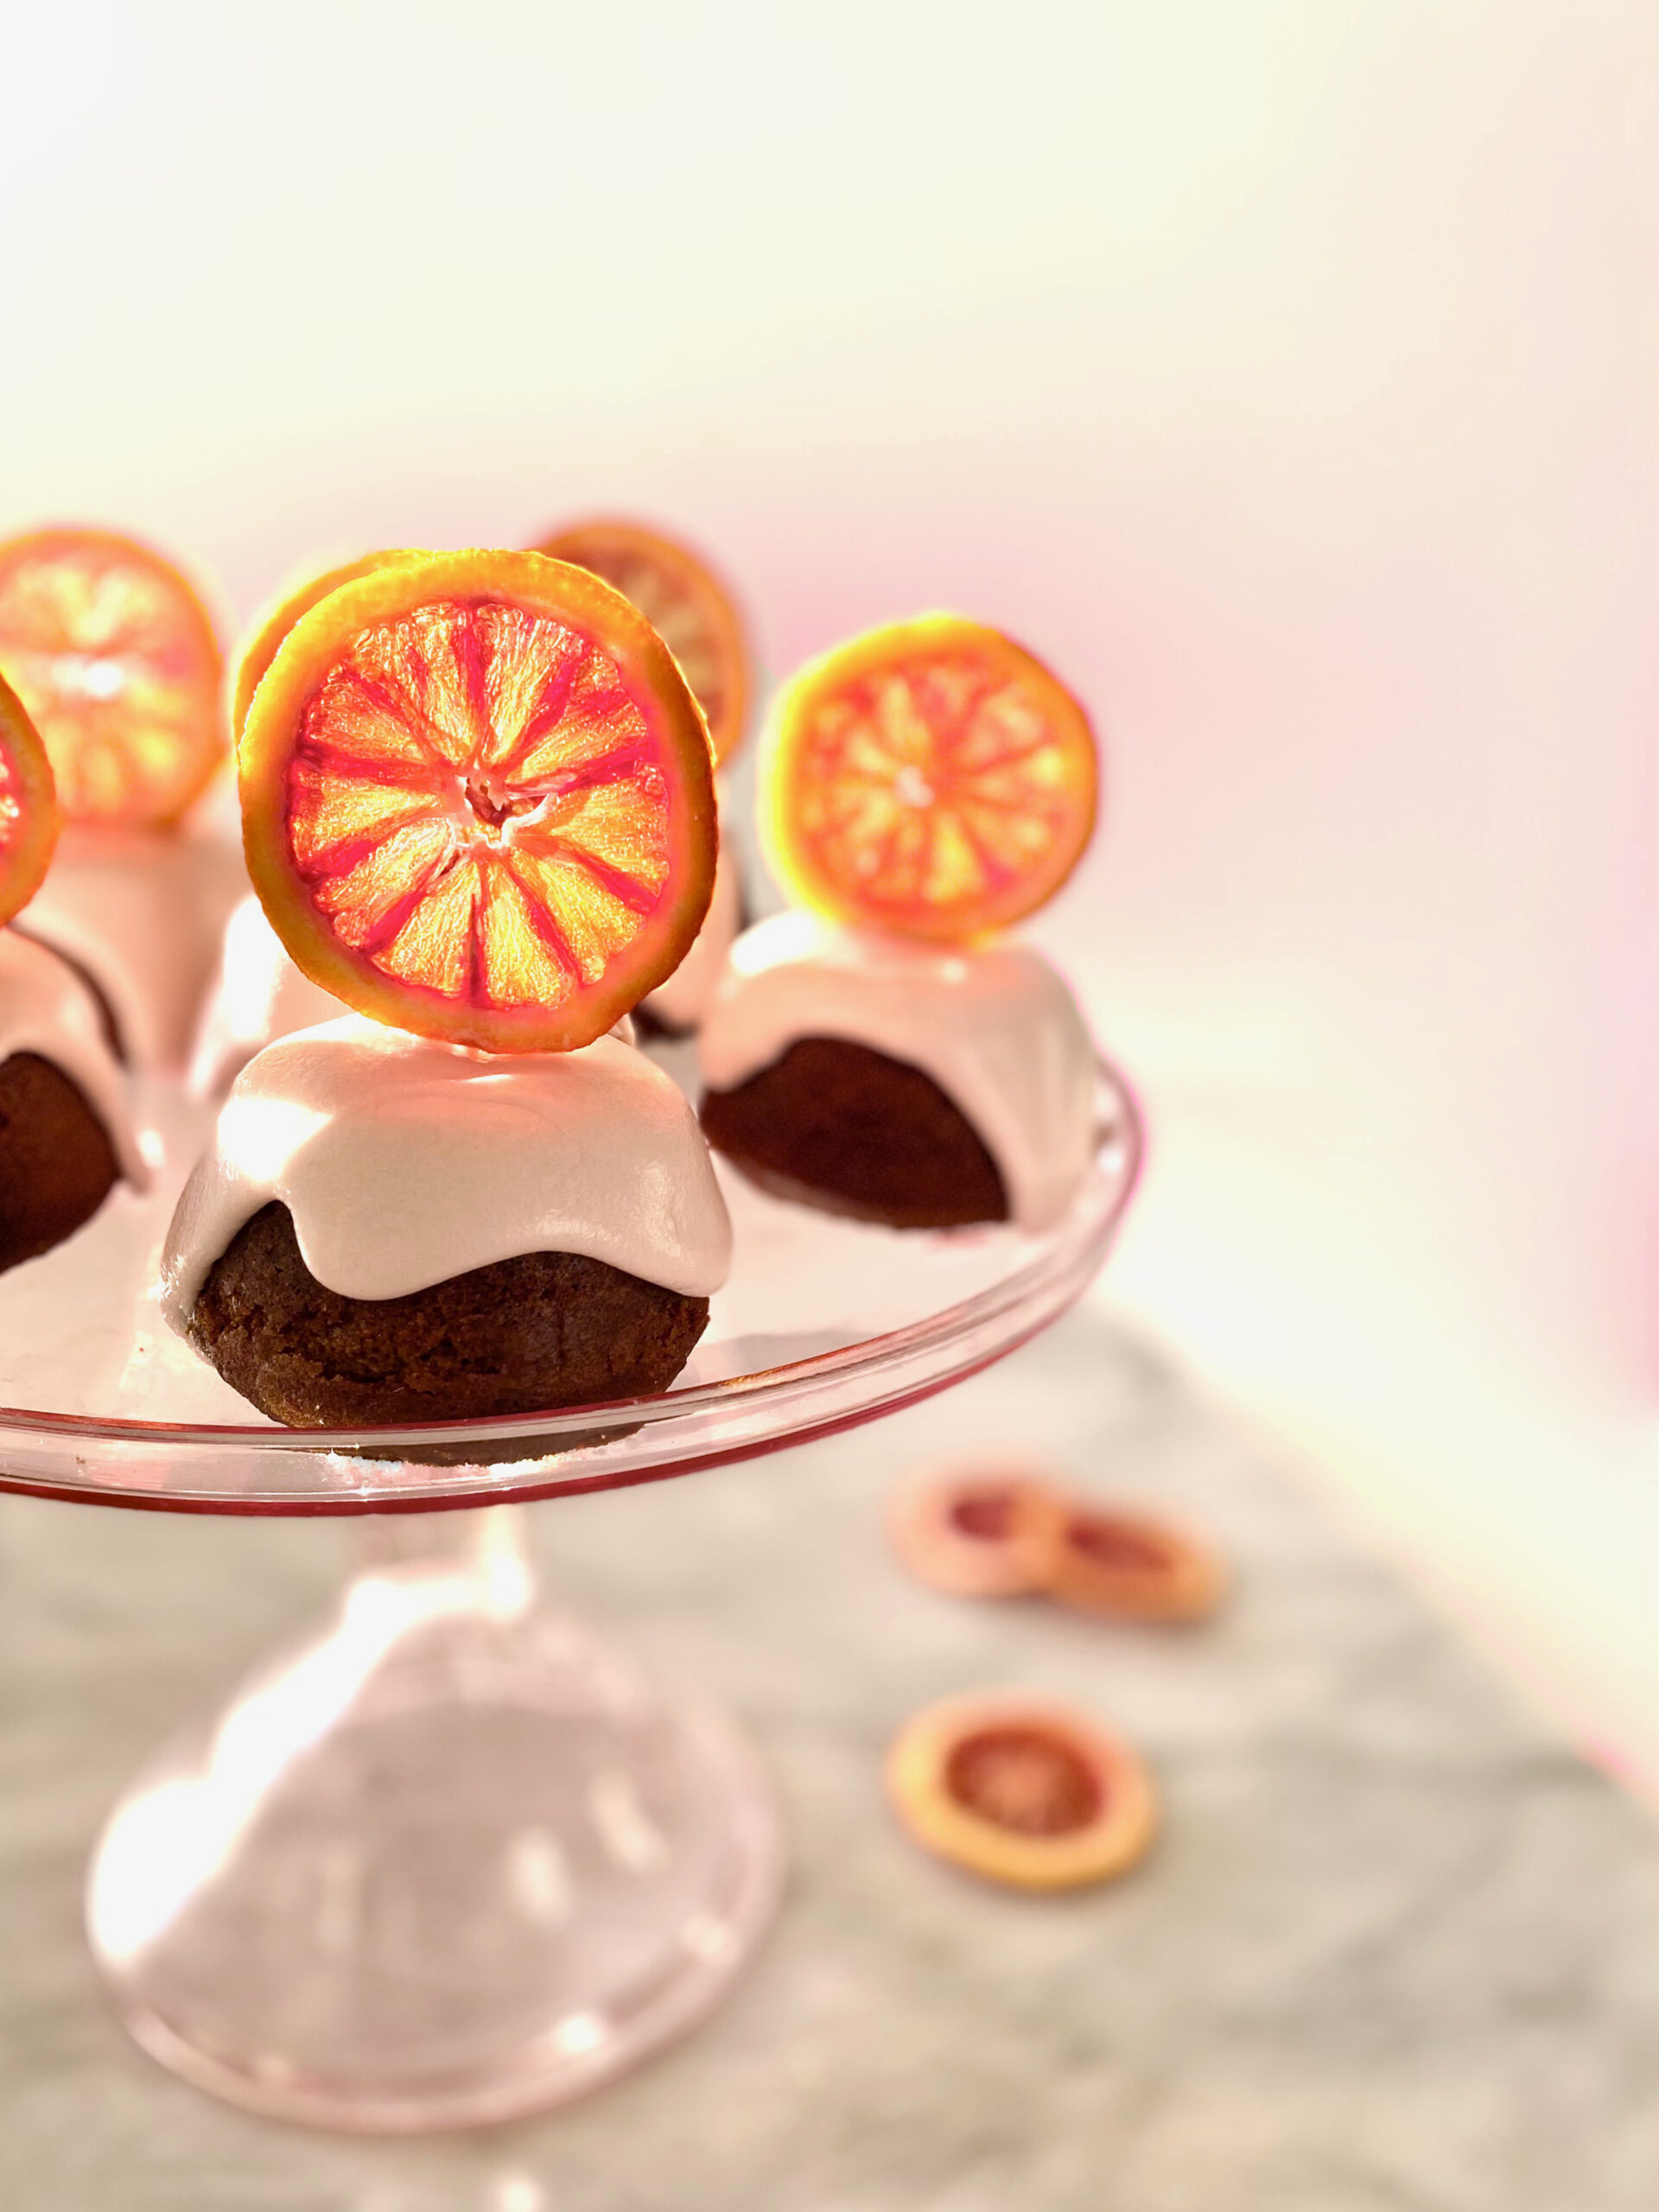
I didn’t get enough of gingerbread this holiday season, so I decided to make a gingerbread cupcake recipe that I created a few years ago when I was experimenting with blood oranges. I used blood orange zest in the cupcake batter and brushed the warm cupcakes with the blood orange syrup left over from making the candied oranges. If you don’t make the candied oranges, you can easily make a batch of the syrup* or skip this step altogether. They will still be delicious. I topped the cupcakes with cream cheese icing made with more orange zest and some blood orange juice mixed in. The juice makes the icing turns a soft shade of pink.

Gingerbread Cupcakes with Blood Orange Cream Cheese Icing and Candied Blood Oranges

Candied blood orange slices are so stunning, that I can’t bring myself to just lay them on top of a dessert. They remind me of stained glass windows. I like to place them on toothpicks so they can stand up in regal style! Many recipes out there will instruct you to boil the orange slices, then let them air dry. This is perfectly fine if you don’t mind floppy candied oranges. For this recipe, boiling the slices, then letting them dry in the oven on low heat will give them enough stiffness to stand up.

If you can’t find blood oranges where you live, here’s a link to get blood oranges shipped to you. This recipe will also work with other types of oranges. You won’t get the deep scarlet color and the flavor will have a bit more tartness, but it will still be beautiful and delicious!

Print Recipe
Gingerbread Cupcakes with Blood Orange Cream Cheese Icing
Servings
12-14 cupcakes
Ingredients
Gingerbread Cupcakes
Blood Orange Cream Cheese Icing
Candied Blood Orange Slices
Servings
12-14 cupcakes
Ingredients
Gingerbread Cupcakes
Blood Orange Cream Cheese Icing
Candied Blood Orange Slices
Instructions
Gingerbread Cupcakes
  1. Preheat oven to 350º. Spray the wells of a muffin tin with non-stick spray.
  2. In a medium bowl, whisk together flour, cinnamon, ginger, allspice, baking soda and salt. Set aside.
  3. In a large bowl, beat butter with an electric mixer at medium speed, until smooth.
  4. Add brown sugar and orange zest and beat until light and fluffy.
  5. Add molasses and beat until combined.
  6. Add eggs one at a time and beat until combined.
  7. Mix in dry ingredients in two additions, alternating with buttermilk. Beat just until combined.
  8. Scoop the batter into prepared muffin tin, filling wells 2/3 full. (If you have any remaining batter, prepare an additional muffin tin.)
  9. Bake for 15-18 minutes until toothpick inserted in center of cupcake comes out clean.
  10. Allow to cool in pan 10 minutes, then remove cupcakes from pan.
  11. Place cupcakes upside down on cooling rack and brush generously with orange simple syrup. Allow cupcakes to cool completely before frosting.
Blood Orange Cream Cheese Icing
  1. In a large bowl, beat cream cheese at medium speed, until smooth.
  2. Add butter, orange zest and salt and beat until combined.
  3. Add powdered sugar. Beat at low speed until powdered sugar is incorporated. Increase speed to medium and beat until smooth.
  4. Add blood orange juice and beat, one tablespoon at a time until desired consistency is reached.
Candied Blood Orange Slices
  1. Slice oranges into thin 1/4 inch slices.
  2. Combine sugar and water in a shallow saucepan and bring to a simmer.
  3. Add orange slices to saucepan. Simmer for 10 minutes.
  4. Drain oranges, reserving syrup.
  5. Heat oven to 175ºF. Place on a large baking sheet lined with a baking mat in a single layer and bake until orange slices begin to stiffen, about 2 hours.
  6. Remove from oven and let cool on baking sheet. If desired, insert toothpicks when slices are cool enough to handle. The slices will continue to stiffen as they cool.
Recipe Notes

*To make orange simple syrup,  combine the juice of one orange with enough water to make 1/2 cup. Combine mixture with the zest of one orange and 1/2 cup sugar in a small saucepan over medium heat. Stir until sugar is dissolved. Let cool and transfer to a glass container. Refrigerate until ready to use.

Purple Berry Cake with Silky Cream Cheese Frosting

Purple Berry Cake with Silky Cream Cheese Frosting by Brownie Mischief

Purple is passionate. It’s mystical. It’s regal. Don’t we all know someone whose favorite color is purple? It’s painfully obvious. They can’t hide it. They don’t want to hide it. They can’t just be friends with purple. They’re in a relationship with purple. The first time I made this Purple Berry Cake, a purple lover I know said that when she saw it, it spoke to her soul. This cake is, what I like to call, a double-take cake. People stare. They can’t resist it’s charismatic charm. Once they stop staring and taste it, they fall hopelessly in love.

Purple Berry Cake with Silky Cream Cheese Frosting by Brownie Mischief

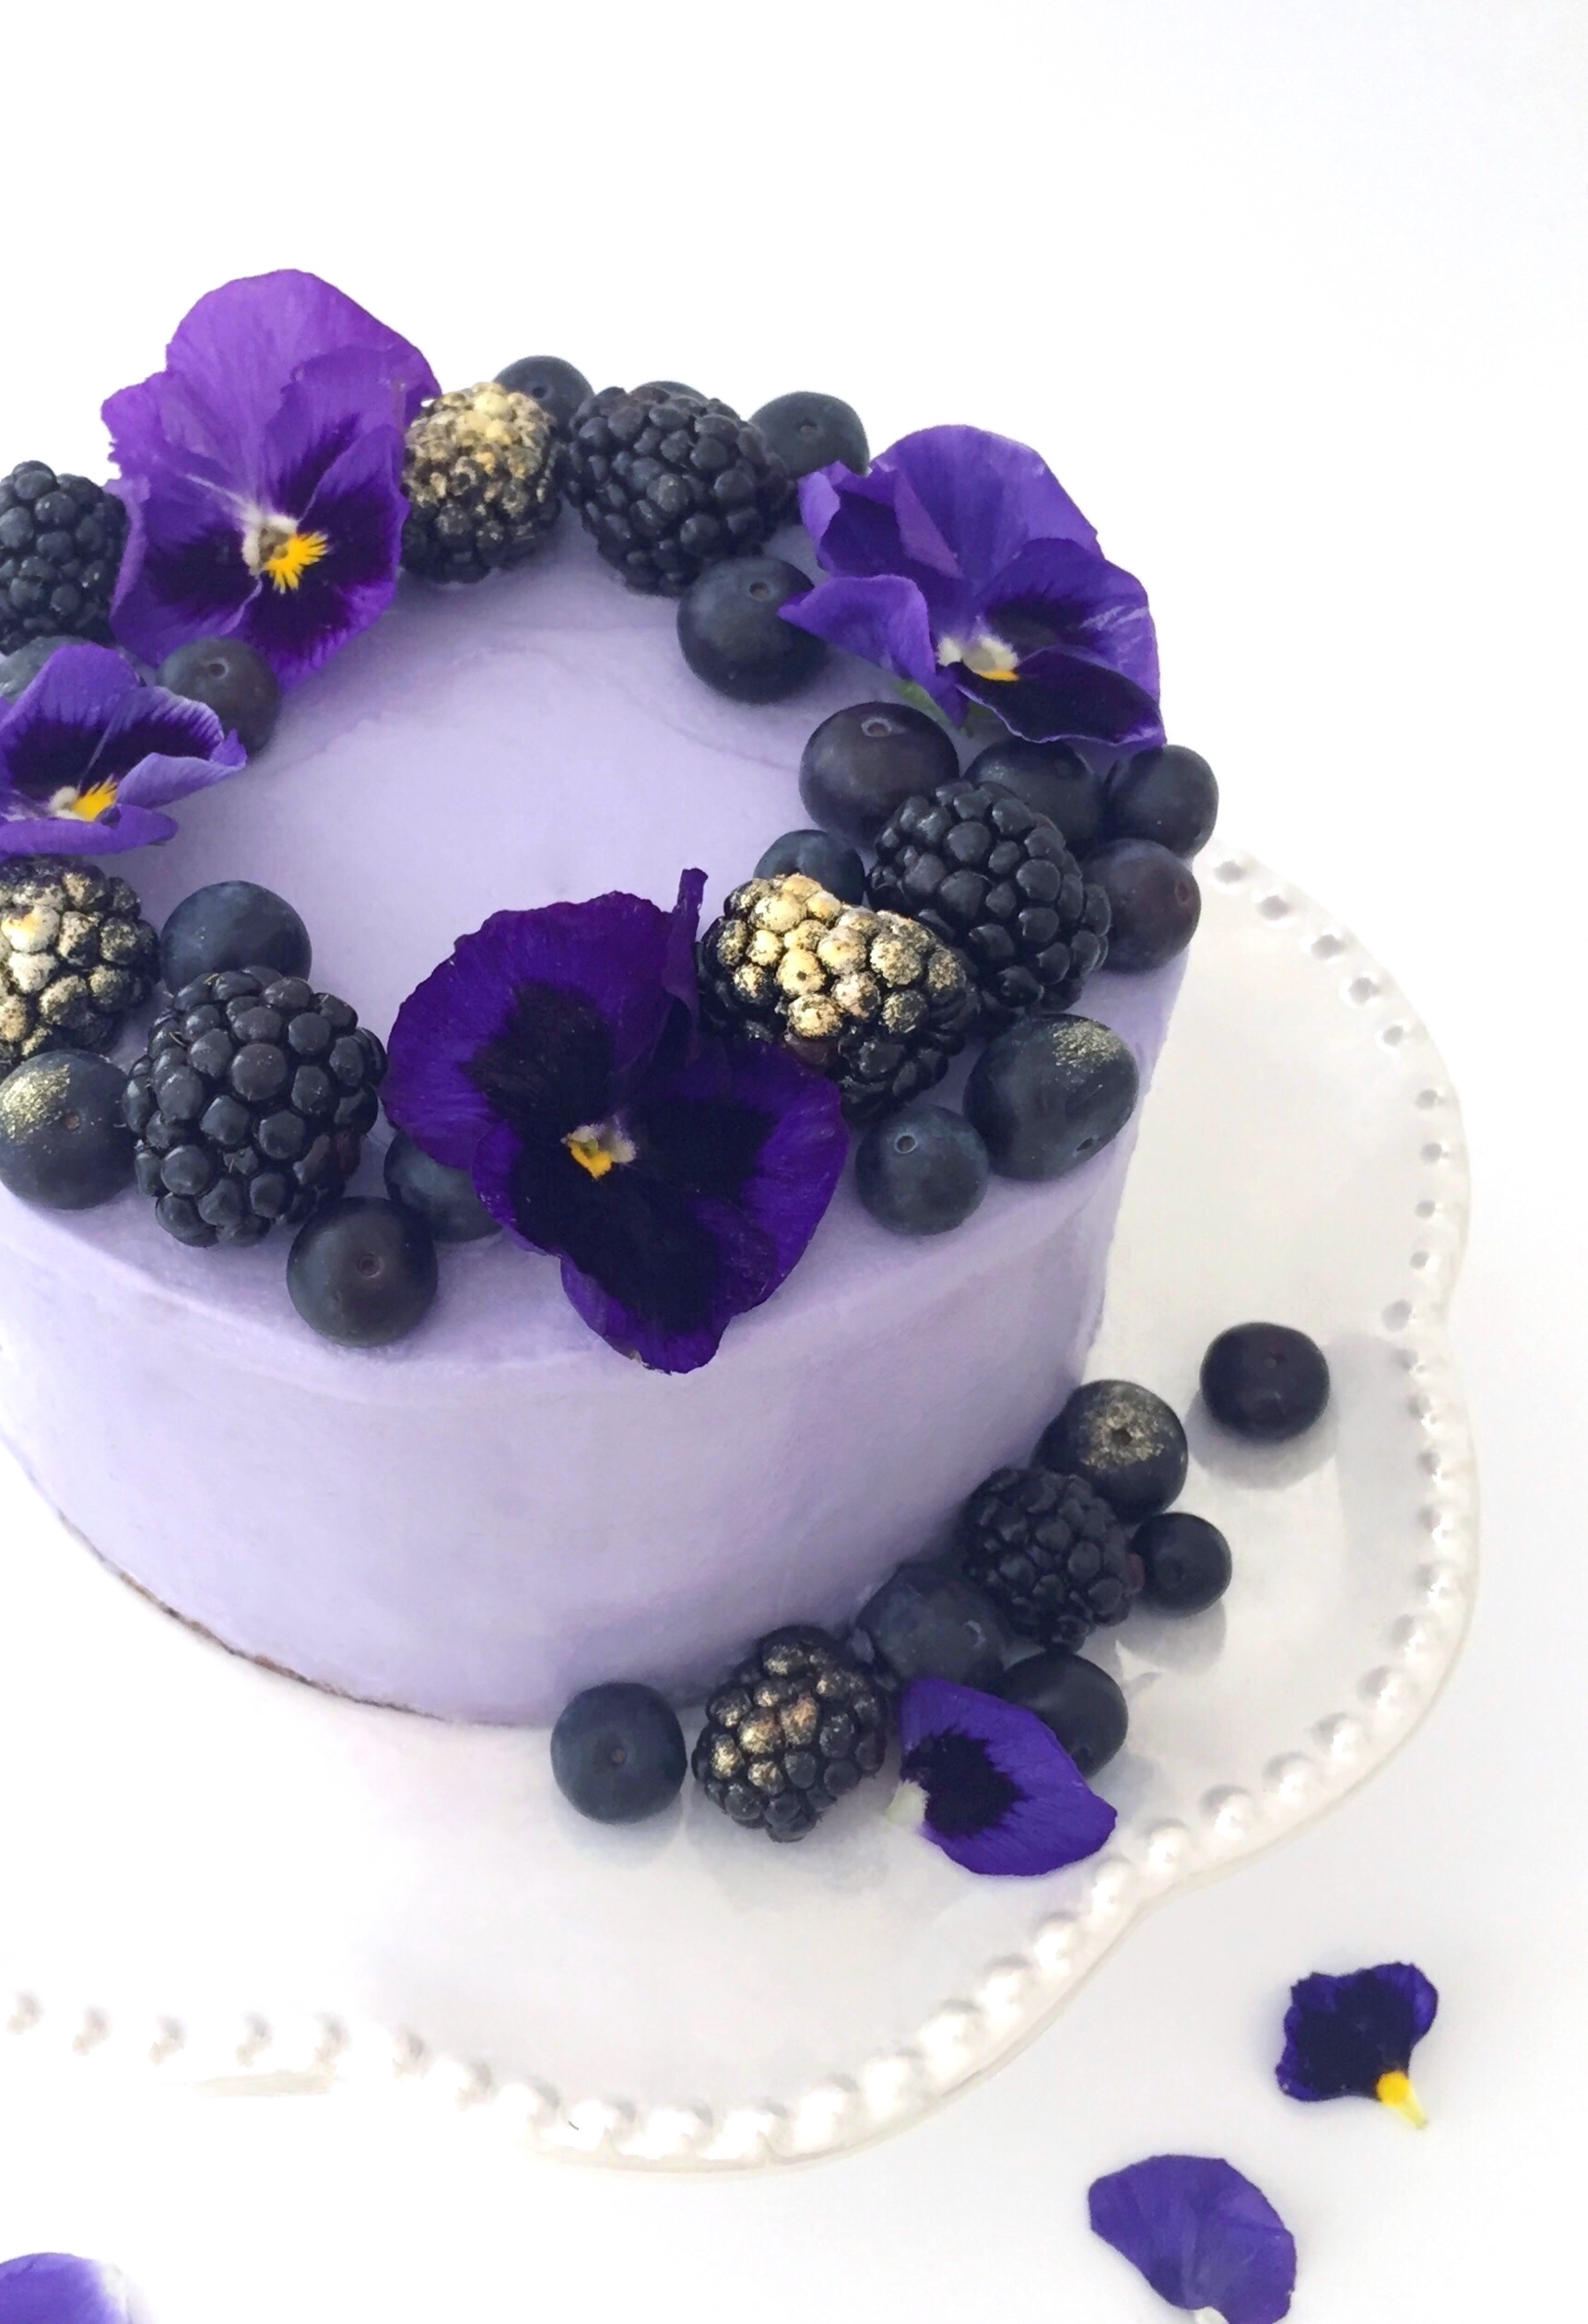
Fresh berry purée is added to the batter, creating a soft, moist cake. The layers are brushed with berry syrup, which helps keeps the cake moist and gives it a nice punch of berry flavor.  I used blackberries and blueberries, but you can use any combination of purple berries that you like. After baking, the color of the cake layers will be a brownish gray with a hint of purple, depending on your berries. I think I need to come up with name for this color. How about Silverberry? You can see tiny flecks of the berries in the cake and I think the color is lovely, especially with the lavender frosting. If you want a more purple cake, feel free to add some gel food color to the batter. I used Wilton Violet gel food color to achieve the pretty lavender cream cheese frosting. The extra butter and the addition of heavy cream makes this frosting silky and spreadable.

Purple Berry Cake with Silky Cream Cheese Icing by Brownie Mishchief

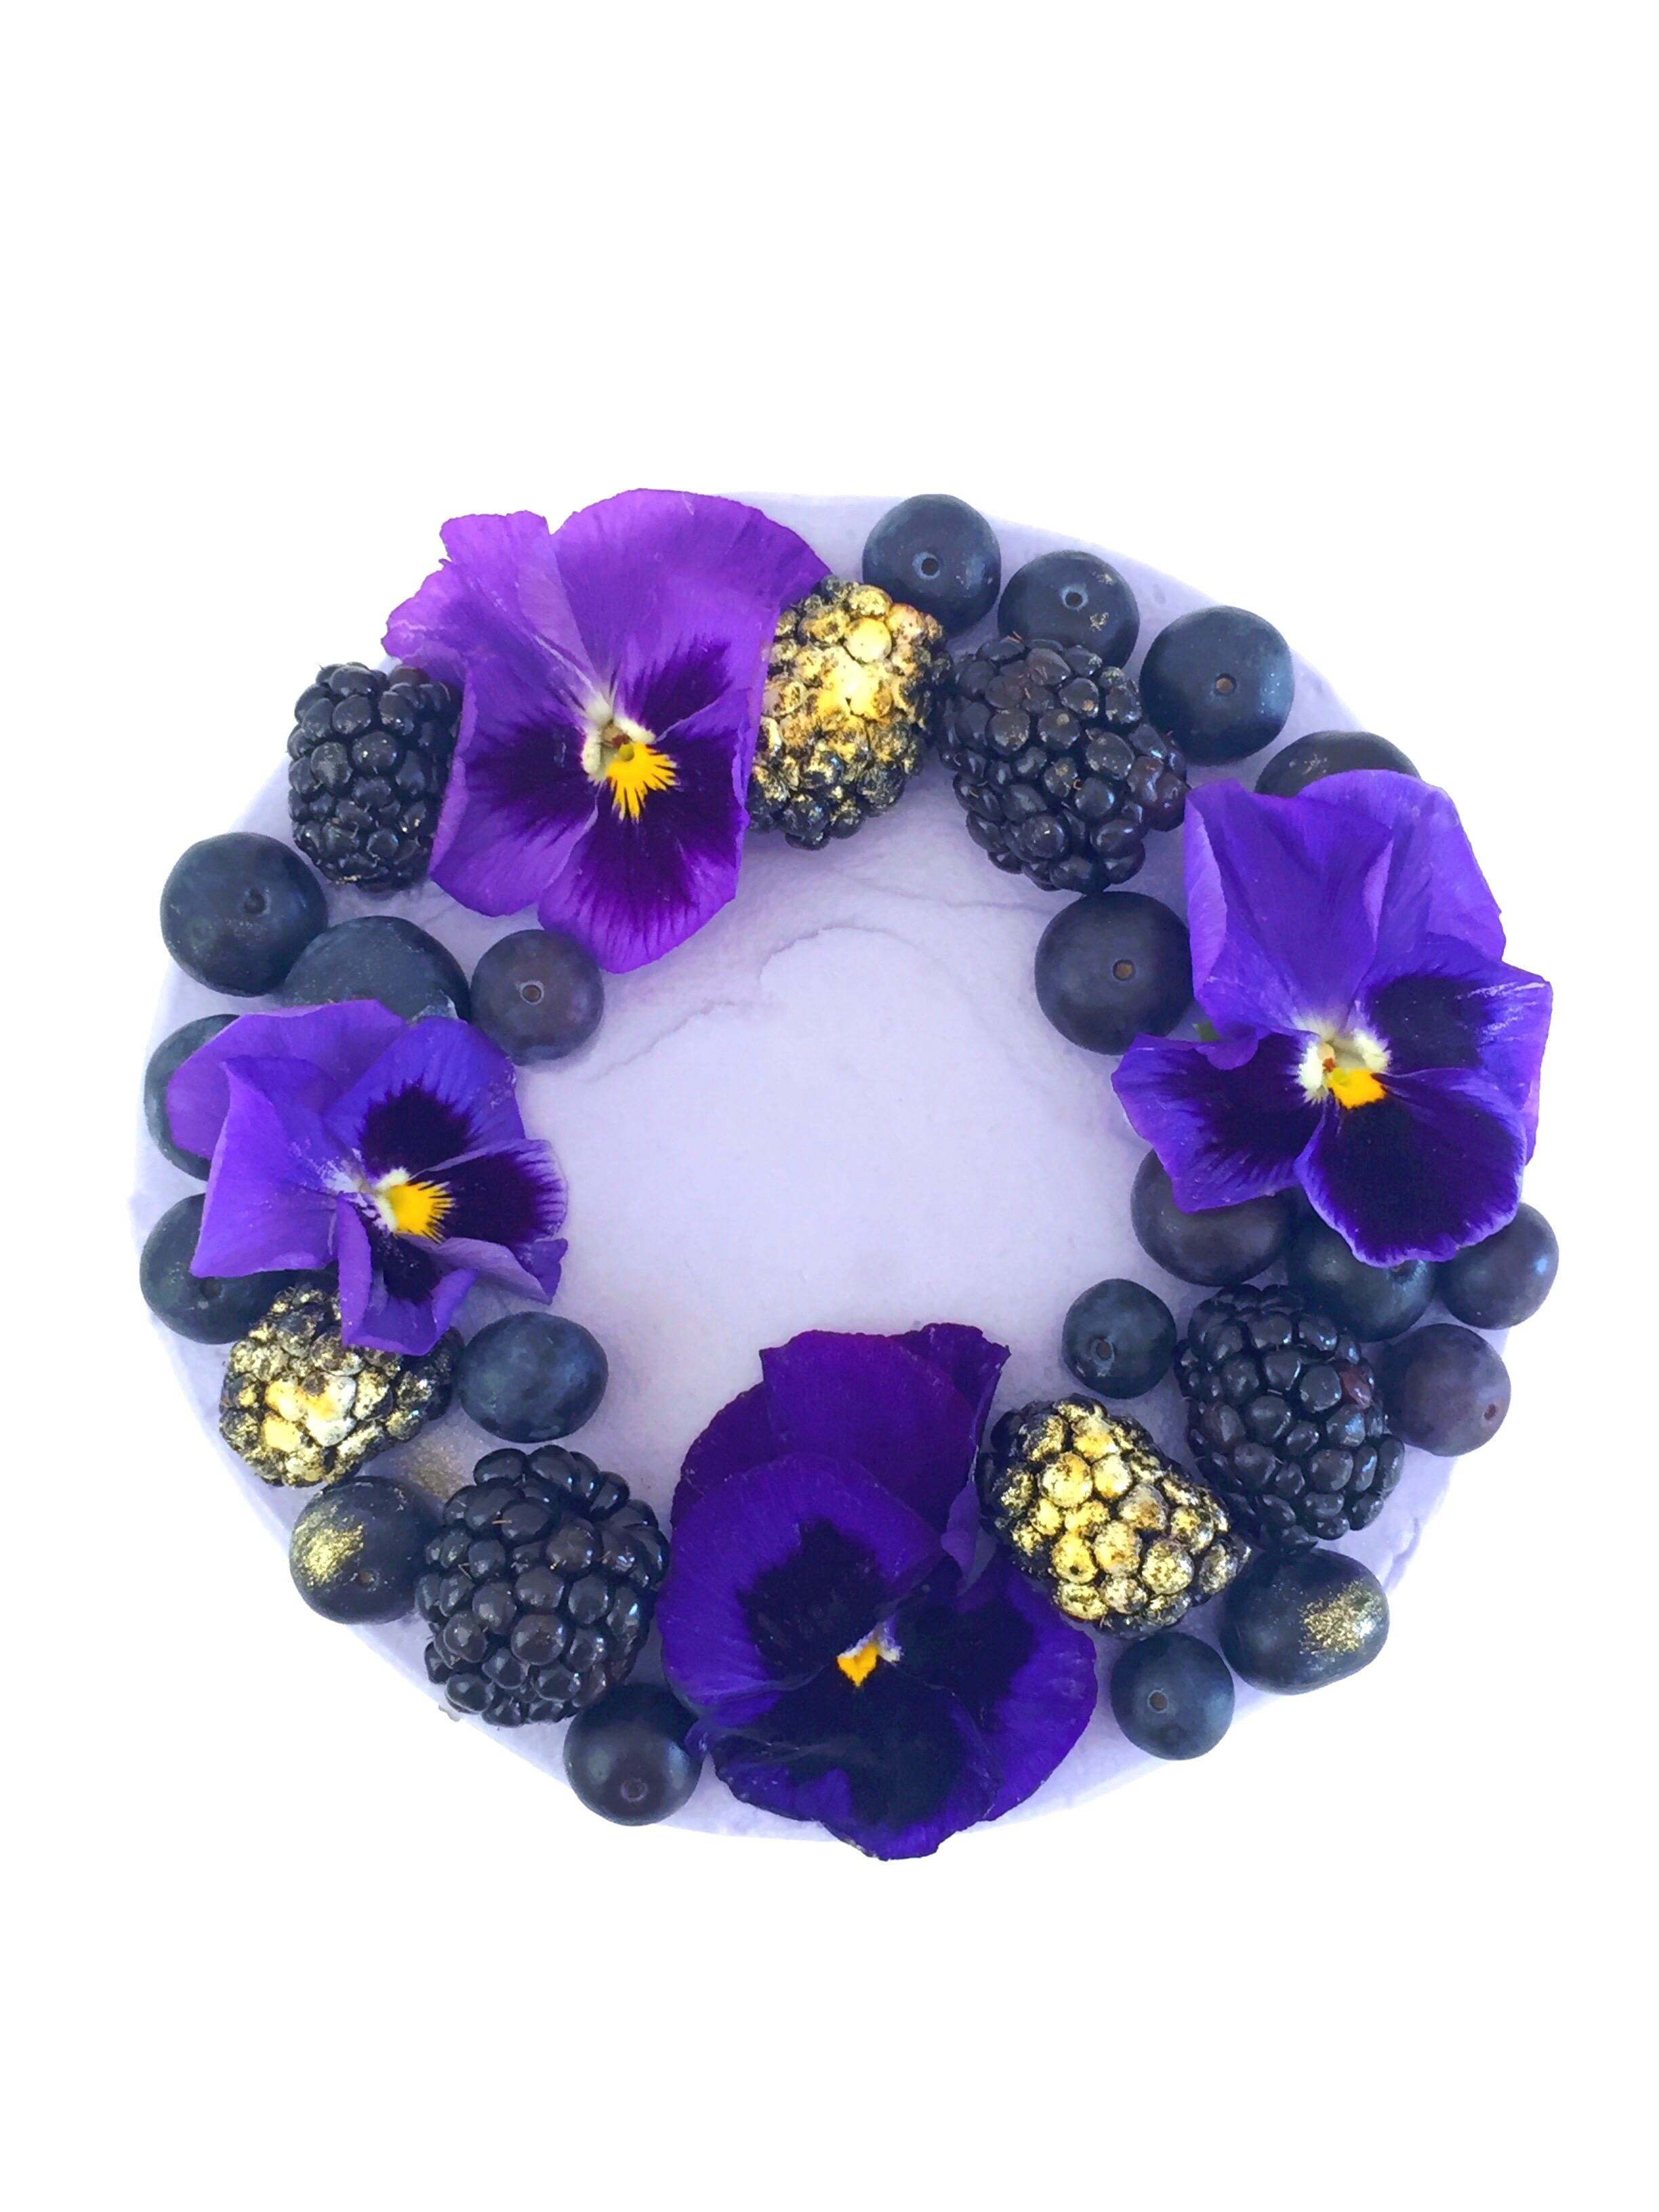
I’m obsessed with edible flowers lately, so I garnish my baked goods with them whenever I can get my hands on some. I found these pansies in the produce department of my local food market. If you can’t find pansies, pesticide free violets or rose petals would also be pretty. Make sure to apply them to your cake right before serving, since they are delicate and will wilt over time. Brush some of your berries with a little dab of edible gold luster dust for an extra regal touch.


Print Recipe


Purple Berry Cake with Silky Cream Cheese Frosting

Course Dessert

Servings
6-inch cake (serves 6)


Ingredients
Purple Berry Cake

Silky Cream Cheese Frosting

Finishing Touches

Course Dessert

Servings
6-inch cake (serves 6)


Ingredients
Purple Berry Cake

Silky Cream Cheese Frosting

Finishing Touches


Instructions
Purple Berry Cake
  1. Preheat oven to 350º F. Spray two 6-inch cake pans with non-stick cooking spray and line with parchment paper circles.

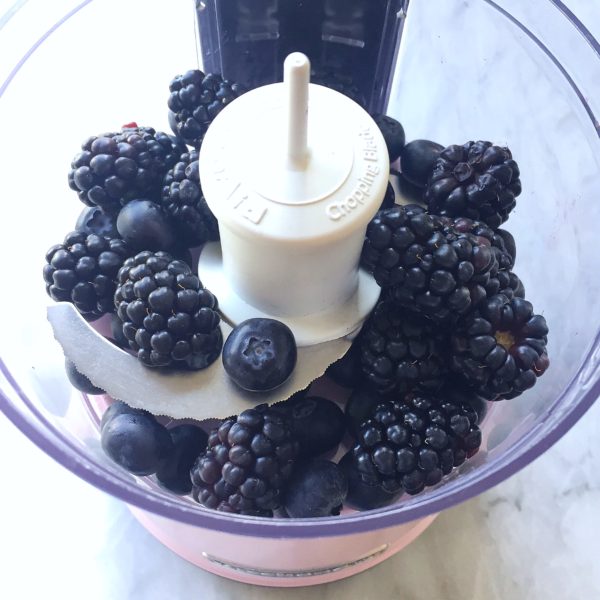
  2. Purée the berries in a blender or small food processor.
    Puree fresh berries.

  3. Strain puréed berries through a sieve. Reserve 2/3 cup berry puree. Set aside remaining puree for syrup.

  4. In a medium bowl, sift together flour, baking powder, baking soda, and salt. Set aside.

  5. In a large bowl, beat 1 1/4 cups (8.75 ounces) sugar, oil, eggs and vanilla extract with an electric mixer on medium speed, until light and fluffy, about 1 minute.

  6. Add flour in two additions, alternating with buttermilk, beating at medium speed just until combined.

  7. Stir in the reserved 2/3 cup berry purée.

  8. Pour batter evenly into the prepared cake pans. Bake until a toothpick inserted into center of cakes comes out clean, about 30-35 minutes.

  9. Cool cakes in pans for 10 minutes. Remove cakes from pans and continue cooling on wire racks.

  10. Meanwhile, make berry syrup. In a small saucepan, heat the remaining berry purée, remaining 1/4 cup sugar (1.75 ounces) and 1/4 cup water over medium-low heat. Stir together and bring to a boil. Cook until sugar is dissolved. Set aside to cool.

  11. Split each cake layer into two and brush with berry syrup. Fill and frost cake with Silky Cream Cheese Frosting.

Silky Cream Cheese Frosting
  1. In a large bowl, beat butter and cream cheese with an electric mixer at medium speed, until smooth.

  2. Add vanilla extract and salt and beat until combined.

  3. Gradually add powdered sugar and beat at medium speed until combined.

  4. Add heavy cream and beat at low speed until smooth and creamy.

  5. Add gel food color with a toothpick, a little at a time, until desired shade is reached. Beat at low speed until well blended.

Finishing Touches
  1. Garnish top of cake with fresh berries. Brush a few of the berries with edible gold luster dust. Garnish with fresh flowers immediately before serving.