Raspberry Rose Shortbread Cookies

I don’t think I’ve ever created a recipe that delighted all of my senses as much as these cookies. If you decide to embark on this journey, you’ll start with your sense of smell. Whether you purchase dried rose petals or make them yourself, they’re pleasantly fragrant. I used dried rosebuds, but you can also use dried rose petals. To find dried rose petals, click here. To find dried rosebuds, click here. I pinched the calyx and stem off of the rosebuds to avoid large crunchy bits in the cookies, then I crushed the roses with a mortar and pestle. You can also place them in a plastic bag and roll over them gently with a rolling pin. Your sense of hearing will be satisfied with the crunching of the delicate, dried rose petals. Next, you’ll use your sense of touch to experience the fun rolling cookie dough into balls and maybe even trigger some childhood memories.

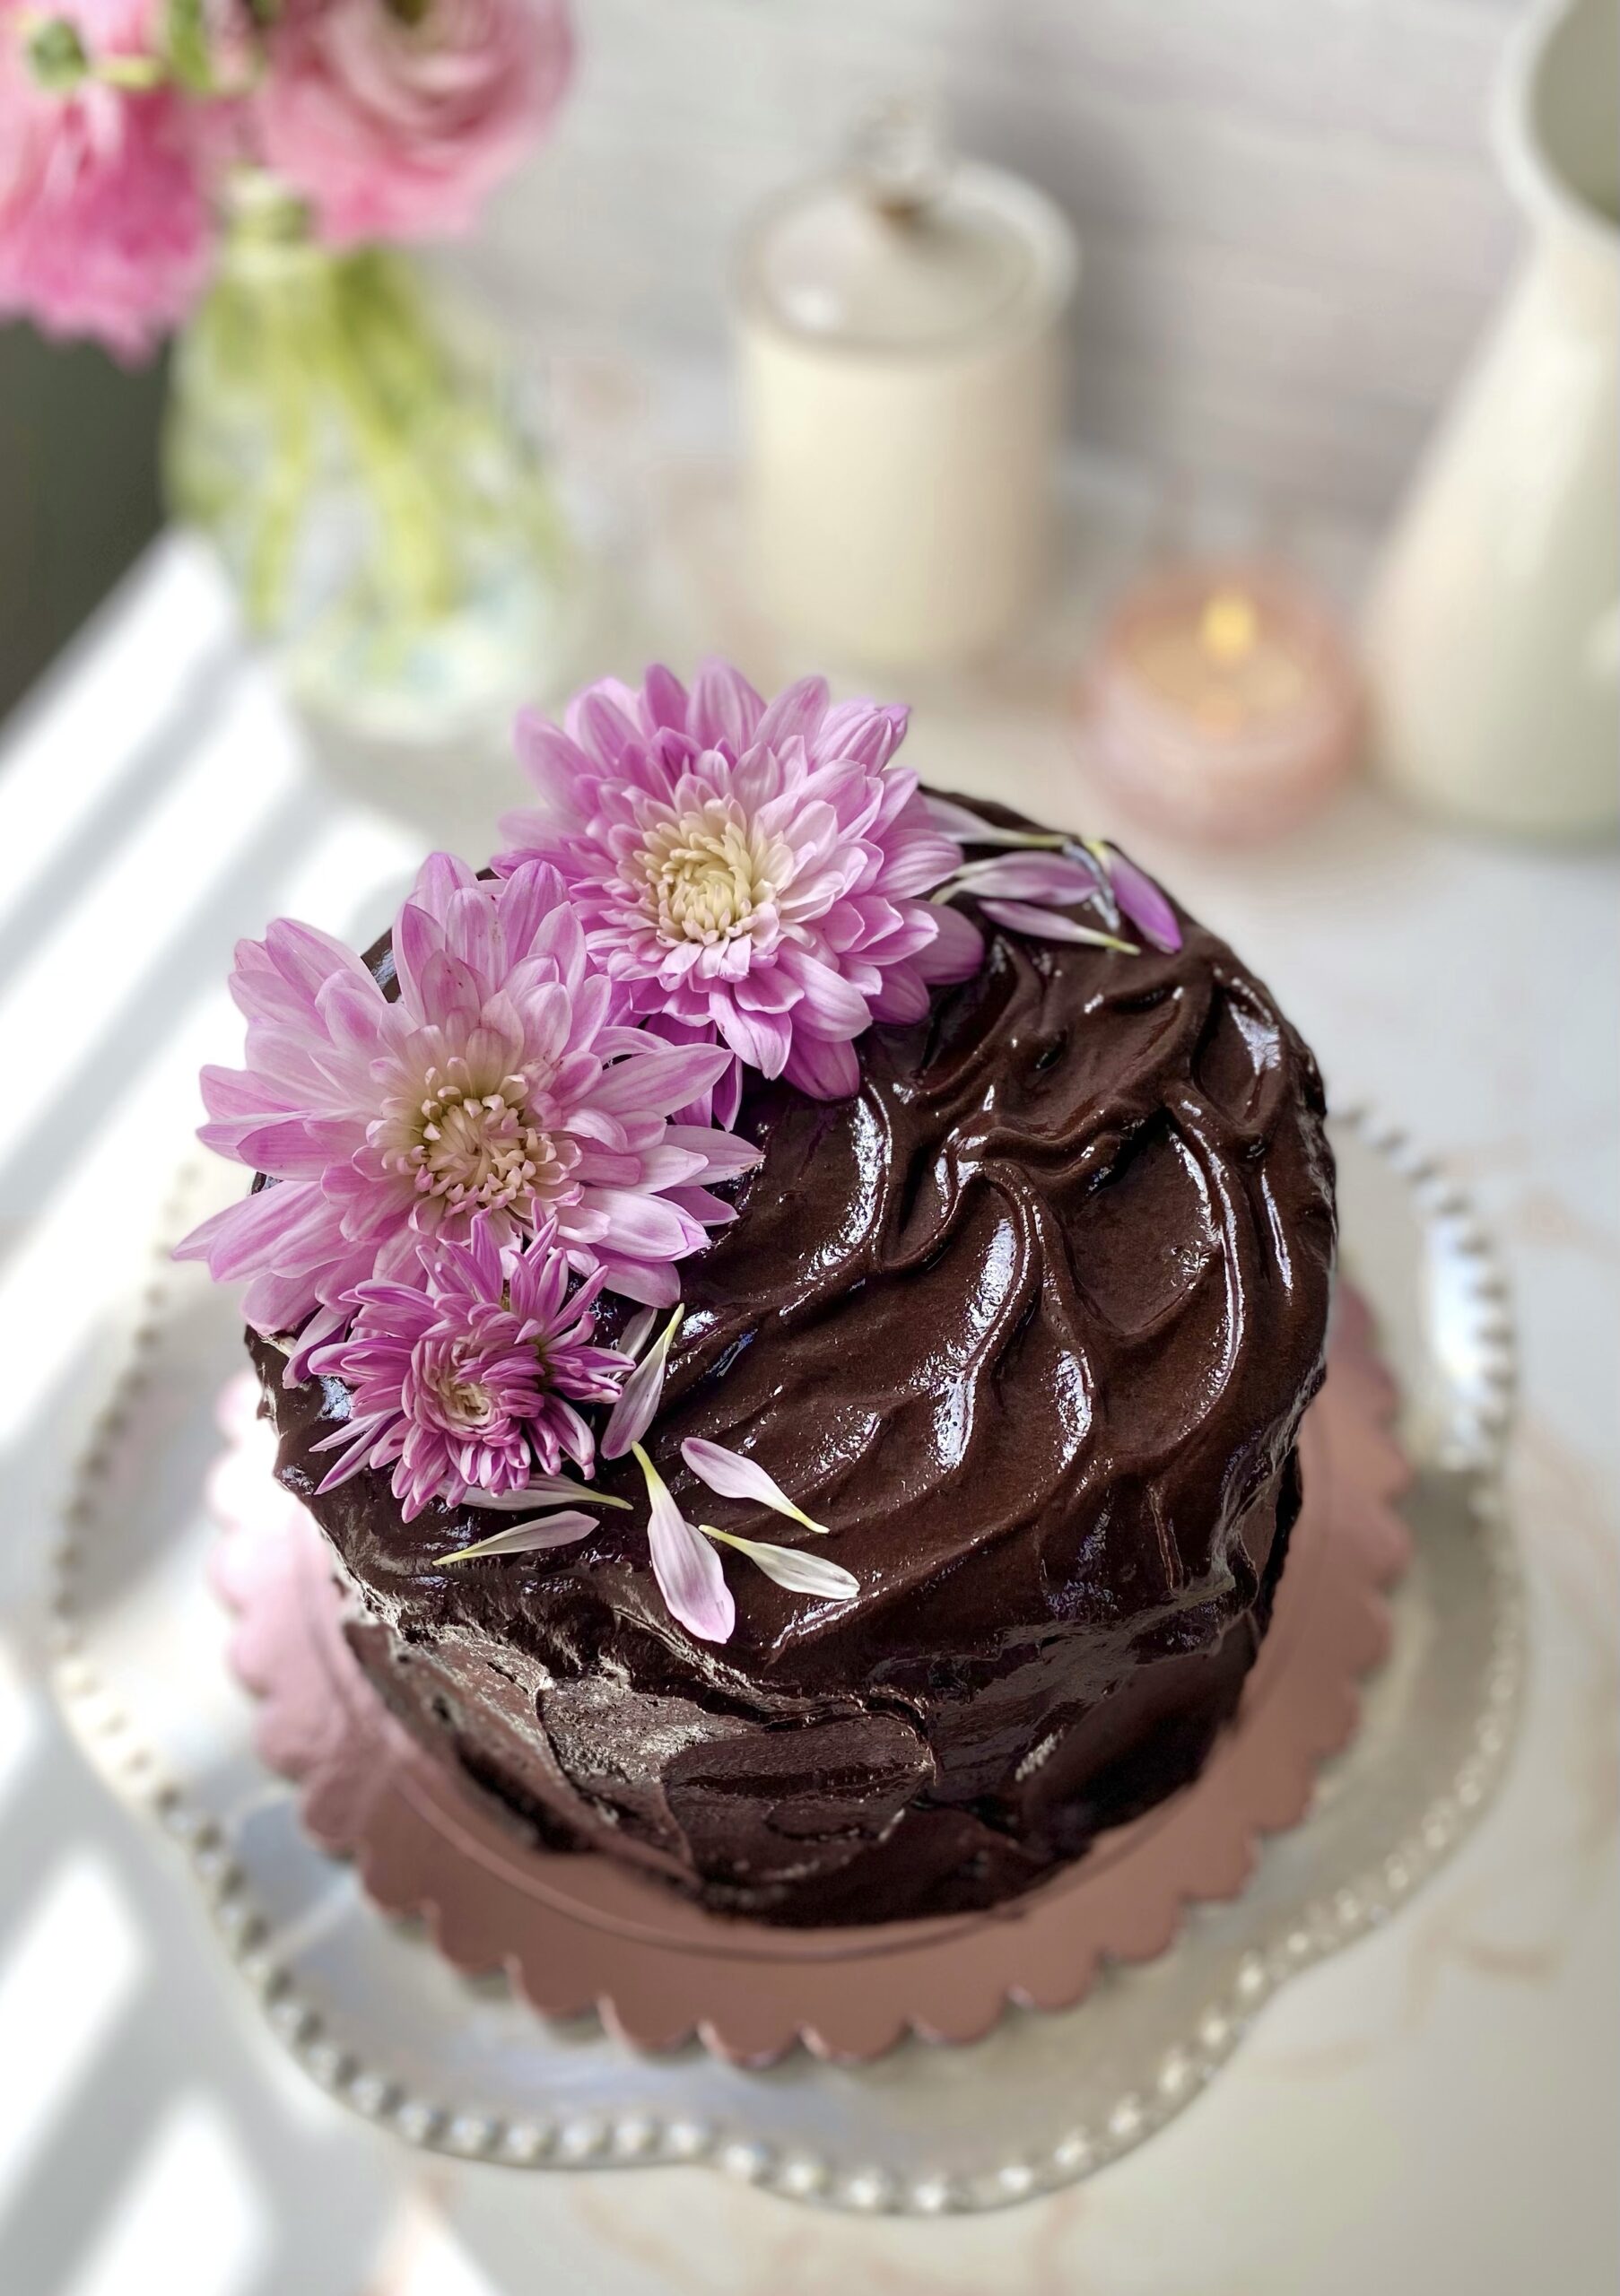
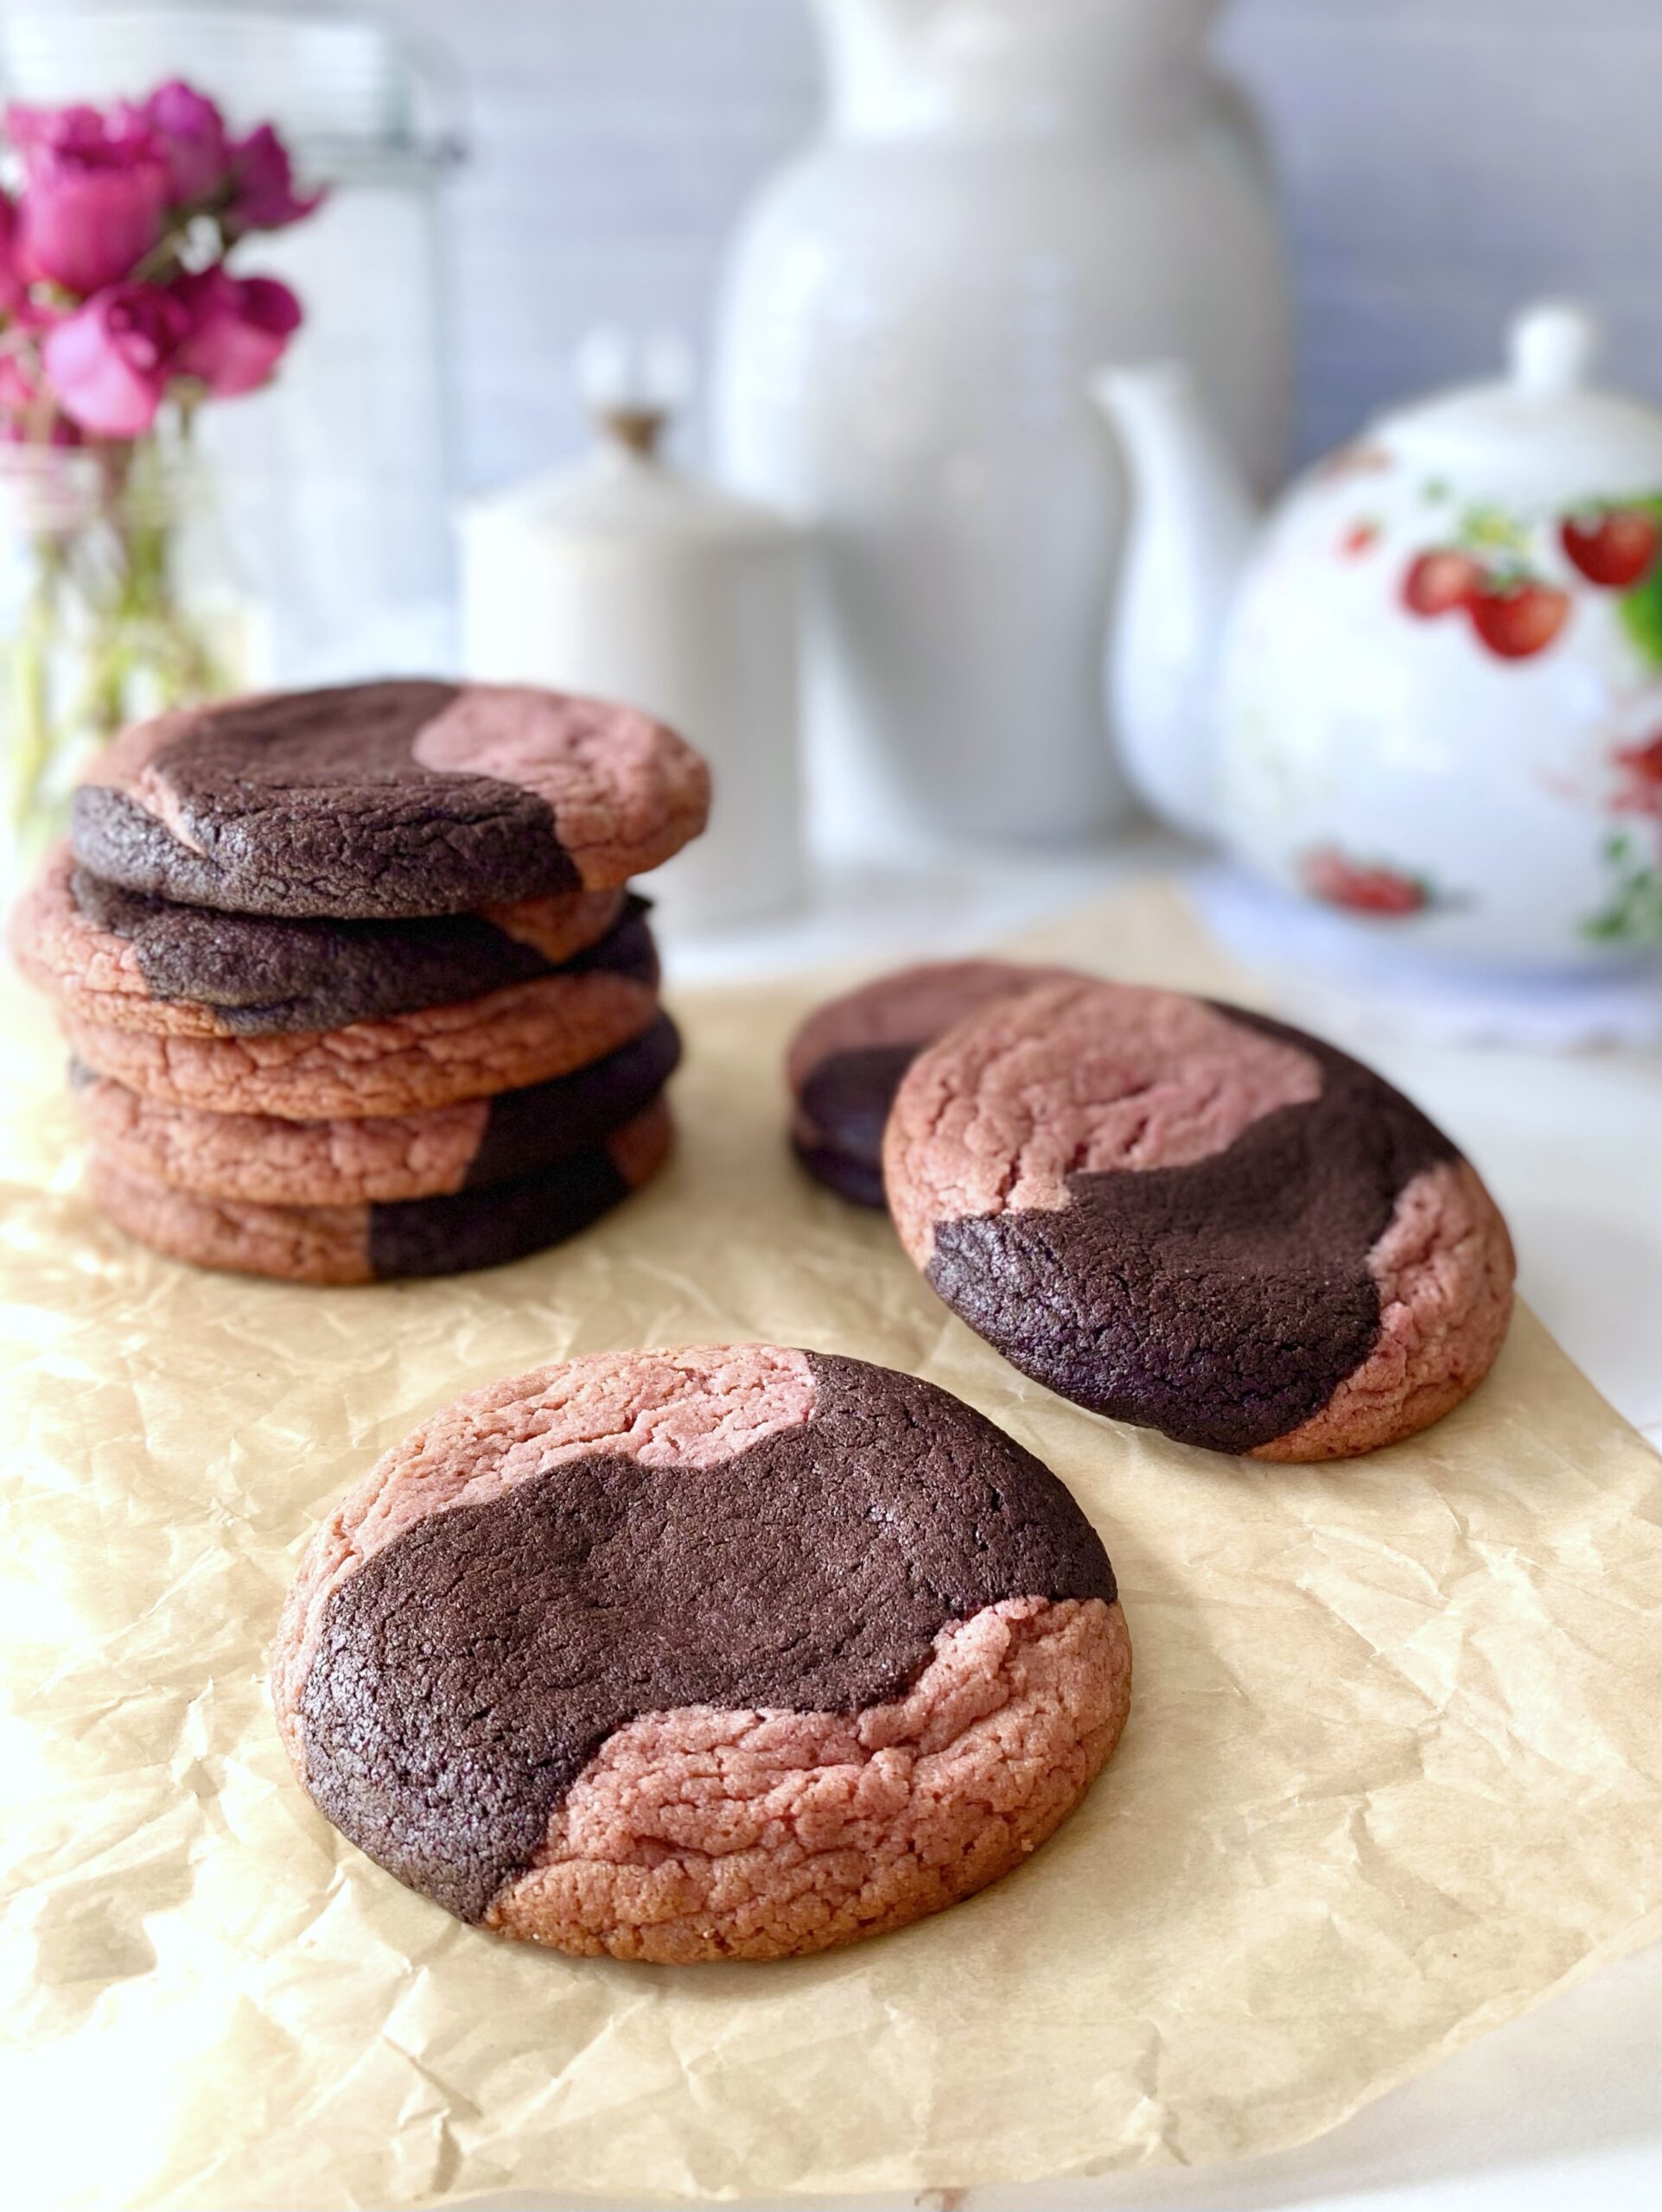
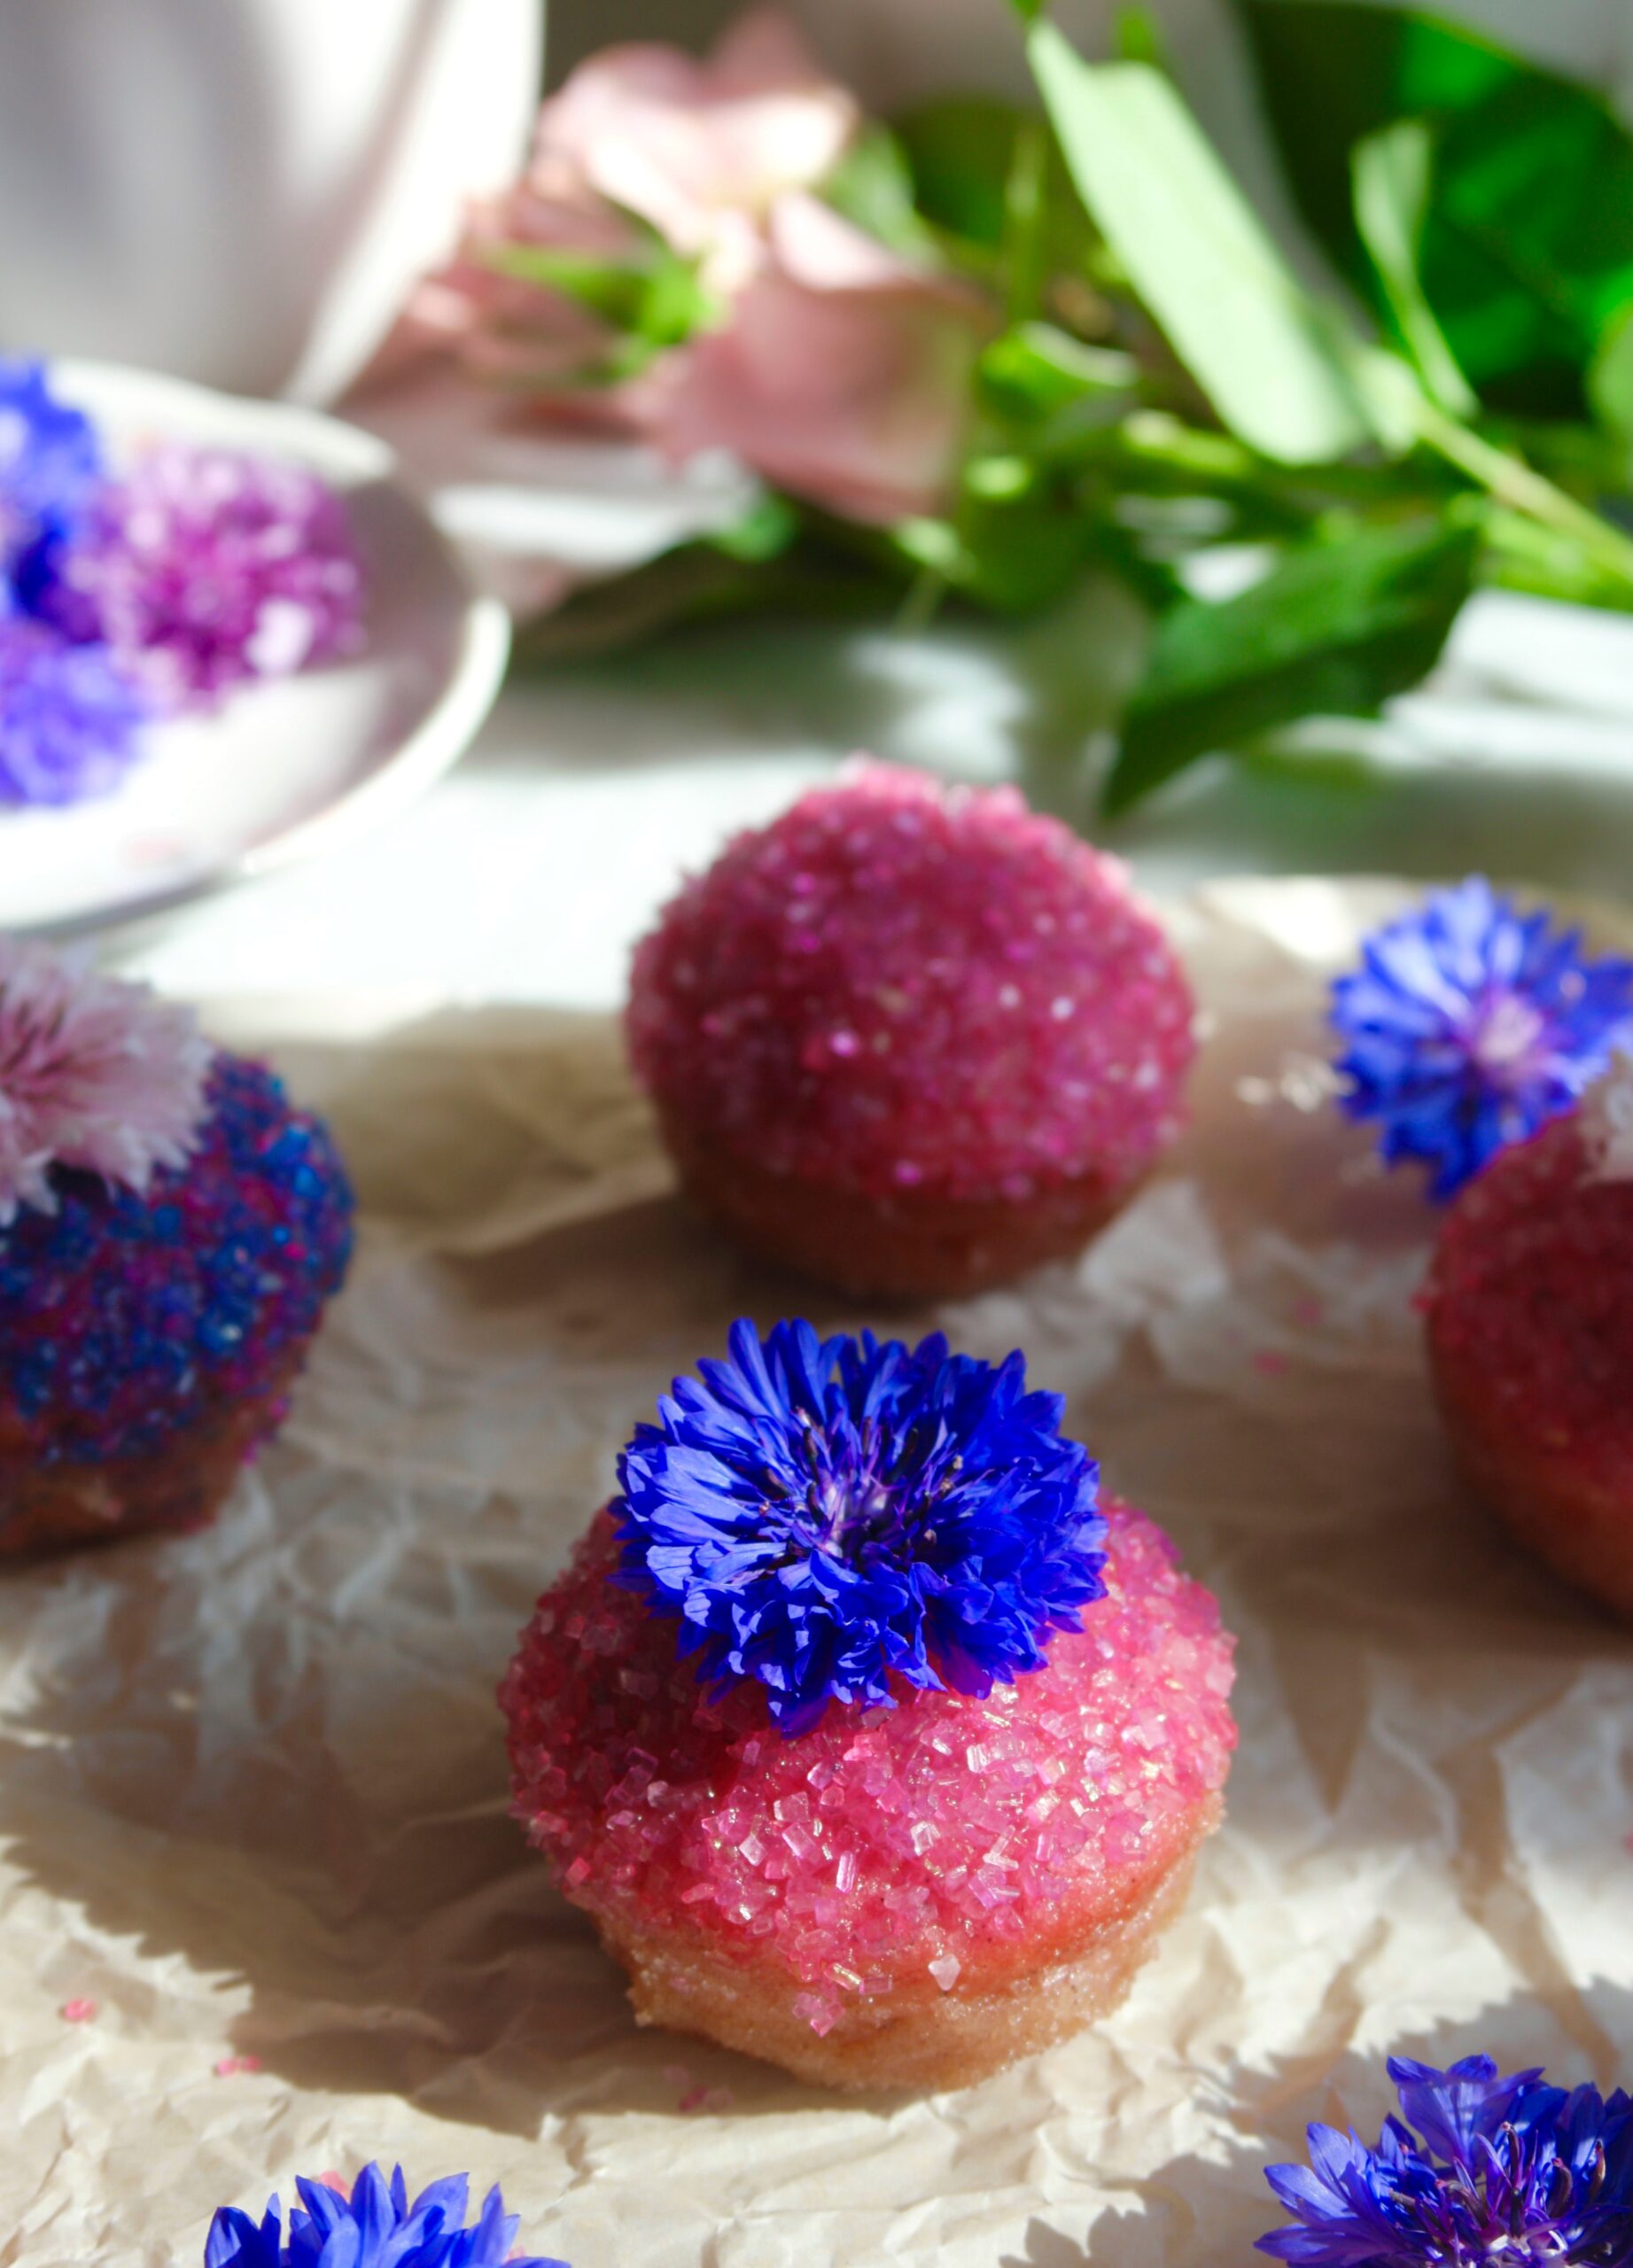
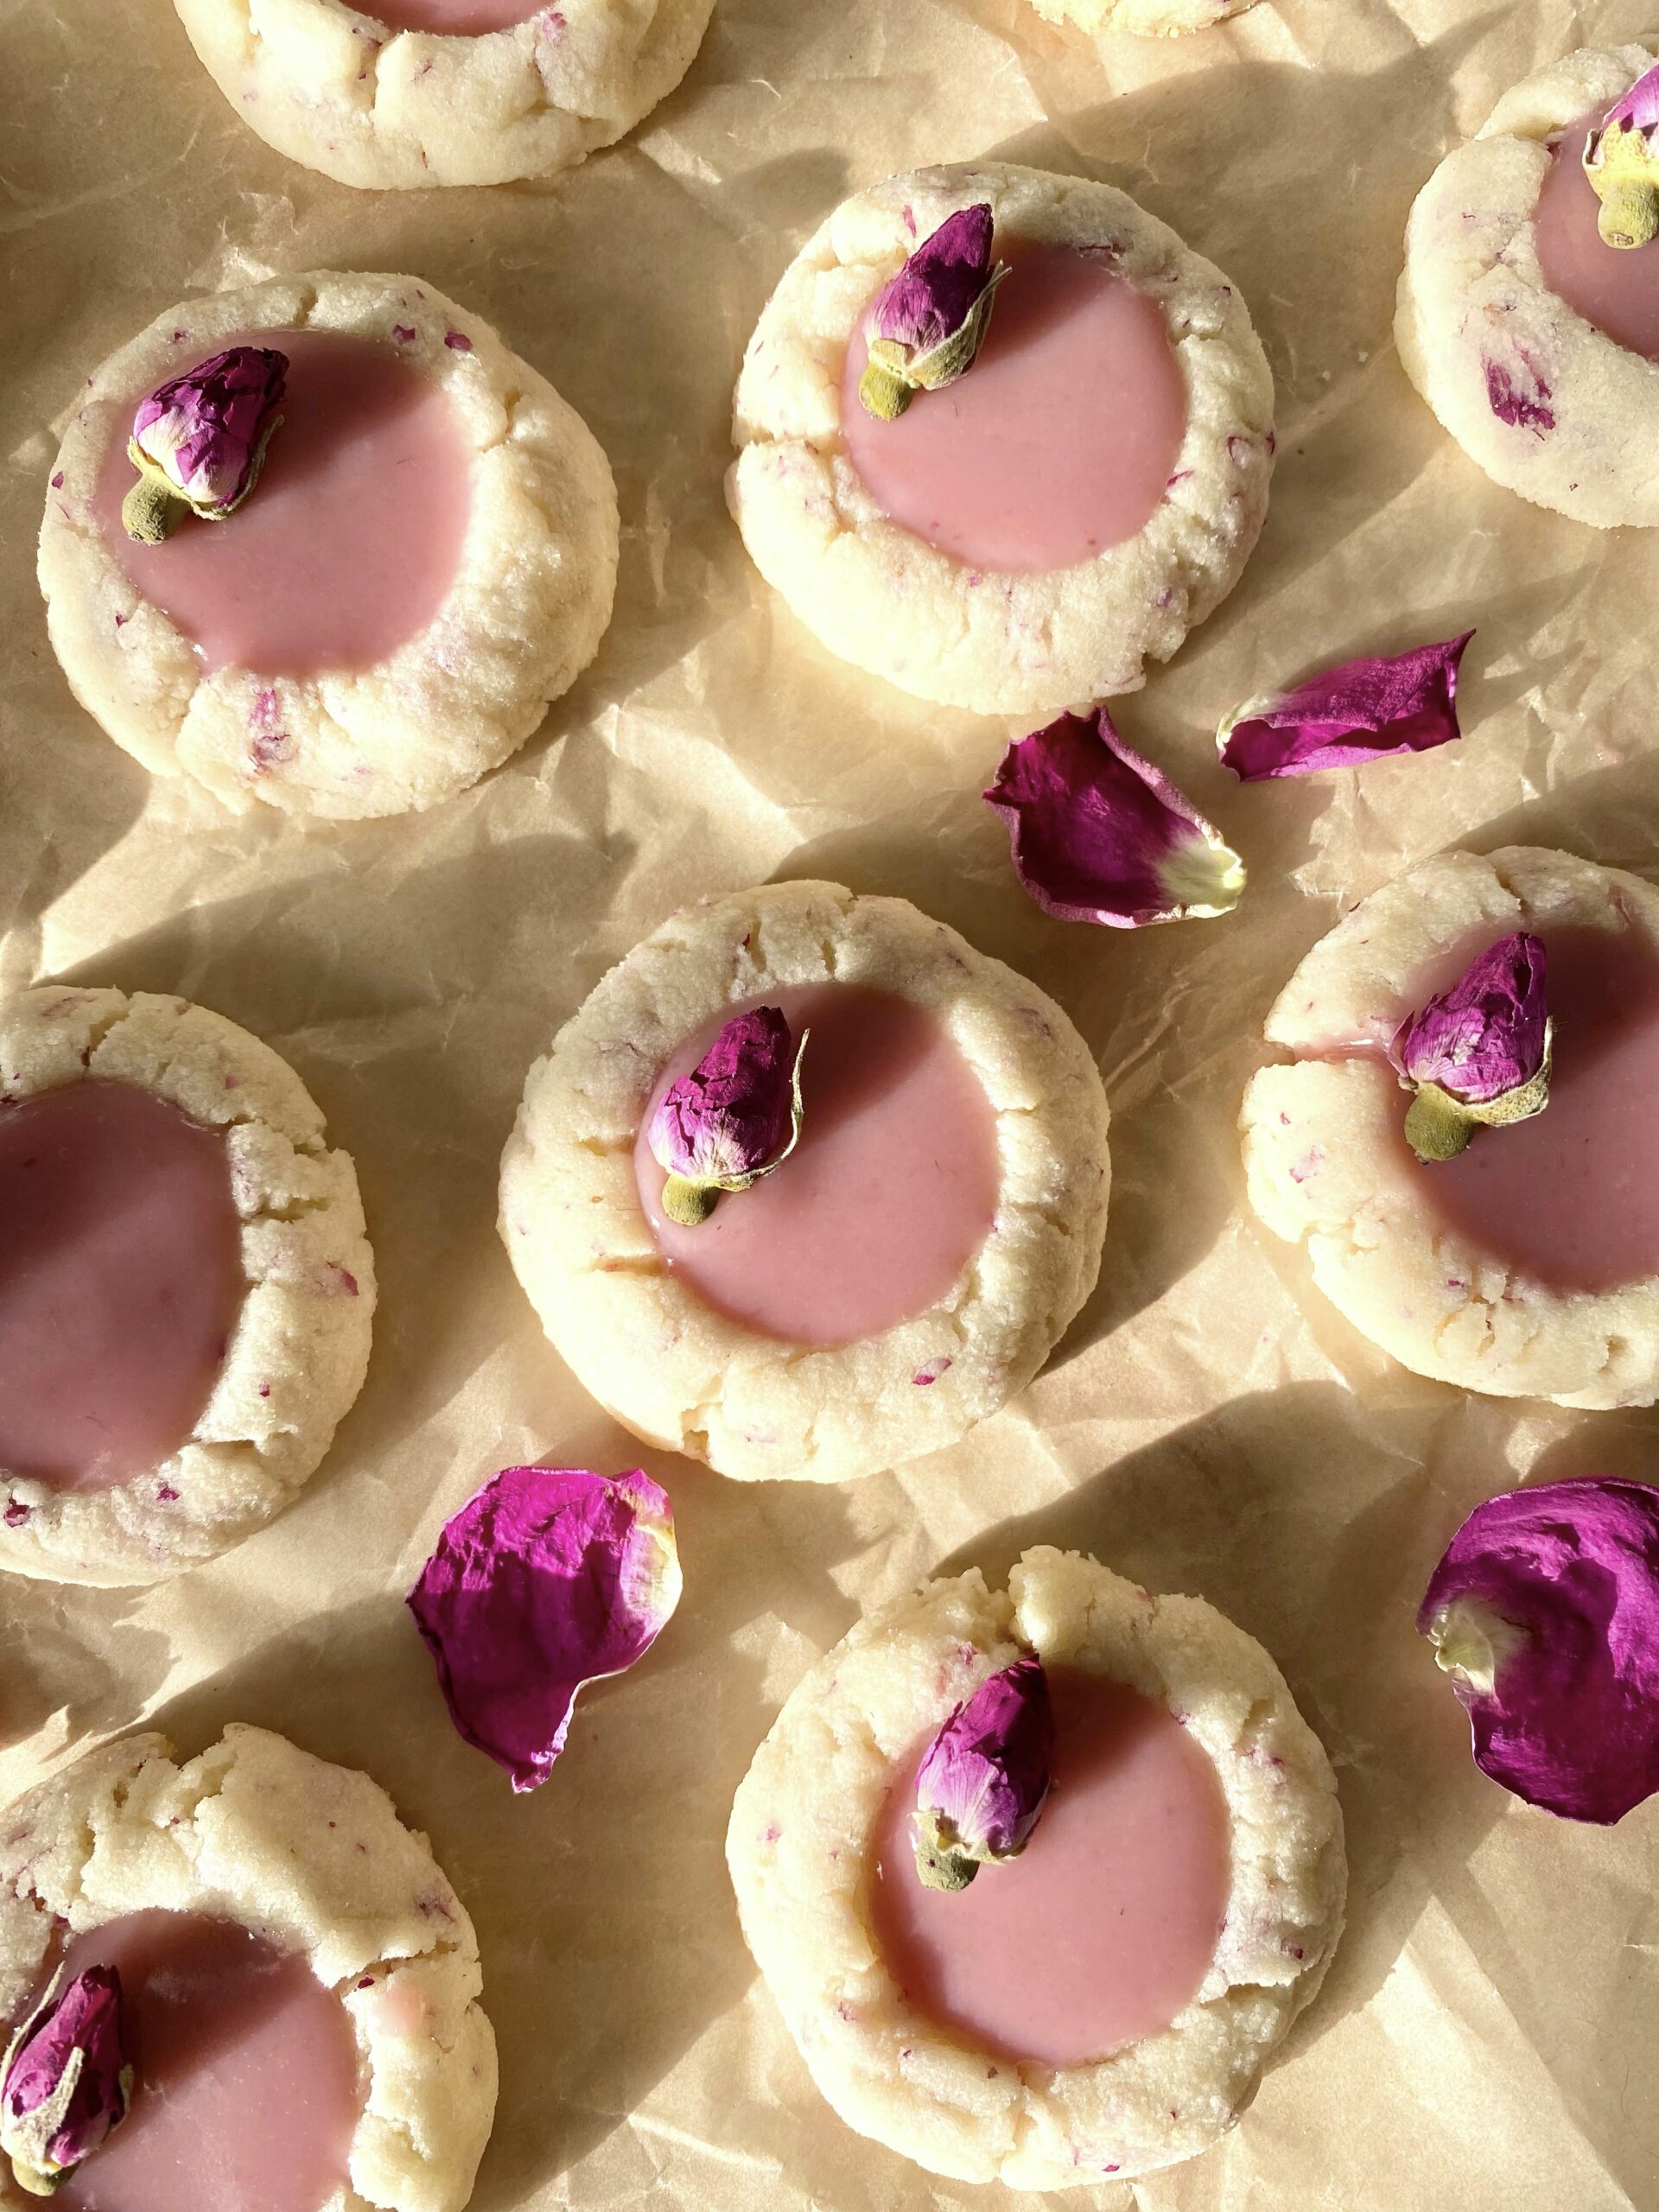
The finished cookies have a rustic, almost shabby chic look with their cracks, rose-speckled dough and beautifully imperfect dried roses. You’ll gaze at your beautiful handiwork. And of course, you’ll sample a warm cookie, before you’re supposed to. The cookies will taste tender and slightly sweet with a hint of rose. I like a more subtle rose flavor in my baked goods. But if you prefer a stronger rose flavor, feel free to add a small amount of rose water to your dough. Start with 1/8 teaspoon or 1/4 teaspoon, because a little goes a long way.

If you’re like me, you’ll taste a spoonful of the raspberry ganache because you can and should. Speaking of the raspberry ganache, please use a good quality white chocolate! In some recipes, it’s fine to use white chocolate chips or candy melts if you prefer, but NOT this one. In my humble, yet educated opinion, you should never use chocolate chips to make ganache. I studied chocolate in culinary school with a master chocolatier. I never use chocolate chips for ganache because they contain stabilizers that keep them from melting completely, which prevents you from having the smoothest ganache possible. They also contain less cocoa butter and tend to have a waxy mouth feel.

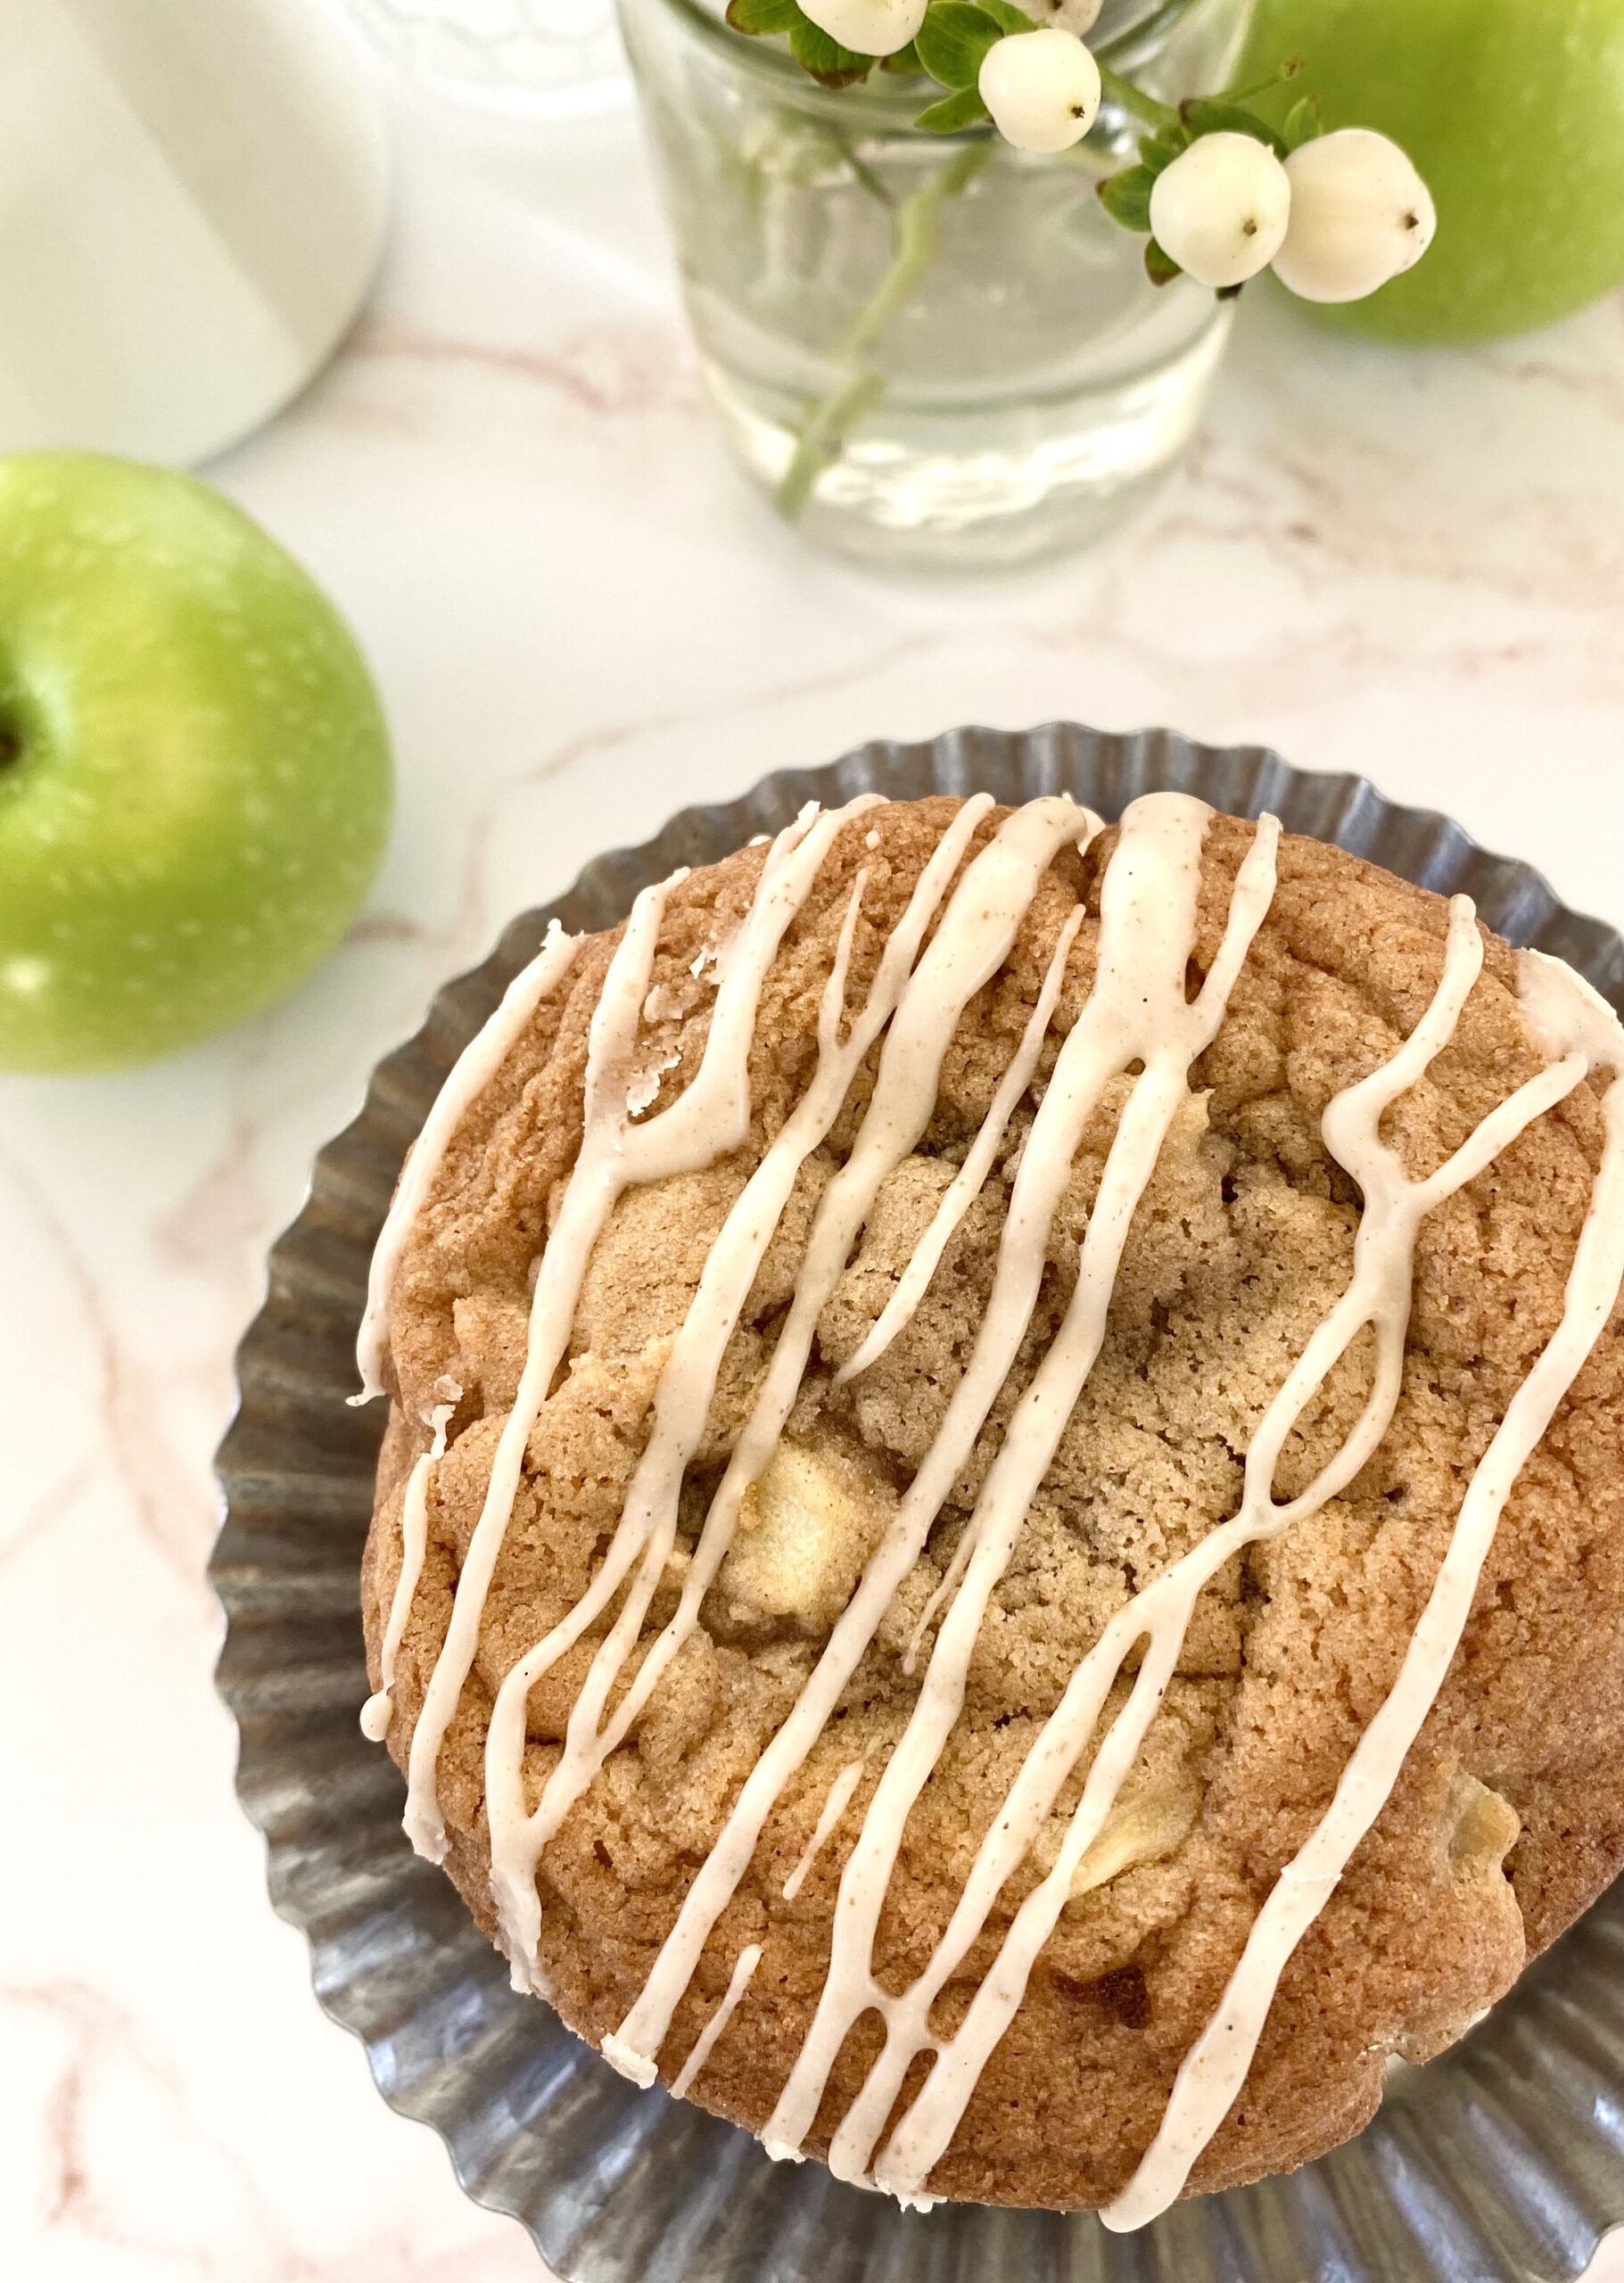
For this recipe, when it comes to butter, you should also be a little bit picky for successful baking. Low quality butter tends to contain more water and your cookies may spread too much. So make sure to use good butter. Your butter should be room temperature, but not warm. If the butter is shiny, it’s too warm. Don’t try to speed up the softening of butter with your microwave. That’s not a hack, in spite of what you may hear on the internet. Microwaves heat unevenly and will potentially melt your butter. The best way to speed up the softening of your butter is to simply cut it into cubes. By the time you get the rest of your ingredients ready, the butter should be soft enough to use. My last, but most important success tip, is to weigh your ingredients. U.S. Imperial weights are shown in parenthesis on the recipe.

Print Recipe
Raspberry Rose Shortbread Cookies
Rose petal shortbread cookies filled with white chocolate raspberry ganache
Course Dessert
Servings
cookies
Ingredients
Cookies
Filling
Course Dessert
Servings
cookies
Ingredients
Cookies
Filling
Instructions
Cookies
  1. Preheat the oven to 350ºF (180ºC). Line two large baking sheets with parchment paper
  2. In a large bowl, beat the butter, with an electric mixer on medium speed, until smooth. Add the rose petals and beat on low speed until combined.
  3. Add the powdered sugar, vanilla extract and salt. Beat until well combined.
  4. On low speed, mix in the flour in two additions. Beat just until combined.
  5. Roll the dough into 1 1/4-inch balls, about 1/2 ounce (14g) each. Place the dough balls about 2 inches apart onto the prepared baking sheets.
  6. Bake for 7 minutes, then remove from the oven. Press indentations into each cookie with a 1-inch diameter pastry tamper or with the flat top of a 1-inch diameter bottle cap.
  7. Return the cookies to the oven and continue baking until the edges are light golden brown, about 5-6 more minutes.
  8. If the indentations in your cookies lose definition, press again with the tamper or bottle cap while the cookies are still hot on the baking sheet.
  9. Transfer the cookies to a cooling rack to cool completely.
Filling
  1. In a small saucepan, bring the pureéd raspberries to a simmer over medium heat. Simmer until the purée is reduced by half, about 5 minutes. Transfer the raspberry reduction to a small bowl and set aside.
  2. Place the white chocolate in a medium heat safe bowl and set aside.
  3. In a small saucepan over medium heat, bring the heavy cream to a simmer, just until bubbles form around the edges. Do not boil. Stir in the raspberry reduction and heat just to a simmer again. Do not boil.
  4. Pour the hot cream mixture over the white chocolate, making sure all of the white chocolate is submerged. Let it sit for 2 minutes, then stir with a spatula until smooth.
  5. Let the ganache cool until slightly thickened. Spoon about 1/2 teaspoon into the indentation of each cookie. The ganache will continue to firm up as it sits.
  6. When the ganache in the cookies has firmed up, decorate with dried rosebud or rose petals, if desired.
Recipe Notes

*To find dried rose petals, click here.

**To find dried rosebuds, click here.

Vintage Chocolate Cake

Dark Chocolate Cake with the Best Chocolate Frosting

If you love chocolate cake, this is the post for you! Chocolate cake is one of the best comfort foods there is. I’ve tasted many over the years, but my all time favorite was one I had growing up. I’ve spent years trying to duplicate the moist, nostalgic cake from my childhood. I noticed that nearly every chocolate cake recipe on the internet is a variation of the century-old recipe from the Hershey’s Cocoa tin. I think many people have passed it down as a family recipe, each grandmother adding her own personal touch. Even some celebrity chefs have claimed it as their own. It’s an easy, delicious, moist recipe and its popularity is well deserved. You can tweak the flavor additions a bit to make it your own too. It’s a recipe that’s hard to mess up.

This cake is topped with the ultimate silky, smooth, deeply chocolate frosting. I developed this recipe mostly because I couldn’t find a chocolate frosting recipe that didn’t taste gritty and/or look speckled from the cocoa powder. Swiss meringue buttercream with melted chocolate added is one alternative. But, while it is smooth, silky and perfect for piping, it’s missing that deep chocolate richness. Another option is chocolate ganache. It looks rich and creamy in those viral videos, but it’s a little too rich and overpowering to use as frosting in my opinion.

I think this frosting is the one! It has the best of both worlds, velvety but not too rich. You’ll notice that this frosting contains maple syrup. The syrup gives it a very subtle maple flavor in the background, but mostly, it helps to make the frosting silky and gives it shine. You can adjust the sweetness level of the frosting by choosing the chocolate you prefer. I used bittersweet chocolate, which I think is just right. This recipe makes enough frosting to frost a 2-layer 6-inch cake. You can easily double the recipe for larger cakes.

Print Recipe
Vintage Chocolate Cake
Course Dessert
Keyword cake, chocolate
Servings
2 layer 6-inch cake
Ingredients
Chocolate Cake
Chocolate Buttercream Frosting
Course Dessert
Keyword cake, chocolate
Servings
2 layer 6-inch cake
Ingredients
Chocolate Cake
Chocolate Buttercream Frosting
Instructions
Chocolate Cake
  1. Preheat the oven to 350ºF (180ºC). Line the bottoms of two 6-inch cake pans with parchment paper. Grease the insides and dust with a mixture of equal parts flour and cocoa powder. Wrap the cake pans with damp cake strips if you have them.
  2. Sift the flour, cocoa powder, baking powder, baking soda and salt together in a medium bowl. Add the sugar and stir util well combined.
  3. Combine the the egg, egg yolk, buttermilk, vegetable oil and vanilla extract in a small bowl. Whisk lightly to combine.
  4. Add the egg mixture to the dry ingredients and mix on low speed with an electric mixer, until combined. Stop the mixer. Scrape the sides and the bottom of the bowl with a spatula. Turn the mixer up to medium speed and beat for 30 seconds.
  5. Add the hot coffee and stir until well combined.
  6. Pour the batter into the prepared cake pans, dividing batter evenly between the pans. Bake until a toothpick inserted into the center of the cakes comes out clean, about 25-28 minutes without cake strips or about 28-32 minutes with cake strips.
  7. Let the cakes cool in the pans for 10 minutes then remove the cakes from the pans and transfer to a cooling rack.
  8. Trim the cake layers to your desired thickness, from 1-inch to 1 1/2-inches thick. Fill and frost with chocolate buttercream frosting.
Chocolate Buttercream Frosting
  1. In a small saucepan over low heat, whisk together the maple syrup, water, cocoa powder and espresso powder until smooth. Set aside to cool to room temperature.
  2. Melt the chocolate in a medium bowl set over a pan of gently simmering water, making sure the water doesn't touch the bottom of the bowl. Remove from heat and set aside to cool to lukewarm.
  3. In a large bowl, beat the butter with an electric mixer at medium speed, until smooth and light in color. Add the powdered sugar and salt and continue beating until smooth and well combined.
  4. Gradually add the the cooled maple syrup mixture and beat on low speed until combined.
  5. Stir in the melted chocolate until well combined. Smooth out any air bubbles by stirring gently with a rubber spatula.
Recipe Notes

*For smoothest results, use chopped bar chocolate and make sure chocolate is completely melted.  Do not use chocolate chips. Chocolate chips do not melt completely and can make your frosting lumpy.


The Best Chocolate Buttercream Frosting

Dark Chocolate Cake with the Best Chocolate Frosting

If you’ve landed here from Instagram, welcome! You’ll notice that this is an ad-free website with no annoying pop-ups. I work very hard creating and testing delicious recipes to share with you. So if you like this recipe or any of my other popular recipes, make sure to follow me on Instagram and/or TikTok.

This is the ultimate silky, smooth, deeply chocolate frosting. I developed this recipe mostly because I couldn’t find a chocolate frosting recipe that didn’t taste gritty and/or look speckled from the cocoa powder. Swiss meringue buttercream with melted chocolate added is one alternative. But, while it is smooth, silky and perfect for piping, it’s missing that deep chocolate richness. Another option is chocolate ganache. It looks rich and creamy in those viral videos, but it’s a little too rich and overpowering to use as frosting in my opinion.

I think this frosting is the one! It has the best of both worlds, velvety but not too rich. You’ll notice that this frosting contains maple syrup. The syrup gives it a very subtle maple flavor in the background, but mostly, it helps to make the frosting silky and gives it shine. You can adjust the sweetness level of the frosting by choosing the chocolate you prefer. I used bittersweet chocolate, which I think is just right. This recipe makes enough frosting to frost a 2-layer 6-inch cake. You can easily double the recipe for larger cakes.

Print Recipe
The Best Chocolate Buttercream Frosting
Silky smooth chocolate frosting with an intense chocolate flavor
Course Dessert
Servings
servings
Ingredients
Course Dessert
Servings
servings
Ingredients
Instructions
  1. In a small saucepan over low heat, whisk together the maple syrup, water, cocoa powder, and espresso powder until smooth. Set aside to cool to room temperature.
  2. Melt the chocolate in a medium bowl set over a pan of barely simmering water, making sure the water doesn't touch the bottom of the bowl. Stir gently until smooth. Remove from heat and set aside to cool to lukewarm.
  3. In a large bowl, beat the butter with an electric mixer at medium speed, until smooth and light in color. Add the powdered sugar and salt and continue beating until smooth and well combined.
  4. Gradually add the cooled maple syrup mixture and beat on low speed until combined.
  5. Stir in the melted chocolate until well combined. Smooth out any air bubbles by stirring gently with a rubber spatula.
Recipe Notes

*To find my favorite Dutch process cocoa powder, click here.

**For the smoothest results, use chopped bar chocolate and make sure chocolate is completely melted.  Do not use chocolate chips. They contain an ingredient which prevents them from melting completely and may make your frosting lumpy.


Dark Chocolate Strawberry Marble Cookies

Dark Chocolate Strawberry Marble Cookies

To the indecisive German baker who invented marble cake, I thank you! Marble cake, sampler platters and tasting flights are the perfect solution for those times when you just can’t decide. Let’s take one more decision off the table. No longer will we have to decide between chocolate and strawberry cookies. These marble cookies are the best of both worlds. Chocolate and strawberry are opposites in many ways, but complement each other so well. After all, who doesn’t love chocolate covered strawberries?

The dark chocolate cocoa powder gives these cookies a deep chocolate flavor. Freeze dried strawberries provide the sweet strawberry flavor and color. I crushed the strawberries with a mini food processor, but you can also use a mortar and pestle, a clean spice grinder or a sturdy plastic bag and a rolling pin. When you crush the 1 1/2 cups of freeze dried strawberries called for in the recipe, you’ll end up with about 1/3 cup of strawberry powder. To find freeze dried strawberries, click here.

This recipe makes about eighteen cookies but you can also make nine large cookies. Follow the instructions in parentheses for large cookies.

Print Recipe
Dark Chocolate Strawberry Marble Cookies
Servings
cookies
Ingredients
Servings
cookies
Ingredients
Instructions
  1. In a medium bowl, whisk together flour, baking soda and salt. Set aside.
  2. In a large bowl, cream butter, sugar and brown sugar with an electric mixer until light and fluffy.
  3. Beat in eggs and vanilla in three separate additions, until well combined.
  4. On low speed, mix in flour mixture just until combined.
  5. Divide dough in half. Leave half of dough in the bowl and place the other half in a separate bowl.
  6. Add freeze dried strawberries to half of the dough and mix just until combined
  7. Add cocoa powder to the other half of the dough and mix just until combined.
  8. Roll dough into 1 1/2 teaspoon size balls. (For large cookies, roll dough into tablespoon size balls.)
  9. To form cookies, place two chocolate dough balls and two strawberry dough balls in your hand in a checkerboard pattern. Roll into a ball.
  10. Repeat with remaining dough balls and refrigerate for 30 minutes.
  11. Preheat oven to 350ºF.
  12. Line two large cookie sheets with parchment paper.
  13. Place dough two inches apart on prepared cookie sheets.
  14. Bake 10-12 minutes, until cookies are set and edges are golden. (For large cookies, bake 14-15 minutes.)
  15. Transfer to cooling rack. (For large cookies, cool on cookie sheet one minute, then transfer to cooling rack.

Chocolate Peanut Butter Tarts

Does anyone else remember those old peanut butter cup commercials where two people on the street would collide and a chocolate bar would miraculously end up inside of a jar of peanut butter? Then the person carrying the open jar of peanut butter would say, “Hey you got chocolate in my peanut butter!” and they would suddenly discover it’s a delicious combination. The real question is, why was anyone walking around outside with an open jar of peanut butter? I miss those silly commercials.

If you love chocolate and peanut butter together, you’ll absolutely love these tarts. The creamy peanut butter filling and the silky chocolate ganache topping are perfect together. The chocolate cookie crust adds a nice crunch. I used heart shaped tart pans to make the tarts a little more special for Valentine’s Day. To find the tart pans I used, click here. You can also use round tart pans if you prefer.

To watch the Instagram video, click here.

Print Recipe
Chocolate Peanut Butter Tarts
Instructions
Crust
  1. Preheat oven to 350ºF. Place four 4-inch tart pans with removable bottoms* on a baking sheet.
  2. in a medium bowl, mix crushed sandwich cookies with melted butter until well combined. Press crumb mixture into tart pans.
  3. Bake for 8 minutes. Let cool completely.
Filling
  1. In a medium bowl, beat peanut butter and softened butter until smooth.
  2. Add remaining filling ingredients and beat until smooth and well combined.
  3. Fill cooled tart shells with filling. Refrigerate tarts until set, at least 2 hours.
Topping
  1. Place chopped chocolate in a small bowl.
  2. In a small saucepan, heat heavy cream over medium-low heat just until bubble form around the edges. Do not boil.
  3. Pour hot cream over chocolate. Let sit two minutes then stir until smooth.
  4. Spoon over peanut butter filling. Add toppings if desired. Refrigerate until chocolate is set. Carefully remove tarts from pans.
Recipe Notes

To find the tart pans I used, click here.

The Nutcracker Land of Sweets Cupcakes

Nutcracker Land of Sweets Cupcakes

The tradition of enjoying the Nutcracker Ballet at Christmastime has been in my family for over 20 years. The Nutcracker Land of Sweets is a magical theme that has me mesmerized. Gingerbread, candy canes, gumdrops and billowy clouds of pink frosting are what dreams are made of. And that’s exactly what these dreamy cupcakes are made of. The cupcake flavor is a subtle spice cake. The recipe is adapted from a Martha Stewart cake recipe I made last summer. The original cake was paired with blackberry jam, but I knew plum jam would be perfect for these cupcakes. I topped them with a mildly sweet, fluffy Swiss meringue buttercream.

Part of the fun of making these cupcakes began at the store as I collected the sweets to decorate the cupcakes. Another perk of the job is taste testing the candy. I discovered that purple spice drops are licorice flavored and red spice drops are cinnamon. Who knew?

You might also like my Nutcracker Land of Sweets inspired candy bark. It’s a delightful holiday bark I designed that is often imitated. To view it, click here.

Print Recipe
The Nutcracker Land of Sweets Cupcakes
Spice cupcakes filled with plum jam, topped with fluffy pink frosting, gingerbread men and Christmas candy, and dusted with sugar snow
Course Dessert
Keyword cupcakes
Servings
cupcakes
Ingredients
Spice cupcakes
Pink Vanilla Swiss Meringue Buttercream
Course Dessert
Keyword cupcakes
Servings
cupcakes
Ingredients
Spice cupcakes
Pink Vanilla Swiss Meringue Buttercream
Instructions
Spice Cupcakes
  1. Preheat oven to 350ºF. Line a 12 serving muffin pan with disposable baking cups. (I used silver foil liners.)
  2. In a medium bowl, whisk together flours, baking powder, spices and salt. Set aside.
  3. In a large bowl, cream butter and sugar together with an electric mixer until light and fluffy.
  4. Add egg, egg white, and vanilla, one at a time, mixing until well combined.
  5. Add flour mixture in two additions, alternating with milk. Mix until combined.
  6. Divide batter evenly into wells of prepared muffin pan, filling about 2/3 full.
  7. Bake until light golden and toothpick inserted comes out clean, about 16-18 minutes.
  8. Let cool in muffin pan for 5 minutes. Gently transfer cupcakes to cooling rack to cool completely.
  9. Core the center of each cupcake, removing a 3/4-inch deep circle. Fill with jam and replace the circle top.
  10. Frost cupcakes with pink Swiss meringue buttercream. Decorate with cookies and candies. Lightly sprinkle with powdered sugar.
Pink Vanilla Swiss Meringue Buttercreamgue Buttercream
  1. Combine egg whites and sugar in a heatproof bowl. Set over a pan of gently simmering water.
  2. Whisk constantly until sugar is dissolved and temperature of 160ºF is reached.
  3. Transfer mixture to the bowl of a stand mixture with a whisk attachment. Whisk on low speed, gradually increasing to medium-high speed. Whisk until glossy, stiff peaks form and mixture reaches room temperature.
  4. Turn mixer to medium-low speed. Add butter, a few pieces at a time, allowing the butter to fully incorporate each time before adding more.
  5. Switch to paddle attachment. On low speed, mix in vanilla, salt and food color. Continue mixing on low speed for a few minutes until smooth.
Recipe Notes

Recipe adapted from Martha Stewart Spice Cake

Apple Spice Cookies with Brown Butter Icing

Apple Spice Cookies with Brown Butter Icing

These Apple Spice Cookies were one of my most popular cookies last fall so I decided to bring them back a little early this year. The combination of cinnamon, nutmeg and vanilla in this cookie dough will remind you of cinnamon rolls and apple pie and inspire you look forward to fall.

The apples in this recipe are cooked briefly on the stovetop to bring out the flavor and create the perfect texture. Dropping raw apple chunks into cookie dough or cake batter is usually not a good idea. If you’ve ever baked an apple pie, you know that apples release liquid as they cook and that liquid will end up in your baked cookies, creating soggy spots. So definitely don’t skip this step!

These gorgeous, golden brown cookies are perfectly delicious on their own, but extra credit goes to the Brown Butter Icing for taking them over the top!

apple spice cookies with brown butter icing

Make sure to head over to Instagram to watch the video of these Apple Spice Cookies being created: Click here

Print Recipe
Apple Spice Cookies with Brown Butter Icing
Spice cookies with fresh apples and brown butter icing
Course Dessert
Servings
cookies
Ingredients
Cooked Apples
Brown Butter Icing
Course Dessert
Servings
cookies
Ingredients
Cooked Apples
Brown Butter Icing
Instructions
Cooked Apples
  1. Melt the butter in a small skillet over medium heat. Add apples, sugar and cinnamon to the skillet.
  2. Cook, stirring occasionally, until the apples are tender, about 4-5 minutes.
  3. Remove from heat and let cool completely. Drain any excess liquid from the cooled apples.
Apple Spice Cookies
  1. Preheat the oven to 375ºF (190ºC). Line two large baking sheets with parchment paper.
  2. In a medium bowl, whisk together the flour, baking soda, salt, cinnamon and nutmeg. Set aside.
  3. In a large bowl, beat the butter and brown sugar with an electric mixer at medium speed until light and fluffy.
  4. Beat in the egg, egg yolk and vanilla extract, one at a time, until well combined
  5. Stir in the flour mixture, just until combined.
  6. Fold the the cooled apples into the cookie dough.
  7. Divide the dough into 12 equal golf ball size portions and place them 3 inches apart on the prepared baking sheets.
  8. Bake until golden brown, about 11-13 minutes. Let cool 1 minute on the baking sheet, then transfer to a cooling rack to cool completely.
Brown Butter Icing
  1. In a small saucepan, cook the butter over medium heat until golden brown and fragrant. When brown specks start to form in the bottom of the pan, remove from heat.
  2. Immediately transfer the browned butter to a small bowl. Whisk in the the powdered sugar, vanilla extract, salt and 1 tablespoon milk. Add more milk as needed to reach desired consistency.
  3. Drizzle the icing over the cooled cookies.
Recipe Notes

NOTE:  If your cookies spread too much when baking, refrigerate dough for 30 minutes, then bake as directed.

Pumpkin Spice Mini Loaves with Caramel Filling

pumpkin spices mini loaves with caramel filling

In early September, I saw someone announce the fall season on social media. In addition to people pointing out that it was too early for the announcement, the word police corrected the person with the word autumn. Since both terms are correct, we can call the season whatever we prefer. I think autumn is a pretty sounding word, so I’ll use it for the rest of this post. Whatever you call it, these Pumpkin Spice Mini Loaves are a perfect little celebration of the season. They have just the right amount of pumpkin spices, making them so fragrant that your kitchen will smell like cozy autumn heaven.

pumpkin spices mini loaves with caramel filling

I call them loaves because I originally made them in mini loaf pans. They’re so cute and delicious that I often give them as holiday gifts. This year I decided to try them in ramekins and I loved the results! I used 6-ounce ramekins, but you can use 8-ounce ramekins, any size mini loaf pans, a muffin pan or even an 8 or 9-inch loaf pan. Keep in mind that baking times will differ. To find the ramekins I used, click here.

Print Recipe
Pumpkin Spice Mini Loaves with Caramel Filling
Mini loaves of tender pumpkin bread with caramel filling and luscious cream cheese frosting
Servings
mini loaves
Ingredients
Pumpkin Spice Mini Loaves
Cream Cheese Frosting
Servings
mini loaves
Ingredients
Pumpkin Spice Mini Loaves
Cream Cheese Frosting
Instructions
Pumpkin Spice Mini Loaves
  1. Preheat oven to 350ºF. Grease and flour seven 6-ounce ramekins or six 8-ounce ramekins or any loaf pans of your choice.
  2. In a large bowl, sift together flour, cinnamon, baking powder, baking soda, salt, ginger, nutmeg and cloves. Set aside.
  3. In a separate large bowl, cream butter and brown sugar together with an electric mixer until light and fluffy.
  4. Beat in eggs, one at a time, until well combined.
  5. Beat in pumpkin and vanilla until combined.
  6. Stir in flour mixture just until combined.
  7. Divide batter evenly into prepared ramekins. Bake for 20-25 minutes or until golden brown and toothpick inserted in center comes out clean. Do not overbake. (Mini loaves or muffins bake for 15-25 minutes, depending on size. 8 or 9-inch loaf bakes for 40-50 minutes)
  8. Cool completely if serving in ramekins or remove from pans after cooling for 10 minutes. Continue to cool on wire rack.
  9. Make 3/4-inch well in the center of each loaf. Fill with caramel sauce. (For an 8 or 9-inch loaf, poke multiple holes with a skewer. Fill with caramel sauce.)
  10. Top with cream cheese frosting and pumpkin seeds
Cream Cheese Frosting
  1. In a large bowl, beat cream cheese and butter together with an electric mixer until smooth.
  2. Add vanilla extract and salt and beat until combined.
  3. Gradually add powdered sugar and beat at medium speed until combined.
  4. Add heavy cream and beat at low speed until combined.

Fairy Puffs

Fairy Puffs sugared mini muffins wtih edible flowers

My dad used to take me on walks in the woods to look for fairy rings when I was a child. I wanted to see a real fairy so badly! I read a book about fairies, hoping to learn more about them. Fairies love little cakes, milk, honey and butter so I’m sure these Fairy Puffs would be fairy approved.

My Fairy Puffs recipe is loosely based on an old favorite mini muffin recipe. I tweaked it quite a bit, including the addition of pink dragonfruit powder. Dragonfruit has a subtle flavor, so the bright fuchsia powder is mostly for color. But oh what a beautiful color it is! You can find dragonfruit powder in healthy food stores or online. To find the dragonfruit powder, also known as pink pitaya powder, I used, click here.

fairy puff muffins

Decorating these little cuties was so entertaining! After sampling multiple variations of sparkling sugar and cinnamon sugar, I decided that dipping the bottoms of the muffins in butter and cinnamon sugar, then dipping the tops in butter and sparkling sugar gave them the perfect balance of sugar and spice. I had purchased some edible flowers a couple of days prior, and they added a pretty, magical touch. The flowers I used are called bachelor’s buttons and I got them at a local gourmet flower seller.

sugared mini muffins with edible flowers

Print Recipe
Fairy Puffs
Course Breakfast, Brunch
Keyword cake, muffins
Servings
mini muffins
Ingredients
Fairy Puffs
Topping
Course Breakfast, Brunch
Keyword cake, muffins
Servings
mini muffins
Ingredients
Fairy Puffs
Topping
Instructions
Fairy Puffs
  1. Preheat oven to 350ºF. Grease and flour a 24 serving mini muffin pan.
  2. In a medium bowl, whisk together flour, dragonfruit powder, baking powder, salt and nutmeg. Set aside.
  3. In a large bowl, cream butter and sugar with an electric mixer until light and fluffy.
  4. Add egg and beat until smooth.
  5. Add flour mixture and milk alternately in two additions and mix just until combined.
  6. Transfer batter to prepared muffin pan, filling muffin cups about 3/4 full.
  7. Bake until toothpick inserted in center of muffins comes out clean, about 12-14 minutes. (Be careful not to over bake. Check a few minutes early. Small muffins can dry out easily.)
  8. Let cool in pan for 5 minutes. Remove puffs from pan and transfer to cooling rack. (Loosen puffs with a small offset spatula or butter knife if necessary.)
Topping
  1. Combine granulated sugar and cinnamon in a shallow bowl.
  2. Place colored sparkling sugar crystals in another shallow bowl.
  3. Dip the bottoms of each puff in melted butter, then into cinnamon sugar mixture.
  4. Dip the tops of each puff in melted butter, then into sparkling sugar.
  5. Decorate with edible flowers if desired.
Recipe Notes

*To purchase dragonfruit powder, click here.

 **To purchase pink sparkling sugar crystals, click here.


Mini Hummingbird Cake

Mini Hummingbird Cake

If you haven’t noticed already, I love little cakes. Mini cakes are not only cute and charming, they’re likely to make you very popular. This recipe makes two darling Mini Hummingbird Cakes, one to keep and one to share. Hummingbird Cake is a delightful way to use your ripe bananas. The version I’m sharing here also contains pineapple, pecans and coconut. This fruity, nutty combination reminds me of spring and would be perfect for Easter or a spring picnic.

Print Recipe
Mini Hummingbird Cake
Hummingbird Cakes filled with bananas, pineapple, pecans and coconut, topped with cream cheese frosting and decorated with graham cracker crumb moss and fresh chamomile flowers.
Course Dessert
Keyword cake, hummingbird
Servings
4-inch 2-layer cakes
Ingredients
Hummingbird Cakes
Cream Cheese Frosting
Optional Decor
Course Dessert
Keyword cake, hummingbird
Servings
4-inch 2-layer cakes
Ingredients
Hummingbird Cakes
Cream Cheese Frosting
Optional Decor
Instructions
Hummingbird Cakes
  1. Preheat oven to 350ºF. Line the bottoms of four 4-inch cake pans**** with parchment paper. Grease and flour the insides.
  2. In a medium bowl, whisk together flour, baking soda, salt and cinnamon. Set aside.
  3. In a large bowl, beat butter, sugar and brown sugar, with an electric mixer, until light and fluffy.
  4. Beat in egg, egg yolk, and vanilla in three separate additions, making sure each one is incorporated before adding the next.
  5. Stir in bananas, pineapple, pecans and coconut until well combined
  6. Transfer batter to prepared cake pans, about 1 cup of batter in each pan. Place filled cake pans on a baking sheet.
  7. Bake until toothpick inserted in centers comes out clean, about 25-28 minutes. Cool cakes in pans 10 minutes then turn cakes out onto a cooling rack to cool.
  8. Trim cakes to 1-inch thickness. Fill, stack and frost cakes with cream cheese frosting.
Cream Cheese Frosting
  1. In a large bowl, beat butter with an electric mixer until smooth and pale.
  2. Beat 1 tablespoon heavy cream, vanilla and salt into butter until well combined.
  3. On low speed, beat in powdered sugar a half cup at a time, until well combined.
  4. In a medium bowl, mix cream cheese with remaining 1 tablespoon heavy cream until smooth.
  5. On low speed, beat cream cheese mixture into butter mixture until smooth and well combined.
Decor
  1. To make graham cracker crumb moss: In two small bowls, dilute 1/8 teaspoon of each gel food color with a few drops of vodka. (Vodka will dissipate as crumbs dry.) Place graham cracker crumbs in a plastic zip bag. Add diluted food colors a little at a time and seal bag. Shake bag and gently massage to distribute color. Add more diluted food color as needed until desired shade of green is reached. Spread crumbs out onto a parchment lined baking sheet to dry. Apply crumbs to bottom edges of frosted cakes.
Recipe Notes

*Chop the coconut flakes to achieve a finer texture. This step is optional.

**To find the avocado green food color gel I used, click here.

***To find the lemon yellow food color gel I used, click here.

****To find the 4-inch cake pans I used, click here.

Strawberry Shortcake Crumble Muffins

strawberrry shortcake crumble muffins

Have you noticed the strawberry shortcake crumble topping trend? I noticed many people sharing various versions of the crumble recipe all over Tiktok. I’ve seen the topping on cake, cupcakes and countless other desserts. Most people seem to make it using strawberry gelatin mix and vanilla pudding mix. The version I’m sharing here uses freeze dried strawberries instead. I’m not opposed to using gelatin mix, I just seriously love the tart, natural flavor of freeze dried strawberries.

This topping is irresistible on these tender strawberry muffins. I wanted to pile on as much crumble topping as possible so I used tulip baking cups. They’re made of grease-proof parchment paper squares. You can buy them online or make them yourself with squares of parchment. You can use the link provided at the end of the recipe to find the ones I used. Keep in mind, if you use standard muffin liners, you’ll use less batter and topping for each muffin, so you’ll end up with a few more muffins.

I used fresh strawberries for the puree in the muffins, but feel free to use frozen, defrosted strawberries if you cant get fresh ones.

Strawberry shortcake crumble muffins

Print Recipe
Strawberry Shortcake Crumble Muffins
Strawberry muffins topped with strawberry shortcake crumble
Servings
muffins
Ingredients
Strawberry Shortcake Crumble Topping
Strawberry Muffins
Servings
muffins
Ingredients
Strawberry Shortcake Crumble Topping
Strawberry Muffins
Instructions
Strawberry Shortcake Crumble Topping
  1. In a medium bowl, combine flour, sugar and salt.
  2. Cut cubed butter into the flour mixture with a pastry blender or with your fingers until it forms pea size pieces.
  3. Place half of crumble mixture into another medium bowl and combine with freeze dried strawberries. Mix well and press together with your fingers to form pea sized pieces.
  4. Gently combine the two bowls of crumble together. Set aside in refrigerator while preparing muffin batter.
Strawberry Muffins
  1. Preheat oven to 375ºF. Line a 12 serving muffin tin with tulip baking liners or parchment squares.
  2. In a medium bowl, combine flour, baking powder, baking soda and salt. Set aside.
  3. In a large bowl, beat butter with an electric mixer on medium speed until smooth. Add sugar and beat until light and fluffy.
  4. Add eggs and extract. Beat until well combined.
  5. Add dry ingredients and beat on low speed, just until combined.
  6. Add buttermilk, strawberry puree and food color. Beat on low speed, just until combined.
  7. Divide batter evenly into muffin liners.
  8. Sprinkle crumble topping evenly over batter.
  9. Bake at 375ºF for 5 minutes, then turn oven temperature down to 350ºF and continue baking until topping is golden and a toothpick inserted in center is clean, about 13-17 more minutes.
Recipe Notes

To find tulip baking cups, click here

To find floral tulip baking cups, as seen on TikTok, click here


Cherry Blossom Cookies

cherry blossom cookies

Each spring, I look forward to the sight and fragrance of beautiful botanical blooms, especially cherry blossoms. We often think of cherry blossoms as something unique to Washington D.C. or Japan, but cherry blossoms can be found in many regions of the United States. Georgia has many thousands of the beautiful pink trees. They can also be found in my home state, California. Here in California we also have many other types of beautiful blossoming fruit trees.

Inspired by the beautiful pink blossoms, I baked some cherry blossom cookies. There are many varieties of the blossoming pink trees. The Yoshino variety that we love to admire is not the same as the trees that produce cherries that we typically eat, but I decided to make the cookies cherry flavor anyway. Cherry extract is more accessible, but it’s also possible to make the cookies sakura blossom flavor if you prefer. You can purchase culinary sakura blossoms or sakura powder and flavor the cookies with it.

These perfectly pretty, pink cookies are easy to make and fun to decorate. You can sprinkle sparkling sugar on them before baking and call it a day or you can make some pink cherry icing and add sugar pearls or sprinkles. Either way, they look beautiful and taste delicious!

Print Recipe
Cherry Blossom Cookies
Pink cherry flavored sugar cookies with cherry icing
Servings
dozen
Ingredients
Cherry Blossom Cookies
Cherry Icing
Servings
dozen
Ingredients
Cherry Blossom Cookies
Cherry Icing
Instructions
Cherry Blossom Cookies
  1. In a large bowl, beat butter and cream cheese together with an electric mixer on medium speed, until smooth.
  2. Add sugar and salt. Beat on medium speed until light and fluffy.
  3. Add egg and extracts. Beat on medium speed until well combined.
  4. Add flour in two additions. Mix on low speed just until combined.
  5. Mix in food color on low speed, a tiny bit at a time, until desired shade is achieved.
  6. Divide dough into two discs. Wrap in plastic wrap and refrigerate until firm, about 2 hours or up to overnight.
  7. Preheat oven to 375ºF. Line two large cookie sheets with parchment paper.
  8. On a lightly floured surface, roll dough to 1/8" thickness.
  9. Cut out cookies with 2-inch blossom cutter. ***See note below.
  10. Transfer to prepared baking sheets. Sprinkle with sparkling sugar if using.
  11. Bake for 7-9 minutes until bottom edges are lightly browned.
  12. Remove from oven and transfer to cooling rack.
  13. Cool completely then ice with cherry icing, if desired.
  14. Decorate with sugar pearls or sprinkles before icing sets.
Cherry Icing
  1. In a small bowl, whisk together powdered sugar, salt, 3 tablespoons of milk and cherry extract. Add additional milk until desired consistency is reached. Whisk together until smooth.
  2. Mix in pink gel food color, a tiny bit at a time, until desired shade is achieved.
Recipe Notes

*Do not use imitation cherry flavoring or extract. Imitation extracts may make your cookies taste medicinal. 

** I used Wilton gel food color in shade rose. Click here to find it. 

*** Use your favorite blossom cookie cutter or click here to find the blossom cutters I used.