White Velvet Snowflake Cakes

Print Recipe
White Velvet Snowflake Cakes
Soft, plush vanilla mini cakes with vanilla icing
Course Dessert
Keyword cake, white velvet
Servings
cakes
Ingredients
Snowflake Cakes
Vanilla Icing
Course Dessert
Keyword cake, white velvet
Servings
cakes
Ingredients
Snowflake Cakes
Vanilla Icing
Instructions
Snowflake Cakes
  1. Preheat the oven to 350ºF (177ºC). Spray a 6-serving silicone snowflake mini cake mold* with nonstick spray. Use a small pastry brush to brush the spray into all of the crevices. Tap out any excess spray. Place the mold on a baking sheet.
  1. In a large bowl, whisk together the cake flour, baking powder and salt. Add the sugar and whisk to combine. Add the butter and beat, with an electric mixer on low speed, until the butter is evenly distributed and the mixture looks like crumbs with no large chunks.
  2. In a medium bowl, whisk together the milk, egg whites, oil and vanilla. Slowly add the milk mixture to the flour mixture and continue beating on low until smooth, about 1-2 minutes.
  3. Transfer the batter to the prepared pan, evenly distributing the batter and filling the cavities a little more than half full. Bake until the tops of the cakes are light golden and a toothpick inserted into the centers of the cakes comes out clean, about 18-22 minutes. Be careful not to over bake. Let the cakes cool in the pan for about 7 minutes then turn the cakes out onto a cooling rack to cool completely.
  4. Brush one or two coats of vanilla icing on the tops and sides of the cakes. Decorate as desired. I used fine opal sanding sugar, candy snowflakes and candy pearls.
Vanilla Icing
  1. In a medium bowl, whisk together the powdered sugar, butter, vanilla, salt and 1 tablespoon of milk until smooth. Add additional milk as need to achieve your desired consistency.
Recipe Notes

I used a 6-serving silicone mold with 3-inch diameter, 1-inch deep cavities.


Apple Cake with Cream Cheese Frosting

Apple Cake with Cream Cheese Frosting

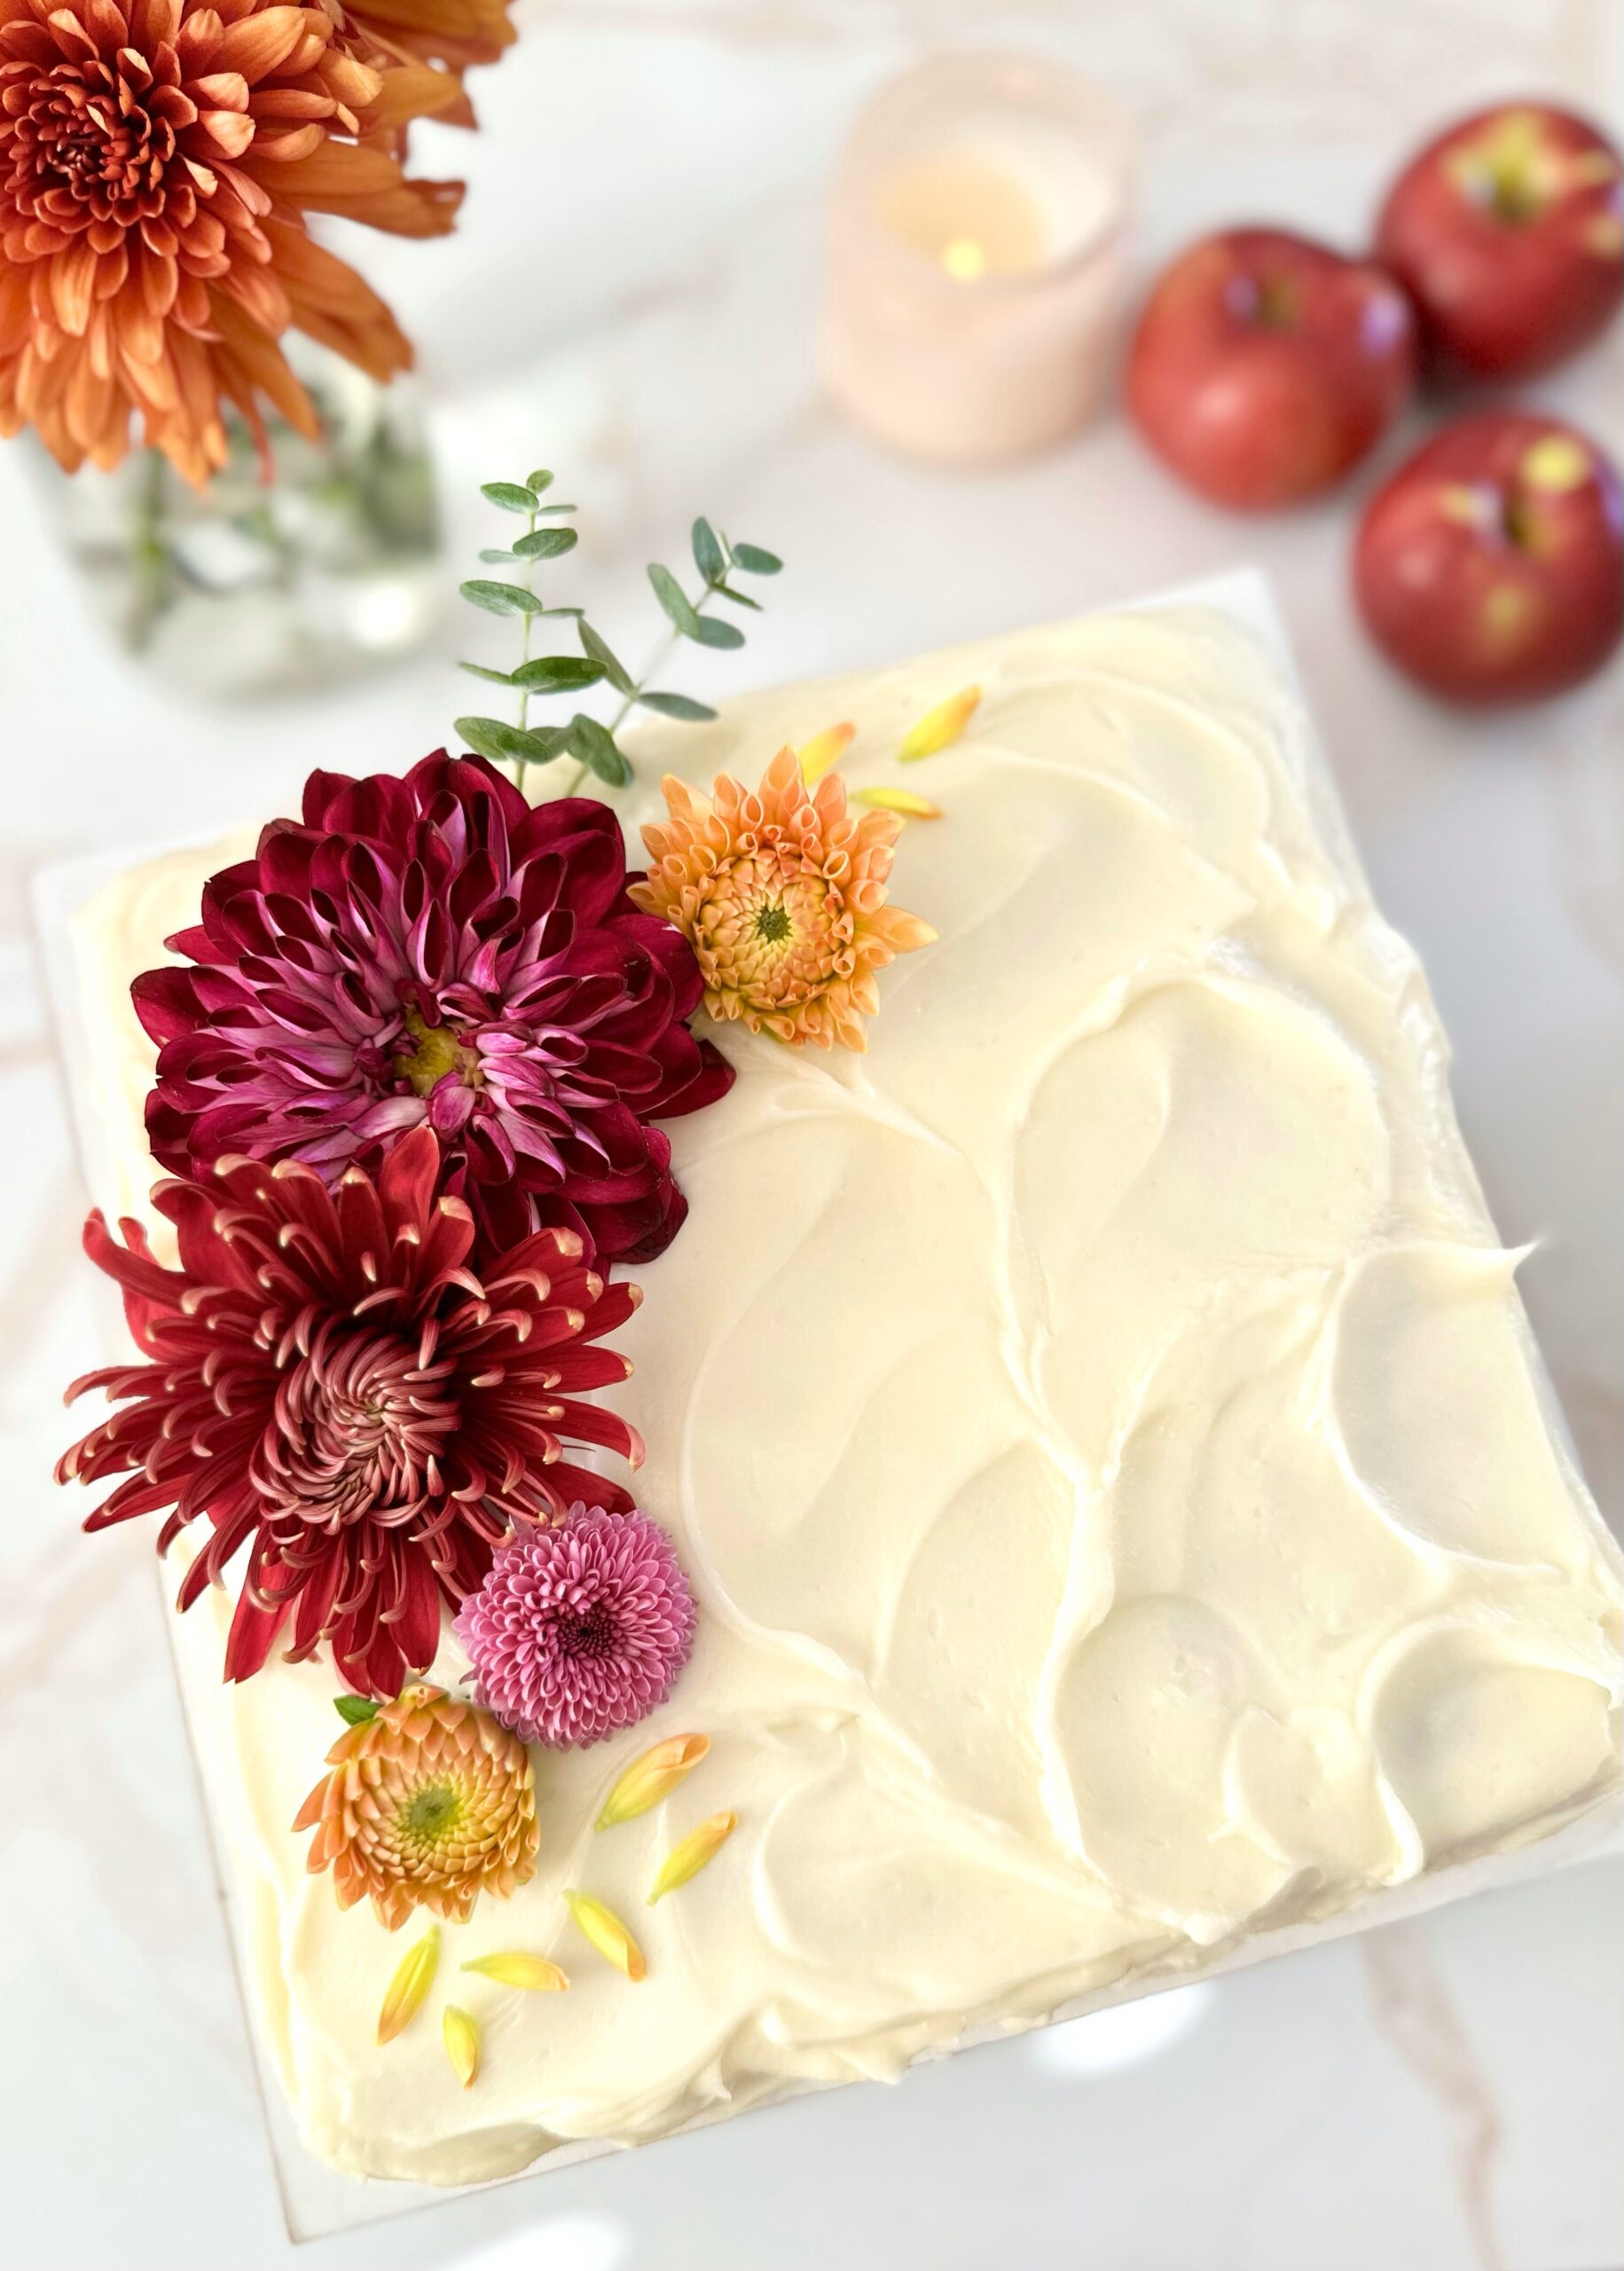
An easy-to-make square cake, typically unfrosted, is what my family would consider a snacking cake when I was growing up. This easy apple cake qualifies as a snacking cake because it stands on its own as a moist, delicious cake, unfrosted. BUT…if you add the silky cream cheese frosting, then you have yourself something a little more special. This cake could easily appear at a Thanksgiving meal and upstage the pies. I added food-safe fresh flowers and a faux sprig of greenery to dress it up for autumn. If you’re using fresh flowers, make sure to use pesticide-free flowers and wrap your stems before placing them into the cake. This cake is also amazing topped with caramel sauce.

Print Recipe
Apple Cake with Cream Cheese Frosting
A soft, moist apple cake with silky cream cheese frosting.
Course Dessert
Keyword apple, cake
Servings
servings
Ingredients
Cream Cheese Frosting
Course Dessert
Keyword apple, cake
Servings
servings
Ingredients
Cream Cheese Frosting
Instructions
Apple Cake
  1. Preheat the oven to 350ºF (180ºC). Line the bottom of an 8-inch square cake pan** with parchment paper. Grease and flour the insides.
  2. In a medium-size bowl, whisk together the flour, baking powder, baking soda, salt, cinnamon, ginger and nutmeg.
  3. In a large bowl, whisk together the brown sugar, granulated sugar, eggs, vegetable oil, and vanilla extract until smooth and well combined. Mix in the puréed apples until incorporated. Stir in the flour mixture just until combined.
  4. Transfer the batter to the prepared cake pan. Bake until a toothpick inserted into the center of the cake comes out clean, about 28-33 minutes. Let the cake cool in the pan for 10 minutes, then remove the cake from the pan and transfer it to a cooling rack.
Cream Cheese Frosting
  1. In a large bowl, stir the cream cheese with a spatula until smooth. Beat in the butter, with an electric mixer on low speed, until smooth and well combined.
  2. Beat in the powdered sugar, vanilla, salt and heavy cream until smooth and well combined. Stir slowly with a spatula to smooth the frosting and remove bubbles.
Recipe Notes

*If you're using applesauce and your applesauce is watery, drain off excess liquid before measuring.

**To find my favorite 8-inch square cake pan, click here.

Strawberry Chocolate Chip Shortbread Cookies

Strawberry Chocolate Chip Shortbread Cookies

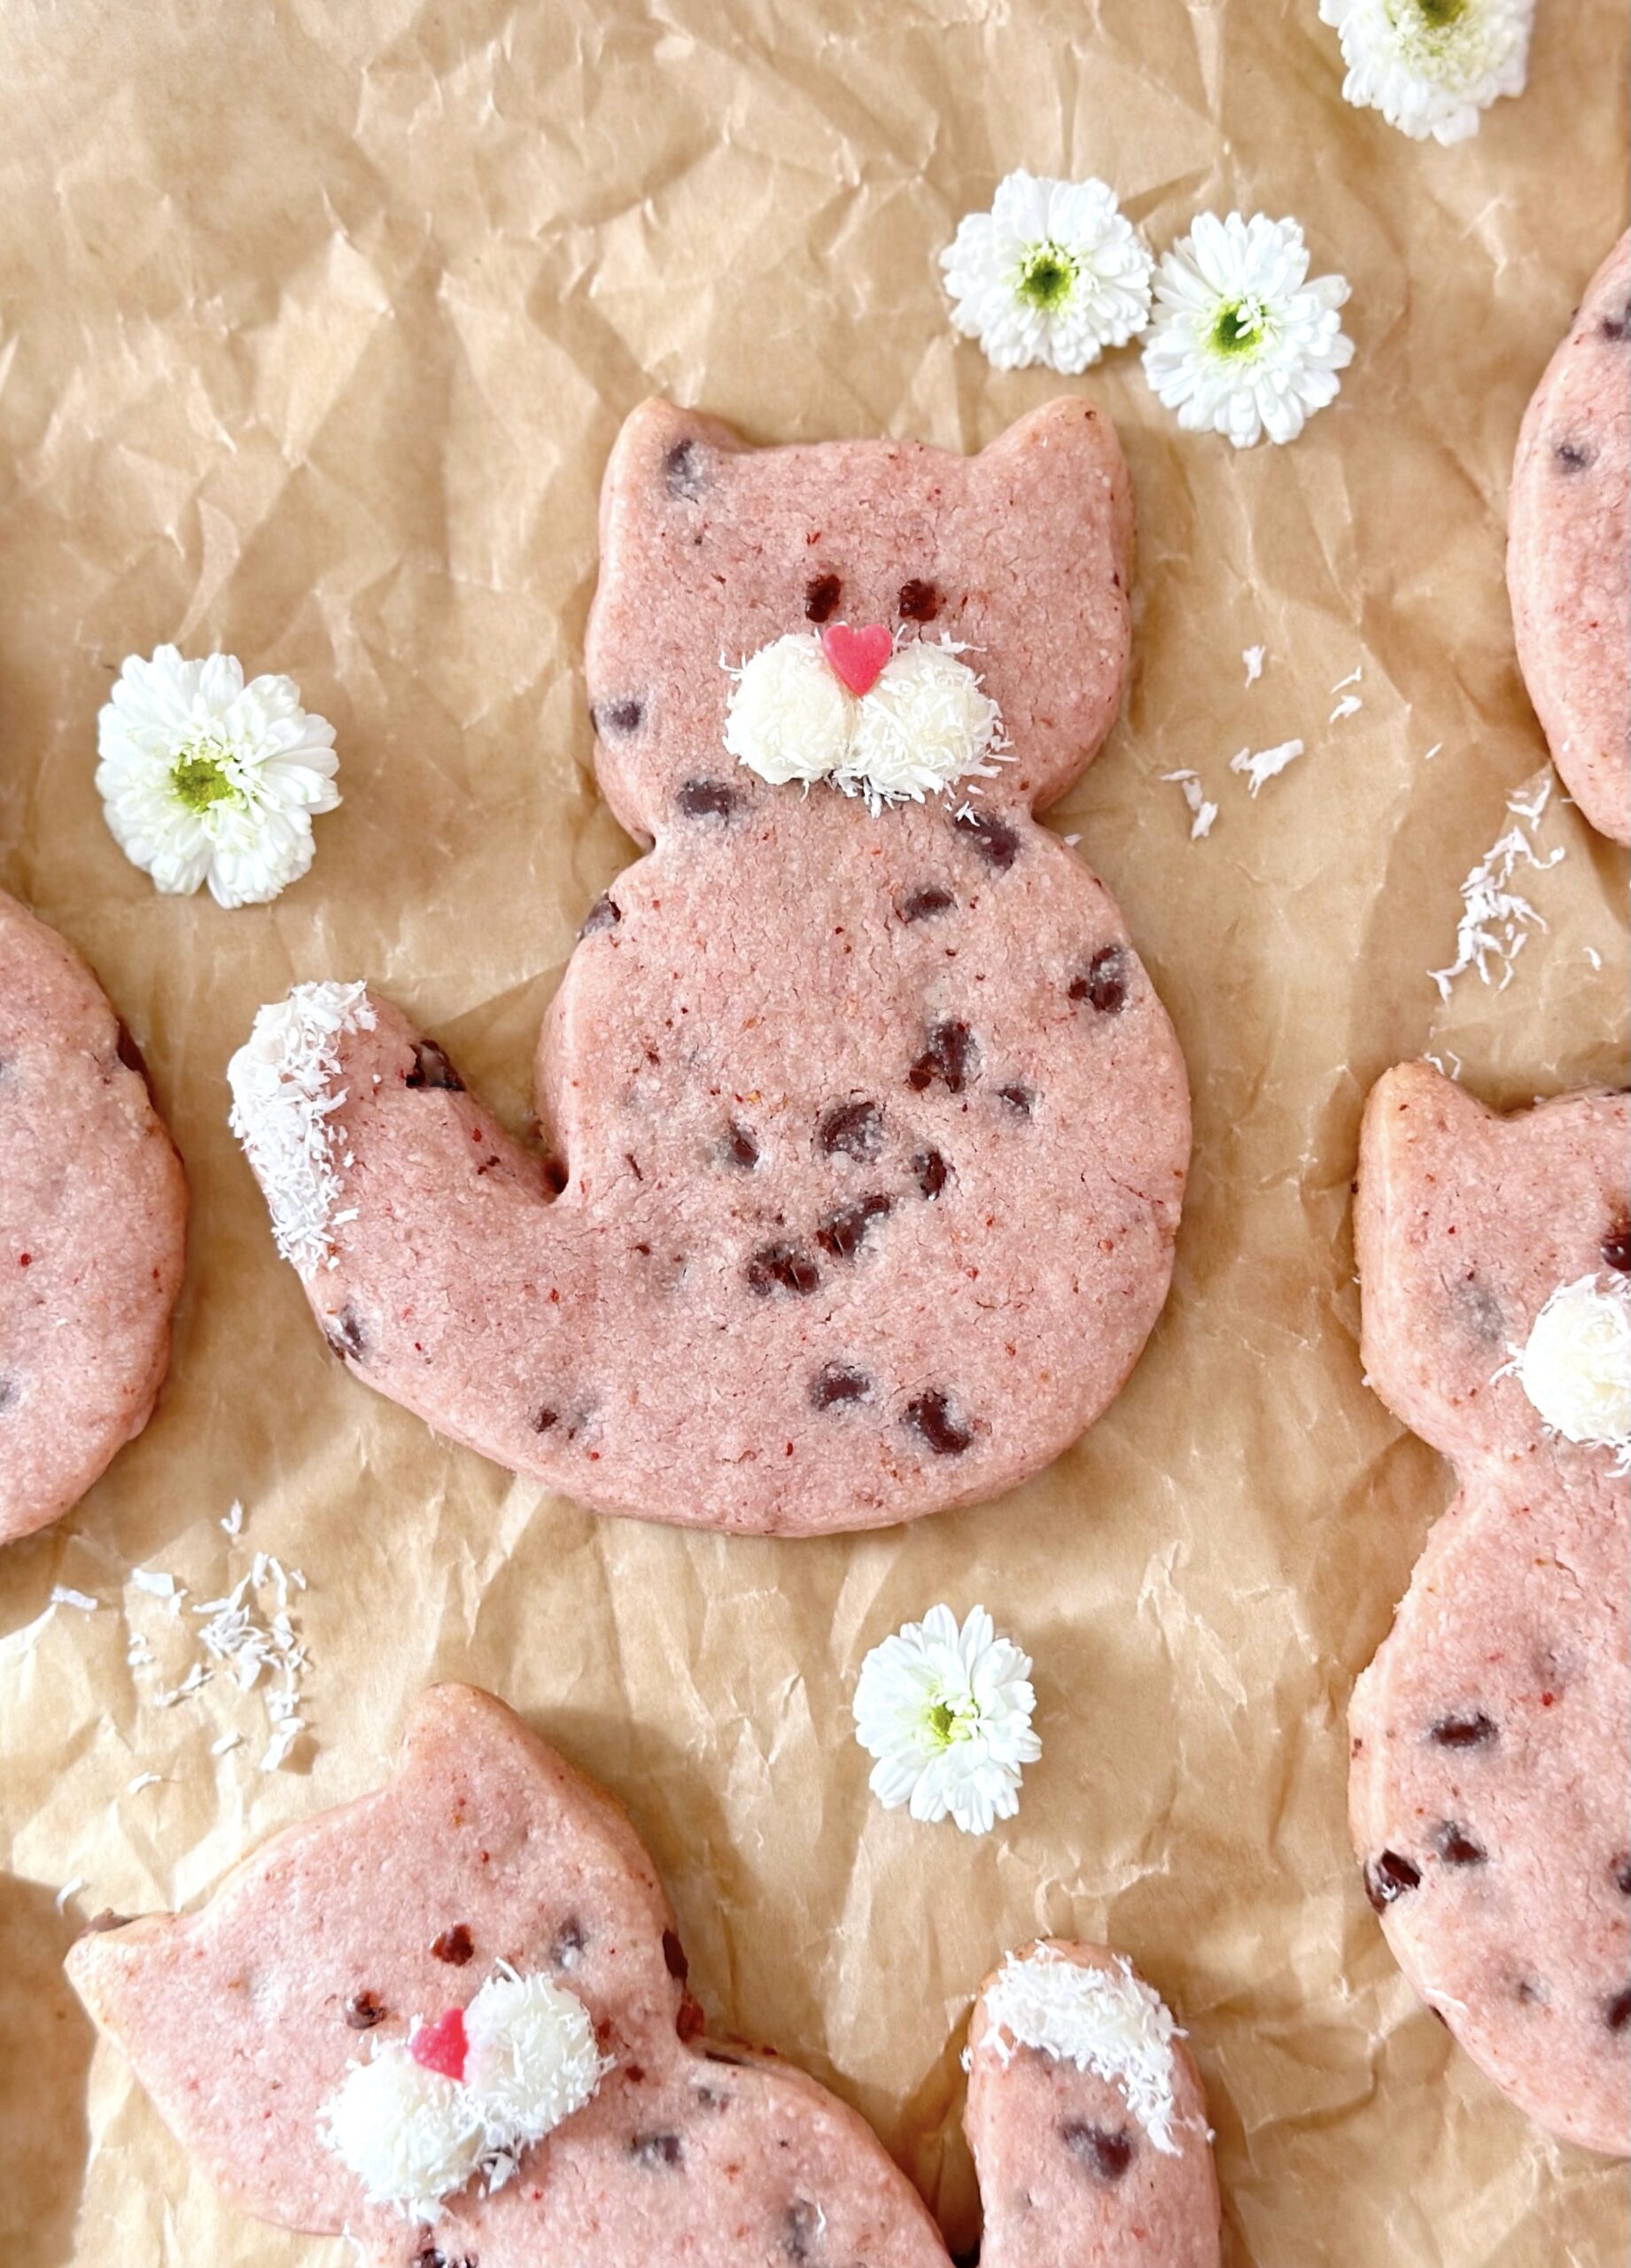
These cute kitties were created as a special request by someone who grew up playing with Webkinz. Do you remember the Strawberry Cloud Leopard? It was a cute pink Webkinz plushie. The cookies are made of tender, buttery shortbread dough. They get their natural color and flavor from freeze dried strawberries. Mini chocolate chips are added to make the adorable leopard spots. I originally made this cookie dough into hearts for Valentine’s Day but it’s perfect for the Strawberry Cloud Leopards!

To watch the Strawberry Cloud Leopard Shortbread Cookies Instagram video, click here.

Print Recipe
Strawberry Chocolate Chip Shortbread Cookies
Tender strawberry shortbread cookies dotted with mini chocolate chips
Servings
4-inch tall cookies
Servings
4-inch tall cookies
Instructions
  1. Pulverize freeze dried strawberries to a powder with a small food processor or a clean spice grinder. Pass through a sieve to strain out seeds.
  2. In a medium bowl, whisk flour, powdered sugar and salt together.
  3. In a large bowl, beat butter until light and fluffy. Add freeze dried strawberry powder and vanilla extract. Beat until well combined.
  4. Add flour mixture and beat just until dough comes together. Fold in mini chocolate chips.
  5. Divide dough into two portions and form into disks. Wrap with plastic wrap and refrigerate for at least 1 hour or up to overnight.
  6. Line two large cookie sheets with parchment paper. On a lightly floured surface, roll dough to 1/4-inch thickness. Alternately, you can roll dough between two sheets of parchment paper. Cut cookies into desired shapes. I used a 4-inch cat cookie cutter.**
  7. Place cookies about 2-inches apart onto prepared cookie sheets. To prevent excessive spreading, refrigerate cut cookies for 30 minutes prior to baking, especially if your dough becomes warm as you work with it.
  8. Preheat oven to 325ºF. Bake until cookies are slightly puffed and edges barely start to turn light golden brown, about 12-14 minutes. (Smaller cookies will need a shorter baking time.) Let cookies cool on cookie sheet for 3 minutes then transfer to cooling rack to cool completely. Decorate as desired.
Recipe Notes

To find a cat cookie cutter, click here.

Blackberry Cornbread

This sweet Blackberry Cornbread is super easy to make. It makes a delicious breakfast, brunch or side dish. It’s so good served with Blackberry Honey Butter. I love baking my cornbread in a cast iron skillet. It gives the cornbread a crisp, rustic crust. You can also use a cake pan if you prefer. (The baking time may vary.) Make sure not to over bake your cornbread since overtaking will dry it out. Use fresh, ripe blackberries when they’re in season. You can also use frozen blackberries or fresh or frozen blueberries. Skip the macerating step if you’re using blueberries or frozen berries.

Print Recipe
Blackberry Cornbread
Sweet cornbread studded with ripe blackberries
Cuisine American
Servings
Ingredients
Cuisine American
Servings
Ingredients
Instructions
  1. Preheat the oven to 350°F (180°C). Grease an 8” cast iron skillet* or an 8” round cake pan.
  2. In a large bowl, whisk together the flour, sugar, cornmeal, baking powder and salt.
  3. In a separate bowl, whisk together the eggs, sour cream, oil and melted butter until smooth. Add the egg mixture to the flour mixture. Mix just until combined. A few lumps are okay. In a small bowl, gently toss one 1 cup (136g) of the blackberries with 1 tsp of flour. Gently fold the berries into the batter.
  4. Transfer the batter to the skillet. Top with the remaining blackberries. Bake until the top is golden brown and toothpick inserted into the center comes out clean, about 35-43 min. Let cool in the pan 10 min. Serve with Blackberry Honey Butter** or honey if desired
Recipe Notes

*To find an 8-inch cast iron skillet, click here.  

**To find the Blackberry Honey Butter Recipe, click here.


Strawberry Sugar Hearts

strawberry sugar hearts
To watch the Strawberry Sugar Hearts video, click here.

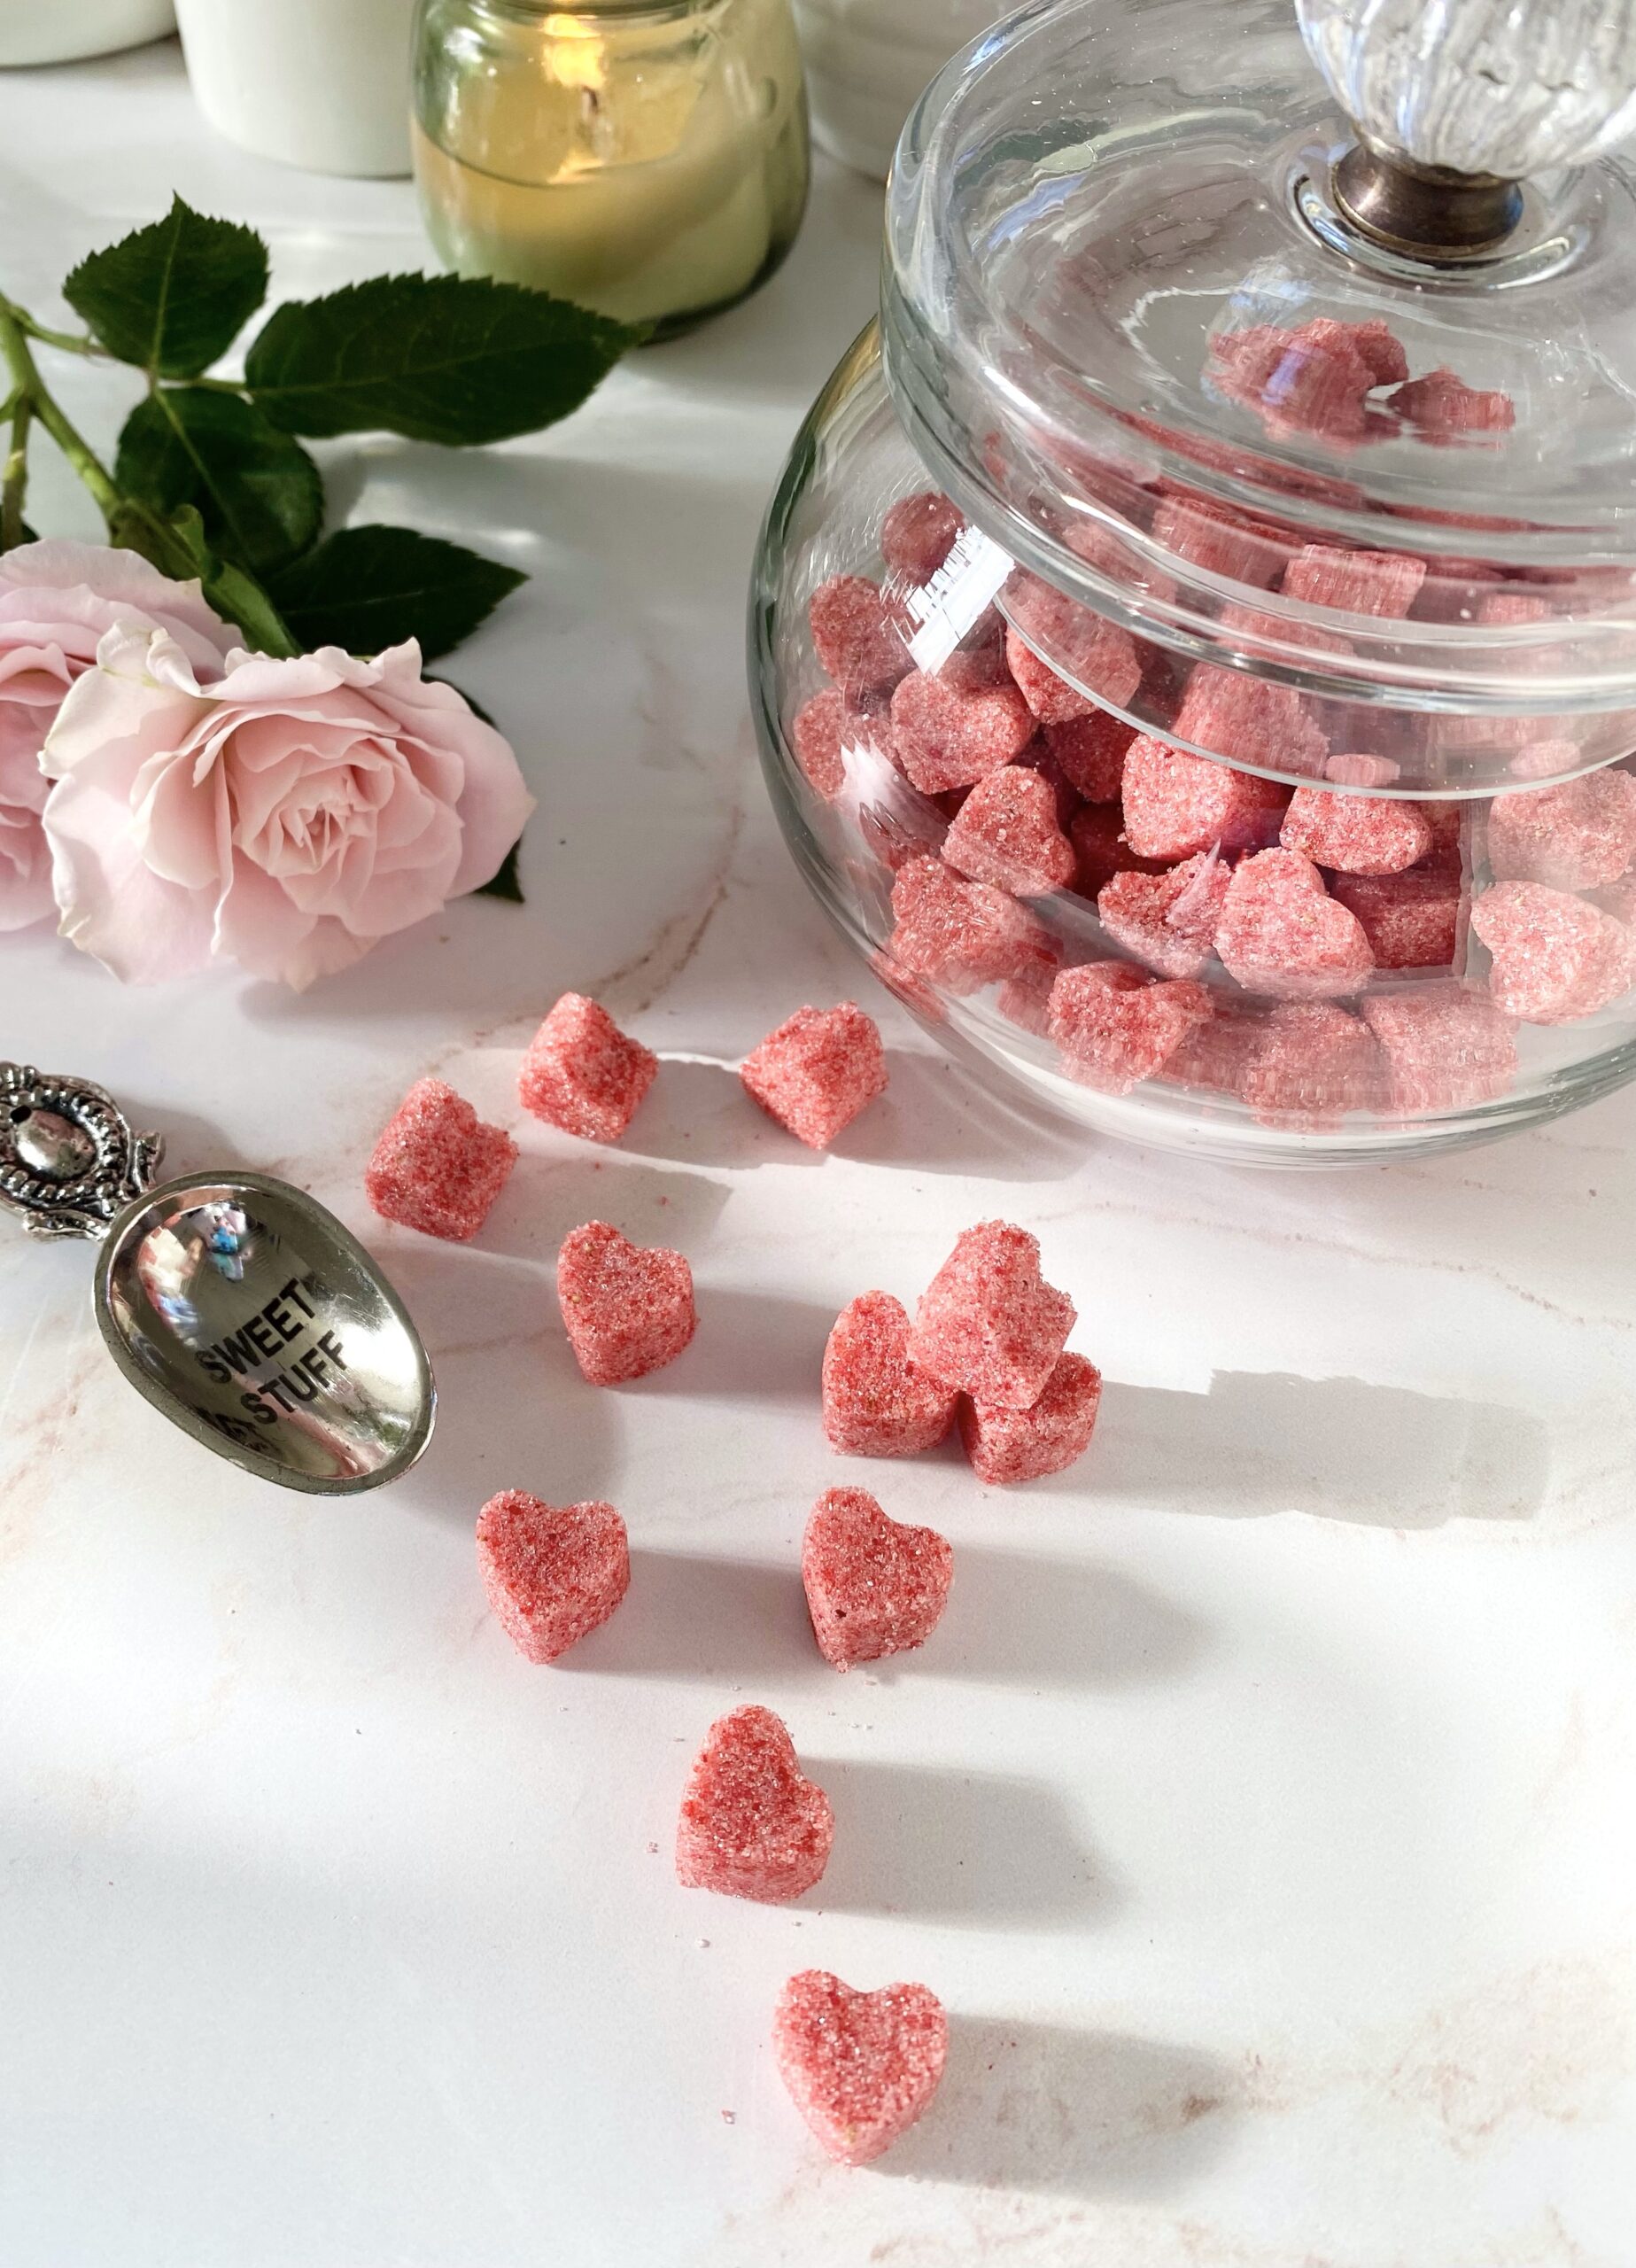
I’ve always been enamored by sugar cubes. You can’t help but feel fancy dropping a lump of sugar or two into your teacup. Flavored sugar formed into cute shapes is so fancy, I may faint. Someone please get the smelling salts! Pardon me while I google “what exactly are smelling salts?” In the mean time please enjoy these sweet, dainty, positively precious Strawberry Sugar Hearts. Pop them into tea, lattes, lemonade, cocktails or sparkling water.

These cuties are fragrant, delicious and easy to make. The most tedious part is filling the molds. Make sure to fill them completely and press firmly for the most defined shape. It’s also important to use enough water. Think of building a sand castle at the beach. You want enough water to dampen the sugar, but not turn it to slush. I live in a dry climate so I used 3 teaspoons, but you may need less depending on your climate.

Feel free to use the freeze dried fruit of your choice. Most grocery stores carry freeze dried fruit and you can always find it online. The most interesting one I saw was an apple-cherry combination. I might try that next!

Print Recipe
Strawberry Sugar Hearts
Servings
batch 1/2" sugar hearts
Servings
batch 1/2" sugar hearts
Instructions
  1. Process freeze-dried strawberries in a small food processor or a clean spice grinder until a powdered consistency is reached.
  2. Pass powdered strawberries through a sieve to strain out seeds.
  3. In a medium bowl, whisk together powdered strawberries and sugar.
  4. Add water, one teaspoon at a time, until the mixture is the consistency of wet sand. Climate will effect how much water is needed.
  5. Press mixture firmly into *silicone heart molds or any shape silicone molds of your choice. Brush off excess sugar.
  6. Let dry, uncovered, at least 24 hours.
  7. Remove sugar hearts from molds and store in a covered container
Recipe Notes

*To find the silicone heart molds I used, click here

Not-So-Scary Halloween Monster Cookies

One of the best things about Halloween is all of the adorable costumes worn by the littlest trick-or-treaters. I’ll never forget the year my young daughter was dressed as a flower with chubby cheeks. She enjoyed wearing her costume and eating her Halloween treats, but spooky costumes and trick-or-treating weren’t for her. She was the type of toddler who cried at the sight of a mall Santa. She even screamed in terror once when Ronald McDonald paid a visit to our local McDonald’s.

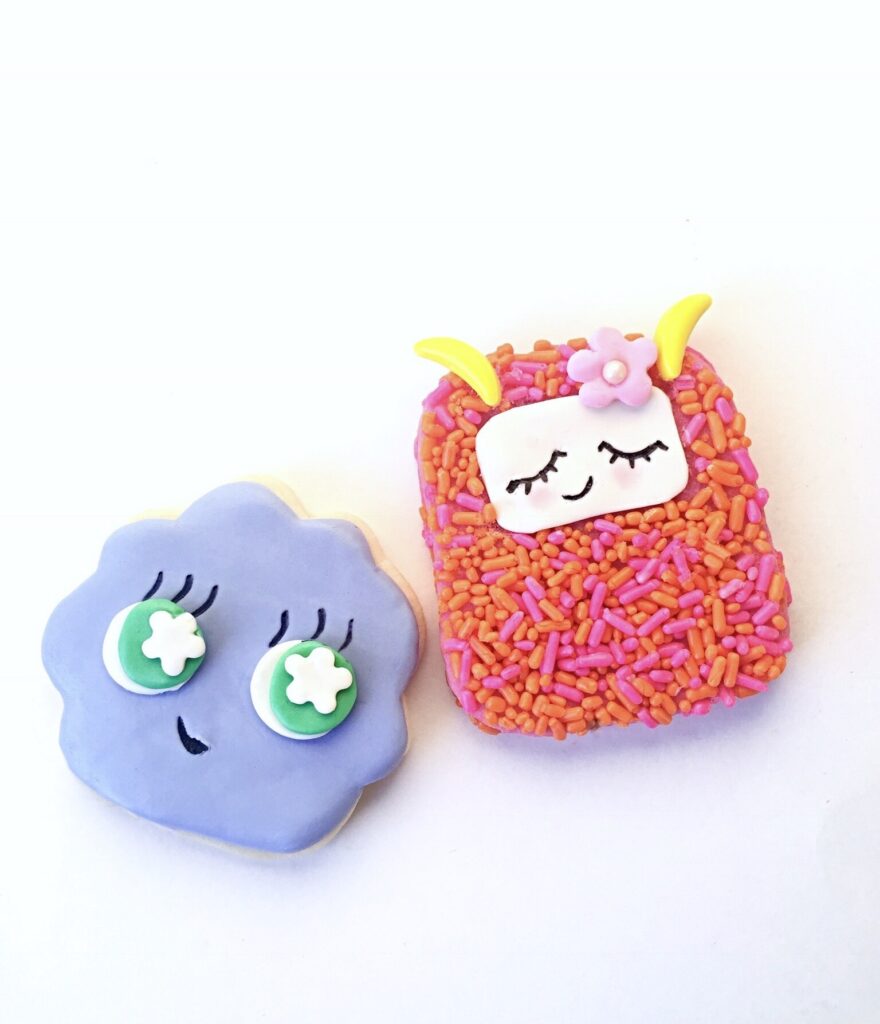
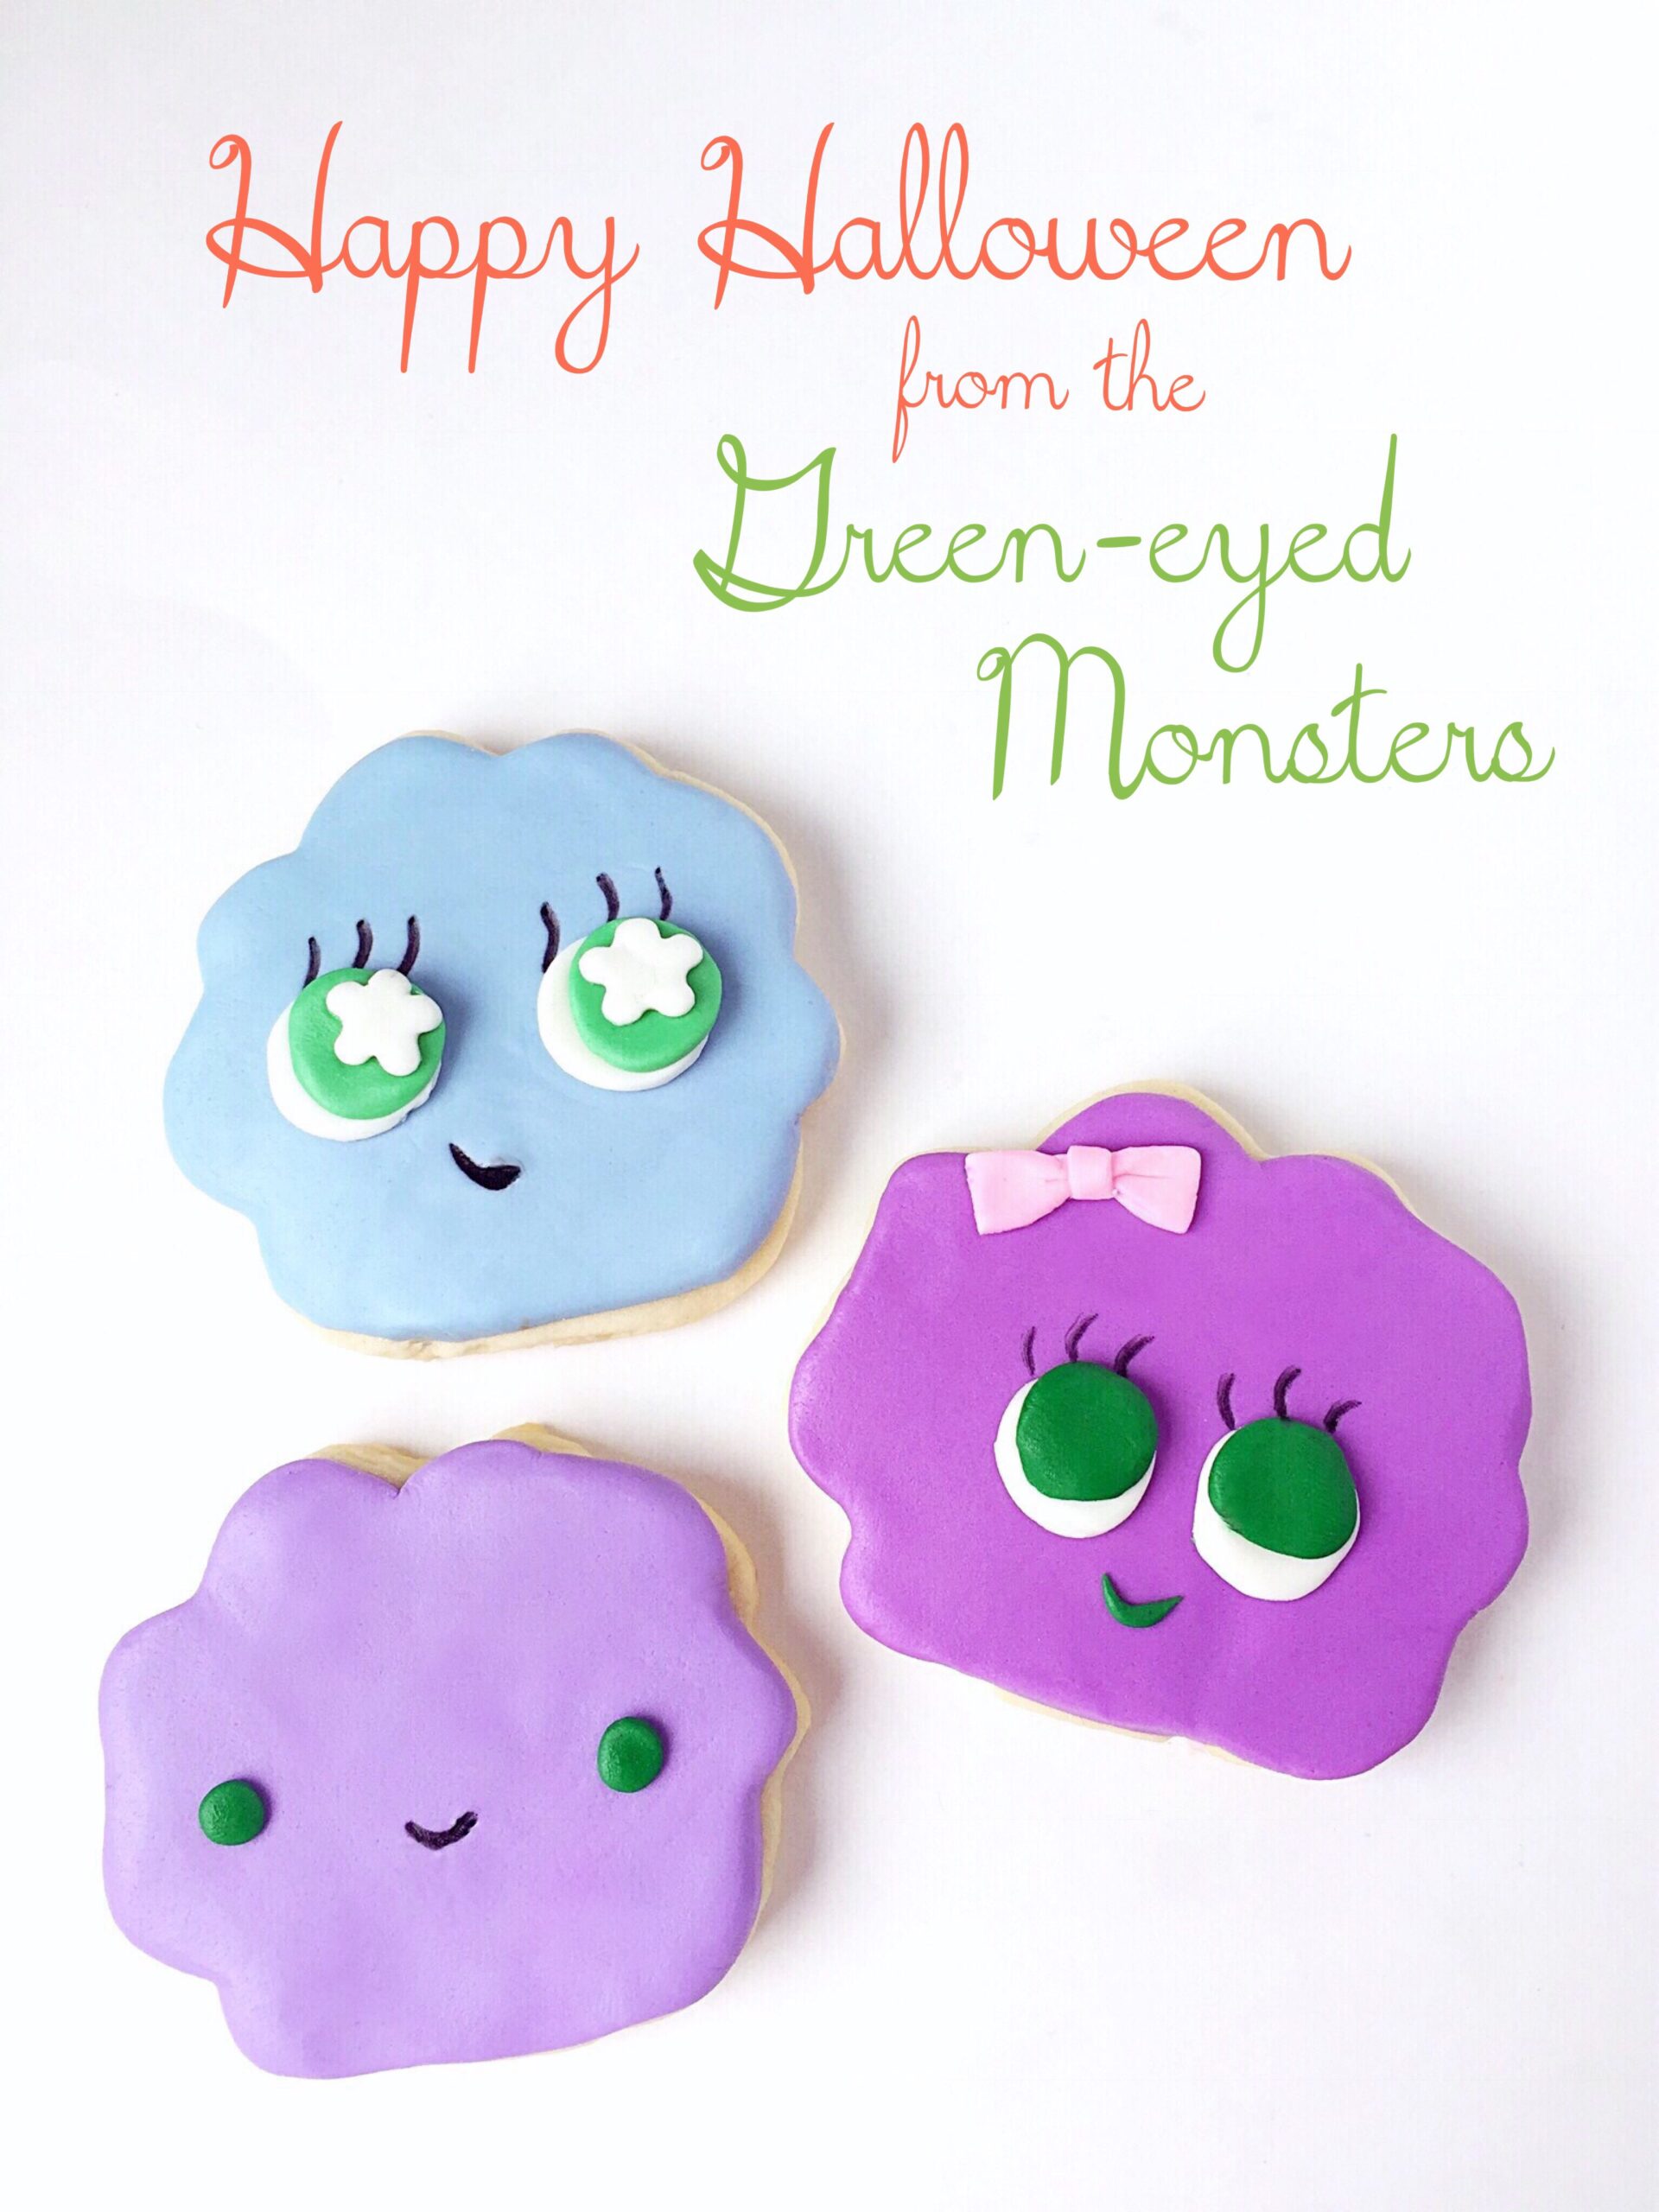
So in honor of those tender hearted little ones, I created some not-so-scary, pretty-darned-cute Yetis and Green-Eyed Monster cookies. You can use your favorite cutout sugar cookie dough and you don’t need any special skills to decorate them. The icing is fondant instead of frosting or royal icing which makes these cute monsters the ideal mess-free (almost) cookie decorating project for kids!

For these cookies you’ll need:

  • One batch of cutout sugar cookie dough
  • Food coloring- I used Wilton Icing Color in Rose
  • Cookie cutters
  • Parchment paper
  • Scissors
  • X-acto knife or paring knife
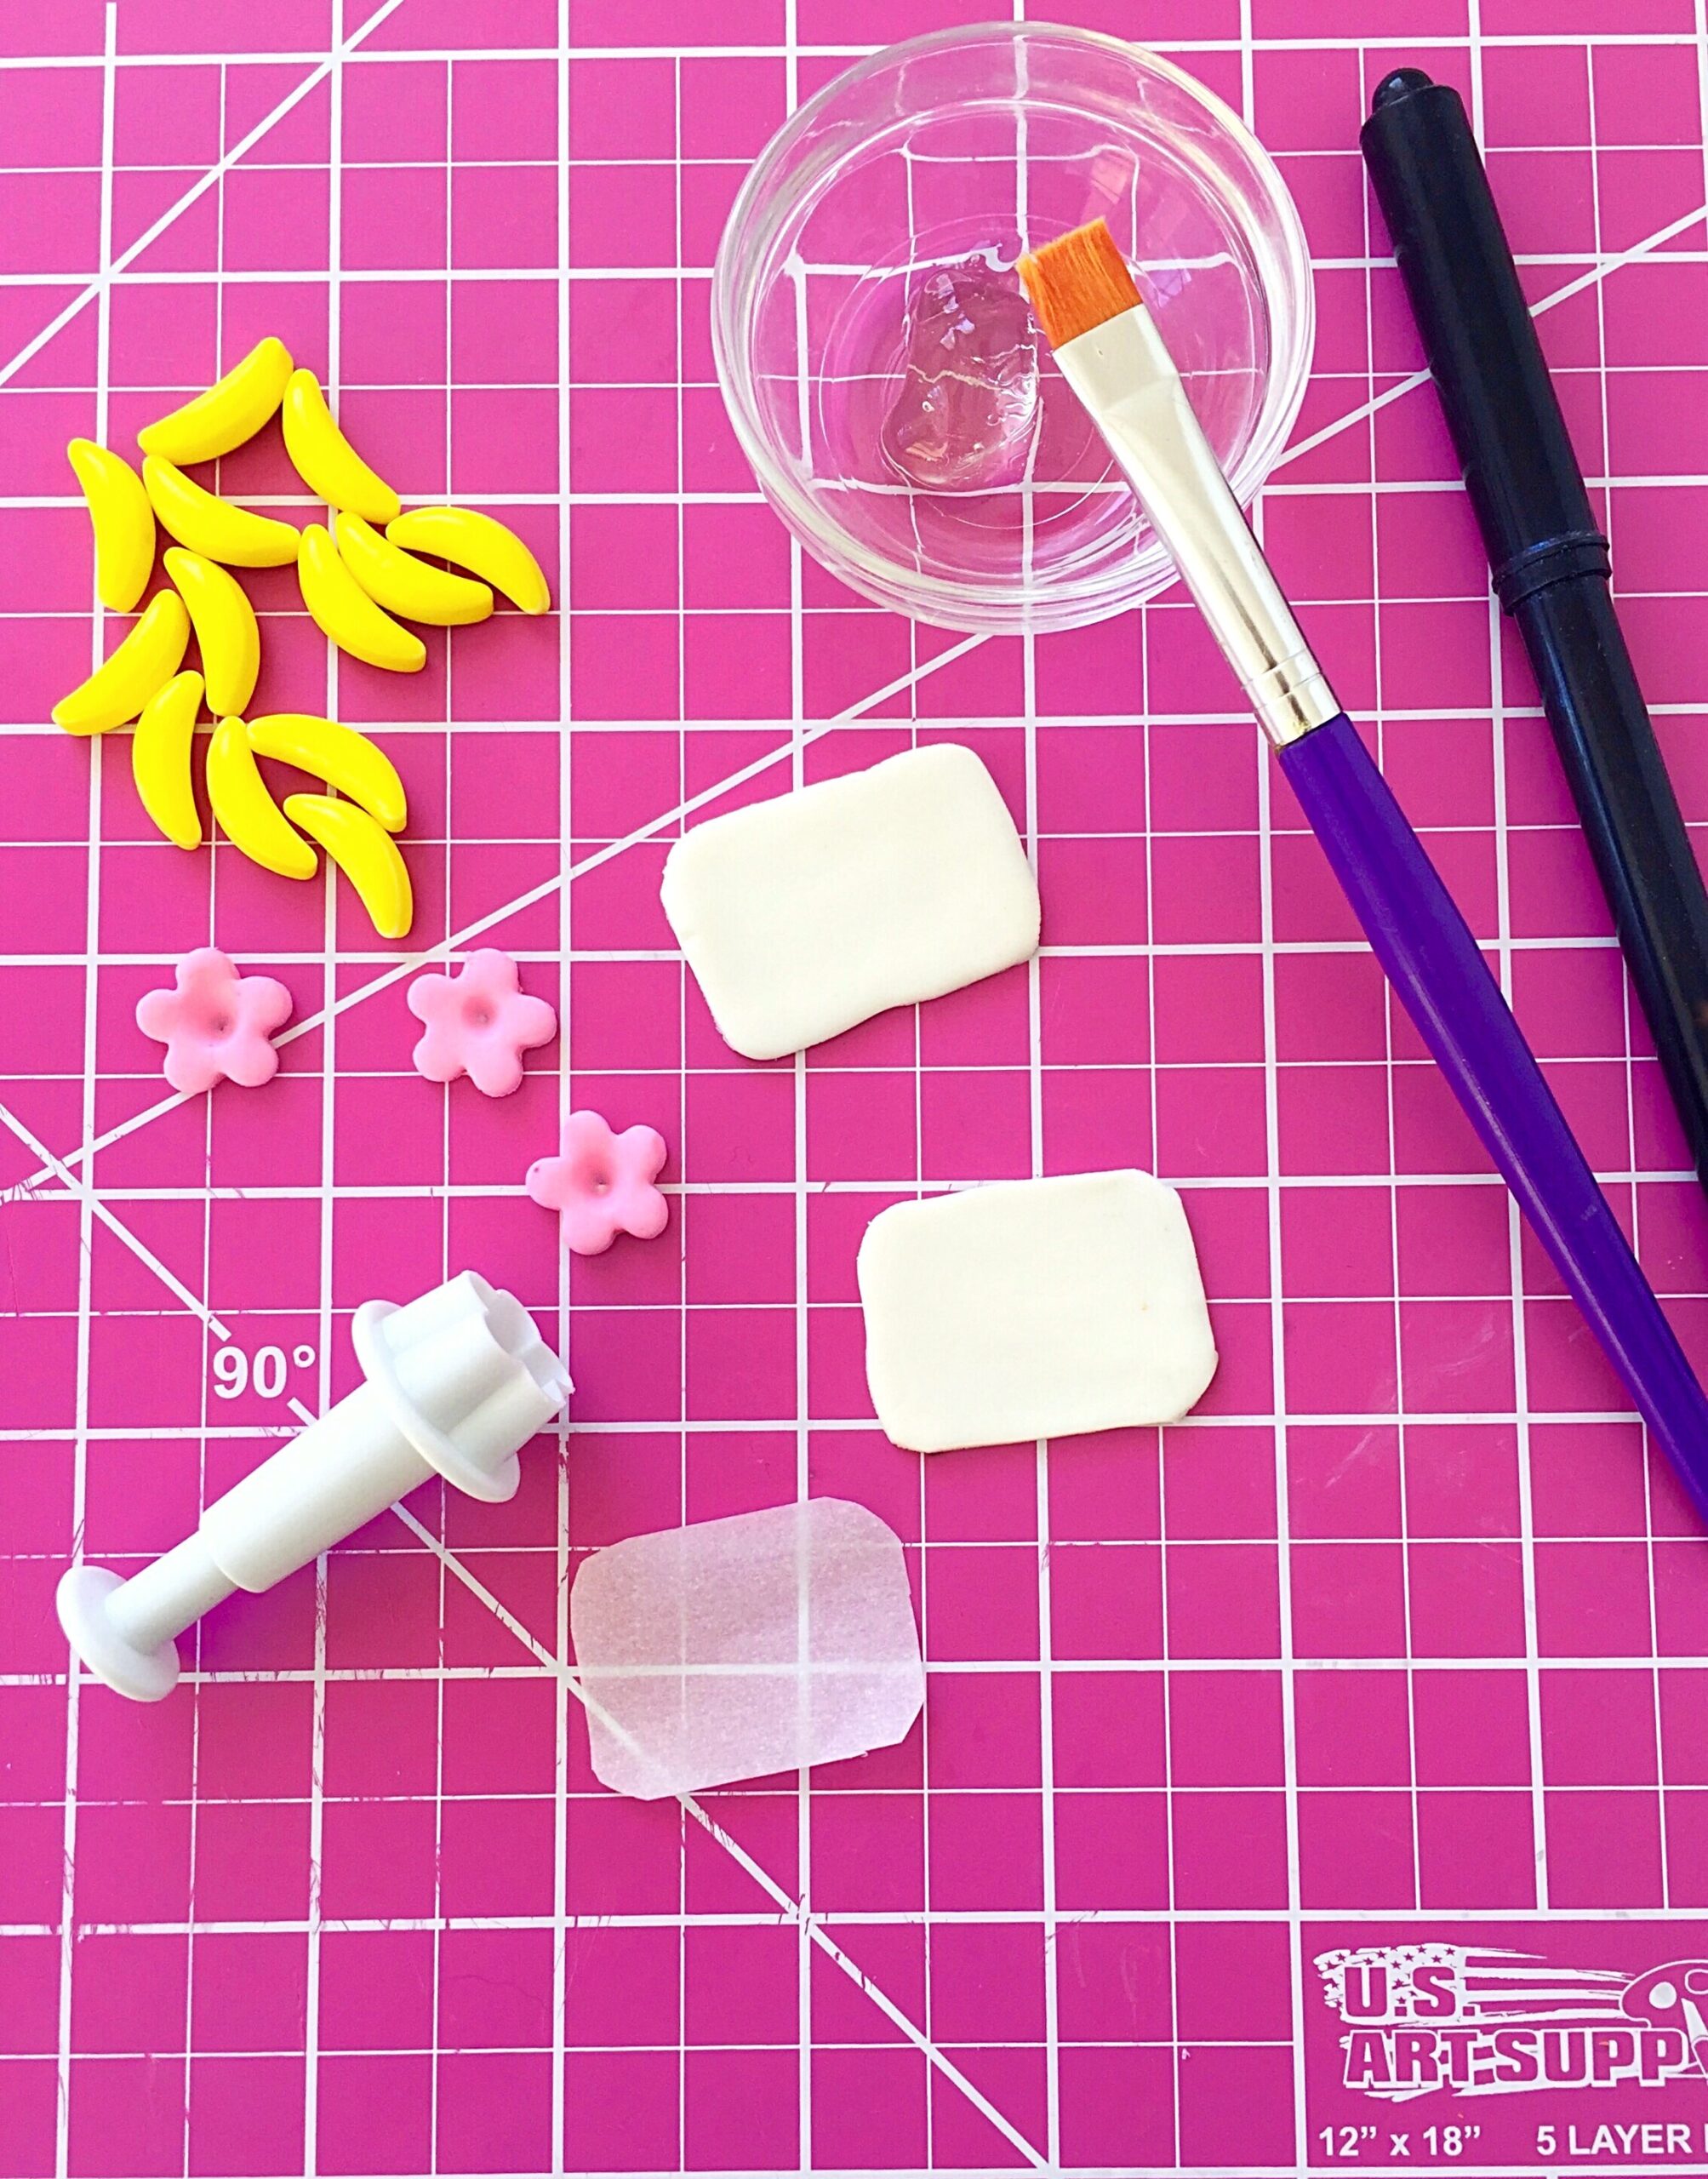
  • White, purple, green and pink fondant or any colors of your choice. I made lavender by combining purple and white.
  • Sprinkles- I used a combination of two parts orange sprinkles and one part pink sprinkles
  • Piping gel
  • Small food safe brush
  • Edible marker- I used Americolor Gourmet Writer
  • Candy bananas, sugar pearls or any edible decorations of your choice
  • Piping tip
  • Optional- flower punch cutter, pink petal dust, cotton swab

Divide your cookie dough in half. For the Yeti cookies, color one half of the cookie dough with pink food coloring. Wrap remaining cookie dough in plastic and set aside in refrigerator.

Yeti cookie tutorial

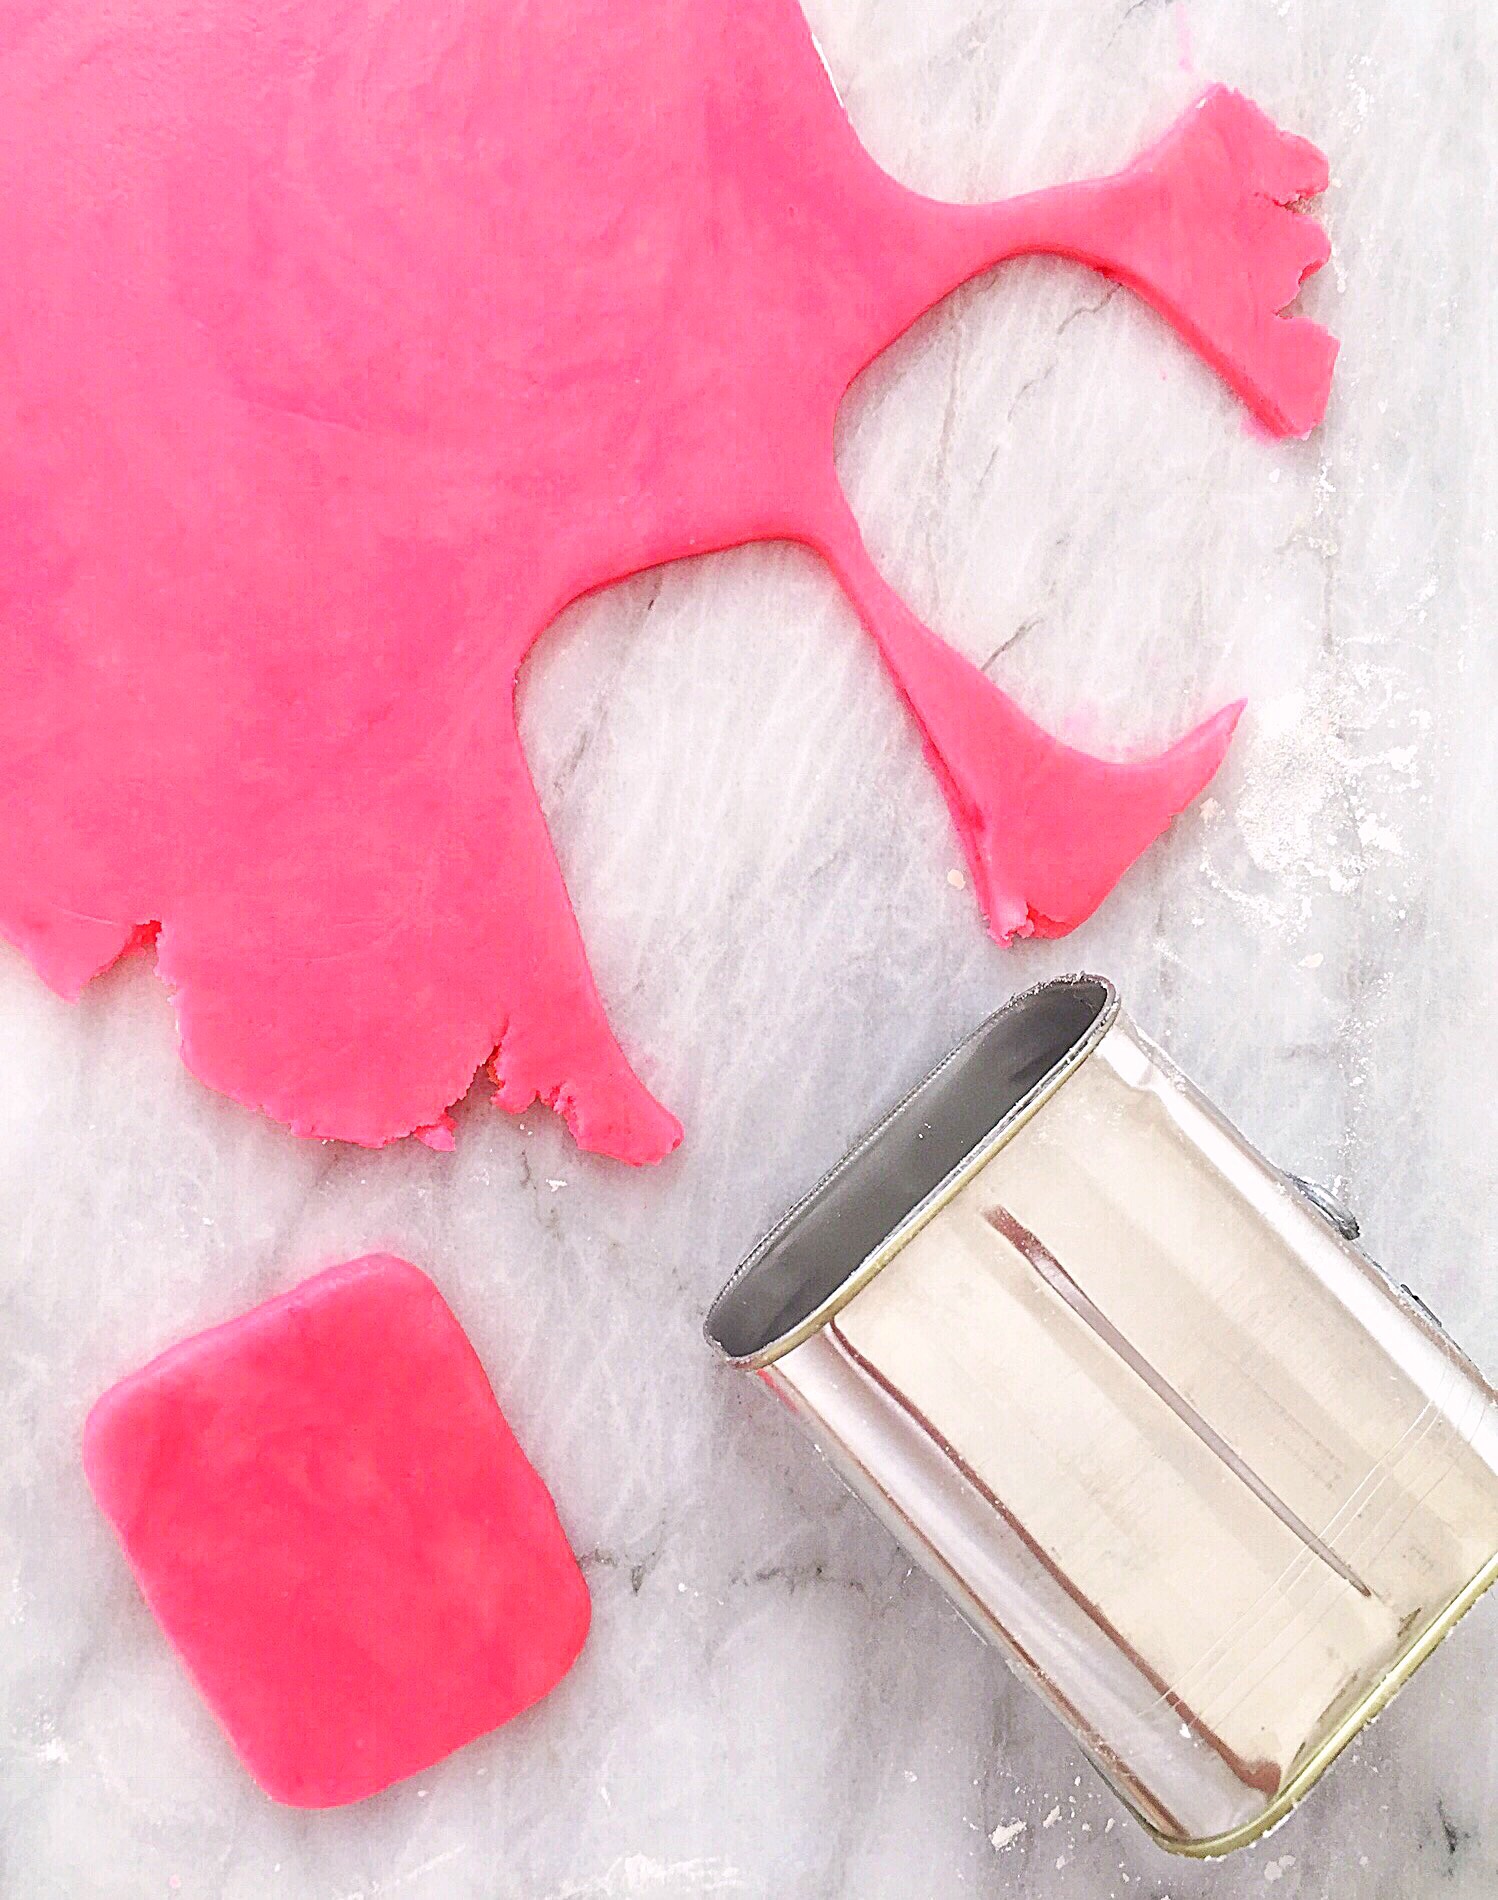
Roll out the pink dough and cut out the Yeti cookies. The Yeti cookies are 2 1/2 inch by 3 1/4 inch rectangles. I used a clean, recycled food can as a cookie cutter. I opened the can with a can opener at both ends, rather than using the little key that comes with the can. If you don’t want to use this method, you can make a pattern out of parchment paper and cut out the cookies with an X-acto knife or a paring knife. 

Yeti cookie tutorial

For the Yeti faces, cut two small 1 1/2 inch x 1 inch rectangles with rounded corners out of parchment paper. The first one will be used to place on the Yeti cookies to keep the sprinkles off of the faces. Place small parchment rectangle on an unbaked cookie. Apply sprinkles, pressing them gently to make sure they adhere to the cookie. Remove the parchment rectangle and repeat with remaining cookies. Bake according to your cookie dough recipe. Let cool.

Yeti cookie tutorial

Roll out white fondant to 1/8 inch thickness. Use the remaining small parchment rectangle as a pattern to cut out a face for each Yeti cookie with an X-acto knife or a paring knife. Brush a bit of piping gel onto each cookie face area. Apply the white fondant face cutouts to the cookies. Let dry for at least 30 minutes, then draw eyes and a mouth with an edible marker. I made rosie cheeks with a small amount of petal dust applied with a cotton swab. Brush dabs of piping gel to apply the banana candy horns. I also added pink fondant flowers and sugar pearls to make my Yeti cookies extra cute. 

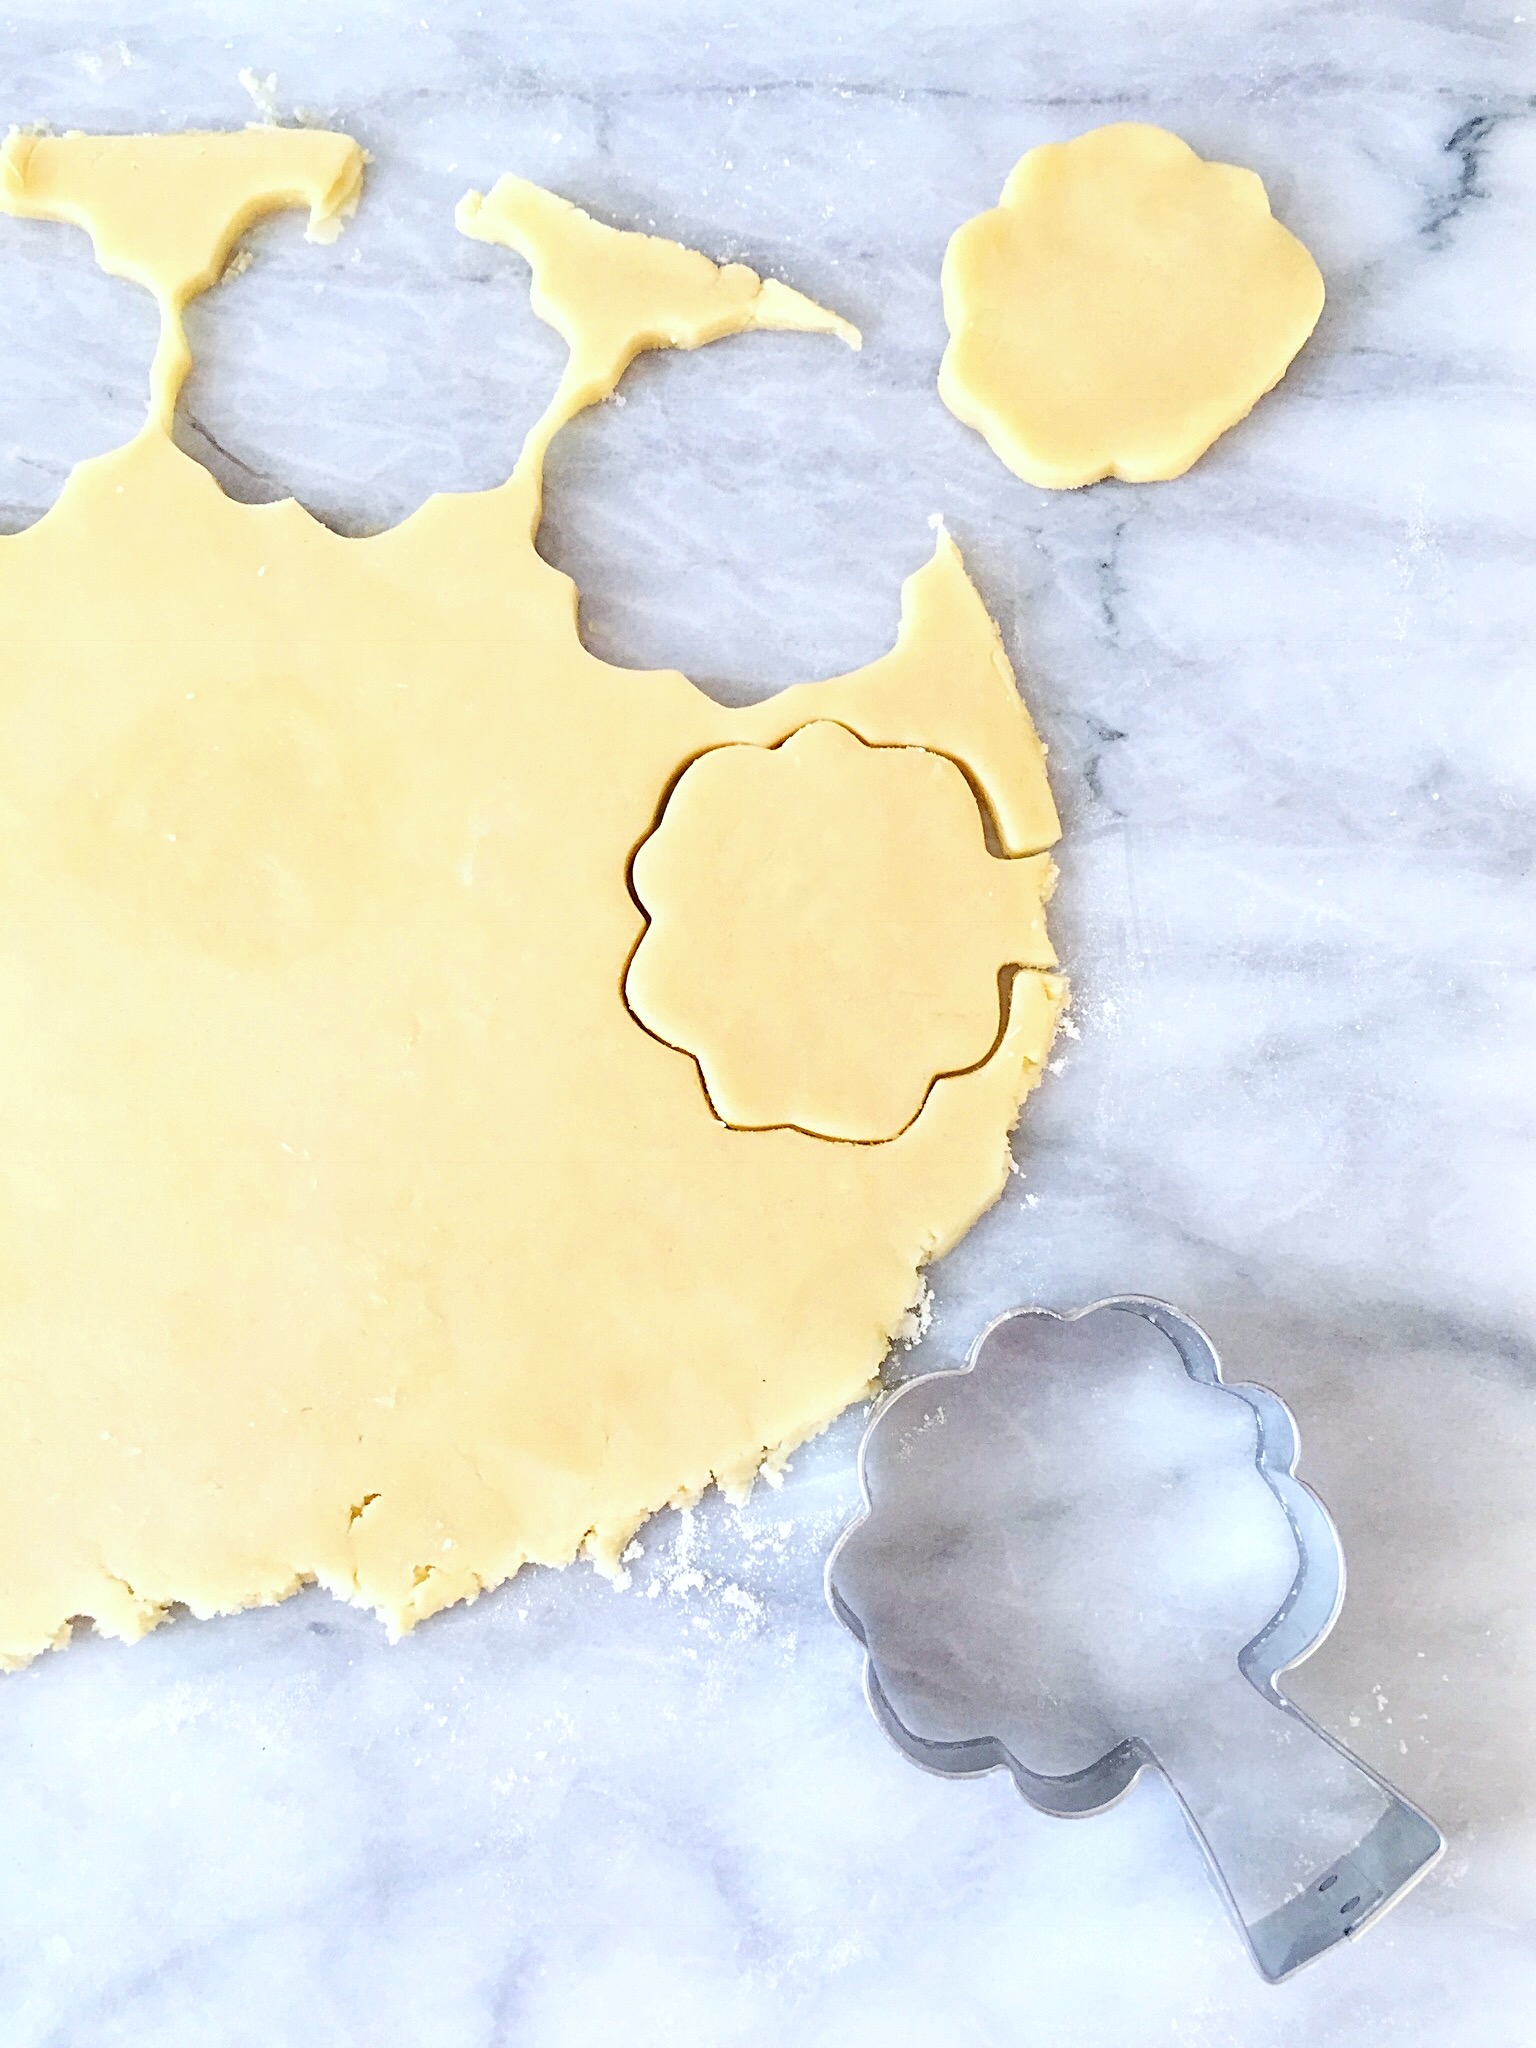
Roll out the remaining cookie dough and cut out the Green-Eyed Monster cookies. I used an apple tree cookie cutter, trimming off the trunk part. If you can’t find an apple tree cutter, you can use a blossom or sun cookie cutter. Bake according to your cookie dough recipe. Let cool.

Green-eyed monster cookie tutorial

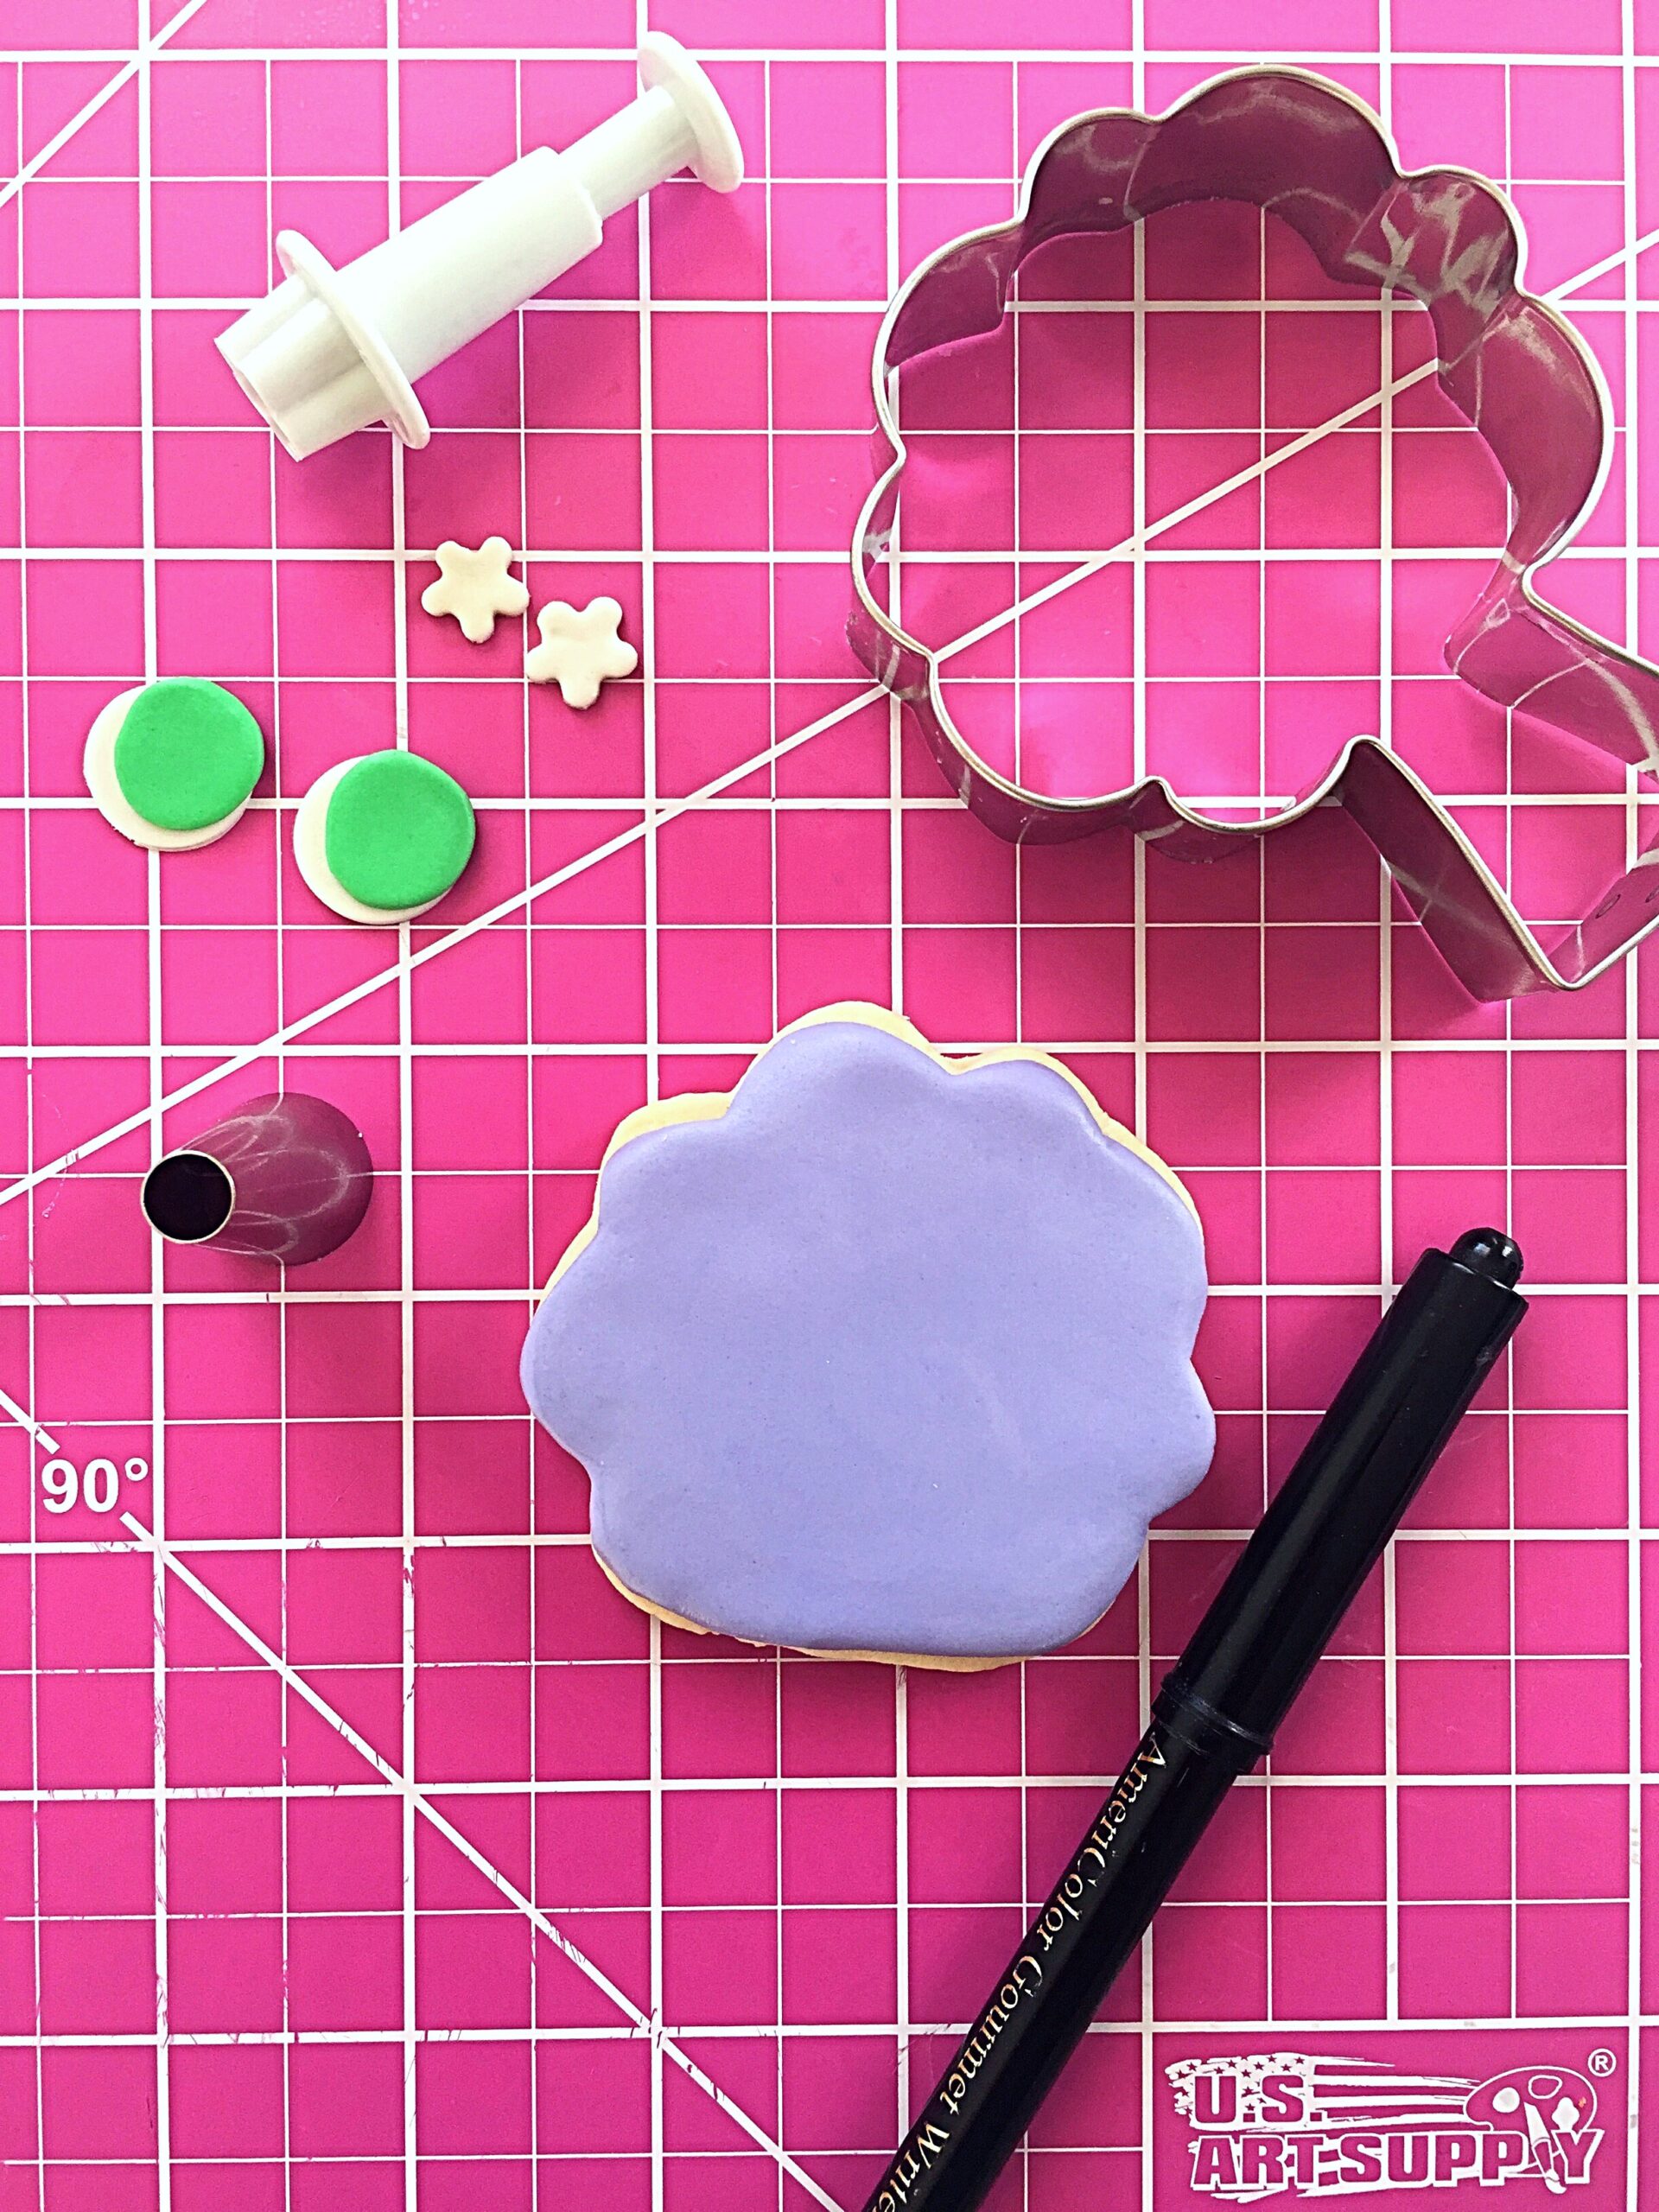
Roll out the lavender fondant. Cut the fondant using the same cutter you used for the cookie dough. Brush piping gel onto cookies and apply the fondant shapes. Let dry at least 30 minutes. 

Green-eyed monster cookie tutorial

For eyes, roll out white and green fondant. I used the large end of a piping tip to cut out two white circles and two green circles for each cookie. Attach the green circles to the white circles with a dab of piping gel, offsetting them slightly. I used a tiny blossom punch cutter for the pupils and applied with piping gel. Use an edible marker to draw eyelashes and a mouth.

Green-eyed monster Halloween cookies

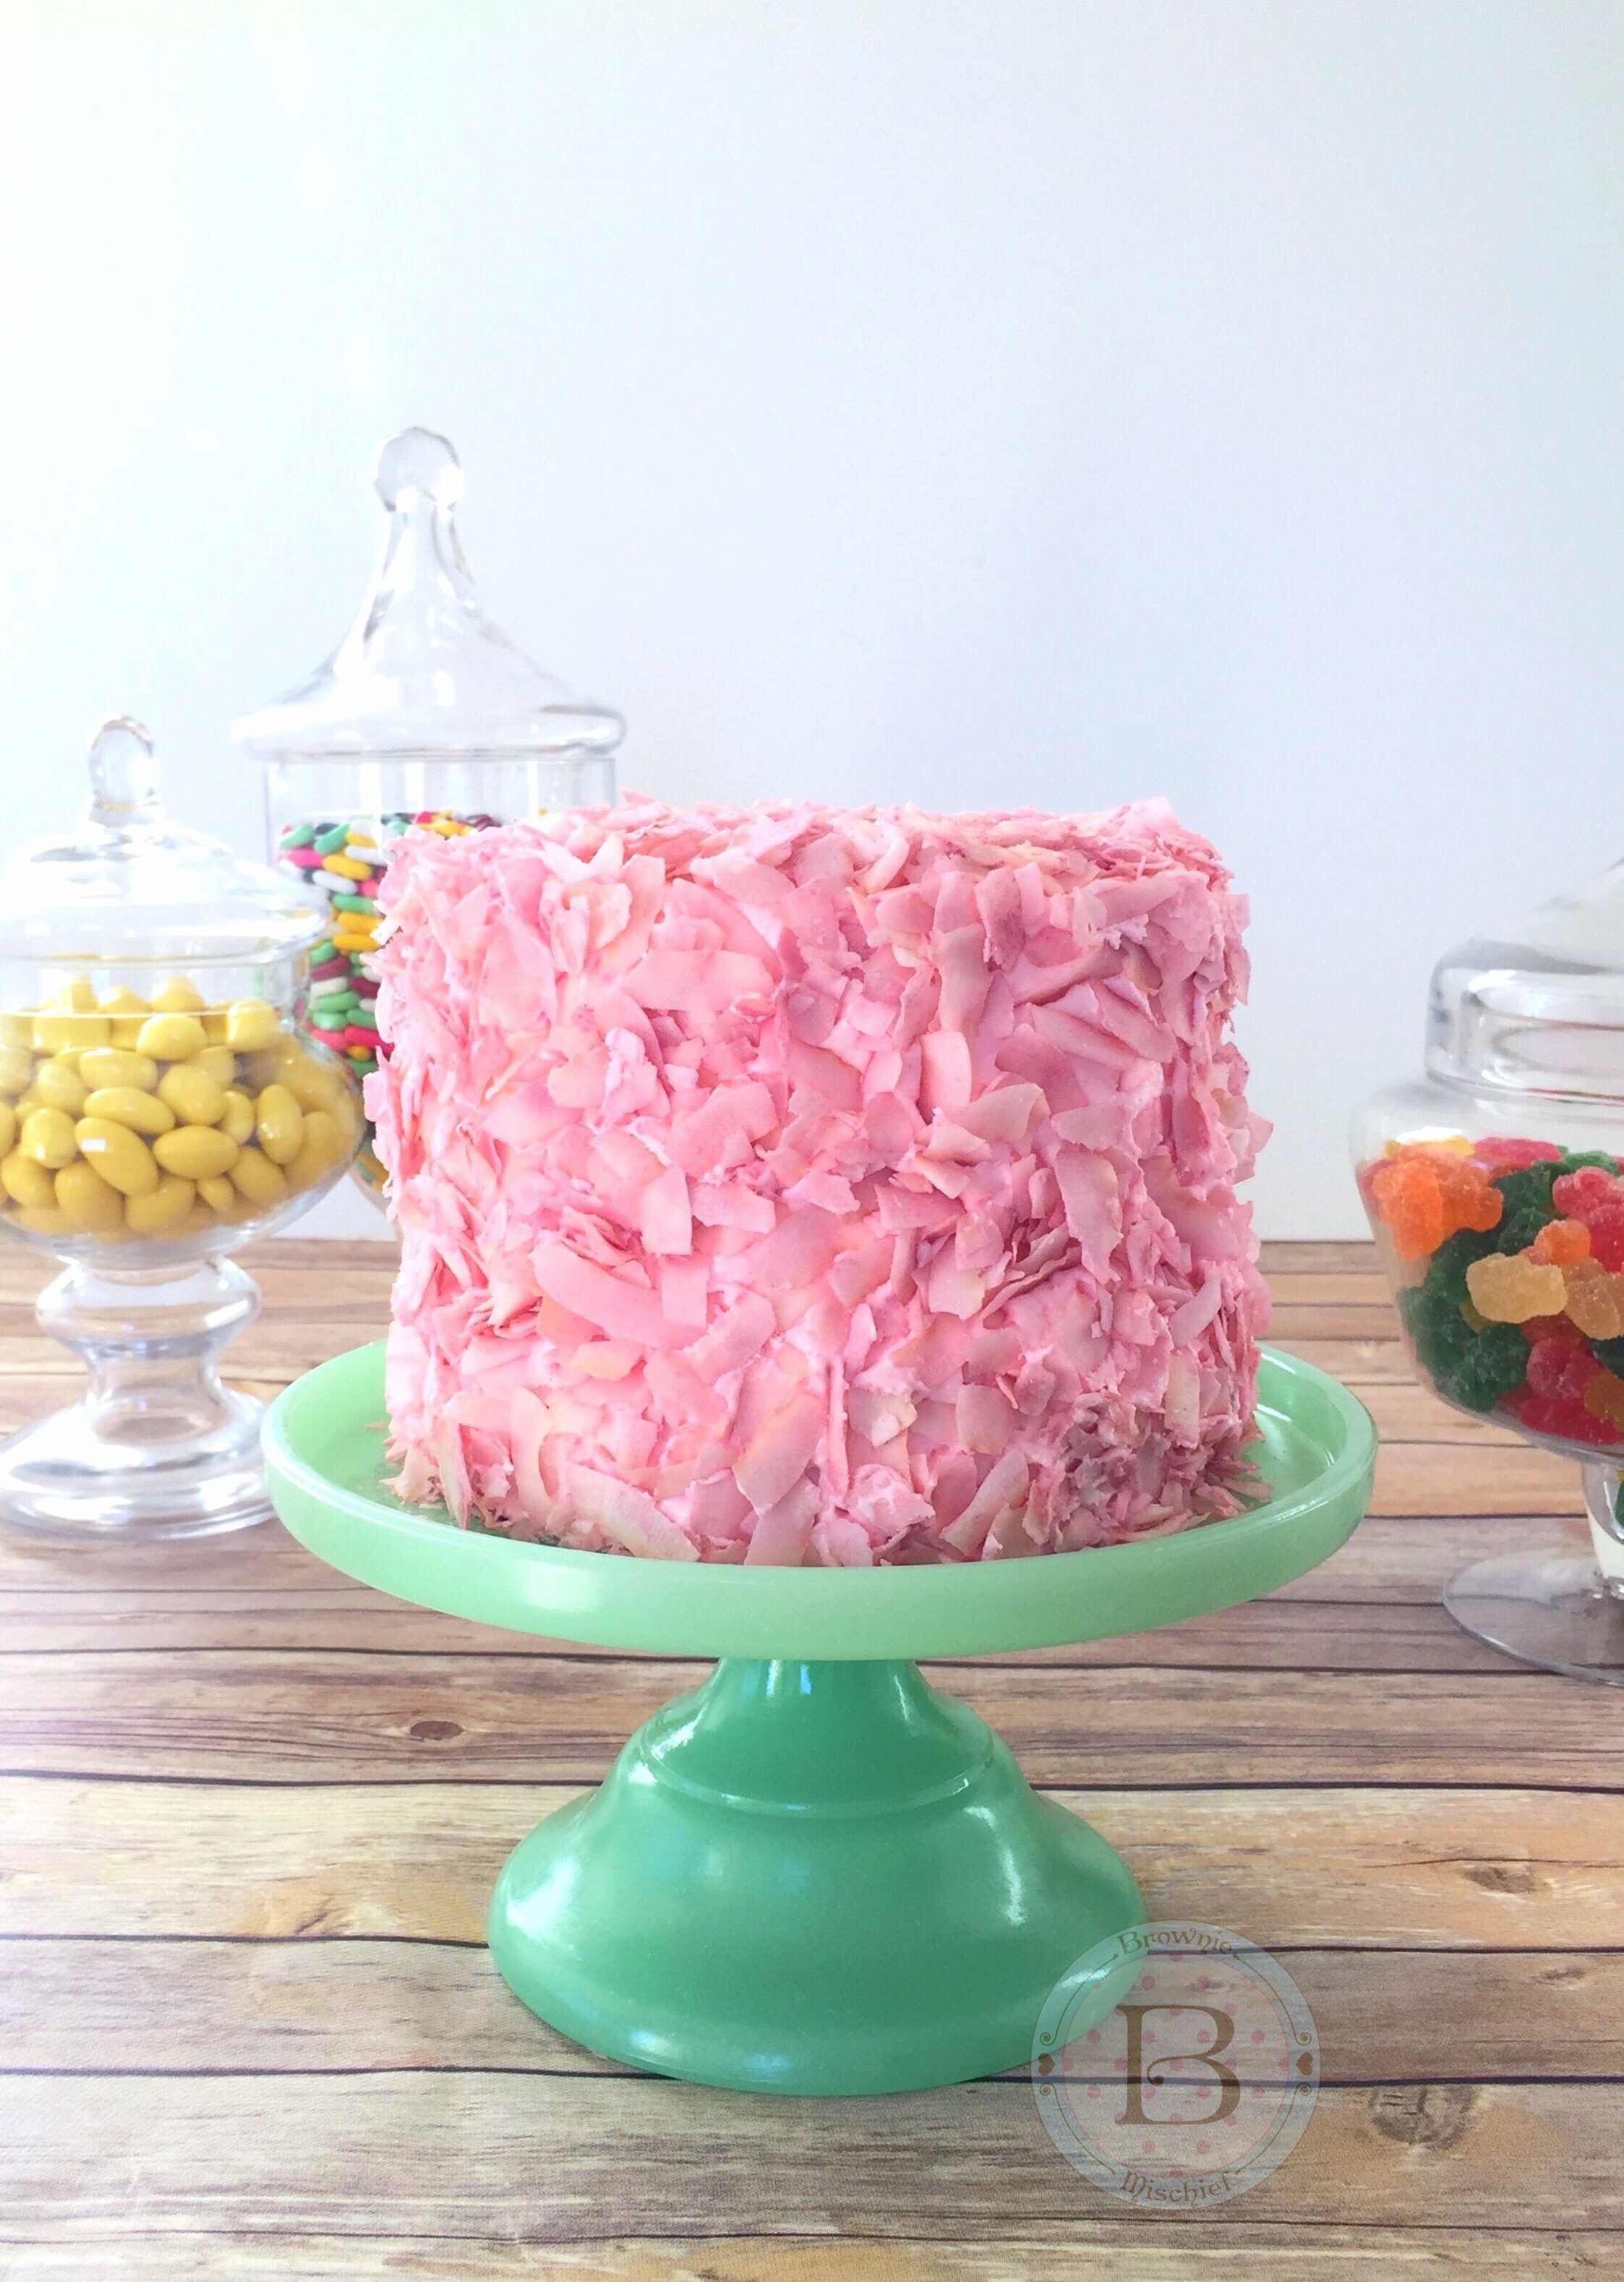
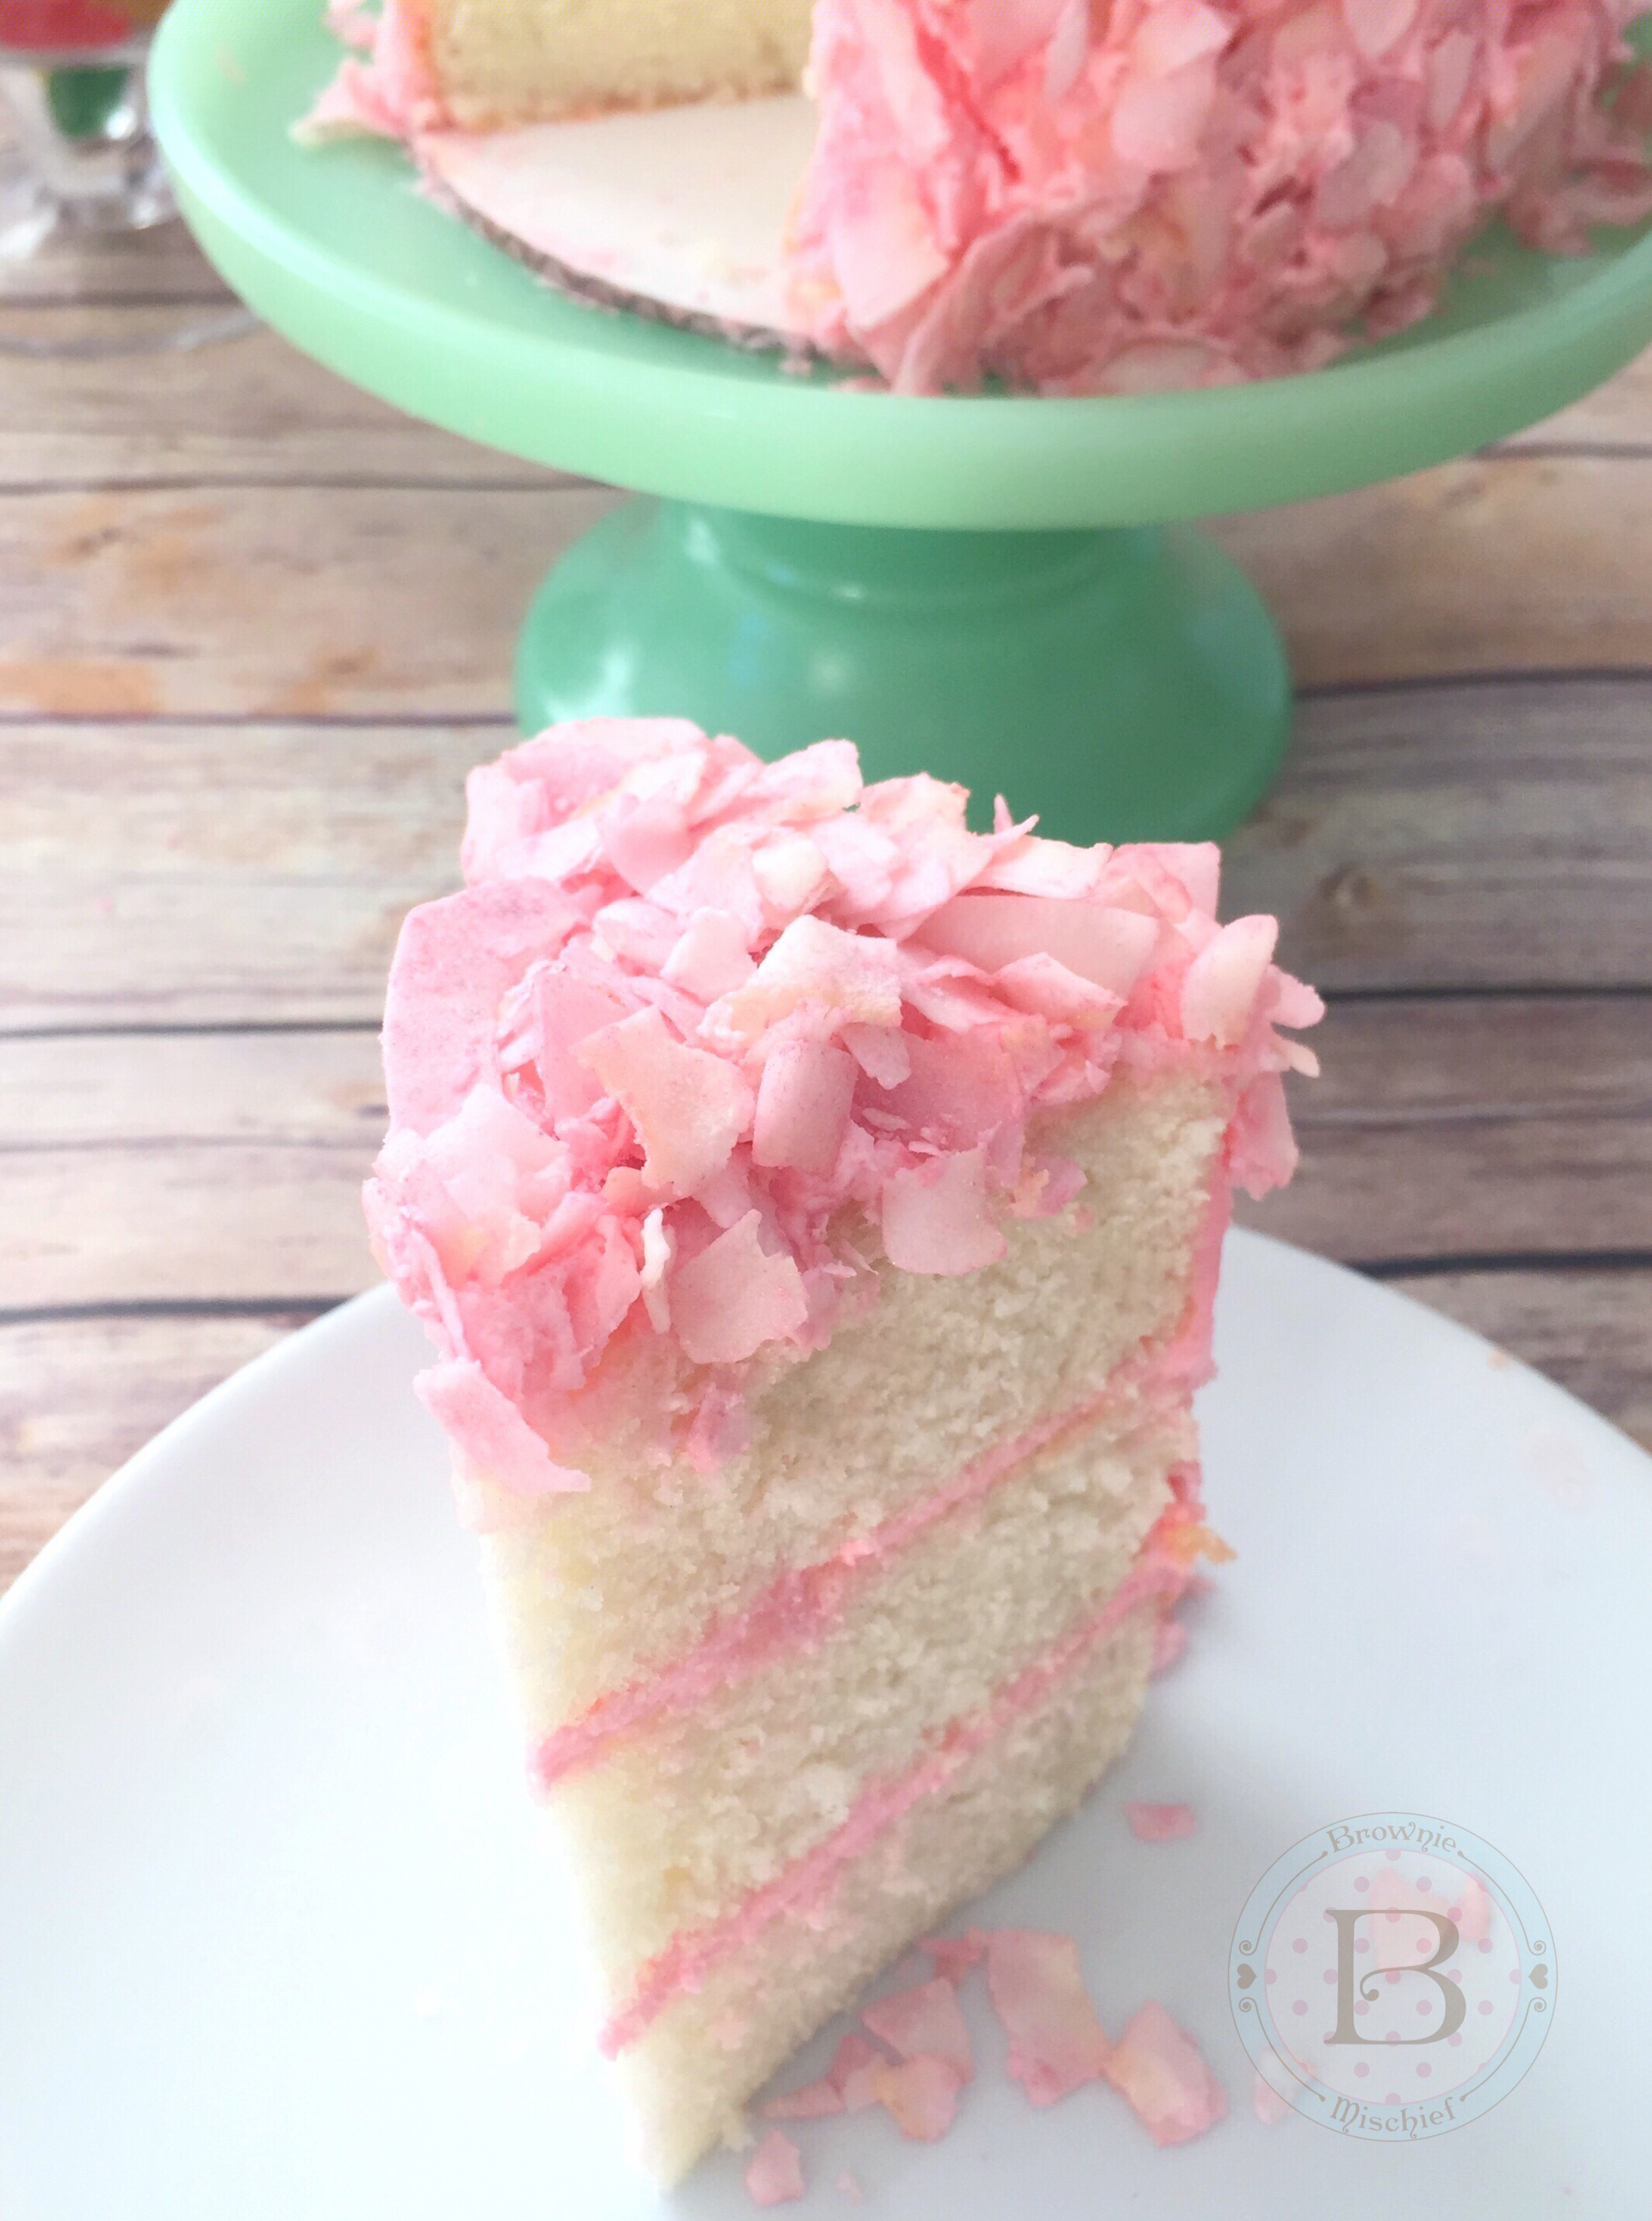
Honeydukes Inspired Pink Coconut Ice Cake

Honeydukes Inspired Pink Coconut Ice Cake by Brownie Mischief

I recently enjoyed a girls’ day out at Universal Studios Hollywood. My daughter is a Harry Potter fan, so of course we beelined straight to the Wizarding World of Harry Potter upon arrival at the theme park. We were spellbound by the ominous looking Hogwart’s Castle and the sparkling snow-topped shops of Hogsmeade. My daughter was in Harry Potter fan heaven, flitting around Hogsmeade, testing out her interactive wand and sipping some refreshing Butter Beer. It’s definitely a must-try

Our favorite shop was Honeydukes sweet shop, where anyone with a sweet tooth can get his or her candy wishes fulfilled. The candy selection was nothing short of magical. We picked up some Chocolate Flies, a Chocolate Frog and some Pink Coconut Ice candy.

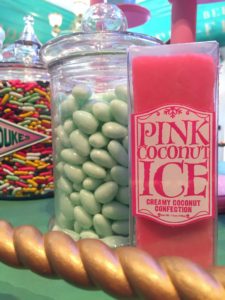
Honeydukes Candy                   Pink Coconut Ice Candy

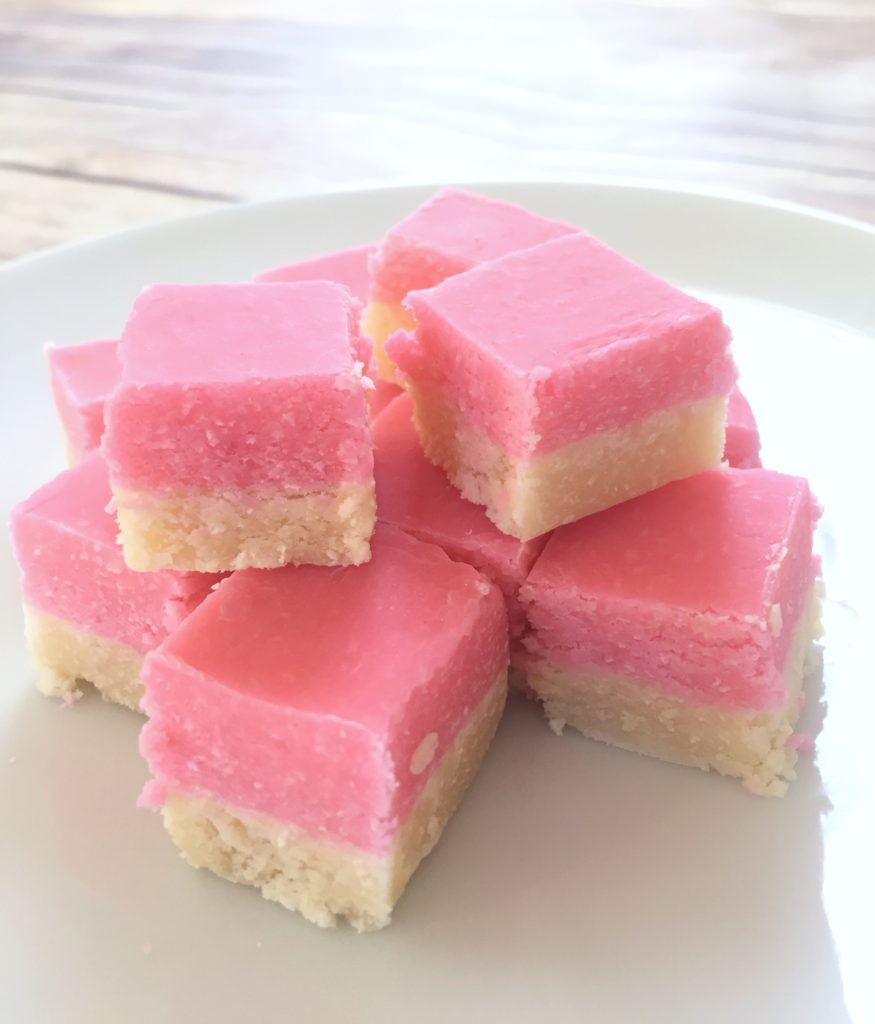
I was most excited to try the Pink Coconut Ice. I’ve been intrigued by the thought of this candy ever since it was mentioned in the book, Harry Potter and the Prisoner of Azkaban by J.K. Rowling. The Pink Coconut Ice candy is similar to a stiff fudge. It’s very sweet, so you can cut it into small squares and have plenty to share with friends.

Pink Coconut Ice Candy

I imagined the “shimmery pink squares” a little differently so, I decided to build on my imagined version of the coconut candy by making a shimmery pink coconut cake. I used my favorite coconut cake recipe and pink coconut buttercream. I tinted my buttercream with Americolor gel food color soft pink. I covered my cake in large flakes of unsweetened coconut. To find unsweetened coconut flakes, click here. I think the large flakes look more whimsical and add texture, but feel free to use whatever kind of coconut you prefer. I colored my coconut a shimmery, soft pink. Click here to see how I colored my coconut flakes.

Honeydukes Inspired Pink Coconut Ice Cake by Brownie Mischief

You don’t have to be a Harry Potter fan to appreciate this pink, fluffy, coconut-covered cake. I can imagine this pretty cake at any party or event with a pink theme. I hope you enjoy this perfectly Pink Coconut Ice Cake as much as we did!


Print Recipe


Pink Coconut Ice Cake

Moist, fluffy coconut cake with pink buttercream and coconut flakes

Course Dessert

Servings
6-inch cake (serves 6)


Ingredients
Coconut Cake

Pink Coconut Buttercream

Pink Coconut Flakes

Course Dessert

Servings
6-inch cake (serves 6)


Ingredients
Coconut Cake

Pink Coconut Buttercream

Pink Coconut Flakes


Instructions
Coconut Cake
  1. Preheat oven to 350º F. Grease three 6-inch cake pans.

  2. In a large bowl, sift together flour, baking powder and salt. Set aside.

  3. In a large bowl, beat butter, sugar and oil together with an electric mixer at medium speed, until light and fluffy, about 2-3 minutes.

  4. Beat in coconut extract. Gradually beat in egg whites until mixture is well combined, stopping to scrape the sides of the bowl.

  5. Beat in flour mixture in three additions, alternating with coconut milk, stopping to scrape the sides of the bowl.

  6. Pour batter into prepared pans, evenly distributing batter between the pans. Bake for 28-32 minutes, until a toothpick inserted into the center of pans comes out clean.

  7. Place pans on wire rack to cool for 10 minutes. Remove cakes from pans and place on rack to cool completely.

Pink Coconut Buttercream
  1. In a large bowl, beat butter with an electric mixer on medium speed, until light and fluffy.

  2. Add salt. Beat until combined.

  3. Turn off mixer. Add powdered sugar. Mix on low speed until sugar is moistened, then turn up to medium speed and beat until combined.

  4. Add coconut milk a little at a time, until desired consistency is reached. Add coconut extract and beat at medium speed until buttercream is smooth.

  5. Add gel food color with a toothpick, a little at a time, until desired consistency is reached. Beat at low speed until well blended.

  6. Fill and frost cake with Pink Coconut Buttercream.

Pink Coconut Flakes
  1. Place powdered sugar in a small bowl. Add a small amount of petal dust. Whisk together with a small whisk. Add additional petal dust until desired color is reached.

  2. Spread coconut flakes out onto a large shallow dish. Sprinkle powdered sugar mixture over coconut with a small sieve. Toss gently with gloved hands.

  3. Place cake on a baking sheet to catch excess coconut. Press colored coconut onto sides and top of cake.


Recipe Notes

*Do not substitute all-purpose flour. For best results weigh your dry ingredients. **For best results, use natural coconut extract. Imitation coconut flavorings may give your baked goods an unpleasant flavor. ***If your coconut milk is separated when you open the can, simply place it in a blender to emulsify before using. To find my favorite 6-inch cake pans, click here. To find the gel food color I used, click here. To find unsweetened coconut flakes, click here. To find the edible pearl dust I used, click here.

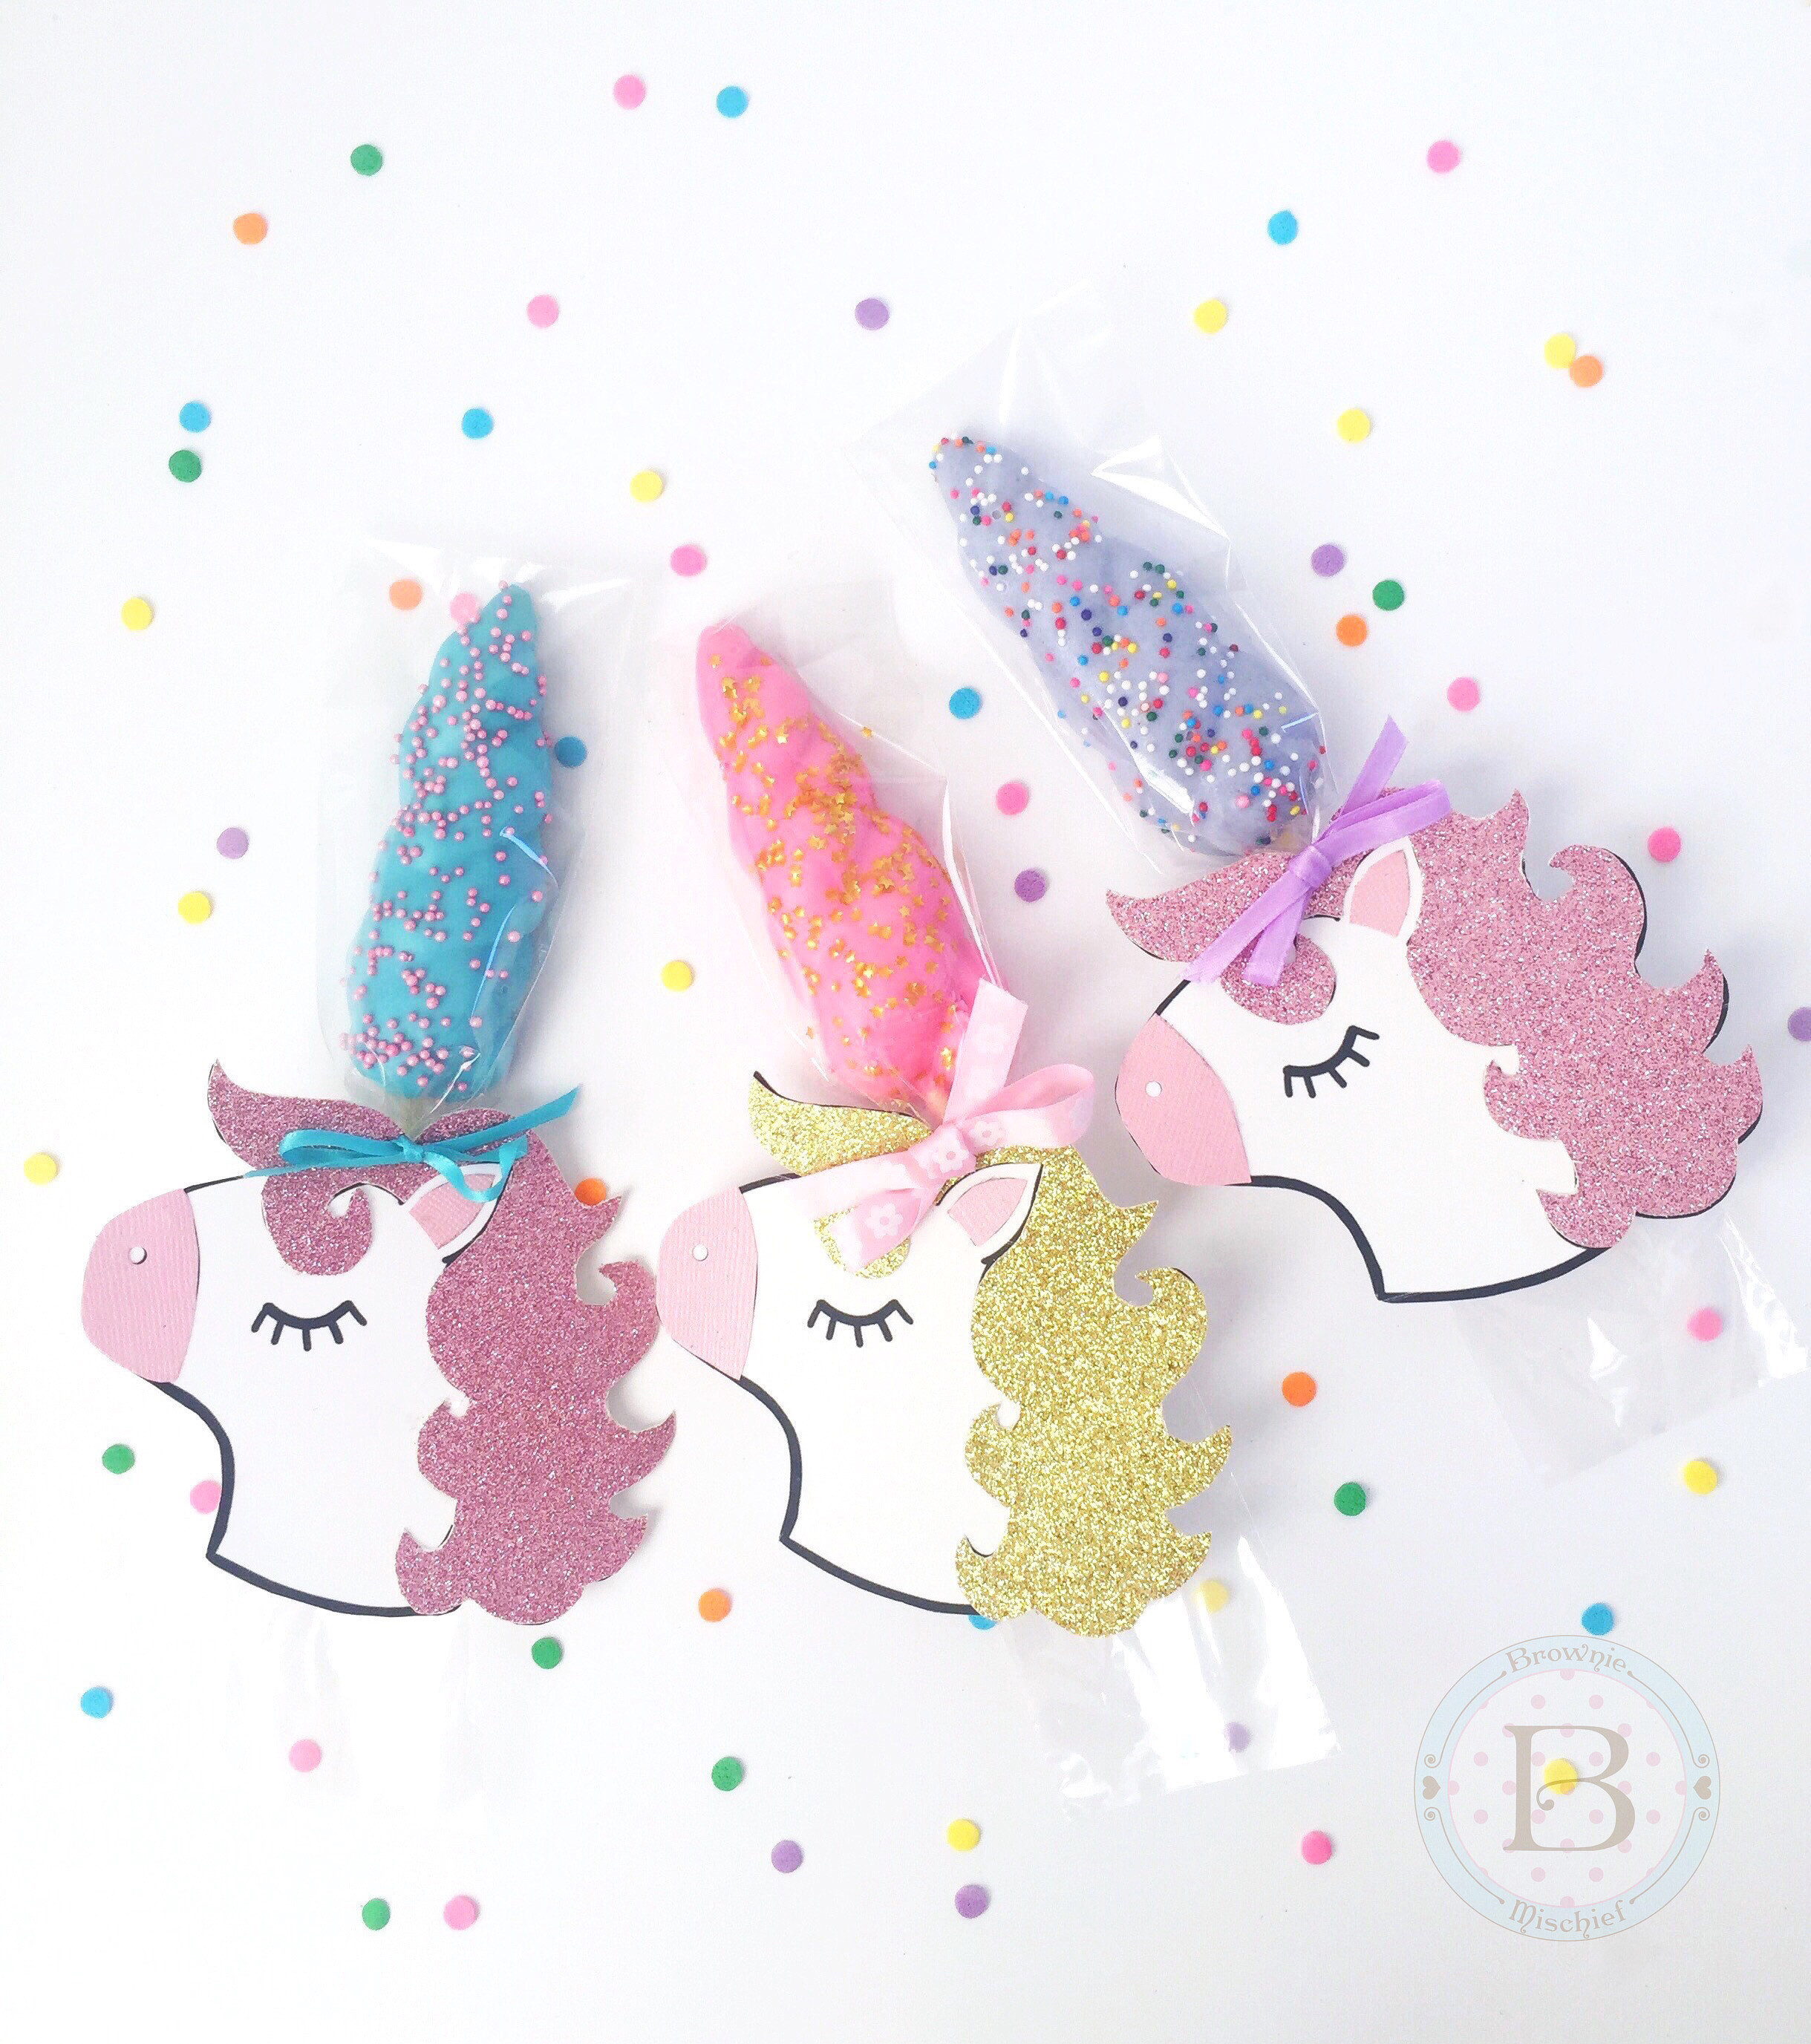
Unicorn Horn Cookie Party Favors

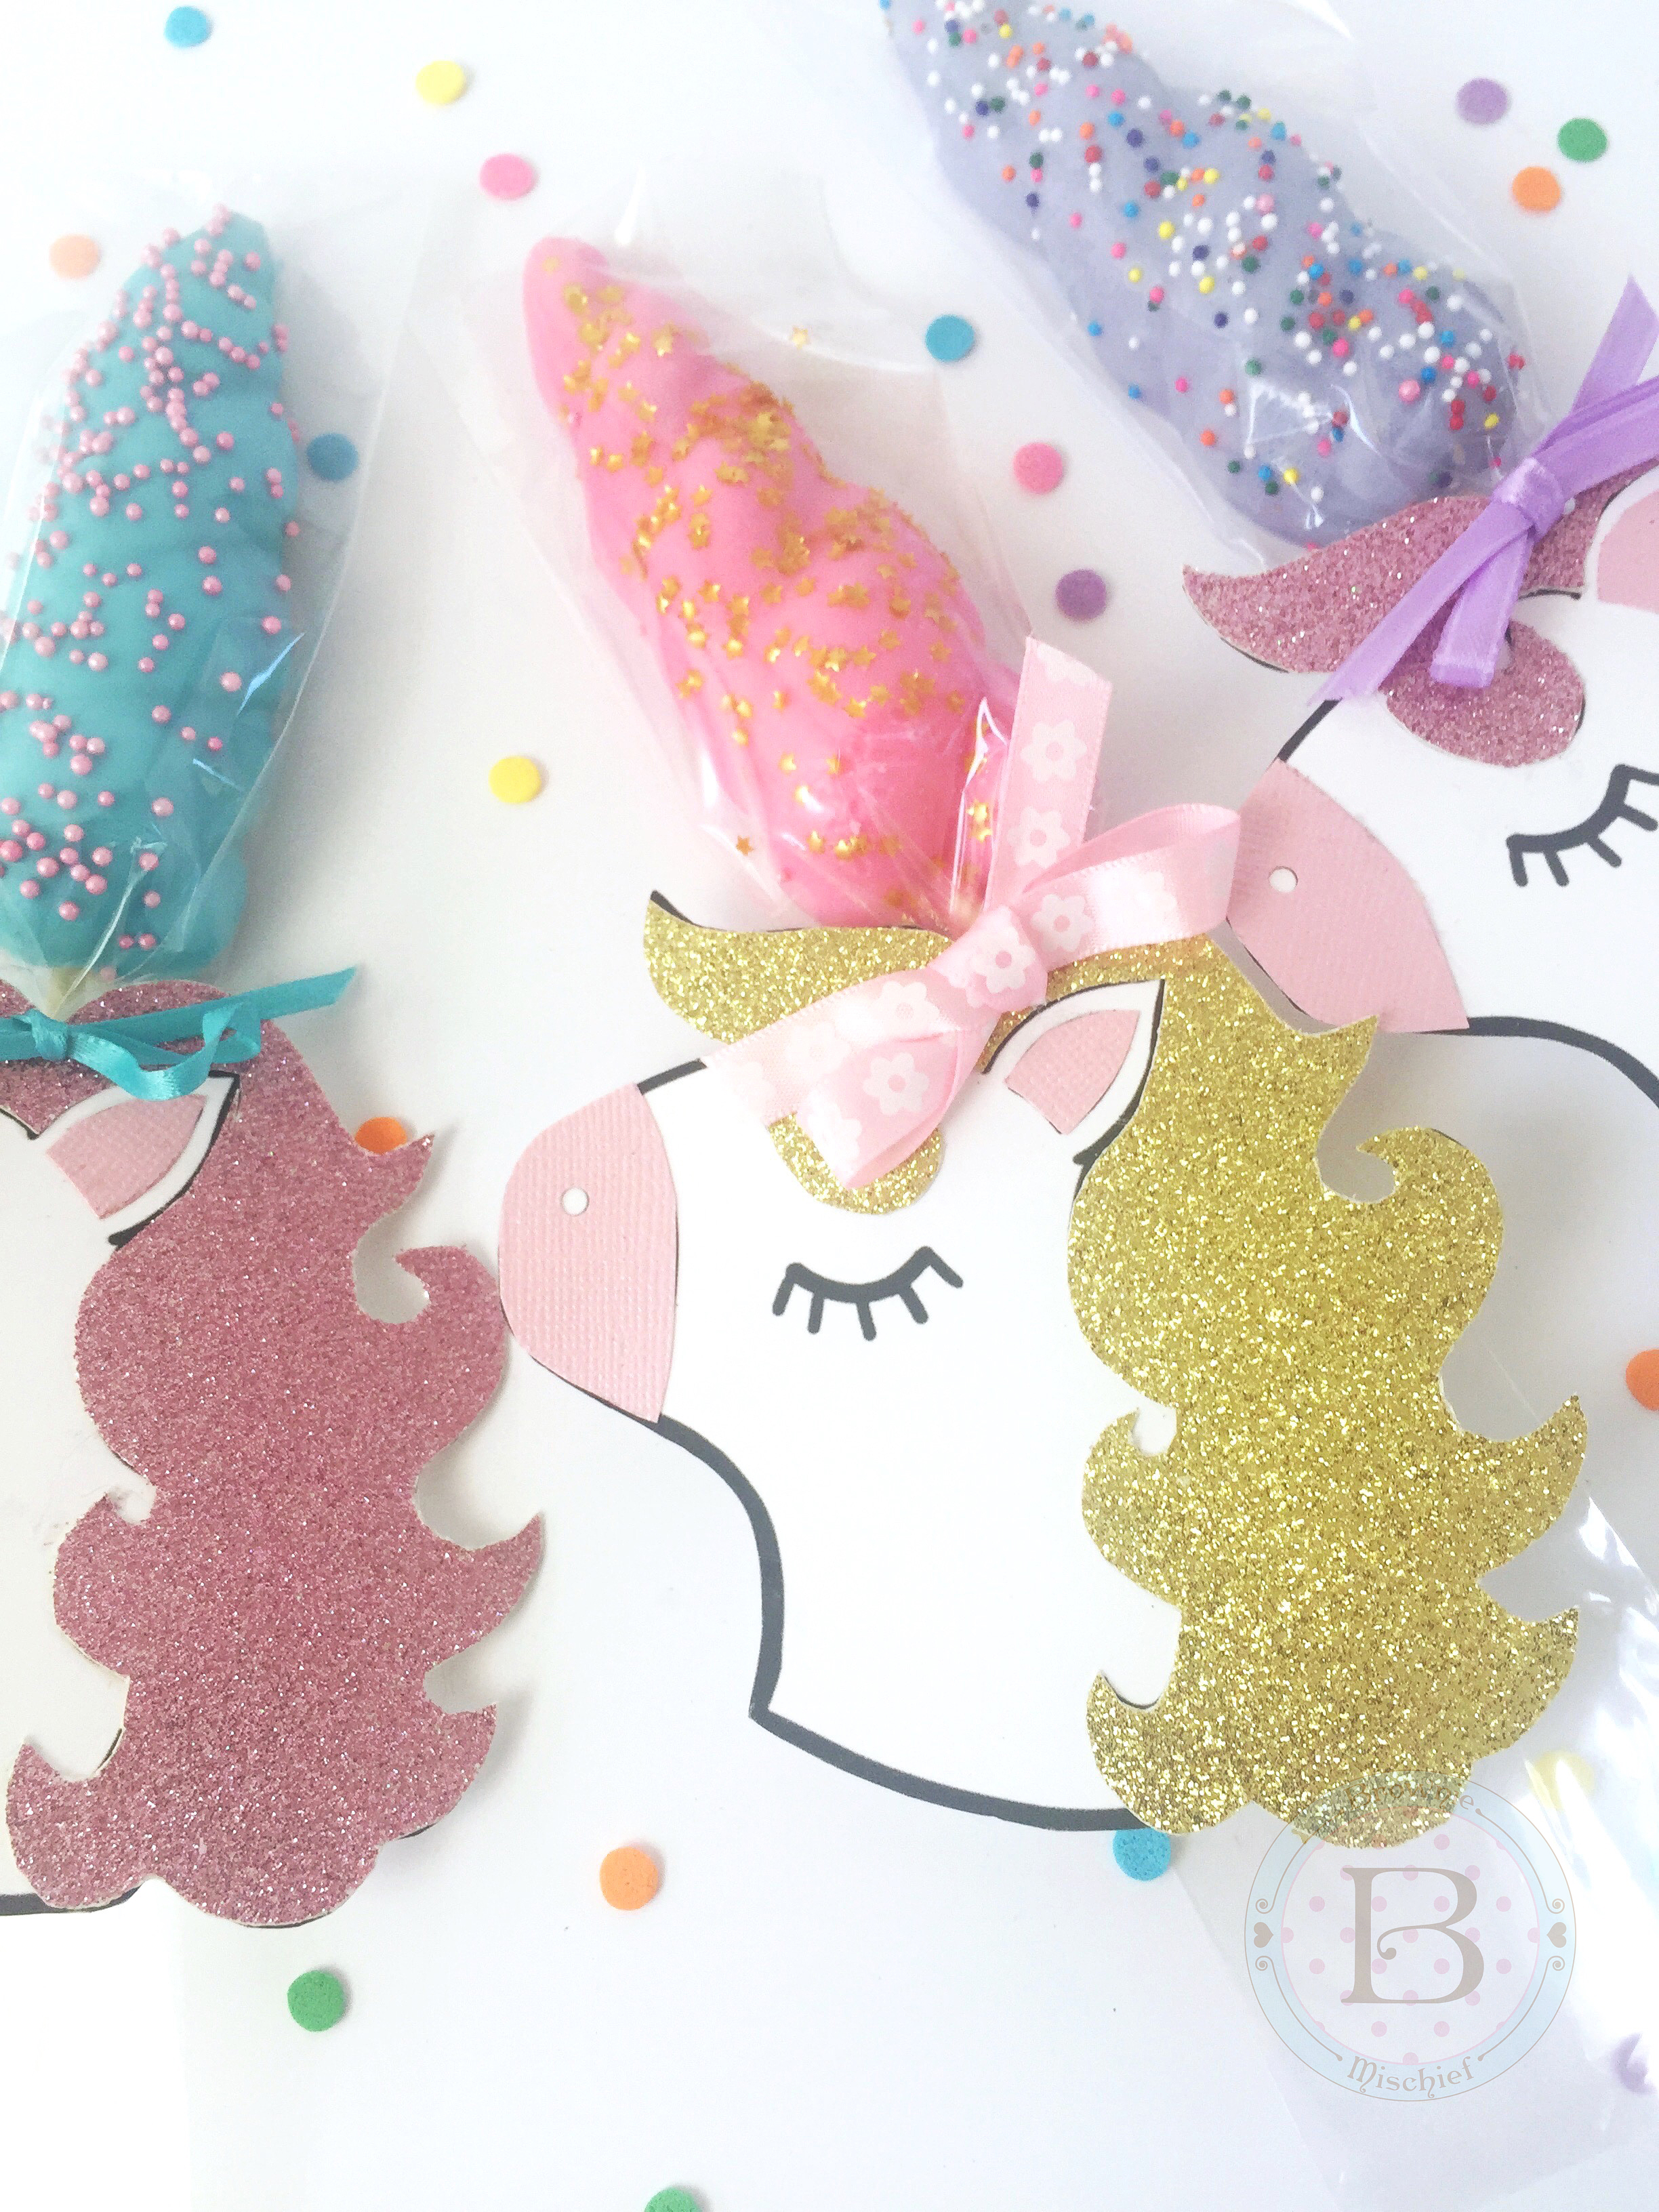
Unicorn Horn Cookie Party Favors by Brownie Mischief

Have you noticed a unicorn or two around lately? The unicorn craze is still going strong and it’s no wonder that unicorns have become so beloved. Unicorns are beautiful, majestic creatures with just the right amount of mystery and elusiveness, and they symbolize the spirit of individuality. So it’s no surprise that so many people, adults and children alike, are clamoring for unicorn-theme parties. If you’re planning a graduation party or a summer birthday party for your unicorn fan, you’ve probably searched the internet for some ideas. Every unicorn party will likely have a unicorn head cake. By the way, does anyone know who the original designer of that cake is? Just wondering. A unicorn party also needs some unicorn treats. Look no further! These Unicorn Horn Cookies make perfect party favors. They’re fun to make and don’t require any special skills. You can also make them ahead which means they’re stress-free!

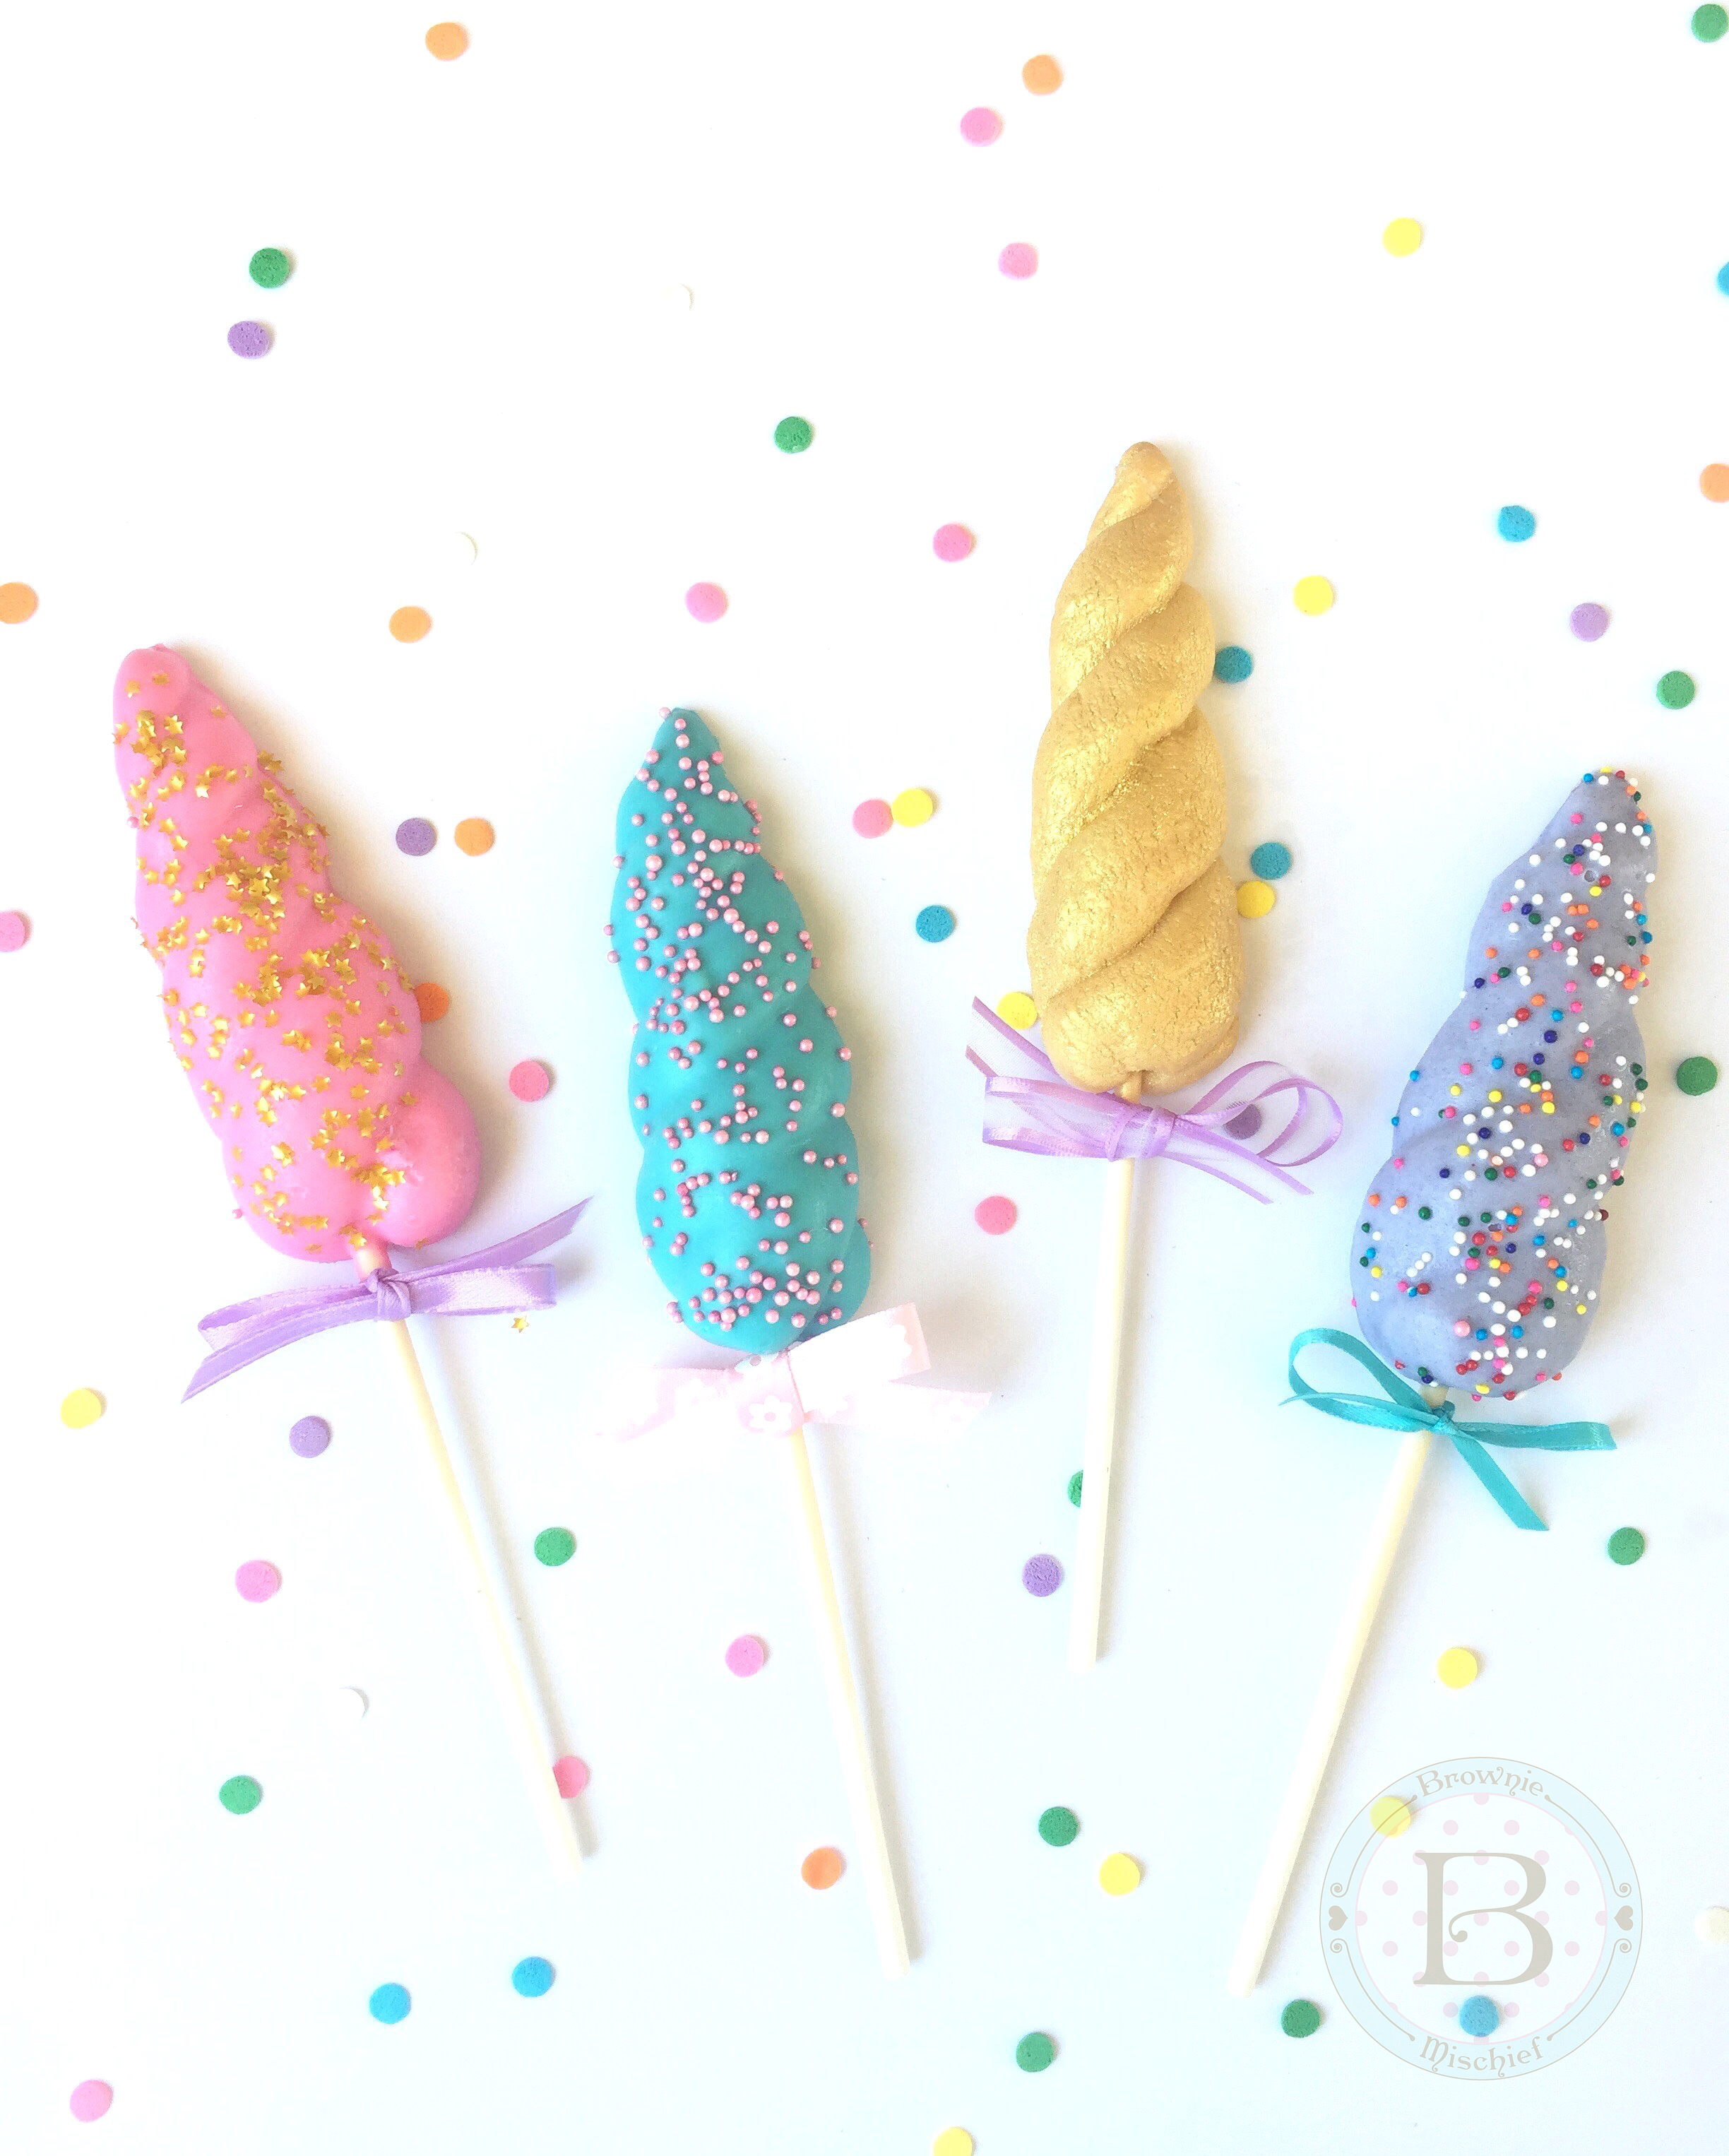
Unicorn Horn Cookies by Brownie Mischief

I came up with Unicorn Horn Cookies when making a Unicorn Rainbow Milkshake. I had extra cookies left, so I decided to take them up a notch by dunking them in candy melts and adding sprinkles. They looked so festive, that they instantly became official party favors. I designed some unicorn gift tags to go with them and I’ve created a free printable to share with you! Click here for free unicorn gift tag printable. You can find the cookie recipe at the bottom of the Unicorn Rainbow Milkshake post. Click here to find the Unicorn Horn Cookies recipe.

To make Unicorn Horn Cookie Party Favors, you’ll need:

Bake unicorn cookies and cool completely. Place candy melts in a microwaveable container and heat in a microwave at 50% power for 1 minute. Stir and heat for 20 second intervals until melted. If the melted candy is too thick, add melted vegetable shortening a half teaspoon at a time until desired consistency is reached. Dip cookies into melted candy and tap off excess. Place cookies on a tray lined with wax paper. Decorate with sprinkles before the candy sets. Place cookies in refrigerator for a few minutes, until set.

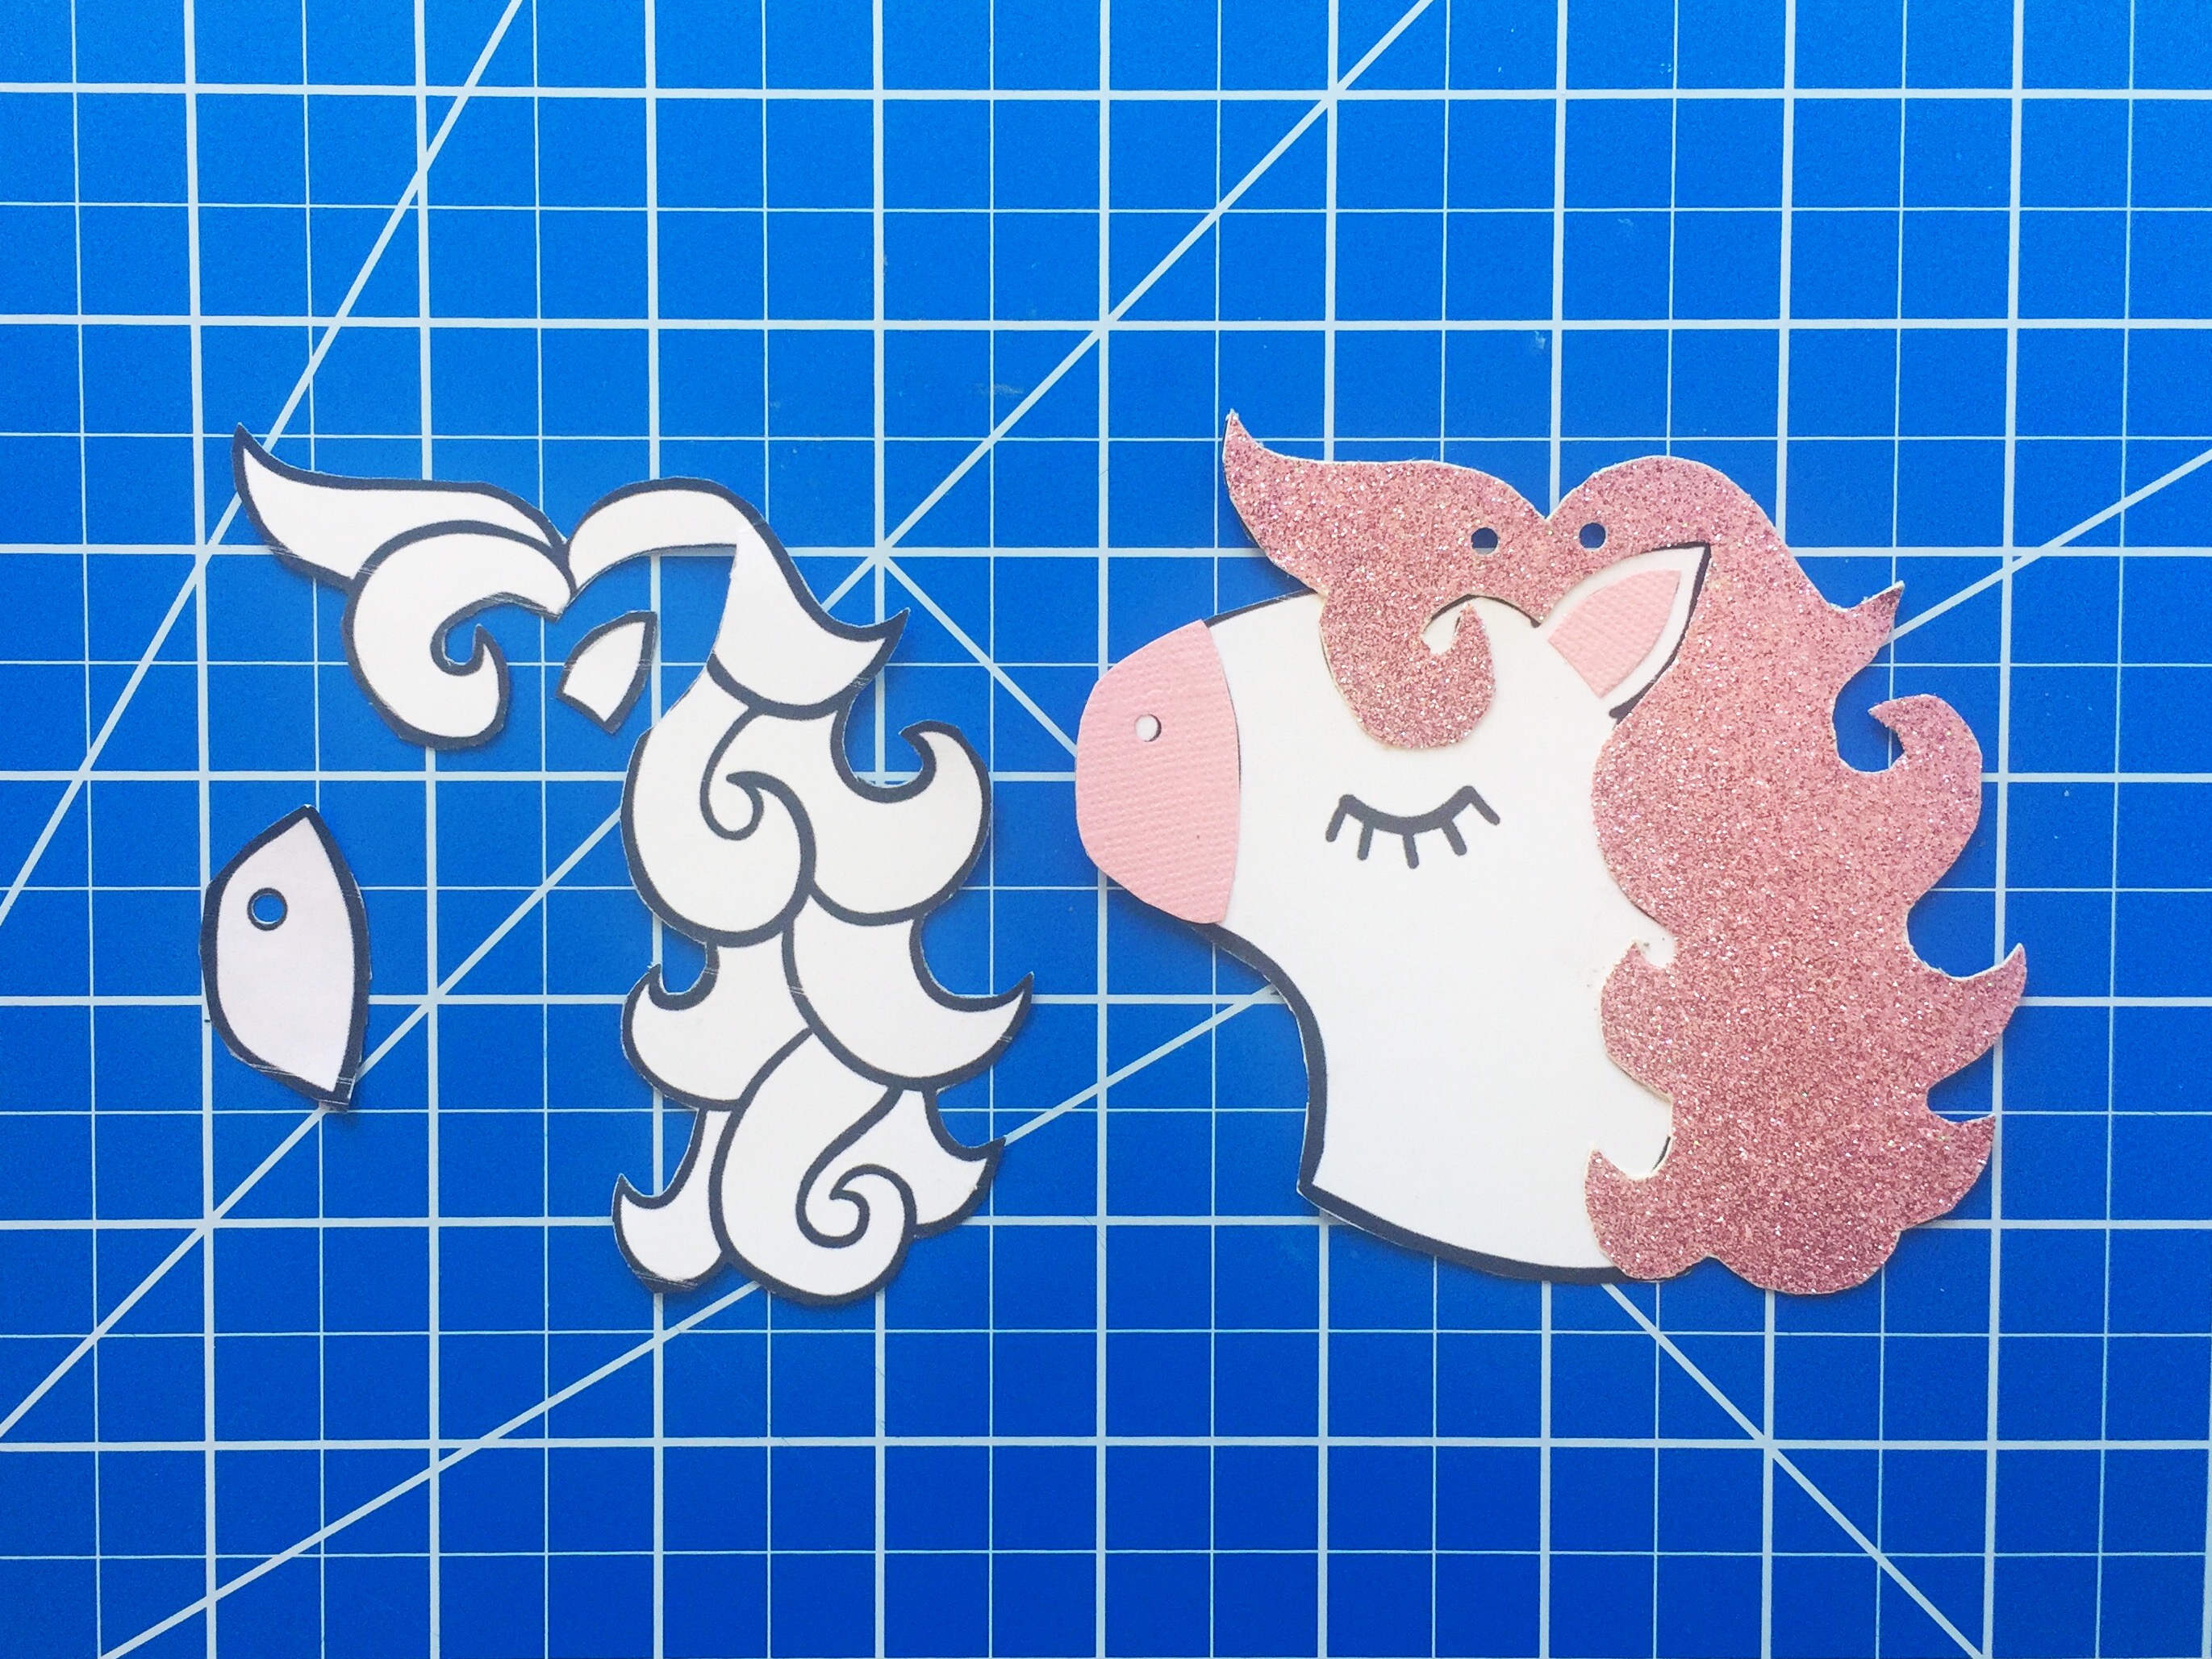
Print unicorn gift tags on card stock. Click here for free unicorn gift tag printable. Cut out desired number of unicorn gift tags. Cut out one extra to use as a pattern. Cut mane, muzzle and ear out of scrapbook paper. Affix with craft glue. (Alternately, you can omit the scrapbook paper step and simply print out the unicorn gift tags and color them with colored pencils or markers.) Punch two holes, about 1/2-inch apart near the top of each gift tag.

Unicorn Gift Tag DIY with Free Printable

Place cookies in treat bags, if using. Tie ribbon onto the lollipop sticks at the base of the cookies. Thread ribbon through the holes of the gift tags and tie into bows.

Unicorn Horn Cookie Party Favors with Free Printable by Brownie Mischief

Unicorn Rainbow Milkshake

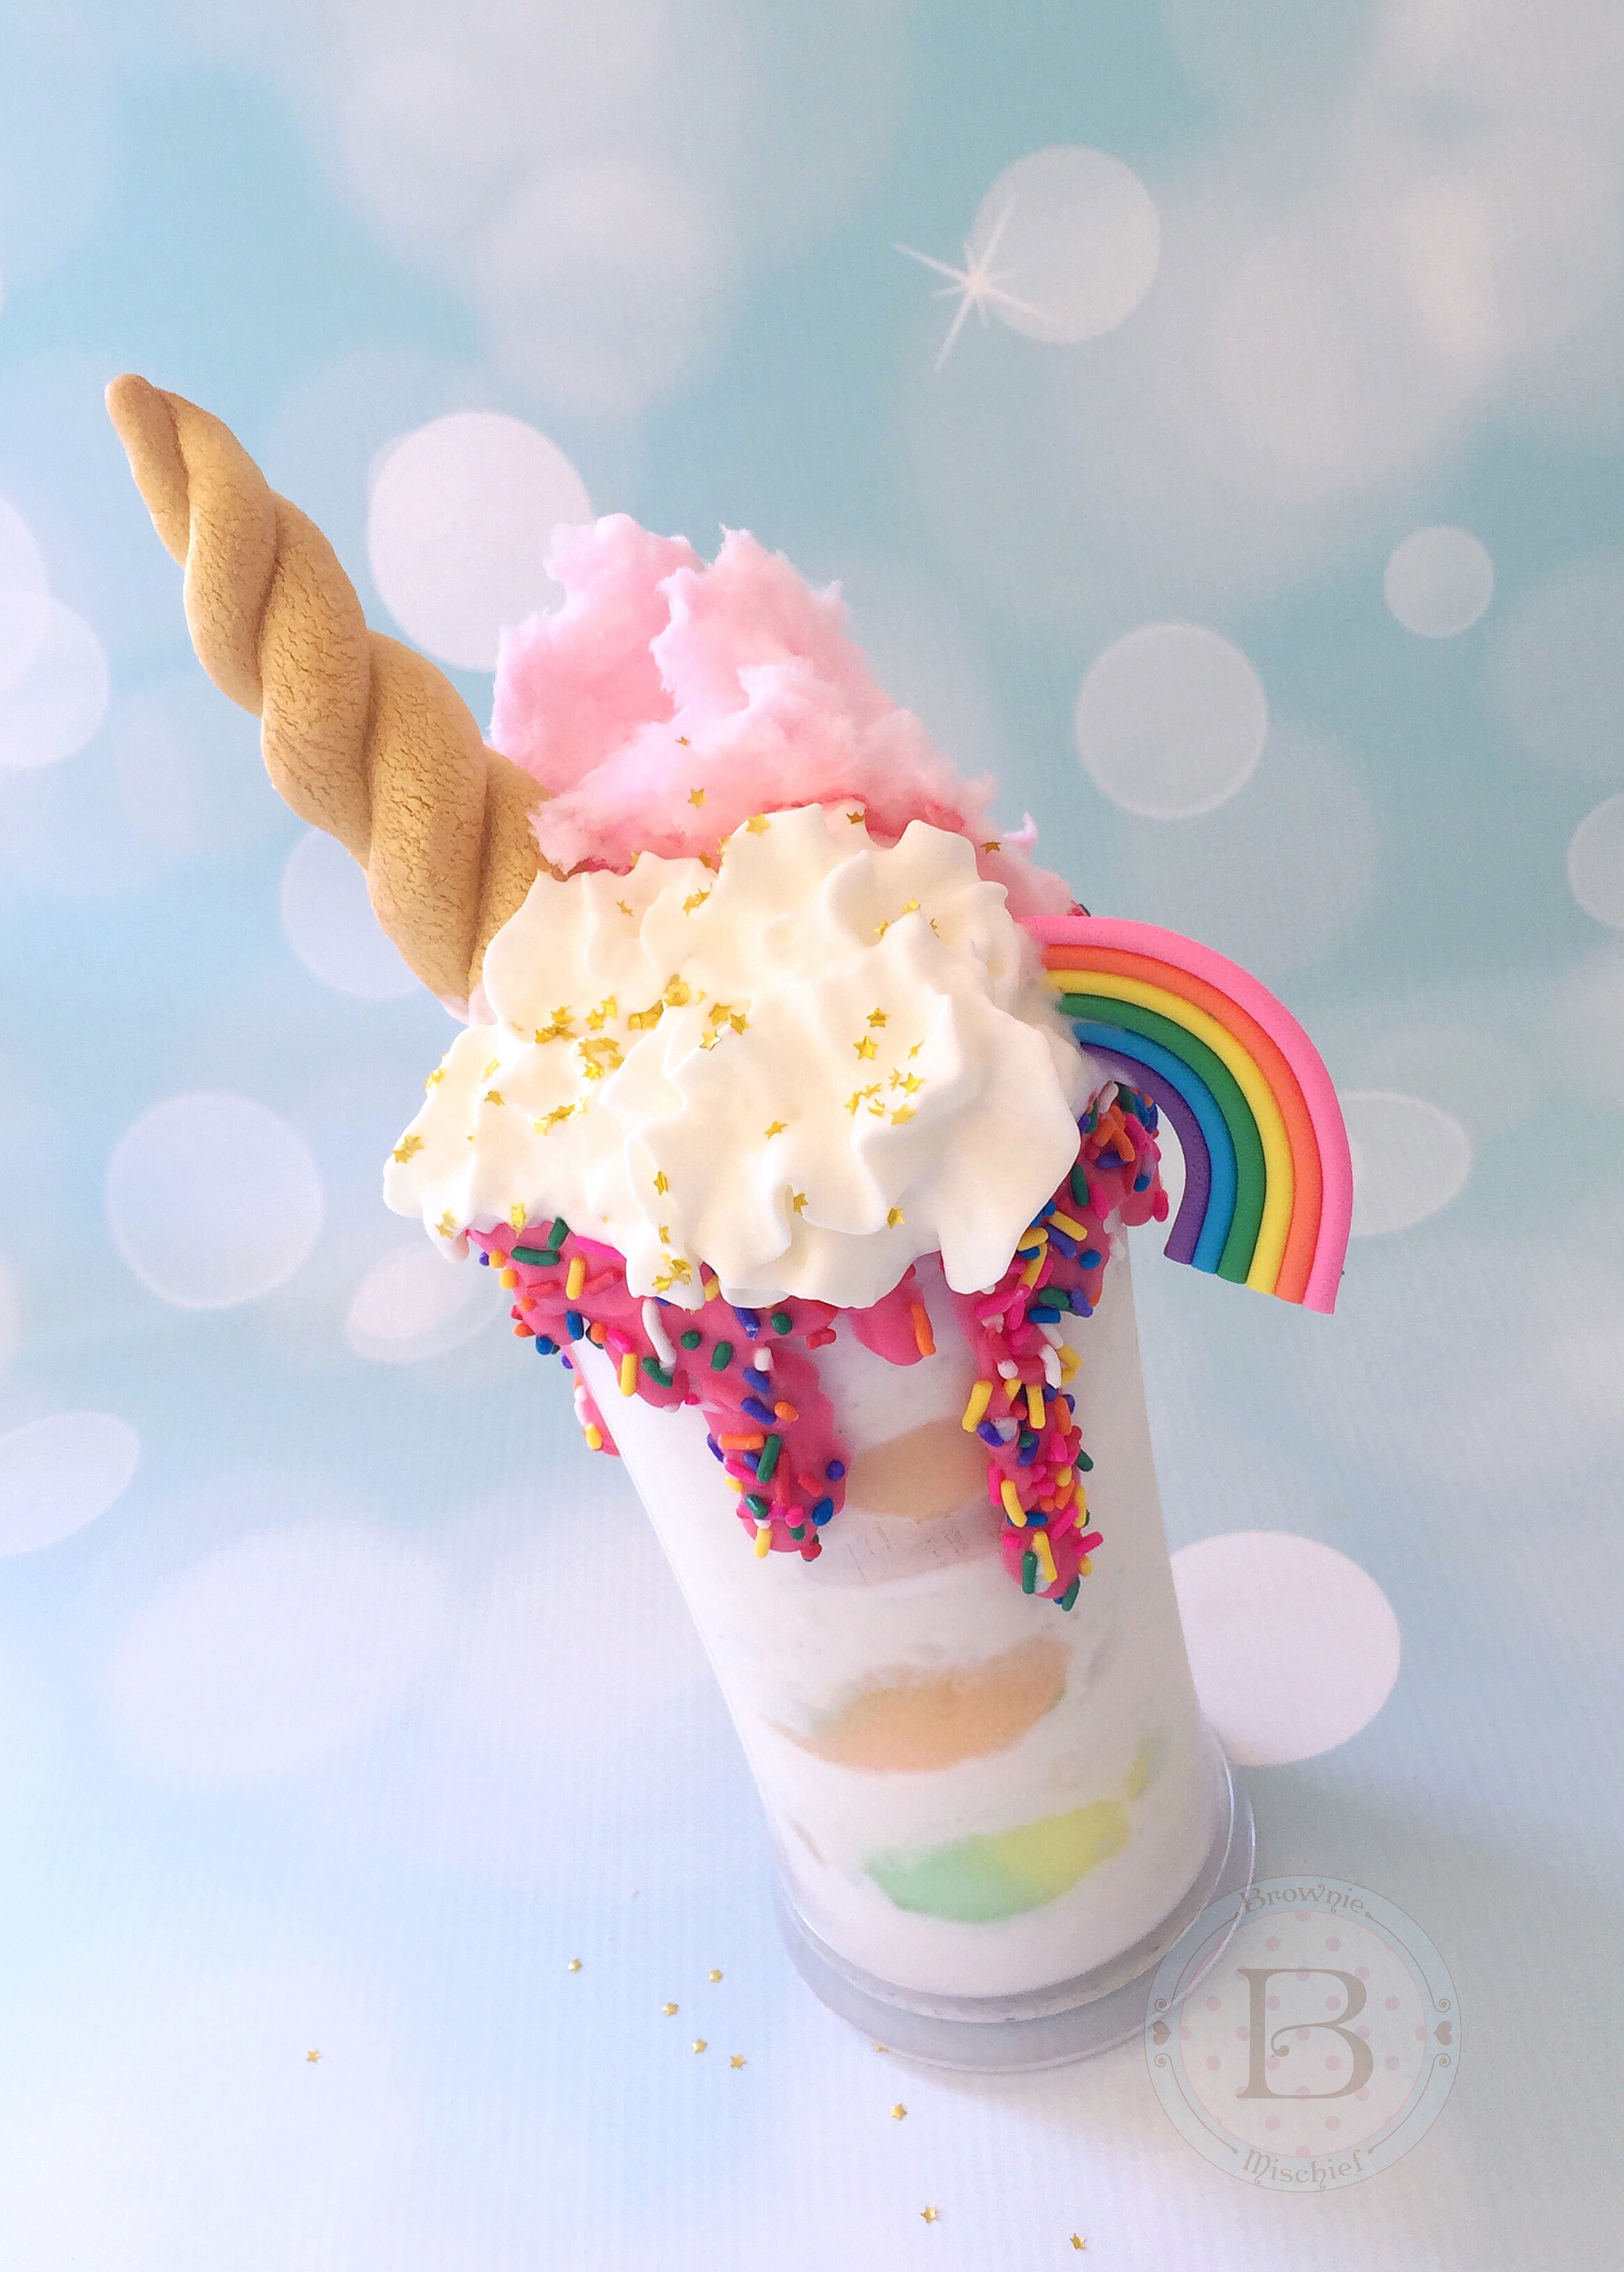
Unicorn Rainbow Milkshake by Brownie Mischief

I’ve been dying to try one of those over-the-top milkshakes that have been catching my eye on social media for some time now. Also known as freakshakes, some magnificently indulgent ones can be found in Australia, the UK and New York City. It’s certainly on my bucket list to go meet up with one of those glorious creations in person and dig in! In the meantime, I decided to concoct my humble version here at home, in honor of National Unicorn Day. Yup, unicorns have their own day! Whoever invented celebrating national days, I thank you. It gives me a great excuse to indulge in a delicious treat…not that I need an excuse.

There are so many versions of unicorn milkshakes out there and I love every one of them! In fact, anything that’s unicorn related sets my heart aflutter. The current unicorn craze won’t seem to go away and, as you can imagine, that is just fine by me! One of the cutest unicorn things I’ve seen is my adorable cousin Nicole, scooting around in her fluffy unicorn slippers. Unicorn slippers are a must while drinking a Unicorn Rainbow Milkshake!

To make the Unicorn Rainbow Milkshake, you’ll need:

  • Unicorn Horn Cookie (Recipe below.)
  • Fondant Rainbow Topper (Click here for instructions.)
  • 3 ounces (about 1/2 cup) candy melts in the color of your choice
  • vegetable shortening, melted (about 1 tablespoon)
  • piping bag or squeeze bottle
  • tall glass (24 ounce)
  • rainbow sprinkles
  • 8 ounces vanilla ice cream
  • 1/3 cup milk (any kind)
  • 6 ounces rainbow sherbet
  • cotton candy
  • whipped cream
  • edible gold star glitter (Click here to find glitter.)

Place candy melts in a microwave safe container. Heat in the microwave for 1 minute at 50% power. Stir. Heat in the microwave for 10 second intervals until melted and smooth. If your melted candy melts are too thick, stir in melted shortening a teaspoon at a time until desired consistency is reached. Transfer the melted candy melts to a disposable piping bag or a squeeze bottle. (Alternately, you can use a plastic zip bag.) Place your glass on a rimmed plate or baking sheet. Snip off the tip of the piping bag and drizzle the melted candy along the rim of the glass. Immediately sprinkle on the rainbow sprinkles, before the melted candy sets.

Combine vanilla ice cream and milk in a blender and blend until smooth. Place 3 scoops of rainbow sherbet into your glass. Pour vanilla milkshake over the sherbet scoops in your glass. Top with cotton candy, whipped cream, a Unicorn Horn Cookie, a Fondant Rainbow Topper and a sprinkle of edible gold star glitter. Put on your unicorn slippers and enjoy your unicorn milkshake!

Unicorn Horn Cookie by Brownie Mischief

Print Recipe
Unicorn Horn Cookies
Sugar cookies shaped like unicorn horns.
Course Dessert
Prep Time 15 minutes
Cook Time 15 minutes
Passive Time 11/2 hours
Servings
cookies (*see note)
Ingredients
Course Dessert
Prep Time 15 minutes
Cook Time 15 minutes
Passive Time 11/2 hours
Servings
cookies (*see note)
Ingredients
Instructions
  1. In a medium bowl, sift together flour, baking powder and salt. Set aside.
  2. In a large bowl, cream butter and sugar with an electric mixer at medium speed until light and fluffy, about 2-3 minutes.
  3. Add the egg yolk and extracts. Beat at medium speed until combined.
  4. Gradually add the flour mixture, beating at low speed just until combined. Do not over mix.
  5. Cover dough with plastic wrap and chill in the refrigerator for 30 minutes.
  6. Line 2 large cookie sheets with parchment paper.
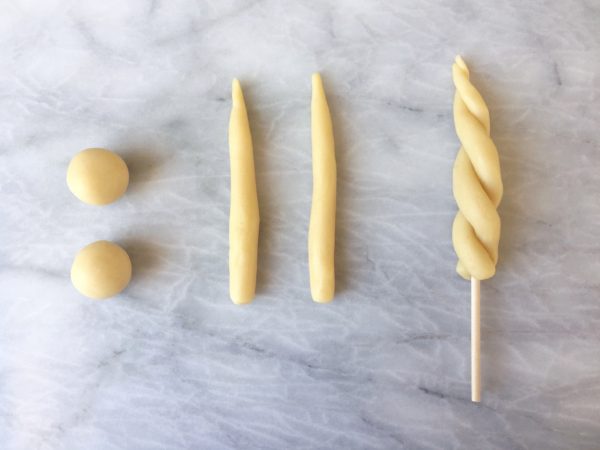
  7. Form dough into tablespoon size balls. (I used a tablespoon cookie scoop to make them uniform in size.) Form each ball of dough into a log, tapering at one end.
    Unicorn Horn Cookie Tutorial
  8. Twist two logs together to form a horn shape. Repeat with remaining logs. Insert skewers or lollipop sticks, if using. Place about 2 inches apart on prepared cookie sheets.
  9. Cover with plastic wrap and chill in the refrigerator for 30 minutes.
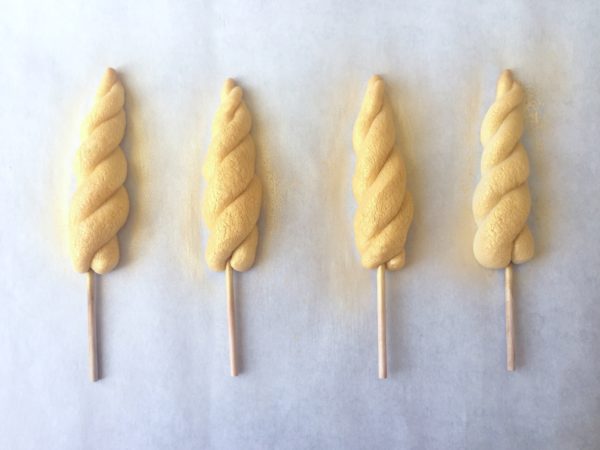
  10. Preheat oven to 350ºF. Bake until golden brown, about 13-15 minutes. Transfer cookies to wire rack to cool.
    Unicorn Horn Cookies Tutorial
  11. When cookies have cooled completely, place them on a parchment paper lined work surface. (You can use the same pieces of parchment paper that you baked them on.) If you are using lollipop sticks, you may want to cover the sticks with plastic wrap to keep them clean. Spray with edible gold spray. Let dry. Apply an additional coat of edible gold spray, if desired.
Recipe Notes

*This recipe makes about 14 unicorn horn cookies, but if you only need a few, you can roll out the remaining dough and use your favorite cookie cutter to make cookies. The baking time will be a bit less. You can also make as many unicorn horns as you need and freeze the remaining dough for later use.

**To make toppers as shown, use wooden skewers. To make cookie pops, use lollipop sticks.

***Click here to find Wilton Gold Color Mist

Marshmallow Love


Marshmallow Cake by Brownie Mischief

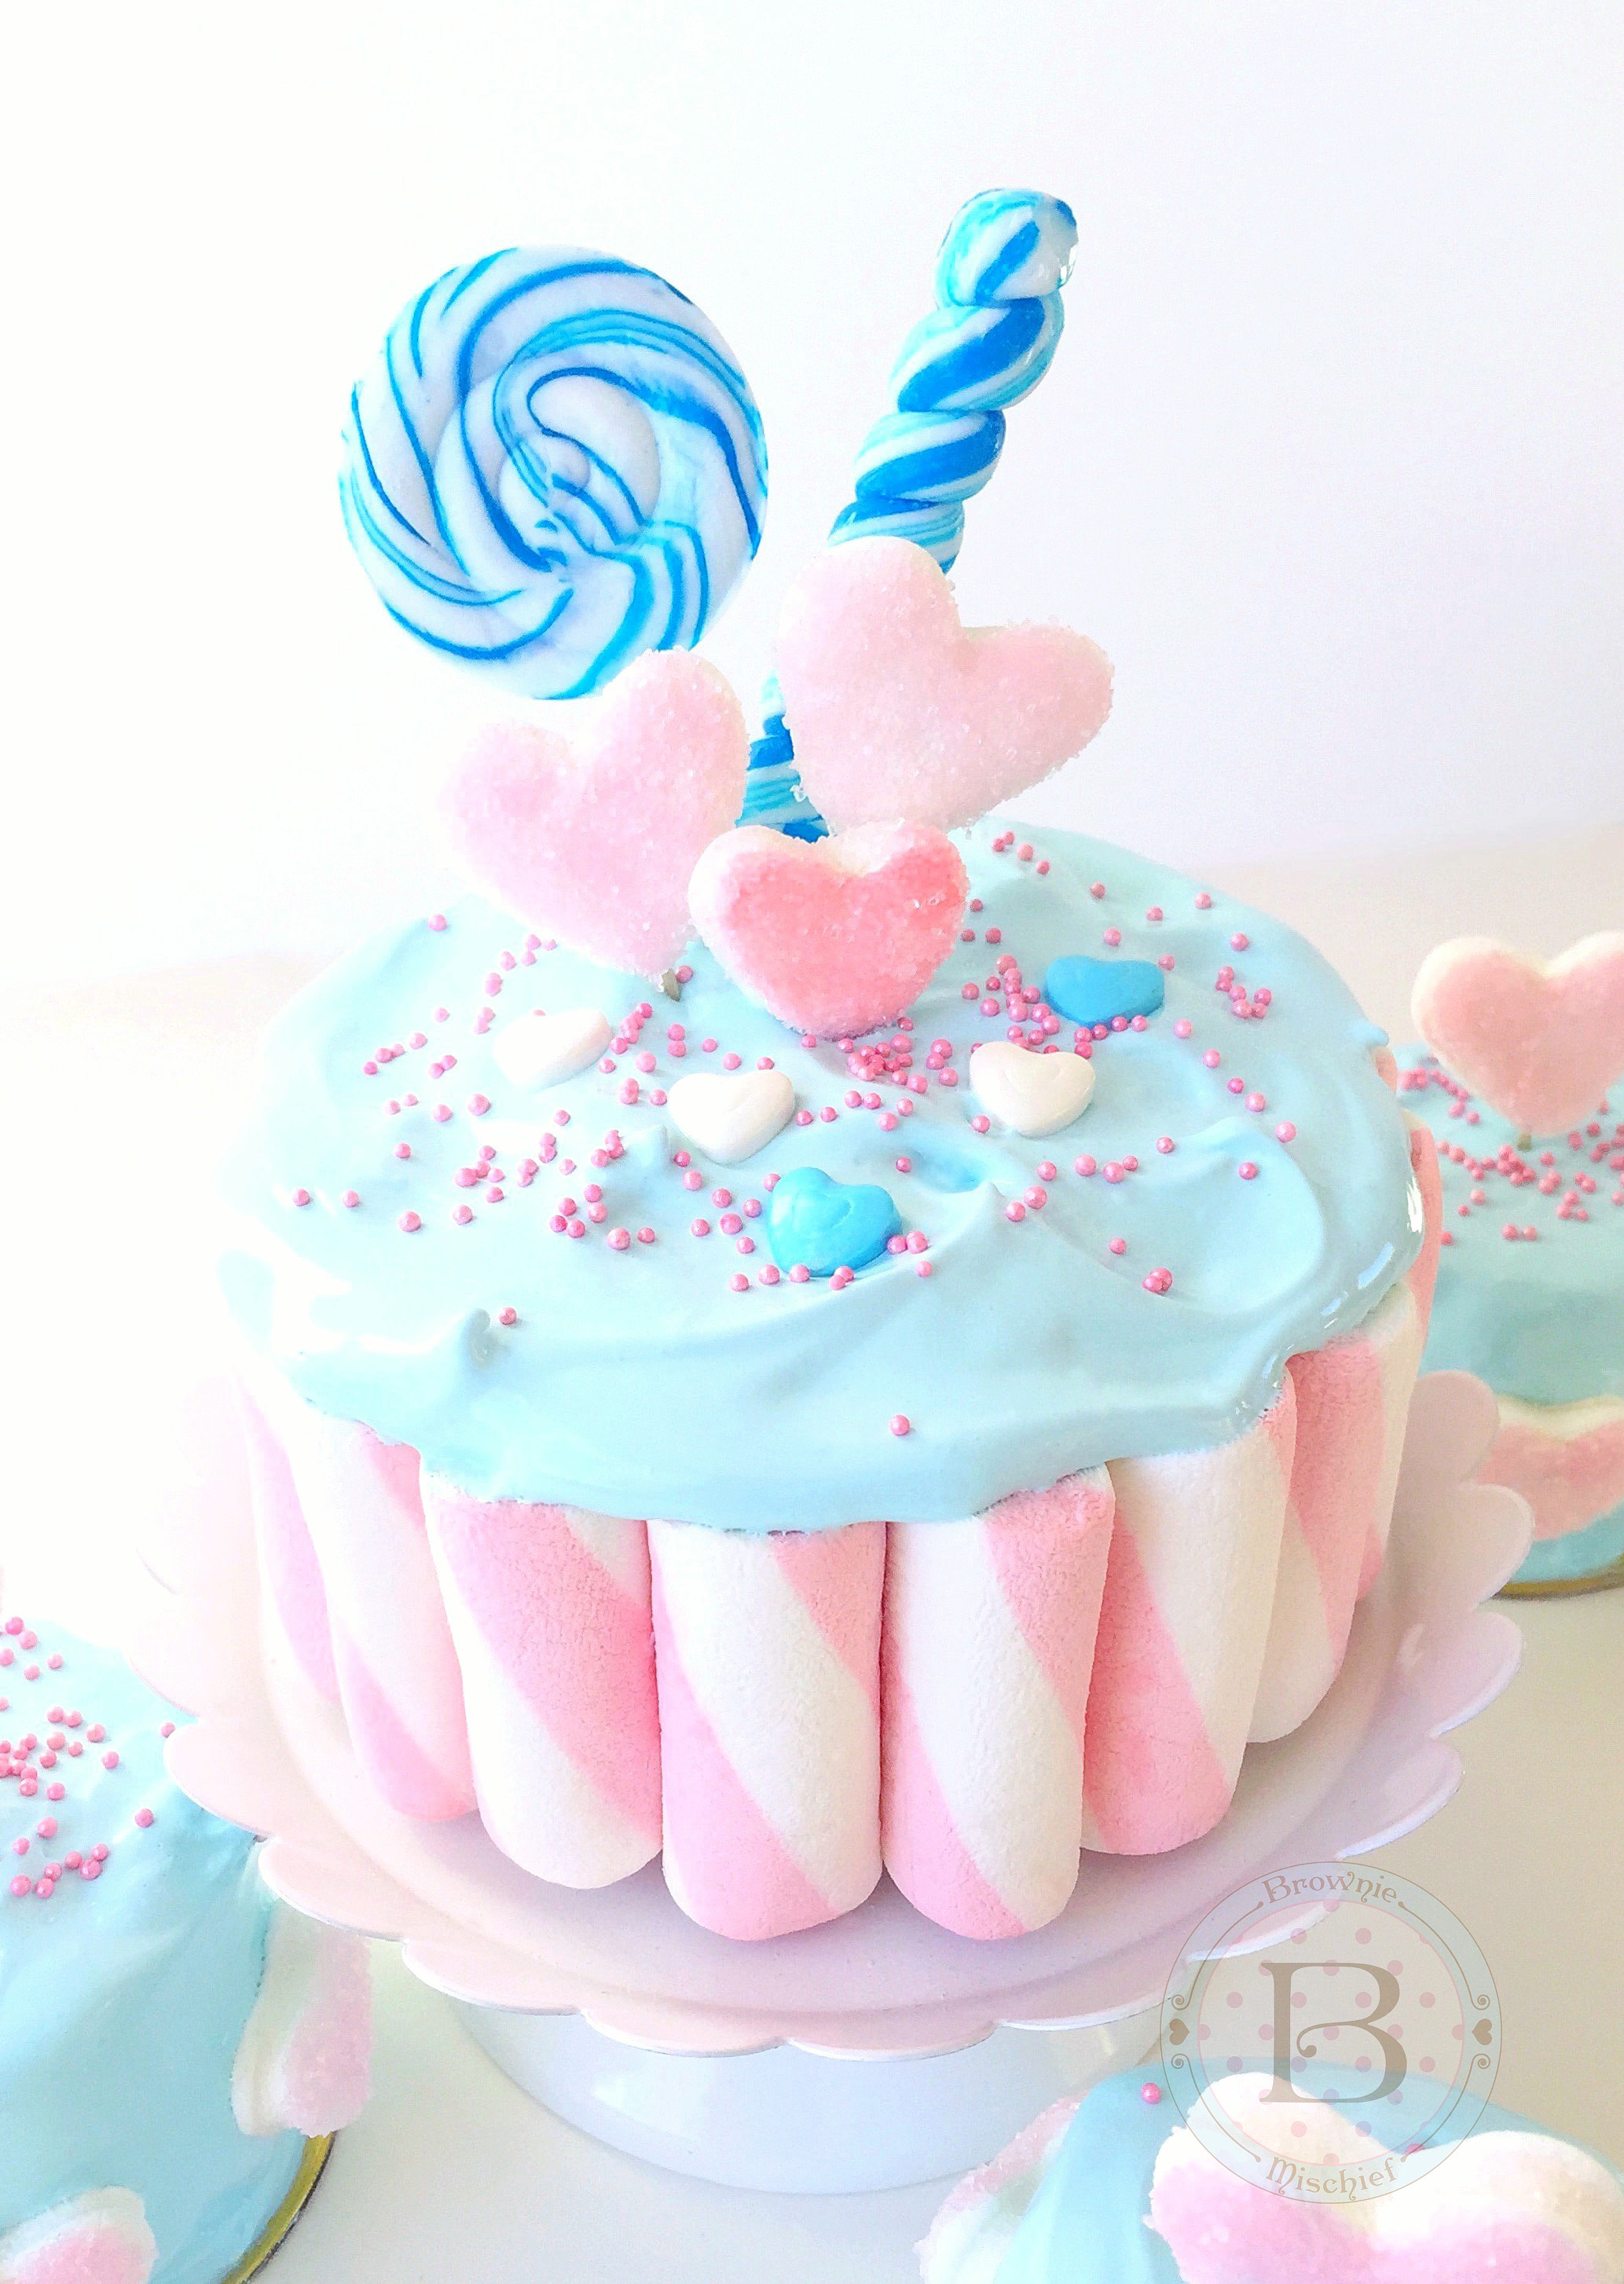
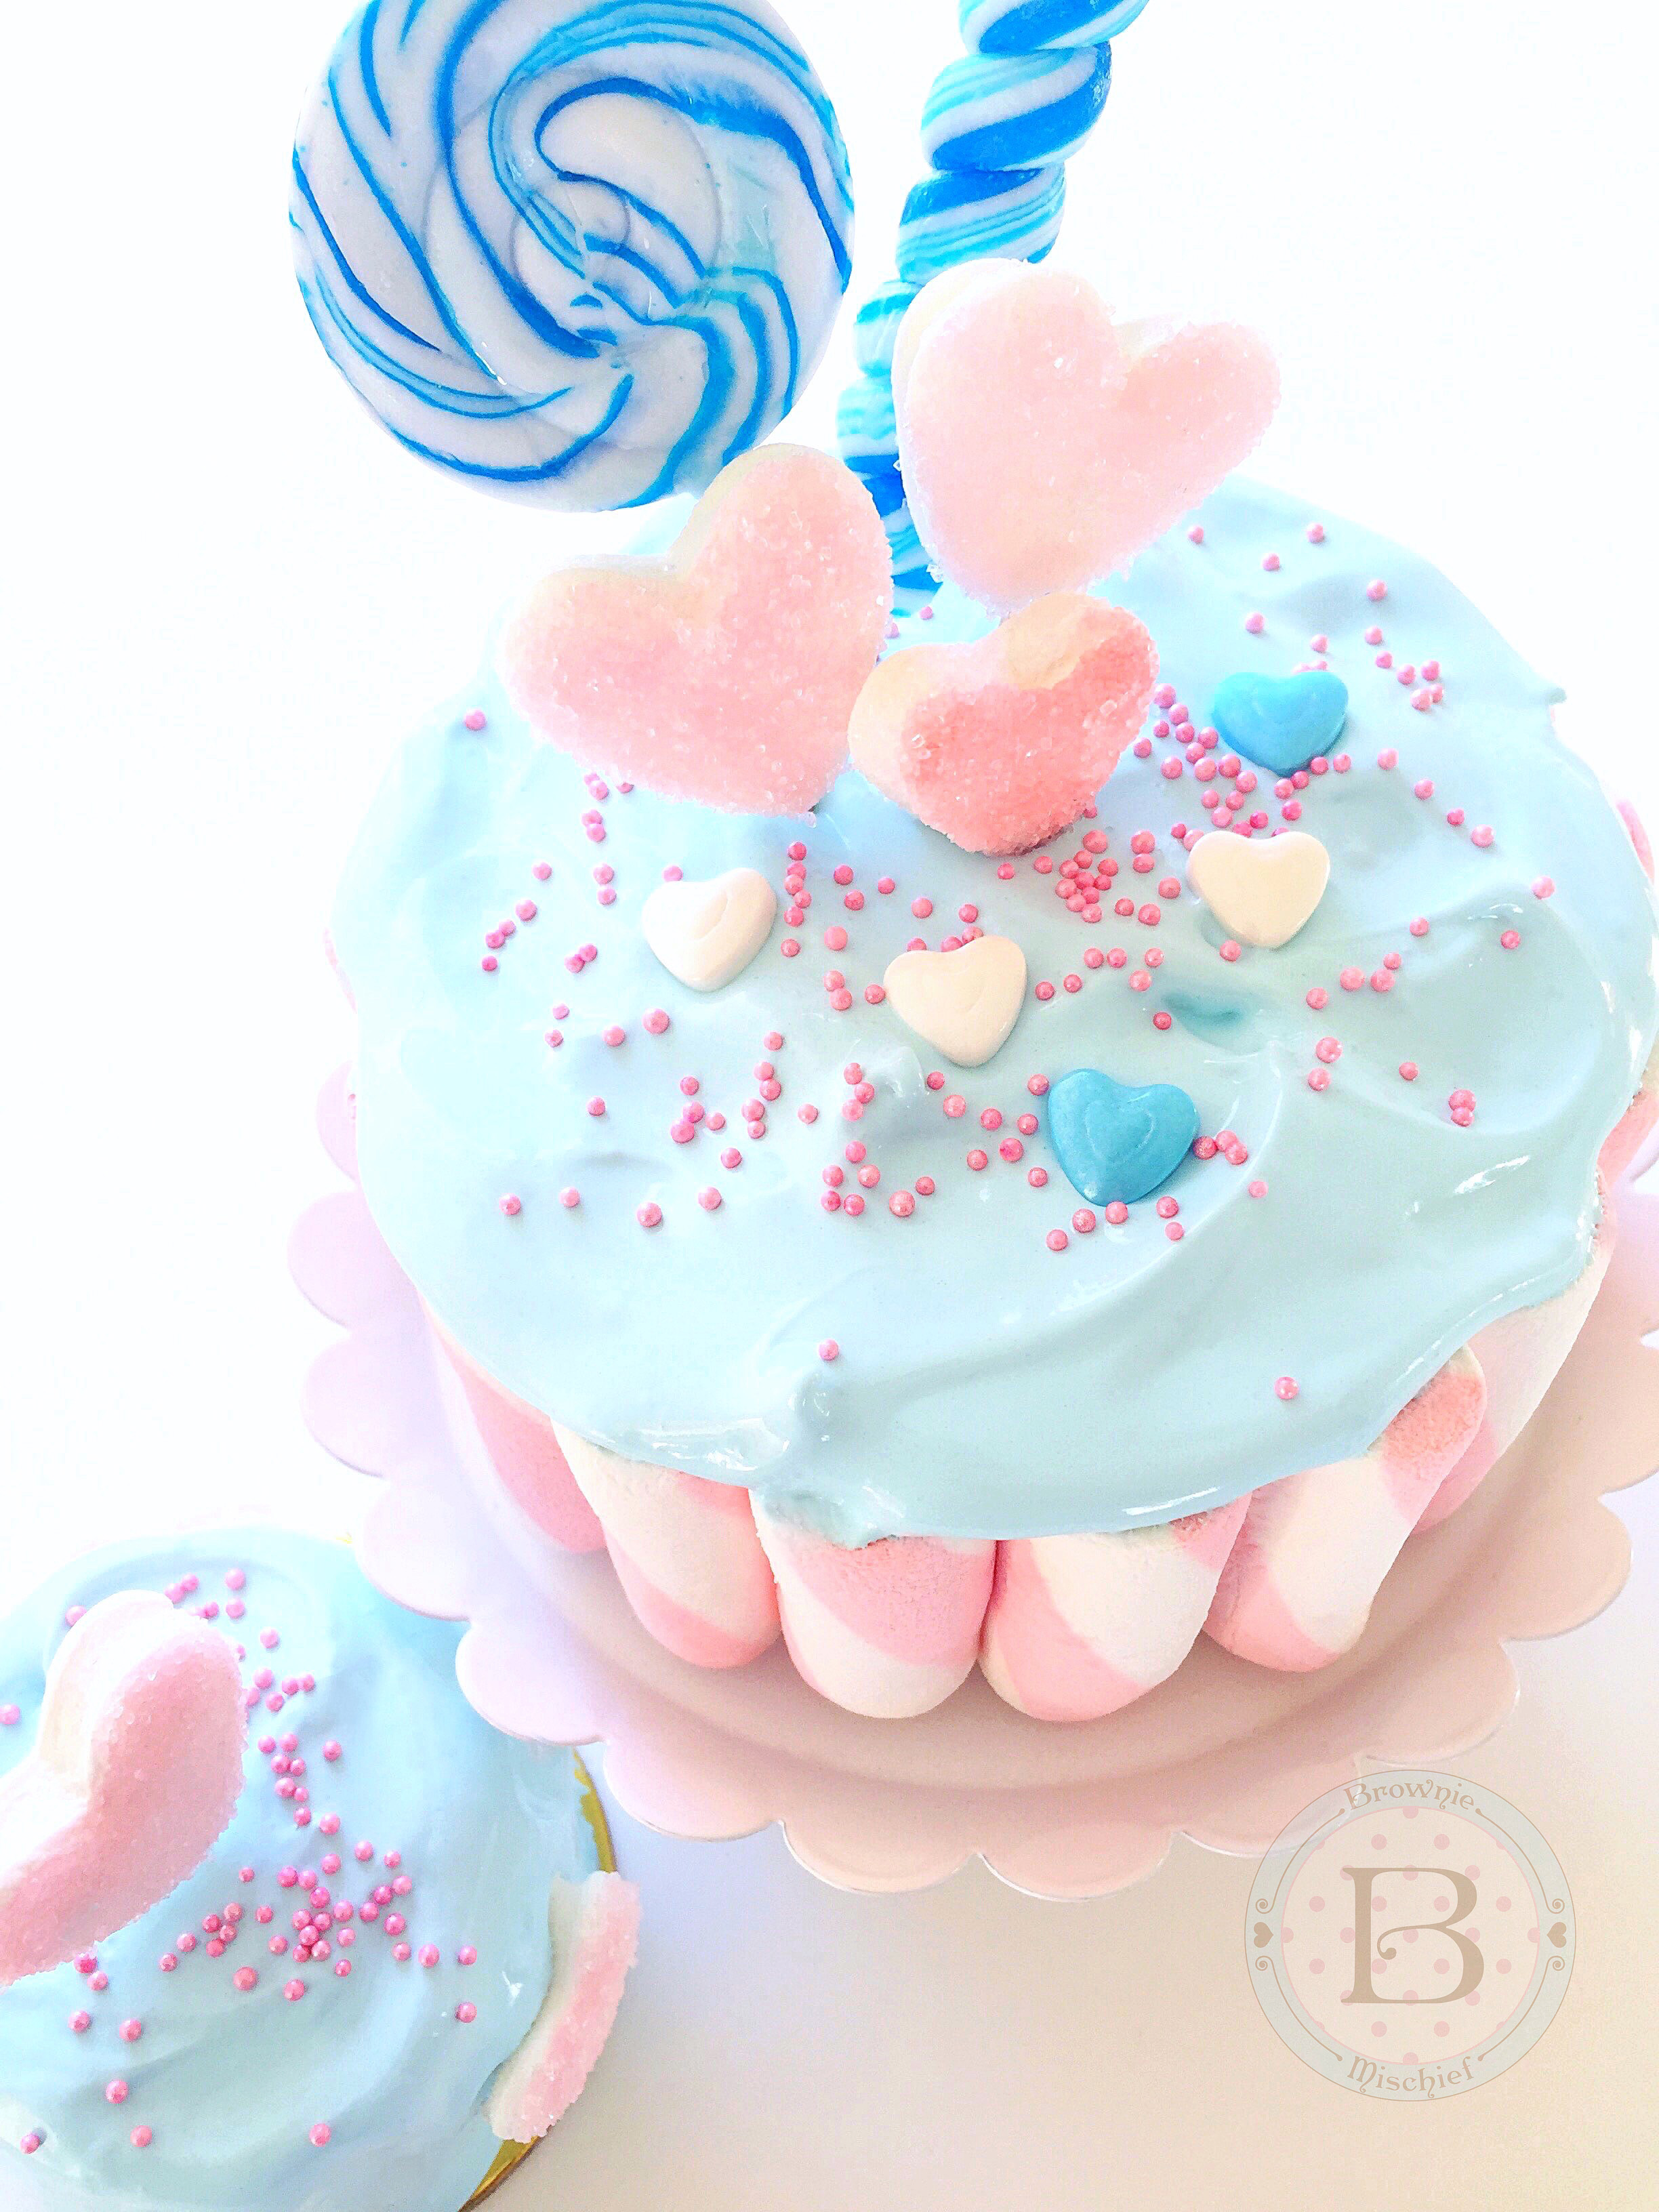
Dear marshmallows, why are you so sweet and fluffy? I shall call you squishy and you shall be mine! Yes, it’s true, I’m a bit crazy about marshmallows. This post is nothing short of a marshmallow fest! First, my daughter and I made some Sparkly Marshmallow Hearts that are super fun and easy to make. I literally want to put them on everything! How cute do they look on this mini cake? They also make adorable cupcake toppers! To view the Sparkly Marshmallow Hearts tutorial click here.

We also had some fun with Puffy Poles. In case you’re not marshmallow savvy, Puffy Poles are marshmallows that look like chubby barber poles. They’re very popular on dessert tables and candy buffets. We used pink ones, which have a subtle strawberry flavor. We applied them to the pictured 4-inch diameter by 2 1/4 inch tall strawberry cake, which was crumb coated with a thin layer of vanilla buttercream. We used buttercream to adhere them to the sides of the cake. To find Puffy Poles click here.

Marshmallow Cake by Brownie Mischief

Next, I made some Billowy Sky Blue Marshmallow Frosting to share with you. One of the things you’re going to love about this frosting, besides being yummy, is it’s natural beauty. You can simply spoon it on, no piping or fancy tricks necessary. Everything it touches becomes an ethereal cloud of deliciousness! The recipe is below.

Print Recipe
Billowy Sky Blue Marshmallow Frosting
Fluffy, glossy, sweet marshmallow frosting.
Course Dessert
Prep Time 10 minutes
Cook Time 15 minutes
Servings
cups
Ingredients
Course Dessert
Prep Time 10 minutes
Cook Time 15 minutes
Servings
cups
Ingredients
Instructions
  1. In a large heatproof bowl, whisk together sugar, egg whites, water and cream of tartar until frothy.
  2. Place bowl over a pan of gently simmering water, making sure the water isn't touching the bottom of the bowl. Whisk mixture until temperature reaches 160° and sugar is completely dissolved.
  3. Remove bowl from heat. Add extracts. Beat mixture with the whisk attachment of an electric mixer on high speed until stiff and glossy.
  4. Add a small amount of food color with a toothpick and mix on low speed. Continue adding food color, a little at a time, until desired shade is reached. Use a clean toothpick for each addition.
Recipe Notes

*It's important to dissolve all of the sugar when making this frosting. Ultra fine sugar dissolves easier, but if you are unable to find it, you can use regular granulated sugar.

Sparkling Sweetheart Palmier Cookies

Sparkling Sweetheart Palmier Cookies

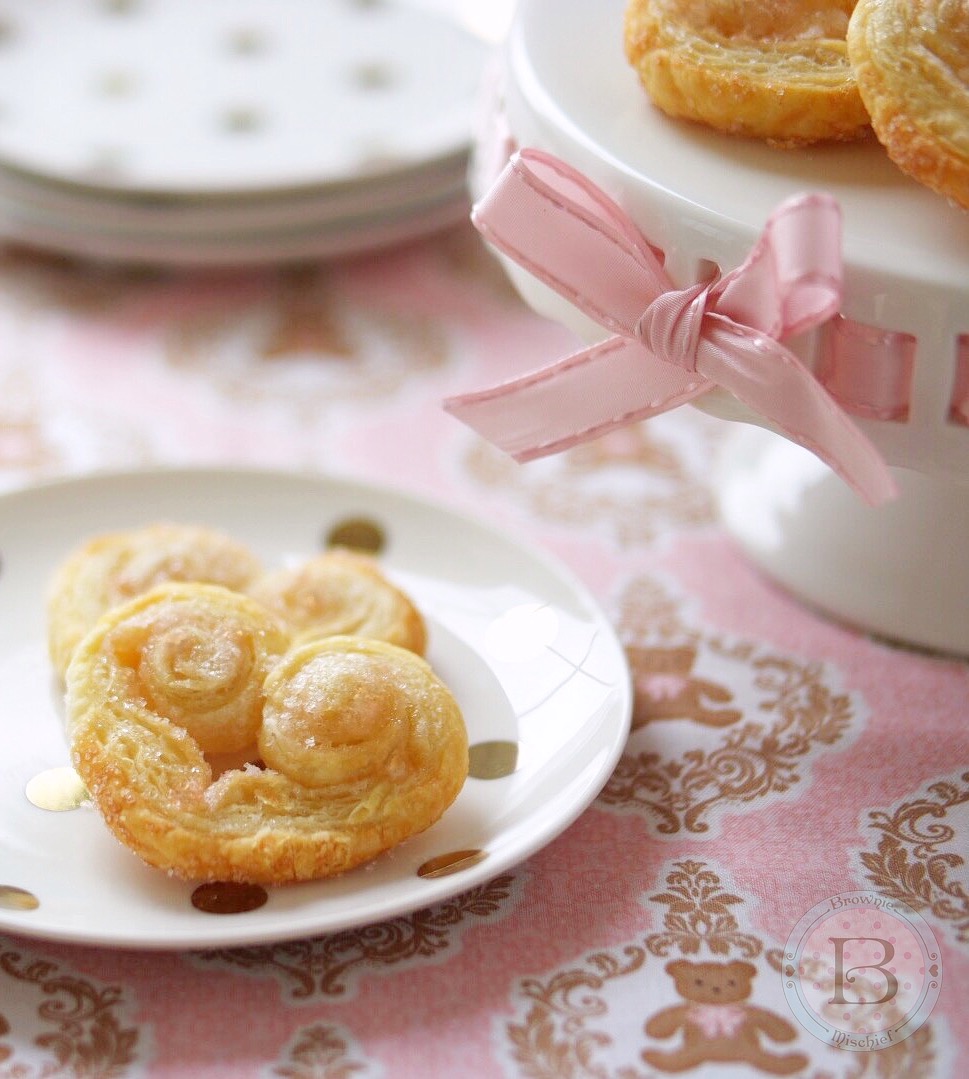
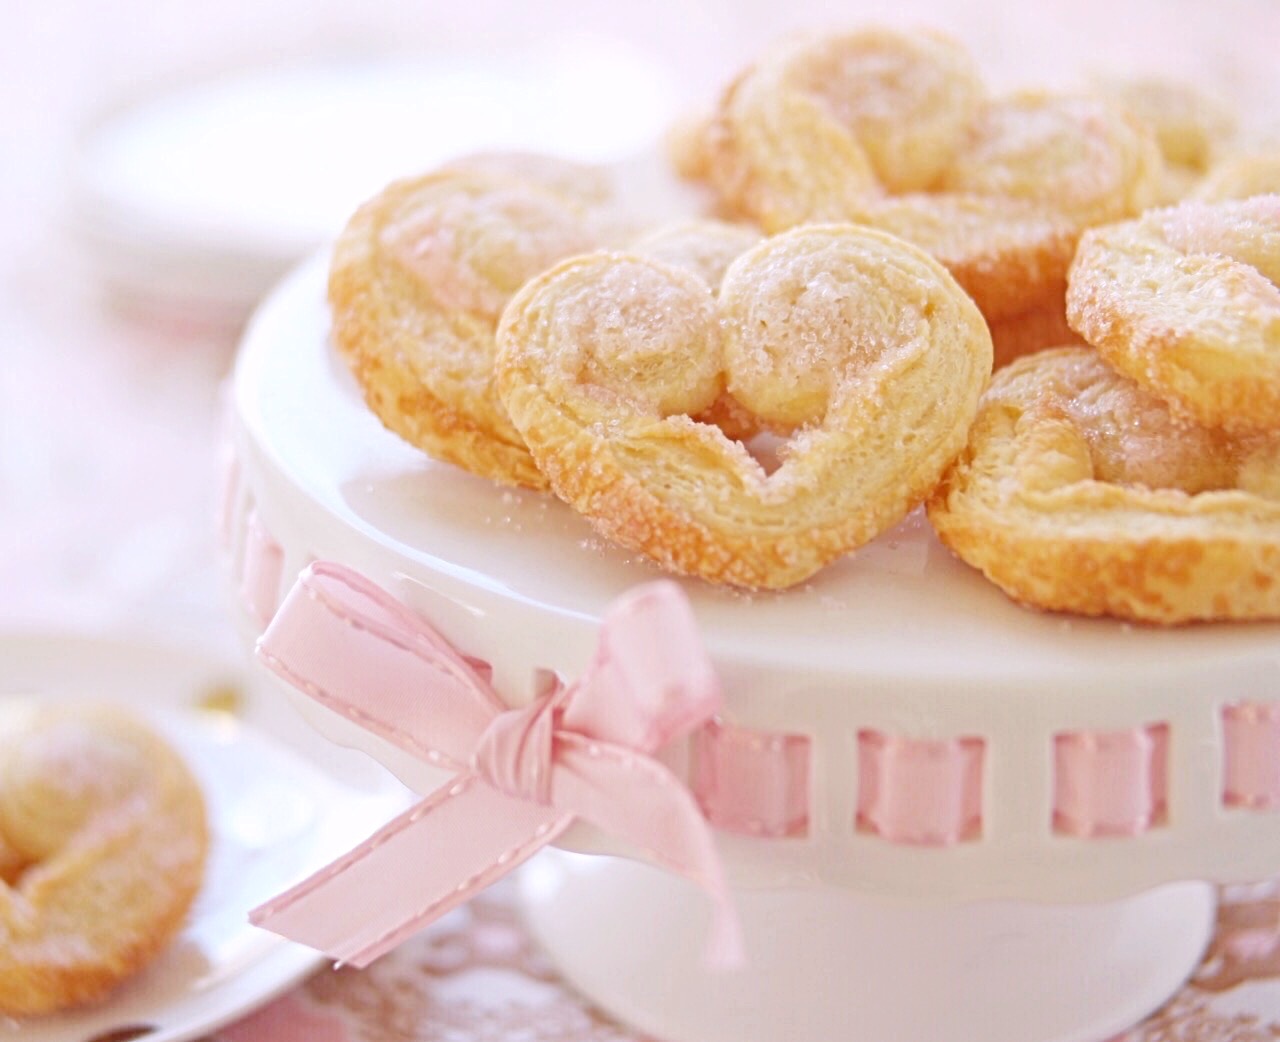
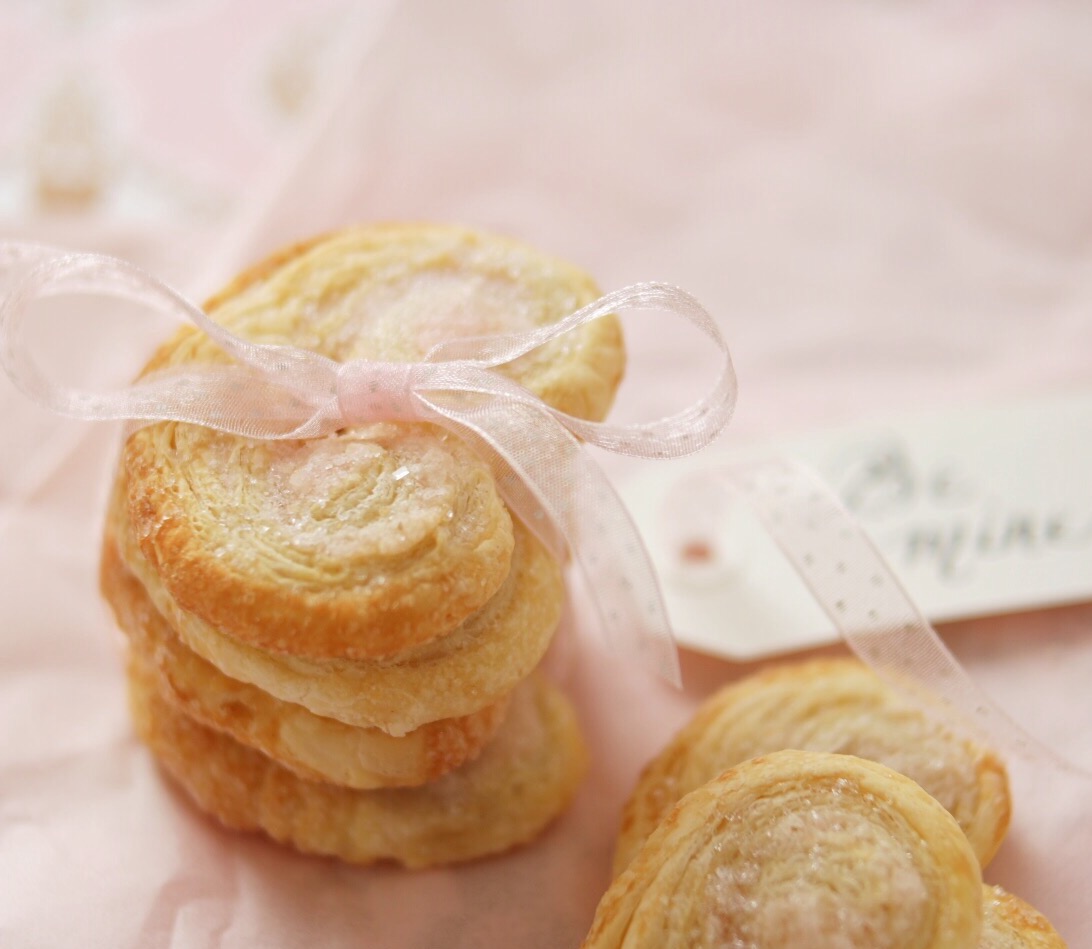
Crisp, delicate French palmier cookies, also known as elephant ears, are the perfect ladylike pastries to enjoy with hot cocoa, tea or coffee. There’s certainly no shortage of palmier recipes out there, but if you’re in the mood for simplicity, this is the recipe for you! This version is very easy to make and only requires two ingredients. Puff pastry dough and sparkling sugar, that’s it! Pretty stress-free, right? Since Valentine’s Day is coming soon, I formed the palmiers into hearts, rather than the traditional palm shape. I used some pale pink sparkling sugar that I had on hand, but feel free to use any color you like.

Sparkling Sweetheart Palmier Cookies

These palmier cookies are as delicious as they are lovely. Wouldn’t they be the perfect addition to a bridal or baby shower sweets table? I also envision them as a simple, but elegant Valentine’s Day breakfast or a sweet, homemade Valentine’s Day gift wrapped in tissue paper and ribbon. Most people love receiving sweet treats, I know I do! (Hint…hint…Hubby if you’re reading this!) I hope this simple recipe provides you with a bit of inspiration. I’ll be sharing more heart-shaped inspiration in the days ahead, so stop by again soon!

Sparkling Sweetheart Palmier Cookies

Print Recipe
Sparkling Sweetheart Palmier Cookies
Sweet, crisp, flaky puff pastry cookies.
Course Dessert
Prep Time 15 minutes
Cook Time 15 minutes
Passive Time 30 minutes
Servings
palmiers
Ingredients
Course Dessert
Prep Time 15 minutes
Cook Time 15 minutes
Passive Time 30 minutes
Servings
palmiers
Ingredients
Instructions
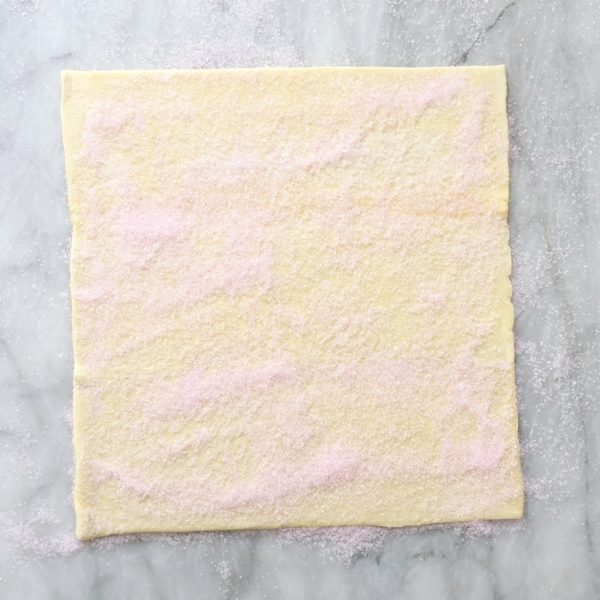
  1. Sprinkle 2 tablespoons of sparkling sugar on your work surface. Place 1 puff pastry sheet on the sugared surface. Sprinkle evenly with 2 tablespoons of sparkling sugar. Roll gently with a rolling pin, pressing sugar into the dough.
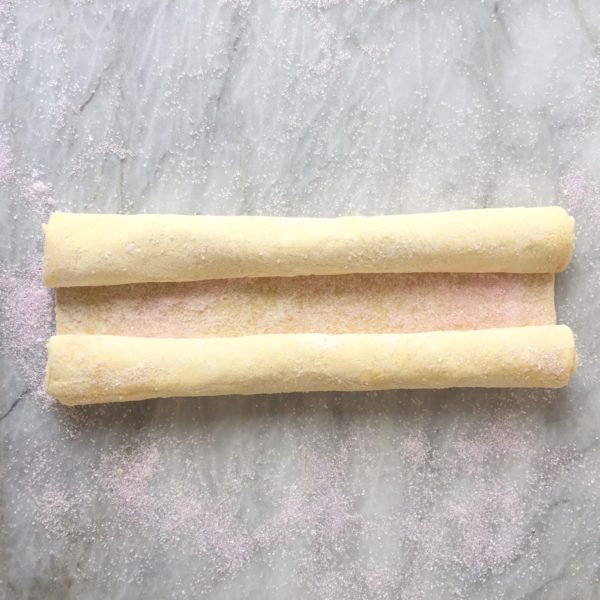
    Sparkling Sweetheart Palmier Tutorial
  2. Roll the short ends of the puff pastry sheet in towards the center, jelly roll style, leaving a 1-inch gap in the center. Repeat steps with the remaining puff pastry sheet.
  3. Transfer puff pastry rolls to a tray. Cover with plastic wrap and chill in the refrigerator for 30 minutes.
  4. Preheat oven to 400°F. Line 2 large baking sheets with parchment paper.
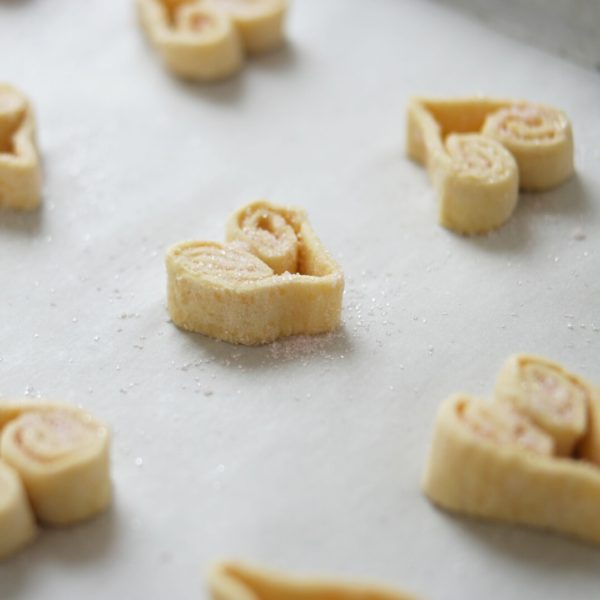
  5. Slice each roll into 1/2-inch slices. Place the slices 2 inches apart onto the prepared baking sheets, cut side down, forming into heart shapes. Sprinkle any remaining sparkling sugar over the hearts.
    Sparkling Sweetheart Palmiers Tutorial
  6. Bake until 15-17 minutes, until golden brown. Remove to wire racks to cool before serving.
Recipe Notes

Palmiers are best served the day they are made. Store in an airtight container for up to a few days.

Rainbow Marble Mini Cake with a Unicorn Cookie Topper

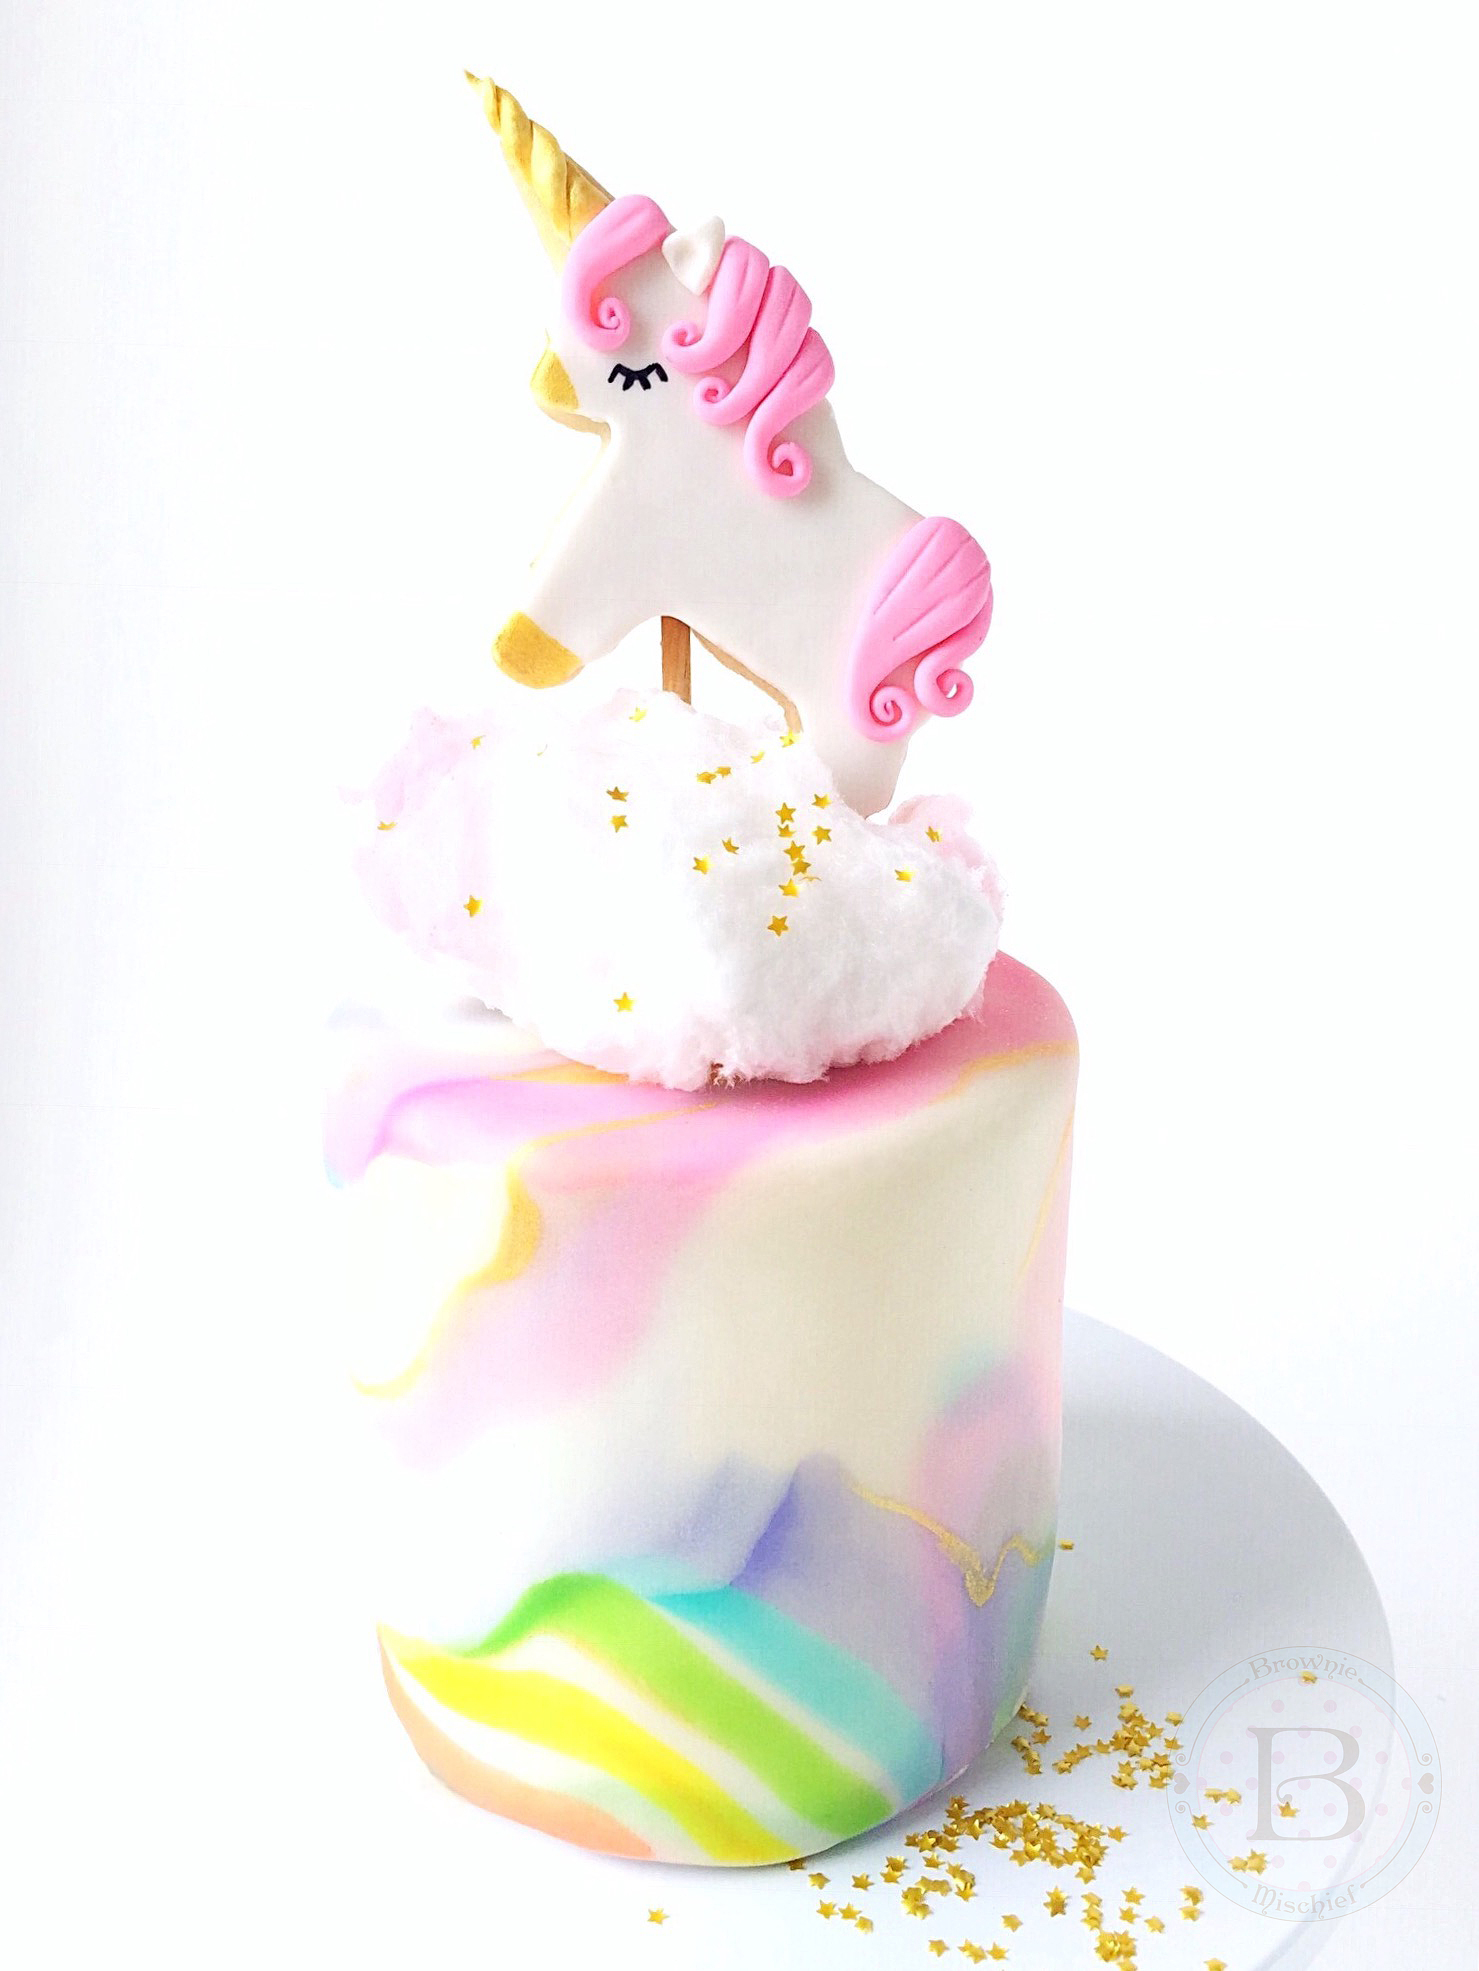
Rainbow Marble Mini Cake with Unicorn Cookie Topper by Brownie Mischief

Here we are! We’ve landed safely in 2017. That year that we left behind was a bumpy ride. Glad that’s over! I’m so hopeful about the New Year that I’m sprinkling good wishes around like confetti! Let’s forget all of our problems today and skip around amongst the unicorns and rainbows!

I’ve been experimenting with marbleized fondant lately, so, based on my current mood, I inevitably ended up with rainbow marble fondant. It looked so pretty on my little four inch cake, but it was screaming for a unicorn. By the way, did you know a group of unicorns is called a blessing? I made a batch, I mean a blessing, of Unicorn Cookie Cake Toppers using a small unicorn cookie cutter. They’re decorated with fondant, which is yummier than royal icing and doesn’t require any special skills. There’s no piping involved. (Phew!) These unicorn cookies are so cute and angelic, I imagine they would prance around in the clouds. If only I had some cotton candy for my unicorn to prance around on! Then, magically, I stumbled upon some cotton candy at my local discount store. Thanks Universe!

This colorful little cake will certainly brighten anyone’s day! It would be perfect for a birthday or to give to a special person “just because”. Thanks for spending a few minutes here in my happy place. Wishing you a blessing of unicorns in 2017!


*A note about working with cotton candy:  Apply cotton candy to your cake right before serving. When cotton candy is exposed to air, it will start to shrivel after an hour or so. If you don’t have cotton candy, a fluffy dollop of whipped buttercream would also be pretty!

To view Unicorn Cookie Cake Toppers instructions click here.

To view Rainbow Marble Fondant instructions click here.