One of the best things about Halloween is all of the adorable costumes worn by the littlest trick-or-treaters. I’ll never forget the year my young daughter was dressed as a flower with chubby cheeks. She enjoyed wearing her costume and eating her Halloween treats, but spooky costumes and trick-or-treating weren’t for her. She was the type of toddler who cried at the sight of a mall Santa. She even screamed in terror once when Ronald McDonald paid a visit to our local McDonald’s.
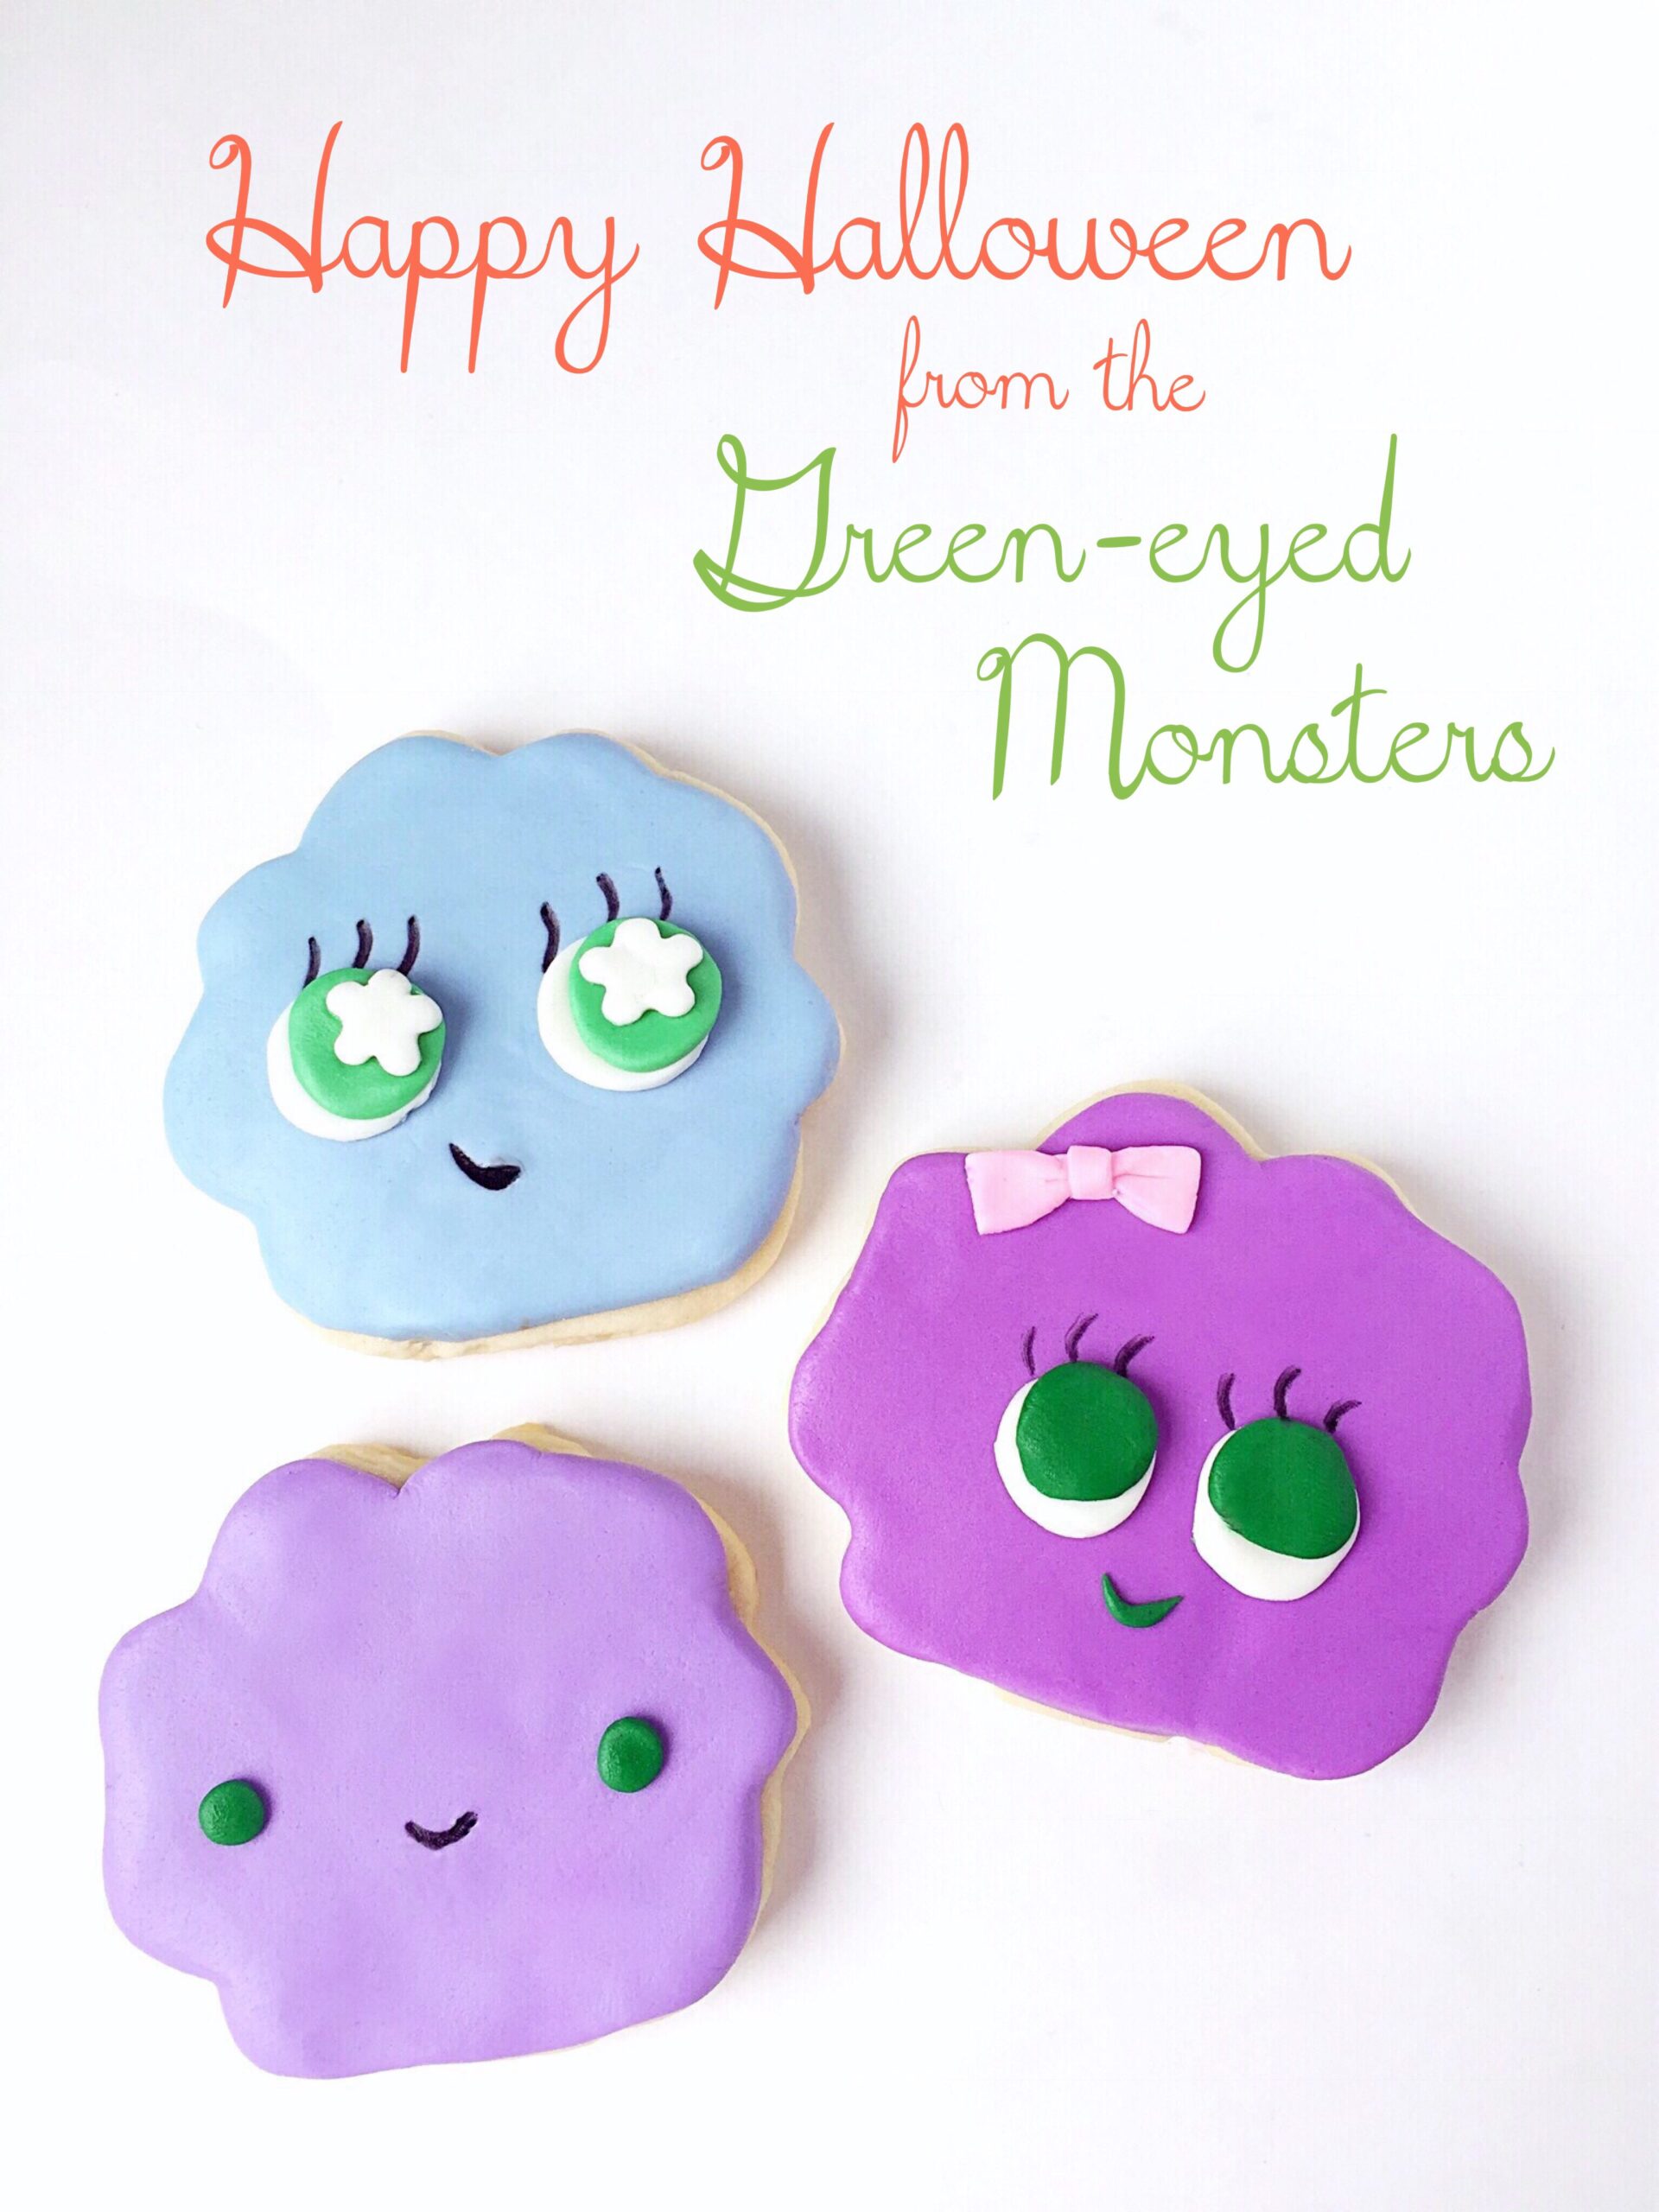
So in honor of those tender hearted little ones, I created some not-so-scary, pretty-darned-cute Yetis and Green-Eyed Monster cookies. You can use your favorite cutout sugar cookie dough and you don’t need any special skills to decorate them. The icing is fondant instead of frosting or royal icing which makes these cute monsters the ideal mess-free (almost) cookie decorating project for kids!
For these cookies you’ll need:
- One batch of cutout sugar cookie dough
- Food coloring- I used Wilton Icing Color in Rose
- Cookie cutters
- Parchment paper
- Scissors
- X-acto knife or paring knife
- White, purple, green and pink fondant or any colors of your choice. I made lavender by combining purple and white.
- Sprinkles- I used a combination of two parts orange sprinkles and one part pink sprinkles
- Piping gel
- Small food safe brush
- Edible marker- I used Americolor Gourmet Writer
- Candy bananas, sugar pearls or any edible decorations of your choice
- Piping tip
- Optional- flower punch cutter, pink petal dust, cotton swab
Divide your cookie dough in half. For the Yeti cookies, color one half of the cookie dough with pink food coloring. Wrap remaining cookie dough in plastic and set aside in refrigerator.
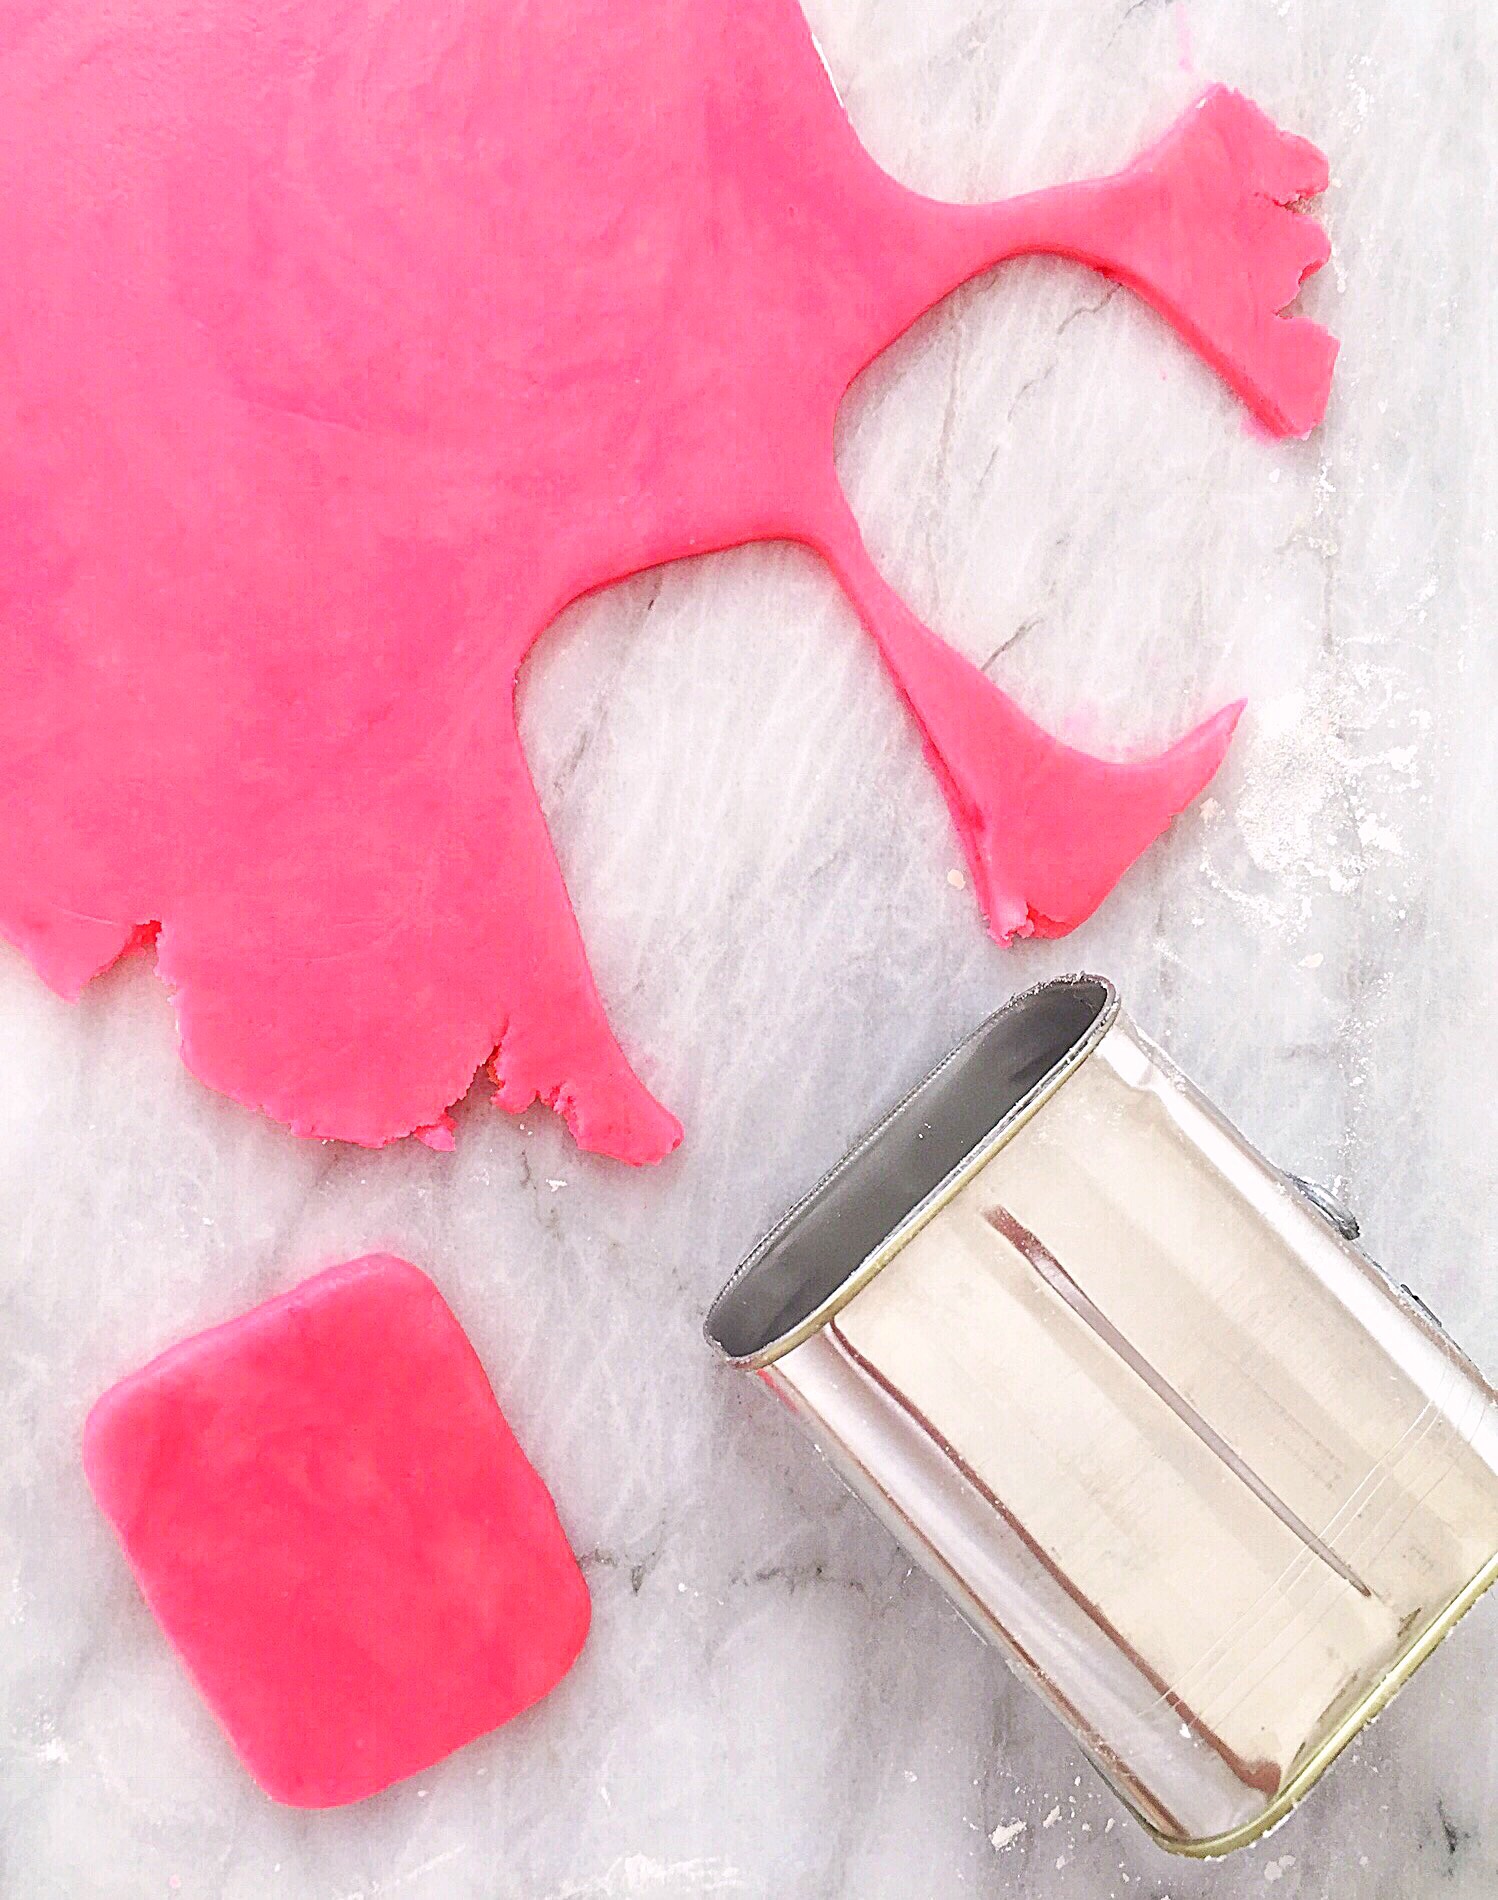
Roll out the pink dough and cut out the Yeti cookies. The Yeti cookies are 2 1/2 inch by 3 1/4 inch rectangles. I used a clean, recycled food can as a cookie cutter. I opened the can with a can opener at both ends, rather than using the little key that comes with the can. If you don’t want to use this method, you can make a pattern out of parchment paper and cut out the cookies with an X-acto knife or a paring knife.

For the Yeti faces, cut two small 1 1/2 inch x 1 inch rectangles with rounded corners out of parchment paper. The first one will be used to place on the Yeti cookies to keep the sprinkles off of the faces. Place small parchment rectangle on an unbaked cookie. Apply sprinkles, pressing them gently to make sure they adhere to the cookie. Remove the parchment rectangle and repeat with remaining cookies. Bake according to your cookie dough recipe. Let cool.

Roll out white fondant to 1/8 inch thickness. Use the remaining small parchment rectangle as a pattern to cut out a face for each Yeti cookie with an X-acto knife or a paring knife. Brush a bit of piping gel onto each cookie face area. Apply the white fondant face cutouts to the cookies. Let dry for at least 30 minutes, then draw eyes and a mouth with an edible marker. I made rosie cheeks with a small amount of petal dust applied with a cotton swab. Brush dabs of piping gel to apply the banana candy horns. I also added pink fondant flowers and sugar pearls to make my Yeti cookies extra cute.
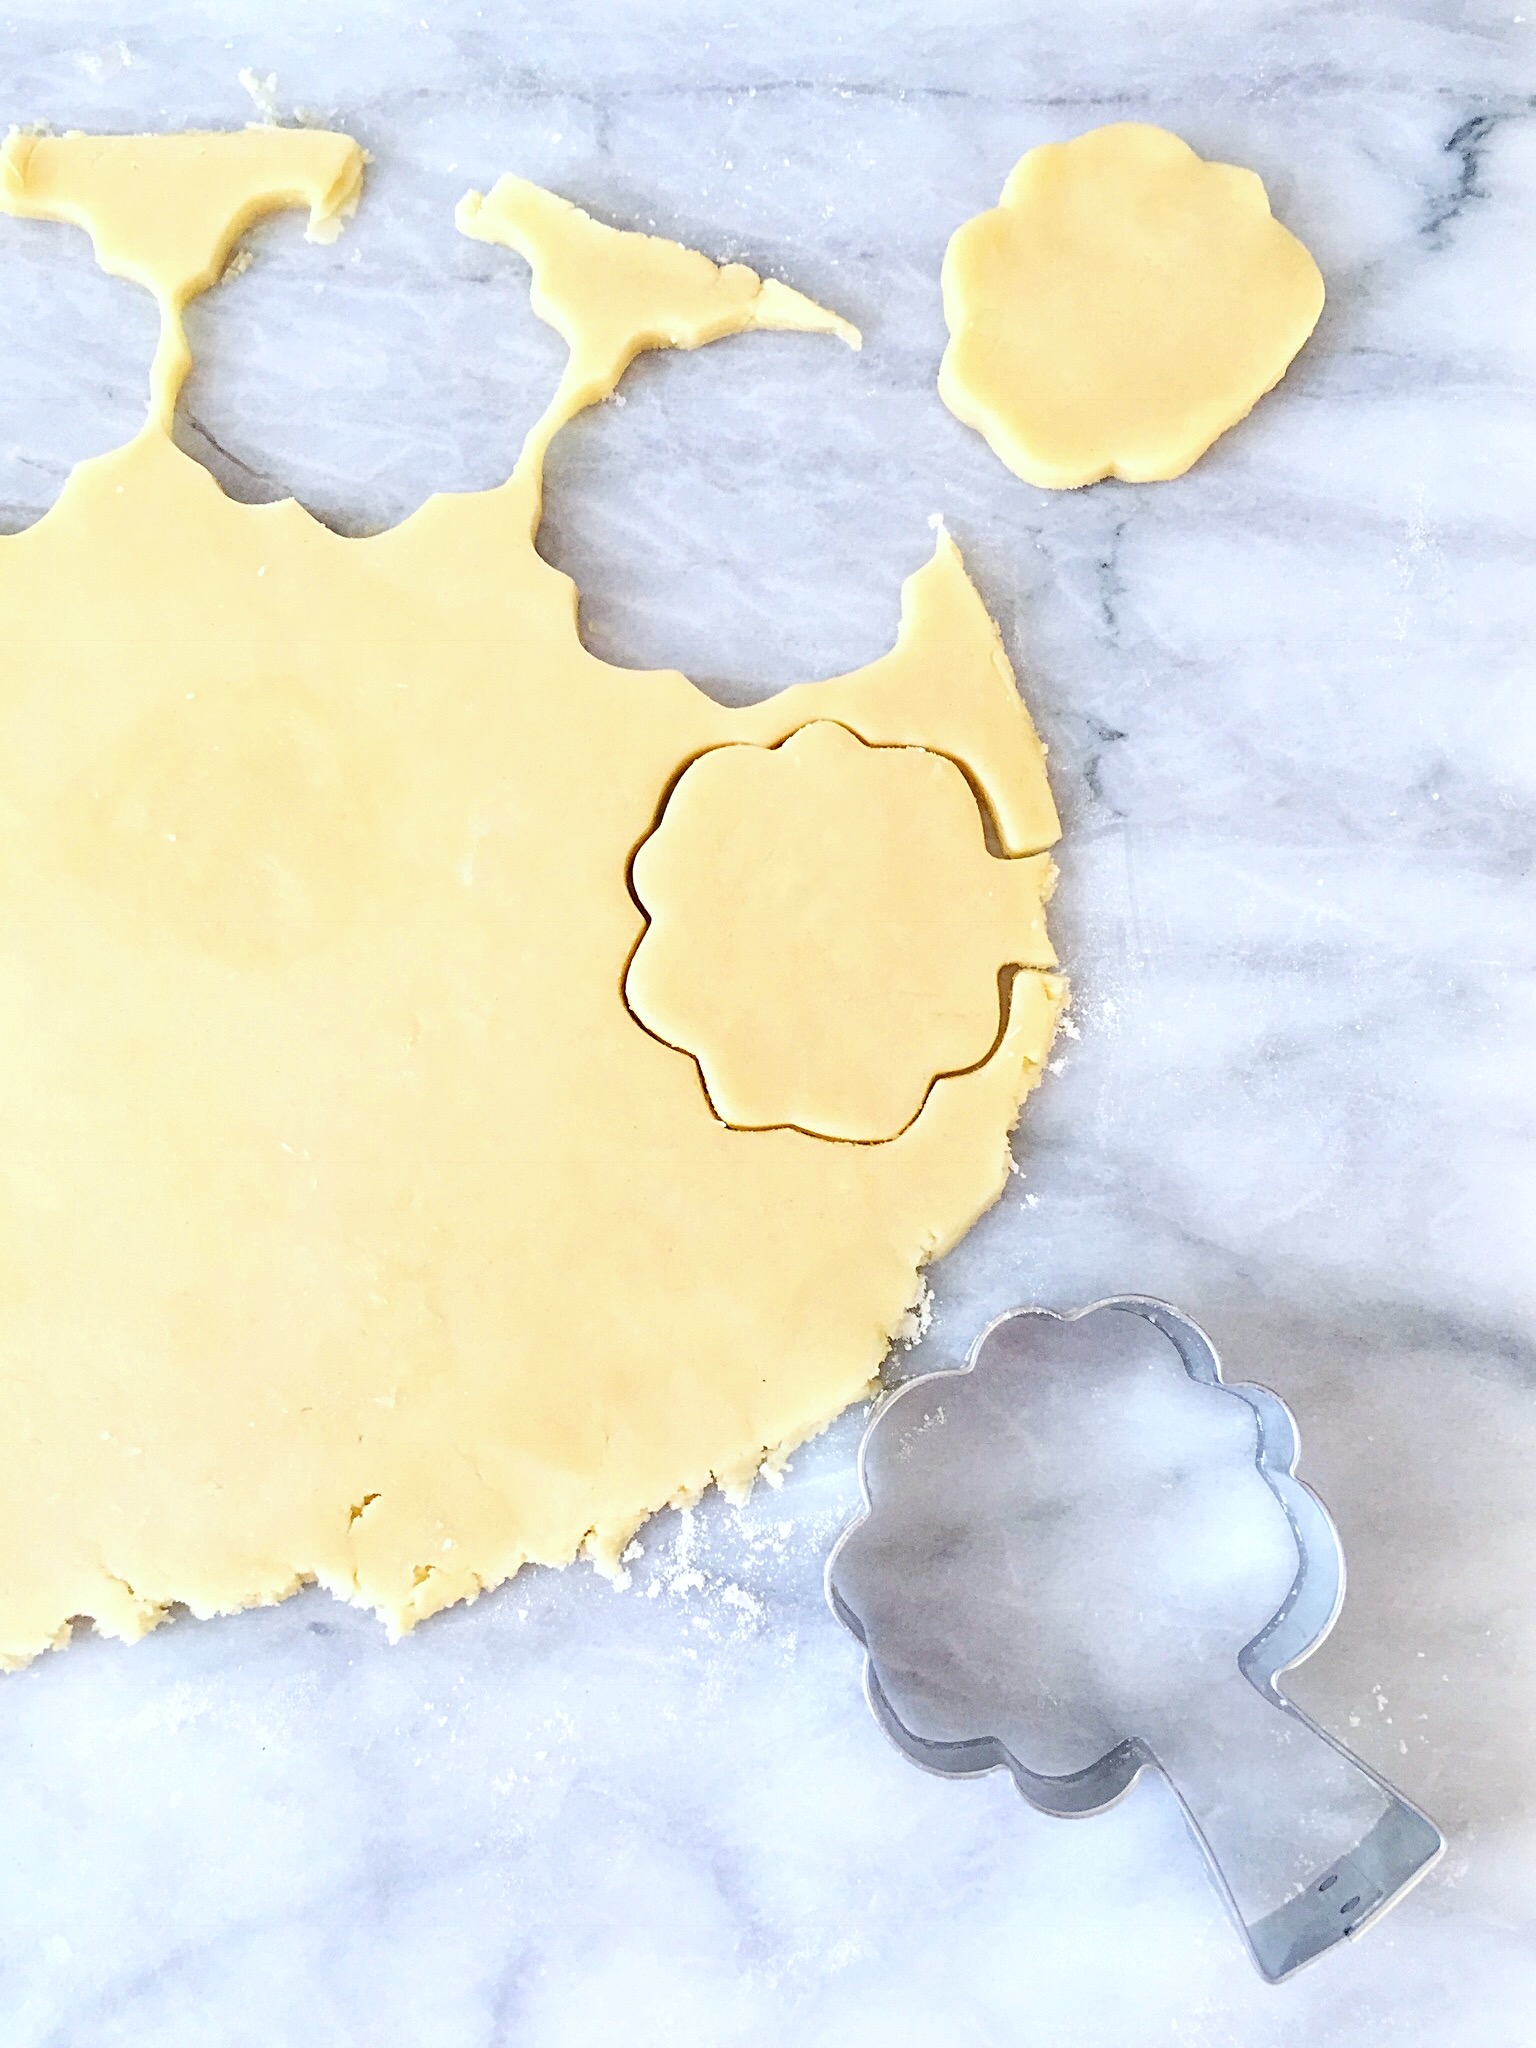
Roll out the remaining cookie dough and cut out the Green-Eyed Monster cookies. I used an apple tree cookie cutter, trimming off the trunk part. If you can’t find an apple tree cutter, you can use a blossom or sun cookie cutter. Bake according to your cookie dough recipe. Let cool.
Roll out the lavender fondant. Cut the fondant using the same cutter you used for the cookie dough. Brush piping gel onto cookies and apply the fondant shapes. Let dry at least 30 minutes.
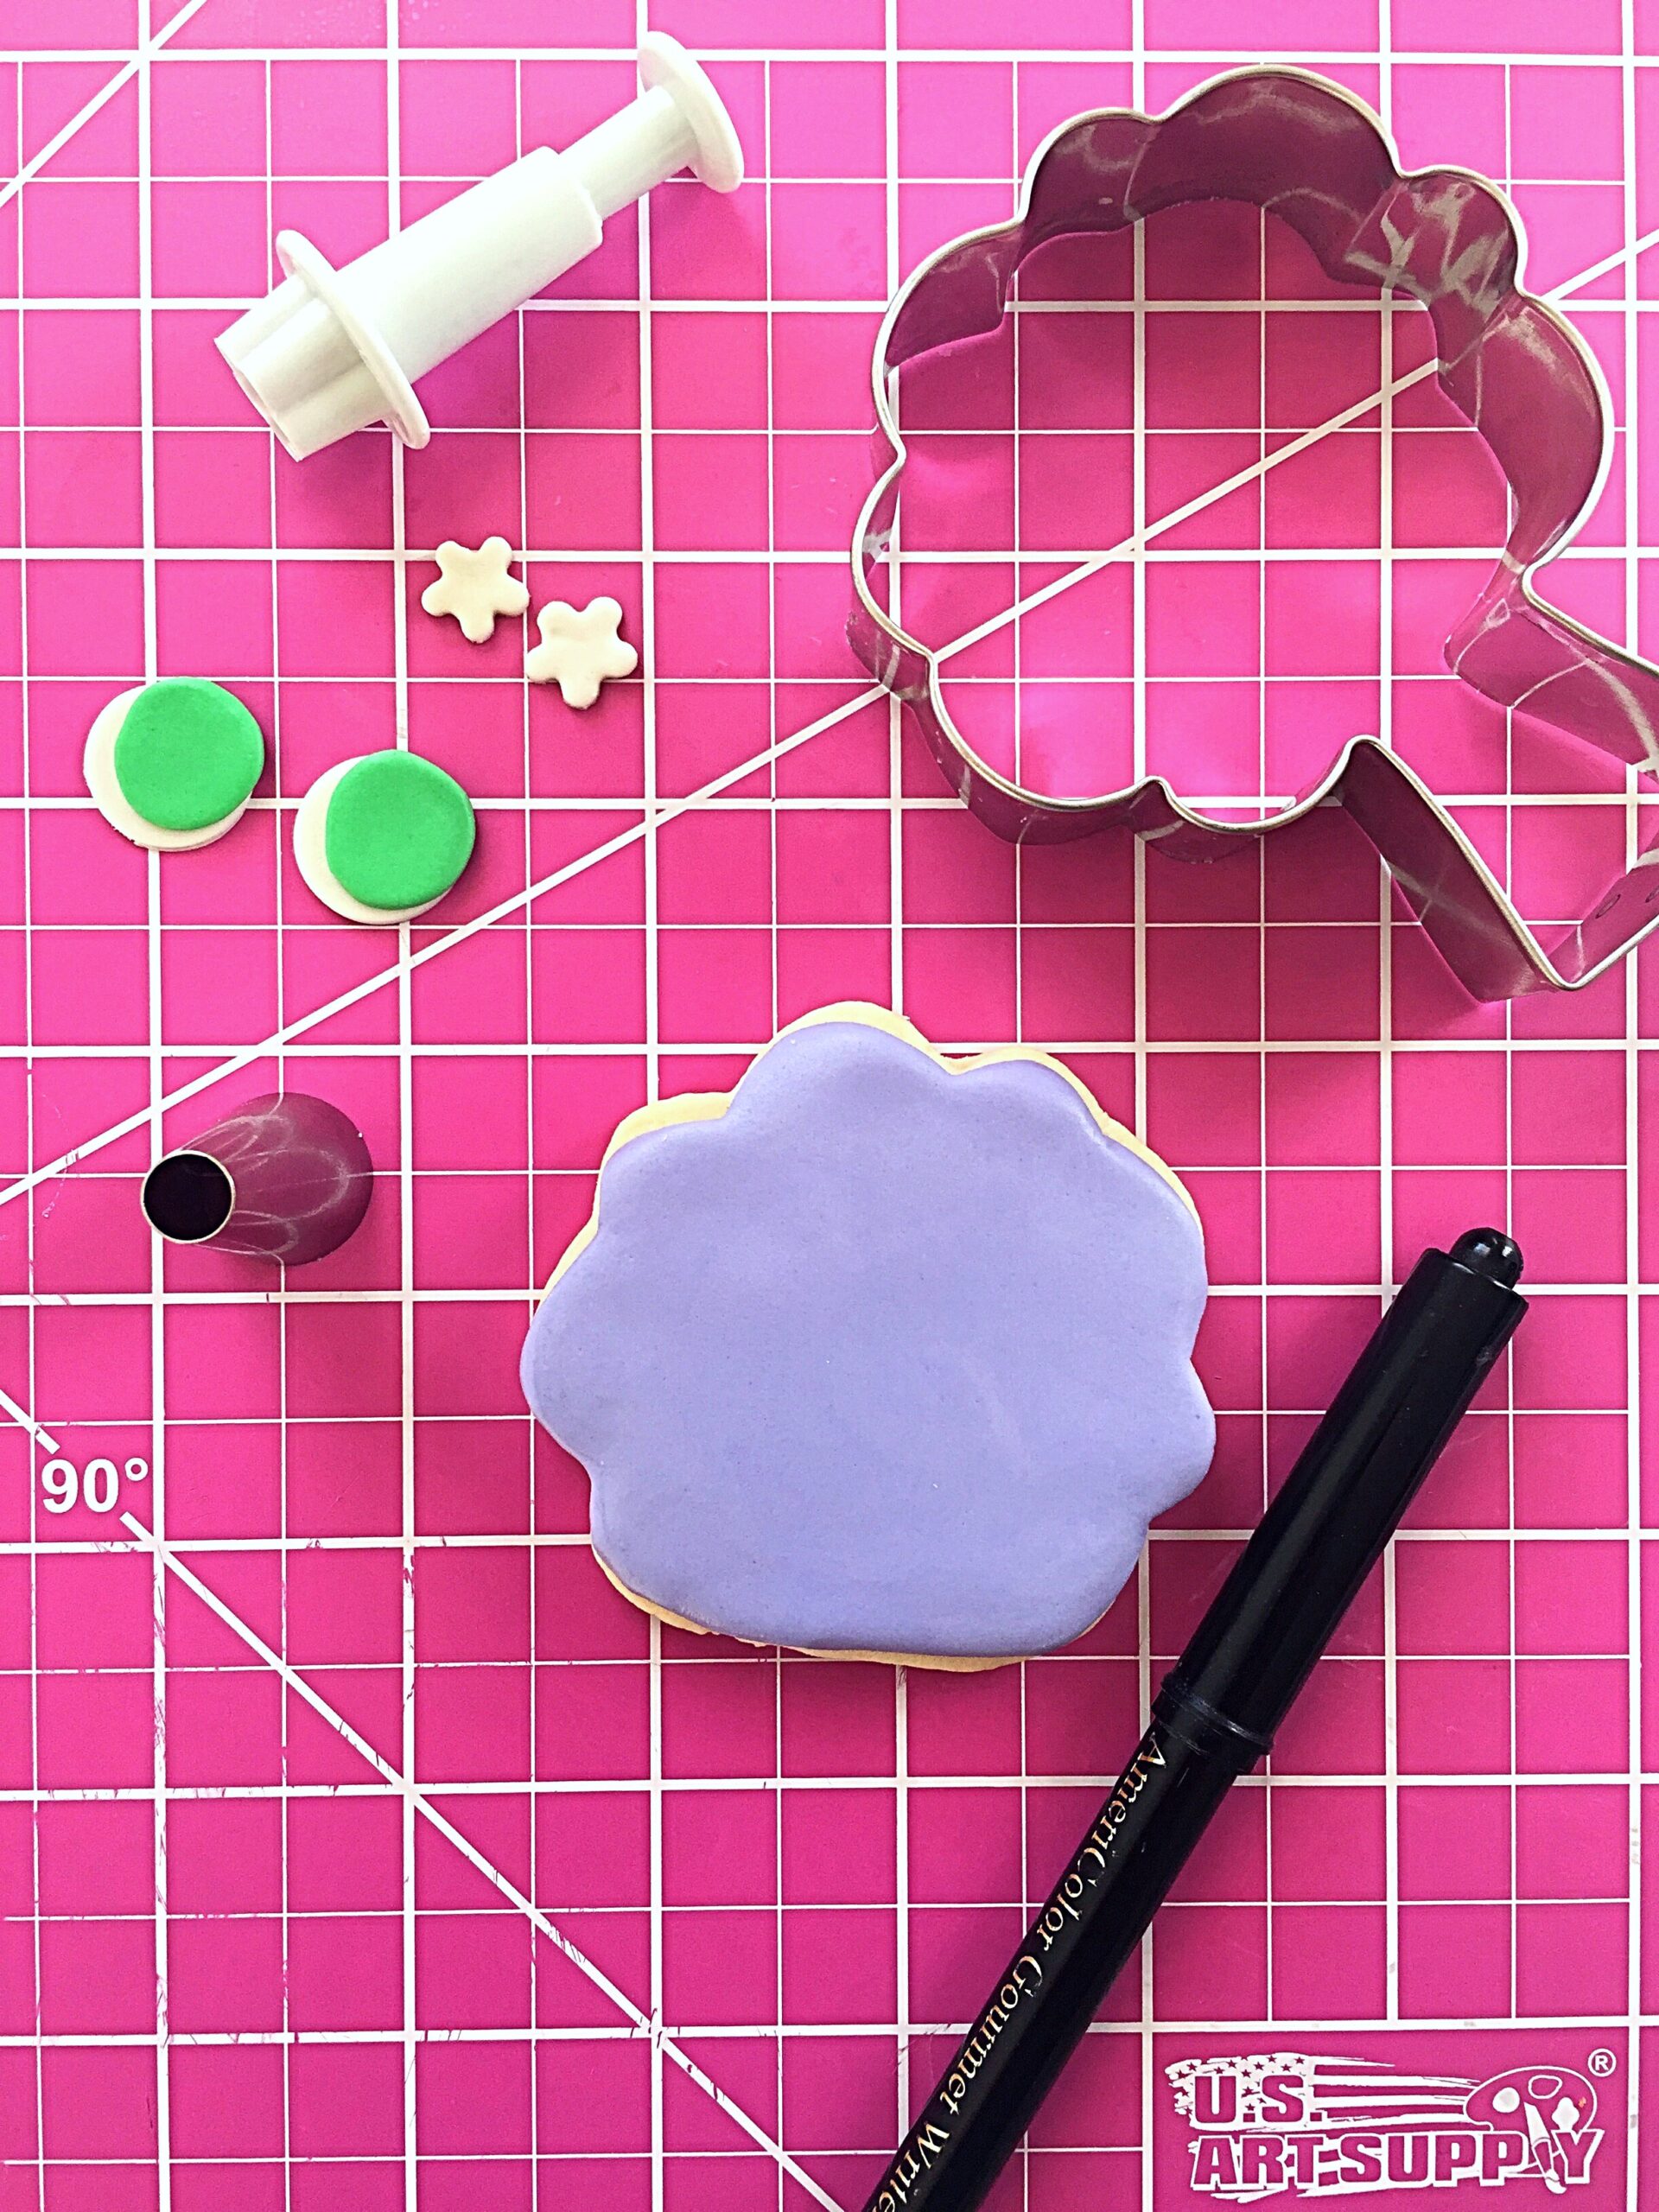
For eyes, roll out white and green fondant. I used the large end of a piping tip to cut out two white circles and two green circles for each cookie. Attach the green circles to the white circles with a dab of piping gel, offsetting them slightly. I used a tiny blossom punch cutter for the pupils and applied with piping gel. Use an edible marker to draw eyelashes and a mouth.