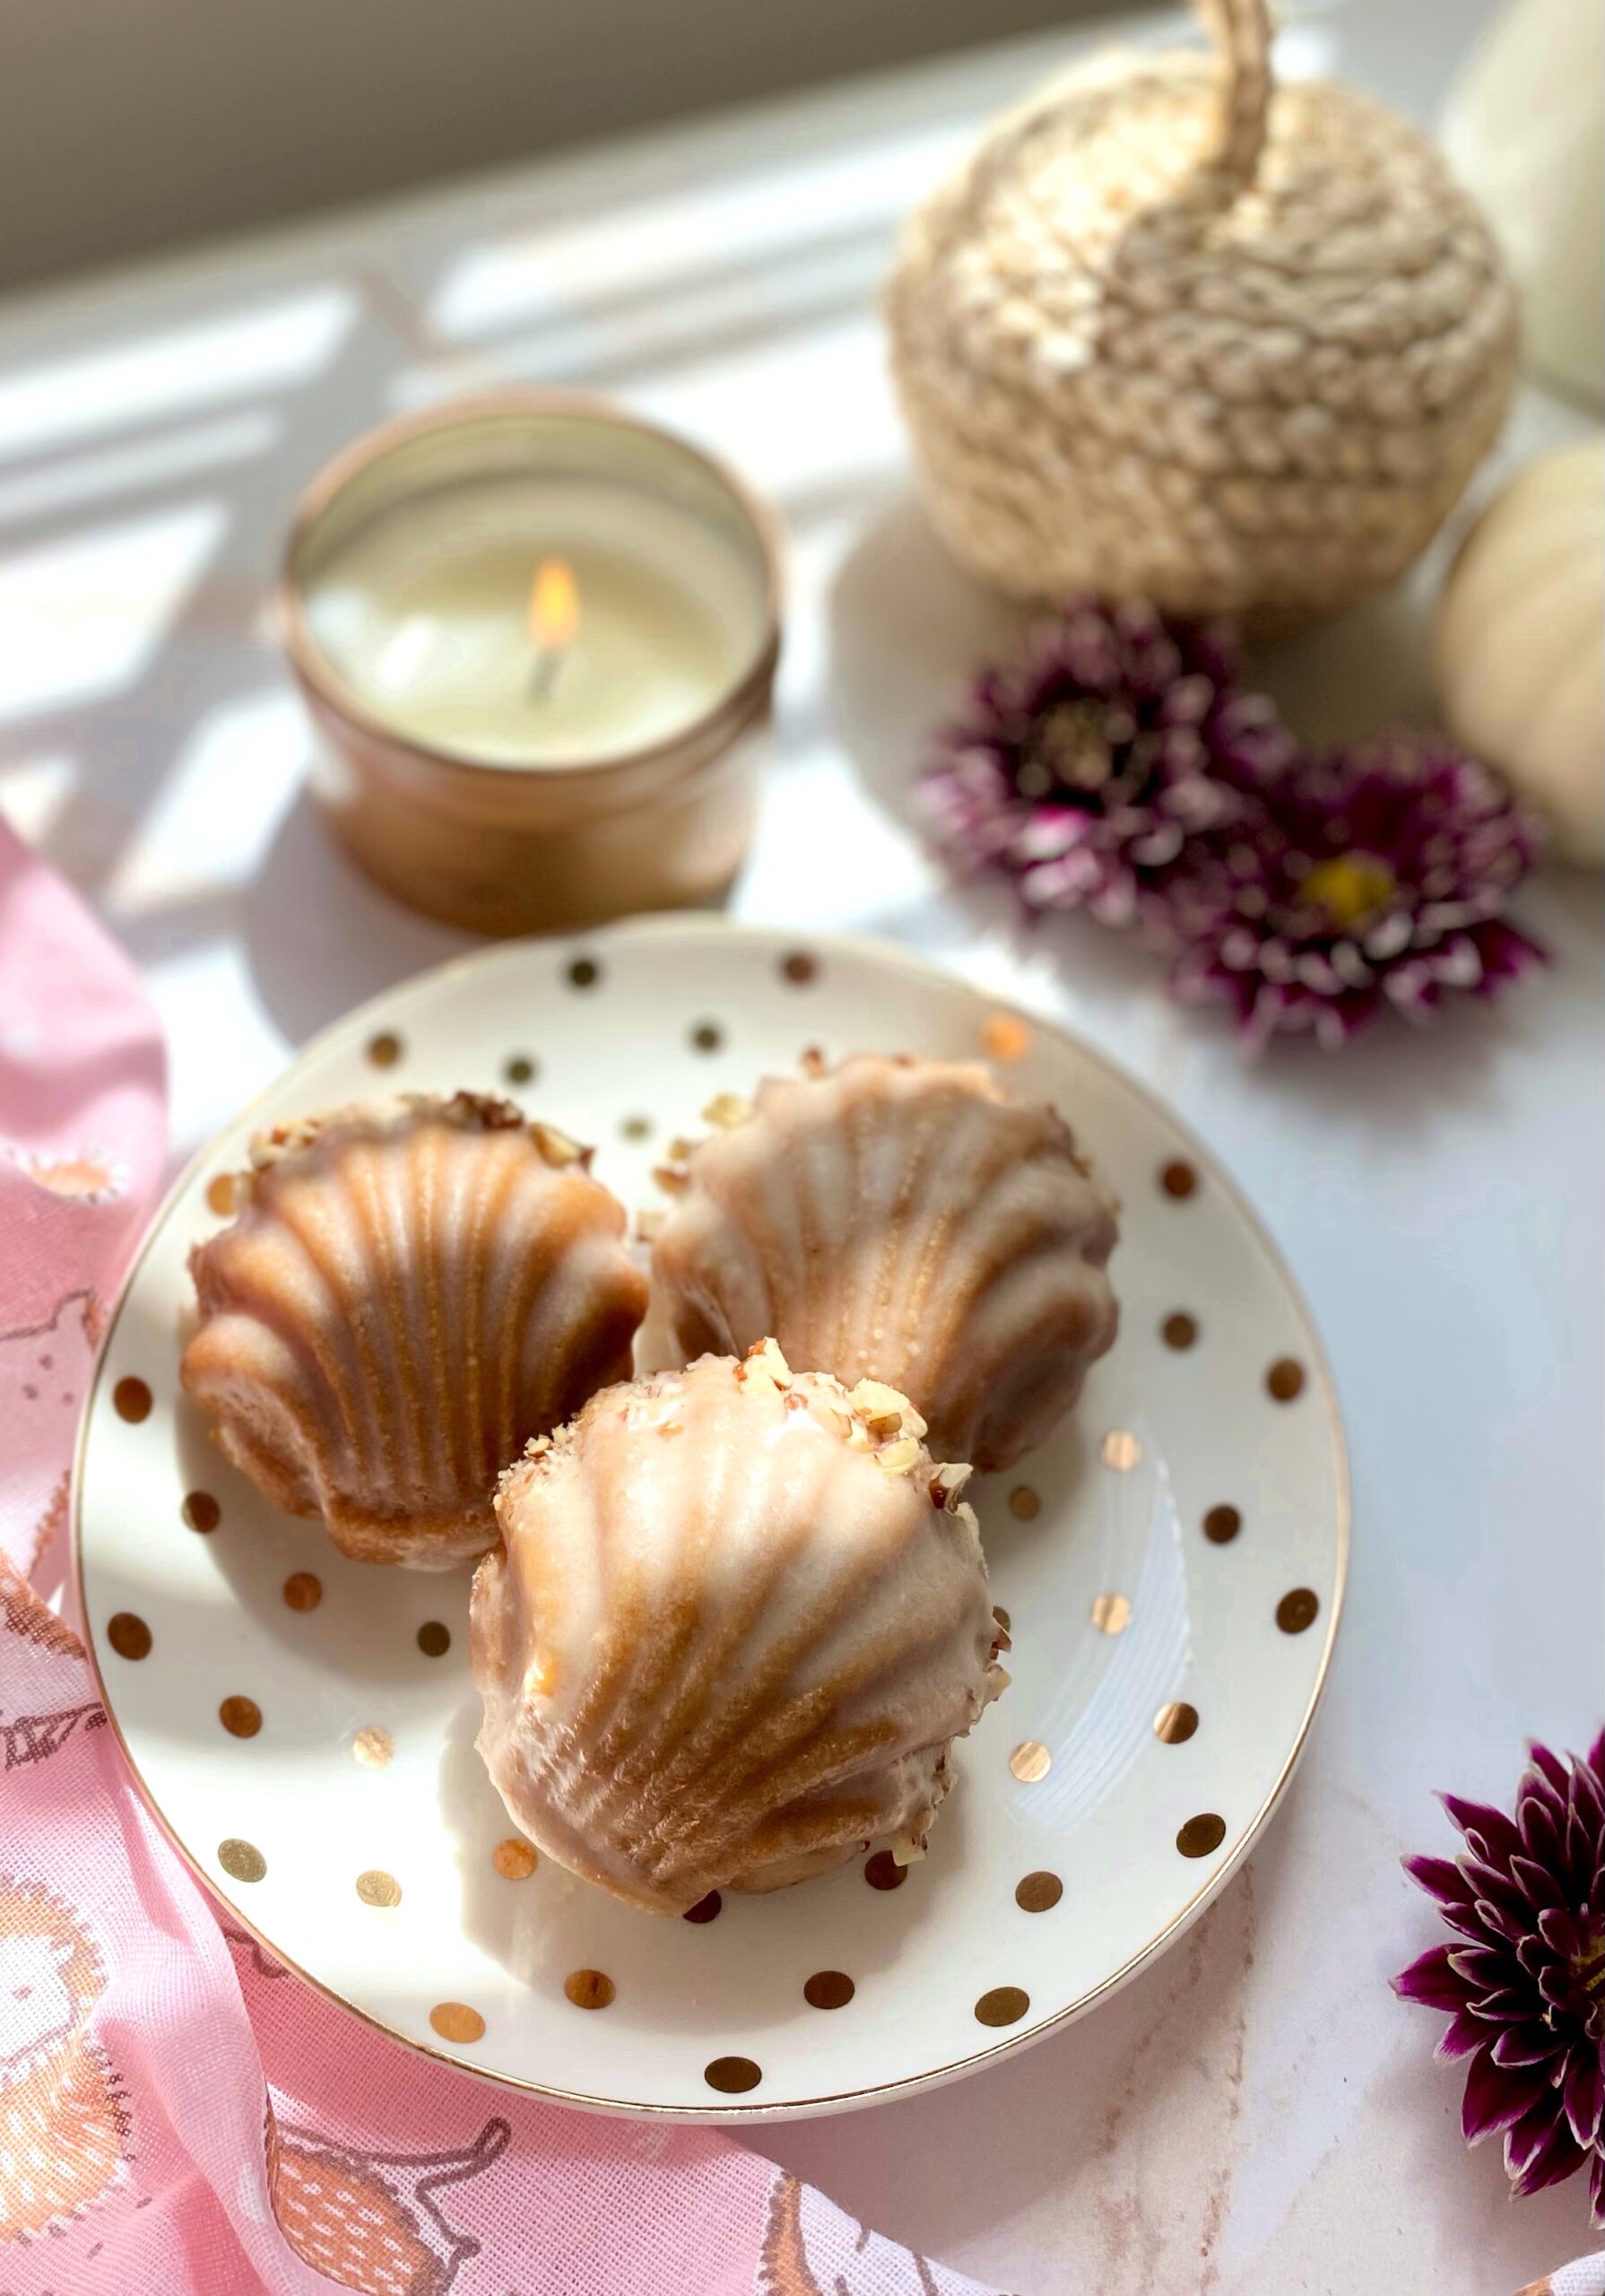
I had tea with with a well mannered hedgehog once on a crisp fall day. He brought me a tiny bouquet of flowers, which I placed in a small jam jar filled with water. He said the delightful maple scent of these Madeleines reminded him of his time in the woods, as a young hoglet. When he had his fill of the delicate little cakes, I wrapped some in a tea towel for his journey home.
As cooler weather approaches, I’m always looking for a little something to enjoy with a warm drink and a good book. Although traditional Madeleines typically remind me of spring, these Maple Brown Sugar Madeleines have a cozy fall feeling. They go well with coffee, tea or hot cocoa. If you want to make them for a friend, make the batter and keep it in the refrigerator. Bake the Madeleines right before your friend arrives.
I used a spherical Madeleine pan to make these maple scented little cakes. The Madeleines made in this pan are a little thicker and fluffier than those made in a traditional oval pan. To find the Madeleine pan I used, click here. You can certainly use a traditional pan if you prefer. Keep in mind that the baking time will be shorter and you will end up with about twice as many.
1 ½teaspoonspure maple extract or natural maple flavoring
½cup (4 oz or 113g)unsalted butter, melted and cooled
1tablespoon pure maple syrup
Maple Icing
1cup (4 1/4 oz or 120g)powdered sugar, sifted
1tablespoon unsalted butter, melted
¼teaspoonpure maple extract or natural maple flavoring
1-2tablespoonswhole milk
1pinch fine sea salt
¼cup (1 oz or 28g)finely chopped, toasted pecans or walnuts
Instructions
Maple Brown Sugar Madeleines
In a medium bowl, sift together the flour, baking powder and salt.
In a large bowl, beat the eggs, brown sugar and maple extract, on medium-high speed with an electric mixer, until the batter is voluminous, light in color and holds its shape when you lift the beater, about 8-10 minutes.
Combine the melted butter and maple syrup.
Gently fold the the flour mixture into the egg mixture in three additions, alternating with the melted butter. Fold just until combined, being careful not to deflate the batter. Make sure to scrape the bottom of the bowl to ensure that all of the flour is combined.
Cover and refrigerate for 30-45 minutes.
Preheat the oven to 350ºF (177ºC). Grease a spherical Madeleine pan* with nonstick spray or melted butter. Dust the pan with a light coating of flour. Tap out the excess flour.
Fill the wells of the Madeleine pan with batter 3/4 full, about 2 tablespoons each, using a scoop**or a spoon. (If you're using a traditional oval Madeleine pan, fill 3/4 full, about a generous tablespoon of batter in each.)
Bake until golden brown around the edges and puffed in the center, about 10-12 minutes. (Baking time for oval Madeleine pan will be about 7-8 minutes.) Do not over bake.
Cool in the pan for one minute then turn Madeleines out onto a cooling rack to cool completely.
Maple Icing
In a small bowl, whisk together the powdered sugar, melted butter, maple extract and one tablespoon of milk. Add additional milk as needed until your desired consistency is reached, Stir in a pinch of salt to taste.
Brush icing onto the Madeleines with a pastry brush. Apply nuts to the edges of Madeleines. Serve immediately. Madeleines are best served the day they're baked.
If you’ve ever gotten up early enough to grab one of those delicious breakfast soufflés at that popular bakery cafe, then you might just love this recipe. There are plenty of copycat versions online, mostly using refrigerated crescent rolls. I love crescent rolls and you can make a pretty close copy of the originals with them, but why not take them up a notch? In my humble opinion, using puff pastry makes them so much better! These pretty little soufflés will puff up and get golden brown and crispy. You can also personalize each one. Try swapping out the spinach and bacon for your favorite omelet ingredients, such as chopped ham, chives, jalapeños or whatever you like.
Preheat oven to 425ºF (220ºC). Grease four 8-ounce (227g) mini pie dishes* or ramekins.
On a lightly floured surface, roll the puff pastry sheet to a 10-inch (24.4cm) square. Cut into four 5-inch (12.7cm) squares. Place one square in each prepared dish. Dock the bottom of each one by poking holes with a fork.
In a small saucepan, melt butter over medium heat. Add the onions and red peppers and cook until softened, about 1 minute. Sprinkle with the flour and cook 1-2 minutes more.
Slowly stir in the milk. Use a whisk if the sauce seems lumpy. Cook until the edges start to bubble and the sauce thickens. Stir in the salt. Remove from heat.
In a medium-size bowl, beat the eggs. Set aside 1 tablespoon (15ml) of beaten eggs in a small bowl for the tops of the soufflés. Add about a third of the sauce mixture into the medium bowl of eggs and whisk until combined. Add the egg mixture back into the saucepan and whisk until smooth. Stir in the Colby-Jack cheese, half of the parmesan cheese and spinach.
Ladle the egg mixture evenly into the prepared dishes. Top with the bacon and the remaining parmesan cheese. Fold the pointed ends toward the center. Brush the folded pastry edges gently with the reserved beaten egg. Bake until golden brown and puffy, about 25-30 minutes.
You can serve the soufflés warm in the pie dishes or remove them from the dishes and transfer to a cooling rack.
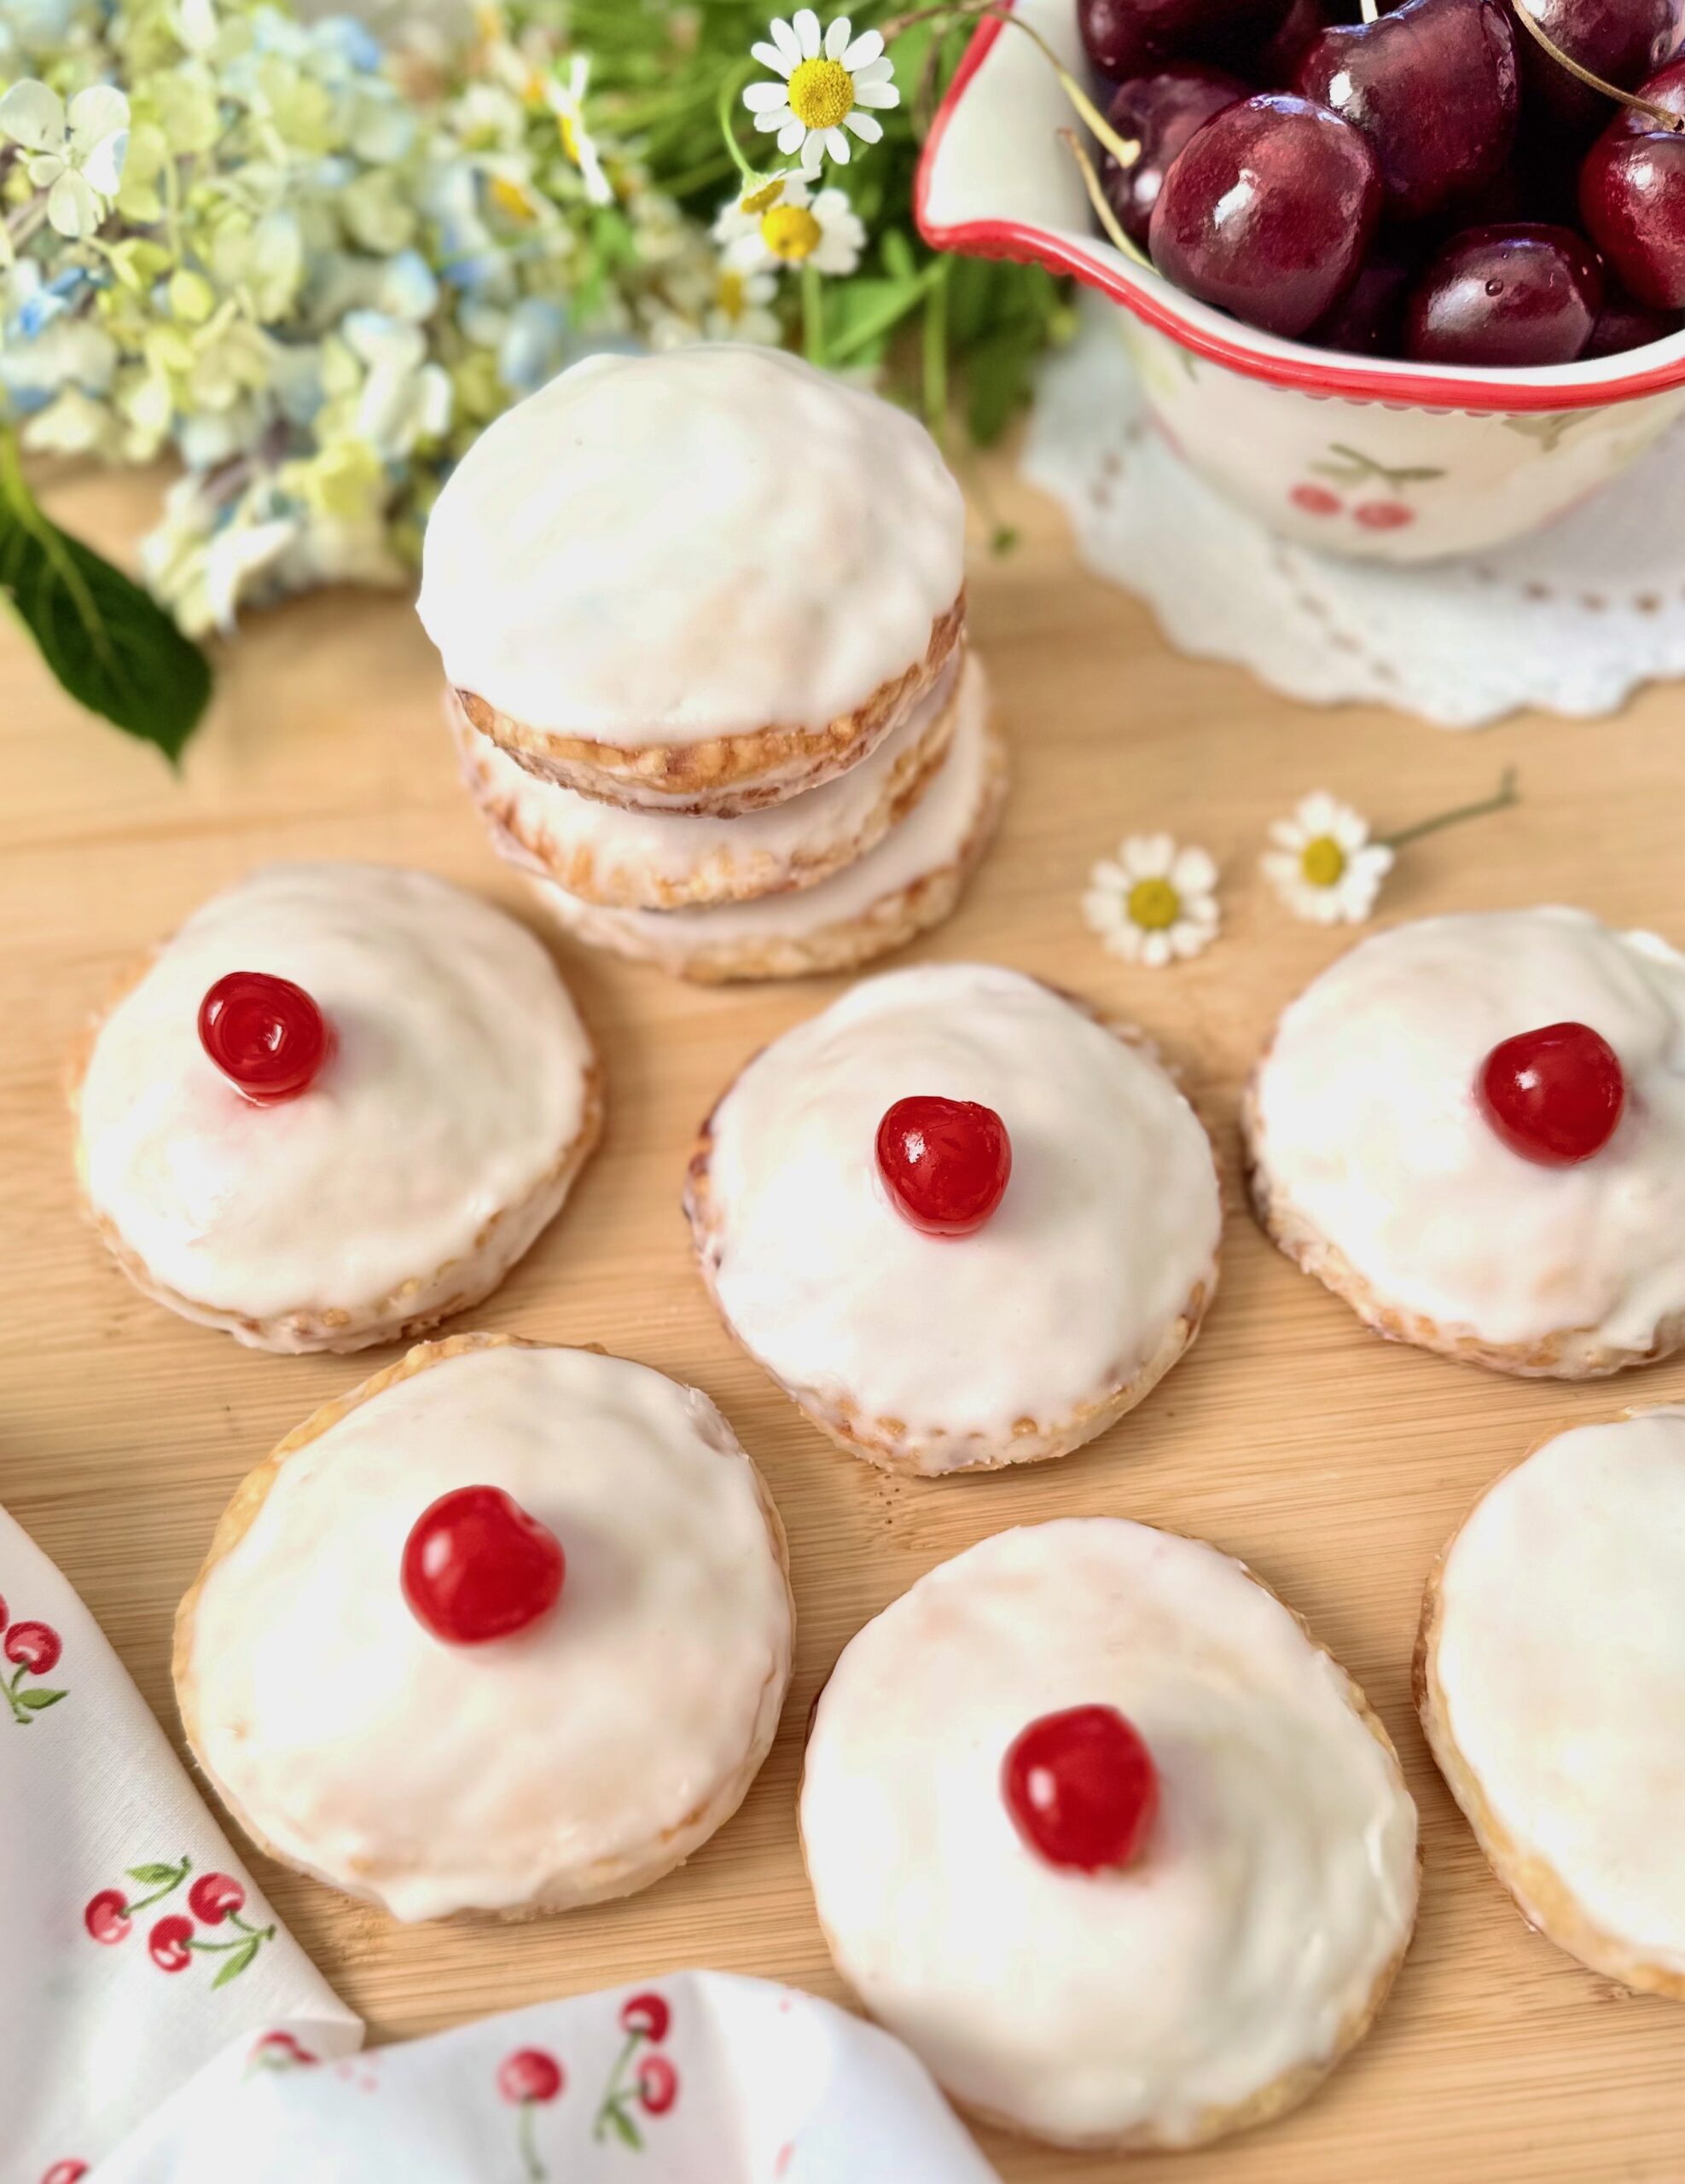
Cherry season is highly anticipated at my house. We love enjoying a bowl of fresh cherries during the summer. We also love fresh cherry desserts. These cute little hand pies are a family favorite. They have the most delicious fresh cherry filling, surrounded with buttery, flaky crust and topped with vanilla icing. The small size makes them perfect for sharing or taking them along in a picnic lunch. I like to make the crust and the filling the day before, which makes them come together quicker on baking day. I decorated mine with bright red maraschino cherries for the photo, but my favorite cherries to top them with are Italian-style maraschino cherries.
Cherry Cutie Pies
by Mari Vasseur
3-inch cherry hand pies with flaky crust, topped with vanilla icing
12ounces (340g)fresh cherries, pitted, halved and stems removed(about 1 3/4 cups after prep)
⅓cup (66g)sugar
1tablespoon (10g)cornstarch
⅛teaspoonalmond extract
Egg wash:1 egg beaten with 1 tablespoon (15 ml) of water
Icing
1 ¼cups (150g)powdered sugar, sifted
½teaspoonmeringue powder(optional)
2-3tablespoons (30-45ml)whole milk
¼teaspoonpure vanilla extract
1dashfine sea salt
Pitted cherries for garnish(optional)
Instructions
Pie Crust
In a large bowl, whisk together the flour, sugar and salt. Work the shortening into the flour with your fingertips until it's evenly dispersed throughout. Work the butter into the flour mixture, creating flat dime size pieces.
In a glass measuring cup, mix the ice water and vinegar together. Sprinkle the liquid over the flour mixture a little at a time, stirring until the dough comes together. You may not need all of the liquid depending on your climate.
Turn the dough out onto a lightly floured surface. Fold the dough over onto itself a couple of times. Do not overwork the dough. Divide the dough into 2 equal portions and form into disks. Wrap them in plastic wrap and refrigerate until firm, at least 2 hours or up to overnight.
Cherry Filling
In a medium-sized saucepan, combine the cherries, sugar and cornstarch. Simmer over low heat, stirring occasionally, until the cherries start to soften and the juices are thickened, about 5 minutes. Transfer the cherries to a bowl. Stir in the almond extract. Set aside to cool completely.
Icing
In a medium-sized bowl, whisk together the powdered sugar, meringue powder, 1 1/2 tablespoons (22ml) of milk, the salt and the vanilla extract. Add additional milk as needed to achieve the desired consistency. (If you decide to omit the meringue powder, you'll need less milk.)
Assembly
Preheat oven to 375°F (190°). Line a large baking sheet with parchment paper.
On a lightly floured surface, roll dough to about 1/8-inch (.3cm) thickness. Cut out 20-22 3-inch (7.6cm) rounds. Transfer half of the rounds to a baking sheet, placing them about 2 inches (5cm) apart. Using a slotted spoon, place the filling onto rounds to within 1/2-inch (1.3cm) of the edges. Using a small pastry brush or your finger, apply egg wash to the edges. Top with the remaining rounds. Press the edges to seal & crimp with a fork. Brush the pies with egg wash. Cut a small x in the top of each pie.
Bake until golden, about 18-24 min. Transfer the pies to a cooling rack to cool completely. Brush icing on the cooled pies with a pastry brush. When the icing is almost set, top the pies with pitted cherries if desired.
Purée the strawberries in a blender or small food processor. Pass the purée through a mesh sieve into a small saucepan. Stir in the sugar and 1/2 cup (118ml) of water. Bring the mixture to a boil over medium heat. Turn the heat down to low and simmer until the sugar has dissolved and the syrup thickens, about 10 minutes. Set aside to cool. Serve warm or at room temperature.
Pink Whipped Cream
In a large bowl, beat the whipped cream to soft peaks with an electric mixer at high speed. Add the powdered sugar, strawberry extract and food coloring in 3 separate additions. Continue beating just until stiff peaks are formed. Set aside in the refrigerator until ready to use.
Strawberry Rose Pancakes
In a large bowl, whisk the flour, sugar, baking powder and salt together until well combined. Set aside.
Purée the strawberries in a blender or small food processor. Pass the purée through a mesh sieve into a medium bowl. Add the egg, milk, melted butter, vanilla extract and food coloring (if using) and whisk until well combined. Stir this mixture into the flour mixture just until combined. A few lumps are okay. Stir in the rose petals.
For each pancake, scoop 3-4 tablespoons of batter onto a hot oiled griddle. Flip the pancakes when bubbles form on the surface. Continue cooking until the pancakes puff and are lightly browned.
Notes
*To find the gel food coloring I used, click here.**To find culinary dried rose petals, click here.
This cheerful little loaf cake feels like a spring or summer picnic with lemonade and sunshine. It’s similar to a pink lemonade cake that my elderly neighbor used to make when I was growing up. She made it for all the neighborhood kids and we always gobbled it up. When I was about ten years old she taught my friend and me how to make it. She used a yellow cake mix in a large baking pan and poked holes all over the cake, then drenched it in a pink, sugary lemon icing. I transformed that happy pink lemonade memory into a delightful loaf cake made from scratch.
1cup plus 2 tablespoons (5 oz or 142g)all purpose flour, sifted
1teaspoon baking powder
½teaspoonfine sea salt
¼teaspoonbaking soda
¼cup (2 oz or 59ml)whole milk
¼cup (2 oz or 59ml)sour cream
1cup (7 oz or 200g)sugar
½cupvegetable oil or neutral oil of your choice
2largeeggs
1tablespoonlemon zest
1 ½teaspoons strawberry extract
1-2dropspink gel food colorI used Americolor deep pink*
Lemon Syrup
juice of one lemon
¼cup (1 3/4 oz or 50g)sugar
Icing
2tablespoons (1 oz or 28g)unsalted butter, softened
1cup (4 oz or 113g)powdered sugar, sifted
2-2 ½tablespoonslemon juice
½teaspoonstrawberry extract
pinchfine sea salt
1tiny droppink gel food colorI used Americolor deep pink*
Instructions
Pink Lemonade Cake
Preheat oven to 325ºF (163ºC). Line the bottom of an 8 X 4-inch loaf pan with parchment paper. Grease and flour the sides.
In a medium bowl, whisk together the flour, baking powder, salt and baking soda.
In a small bowl, whisk together the milk and sour cream.
In a large bowl, beat the sugar, oil, eggs, lemon zest and strawberry extract until smooth.
Stir in the flour mixture in two additions, alternating with the milk mixture. Stir just until combined. Stir in food color a little at time until your desired shade is achieved.
Transfer the batter to the prepared baking pan. Bake until a toothpick inserted into center of the loaf comes out clean, about 45-50 minutes. Meanwhile, prepare lemon syrup.
Let the cake cool in the pan for 10 minutes, then remove from pan and transfer to a cooling rack. Poke holes all over the top of cake with a skewer.
Brush the warm cake generously with the lemon syrup. Let the cake cool completely, then top with icing.
Lemon Syrup
In a small saucepan, combine the juice of one lemon with enough water to equal 1/4 cup. Add sugar and stir over medium-low heat until sugar is dissolved. Remove from heat.
Icing
In a medium bowl, beat the butter, powdered sugar, 1 tablespoon lemon juice, the strawberry extract and a pinch of salt, until smooth. Add more lemon juice until your desired consistency is reached. Mix in gel food color.
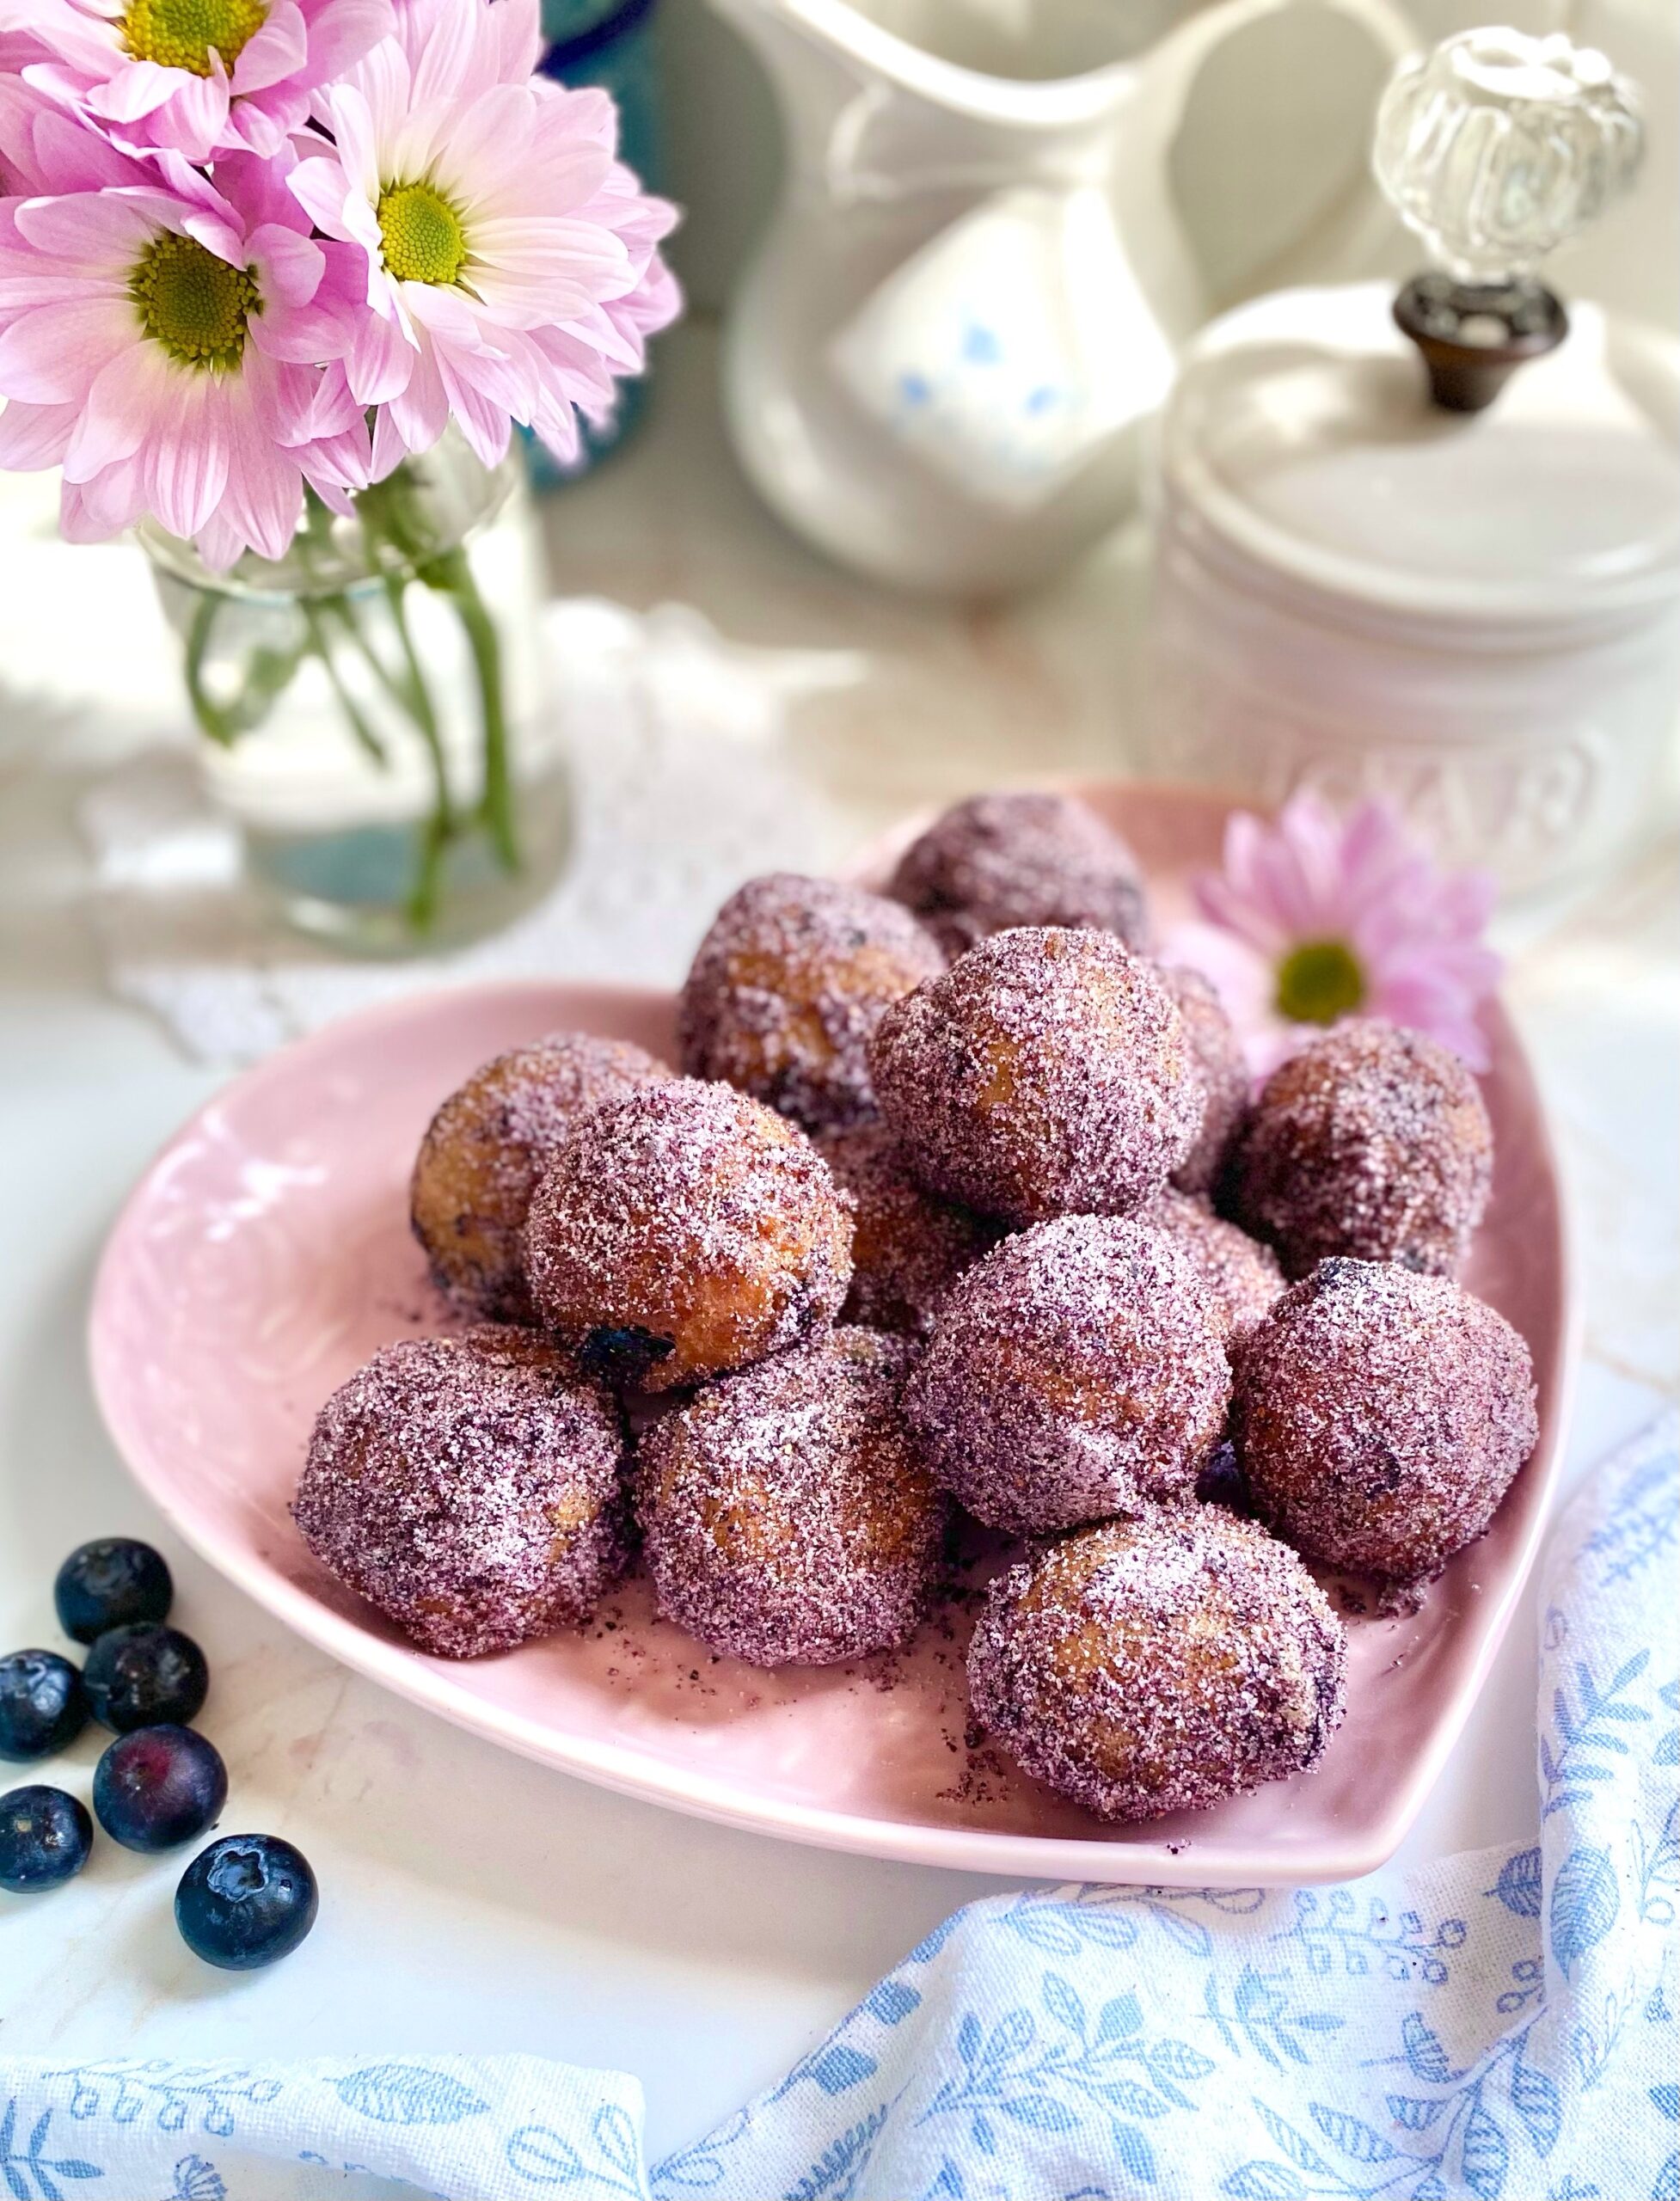
If you landed here from one of my social media accounts, welcome! I’m really glad you’re here. I love to create fun, pretty and sweet treats like these delicious blueberry donut holes! The thing that really makes these special is the homemade blueberry sugar, which adds a burst of blueberry flavor. Freeze dried blueberries are combined with sugar to create a beautiful, flavorful sugar that you can use for many other things. It can also be used in tea, lattes, lemonade, cocktails or sprinkled on cookies or scones. Keep in mind that freeze dried blueberries are not the same as dried blueberries. Dried blueberries still contain some moisture, so they won’t work for this purpose.
The donut hole batter comes together quickly and easily. The most challenging part for me is frying them. I found that using a thermometer and testing one donut hole first, helps you determine the perfect oil temperature. Using a small portion scoop helps you get uniform donut holes. Make sure the outside of the scoop is clean between each donut to help them keep the round shape and avoid pointy tails.
Blueberry Donut Holes with Homemade Blueberry Sugar
2tablespoons (1 oz or 28g))unsalted butter, melted
½cup (4 oz or 118ml)whole milk
1teaspoonpure vanilla extract
1 ¼cupschopped fresh blueberries
oil for frying
½cup (3 1/2 oz or 100g)blueberry sugar
Instructions
Blueberry Sugar
Process freeze dried blueberries and sugar in a food processor or a clean spice grinder until finely ground. Be careful not to over process or you may end up with powdered sugar.
Blueberry Donut Holes
In a medium bowl, whisk together flour, baking powder, nutmeg and salt. Set aside.
In a large bowl, beat sugar, eggs, melted butter, milk and vanilla extract until well combined.
Add flour mixture and mix just until combined. Do not over mix. A few lumps are okay.
Fold in chopped blueberries.
In a heavy saucepan, heat 1 1/2 inches of oil to 340ºF.
Drop tablespoon size portions of batter into hot oil. I used a #60 portion scoop.** Don't overcrowd the pan.
Cook donut holes until golden brown on all sides, about 2-4 minutes, flipping halfway through. If donut holes cook too quickly on the outside, turn heat down.
Briefly drain donut holes on paper towels, then toss warm donut holes in blueberry sugar. Serve immediately.
Notes
Success tips: Use a small ice cream scoop sprayed with nonstick spray to drop donut holes into oil. Make sure the outside of scoop is clean between each donut hole to keep the round shape and avoid tails on your donut holes.*To find freeze dried blueberries, click here.**To find the portion scoop I used, click here.
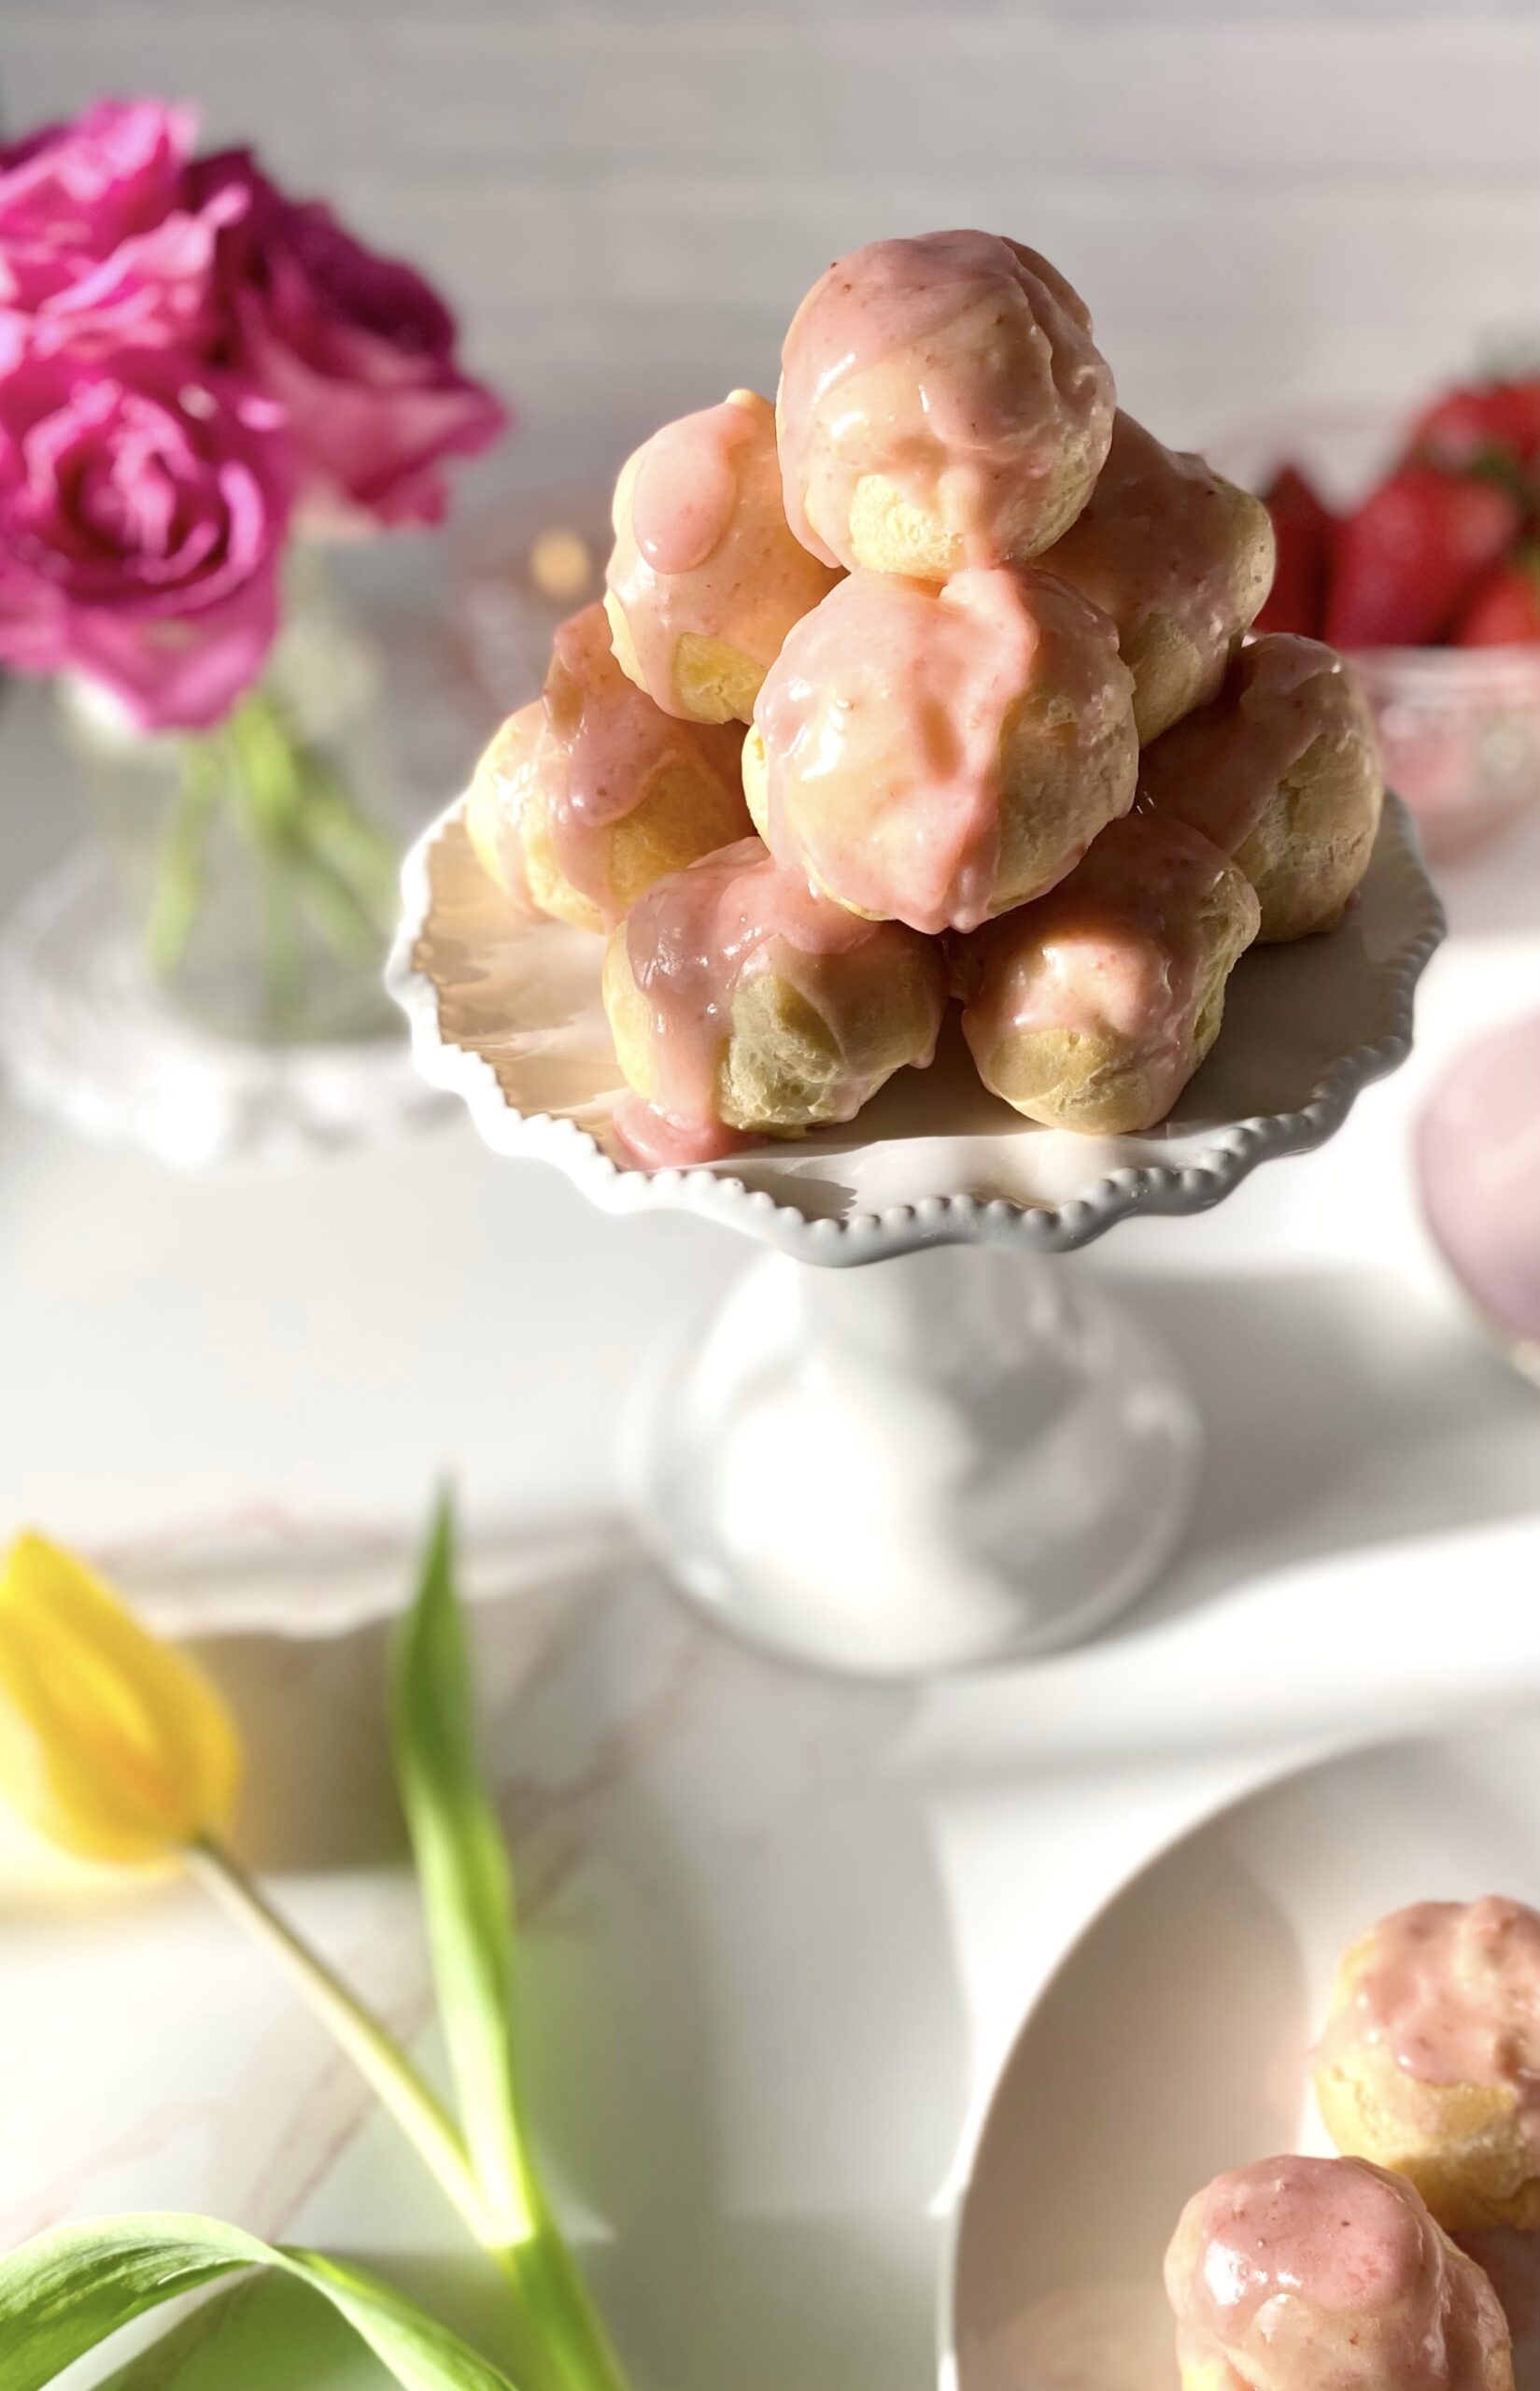
Imagine you’re in a beautiful room, reclining on a plush velvet chaise lounge. There’s a dainty table nearby. On the table is a cake pedestal with a little pyramid of small, perfectly plump, pink pastries. They’re filled with sweet, luscious strawberry cream. And they’re all yours. This Strawberries & Cream Profiteroles recipe can make that dream come true. Maybe not the velvet chaise lounge, but really any comfortable chair will do while you indulge in these delicious little gems. Profiteroles have a way of making you feel regal and majestic. I think princesses and princes snack on them. Most of us don’t have a personal pastry chef or the budget to order from a French bakery every day, but we can certainly follow a recipe and make one of the easiest pastry doughs there is. Choux pastry or pate à choux is used to make profiteroles, cream puffs, eclairs, churros and other pastries. Once you get the hang of it, the possibilities are endless.
This recipe features fresh strawberries, but frozen strawberries will work too. You can also substitute raspberries or peaches. To find the recipe for Peaches & Cream Profiteroles, click here. The strawberry purée can be made a day or two ahead and stored in the refrigerator. To make it easy on myself, I like to make the strawberry purée on day one, the pastry cream on day two, then make the profiteroles and strawberry icing and assemble on day three. It’s also helpful to practice the French culinary style of prep, mise en place, which means to have all of your ingredients and equipment in place before you begin. Everything will go much smoother and prevent you from feeling overwhelmed.
Strawberries & Cream Profiteroles
Mari Vasseur
Bite sized choux pastry puffs filled with fresh strawberries and cream filling and topped with fresh strawberry icing
12ounces (340g)strawberries, hulled and slicedAbout 2 1/2 cups after hulling and slicing
1teaspoonlemon juice
½teaspoonstrawberry extract
Strawberries and Cream Filling
1cup (237ml)whole milk
⅓cup (66g)sugar
2tablespoons (17g)cornstarch
¼teaspoonfine sea salt
1largeegg
2tablespoons (28g)unsalted butter, cubed
½teaspoonpure vanilla extract
Strawberry pureerecipe above
⅔cup (156ml)heavy whipping cream
Profiteroles
½cup (118ml)water
¼cup (57g)unsalted butter, cubed
⅛teaspoonfine sea salt
½cup (64g)all purpose flour
2largeeggsroom temperature
Strawberry Icing
¾cup (90g)powdered sugar
2tablespoons (30ml)reserved strawberry purée
1tablespoon (15ml)heavy whipping cream
¼teaspoonstrawberry extract
Instructions
Strawberry Purée
Purée the strawberries in a blender or food processor. Strain the puréed strawberries through a sieve into a small saucepan. Stir in the lemon juice.
Bring to a boil over medium heat. Reduce heat and simmer until the strawberry purée is reduced by half. Remove from heat. Stir in the strawberry extract. Set aside to cool completely
Strawberries and Cream Filling
Bring the milk to a boil in a small saucepan over medium heat.
Meanwhile, whisk the sugar, cornstarch and salt together in a medium bowl. Add the egg and whisk until smooth.
When the milk starts to boil, remove from heat and pour 1/3 of the hot milk into the egg mixture and whisk to combine.
Pour the egg mixture back into the remaining hot milk and cook over medium heat, whisking continuously, until the mixture comes to a boil and thickens.
Remove from heat. Stir in the butter and vanilla extract. Pour the mixture through a sieve placed over a bowl. Cover the surface with plastic wrap and let cool completely.
Set aside 2 tablespoons (30ml) of strawberry purée. Add the remaining strawberry purée to the cooled pastry cream and stir until well combined. Cover strawberry pastry cream and chill in refrigerator.
In a medium-sized bowl, whip the heavy cream, with an electric mixer at high speed, until stiff peaks begin to form. Fold the whipped cream into cooled strawberry pastry cream. Set aside in the refrigerator.
Profiteroles
Preheat oven to 400ºF (205ºC). Line 2 large baking sheets with parchment paper.
Combine the water, butter and salt in a medium-sized saucepan. Bring to a boil over medium heat. Reduce the heat. Add the flour and stir vigorously with a wooden spoon until the mixture pulls away from sides of pan and forms a ball.
Transfer the mixture to the bowl of a stand mixer. Mix on low speed until steam dissipates and mixture cools to lukewarm. Add the eggs one at a time and beat on medium speed until smooth, stopping to scrape down the bowl.
Transfer the mixture to a piping bag fitted with a large round tip. (I used Ateco tip 808.*) Pipe 1 1/4-inch mounds, about 2 inches apart, onto the prepared baking sheets. Smooth the tops lightly with a wet finger.
Bake for 15 minutes, then turn down the oven heat to 350ºF (180ºC) and continue baking until golden brown, about 8-10 more minutes. Using a toothpick or skewer, prick a small hole in each profiterole to allow steam to escape. Place on a wire rack to cool completely.
Use the tip of a paring knife to make a pilot hole in the bottom of each profiterole.
Place strawberries and cream filling into a piping bag fitted with a medium round piping tip. (I used Wilton tip 12**) Place the tip into the pilot holes and fill each profiterole with filling.
Strawberry Icing
In a medium -sized bowl, whisk all of the icing ingredients together until smooth. Spoon over the filled profiteroles. Refrigerate profiteroles until ready to serve.
Ever since a certain celebrity cut a hole from the middle of her favorite olive oil cake back in 2020, the internet has been obsessed with olive oil cakes. I must confess that I was a fan of olive oil cakes long before that. I first tasted one at a restaurant years ago and fell in love. The flavor and texture was so delightful, that all it needed was a dusting of powdered sugar on top. Now that the dust has settled, I’m sharing my favorite orange olive oil cake recipe. Not because it’s trendy, but because it’s a really delicious recipe that tastes like spring.
I made cute little orange scented, personal cakes that are really just elegant cupcakes. The recipe is easily adapted to your tastes. You can switch up the orange flavor and substitute with lemon or any citrus of your choice. Even if you don’t like olive oil, you’ll still like these little cakes. I used light olive oil, rather than extra virgin olive oil, for a more subtle olive oil flavor. It’s also able to withstand higher temperatures. Feel free to use your favorite olive oil or replace it with the oil you prefer. Grape seed, avocado, canola and vegetable oil are some examples of oils you can use as a replacement.
This recipe contains almond flour. It helps with texture and flavor, so it’s a necessary ingredient. Almond flour can be pricey, but it’s good to have on hand. Adding it to your baked goods will make them more moist and tender. To find almond flour click here,
Mini Orange Olive Oil Cakes
Mari Vasseur
Soft, tender mini orange cakes brushed with orange syrup & dusted with powdered sugar
Heat the oven to 350ºF (180ºC). Grease and flour a 12 serving muffin pan.
In a medium-sized bowl, whisk together the cake flour, almond flour, baking powder, baking soda and salt until well blended.
In a large bowl, beat the sugar, eggs, orange zest and vanilla extract together until smooth. Gradually mix in the olive oil and beat until creamy and well blended.
Stir in the dry ingredients in two additions, alternating with the milk and orange juice. Stir just until combined. Do not over mix.
Fill the prepared muffin pan cups 2/3 full with batter. Do not overfill or cakes will be more difficult to remove.
Bake for 10-12 minutes or until the tops look light golden, but still moist and a toothpick inserted comes out clean. They bake very quickly, so check them a few minutes early to avoid over baking.
Cool the cakes in pan for 5 minutes. Remove them from pan and transfer to a cooling rack. Brush the warm cakes with orange simple syrup and allow to cool completely. When the cakes have cooled, dust with powdered sugar.
Orange Simple Syrup
In a small saucepan, stir together the sugar, orange juice, lemon juice, and orange zest. Cook over low heat, stirring occasionally, just until the sugar is dissolved.
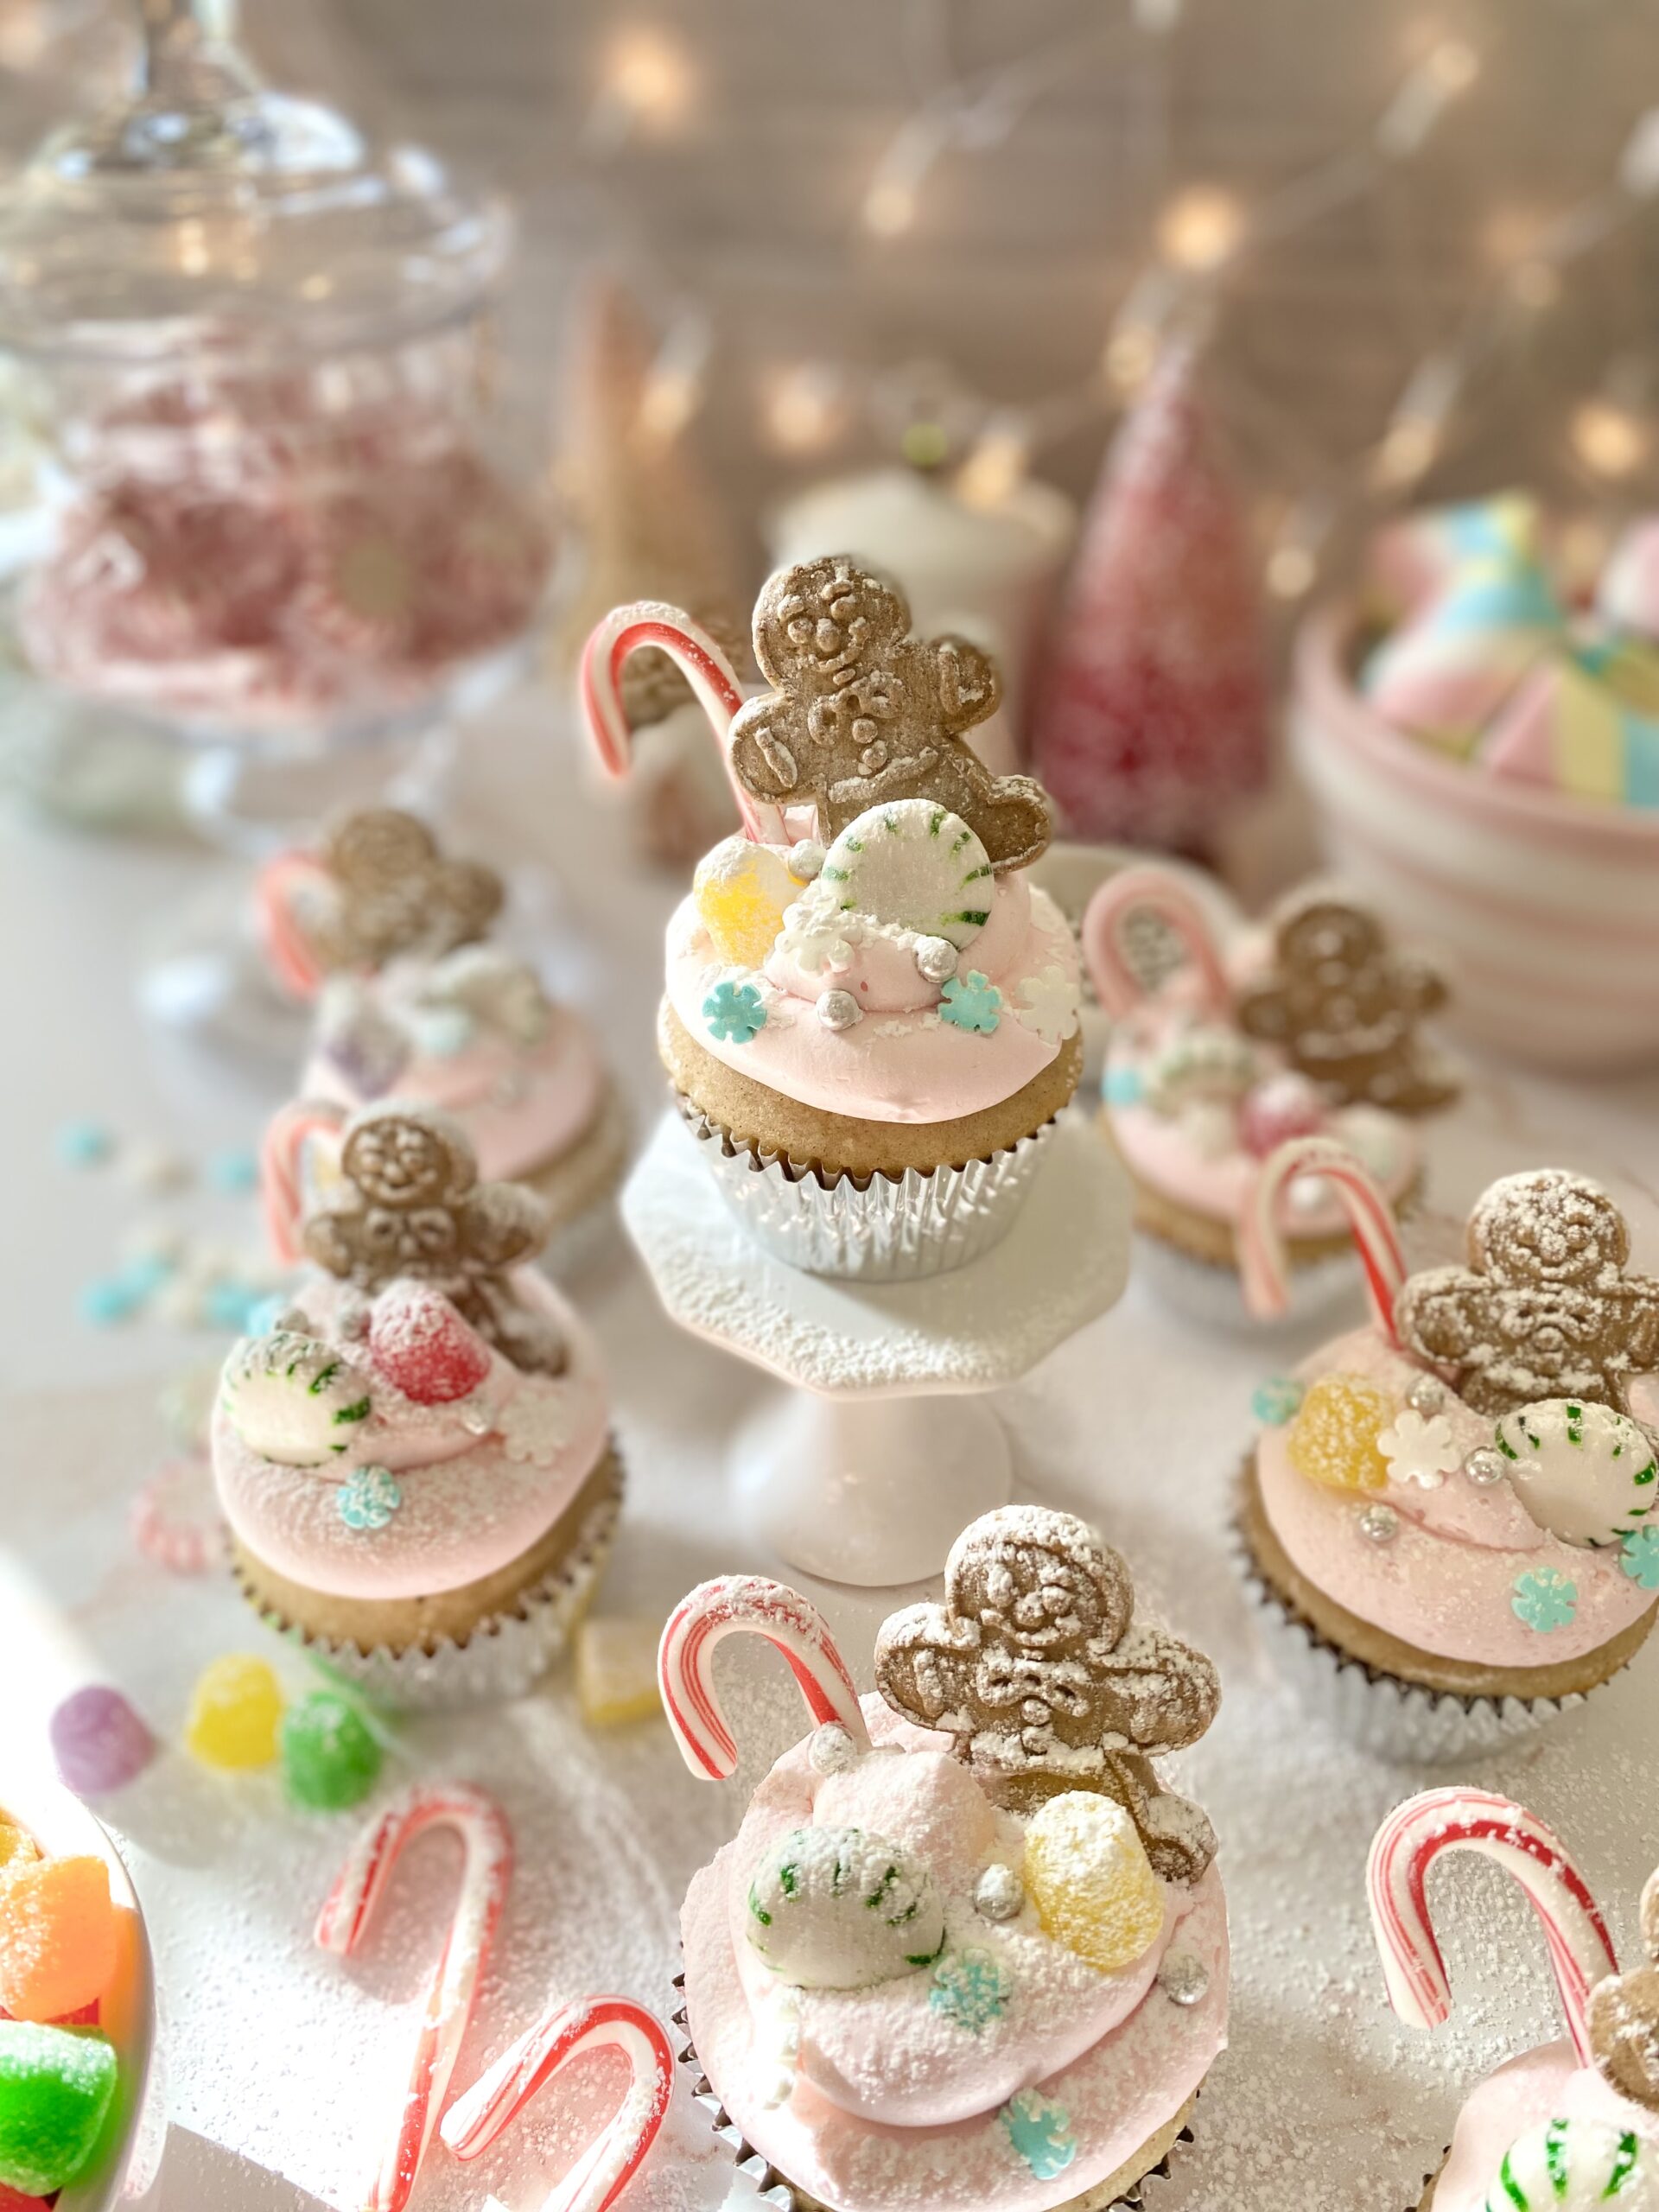
The tradition of enjoying the Nutcracker Ballet at Christmastime has been in my family for over 20 years. The Nutcracker Land of Sweets is a magical theme that has me mesmerized. Gingerbread, candy canes, gumdrops and billowy clouds of pink frosting are what dreams are made of. And that’s exactly what these dreamy cupcakes are made of. The cupcake flavor is a subtle spice cake. The recipe is adapted from a Martha Stewart cake recipe I made last summer. The original cake was paired with blackberry jam, but I knew plum jam would be perfect for these cupcakes. I topped them with a mildly sweet, fluffy Swiss meringue buttercream.
Part of the fun of making these cupcakes began at the store as I collected the sweets to decorate the cupcakes. Another perk of the job is taste testing the candy. I discovered that purple spice drops are licorice flavored and red spice drops are cinnamon. Who knew?
You might also like my Nutcracker Land of Sweets inspired candy bark. It’s a delightful holiday bark I designed that is often imitated. To view it, click here.
The Nutcracker Land of Sweets Cupcakes
Spice cupcakes filled with plum jam, topped with fluffy pink frosting, gingerbread men and Christmas candy, and dusted with sugar snow
Combine egg whites and sugar in a heatproof bowl. Set over a pan of gently simmering water.
Whisk constantly until sugar is dissolved and temperature of 160ºF is reached.
Transfer mixture to the bowl of a stand mixture with a whisk attachment. Whisk on low speed, gradually increasing to medium-high speed. Whisk until glossy, stiff peaks form and mixture reaches room temperature.
Turn mixer to medium-low speed. Add butter, a few pieces at a time, allowing the butter to fully incorporate each time before adding more.
Switch to paddle attachment. On low speed, mix in vanilla, salt and food color. Continue mixing on low speed for a few minutes until smooth.
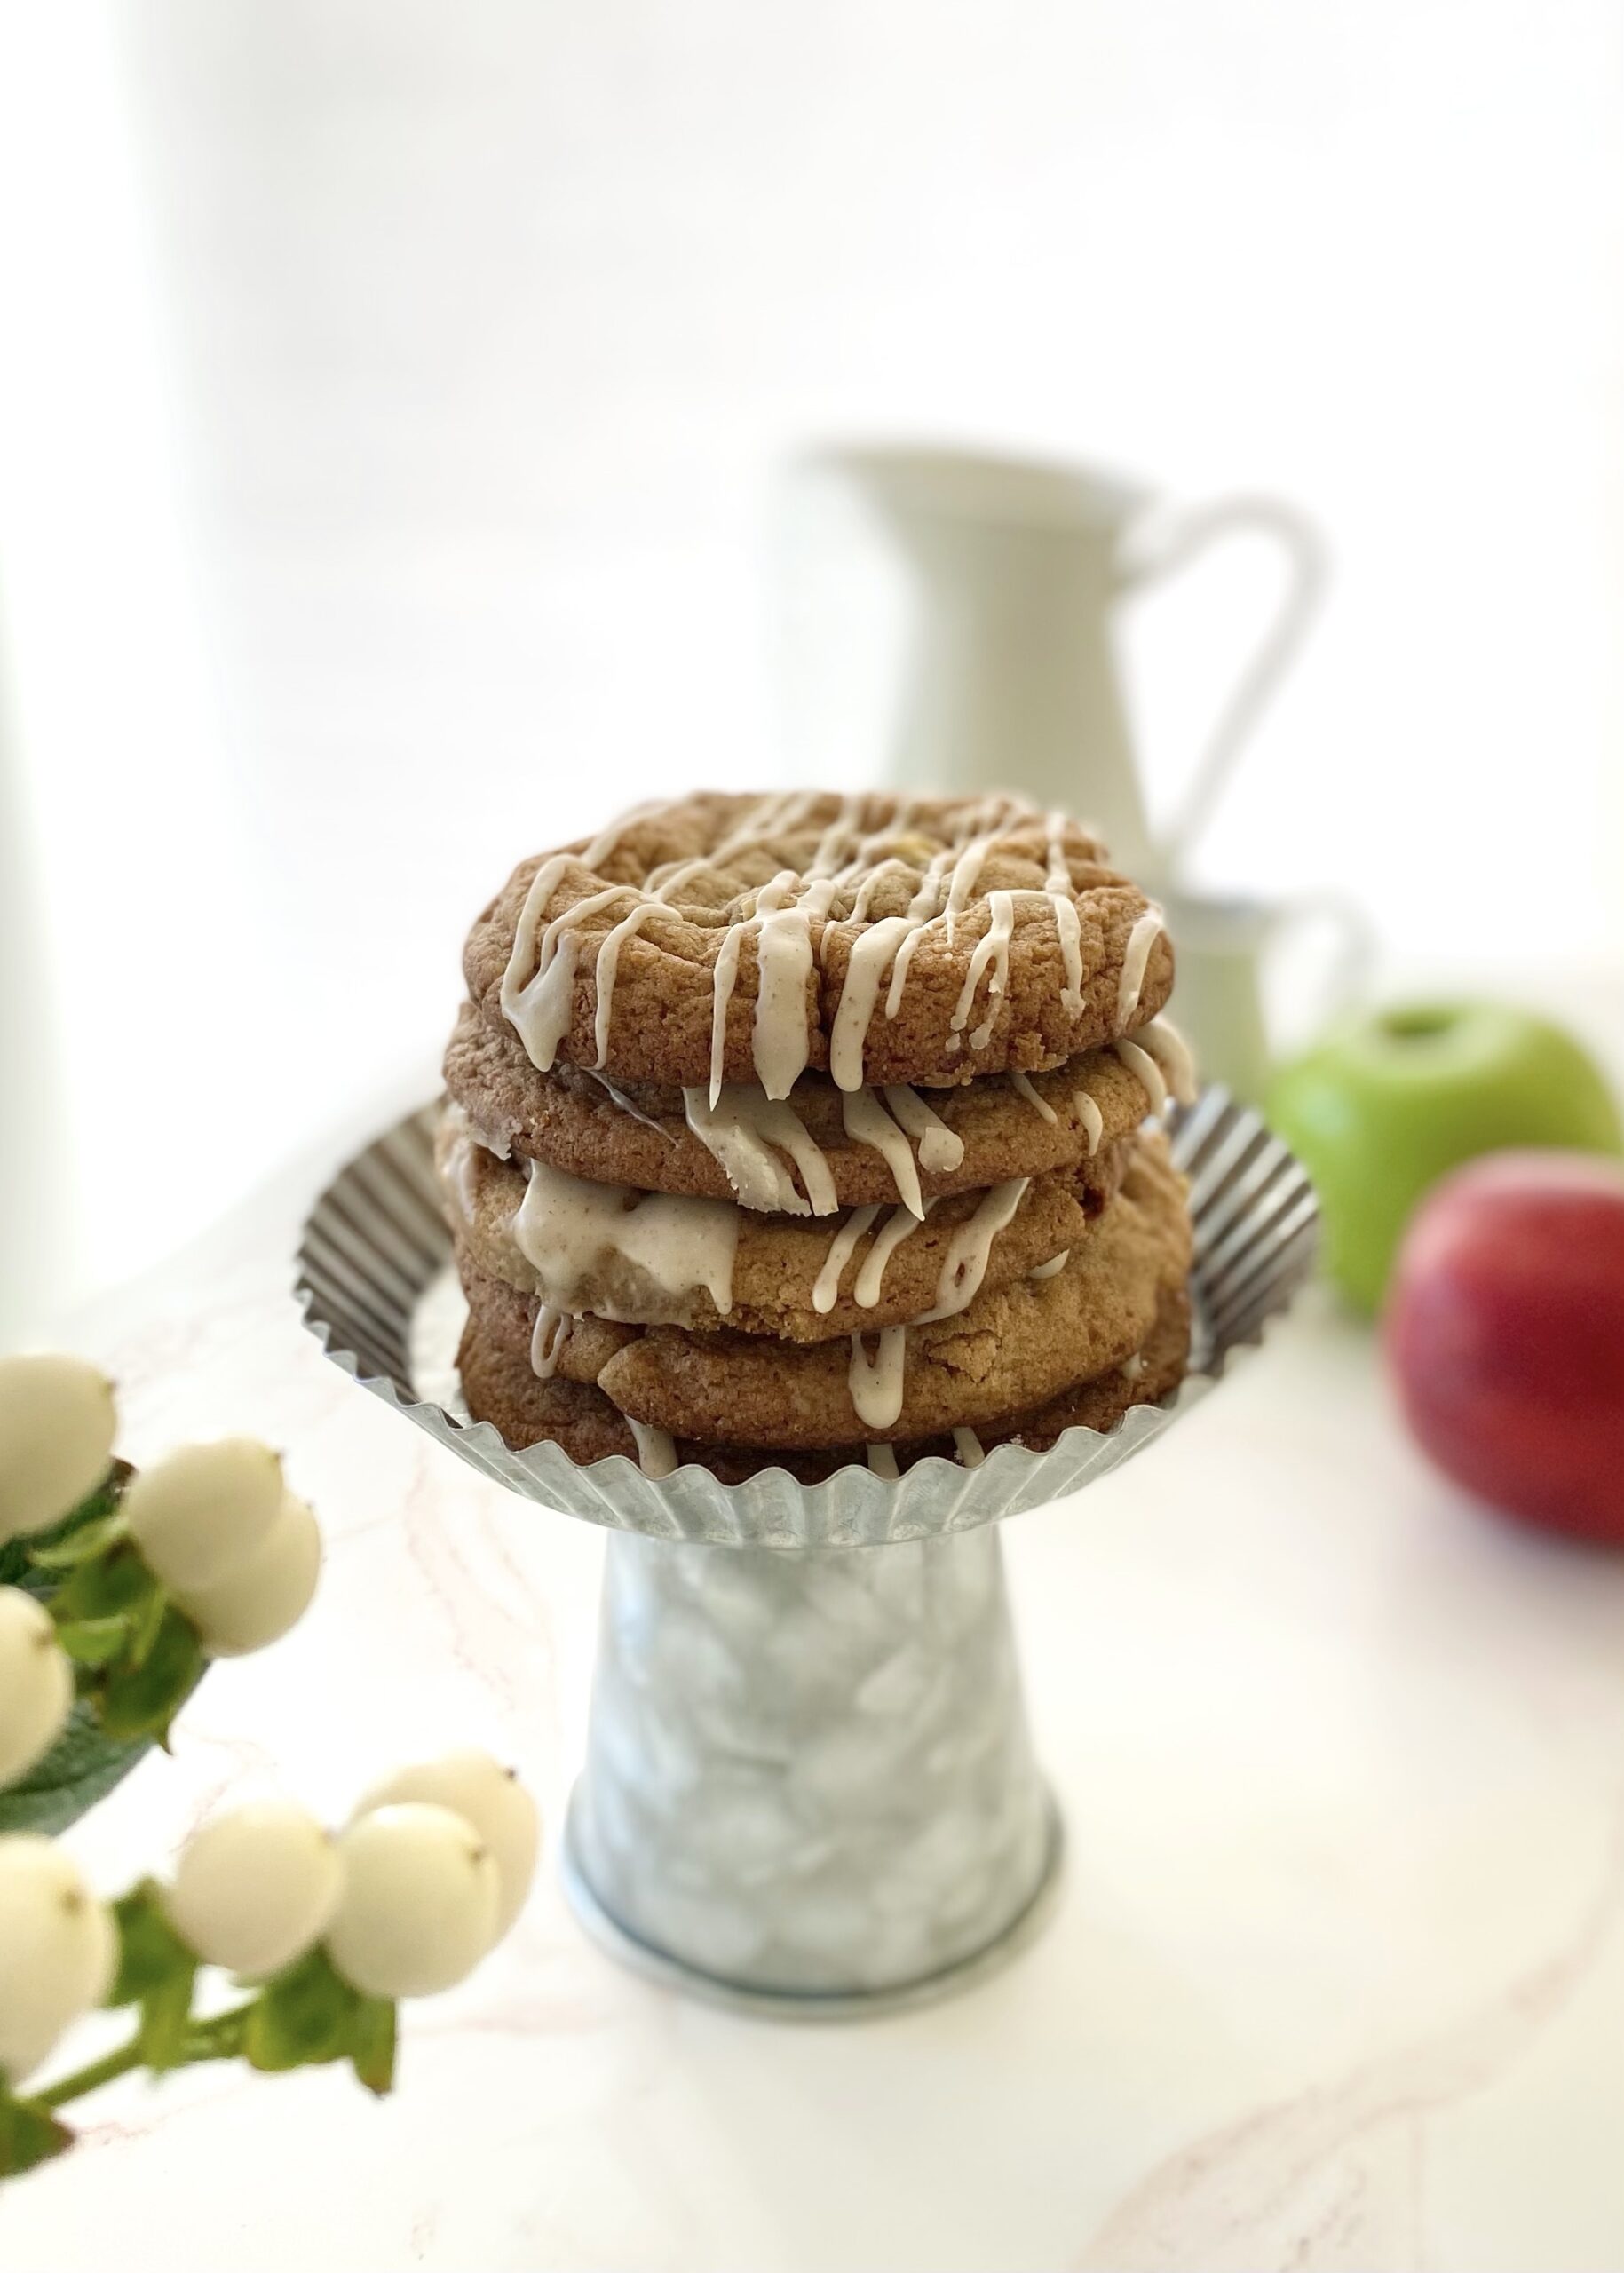
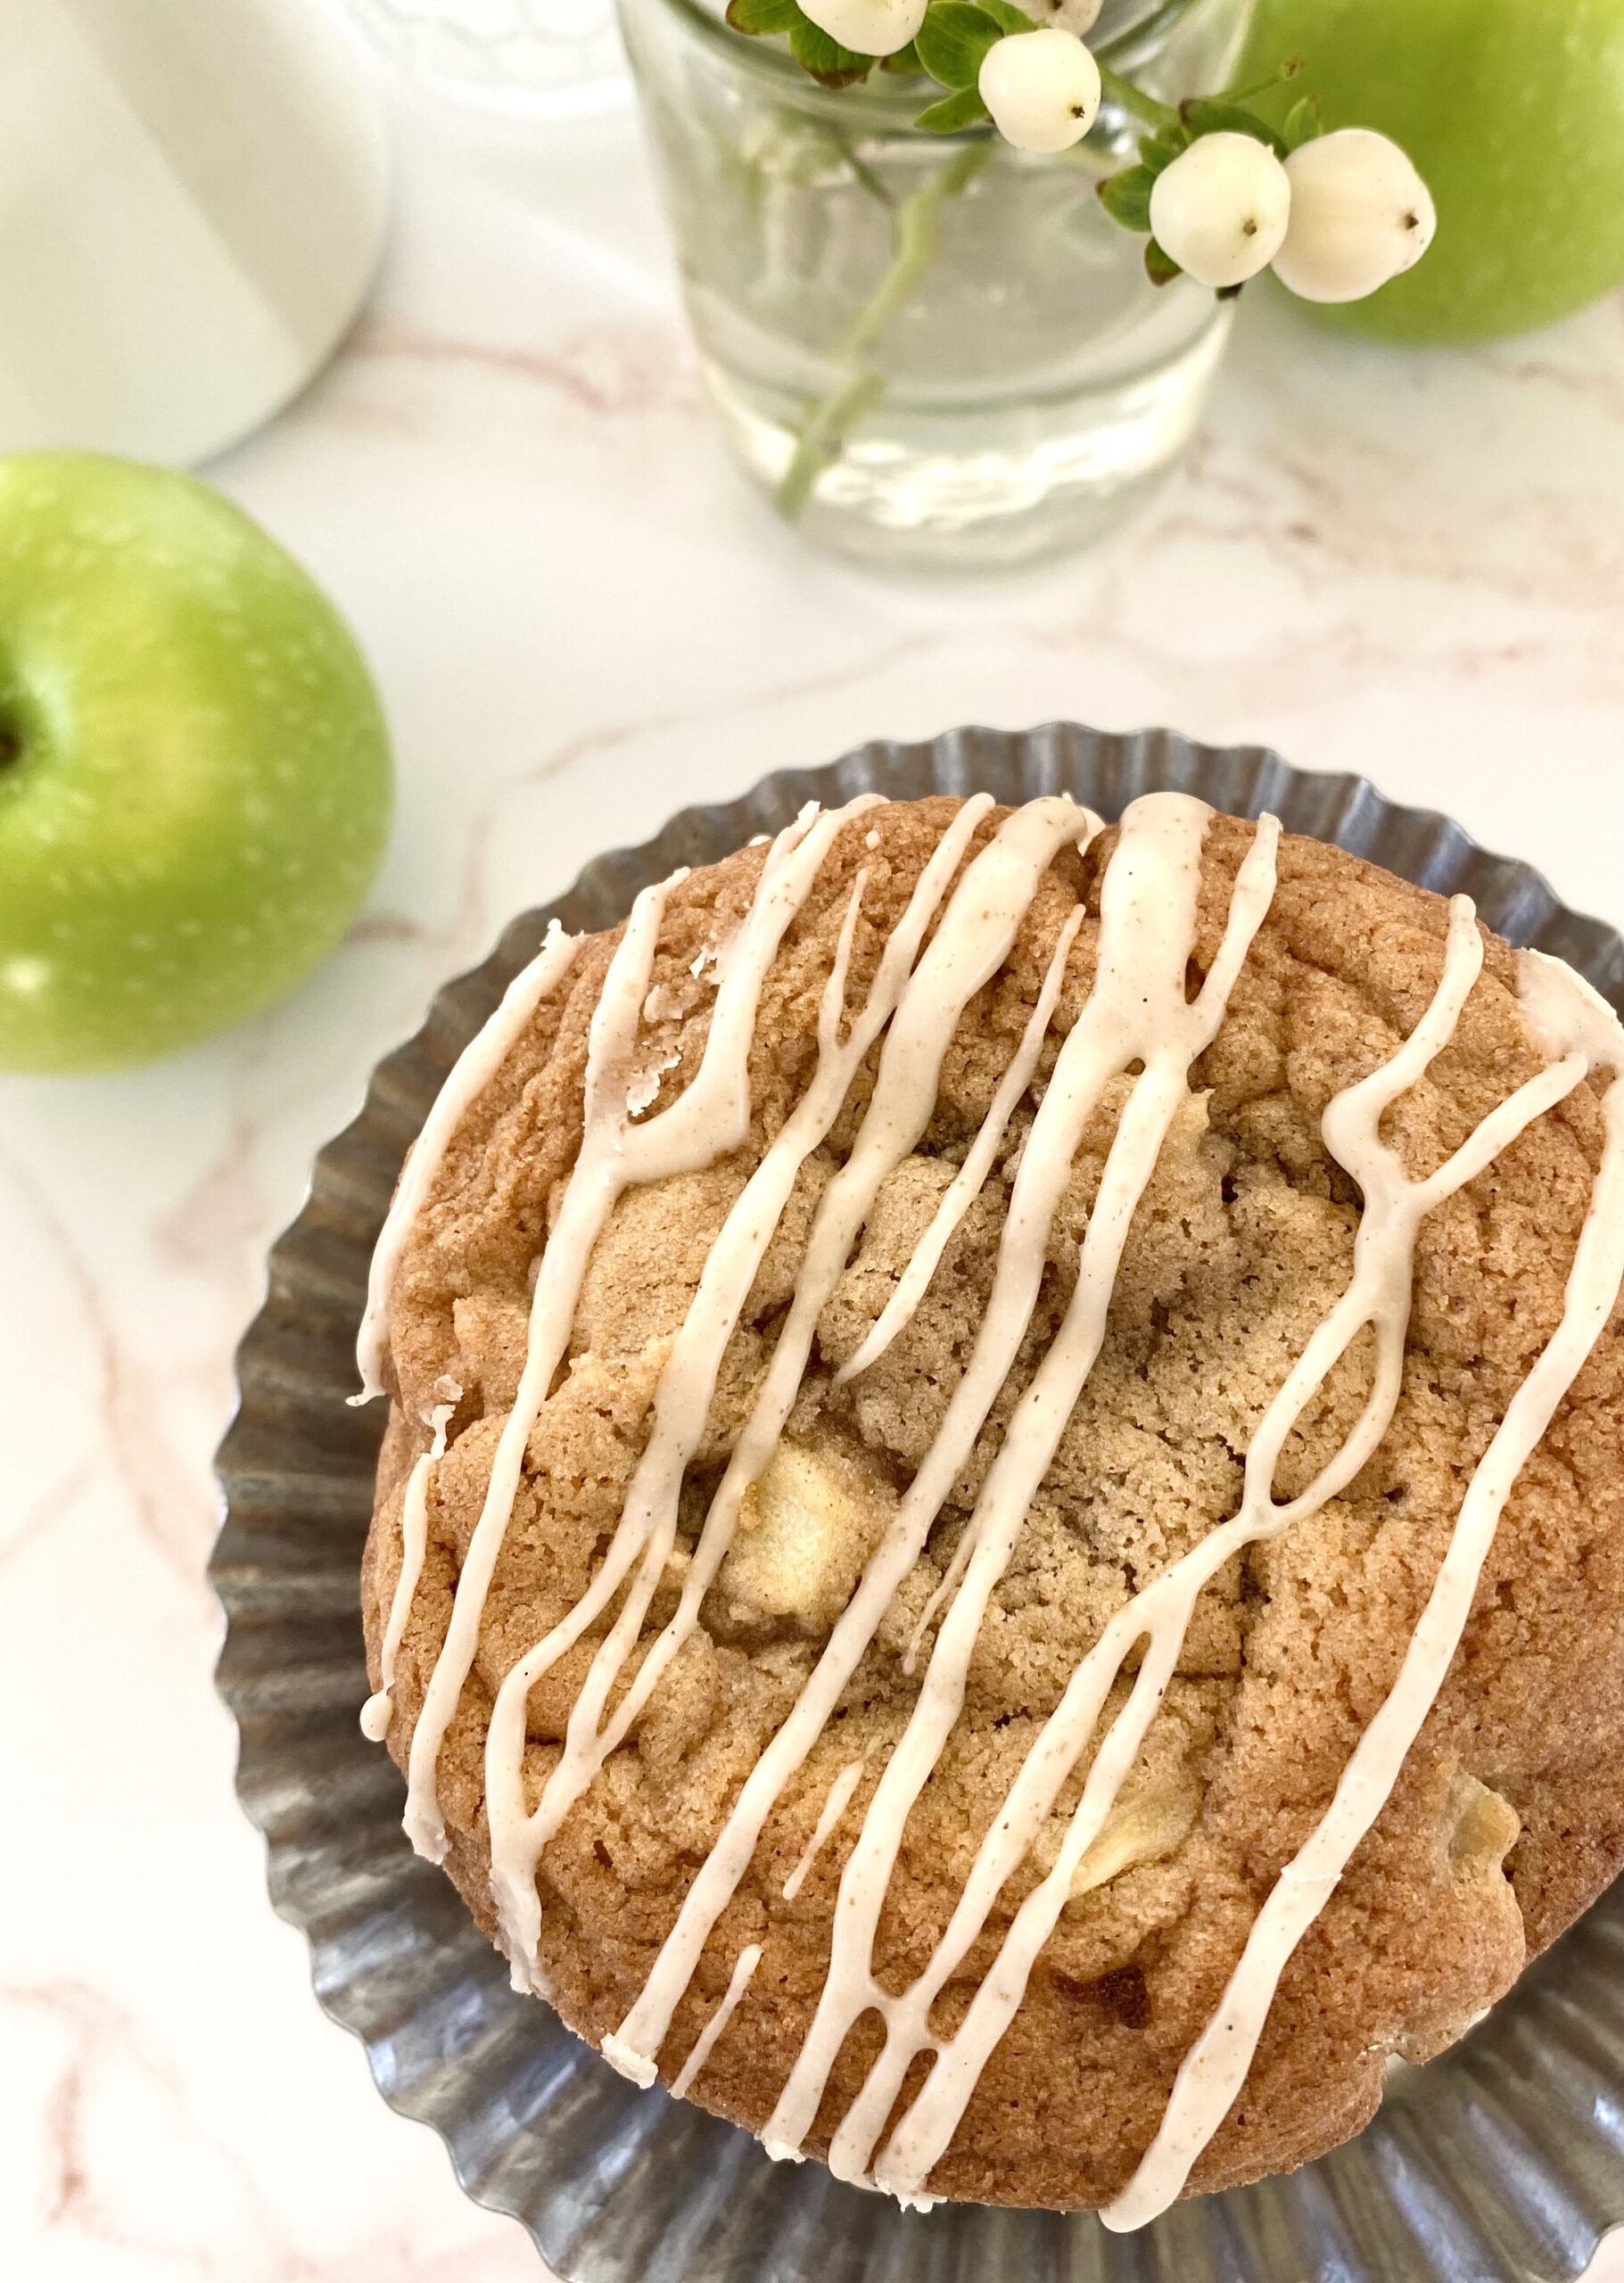
These Apple Spice Cookies were one of my most popular cookies last fall so I decided to bring them back a little early this year. The combination of cinnamon, nutmeg and vanilla in this cookie dough will remind you of cinnamon rolls and apple pie and inspire you look forward to fall.
The apples in this recipe are cooked briefly on the stovetop to bring out the flavor and create the perfect texture. Dropping raw apple chunks into cookie dough or cake batter is usually not a good idea. If you’ve ever baked an apple pie, you know that apples release liquid as they cook and that liquid will end up in your baked cookies, creating soggy spots. So definitely don’t skip this step!
These gorgeous, golden brown cookies are perfectly delicious on their own, but extra credit goes to the Brown Butter Icing for taking them over the top!
Make sure to head over to Instagram to watch the video of these Apple Spice Cookies being created: Click here
Apple Spice Cookies with Brown Butter Icing
Spice cookies with fresh apples and brown butter icing
1 cup (4 oz or 113g)chopped apples (1/4-inch pieces)I used one large Granny Smith apple
1tablespoonsugar
¼teaspoonground cinnamon
Apple Spice Cookie Dough
1 ½cups (6 3/4 oz or 191g)all purpose flour, sifted
½teaspoonbaking soda
½teaspoonsalt
1teaspoonground cinnamon
¼teaspoonground nutmeg
½cup (4 oz 113g)unsalted butter, softened
1cup (7 oz or 200g)packed brown sugar
1 largeegg
1 largeegg yolk
½teaspooonpure vanilla extract
Brown Butter Icing
2tablespoonsunsalted butter
½cup (2 oz or 57g)powdered sugar, sifted
½teaspoonpure vanilla extract
pinchfine sea salt
1-2tablespoonswhole milk
Instructions
Cooked Apples
Melt the butter in a small skillet over medium heat. Add apples, sugar and cinnamon to the skillet.
Cook, stirring occasionally, until the apples are tender, about 4-5 minutes.
Remove from heat and let cool completely. Drain any excess liquid from the cooled apples.
Apple Spice Cookies
Preheat the oven to 375ºF (190ºC). Line two large baking sheets with parchment paper.
In a medium bowl, whisk together the flour, baking soda, salt, cinnamon and nutmeg. Set aside.
In a large bowl, beat the butter and brown sugar with an electric mixer at medium speed until light and fluffy.
Beat in the egg, egg yolk and vanilla extract, one at a time, until well combined
Stir in the flour mixture, just until combined.
Fold the the cooled apples into the cookie dough.
Divide the dough into 12 equal golf ball size portions and place them 3 inches apart on the prepared baking sheets.
Bake until golden brown, about 11-13 minutes. Let cool 1 minute on the baking sheet, then transfer to a cooling rack to cool completely.
Brown Butter Icing
In a small saucepan, cook the butter over medium heat until golden brown and fragrant. When brown specks start to form in the bottom of the pan, remove from heat.
Immediately transfer the browned butter to a small bowl. Whisk in the the powdered sugar, vanilla extract, salt and 1 tablespoon milk. Add more milk as needed to reach desired consistency.
Drizzle the icing over the cooled cookies.
Notes
NOTE: If your cookies spread too much when baking, refrigerate dough for 30 minutes, then bake as directed.
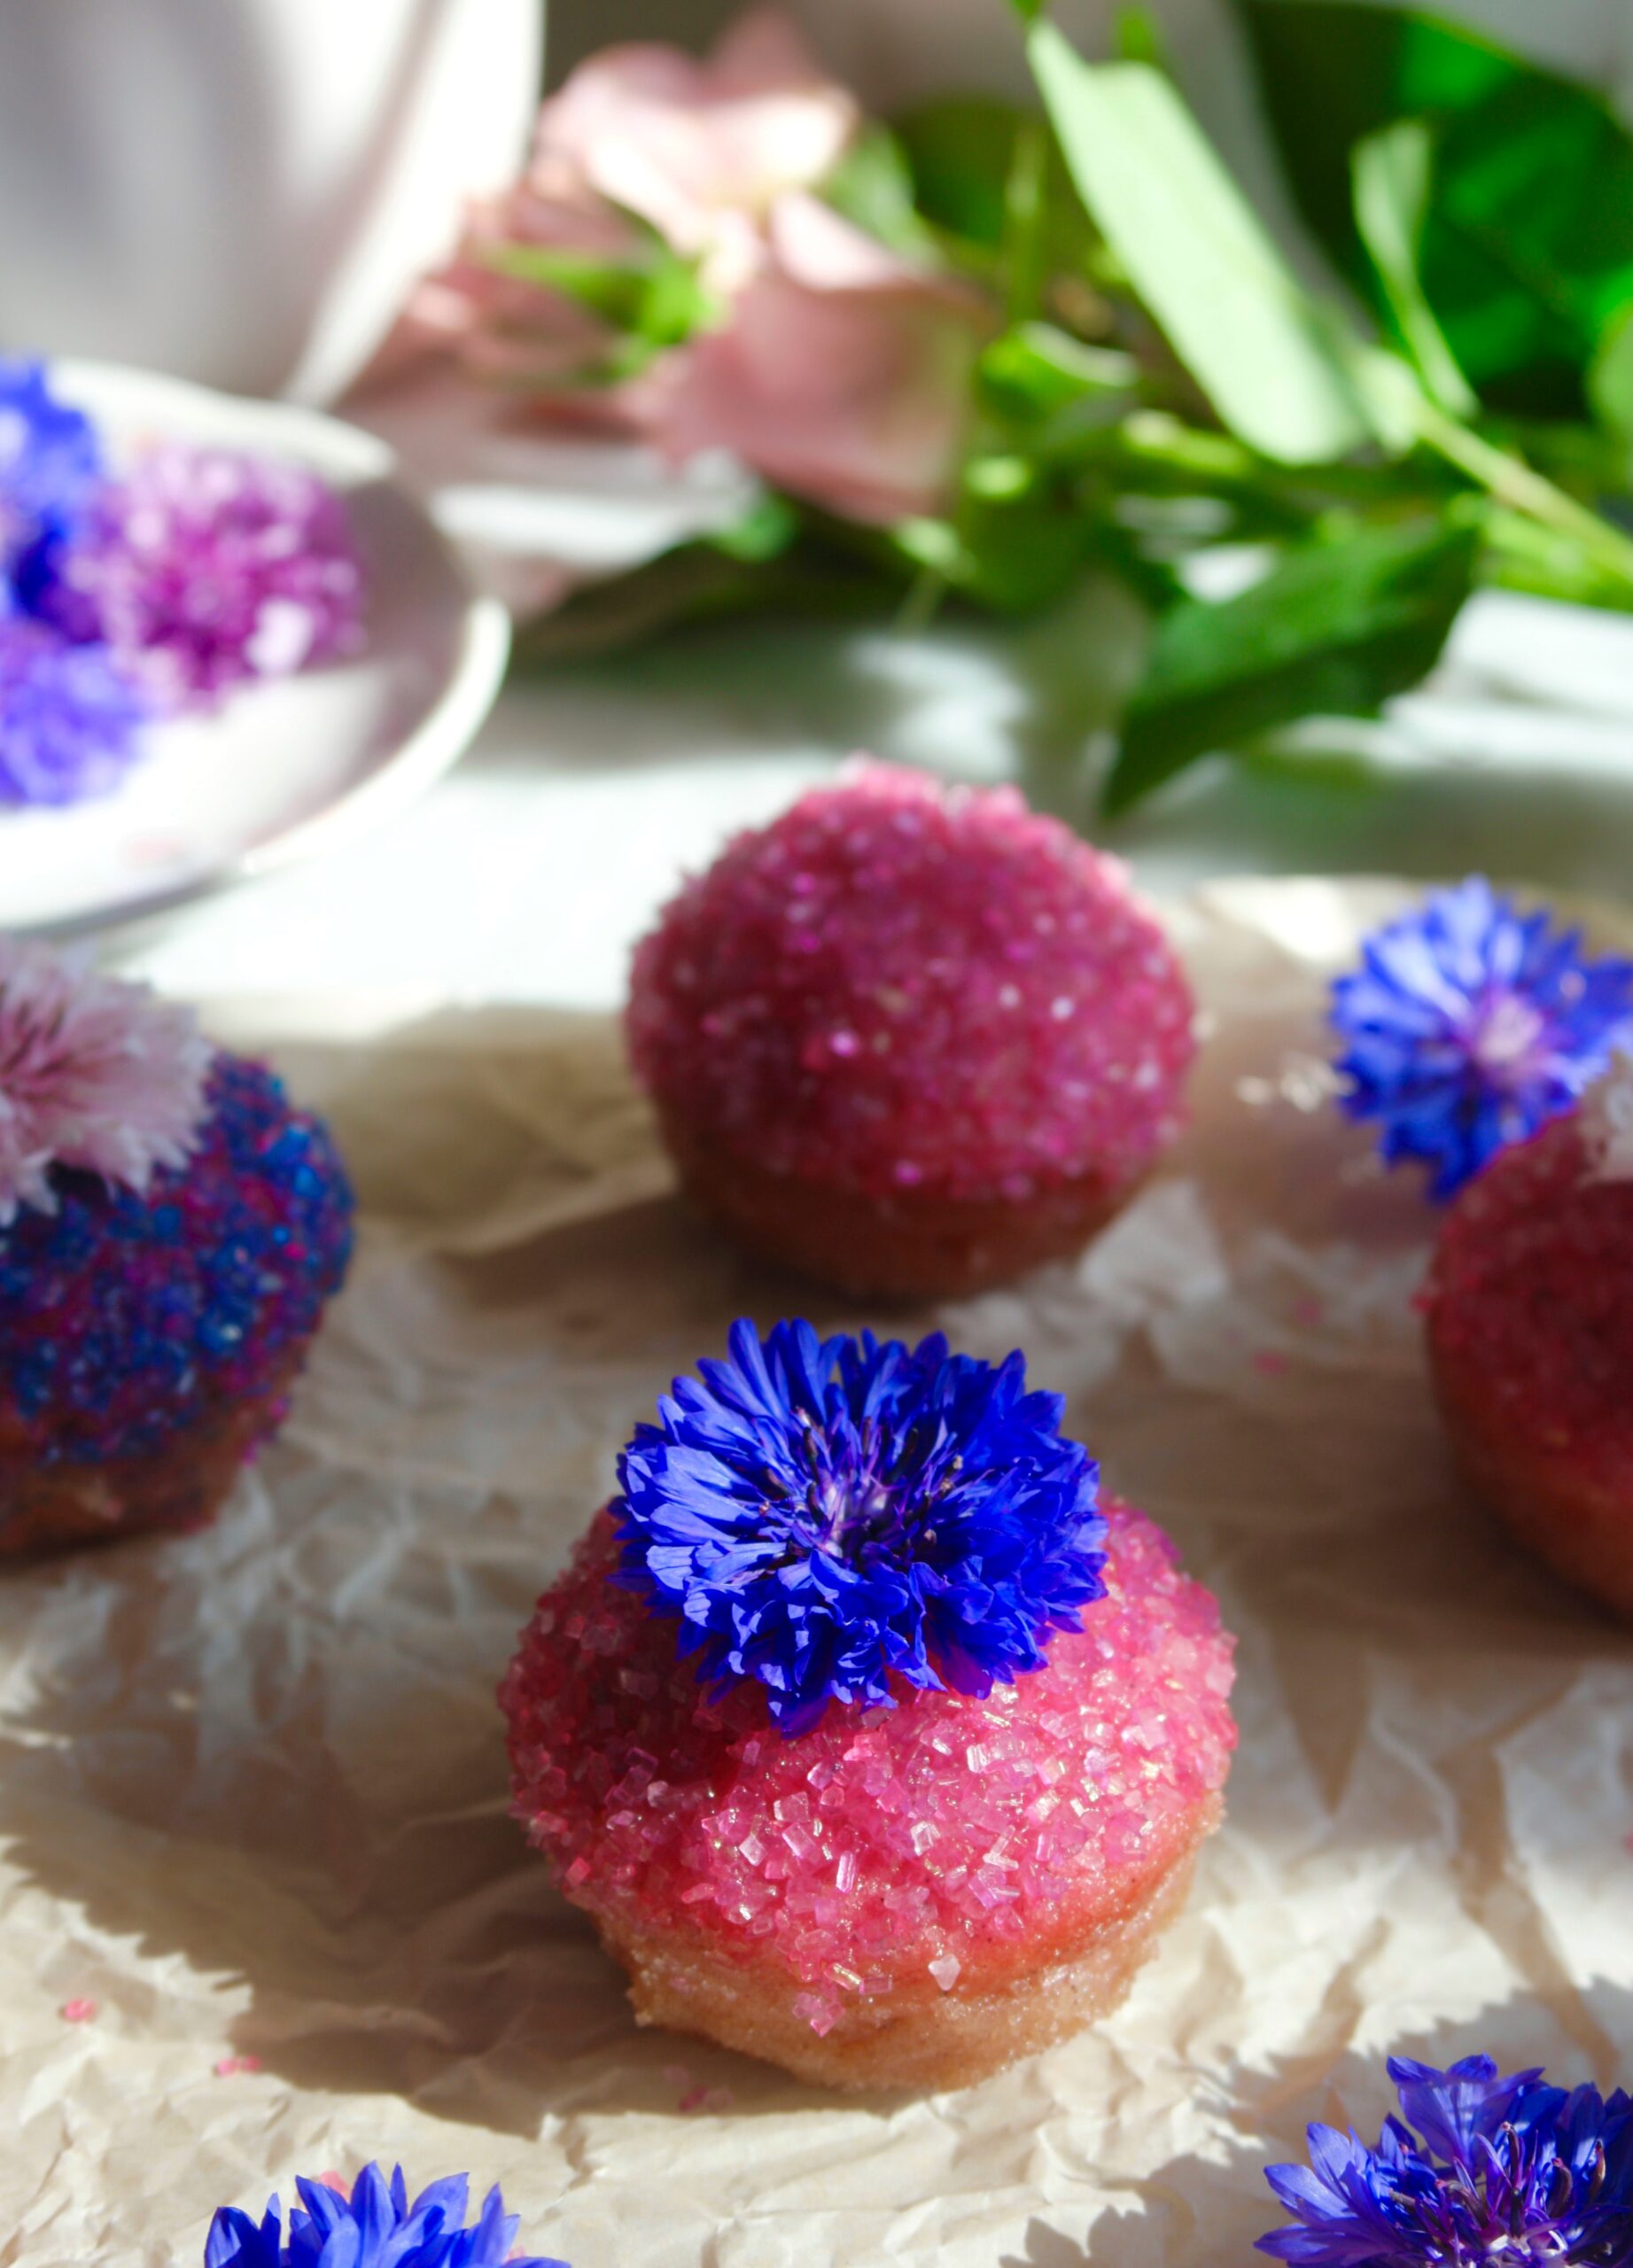
My dad used to take me on walks in the woods to look for fairy rings when I was a child. I wanted to see a real fairy so badly! I read a book about fairies, hoping to learn more about them. Fairies love little cakes, milk, honey and butter so I’m sure these Fairy Puffs would be fairy approved.
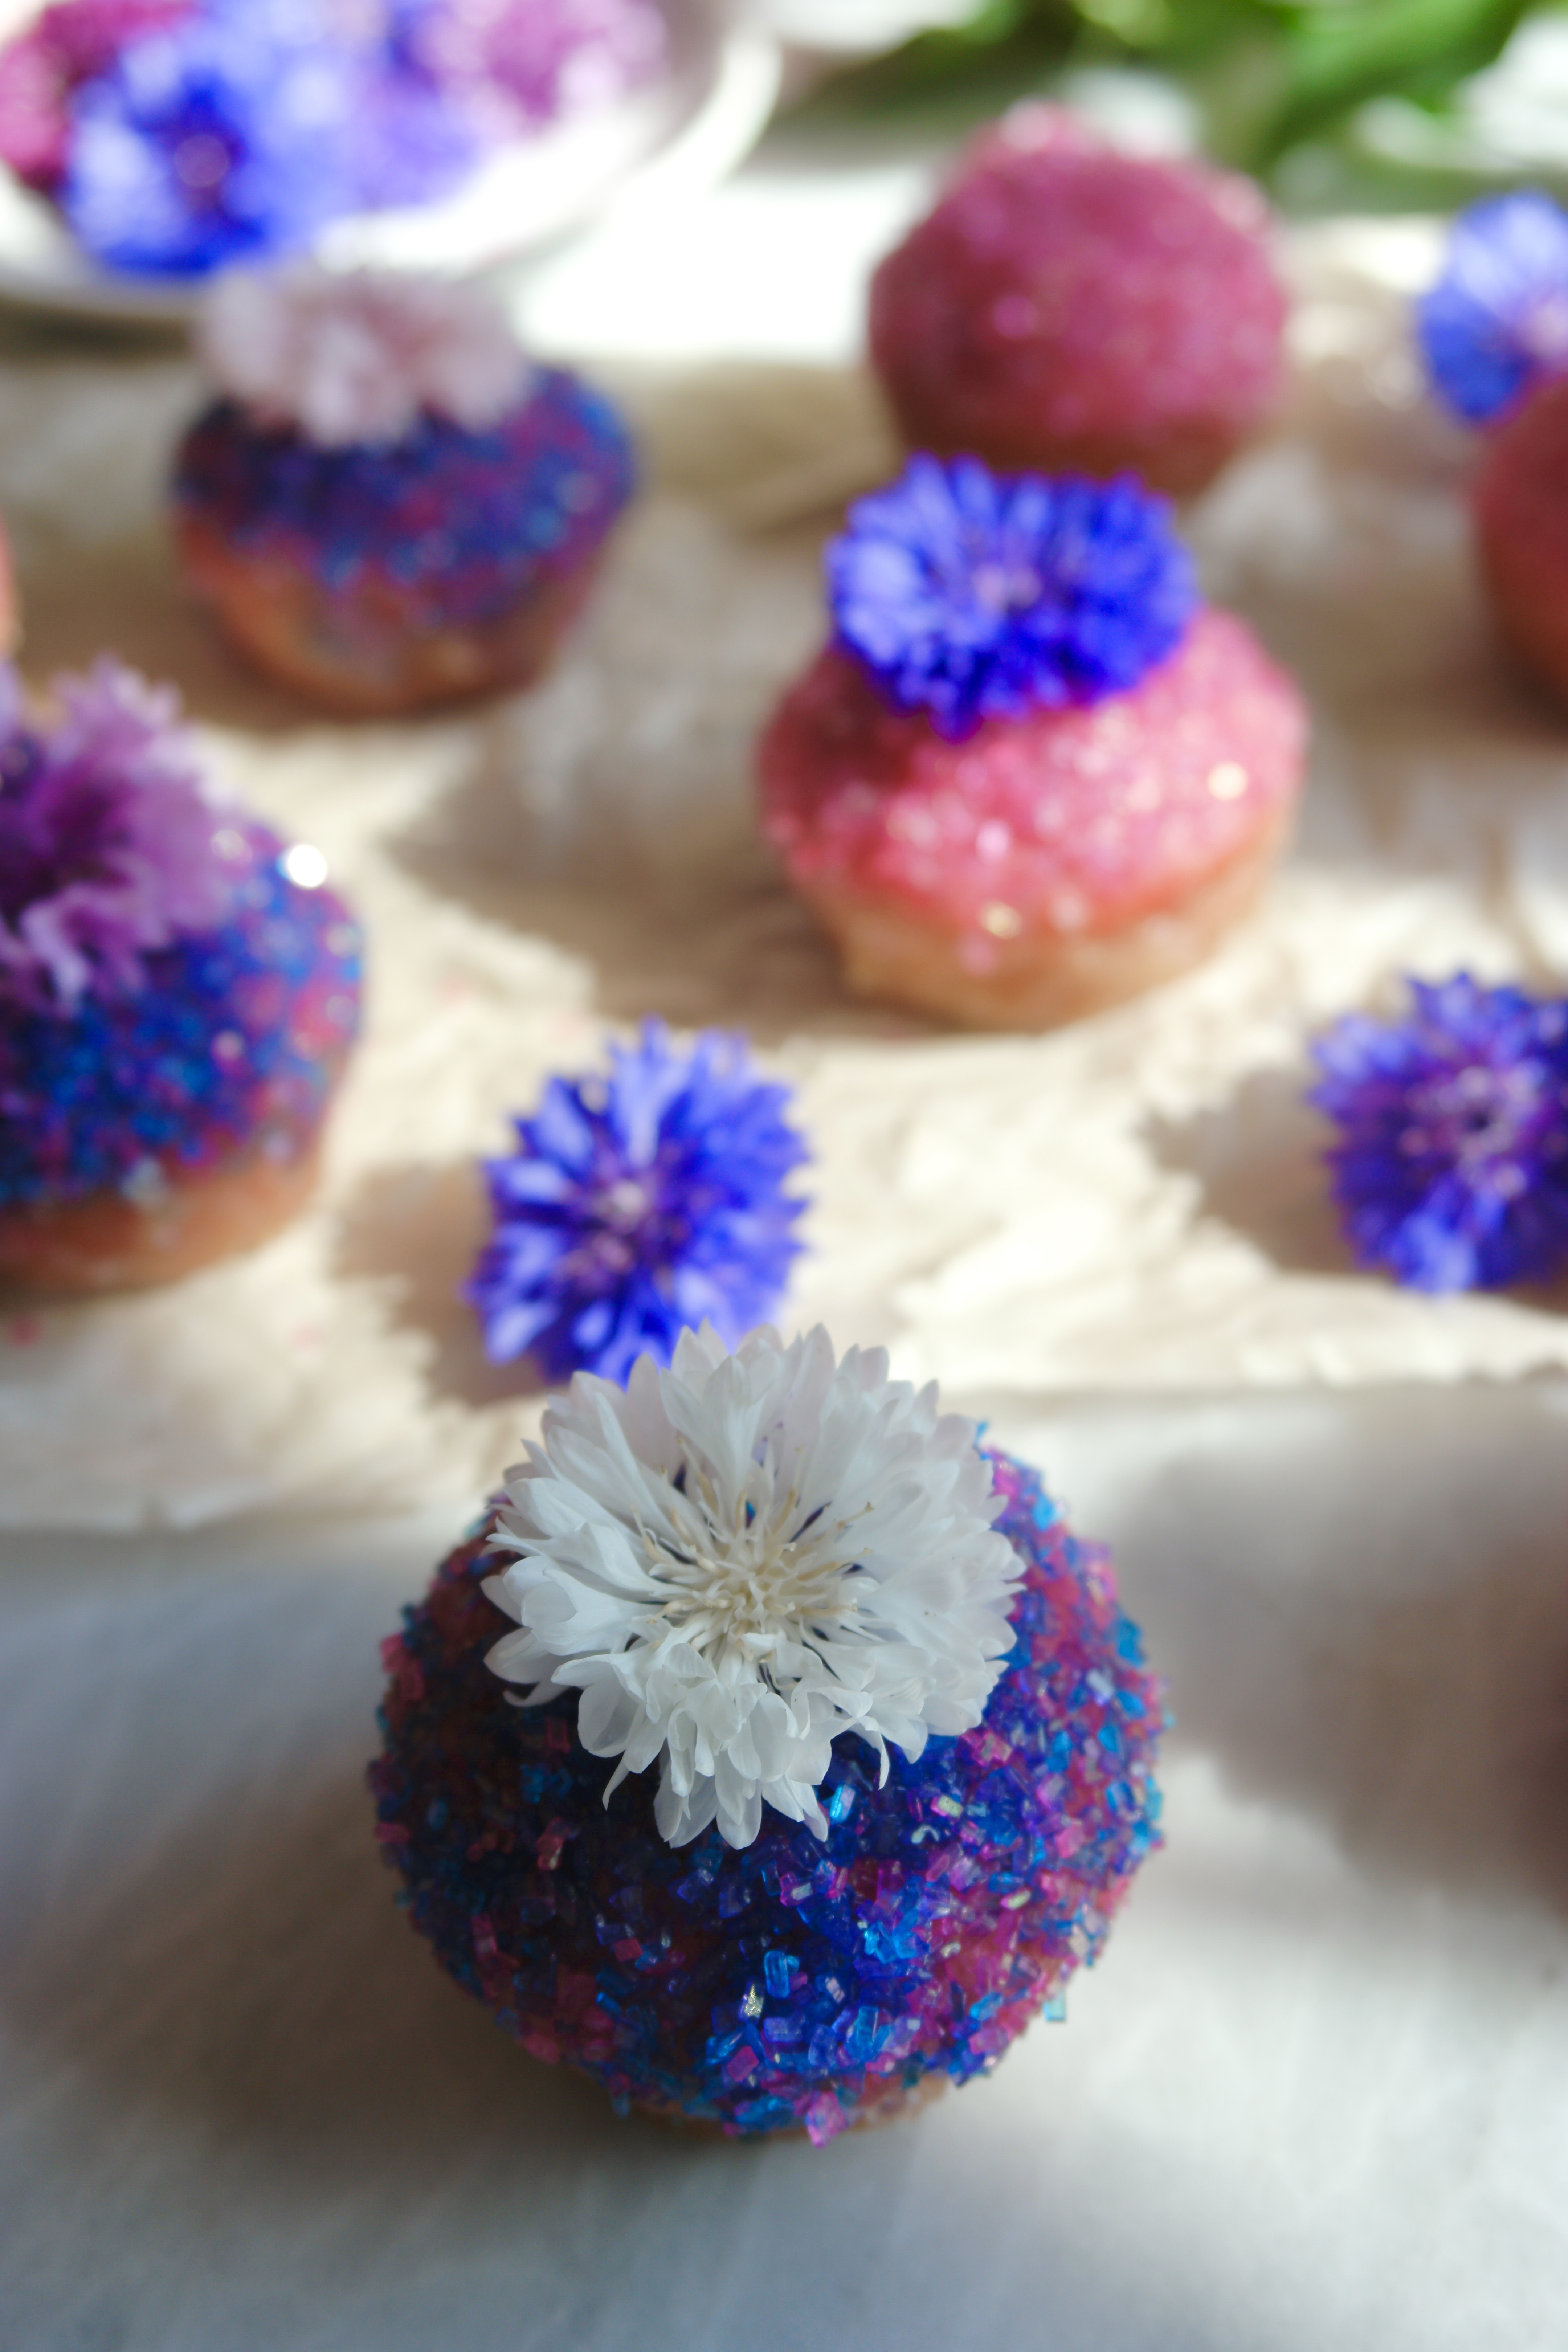
My Fairy Puffs recipe is loosely based on an old favorite mini muffin recipe. I tweaked it quite a bit, including the addition of pink dragonfruit powder. Dragonfruit has a subtle flavor, so the bright fuchsia powder is mostly for color. But oh what a beautiful color it is! You can find dragonfruit powder in healthy food stores or online. To find the dragonfruit powder, also known as pink pitaya powder, I used, click here.
Decorating these little cuties was so entertaining! After sampling multiple variations of sparkling sugar and cinnamon sugar, I decided that dipping the bottoms of the muffins in butter and cinnamon sugar, then dipping the tops in butter and sparkling sugar gave them the perfect balance of sugar and spice. I had purchased some edible flowers a couple of days prior, and they added a pretty, magical touch. The flowers I used are called bachelor’s buttons and I got them at a local gourmet flower seller.
½cup (3 1/2 oz or 100g)sparkling sugar crystals**I used combinations of white, pink, purple & blue
edible flowers (optional)
Instructions
Fairy Puffs
Preheat oven to 350ºF. Grease and flour a 24 serving mini muffin pan.
In a medium bowl, whisk together flour, dragonfruit powder, baking powder, salt and nutmeg. Set aside.
In a large bowl, cream butter and sugar with an electric mixer until light and fluffy.
Add egg and beat until smooth.
Add flour mixture and milk alternately in two additions and mix just until combined.
Transfer batter to prepared muffin pan, filling muffin cups about 3/4 full.
Bake until toothpick inserted in center of muffins comes out clean, about 12-14 minutes. (Be careful not to over bake. Check a few minutes early. Small muffins can dry out easily.)
Let cool in pan for 5 minutes. Remove puffs from pan and transfer to cooling rack. (Loosen puffs with a small offset spatula or butter knife if necessary.)
Topping
Combine granulated sugar and cinnamon in a shallow bowl.
Place colored sparkling sugar crystals in another shallow bowl.
Dip the bottoms of each puff in melted butter, then into cinnamon sugar mixture.
Dip the tops of each puff in melted butter, then into sparkling sugar.