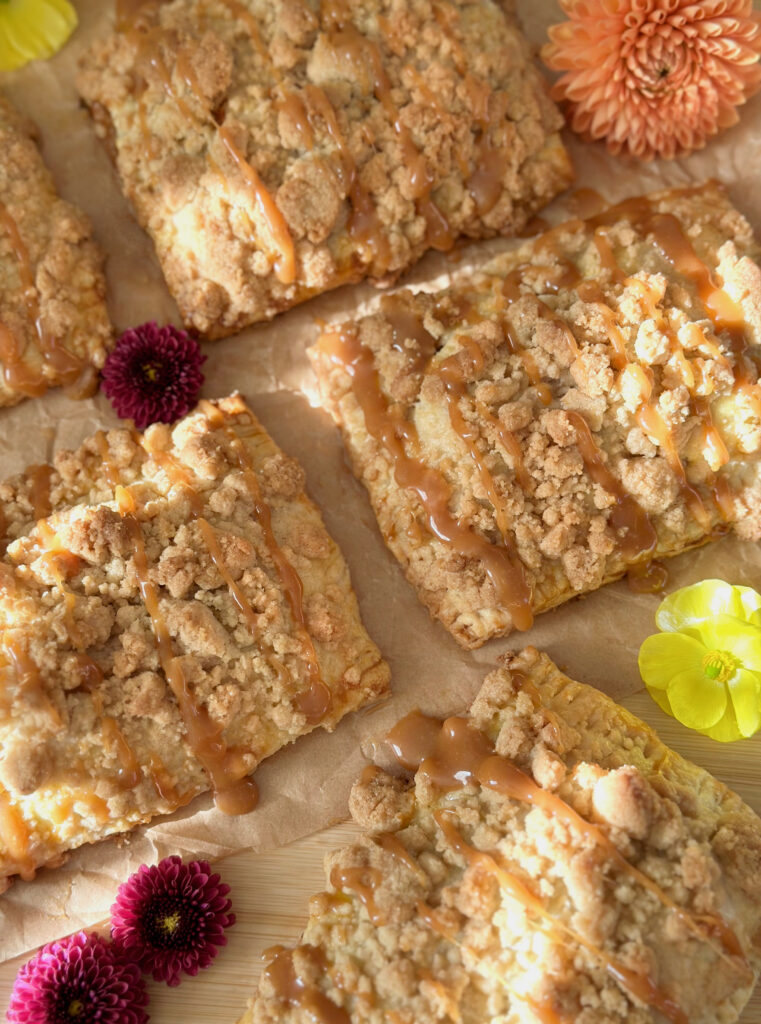
Caramel Apple Crumble Hand Pies

Caramel Apple Crumble Hand Pies

Fresh apples + flaky pie crust + buttery streusel topping + caramel drizzle = a heavenly combination of autumn flavors, textures and aromas in one handheld treat. These Caramel Apple Crumble Hand Pies are irresistible and even a little addicting. They’re the perfect bake for a crisp autumn day and they go beautifully with all of the warm, cozy fall drinks from lattes to teas.

With this recipe, I’m sharing an idea I use to fill the pies with even more apples, which is cutting the top crusts a bit larger than the bottom crusts. It’s also helpful to arrange the apples on the crusts by hand which helps to avoid any air pockets.

The buttery crumb topping takes these hand pies to another level. You can add as much or as little of the crumb topping as you like. Typically I say to follow measurements strictly when baking, because it’s an exact science, but with this streusel crumb topping, go ahead and measure with your heart when topping your hand pies.

Print Recipe
Caramel Apple Crumble Hand Pies
Fresh apple hand pies with buttery streusel crumb topping and caramel drizzle
Servings
hand pies
Ingredients
Pie Crust
Apple Filling
Crumb Topping
Assembly
Servings
hand pies
Ingredients
Pie Crust
Apple Filling
Crumb Topping
Assembly
Instructions
Pie Crust
  1. In a large bowl, whisk together the flour, granulated sugar and salt. Work in the shortening with your fingertips until it's evenly dispersed. Work in the butter until flat dime-sized pieces are formed.
  2. In a small bowl, combine the ice water and vinegar. Sprinkle the ice water mixture over the flour mixture a little at a time and stir just until the dough comes together. You may not need all of the liquid, depending on your climate. Turn the dough out onto a lightly floured surface. Fold the dough over onto itself a couple of times. Do not overwork the dough! Divide the dough into 2 equal portions and form the portions into 1/2-inch thick rectangular blocks. Wrap them with plastic wrap and refrigerate for at least 2 hours or up to overnight.
Apple Filling
  1. In a small bowl whisk the apple juice together with the cornstarch. Set aside. Toss the apples and lemon juice together in a large bowl. Melt the butter in a large skillet over medium heat. When the butter is melted and starts to sizzle add the apples, brown sugar, cinnamon, and salt. Stir gently until well combined. Cook until the sugar melts and the mixture starts to bubble. Turn the heat down to medium-low and simmer until the apples soften a bit, about 2-3 minutes. Stir in the cornstarch mixture. Continue cooking until the sauce thickens, about 2 minutes. Transfer the contents of the pan to a bowl and set aside to cool to room temperature, about 20 minutes.
Crumb Topping
  1. In a medium bowl, whisk together the flour, sugar, brown sugar, cinnamon and salt until well combined. Work the butter into the flour mixture with your fingertips until no large pieces of butter are remaining. Press the mixture together to form chunks. Set aside in the refrigerator until ready to use.
Assembly
  1. Line a large baking sheet with parchment paper. On a lightly floured surface, roll the dough to 1/8-inch thickness. Cut out 6 rectangles measuring 3 by 4 1/2-inches for the bottoms. Cut out 6 rectangles measuring 3 1/4 by 4 3/4-inches for the tops.
  2. Chill the cut dough rectangles in the refrigerator for 15 minutes. Meanwhile preheat the oven to 375ºF (190ºC). Place the 6 bottom pieces on the baking sheet about 2 inches apart. Brush the perimeter edges of the dough with egg wash. Top with filling to within 1/2 inch of the edges. Pinch off pieces of the softened butter and dot the tops of the filling. Place on the top pieces of dough and press the edges together to seal. Crimp the edges with a fork. Brush the pies with egg wash. Cut a 1/2-inch ventilation slit in the top of each one. Top with crumb topping, pressing it lightly to adhere.
  3. Bake until golden brown, about 20-25 minutes. Let the pies cool on the baking sheet for 5 minutes, then transfer them to a cooling rack. Drizzle the warm or room temperature pies with caramel sauce.
Recipe Notes

*Slice the apples about 3/8-inch thick, then cut the slices in half

**For my Homemade Caramel Sauce recipe, click here. For my Easy Caramel Sauce recipe, click here. For store bought caramel sauce, click here.

Bakery-Style PB & J Cookies

Bakery style PB & J cookies by Brownie Mischief

Many of us think of peanut butter & jelly as nostalgic comfort food. It brings back happy memories of childhood. A peanut butter & jelly sandwich in my school lunch box was a welcome favorite in the sandwich rotation. I created my ideal PB & J cookies with those nostalgic flavors in mind. These deluxe jumbo peanut butter cookies are worthy of packing in a grown-up lunch or enjoying as a comforting snack with a tall glass of ice-cold milk or with your favorite coffee drink.

These cookies are a generous 3-inch size, but you can make them smaller if you wish. Keep in mind that the baking time will be shorter for smaller cookies. My favorite way to make these cookies is with blueberry jam and fresh blueberries. The strawberry ones took a few attempts to get right due to the juiciness of the strawberries. The instructions for the strawberry version of these cookies are in the notes below. Feel free to use your favorite jam flavor and have fun experimenting with different fruits or berries.

Print Recipe
Bakery-Style PB & J Cookies
Jumbo bakery-style peanut butter cookies filled with jam & fresh fruit
Course Dessert
Cuisine American
Servings
3-inch cookies
Ingredients
Course Dessert
Cuisine American
Servings
3-inch cookies
Ingredients
Instructions
  1. Preheat the oven to 350ºF. Line 2 large cookie sheets with parchment paper.
  2. In a medium-size bowl, whisk together the all purpose flour, cake flour, baking powder and salt until well combined.
  3. In a large bowl, beat the butter and peanut butter together, with an electric mixer on medium speed, until smooth. Place 2 tablespoons of the granulated sugar in a small, shallow bowl and set aside. Beat the remaining granulated sugar and the brown sugar into the butter mixture until light and fluffy. Beat in the egg, then the vanilla extract until well incorporated. On low speed, beat in the flour mixture just until combined.
  4. Chill the cookie dough in the refrigerator, just until easier to work with, about 15 minutes. Divide the dough into 12 equal portions, (about 60g each). Form the portions into balls, then roll them in the reserved granulated sugar. Place them about 2 inches apart onto the cookie sheets. Make indentations in each ball using a 1-inch pastry tamper or use your thumbs. Fill each indentation with about a teaspoon of jam, then top with blueberries.
  5. Bake the cookies until the edges start to turn golden brown and the jam begins to bubble, about 14-15 minutes. (The cookies will spread, but if your cookies spread too much, you can shape the hot cookies when they come out of the oven by immediately placing a large round cookie cutter onto the cookie sheet over each cookie and slide it around in a circular motion a couple of times. (Or you can refrigerate the dough balls until firm prior to baking to help reduce spreading.) Let the cookies cool on the cookie sheets for 1 minute, then transfer them to a cooling rack.
Recipe Notes

To make the strawberry version of these cookies, replace the blueberry jam with strawberry jam. Optional: Cut out 12 strawberry hearts (as shown in the photo). Place the strawberries in a small bowl. Sprinkle with 1 teaspoon of sugar and let macerate for 20-30 minutes to draw out the excess juices. If you skip this step, the juice from the strawberries may make the centers of your cookies soggy. Drain the strawberries, pat dry, then place them on the cookies with the jam before baking.

Chocolate Chip Strawberry Shortcakes

Chocolate Chip Strawberry Shortcakes

These Chocolate Chip Strawberry Shortcakes are Grandma’s classic tender strawberry shortcakes, but with a twist. The addition of chocolate chips makes them extra delicious! Top with a cloud of fresh homemade whipped cream and you’ll have the most delightful dessert to share with family and friends.

Print Recipe
Chocolate Chip Strawberry Shortcakes
Soft tender chocolate chip shortcakes topped with fresh sweetened strawberries and homemade whipped cream.
Servings
shortcakes
Ingredients
Macerated Strawberries
Whipped Cream
Servings
shortcakes
Ingredients
Macerated Strawberries
Whipped Cream
Instructions
Macerated Strawberries
  1. Stir the strawberries and sugar together. Cover and refrigerate at least 30 minutes or up to a few hours.
Chocolate Chip Shortcakes
  1. Preheat the oven to 375°F (190°C). Line a large baking sheet with parchment paper.
  2. In a large bowl, whisk the flour, sugar, baking powder and salt together until well blended. Work the butter into the flour mixture with a pastry blender or with your fingertips until small pea-size pieces are formed. Stir in the mini chocolate chips.
  3. In a small bowl, whisk the buttermilk and vanilla extract together. Stir this mixture into the dry ingredients just until a shaggy dough forms
  4. Turn the dough out into a lightly floured surface. Fold the dough over into itself a few times. Do not overwork the dough! Form the dough into a 1-inch thick, 6-inch diameter round. Cut out 6 rounds with a 2 3/4-inch floured biscuit cutter. Place them about 2 inches apart on the baking sheet. (It’s important to keep the dough cold. If your kitchen is very warm, freeze the rounds for 5-10 min. before baking.)
  5. Brush the shortcakes with heavy cream & sprinkle with coarse sugar. Bake until golden, about 17-22 minutes. Immediately transfer the shortcakes to a cooling rack. Split the cooled shortcakes and top with strawberries and whipped cream.
Whipped Cream
  1. In a large bowl, mix the heavy cream and vanilla, with an electric mixer on low speed. Sift the powdered sugar into the heavy cream and mix until combined. Turn the speed up to medium-high and beat until medium peaks form. Refrigerate until ready to use.

Blueberry Crumb Cake Cookies

Blueberry Crumb Cake Cookies

Over the holidays, my Cranberry Orange Crumb Cake Cookies went viral, so I thought it was time to introduce a spring version of the popular cookies. Blueberry Crumb Cake Cookies have homemade blueberry filling with crumble topping and a touch of lemon zest in the dough to brighten them up. The sweet-tart lemon icing gives them the perfect balance. These delightful blueberry cookies are perfect alongside a cup of tea or a glass of lemonade.

Print Recipe
Blueberry Crumb Cake Cookies
Vanilla cookies with a touch of lemon zest, topped blueberry filling, crumble topping and lemon icing by Brownie Mischief
Course Dessert
Cuisine American
Keyword blueberry, cookies
Servings
cookies
Ingredients
Blueberry Filling
Crumb Topping
Cookies
Icing
Course Dessert
Cuisine American
Keyword blueberry, cookies
Servings
cookies
Ingredients
Blueberry Filling
Crumb Topping
Cookies
Icing
Instructions
Blueberry Filling
  1. Set aside 1/4 cup (34g) of blueberries. Combine the remaining blueberries with the sugar, cornstarch and lemon juice in a small saucepan.
  2. Simmer over medium-low heat, stirring occasionally, until the blueberries are softened and the sauce is a thick jam consistency, about 5-7 minutes. Stir in the reserved 1/4 cup (34g) of blueberries and cook for 1 more minute. Remove from heat and set aside to cool completely.
Crumb Topping
  1. In a medium-size bowl, whisk together the flour, granulated sugar, brown sugar and salt until well combined. Work the butter into the flour mixture with your fingertips until it looks like sand with no large pieces of butter. Press the mixture together to form chunks. Set aside in the refrigerator while you make the cookie dough.
Cookies
  1. Preheat the oven to 350ºF (180ºC). Line 2 large cookies sheets with parchment paper.
  2. In a medium-size bowl, whisk together the flour, baking powder and salt until well combined.
  3. In a large bowl, beat the butter, granulated sugar, brown sugar and lemon zest, with an electric mixer at medium speed, until light and fluffy. Beat in the egg and egg yolk in two separate additions, making sure each one is incorporated before adding the next. Beat in the vanilla extract. On low speed, beat the flour mixture into the batter, just until combined. Stir in the white chocolate chips, if using.
  4. Form the cookie dough into 2-tablespoon size balls. Place them about 3 inches apart onto the cookie sheets. Press a 1-inch wide indentation into each cookie using your thumb or a pastry tamper. Fill each indentation with a generous teaspoon of the blueberry filling. Top each one generously with the crumb topping. Gently press the topping onto the cookies.
  5. Bake until the topping and the edges start to turn light golden, about 11-13 minutes. (Be careful not to over bake to avoid drying out your cookies.) Let the cookies cool on the baking sheet for 1 minute, then transfer them to a cooling rack.
Icing
  1. In a small bowl, whisk together the powdered sugar, salt, and 2 tablespoons of lemon juice until well combined. Add additional lemon juice as needed to achieve the desired consistency. Whisk until smooth. Drizzle the icing over the cooled cookies.

Blueberry Carrot Cake

Blueberry Carrot Cake

Spring is here and it’s the season to eat carrot cake! Many people have strong opinions about which add-ins are best to use in carrot cake. Some popular ones, besides the carrots themselves, include nuts, pineapple, raisins, and even coconut. My Blueberry Carrot Cake came about when I was thinking about making a breakfast carrot cake. I replaced the typical add-ins with blueberries and the results were so delicious. I originally made this cake with a maple-butter glaze which was perfect for a breakfast cake. For Easter brunch, I opted to dress up the cake with Blueberry Cream Cheese Frosting, fresh blueberries and lilacs. This combination is magical.

Print Recipe
Blueberry Carrot Cake
Moist, subtly spiced carrot cake studded with blueberries and topped with blueberry cream cheese icing by Brownie Mischief
Cuisine American
Keyword blueberry, cake, carrot
Servings
Ingredients
Blueberry Carrot Cake
Blueberry Cream Cheese Frosting
Cuisine American
Keyword blueberry, cake, carrot
Servings
Ingredients
Blueberry Carrot Cake
Blueberry Cream Cheese Frosting
Instructions
Blueberry Carrot Cake
  1. Preheat the oven to 350ºF (180ºC). Line the bottom of an 8-inch round cake pan with parchment paper. Grease and flour the insides.
  2. In a medium-size bowl, whisk together the flour, baking powder, baking soda, cinnamon, salt, ginger and nutmeg until well combined.
  3. In a large bowl, beat the granulated sugar, brown sugar and oil together until well combined. Beat in the eggs and vanilla, with an electric mixer at medium speed, until smooth and well incorporated. Stir in the carrots. Add the flour mixture and stir just until combined.
  4. In a small bowl, toss the blueberries with 1 teaspoon of flour. Fold the blueberries into the batter. Transfer the batter to the cake pan. Bake until a toothpick inserted into the center of the cake comes out clean, about 37-43 minutes. Let the cake cool in the pan for 10 minutes, then turn the cake out onto a cooling rack.
Blueberry Cream Cheese Frosting
  1. Smash the blueberries with a fork and press through a sieve into a small bowl.
  2. In a medium-size bowl, stir the cream cheese with a spatula until smooth. Add the butter and beat, with an electric mixer on low speed, until smooth.
  3. Gradually mix in the powdered sugar. Add the vanilla, salt and 1 tablespoon (15 ml) of the smashed blueberries and beat until smooth. Add milk, if needed, until the desired consistency is reached. Stir with a spatula to smooth out any bubbles.
Recipe Notes

To use fresh blueberries for the frosting, place the blueberries in a small saucepan with a teaspoon of sugar and 1/2 teaspoon of lemon juice or water. Cook over medium-low heat until the sugar is dissolved and the blueberries start to soften. Smash the blueberries with a potato masher. Press this mixture through a sieve into a small bowl and let cool to room temperature.

Bakery Style Marble Confetti Cookies

Bakery Style Marble Confetti Cookies

I think of April as one of the most festive months; spring flowers begin to bloom, we celebrate Easter and it’s also my birthday month. It’s a good time to make my big Bakery Style Marble Confetti Cookies. They have the perfect texture with soft, centers and crisp edges. The pretty pink cookie dough and the rainbow sprinkles make them so cheery and fun. They’re ideal for birthday parties and spring celebrations.

My method of adding in extra sprinkles gives the tops of the cookies extra sprinkles without hiding the pretty pink marbling. You can change up the colors of the dough to match your event. You can also add mix-ins, such as white chocolate chips, Easter candy or spring-themed sprinkles if you like. The possibilities are endless.

Print Recipe
Bakery Style Marble Confetti Cookies
Large marbled bakery style cookies with rainbow sprinkles by Brownie Mischief
Course Dessert
Cuisine American
Servings
large cookies
Ingredients
Course Dessert
Cuisine American
Servings
large cookies
Ingredients
Instructions
  1. Preheat the oven to 350ºF (180ºC). Line a large cookie sheet with parchment paper.
  2. In a medium-size bowl, whisk together the flour, cornstarch, salt, baking powder and baking soda until well-combined.
  3. In a large bowl, beat the butter, granulated sugar and brown sugar, with an electric mixer at medium speed, until light and fluffy. Beat in the egg and egg yolk in 2 separate additions until well incorporated. Beat in the extracts. On low speed, beat in the flour mixture, just until combined.
  4. Divide the dough into 2 equal portions, using a kitchen scale for accuracy. Place the dough into 2 separate bowls. Mix the food coloring into one of the dough portions, a little at a time until your desired shade is achieved.
  5. Place 3 tablespoons of sprinkles into a small, shallow bowl and set aside. Divide the remaining sprinkles in half. Mix each half of the sprinkles into the 2 separate dough colors.
  6. Divide each color of dough into 16 portions, approximately 1 tablespoon each. Roll them into balls. Dip each dough ball into the reserved bowl of sprinkles, pressing gently to adhere the sprinkles to the bottoms of the dough balls.
  7. Take 2 balls of each color of dough (4 total) and arrange them in a checkerboard pattern, sprinkle side up. Roll them together to form a large ball. Repeat this process to make 8 large dough balls. Form the dough balls into cylinder shapes and place them sprinkle side up onto the cookie sheet, about 3 inches apart. You may need to bake them in 2 batches.
  8. Bake until the cookies are slightly puffed and the tops are set, about 10-12 minutes. Let the cookies cool on the baking sheet for 5 minutes, then transfer them to a cooling rack.
Recipe Notes

To find the pink food coloring I used, click here.  

Fudgy Chocolate Crumb Cake

Fudgy Chocolate Crumb Cake

This moist, fudgy chocolate cake with a generous amount of melt-in-your-mouth chocolate crumb topping and powdered sugar snow is perfect for frosty mornings with a cup of hot coffee or tea. It’s also perfect for a holiday breakfast or brunch served with fresh raspberries and/or raspberry sauce.*

Print Recipe
Fudgy Chocolate Crumb Cake
Rich, moist, fudgy chocolate cake with melt-in-your mouth crumb topping and sprinkled with powdered sugar.
Cuisine American
Keyword cake, chocolate, crumb
Servings
servings
Ingredients
Crumb Topping
Cake
Cuisine American
Keyword cake, chocolate, crumb
Servings
servings
Ingredients
Crumb Topping
Cake
Instructions
Crumb Topping
  1. In a medium-size bowl, whisk together the flour, granulated sugar, brown sugar, cocoa powder and salt until well combined. Work the butter into the flour mixture with your fingertips until it looks like dirt, with no large pieces of butter remaining. Press the mixture together to form chunks. Set aside in the refrigerator until ready to use.
Cake
  1. Preheat the oven to 350ºF (180ºC). Line an 8-inch square cake pan** with parchment paper, leaving a couple of inches of overhang to serve as handles to lift the cake out of the pan. If you want to serve the cake directly from the pan, you can skip the parchment paper and simply spray the pan with nonstick spray.
  2. In a medium-size bowl, whisk the flour, cocoa powder, baking powder, baking soda and salt together until well combined.
  3. In a large bowl, beat the butter, granulated sugar and brown sugar together, with an electric mixer at medium speed, until light and fluffy. Beat in the oil until combined. Beat in the egg, egg yolk, and vanilla in 3 separate additions, making sure each one is incorporated before adding the next.
  4. On low speed, beat the flour mixture into the batter in 2 additions, alternating with half of the sour cream after each addition. Beat just until combined. Gradually beat in the hot coffee just until smooth and well combined. Fold in the mini chocolate chips.
  5. Transfer the batter to the prepared cake pan. Top the batter evenly with the crumb topping. Bake until a toothpick inserted into the center of the cake comes with a few moist crumbs attached (not wet batter), about 28-37 minutes.
  6. Cool the cake in the pan for 15 minutes, then remove the cake from the pan and continue cooling on a cooling rack. Sprinkle powdered sugar over the cooled cake.
Recipe Notes

*To find my raspberry sauce recipe, click here.

**To find my favorite 8-inch square cake pan, click here.


Mini Banana Bread Puddings

These delightful Mini Banana Bread Puddings are a great way to use up leftover banana bread. At my house, we rarely have any leftover banana bread so I like to bake a special loaf of banana bread just for this recipe, a couple of days before I want to serve the bread puddings. If you need a banana bread recipe, try My Favorite Banana Bread, click here for the recipe. These personal bread puddings make an equally delicious brunch or dessert. You can top them with whipped cream or vanilla ice cream which makes them even more delicious.

Print Recipe
Mini Banana Bread Puddings
Individual banana bread puddings with caramel sauce
Cuisine American
Servings
servings
Ingredients
Cuisine American
Servings
servings
Ingredients
Instructions
  1. Preheat the oven to 300ºF (150ºC). Line a baking sheet with parchment paper. Place the banana bread cubes on the baking sheet. Bake until dry and slightly crisp, about 10-15 minutes, turning every 5 minutes. Set aside to cool.
  2. In a small bowl, whisk the sugar and cinnamon together until well combined.
  3. In a large bowl, whisk the eggs, milk, heavy cream, vanilla extract, salt and the cinnamon-sugar mixture together until well combined. Add the cooled banana bread cubes to the egg mixture and gently toss to coat. Let sit until all of the liquid is absorbed, about 15-20 minutes.
  4. Preheat the oven to 350ºF (180º). Generously butter six 7 or 8-ounce ramekins or a 6-serving jumbo muffin pan. (You can also line the bottoms of the ramekins or the muffin pan with parchment paper rounds to make them easier to release. The parchment isn't necessary if you want to serve the bread puddings in ramekins.) Place the ramekins on a baking sheet.
  5. Spoon the banana bread cubes into the ramekins or the muffin pan. Drizzle with melted butter. Top each one with a few pecans.
  6. Bake until the bread puddings are golden brown and the center is set, about 25-33 minutes. Let the puddings cool for about 5 minutes, then turn them out if you're using a muffin pan. Drizzle the warm bread puddings with caramel sauce and top with whipped cream if desired.
Recipe Notes

To find 7-ounce ramekins, click here.

To find 8-ounce ramekins, click here.

To find a jumbo muffin pan, click here.

Honey Caramel Popcorn

Honey Caramel Popcorn

Autumn is my favorite time of year to make caramel popcorn. That’s when the weather start to get cooler and we love curling up in a blanket with some snacks to watch a movies. Honey Caramel Popcorn has a buttery, sweet, earthy flavor that brings back memories of past fall seasons. It’s easy to make and fun to share. I added roasted almonds to mine but you can use your favorite nuts or leave them out if you wish.

If you want to share your Honey Caramel Popcorn, place it in food safe treat bags. I created some free printable labels that you can add to your treat bags. To get the free printables, click here.

Print Recipe
Honey Caramel Popcorn
Honey caramel coated popcorn with roasted almonds
Course Dessert
Cuisine American
Servings
servings
Ingredients
Course Dessert
Cuisine American
Servings
servings
Ingredients
Instructions
  1. Preheat the oven to 200ºF (95Cº). Line a large baking sheet with nonstick parchment paper or a silicone mat, such as a silpat.* Place the popcorn in an extra-large lightly greased bowl. Wipe out any excess oil or grease with a paper towel.
  2. In a medium-size, heavy bottom saucepan over medium heat, melt the butter, brown sugar, honey, corn syrup and salt together, stirring gently. When the mixture comes to a boil, stop stirring and let the mixture bubble for 5 minutes. Stir in the vanilla and baking soda. The mixture will foam up. Remove from heat.
  3. Carefully pour half of the caramel mixture over the popcorn. Stir gently, then pour the remaining caramel over the popcorn. Stir again. Add the almonds, then stir once more. Transfer the caramel popcorn to the baking sheet, arranging it in an even layer. Bake for about 1 hour, stirring gently every 15 minutes. Remove from the oven and let cool completely. Sprinkle with sea salt to taste if desired.
Recipe Notes

To find my favorite large baking sheets, click here. 

To find a silicone mat, click here.  

Brown Butter Monster Cookie Bars

Brown Butter Monster Cookie Bars

If you’re looking for an easy, delicious and cute Halloween bake, Brown Butter Monster Cookie Bars are perfect for you. These spooky bars are crisp and golden on the outside, buttery, soft and chewy on the inside. They’re loaded with milk chocolate M & M’s and semisweet chocolate pieces which makes these the best Halloween cookie bars ever! I used a chocolate bar broken into pieces, rather than chocolate chips because the chocolate pieces melt into generous, silky pools of chocolate. The fun part is adding the spooky candy eyes. You can even create expressions with sprinkle eyebrows.

Print Recipe
Brown Butter Monster Cookie Bars
Crisp and golden on the outside, buttery, soft and chewy on the inside with M & M's and chocolate pieces. The best Halloween cookie bars ever!
Course Dessert
Cuisine American
Keyword bars, monster cookie
Servings
bars
Ingredients
Course Dessert
Cuisine American
Keyword bars, monster cookie
Servings
bars
Ingredients
Instructions
  1. In a medium-size light-colored saucepan over medium heat, melt the butter and cook until it's deep golden and fragrant. When brown specks start to appear, remove it from the heat and immediately transfer the butter with the brown specks to a large bowl. Set aside.
  2. Preheat the oven to 350ºF (180ºC). Line an 8-inch square baking pan*** with parchment paper, leaving a couple of inches of overhang.
  3. Whisk together the flour, baking powder and salt in a medium-size bowl until well combined. Set aside.
  4. Add the brown sugar, granulated sugar and vanilla extract to the brown butter and stir until combined. Add the egg and egg yolk and stir vigorously for 1-2 minutes, until smooth and well combined. Stir in the flour mixture just until combined. Set aside a few of the larger chocolate pieces for the top. Gently fold the remaining chocolate pieces and the M & M's into the dough.
  5. Press the dough evenly into the baking pan and smooth the top with a spatula. Arrange the reserved chocolate pieces on the top. Bake until the top is set and light golden brown and a toothpick inserted into the center of the bars comes out with a few moist crumbs on it, about 20-25 minutes. Add the candy eyes and sprinkles while the bars are still warm. Let the bars cool in the pan.
Recipe Notes

*To find candy eyes, click here.

**To find green sprinkles, click here. Alternately, if you have rainbow sprinkles, you can take the  green ones out to use for your cookies bars if you don't want to purchase green sprinkles.

***To find the 8-inch baking pan I used, click here.

Maple Blueberry Buckle

Maple Blueberry Buckle

A “buckle” is a single layer cake made with fruit. It often has a crumb topping similar to a crumb cake or a coffee cake. My version of a buckle is made with blueberries and maple icing. Although blueberry desserts are typically made when blueberries are in season, this delicious cake can be made year around, because the recipe also works well with frozen blueberries. The maple flavor pairs beautifully with the blueberries and brown sugar in the cake and gives it a cozy autumn feeling.

Print Recipe
Maple Blueberry Buckle
Tender maple brown sugar cake topped with blueberries, crumb topping and maple icing
Servings
servings
Ingredients
Crumb Topping
Cake
Icing
Servings
servings
Ingredients
Crumb Topping
Cake
Icing
Instructions
Crumb Topping
  1. In a medium-size bowl, mix the flour, brown sugar, cinnamon and salt. Work in the butter with your fingertips until the mixture looks sandy with no large pieces of butter remaining. Press the mixture together to make chunks. Set aside in the refrigerator until ready to use.
Cake
  1. Preheat the oven to 350ºF (180ºC). Line a 9-inch square cake pan* with parchment paper, leaving a couple of inches of overhang.
  2. In a medium-size bowl, whisk together the flour, baking powder, salt, cinnamon and nutmeg until well blended.
  3. In a large bowl, cream the butter, brown sugar and granulated sugar, with an electric mixer on medium speed, until light and fluffy. Beat the eggs into the butter mixture in two separate additions, making sure each one is incorporated before adding the next. Beat in the extracts until combined.
  4. In a small bowl, whisk the milk and sour cream together. On low speed, beat the flour mixture into the batter in three additions, alternating with the milk mixture. Mix just until combined.
  5. Transfer the batter to the prepared pan. Smooth the top with a spatula. Set aside 1/4 cup (38g) of blueberries. Top the cake batter evenly with the remaining blueberries, then the topping mixture. Top with the reserved blueberries. Bake until a toothpick inserted into the center of the cake comes out clean, about 25-30 minutes. Do not over bake. Cool the cake in the pan. Remove the cake from pan and transfer it to a serving platter.**
Icing
  1. In a small bowl, whisk together the powdered sugar, maple syrup, butter, maple extract, salt and 1 tablespoon (15 ml) of milk until well combined. Add additional milk as needed to reach the desired consistency. Whisk until smooth. Drizzle the icing over the cooled cake.
Recipe Notes

*To find the 9-inch square cake pan I used, click here.

**To remove the cake from the pan, tilt the cake pan and lift one end of the cake using the parchment paper as a handle. Gently slide the cake onto a serving platter or cutting board. You can also serve the cake directly out of the pan if you prefer.

Apple Cinnamon Mini Muffins

Apple Cinnamon Mini Muffins

These delicious little two-bite muffins are the apple version of my viral Pumpkin Cinnamon Mini Muffins. They have fresh apples in the batter which helps to make them soft and moist. They’re rolled in cinnamon sugar after baking, which gives them a subtle crunch on the outside. These delightful mini muffins have the flavor and texture of cake donuts. They’re perfect on their own, but I love to serve them with caramel sauce for dipping which takes them over the top.

Print Recipe
Apple Cinnamon Mini Muffins
Soft, tender apple mini muffins rolled in cinnamon sugar
Cuisine American
Keyword apple, cinnamon, muffins
Servings
muffins
Ingredients
Muffins
Cinnamon Sugar
Cuisine American
Keyword apple, cinnamon, muffins
Servings
muffins
Ingredients
Muffins
Cinnamon Sugar
Instructions
Muffins
  1. Preheat the oven to 350ºF (180ºC). Grease and flour a 24-serving mini muffin pan.* Do not use muffin liners. (The muffins need to form an outer crust. This prevents them from absorbing too much melted butter in the last step.)
  2. In a medium-size bowl, whisk together the flour, baking powder, salt, cinnamon, ginger and nutmeg.
  3. In a large bowl, whisk the granulated sugar, brown sugar, oil, egg and vanilla extract together until smooth and well combined. Stir in the puréed apples. Stir in the flour mixture just until combined. The batter will be thick.
  4. Transfer the batter to prepared pan, filling the muffin cups about 2/3 full. Bake until a toothpick inserted into the center of the muffins comes out clean, about 9-11 minutes. Do not over bake! Be diligent, since over baking can happen very quickly with mini muffins. Let the muffins cool in the pan for 5 minutes. Turn the muffins out and place on a cooling rack.
Cinnamon Sugar
  1. Whisk the cinnamon and granulated sugar together in a shallow bowl until well combined. Briefly dunk the warm muffins in the melted butter, then roll them in the cinnamon sugar.
Recipe Notes

*To find the mini muffin pan I used, click here.

**If your applesauce is very watery, drain the excess liquid before measuring.