Chocolate Chip Cookie Bread

Chocolate Chip Cookie Bread

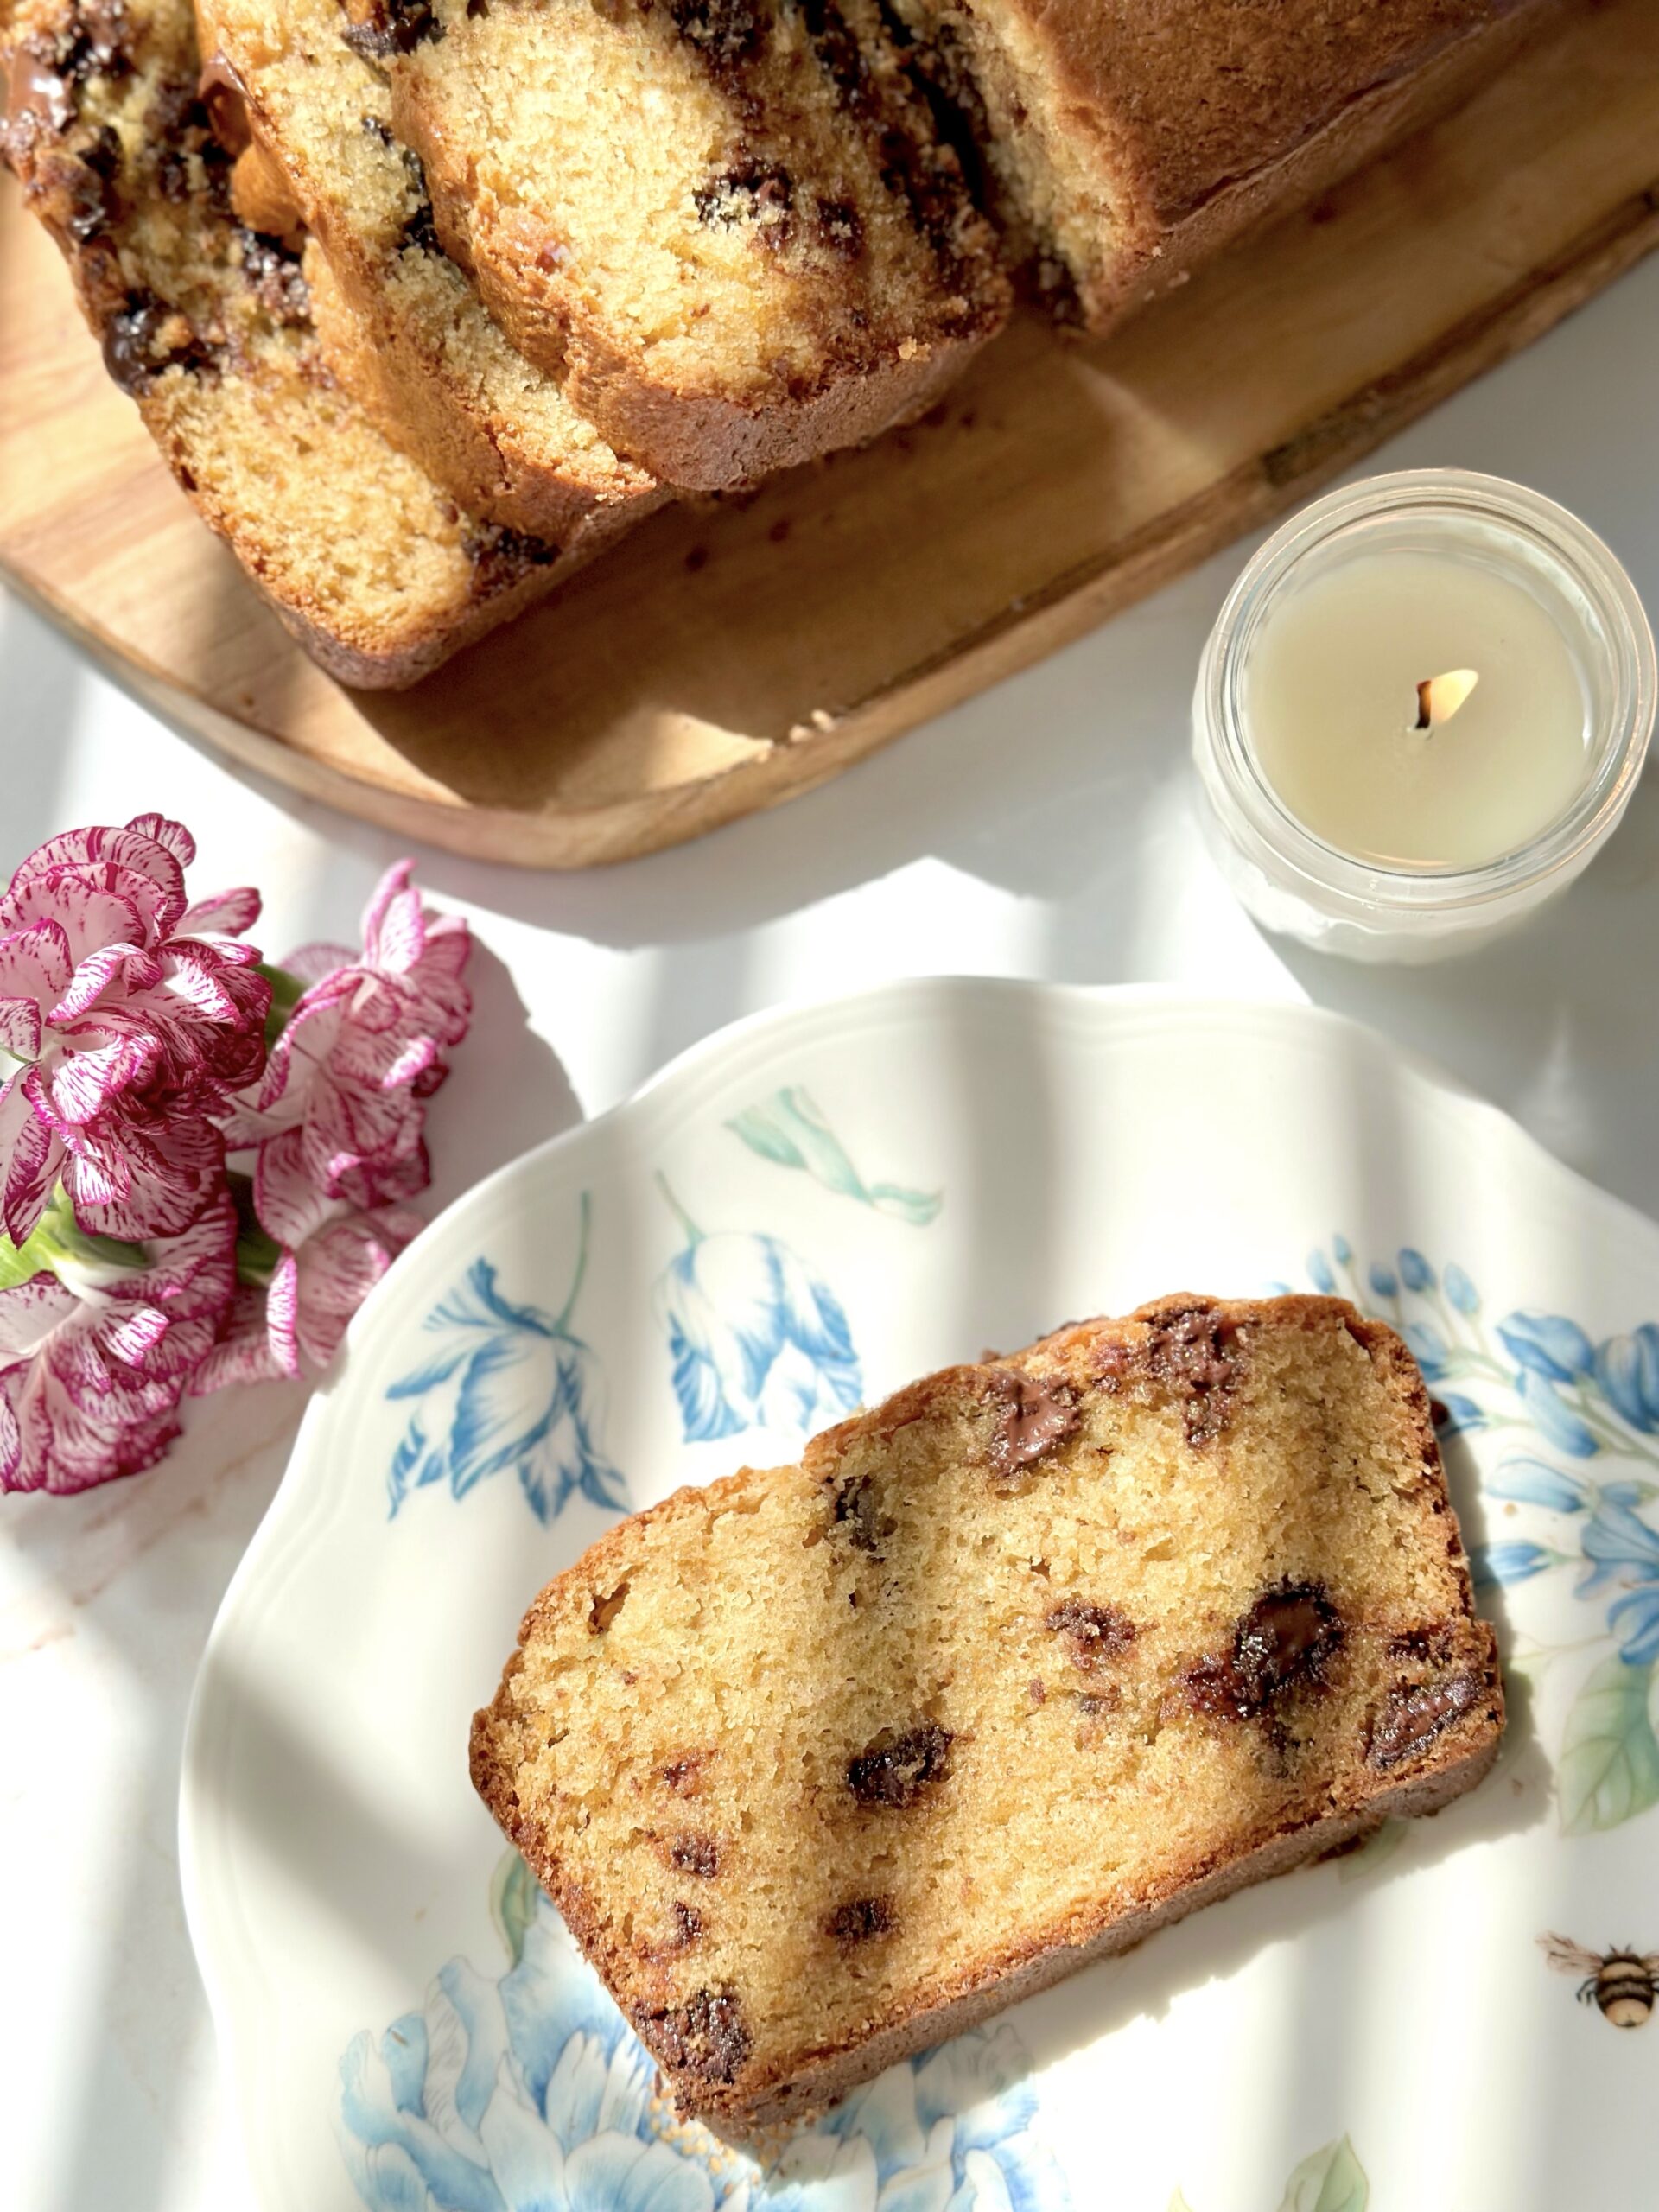
This is the ultimate chocolate chip bread! There are no cookies in this recipe, but it tastes so much like freshly baked chocolate chip cookies that Chocolate Chip Cookie Bread is the perfect name for it. Brown sugar, vanilla and jumbo chocolate chips really help to mimic that beloved chocolate chip cookie flavor. I love the big pockets of chocolate that come from using jumbo chocolate chips, but of course you can use regular or mini chocolate chips if you prefer.

I typically wait until a loaf is cooled off before slicing it, but in this case, I wanted to capture the melted pools of chocolate for the video. The fresh baked chocolate chip aroma was so heavenly, that it took all of my willpower not to immediately devour the entire loaf! It’s easier to slice a fresh baked loaf when it’s cooled off. But if you want to experience the melty chocolate chips, warm your slice in the microwave for 10 seconds.

To watch the TikTok video, click here.

Print Recipe
Chocolate Chip Cookie Bread
A moist, tender loaf cake with brown sugar and chocolate chips that tastes just like chocolate chip cookies
Servings
loaf
Ingredients
Servings
loaf
Ingredients
Instructions
  1. Preheat oven to 375ºF (190ºC). Line the bottom of a 9 x 5-inch loaf pan with parchment paper. Grease and flour the insides.
  2. In a medium bowl, whisk together the 1 3/4 cups flour, baking powder, baking soda and salt.
  3. In a large bowl, cream the butter and brown sugar until fluffy and well combined.
  4. Beat in the egg, egg yolk and vanilla in 3 separate additions, making sure each one is fully incorporated before adding the next.
  5. In a small bowl, whisk the milk and sour cream together.
  6. Add the flour mixture to the batter in two additions, alternating with half of the milk mixture after each addition. Beat just until combined. Do not over mix.
  7. Set aside a handful of chocolate chips for the top of the loaf. In a small bowl, toss the remaining chips with 1 teaspoon flour, making sure to coat them all, then fold them into the batter. This will help to prevent them from sinking.
  8. Transfer the batter to the prepared loaf pan. Top with the reserved chocolate chips.
  9. Bake for 10 minutes. Turn the oven temperature down to 325ºF (165ºC) and continue baking until the loaf is golden brown and a toothpick inserted in center comes out clean, about 45-50 more minutes.
  10. Cool the loaf in pan for 10 minutes then turn the loaf out onto a cooling rack.
Recipe Notes

*If you want to use mini chocolate chips, use one cup (6 oz or 170g)

Raspberry Truffle Brownies

Raspberry Truffle Brownies

Who else loves those heart shaped boxes of chocolates we see at Valentine’s Day? That adventurous first bite of chocolate, when you don’t know which flavor you’re getting, is so much fun! I adore the fruit ganache filled chocolate bon bons. If you love bon bons too, you’ll love these brownies. They’re rich, fudgy and topped with a silky raspberry ganache that makes you feel like you’re biting into a raspberry truffle. The ganache adds an elegant touch to these brownies, so dried rose buds, rose petals and crispy chocolate pearls were my toppings of choice.

This isn’t the first time I’ve created elegant brownies. I displayed beautifully decorated brownies at two previous cookie conventions and they were well received. Elevated brownies are unexpected, but they’re definitely appreciated!

To watch the Raspberry Truffle Brownie Instagram video, click here.

Print Recipe
Raspberry Truffle Brownies
Servings
Ingredients
Servings
Ingredients
Instructions
  1. Preheat oven to 325ºF (165ºC). Line an 8-inch square baking pan with parchment paper, leaving a couple of inches of overhang.
  2. In a medium bowl, sift together the flour, cocoa powder and salt.
  3. In a large heat safe bowl set over a pot of barely simmering water, melt the butter and chocolate together, stirring occasionally, until smooth.
  4. Beat the sugar into butter and chocolate mixture until well combined.
  5. Add the eggs, egg yolk and vanilla to the chocolate mixture and whisk until smooth.
  6. Fold in the flour mixture until combined.
  7. Transfer the batter to the prepared baking pan. Bake until a toothpick inserted in the center comes out with moist crumbs on it, about 25-30 minutes. Do not over bake. Let cool completely.
  8. Place the white chocolate in a medium bowl.
  9. In a small saucepan over medium-low heat, simmer raspberry purée until reduced by half. Combine heavy cream with the reduced purée in saucepan. Heat until bubbles start to form around the edges. Do not boil.
  10. Pour the hot cream mixture over the white chocolate, making sure its completely submerged, and let stand 5 minutes. Stir until smooth and well combined. Spread over the cooled brownies.
Recipe Notes

To find dried rosebuds, click here.

To find dried rose petals, click here.


Blueberry Earl Grey Tarts

Blueberry Earl Grey Tarts

These Blueberry Earl Grey Tarts have three individual components, which, when combined together, are absolutely delicious. I experimented with each separate component of this recipe until I perfected them individually. The tart crust is flaky and tender, yet sturdy enough to hold the filling. The filling is just sweet enough for my sweet tooth and the whipped cream has just enough Earl Grey flavor.

This recipe makes enough whipped cream to cover the entire tops of the tarts or you can be like me and try to be artistic and avant-garde with your whipped cream. To make the Earl Grey infused whipped cream, use your favorite Earl Grey tea, whether it’s loose leaf tea or a teabag. We don’t discriminate here. All forms of tea are welcome! I do have a favorite Earl Grey tea. If you want to check it out, click here. The tea will make your whipped cream a dull pale yellow. This issue is purely aesthetic. I added a tiny bit of violet gel food color which brightens the whipped cream. You can add more if you want a lavender shade.

Print Recipe
Blueberry Earl Grey Tarts
Course Dessert
Keyword blueberries, tarts
Servings
4-inch tarts
Ingredients
Tart Crust
Blueberry Filling
Earl Grey Whipped Cream
Course Dessert
Keyword blueberries, tarts
Servings
4-inch tarts
Ingredients
Tart Crust
Blueberry Filling
Earl Grey Whipped Cream
Instructions
Tart Crust
  1. In a large bowl, whisk together flour, powdered sugar and salt.
  2. Work in butter and egg yolk, with a pastry blender or with your fingers, until pea sized pieces are formed.
  3. Add ice water one tablespoon at a time until dough comes together.
  4. Form dough into a disk. Wrap in plastic wrap and chill in refrigerate for at least one hour or up to overnight.
  5. On a lightly floured surface, roll dough to scant 1/4-inch thickness.
  6. Cut dough into six 5-inch rounds. Press rounds into six 4-inch or 4 1/4-inch tart pans
  7. Dock the bottoms of tart crusts with a fork. Freeze for 30 minutes.
  8. Heat oven to 375ºF. Place tart pans on a large baking sheet.
  9. Line tart shells with 6-inch parchment rounds. Fill with pie weights. (You can use dried beans or rice if you don't have pie weights)
  10. Bake tart shells for 12 minutes. Remove parchment paper and pie weights. Continue baking until tart shells are light golden brown, about 4-6 more minutes.
Blueberry Filling
  1. Set aside 1 cup blueberries. Combine the remaining 3 cups blueberries, sugar, corn starch and lemon juice in a medium saucepan.
  2. Simmer over low heat, stirring occasionally, until blueberries are softened and sauce is thickened, about 5 minutes.
  3. Stir in the reserved 1 cup of blueberries during the last minute of cooking.
  4. Remove from heat and let cool completely.
Earl Grey Whipped Cream
  1. Combine heavy cream and tea leaves or tea bag in a small saucepan.
  2. Heat just until bubbles form around the edges.
  3. Transfer to a small bowl, cover with plastic wrap and let cool.
  4. Pass through a sieve to strain out tea leaves or remove tea bag.
  5. Cover surface with plastic wrap and place in refrigerator to chill.
  6. Transfer chilled cream to a large bowl. Whip with an electric mixer until thickened.
  7. Add powdered sugar and food color in separate additions and continue whipping at high speed just until stiff peaks form.

Vintage Chocolate Cake

Dark Chocolate Cake with the Best Chocolate Frosting

If you love chocolate cake, this is the post for you! Chocolate cake is one of the best comfort foods there is. I’ve tasted many over the years, but my all time favorite was one I had growing up. I’ve spent years trying to duplicate the moist, nostalgic cake from my childhood. I noticed that nearly every chocolate cake recipe on the internet is a variation of the century-old recipe from the Hershey’s Cocoa tin. I think many people have passed it down as a family recipe, each grandmother adding her own personal touch. Even some celebrity chefs have claimed it as their own. It’s an easy, delicious, moist recipe and its popularity is well deserved. You can tweak the flavor additions a bit to make it your own too. It’s a recipe that’s hard to mess up.

This cake is topped with the ultimate silky, smooth, deeply chocolate frosting. I developed this recipe mostly because I couldn’t find a chocolate frosting recipe that didn’t taste gritty and/or look speckled from the cocoa powder. Swiss meringue buttercream with melted chocolate added is one alternative. But, while it is smooth, silky and perfect for piping, it’s missing that deep chocolate richness. Another option is chocolate ganache. It looks rich and creamy in those viral videos, but it’s a little too rich and overpowering to use as frosting in my opinion.

I think this frosting is the one! It has the best of both worlds, velvety but not too rich. You’ll notice that this frosting contains maple syrup. The syrup gives it a very subtle maple flavor in the background, but mostly, it helps to make the frosting silky and gives it shine. You can adjust the sweetness level of the frosting by choosing the chocolate you prefer. I used bittersweet chocolate, which I think is just right. This recipe makes enough frosting to frost a 2-layer 6-inch cake. You can easily double the recipe for larger cakes.

Print Recipe
Vintage Chocolate Cake
Course Dessert
Keyword cake, chocolate
Servings
2 layer 6-inch cake
Ingredients
Chocolate Cake
Chocolate Buttercream Frosting
Course Dessert
Keyword cake, chocolate
Servings
2 layer 6-inch cake
Ingredients
Chocolate Cake
Chocolate Buttercream Frosting
Instructions
Chocolate Cake
  1. Preheat the oven to 350ºF (180ºC). Line the bottoms of two 6-inch cake pans with parchment paper. Grease the insides and dust with a mixture of equal parts flour and cocoa powder. Wrap the cake pans with damp cake strips if you have them.
  2. Sift the flour, cocoa powder, baking powder, baking soda and salt together in a medium bowl. Add the sugar and stir util well combined.
  3. Combine the the egg, egg yolk, buttermilk, vegetable oil and vanilla extract in a small bowl. Whisk lightly to combine.
  4. Add the egg mixture to the dry ingredients and mix on low speed with an electric mixer, until combined. Stop the mixer. Scrape the sides and the bottom of the bowl with a spatula. Turn the mixer up to medium speed and beat for 30 seconds.
  5. Add the hot coffee and stir until well combined.
  6. Pour the batter into the prepared cake pans, dividing batter evenly between the pans. Bake until a toothpick inserted into the center of the cakes comes out clean, about 25-28 minutes without cake strips or about 28-32 minutes with cake strips.
  7. Let the cakes cool in the pans for 10 minutes then remove the cakes from the pans and transfer to a cooling rack.
  8. Trim the cake layers to your desired thickness, from 1-inch to 1 1/2-inches thick. Fill and frost with chocolate buttercream frosting.
Chocolate Buttercream Frosting
  1. In a small saucepan over low heat, whisk together the maple syrup, water, cocoa powder and espresso powder until smooth. Set aside to cool to room temperature.
  2. Melt the chocolate in a medium bowl set over a pan of gently simmering water, making sure the water doesn't touch the bottom of the bowl. Remove from heat and set aside to cool to lukewarm.
  3. In a large bowl, beat the butter with an electric mixer at medium speed, until smooth and light in color. Add the powdered sugar and salt and continue beating until smooth and well combined.
  4. Gradually add the the cooled maple syrup mixture and beat on low speed until combined.
  5. Stir in the melted chocolate until well combined. Smooth out any air bubbles by stirring gently with a rubber spatula.
Recipe Notes

*For smoothest results, use chopped bar chocolate and make sure chocolate is completely melted.  Do not use chocolate chips. Chocolate chips do not melt completely and can make your frosting lumpy.


Apple Spice Cookies with Brown Butter Icing

Apple Spice Cookies with Brown Butter Icing

These Apple Spice Cookies were one of my most popular cookies last fall so I decided to bring them back a little early this year. The combination of cinnamon, nutmeg and vanilla in this cookie dough will remind you of cinnamon rolls and apple pie and inspire you look forward to fall.

The apples in this recipe are cooked briefly on the stovetop to bring out the flavor and create the perfect texture. Dropping raw apple chunks into cookie dough or cake batter is usually not a good idea. If you’ve ever baked an apple pie, you know that apples release liquid as they cook and that liquid will end up in your baked cookies, creating soggy spots. So definitely don’t skip this step!

These gorgeous, golden brown cookies are perfectly delicious on their own, but extra credit goes to the Brown Butter Icing for taking them over the top!

apple spice cookies with brown butter icing

Make sure to head over to Instagram to watch the video of these Apple Spice Cookies being created: Click here

Print Recipe
Apple Spice Cookies with Brown Butter Icing
Spice cookies with fresh apples and brown butter icing
Course Dessert
Servings
cookies
Ingredients
Cooked Apples
Brown Butter Icing
Course Dessert
Servings
cookies
Ingredients
Cooked Apples
Brown Butter Icing
Instructions
Cooked Apples
  1. Melt the butter in a small skillet over medium heat. Add apples, sugar and cinnamon to the skillet.
  2. Cook, stirring occasionally, until the apples are tender, about 4-5 minutes.
  3. Remove from heat and let cool completely. Drain any excess liquid from the cooled apples.
Apple Spice Cookies
  1. Preheat the oven to 375ºF (190ºC). Line two large baking sheets with parchment paper.
  2. In a medium bowl, whisk together the flour, baking soda, salt, cinnamon and nutmeg. Set aside.
  3. In a large bowl, beat the butter and brown sugar with an electric mixer at medium speed until light and fluffy.
  4. Beat in the egg, egg yolk and vanilla extract, one at a time, until well combined
  5. Stir in the flour mixture, just until combined.
  6. Fold the the cooled apples into the cookie dough.
  7. Divide the dough into 12 equal golf ball size portions and place them 3 inches apart on the prepared baking sheets.
  8. Bake until golden brown, about 11-13 minutes. Let cool 1 minute on the baking sheet, then transfer to a cooling rack to cool completely.
Brown Butter Icing
  1. In a small saucepan, cook the butter over medium heat until golden brown and fragrant. When brown specks start to form in the bottom of the pan, remove from heat.
  2. Immediately transfer the browned butter to a small bowl. Whisk in the the powdered sugar, vanilla extract, salt and 1 tablespoon milk. Add more milk as needed to reach desired consistency.
  3. Drizzle the icing over the cooled cookies.
Recipe Notes

NOTE:  If your cookies spread too much when baking, refrigerate dough for 30 minutes, then bake as directed.

Raspberry Lemonade Brownies

Raspberry Lemonade Brownies by Brownie Mischief

This is my new and improved Raspberry Lemonade Brownie recipe. The previous recipe was inspired by some lemon brownies I saw on Pinterest. I transformed them into Raspberry Lemonade Brownies and they were very good. But I knew I could improve them. I started over and after some experimentation, I came up with an even better version. I love the sweet-tart burst of flavor and color from the fresh raspberries. The icing contains no food coloring. Just three raspberries will give you that luscious shade of pink!

I want to clarify that lemon brownies are not lemon bars. We all know what a lemon bar is. The one we all know and love has a lemon curd filling on a shortbread crust, possibly drizzled with lemon icing or sprinkled with powdered sugar. The lemon brownie is a whole different animal. Don’t mistake lemon brownies for lemon cake either. Lemon brownies contain white chocolate which gives them a rich, fudgy texture like their chocolate cousins. We may be tempted to call them blondies, but blondies have a butterscotch flavor and typically don’t contain chocolate. Now that we got that straightened out, we can sleep peacefully tonight.

Print Recipe
Raspberry Lemonade Brownies
Course Dessert
Servings
bars
Ingredients
Raspberry Lemonade Bownies
Raspberry Lemonade Icing
Course Dessert
Servings
bars
Ingredients
Raspberry Lemonade Bownies
Raspberry Lemonade Icing
Instructions
Raspberry Lemonade Bownies
  1. Preheat the oven to 325ºF (165ºC). Line an 8-inch square baking pan* with parchment paper.
  2. In a medium microwaveable bowl, heat the white chocolate and butter in the microwave for 20 second intervals until melted. Alternately, melt the white chocolate and butter on the stove in a large heat safe bowl set over a pan of barely simmering water. Stir gently until smooth.
  3. In a large bowl, whisk together the sugar, eggs, egg yolk, lemon juice, zest and salt until smooth and well combined. Stir in the melted white chocolate mixture with a rubber spatula. Add the flour and stir just until combined.
  4. Gently fold in the raspberries.
  5. Transfer the batter to the prepared baking pan. Bake until the top is set, the edges are light golden brown and a toothpick inserted into the center comes out with a few moist crumbs on it, about 23-28 minutes.
  6. Let cool completely. Top with Raspberry Lemonade Icing.
Raspberry Lemonade Icing
  1. In a small bowl, smash the raspberries with a fork.
  2. Add the powdered sugar, melted butter and 1 tablespoon of lemon juice. Whisk until smooth, adding more lemon juice as needed.
  3. Spread the icing over cooled brownies.
  4. Cut into 2-inch squares and serve with additional raspberries, if desired.
Recipe Notes

*To find the 8 x 8 inch pan I used, click here.


Mini Hummingbird Cake

Mini Hummingbird Cake

If you haven’t noticed already, I love little cakes. Mini cakes are not only cute and charming, they’re likely to make you very popular. This recipe makes two darling Mini Hummingbird Cakes, one to keep and one to share. Hummingbird Cake is a delightful way to use your ripe bananas. The version I’m sharing here also contains pineapple, pecans and coconut. This fruity, nutty combination reminds me of spring and would be perfect for Easter or a spring picnic.

Print Recipe
Mini Hummingbird Cake
Hummingbird Cakes filled with bananas, pineapple, pecans and coconut, topped with cream cheese frosting and decorated with graham cracker crumb moss and fresh chamomile flowers.
Course Dessert
Keyword cake, hummingbird
Servings
4-inch 2-layer cakes
Ingredients
Hummingbird Cakes
Cream Cheese Frosting
Optional Decor
Course Dessert
Keyword cake, hummingbird
Servings
4-inch 2-layer cakes
Ingredients
Hummingbird Cakes
Cream Cheese Frosting
Optional Decor
Instructions
Hummingbird Cakes
  1. Preheat oven to 350ºF. Line the bottoms of four 4-inch cake pans**** with parchment paper. Grease and flour the insides.
  2. In a medium bowl, whisk together flour, baking soda, salt and cinnamon. Set aside.
  3. In a large bowl, beat butter, sugar and brown sugar, with an electric mixer, until light and fluffy.
  4. Beat in egg, egg yolk, and vanilla in three separate additions, making sure each one is incorporated before adding the next.
  5. Stir in bananas, pineapple, pecans and coconut until well combined
  6. Transfer batter to prepared cake pans, about 1 cup of batter in each pan. Place filled cake pans on a baking sheet.
  7. Bake until toothpick inserted in centers comes out clean, about 25-28 minutes. Cool cakes in pans 10 minutes then turn cakes out onto a cooling rack to cool.
  8. Trim cakes to 1-inch thickness. Fill, stack and frost cakes with cream cheese frosting.
Cream Cheese Frosting
  1. In a large bowl, beat butter with an electric mixer until smooth and pale.
  2. Beat 1 tablespoon heavy cream, vanilla and salt into butter until well combined.
  3. On low speed, beat in powdered sugar a half cup at a time, until well combined.
  4. In a medium bowl, mix cream cheese with remaining 1 tablespoon heavy cream until smooth.
  5. On low speed, beat cream cheese mixture into butter mixture until smooth and well combined.
Decor
  1. To make graham cracker crumb moss: In two small bowls, dilute 1/8 teaspoon of each gel food color with a few drops of vodka. (Vodka will dissipate as crumbs dry.) Place graham cracker crumbs in a plastic zip bag. Add diluted food colors a little at a time and seal bag. Shake bag and gently massage to distribute color. Add more diluted food color as needed until desired shade of green is reached. Spread crumbs out onto a parchment lined baking sheet to dry. Apply crumbs to bottom edges of frosted cakes.
Recipe Notes

*Chop the coconut flakes to achieve a finer texture. This step is optional.

**To find the avocado green food color gel I used, click here.

***To find the lemon yellow food color gel I used, click here.

****To find the 4-inch cake pans I used, click here.

Strawberries & Cream Tarts

Strawberries & Cream Tarts

May is when I get to pull out all of my summery recipes. These pretty little Strawberries & Cream Tarts remind me of a summer day. The kind of day when you’re outside enjoying the sunshine and you’re craving a cool, refreshing dessert. This strawberry cream filling alone is so delicious that I could just eat the entire bowl with a spoon. But since I’m extra, I had to create an aesthetic dessert with it.

I used my favorite tart shells for this recipe, but this would also be delicious with those little pre-made graham cracker pie crusts if you want to take a shortcut. The reason I love this tart crust recipe so much though, is that it actually tastes delicious. Once, a few years ago, I purchased a beautiful, small fruit tart from a famous bakery. The fruit was vibrant and glistening and the pastry cream filling was sweet and silky. Now we need the sound of a mic drop, because the tart crust was hard and flavorless, like cardboard! Ever since then, I knew I would settle for nothing less than a delicious tart crust.

Print Recipe
Strawberries & Cream Tarts
Course Dessert
Keyword strawberry, tarts
Servings
4-inch tarts
Ingredients
Tart Crust
Strawberry Cream Filling
Course Dessert
Keyword strawberry, tarts
Servings
4-inch tarts
Ingredients
Tart Crust
Strawberry Cream Filling
Instructions
Tart Crust
  1. In a bowl, whisk together flour, powdered sugar and salt. Set aside.
  2. Work in butter and egg yolk with a pastry blender or with your fingers, until pea size pieces are formed.
  3. Add ice water, one tablespoon at a time, until dough comes together.
  4. Form dough into a disc. Wrap in plastic and refrigerate for one hour.
  5. On a lightly floured surface, roll dough to a scant 1/4-inch thickness
  6. Cut dough into six 5-inch rounds. Press rounds into six 4-inch or 4 1/4-inch tart pans.*
  7. Dock the bottoms of pie crusts with a fork. Freeze for 30 minutes.
  8. Heat oven to 375ºF. Place tart pans on a large baking sheet.
  9. Line tart shells with six 6-inch parchment rounds. Fill with pie weights. (You can use dried beans or rice if you don't have pie weights.)
  10. Bake tart shells for 12 minutes. Remove parchment paper and pie weights. Continue baking until tart shells are light golden brown, about 4-6 more minutes.
  11. Transfer to cooling rack to cool completely.
Strawberry Cream Filling
  1. Pass the strawberry purée through a mesh sieve to remove large seeds.
  2. In a medium saucepan, simmer the strawberry purée until it's reduced by half. Stir in the sugar and continue cooking over medium heat, until the sugar is dissolved. Transfer to a medium bowl.
  3. Meanwhile, place 3 tablespoons of water into a small bowl. Sprinkle gelatin powder over the top of water. Let sit until water is absorbed, about 5 minutes.
  4. Pour the gelatin mixture into the warm strawberry reduction mixture and stir until fully incorporated.
  5. In a large bowl, beat cream cheese on low speed with an electric mixer until smooth.
  6. Add extracts and beat until combined.
  7. Add the strawberry reduction mixture to the cream cheese a little at time. Beat until well combined.
  8. In a medium bowl, beat heavy whipping cream with an electric mixer at high speed until stiff peaks form.
  9. Fold whipped cream into strawberry mixture.
  10. Spoon into cooled tart shells. Smooth tops with a small offset spatula. Refrigerate for two hours. Garnish with sliced, fresh strawberries.
Recipe Notes

*To find the tart pans I used, click here.