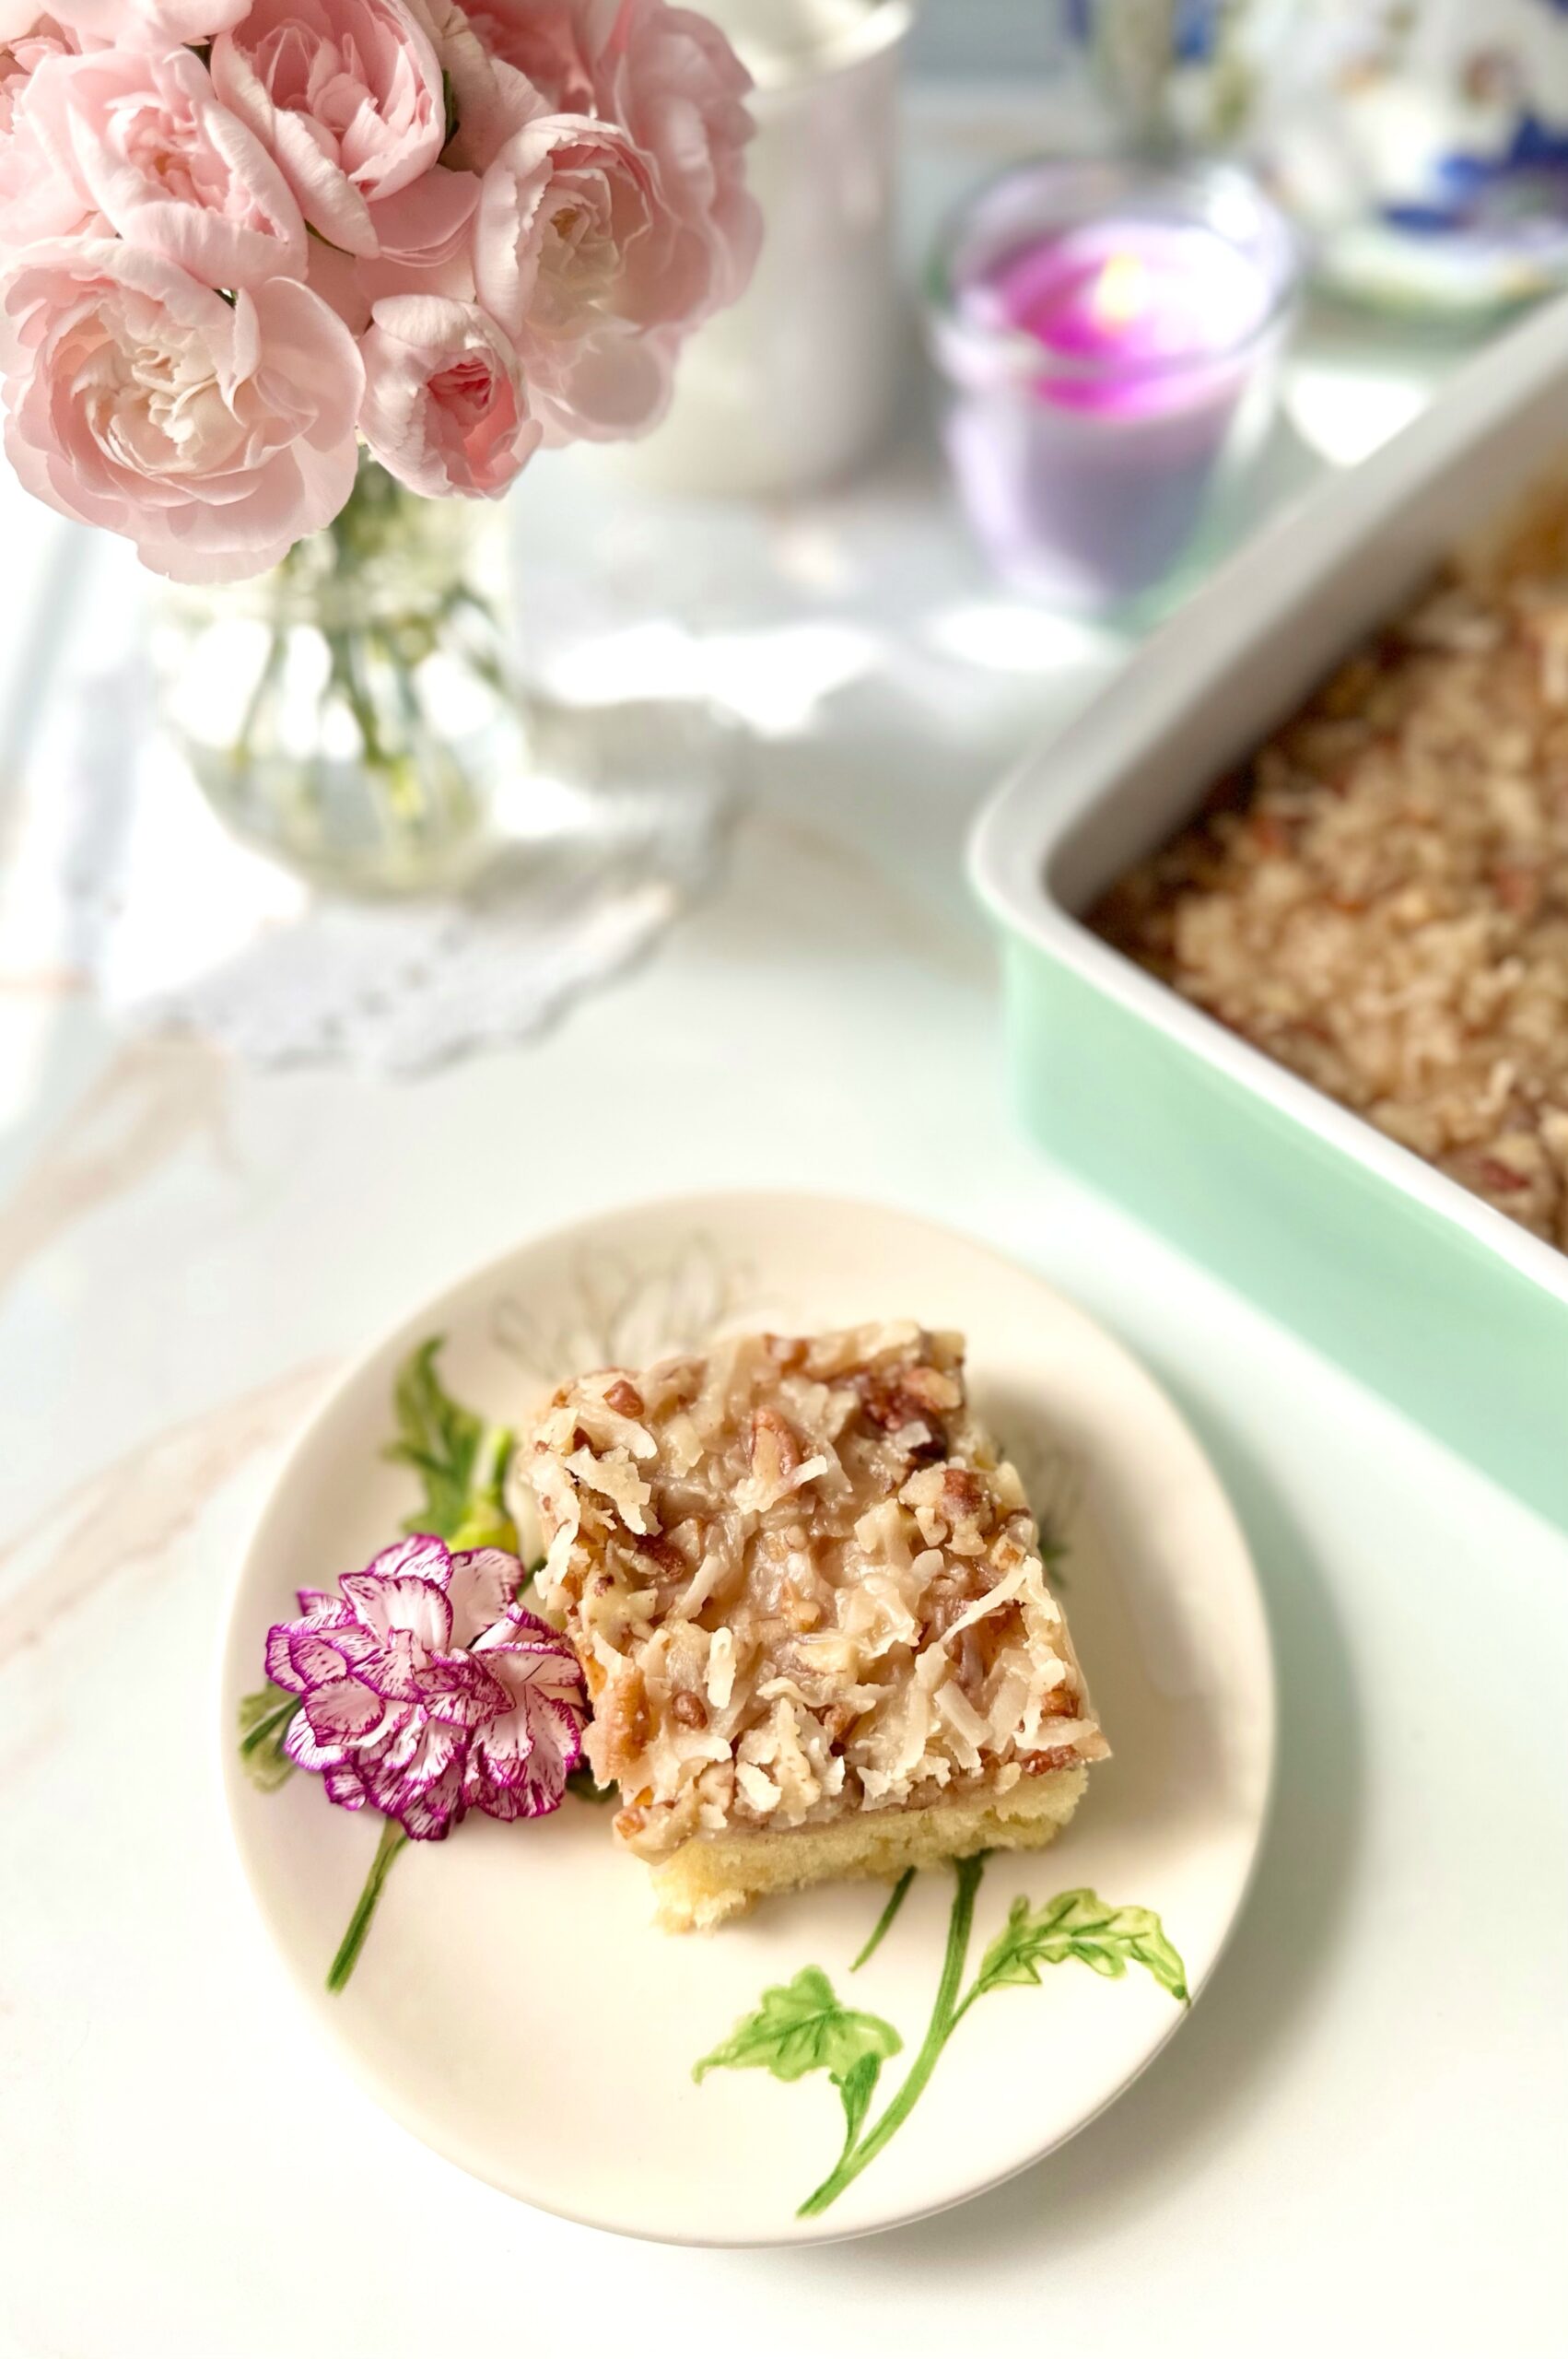
If you like tropical flavors, you’ll love this spring dessert from my childhood. We used to call it Pineapple Coconut Snack Cake, but I would consider it more of a cake bar, so I changed the name to Pineapple Coconut Cake Bars. We would typically enjoy it on Easter or Mother’s Day because it was my mom’s favorite. It’s buttery, moist and rich. It’s also kind of addicting, because everyone always asks for seconds. You can double the recipe if you need to.
Pineapple Coconut Cake Bars
by Mari Vasseur
Soft, ultra-moist pineapple cake topped with a buttery toasted coconut topping
1 cup plus 2 tablespoons (142g )all purpose flour, sifted
1 ½ teaspoons baking powder
¼teaspoonfine sea salt
¼cup (57g)unsalted butter, melted
1cup (200g)sugar
1largeegg
1 largeegg yolk
18 oz (227g) cancrushed pineapple in juice, undrained
½teaspoonpure vanilla extract
Topping
¼cup (57g)unsalted butter
¼cup (50g)granulated sugar
¼cup (50g)packed brown sugar
⅛teaspoonfine sea salt
⅓cup (78ml)heavy cream
1cup (75g)sweetened coconut flakes
½cup (50g)chopped toasted pecans
½teaspoonpure vanilla extract
Instructions
Cake
Preheat the oven to 350ºF (180ºC). Grease an 8-inch square baking pan.
In a medium-sized bowl, whisk together the flour, baking powder and salt until well blended.
In a large bowl, whisk the melted butter, sugar, egg, egg yolk and vanilla until smooth & creamy. tir in the pineapple until incorporated. Stir in the flour mixture just until combined.
Transfer the batter to the prepared baking pan. Bake until the top is golden brown and a toothpick inserted into center of cake comes out clean, about 20-25 minutes.
Topping
In a medium-sized saucepan over medium heat, melt the butter with the granulated sugar, brown sugar and salt. Whisk in the heavy cream.
When the mixture starts to bubble, turn the heat down to low and simmer until thickened, about 3 minutes.
Remove from heat and stir in the coconut, pecans and vanilla. Spread over the warm cake. Let cool at least 15 minutes before cutting the cake.
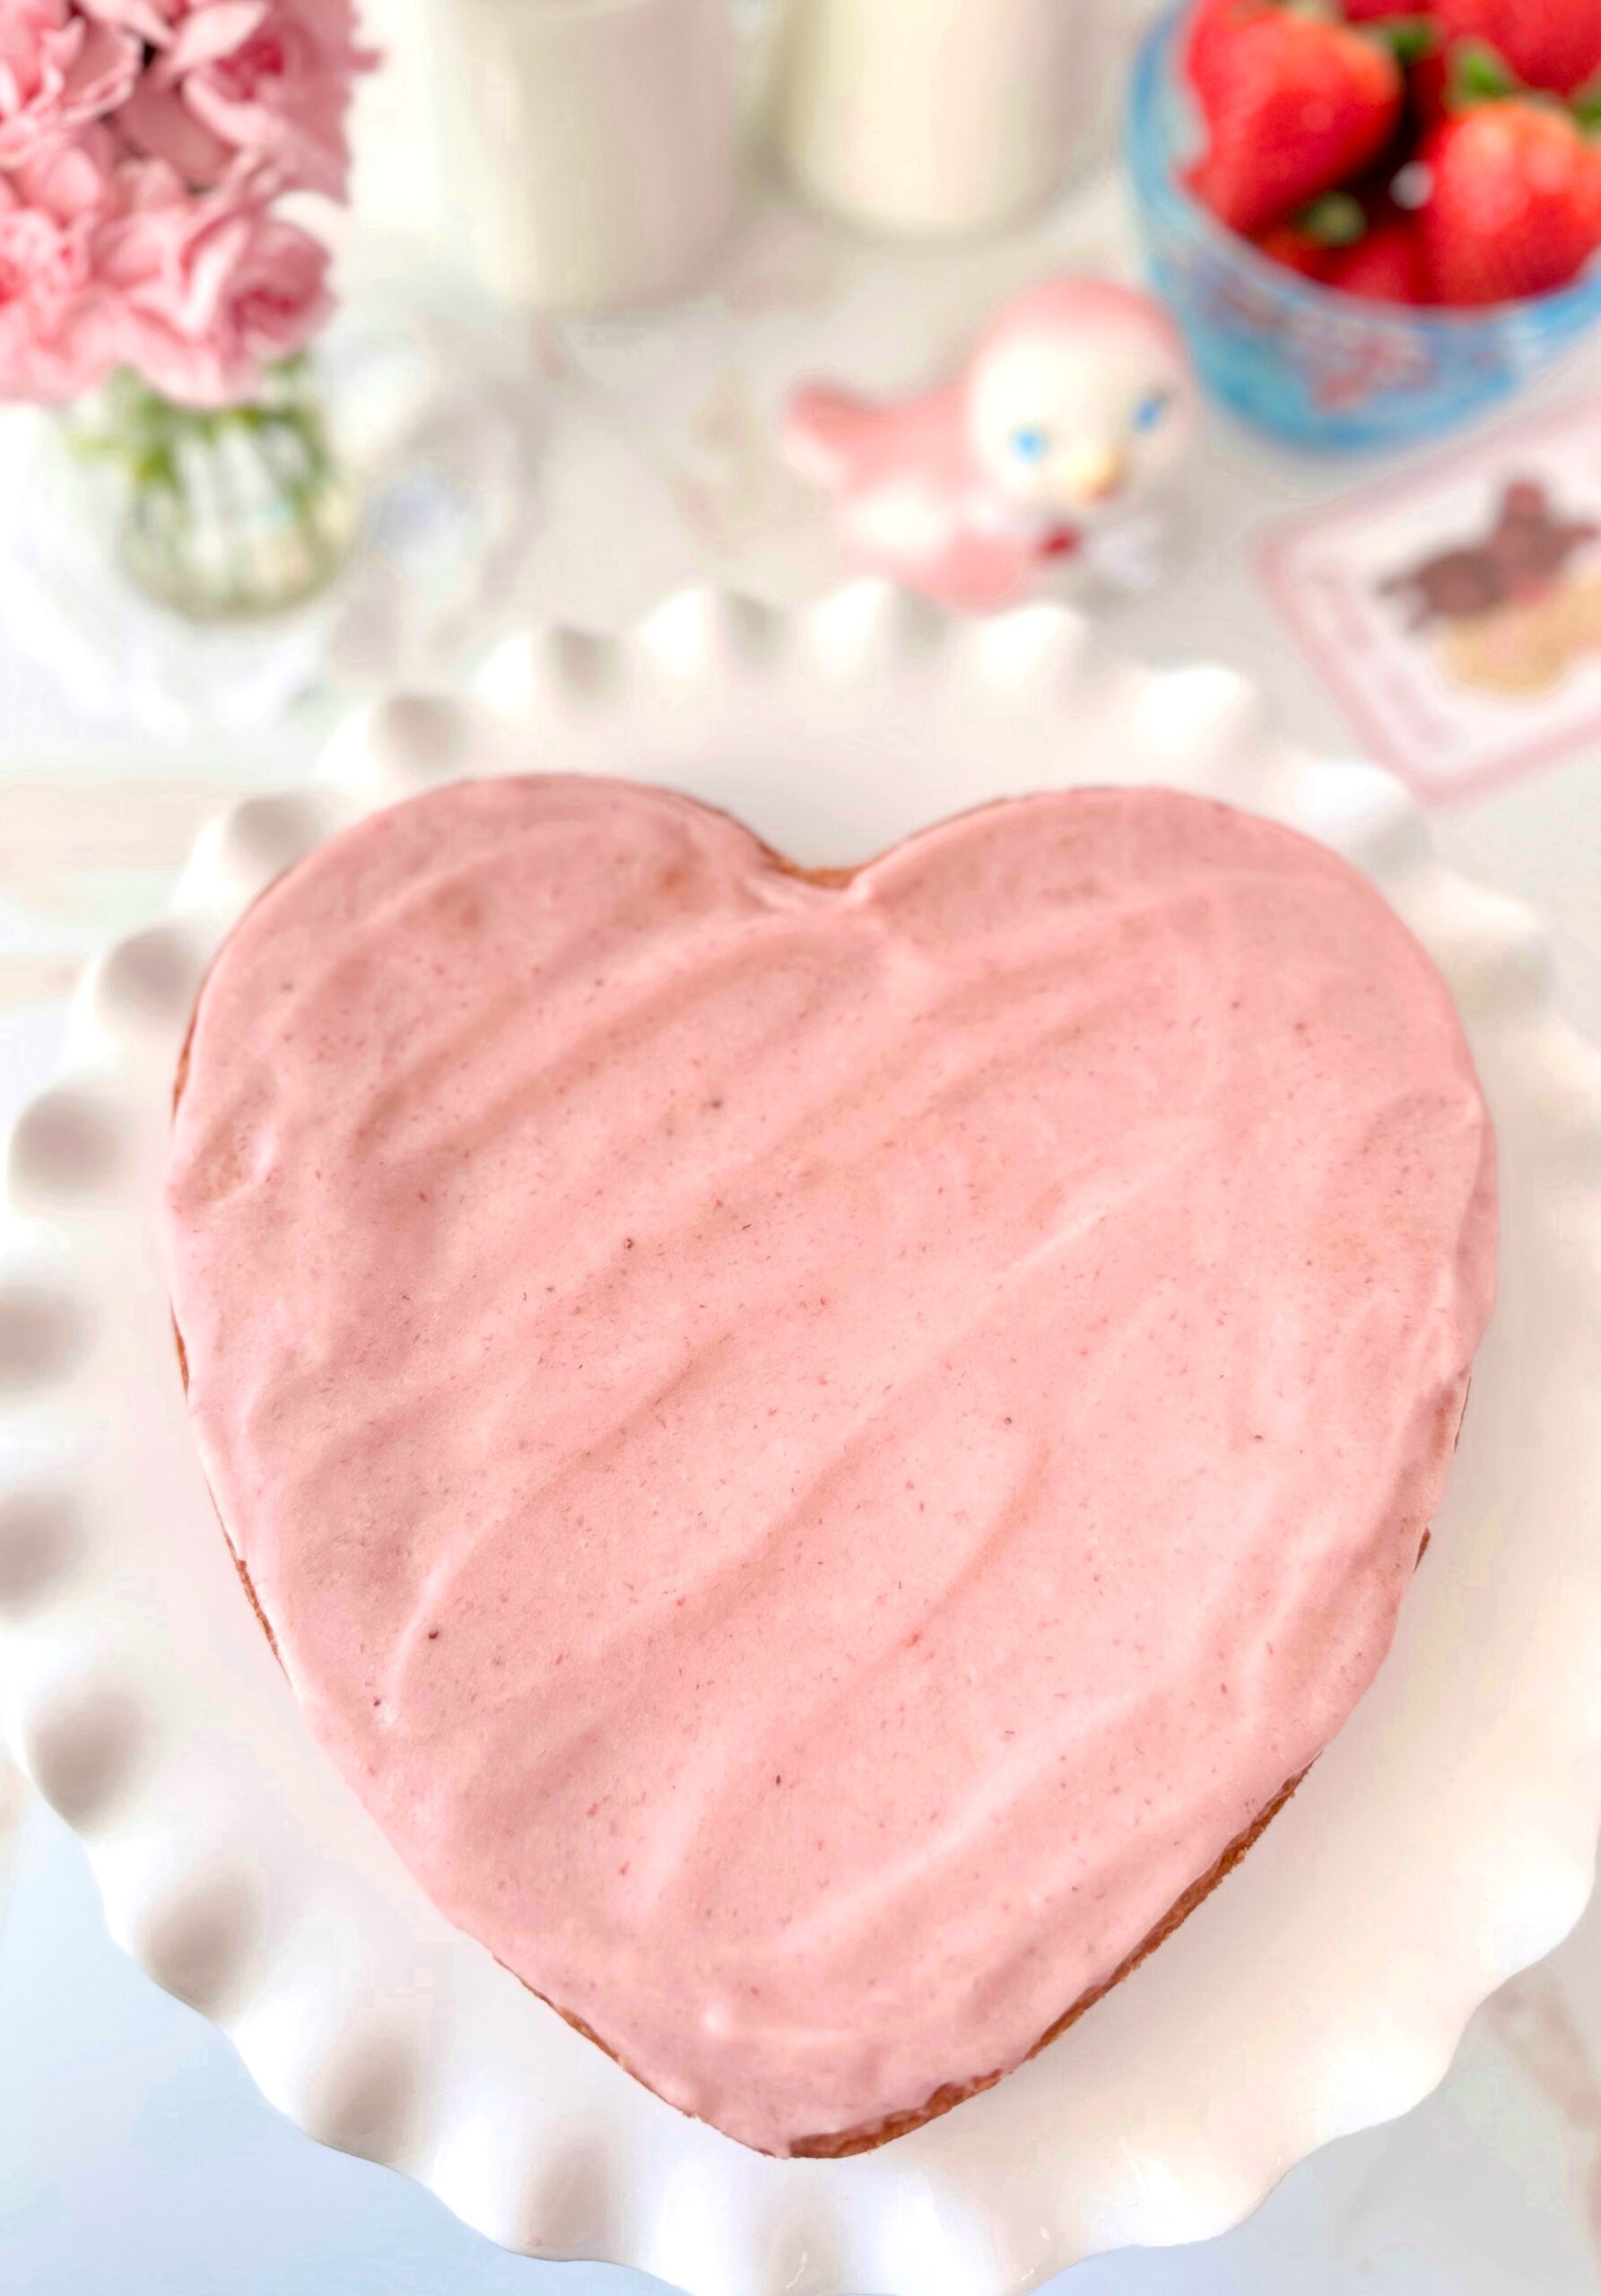
A cute little, stress-free, perfectly pink heart cake is my gift to you for Valentine’s Day. The vanilla cake is soft and fluffy. The frosting is super easy and delicious, with only two ingredients. It all comes together with fresh strawberries and it’s so good, you won’t want to share.
Little Strawberry Heart Cake
A six inch heart shaped vanilla cake with fresh strawberries and two-ingredient frosting
1tablespoonvegetable oil or neutral oil of your choice
1largeegg
½teaspoon pure vanilla extract
⅓cup whole milk, room temperature
3tablespoonssour cream, room temperature
8ouncescream cheese, softened
17.5 ounce jarMarshmallow Fluff
tiny droppink gel food colorI used Americolor deep pink*
Optional Decor
strawberries
meringue powder** or pasteurized egg whites
sugar
Instructions
In a small bowl, combine strawberries and 2 teaspoons sugar. Set aside to macerate for about 30 minutes.
Preheat oven to 350ºF. Line the bottom of a 6-inch heart shaped cake pan*** with parchment paper. Grease and flour the sides.
In a medium bowl, whisk together flour, baking powder and salt.
In a large bowl, cream butter, sugar and oil with an electric mixer, until light and fluffy.
Beat in egg and vanilla in two separate additions until well combined.
In a small bowl, whisk together milk and sour cream.
Beat flour mixture into batter in two additions, alternating with milk mixture.
Transfer batter to prepared cake pan. Bake until toothpick inserted in the center comes out clean, about 25-30 minutes. Let cake cool in pan 10 minutes then turn out onto a cooling rack to cool.
In a large bowl, stir cream cheese with a spatula to smooth out lumps.
Add marshmallow fluff and beat until well combined. Add food gel color with a toothpick and beat until evenly distributed.
Split cake into two layers. Top the bottom layer with frosting. Drain strawberries and spoon onto cake. Top with second layer, then more frosting.
Optional Decor
To make sugared strawberries, mix 1 part meringue powder with 3 parts water. Dip strawberries in meringue mixture, cover with sugar, then let dry. Alternately you can dip the strawberries in pasteurized egg whites, cover with sugar, then let dry.
Notes
*To find the gel food color I used, click here.**To find meringue powder, click here.***To find the heart cake pan I used, click here.
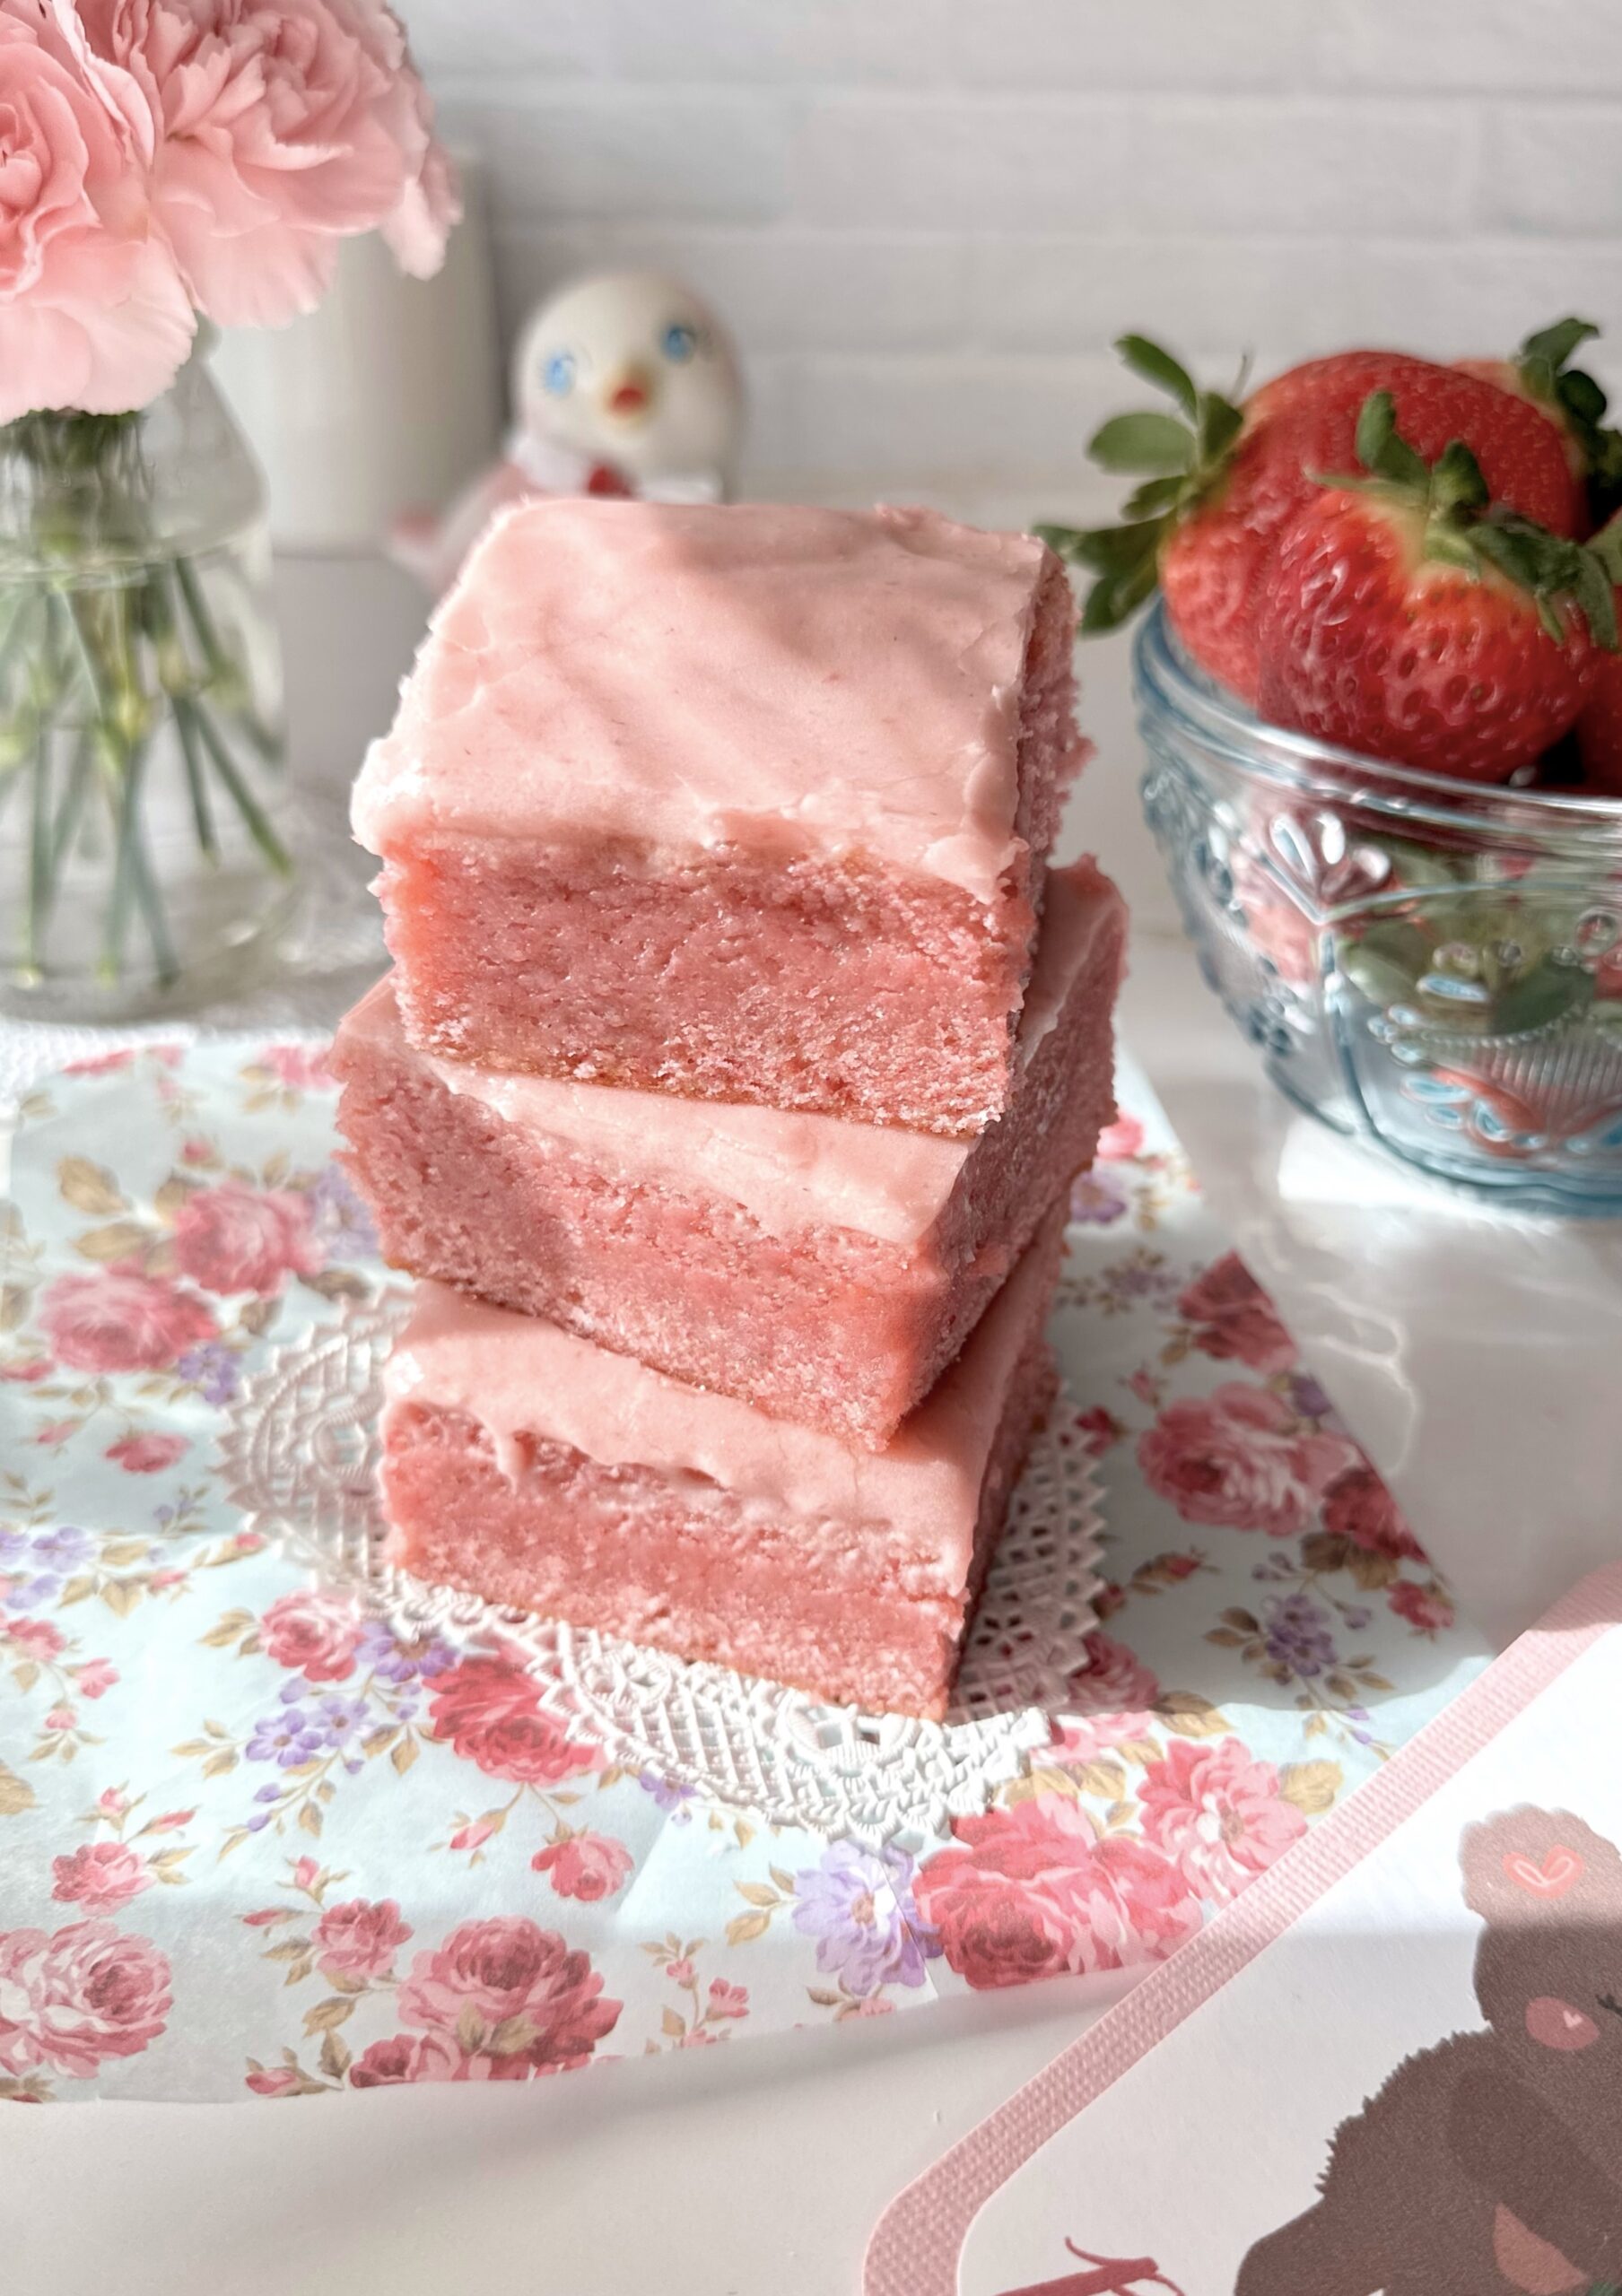
At the Brownie Mischief website, all types of brownies are welcome. We all know and love chocolate brownies. But there are other less common brownies in the universe, that deserve to shine too. Let me introduce you to Strawberry Sweetheart Brownies. These lovely pink creations aren’t strawberry cake or strawberry blondies. They contain white chocolate and they’re made with the same baking method as brownies. When you bake chocolate brownies, you want to be careful not to over bake them, to achieve the rich, fudgy texture. The same is true for these strawberry brownies. When you test for doneness, the toothpick should have a few moist crumbs attached to it. If the toothpick is clean, the brownies have baked too long and will likely be a little dry and cakey, although still edible. So make sure to test for doneness well before the end of the baking time!
The baking temperature for this recipe is 325ºF. I noticed that when baking in a heart shaped cake pan, things tend to bake unevenly because of the shape. So I used a lower temperature to help with even baking. If you don’t have an 8-inch heart shaped cake pan, you can also use an 8-inch round cake pan. To find the cake pan I used, click here.
To watch the Strawberry Sweetheart Brownies Instagram video, click here.
Strawberry Sweetheart Brownies
A heart shaped strawberry brownie made with fresh strawberries topped with strawberry icing.
1petite pea size drop pink gel food color (optional)I used Americolor Deep Pink**
1 ½ cups (6 3/4 ounces)all purpose flour, sifted
Strawberry Icing
¾cup (3 ounces)powdered sugar, sifted
1tablespoonunsalted butter, melted
2tablespoonsreserved strawberry purée
¼teaspoon pure vanilla extract
¼teaspoonpure strawberry extract
dashfine sea salt
Instructions
Strawberry Brownies
Preheat oven to 325ºF. Line the bottom of an 8-inch heart shaped cake pan*** with parchment paper. Spray the insides with nonstick spray.
In a large heat safe bowl, melt butter and white chocolate together on the stovetop over a pan of barely simmering water or in the microwave for 20 seconds at time, stirring at each interval. White chocolate overheats easily, so be vigilant.
Add the sugar and salt to the butter mixture and mix until well combined.
Add egg and egg yolks. Whisk until smooth.
Pass strawberry purée through a sieve to remove seeds. Set aside 2 tablespoons of strawberry purée for icing. Add remaining purée to batter. Mix until well combined.
Add extracts and food color. Mix until combined.
Stir in flour until combined, scraping bowl as needed.
Transfer batter to prepared pan. Bake until toothpick inserted in center has a few moist crumbs on it, (not batter), about 25-30 minutes. Do not over bake. Let cool in pan. Remove from pan and top with strawberry icing.
Strawberry Icing
Whisk all icing ingredients together until smooth and well combined.
Notes
*To make strawberry purée: Purée clean, hulled and quartered strawberries in a blender or food processor. **To find the food color I used, click here. **To find the heart cake pan I used, click here.This recipe was updated on January 24th, 2023
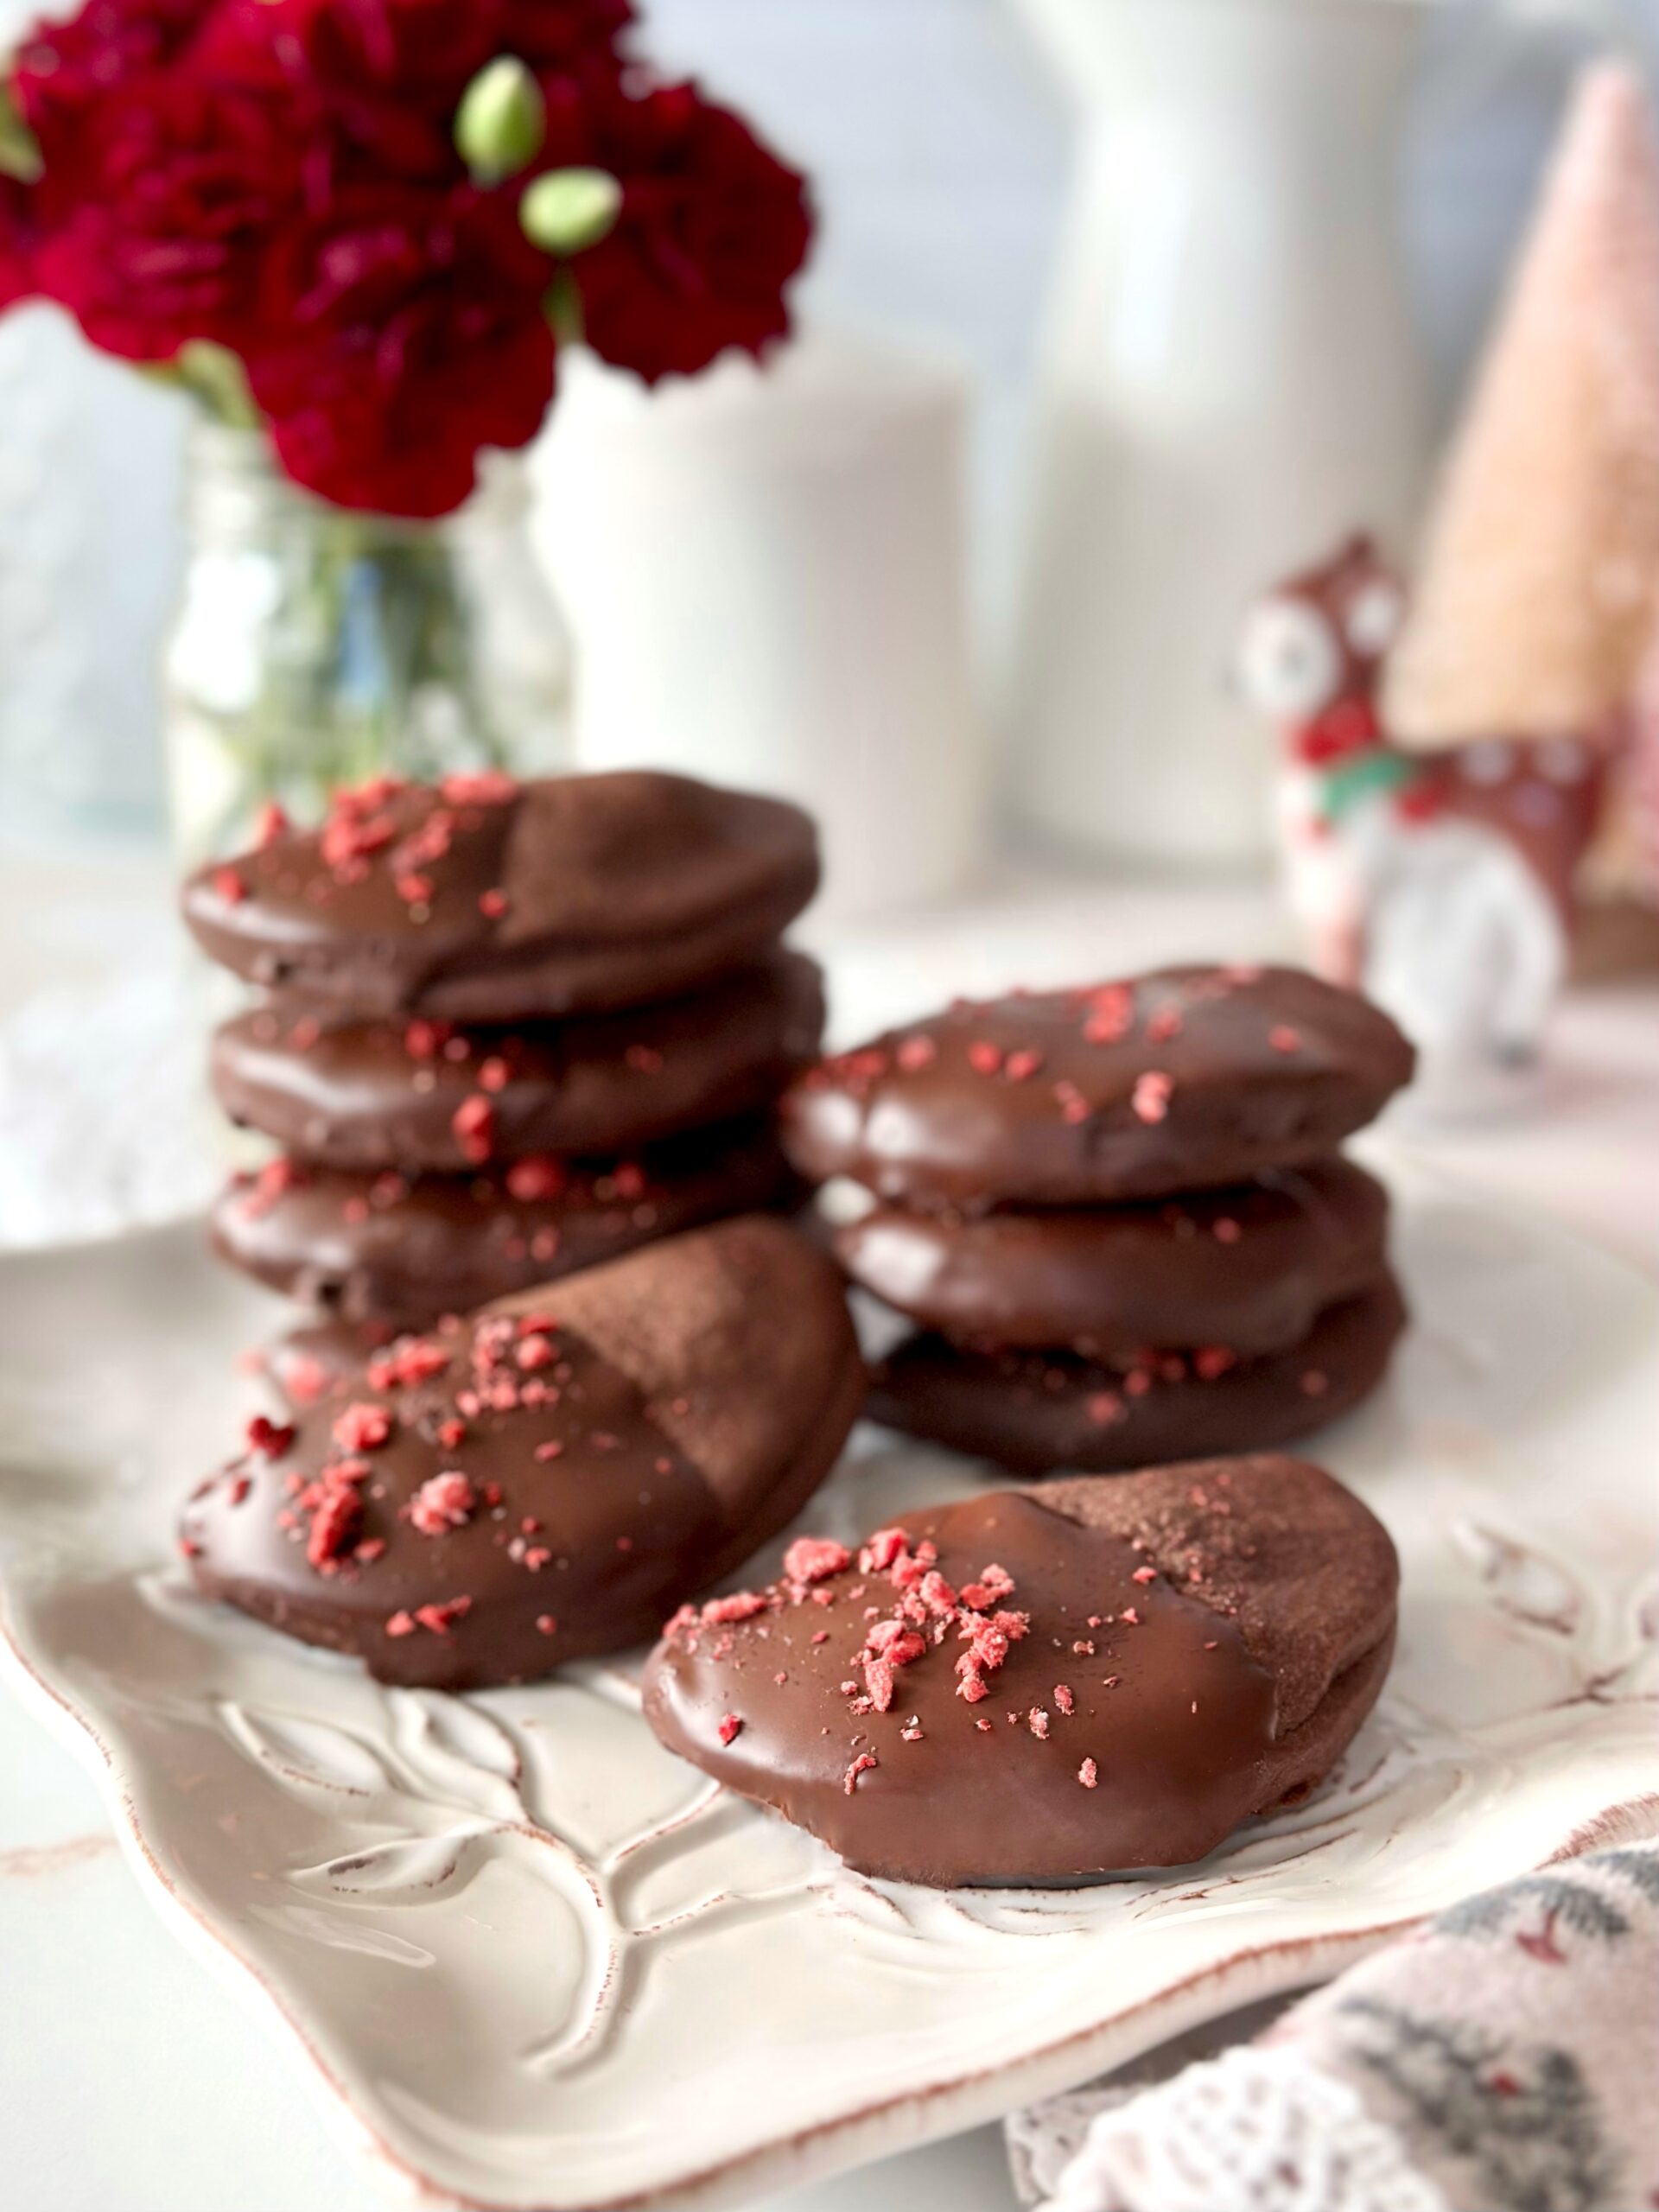
My fascination with Christmas cookies started as a child when my elderly neighbor used to bring over a tray of her homemade Christmas cookies every year. I loved the moment where I got to choose a cookie from the beautiful, interesting selection. In my humble opinion, I think a holiday cookie should be something special. It should be something that you don’t eat on a regular basis, maybe because it seems fancy or requires a little extra work to make. Or maybe it has a special meaning or a fond memory. These Chocolate Raspberry Cookie Tartlets check all the boxes for me. They have that something special a cookie needs to be the star of the holiday cookie tray…tender jam-filled chocolate dough, dipped in shiny chocolate with a pretty pop of red.
⅓cup (1 ounce)unsweetened Dutch process cocoa powder
½teaspoon baking powder
¼teaspoonfine sea salt
½cup (4 ounces)unsalted butter, softened
3ouncescream cheese, softened
1largeegg
1teaspoonpure vanilla extract
2cups (9 ounces)all purpose flour, sifted
½cup (5 ounces)raspberry jam or or fruit spread
4ounces melted semisweet or bittersweet chocolate
1teaspoonmelted coconut oil or vegetable shortening
crushed freeze dried raspberries or sprinkles of your choiceOptional
Instructions
In a medium bowl, sift together powdered sugar, cocoa powder, baking powder and salt.
In a large bowl, beat butter and cream cheese, with an electric mixer on medium speed, until smooth.
Add powdered sugar mixture and beat until well combined.
Beat in egg and vanilla until well combined.
On low speed, beat in flour just until combined.
Divide dough into two equal portions. Wrap with plastic wrap and form into disks. Refrigerate at least two hours or overnight.
Preheat oven to 375ºF. Line two baking sheets with parchment paper.
Roll dough between two sheets of wax paper to 1/8-inch thickness. Cut dough into 3-inch rounds, re-rolling scraps as necessary. If dough becomes too soft at any point, chill in the refrigerator for 10-15 minutes then continue with recipe.
Place rounds on prepared baking sheets. Top each round with a teaspoon of jam.
With a small food safe brush or with your finger, apply a small amount of water to the edge of half of each round. Fold over and press edges to seal.
Bake until tops of cookies look set, about 9-11 minutes. Transfer cookies to a cooling rack and let cool completely.
In a small bowl, mix melted chocolate with coconut oil until smooth.
Dip cookies about 1/3 of the way into melted chocolate. Top with freeze dried fruit or sprinkles.
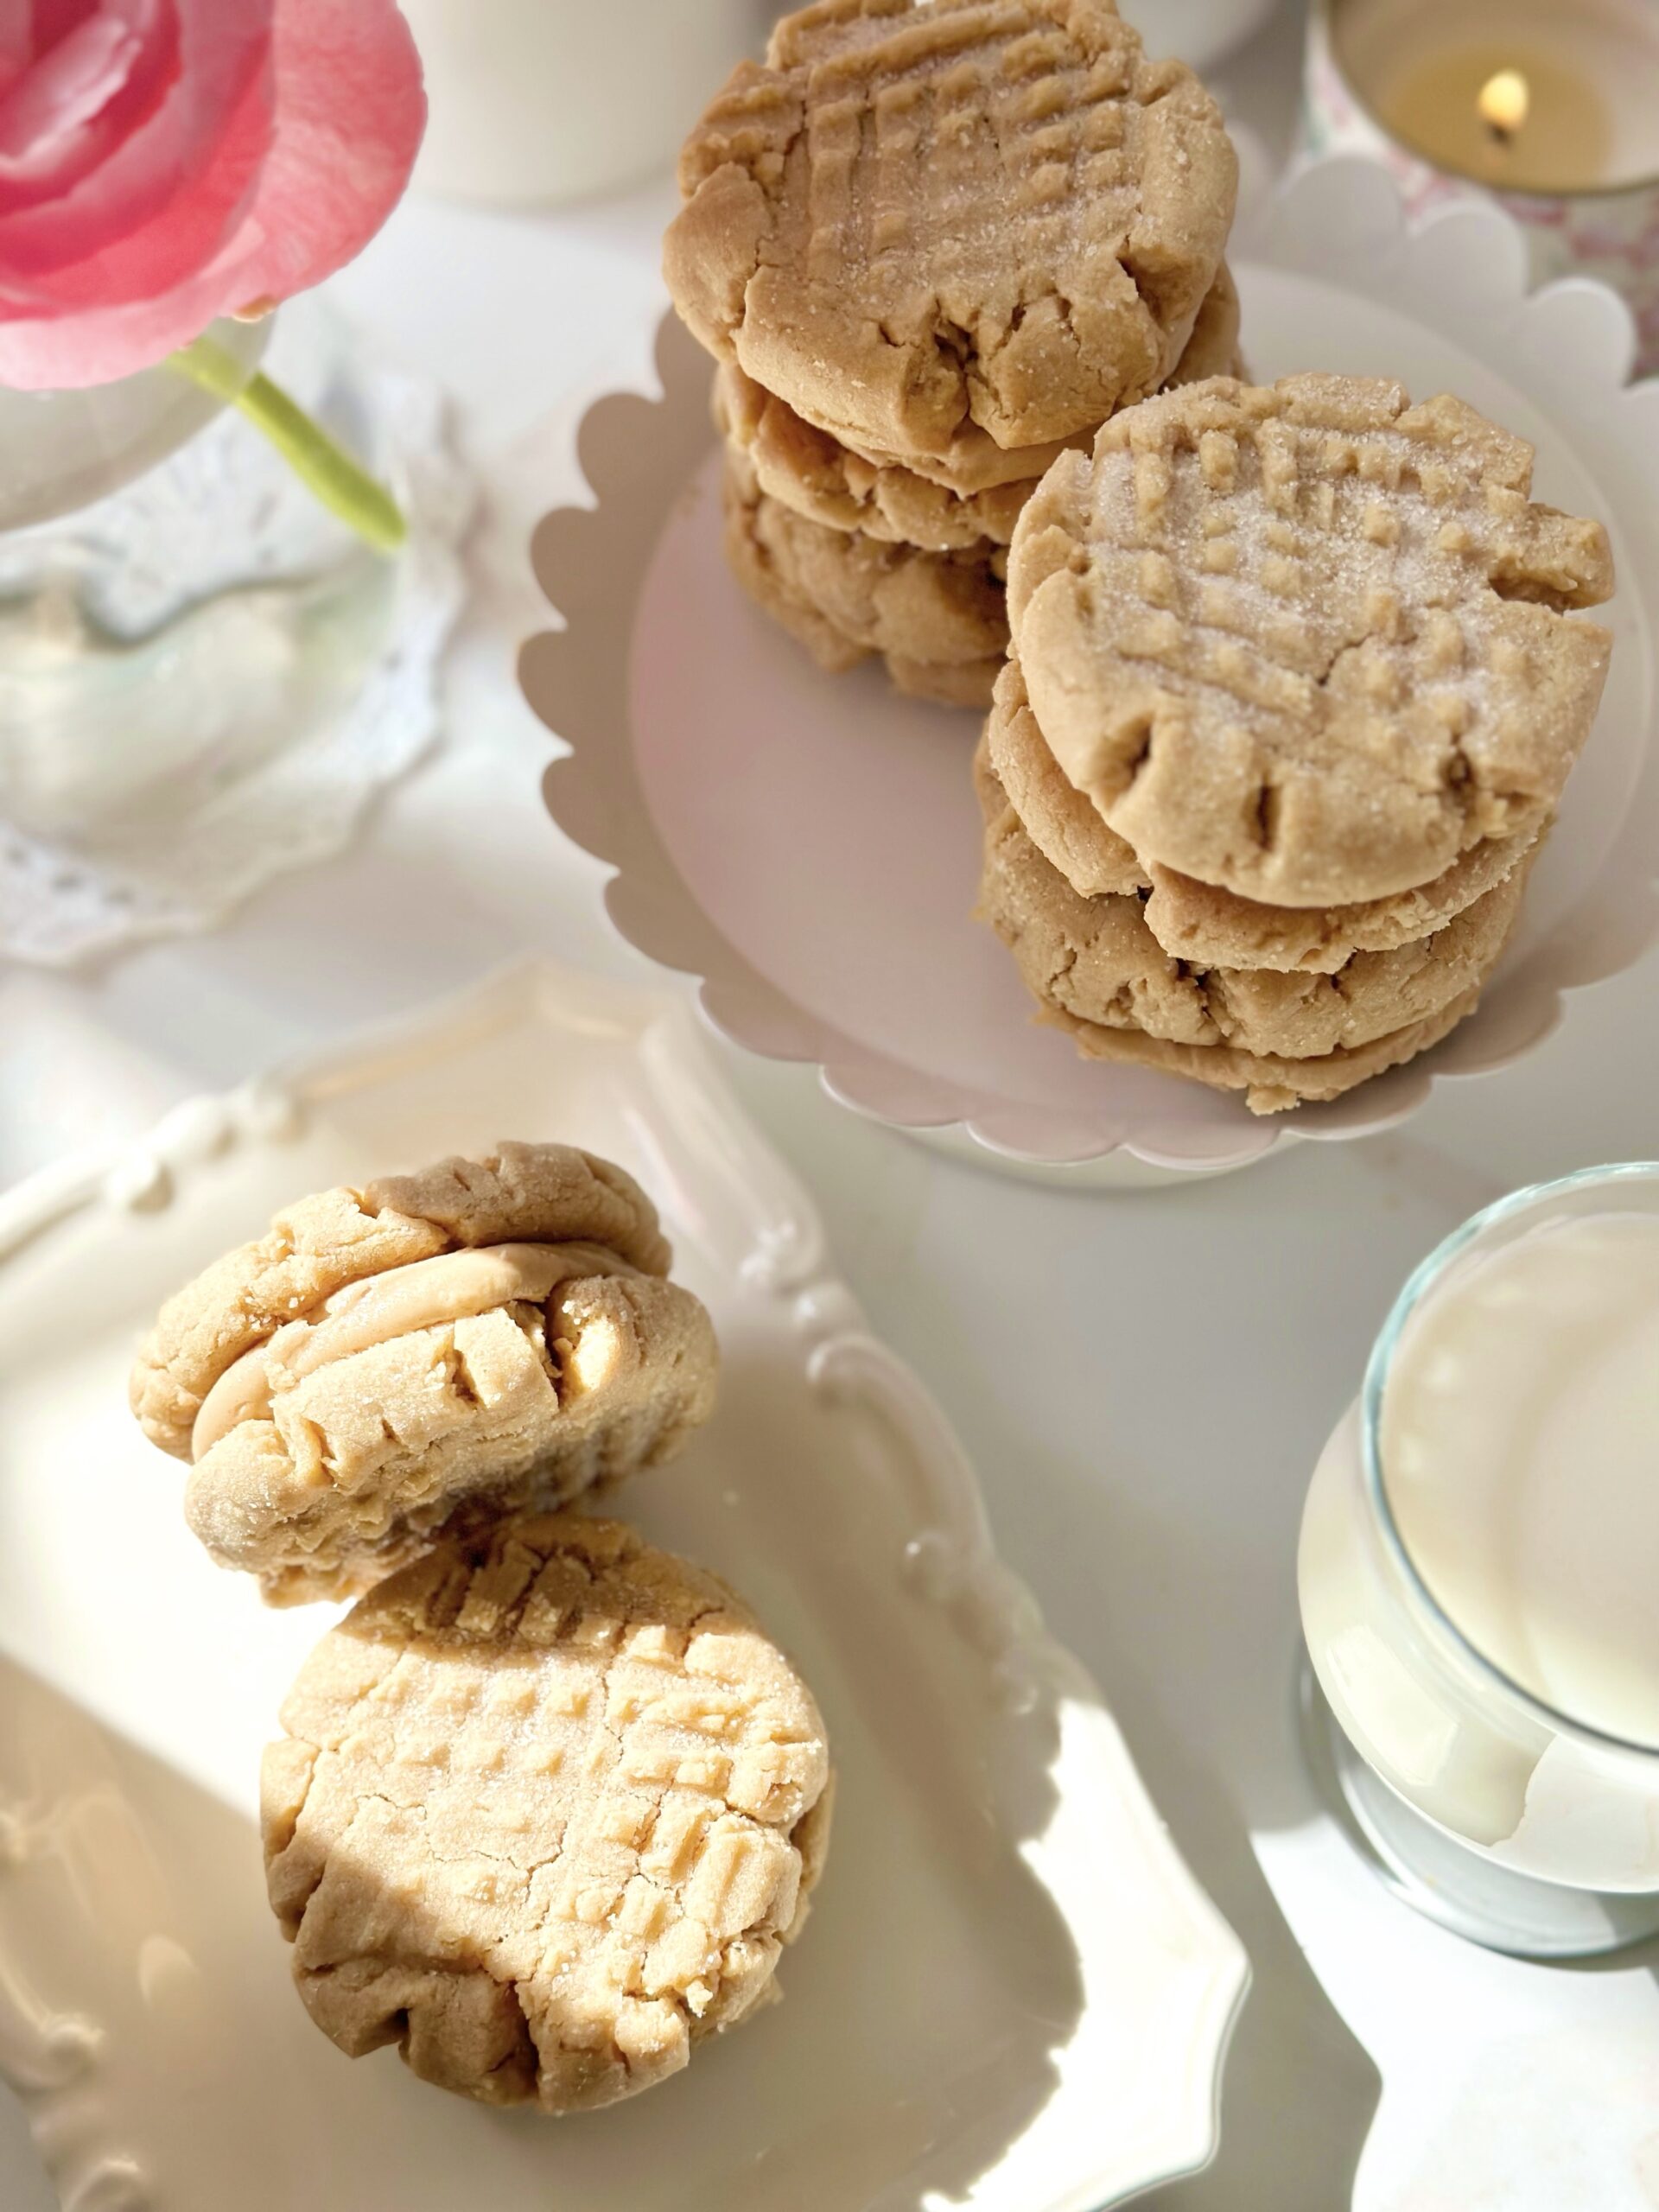
I never imagined that I’d ever be posting a peanut butter cookie recipe. There are already crunchy peanut butter cookies, soft ones, chewy ones, and those peanut shaped store bought ones out there. I mean, do we even need another peanut butter cookie recipe? After I tasted this one, it’s a resounding YES! These soft, tender cookies combined with a silky, smooth filling are a new peanut butter experience that I had to share.
The key to getting the soft texture in the cookie, without being dry, is cake flour. So don’t substitute it, because it’s vital to achieve the correct texture. Make sure to weigh your flour for the most accurate results. The second important ingredient is heavy whipping cream. Just a little added to the filling gives it a luxurious, silky texture.
This recipe makes sixteen medium size peanut butter cookies, which will give you eight sandwiches. If you want more, you can double the recipe or make the cookies smaller. Smaller cookies will have a shorter baking time.
2 ½tablespoons (37ml)heavy whipping cream, room temperature
¼teaspoonpure vanilla extract
1pinchfine sea salt
Instructions
Peanut Butter Cookies
Preheat the oven to 350ºF (180ºC). Line two large baking sheets with parchment paper.
In a medium-sized bowl, whisk together the all purpose flour, cake flour, baking soda and salt until well blended.
In a large bowl, beat the peanut butter, butter and shortening, with an electric mixer on low speed, until smooth. Beat in the egg and vanilla, on medium speed, until well combined.
Set aside 1/4 cup (50g) of the granulated sugar. Add the remaining granulate sugar and the brown sugar to the peanut butter mixture. Beat on medium speed, until light and fluffy. Add the flour mixture and beat on low speed, just until combined.
Roll the dough into 1 1/2-inch (3.8cm) diameter balls (about 1 1/4 oz or 35g each). Roll the dough balls in the reserved granulated sugar.
Place the dough balls 3 inches apart onto the prepared baking sheets. Flatten with a fork, making a criss cross pattern. Bake until the cookies are puffy and start to crack around the edges, about 9-11 minutes.
Let the cookies cool on baking sheet for 1 minute, then carefully transfer them to a cooling rack. The cookies will be fragile, but they will firm up as they cool.
Place a spoonful of filling on the bottoms of half of the cooled cookies. Top with remaining the remaining cookies.
Peanut Butter Filling
In medium-sized bowl, beat the peanut butter and butter together with an electric mixer until smooth and well blended. Beat in the powdered sugar, heavy cream, vanilla and salt until smooth.
Even though the weather is warm where I live at the moment, I’m dreaming about all the delicious fall treats I’ll be baking this year. Let’s look forward to cool, crisp weather, the smell of pumpkin or apples baking, and sipping a warm mug of something spicy while we wait for our bakes to come out of the oven.
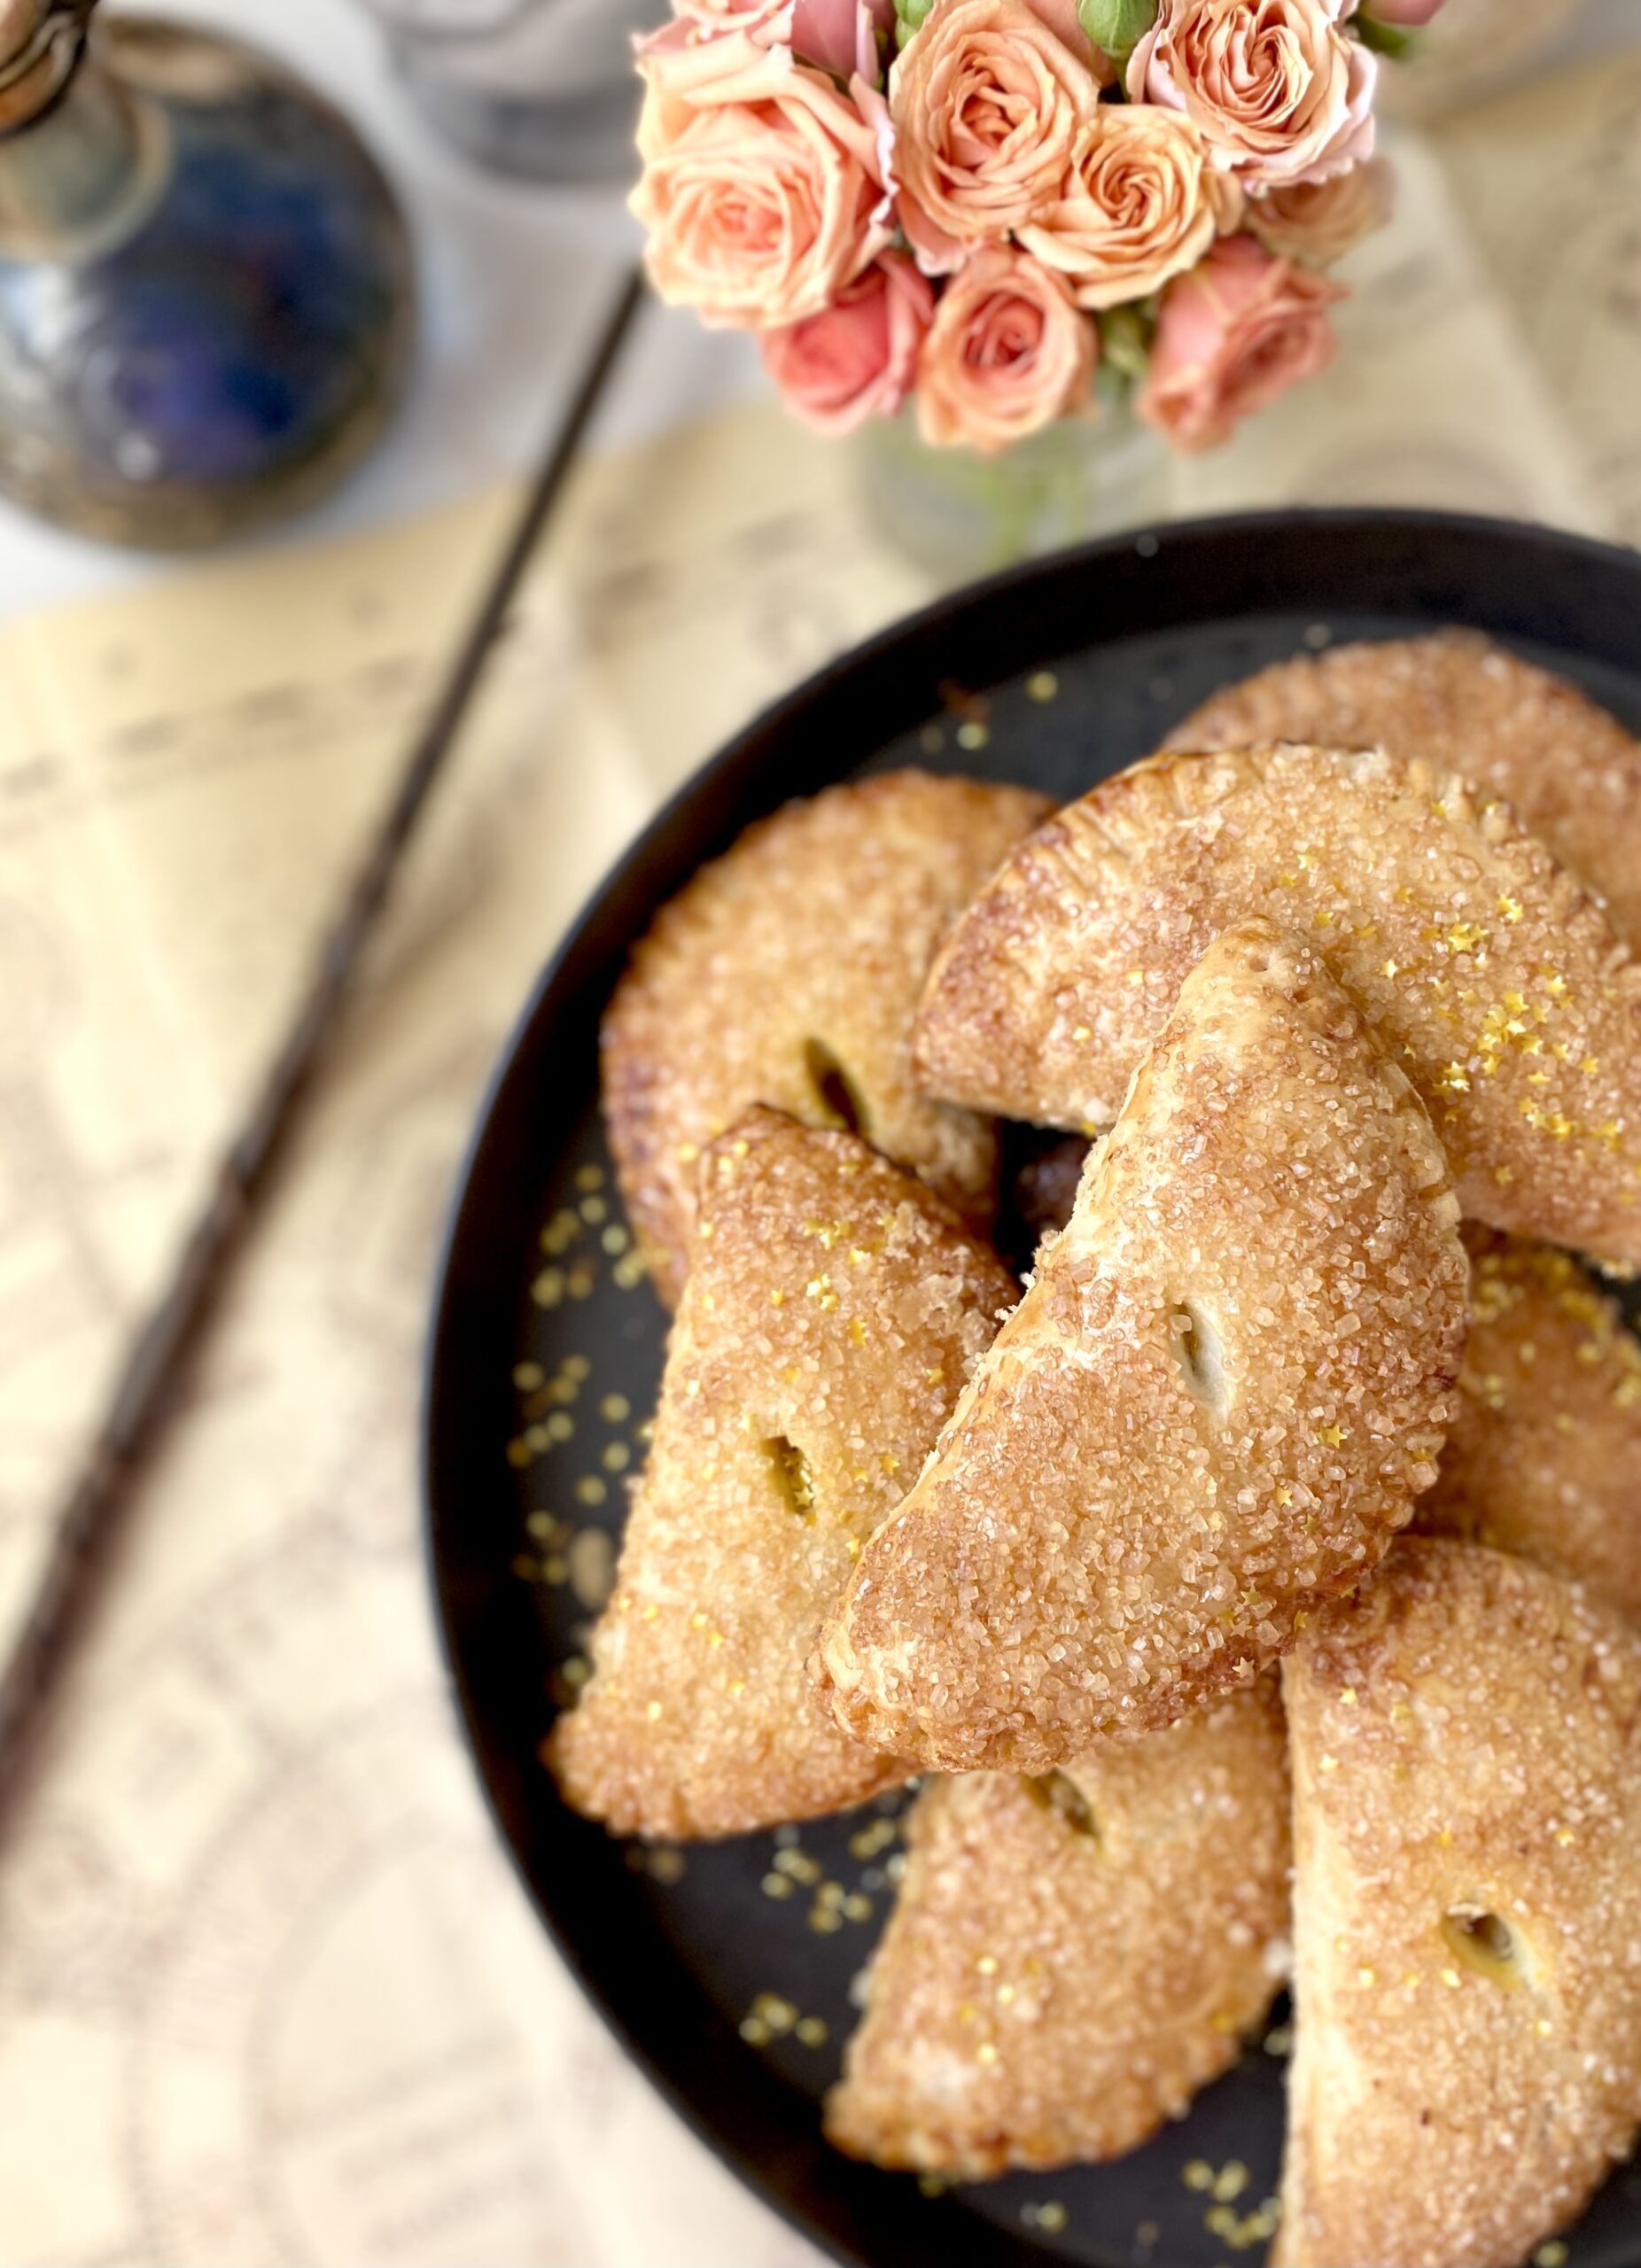
Inevitably, every fall, the Harry Potter movies come on at my house and it’s nice to have some popcorn and sweet treats to enjoy while watching the movies. And these Harry Potter Inspired Pumpkin Pasties are perfect for that! If you’ve read the Harry Potter books, you may remember the Pumpkin Pasties being mentioned. There are many interpretations out there, but I imagined them to be crispy and flaky on the outside with a sweet pumpkin filling. I included a delicious flaky pie crust recipe here, but feel free to use store bought pie dough if you want to streamline the process. I sprinkled mine with raw turbinado sugar before baking which provides a sweet delicious crunch. You can also use maple sugar or sparkling sugar. To find the sugar I used, click here. And as a magical touch, I added some edible gold star glitter. To find the edible gold stars, click here.
Pumpkin Pasties
Harry Potter inspired sweet pumpkin filled hand pies
¾cup (170g)canned pure pumpkin puréeNot pie filling
⅓cup (66g)sugar
1largeegg
2tablespoons (30ml)heavy cream
½teaspoonground cinnamon
¼teaspoon ground ginger
⅛ teaspoonground nutmegpreferably freshly ground
Assembly
egg wash1 egg beaten with 1 tablespoon (15ml) of water
coarse sugar
Instructions
Pie Crust
In a large bowl, whisk together the flour, sugar and salt. Work the shortening into the flour mixture with your fingertips until evenly dispersed throughout.
Work the butter into the flour mixture with your fingertips, creating flat dime size pieces.
Mix the ice water and vinegar together. Sprinkle over the flour mixture a little at a time, stirring until dough comes together. You may not need all of the water depending on your climate.
Turn the dough out onto a lightly floured surface. Fold the dough over onto itself a few times. Do not overwork the dough! Form the dough into two disks. Cover with plastic wrap and refrigerate at least two hours or up to overnight.
Pumpkin Filling
In a medium-size bowl, mix together the pumpkin purée, sugar, egg, heavy cream, cinnamon, ginger and nutmeg until well combined.
Assembly
Preheat the oven to 400ºF (200ºC). Line two baking sheets with parchment paper.
On a lightly floured surface, roll the dough to 1/8-inch thickness. Cut the dough into twelve 5-inch* rounds, re-rolling the scraps as needed. Place the dough rounds a couple of inches apart onto the prepared baking sheets.
Place about 2 tablespoons of filling on each round, leaving a half-inch border. Apply egg wash to the edges of the rounds.
Fold the dough over and press the edges together. Crimp the edges with a fork. If any filling oozes out, wipe it up with a paper towel or it will burn.
Brush the pasties with egg wash. Cut a half-inch slit into the top of each pastie. Sprinkle with coarse sugar.
Bake until golden brown, about 18-20 minutes. Transfer to a cooling rack.
My mom had a cupboard in the kitchen containing a few old cookbooks that she rarely used. As a child, I used to enjoy perusing them and looking at the baked treats. Some of the cookbooks were so old, they had black and white photos or even just drawings of the food. The ones with drawings interested me because they often depicted smiling children enjoying the treats.
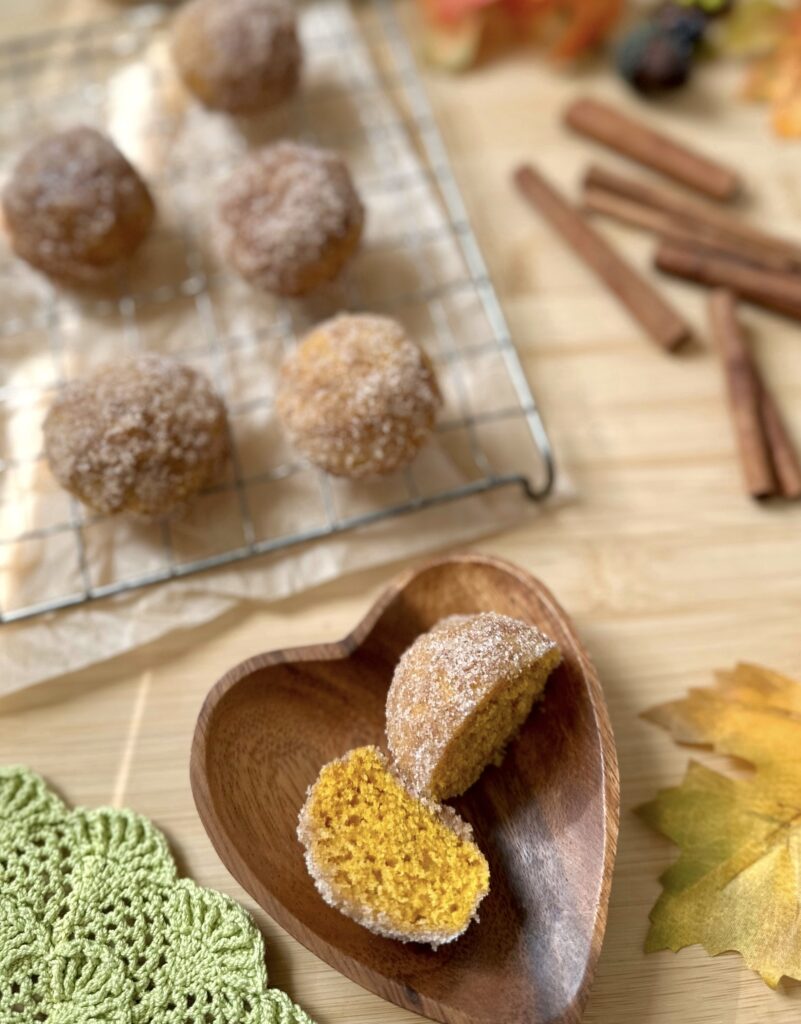
When I started learning to bake, I found a recipe for French Breakfast Puffs in one of those old books. The title sounded so fancy, but they were really just simple muffins dunked in butter and rolled in cinnamon sugar. I have no idea what the name of the cookbook was or what happened to it, but the delicious muffin recipe stuck around for a while. I’ve tweaked the recipe so many times over the years, and most recently, I added pumpkin to it. These Pumpkin Cinnamon Mini Muffins are one of the best versions I’ve created. The inside texture of the muffins is soft and moist and it contrasts nicely with the slight crunch you get from the cinnamon sugar on the outside. They look so cute too, like little pumpkins, and they definitely make children smile!
To watch the Instagram video of these mini muffins being made, click here.
Pumpkin Cinnamon Mini Muffins
Soft, tender pumpkin mini muffins rolled in cinnamon sugar
⅓cup (80ml)vegetable oil or neutral oil of your choice
1largeegg
½cup (113g)canned pure pumpkin puréeNot pie filling
Topping
⅔cup (132g)granulated sugar
1 ½teaspoonsground cinnamon
6tablespoons (85g)melted butter
Instructions
Muffins
Preheat the oven to 350ºF (180ºC). Grease and flour a 24-serving mini muffin pan.* Do not use muffin liners. (The muffins need to form an outer crust. This prevents them from absorbing too much melted butter later in the recipe.)
In a medium-size bowl, whisk together the flour, baking powder, salt, cinnamon, ginger and nutmeg until well combined.
In a large bowl, whisk together the sugar, oil, egg and pumpkin purée until smooth and well combined. Stir in the flour mixture just until combined. The batter will be thick.
Transfer the batter to the prepared pan, filling the muffin cups about 2/3 full. (I ended up with 22 muffins.)
Bake until toothpick inserted into the muffins comes out clean, about 10-13 minutes. Do not over bake! Be diligent, since over baking can happen very quickly with mini muffins. Let the muffins cool in the pan for 5 minutes. Turn the muffins out and place on a cooling rack.
Topping
Whisk the sugar and cinnamon together in a shallow bowl until well combined.
Briefly dunk the warm muffins in melted butter, then roll in cinnamon sugar.
Purée the strawberries in a blender or small food processor. Pass the purée through a mesh sieve into a small saucepan. Stir in the sugar and 1/2 cup (118ml) of water. Bring the mixture to a boil over medium heat. Turn the heat down to low and simmer until the sugar has dissolved and the syrup thickens, about 10 minutes. Set aside to cool. Serve warm or at room temperature.
Pink Whipped Cream
In a large bowl, beat the whipped cream to soft peaks with an electric mixer at high speed. Add the powdered sugar, strawberry extract and food coloring in 3 separate additions. Continue beating just until stiff peaks are formed. Set aside in the refrigerator until ready to use.
Strawberry Rose Pancakes
In a large bowl, whisk the flour, sugar, baking powder and salt together until well combined. Set aside.
Purée the strawberries in a blender or small food processor. Pass the purée through a mesh sieve into a medium bowl. Add the egg, milk, melted butter, vanilla extract and food coloring (if using) and whisk until well combined. Stir this mixture into the flour mixture just until combined. A few lumps are okay. Stir in the rose petals.
For each pancake, scoop 3-4 tablespoons of batter onto a hot oiled griddle. Flip the pancakes when bubbles form on the surface. Continue cooking until the pancakes puff and are lightly browned.
Notes
*To find the gel food coloring I used, click here.**To find culinary dried rose petals, click here.
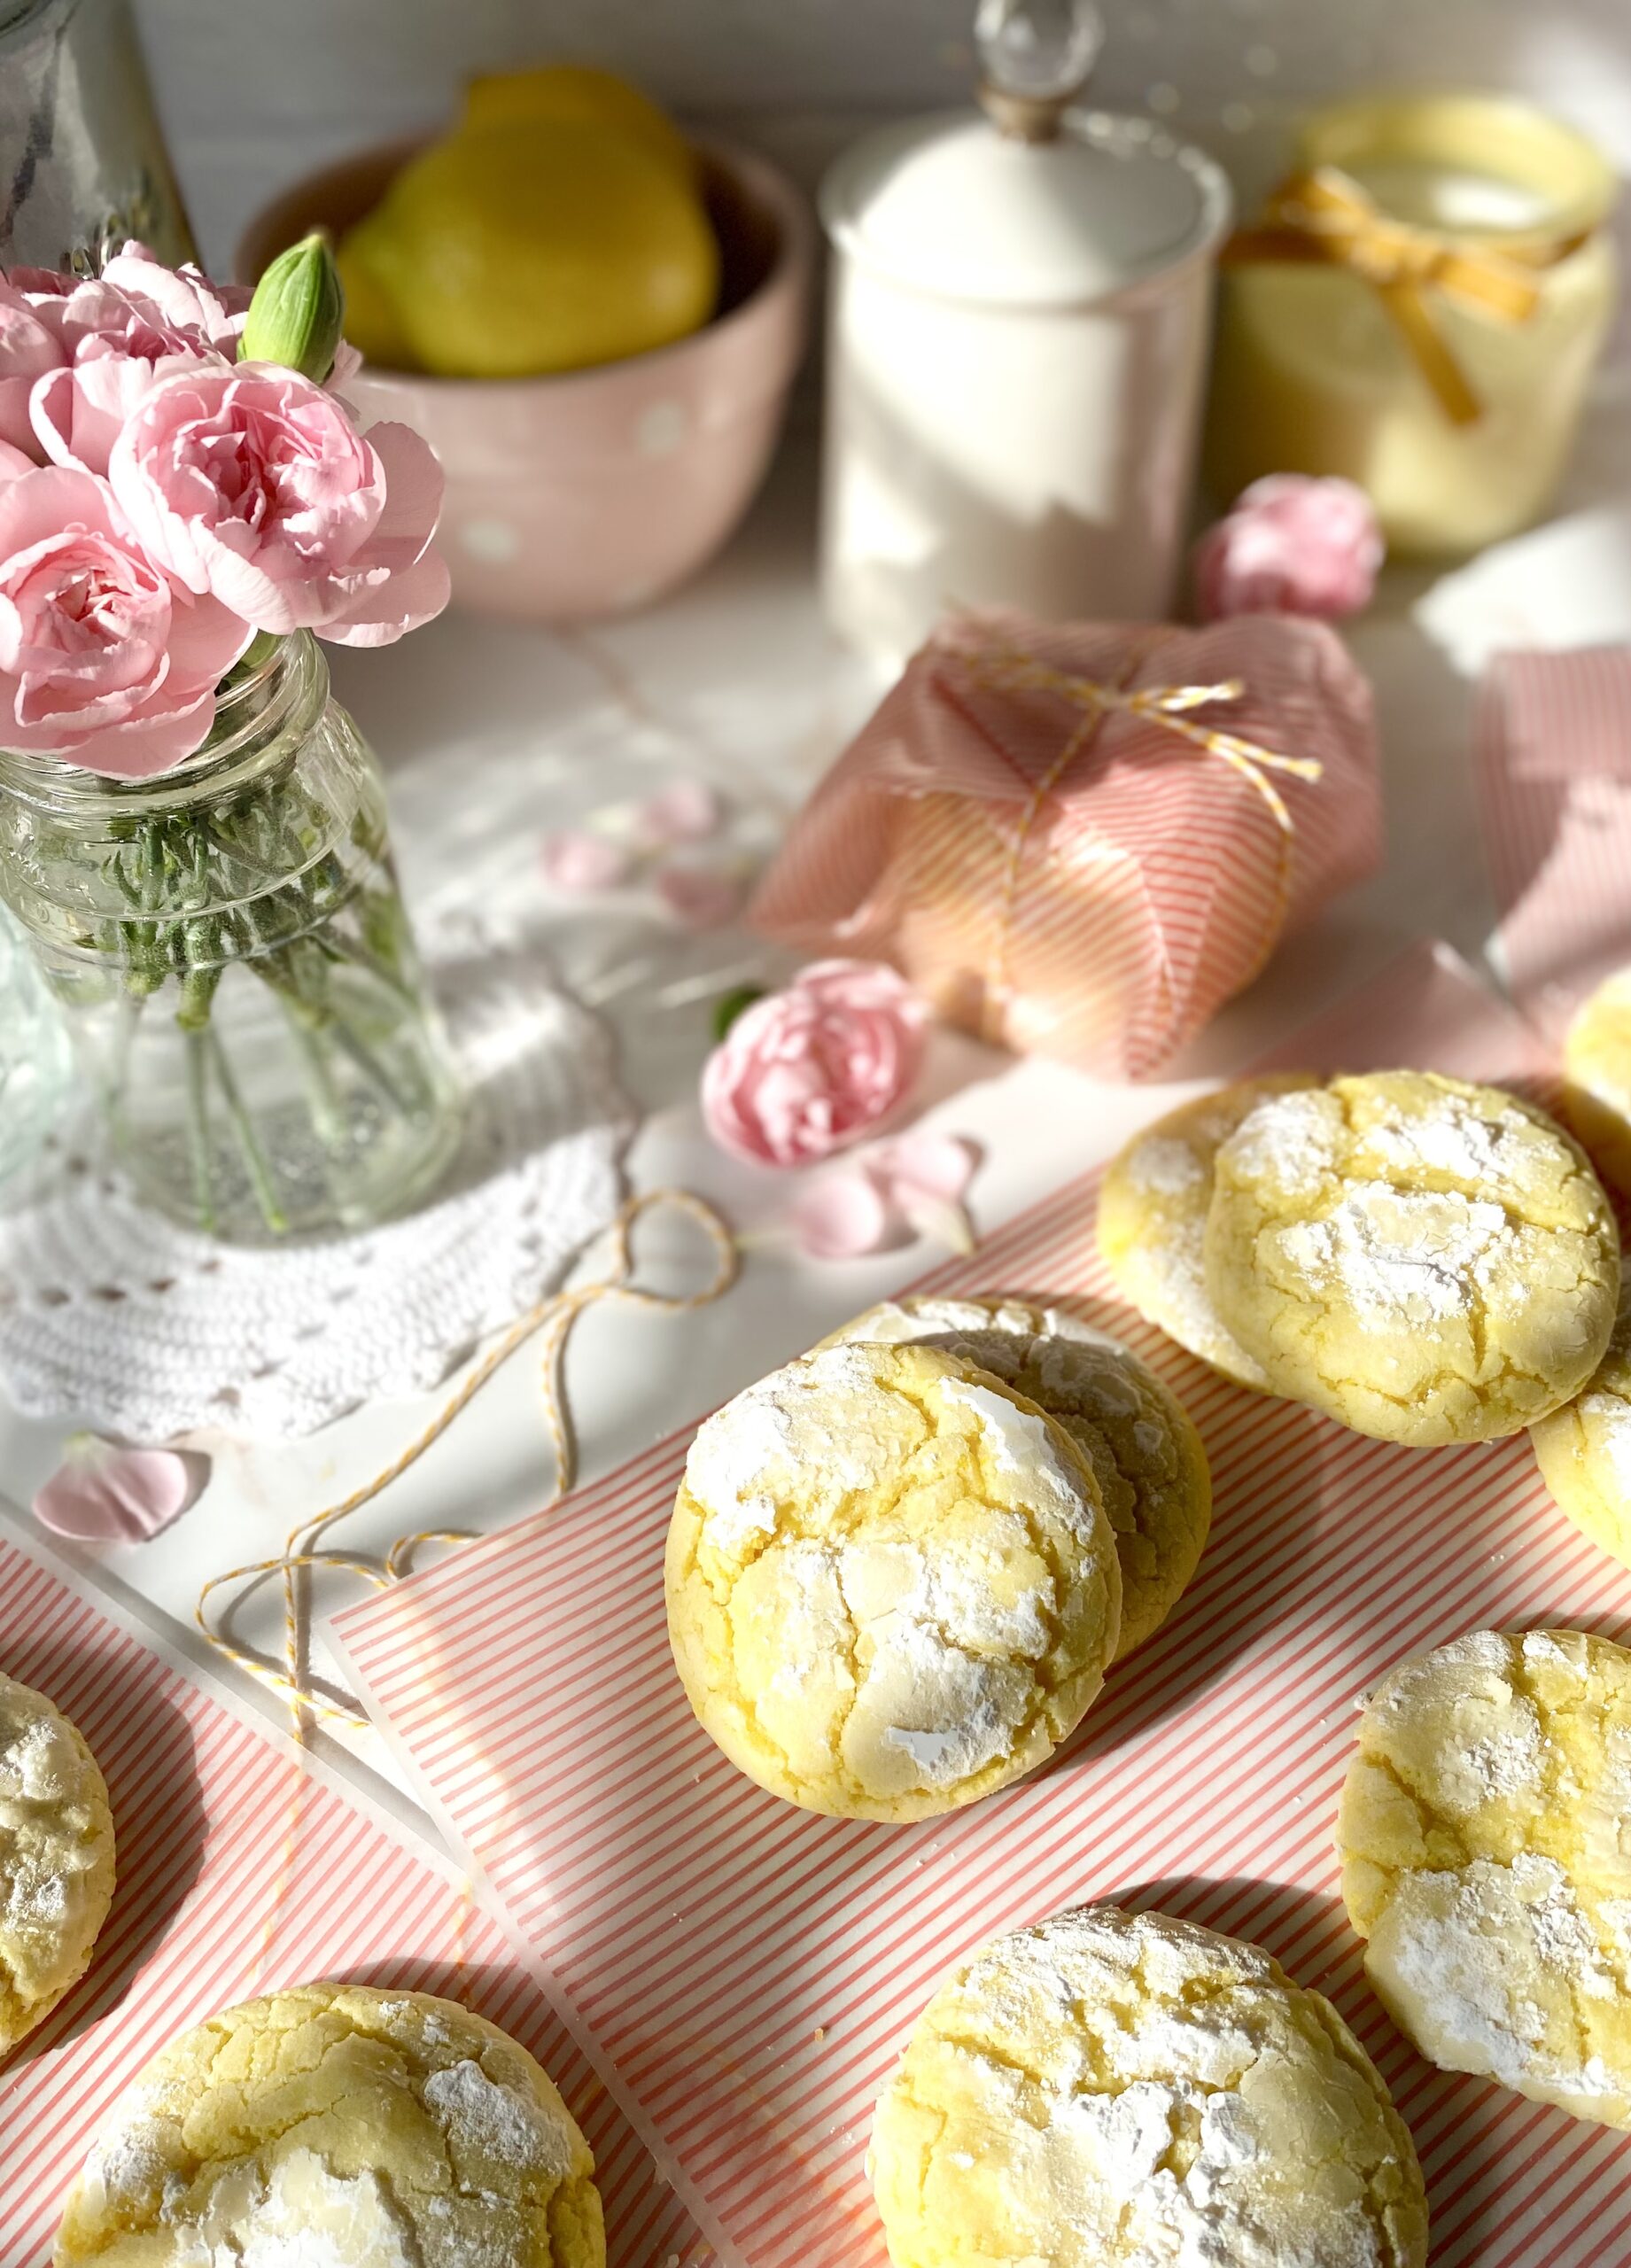
Crinkle cookies, also known as crackle cookies, have been around for a very long time. The pretty, crispy, cracked exterior and the soft, moist interior are what we love about them! There’s definitely no shortage of recipes for crinkles out there, everything from chocolate to red velvet. I even saw an audacious cookie company selling lemon crinkles for twelve dollars each, more money than it will cost for this entire batch! So many of the recipes I tried were disappointing, especially the ones made with cake mix. So I created my own version which happened to go viral! Here’s to making sure delicious lemon crinkle cookies are available for all to enjoy.
This recipe requires a bit of chilling, which I know many people don’t like because they’re impatient. I happen to be one of those people. Old fashioned crinkle cookies require about 3 hours of chilling. My recipe has the addition of cornstarch, which helps prevent spreading and allows for a shorter chilling time. As an added bonus, cornstarch makes the cookies more tender. Win win!
Fresh lemon zest and lemon juice in these cookies is crucial to the best lemon flavor. A bit of pure lemon extract is added to enhance that flavor. Don’t be tempted to use imitation extracts. The flavor will disappoint you. I added two drops of lemon yellow food color, which made them so pretty they look like pure sunshine!
Lemon Crinkle Cookies
Lemon cookies with a crackled, crispy exterior and a soft, tender interior
1-2dropsyellow gel food coloring (optional)*I used Americolor lemon yellow
½cup (60g)powdered sugar
Instructions
In a medium-sized bowl, whisk together the flour, cornstarch, baking powder, salt and baking soda until well blended.
In a large bowl, beat the butter, sugar and lemon zest together until pale and fluffy. Beat in the egg until well incorporated. Mix in the lemon juice, extracts and food coloring until well combined. Add the flour mixture and mix just until combined.
Refrigerate the cookie dough for 30 minutes to one hour.
Meanwhile, preheat the oven to 350ºF (180ºC). Line two large cookie sheets with parchment paper.
Roll the dough into balls, about 2 tablespoons each. I used a #30 portion scoop*. Roll the dough balls generously in powdered sugar.
Place the dough balls about 2 inches apart onto the prepared baking sheets.
Bake until the cookies are set, about 10-12 minutes. Let them cool on the cookie sheet for 1 minute then transfer to a cooling rack.
Notes
*To find Americolor lemon yellow gel food color, click here.**To find a #30 cookie scoop, click here.To find the striped wax paper pictured above, click here.
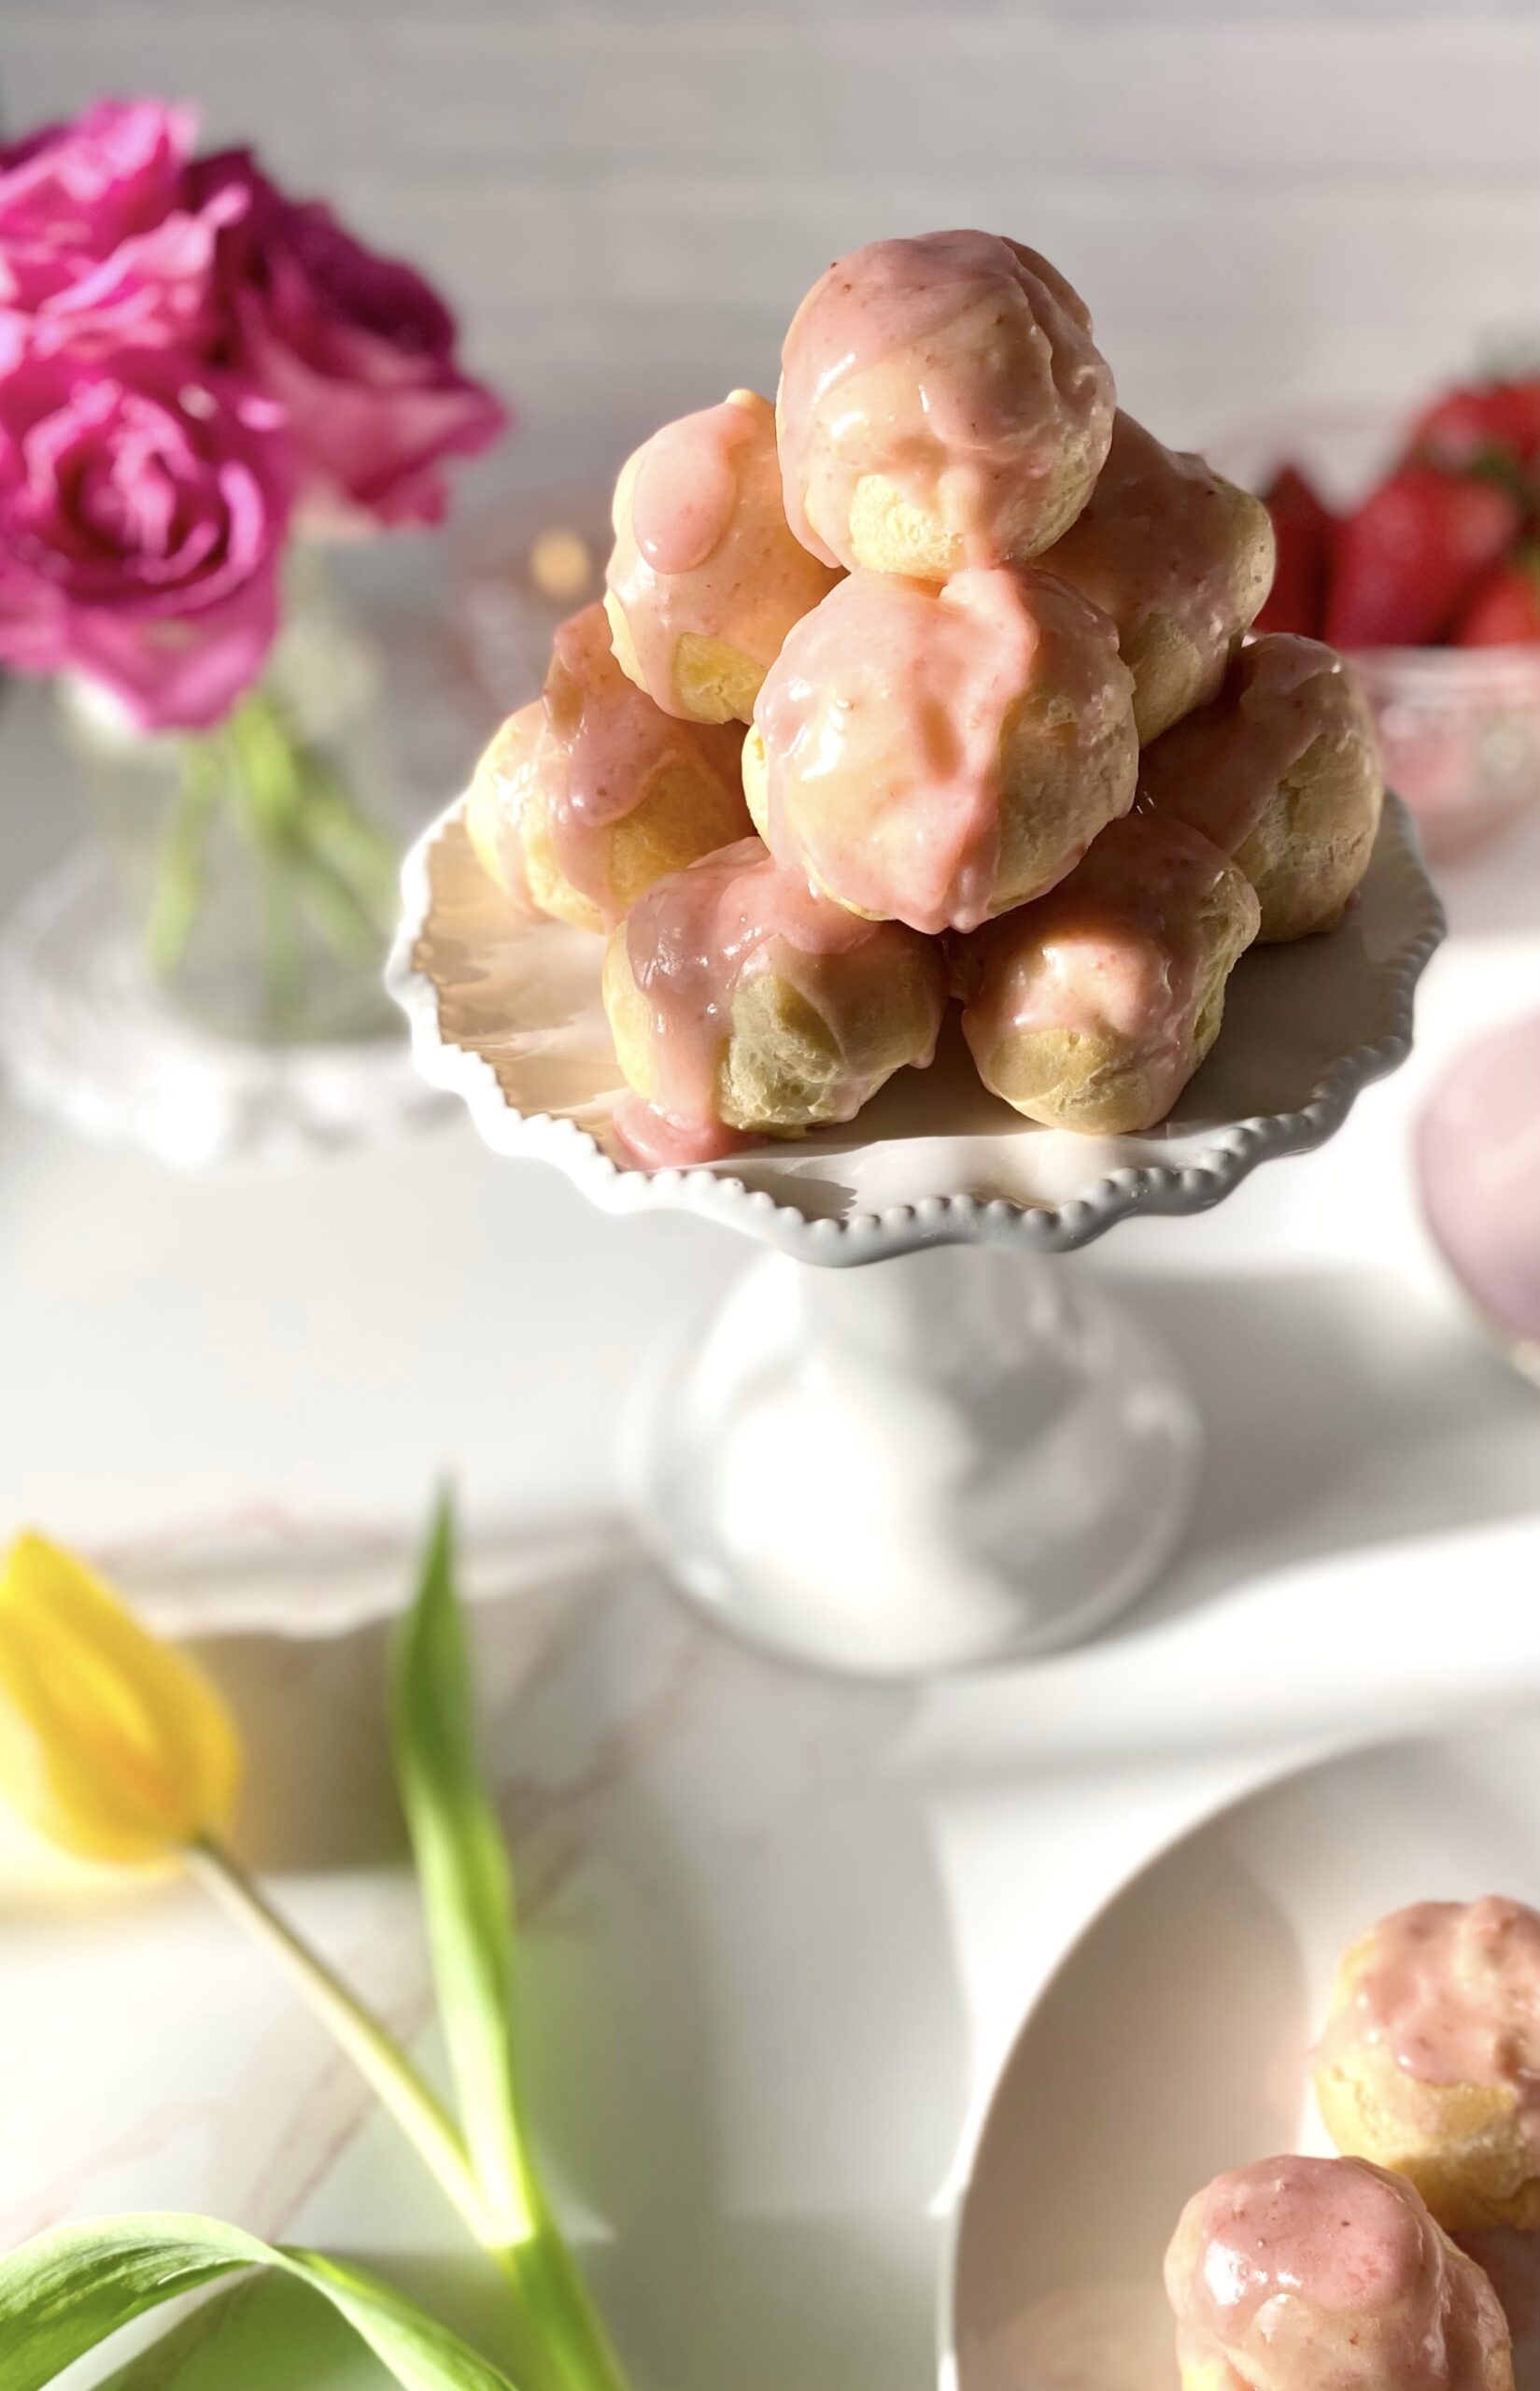
Imagine you’re in a beautiful room, reclining on a plush velvet chaise lounge. There’s a dainty table nearby. On the table is a cake pedestal with a little pyramid of small, perfectly plump, pink pastries. They’re filled with sweet, luscious strawberry cream. And they’re all yours. This Strawberries & Cream Profiteroles recipe can make that dream come true. Maybe not the velvet chaise lounge, but really any comfortable chair will do while you indulge in these delicious little gems. Profiteroles have a way of making you feel regal and majestic. I think princesses and princes snack on them. Most of us don’t have a personal pastry chef or the budget to order from a French bakery every day, but we can certainly follow a recipe and make one of the easiest pastry doughs there is. Choux pastry or pate à choux is used to make profiteroles, cream puffs, eclairs, churros and other pastries. Once you get the hang of it, the possibilities are endless.
This recipe features fresh strawberries, but frozen strawberries will work too. You can also substitute raspberries or peaches. To find the recipe for Peaches & Cream Profiteroles, click here. The strawberry purée can be made a day or two ahead and stored in the refrigerator. To make it easy on myself, I like to make the strawberry purée on day one, the pastry cream on day two, then make the profiteroles and strawberry icing and assemble on day three. It’s also helpful to practice the French culinary style of prep, mise en place, which means to have all of your ingredients and equipment in place before you begin. Everything will go much smoother and prevent you from feeling overwhelmed.
Strawberries & Cream Profiteroles
Mari Vasseur
Bite sized choux pastry puffs filled with fresh strawberries and cream filling and topped with fresh strawberry icing
12ounces (340g)strawberries, hulled and slicedAbout 2 1/2 cups after hulling and slicing
1teaspoonlemon juice
½teaspoonstrawberry extract
Strawberries and Cream Filling
1cup (237ml)whole milk
⅓cup (66g)sugar
2tablespoons (17g)cornstarch
¼teaspoonfine sea salt
1largeegg
2tablespoons (28g)unsalted butter, cubed
½teaspoonpure vanilla extract
Strawberry pureerecipe above
⅔cup (156ml)heavy whipping cream
Profiteroles
½cup (118ml)water
¼cup (57g)unsalted butter, cubed
⅛teaspoonfine sea salt
½cup (64g)all purpose flour
2largeeggsroom temperature
Strawberry Icing
¾cup (90g)powdered sugar
2tablespoons (30ml)reserved strawberry purée
1tablespoon (15ml)heavy whipping cream
¼teaspoonstrawberry extract
Instructions
Strawberry Purée
Purée the strawberries in a blender or food processor. Strain the puréed strawberries through a sieve into a small saucepan. Stir in the lemon juice.
Bring to a boil over medium heat. Reduce heat and simmer until the strawberry purée is reduced by half. Remove from heat. Stir in the strawberry extract. Set aside to cool completely
Strawberries and Cream Filling
Bring the milk to a boil in a small saucepan over medium heat.
Meanwhile, whisk the sugar, cornstarch and salt together in a medium bowl. Add the egg and whisk until smooth.
When the milk starts to boil, remove from heat and pour 1/3 of the hot milk into the egg mixture and whisk to combine.
Pour the egg mixture back into the remaining hot milk and cook over medium heat, whisking continuously, until the mixture comes to a boil and thickens.
Remove from heat. Stir in the butter and vanilla extract. Pour the mixture through a sieve placed over a bowl. Cover the surface with plastic wrap and let cool completely.
Set aside 2 tablespoons (30ml) of strawberry purée. Add the remaining strawberry purée to the cooled pastry cream and stir until well combined. Cover strawberry pastry cream and chill in refrigerator.
In a medium-sized bowl, whip the heavy cream, with an electric mixer at high speed, until stiff peaks begin to form. Fold the whipped cream into cooled strawberry pastry cream. Set aside in the refrigerator.
Profiteroles
Preheat oven to 400ºF (205ºC). Line 2 large baking sheets with parchment paper.
Combine the water, butter and salt in a medium-sized saucepan. Bring to a boil over medium heat. Reduce the heat. Add the flour and stir vigorously with a wooden spoon until the mixture pulls away from sides of pan and forms a ball.
Transfer the mixture to the bowl of a stand mixer. Mix on low speed until steam dissipates and mixture cools to lukewarm. Add the eggs one at a time and beat on medium speed until smooth, stopping to scrape down the bowl.
Transfer the mixture to a piping bag fitted with a large round tip. (I used Ateco tip 808.*) Pipe 1 1/4-inch mounds, about 2 inches apart, onto the prepared baking sheets. Smooth the tops lightly with a wet finger.
Bake for 15 minutes, then turn down the oven heat to 350ºF (180ºC) and continue baking until golden brown, about 8-10 more minutes. Using a toothpick or skewer, prick a small hole in each profiterole to allow steam to escape. Place on a wire rack to cool completely.
Use the tip of a paring knife to make a pilot hole in the bottom of each profiterole.
Place strawberries and cream filling into a piping bag fitted with a medium round piping tip. (I used Wilton tip 12**) Place the tip into the pilot holes and fill each profiterole with filling.
Strawberry Icing
In a medium -sized bowl, whisk all of the icing ingredients together until smooth. Spoon over the filled profiteroles. Refrigerate profiteroles until ready to serve.
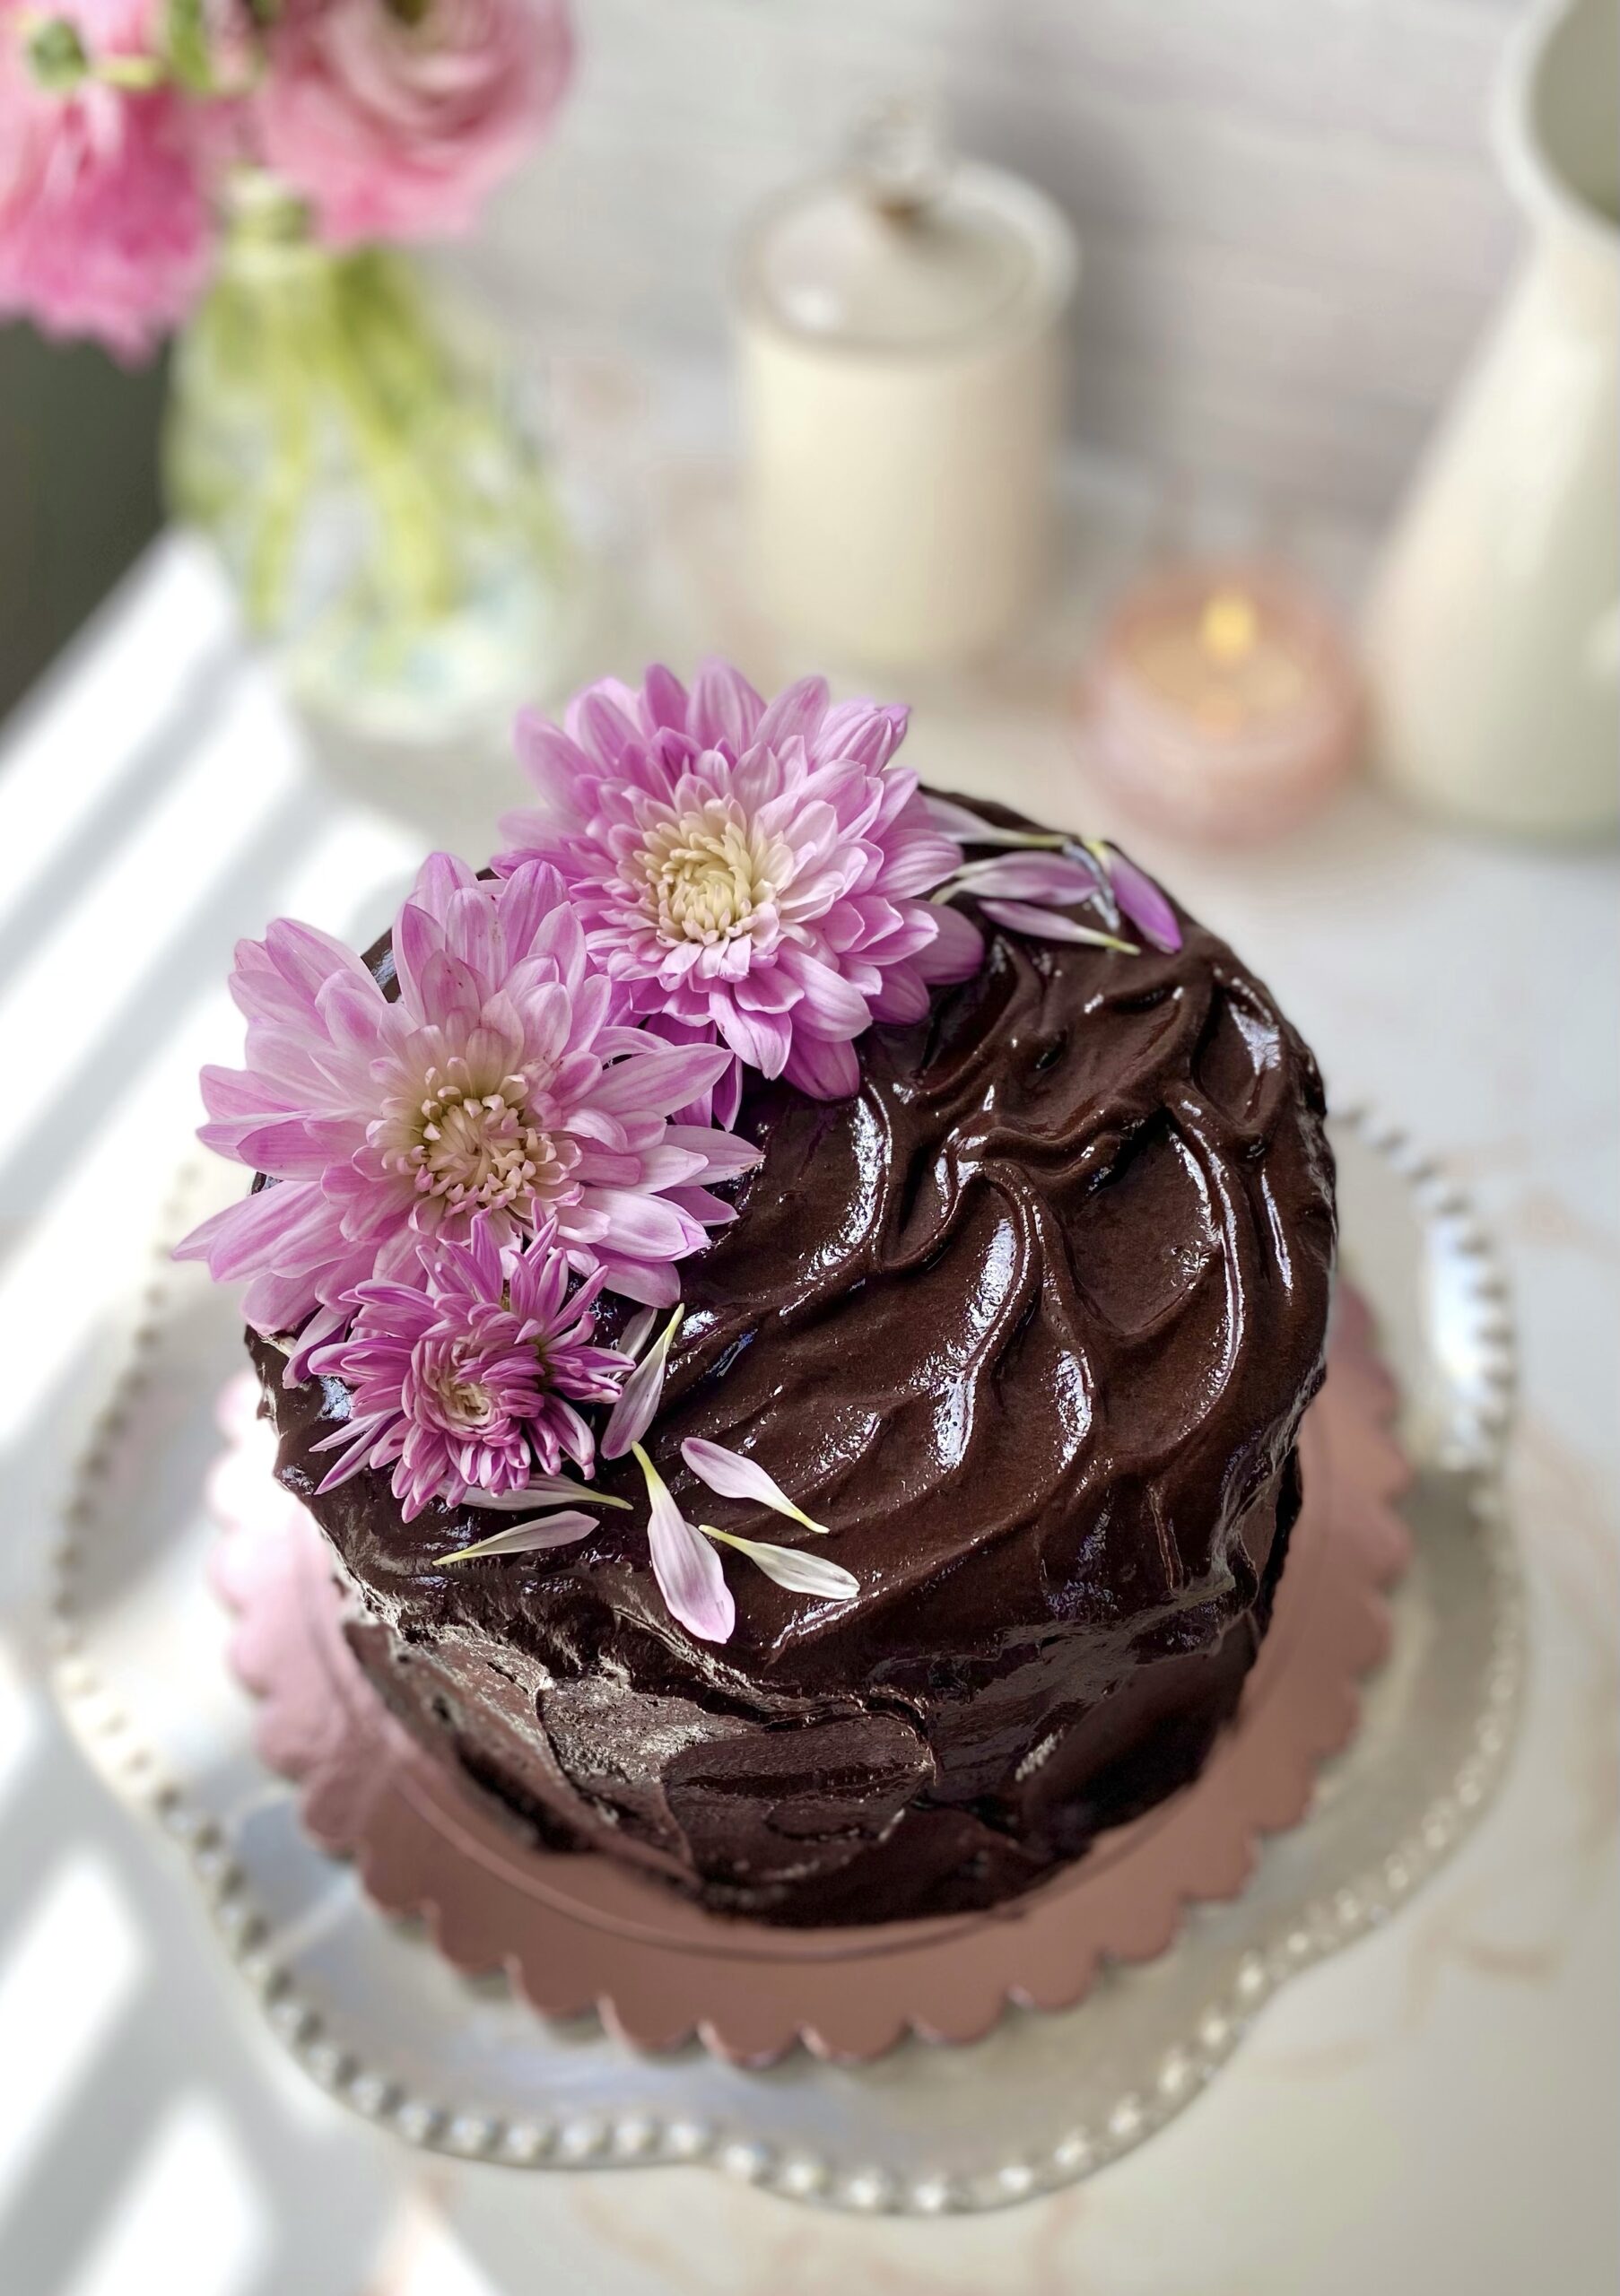
If you love chocolate cake, this is the post for you! Chocolate cake is one of the best comfort foods there is. I’ve tasted many over the years, but my all time favorite was one I had growing up. I’ve spent years trying to duplicate the moist, nostalgic cake from my childhood. I noticed that nearly every chocolate cake recipe on the internet is a variation of the century-old recipe from the Hershey’s Cocoa tin. I think many people have passed it down as a family recipe, each grandmother adding her own personal touch. Even some celebrity chefs have claimed it as their own. It’s an easy, delicious, moist recipe and its popularity is well deserved. You can tweak the flavor additions a bit to make it your own too. It’s a recipe that’s hard to mess up.
This cake is topped with the ultimate silky, smooth, deeply chocolate frosting. I developed this recipe mostly because I couldn’t find a chocolate frosting recipe that didn’t taste gritty and/or look speckled from the cocoa powder. Swiss meringue buttercream with melted chocolate added is one alternative. But, while it is smooth, silky and perfect for piping, it’s missing that deep chocolate richness. Another option is chocolate ganache. It looks rich and creamy in those viral videos, but it’s a little too rich and overpowering to use as frosting in my opinion.
I think this frosting is the one! It has the best of both worlds, velvety but not too rich. You’ll notice that this frosting contains maple syrup. The syrup gives it a very subtle maple flavor in the background, but mostly, it helps to make the frosting silky and gives it shine. You can adjust the sweetness level of the frosting by choosing the chocolate you prefer. I used bittersweet chocolate, which I think is just right. This recipe makes enough frosting to frost a 2-layer 6-inch cake. You can easily double the recipe for larger cakes.
Vintage Chocolate Cake
by Mari Vasseur
Rich moist classic chocolate cake with silky chocolate buttercream frosting
1 ⅛cup (145g)all purpose flour, siftedPlus more for dusting the pans
½cup (45g)unsweetened cocoa powder, siftedPlus more for dusting the pans
1teaspoonbaking powder
½teaspoonbaking soda
¾teaspoonfine sea salt
1 ⅓cups (265g)sugar
1largeegg
1largeegg yolk
⅔cup (155ml)buttermilk
⅓cup (70ml)vegetable oil
1 ½teaspoonspure vanilla extract
⅔cup (155ml)hot coffee or espresso
Chocolate Buttercream Frosting
½cup (148ml)pure maple syrup
3tablespoons (45ml)water
¾cup (67g)unsweetened Dutch process or dark cocoa powder, sifted
½teaspoonespresso powderoptional
1 ¼cups (283g)unsalted butter, softened
1cup (113g)powdered sugar, sifted
⅛teaspoonfine sea salt
8oz (227g)dark, bittersweet or semi-sweet chocolate, chopped*not chocolate chips
Instructions
Chocolate Cake
Preheat the oven to 350ºF (180ºC). Line the bottoms of two 6-inch cake pans with parchment paper. Grease the insides and dust with a mixture of equal parts flour and cocoa powder. Wrap the cake pans with damp cake strips if you have them.
Sift the flour, cocoa powder, baking powder, baking soda and salt together in a medium-sized bowl. Add the sugar and stir until well blended.
Combine the the egg, egg yolk, buttermilk, vegetable oil and vanilla extract in a small bowl. Whisk lightly to combine.
Add the egg mixture to the dry ingredients and beat, on low speed with an electric mixer, until combined. Stop the mixer. Scrape the sides and the bottom of the bowl with a spatula. Turn the mixer up to medium speed and beat for 30 seconds. Add the hot coffee and stir until well combined.
Pour the batter into the prepared cake pans, dividing batter evenly between the pans. Bake until a toothpick inserted into the center of the cakes comes out clean, about 25-28 minutes without cake strips or about 28-32 minutes with cake strips.
Let the cakes cool in the pans for 10 minutes then remove the cakes from the pans and transfer to a cooling rack.
Trim the cake layers to your desired thickness, from 1-inch to 1 1/2-inches thick. Fill and frost with chocolate buttercream frosting.
Chocolate Buttercream Frosting
In a small saucepan over low heat, whisk together the maple syrup, water, cocoa powder and espresso powder until smooth. Set aside to cool to room temperature.
Melt the chocolate in a medium-sized heat safe bowl set over a pan of gently simmering water, making sure the water doesn't touch the bottom of the bowl. Remove from heat and set aside to cool to lukewarm.
In a large bowl, beat the butter with an electric mixer at medium speed, until smooth and pale. Add the powdered sugar and salt and continue beating until smooth and well combined. Gradually add the the cooled maple syrup mixture and beat on low speed until combined. Stir in the melted chocolate until well blended. Smooth out any air bubbles by stirring gently with a rubber spatula.
Notes
*For smoothest results, use chopped bar chocolate and make sure chocolate is completely melted. Do not use chocolate chips. Chocolate chips do not melt completely and can make your frosting lumpy.