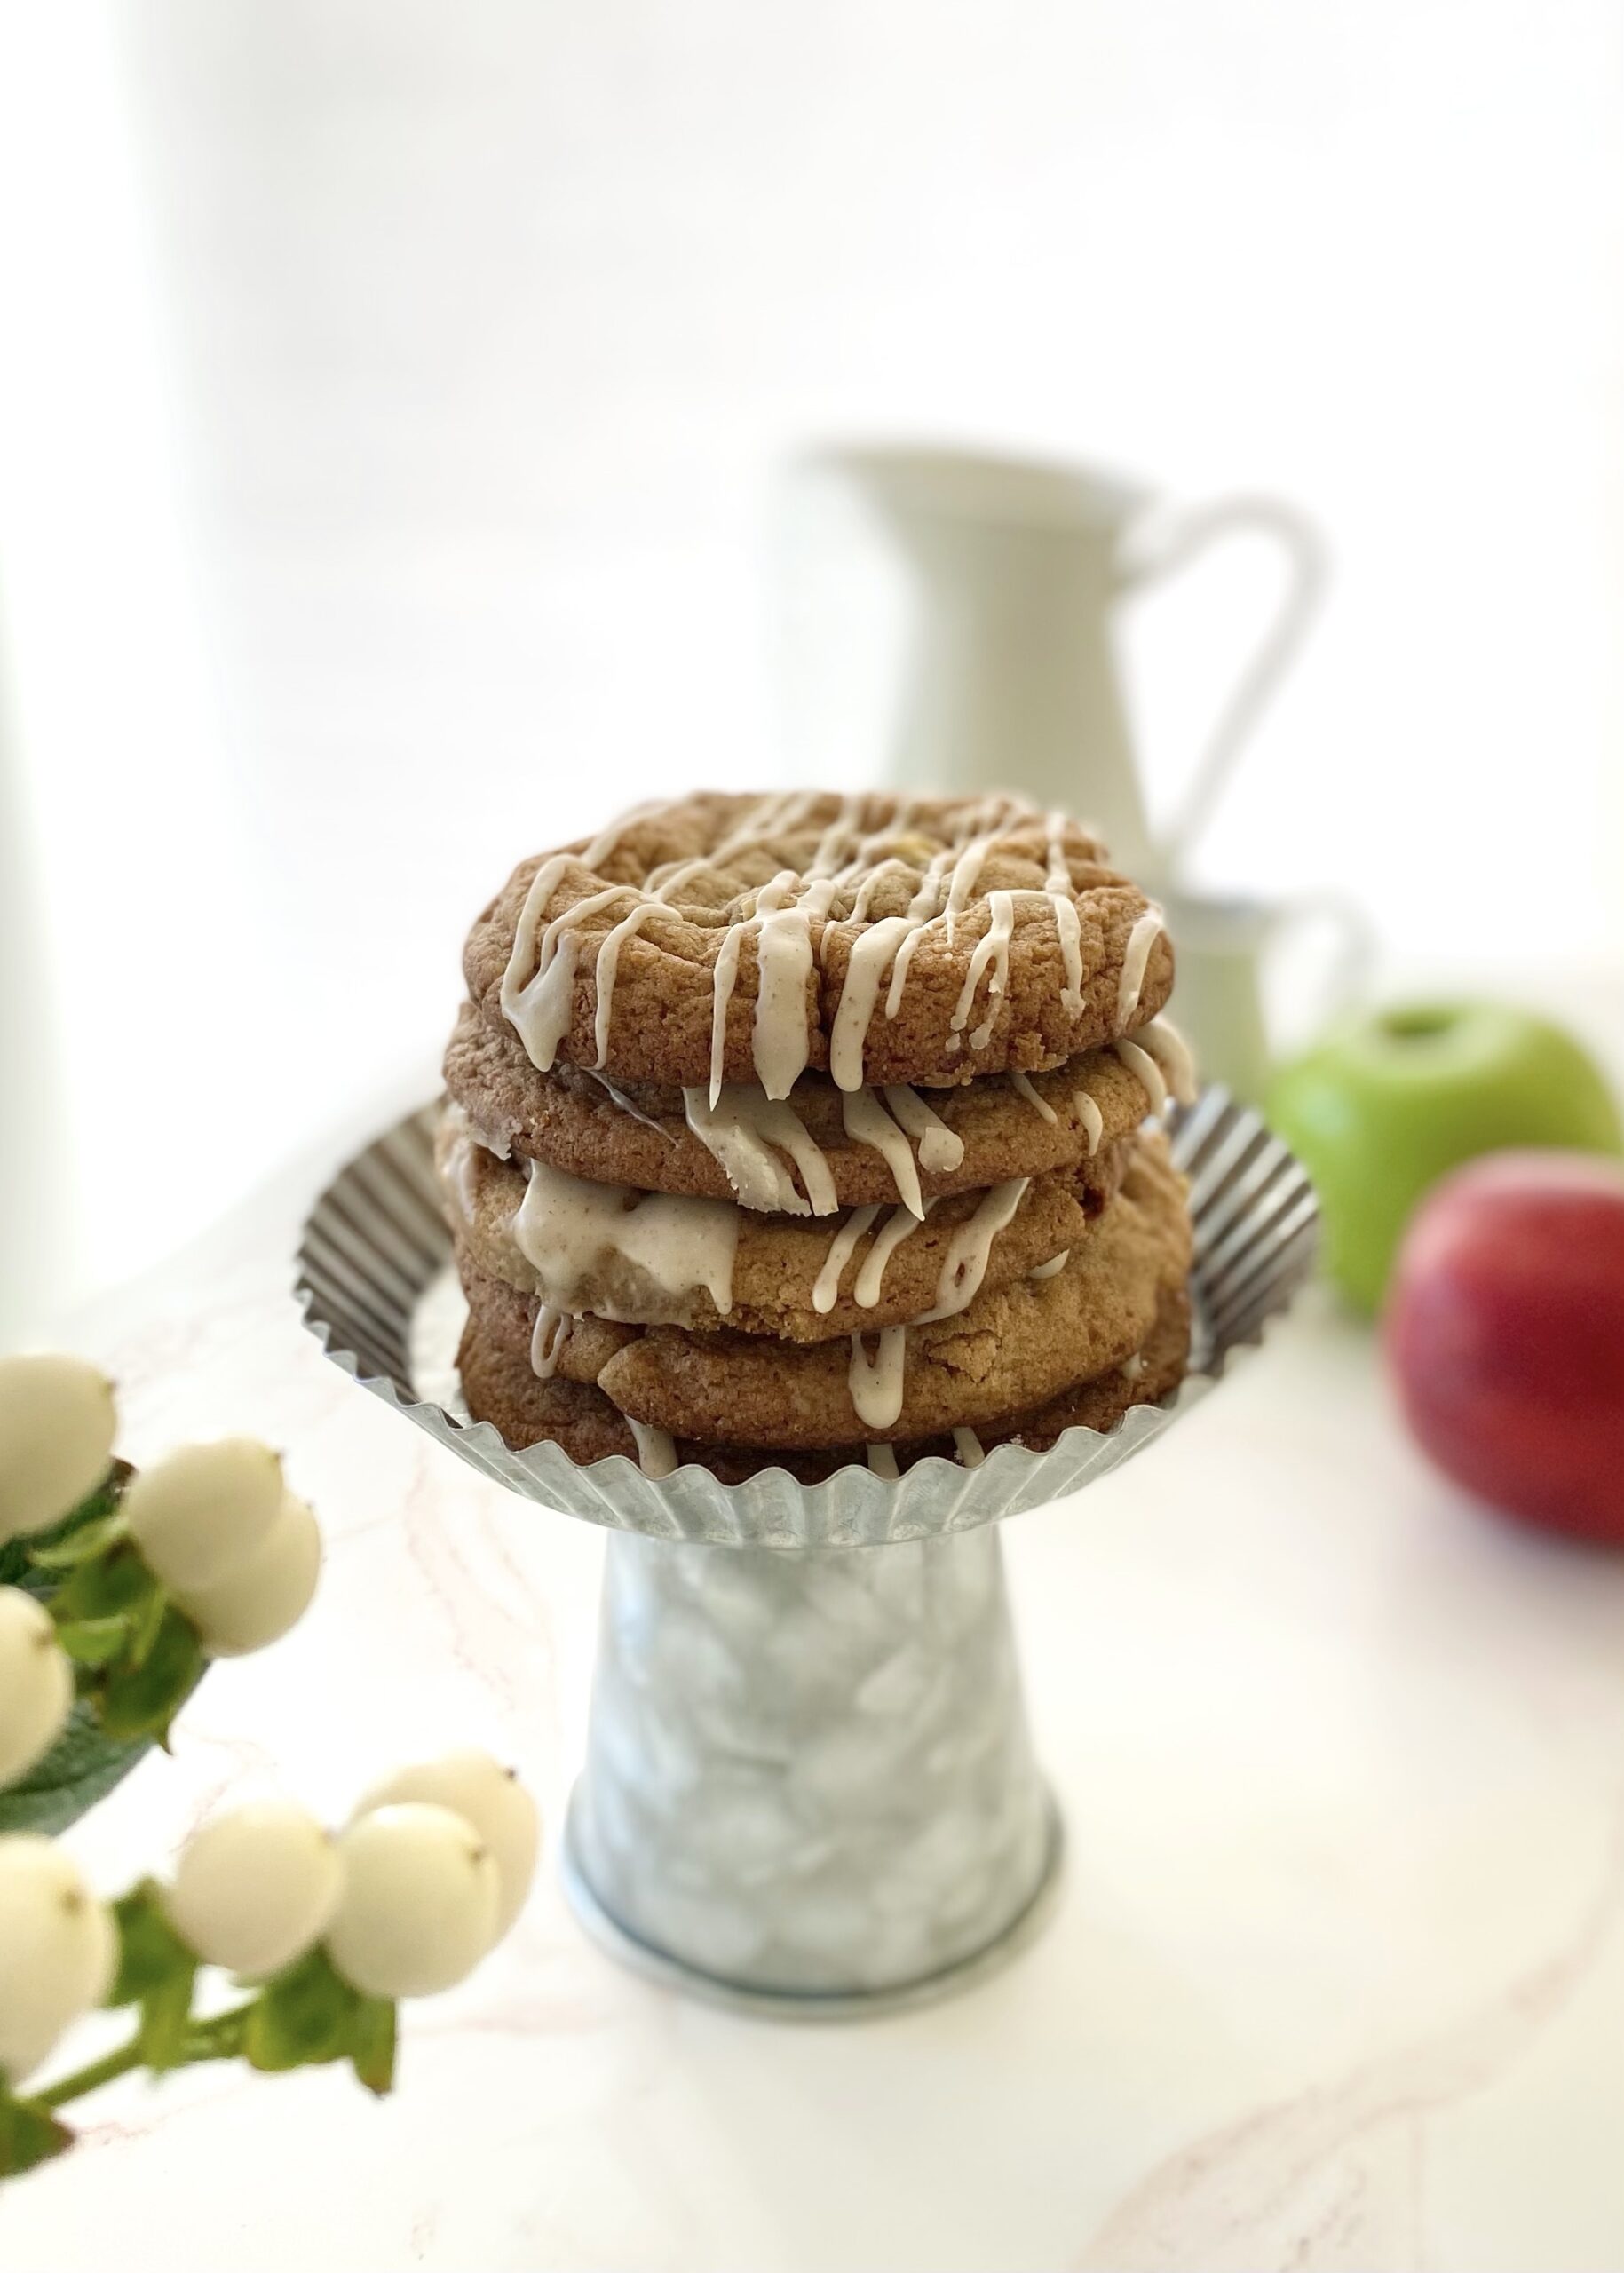
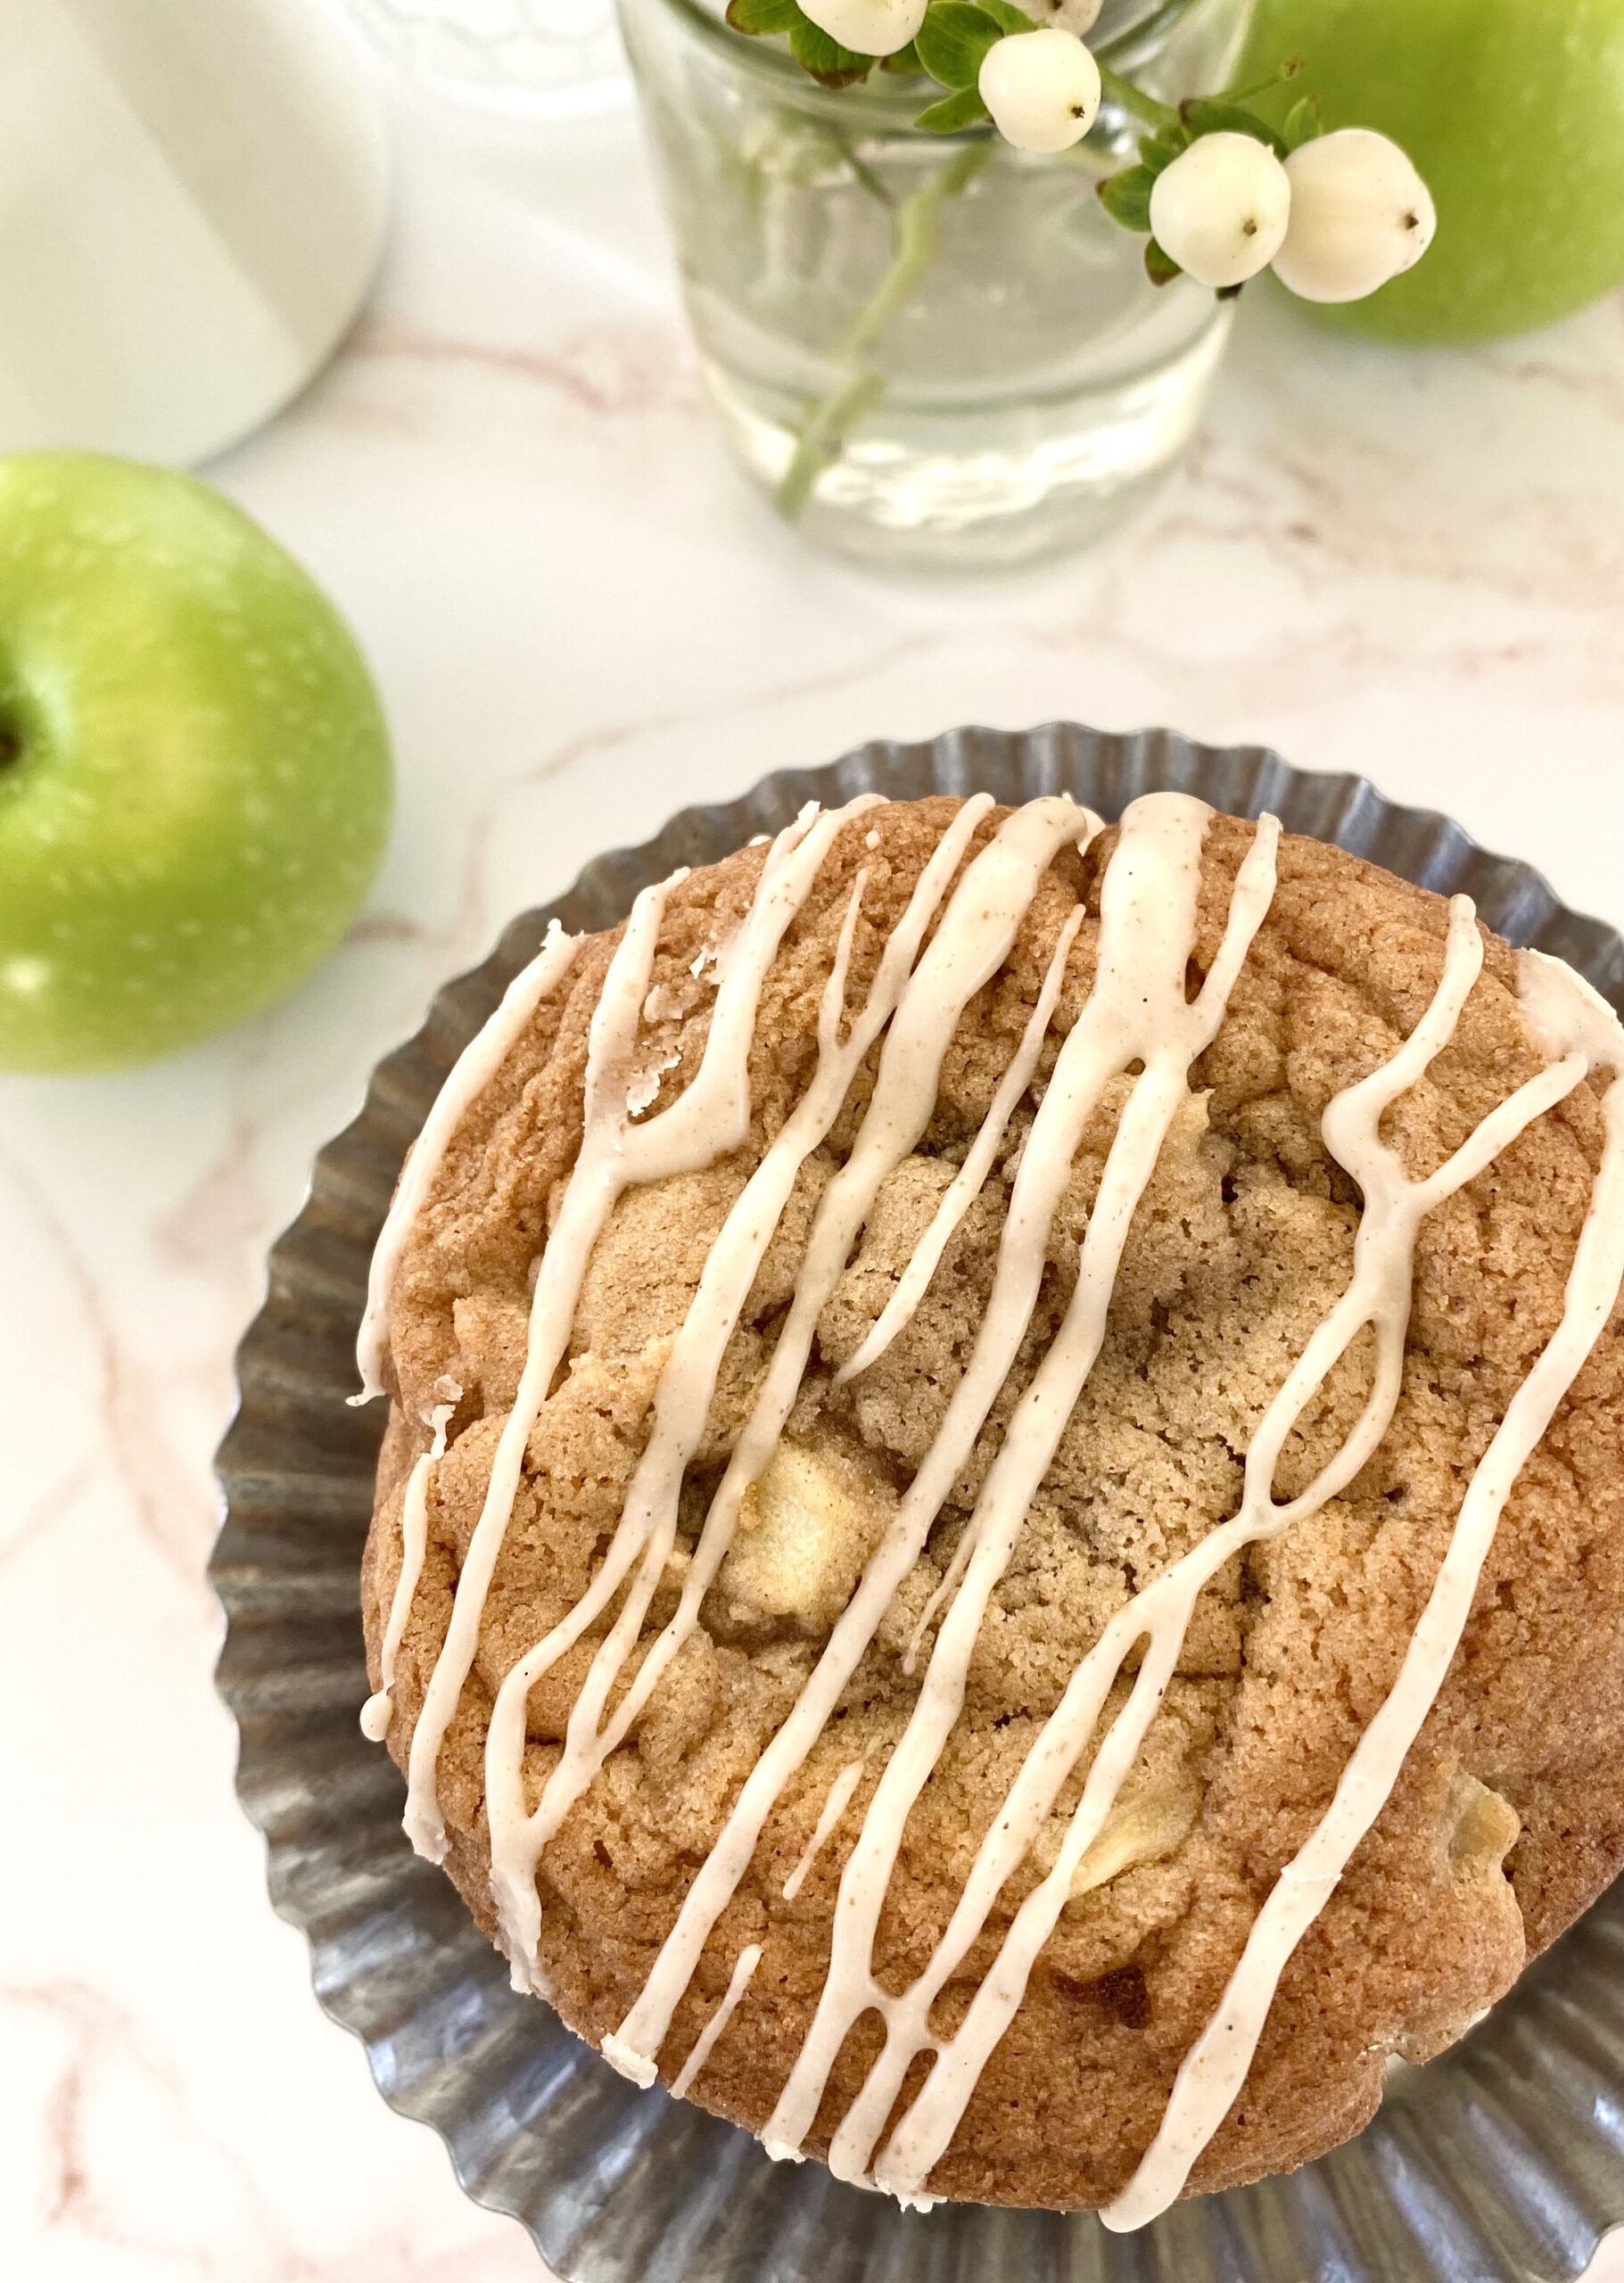
These Apple Spice Cookies were one of my most popular cookies last fall so I decided to bring them back a little early this year. The combination of cinnamon, nutmeg and vanilla in this cookie dough will remind you of cinnamon rolls and apple pie and inspire you look forward to fall.
The apples in this recipe are cooked briefly on the stovetop to bring out the flavor and create the perfect texture. Dropping raw apple chunks into cookie dough or cake batter is usually not a good idea. If you’ve ever baked an apple pie, you know that apples release liquid as they cook and that liquid will end up in your baked cookies, creating soggy spots. So definitely don’t skip this step!
These gorgeous, golden brown cookies are perfectly delicious on their own, but extra credit goes to the Brown Butter Icing for taking them over the top!
Make sure to head over to Instagram to watch the video of these Apple Spice Cookies being created: Click here
Apple Spice Cookies with Brown Butter Icing
Spice cookies with fresh apples and brown butter icing
1 cup (4 oz or 113g)chopped apples (1/4-inch pieces)I used one large Granny Smith apple
1tablespoonsugar
¼teaspoonground cinnamon
Apple Spice Cookie Dough
1 ½cups (6 3/4 oz or 191g)all purpose flour, sifted
½teaspoonbaking soda
½teaspoonsalt
1teaspoonground cinnamon
¼teaspoonground nutmeg
½cup (4 oz 113g)unsalted butter, softened
1cup (7 oz or 200g)packed brown sugar
1 largeegg
1 largeegg yolk
½teaspooonpure vanilla extract
Brown Butter Icing
2tablespoonsunsalted butter
½cup (2 oz or 57g)powdered sugar, sifted
½teaspoonpure vanilla extract
pinchfine sea salt
1-2tablespoonswhole milk
Instructions
Cooked Apples
Melt the butter in a small skillet over medium heat. Add apples, sugar and cinnamon to the skillet.
Cook, stirring occasionally, until the apples are tender, about 4-5 minutes.
Remove from heat and let cool completely. Drain any excess liquid from the cooled apples.
Apple Spice Cookies
Preheat the oven to 375ºF (190ºC). Line two large baking sheets with parchment paper.
In a medium bowl, whisk together the flour, baking soda, salt, cinnamon and nutmeg. Set aside.
In a large bowl, beat the butter and brown sugar with an electric mixer at medium speed until light and fluffy.
Beat in the egg, egg yolk and vanilla extract, one at a time, until well combined
Stir in the flour mixture, just until combined.
Fold the the cooled apples into the cookie dough.
Divide the dough into 12 equal golf ball size portions and place them 3 inches apart on the prepared baking sheets.
Bake until golden brown, about 11-13 minutes. Let cool 1 minute on the baking sheet, then transfer to a cooling rack to cool completely.
Brown Butter Icing
In a small saucepan, cook the butter over medium heat until golden brown and fragrant. When brown specks start to form in the bottom of the pan, remove from heat.
Immediately transfer the browned butter to a small bowl. Whisk in the the powdered sugar, vanilla extract, salt and 1 tablespoon milk. Add more milk as needed to reach desired consistency.
Drizzle the icing over the cooled cookies.
Notes
NOTE: If your cookies spread too much when baking, refrigerate dough for 30 minutes, then bake as directed.
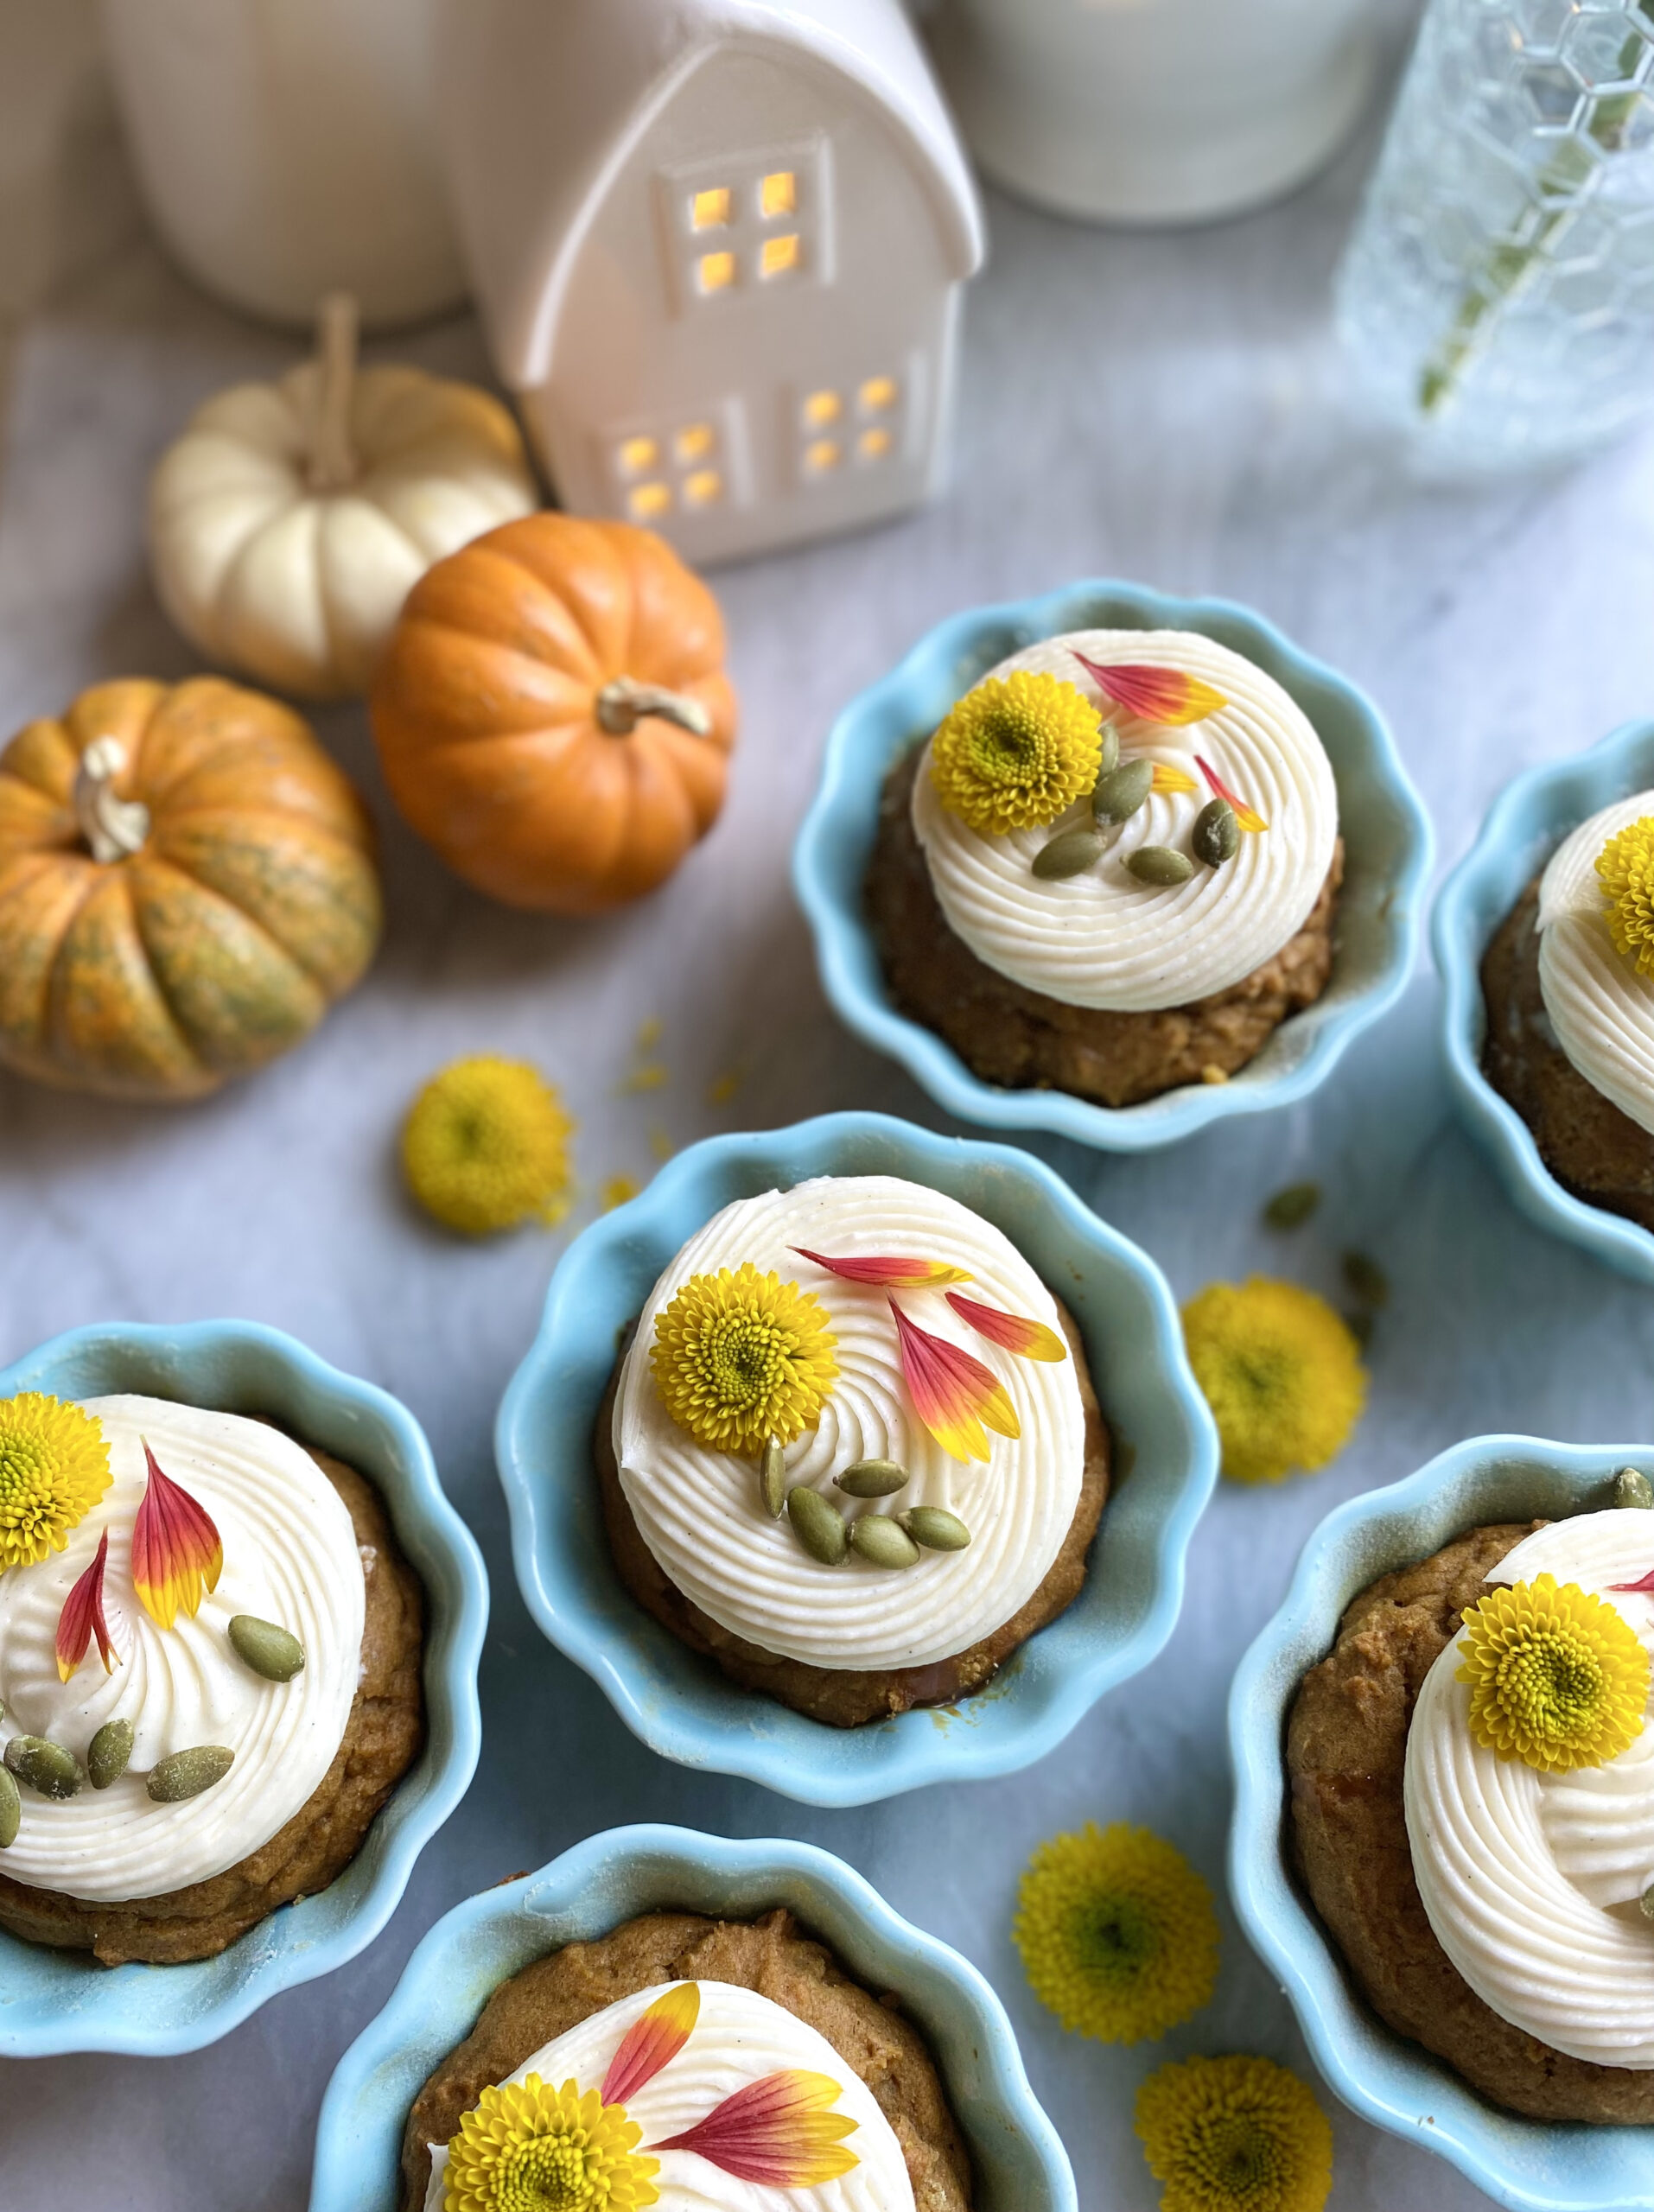
In early September, I saw someone announce the fall season on social media. In addition to people pointing out that it was too early for the announcement, the word police corrected the person with the word autumn. Since both terms are correct, we can call the season whatever we prefer. I think autumn is a pleasant sounding word, so I’ll use it for the rest of this post. Whatever you call it, these Pumpkin Spice Muffins are a perfect little celebration of the season. They have just the right amount of warm spices, making them so fragrant that your kitchen will smell like cozy autumn heaven.
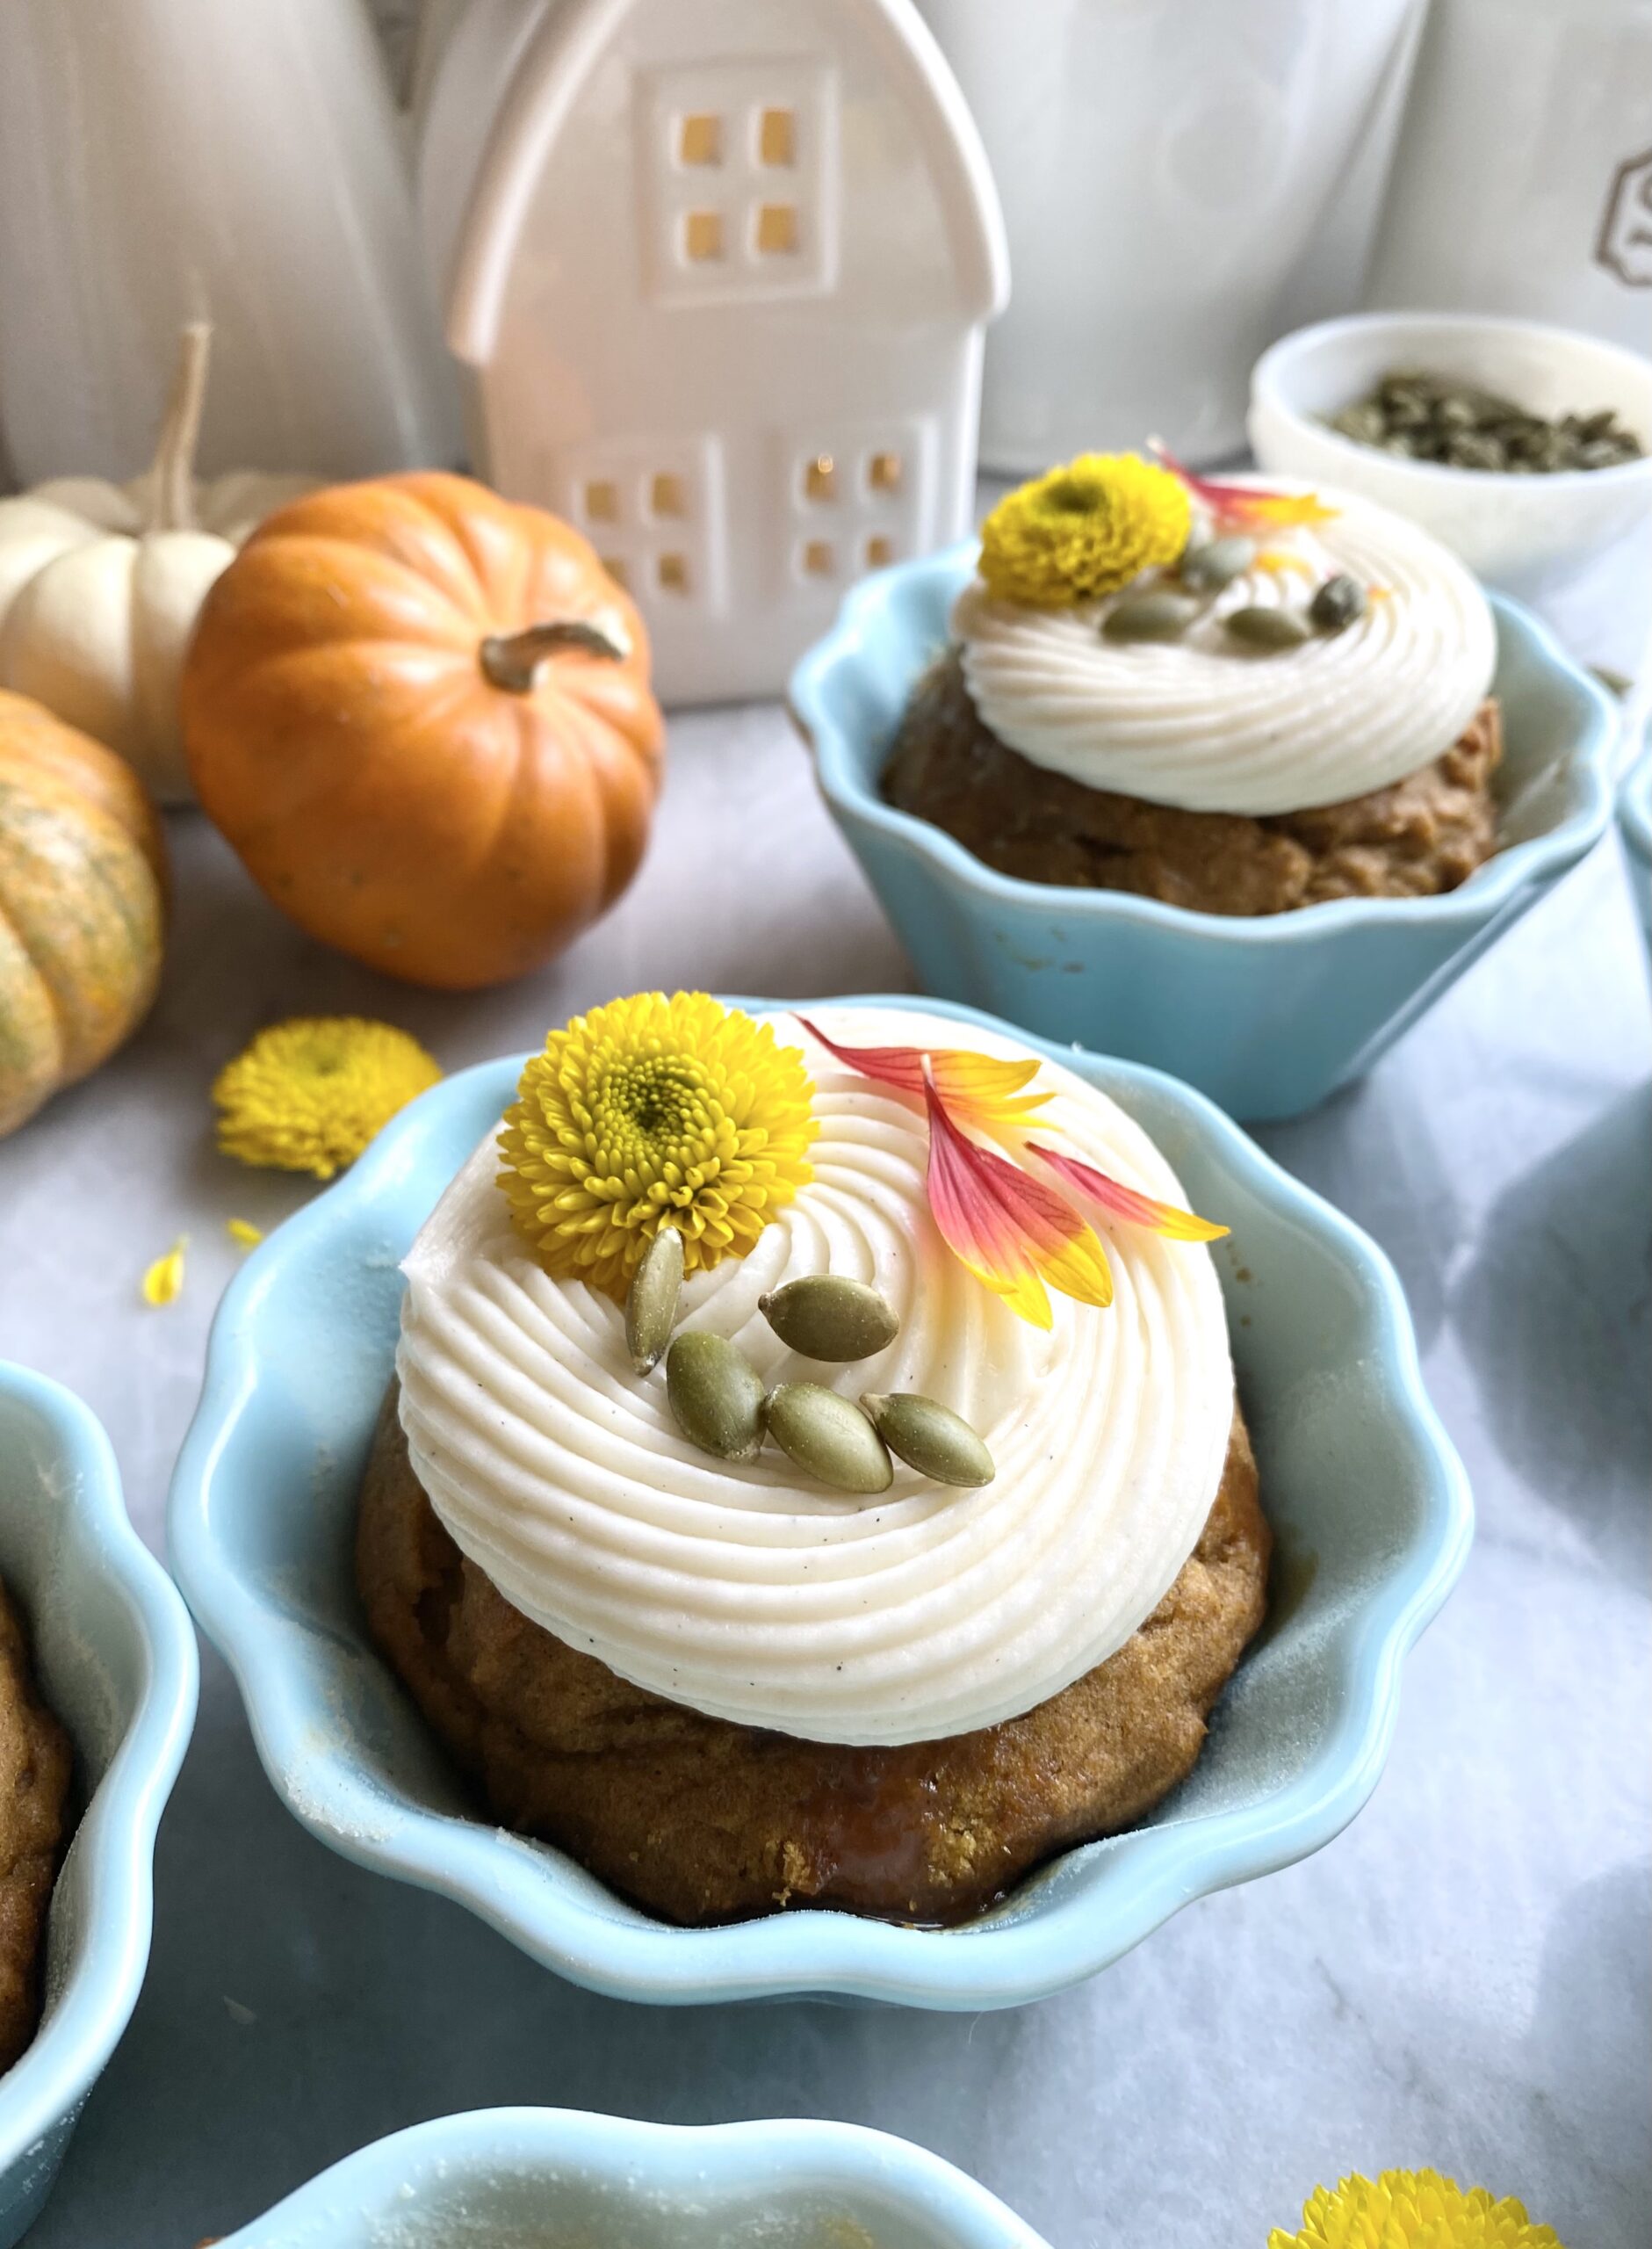
I originally made them in mini loaf pans, but I thought they would be cute as muffins too. They’re so cute and delicious that I often give them as holiday gifts. This year I decided to try them in ramekins and I loved the results! I used 6-ounce ramekins, but you can use 8-ounce ramekins, any size mini loaf pans, a muffin pan or even an 8 or 9-inch loaf pan. Keep in mind that baking times will differ. To find the ramekins I used, click here.
Pumpkin Spice Muffins with Caramel Filling
by Mari Vasseur
Tender pumpkin spice muffins with caramel filling and luscious cream cheese frosting
Preheat the oven to 350ºF (180ºC). Grease and flour seven 6-ounce ramekins or six 8-ounce ramekins or any mini loaf pans of your choice.
In a large bowl, sift together the flour, cinnamon, baking powder, baking soda, salt, ginger, nutmeg and cloves until well blended.
In a separate large bowl, beat the butter and brown sugar together, with an electric mixer at medium speed, until pale and fluffy. Beat in the eggs, one at a time, until incorporated. Beat in the pumpkin purée and vanilla extract until well blended. Stir in the flour mixture just until combined.
Divide the batter evenly into the prepared ramekins. Bake for 15-25 minutes or until golden brown and a toothpick inserted in the center comes out clean. Do not overbake.
Cool completely if serving in ramekins or remove from pans after cooling for 10 minutes. Continue to cool on wire rack.
Make 3/4-inch wells in the center of each muffin. Fill with caramel sauce. (For loaves, poke multiple holes with a skewer. Fill with caramel sauce.) Top with cream cheese frosting and pumpkin seeds
Cream Cheese Frosting
In a large bowl, beat the cream cheese and butter together, with an electric mixer at medium speed until smooth and well blended. Do not over beat.
Add the vanilla extract and salt and beat until combined. On low speed, gradually beat in the powdered sugar incorporated. Add the heavy cream and continue beating at low speed smooth. Remove any bubbles by gently stirring with a spatula.
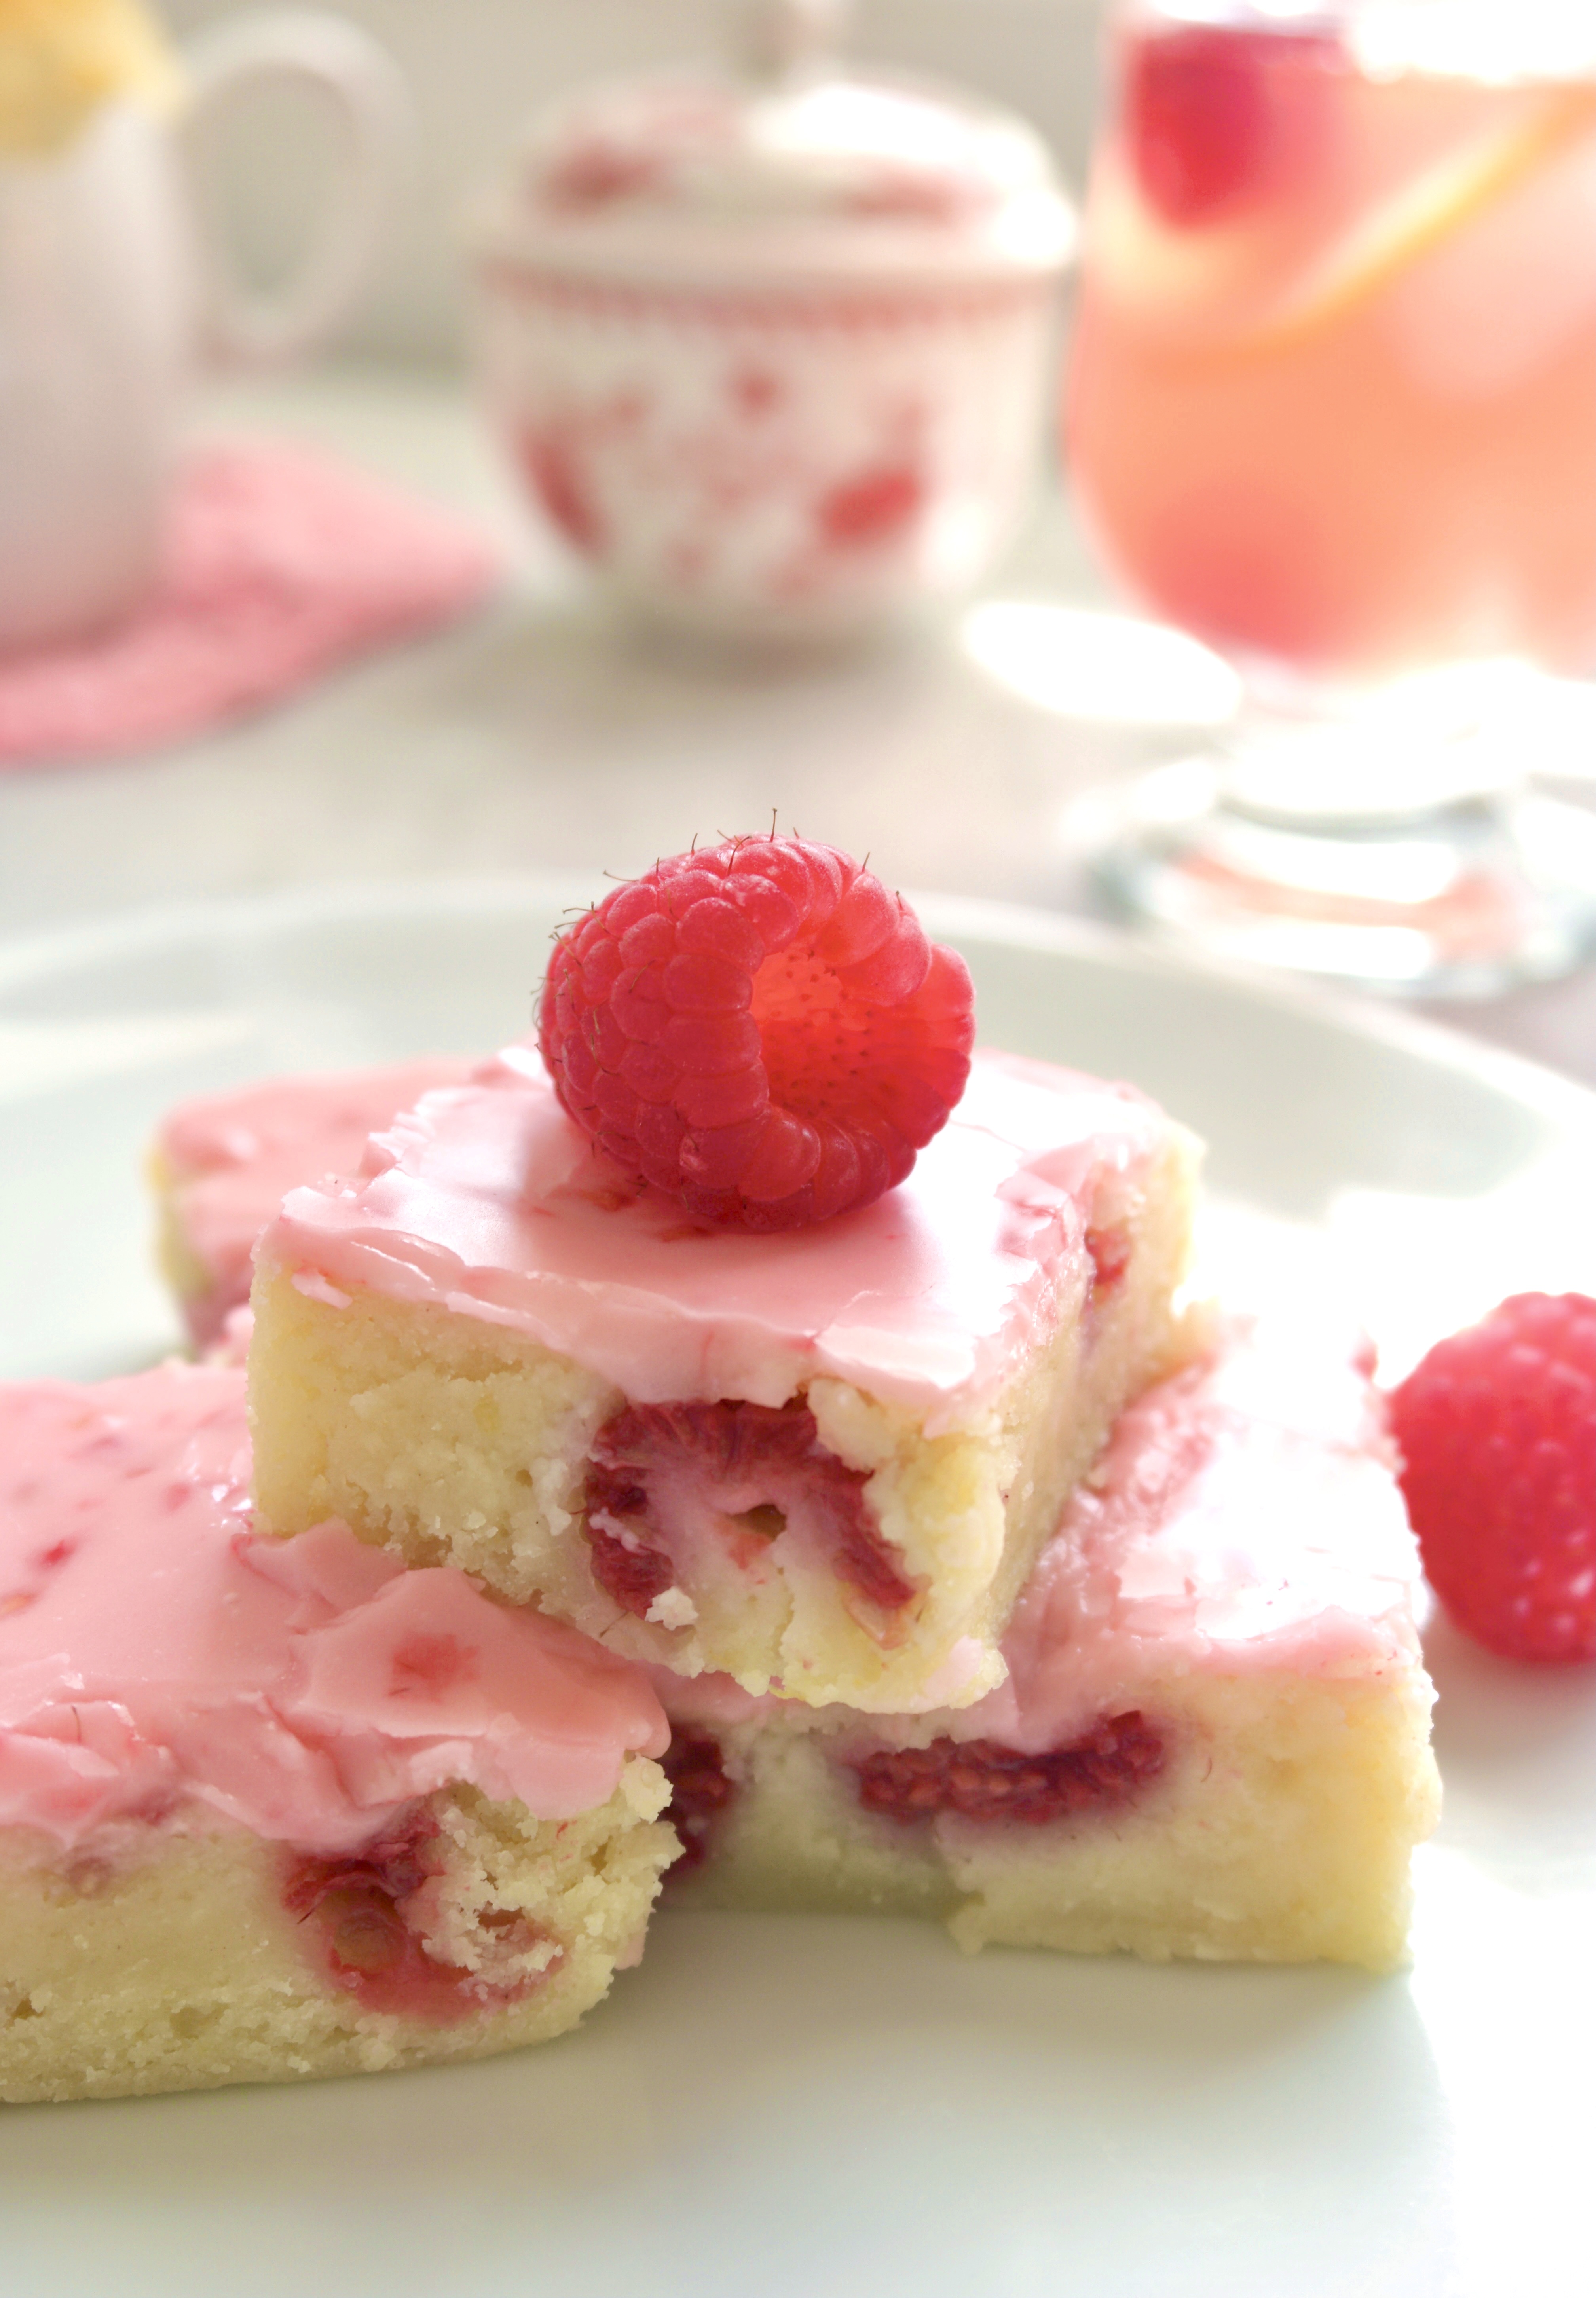
Raspberry Lemonade Brownies are the perfect easy recipe for spring and summer. They’re so pretty and delightfully delicious! The fudgy lemon batter is brightened with fresh lemon zest and raspberries, then topped with a sweet-tart burst of flavor and color from fresh raspberries. The icing contains no food coloring. Just three raspberries will give you that luscious shade of pink!
I want to clarify that lemon brownies are not lemon bars. We all know what a lemon bar is. The one we all know and love has a lemon curd filling on a shortbread crust, possibly drizzled with lemon icing or sprinkled with powdered sugar. The lemon brownie is a whole different animal. Don’t mistake lemon brownies for lemon cake either. Lemon brownies contain white chocolate which gives them a rich, fudgy texture like their chocolate cousins. We may be tempted to call them blondies, but blondies have a butterscotch flavor and typically don’t contain chocolate. Now that we got that straightened out, we can sleep peacefully tonight.
1cup (170g)raspberriesplus extra for serving, if desired
Raspberry Lemonade Icing
3raspberries
1 ¼cups (142g)powdered sugar, sifted
1tablespoon (14g)melted butter
2-3tablespoons (30-45ml)fresh lemon juice
Instructions
Raspberry Lemonade Bownies
Preheat the oven to 325ºF (165ºC). Line an 8-inch square baking pan* with parchment paper.
In a medium microwaveable bowl, melt the white chocolate and butter in the microwave for 20 second bursts, stirring after each one. Alternately, melt the white chocolate and butter on the stovetop in a heat safe bowl set over a pan of barely simmering water. Stir gently until smooth.
In a large bowl, whisk together the sugar, eggs, egg yolk, lemon juice, zest and salt until smooth and well combined. Stir in the melted white chocolate mixture. Add the flour and mix just until combined. Gently stir in the raspberries.
Transfer the batter to the prepared baking pan. Bake until the top is set, the edges are light golden brown and a toothpick inserted into the center comes out with a few moist crumbs on it, about 23-28 minutes. Let the brownies cool in the pan.
Raspberry Lemonade Icing
In a medium-size bowl, smash the raspberries with a fork.
Add the powdered sugar, melted butter and 1 tablespoon of lemon juice. Whisk until smooth, adding more lemon juice as needed. Spread the icing over the cooled brownies.
Cut into 2-inch squares and serve with additional raspberries, if desired.
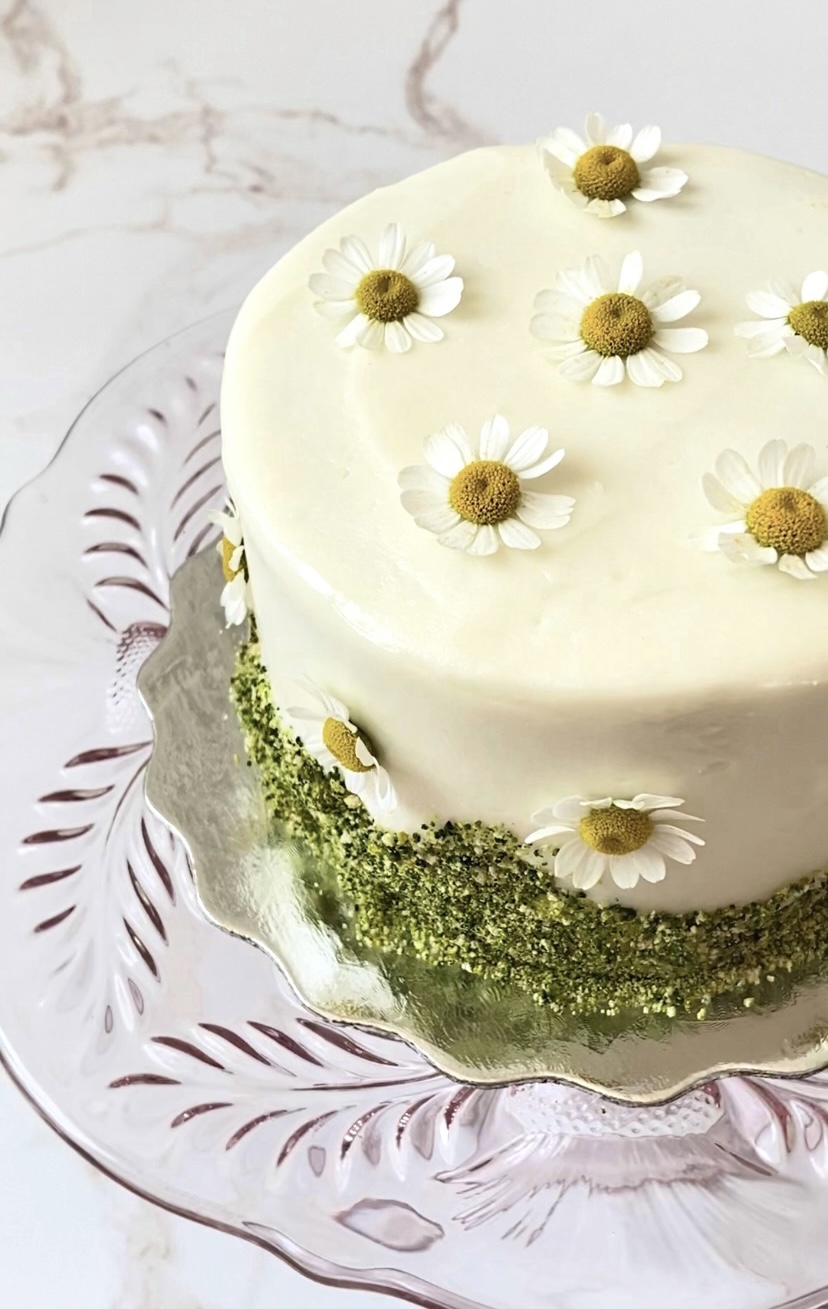
If you haven’t noticed already, I love little cakes. Mini cakes are not only cute and charming, they’re likely to make you very popular. This recipe makes two darling Mini Hummingbird Cakes, one to keep and one to share. Hummingbird Cake is a delightful way to use your ripe bananas. The version I’m sharing here also contains pineapple, pecans and coconut. This fruity, nutty combination reminds me of spring and would be perfect for Easter or a spring picnic.
Mini Hummingbird Cake
by Mari Vasseur
Hummingbird Cakes filled with bananas, pineapple, pecans and coconut, topped with cream cheese frosting and decorated with graham cracker crumb moss and fresh chamomile flowers.
Green gel food colorI used Americolor avocado green**
Yellow gel food coolI used Americolor lemon yellow***
Vodka
6graham crackers (two squares each), crushed
Fresh pesticide free chamomile flowers
Instructions
Hummingbird Cakes
Preheat oven to 350ºF (180ºC). Line the bottoms of four 4-inch cake pans**** with parchment paper. Grease and flour the insides.
In a medium-sized bowl, whisk together the flour, baking soda, salt and cinnamon until well blended.
In a large bowl, beat the butter, sugar, brown sugar and oil with an electric mixer, until pale and fluffy. Beat in the egg, egg yolk, and vanilla extract in three separate additions, making sure each one is incorporated before adding the next. Stir in the bananas, pineapple, pecans and coconut until combined.
Transfer the batter to prepared cake pans, about 1 cup of batter in each pan. Place the filled cake pans on a baking sheet.
Bake until toothpick inserted in centers comes out clean, about 25-28 minutes. Cool the cakes in pans 10 minutes then turn the cakes out onto a cooling rack.
Trim the cakes to 1-inch thickness. Fill, stack and frost the cakes with cream cheese frosting.
Cream Cheese Frosting
In a large bowl, beat the butter with an electric mixer until smooth and pale. Beat 1 tablespoon (15ml)of heavy cream, the vanilla extract and salt into the butter until well combined. On low speed, beat in the powdered sugar a half cup at a time, until well combined.
In a medium-sized bowl, mix cream the cheese with remaining 1 tablespoon (15ml) heavy cream, with a spatula until smooth. On low speed, beat the cream cheese mixture into the butter mixture until smooth and well blended. Smooth out any bubbles by stirring by hand with a spatula.
Decor
To make the graham cracker crumb moss: In two small bowls, dilute 1/8 teaspoon of each gel food color with a few drops of vodka. (Vodka will dissipate as the crumbs dry.) Place the graham cracker crumbs in a plastic food bag. Add diluted food colors a little at a time and seal the bag. Shake the bag and gently massage it to distribute the color. Add more diluted food color as needed until desired your shade of green is reached. Spread the crumbs out onto a parchment lined baking sheet to dry. Apply the crumbs to bottom edges of the frosted cakes.
Notes
*Chop the coconut flakes to achieve a finer texture. This step is optional.**To find the avocado green food color gel I used, click here.***To find the lemon yellow food color gel I used, click here.****To find the 4-inch cake pans I used, click here.
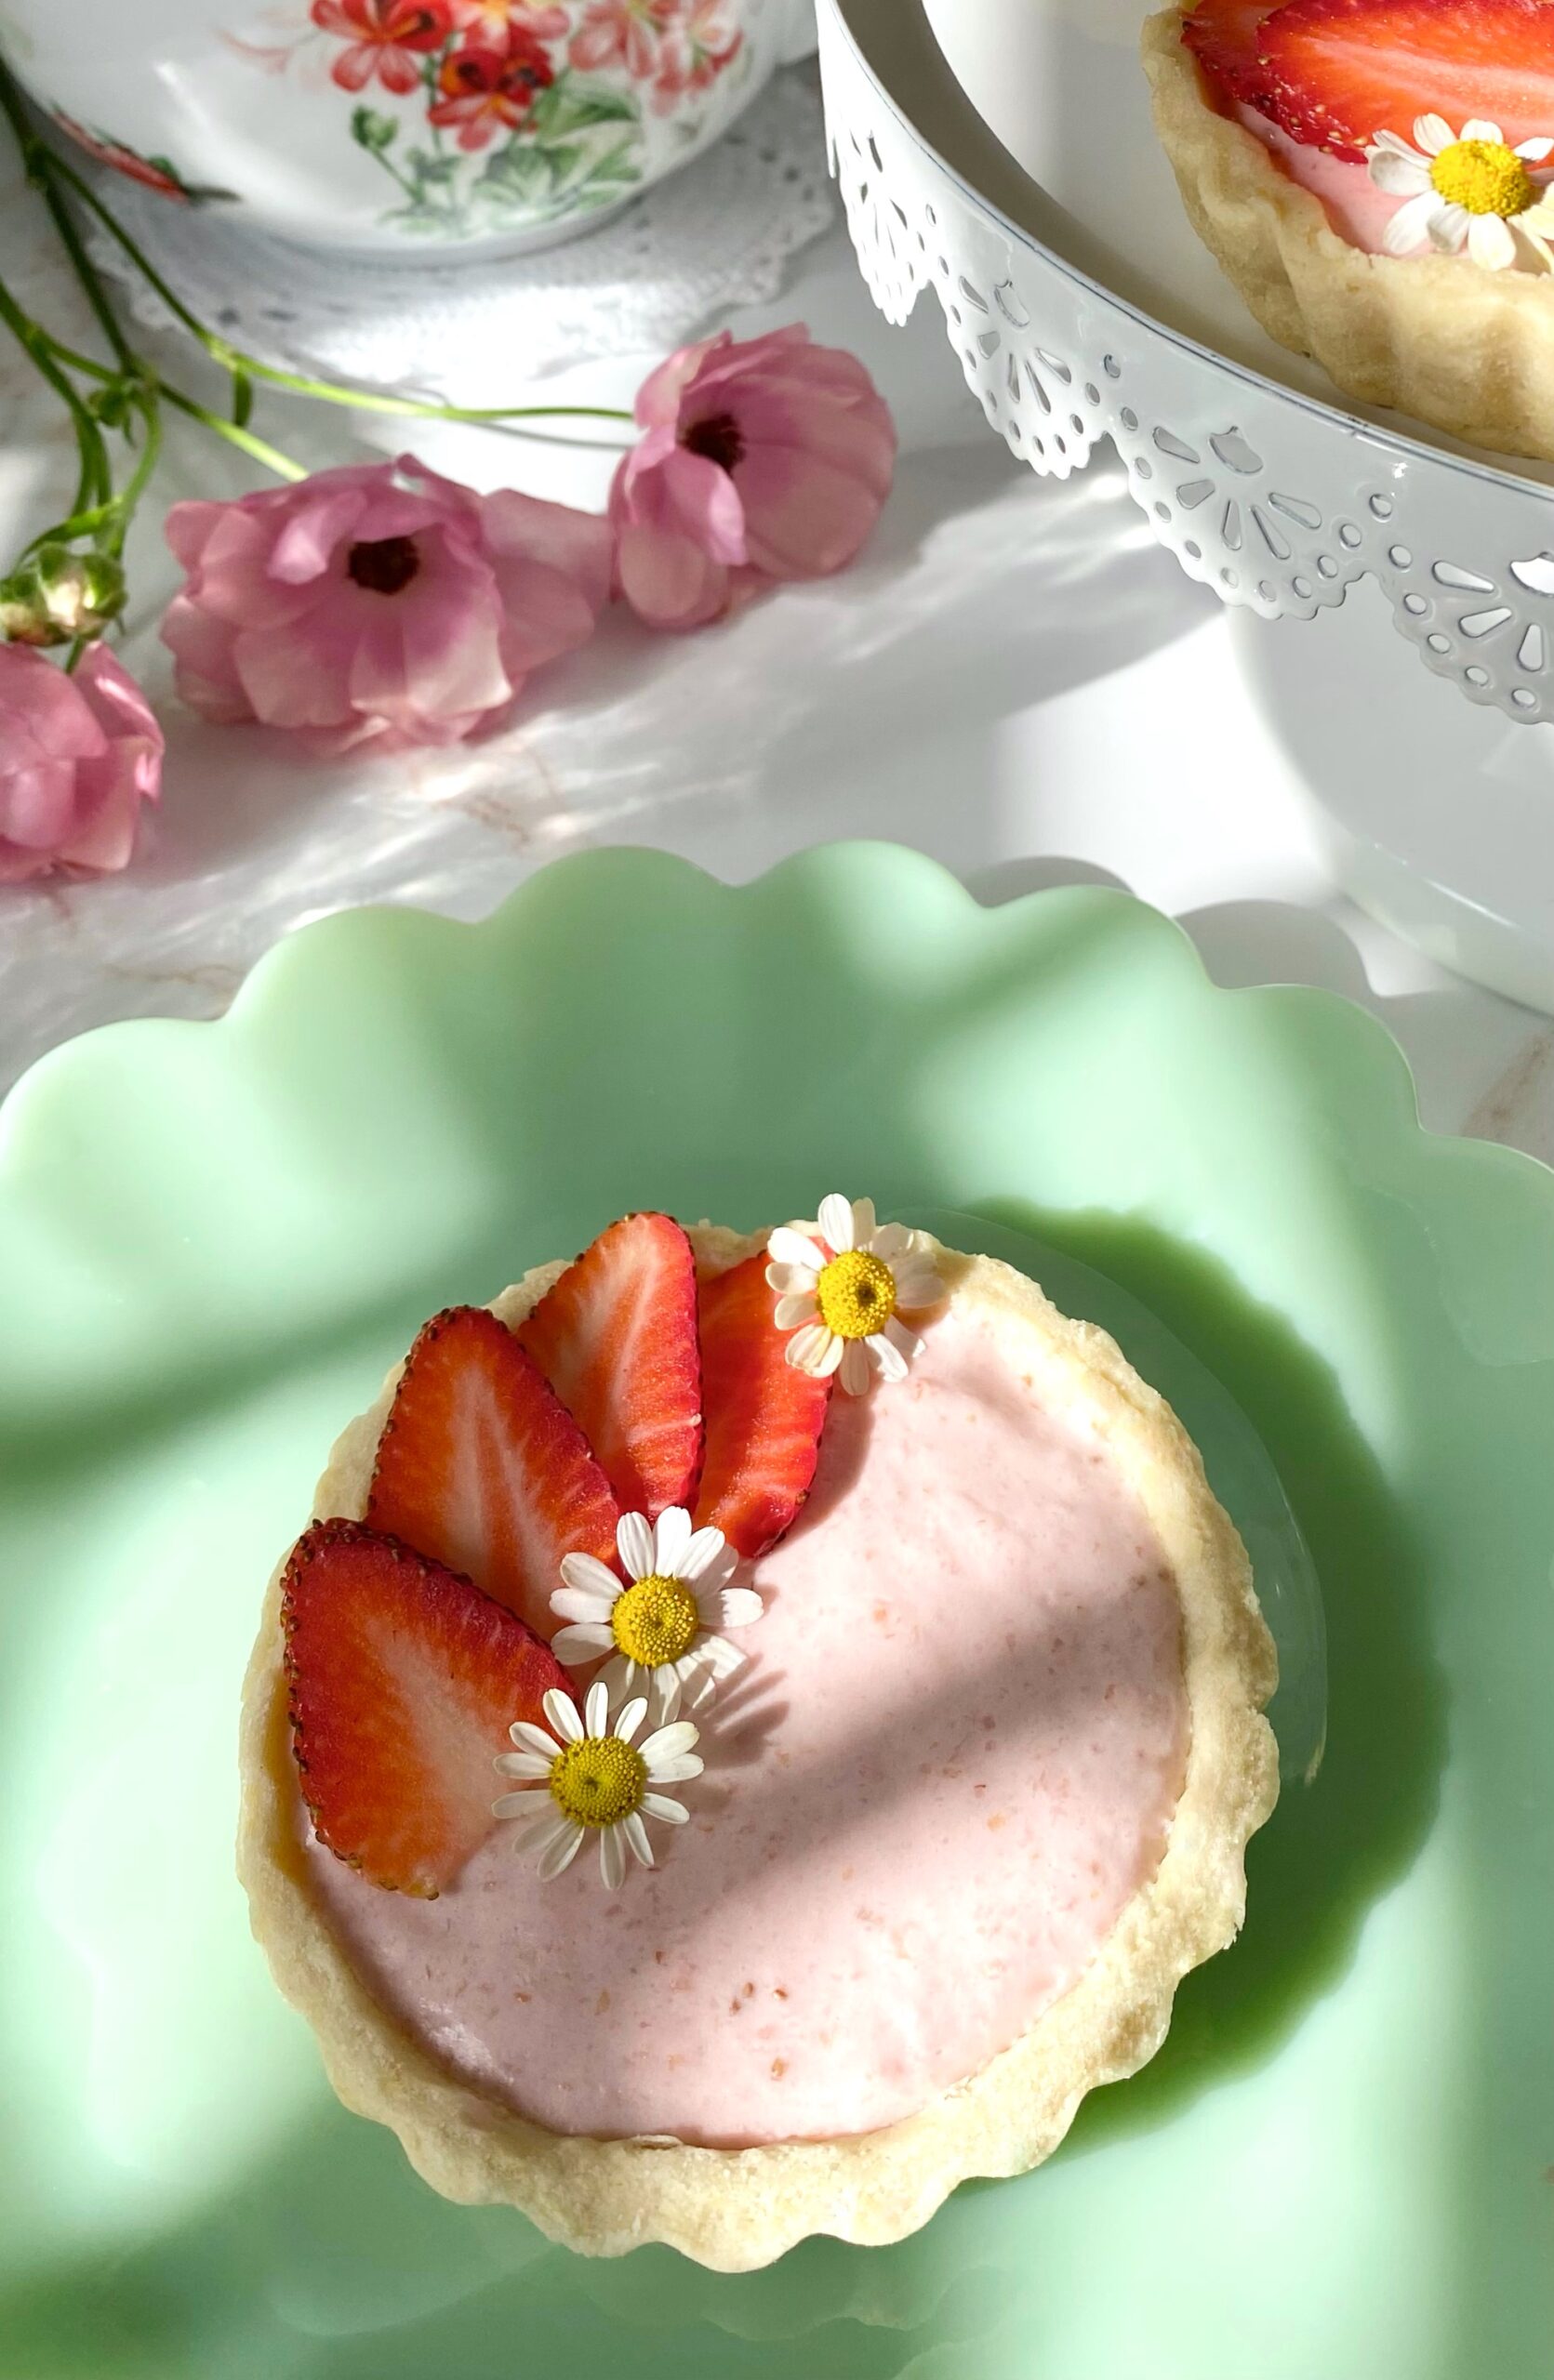
May is when I get to pull out all of my summery recipes. These pretty little Strawberries & Cream Tarts remind me of a summer day. The kind of day when you’re outside enjoying the sunshine and you’re craving a cool, refreshing dessert. This strawberry cream filling alone is so delicious that I could just eat the entire bowl with a spoon. But since I’m extra, I had to create an aesthetic dessert with it.
I used my favorite tart shells for this recipe, but this would also be delicious with those little pre-made graham cracker pie crusts if you want to take a shortcut. The reason I love this tart crust recipe so much though, is that it actually tastes delicious. Once, a few years ago, I purchased a beautiful, small fruit tart from a famous bakery. The fruit was vibrant and glistening and the pastry cream filling was sweet and silky. Now we need the sound of a mic drop, because the tart crust was hard and flavorless, like cardboard! Ever since then, I knew I would settle for nothing less than a delicious tart crust.
2cups (16 ounces)strawberry pureePlus more for garnish
½cup (3.5 ounces)granulated sugar
3tablespoonswater
2teaspoonsunflavored gelatin powder
½cup (4 ounces)cream cheese, softened
½teaspoonstrawberry extract
½teaspoonvanilla extract
½cup (4 ounces)cold heavy whipping cream
Instructions
Tart Crust
In a bowl, whisk together flour, powdered sugar and salt. Set aside.
Work in butter and egg yolk with a pastry blender or with your fingers, until pea size pieces are formed.
Add ice water, one tablespoon at a time, until dough comes together.
Form dough into a disc. Wrap in plastic and refrigerate for one hour.
On a lightly floured surface, roll dough to a scant 1/4-inch thickness
Cut dough into six 5-inch rounds. Press rounds into six 4-inch or 4 1/4-inch tart pans.*
Dock the bottoms of pie crusts with a fork. Freeze for 30 minutes.
Heat oven to 375ºF. Place tart pans on a large baking sheet.
Line tart shells with six 6-inch parchment rounds. Fill with pie weights. (You can use dried beans or rice if you don't have pie weights.)
Bake tart shells for 12 minutes. Remove parchment paper and pie weights. Continue baking until tart shells are light golden brown, about 4-6 more minutes.
Transfer to cooling rack to cool completely.
Strawberry Cream Filling
Pass the strawberry purée through a mesh sieve to remove large seeds.
In a medium saucepan, simmer the strawberry purée until it's reduced by half. Stir in the sugar and continue cooking over medium heat, until the sugar is dissolved. Transfer to a medium bowl.
Meanwhile, place 3 tablespoons of water into a small bowl. Sprinkle gelatin powder over the top of water. Let sit until water is absorbed, about 5 minutes.
Pour the gelatin mixture into the warm strawberry reduction mixture and stir until fully incorporated.
In a large bowl, beat cream cheese on low speed with an electric mixer until smooth.
Add extracts and beat until combined.
Add the strawberry reduction mixture to the cream cheese a little at time. Beat until well combined.
In a medium bowl, beat heavy whipping cream with an electric mixer at high speed until stiff peaks form.
Fold whipped cream into strawberry mixture.
Spoon into cooled tart shells. Smooth tops with a small offset spatula. Refrigerate for two hours. Garnish with sliced, fresh strawberries.
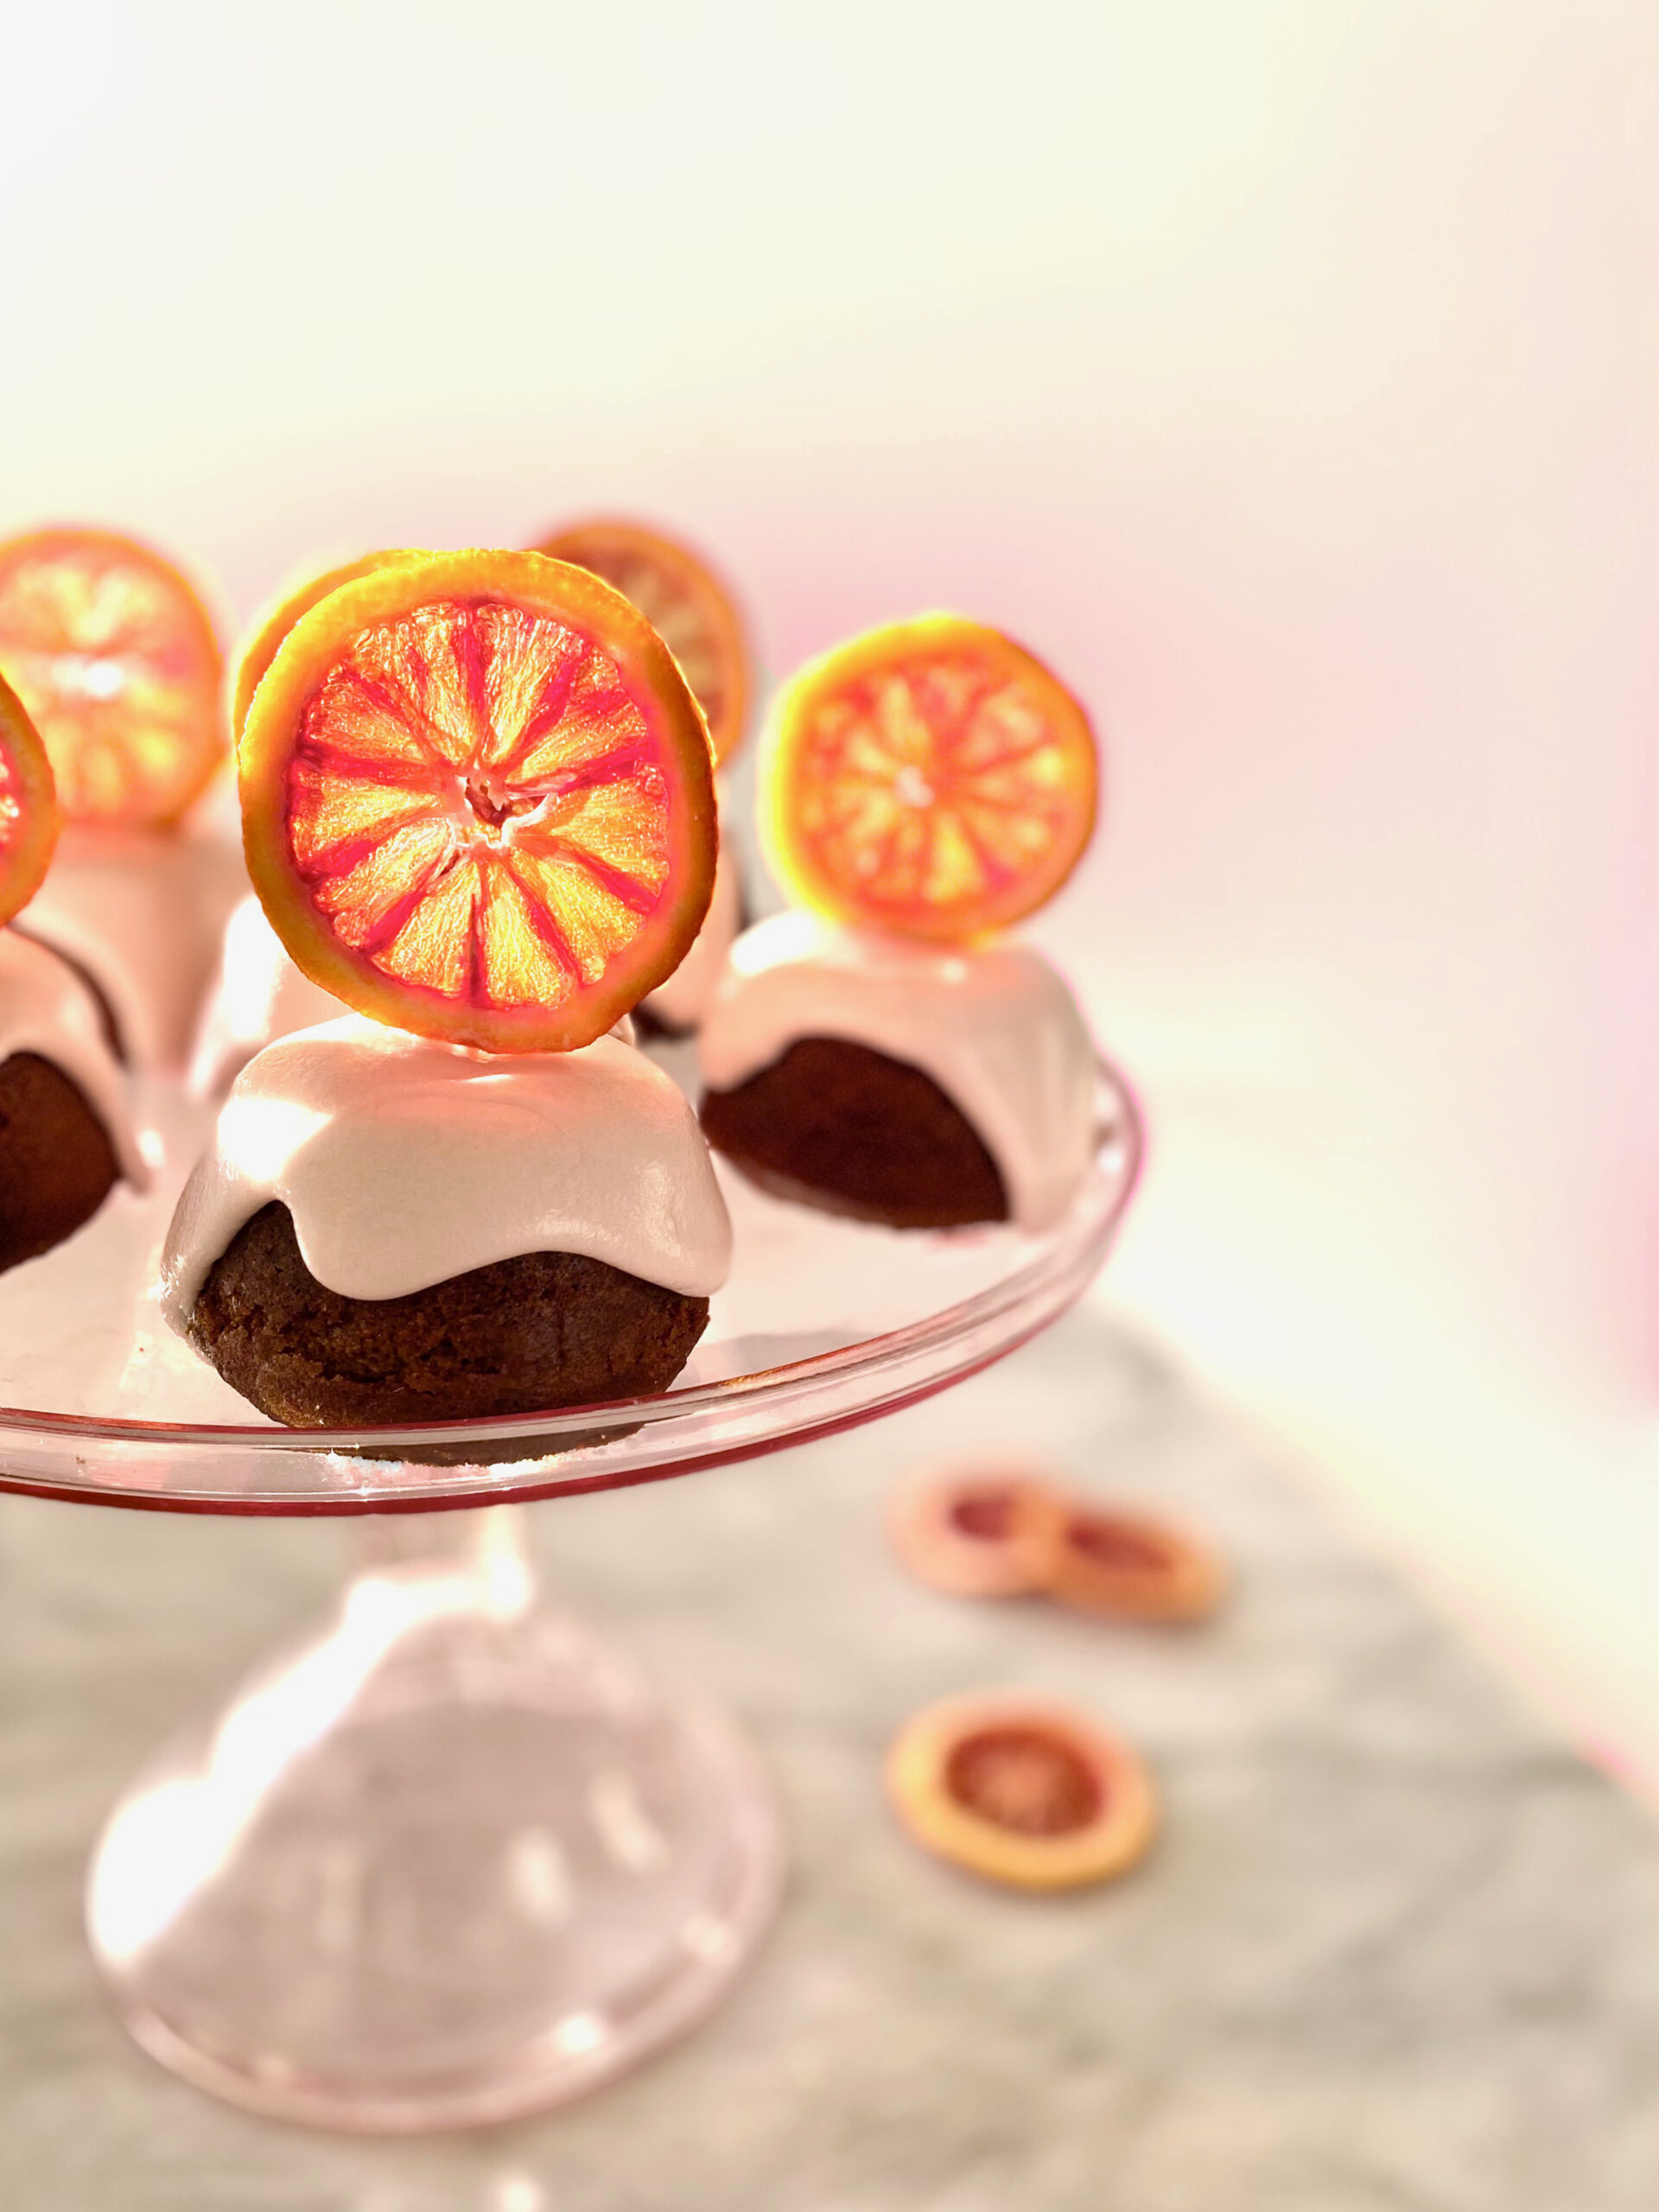
Every winter, when blood oranges come back in season, I start keeping an eye out for them at grocery stores and farmers markets. This year was different. I’ve been at home, having my groceries delivered instead of perusing the local produce aisles. If you’ve been entrusting strangers to do your shopping like I have, then you know delivery produce selections are hit and miss. So I was elated when a bag of perfectly beautiful, ripe blood oranges landed on my doorstep. This simple joy made my day. There was no choice. I had to make something worthy of the gorgeous red beauties!
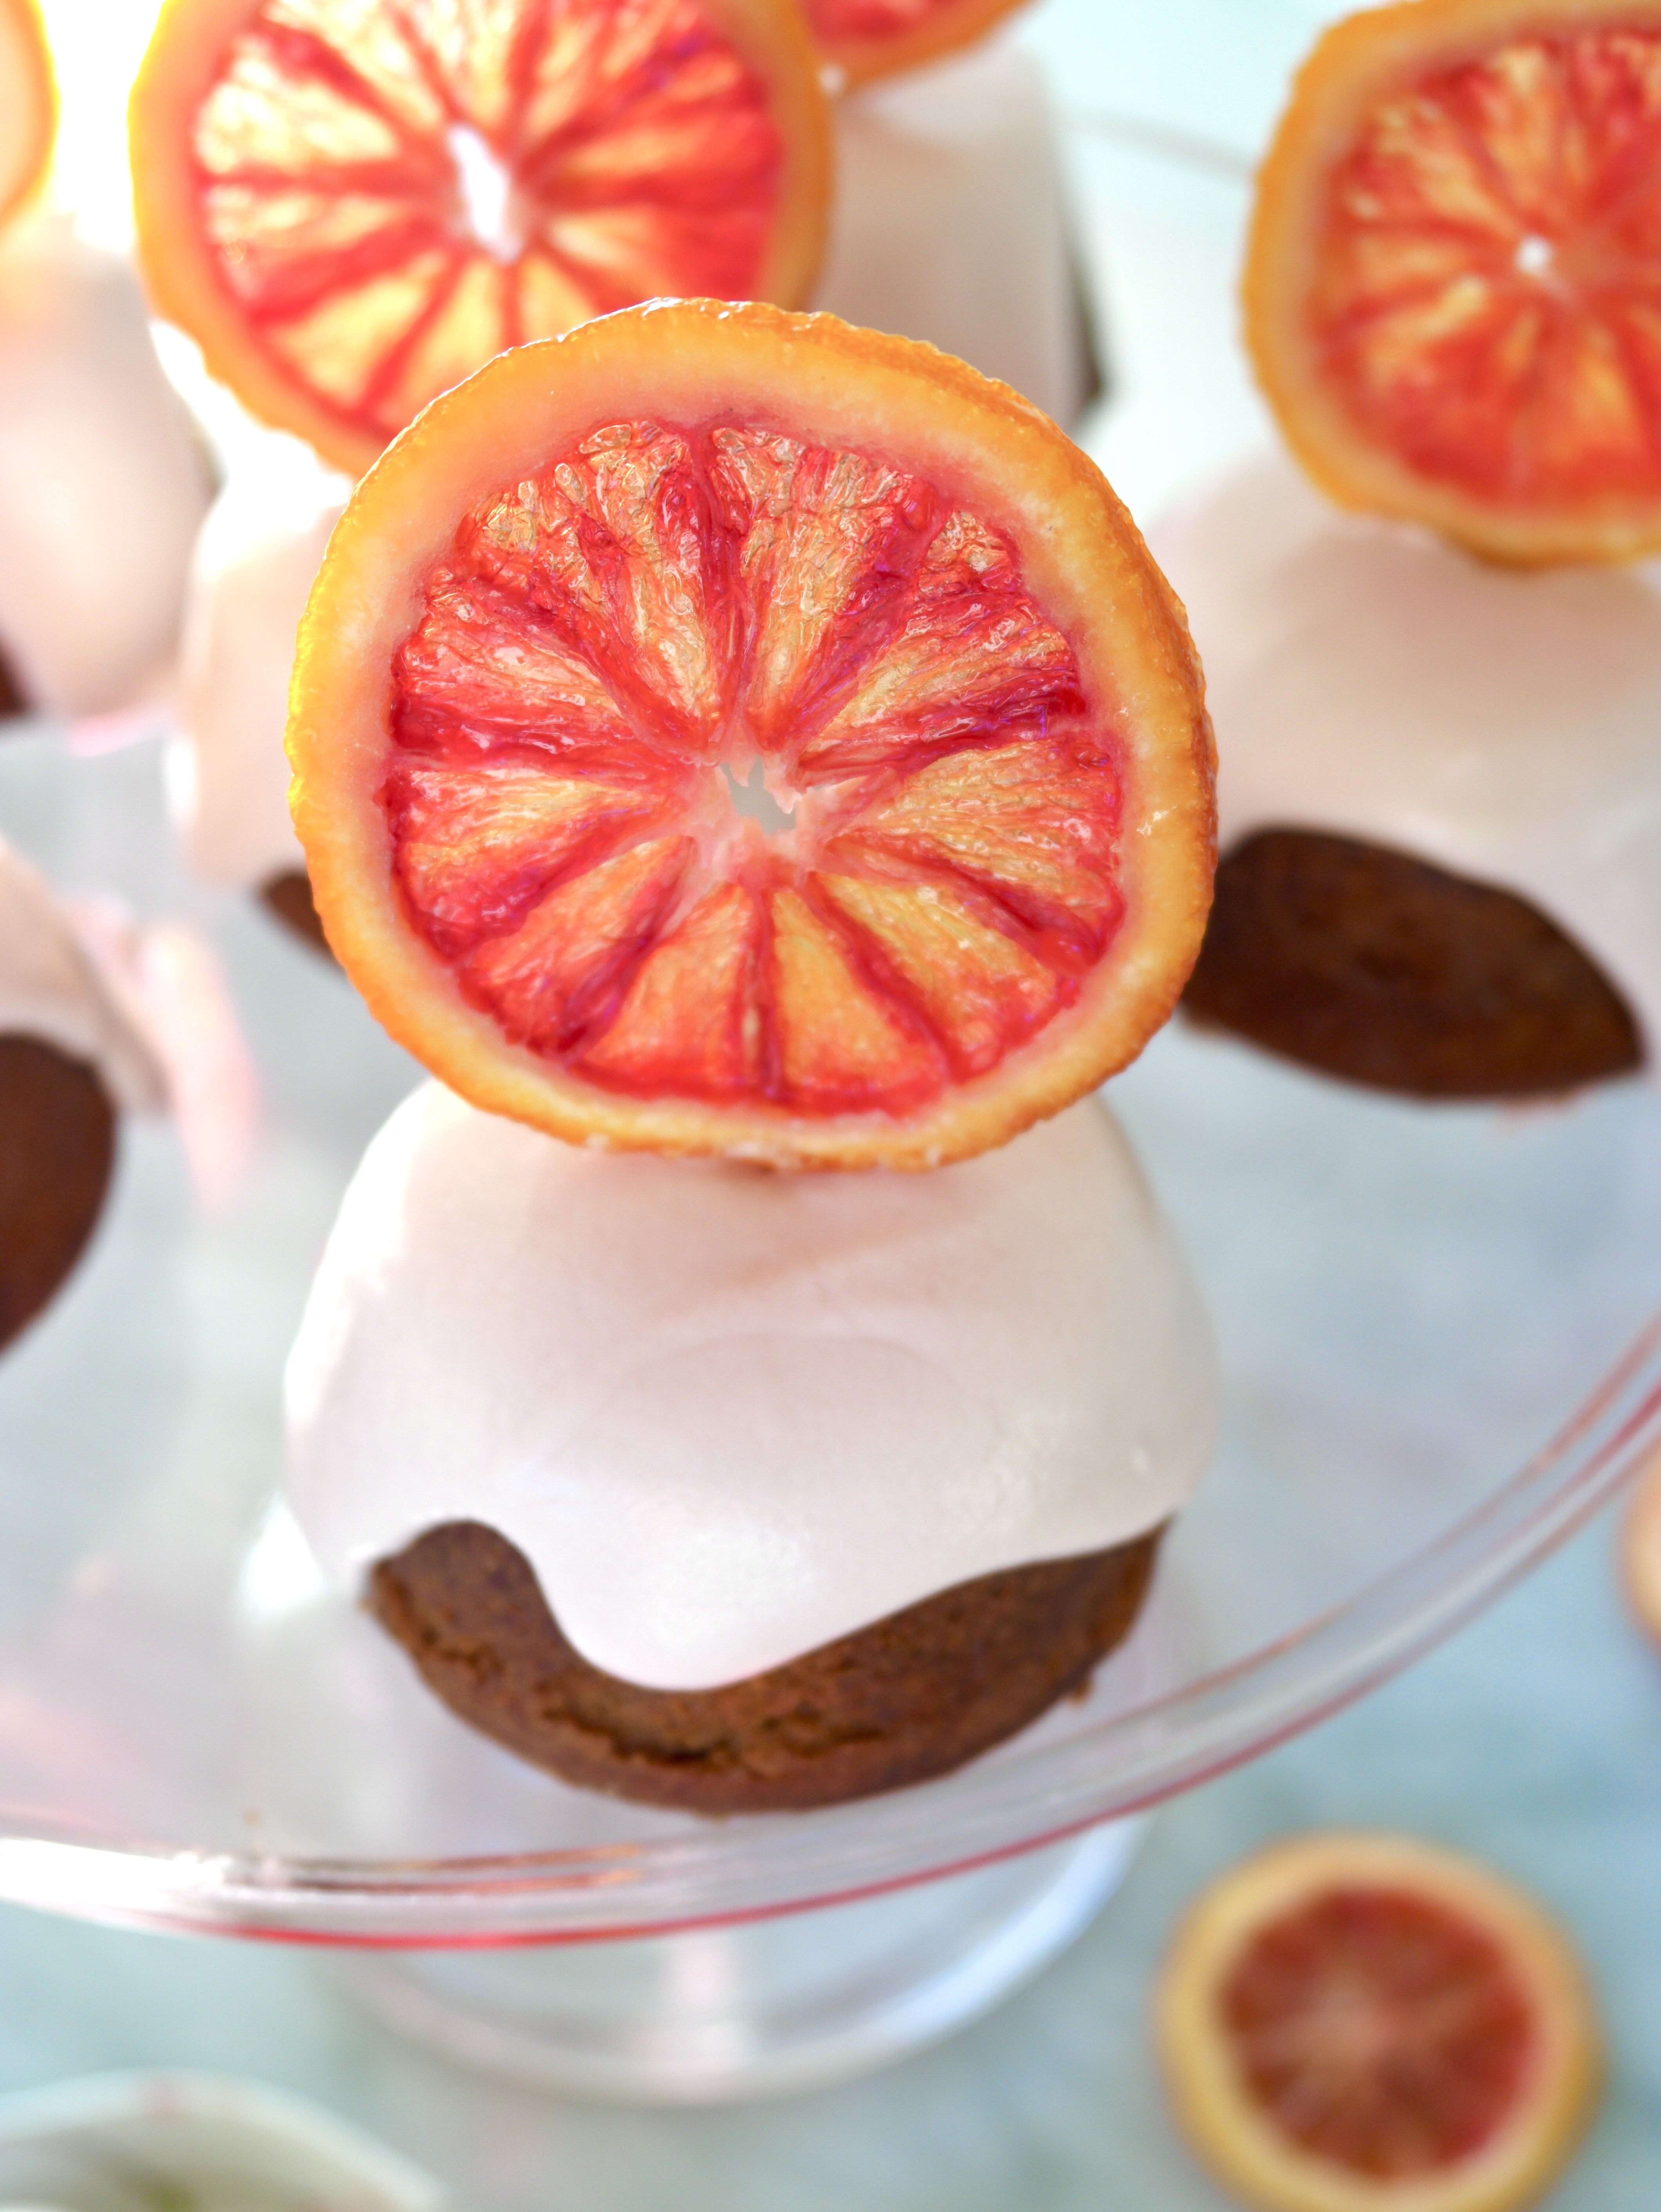
I didn’t get enough of gingerbread this holiday season, so I decided to make a gingerbread cupcake recipe that I created a few years ago when I was experimenting with blood oranges. I used blood orange zest in the cupcake batter and brushed the warm cupcakes with the blood orange syrup left over from making the candied oranges. If you don’t make the candied oranges, you can easily make a batch of the syrup* or skip this step altogether. They will still be delicious. I topped the cupcakes with cream cheese icing made with more orange zest and some blood orange juice mixed in. The juice makes the icing turns a soft shade of pink.
Candied blood orange slices are so stunning, that I can’t bring myself to just lay them on top of a dessert. They remind me of stained glass windows. I like to place them on toothpicks so they can stand up in regal style! Many recipes out there will instruct you to boil the orange slices, then let them air dry. This is perfectly fine if you don’t mind floppy candied oranges. For this recipe, boiling the slices, then letting them dry in the oven on low heat will give them enough stiffness to stand up.
If you can’t find blood oranges where you live, here’s a link to get blood oranges shipped to you. This recipe will also work with other types of oranges. You won’t get the deep scarlet color and the flavor will have a bit more tartness, but it will still be beautiful and delicious!
Gingerbread Cupcakes with Blood Orange Cream Cheese Icing
3-4tablespoons (45-59ml)blood orange juiceor orange juice
Candied Blood Orange Slices
2mediumblood orangesor oranges
½cup (100g)granulated sugar
¾cup (177ml)water
Instructions
Gingerbread Cupcakes
Preheat the oven to 350º. Spray the wells a 12-serving muffin pan with non-stick spray.
In a medium-sized bowl, whisk together flour, cinnamon, ginger, allspice, baking soda and salt until well blended.
In a large bowl, beat the butter, brown sugar and orange zest with an electric mixer at medium speed, until pale and fluffy.
Add the molasses and beat until combined. Beat in the eggs one at a time until incorporated. On low speed, mix in the flour mixture in two additions, alternating with the buttermilk. Beat just until combined.
Scoop the batter into prepared the muffin pan, filling the wells 2/3 full.
Bake until a toothpick inserted into the center of the cupcakes comes out clean, about 15-18 minutes. Allow the cupcakes to cool in pan for 7 minutes, then remove them from pan and place them upside down on a cooling rack.
Brush the warm cupcakes generously with orange simple syrup. Allow them to cool completely before frosting.
Blood Orange Cream Cheese Icing
In a large bowl, beat the cream cheese, on low speed with an electric mixer, until smooth.
Add the butter, orange zest and salt and beat until smooth and well blended.
Add the powdered sugar. Beat on low speed until the powdered sugar is incorporated. Increase the speed to medium and beat until smooth.
Beat in the blood orange juice, one tablespoon (15ml) at a time until the desired consistency is reached.
Candied Blood Orange Slices
Slice the oranges into thin 1/4 inch slices.
Combine the sugar and water in a shallow saucepan and bring to a simmer. Add the orange slices to the saucepan. Simmer for 10 minutes.
Drain the oranges, reserving the syrup.
Preheat the oven to 175ºF (80ºC). Place on a large baking sheet lined with a baking mat in a single layer and bake until the orange slices begin to stiffen, about 2 hours.
Remove the orange slices from the oven and let them cool on the baking sheet. If desired, insert toothpicks when the slices are cool enough to handle. The slices will continue to stiffen as they cool.
Notes
*To make orange simple syrup, combine the juice of one orange with enough water to make 1/2 cup. Combine mixture with the zest of one orange and 1/2 cup sugar in a small saucepan over medium heat. Stir until sugar is dissolved. Let cool and transfer to a glass container. Refrigerate until ready to use.
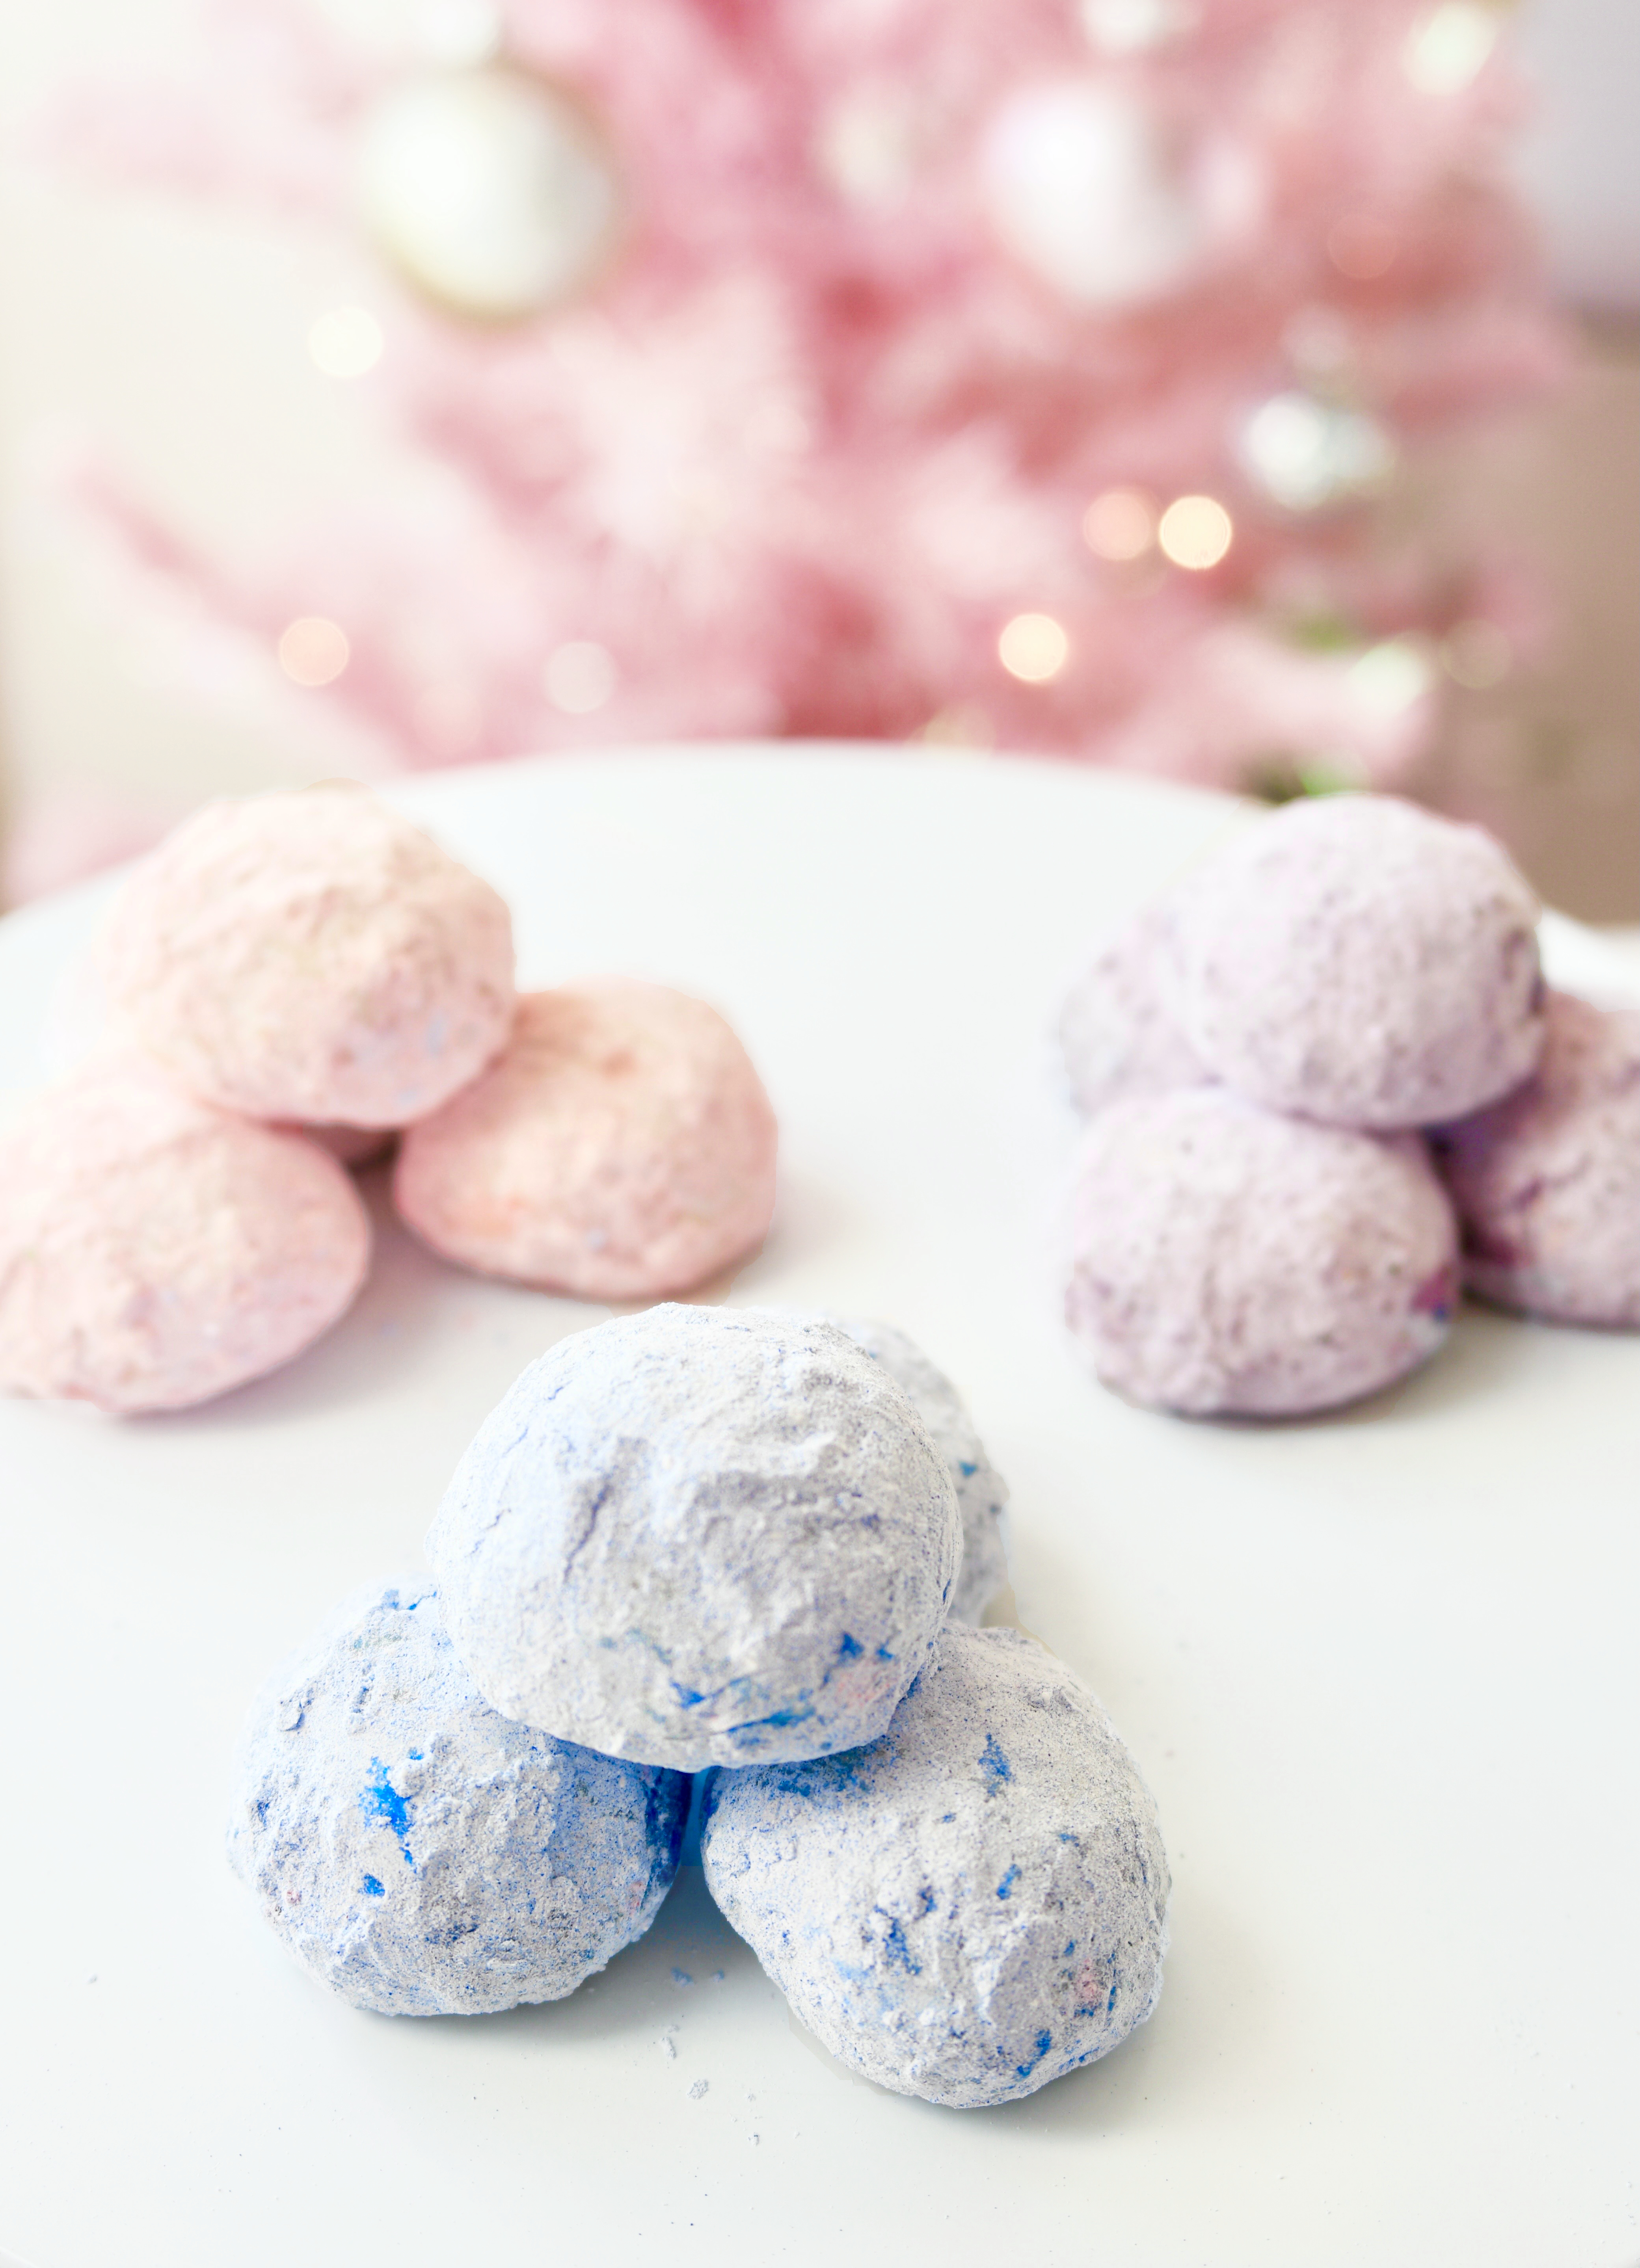
This delightful melt-in-your-mouth cookie recipe has been in my family for decades. We call them Snowballs, but they’re also known as Mexican Wedding Cakes or Greek Kourabiedes. I make them every year for Christmas, but they would also be perfect for Easter, Mother’s Day, birthday parties, tea parties, weddings, bridal showers, and baby showers.
Pecans are my favorite nuts to use in this recipe, but you can use almost any nuts you have on hand. The original snowy white version is a classic but you can take them up a notch with pretty pastels and fruit flavors. You can use crushed, freeze-dried fruit for color and subtle flavor. Spirulina is a nutritious, vibrant powder you can use to make beautiful blue cookies. You can also dress up your snowballs with edible glitter or luster dust used for cake decorating. There are endless ways to be creative with these cute cookies!
Pastel Snowball Cookies
by Mari Vasseur
Melt-in-your-mouth shortbread cookie balls covered in pastel powdered sugar
1 cup (120g)powdered sugar, sifted and dividedplus more for desired pastel powdered sugar color
1teaspoonvanilla extract
¼teaspoonfine sea salt
2cups (255g)all purpose flour, sifted
½cup (64g)finely chopped pecans
Pink powdered sugar
⅓cup (40g)powdered sugar, sifted
½cup (14g)freeze-dried strawberries or raspberriessee note below*
Blue powered sugar
⅓cup (40g)powdered sugar, sifted
1 ½teaspoonsblue spirulina powder
Lavender powered sugar
⅓ cup (40g)powdered sugar, sifted
½cup (14g)freeze-dried blueberriessee note below*
¼teaspoonviolet edible petal dustoptional
Instructions
Cookies
Preheat the oven to 325ºF (165ºC). Line two cookie sheets with parchment paper.
In a large bowl, beat the butter, with an electric mixer at medium speed, until smooth and creamy. Add 1/2 cup (60g)of powdered sugar, the vanilla and salt. Beat until pale and fluffy.
In a separate medium-sized bowl, combine the flour and pecans. Gradually add the flour and pecan mixture to the butter mixture, beating on low speed until combined.
Shape the dough into scant 1-inch balls. Place the balls about 2 inches apart onto the prepared cookie sheets. Bake until light golden brown, about 17-20 minutes.
Place the remaining 1/2 cup (60g) of powdered sugar in a plastic bag. With a spatula, transfer three warm cookies into the bag. Shake gently to coat the cookies with powdered sugar. Transfer them to a cooling rack. Repeat with the remaining cookies.
Cool the cookies completely then proceed to the instructions for pastel powdered sugar, depending on which color you have selected.
Pink powdered sugar
Process the freeze-dried strawberries or raspberries into a fine powder in a mini food processor.
Whisk the freeze-dried berry powder with 1/3 cup (40g) powered sugar together in a small bowl.
Transfer the powered sugar mixture to a plastic bag. Place three cookies in the bag and shake gently until coated with the powdered sugar mixture. Transfer the cookies back to the rack and repeat with remaining cookies.
Blue powered sugar
Whisk 1/3 cup (40g) powdered sugar and the spriulina powder in a small bowl.
Transfer the powered sugar mixture to a plastic bag. Place three cookies in the bag and shake gently until coated with the powdered sugar mixture. Transfer the cookies back to the rack and repeat with the remaining cookies.
Lavender powered sugar
Process the freeze-dried blueberries into a fine powder in a mini food processor.
Whisk the freeze-dried blueberry powder with 1/3 cup (40g) powered sugar together in a small bowl. Whisk in petal dust for a more vibrant color, if desired.
Transfer the powered sugar mixture to a plastic bag. Place three cookies in the bag and shake gently until coated with the powdered sugar mixture. Transfer the cookies back to the rack and repeat with the remaining cookies.
Notes
*The ratios for the pastel powered sugar are approximate. Freeze-dried fruit varies in color. Add more or less to achieve your desired shade.
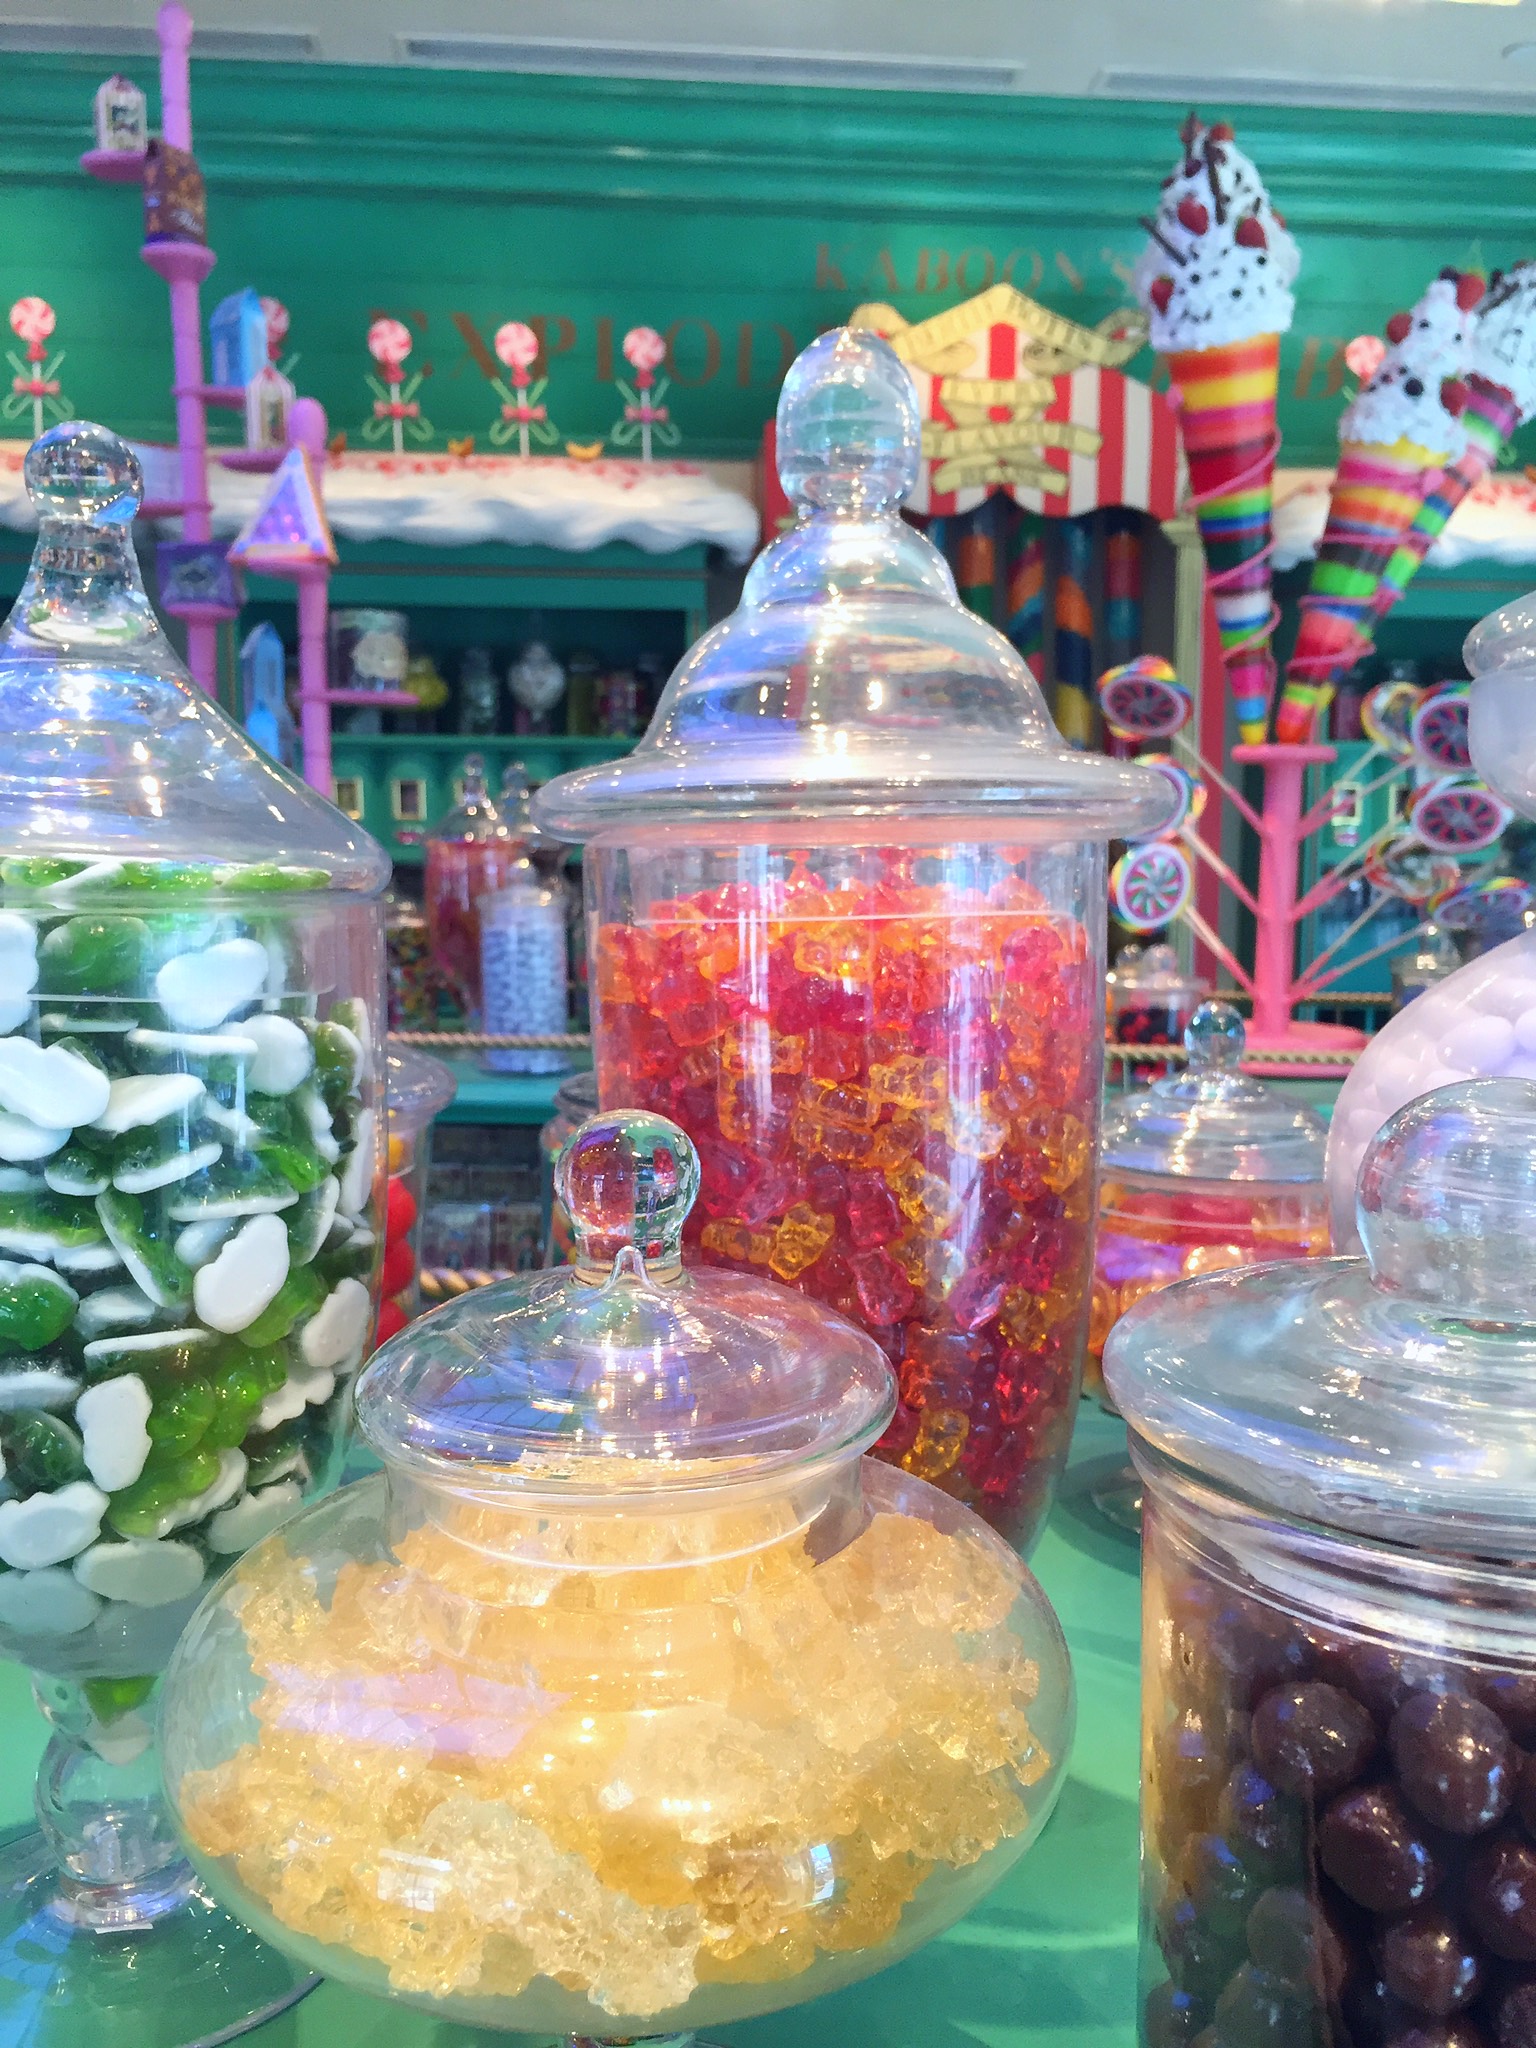
I recently enjoyed a girls’ day out at Universal Studios Hollywood. My daughter is a Harry Potter fan, so of course we beelined straight to the Wizarding World of Harry Potter upon arrival at the theme park. We were spellbound by the ominous looking Hogwart’s Castle and the sparkling snow-topped shops of Hogsmeade. My daughter was in Harry Potter fan heaven, flitting around Hogsmeade, testing out her interactive wand and sipping some refreshing Butter Beer. It’s definitely a must-try
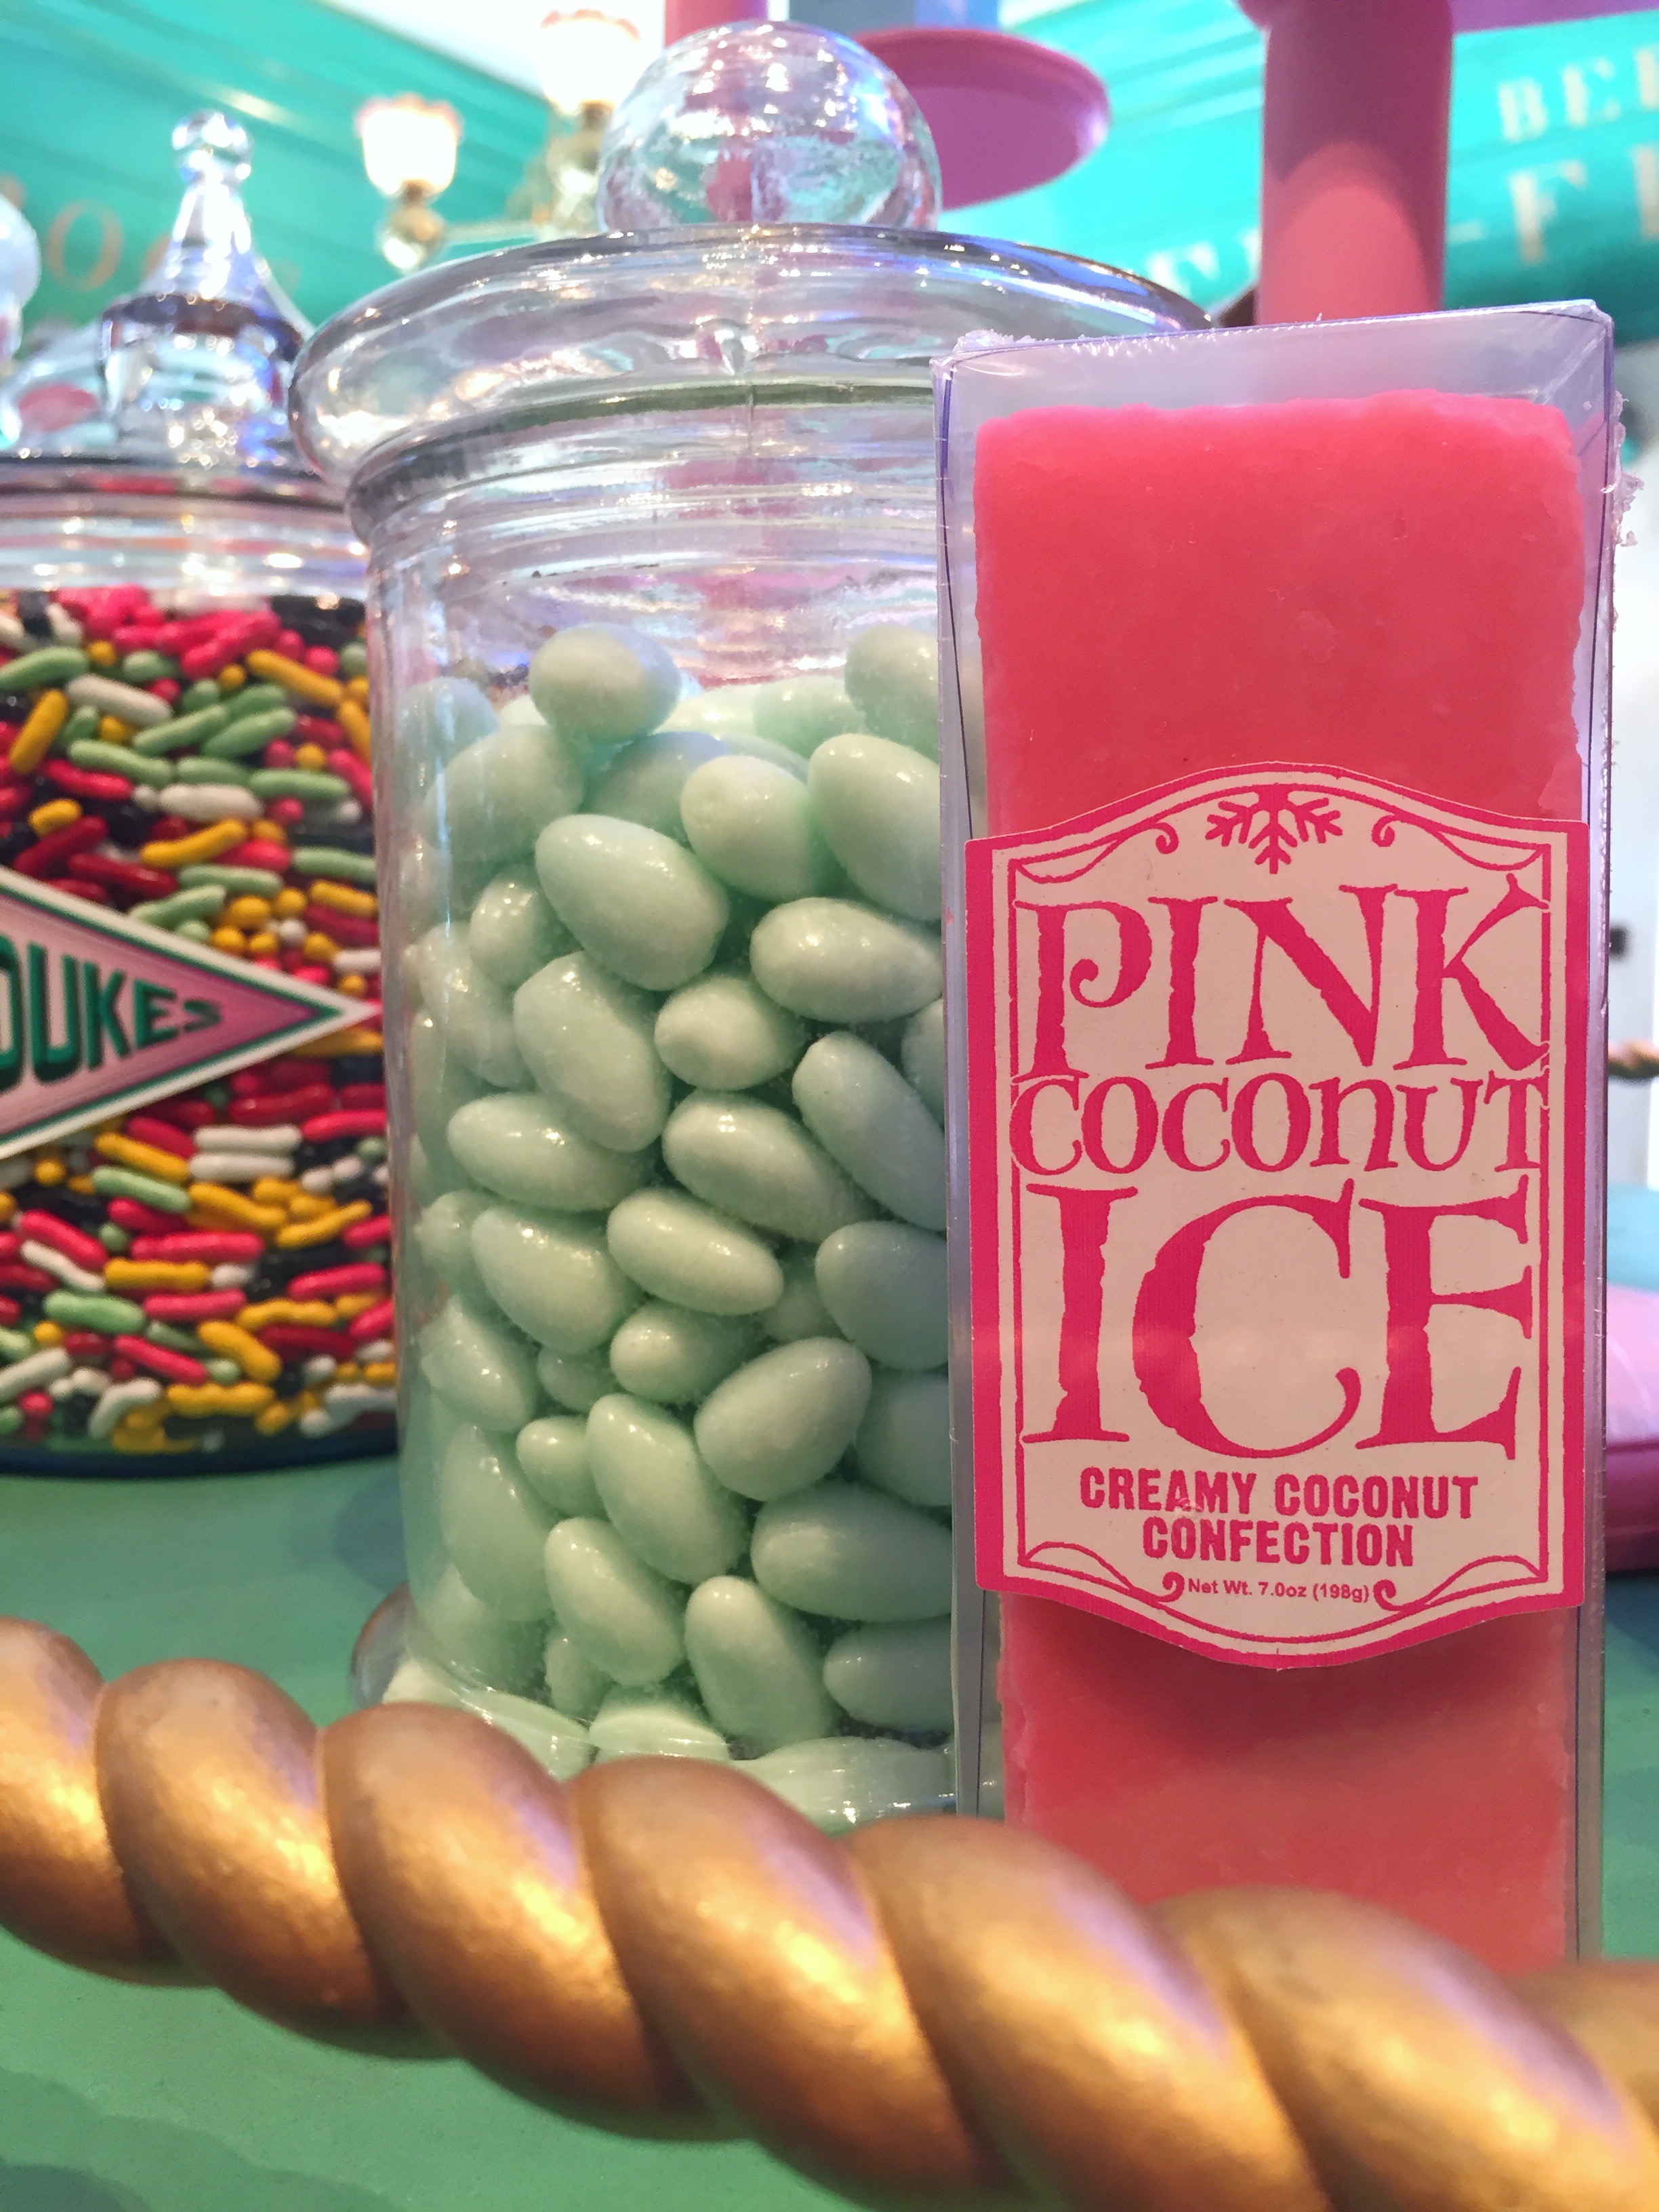
Our favorite shop was Honeydukes sweet shop, where anyone with a sweet tooth can get his or her candy wishes fulfilled. The candy selection was nothing short of magical. We picked up some Chocolate Flies, a Chocolate Frog and some Pink Coconut Ice candy.
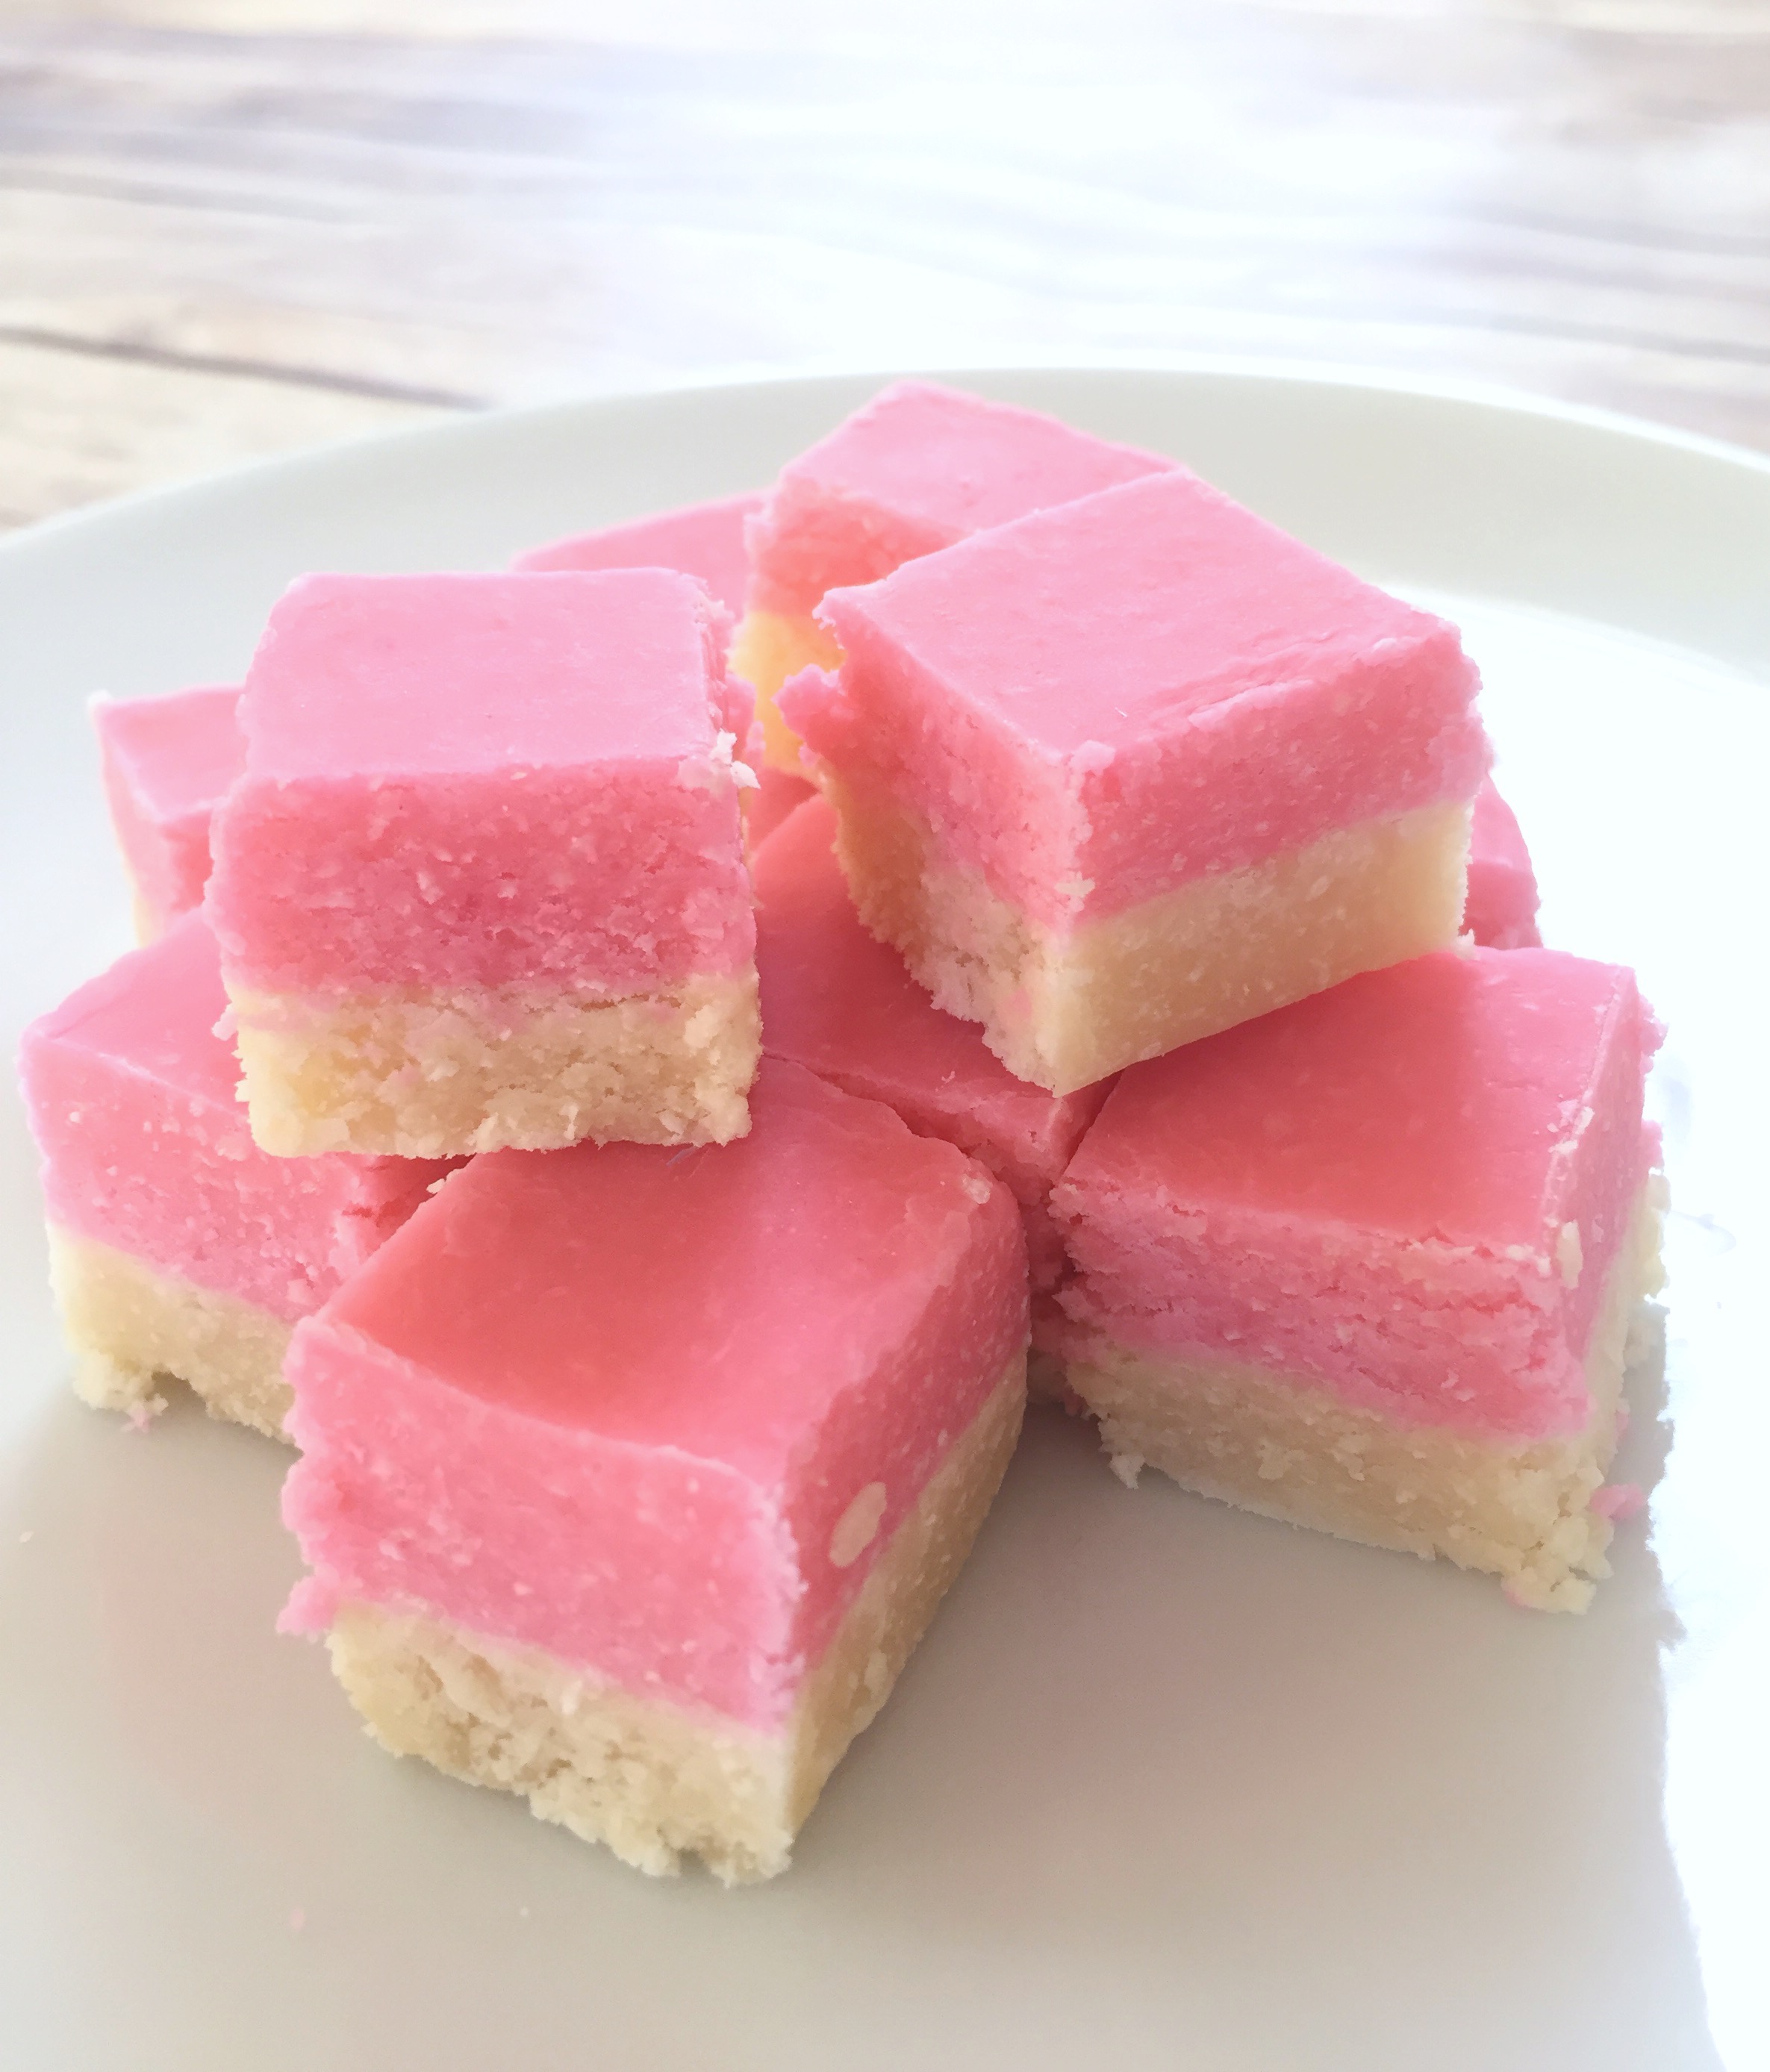
I was most excited to try the Pink Coconut Ice. I’ve been intrigued by the thought of this candy ever since it was mentioned in the book, Harry Potter and the Prisoner of Azkaban by J.K. Rowling. The Pink Coconut Ice candy is similar to a stiff fudge. It’s very sweet, so you can cut it into small squares and have plenty to share with friends.
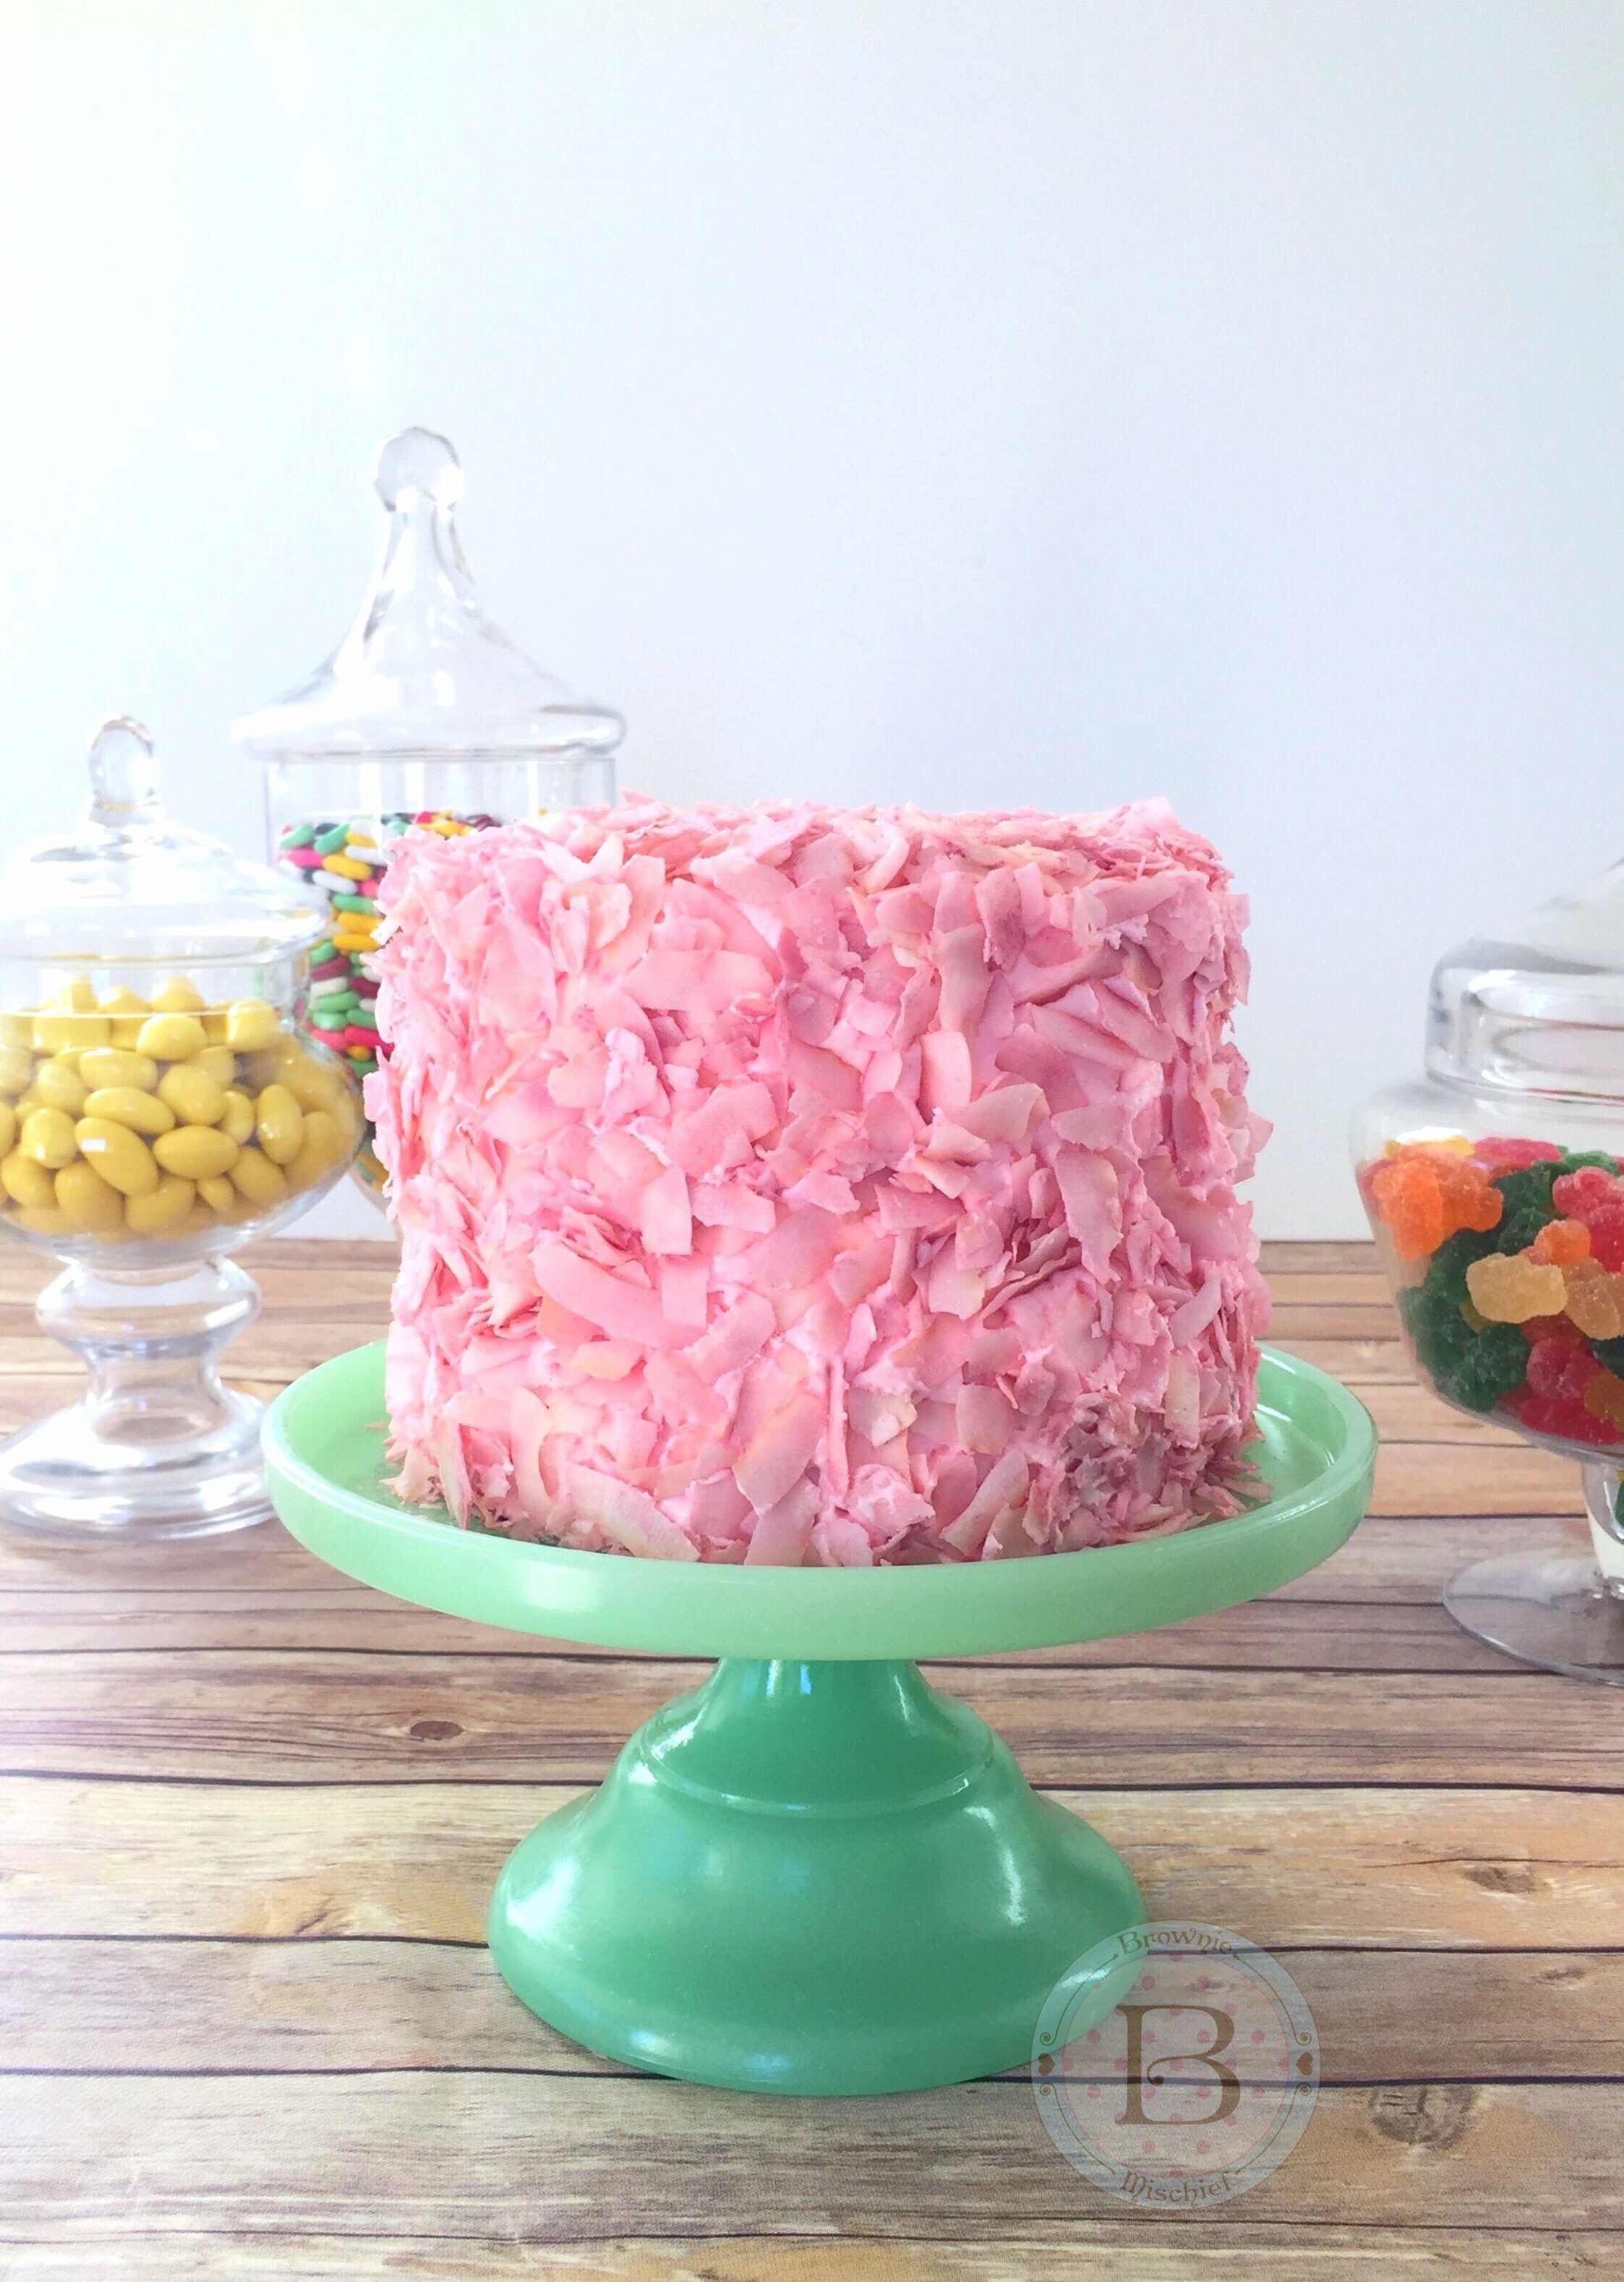
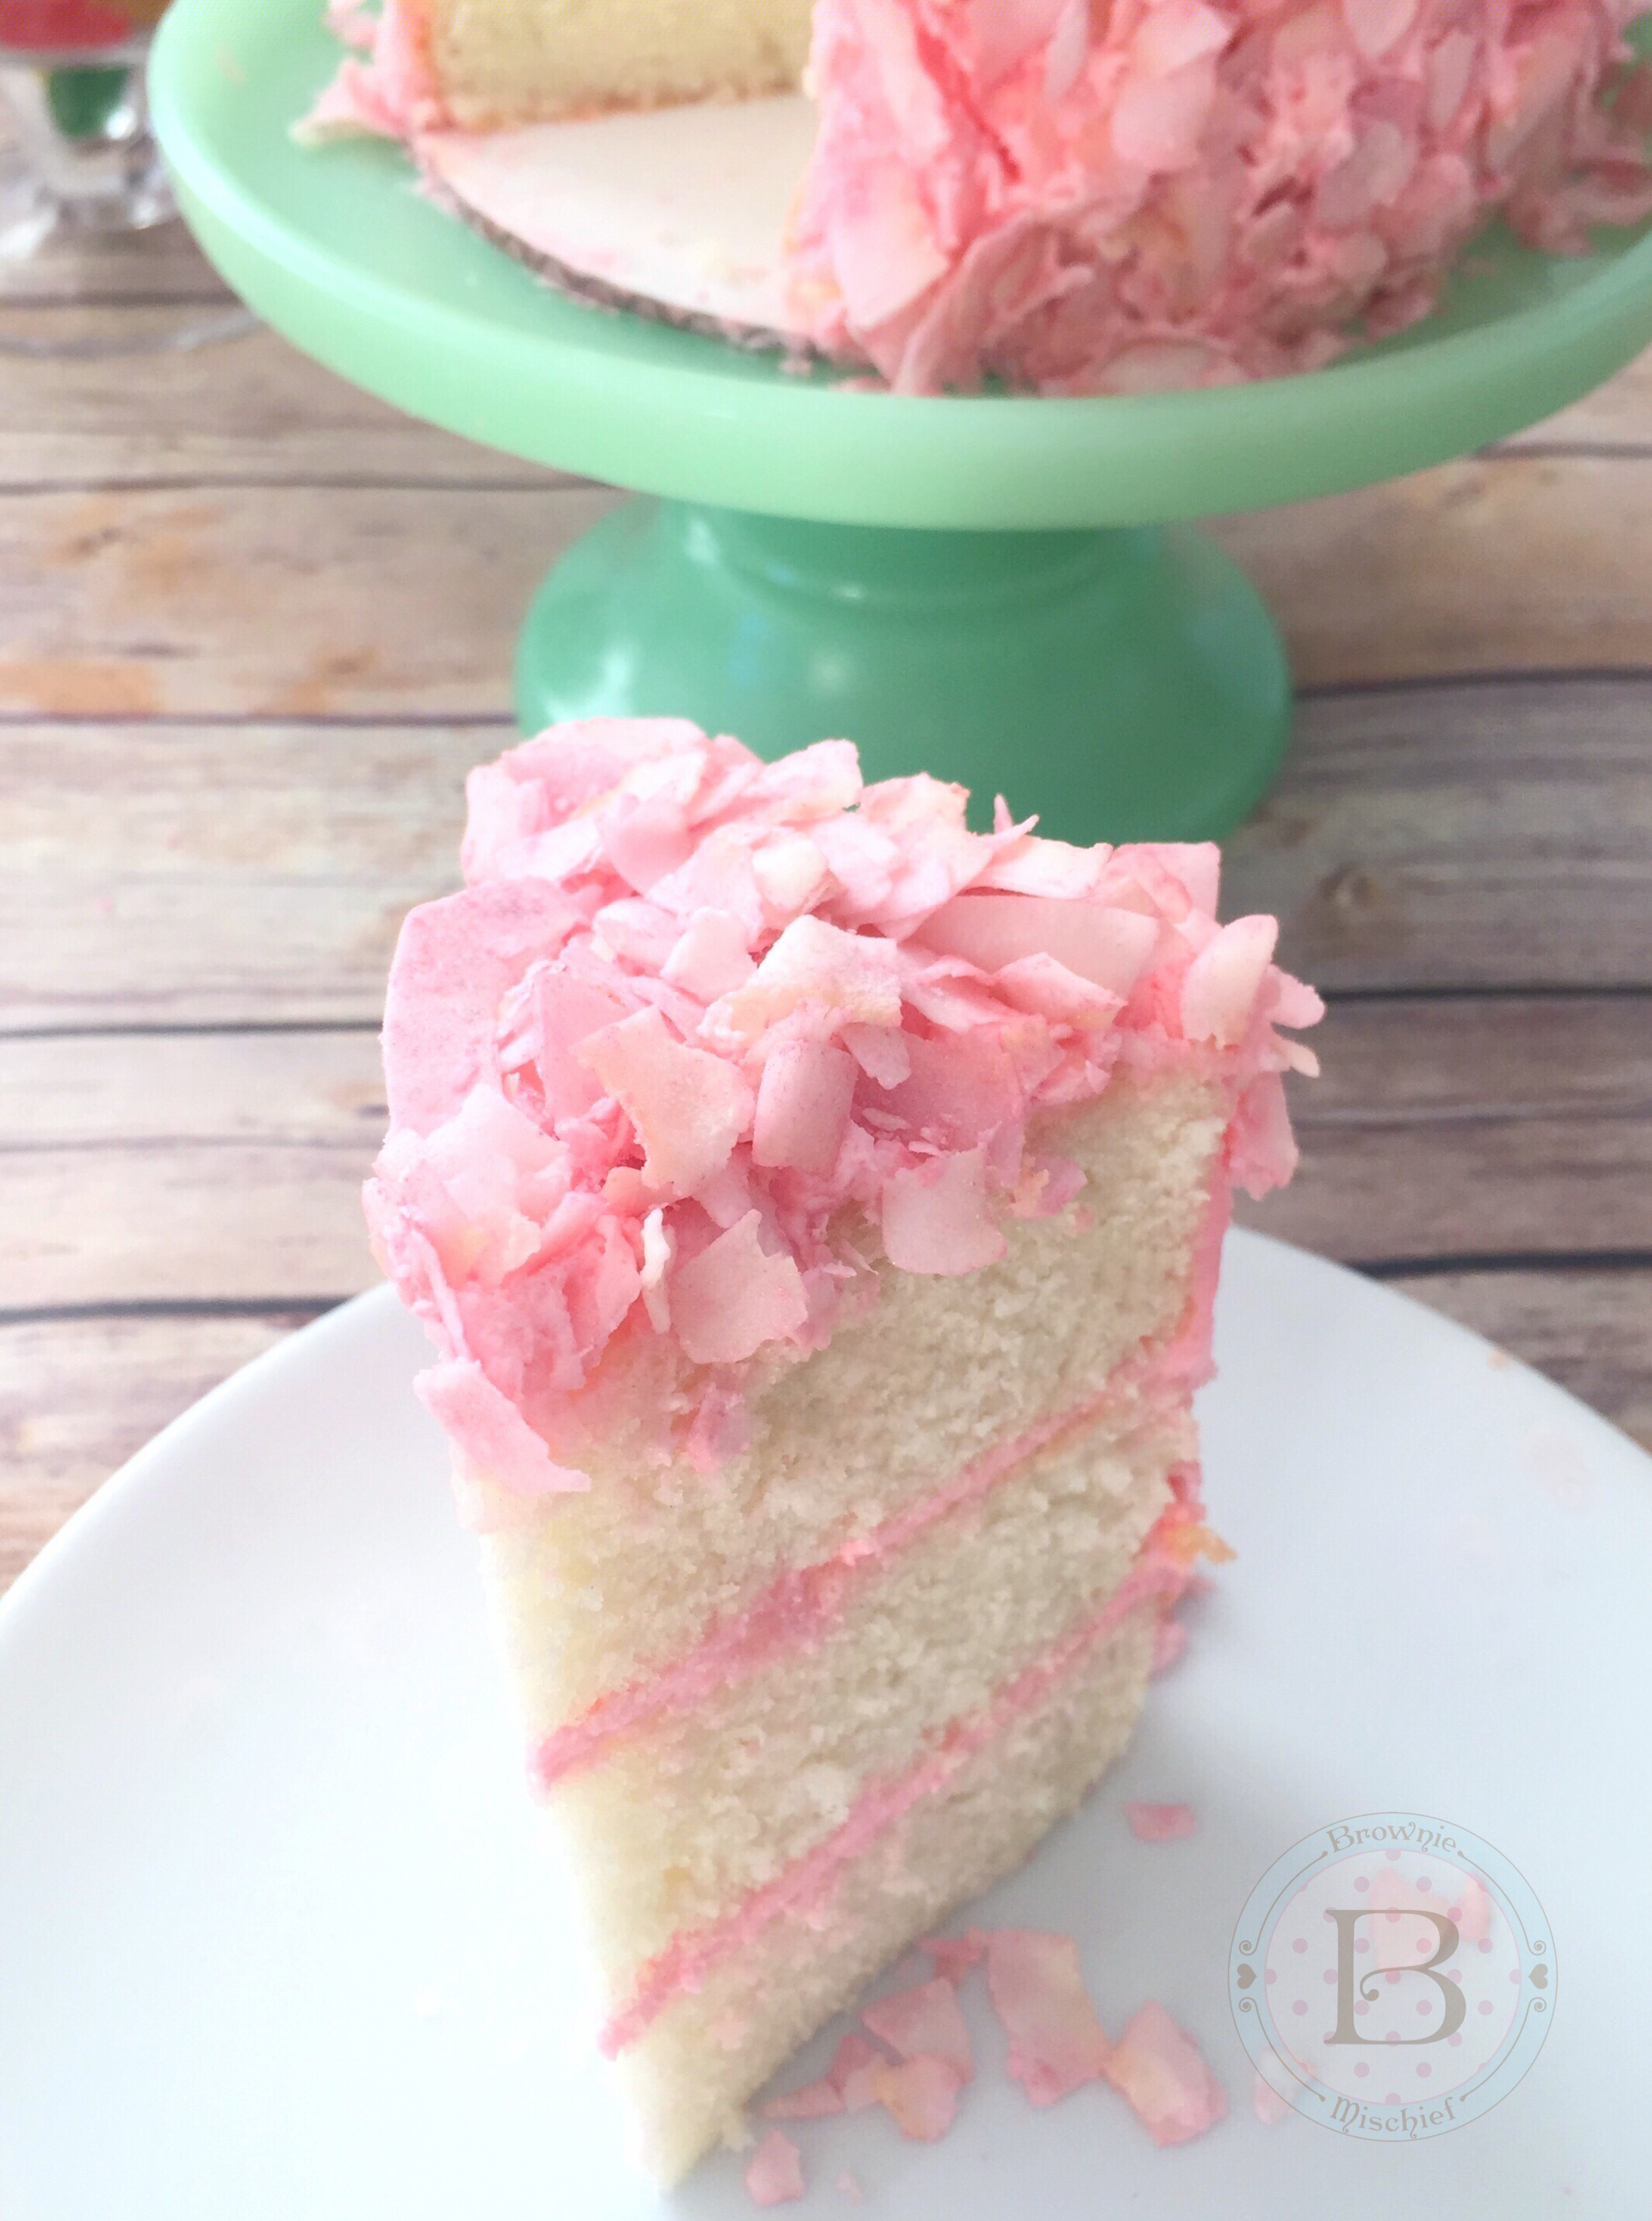
I imagined the “shimmery pink squares” a little differently so, I decided to build on my imagined version of the coconut candy by making a shimmery pink coconut cake. I used my favorite coconut cake recipe and pink coconut buttercream. I tinted my buttercream with Americolor gel food color soft pink. I covered my cake in large flakes of unsweetened coconut. To find unsweetened coconut flakes, click here. I think the large flakes look more whimsical and add texture, but feel free to use whatever kind of coconut you prefer. I colored my coconut a shimmery, soft pink. Click here to see how I colored my coconut flakes.
You don’t have to be a Harry Potter fan to appreciate this pink, fluffy, coconut-covered cake. I can imagine this pretty cake at any party or event with a pink theme. I hope you enjoy this perfectly Pink Coconut Ice Cake as much as we did!
Pink Coconut Ice Cake
by Mari Vasseur
Moist, fluffy coconut cake with pink buttercream and coconut flakes
Pink gel food colorI used Americolor soft pink (link below)
Pink Coconut Flakes
3cups unsweetened coconut flakes
1tablespoon powdered sugar
Edible pink petal dustI used Rosie Sterling Pearl Dust by GSA (link below)
Instructions
Coconut Cake
Preheat the oven to 350ºF (180ºC). Line the bottoms of three 6-inch cake pans with parchment paper. Grease and flour the insides.
In a large bowl, whisk together the flour, baking powder and salt until well blended.
In a large bowl, beat the butter, sugar and oil and coconut extract together with an electric mixer at medium speed, until pale and fluffy, about 2-3 minutes. Gradually beat in egg whites until the mixture is smooth and creamy, stopping to scrape the sides of the bowl as needed.
On low speed, beat in flour mixture in 3 additions, alternating with the coconut milk after each addition.
Pour batter into the prepared pans, evenly distributing batter among the pans. Bake for 28-32 minutes, until a toothpick inserted into the center of the cakes comes out clean.
Cool the cakes for 10 minutes. Remove the cakes from pans and transfer them to a cooling rack.
Pink Coconut Buttercream
In a large bowl, beat the butter with an electric mixer on medium speed, until pale and fluffy.
Turn off the mixer. Add the powdered sugar and salt. Mix on low speed until the sugar is moistened, then turn the mixer up to medium speed and beat until combined. Add coconut extract, then add the coconut milk a little at a time, until the desired consistency is reached. Continue mixing on low speed until the buttercream is smooth.
Add the food coloring with a toothpick, a little at a time, until desired consistency is reached. Beat at low speed until well blended. Fill and frost the cake.
Pink Coconut Flakes
Place the powdered sugar in a small bowl. Add a small amount of petal dust. Whisk together with a small whisk. Add additional petal dust until the desired color is reached.
Spread the coconut flakes out onto a large shallow dish. Sprinkle powdered sugar mixture over coconut with a small sieve. Toss gently with gloved hands.
Place the cake on a baking sheet to catch excess coconut. Gently press the colored coconut onto the sides and the top of cake.
Summer is nearly over, and after the recent heatwave here in Southern California, I’m more than ready to welcome fall weather. But before I put on my fluffy sweater and dive into pumpkin spice everything, I want to enjoy the tail end of peach season, don’t you? Farmer’s markets and stores near my home are still brimming over with fresh peaches, so I picked up some peaches and decided to give them a proper goodbye and send them off in style.
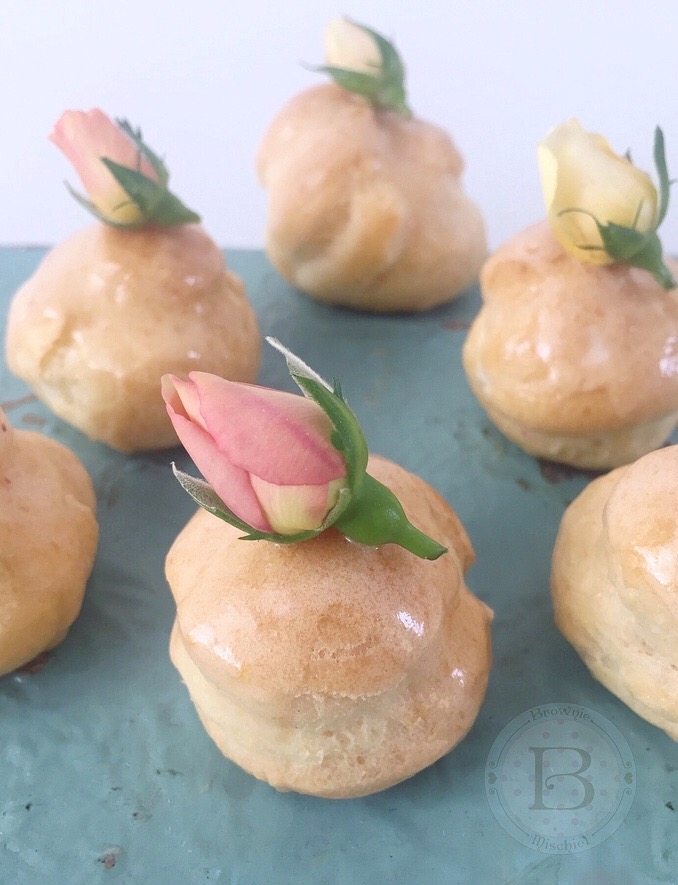
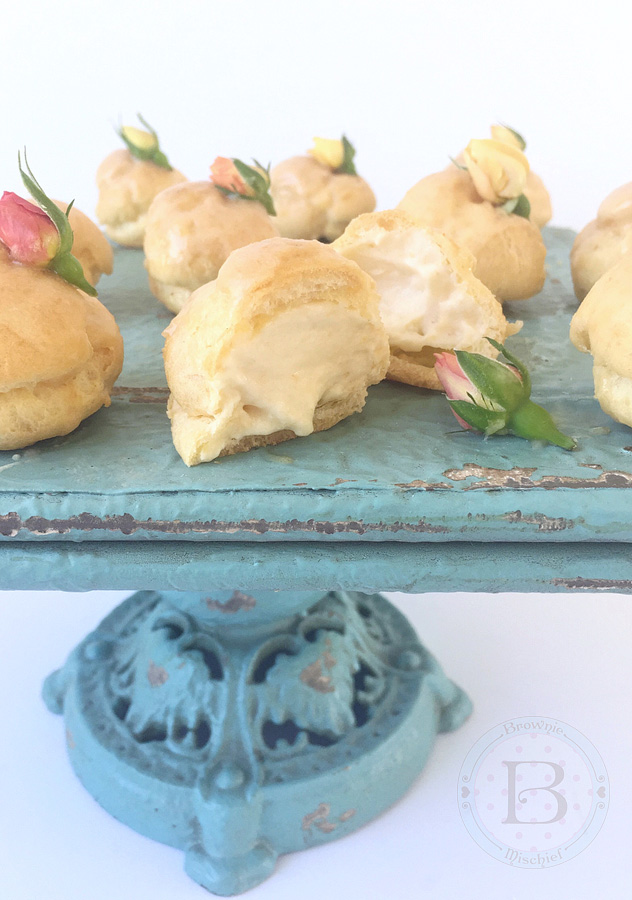
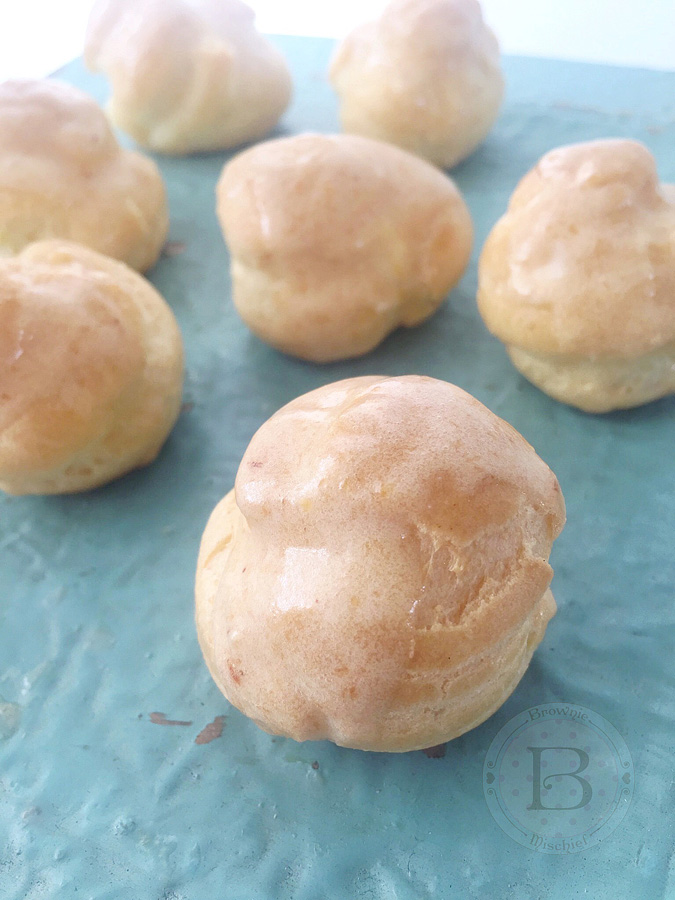
I created some luscious peaches and cream filled, bite-size puffs of choux pastry, called profiteroles. They’re like cream puffs, only smaller. The filling is creamy, but so light and airy that I’m convinced that these profiteroles have no calories! The recipe I’m sharing with you uses fresh peaches, but feel free to substitute frozen peaches if fresh peaches aren’t available. There are a lot of steps to this recipe, but the steps are done in stages and are very easy to do.
I decorated my profiteroles with fresh, pesticide-free miniature rosebuds, also known as spray roses. If you can’t find miniature rosebuds, pesticide-free rose petals would be a good substitute. You may not get a chance to embellish these little beauties. They have a way of popping into people’s mouths even before you can decorate them!
Peaches & Cream Profiteroles
Bite-sized puffs of choux pastry filled with a creamy, fresh peach filling and topped with fresh peach icing.
2 largefresh peaches, peeled, pitted and sliced*see note below
½teaspoonfresh lemon juice
½ teaspoonnatural peach flavoring
Peaches & Cream Filling
1cup whole milk
⅓cup (2 ounces)granulated sugar
2tablespoons (1/2 ounce)cornstarch
¼teaspoonfine sea salt
1egg
2tablespoon (1 ounce)unsalted butter
¼teaspoonpure vanilla extract
⅛teaspoonpure almond extract
peach puréerecipe above
⅔cupheavy whipping cream
Profiteroles
½cupwater
4tablespoons (2 ounces)unsalted butter, cubed
⅛teaspoonfine sea salt
½cup (2 1/4 ounces)all purpose flour
2eggsroom temperature
Peach Icing
¾ cup (3 ounces)powdered sugar, sifted
2tablespoonsreserved peach puree
1tablespoonheavy whipping cream
¼teaspoonnatural peach flavoring
Instructions
Peach Purée
Purée peaches in a blender or food processor. Strain puréed peaches through a sieve. Stir in lemon juice.
Place puréed peaches in a small saucepan. Bring to a boil over medium heat.
Reduce heat and simmer until peach purée is reduced by half.
Remove from heat. Stir in peach flavoring and set aside to cool completely.
Peaches and Cream Filling
Bring milk to a boil in a small saucepan over medium heat.
Meanwhile, whisk sugar, cornstarch and salt together in a medium bowl. Add the egg and whisk until smooth.
When milk starts to boil, remove from heat and pour 1/3 of the hot milk into the egg mixture and whisk to combine.
Pour the egg mixture into the remaining hot milk and cook over medium heat, stirring continuously, until the mixture comes to a boil and thickens.
Remove from heat. Stir in butter and extracts.
Pour mixture through a sieve placed over a bowl. Cover the surface of pastry cream with plastic wrap. Let cool.
Set aside 2 tablespoons of cooled peach purée. Add remaining peach purée to cooled pastry cream and stir to combine. Chill in refrigerator.
In a medium bowl, whip heavy cream to stiff peaks with an electric mixer at high speed. Fold whipped cream into peach pastry cream mixture. Set aside in refrigerator.
Profiteroles
Preheat oven to 400ºF. Line two large baking sheets with parchment paper.
Combine water, butter and salt in a medium saucepan and bring to a boil over medium heat.
Reduce heat. Add flour and stir vigorously with a wooden spoon until mixture pulls away from sides of the pan and forms a ball.
Transfer mixture to the bowl of a stand mixer. Mix on low speed until steam dissipates and mixture cools to lukewarm.
Add eggs one at a time and beat with an electric mixer at medium speed, until smooth, stopping to scrape down bowl.
Transfer mixture to a piping bag, fitted with a large round tip. (**I used Ateco tip 808.)
Pipe 1 1/4 inch mounds, about 2 inches apart onto prepared baking sheets. Smooth tops with a wet finger.
Bake for 15 minutes, then turn oven temperature down to 350ºF and continue baking until golden brown, about 8-10 more minutes. Using a toothpick or skewer poke a small hole in each profiterole to let steam escape. Place on a wire rack to cool completely.
Using the tip of a paring knife, poke a pilot hole in the bottom of each profiterole.
Place peaches and cream filling into a piping bag fitted with a medium round piping tip. (***I used Wilton tip 12.)
Place piping tip into the pilot holes and fill each profiterole with filling.
Peach Icing
In a small bowl, whisk all icing ingredients together and spoon over filled profiteroles. Refrigerate until ready to serve.
Purple is passionate. It’s mystical. It’s regal. Don’t we all know someone whose favorite color is purple? It’s painfully obvious. They can’t hide it. They don’t want to hide it. They can’t just be friends with purple. They’re in a relationship with purple. The first time I made this Purple Berry Cake, a purple lover I know said that when she saw it, it spoke to her soul.
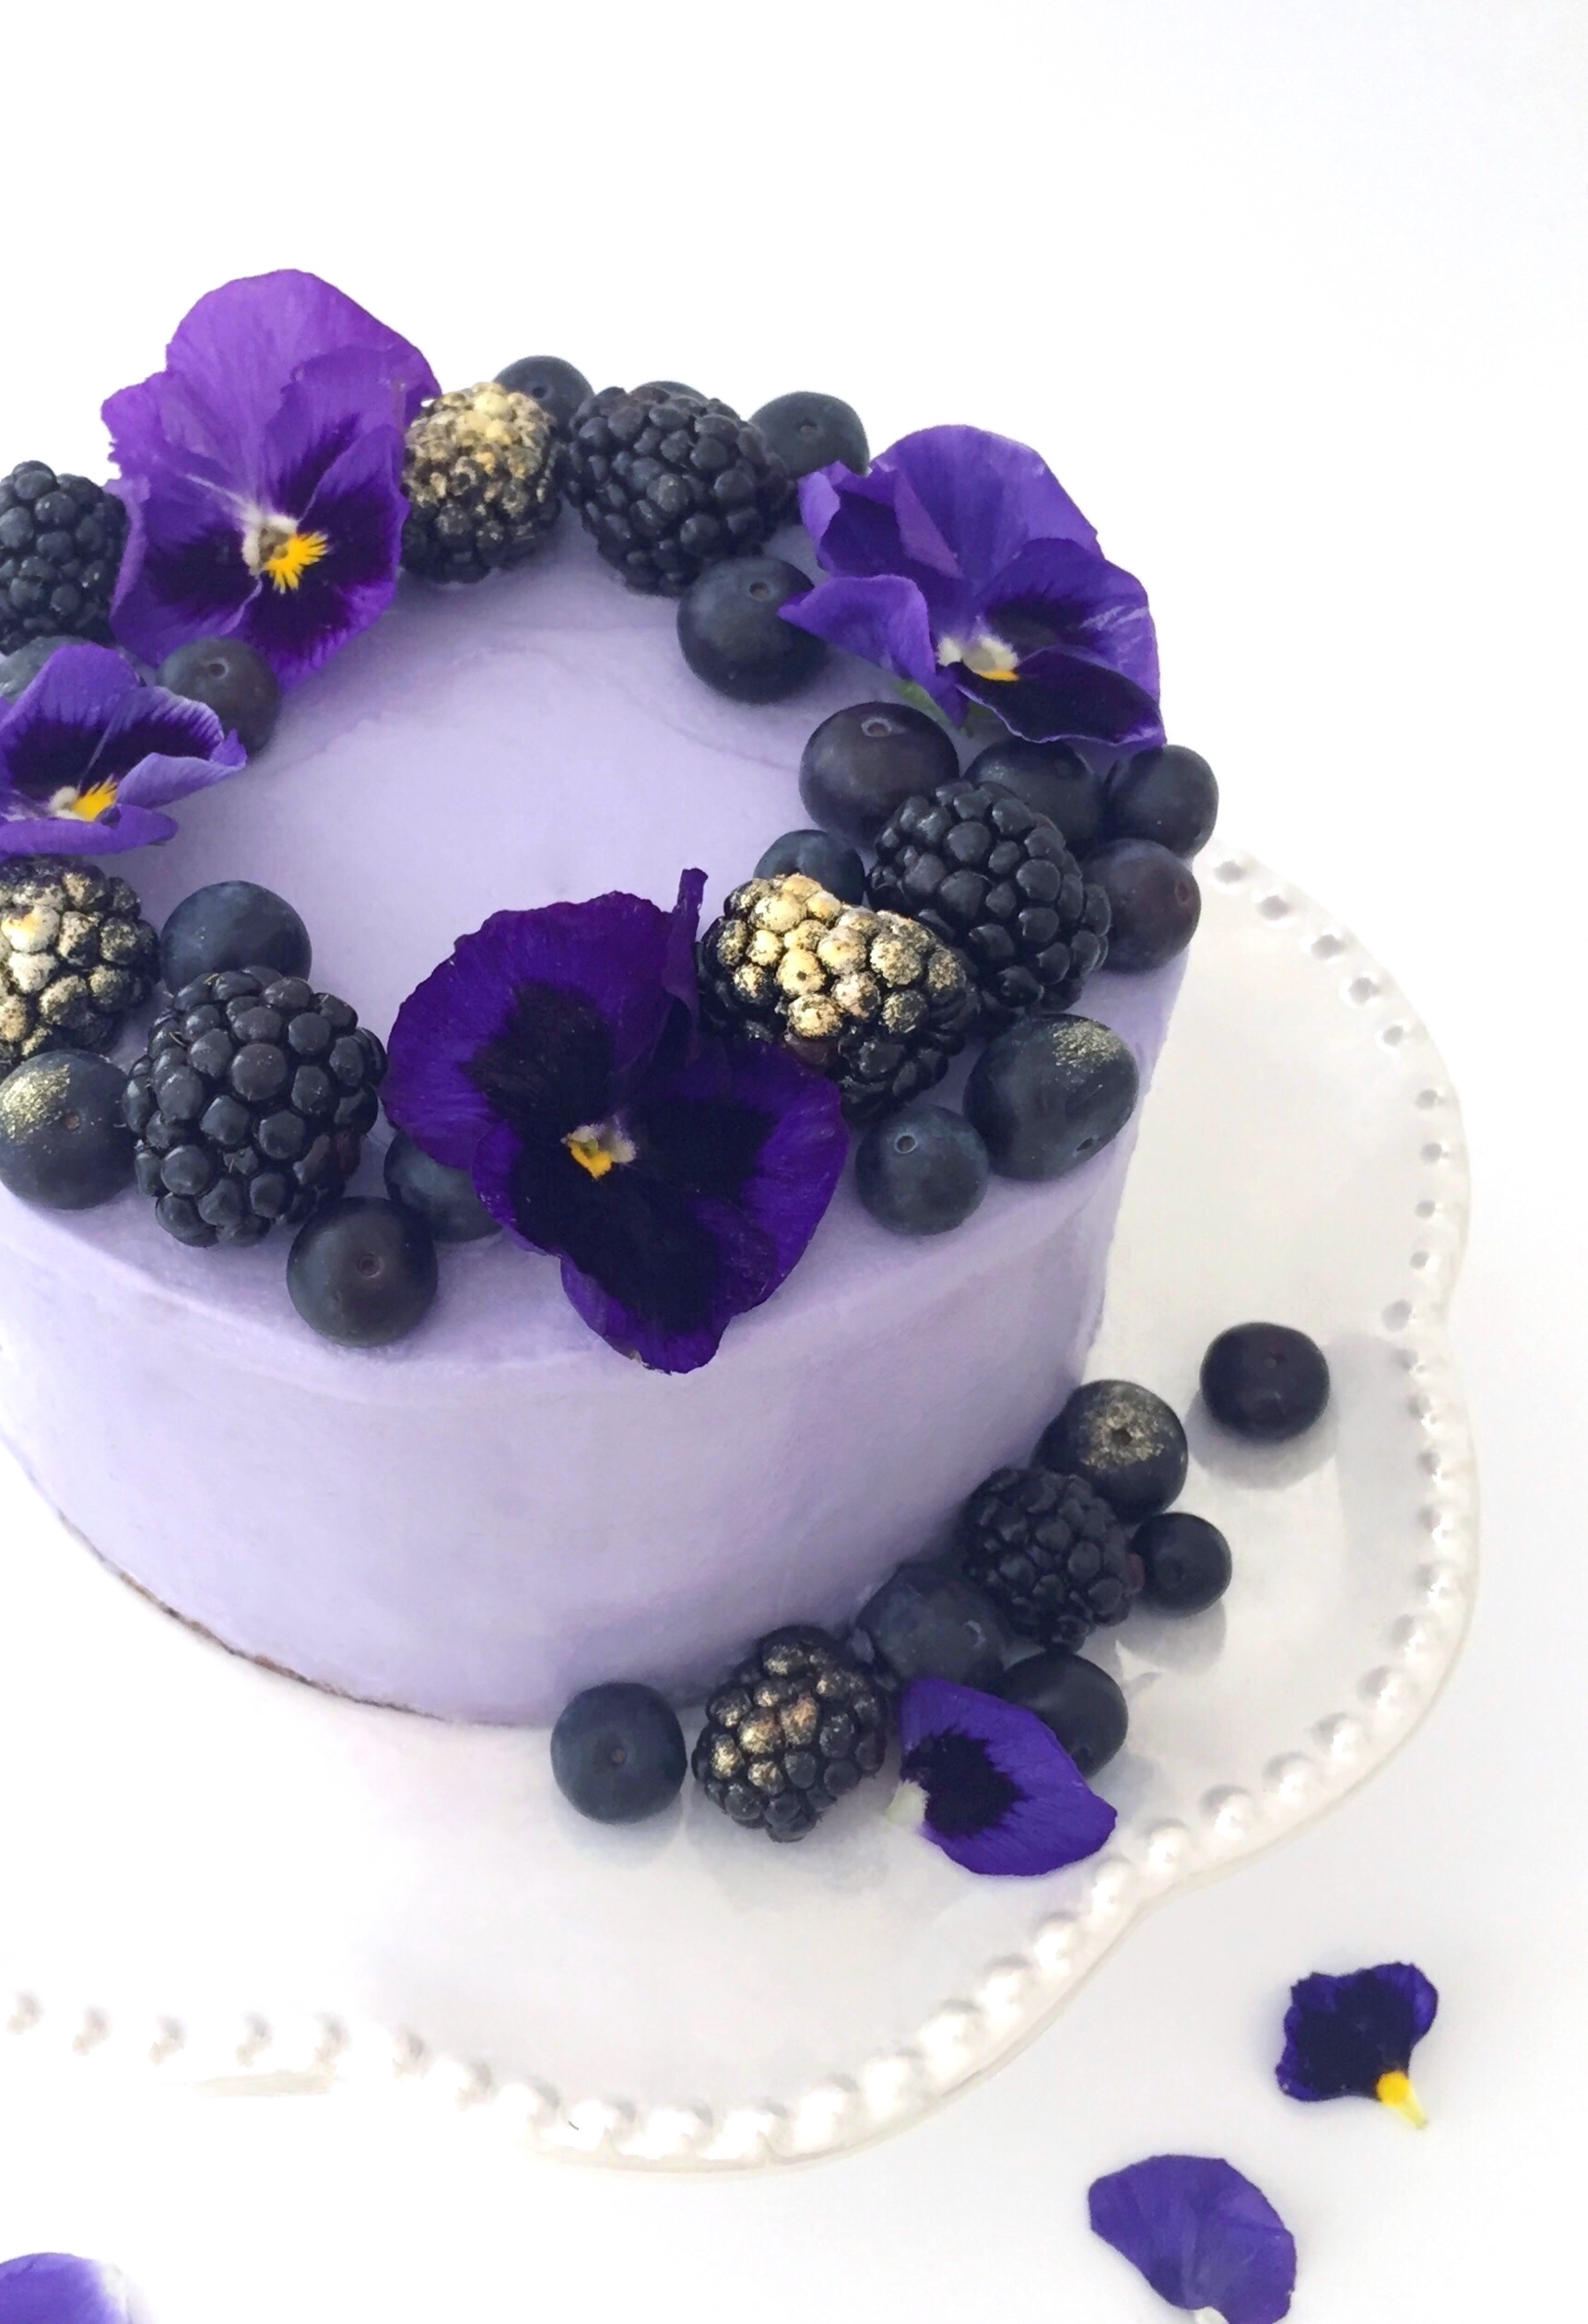
Fresh berry purée is added to the batter, creating a soft, moist cake. The layers are brushed with berry syrup, which helps keeps the cake moist and gives it a nice punch of berry flavor. I used blackberries and blueberries, but you can use any combination of purple berries that you like. After baking, the color of the cake layers will be a brownish gray with a hint of purple, depending on your berries. I think I need to come up with name for this color. How about Silverberry? You can see tiny flecks of the berries in the cake and I think the color is lovely, especially with the lavender frosting. If you want a more purple cake, feel free to add some gel food color to the batter. I used Wilton Violet gel food color to achieve the pretty lavender cream cheese frosting. The extra butter and the addition of heavy cream makes this frosting silky and spreadable.
I’m obsessed with edible flowers lately, so I garnish my baked goods with them whenever I can get my hands on some. I found these pansies in the produce department of my local food market. If you can’t find pansies, pesticide free violets or rose petals would also be pretty. Make sure to apply them to your cake right before serving, since they are delicate and will wilt over time. Brush some of your berries with a little dab of edible gold luster dust for an extra regal touch.
Purple Berry Cake with Silky Cream Cheese Frosting
A soft, moist cake made with berry purée and topped with silky lavender cream cheese icing
12ounces (340g)fresh berries (plus more to garnish cake)I used blackberries and blueberries
1 ½ cups (191g)all purpose flour, sifted
1teaspoonbaking powder
½ teaspoonbaking soda
½teaspoonfine sea salt
1 ½cups (300g)sugar, divided
⅓cup (75ml)vegetable oil
2largeeggs, room temperature
1teaspoonpure vanilla extract
½cup (118ml)buttermilk, room temperature
Silky Cream Cheese Frosting
¾cup (170g)cream cheese, softened
¾cup (170g)unsalted butter, softened
1teaspoonpure vanilla extract
⅛teaspoonfine sea salt
1pound (454g)powdered sugar, sifted
1tablespoonheavy cream, room temperature
Purple gel food colorI used Wilton Violet
Garnishes
Fresh berries
Edible gold luster dustI used Alan Tetreault Edible Hybrid Luster Dust Soft Gold
Edible flowersI used pesticide free pansies
Instructions
Purple Berry Cake
Preheat the oven to 350º F (180ºC). Like the bottoms of two 6-inch round cake pans with parchment paper circles. Grease and flour the insides.
Purée the berries in a blender or small food processor. Strain the puréed berries through a sieve. Reserve 2/3 cup (150g) of the berry puree. Set aside the remaining puree for the syrup.
In a medium-size bowl, whisk together the flour, baking powder, baking soda, and salt until well combined.
In a large bowl, beat 1 1/4 cups (250g) of sugar with the oil, eggs and vanilla extract, with an electric mixer on medium speed, until light and fluffy. Stir in the reserved 2/3 cup berry purée. Add the flour mixture in two additions, alternating with the buttermilk, beating at low speed just until combined.
Pour the batter evenly into the prepared cake pans. Bake until a toothpick inserted into center of cakes comes out clean, about 30-35 minutes. Cool the cakes in the pans for 10 minutes. Remove the cakes from pans and transfer them to cooling racks to cool.
While the cakes are baking, make the berry syrup. In a small saucepan, heat the remaining berry purée with the remaining 1/4 cup sugar (50g) and 1/4 cup (59ml) of water over medium-low heat. Stir together and cook until sugar is dissolved. Set aside to cool.
Split each cooled cake llayer into two and brush with berry syrup. Fill and frost the cake with Silky Cream Cheese Frosting.
Silky Cream Cheese Frosting
In a large bowl, beat cream cheese with an electric mixer on speed or by hand with a spatula, until smooth. Add the butter and beat until smooth and well combined. Add the vanilla extract and salt and beat until combined.
Gradually add the powdered sugar and beat at medium speed until combined. Add the heavy cream and beat at low speed until smooth and creamy.
Add the food color with a toothpick, a little at a time, until the desired shade is reached. Beat at low speed until well blended. Smooth out any air bubbles by stirring slowly by hand with a spatula.
Garnishes
Garnish the top of the cake with fresh berries. Brush a few of the berries with edible gold luster dust. Garnish with fresh flowers immediately before serving.
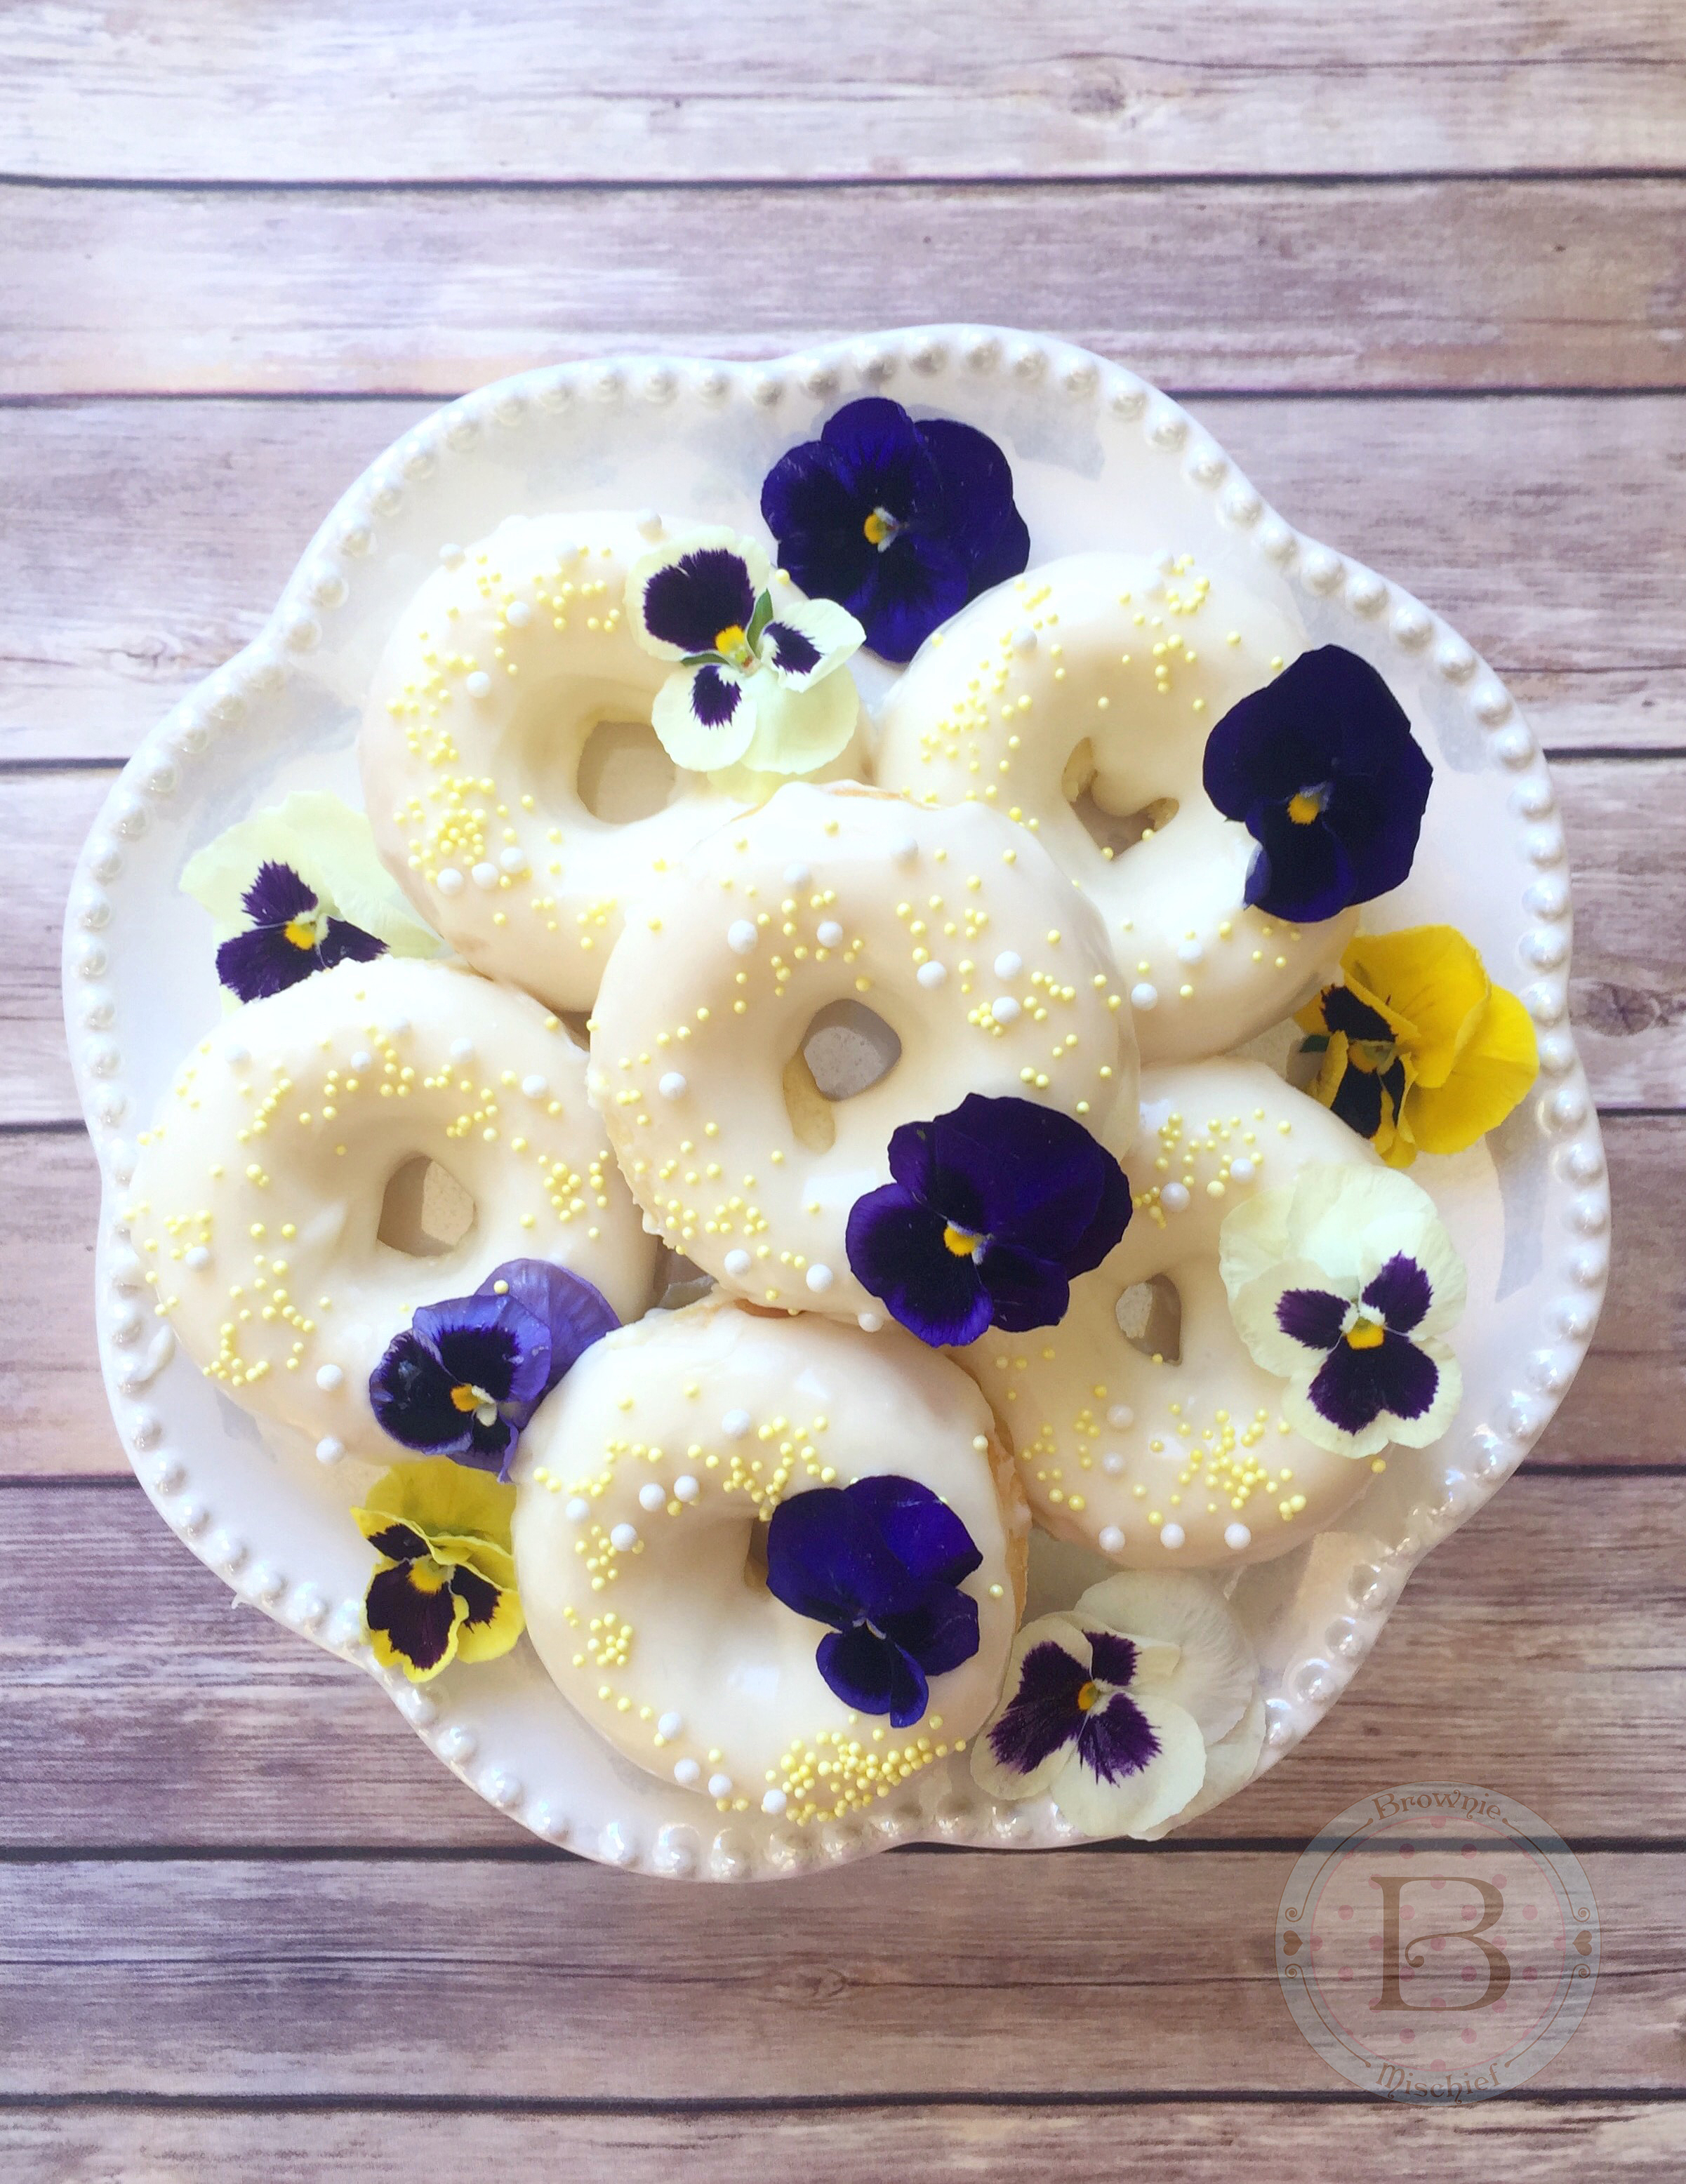
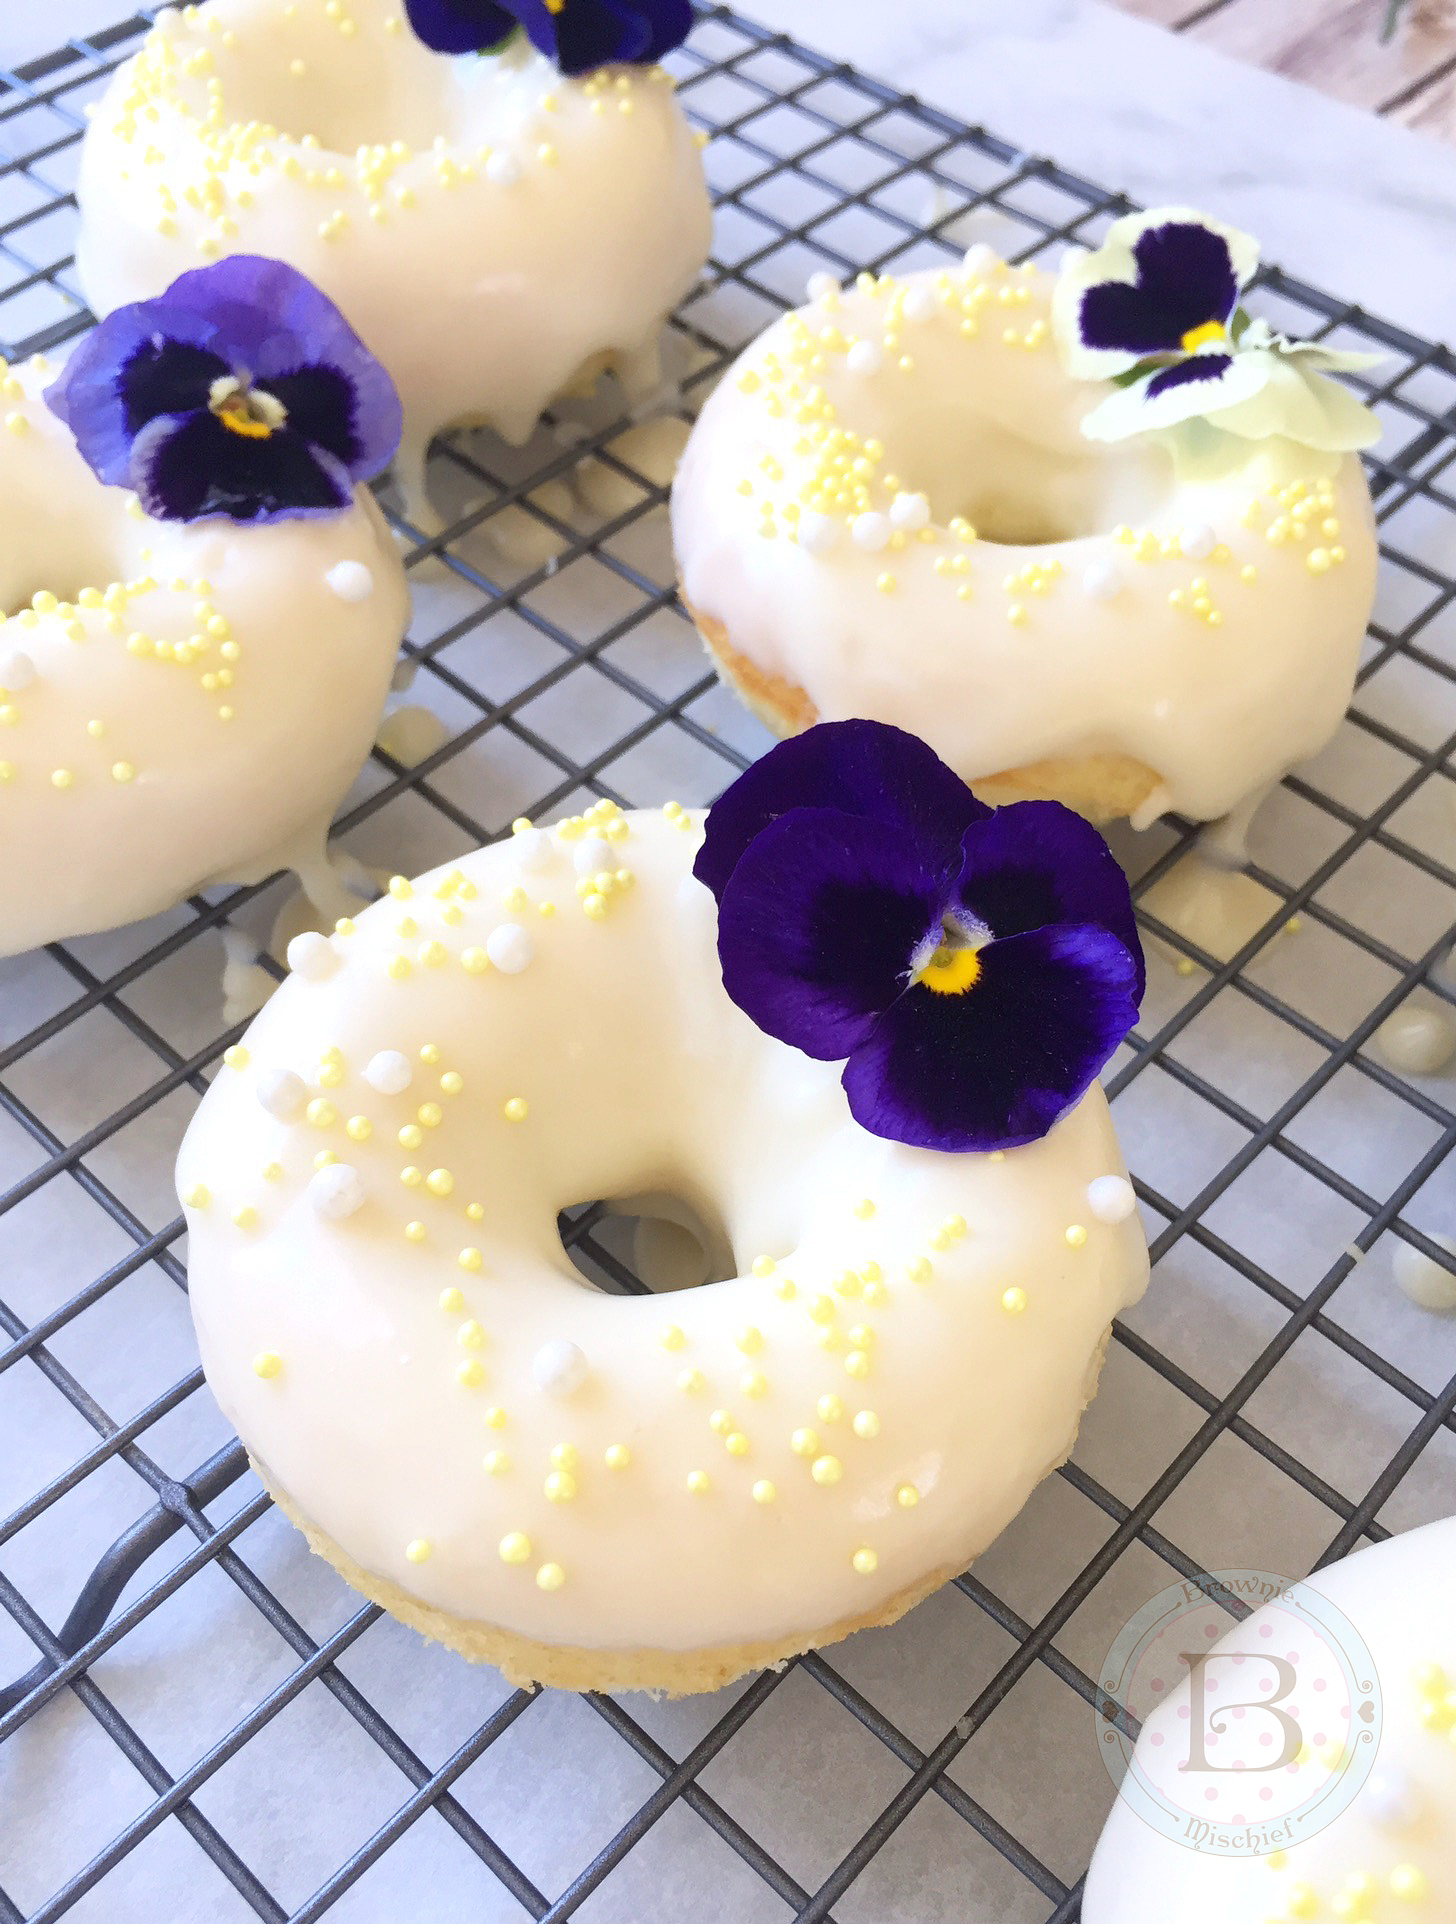
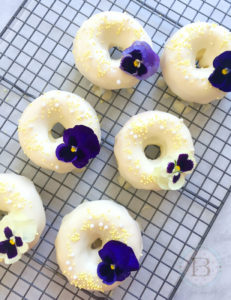
I was seriously happy when I started seeing donuts appearing at weddings, bridal showers and occasions other than work meetings. I’ve always felt those sweet, fluffy rings of dough had a higher calling. They had such potential! And honestly who doesn’t love donuts? They’re delicious, but they can also be beautiful. These Lemon Buttermilk Donuts could certainly win a beauty contest. They would make a gorgeous edition to any breakfast, brunch or dessert table. The fresh lemon zest and the earthy flavor of honey will bring springtime right into your kitchen.
If you’re on the lookout for a Mother’s Day recipe, any mom will love these pretty, fragrant treats. This is a very easy recipe and the donuts bake up quickly, so you’ll have time to fix mom a cup of her favorite tea. If you don’t have a donut pan, and you’ve been reluctant to buy one, I can honestly say I love mine. It was very affordable and I’m pleased with the performance and ease of clean up with the pan I purchased. To find the donut pan click here.
In keeping with the springtime feel, I decorated my donuts with pesticide-free edible flowers. I used pansies, but if you’re unable to find them, you can substitute pesticide-free rose petals. I found these edible pansies at my local food market in the produce department, near the fresh herbs. You can also find edible flowers at farmers’ markets and online. For a list of edible flowers, click here.Note: The above pictured orange ranunculus flowers on the table are not edible.
Lemon Buttermilk Donuts with Honey Cream Cheese Icing
Preheat oven to 375ºF (190ºC). Spray the wells of a donut pan*** with non-stick cooking spray.
In a medium-sized bowl, whisk together the cake flour, sugar, baking powder and salt until well blended.
In a separate medium-sized bowl, whisk the buttermilk, egg, melted butter, and lemon zest together until creamy and well combined. Add this mixture to the flour mixture and stir just until combined. Do not over mix.
Transfer the batter to a piping bag or plastic zip bag. Snip off the tip of the bag and pipe batter into the prepared donut pan, filling the wells 2/3 full.
Bake until a toothpick inserted into donuts comes out clean, about 7-8 minutes. Let cool in the pan for a couple of minutes, then remove the donuts to a cooling rack to cool completely.
Prepare Honey Cream Cheese Icing while the donuts are cooling. Dip the tops of the donuts into the icing and decorate as desired. Serve immediately.
Honey Cream Cheese Icing
In a medium-sized bowl, beat the cream cheese and butter together, with an electric mixer at medium speed, until smooth and well blended. Do not over beat. Add the vanilla extract and salt. Mix until combined.
On low speed, gradually add powdered sugar and mix until incorporated. Add the honey and beat on medium speed until smooth. Add milk, a little at a time until the desired consistency is reached. Beat on low speed until smooth.
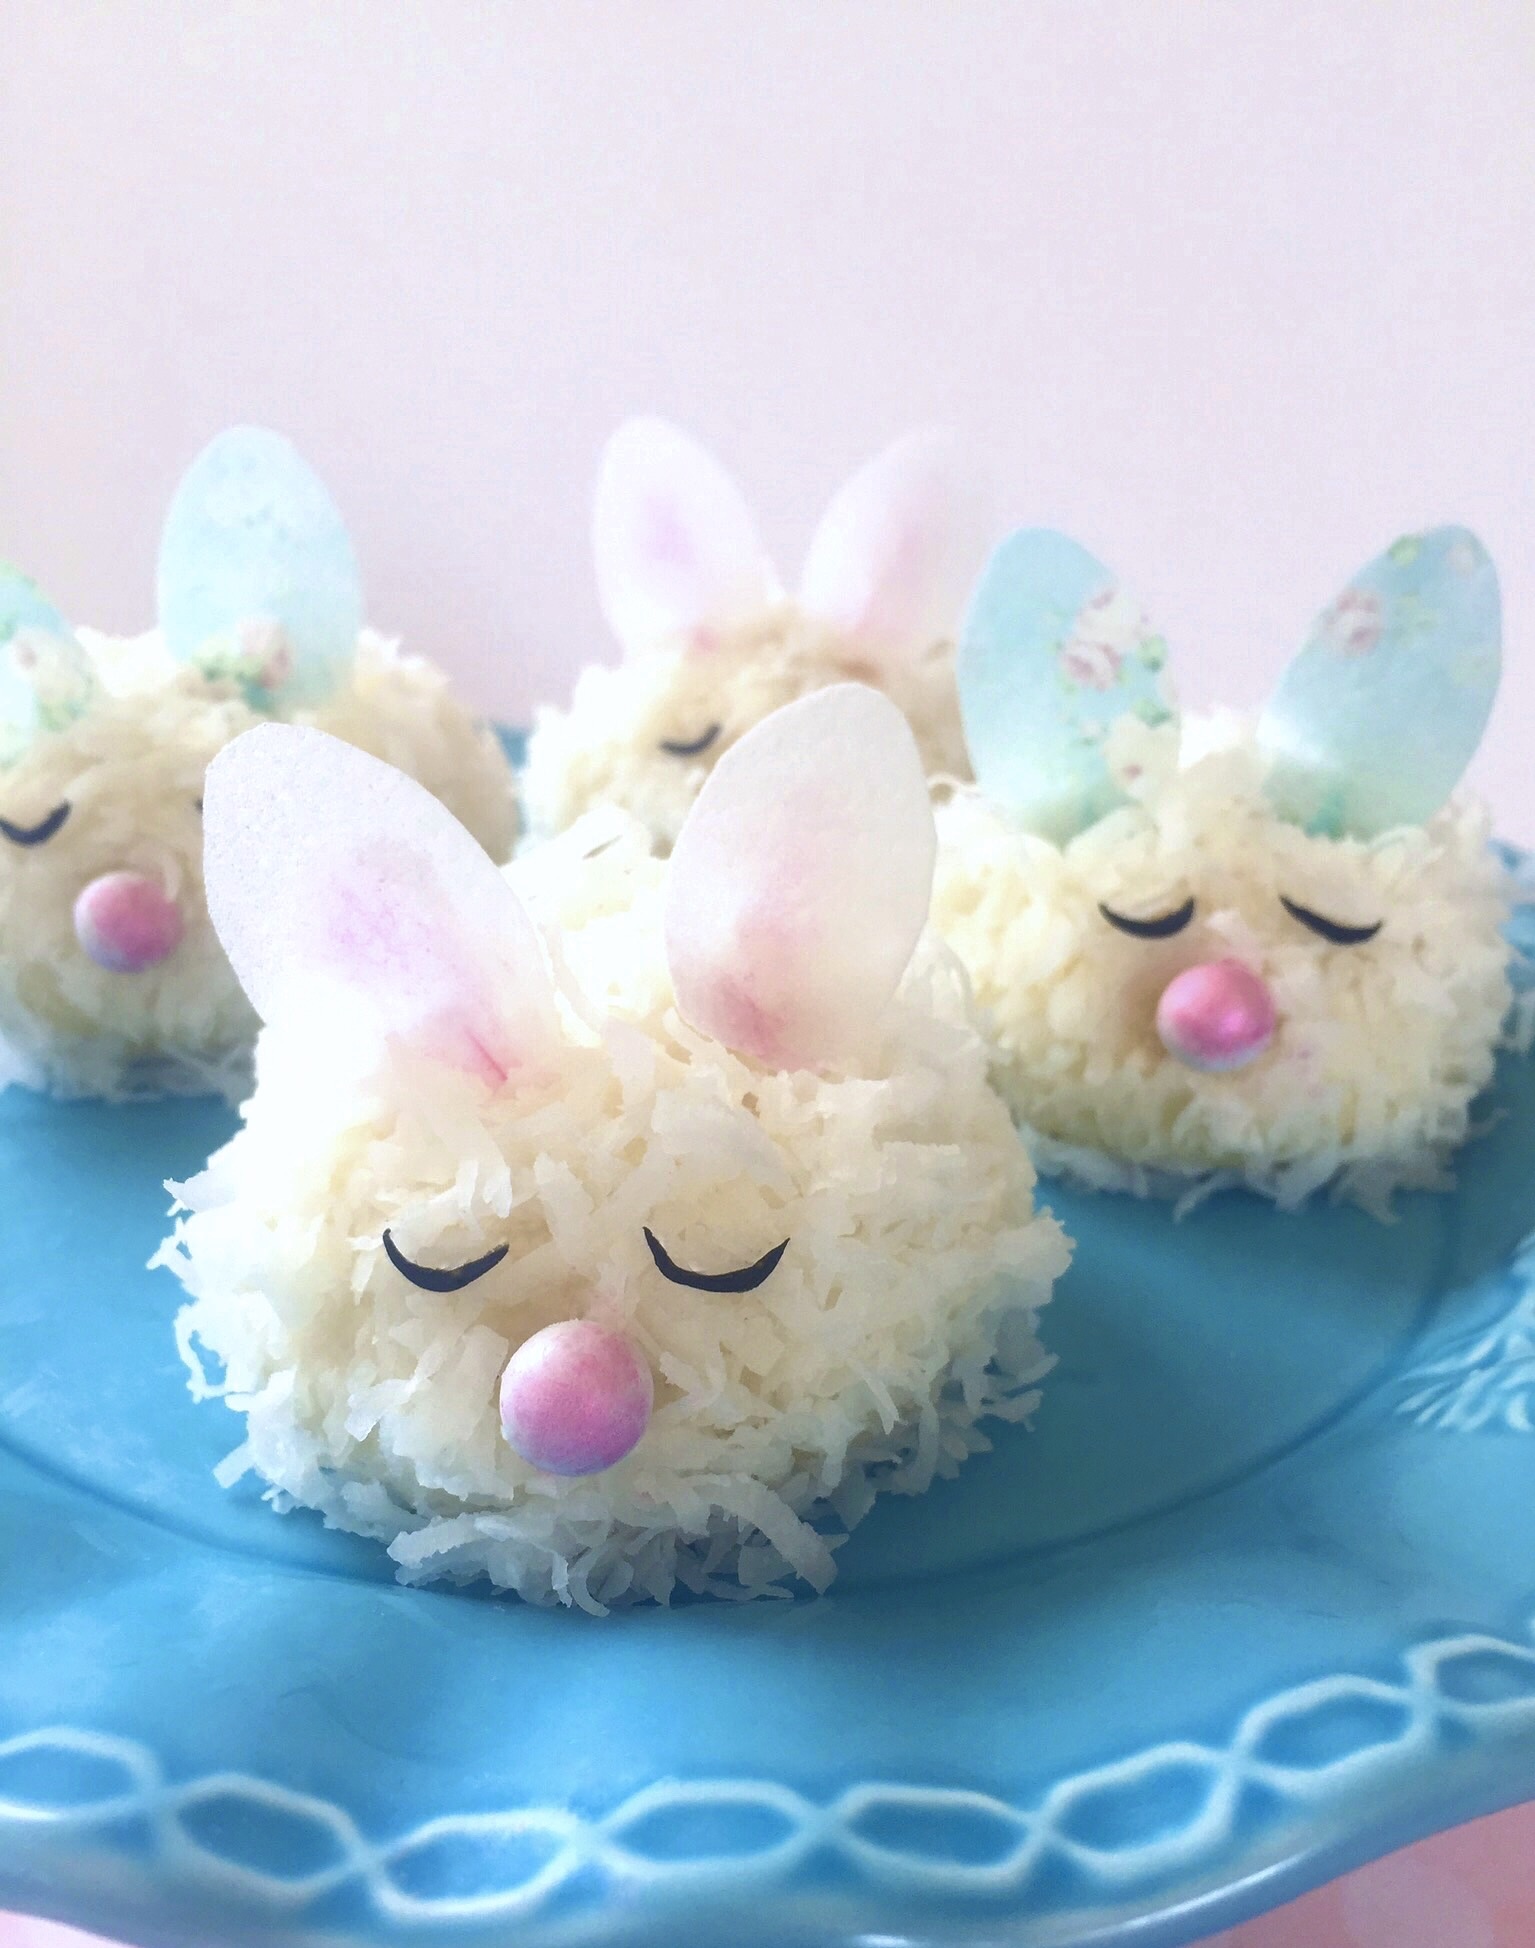
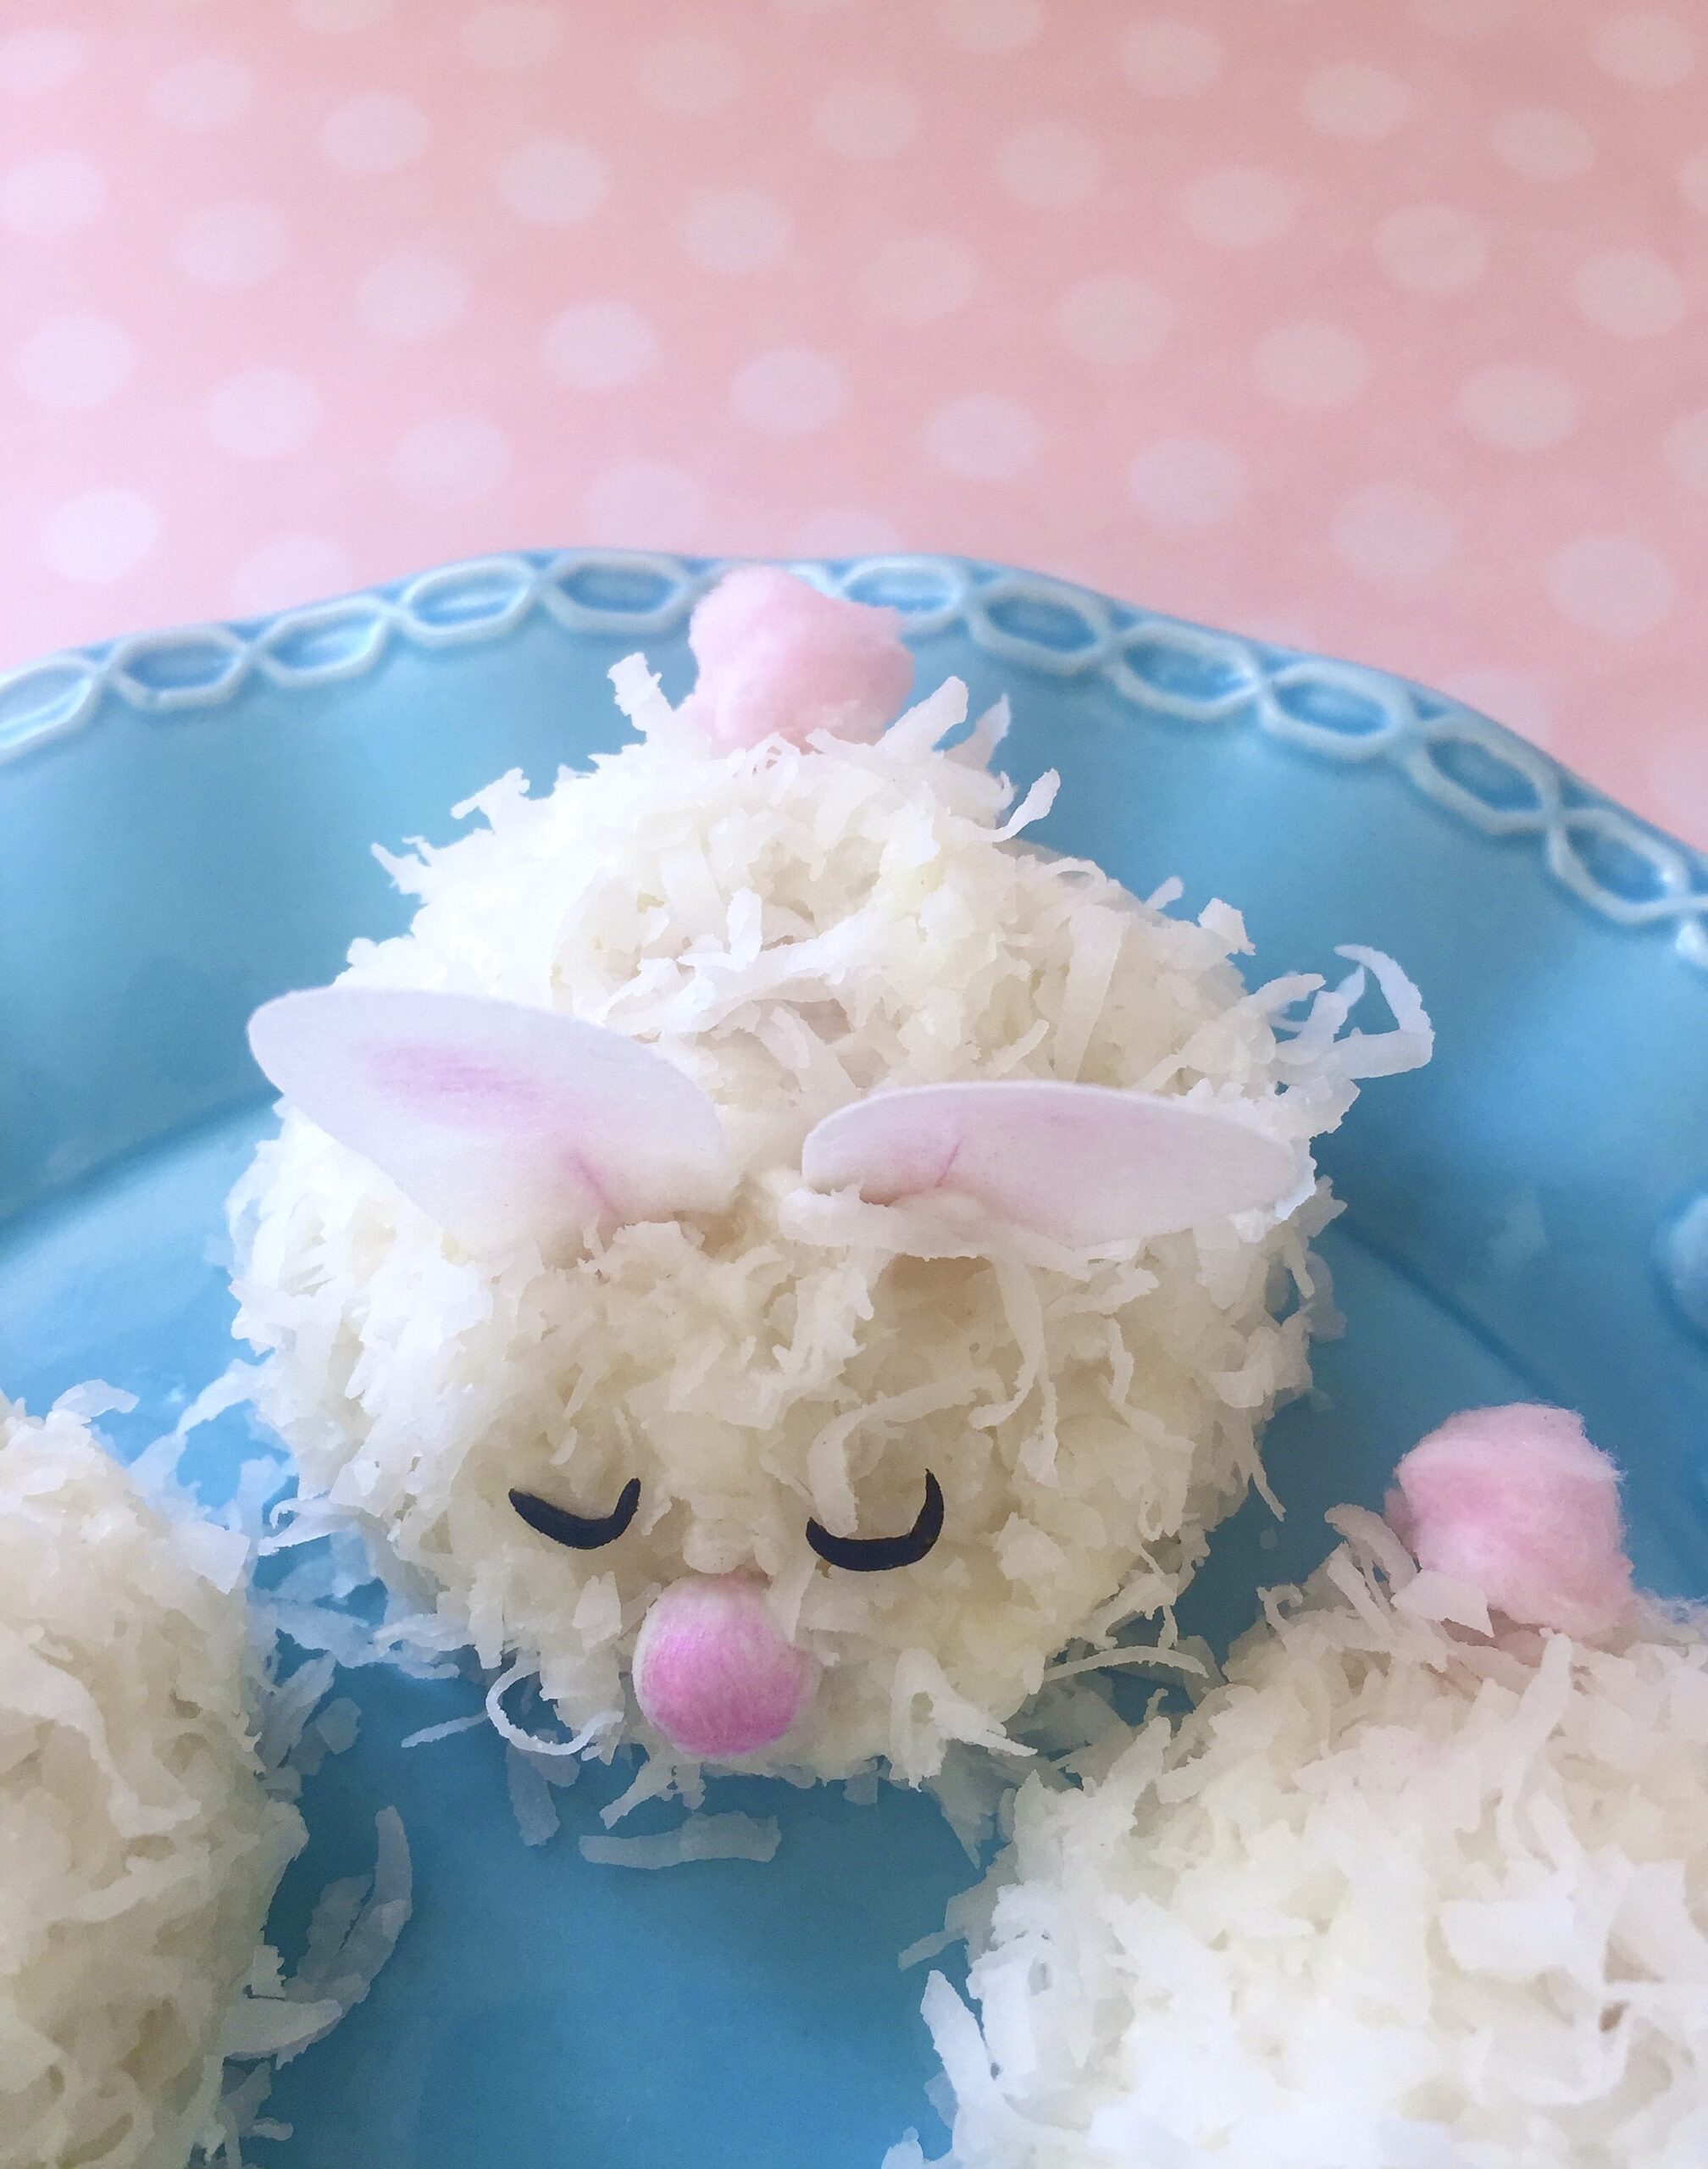
Spring is the time for blue skies, flowers blooming, bunnies scampering around and Easter celebrations. What better time to make cute Baby Bunny Coconut Cakes? I wanted to make them look like newborn bunnies curled up peacefully for a nap, so I decided to use a hemisphere pan.
When I was shopping around for hemisphere pans, also know as ball pans, I considered metal pans and silicone pans. In general, I prefer metal pans for baking cakes, but I decided on silicone, hoping to get more use out them. I plan on using them for frozen and refrigerated desserts as well. You can find hemisphere pans at kitchen stores, craft stores, baking supply stores and online. To find the pan I chose, click here.
My next dilemma was whether or not to coat the pans before baking. From what I’ve read, many people seem to have trouble getting their baked goods out of silicone pans, even though the majority of these pans claim to be non-stick. I decided to experiment, trying three different ways. I coated some of the wells with grease and flour, some with only grease, and some were left uncoated. I found that when I inverted the pan, the cakes released effortlessly from the coated wells. The cakes in the uncoated wells took a slight amount of prodding and a bit of residue was left behind, but the cakes were in tact. All three ways seem to work fine, but I decided that, for my own peace of mind, I will grease all of the wells in the future.
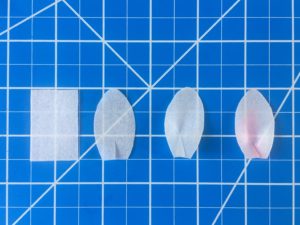
Decorating these bunny cakes is fun and easy, so this would make a great project for the little ones. You can use the candies of your choice to make eyes and noses. I used white candy pearls for the noses and colored them pink with edible petal dust. I made sleepy eyes out of black fondant. Black fondant is difficult to make, so I always buy it. It’s available for purchase in small quantities. I used edible wafer paper to make the bunny ears, but fondant would also work. A little puff of cotton candy makes a sweet tail. So many possibilities! Whether you make Baby Bunny Coconut Cakes for Easter, a child’s birthday party, a baby shower or simply to celebrate spring.
Baby Bunny Coconut Cakes
by Mari Vasseur
Fluffy, moist mini hemisphere coconut cakes with coconut buttercream frosting, topped with shredded coconut.
Preheat the oven to 325ºF (165ºC). Grease 2 silicone 6-serving mini hemisphere pans. Place the pans on large baking sheet.
In a medium-sized bowl, sift together the flour, baking powder and salt until well blended.
In a large bowl, beat the butter, sugar and oil together with an electric mixer at medium speed, until pale and fluffy. Beat in the coconut extract. Gradually beat in egg whites, until the mixture is well combined, stopping to scrape the sides of the bowl. On low speed, beat in the flour mixture in three additions, alternating with the coconut milk, stopping to scrape the sides of the bowl as needed. Beat just until combined.
Fill the hemisphere pan wells, 2/3 full with batter. Bake for 20-24 minutes, until a toothpick inserted into the center of cakes comes out clean.
Place the silicone pans on a cooling rack to cool for 10 minutes. Invert the pans to remove mini cakes and place on cooling racks to cool completely.
Coconut Buttercream
In a large bowl, beat the the butter with an electric mixer on medium speed, until pale and fluffy.
On low speed, gradually add the powdered sugar and mix until smooth and well combined. Add the coconut extract and salt. Beat until combined. Add the coconut milk a little at a time until the desired consistency is reached. Continue beating at low speed until the buttercream is smooth.
Frost the domed tops of the mini cakes with a small offset spatula. Cover with shredded coconut, pressing lightly to adhere. Decorate as desired.
Finishing Touches
To make bunny ears, cut twenty-four 1 1/2-inch by 1-inch rectangles out of edible wafer paper. Cut each rectangle into a long football shape, flat at one end. Cut a 1/2-inch slit at the flat end. With a small paint brush, dab a bit of piping gel on one side of the slit. Overlap the cut ends of the slit and press together with your fingers. Let dry. Brush pink luster dust into the center of the ears. Skip this step if you are using floral wafer paper. Cut small slits into the bunny cakes and insert the ears.
To make sleepy eyes, roll out a bit of black fondant to 1/16-inch thickness. Cut circles using the small end of a #12 piping tip. Cut thin crescent shapes from the circles using the small end of the piping tip. For easier handling, let eyes dry for a few minutes. If the coconut on your bunny cakes is still moist and tacky, the eyes will stick. If not, brush them with a small bit of water or piping gel.
To make noses, use the candy of your choice, such as candy pearls or candy hearts. I used white candy pearls, brushed with edible pink luster dust.
To make tails, you can use cotton candy or mini marshmallows attached with a bit of buttercream. If using cotton candy, keep in mind that it melts when exposed to air, so it's best applied right before serving.
Notes
*Do not substitute all-purpose flour. For best results, weigh your dry ingredients.**For best results, use natural coconut extract. Imitation coconut flavorings may give your baked goods an unpleasant flavor.***If your coconut milk is separated when you open the can, simply place it in a blender to emulsify it before using.To find the hemisphere pan I used, click here.To find white edible wafer paper, click here. Floral wafer paper can be found on Etsy.To find black fondant, click here.