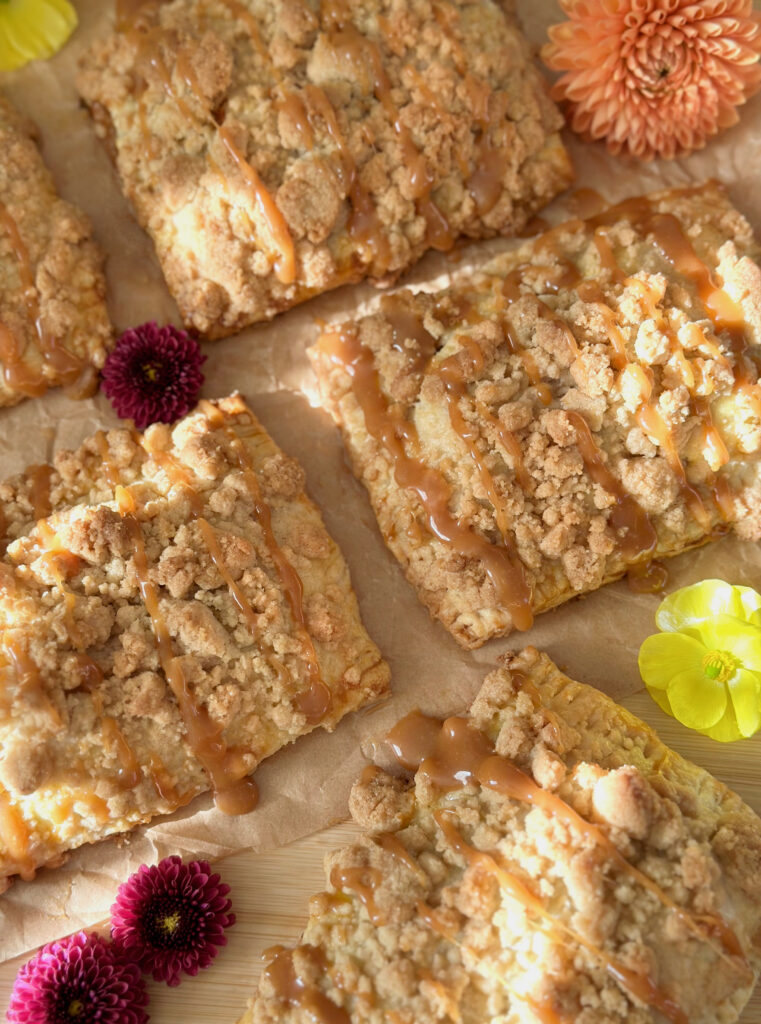
Fresh apples + flaky pie crust + buttery streusel topping + caramel drizzle = a heavenly combination of autumn flavors, textures and aromas in one handheld treat. These Caramel Apple Crumble Hand Pies are irresistible and even a little addicting. They’re the perfect bake for a crisp autumn day and they go beautifully with all of the warm, cozy fall drinks from lattes to teas.
With this recipe, I’m sharing an idea I use to fill the pies with even more apples, which is cutting the top crusts a bit larger than the bottom crusts. It’s also helpful to arrange the apples on the crusts by hand which helps to avoid any air pockets.
The buttery crumb topping takes these hand pies to another level. You can add as much or as little of the crumb topping as you like. Typically I say to follow measurements strictly when baking, because it’s an exact science, but with this streusel crumb topping, go ahead and measure with your heart when topping your hand pies.
| Servings |
hand pies
|
- 2 2/3 cups (340g) all purpose flour, sifted
- 2 tablespoons (25g) granulated sugar
- 1/2 teaspoon fine sea salt
- 1/4 cup (47g) vegetable shortening
- 3/4 cup (170g) cold, unsalted butter, cubed
- 1/2 cup (118ml) ice water
- 1 tablespoon (15ml) apple cider vinegar
- 3 1/2-4 cups (14 oz or 397g) peeled, sliced apples See notes below*
- 2 teaspoons lemon juice
- 1 tablespoon (14g) butter
- 6 tablespoons (75g) packed brown sugar
- 2 teaspoons (20g) cornstarch
- 3/4 teaspoon cinnamon
- 1/8 teaspoon fine sea salt
- 1 tablespoon (15ml) apple cider or apple juice
- 3/4 cup (96g) all purpose flour
- 1/4 cup (50g) granulated sugar
- 2 tablespoons (25g) packed brown sugar
- 1/4 teaspoon cinnamon
- 1 pinch fine sea salt
- 1/4 cup cold, unsalted butter, cubed
- 1 1/2 tablespoons (21g) butter, softened
- egg wash 1 egg yolk beaten with 2 teaspoons of water
- caramel sauce store bought or homemade**
Ingredients
Pie Crust
Apple Filling
Crumb Topping
Assembly
|
|
- In a large bowl, whisk together the flour, granulated sugar and salt. Work in the shortening with your fingertips until it's evenly dispersed. Work in the butter until flat dime-sized pieces are formed.
- In a small bowl, combine the ice water and vinegar. Sprinkle the ice water mixture over the flour mixture a little at a time and stir just until the dough comes together. You may not need all of the liquid, depending on your climate. Turn the dough out onto a lightly floured surface. Fold the dough over onto itself a couple of times. Do not overwork the dough! Divide the dough into 2 equal portions and form the portions into 1/2-inch thick rectangular blocks. Wrap them with plastic wrap and refrigerate for at least 2 hours or up to overnight.
- In a small bowl whisk the apple juice together with the cornstarch. Set aside. Toss the apples and lemon juice together in a large bowl. Melt the butter in a large skillet over medium heat. When the butter is melted and starts to sizzle add the apples, brown sugar, cinnamon, and salt. Stir gently until well combined. Cook until the sugar melts and the mixture starts to bubble. Turn the heat down to medium-low and simmer until the apples soften a bit, about 2-3 minutes. Stir in the cornstarch mixture. Continue cooking until the sauce thickens, about 2 minutes. Transfer the contents of the pan to a bowl and set aside to cool to room temperature, about 20 minutes.
- In a medium bowl, whisk together the flour, sugar, brown sugar, cinnamon and salt until well combined. Work the butter into the flour mixture with your fingertips until no large pieces of butter are remaining. Press the mixture together to form chunks. Set aside in the refrigerator until ready to use.
- Line a large baking sheet with parchment paper. On a lightly floured surface, roll the dough to 1/8-inch thickness. Cut out 6 rectangles measuring 3 by 4 1/2-inches for the bottoms. Cut out 6 rectangles measuring 3 1/4 by 4 3/4-inches for the tops.
- Chill the cut dough rectangles in the refrigerator for 15 minutes. Meanwhile preheat the oven to 375ºF (190ºC). Place the 6 bottom pieces on the baking sheet about 2 inches apart. Brush the perimeter edges of the dough with egg wash. Top with filling to within 1/2 inch of the edges. Pinch off pieces of the softened butter and dot the tops of the filling. Place on the top pieces of dough and press the edges together to seal. Crimp the edges with a fork. Brush the pies with egg wash. Cut a 1/2-inch ventilation slit in the top of each one. Top with crumb topping, pressing it lightly to adhere.
- Bake until golden brown, about 20-25 minutes. Let the pies cool on the baking sheet for 5 minutes, then transfer them to a cooling rack. Drizzle the warm or room temperature pies with caramel sauce.
*Slice the apples about 3/8-inch thick, then cut the slices in half
**For my Homemade Caramel Sauce recipe, click here. For my Easy Caramel Sauce recipe, click here. For store bought caramel sauce, click here.
