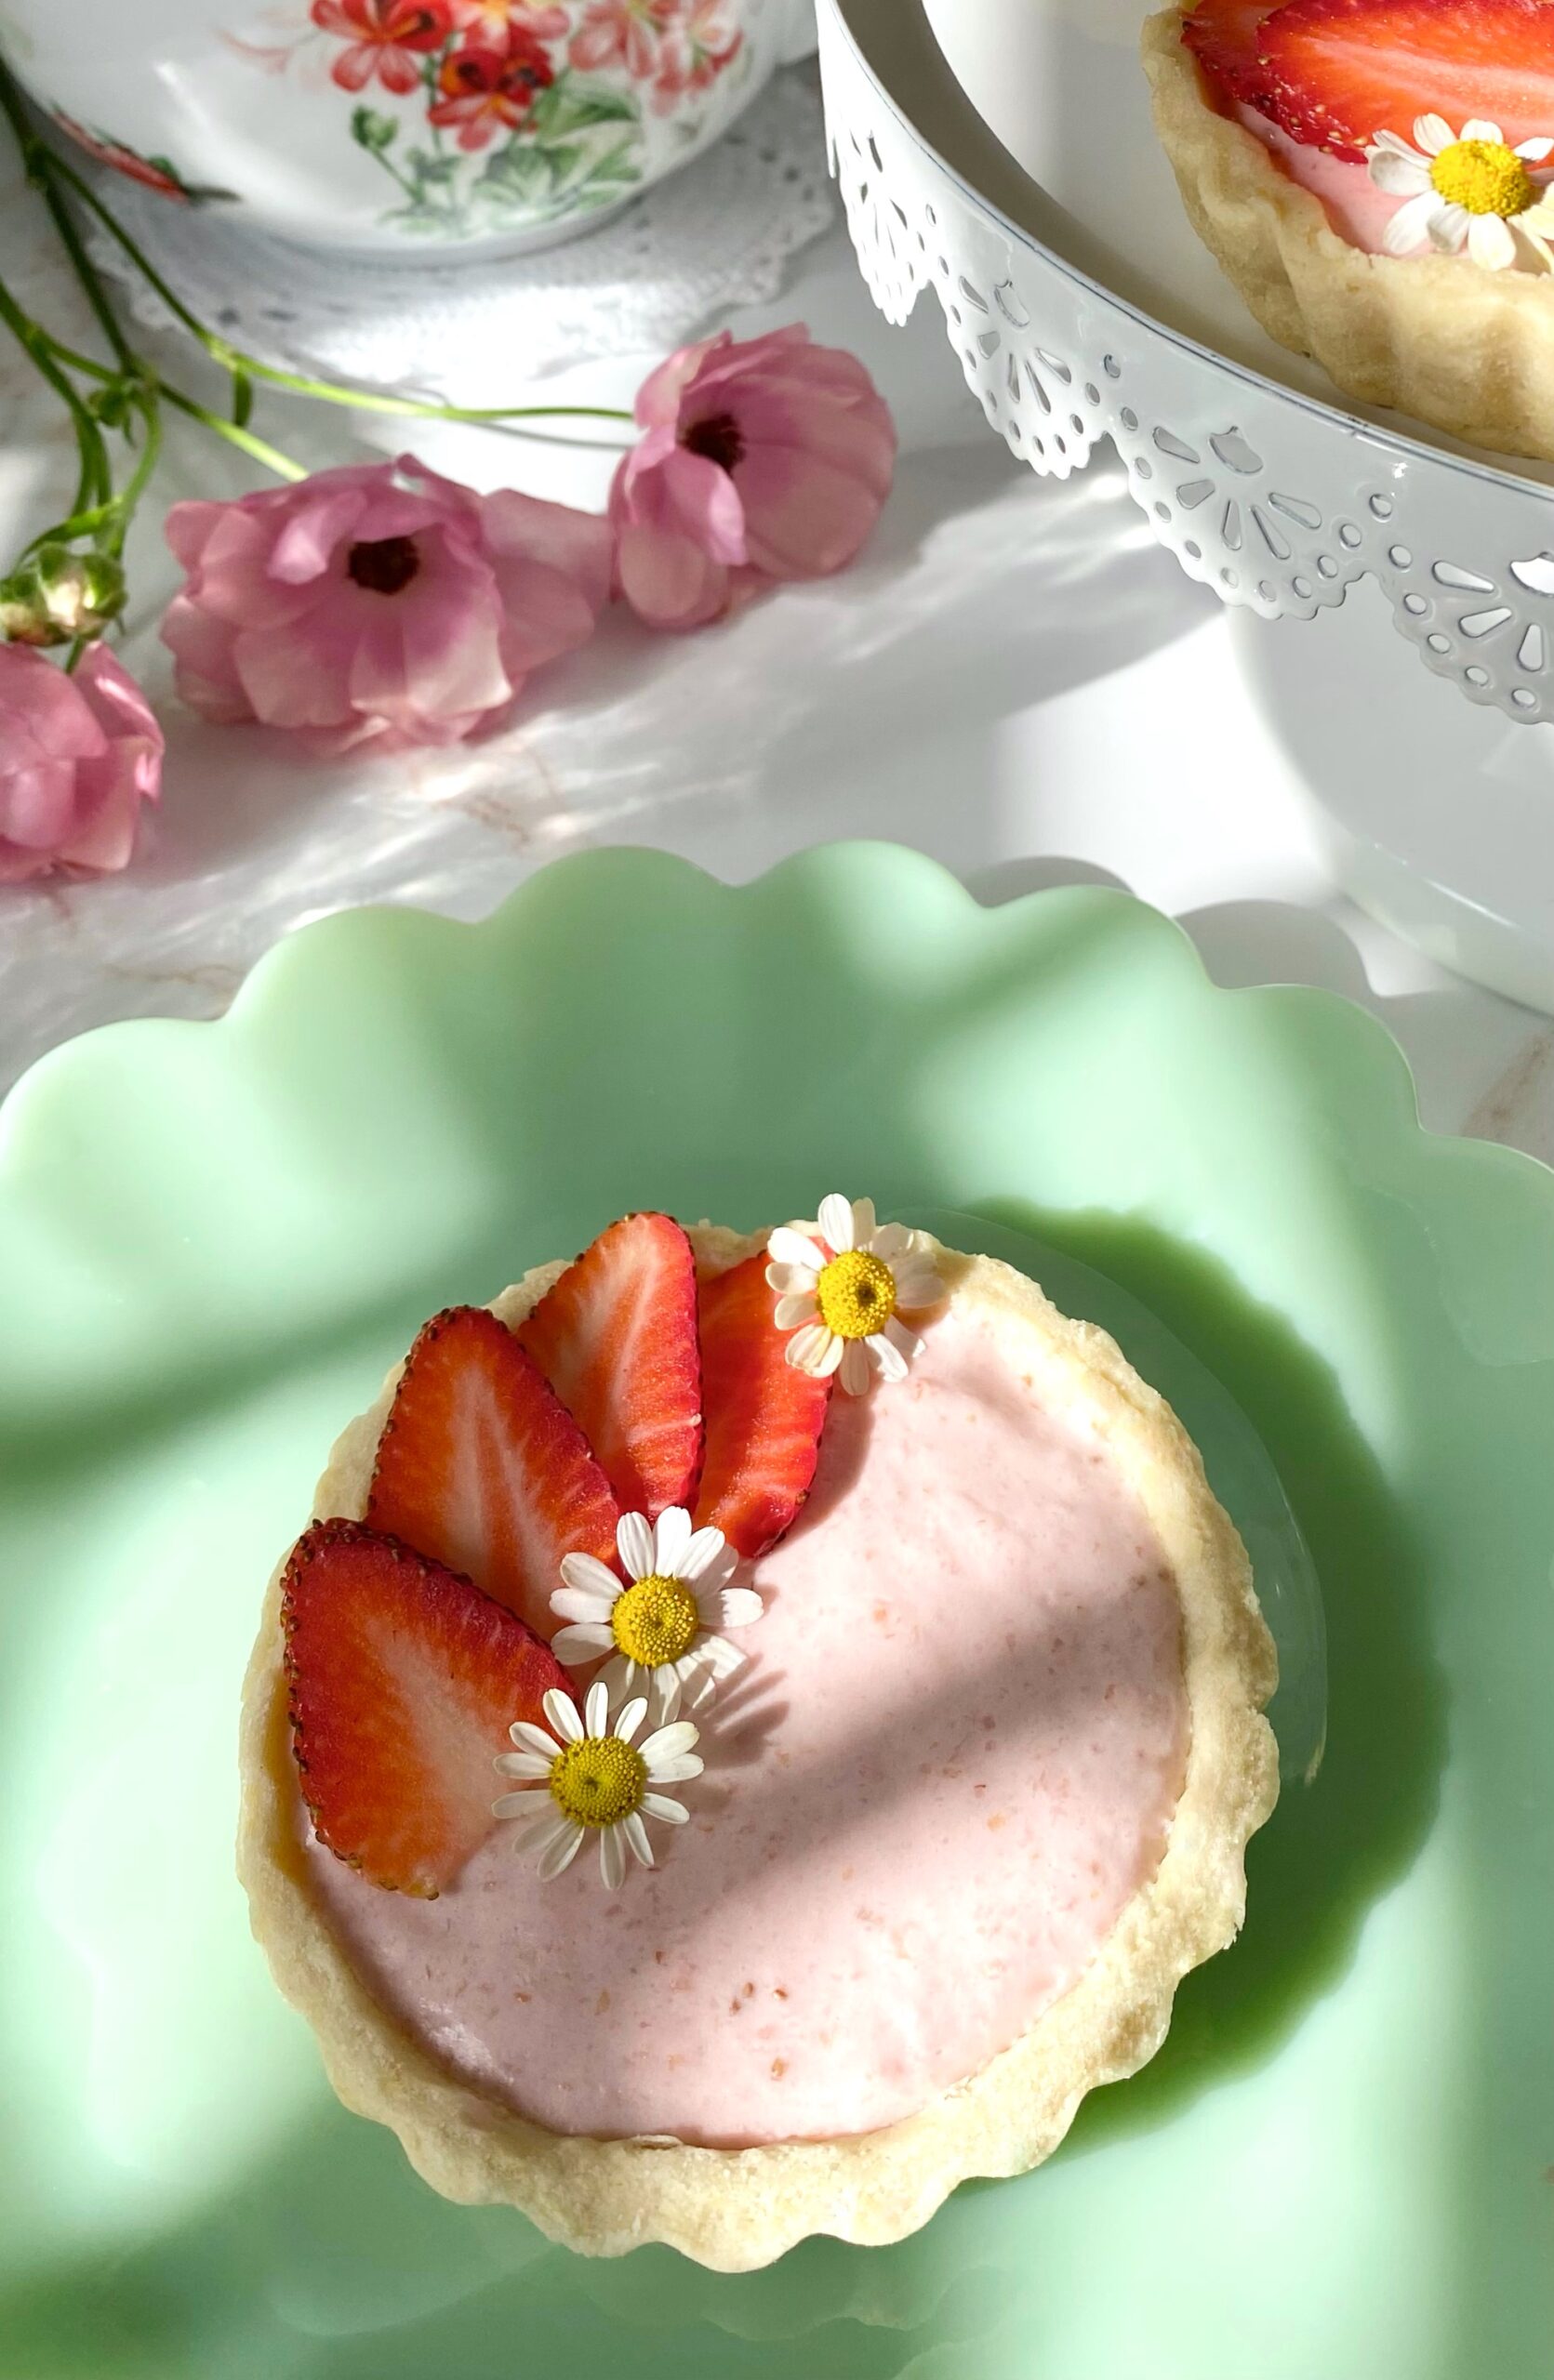
Strawberries & Cream Tarts

Strawberries & Cream Tarts

May is when I get to pull out all of my summery recipes. These pretty little Strawberries & Cream Tarts remind me of a summer day. The kind of day when you’re outside enjoying the sunshine and you’re craving a cool, refreshing dessert. This strawberry cream filling alone is so delicious that I could just eat the entire bowl with a spoon. But since I’m extra, I had to create an aesthetic dessert with it.

I used my favorite tart shells for this recipe, but this would also be delicious with those little pre-made graham cracker pie crusts if you want to take a shortcut. The reason I love this tart crust recipe so much though, is that it actually tastes delicious. Once, a few years ago, I purchased a beautiful, small fruit tart from a famous bakery. The fruit was vibrant and glistening and the pastry cream filling was sweet and silky. Now we need the sound of a mic drop, because the tart crust was hard and flavorless, like cardboard! Ever since then, I knew I would settle for nothing less than a delicious tart crust.

Strawberries & Cream Tarts

Course Dessert
Servings 6 4-inch tarts

Ingredients
  

Tart Crust

  • 1 ½ cups (6.75 ounces) all purpose flour, sifted
  • ¼ cup (1 ounce) powdered sugar, sifted
  • ¼ teaspoon fine sea salt
  • ½ cup (4 ounces) cold, unsalted butter, cubed
  • 1 egg yolk
  • 1-2 tablespoons ice water

Strawberry Cream Filling

  • 2 cups (16 ounces) strawberry puree Plus more for garnish
  • ½ cup (3.5 ounces) granulated sugar
  • 3 tablespoons water
  • 2 teaspoons unflavored gelatin powder
  • ½ cup (4 ounces) cream cheese, softened
  • ½ teaspoon strawberry extract
  • ½ teaspoon vanilla extract
  • ½ cup (4 ounces) cold heavy whipping cream

Instructions
 

Tart Crust

  • In a bowl, whisk together flour, powdered sugar and salt. Set aside.
  • Work in butter and egg yolk with a pastry blender or with your fingers, until pea size pieces are formed.
  • Add ice water, one tablespoon at a time, until dough comes together.
  • Form dough into a disc. Wrap in plastic and refrigerate for one hour.
  • On a lightly floured surface, roll dough to a scant 1/4-inch thickness
  • Cut dough into six 5-inch rounds. Press rounds into six 4-inch or 4 1/4-inch tart pans.*
  • Dock the bottoms of pie crusts with a fork. Freeze for 30 minutes.
  • Heat oven to 375ºF. Place tart pans on a large baking sheet.
  • Line tart shells with six 6-inch parchment rounds. Fill with pie weights. (You can use dried beans or rice if you don't have pie weights.)
  • Bake tart shells for 12 minutes. Remove parchment paper and pie weights. Continue baking until tart shells are light golden brown, about 4-6 more minutes.
  • Transfer to cooling rack to cool completely.

Strawberry Cream Filling

  • Pass the strawberry purée through a mesh sieve to remove large seeds.
  • In a medium saucepan, simmer the strawberry purée until it's reduced by half. Stir in the sugar and continue cooking over medium heat, until the sugar is dissolved. Transfer to a medium bowl.
  • Meanwhile, place 3 tablespoons of water into a small bowl. Sprinkle gelatin powder over the top of water. Let sit until water is absorbed, about 5 minutes.
  • Pour the gelatin mixture into the warm strawberry reduction mixture and stir until fully incorporated.
  • In a large bowl, beat cream cheese on low speed with an electric mixer until smooth.
  • Add extracts and beat until combined.
  • Add the strawberry reduction mixture to the cream cheese a little at time. Beat until well combined.
  • In a medium bowl, beat heavy whipping cream with an electric mixer at high speed until stiff peaks form.
  • Fold whipped cream into strawberry mixture.
  • Spoon into cooled tart shells. Smooth tops with a small offset spatula. Refrigerate for two hours. Garnish with sliced, fresh strawberries.
Notes

*To find the tart pans I used, click here.
Keyword strawberry, tarts

Pastel Snowball Cookies

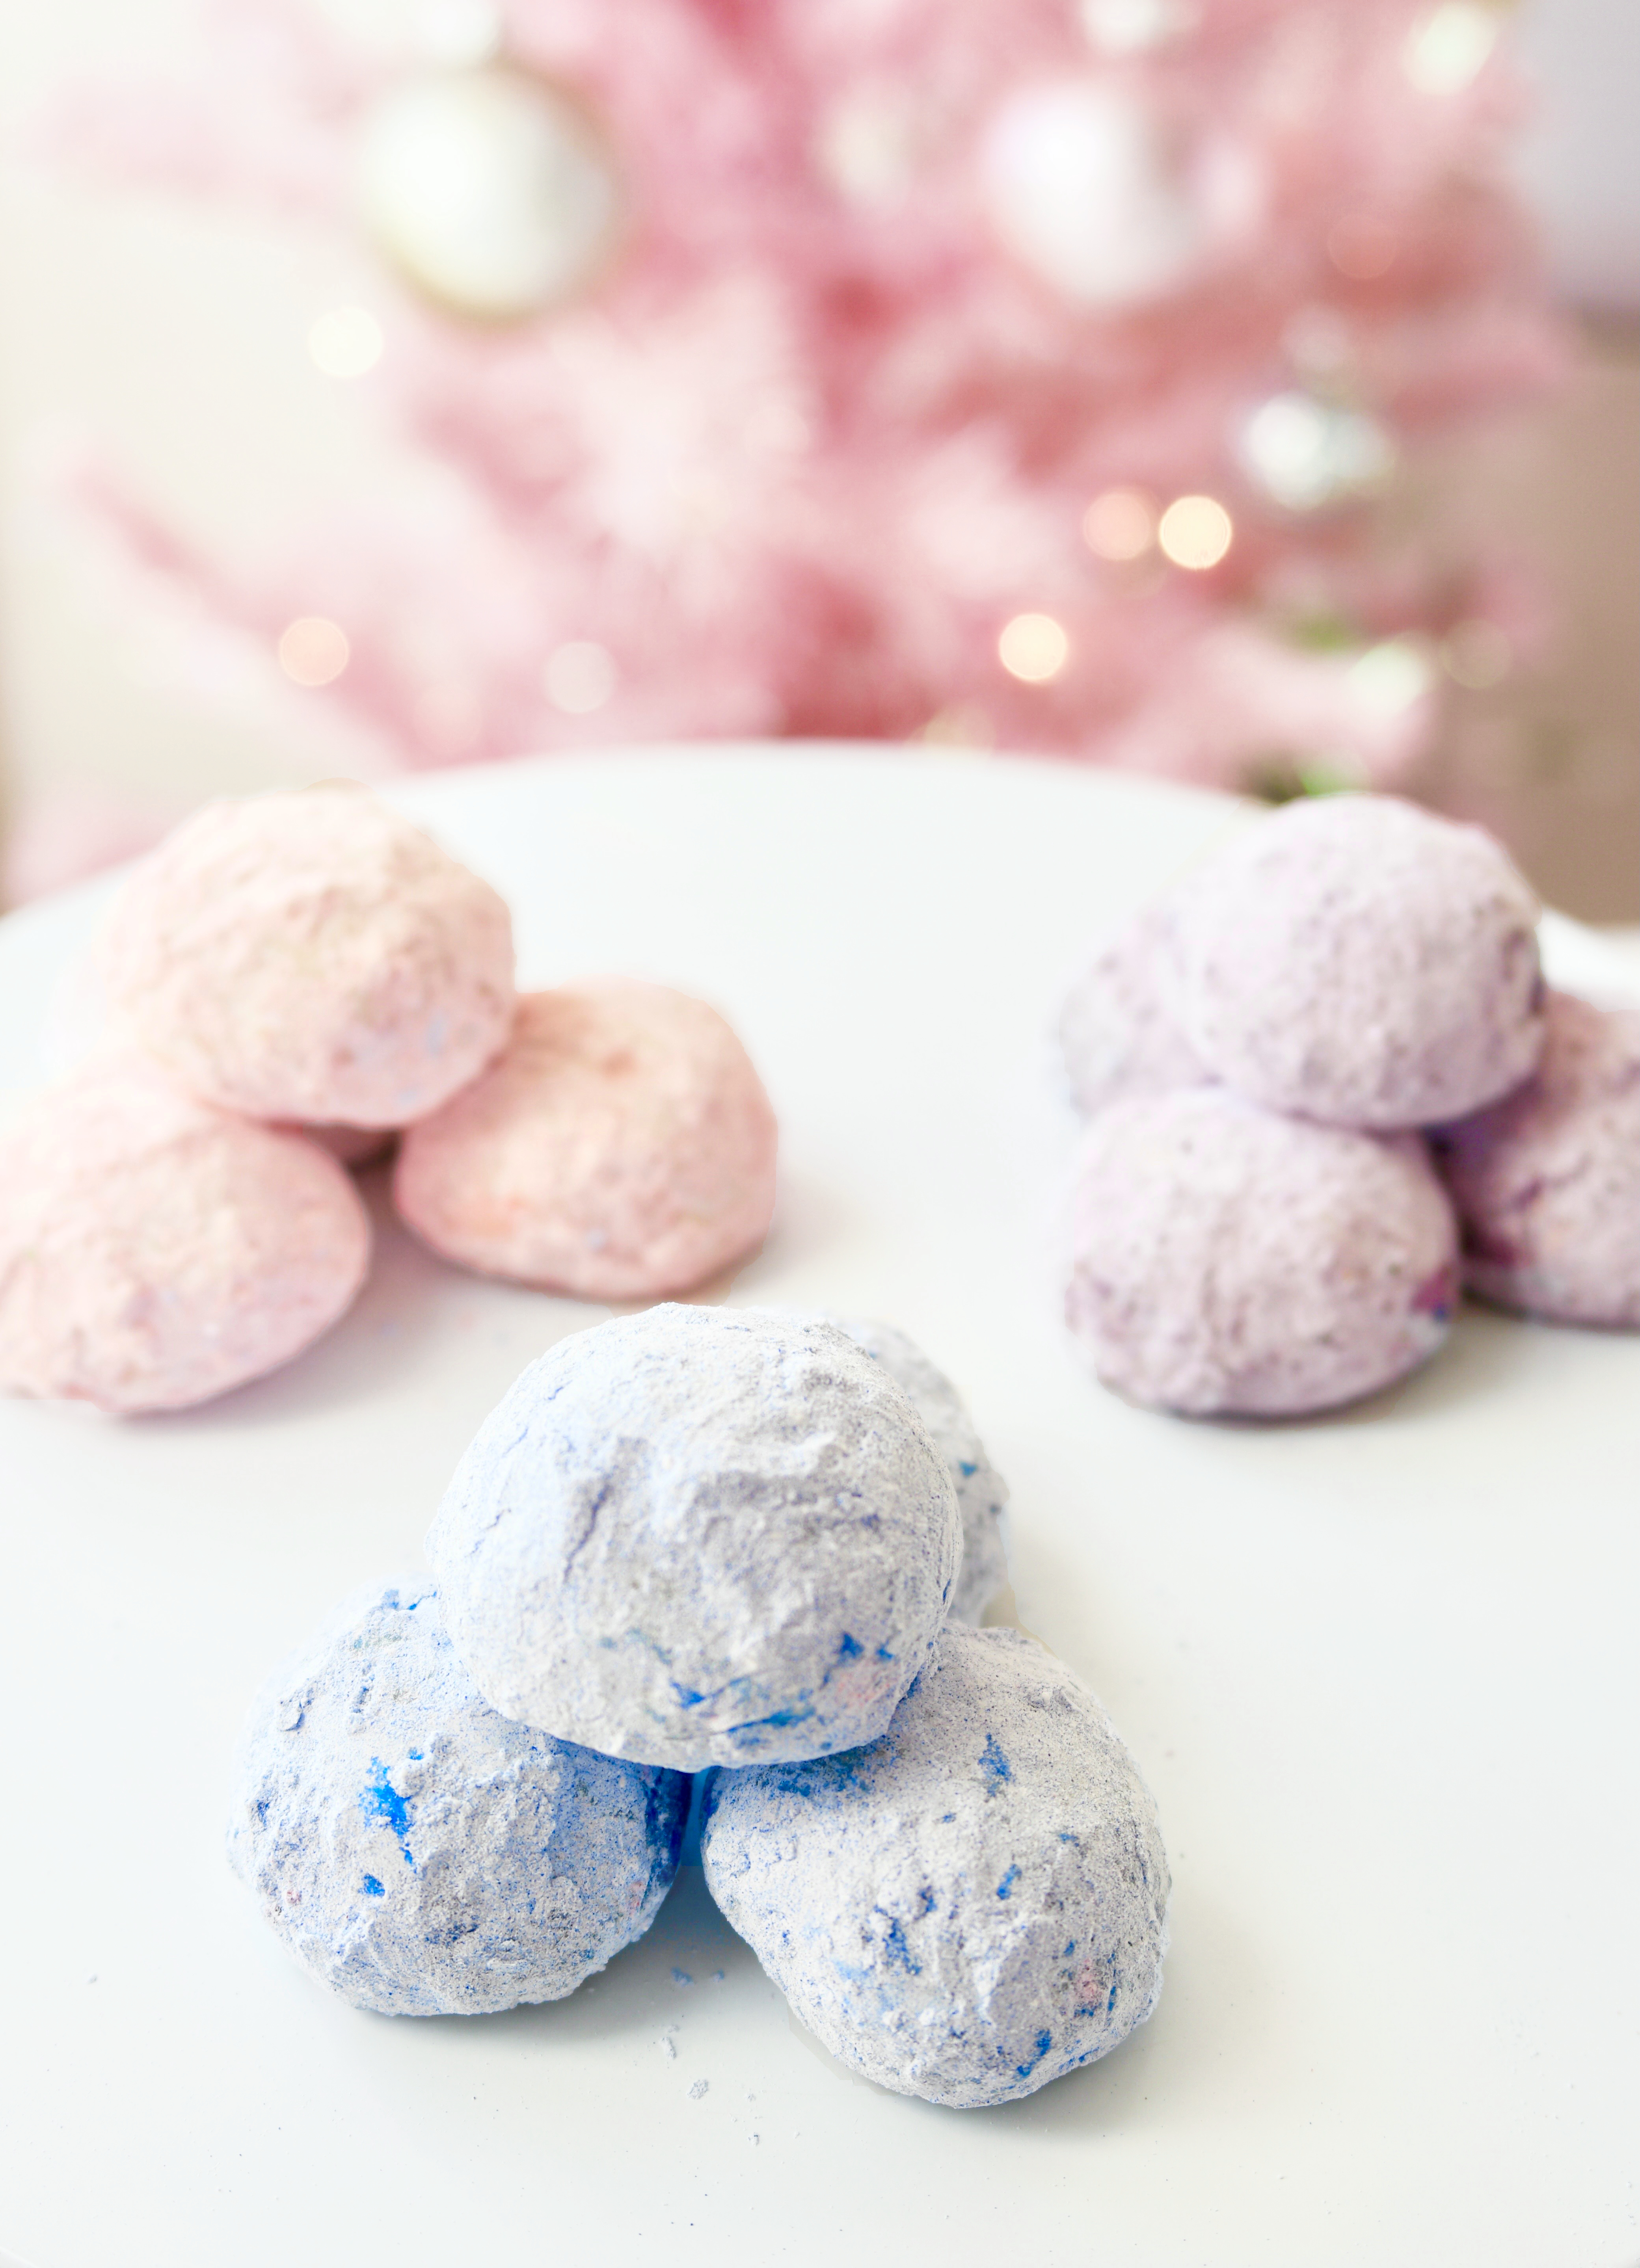
pastel snowball cookies

This delightful melt-in-your-mouth cookie recipe has been in my family for decades. We call them Snowballs, but they’re also known as Mexican Wedding Cakes or Greek Kourabiedes. I make them every year for Christmas, but they would also be perfect for Easter, Mother’s Day, birthday parties, tea parties, weddings, bridal showers, and baby showers.

Pecans are my favorite nuts to use in this recipe, but you can use almost any nuts you have on hand. The original snowy white version is a classic but you can take them up a notch with pretty pastels and fruit flavors. You can use crushed, freeze-dried fruit for color and subtle flavor. Spirulina is a nutritious, vibrant powder you can use to make beautiful blue cookies. You can also dress up your snowballs with edible glitter or luster dust used for cake decorating. There are endless ways to be creative with these cute cookies!


Pastel Snowball Cookies

by Mari Vasseur
Melt-in-your-mouth shortbread cookie balls covered in pastel powdered sugar
Course Dessert
Servings 36 cookies

Ingredients
  

Cookies

  • 1 cup (227g) unsalted butter, softened
  • 1 cup (120g) powdered sugar, sifted and divided plus more for desired pastel powdered sugar color
  • 1 teaspoon vanilla extract
  • ¼ teaspoon fine sea salt
  • 2 cups (255g) all purpose flour, sifted
  • ½ cup (64g) finely chopped pecans

Pink powdered sugar

  • â…“ cup (40g) powdered sugar, sifted
  • ½ cup (14g) freeze-dried strawberries or raspberries see note below*

Blue powered sugar

  • â…“ cup (40g) powdered sugar, sifted
  • 1 ½ teaspoons blue spirulina powder

Lavender powered sugar

  • â…“ cup (40g) powdered sugar, sifted
  • ½ cup (14g) freeze-dried blueberries see note below*
  • ¼ teaspoon violet edible petal dust optional

Instructions
 

Cookies

  • Preheat the oven to 325ºF (165ºC). Line two cookie sheets with parchment paper.
  • In a large bowl, beat the butter, with an electric mixer at medium speed, until smooth and creamy. Add 1/2 cup (60g)of powdered sugar, the vanilla and salt. Beat until pale and fluffy.
  • In a separate medium-sized bowl, combine the flour and pecans. Gradually add the flour and pecan mixture to the butter mixture, beating on low speed until combined.
  • Shape the dough into scant 1-inch balls. Place the balls about 2 inches apart onto the prepared cookie sheets. Bake until light golden brown, about 17-20 minutes.
  • Place the remaining 1/2 cup (60g) of powdered sugar in a plastic bag. With a spatula, transfer three warm cookies into the bag. Shake gently to coat the cookies with powdered sugar. Transfer them to a cooling rack. Repeat with the remaining cookies.
  • Cool the cookies completely then proceed to the instructions for pastel powdered sugar, depending on which color you have selected.

Pink powdered sugar

  • Process the freeze-dried strawberries or raspberries into a fine powder in a mini food processor.
  • Whisk the freeze-dried berry powder with 1/3 cup (40g) powered sugar together in a small bowl.
  • Transfer the powered sugar mixture to a plastic bag. Place three cookies in the bag and shake gently until coated with the powdered sugar mixture. Transfer the cookies back to the rack and repeat with remaining cookies.

Blue powered sugar

  • Whisk 1/3 cup (40g) powdered sugar and the spriulina powder in a small bowl.
  • Transfer the powered sugar mixture to a plastic bag. Place three cookies in the bag and shake gently until coated with the powdered sugar mixture. Transfer the cookies back to the rack and repeat with the remaining cookies.

Lavender powered sugar

  • Process the freeze-dried blueberries into a fine powder in a mini food processor.
  • Whisk the freeze-dried blueberry powder with 1/3 cup (40g) powered sugar together in a small bowl. Whisk in petal dust for a more vibrant color, if desired.
  • Transfer the powered sugar mixture to a plastic bag. Place three cookies in the bag and shake gently until coated with the powdered sugar mixture. Transfer the cookies back to the rack and repeat with the remaining cookies.

Notes

*The ratios for the pastel powered sugar are approximate. Freeze-dried fruit varies in color. Add more or less to achieve your desired shade.
Keyword cookies

Pumpkin Cheesecake Crumble Brownies

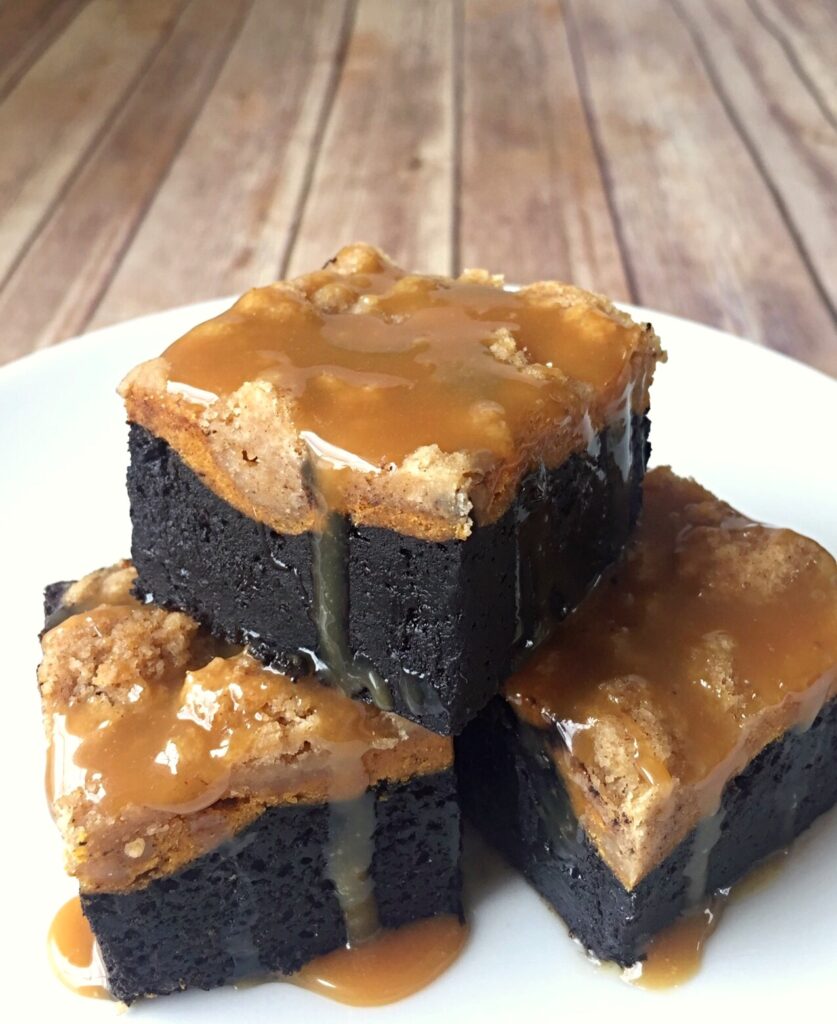
pumpkin cheesecake crumble brownies

It’s Fall 2020. We need chocolate! We need pumpkin spice! And we need it drenched with caramel! These satisfying brownies check all of the boxes with multiple layers of comfort. A rich chocolate brownie is the base. The next layer is heavenly pumpkin cheesecake. The topping is a buttery crumble that rivals the best crumb cake. Finally, as if that isn’t enough, it’s drizzled with caramel sauce!

If it sounds complicated, don’t worry, it’s not. Each layer is super easy to make. You can use your favorite store bought caramel sauce to top it with. Vanilla ice cream and/or whipped cream are optional, but highly recommended toppings also. Just saying.

The layers go unexpectedly well together and make the perfect dessert for Halloween or Thanksgiving. I’m even going to add these beauties to my Christmas dessert table this year. Enjoy! You deserve it.

Pumpkin Cheesecake Crumble Brownies

by Mari Vasseur
Chocolate brownies with pumpkin cheesecake and crumb topping, topped with caramel sauce.
Course Dessert
Servings 12

Ingredients
  

Crumb Topping

  • 1 ½ cups (190g) all purpose flour
  • ½ cup (100g) brown sugar
  • 1 ½ teaspoons ground cinnamon
  • ½ teaspoon fine sea salt
  • ¾ cup (170g) unsalted butter

Pumpkin Cheesecake Layer

  • ¾ cup (170) cream cheese, softened
  • 1 cup (8 ounces) canned pumpkin
  • 2 large eggs
  • 6 tablespoons (75g) sugar
  • 1 ½ teaspoons ground cinnamon
  • ¼ teaspoon ground ginger
  • ¼ teaspoon ground nutmeg

Brownie Layer

  • ¾ cup (100g) all purpose flour, sifted
  • ½ teaspoon baking powder
  • ½ teaspoon fine sea salt
  • ½ cup (113g) unsalted butter, cubed
  • 1 â…› cup (225g) granulated sugar
  • 3 large eggs
  • 1 teaspoon pure vanilla extract
  • ½ cup (45g) unsweetened Dutch-Process cocoa powder, sifted
  • ½ cup (150g) caramel sauce, purchased or homemade

Instructions
 

Crumb Topping

  • In a medium-sized bowl, mix the flour, brown sugar, cinnamon and salt until well combined.
  • Work in the butter using a pastry blender or your fingertips until the mixture looks sandy. Press the mixture together to form chunks. Set aside in the refrigerator until ready to use.

Pumpkin Cheesecake Layer

  • Preheat oven to 350º (180ºC). Line a 9-inch square baking pan with parchment paper.
  • In a medium-sized bowl, beat the cream cheese, with an electric mixer until on low speed until smooth.
  • Add the pumpkin, eggs, sugar, cinnamon, ginger and nutmeg and mix until well blended.

Brownie Layer

  • In a medium-sized bowl, whisk together the flour, baking powder and salt until well blended.
  • Melt the butter in the microwave in a large microwaveable bowl. Whisk in the sugar, eggs, vanilla extract until smooth and creamy. Whisk in the cocoa powder until well blended. Stir in the flour mixture just until combined. Do not over mix.
  • Spread the brownie batter into prepared baking pan. Smooth the top with a spatula. Spread the pumpkin cheesecake batter over the top of brownie batter, then smooth the top. Sprinkle the crumb topping evenly over the top of the pumpkin cheesecake layer.
  • Bake until a toothpick inserted into pumpkin cheesecake layer comes out clean, about 40-50 minutes.
  • Let cool completely. Cut into squares and serve with warm caramel sauce.

Not-So-Scary Halloween Monster Cookies

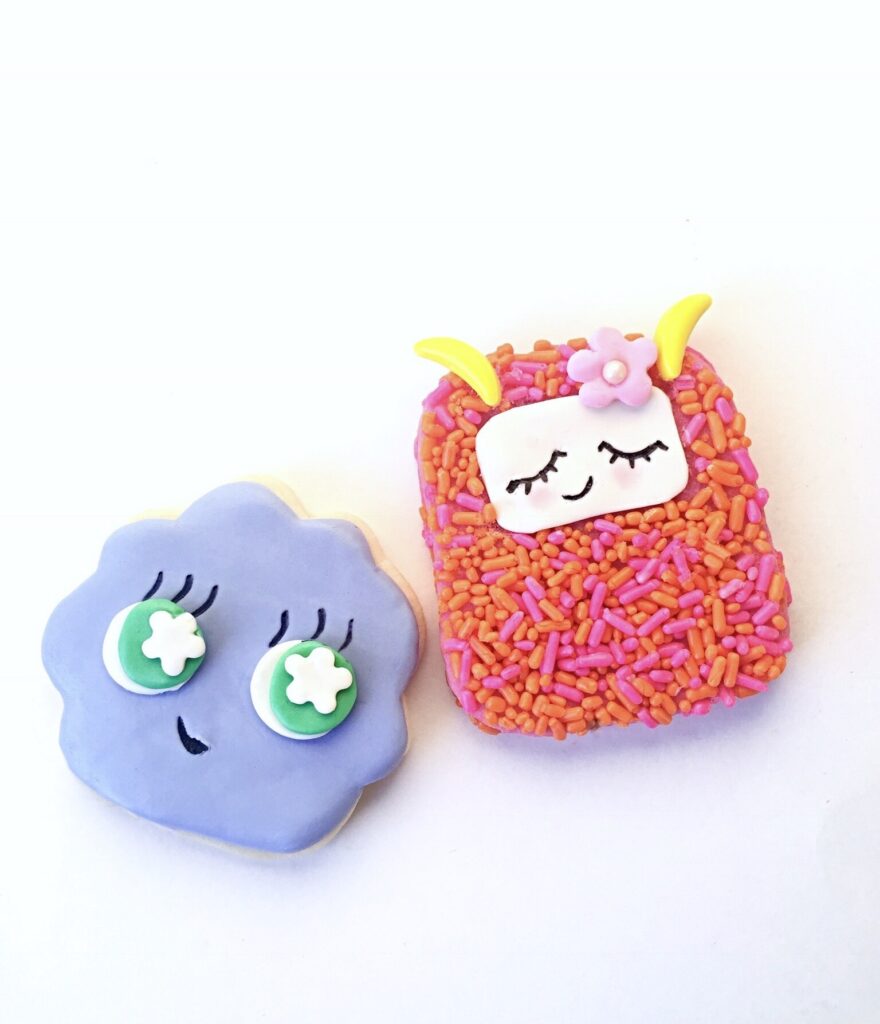
One of the best things about Halloween is all of the adorable costumes worn by the littlest trick-or-treaters. I’ll never forget the year my young daughter was dressed as a flower with chubby cheeks. She enjoyed wearing her costume and eating her Halloween treats, but spooky costumes and trick-or-treating weren’t for her. She was the type of toddler who cried at the sight of a mall Santa. She even screamed in terror once when Ronald McDonald paid a visit to our local McDonald’s.

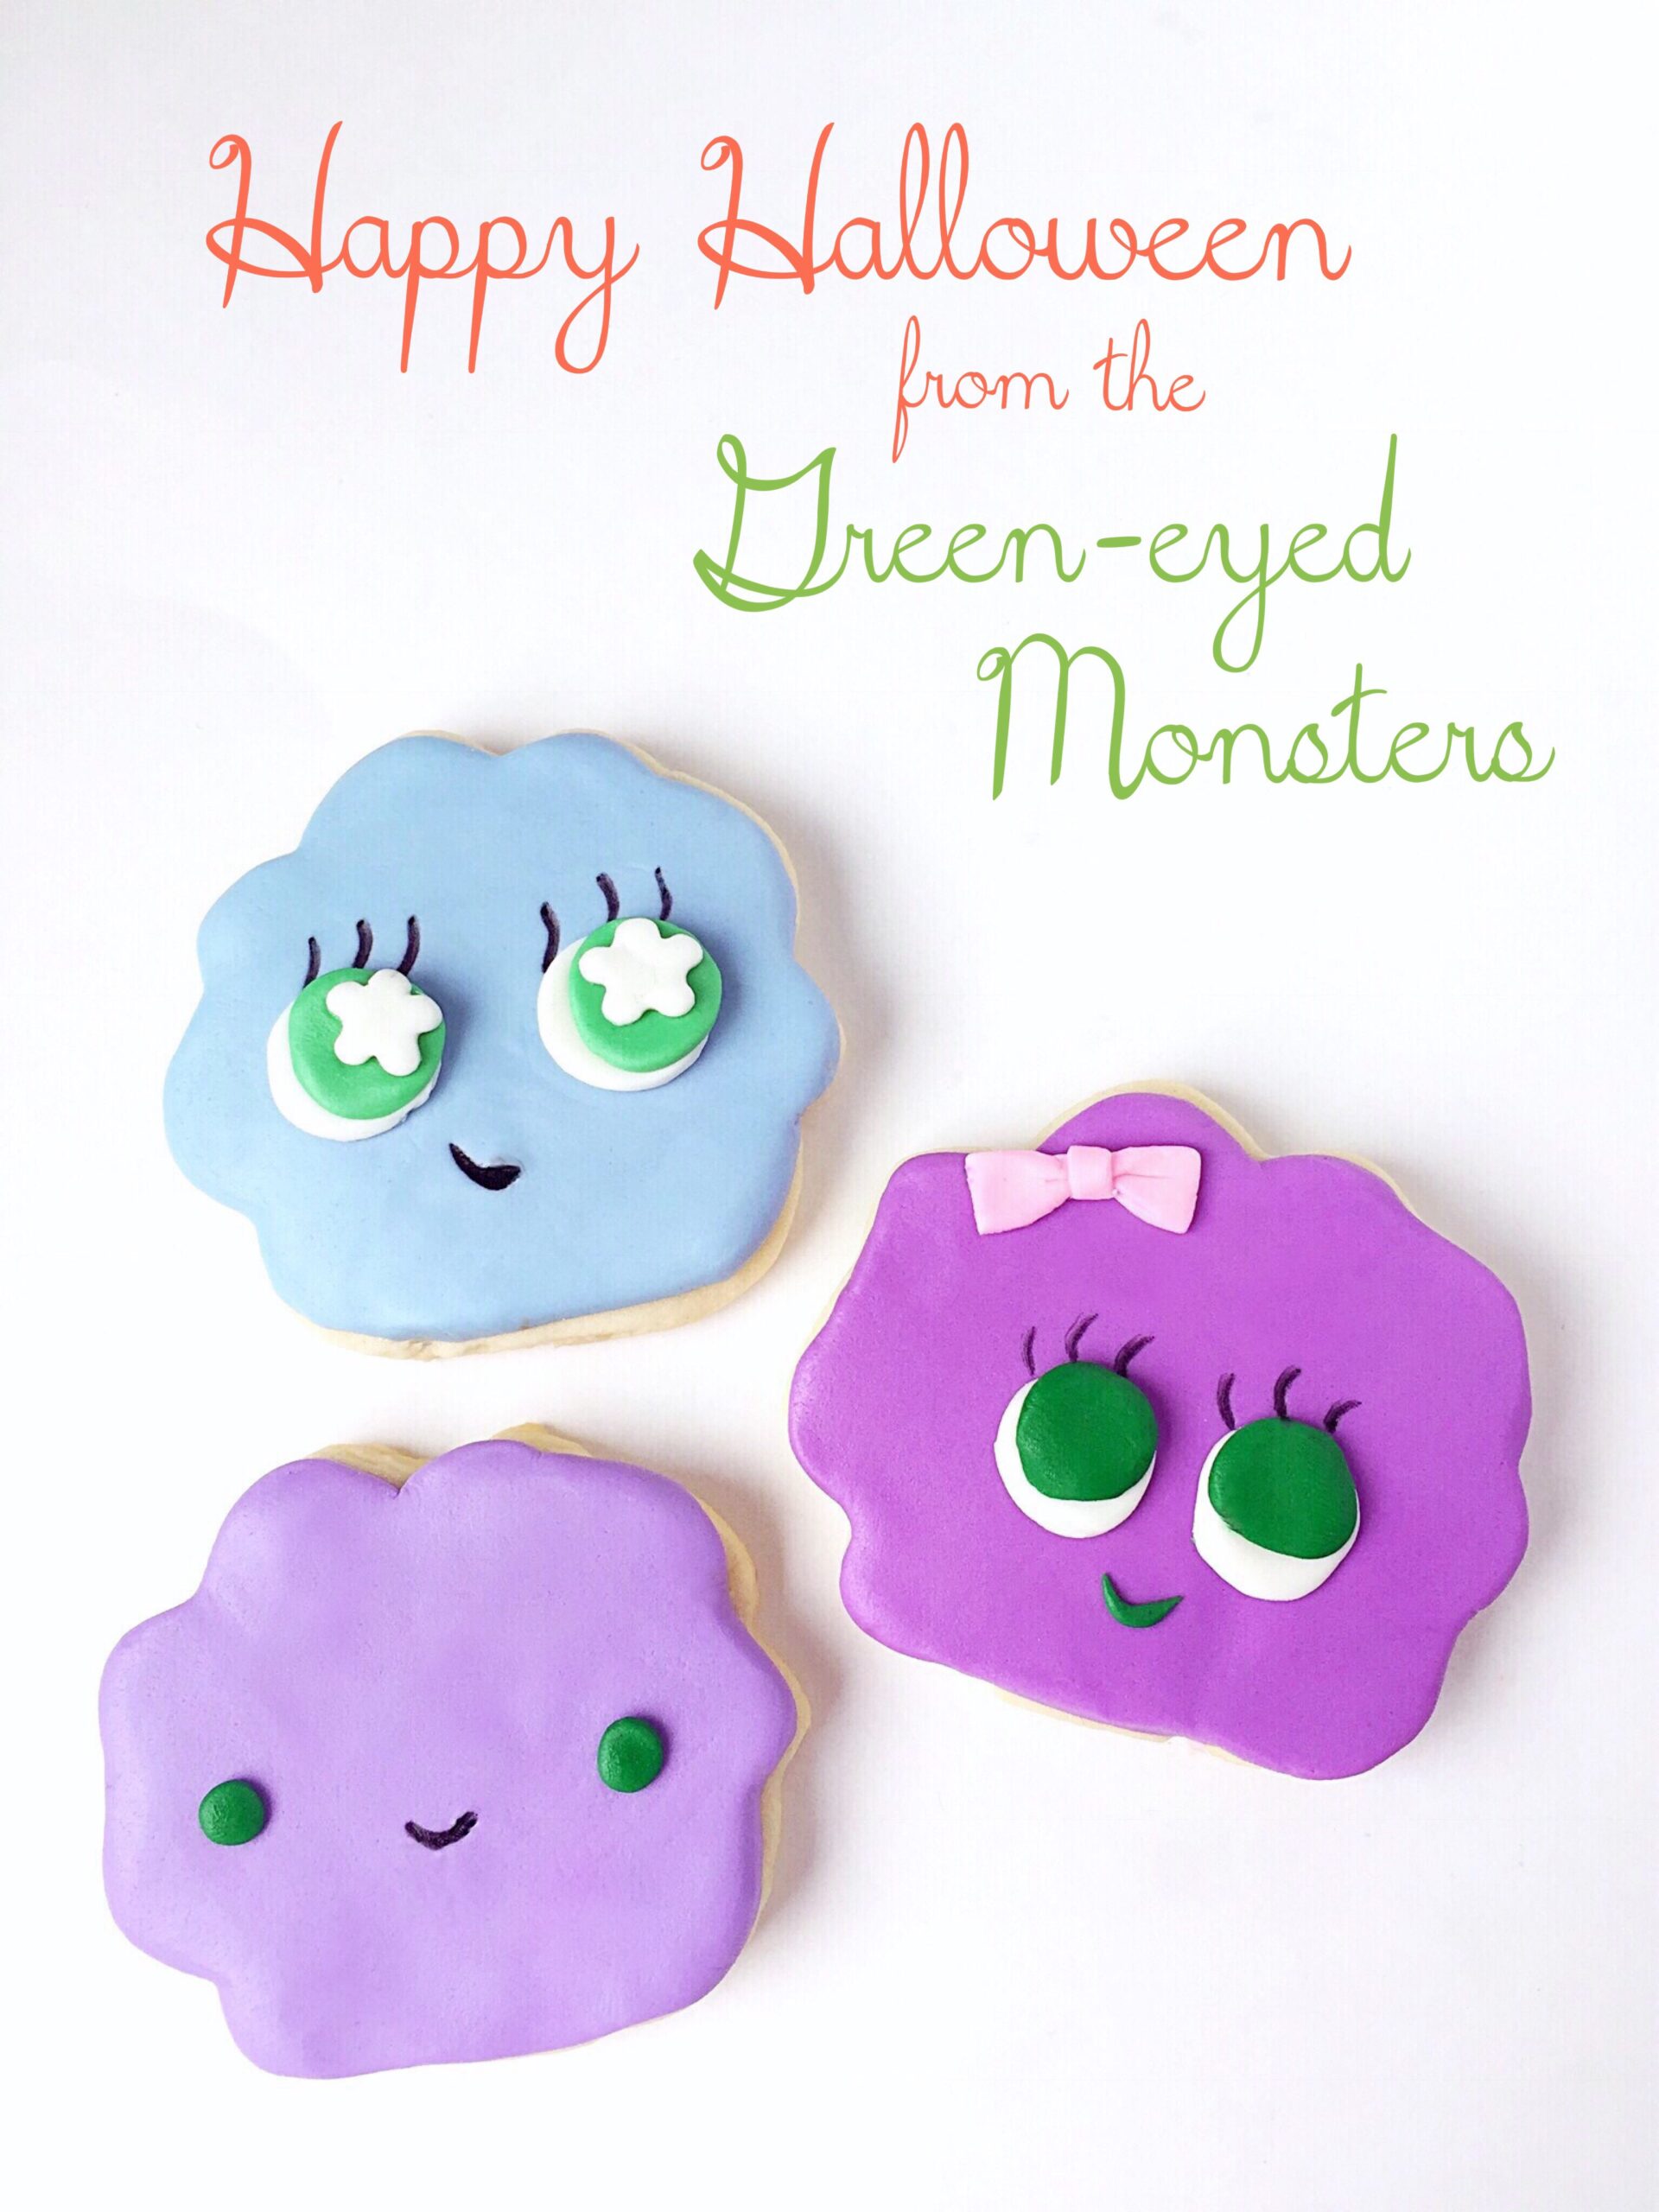
So in honor of those tender hearted little ones, I created some not-so-scary, pretty-darned-cute Yetis and Green-Eyed Monster cookies. You can use your favorite cutout sugar cookie dough and you don’t need any special skills to decorate them. The icing is fondant instead of frosting or royal icing which makes these cute monsters the ideal mess-free (almost) cookie decorating project for kids!

For these cookies you’ll need:

  • One batch of cutout sugar cookie dough
  • Food coloring- I used Wilton Icing Color in Rose
  • Cookie cutters
  • Parchment paper
  • Scissors
  • X-acto knife or paring knife
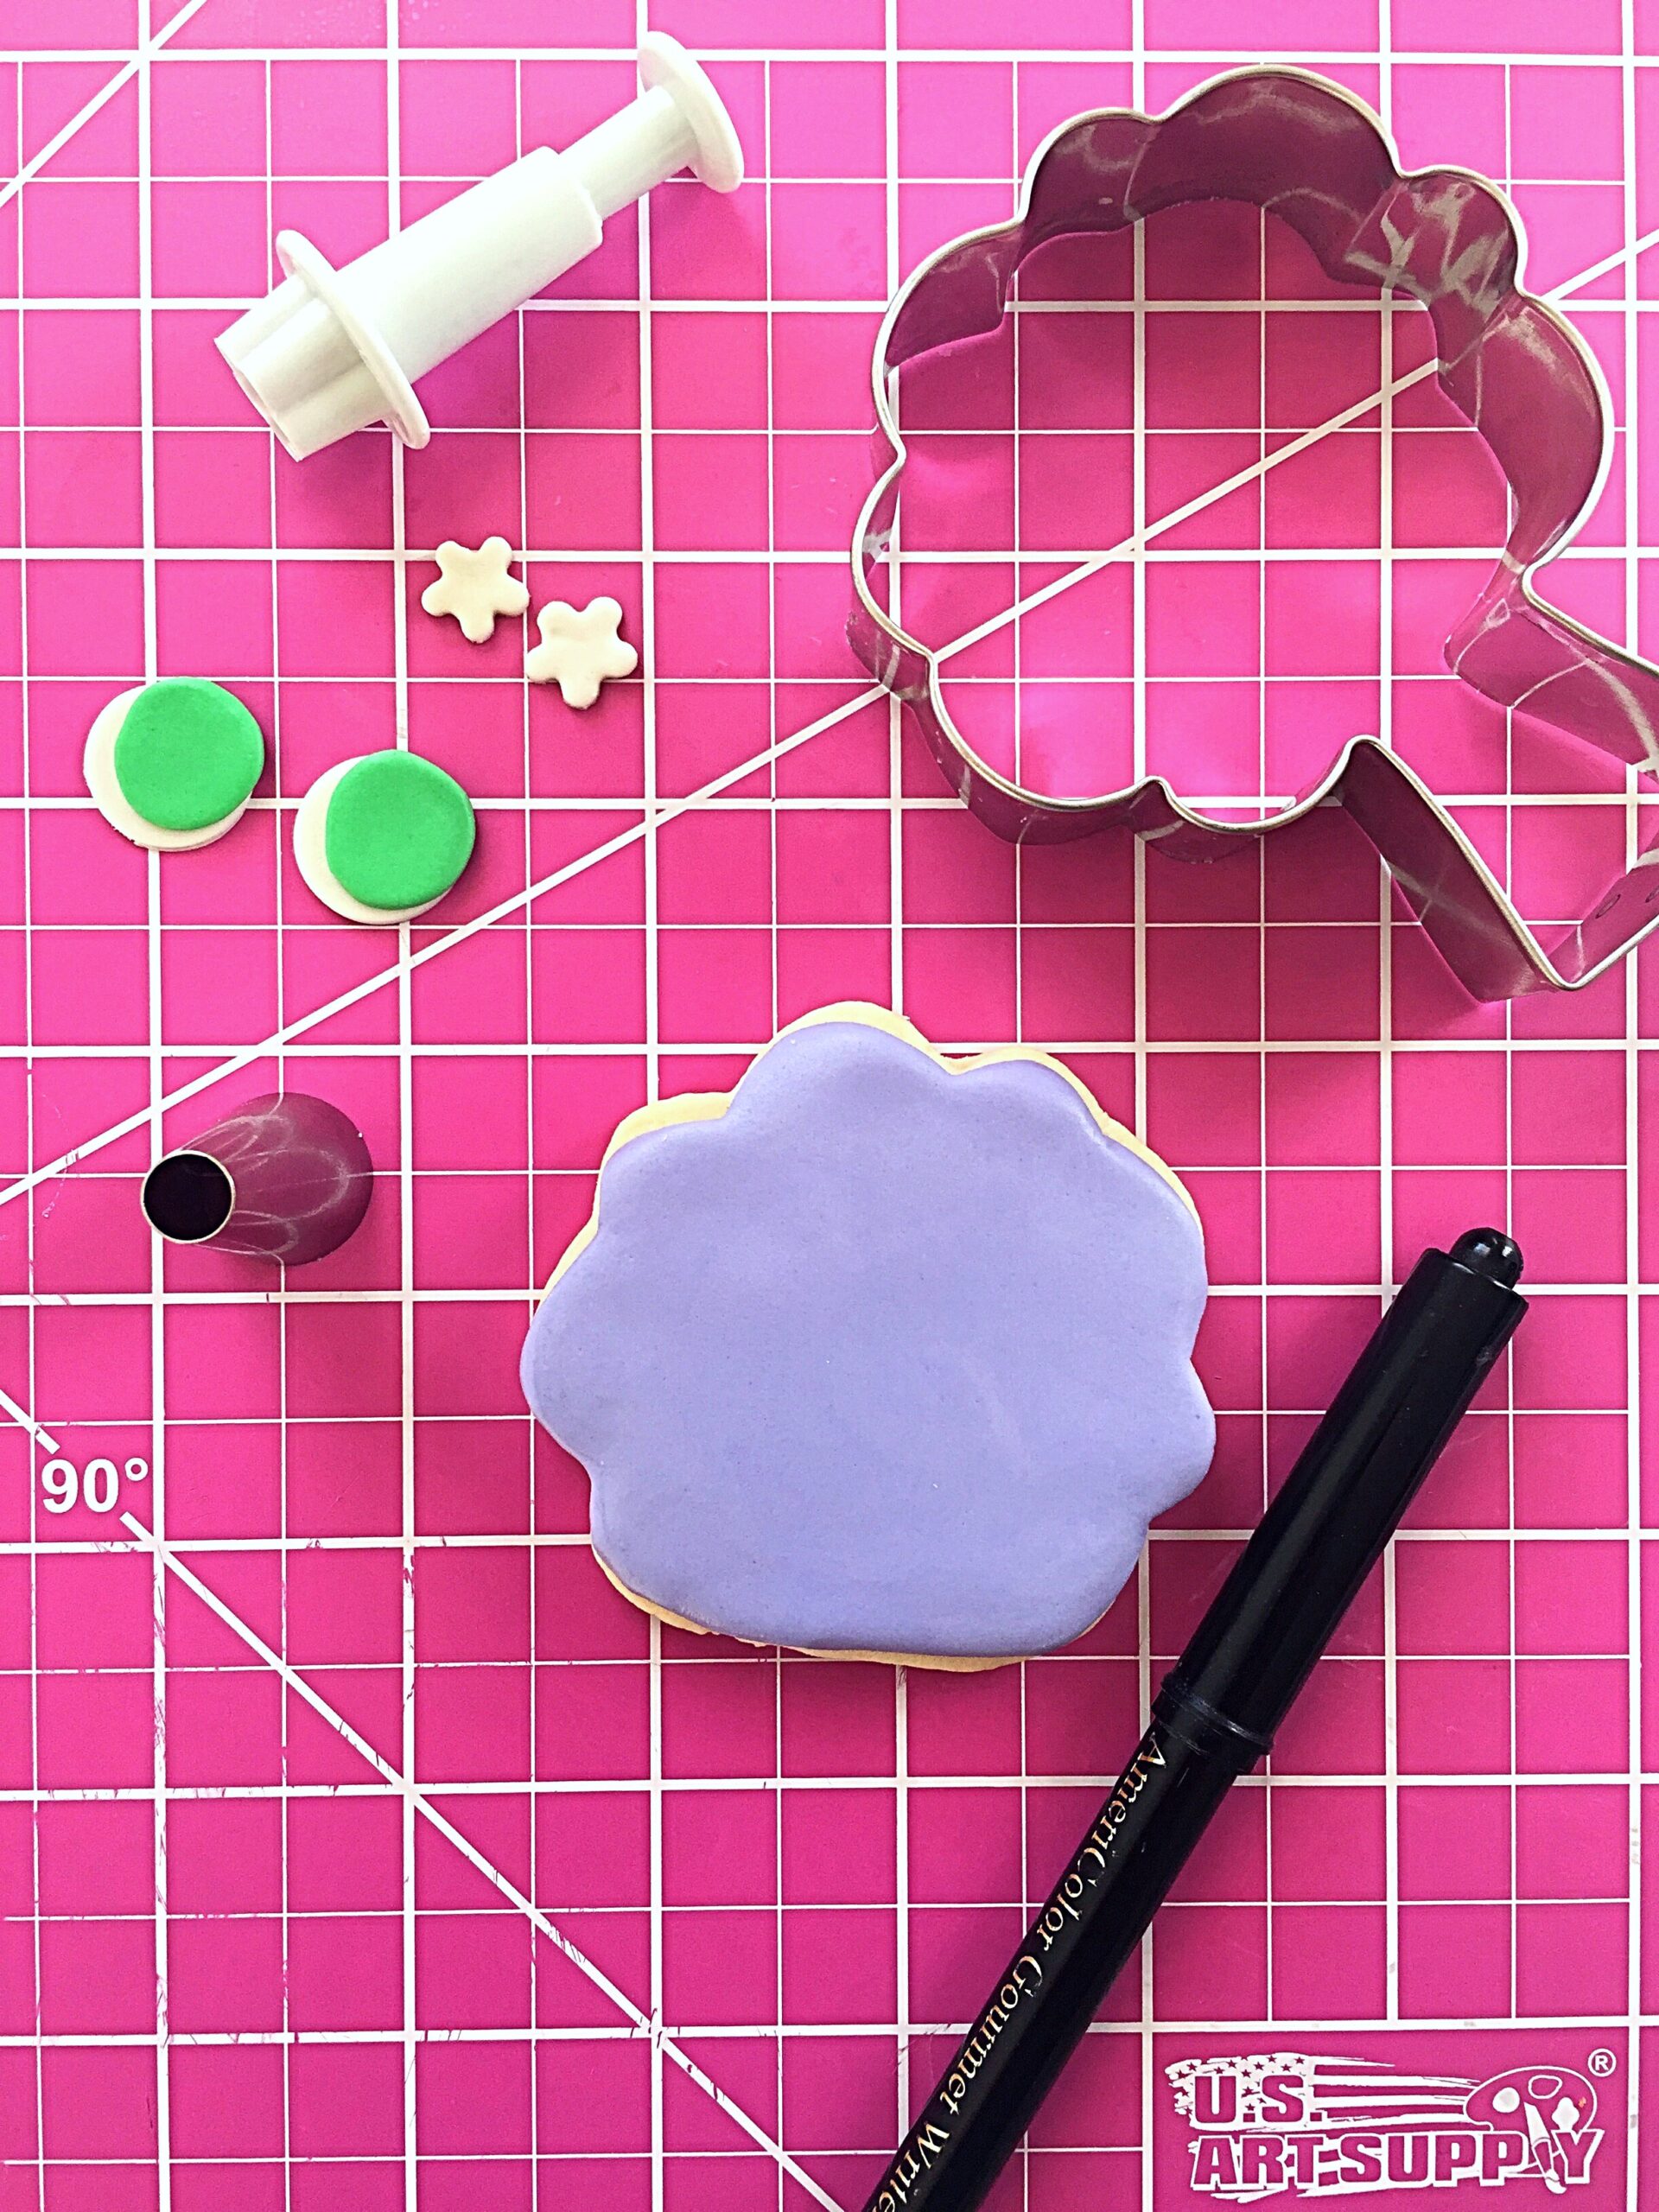
  • White, purple, green and pink fondant or any colors of your choice. I made lavender by combining purple and white.
  • Sprinkles- I used a combination of two parts orange sprinkles and one part pink sprinkles
  • Piping gel
  • Small food safe brush
  • Edible marker- I used Americolor Gourmet Writer
  • Candy bananas, sugar pearls or any edible decorations of your choice
  • Piping tip
  • Optional- flower punch cutter, pink petal dust, cotton swab

Divide your cookie dough in half. For the Yeti cookies, color one half of the cookie dough with pink food coloring. Wrap remaining cookie dough in plastic and set aside in refrigerator.

Yeti cookie tutorial

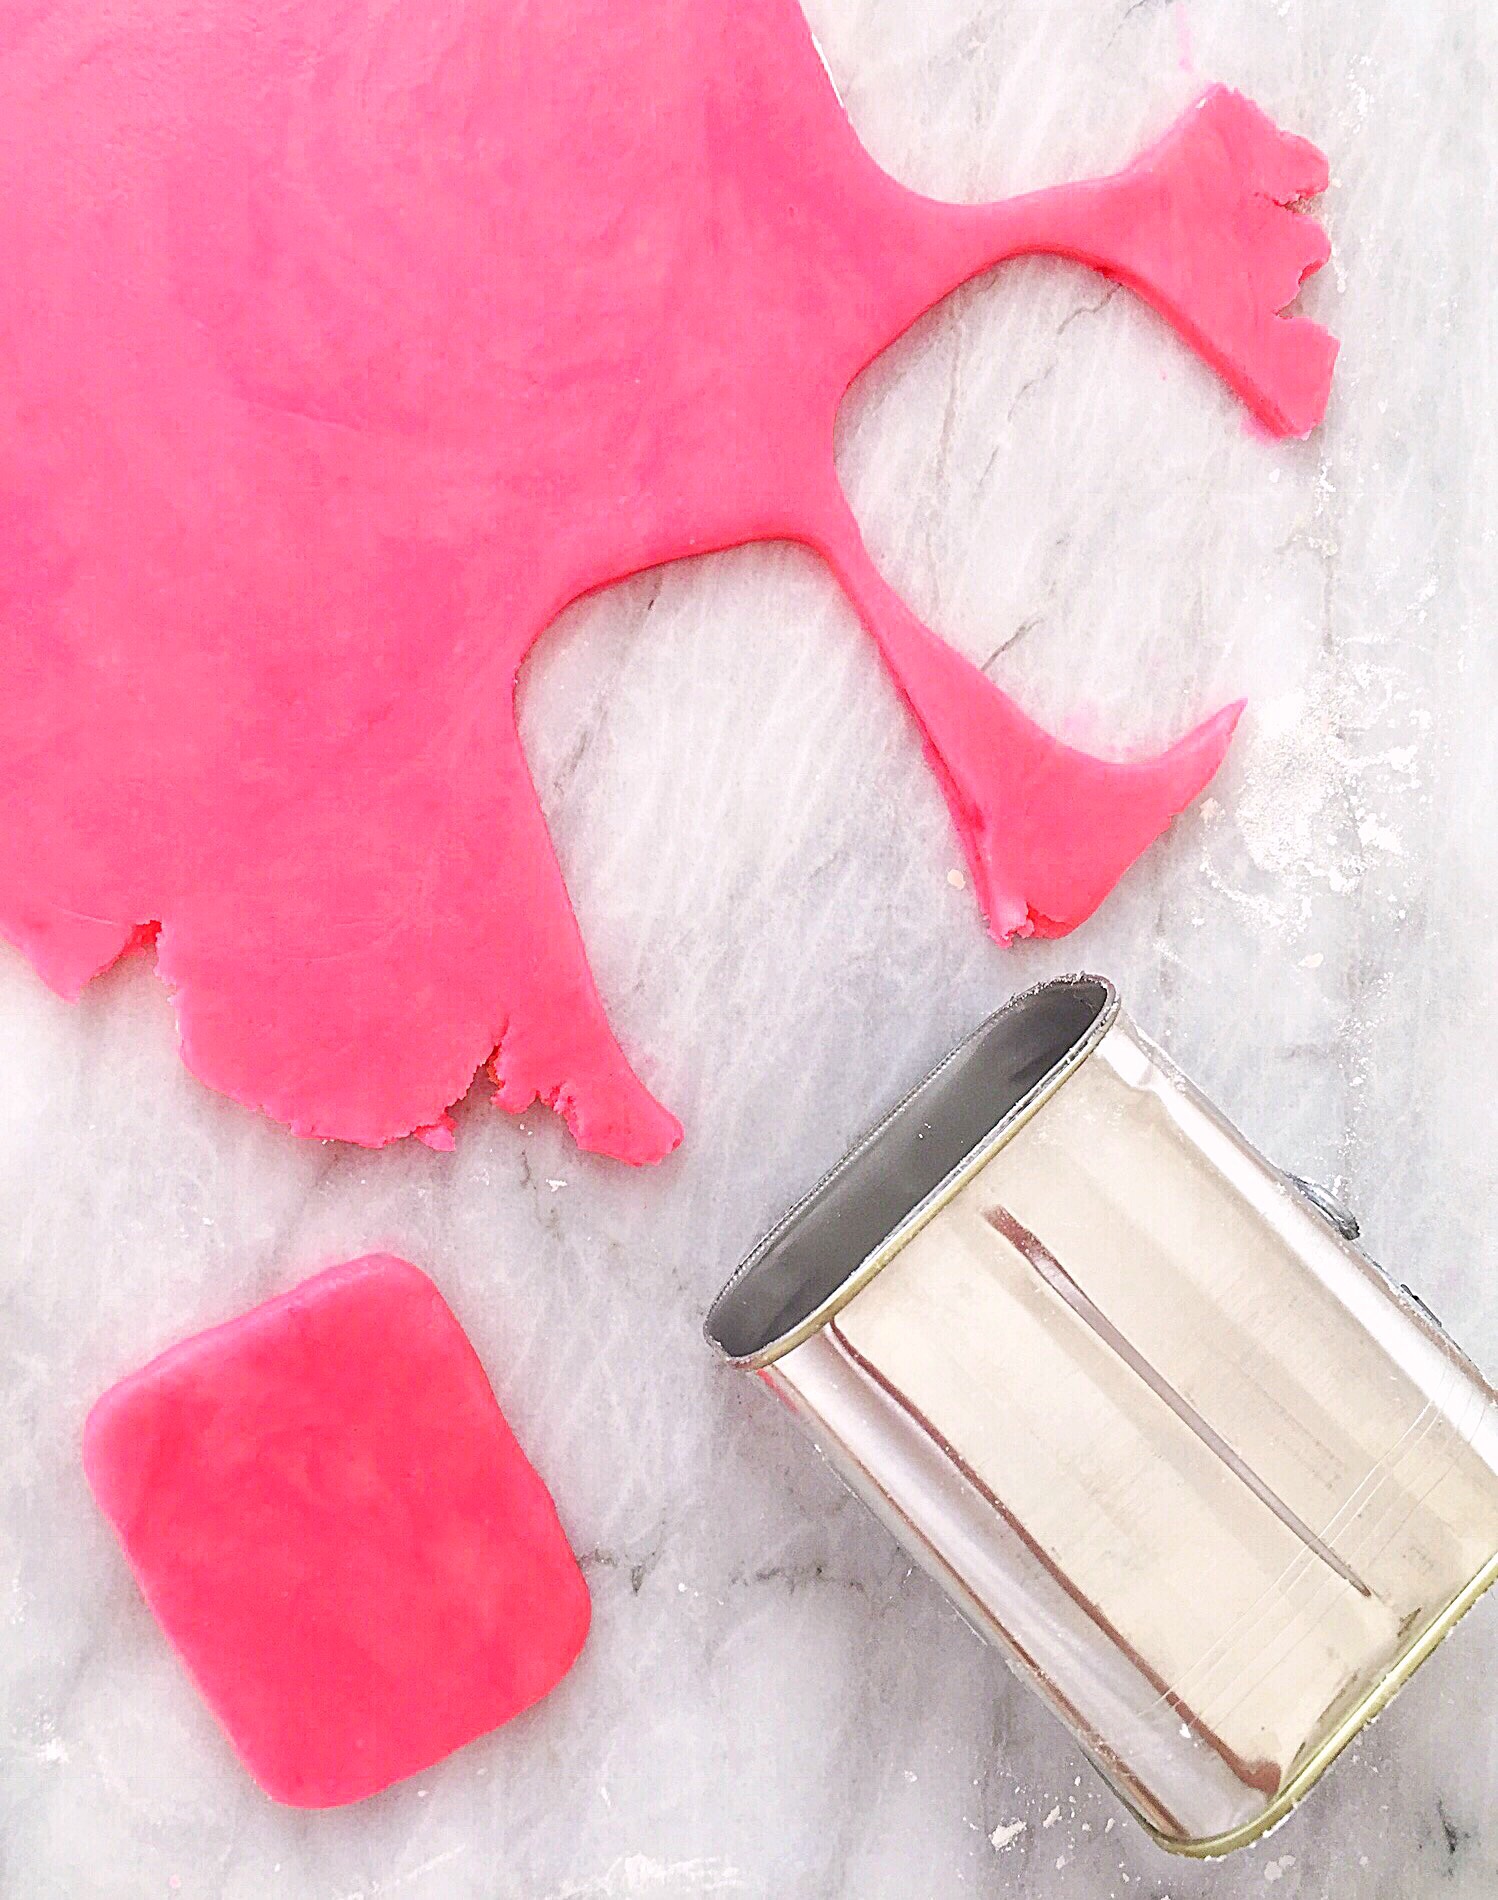
Roll out the pink dough and cut out the Yeti cookies. The Yeti cookies are 2 1/2 inch by 3 1/4 inch rectangles. I used a clean, recycled food can as a cookie cutter. I opened the can with a can opener at both ends, rather than using the little key that comes with the can. If you don’t want to use this method, you can make a pattern out of parchment paper and cut out the cookies with an X-acto knife or a paring knife. 

Yeti cookie tutorial

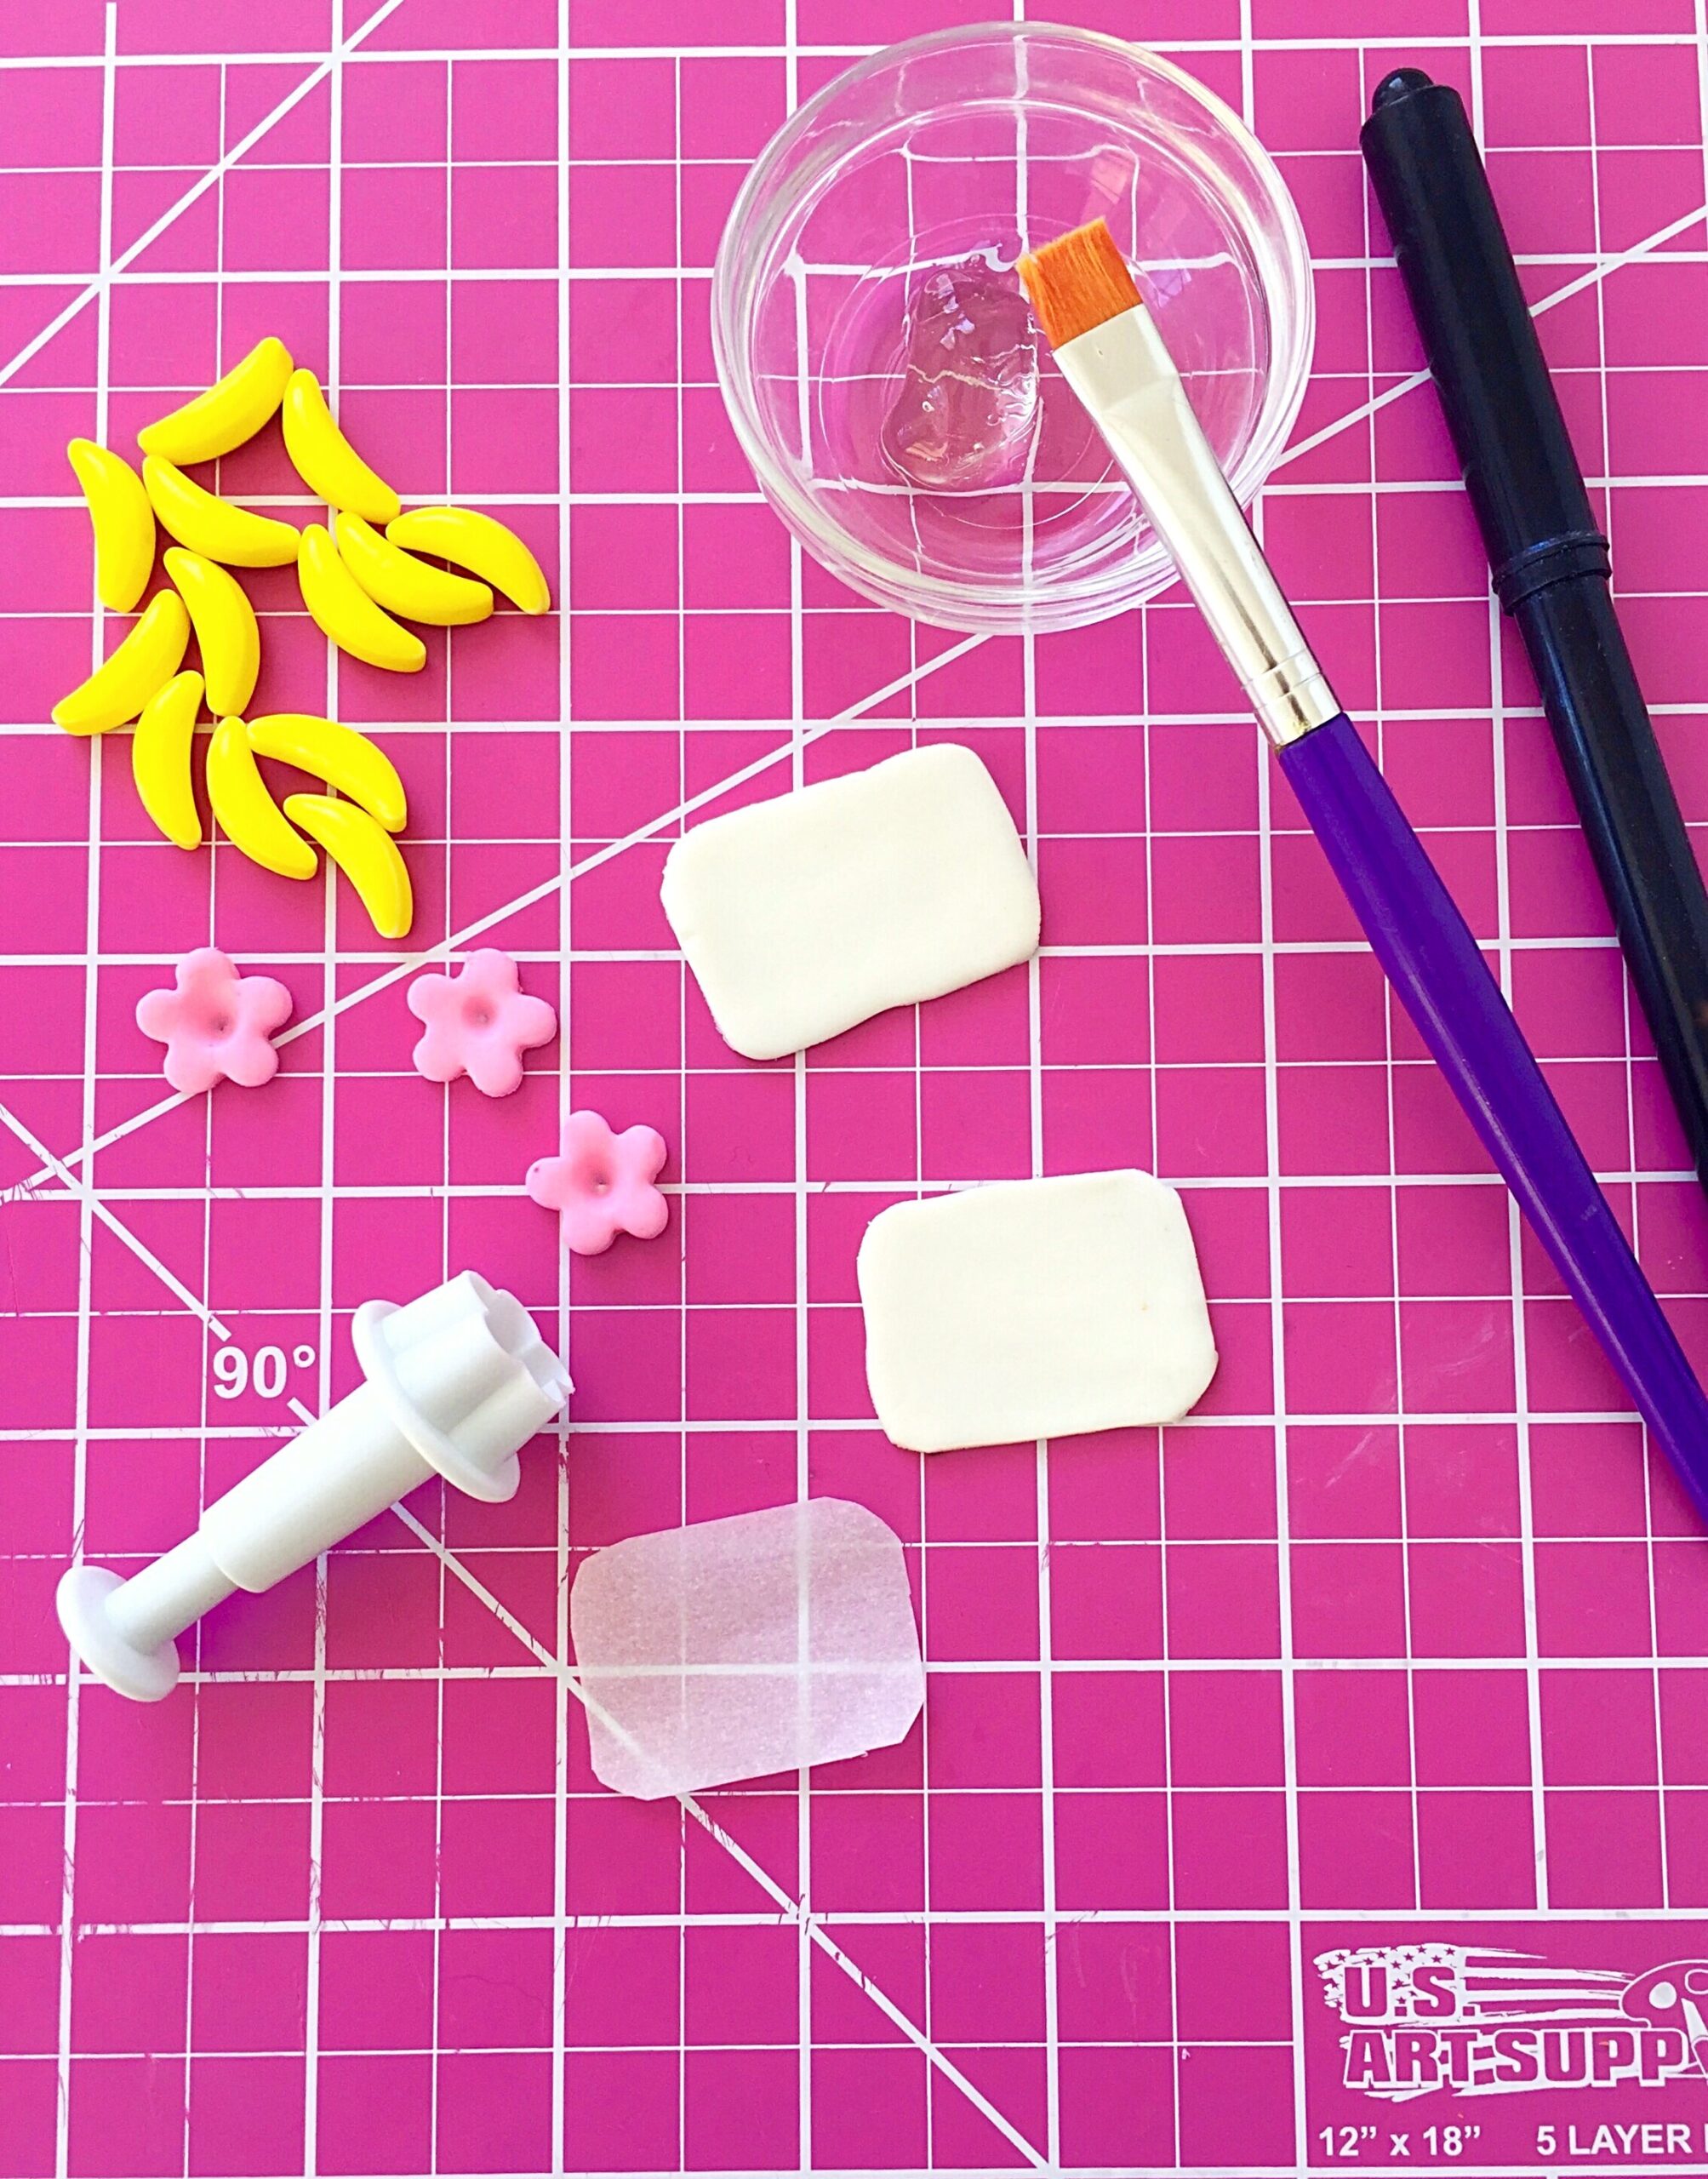
For the Yeti faces, cut two small 1 1/2 inch x 1 inch rectangles with rounded corners out of parchment paper. The first one will be used to place on the Yeti cookies to keep the sprinkles off of the faces. Place small parchment rectangle on an unbaked cookie. Apply sprinkles, pressing them gently to make sure they adhere to the cookie. Remove the parchment rectangle and repeat with remaining cookies. Bake according to your cookie dough recipe. Let cool.

Yeti cookie tutorial

Roll out white fondant to 1/8 inch thickness. Use the remaining small parchment rectangle as a pattern to cut out a face for each Yeti cookie with an X-acto knife or a paring knife. Brush a bit of piping gel onto each cookie face area. Apply the white fondant face cutouts to the cookies. Let dry for at least 30 minutes, then draw eyes and a mouth with an edible marker. I made rosie cheeks with a small amount of petal dust applied with a cotton swab. Brush dabs of piping gel to apply the banana candy horns. I also added pink fondant flowers and sugar pearls to make my Yeti cookies extra cute. 

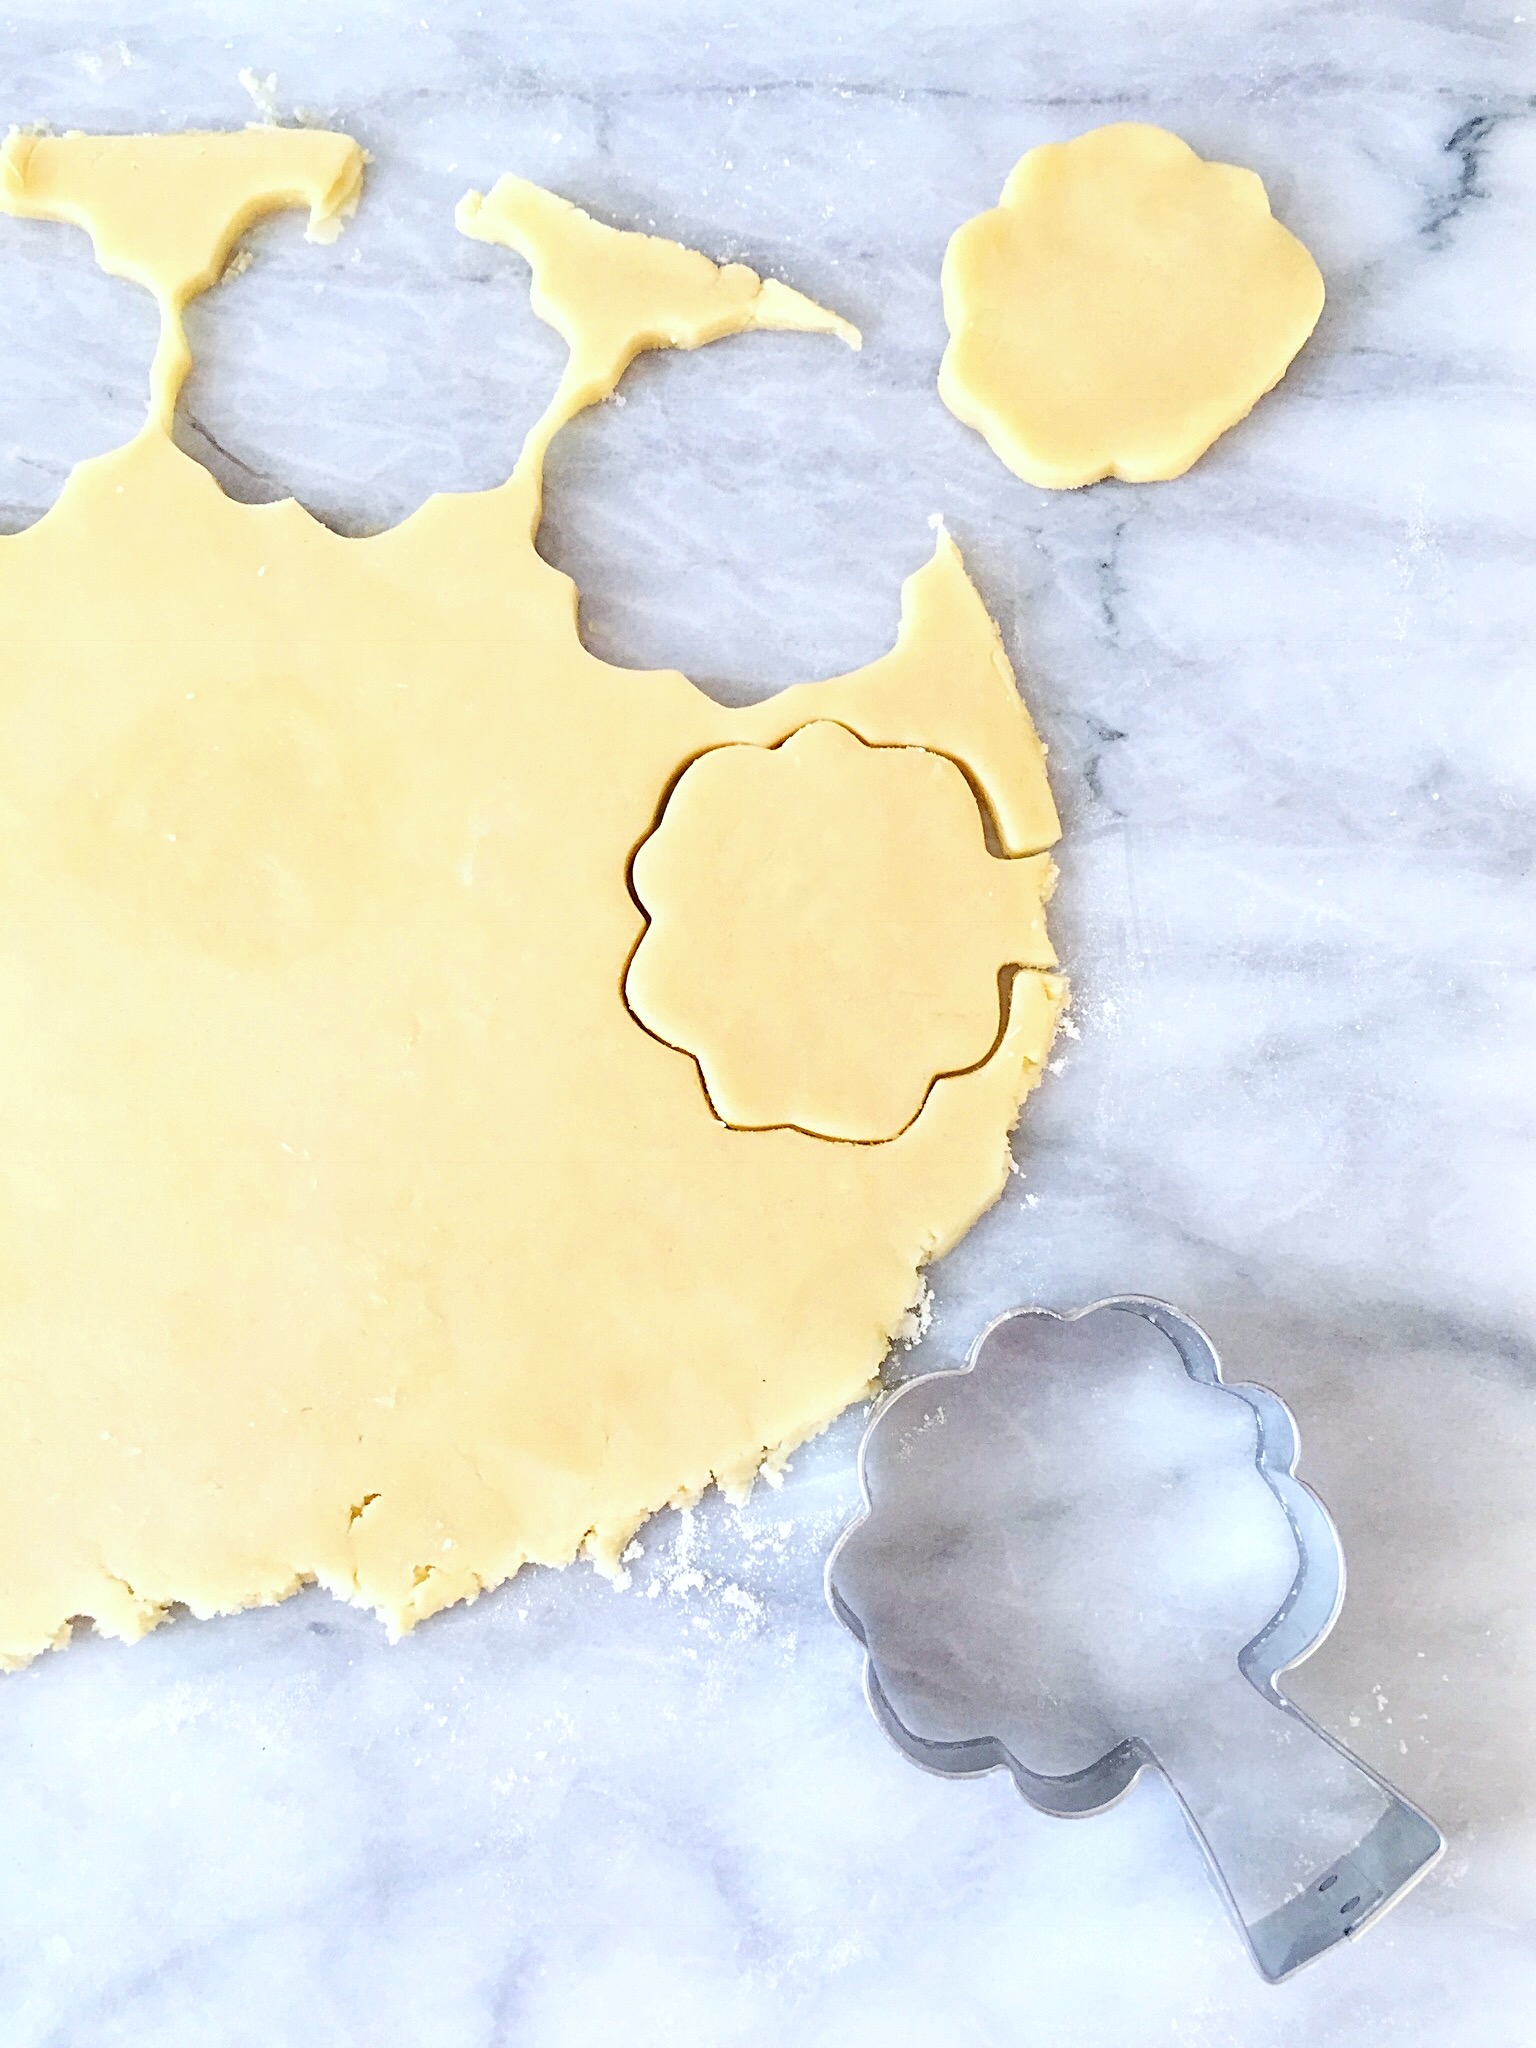
Roll out the remaining cookie dough and cut out the Green-Eyed Monster cookies. I used an apple tree cookie cutter, trimming off the trunk part. If you can’t find an apple tree cutter, you can use a blossom or sun cookie cutter. Bake according to your cookie dough recipe. Let cool.

Green-eyed monster cookie tutorial

Roll out the lavender fondant. Cut the fondant using the same cutter you used for the cookie dough. Brush piping gel onto cookies and apply the fondant shapes. Let dry at least 30 minutes. 

Green-eyed monster cookie tutorial

For eyes, roll out white and green fondant. I used the large end of a piping tip to cut out two white circles and two green circles for each cookie. Attach the green circles to the white circles with a dab of piping gel, offsetting them slightly. I used a tiny blossom punch cutter for the pupils and applied with piping gel. Use an edible marker to draw eyelashes and a mouth.

Green-eyed monster Halloween cookies

Chocolate Snack Attack Cookies

Fully Loaded Chocolate Snack Attack Cookies by Brownie Mischief

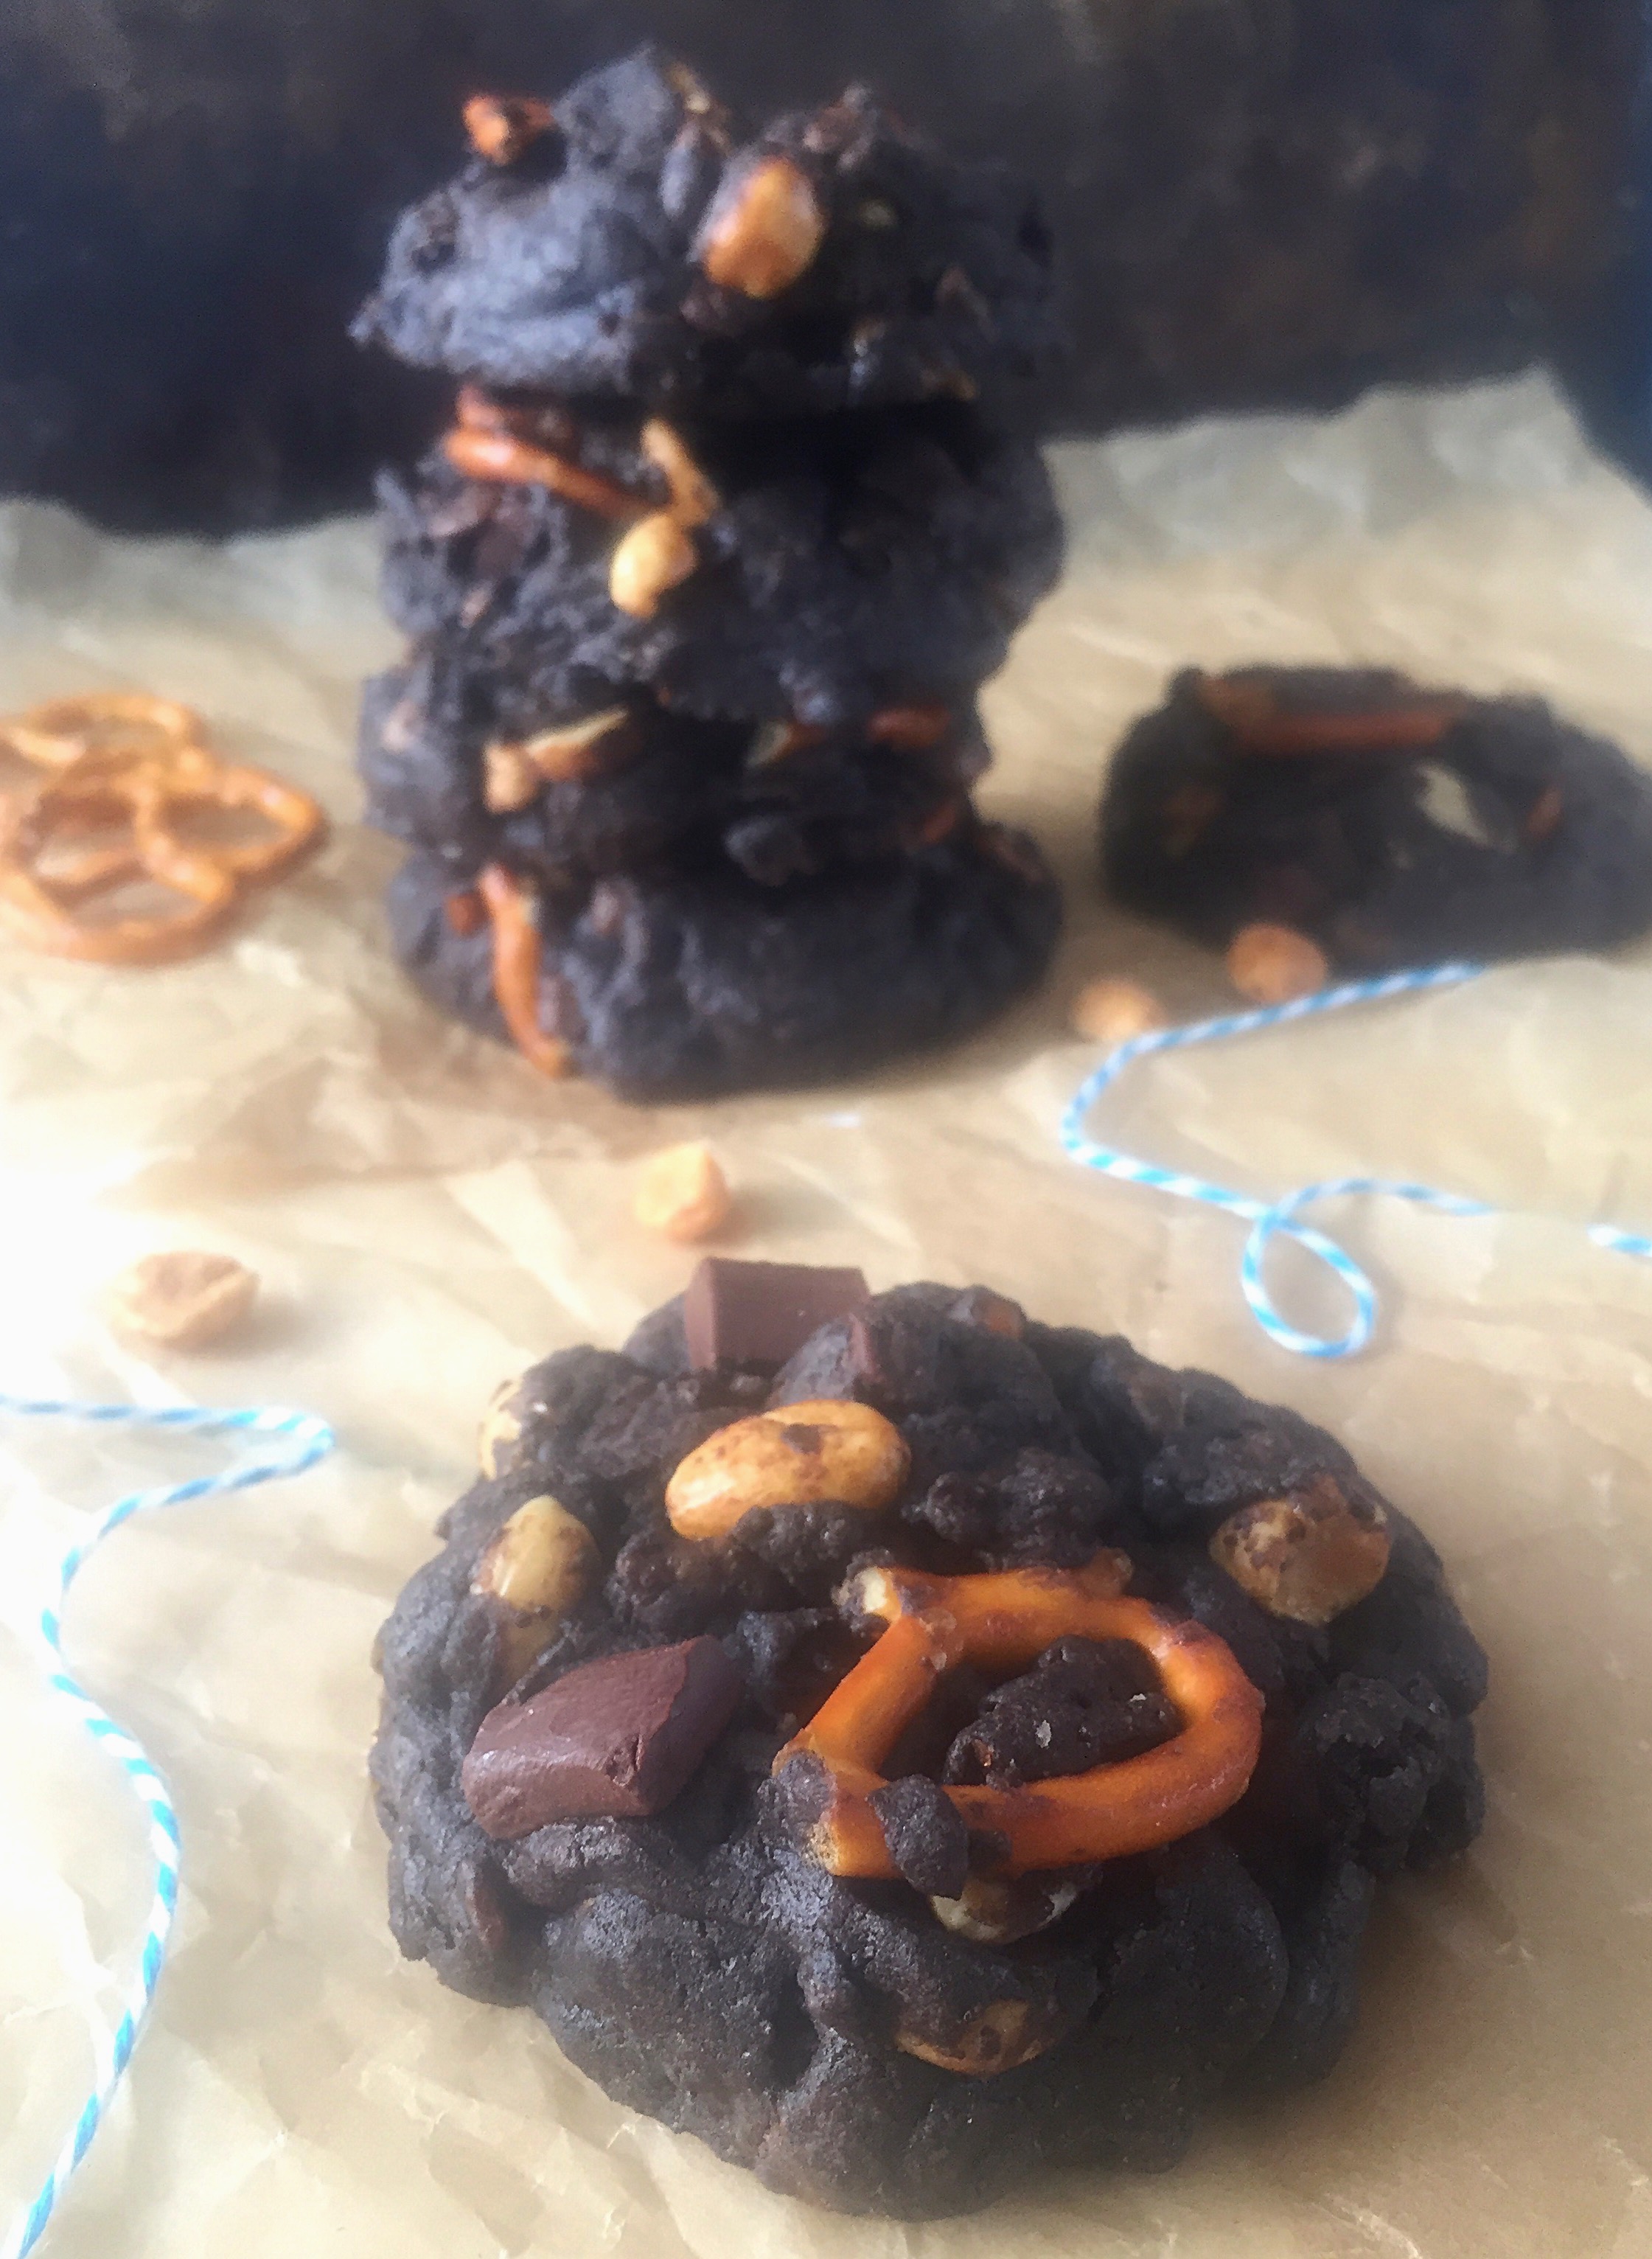
I’ve seen some cookies loaded with add-ins out there, but these extreme cookies just won the title! They’ve got enough chunky, chocolatey, sweet and saltiness to satisfy the most ravenous cookie craving! But, before we even go one step further, I must mention a few disclaimers. I strongly urge you to make sure your fridge is stocked with milk. Please change into your comfiest pants before attempting this recipe. Canceling all plans for the rest of the day is recommended, as a nap may ensue immediately following consumption of these cookies. OK, now that we got that out of the way, let’s jump in with both feet!

Fully Loaded Chocolate Snack Attack Cookies by Brownie Mischief

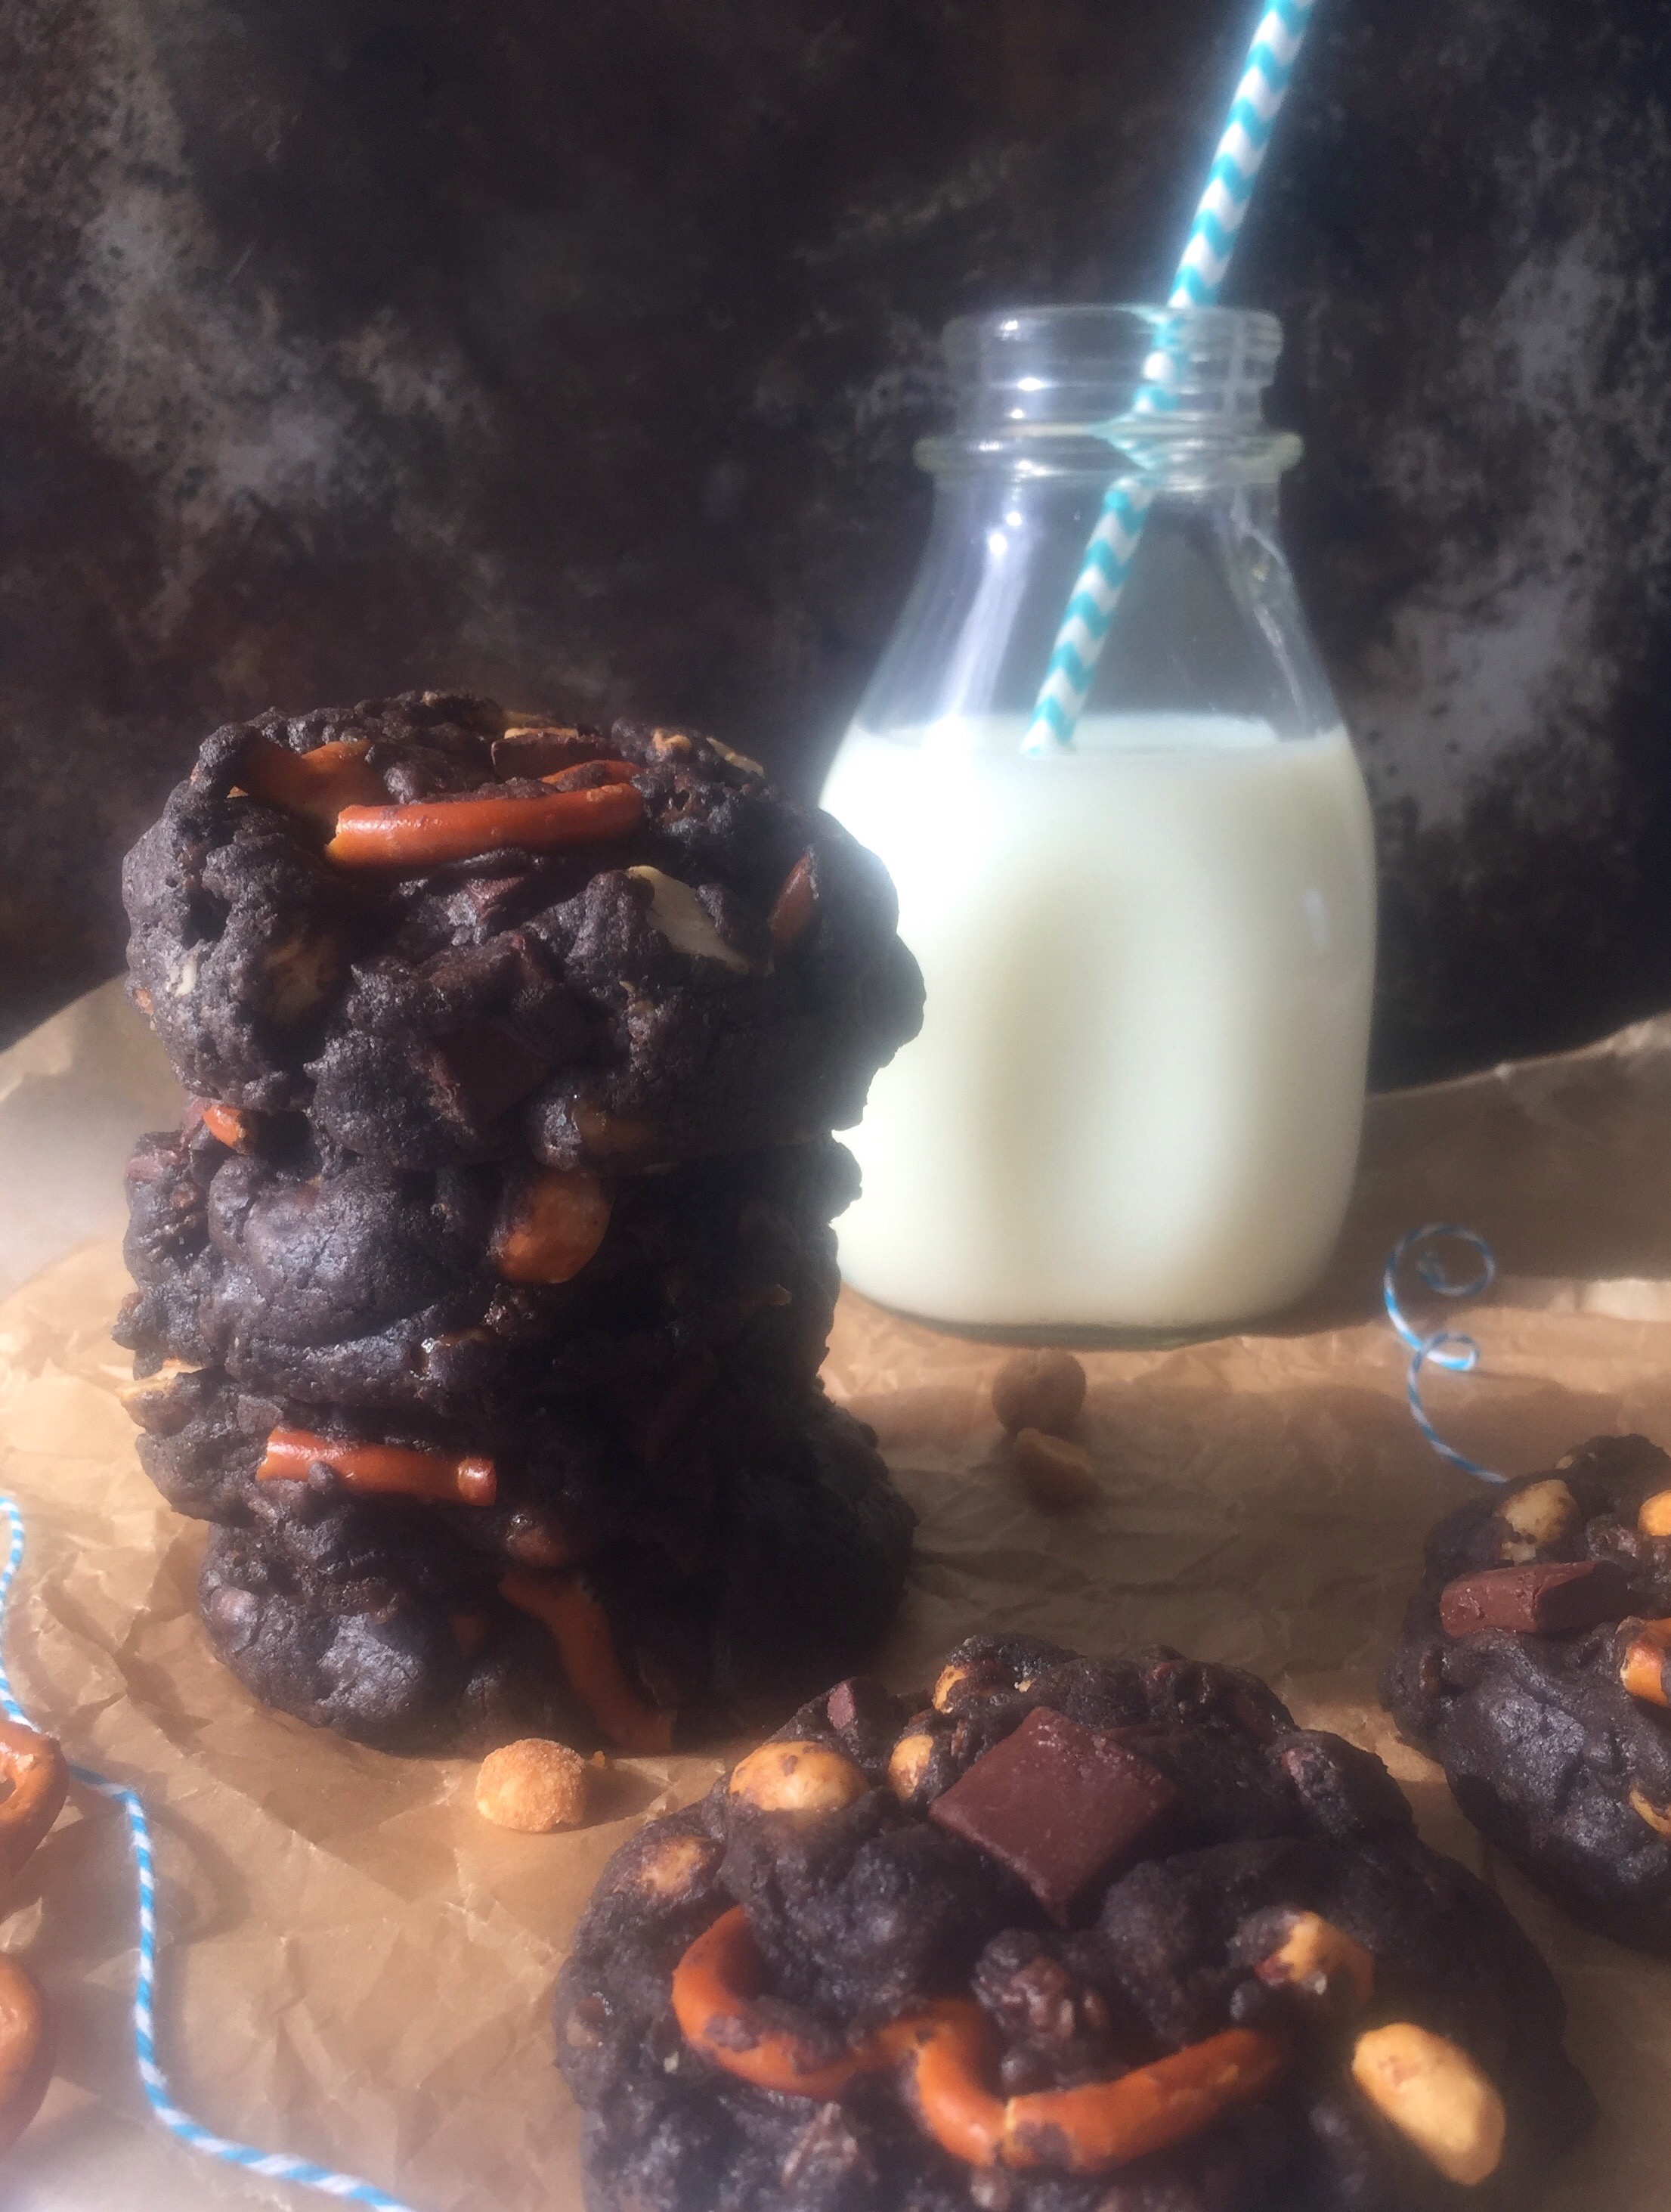
First we need a moody photo that looks like it was taken in a rustic cabin to emphasize the seriousness of these chocolate cookies. It’s no coincidence that I’m sharing this recipe with you right before Father’s Day. Every Dad I know is an accomplished snacker. Dad will love these cookies for his personal snack stash! Package them up and deliver them to your Pop with a jug of milk or a thermos of coffee. You can probably skip the straw. We all know that Dad is going to chug his milk, but every respectable blog photo of milk must contain a pretty straw.

Fully Loaded Chocolate Snack Attack Cookie Ice Cream Sandwiches by Brownie Mischief

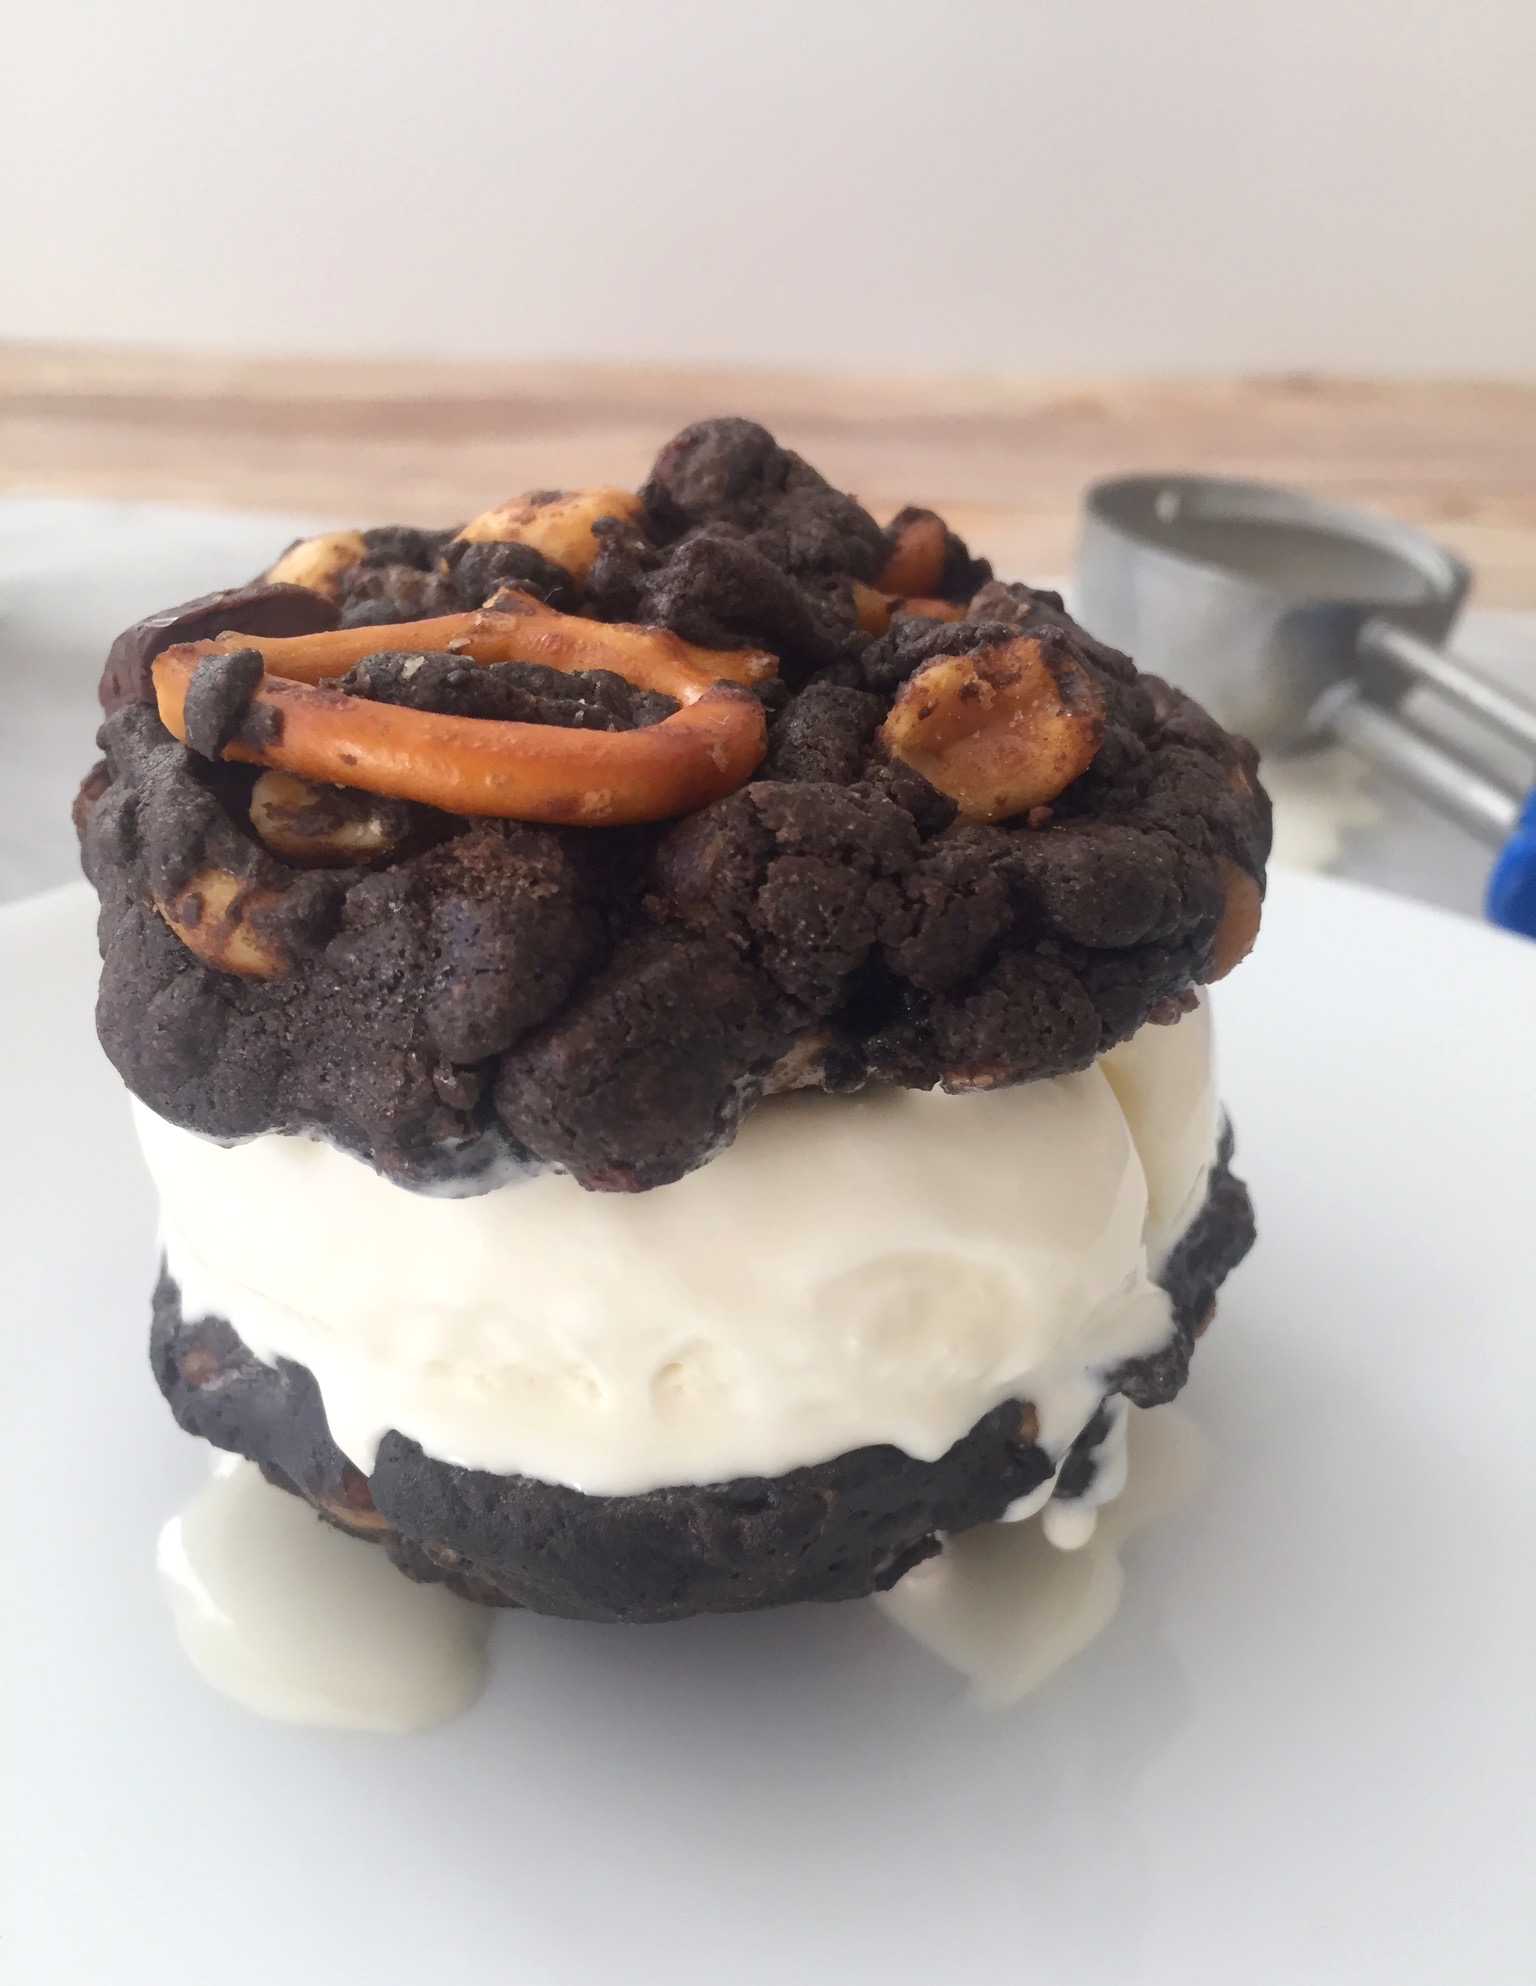
These cookies make amazing ice cream sandwiches, too. Press a scoop of softened vanilla ice cream between two cookies and pop it in the freezer. If you want to make these cookies picture perfect, use a scoop to portion out your dough. This will make them uniform in size and they’ll bake more evenly. Click here to find the scoop I used. For even more visual appeal, don’t crush the pretzels before adding to the cookie dough. Some of them will break when you are mixing them into the dough and this is fine, because the large pieces help make these cookies chunky. This recipe makes eighteen large cookies. That’s one dozen for Dad plus six for you to snack on, because when these babies come out of the oven with their melted chocolate chunks and little pools of caramel, resisting will be impossible! Now it’s cookie time…you’ve got this!

Fully Loaded Chocolate Snack Attack Cookies

Large chunky, sweet and salty chocolate cookies loaded with chocolate chunks, pretzels, caramel, rice cereal and nuts.
Prep Time 15 minutes
Cook Time 15 minutes
Total Time 30 minutes
Course Dessert
Servings 18 cookies

Ingredients
  

  • 2 â…› cups (270g) all purpose flour, sifted
  • ½ cup (45g) dark cocoa powder, sifted
  • ½ teaspoon baking powder
  • ¼ teaspoon baking soda
  • ¼ teaspoon fine sea salt
  • 1 cup (227g) unsalted butter, softened
  • 1 cup (200g) granulated sugar
  • ¼ cup (50g) brown sugar
  • 2 large eggs
  • 1 teaspoon pure vanilla extract
  • 1 ½ cups (213g) semisweet chocolate chunks
  • 1 ½ cup (43g) mini pretzel twists
  • 1 cup (170g) caramel baking bits
  • 1 cup (43g) chocolate rice cereal (I used Cocoa Pebbles)
  • ¾ cup (92g) honey roasted peanuts (or roasted mixed nuts)

Instructions
 

  • Preheat the oven to 350º F (180ºC). Line 2 large baking sheets with parchment paper.
  • In a medium-sized bowl, whisk together the flour, cocoa powder, baking powder, baking soda and salt until well blended.
  • In a large bowl, beat the butter, granulated sugar, and brown sugar together, with an electric mixer at medium speed until pale and fluffy. Add eggs, one at a time, beating until incorporated. Add vanilla and beat until combined. On low speed, mix in the flour mixture just until combined. Stir in the chocolate chunks, pretzels, caramel bits, chocolate rice cereal and peanuts.
  • Scoop 1/4 cup portions of cookie dough and place them about 2 inches apart onto the prepared baking sheets. Bake until set, about 13-15 minutes. Let the cookies cool on cookie sheets for 1 minute before transferring to a cooling rack.

Lemon Buttermilk Donuts with Honey Cream Cheese Icing

Lemon Buttermilk Donuts with Honey Cream Cheese Icing by Brownie Mischief

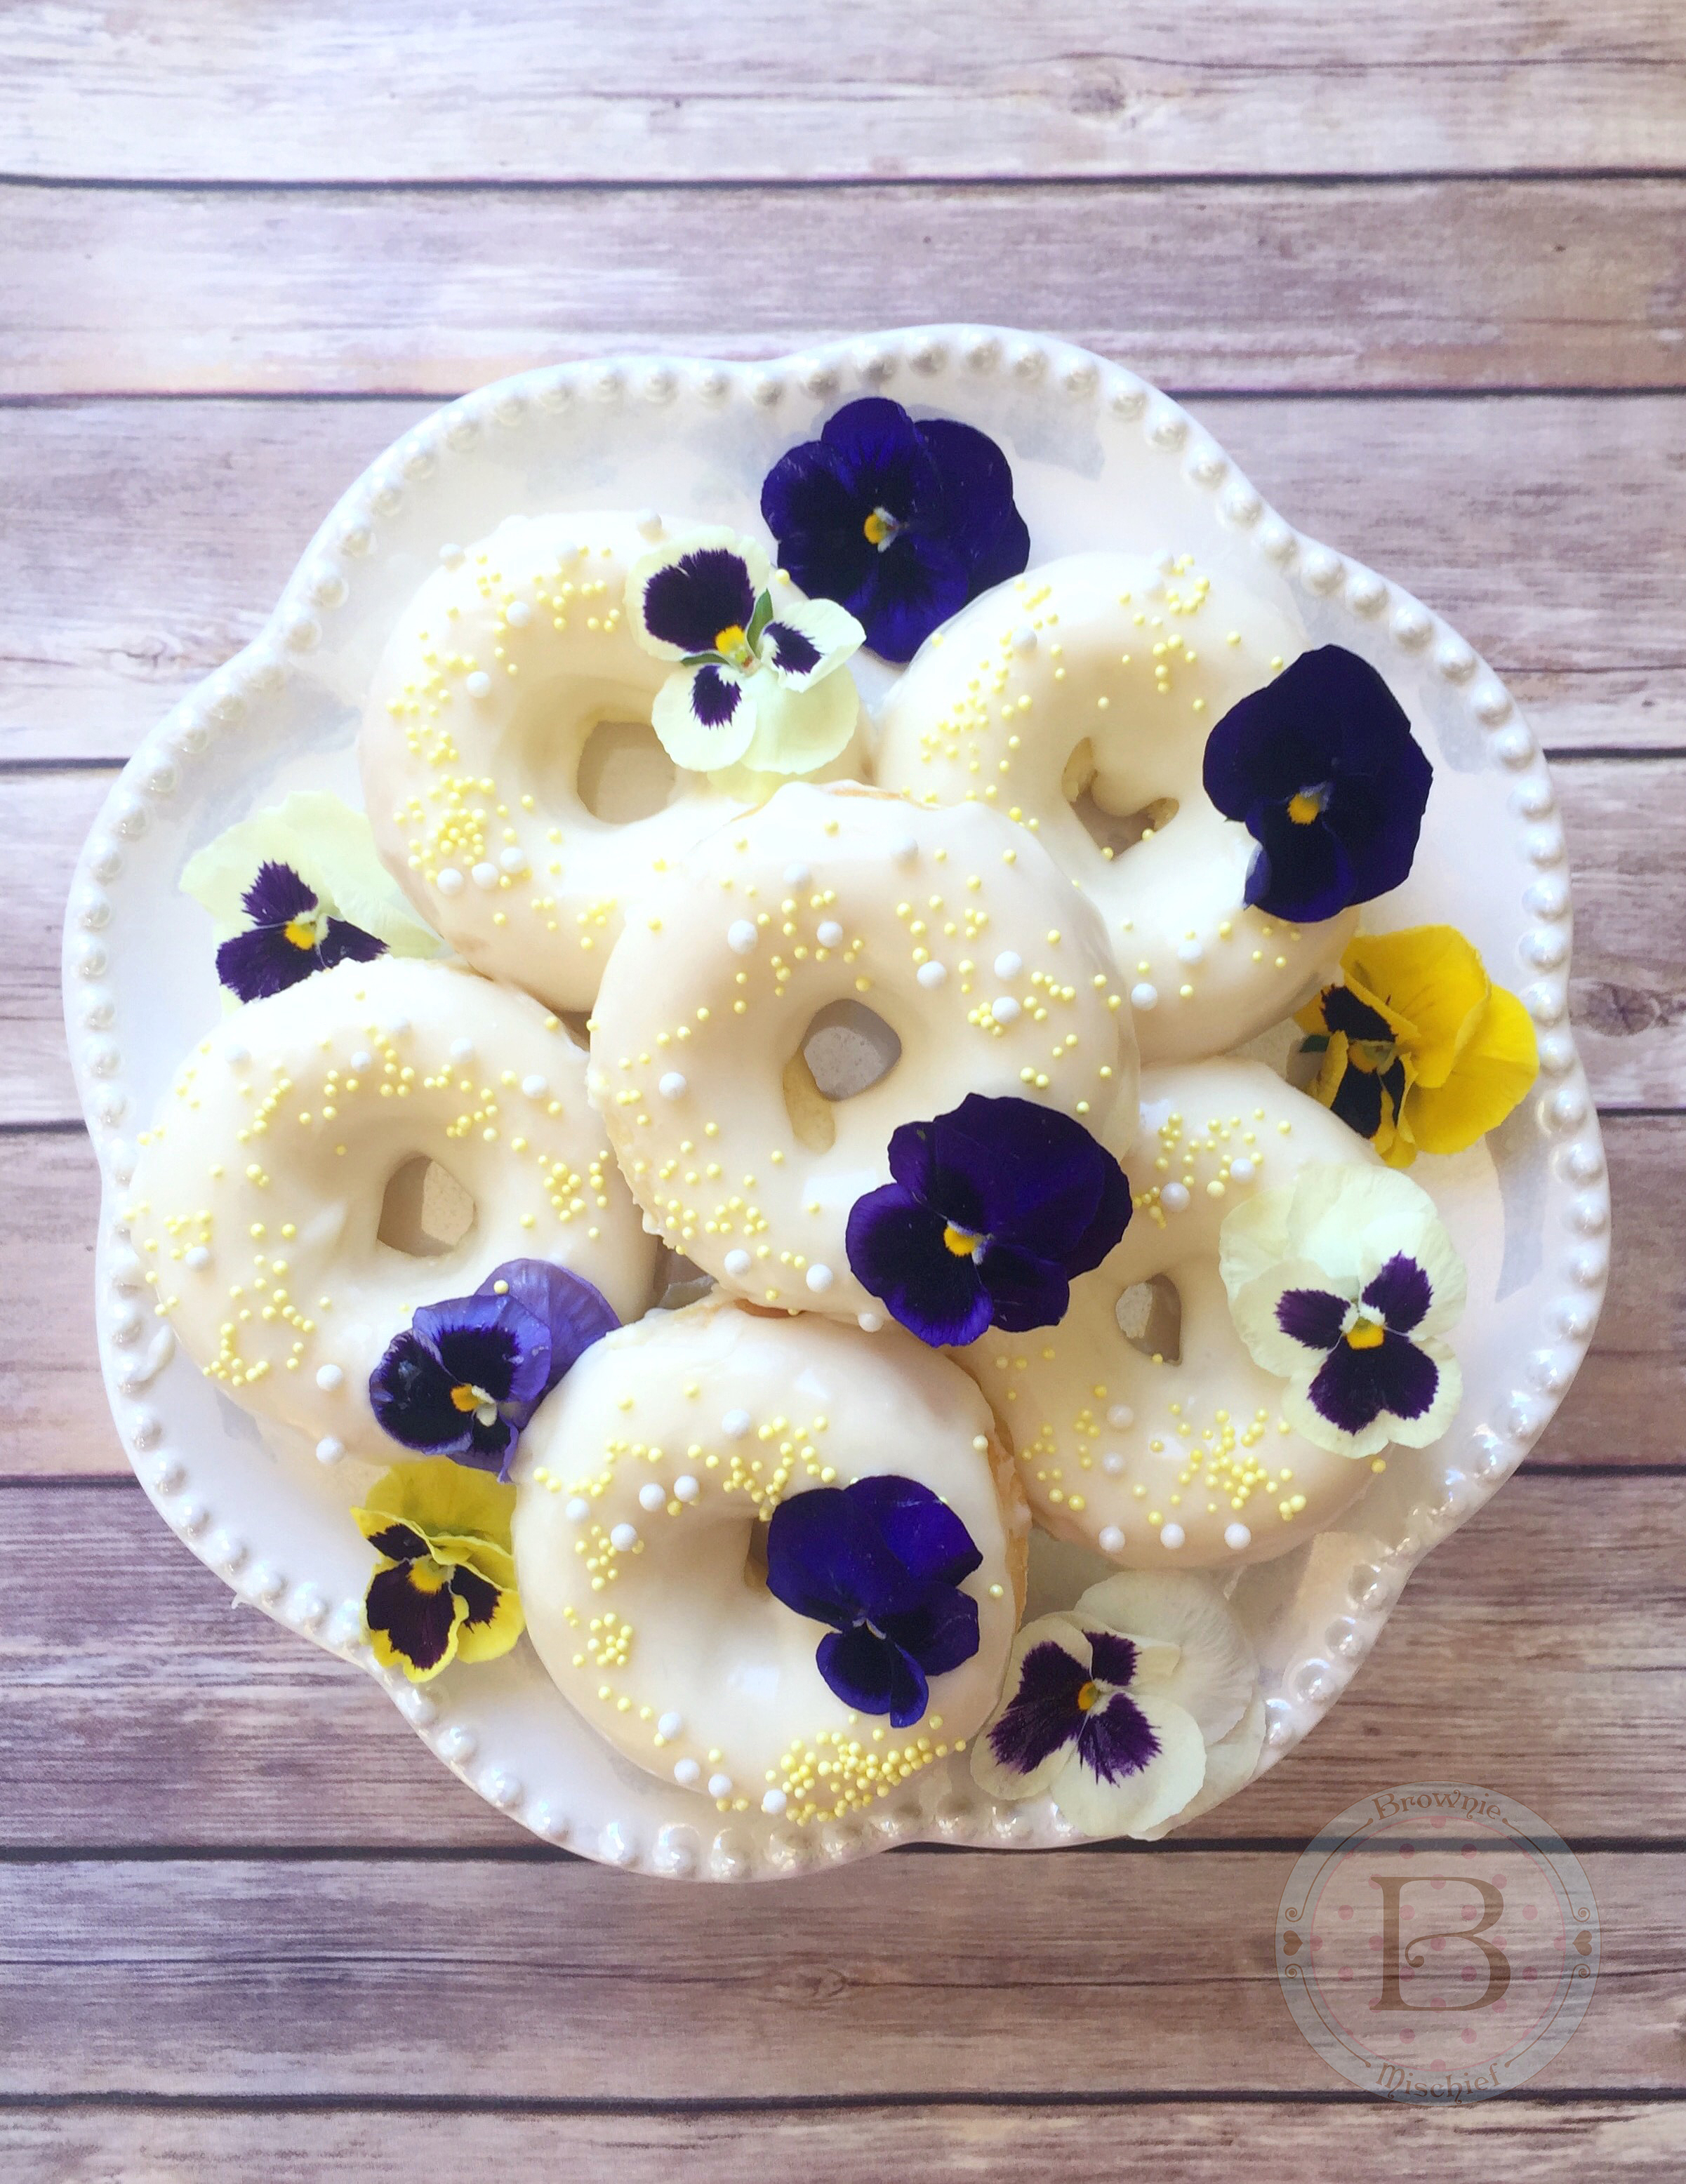
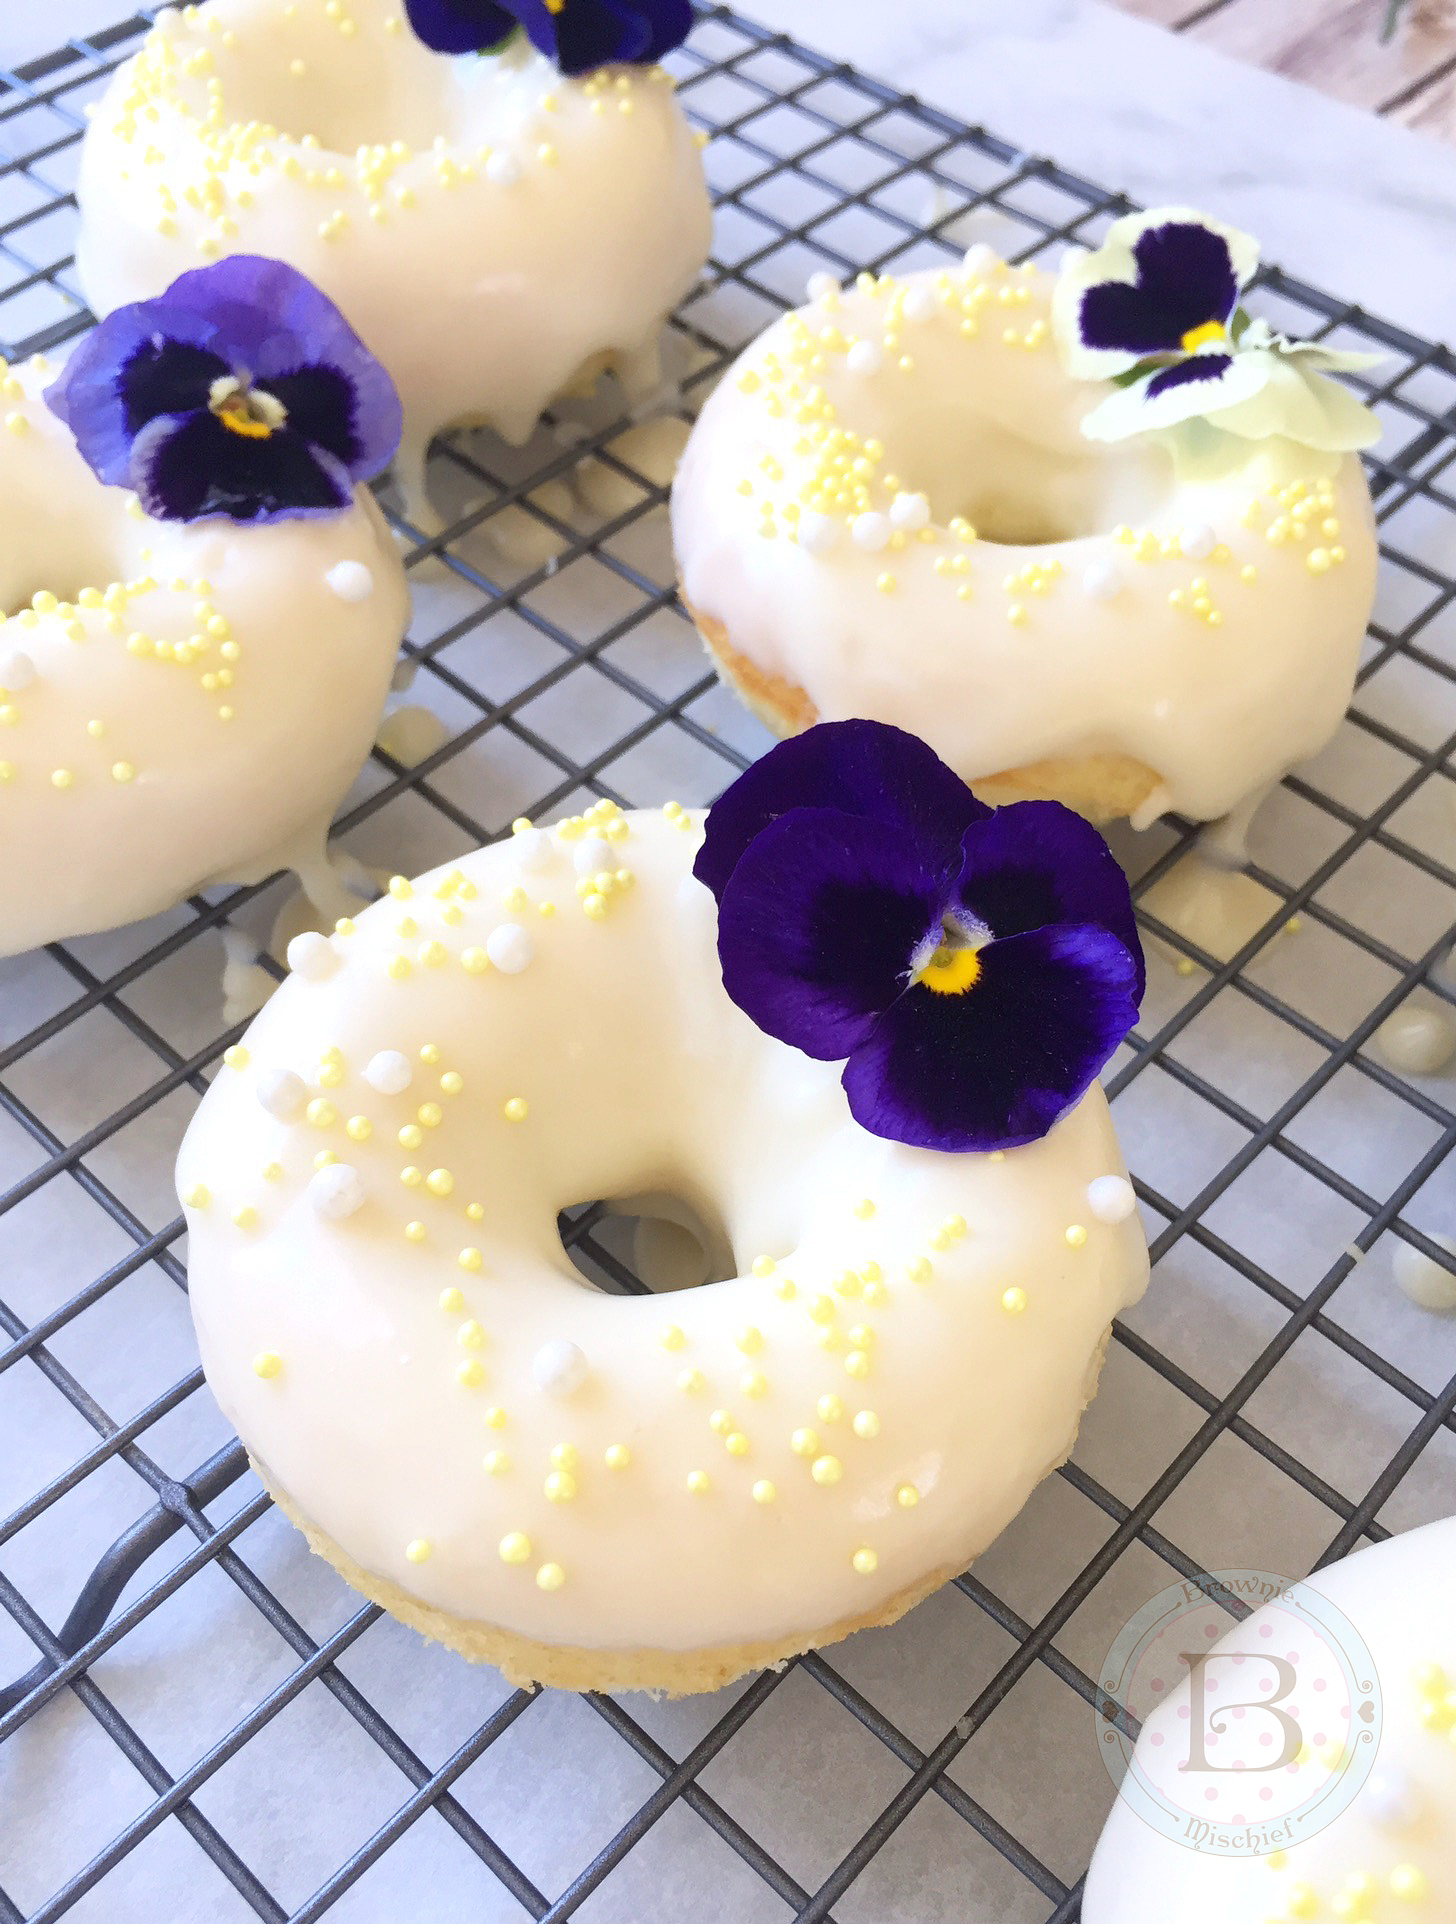
I was seriously happy when I started seeing donuts appearing at weddings, bridal showers and occasions other than work meetings. I’ve always felt those sweet, fluffy rings of dough had a higher calling. They had such potential! And honestly who doesn’t love donuts? They’re delicious, but they can also be beautiful. These Lemon Buttermilk Donuts could certainly win a beauty contest. They would make a gorgeous edition to any breakfast, brunch or dessert table. The fresh lemon zest and the earthy flavor of honey will bring springtime right into your kitchen.

Lemon Buttermilk Donuts with Honey Cream Cheese Frosting by Brownie Mischief

If you’re on the lookout for a Mother’s Day recipe, any mom will love these pretty, fragrant treats. This is a very easy recipe and the donuts bake up quickly, so you’ll have time to fix mom a cup of her favorite tea. If you don’t have a donut pan, and you’ve been reluctant to buy one, I can honestly say I love mine. It was very affordable and I’m pleased with the performance and ease of clean up with the pan I purchased. To find the donut pan click here.

In keeping with the springtime feel, I decorated my donuts with pesticide-free edible flowers. I used pansies, but if you’re unable to find them, you can substitute pesticide-free rose petals. I found these edible pansies at my local food market in the produce department, near the fresh herbs. You can also find edible flowers at farmers’ markets and online. For a list of edible flowers, click here.  Note:  The above pictured orange ranunculus flowers on the table are not edible.  

Lemon Buttermilk Donuts with Honey Cream Cheese Icing by Brownie Mischief

Lemon Buttermilk Donuts with Honey Cream Cheese Icing

Prep Time 20 minutes
Cook Time 7 minutes
Total Time 27 minutes
Course Breakfast, Brunch, Dessert
Servings 6

Ingredients
  

Lemon Buttermilk Donuts

  • 1 cup (113g) cake flour, sifted
  • ½ cup (100g) fine granulated sugar
  • 1 teaspoon baking powder
  • ¼ teaspoon fine sea salt
  • â…“ cup (78ml) buttermilk
  • 1 large egg
  • 2 tablespoons (28g) unsalted butter, melted
  • Zest of 1 medium lemon

Honey Cream Cheese Icing

  • ¼ cup (85g) cream cheese, softened
  • 2 tablespoons (28g) unsalted butter, softened
  • ¼ teaspoon vanilla extract
  • 1 pinch fine sea salt
  • 1 cup (120g) powdered sugar, sifted
  • 2 tablespoons honey
  • 2 teaspoons milk

Finishing Touches

  • Pesticide-free edible flowers
  • Sugar pearls*
  • Nonpareils**

Instructions
 

Lemon Buttermilk Donuts

  • Preheat oven to 375ºF (190ºC). Spray the wells of a donut pan*** with non-stick cooking spray.
  • In a medium-sized bowl, whisk together the cake flour, sugar, baking powder and salt until well blended.
  • In a separate medium-sized bowl, whisk the buttermilk, egg, melted butter, and lemon zest together until creamy and well combined. Add this mixture to the flour mixture and stir just until combined. Do not over mix.
  • Transfer the batter to a piping bag or plastic zip bag. Snip off the tip of the bag and pipe batter into the prepared donut pan, filling the wells 2/3 full.
  • Bake until a toothpick inserted into donuts comes out clean, about 7-8 minutes. Let cool in the pan for a couple of minutes, then remove the donuts to a cooling rack to cool completely.
  • Prepare Honey Cream Cheese Icing while the donuts are cooling. Dip the tops of the donuts into the icing and decorate as desired. Serve immediately.

Honey Cream Cheese Icing

  • In a medium-sized bowl, beat the cream cheese and butter together, with an electric mixer at medium speed, until smooth and well blended. Do not over beat. Add the vanilla extract and salt. Mix until combined.
  • On low speed, gradually add powdered sugar and mix until incorporated. Add the honey and beat on medium speed until smooth. Add milk, a little at a time until the desired consistency is reached. Beat on low speed until smooth.
  • Lemon Buttermilk Donuts with Honey Cream Cheese Frosting by Brownie Mischief

Baby Bunny Coconut Cakes

Baby Bunny Coconut Cakes

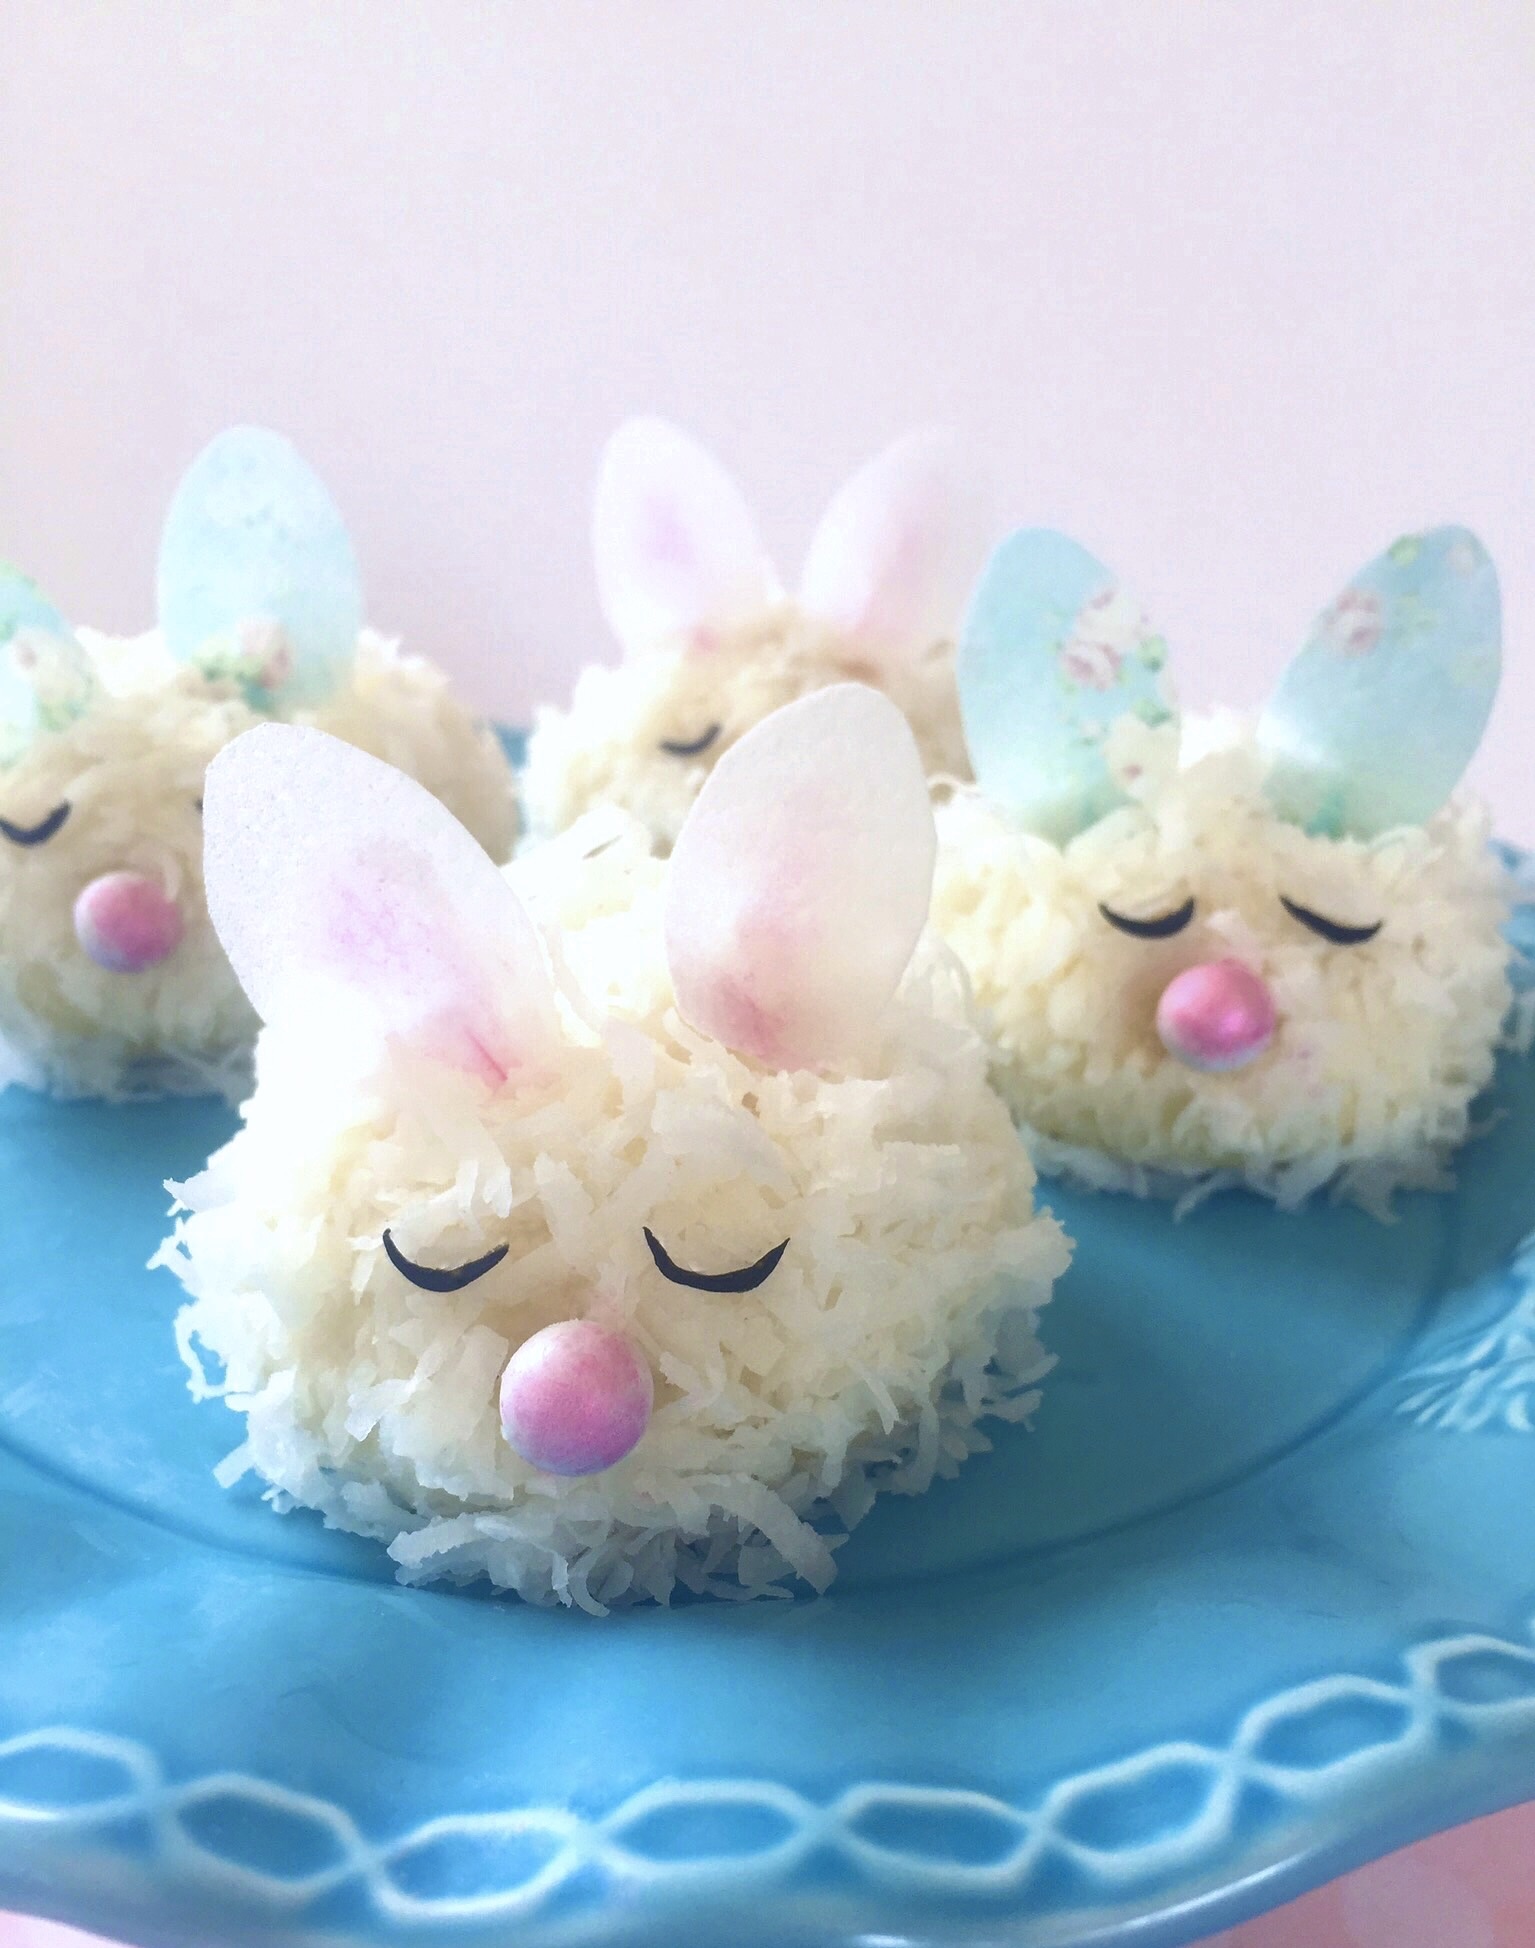
Spring is the time for blue skies, flowers blooming, bunnies scampering around and Easter celebrations. What better time to make cute Baby Bunny Coconut Cakes? I wanted to make them look like newborn bunnies curled up peacefully for a nap, so I decided to use a hemisphere pan.

When I was shopping around for hemisphere pans, also know as ball pans, I considered metal pans and silicone pans. In general, I prefer metal pans for baking cakes, but I decided on silicone, hoping to get more use out them. I plan on using them for frozen and refrigerated desserts as well. You can find hemisphere pans at kitchen stores, craft stores, baking supply stores and online. To find the pan I chose, click here.

My next dilemma was whether or not to coat the pans before baking. From what I’ve read, many people seem to have trouble getting their baked goods out of silicone pans, even though the majority of these pans claim to be non-stick. I decided to experiment, trying three different ways. I coated some of the wells with grease and flour, some with only grease, and some were left uncoated. I found that when I inverted the pan, the cakes released effortlessly from the coated wells. The cakes in the uncoated wells took a slight amount of prodding and a bit of residue was left behind, but the cakes were in tact. All three ways seem to work fine, but I decided that, for my own peace of mind, I will grease all of the wells in the future.

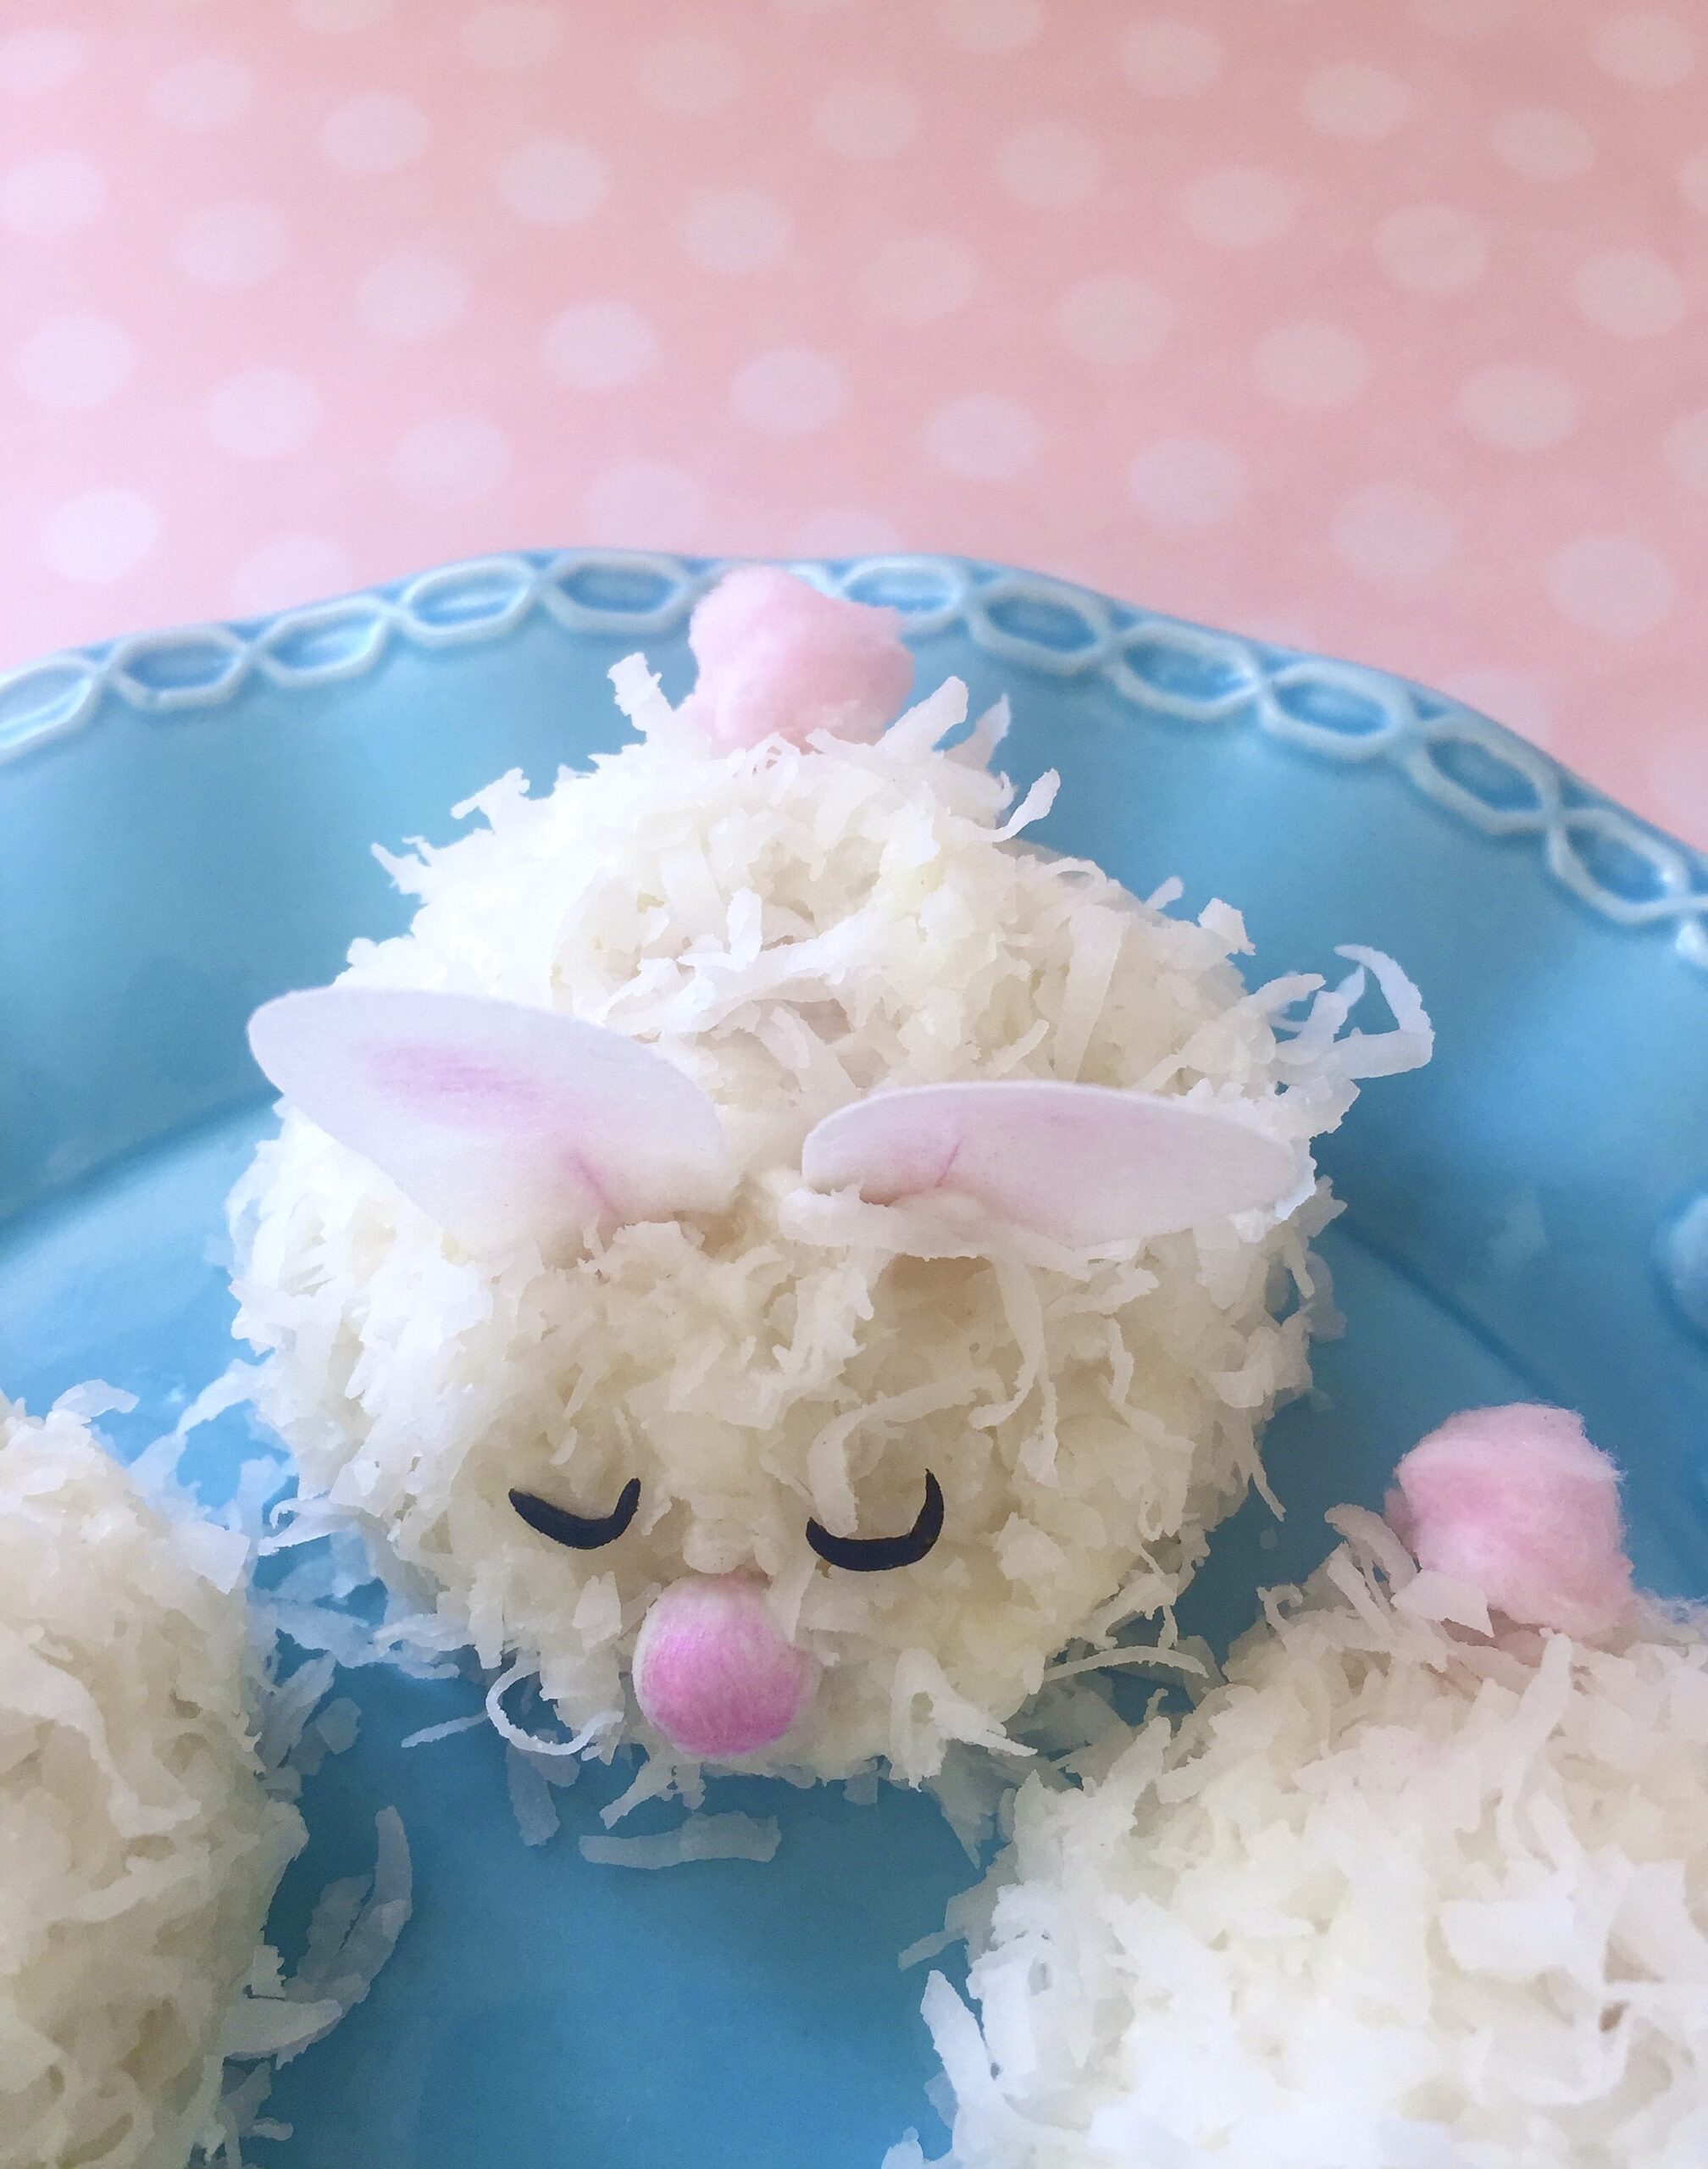
Decorating these bunny cakes is fun and easy, so this would make a great project for the little ones. You can use the candies of your choice to make eyes and noses. I used white candy pearls for the noses and colored them pink with edible petal dust. I made sleepy eyes out of black fondant. Black fondant is difficult to make, so I always buy it. It’s available for purchase in small quantities. I used edible wafer paper to make the bunny ears, but fondant would also work. A little puff of cotton candy makes a sweet tail. So many possibilities! Whether you make Baby Bunny Coconut Cakes for Easter, a child’s birthday party, a baby shower or simply to celebrate spring.

Baby Bunny Coconut Cakes

Baby Bunny Coconut Cakes

by Mari Vasseur
Fluffy, moist mini hemisphere coconut cakes with coconut buttercream frosting, topped with shredded coconut.
Course Dessert
Servings 12 mini cakes

Ingredients
  

Mini Coconut Cakes

  • 1 â…“ cups (165g) cake flour, sifted
  • 1 teaspoon baking powder
  • ½ teaspoon fine sea salt
  • 4 tablespoons (57g) unsalted butter, softened
  • ¾ cup plus 2 tablespoons (175g) sugar
  • 2 tablespoons (30ml) vegetable oil
  • 1 teaspoon natural coconut extract
  • 3 large large egg whites
  • ¾ cup (155ml) canned light coconut milk

Coconut Buttercream

  • ½ cup (113g) unsalted butter, softened
  • 2 cups (240g) powdered sugar, sifted
  • ¼ teaspoon natural coconut extract
  • 1 pinch fine sea salt
  • 3 tablespoons (45ml) canned light coconut milk

Finishing Touches

  • 3 cups (240g) sweetened, shredded coconut
  • Candies such as Sixlets
  • Edible pink luster dust
  • Black fondant
  • Edible wafer paper or white fondant
  • Piping gel
  • Cotton candy or mini marshmallows

Instructions
 

Mini Coconut Cakes

  • Preheat the oven to 325ºF (165ºC). Grease 2 silicone 6-serving mini hemisphere pans. Place the pans on large baking sheet.
  • In a medium-sized bowl, sift together the flour, baking powder and salt until well blended.
  • In a large bowl, beat the butter, sugar and oil together with an electric mixer at medium speed, until pale and fluffy. Beat in the coconut extract. Gradually beat in egg whites, until the mixture is well combined, stopping to scrape the sides of the bowl. On low speed, beat in the flour mixture in three additions, alternating with the coconut milk, stopping to scrape the sides of the bowl as needed. Beat just until combined.
  • Fill the hemisphere pan wells, 2/3 full with batter. Bake for 20-24 minutes, until a toothpick inserted into the center of cakes comes out clean.
  • Place the silicone pans on a cooling rack to cool for 10 minutes. Invert the pans to remove mini cakes and place on cooling racks to cool completely.

Coconut Buttercream

  • In a large bowl, beat the the butter with an electric mixer on medium speed, until pale and fluffy.
  • On low speed, gradually add the powdered sugar and mix until smooth and well combined. Add the coconut extract and salt. Beat until combined. Add the coconut milk a little at a time until the desired consistency is reached. Continue beating at low speed until the buttercream is smooth.
  • Frost the domed tops of the mini cakes with a small offset spatula. Cover with shredded coconut, pressing lightly to adhere. Decorate as desired.

Finishing Touches

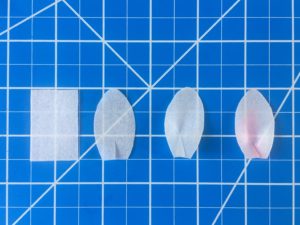
  • To make bunny ears, cut twenty-four 1 1/2-inch by 1-inch rectangles out of edible wafer paper. Cut each rectangle into a long football shape, flat at one end. Cut a 1/2-inch slit at the flat end. With a small paint brush, dab a bit of piping gel on one side of the slit. Overlap the cut ends of the slit and press together with your fingers. Let dry. Brush pink luster dust into the center of the ears. Skip this step if you are using floral wafer paper. Cut small slits into the bunny cakes and insert the ears.
    Baby Bunny Coconut Cakes Tutorial
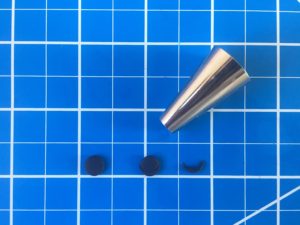
  • To make sleepy eyes, roll out a bit of black fondant to 1/16-inch thickness. Cut circles using the small end of a #12 piping tip. Cut thin crescent shapes from the circles using the small end of the piping tip. For easier handling, let eyes dry for a few minutes. If the coconut on your bunny cakes is still moist and tacky, the eyes will stick. If not, brush them with a small bit of water or piping gel.
    Baby Bunny Coconut Cakes Tutorial
  • To make noses, use the candy of your choice, such as candy pearls or candy hearts. I used white candy pearls, brushed with edible pink luster dust.
  • To make tails, you can use cotton candy or mini marshmallows attached with a bit of buttercream. If using cotton candy, keep in mind that it melts when exposed to air, so it's best applied right before serving.

Notes

*Do not substitute all-purpose flour. For best results, weigh your dry ingredients.
**For best results, use natural coconut extract. Imitation coconut flavorings may give your baked goods an unpleasant flavor.
***If your coconut milk is separated when you open the can, simply place it in a blender to emulsify it before using.
To find the hemisphere pan I used, click here.
To find white edible wafer paper,  click here. Floral wafer paper can be found on Etsy.
To find black fondant, click here.
 

Marshmallow Love


Marshmallow Cake by Brownie Mischief

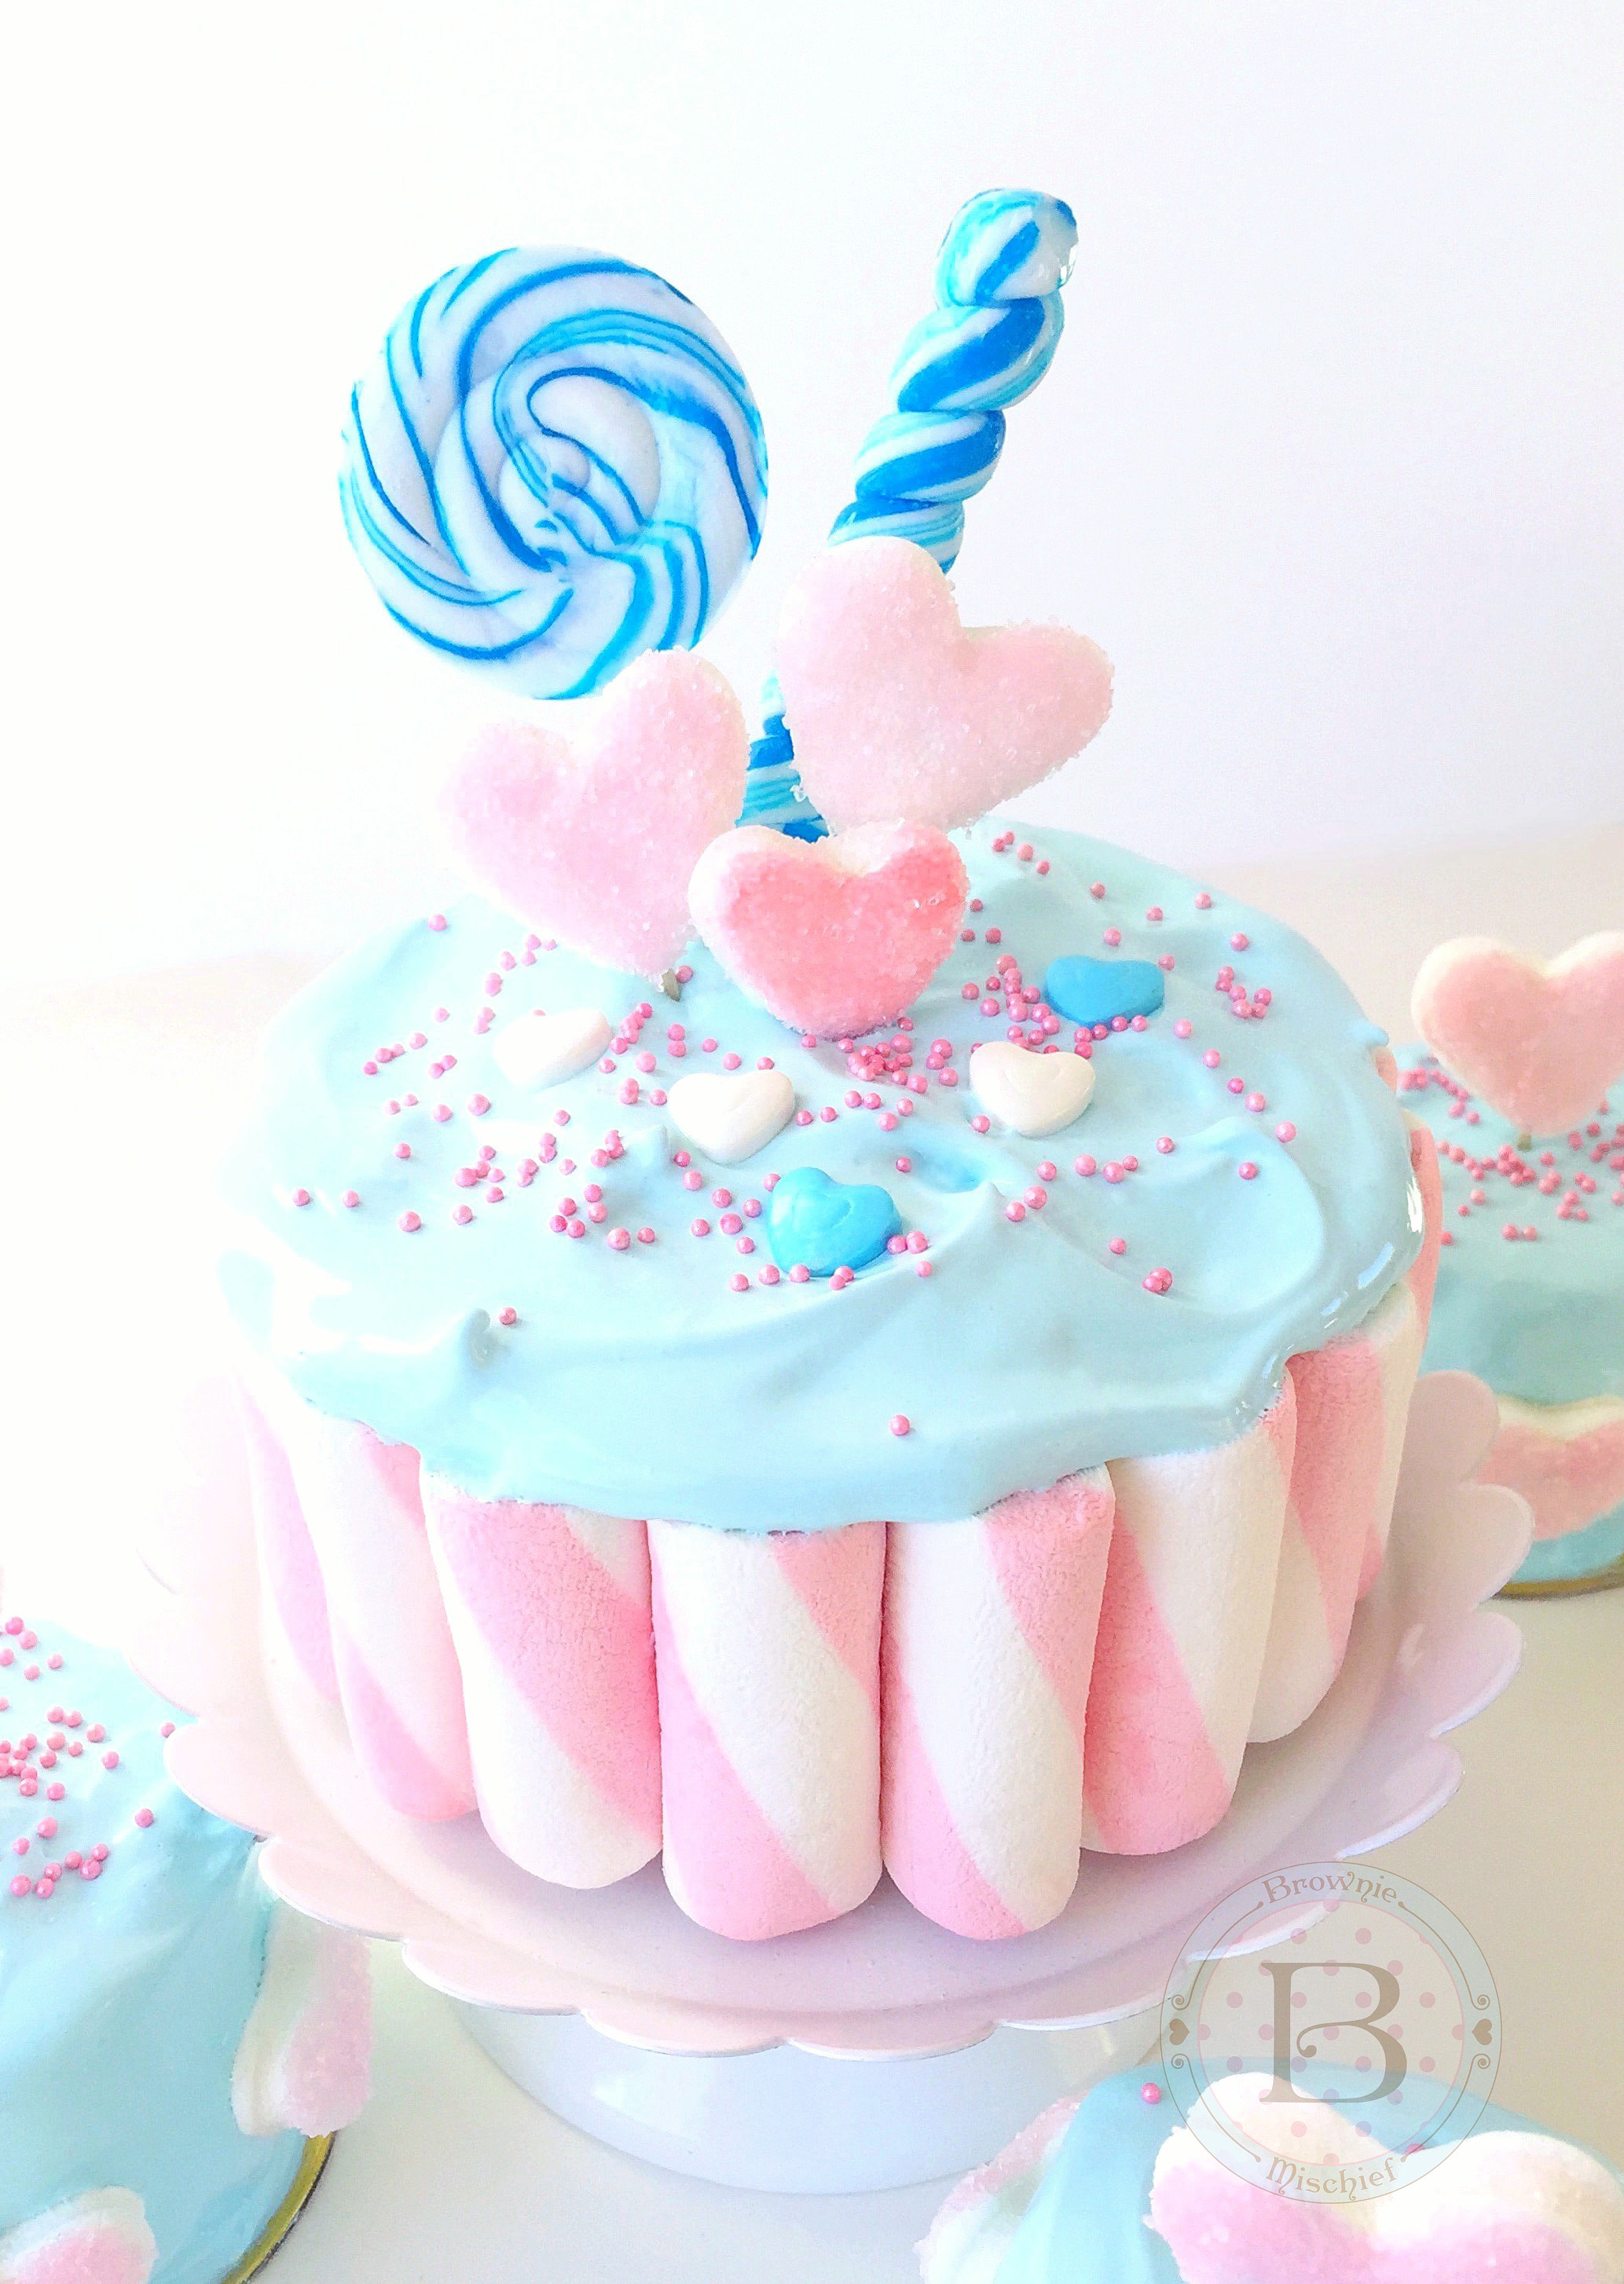
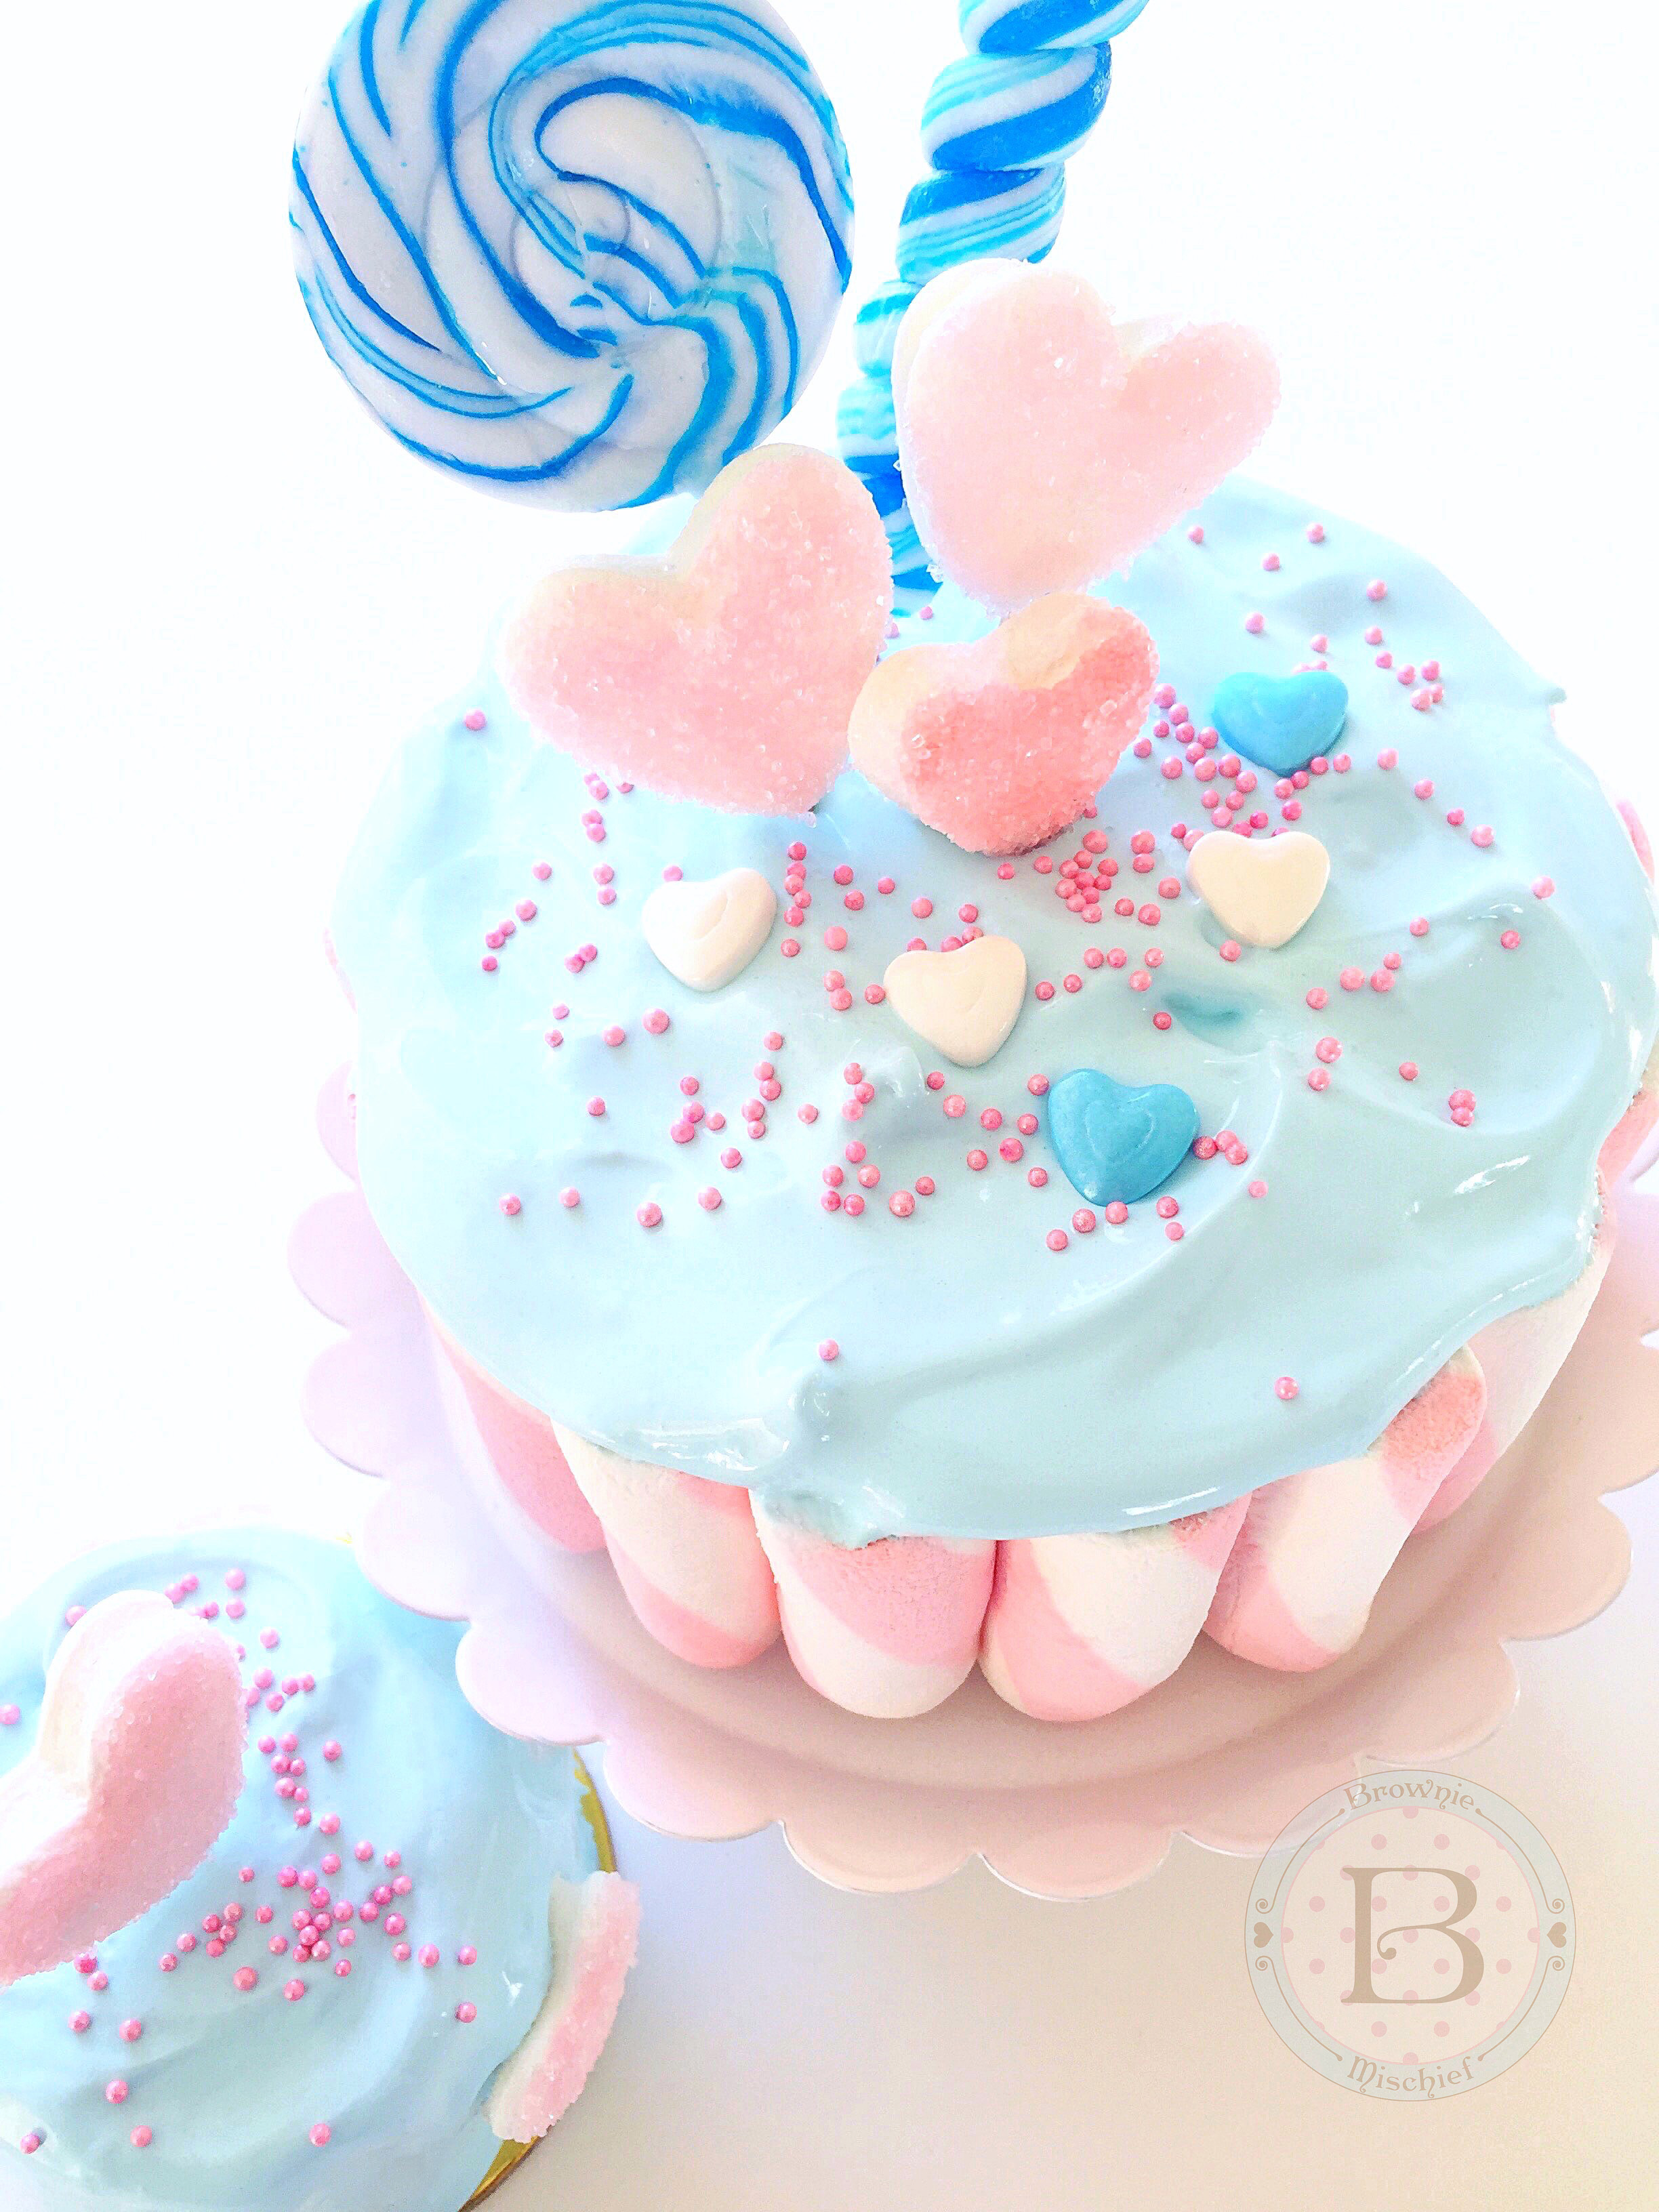
Dear marshmallows, why are you so sweet and fluffy? I shall call you squishy and you shall be mine! Yes, it’s true, I’m a bit crazy about marshmallows. This post is nothing short of a marshmallow fest! First, my daughter and I made some Sparkly Marshmallow Hearts that are super fun and easy to make. I literally want to put them on everything! How cute do they look on this mini cake? They also make adorable cupcake toppers! To view the Sparkly Marshmallow Hearts tutorial click here.

We also had some fun with Puffy Poles. In case you’re not marshmallow savvy, Puffy Poles are marshmallows that look like chubby barber poles. They’re very popular on dessert tables and candy buffets. We used pink ones, which have a subtle strawberry flavor. We applied them to the pictured 4-inch diameter by 2 1/4 inch tall strawberry cake, which was crumb coated with a thin layer of vanilla buttercream. We used buttercream to adhere them to the sides of the cake. To find Puffy Poles click here.

Marshmallow Cake by Brownie Mischief

Next, I made some Billowy Sky Blue Marshmallow Frosting to share with you. One of the things you’re going to love about this frosting, besides being yummy, is it’s natural beauty. You can simply spoon it on, no piping or fancy tricks necessary. Everything it touches becomes an ethereal cloud of deliciousness! The recipe is below.

Billowy Sky Blue Marshmallow Frosting

Fluffy, glossy, sweet marshmallow frosting.
Prep Time 10 minutes
Cook Time 15 minutes
Total Time 25 minutes
Course Dessert
Servings 3 cups

Ingredients
  

  • 1 ½ cup (10.5 ounces) ultra fine sugar *see notes below
  • ½ cup egg whites (3-4 large)
  • 2 tablespoons water
  • ¼ teaspoon cream of tartar
  • 1 teaspoon vanilla extract
  • ¼ teaspoon almond extract
  • Americolor Sky Blue gel food coloring (or any color of your choice)

Instructions
 

  • In a large heatproof bowl, whisk together sugar, egg whites, water and cream of tartar until frothy.
  • Place bowl over a pan of gently simmering water, making sure the water isn't touching the bottom of the bowl. Whisk mixture until temperature reaches 160° and sugar is completely dissolved.
  • Remove bowl from heat. Add extracts. Beat mixture with the whisk attachment of an electric mixer on high speed until stiff and glossy.
  • Add a small amount of food color with a toothpick and mix on low speed. Continue adding food color, a little at a time, until desired shade is reached. Use a clean toothpick for each addition.

Notes

*It's important to dissolve all of the sugar when making this frosting. Ultra fine sugar dissolves easier, but if you are unable to find it, you can use regular granulated sugar.

Chocolate Lovers’ Valentine Cake for Two

Chocolate Lovers' Valentine Drip Cake for Two

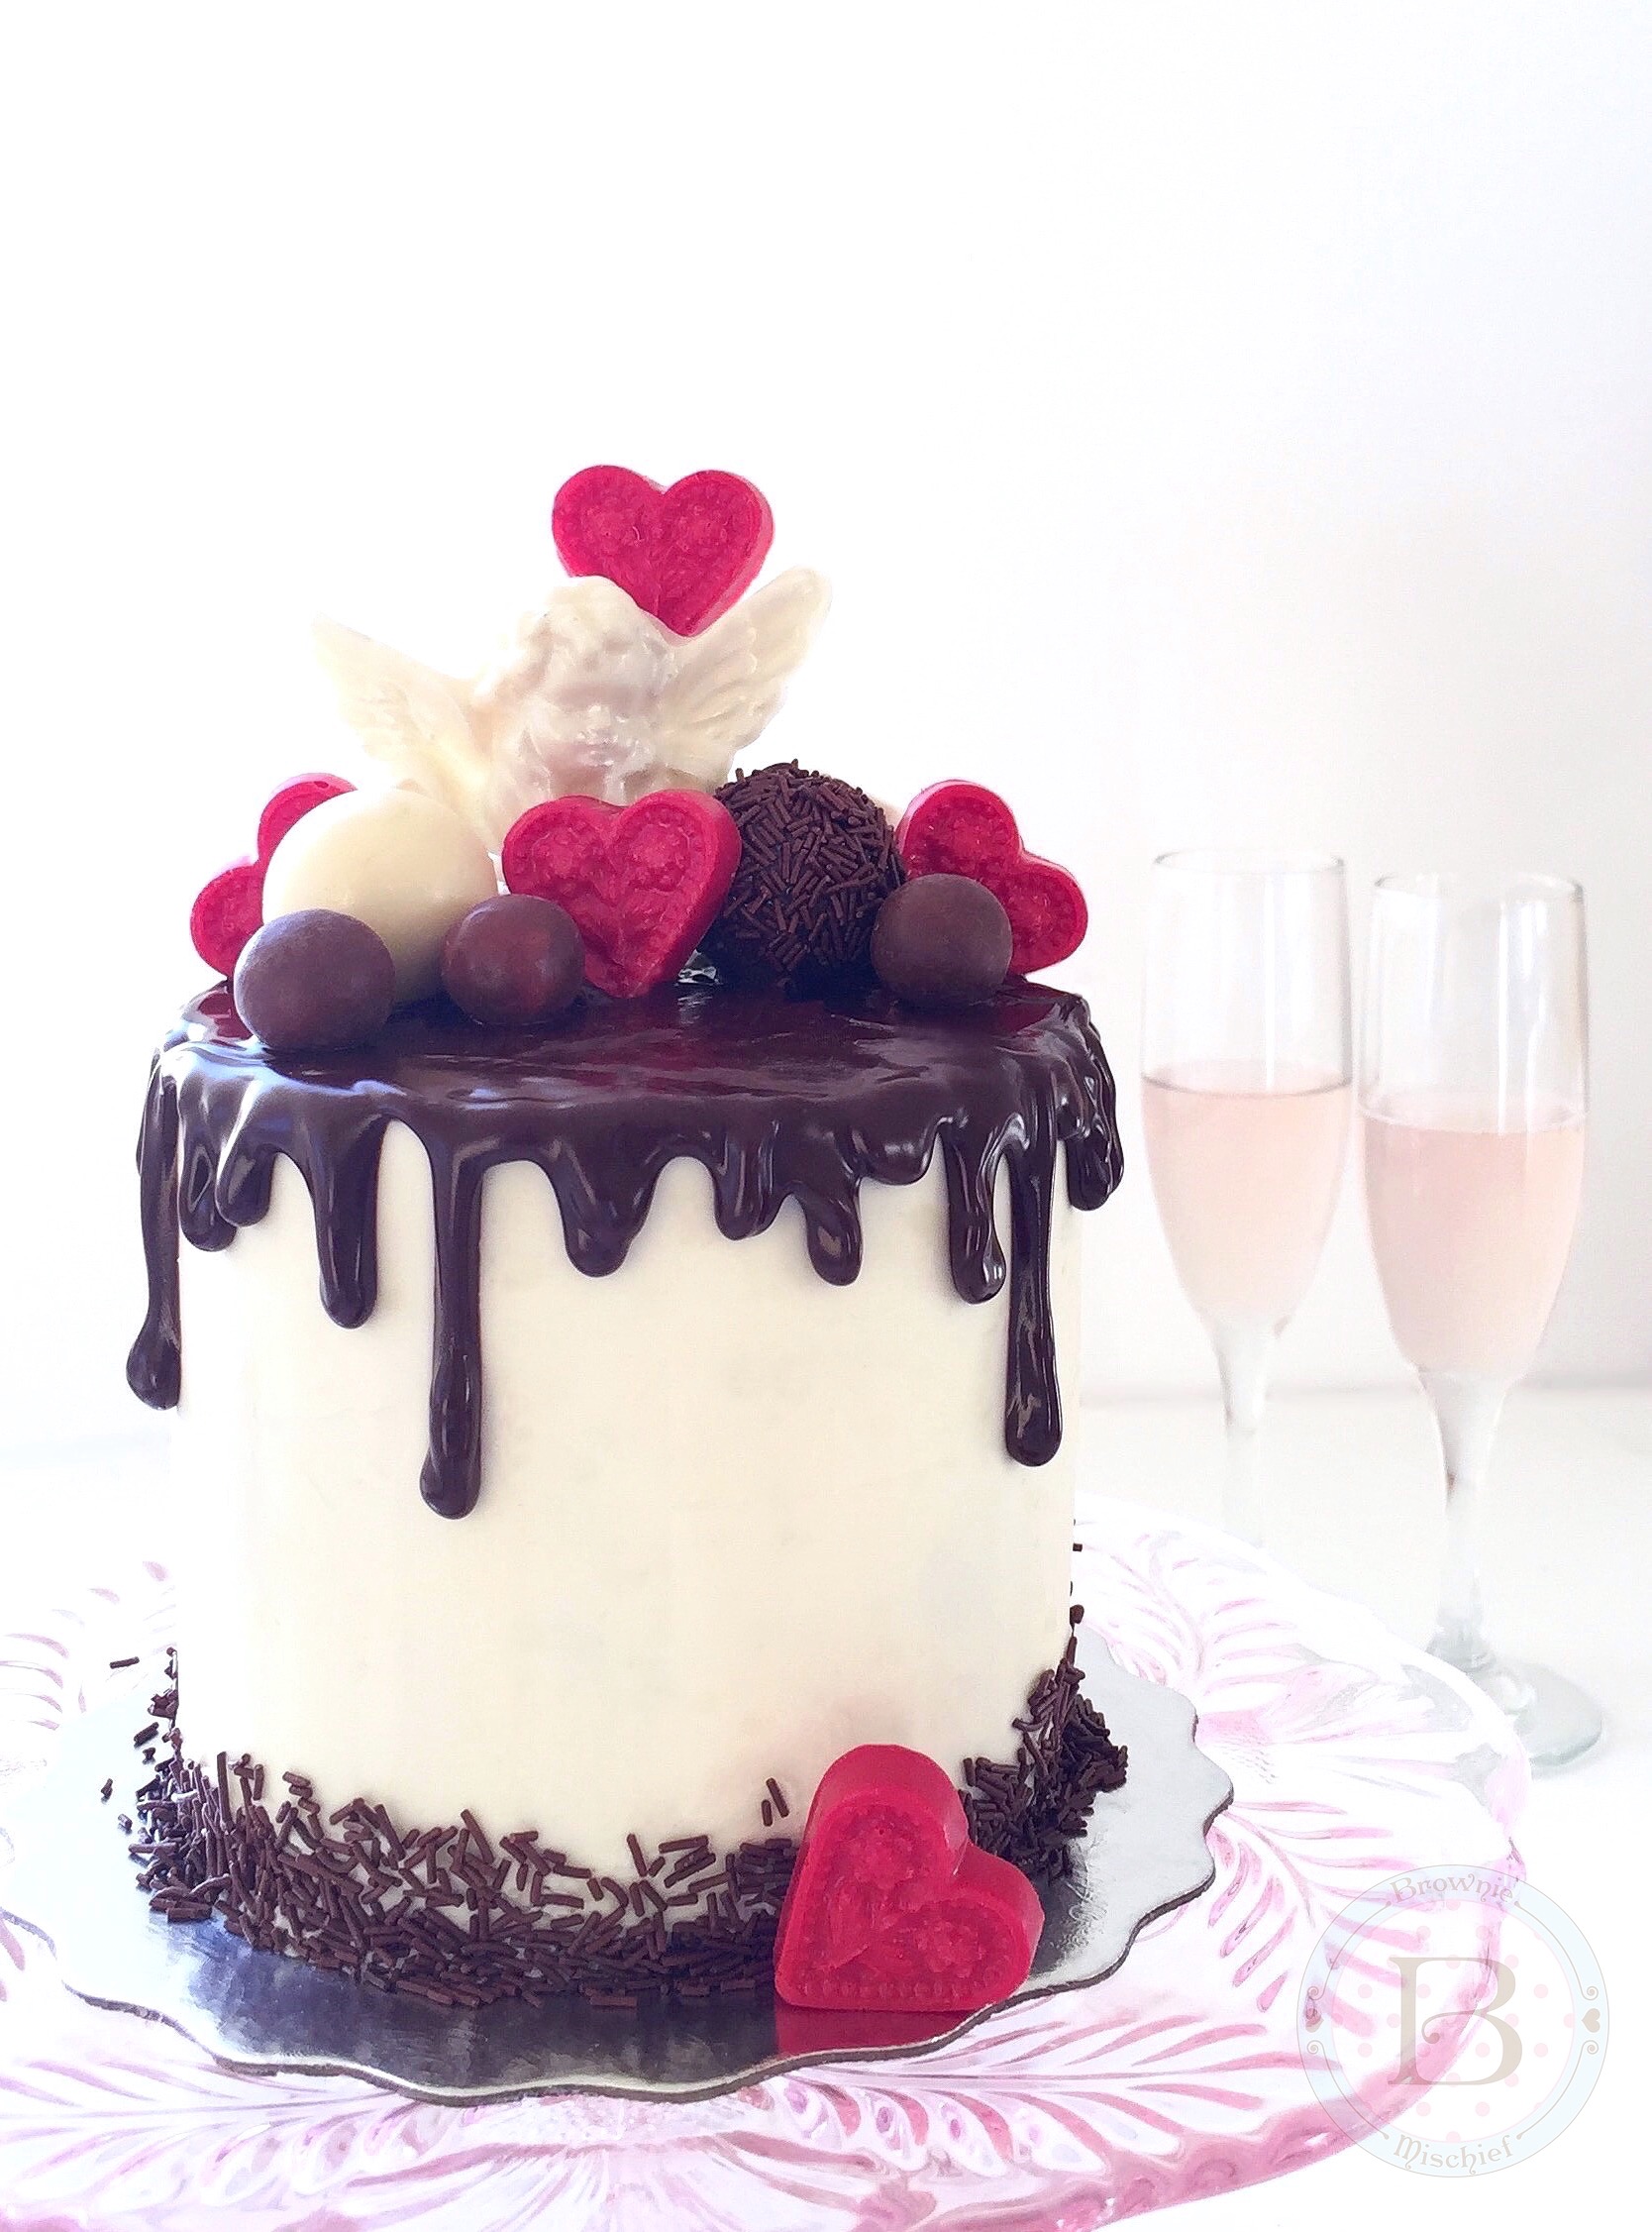
My relationship with Valentine’s Day has transformed over the years. When I was a child, I joyfully skipped home from school with my bounty of tiny Valentine cards, candy hearts and a cupcake someone’s mother baked. As I grew older, I was hot and cold towards Valentine’s Day, depending on the state of my love life at the time. After having kids, Valentine’s Day became about red construction paper, doily hearts and glue sticks. I happily cleaned up sprinkles and kissed chubby, frosting-stained cheeks. Now I think of Valentine’s Day as simply a day to celebrate love. I embrace Valentine’s Day and all the hearts, roses and chocolates that go with it! Show your loved ones that you love them on Valentine’s Day, but more importantly, show them throughout the year, by loving, respecting and accepting them for who they are every day.

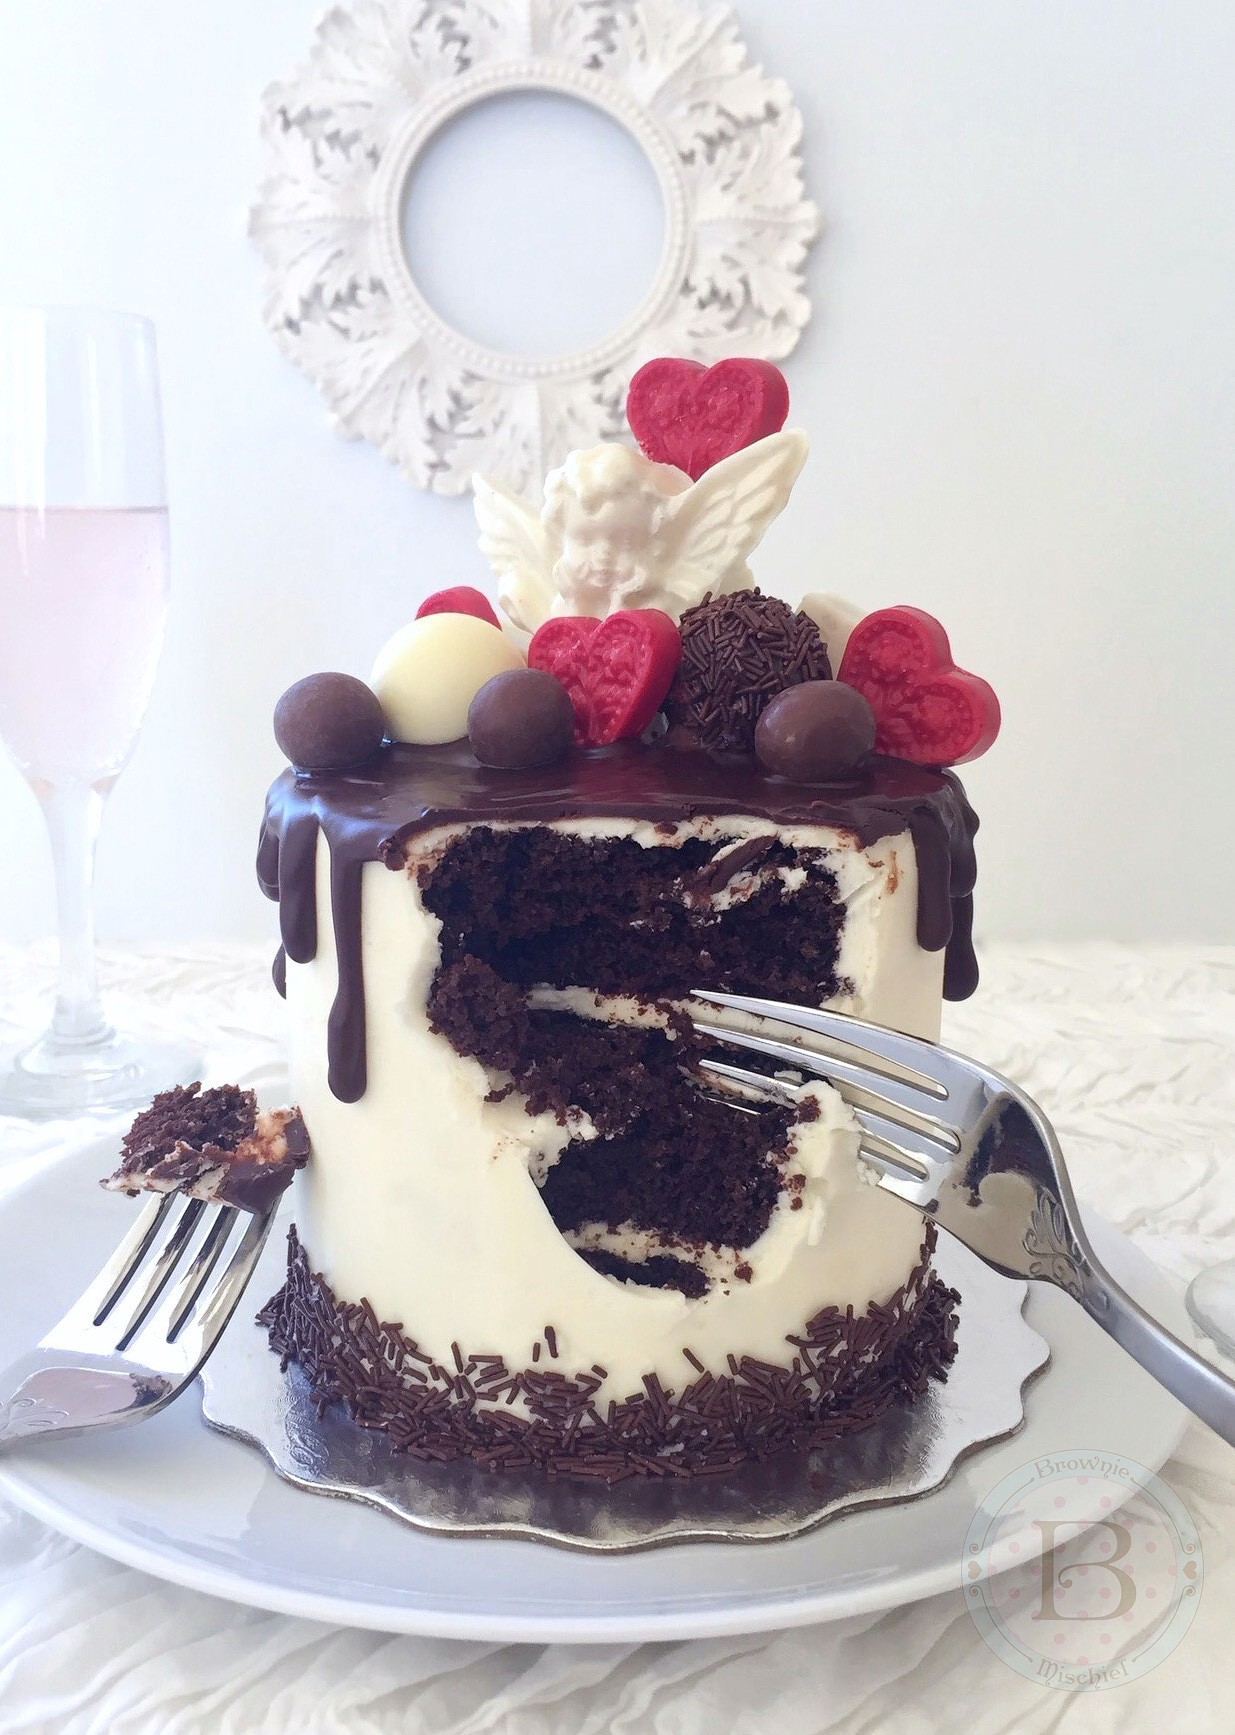
If your heart beats for a chocolate lover, then this Valentine cake for two will have them swooning. It’s small in size, but grand in chocolate indulgence. It has three layers of moist chocolate cake, rich, white chocolate buttercream and a silky chocolate glaze. As if that isn’t enough, I loaded the top with chocolate candy! Some of the candy is store bought and some I made with candy melts and chocolate molds. Click here to find the cherub mold. Click here to find the heart mold.

Chocolate Lovers' Valentine Drip Cake for Two

I hope you share this Valentine cake with someone you love! However you celebrate the day and whoever you love, have a happy one!

Chocolate Lovers' Valentine Cake for Two

A mini chocolate cake with white chocolate buttercream, topped with chocolate glaze and chocolate Valentine candy. Perfect for sharing!
Prep Time 1 hour
Cook Time 30 minutes
Total Time 2 hours 30 minutes
Course Dessert
Servings 2

Ingredients
  

Chocolate Cake for Two

  • â…” cup (3 ounces) all purpose flour
  • â…“ cup (1 ounce) unsweetened cocoa powder
  • ½ teaspoon baking powder
  • ½ teaspoon baking soda
  • ¼ plus â…› teaspoons salt
  • ¾ cup (5.25 ounces) sugar
  • 1 small egg
  • â…“ cup buttermilk
  • 3 tablespoons vegetable oil
  • ¾ teaspoon vanilla extract
  • ½ cup hot coffee

White Chocolate Buttercream

  • 6 ounces white chocolate, chopped
  • 1 ½ sticks (6 ounces) unsalted butter, softened
  • ½ teaspoon vanilla extract
  • pinch salt
  • â…” cup (3 ounces) powdered sugar, sifted

Chocolate Drip Glaze

  • 3 ounces semi-sweet chocolate, chopped
  • 2 tablespoons unsalted butter
  • 1 teaspoon corn syrup or honey

Cake Decorating Supplies

  • cake board
  • piping bag
  • chocolate sprinkles
  • assorted chocolate candy

Instructions
 

Chocolate Cake for Two

  • Preheat oven to 350°F. Grease & flour three 4-inch cake pans. *See note below.
  • Sift flour, cocoa powder, baking powder, baking soda and salt together in a medium bowl. Add sugar and stir to combine.
  • Combine egg, buttermilk, vegetable oil and vanilla extract in a small bowl. Whisk lightly to combine.
  • Add egg mixture to dry ingredients and mix on low speed with a handheld electric mixer, until combined. Stop mixer. Scrape sides of bowl with spatula. Turn mixer up to medium speed and beat for 1 minute.
  • Add hot coffee and stir until incorporated.
  • Pour batter into prepared cake pans, dividing batter evenly between the pans. Bake for 20-25 minutes or until a toothpick inserted into the center of the cake comes out clean.
  • Cool cakes in pans 10 minutes, then invert onto a wire rack to cool.

White Chocolate Buttercream

  • Melt white chocolate in a double boiler over gently simmering water. (Alternately, you can melt the white chocolate in the microwave. In a small microwaveable bowl, heat the white chocolate for 30 seconds, then stir. Heat again for 10 second intervals, stirring until melted, being very careful not to overheat it.)
  • Set white chocolate aside to cool until lukewarm and still soft.
  • In a medium bowl, beat butter with an electric mixer at medium speed until pale and creamy.
  • Add vanilla extract, salt and melted white chocolate. Beat at low speed until combined. Stop mixer. Scrape sides of bowl with spatula.
  • Add powdered sugar. Beat at low speed, until powdered sugar is combined. Beat at medium speed until buttercream is smooth, stopping to scrape the bowl occasionally. Keep covered at room temperature until ready to use.

Cake Assembly

  • When cakes have cooled completely, trim the cake layers to 1-inch tall.
  • Attach one of the layers to a cake board with some of the white chocolate buttercream. Apply 1/4-inch thick layer of buttercream to the top of the cake layer, followed by the second cake layer, another 1/4-inch thick layer of buttercream, then the final cake layer.
  • Apply a crumb coat (thin layer) of buttercream to the cake. Chill the cake in the refrigerator for 20 minutes.
  • Frost the cake with the remaining buttercream. Apply chocolate sprinkles to the bottom edge of the cake.
  • Melt chocolate drip glaze ingredients together in a double boiler over gently simmering water. Let cool slightly.
  • Spoon chocolate glaze into a piping bag. Snip off the end of the bag with kitchen scissors. Drizzle chocolate glaze along the edges of the perimeter of the cake, then fill in the middle. Smooth top with a small offset spatula.
  • Top cake with assorted chocolate candy. If desired, you can stack some of the candy and adhere them with melted chocolate to give some variation in height.

Sparkling Sweetheart Palmiers

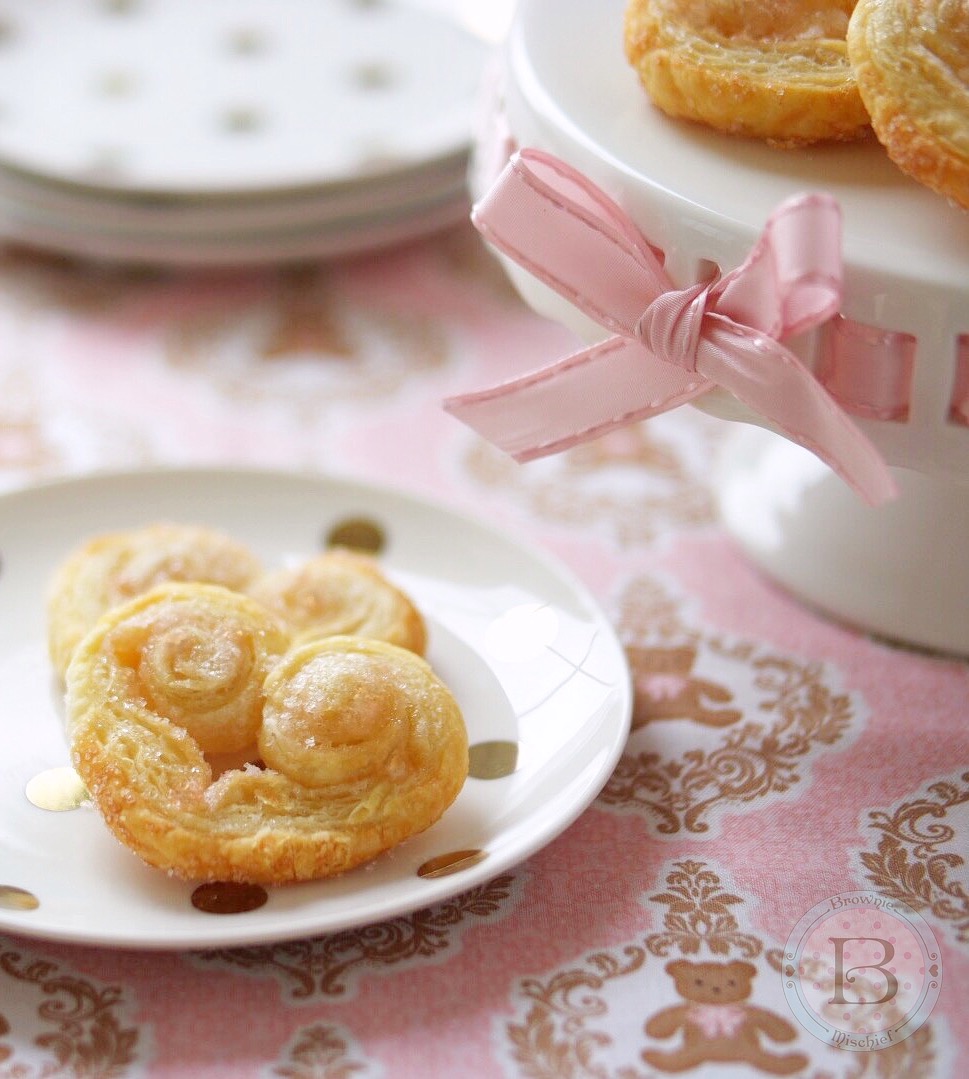
Sparkling Sweetheart Palmier Cookies

Crisp, delicate French palmiers, also known as elephant ears, are the perfect ladylike pastries to enjoy with hot cocoa, tea or coffee. There’s certainly no shortage of palmier recipes out there, but if you’re in the mood for simplicity, this is the recipe for you! This version is very easy to make and only requires two ingredients. Puff pastry dough and sparkling sugar, that’s it! Pretty stress-free, right? Since Valentine’s Day is coming soon, I formed the palmiers into hearts, rather than the traditional palm shape. I used some pale pink sparkling sugar that I had on hand, but feel free to use any color you like.

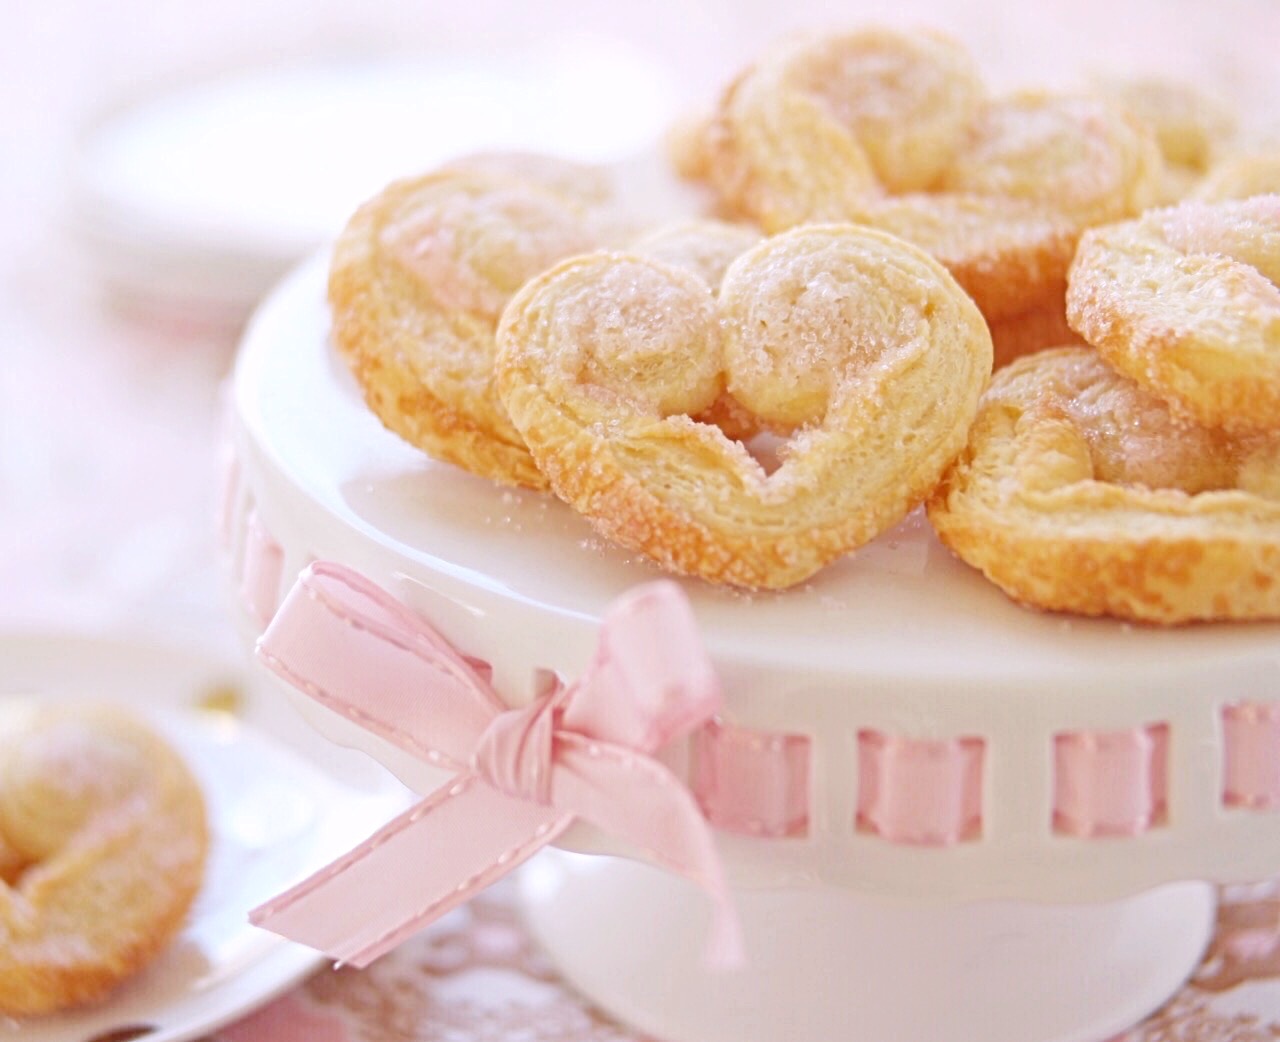
Sparkling Sweetheart Palmier Cookies

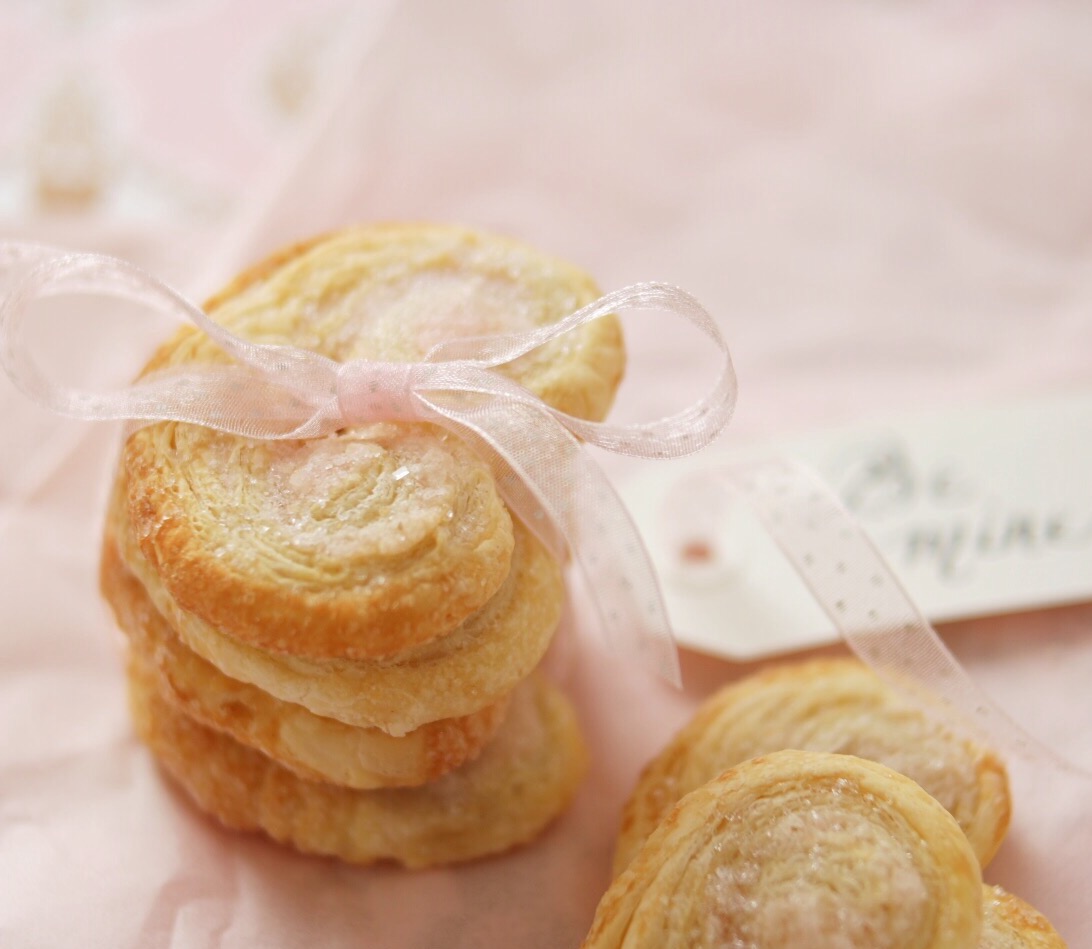
These palmier cookies are as delicious as they are lovely. Wouldn’t they be the perfect addition to a bridal or baby shower sweets table? I also envision them as a simple, but elegant Valentine’s Day breakfast or a sweet, homemade Valentine’s Day gift wrapped in tissue paper and ribbon. Most people love receiving sweet treats, I know I do! (Hint…hint…Hubby if you’re reading this!) I hope this simple recipe provides you with a bit of inspiration. I’ll be sharing more heart-shaped inspiration in the days ahead, so stop by again soon!

Sparkling Sweetheart Palmier Cookies

Sparkling Sweetheart Palmiers

by Mari Vasseur
Sweet, crisp, flaky puff pastry cookies.
Prep Time 15 minutes
Cook Time 15 minutes
Total Time 1 hour
Course Dessert
Servings 28 palmiers

Ingredients
  

  • 1 1 lb. (454g) package (two sheets) frozen puff pastry, thawed
  • ½ cup (100g) sparkling sugar, divided

Instructions
 

  • Sprinkle 2 tablespoons (25g) of sparkling sugar on your work surface. Place 1 puff pastry sheet on the sugared surface. Sprinkle evenly with 2 tablespoons (25g)of sparkling sugar. Roll gently with a rolling pin, pressing the sugar into the dough.
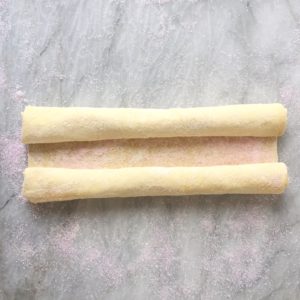
    Sparkling Sweetheart Palmier Tutorial
  • Roll the short ends of the puff pastry sheet in towards the center, jelly roll style, leaving a 1-inch gap in the center. Repeat the steps with the remaining puff pastry sheet. Transfer the puff pastry rolls to a tray. Cover with plastic wrap and chill in the refrigerator for 30 minutes.
  • Preheat the oven to 400°F (205ºC). Line 2 large baking sheets with parchment paper.
  • Slice each roll into 1/2-inch slices. Place the slices 2 inches apart onto the prepared baking sheets, cut side down, forming into heart shapes. Sprinkle any remaining sparkling sugar over the hearts.
    Sparkling Sweetheart Palmiers Tutorial
  • Bake until 15-17 minutes, until golden brown. Transfer to a cooling rack to cool before serving.

Notes

Palmiers are best served the day they are made. Store in an airtight container for up to a few days.