Raspberry Lemonade Brownies

Raspberry Lemonade Brownies by Brownie Mischief

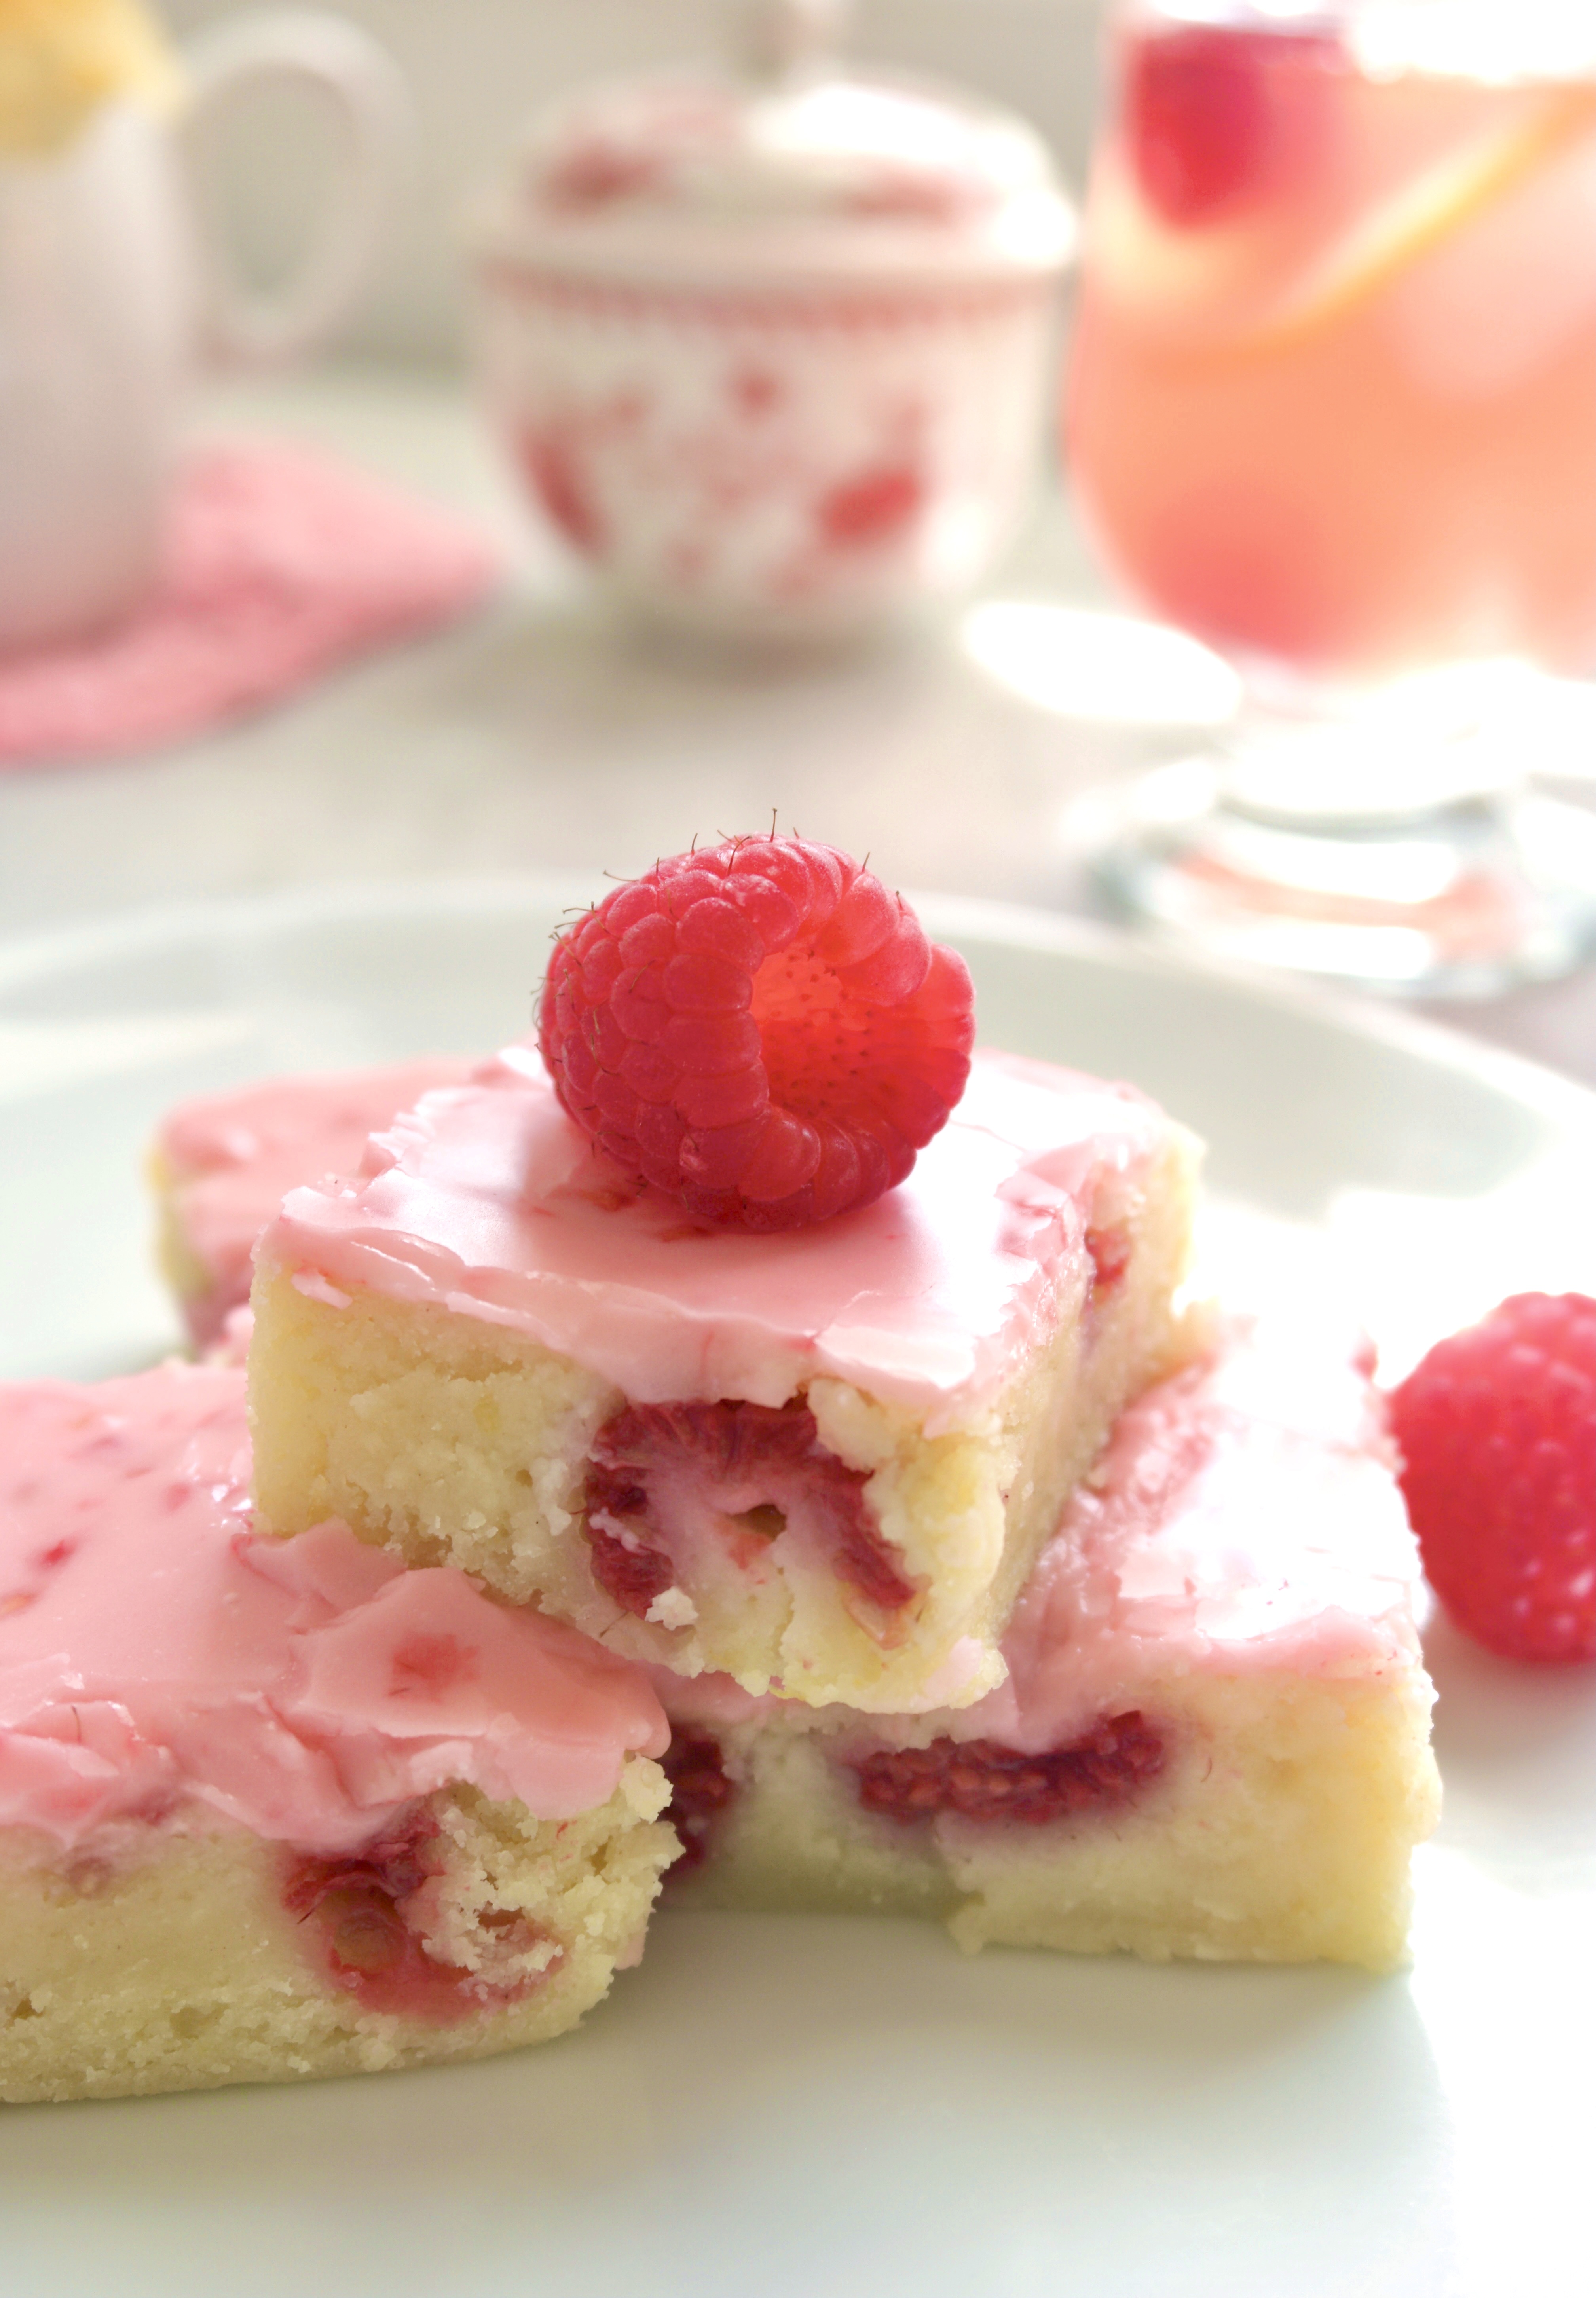
Raspberry Lemonade Brownies are the perfect easy recipe for spring and summer. They’re so pretty and delightfully delicious! The fudgy lemon batter is brightened with fresh lemon zest and raspberries, then topped with a sweet-tart burst of flavor and color from fresh raspberries. The icing contains no food coloring. Just three raspberries will give you that luscious shade of pink!

I want to clarify that lemon brownies are not lemon bars. We all know what a lemon bar is. The one we all know and love has a lemon curd filling on a shortbread crust, possibly drizzled with lemon icing or sprinkled with powdered sugar. The lemon brownie is a whole different animal. Don’t mistake lemon brownies for lemon cake either. Lemon brownies contain white chocolate which gives them a rich, fudgy texture like their chocolate cousins. We may be tempted to call them blondies, but blondies have a butterscotch flavor and typically don’t contain chocolate. Now that we got that straightened out, we can sleep peacefully tonight.

Print Recipe
Raspberry Lemonade Brownies
Course Dessert
Servings
bars
Ingredients
Raspberry Lemonade Bownies
Raspberry Lemonade Icing
Course Dessert
Servings
bars
Ingredients
Raspberry Lemonade Bownies
Raspberry Lemonade Icing
Instructions
Raspberry Lemonade Bownies
  1. Preheat the oven to 325ºF (165ºC). Line an 8-inch square baking pan* with parchment paper.
  2. In a medium microwaveable bowl, melt the white chocolate and butter in the microwave for 20 second bursts, stirring after each one. Alternately, melt the white chocolate and butter on the stovetop in a heat safe bowl set over a pan of barely simmering water. Stir gently until smooth.
  3. In a large bowl, whisk together the sugar, eggs, egg yolk, lemon juice, zest and salt until smooth and well combined. Stir in the melted white chocolate mixture. Add the flour and mix just until combined. Gently stir in the raspberries.
  4. Transfer the batter to the prepared baking pan. Bake until the top is set, the edges are light golden brown and a toothpick inserted into the center comes out with a few moist crumbs on it, about 23-28 minutes. Let the brownies cool in the pan.
Raspberry Lemonade Icing
  1. In a medium-size bowl, smash the raspberries with a fork.
  2. Add the powdered sugar, melted butter and 1 tablespoon of lemon juice. Whisk until smooth, adding more lemon juice as needed. Spread the icing over the cooled brownies.
  3. Cut into 2-inch squares and serve with additional raspberries, if desired.
Recipe Notes

*To find the 8 x 8 inch pan I used, click here.


Mini Hummingbird Cake

Mini Hummingbird Cake

If you haven’t noticed already, I love little cakes. Mini cakes are not only cute and charming, they’re likely to make you very popular. This recipe makes two darling Mini Hummingbird Cakes, one to keep and one to share. Hummingbird Cake is a delightful way to use your ripe bananas. The version I’m sharing here also contains pineapple, pecans and coconut. This fruity, nutty combination reminds me of spring and would be perfect for Easter or a spring picnic.

Print Recipe
Mini Hummingbird Cake
Hummingbird Cakes filled with bananas, pineapple, pecans and coconut, topped with cream cheese frosting and decorated with graham cracker crumb moss and fresh chamomile flowers.
Course Dessert
Keyword cake, hummingbird
Servings
4-inch 2-layer cakes
Ingredients
Hummingbird Cakes
Cream Cheese Frosting
Optional Decor
Course Dessert
Keyword cake, hummingbird
Servings
4-inch 2-layer cakes
Ingredients
Hummingbird Cakes
Cream Cheese Frosting
Optional Decor
Instructions
Hummingbird Cakes
  1. Preheat oven to 350ºF (180ºC). Line the bottoms of four 4-inch cake pans**** with parchment paper. Grease and flour the insides.
  2. In a medium-size bowl, whisk together the flour, baking soda, salt and cinnamon until well combined.
  3. In a large bowl, beat the butter, sugar, brown sugar and oil with an electric mixer, until light and fluffy. Beat in the egg, egg yolk, and vanilla extract in three separate additions, making sure each one is incorporated before adding the next. Stir in the bananas, pineapple, pecans and coconut until combined.
  4. Transfer the batter to prepared cake pans, about 1 cup of batter in each pan. Place the filled cake pans on a baking sheet.
  5. Bake until toothpick inserted in centers comes out clean, about 25-28 minutes. Cool the cakes in pans 10 minutes then turn the cakes out onto a cooling rack.
  6. Trim the cakes to 1-inch thickness. Fill, stack and frost the cakes with cream cheese frosting.
Cream Cheese Frosting
  1. In a large bowl, beat the butter with an electric mixer until smooth and pale. Beat 1 tablespoon of heavy cream, the vanilla extract and salt into the butter until well combined.On low speed, beat in the powdered sugar a half cup at a time, until well combined.
  2. In a medium-size bowl, mix cream the cheese with remaining 1 tablespoon heavy cream, with a spatula until smooth. On low speed, beat the cream cheese mixture into the butter mixture until smooth and well combined.
Decor
  1. To make the graham cracker crumb moss: In two small bowls, dilute 1/8 teaspoon of each gel food color with a few drops of vodka. (Vodka will dissipate as crumbs dry.) Place the graham cracker crumbs in a plastic food bag. Add diluted food colors a little at a time and seal the bag. Shake the bag and gently massage it to distribute the color. Add more diluted food color as needed until desired your shade of green is reached. Spread the crumbs out onto a parchment lined baking sheet to dry. Apply the crumbs to bottom edges of the frosted cakes.
Recipe Notes

*Chop the coconut flakes to achieve a finer texture. This step is optional.

**To find the avocado green food color gel I used, click here.

***To find the lemon yellow food color gel I used, click here.

****To find the 4-inch cake pans I used, click here.

Strawberries & Cream Tarts

Strawberries & Cream Tarts

May is when I get to pull out all of my summery recipes. These pretty little Strawberries & Cream Tarts remind me of a summer day. The kind of day when you’re outside enjoying the sunshine and you’re craving a cool, refreshing dessert. This strawberry cream filling alone is so delicious that I could just eat the entire bowl with a spoon. But since I’m extra, I had to create an aesthetic dessert with it.

I used my favorite tart shells for this recipe, but this would also be delicious with those little pre-made graham cracker pie crusts if you want to take a shortcut. The reason I love this tart crust recipe so much though, is that it actually tastes delicious. Once, a few years ago, I purchased a beautiful, small fruit tart from a famous bakery. The fruit was vibrant and glistening and the pastry cream filling was sweet and silky. Now we need the sound of a mic drop, because the tart crust was hard and flavorless, like cardboard! Ever since then, I knew I would settle for nothing less than a delicious tart crust.

Print Recipe
Strawberries & Cream Tarts
Course Dessert
Keyword strawberry, tarts
Servings
4-inch tarts
Ingredients
Tart Crust
Strawberry Cream Filling
Course Dessert
Keyword strawberry, tarts
Servings
4-inch tarts
Ingredients
Tart Crust
Strawberry Cream Filling
Instructions
Tart Crust
  1. In a bowl, whisk together flour, powdered sugar and salt. Set aside.
  2. Work in butter and egg yolk with a pastry blender or with your fingers, until pea size pieces are formed.
  3. Add ice water, one tablespoon at a time, until dough comes together.
  4. Form dough into a disc. Wrap in plastic and refrigerate for one hour.
  5. On a lightly floured surface, roll dough to a scant 1/4-inch thickness
  6. Cut dough into six 5-inch rounds. Press rounds into six 4-inch or 4 1/4-inch tart pans.*
  7. Dock the bottoms of pie crusts with a fork. Freeze for 30 minutes.
  8. Heat oven to 375ºF. Place tart pans on a large baking sheet.
  9. Line tart shells with six 6-inch parchment rounds. Fill with pie weights. (You can use dried beans or rice if you don't have pie weights.)
  10. Bake tart shells for 12 minutes. Remove parchment paper and pie weights. Continue baking until tart shells are light golden brown, about 4-6 more minutes.
  11. Transfer to cooling rack to cool completely.
Strawberry Cream Filling
  1. Pass the strawberry purée through a mesh sieve to remove large seeds.
  2. In a medium saucepan, simmer the strawberry purée until it's reduced by half. Stir in the sugar and continue cooking over medium heat, until the sugar is dissolved. Transfer to a medium bowl.
  3. Meanwhile, place 3 tablespoons of water into a small bowl. Sprinkle gelatin powder over the top of water. Let sit until water is absorbed, about 5 minutes.
  4. Pour the gelatin mixture into the warm strawberry reduction mixture and stir until fully incorporated.
  5. In a large bowl, beat cream cheese on low speed with an electric mixer until smooth.
  6. Add extracts and beat until combined.
  7. Add the strawberry reduction mixture to the cream cheese a little at time. Beat until well combined.
  8. In a medium bowl, beat heavy whipping cream with an electric mixer at high speed until stiff peaks form.
  9. Fold whipped cream into strawberry mixture.
  10. Spoon into cooled tart shells. Smooth tops with a small offset spatula. Refrigerate for two hours. Garnish with sliced, fresh strawberries.
Recipe Notes

*To find the tart pans I used, click here.