Strawberry Chocolate Chip Shortbread Cookies

Strawberry Chocolate Chip Shortbread Cookies

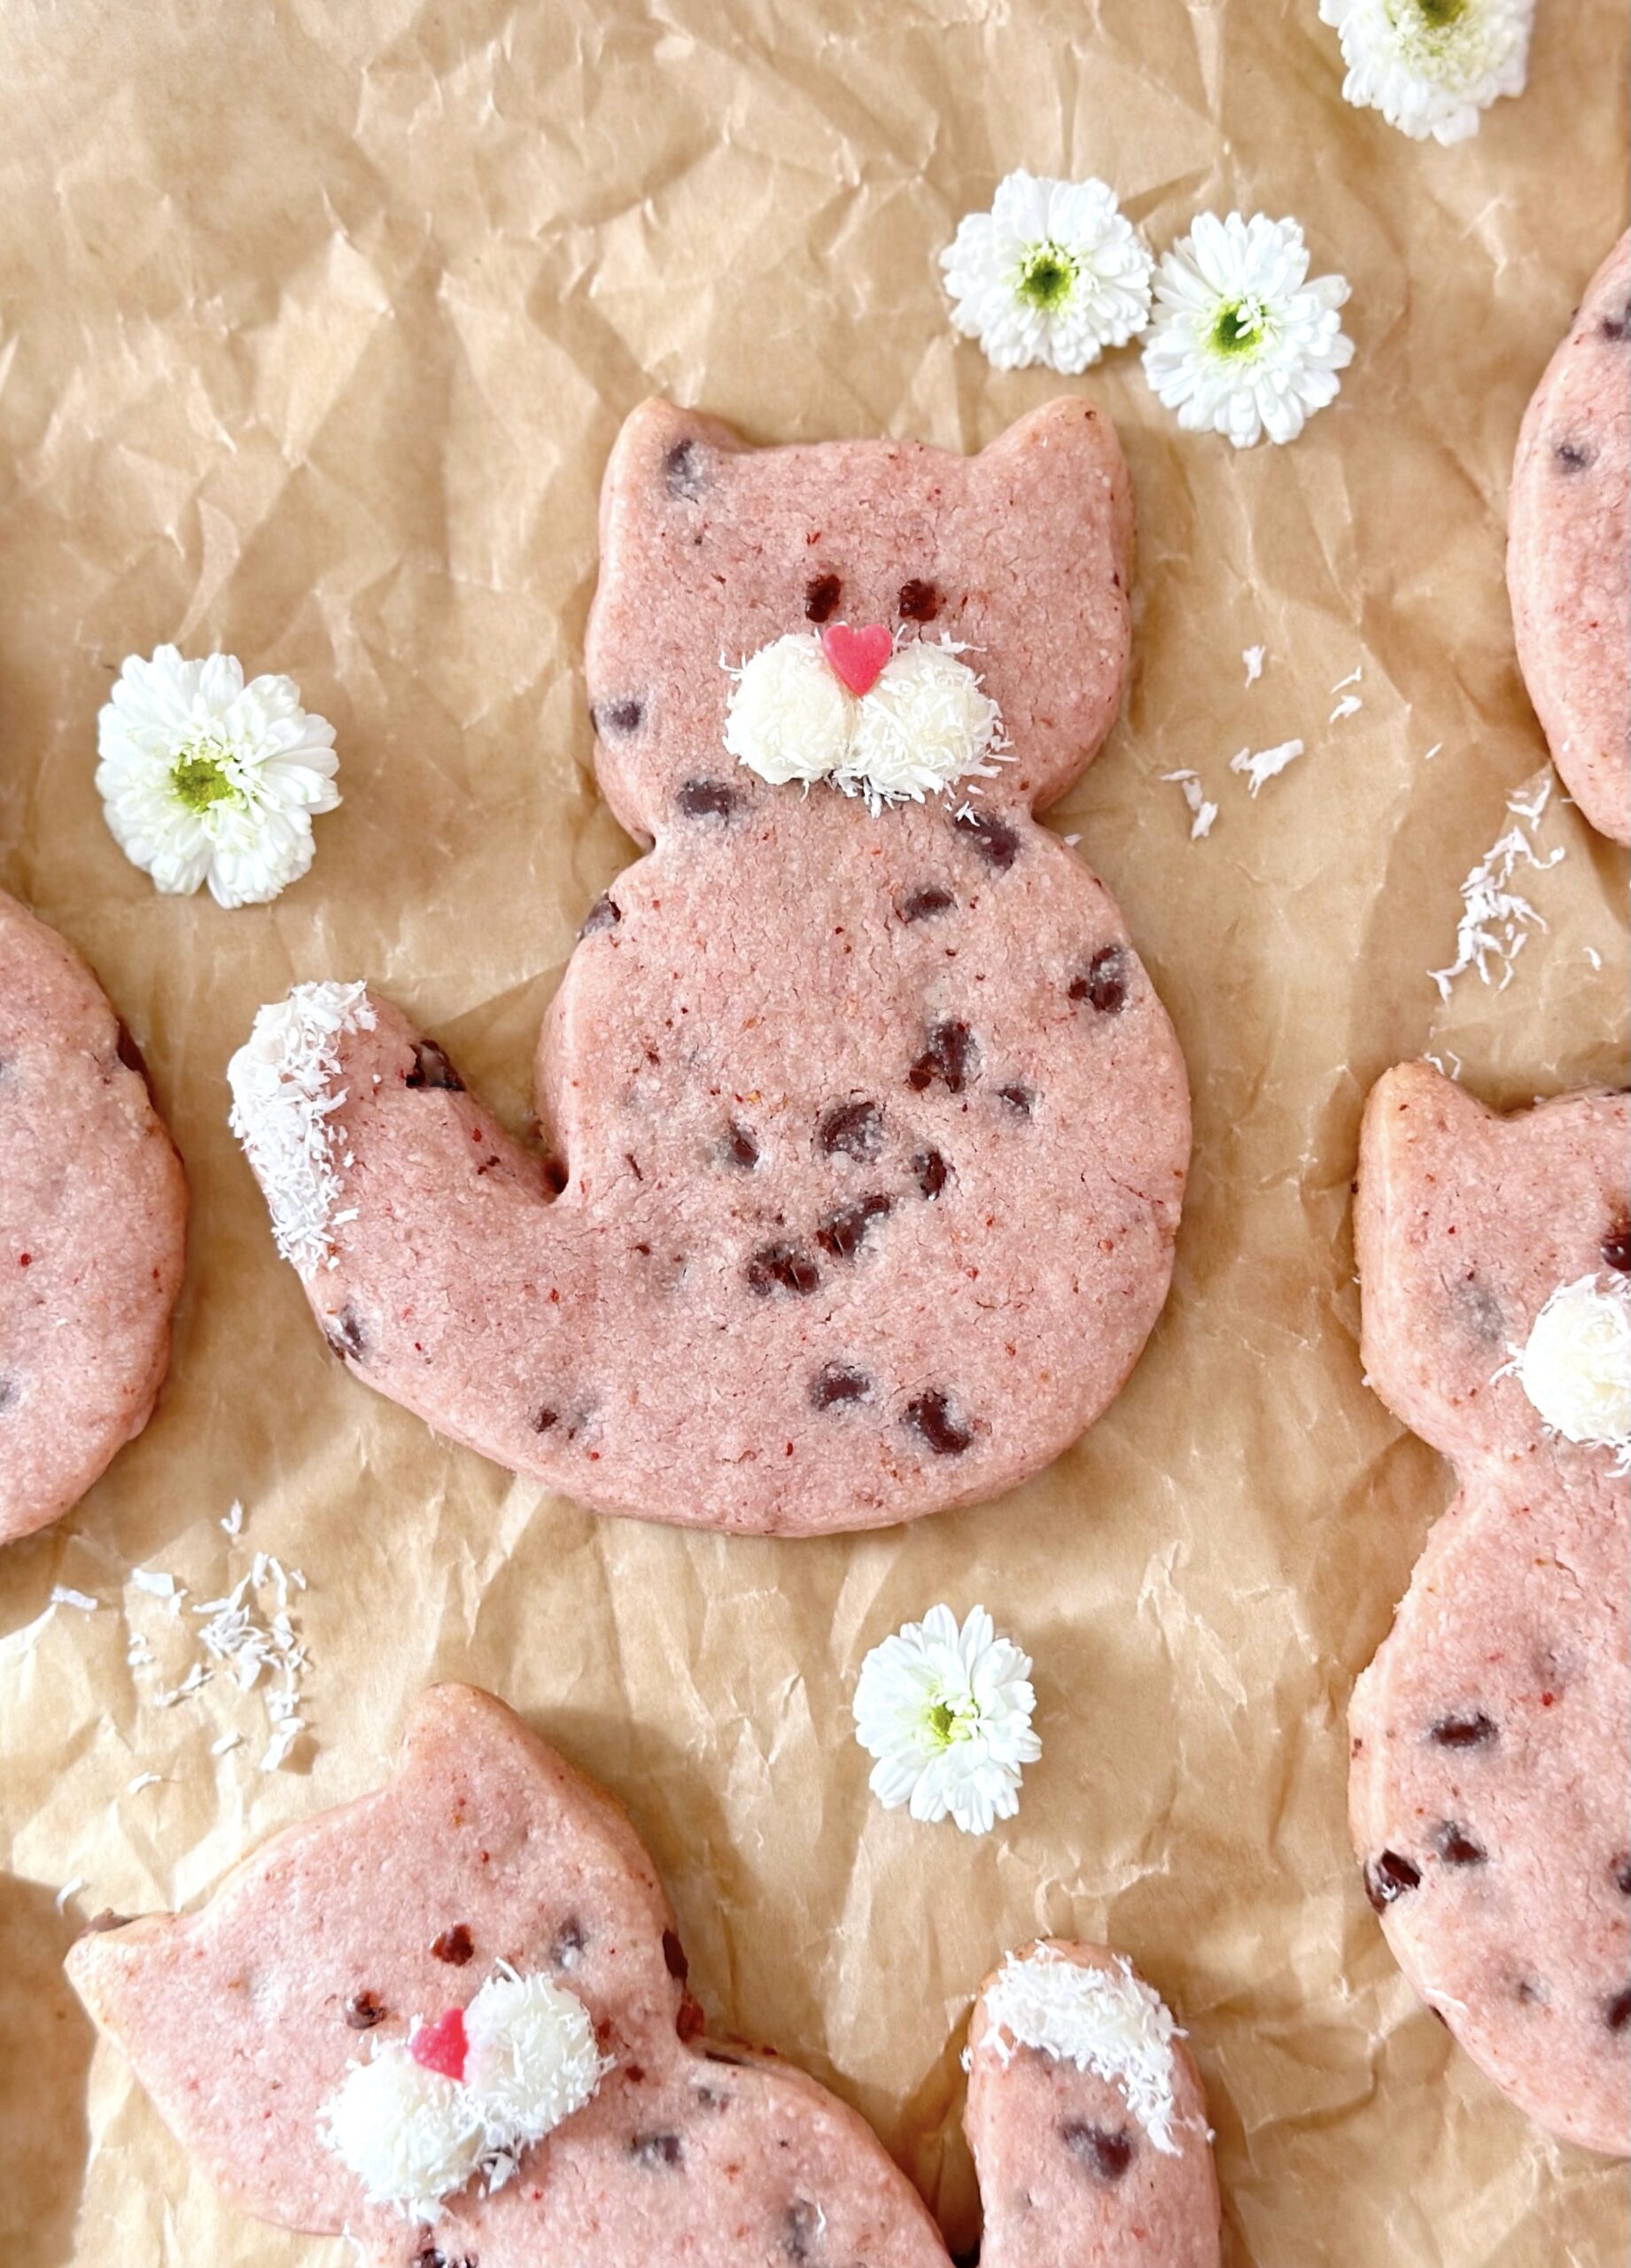
These cute kitties were created two years ago as a special request by someone who grew up playing with Webkinz. Do you remember the Strawberry Cloud Leopard? It was a cute pink Webkinz plushie. The cookies are made of tender, buttery shortbread dough. They get their natural color and flavor from freeze dried strawberries. Mini chocolate chips are added to make the adorable leopard spots. To watch the Strawberry Cloud Leopard Shortbread Cookies Instagram video, click here.

Heart shaped Strawberry Chocolate Chip Shortbread Cookies

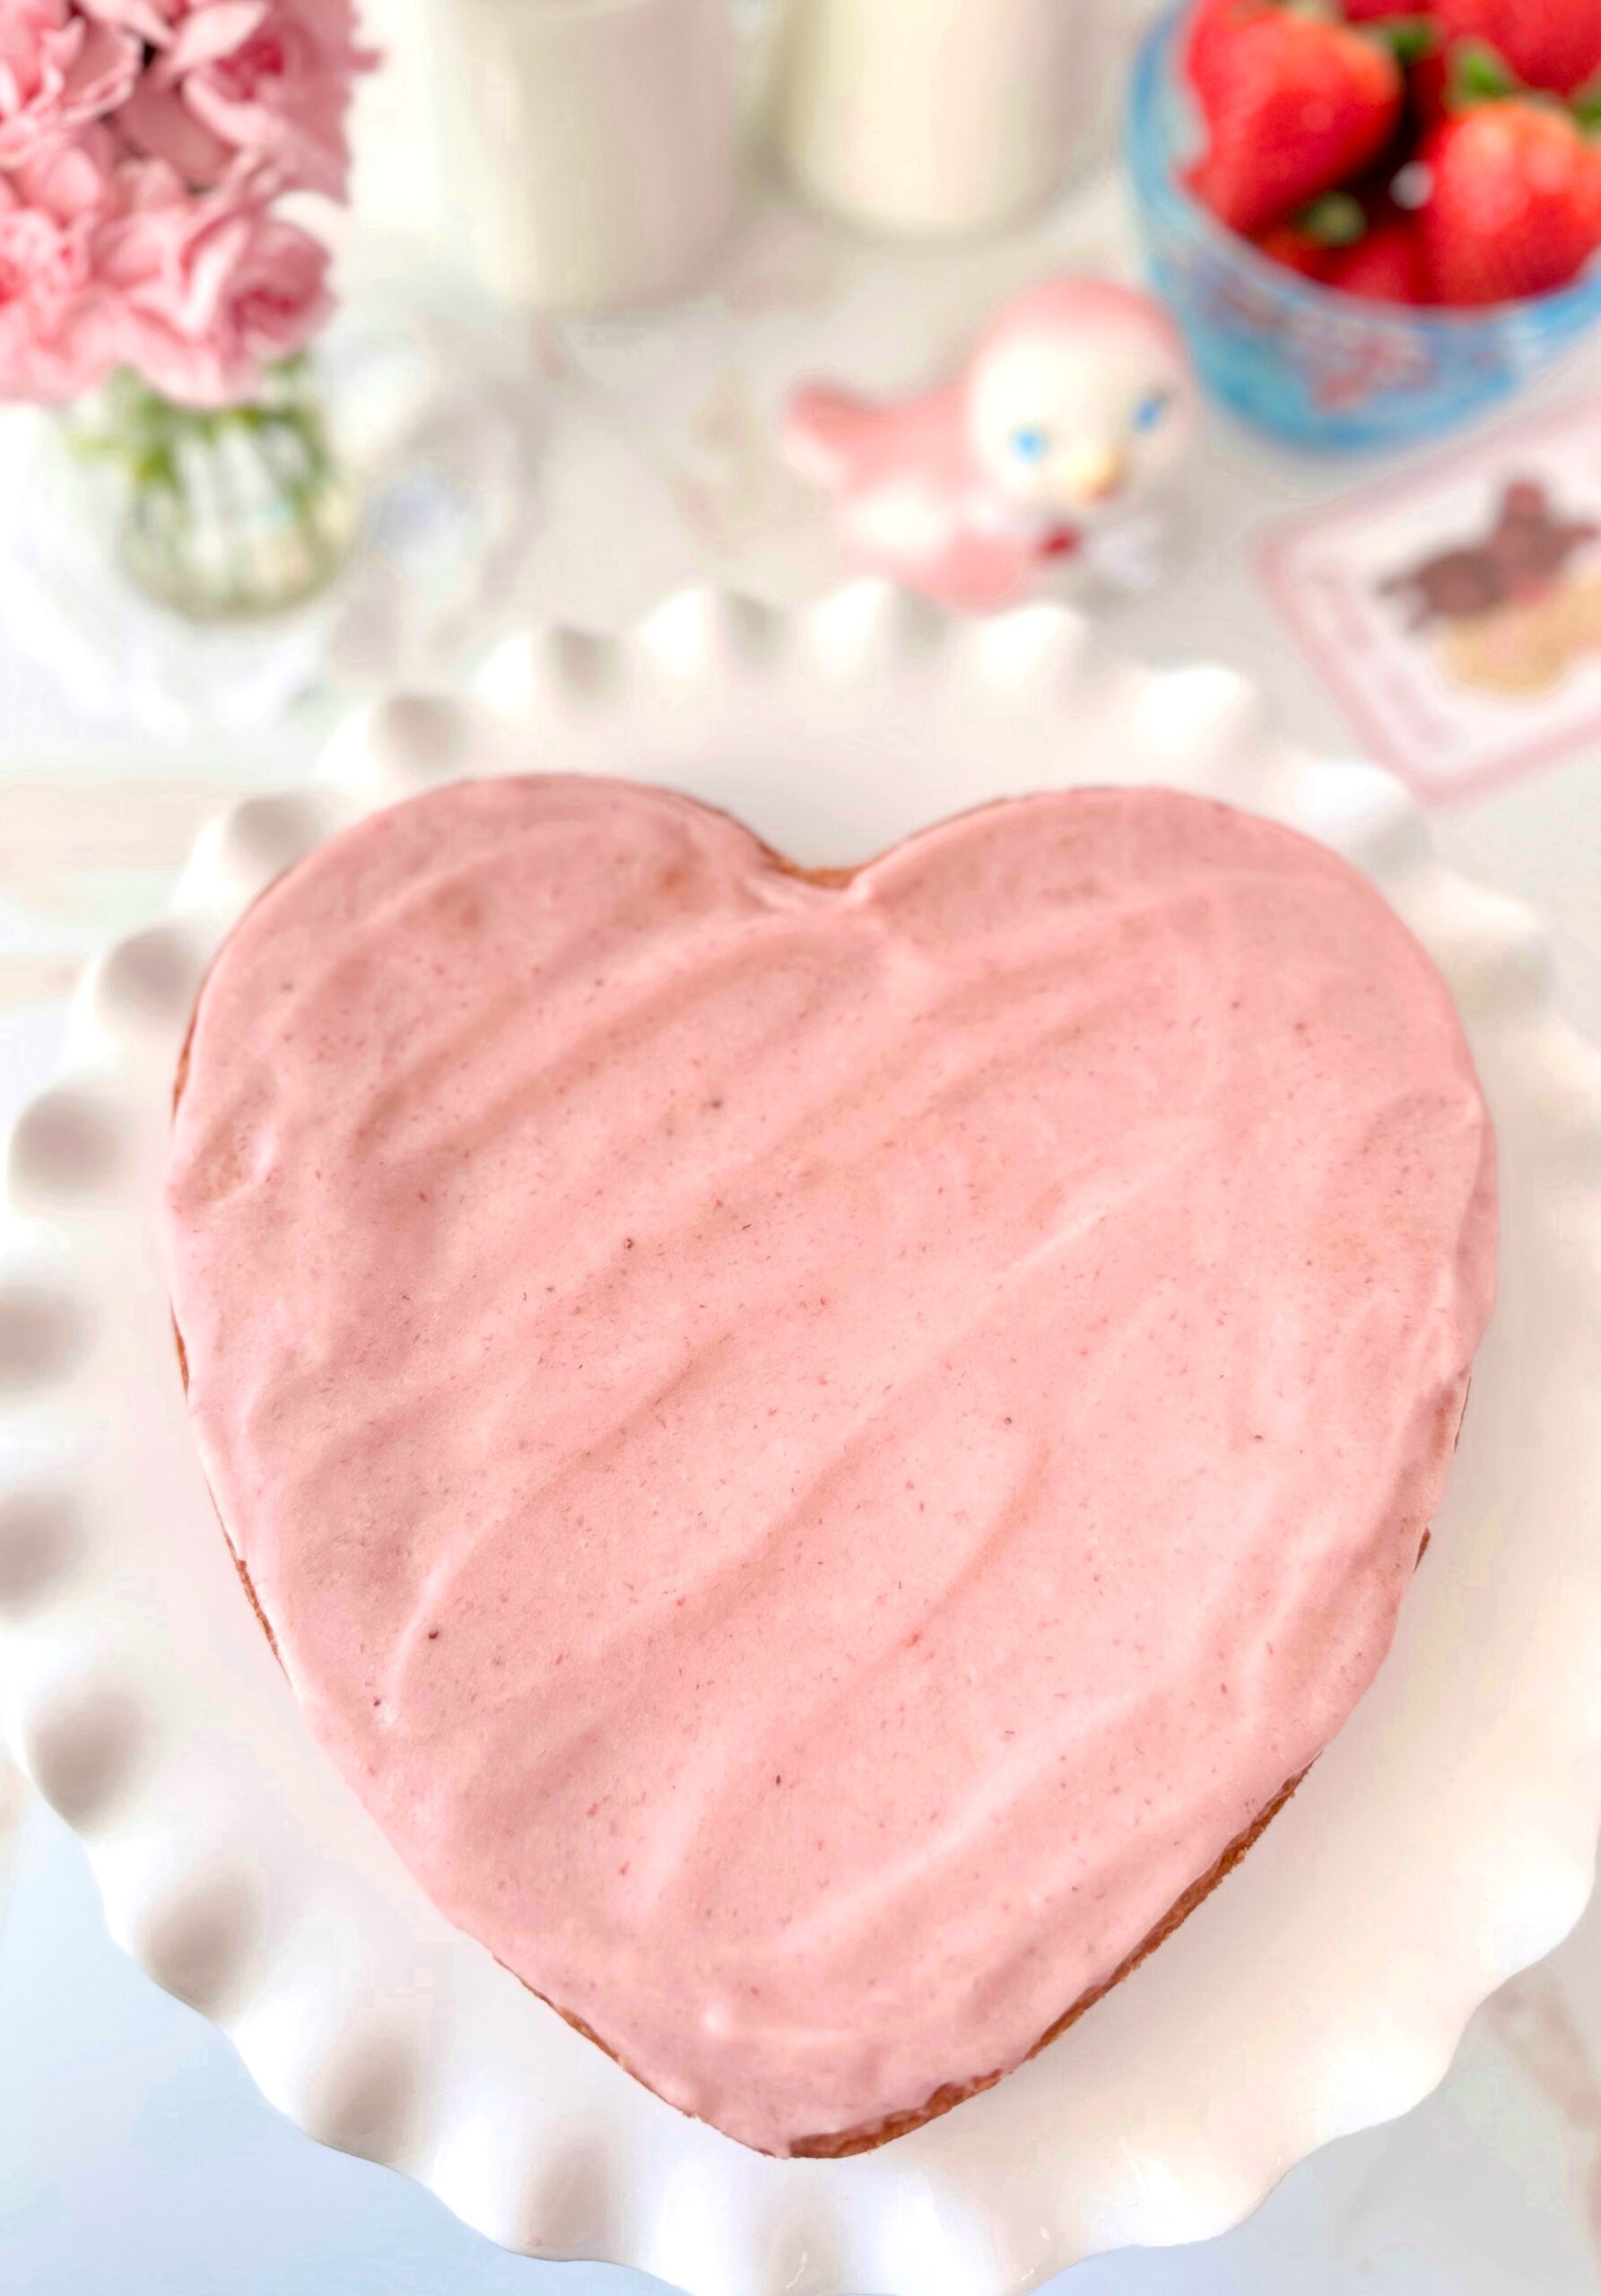
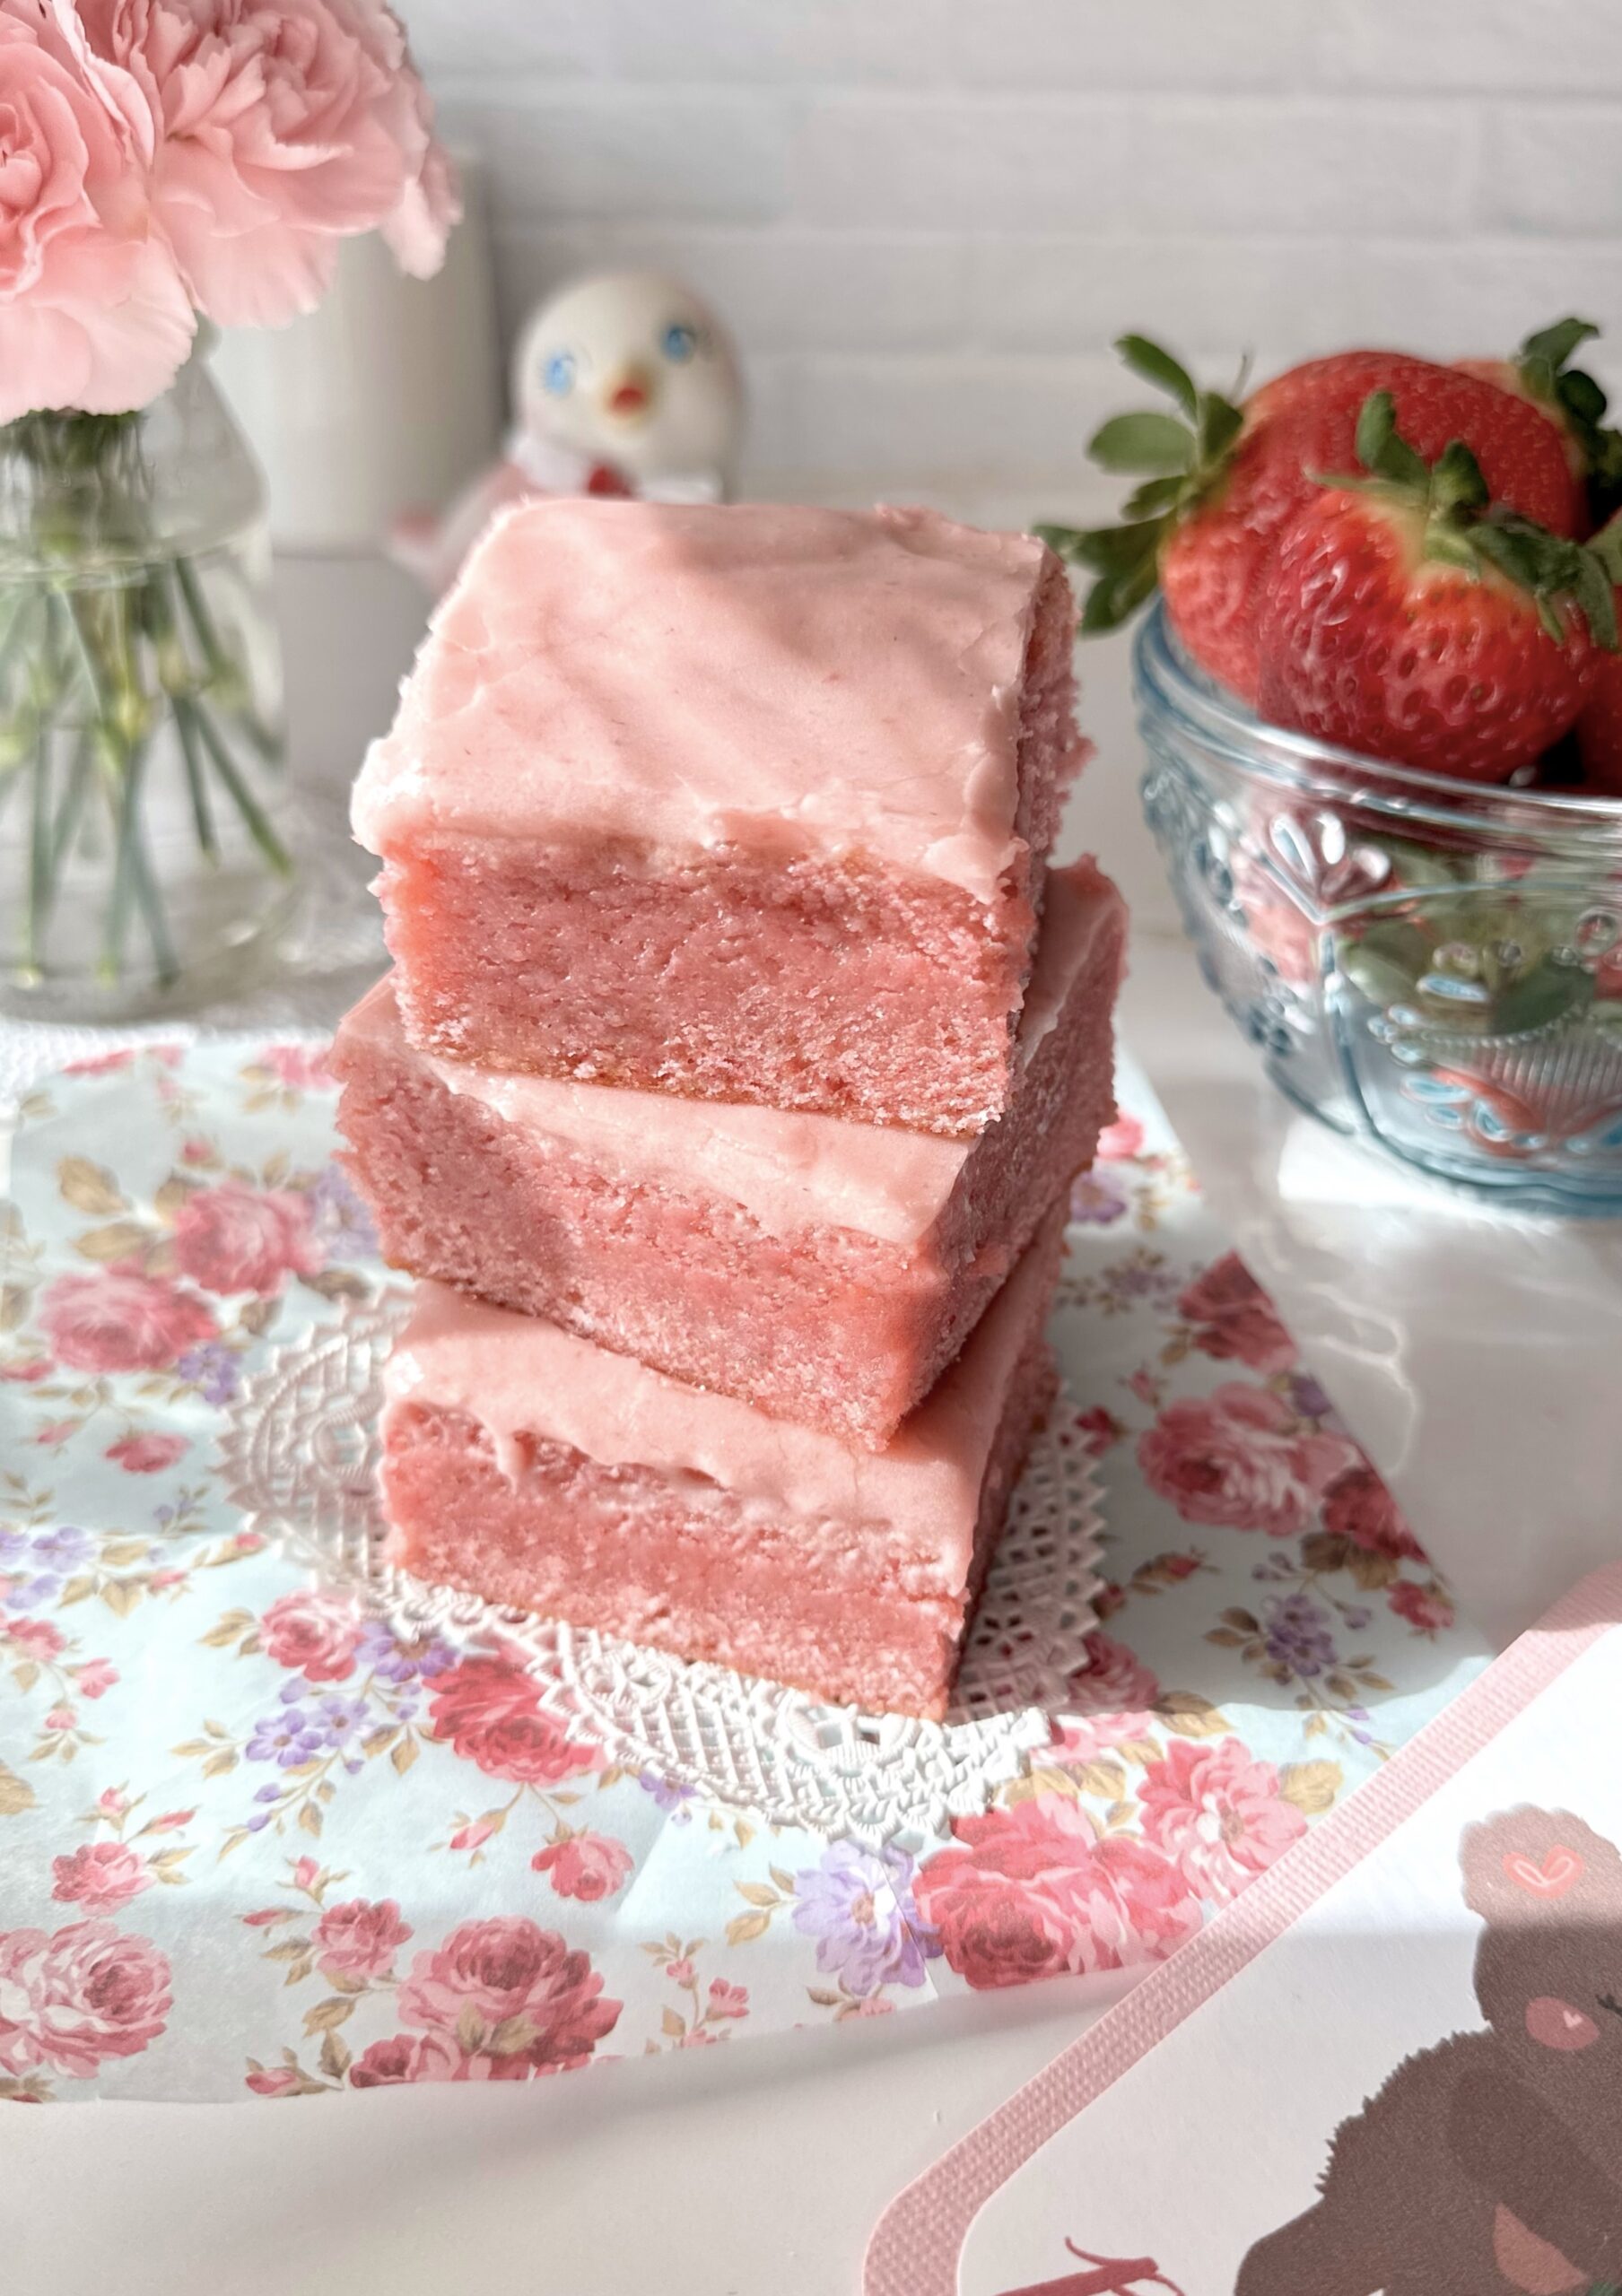
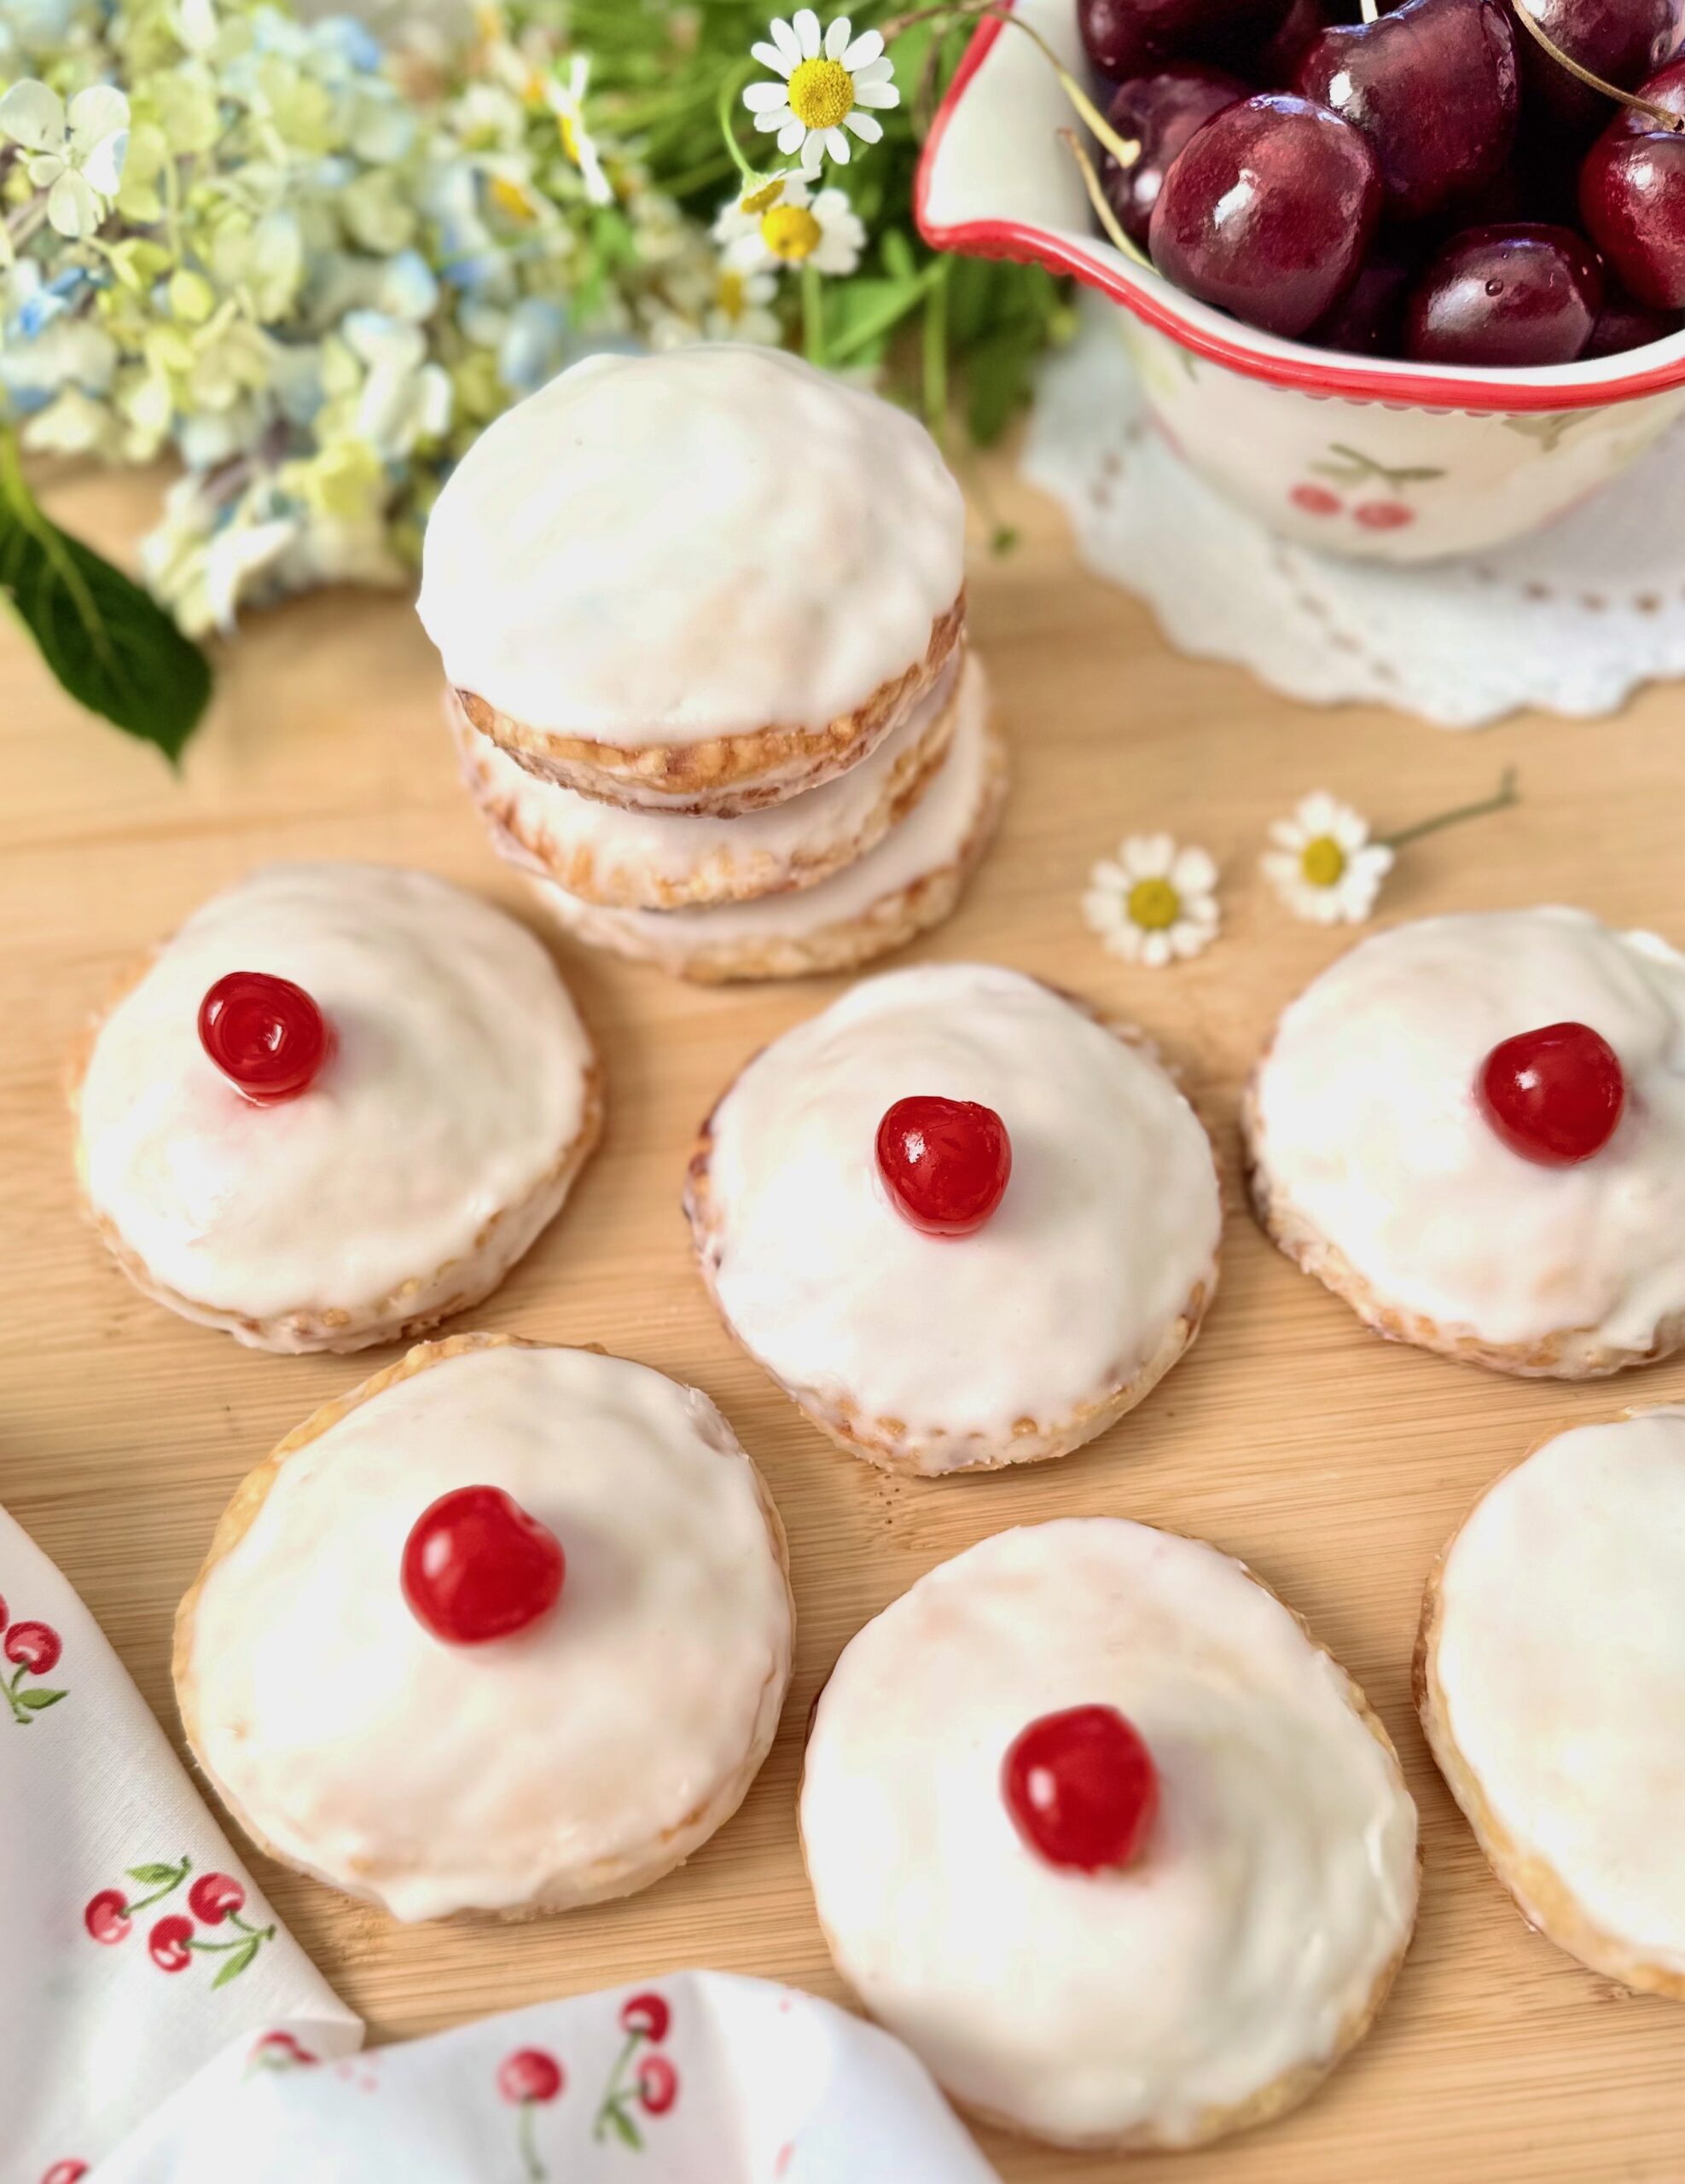
I recently brought back the heart-shaped version of these cookies on social media, just in time for Valentine’s Day. Currently, the price of eggs is very high. These cookies don’t contain eggs, which is so helpful right now. They make a perfect shareable Valentine treat.

Strawberry Chocolate Chip Shortbread Cookies

Tender strawberry shortbread cookies dotted with mini chocolate chips
Course Dessert
Servings 15 4-inch cat cookies or 20 3-inch heart cookies

Ingredients
  

  • 2 cups (255g) all purpose flour, sifted
  • ½ cup (64g) powdered sugar, sifted
  • ½ teaspoon fine sea salt
  • ¾ cup (18g) freeze dried strawberries not dried
  • 1 cup (227g) good quality unsalted butter, softened
  • 1 teaspoon pure vanilla extract
  • 1/3-1/2 cup (57g-85g) mini semi sweet chocolate chips
  • Decor for leopards vanilla buttercream, finely shredded unsweetened coconut, heart candy sprinkles, melted chocolate optional

Instructions
 

  • Process the freeze dried strawberries to a powder with a small food processor or a clean spice grinder. Pass the powder through a sieve to strain out the seeds.
  • In a medium-size bowl, whisk the flour, powdered sugar and salt together.
  • In a large bowl, beat the butter until light and fluffy. Add the freeze dried strawberry powder and vanilla extract. Beat until well combined.
  • Add the flour mixture and beat just until dough comes together. Fold in 1/3 cup (57g) of mini chocolate chips for the leopards or 1/2 cup (85g) of mini chocolate chips for the hearts.
  • Divide the dough into two portions and form into disks. (Alternately, you can roll the dough between two sheets of parchment paper.) Wrap with plastic wrap and refrigerate for at least 1 hour or up to overnight.
  • Line two large cookie sheets with parchment paper. On a lightly floured surface, roll the dough to 1/4-inch thickness. Cut the cookies into your desired shapes. I used a 4-inch tall cat cookie cutter** for the leopards and a 3-inch tall heart cookie cutter for the hearts.
  • Place the cookies about 2-inches apart onto the prepared cookie sheets. To prevent excessive spreading, refrigerate the cut cookies for 30 minutes prior to baking, especially if your dough becomes warm as you work with it.
  • Preheat the oven to 325ºF (165ºC). Bake until the cookies are slightly puffed and the edges barely start to turn light golden brown, about 11-13 minutes. (Smaller cookies will need a shorter baking time.) Let the cookies cool on the cookie sheets for 3-4 minutes then transfer to a cooling rack to cool completely. Decorate as desired.

Notes

To find a cat cookie cutter, click here.
 
Keyword cookies, strawberry chocolate chip

Strawberry Sweetheart Brownies

Strawberry Sweetheart Brownies

At the Brownie Mischief website, all types of brownies are welcome. We all know and love chocolate brownies. But there are other less common brownies in the universe, that deserve to shine too. Let me introduce you to Strawberry Sweetheart Brownies. These lovely pink creations aren’t strawberry cake or strawberry blondies. They contain white chocolate and they’re made with the same baking method as brownies. When you bake chocolate brownies, you want to be careful not to over bake them, to achieve the rich, fudgy texture. The same is true for these strawberry brownies. When you test for doneness, the toothpick should have a few moist crumbs attached to it. If the toothpick is clean, the brownies have baked too long and will likely be a little dry and cakey, although still edible. So make sure to test for doneness well before the end of the baking time!

The baking temperature for this recipe is 325ºF. I noticed that when baking in a heart shaped cake pan, things tend to bake unevenly because of the shape. So I used a lower temperature to help with even baking. If you don’t have an 8-inch heart shaped cake pan, you can also use an 8-inch round cake pan. To find the cake pan I used, click here.

Strawberry Sweetheart Brownies

To watch the Strawberry Sweetheart Brownies Instagram video, click here.

Strawberry Sweetheart Brownies

A heart shaped strawberry brownie made with fresh strawberries topped with strawberry icing.
Course Dessert
Servings 8

Ingredients
  

Strawberry Brownies

  • 7 tablespoons (3 1/2 ounces) unsalted butter, cubed
  • 6 ounces white chocolate, finely chopped
  • ¾ cup (5 1/4 ounces) sugar
  • ¼ teaspoon fine sea salt
  • 1 large egg
  • 2 large egg yolks
  • ½ cup (4 ounces) strawberry purée, divided
  • ½ teaspoon pure vanilla extract
  • ½ teaspoon pure strawberry extract
  • 1 petite pea size drop pink gel food color (optional) I used Americolor Deep Pink**
  • 1 ½ cups (6 3/4 ounces) all purpose flour, sifted

Strawberry Icing

  • ¾ cup (3 ounces) powdered sugar, sifted
  • 1 tablespoon unsalted butter, melted
  • 2 tablespoons reserved strawberry purée
  • ¼ teaspoon pure vanilla extract
  • ¼ teaspoon pure strawberry extract
  • dash fine sea salt

Instructions
 

Strawberry Brownies

  • Preheat oven to 325ºF. Line the bottom of an 8-inch heart shaped cake pan*** with parchment paper. Spray the insides with nonstick spray.
  • In a large heat safe bowl, melt butter and white chocolate together on the stovetop over a pan of barely simmering water or in the microwave for 20 seconds at time, stirring at each interval. White chocolate overheats easily, so be vigilant.
  • Add the sugar and salt to the butter mixture and mix until well combined.
  • Add egg and egg yolks. Whisk until smooth.
  • Pass strawberry purée through a sieve to remove seeds. Set aside 2 tablespoons of strawberry purée for icing. Add remaining purée to batter. Mix until well combined.
  • Add extracts and food color. Mix until combined.
  • Stir in flour until combined, scraping bowl as needed.
  • Transfer batter to prepared pan. Bake until toothpick inserted in center has a few moist crumbs on it, (not batter), about 25-30 minutes. Do not over bake. Let cool in pan. Remove from pan and top with strawberry icing.

Strawberry Icing

  • Whisk all icing ingredients together until smooth and well combined.

Notes

*To make strawberry purée:   Purée clean, hulled and quartered strawberries in a blender or food processor. **To find the food color I used, click here. **To find the heart cake pan I used, click here.
This recipe was updated on January 24th, 2023
Keyword brownies, strawberry

Cinnamon Crumble Scones

The weeks following the winter holidays always feel peaceful to me. The rush is over and it’s time to catch my breath and rest. When it’s chilly and raining outside, I love spending time at home curled up in my coziest fluffy pajama bottoms and fuzzy socks. Give me a blanket, 75 pillows, a warm cup of tea and these Cinnamon Crumble Scones for ultimate coziness!

The crumb topping on these scones will remind you of a cinnamon crumb cake, which makes them extra nostalgic and comforting. The technique of folding the dough over itself gives them a flaky layered texture. For the tenderest scones, make sure not to over work your dough.

To watch Instagram reel, click here. To watch extended TikTok video showing baking process, click here.

Cinnamon Crumble Scones

Course Breakfast, Brunch
Servings 8 scones

Ingredients
  

Crumb Topping

  • ¼ cup (1 1/8 ounces) all purpose flour
  • 1 tablespoon brown sugar
  • 1 tablespoon sugar
  • â…› teaspoon ground cinnamon
  • pinch fine sea salt
  • 1 ½ tablespoons cold, unsalted butter, cubed

Cinnamon Filling

  • ¼ cup (1 3/4 ounces) brown sugar
  • 1 ½ tablespoons unsalted butter, melted
  • 2 teaspoons all purpose flour
  • 1 teaspoon ground cinnamon

Scones

  • 1 ¾ cups (7 7/8 ounces) all purpose flour, sifted
  • 1 tablespoon baking powder
  • ½ teaspoon fine sea salt
  • 7 tablespoons (3 1/2 ounces) cold, unsalted butter, cubed
  • ½ cup cold heavy cream plus extra for tops
  • ¼ cup cold sour cream
  • ½ teaspoon pure vanilla extract

Icing

  • ½ cup (2 ounces) powdered sugar, sifted
  • 1 tablespoon melted butter
  • 1-2 tablespoons whole milk, room temperature
  • ¼ teaspoon pure vanilla extract

Instructions
 

Crumb Topping

  • In a medium bowl, combine flour, brown sugar, sugar cinnamon and salt.
  • Work in butter with your fingertips until it looks like wet sand. Press together to make dime size chunks.
  • Set aside in refrigerator until ready to use.

Cinnamon Filling

  • In a small bowl, mix filling ingredients together until well combined.

Scones

  • Preheat oven to 375ºF. Line a large baking sheet with parchment paper.
  • In a large bowl, whisk together flour, baking powder and salt.
  • Work butter into flour mixture with your fingertips or with a pastry blender until pea sized pieces are formed.
  • In a small bowl, whisk together heavy cream, sour cream and vanilla extract.
  • Stir cream mixture into flour mixture a little at a time until dough comes together. If your dough is too dry add 1-2 more teaspoons of heavy cream.
  • Turn dough out onto a lightly floured surface. Fold dough over onto itself a couple of times.
  • Pat dough into an approximately 9 x 5-inch oval. Spread cinnamon filling on half of the dough to within 1/2-inch from the edges. Fold dough in half bringing short ends together. Press edges to seal.
  • Shape dough into a 7-inch round, about 3/4-inch thickness. Cut into 8 wedges. (Or 6 wedges if you prefer larger scones.)
  • Pinch the pointed tip of the wedges and tuck under to seal. This helps to prevent the top layer from sliding off while baking. Place wedges about 2-inches apart onto prepared baking sheet.
  • Brush tops of scones with heavy cream. Top with crumb topping. Bake until light golden brown, about 18-22 minutes.
  • Transfer scones to a cooling rack to cool. Drizzle with icing.

Icing

  • In a small bowl, whisk together powdered sugar, butter, 1 tablespoon of milk and vanilla. Add additional milk until desired consistency is reached.
Keyword cinnamon, scones

Chocolate Gingerbread

Chocolate Gingerbread

Chocolate gingerbread is gingerbread’s elegant sister. It has the warm spices we love in gingerbread combined with the earthy depth of chocolate. Topping this rich, tender loaf with silky cream cheese frosting is the best possible choice to take it over the top. It’s a lovely loaf to enjoy during the holiday season and beyond. Enjoy it with a hot drink for a cozy, comforting winter treat.

Make sure to check out my method for making sugared cranberries below. No raw eggs required!

Chocolate Gingerbread

Course Dessert
Servings 1 loaf

Ingredients
  

Chocolate Gingerbread

  • 1 ¼ cups (156g) all purpose flour, sifted plus extra for dusting the pan
  • â…“ cup (28g) Dutch process unsweetened cocoa powder, sifted plus extra for dusting the pan
  • 2 teaspoons ground cinnamon
  • 2 teaspoons ground ginger
  • 1 teaspoon baking powder
  • ½ teaspoon baking soda
  • ½ teaspoon fine sea salt
  • ¼ teaspoon ground nutmeg, preferably freshly ground
  • â…› teaspoon ground cloves
  • 1 cup (200g) packed dark brown sugar
  • ½ cup (115ml) vegetable oil or neutral oil of your choice
  • 2 large eggs, room temperature
  • 1 teaspoon pure vanilla extract
  • ½ cup (113g) sour cream, room temperature
  • ½ cup (118ml) whole milk, room temperature

Cream Cheese Frosting

  • ¼ cup (57g) cream cheese, softened
  • 2 tablespoons (28g) unsalted butter, softened
  • 2 cups (234g) powdered sugar, sifted
  • 2-3 tablespoons (30-45ml) whole milk, room temperature
  • ¼ teaspoon pure vanilla extract
  • 1 pinch fine sea salt

Instructions
 

Chocolate Gingerbread

  • Preheat oven go 350ºF (180ºC). Line the bottom of a 9 x 5-inch loaf pan with parchment paper. Grease the insides and dust with a mixture of equal parts flour and cocoa powder.
  • In a medium-size bowl, whisk together the flour, cocoa powder, cinnamon, ginger, baking powder, baking soda, salt, nutmeg, and cloves until well blended
  • In a large bowl, beat the brown sugar, oil, eggs and vanilla together until smooth.
  • In a small bowl, whisk together the sour cream and milk.
  • Add flour the mixture to the batter in two additions, alternating with the milk mixture, beating just until combined.
  • Transfer the batter to the prepared pan. Bake until a toothpick inserted into the center comes out clean, about 38-45 minutes.
  • Cool the loaf in the pan for 10 minutes, then turn the loaf out onto a cooling rack to cool completely. Frost with cream cheese frosting.

Cream Cheese Frosting

  • In a medium bowl, beat the butter and cream cheese together until smooth.
  • Add the powdered sugar, 2 tablespoons (30 ml) of milk, the vanilla and salt. Beat until smooth. Add additional milk, if needed, until your desired consistency is reached.

Notes

To make sugared cranberries and rosemary for garnish:  Mix 1 teaspoon of meringue powder* with 1 tablespoon of water. Place 1 cup of fresh cranberries in a bowl and coat them in the meringue powder mixture. Drain any excess liquid then coat the cranberries with granulated sugar.  Place them on a parchment lined baking sheet to dry at room temperature for at least 1 hour. Use the same method for sprigs of rosemary.
*To find meringue powder, click here.
Keyword cake, chocolate gingerbread

Grandma’s Apple Crumb Cake

Grandma's Apple Crumb Cake

I remember my grandma making coffee cakes and sweet muffins for breakfast, along with eggs, sausages, hot coffee and a big pitcher of milk on the table. Why do most of our grandmothers cook and bake so well? Because they’ve had decades of trial and error to perfect their recipes, tweaking them here and there until they’re approved and loved by their families, neighbors and friends. This cake has had its share of trial and error. She has earned her place as a well-loved, delicious, beautiful queen of coffee cakes.

A classic coffee cake is usually a subtly sweet cake with cinnamon, crumb topping and maybe some icing. They’re called coffee cakes because they go so well with a cup of coffee, not necessarily because they contain coffee. This Apple Crumb Cake has the elements of a classic coffee cake, but so much better! The cake is fluffy and soft, the crumb topping is chunky and plentiful, and the apples are perfectly tender. And don’t get me started about the icing!

Grandma's Apple Crumb Cake

Tender vanilla cake with generous crumb topping and vanilla icing
Course Breakfast, Brunch, Dessert
Servings 8 servings

Ingredients
  

Apples

  • 1 tablespoon (14g) butter
  • 3 cups (340g) chopped apples (1/2-inch pieces) Use any combination of your favorite baking apples.
  • 2 tablespoons (25g) sugar
  • ½ teaspoon ground cinnamon

Crumb Topping

  • 1 cup (128g) all purpose flour
  • â…“ cup (67g) brown sugar
  • 3 tablespoons (38g) sugar
  • ¼ teaspoon ground cinnamon
  • Scant ¼ teaspoon fine sea salt
  • 6 tablespoons (85g) cold, unsalted butter, cubed

Cake

  • 1 â…” cups (213g) all purpose flour, sifted
  • 2 teaspoons baking powder
  • ½ teaspoon fine sea salt
  • ½ cup (113g) unsalted butter, softened
  • 1 cup (200g) sugar
  • 2 large eggs, room temperature
  • 1 ½ teaspoons pure vanilla extract
  • ½ cup (118ml) whole milk, room temperature
  • â…“ cup (75g) sour cream, room temperature

Icing

  • 2 cups (234g) powdered sugar, sifted
  • 2 tablespoons (28g) unsalted butter, melted
  • ½ teaspoon vanilla bean paste or pure vanilla extract
  • 1 pinch fine sea salt
  • 3-4 tablespoons (45-60ml) half & half cream, room temperature

Instructions
 

Apples

  • In a large skillet, melt the butter over medium heat. Add the apples, sugar and cinnamon.
  • Cook, stirring occasionally, until the apples are tender, about 7-10 minutes. Transfer the apples to a bowl and let cool to room temperature.

Crumb Topping

  • In a medium bowl, mix the flour, brown sugar, sugar, cinnamon and salt.
  • Work in the butter with your fingertips until the mixture looks like wet sand with no large pieces of butter remaining. Press together to make 1/2-inch chunks.

Cake

  • Preheat the oven to 325ºF (165ºC). Line a 9-inch cake pan with a removable bottom*, or a 9-inch springform pan, with parchment paper. Wrap the bottom of the cake pan with aluminum foil and place pan on a baking sheet.
  • In a medium bowl, whisk together the flour, baking powder and salt until well blended.
  • In a large bowl, cream the butter and sugar, with an electric mixer on medium speed, until light and fluffy. Beat the eggs and vanilla into the butter mixture in three separate addition, making sure each addition is incorporated before adding the next.
  • In a small bowl, whisk the milk and sour cream together. On low speed, beat the flour mixture into batter in three additions, alternating with milk mixture. Mix just until combined.
  • Transfer the batter to the prepared cake pan. Smooth the top with a spatula. Drain any excess liquid from the apples. Top the cake batter evenly with apples, then the topping mixture.
  • Bake until a toothpick inserted into the center of the cake comes out clean, about 50-60 minutes. Cool the cake in pan for 10 minutes. Remove the cake from pan and transfer it to a cooling rack to cool completely.

Icing

  • In a medium bowl, whisk together the powdered sugar, melted butter, vanilla, salt and 2 tablespoons (30ml) of half & half. Add additional half & half until the desired consistency is reached. Drizzle over the cooled cake.

Notes

*To find the cake pan I used, click here.
Keyword apple, cake

Melt-in-Your-Mouth Peanut Butter Cookie Sandwiches

Soft Peanut Butter Sandwich Cookies

I never imagined that I’d ever be posting a peanut butter cookie recipe. There are already crunchy peanut butter cookies, soft ones, chewy ones, and those peanut shaped store bought ones out there. I mean, do we even need another peanut butter cookie recipe? After I tasted this one, it’s a resounding YES! These soft, tender cookies combined with a silky, smooth filling are a new peanut butter experience that I had to share.

The key to getting the soft texture in the cookie, without being dry, is cake flour. So don’t substitute it, because it’s vital to achieve the correct texture. Make sure to weigh your flour for the most accurate results. The second important ingredient is heavy whipping cream. Just a little added to the filling gives it a luxurious, silky texture.

This recipe makes sixteen medium size peanut butter cookies, which will give you eight sandwiches. If you want more, you can double the recipe or make the cookies smaller. Smaller cookies will have a shorter baking time.

Melt-in-Your-Mouth Peanut Butter Cookie Sandwiches

Soft peanut butter cookies sandwiched with silky peanut butter filling
Course Dessert
Servings 8 cookie sandwiches

Ingredients
  

Peanut Butter Cookies

  • 1 cup (128g) all purpose flour, sifted
  • ½ cup (57g) cake flour, sifted
  • ½ teaspoon baking soda
  • ½ teaspoon fine sea salt
  • ¾ cup (190g) creamy peanut butter
  • ¼ cup (57g) unsalted butter, softened
  • ¼ cup (47g) vegetable shortening
  • ½ cup (100g) packed brown sugar
  • ½ cup (100g) granulated sugar, divided
  • 1 large egg
  • ½ teaspoon pure vanilla extract

Peanut Butter Filling

  • ½ cup (127g) creamy peanut butter, room temperature
  • 2 tablespoons (28g) unsalted butter, softened
  • ½ cup (60g) powdered sugar, sifted
  • 2 ½ tablespoons (37ml) heavy whipping cream, room temperature
  • ¼ teaspoon pure vanilla extract
  • 1 pinch fine sea salt

Instructions
 

Peanut Butter Cookies

  • Preheat the oven to 350ºF (180ºC). Line two large baking sheets with parchment paper.
  • In a medium-sized bowl, whisk together the all purpose flour, cake flour, baking soda and salt until well blended.
  • In a large bowl, beat the peanut butter, butter and shortening, with an electric mixer on low speed, until smooth. Beat in the egg and vanilla, on medium speed, until well combined.
  • Set aside 1/4 cup (50g) of the granulated sugar. Add the remaining granulate sugar and the brown sugar to the peanut butter mixture. Beat on medium speed, until light and fluffy. Add the flour mixture and beat on low speed, just until combined.
  • Roll the dough into 1 1/2-inch (3.8cm) diameter balls (about 1 1/4 oz or 35g each). Roll the dough balls in the reserved granulated sugar.
  • Place the dough balls 3 inches apart onto the prepared baking sheets. Flatten with a fork, making a criss cross pattern. Bake until the cookies are puffy and start to crack around the edges, about 9-11 minutes.
  • Let the cookies cool on baking sheet for 1 minute, then carefully transfer them to a cooling rack. The cookies will be fragile, but they will firm up as they cool.
  • Place a spoonful of filling on the bottoms of half of the cooled cookies. Top with remaining the remaining cookies.

Peanut Butter Filling

  • In medium-sized bowl, beat the peanut butter and butter together with an electric mixer until smooth and well blended. Beat in the powdered sugar, heavy cream, vanilla and salt until smooth.

Notes

To find my favorite cookie sheet, click here.
Keyword cookies, peanut butter

Blueberry Crumble Bars

Crumb bars with fruit are classic, rustic bars that are easy to make and so delicious. These Blueberry Crumble Bars happen to be the best I’ve ever tasted! With a tender, almost addicting shortbread crust, the filling is perfectly sweet and blanketed with plenty of crisp crumb topping. They’re perfect to pack in a lunch, take on a family picnic or as an addition to a backyard cookout. Everyone who tries these comes back for seconds!


Blueberry Crumble Bars

by Mari Vasseur
The best Blueberry Crumble Bars ever! Tender shortbread crust topped with sweet blueberry filling and generous crumb topping
Course Dessert
Servings 12

Ingredients
  

Crumb Topping

  • 1 cup (128g) all purpose flour
  • â…“ cup (66g) packed brown sugar
  • 3 tablespoons (38g) granulated sugar
  • ¼ teaspoon cinnamon
  • ¼ teaspoon fine sea salt
  • 6 tablespoons cold, unsalted butter, cubed

Crust

  • 1 ½ cups (191g) all purpose flour, sifted
  • ¼ cup plus 2 tablespoons (42g) powdered sugar, sifted plus extra for sprinkling on top
  • 1 teaspoon baking powder
  • ¼ teaspoon fine sea salt
  • ¾ cup (170g) unsalted butter, room temperature

Blueberry Filling

  • 3 ½ cups(454-510g) blueberries
  • 1 teaspoon lemon juice
  • â…” cup (131g) granulated sugar
  • 2 teaspoons cornstarch

Instructions
 

Crumb Topping

  • In a medium-sized bowl, whisk together the flour, brown sugar, granulated sugar, cinnamon and salt until well combined. Work the butter into the flour mixture with your fingertips, until it looks sandy, with no large pieces of butter remaining. Press the mixture together to form chunks. Set aside in the refrigerator until ready to use.

Crust

  • Preheat the oven to 350ºF (180ºC). Line an 8-inch square baking pan with parchment paper, overlapping the ends a couple of inches. These will be handles to lift the bars out of the pan.
  • In a medium-sized bowl, whisk together the flour, powdered sugar, baking powder and salt until well combined. In a large bowl, beat the butter until smooth. Add the flour mixture and beat just until combined.
  • Press the dough evenly into the baking pan. Bake until the surface looks light golden brown, about 15-20 more minutes. Meanwhile, prepare the filling.

Blueberry Filling

  • In a large bowl, toss the blueberries with the lemon juice. Mix in the sugar and cornstarch. Pour the blueberry mixture over the warm crust. Top evenly with the crumb topping. Return the pan to the oven and continue baking until the topping is golden brown and the filling starts to bubble, about 28-33 minutes. Let cool completely before removing the bars from the pan. Sprinkle with powdered sugar.
Keyword bars, blueberry crumble

Maple Brown Sugar Madeleines

Maple Brown Sugar Madeleines

I had tea with with a well mannered hedgehog once on a crisp fall day. He brought me a tiny bouquet of flowers, which I placed in a small jam jar filled with water. He said the delightful maple scent of these Madeleines reminded him of his time in the woods, as a young hoglet. When he had his fill of the delicate little cakes, I wrapped some in a tea towel for his journey home.

As cooler weather approaches, I’m always looking for a little something to enjoy with a warm drink and a good book. Although traditional Madeleines typically remind me of spring, these Maple Brown Sugar Madeleines have a cozy fall feeling. They go well with coffee, tea or hot cocoa. If you want to make them for a friend, make the batter and keep it in the refrigerator. Bake the Madeleines right before your friend arrives.

I used a spherical Madeleine pan to make these maple scented little cakes. The Madeleines made in this pan are a little thicker and fluffier than those made in a traditional oval pan. To find the Madeleine pan I used, click here. You can certainly use a traditional pan if you prefer. Keep in mind that the baking time will be shorter and you will end up with about twice as many.

Maple Brown Sugar Madeleines

Course Dessert
Cuisine French
Servings 12

Ingredients
  

Maple Brown Sugar Madeleines

  • 1 cup (4 oz or 113g) cake flour
  • ½ teaspoon baking powder
  • ¼ teaspoon fine sea salt
  • 3 large eggs
  • ½ cup (3 1/2 oz or 100g) packed brown sugar
  • 1 ½ teaspoons pure maple extract or natural maple flavoring
  • ½ cup (4 oz or 113g) unsalted butter, melted and cooled
  • 1 tablespoon pure maple syrup

Maple Icing

  • 1 cup (4 1/4 oz or 120g) powdered sugar, sifted
  • 1 tablespoon unsalted butter, melted
  • ¼ teaspoon pure maple extract or natural maple flavoring
  • 1-2 tablespoons whole milk
  • 1 pinch fine sea salt
  • ¼ cup (1 oz or 28g) finely chopped, toasted pecans or walnuts

Instructions
 

Maple Brown Sugar Madeleines

  • In a medium bowl, sift together the flour, baking powder and salt.
  • In a large bowl, beat the eggs, brown sugar and maple extract, on medium-high speed with an electric mixer, until the batter is voluminous, light in color and holds its shape when you lift the beater, about 8-10 minutes.
  • Combine the melted butter and maple syrup.
  • Gently fold the the flour mixture into the egg mixture in three additions, alternating with the melted butter. Fold just until combined, being careful not to deflate the batter. Make sure to scrape the bottom of the bowl to ensure that all of the flour is combined.
  • Cover and refrigerate for 30-45 minutes.
  • Preheat the oven to 350ºF (177ºC). Grease a spherical Madeleine pan* with nonstick spray or melted butter. Dust the pan with a light coating of flour. Tap out the excess flour.
  • Fill the wells of the Madeleine pan with batter 3/4 full, about 2 tablespoons each, using a scoop**or a spoon. (If you're using a traditional oval Madeleine pan, fill 3/4 full, about a generous tablespoon of batter in each.)
  • Bake until golden brown around the edges and puffed in the center, about 10-12 minutes. (Baking time for oval Madeleine pan will be about 7-8 minutes.) Do not over bake.
  • Cool in the pan for one minute then turn Madeleines out onto a cooling rack to cool completely.

Maple Icing

  • In a small bowl, whisk together the powdered sugar, melted butter, maple extract and one tablespoon of milk. Add additional milk as needed until your desired consistency is reached, Stir in a pinch of salt to taste.
  • Brush icing onto the Madeleines with a pastry brush. Apply nuts to the edges of Madeleines. Serve immediately. Madeleines are best served the day they're baked.

Notes

*To find the Madeleine pan I used, click here.
**To find the scoop I used, click here.
Keyword madeleines, maple

Perfect Pumpkin Cake

Pumpkin Cake

This Perfect Pumpkin cake brings back memories. The tender, moist texture reminds me of the pumpkin cake bars I used to make in junior high. I got the treasured bar recipe from an old children’s cookbook. I lent the cookbook to a neighbor and never saw the book or the recipe again. Through trial and error, I came up with this perfectly spiced, soft fluffy cake, which I think is even better! It’s so delicious it doesn’t need frosting, but the classic pairing with cream cheese frosting takes it over the top.

Perfect Pumpkin Cake

Course Dessert
Servings 8

Ingredients
  

Pumpkin Cake

  • 1 cup (128g) all purpose flour, sifted
  • 1 teaspoon baking powder
  • ½ teaspoon baking soda
  • ½ teaspoon fine sea salt
  • 1 teaspoon ground cinnamon
  • ½ teaspoon ground ginger
  • ¼ teaspoon ground nutmeg, preferably freshly ground
  • 1 cup (200g) sugar
  • â…” cup (150ml) avocado oil or neutral oil of your choice
  • 2 large eggs
  • 1 teaspoon pure vanilla extract
  • 1 cup (227g) pure pumpkin purée Not pie filling

Cream Cheese Frosting

  • 6 tablespoons (85g) cream cheese, softened
  • 6 tablespoons (85g) unsalted butter, softened
  • ¾ teaspoon vanilla bean paste or pure vanilla extract
  • 1 pinch fine sea salt
  • 2 cups (240g) powdered sugar, sifted
  • 1-3 teaspoons heavy cream, room temperature

Instructions
 

Pumpkin Cake

  • Preheat the oven to 325ºF (165ºC). Line the bottom of an 8-inch round cake pan* with parchment paper**. Grease and flour the insides.
  • In a medium-size bowl, whisk together the flour, baking powder, baking soda, salt, cinnamon, ginger and nutmeg until well combined.
  • In a large bowl, beat the sugar, oil, eggs, vanilla and pumpkin purée with an electric mixer or by hand with a whisk, until smooth and well blended. Stir in the flour mixture, just until combined.
  • Transfer the batter to the prepared cake pan. Bake until a toothpick inserted into the center of the cake comes out clean, about 38-43 minutes. Cool the cake in pan for 10 minutes. Remove the cake from pan and transfer to a cooling rack.

Cream Cheese Frosting

  • In a large bowl, beat the cream cheese and butter together with an electric mixer, until creamy. Beat in the vanilla extract and salt until well combined. On low speed, beat in the powdered sugar. Keeping the mixture at low speed, beat in the heavy cream a little at a time until your desired consistency is reached. Stir with a spatula to smooth out any bubbles.

Notes

*To find the cake pan I used, click here.
**To find the parchment rounds I used, click here.
Keyword cake, pumpkin

Peaches and Cream Loaf Cake

Every peach season, I get excited by the abundance of peaches at my local farmers market and I end up buying way too many. So if you’re like me and you have ripe peaches sitting on your counter, turn them into peach purée. I love adding peach purée to my iced tea or adding it to desserts like this moist, tender cake. This is one of my most popular cake recipes on social media, and for good reason. It does not disappoint! To watch the TikTok video, click here.

Peaches and Cream Loaf Cake

Moist, tender peach cake with peach cream cheese icing
Course Breakfast, Brunch, Dessert
Servings 1 loaf

Ingredients
  

Cake

  • 1 ¼ cups (5 1/2 ounces) all purpose flour, sifted
  • 1 teaspoon baking powder
  • ½ teaspoon baking soda
  • ½ teaspoon fine sea salt
  • ½ teaspoon ground cinnamon
  • â…› teaspoon ground nutmeg, preferably freshly ground
  • 1 cup (7 ounces) granulated sugar
  • â…” cup vegetable oil or neutral oil of your choice
  • 2 large eggs
  • 1 cup peach purée, divided (About 1 1/3 cups peeled, sliced peaches puréed in a food processor or blender)
  • ½ teaspoon pure vanilla extract
  • â…› teaspoon pure almond extract

Icing

  • 2 tablespoons cream cheese, softened
  • 1 tablespoon unsalted butter, softened
  • 1 cup (4 ounces) powdered sugar, sifted
  • ¼ teaspoon pure vanilla extract
  • pinch fine sea salt
  • 1-2 tablespoons reserved peach puree
  • 2 tablespoons diced peaches

Instructions
 

Cake

  • Preheat oven to 350ºF. Line the bottom of an 8 x 4-inch loaf pan with parchment paper. Grease and flour the sides.
  • In a medium bowl, whisk together flour, baking powder, baking soda, salt, cinnamon and nutmeg.
  • Set aside 2 tablespoons peach purée for icing.
  • In a large bowl, beat sugar, oil, eggs, remaining peach purée and extracts until smooth.
  • Add flour mixture and beat just until combined.
  • Transfer batter to prepared baking pan. Bake until toothpick inserted into center comes out clean, about 38-45 minutes.
  • Let cake cool in pan for 10 minutes, then turn out onto a cooling rack to cool completely. Spread icing on cooled cake.

Icing

  • In a medium bowl, beat cream cheese and butter together until smooth.
  • Add powdered sugar, salt, vanilla extract and 1 tablespoon of peach purée. Beat until smooth. Add additional peach purée, if needed, until desired consistency is reached. Fold in diced peaches.
Keyword cake, peach

Pineapple Scones with Cream Cheese Icing

Pineapple Scones with Cream Cheese Icing

I had pineapple smoothies two days in a row. There’s something so vibrant and refreshing about pineapple. It feels sunny and tropical. Should scones ever feel sunny and tropical? I’m going to say yes, why not? Scones deserve a vacation too. They can take a break from tea parties and coffee shops and enjoy a little sunny picnic with iced tea or a beachfront breakfast or brunch with mimosas.

You’ll be pleasantly surprised when you experience your first bite of a scone with a burst of pineapple flavor. I immediately thought, “Why isn’t this a thing?” There are probably other pineapple scones out there in the universe, but they’re definitely not well known, like the very popular blueberry scone for example. I’m going to go so far as to say, pineapple scones are better than blueberry scones. And this is coming from a person who loves blueberries!


Pineapple Scones with Cream Cheese Icing

by Mari Vasseur
Course Breakfast, Brunch
Servings 8 scones

Ingredients
  

Pineapple Scones

  • 1 ¾ cups (223g) all purpose flour, sifted
  • 2 tablespoons (25g) sugar
  • 1 tablespoon (14g) baking powder
  • ½ teaspoon fine sea salt
  • 7 tablespoons (99g) cold, unsalted butter, cubed
  • ½ cup (118ml) cold heavy cream
  • 2 tablespoons (30ml) pineapple juice
  • 1 teaspoon pure vanilla extract
  • 1 cup (170g) chopped pineapple, fresh or canned in juice Chop into 1/2-inch pieces. If using canned pineapple, drain well and reserve the juice
  • Egg wash 1 egg whisked together with 1 tablespoon water

Cream Cheese Icing

  • 2 tablespoons (28g) cream cheese, softened
  • 1 tablespoon (14g) unsalted butter, softened
  • ½ cup (57g) powdered sugar, sifted
  • 2 tablespoons (30ml) pineapple juice

Instructions
 

Pineapple Scones

  • Preheat the oven to 375ºF. (190ºC). Line a baking sheet with parchment paper.
  • In a large bowl, whisk together the flour, sugar, baking powder and salt until well combined. Work the butter into the flour mixture with your fingertips or with a pastry blender until pea size pieces form.
  • In a small bowl, whisk together the heavy cream, pineapple juice and vanilla. Stir the heavy cream mixture into the flour and butter mixture until a shaggy dough is formed. Gently stir in the pineapple.
  • Turn the dough out onto a lightly floured surface. Fold the dough over onto itself a few times. Do not overwork the dough. Pat or roll the dough into a 7-inch round. Cut the dough into 8 wedges.
  • Place the scones about 2 inches apart onto the prepared baking sheet. Brush the scones with egg wash. Bake until golden brown, about 18-22 minutes. Transfer the scones to a cooling rack.

Cream Cheese Icing

  • In a medium-sized bowl, stir the cream cheese with a spatula until smooth. Add the butter and beat until smooth and well combined. Whisk in the powdered sugar and pineapple juice until smooth. Drizzle the icing over the cooled scones.
Keyword pineapple, scones

Cherry Cutie Pies

Cherry Cutie Pies

Cherry season is highly anticipated at my house. We love enjoying a bowl of fresh cherries during the summer. We also love fresh cherry desserts. These cute little hand pies are a family favorite. They have the most delicious fresh cherry filling, surrounded with buttery, flaky crust and topped with vanilla icing. The small size makes them perfect for sharing or taking them along in a picnic lunch. I like to make the crust and the filling the day before, which makes them come together quicker on baking day. I decorated mine with bright red maraschino cherries for the photo, but my favorite cherries to top them with are Italian-style maraschino cherries.


Cherry Cutie Pies

by Mari Vasseur
3-inch cherry hand pies with flaky crust, topped with vanilla icing
Course Dessert
Cuisine American
Servings 20 hand pies

Ingredients
  

Pie Crust

  • 2 â…” cups (340g) all purpose flour, sifted
  • 2 tablespoons (25g) sugar
  • ½ teaspoon fine sea salt
  • ¼ cup (48g) vegetable shortening
  • ¾ cup (170g) cold, unsalted butter, cubed
  • ½ cup (118ml) cold ice water
  • 1 tablespoon (15ml) apple cider vinegar

Cherry Filling

  • 12 ounces (340g) fresh cherries, pitted, halved and stems removed (about 1 3/4 cups after prep)
  • â…“ cup (66g) sugar
  • 1 tablespoon (10g) cornstarch
  • â…› teaspoon almond extract
  • Egg wash: 1 egg beaten with 1 tablespoon (15 ml) of water

Icing

  • 1 ¼ cups (150g) powdered sugar, sifted
  • ½ teaspoon meringue powder (optional)
  • 2-3 tablespoons (30-45ml) whole milk
  • ¼ teaspoon pure vanilla extract
  • 1 dash fine sea salt
  • Pitted cherries for garnish (optional)

Instructions
 

Pie Crust

  • In a large bowl, whisk together the flour, sugar and salt. Work the shortening into the flour with your fingertips until it's evenly dispersed throughout. Work the butter into the flour mixture, creating flat dime size pieces.
  • In a glass measuring cup, mix the ice water and vinegar together. Sprinkle the liquid over the flour mixture a little at a time, stirring until the dough comes together. You may not need all of the liquid depending on your climate.
  • Turn the dough out onto a lightly floured surface. Fold the dough over onto itself a couple of times. Do not overwork the dough. Divide the dough into 2 equal portions and form into disks. Wrap them in plastic wrap and refrigerate until firm, at least 2 hours or up to overnight.

Cherry Filling

  • In a medium-sized saucepan, combine the cherries, sugar and cornstarch. Simmer over low heat, stirring occasionally, until the cherries start to soften and the juices are thickened, about 5 minutes. Transfer the cherries to a bowl. Stir in the almond extract. Set aside to cool completely.

Icing

  • In a medium-sized bowl, whisk together the powdered sugar, meringue powder, 1 1/2 tablespoons (22ml) of milk, the salt and the vanilla extract. Add additional milk as needed to achieve the desired consistency. (If you decide to omit the meringue powder, you'll need less milk.)

Assembly

  • Preheat oven to 375°F (190°). Line a large baking sheet with parchment paper.
  • On a lightly floured surface, roll dough to about 1/8-inch (.3cm) thickness. Cut out 20-22 3-inch (7.6cm) rounds. Transfer half of the rounds to a baking sheet, placing them about 2 inches (5cm) apart. Using a slotted spoon, place the filling onto rounds to within 1/2-inch (1.3cm) of the edges. Using a small pastry brush or your finger, apply egg wash to the edges. Top with the remaining rounds. Press the edges to seal & crimp with a fork. Brush the pies with egg wash. Cut a small x in the top of each pie.
  • Bake until golden, about 18-24 min. Transfer the pies to a cooling rack to cool completely. Brush icing on the cooled pies with a pastry brush. When the icing is almost set, top the pies with pitted cherries if desired.
Keyword cherry, pastry, pie