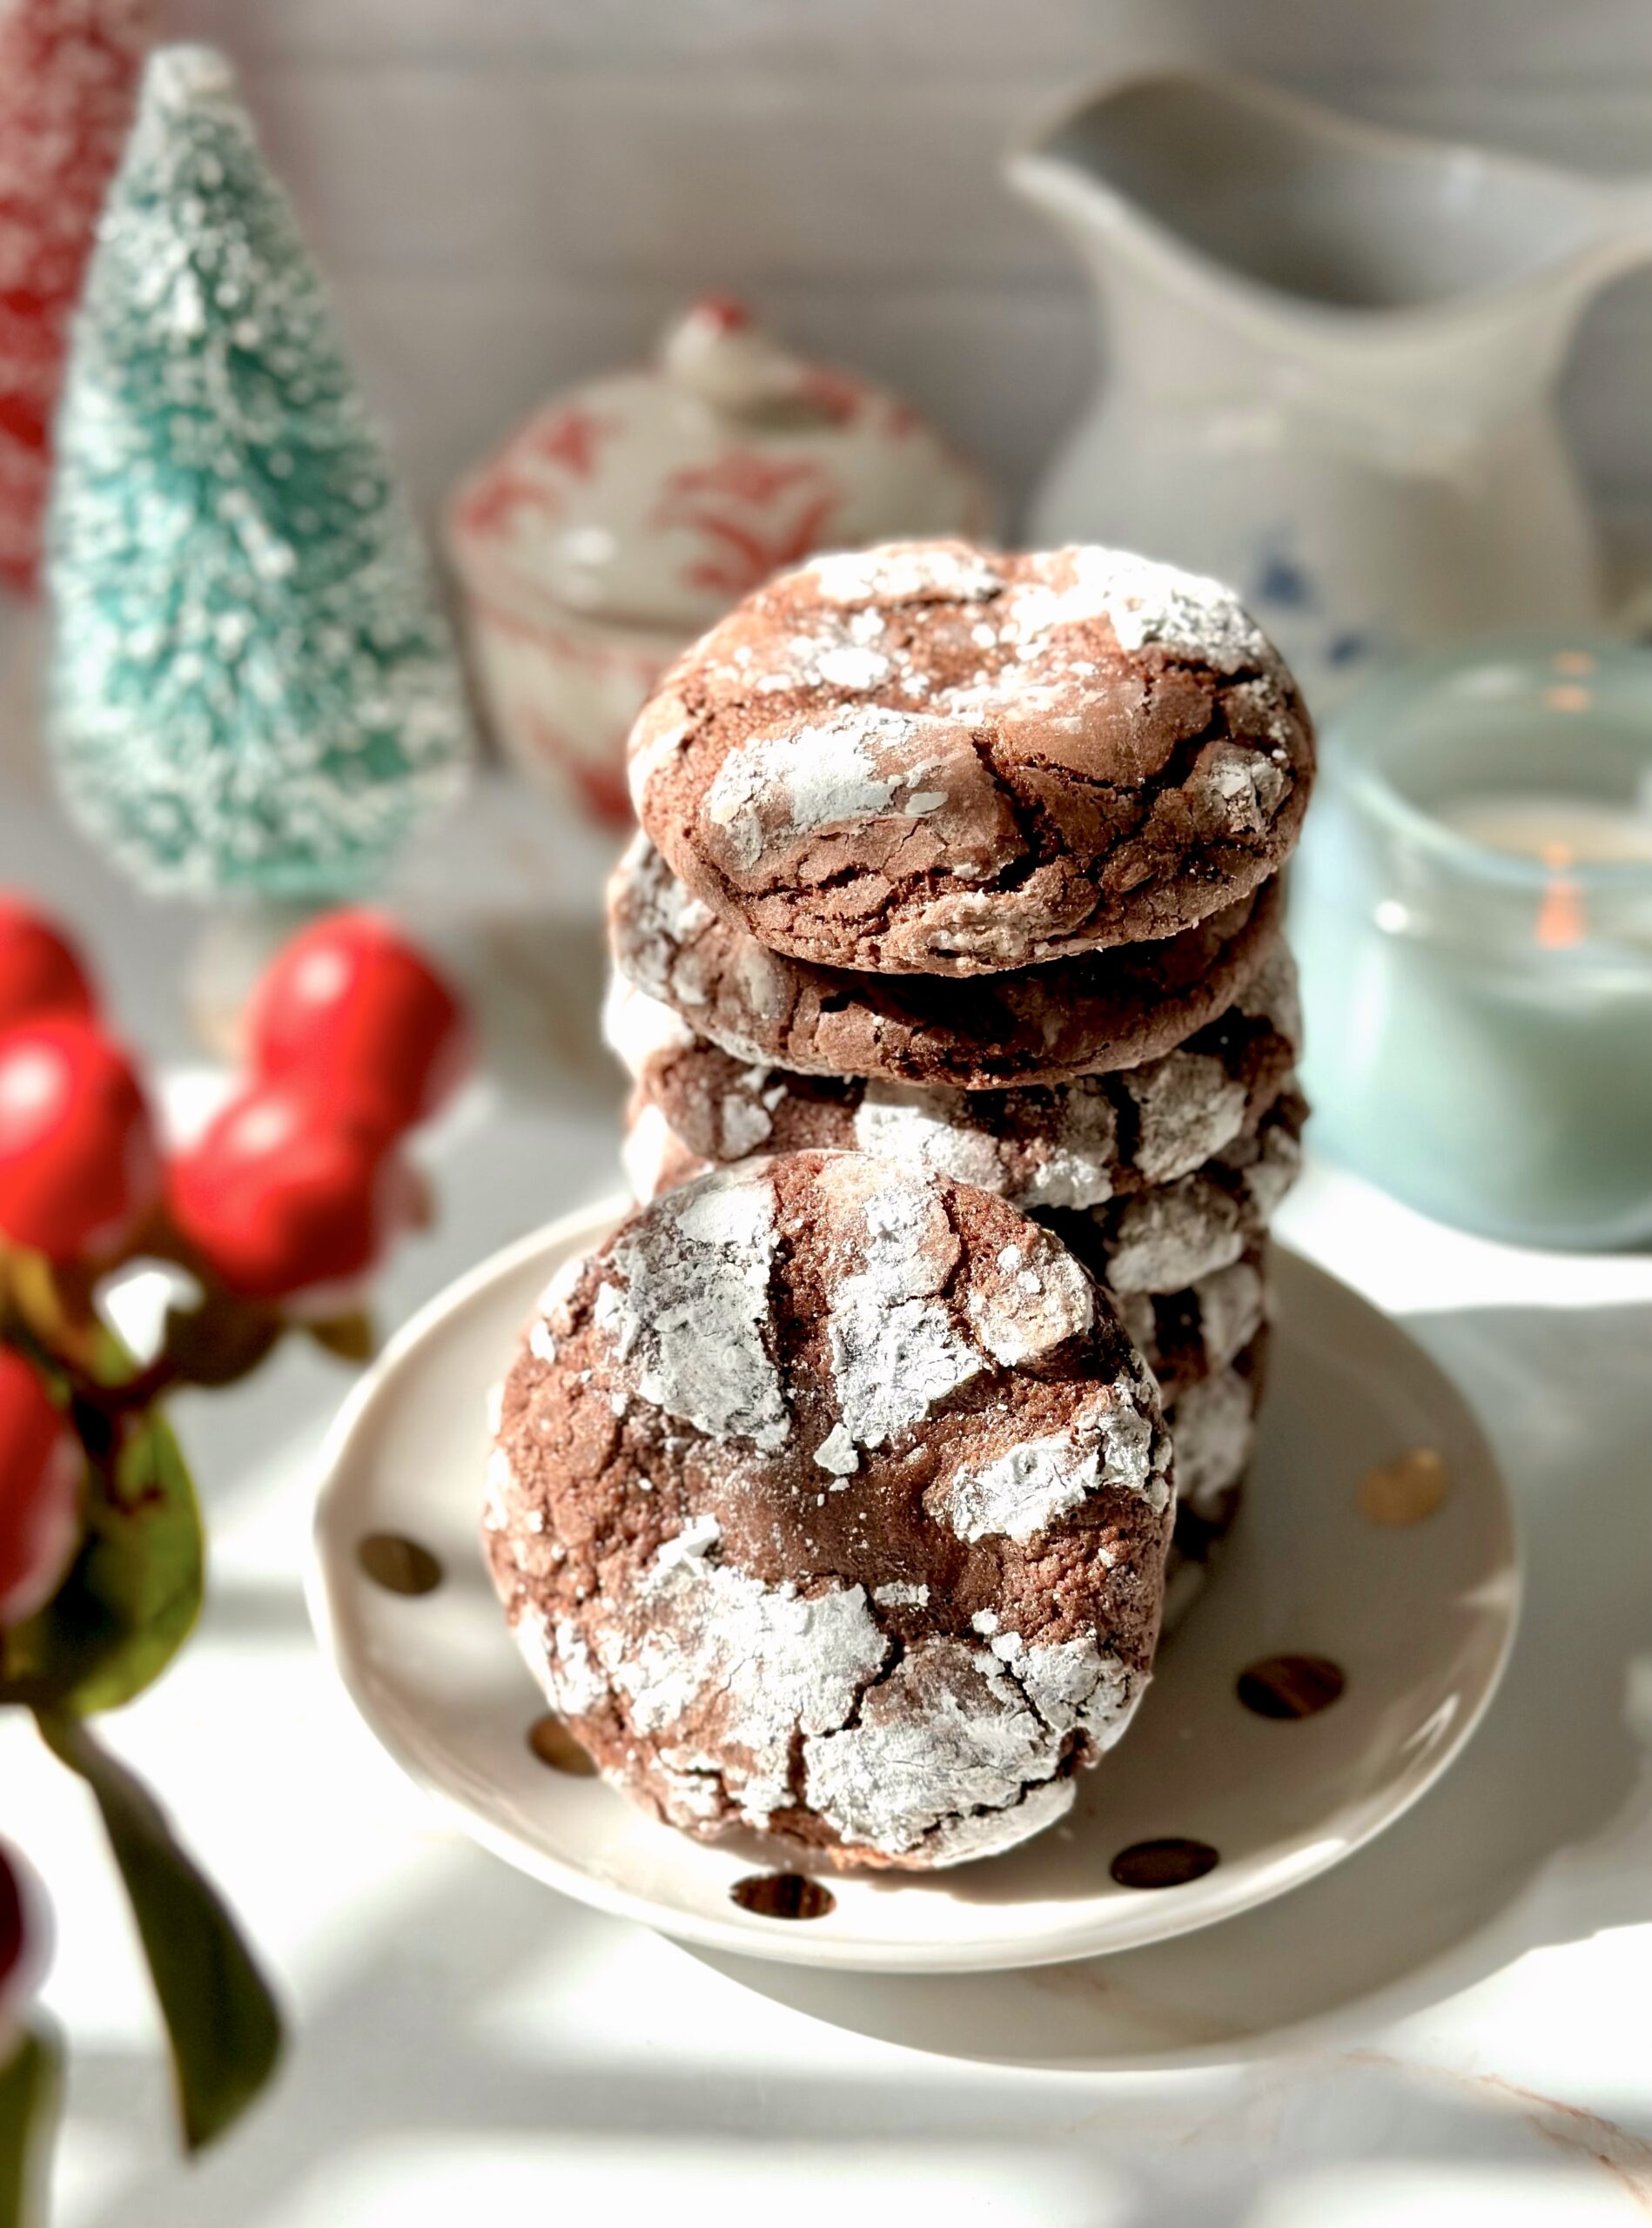
Chocolate Crinkle Cookies are traditional holiday cookies, probably because of the pretty, crackly powdered sugar covered exterior that reminds us of snow. They always seem to show up on cookie trays at Christmas time and I’ve loved them since I was a child. I decided to take my old favorites to another level by adding a surprise inside! Two years ago, I made some cookies with fudge filling that my family and friends raved over. They’re my Marshmallow Mudslide Cookies. To view the recipe, click here. I used the same concept for these Chocolate Crinkle Cookies. I filled them with a simple, smooth fudge filling that stays soft at room temperature. The results were absolutely delicious!
Fudge Filled Chocolate Crinkle Cookies
Chocolate crinkle cookies with a smooth fudge filling that stays soft at room temperature
2tablespoonsunsweetened cocoa powder, preferably Dutch process
1 ½teaspoonsbaking powder
½teaspoonfine sea salt
â…“cup (2 5/8 ounces)unsalted butter, softened
2 ½cups (9 5/8 ounces)powdered sugar, sifted and divided
2largeeggs
1 teaspoonpure vanilla extract
2ounces unsweetened chocolate, melted and cooled to room temperature
Instructions
Fudge Filling
In a double boiler or in the microwave*, melt chocolate chips and sweetened condensed milk together until smooth. Set aside to cool while preparing cookie dough.
Cover and refrigerate for two hours. Roll filling into 1-inch balls.
Chocolate Crinkle Cookies
In a medium bowl, whisk together flour, cocoa powder, baking powder and salt.
In a large bowl, beat butter with an electric mixer until light and fluffy.
Gradually beat in 2 cups (7 3/4 ounces) of powdered sugar until well combined. Set aside remaining 1/2 cup powdered sugar in a shallow dish.
Beat in eggs and vanilla in three separate additions, until smooth. Stop to scrape bowl as needed.
Beat in melted chocolate until combined. Beat in flour mixture just until combined.
Cover and refrigerate dough for 2 hours. Don't skip this step.
Preheat oven to 350ºF. Line two large baking sheets with parchment paper.
Roll dough into 15 2-inch balls, 1 1/4 ounce each. Flatten each ball into a 3-inch disk. Place a fudge ball in the center of each disk and wrap dough around it, pinching edges together to seal. Roll dough balls generously in remaining powdered sugar.
Place dough balls three inches apart on prepared baking sheets. Bake until cookies puff up and tops are set, about 11-13 minutes. Transfer cookies to a cooling rack.
Notes
*To melt fudge filling in microwave, heat for 30 seconds. Stir, then microwave for 10 second intervals, stirring until melted.MAKE AHEAD INSTRUCTIONS: To make cookie dough one day ahead, prepare cookie dough. Cover the surface with plastic wrap and refrigerate in a covered container up to 24 hours. To make fudge filling one day ahead, prepare filling and chill for 1 1/2 to 2 hours. Roll filling into 1-inch balls and place on a parchment lined tray. Cover tightly with plastic wrap and refrigerate up to 24 hours.Â
These soft, tender, fluffy, sweet cornbread muffins are my favorite version of cornbread ever! No hate to the crumbly, savory cornbread that some people prefer. I like that too! Coincidentally, the latter has fans who leave the most heated comments on my cornbread posts. Maybe their cornbread is making them cranky. This cornbread recipe is delightful and would cheer up anyone, especially when it’s served warm and slathered with butter and honey. Positively divine.
I used a square muffin pan because it makes the muffins look absolutely adorable. The pan is also known as a brownie pan. The pan details are in the recipe notes. Feel fee to use a standard round muffin pan instead.
2 ½cups (11 1/4 oz or 319g)all purpose flour, sifted
1 â…“cups (9 3/8 oz or 266g)sugar
½cup (2 1/2 oz 71g)cornmeal
4teaspoons baking powder
1teaspoon fine sea salt
4largeeggs
1 ½cups (12 oz or 355ml) sour cream
½ cup (4 oz or 118ml)vegetable oil or neutral oil of your choice
¼ cup (2 oz 57g)unsalted butter, melted and cooled to room temperature
Instructions
Preheat oven to 350ºF. Grease and flour a 12-serving square muffin pan, also known as a brownie pan.* (You can also use a traditional round muffin pan. The baking time may be a little shorter.)
In a large bowl, whisk together flour, sugar, cornmeal, baking powder and salt.
In a separate bowl, whisk eggs, sour cream, oil and butter until smooth.
Add egg mixture into the flour mixture and mix just until combined. A few lumps are okay.
Transfer batter to prepared pan, filling wells halfway full. (Fill 2/3 full if using a round muffin pan.)
Bake until edges turn golden brown and a toothpick inserted into center comes out clean, about 17-20 minutes. Do not over bake.
Let cool in pan for 5 minutes them transfer muffins to a cooling rack. Serve warm or room temperature.
Notes
*I used a Fat Daddio's square muffin pan. It's available at kitchen stores and online.  If you can't find that one, Chefmade also makes a good one. The cavities on that one are a little smaller, so the baking time may be shorter. To find it, click here.If you're using a dark colored pan, reduce your oven temperature to 325ºF
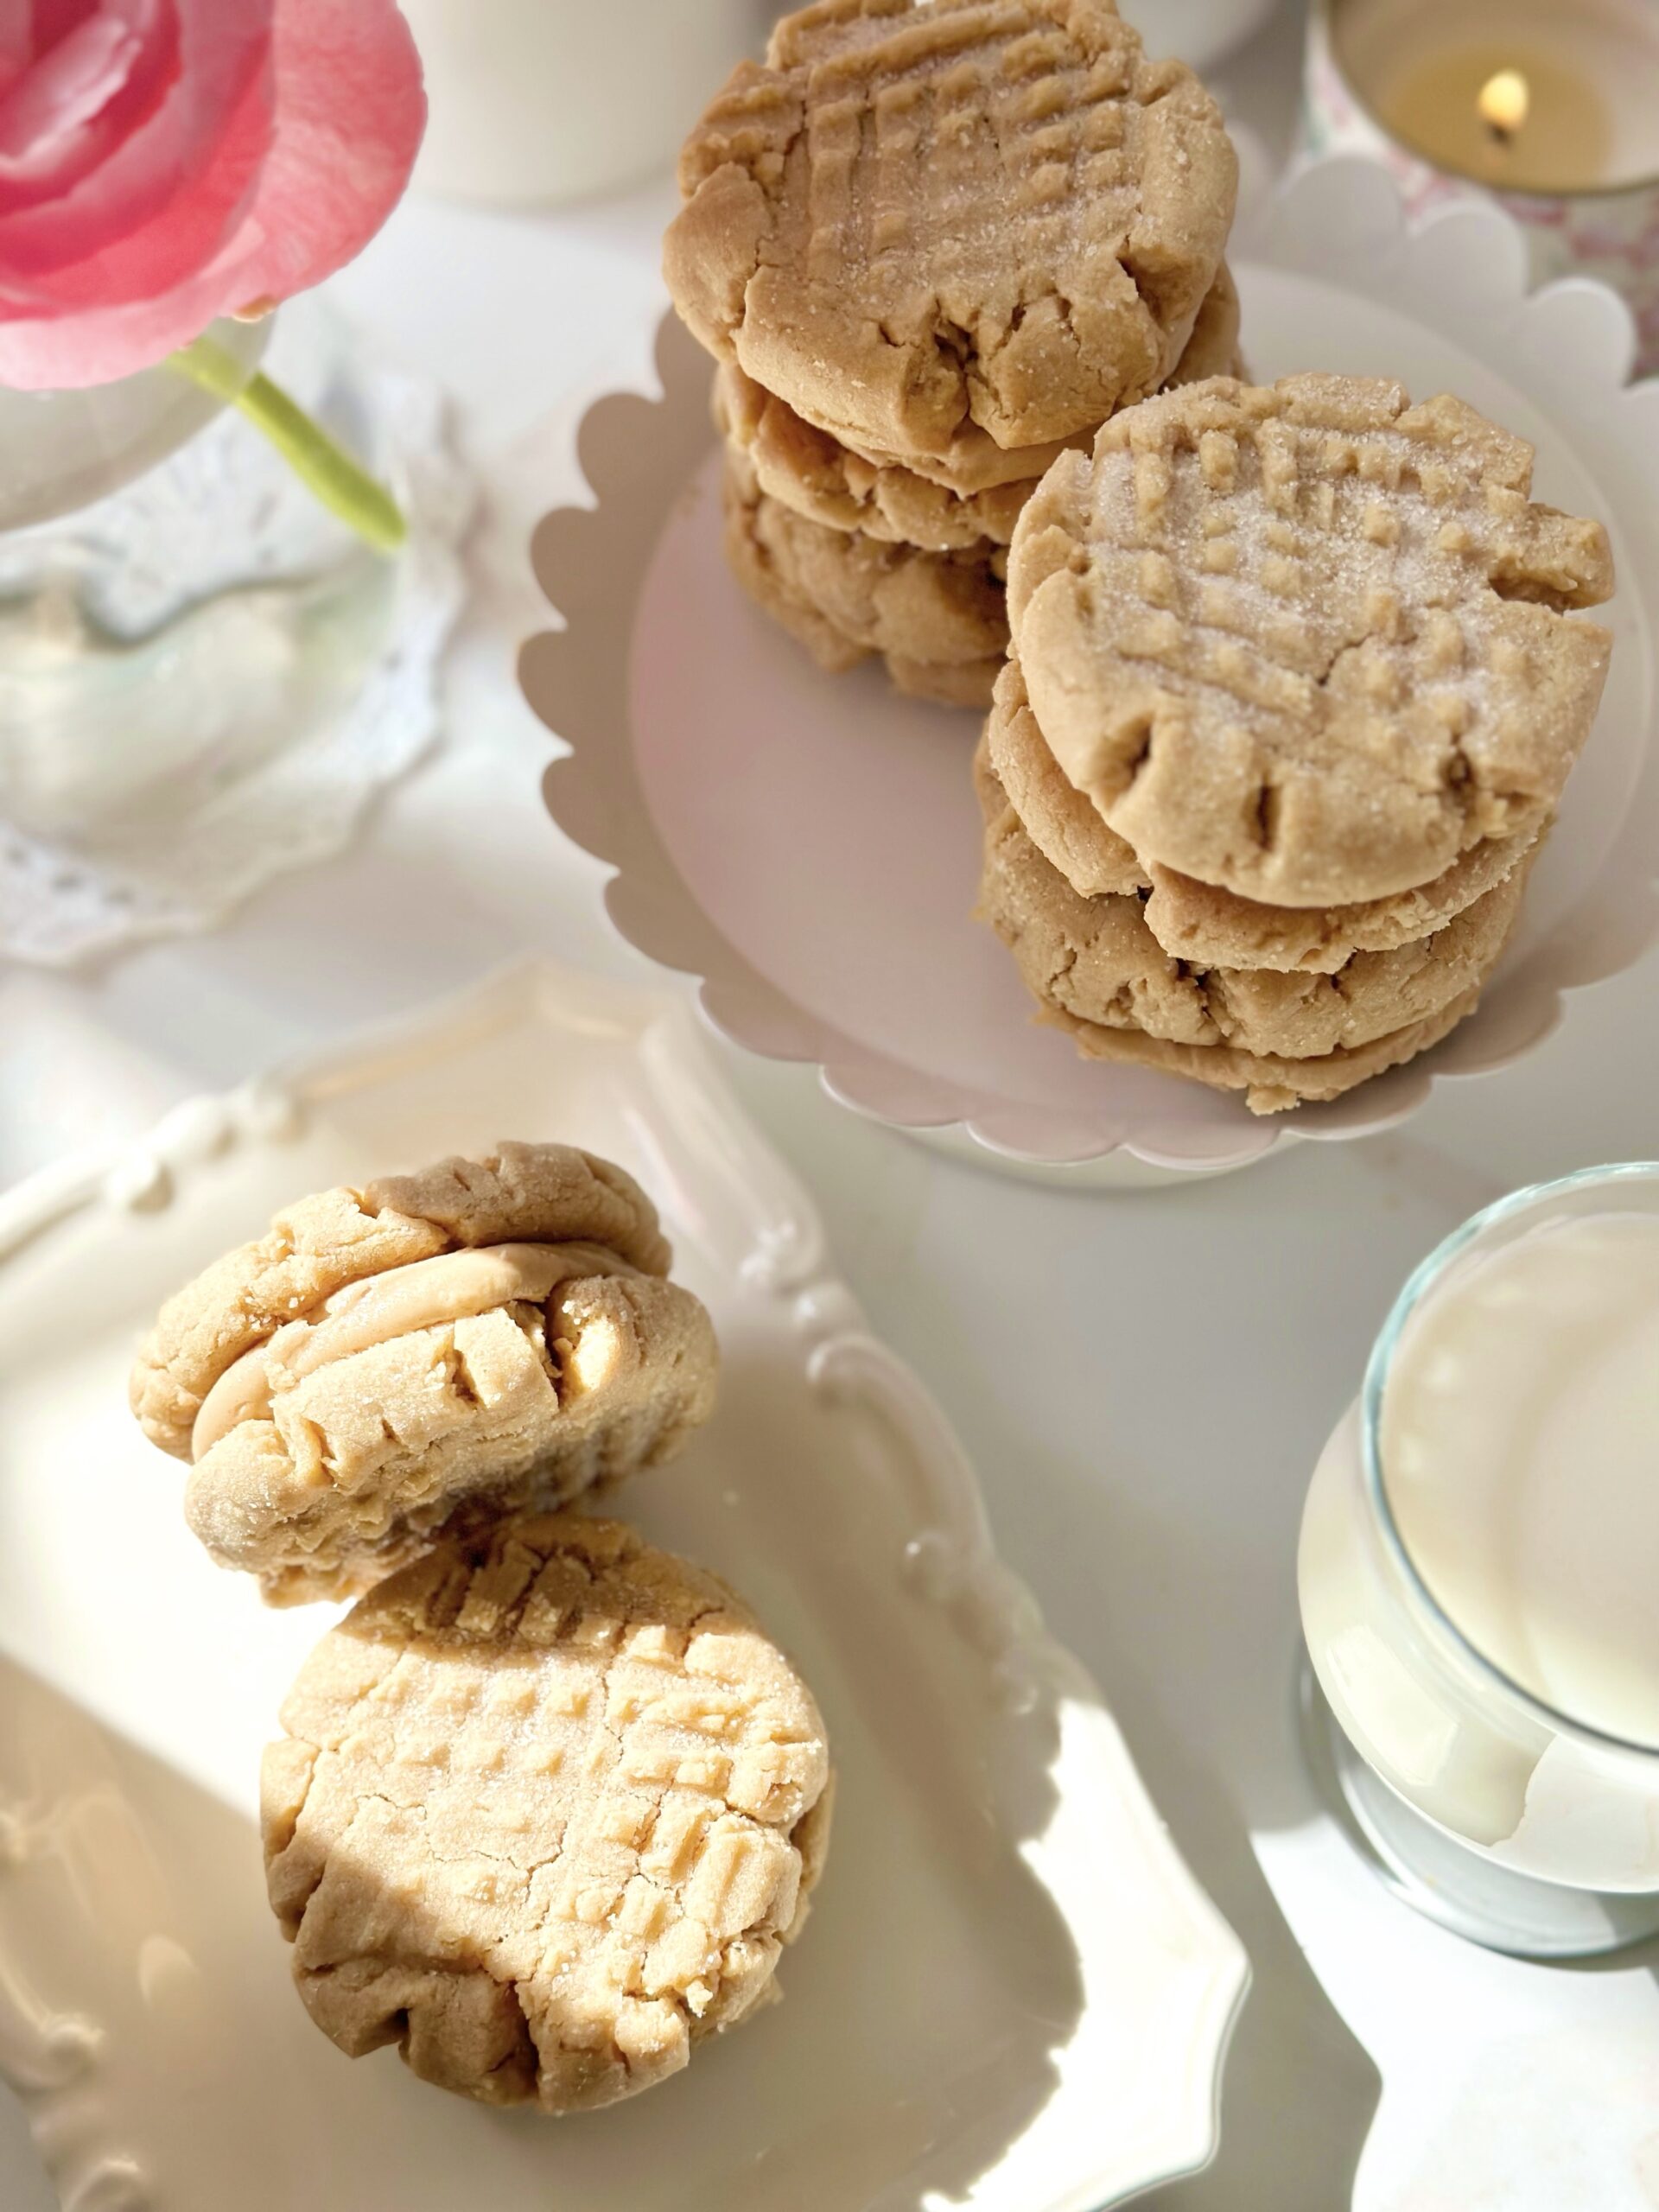
I never imagined that I’d ever be posting a peanut butter cookie recipe. There are already crunchy peanut butter cookies, soft ones, chewy ones, and those peanut shaped store bought ones out there. I mean, do we even need another peanut butter cookie recipe? After I tasted this one, it’s a resounding YES! These soft, tender cookies combined with a silky, smooth filling are a new peanut butter experience that I had to share.
The key to getting the soft texture in the cookie, without being dry, is cake flour. So don’t substitute it, because it’s vital to achieve the correct texture. Make sure to weigh your flour for the most accurate results. The second important ingredient is heavy whipping cream. Just a little added to the filling gives it a luxurious, silky texture.
This recipe makes sixteen medium size peanut butter cookies, which will give you eight sandwiches. If you want more, you can double the recipe or make the cookies smaller. Smaller cookies will have a shorter baking time.
½cup (127g)creamy peanut butter, room temperature
2tablespoons (28g)unsalted butter, softened
½cup (60g)powdered sugar, sifted
2 ½tablespoons (37ml)heavy whipping cream, room temperature
¼teaspoonpure vanilla extract
1pinchfine sea salt
Instructions
Peanut Butter Cookies
Preheat the oven to 350ºF (180ºC). Line two large baking sheets with parchment paper.
In a medium-sized bowl, whisk together the all purpose flour, cake flour, baking soda and salt until well blended.
In a large bowl, beat the peanut butter, butter and shortening, with an electric mixer on low speed, until smooth. Beat in the egg and vanilla, on medium speed, until well combined.
Set aside 1/4 cup (50g) of the granulated sugar. Add the remaining granulate sugar and the brown sugar to the peanut butter mixture. Beat on medium speed, until light and fluffy. Add the flour mixture and beat on low speed, just until combined.
Roll the dough into 1 1/2-inch (3.8cm) diameter balls (about 1 1/4 oz or 35g each). Roll the dough balls in the reserved granulated sugar.
Place the dough balls 3 inches apart onto the prepared baking sheets. Flatten with a fork, making a criss cross pattern. Bake until the cookies are puffy and start to crack around the edges, about 9-11 minutes.
Let the cookies cool on baking sheet for 1 minute, then carefully transfer them to a cooling rack. The cookies will be fragile, but they will firm up as they cool.
Place a spoonful of filling on the bottoms of half of the cooled cookies. Top with remaining the remaining cookies.
Peanut Butter Filling
In medium-sized bowl, beat the peanut butter and butter together with an electric mixer until smooth and well blended. Beat in the powdered sugar, heavy cream, vanilla and salt until smooth.
What’s better than the smell of chocolate chip cookies baking or of fresh coffee brewing? The aroma of this warm, sweet buttery loaf of Butterscotch Bread is so heavenly that I’m convinced that angel grandmothers bake this on a regular basis in heaven. The rich scent is accompanied by a soft, tender bread topped with a silky butterscotch glaze.
It all starts with browning your butter first. It adds a nutty, deep butter flavor. When browning your butter, use a light colored saucepan so you can see the visual clues. You’ll see it start to foam and brown specks will collect on the bottom of the pan. It will smell nutty and fragrant. Keep a close eye on it. It can go from brown to burnt in a quick second. When your brown butter has cooled to room temperature, the rest of the recipe comes together quickly. You can also brown your butter a day ahead and keep it in the refrigerator. Bring it to room temperate before using.
This delightful bread goes well with coffee or tea and is just as delicious the next day. Store covered at room temperature.
In a small saucepan, cook the butter over medium heat until brown and fragrant. When brown specks begin to form at the bottom of the pan, immediately transfer the butter to a small bowl. Let cool to room temperature.
Preheat the oven to 350ºF (180ºC). Line the bottom of an 8 x 4-inch baking pan with parchment paper. Grease and flour the insides.
In a medium-sized bowl, beat the brown butter, brown sugar, eggs, vanilla and buttermilk until smooth and creamy. Stir in the flour mixture in two additions. Mix just until combined.
Transfer the batter to prepared baking pan. Bake until the top is deep golden brown and a toothpick inserted into center comes out clean, about 38-43 minutes.
Let the bread cool in pan for 10 minutes, them turn it out onto a cooling rack to cool completely. Top the cooled cake with two coats of butterscotch glaze.
Butterscotch Glaze
Melt the butter in a small saucepan over medium heat. Stir in the brown sugar and salt. Continue stirring over medium heat until the mixture comes to a boil. Boil for two minutes.
Turn the heat down and slowly stir in the heavy cream. Keep stirring until mixture is smooth. Remove from heat and stir in the vanilla extract.
Transfer the butterscotch glaze to a small bowl and let cool until thickened.
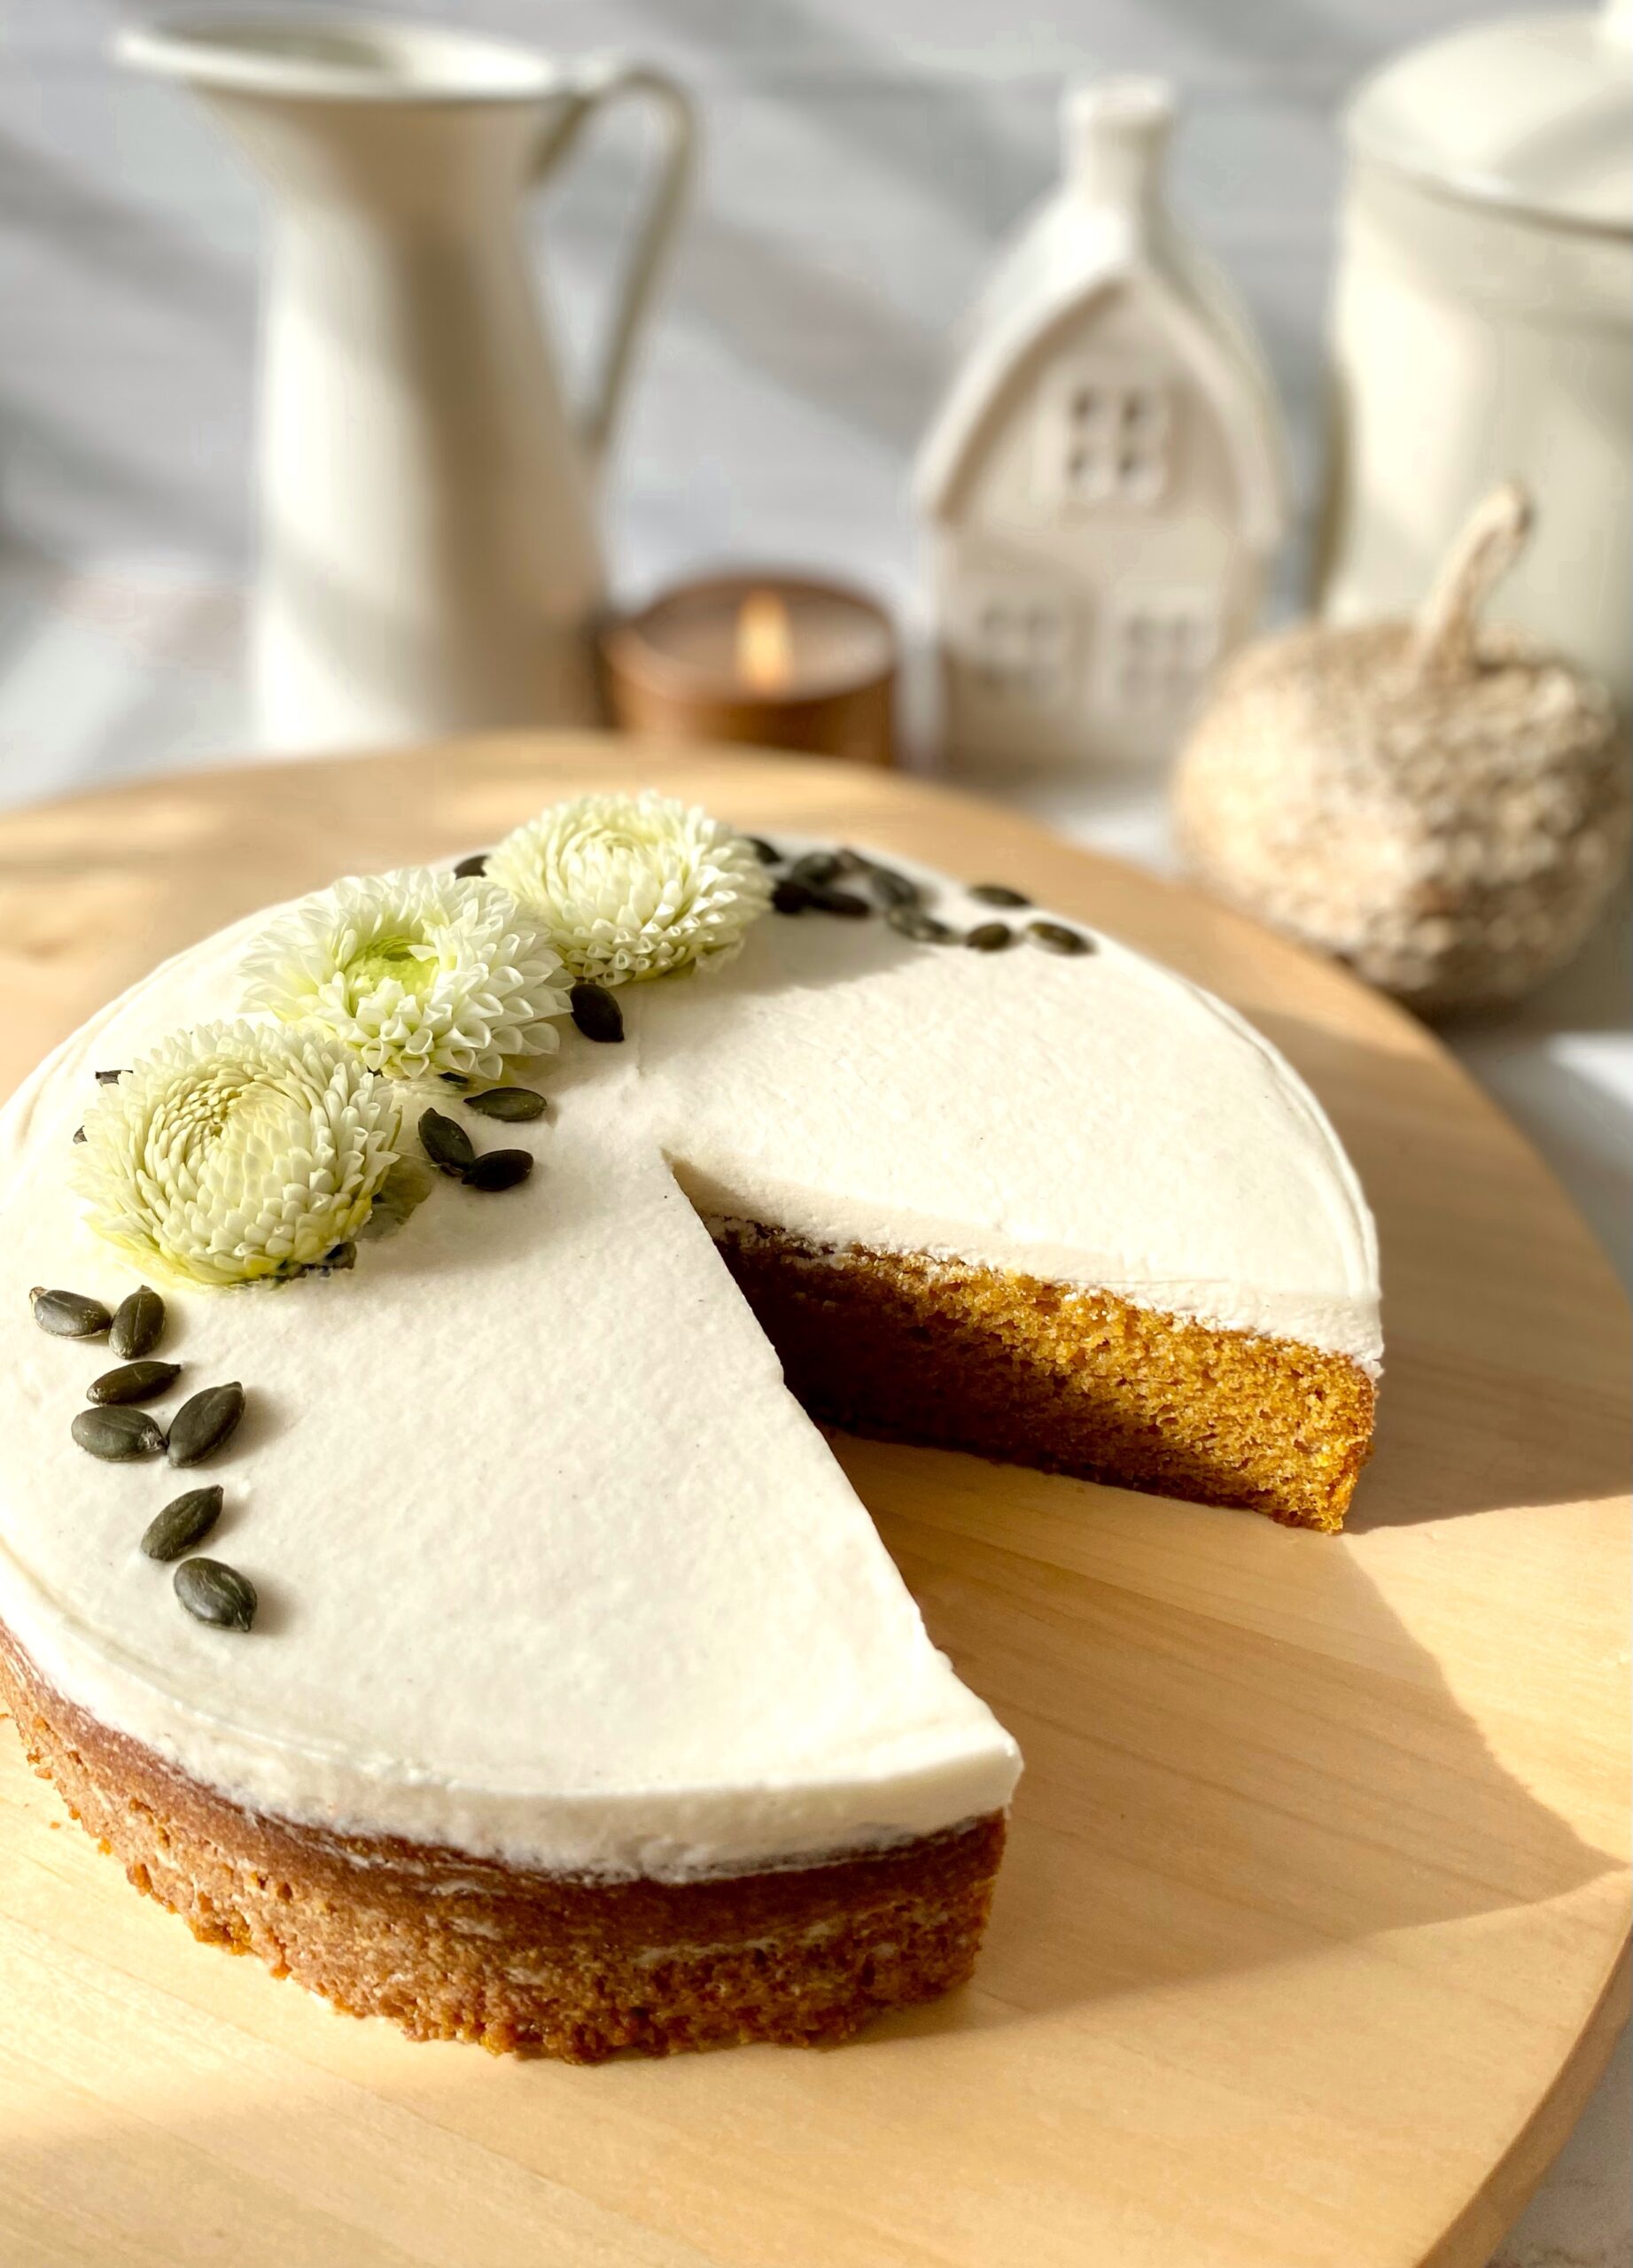
This Perfect Pumpkin cake brings back memories. The tender, moist texture reminds me of the pumpkin cake bars I used to make in junior high. I got the treasured bar recipe from an old children’s cookbook. I lent the cookbook to a neighbor and never saw the book or the recipe again. Through trial and error, I came up with this perfectly spiced, soft fluffy cake, which I think is even better! It’s so delicious it doesn’t need frosting, but the classic pairing with cream cheese frosting takes it over the top.
Transfer the batter to the prepared cake pan. Bake until a toothpick inserted into the center of the cake comes out clean, about 38-43 minutes. Cool the cake in pan for 10 minutes. Remove the cake from pan and transfer to a cooling rack.
Cream Cheese Frosting
In a large bowl, beat the cream cheese and butter together with an electric mixer, until creamy. Beat in the vanilla extract and salt until well combined. On low speed, beat in the powdered sugar. Keeping the mixture at low speed, beat in the heavy cream a little at a time until your desired consistency is reached. Stir with a spatula to smooth out any bubbles.
Notes
*To find the cake pan I used, click here.**To find the parchment rounds I used, click here.
Even though the weather is warm where I live at the moment, I’m dreaming about all the delicious fall treats I’ll be baking this year. Let’s look forward to cool, crisp weather, the smell of pumpkin or apples baking, and sipping a warm mug of something spicy while we wait for our bakes to come out of the oven.
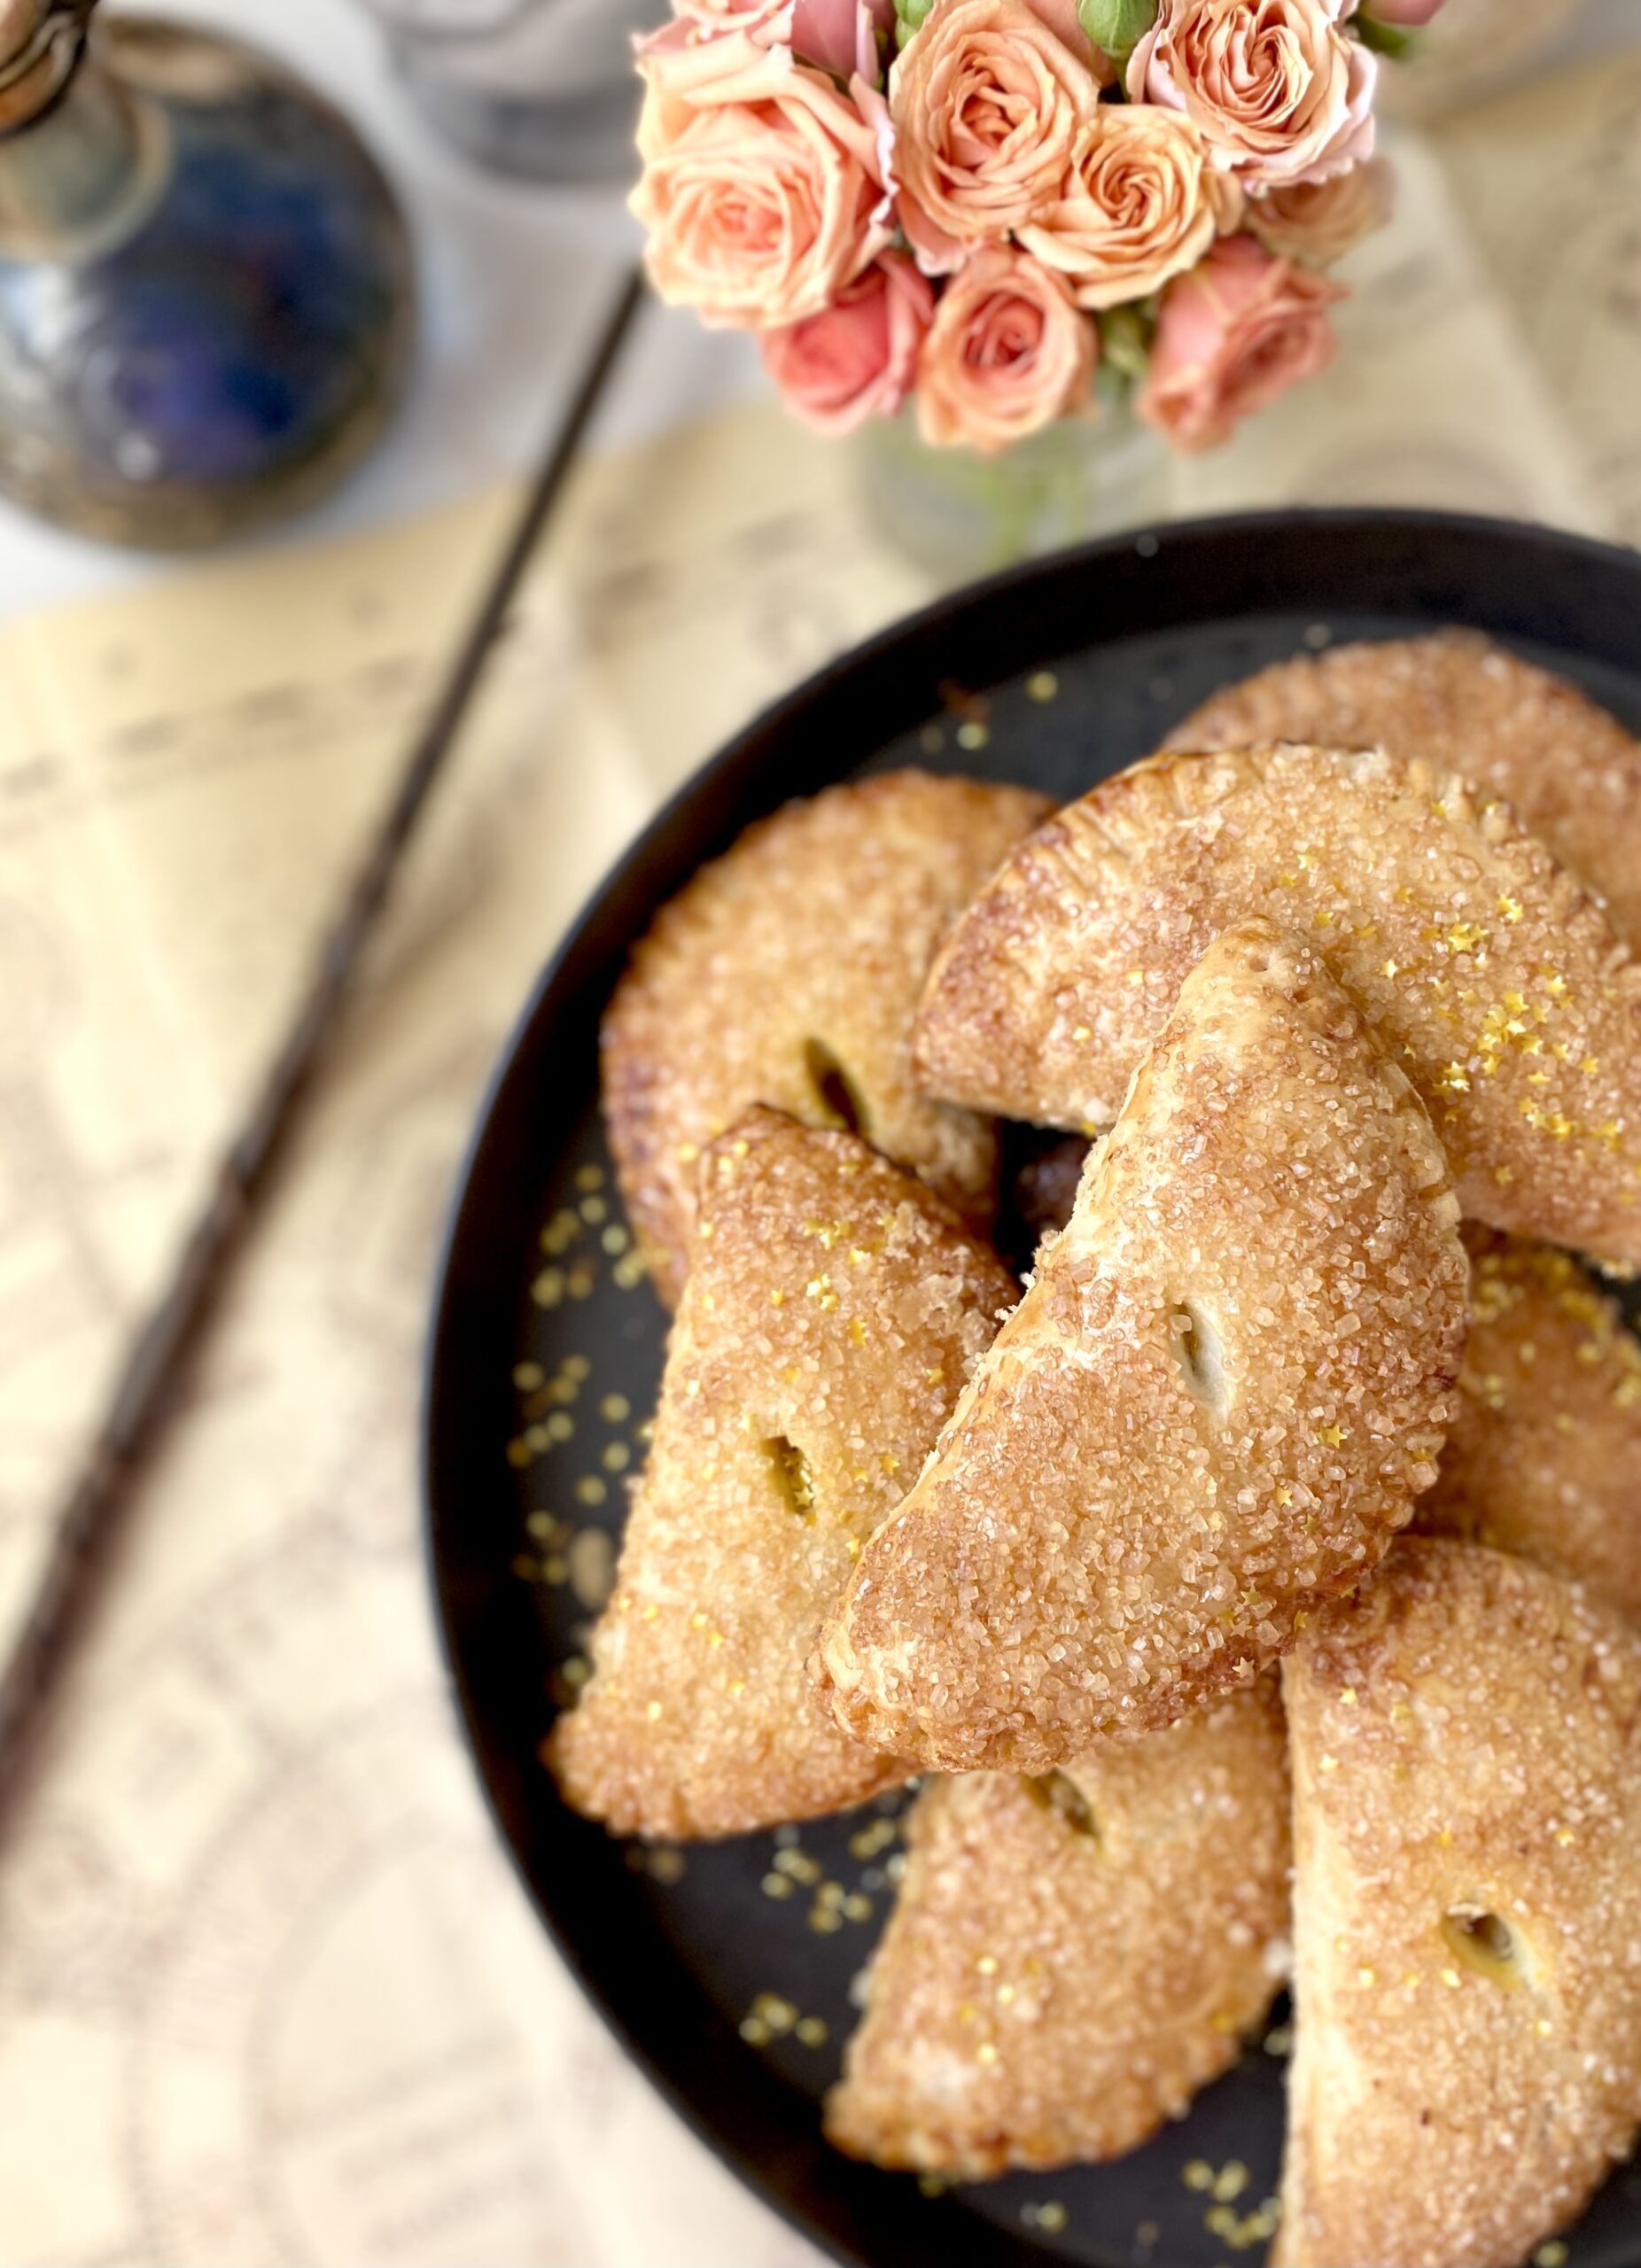
Inevitably, every fall, the Harry Potter movies come on at my house and it’s nice to have some popcorn and sweet treats to enjoy while watching the movies. And these Harry Potter Inspired Pumpkin Pasties are perfect for that! If you’ve read the Harry Potter books, you may remember the Pumpkin Pasties being mentioned. There are many interpretations out there, but I imagined them to be crispy and flaky on the outside with a sweet pumpkin filling. I included a delicious flaky pie crust recipe here, but feel free to use store bought pie dough if you want to streamline the process. I sprinkled mine with raw turbinado sugar before baking which provides a sweet delicious crunch. You can also use maple sugar or sparkling sugar. To find the sugar I used, click here. And as a magical touch, I added some edible gold star glitter. To find the edible gold stars, click here.
Pumpkin Pasties
by Mari Vasseur
Harry Potter inspired sweet pumpkin filled hand pies
egg wash1 egg beaten with 1 tablespoon (15ml) of water
coarse sugar
Instructions
Pie Crust
In a large bowl, whisk together the flour, sugar and salt. Work the shortening into the flour mixture with your fingertips until evenly dispersed throughout. Work the butter into this mixture with your fingertips, creating flat dime size pieces.
Mix the ice water and vinegar together. Sprinkle over the flour mixture a little at a time, stirring until dough comes together. You may not need all of the water depending on your climate.
Turn the dough out onto a lightly floured surface. Fold the dough over onto itself a few times. Do not overwork the dough! Form the dough into two disks. Cover with plastic wrap and refrigerate at least two hours or up to overnight.
Preheat the oven to 400ºF (200ºC). Line two baking sheets with parchment paper.
On a lightly floured surface, roll the dough to 1/8-inch thickness. Cut the dough into twelve 5-inch* rounds, re-rolling the scraps as needed. Place the dough rounds a couple of inches apart onto the prepared baking sheets.
Place about 2 tablespoons of filling on each round, leaving a half-inch border. Apply egg wash to the edges of the rounds. Fold the dough over and press the edges together. Crimp the edges with a fork. If any filling oozes out, wipe it up with a paper towel or it will burn.
Brush the pasties with egg wash. Cut a half-inch slit into the top of each pastie. Sprinkle with coarse sugar. Bake until golden brown, about 18-20 minutes. Transfer to a cooling rack.
My mom had a cupboard in the kitchen containing a few old cookbooks that she rarely used. As a child, I used to enjoy perusing them and looking at the baked treats. Some of the cookbooks were so old, they had black and white photos or even just drawings of the food. The ones with drawings interested me because they often depicted smiling children enjoying the treats.
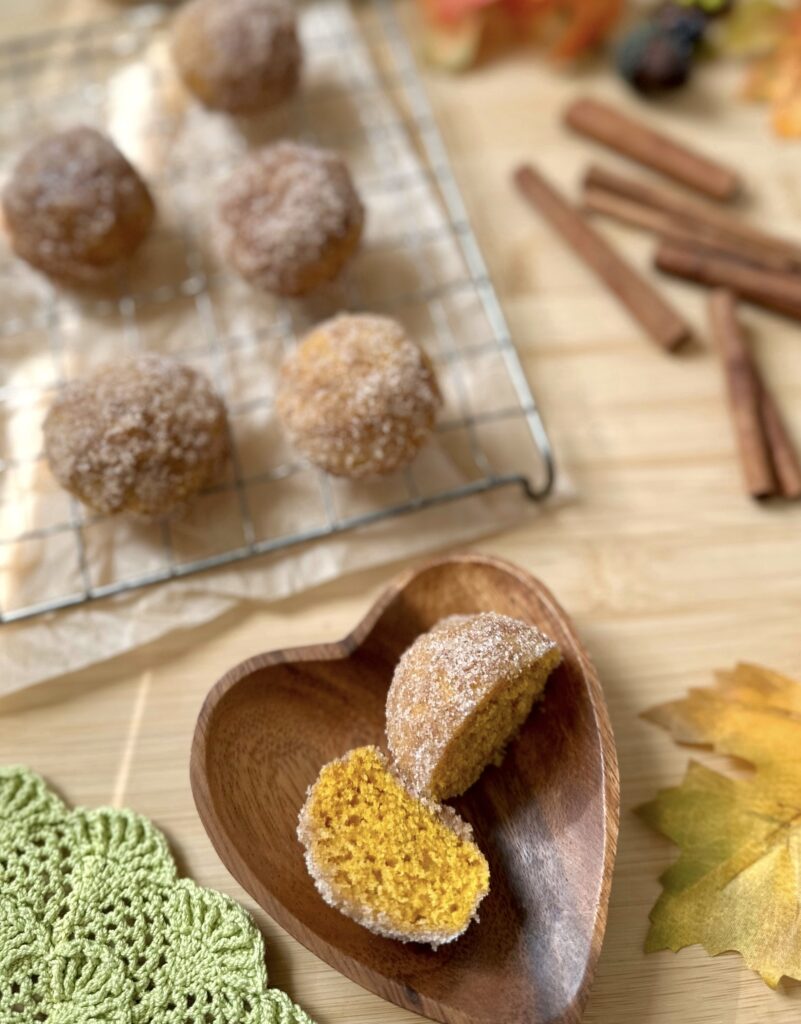
When I started learning to bake, I found a recipe for French Breakfast Puffs in one of those old books. The title sounded so fancy, but they were really just simple muffins dunked in butter and rolled in cinnamon sugar. I have no idea what the name of the cookbook was or what happened to it, but the delicious muffin recipe stuck around for a while. I’ve tweaked the recipe so many times over the years, and most recently, I added pumpkin to it. These Pumpkin Cinnamon Mini Muffins are one of the best versions I’ve created. The inside texture of the muffins is soft and moist and it contrasts nicely with the slight crunch you get from the cinnamon sugar on the outside. They look so cute too, like little pumpkins, and they definitely make children smile!
To watch the Instagram video of these mini muffins being made, click here.
Pumpkin Cinnamon Mini Muffins
Soft, tender pumpkin mini muffins rolled in cinnamon sugar
Preheat the oven to 350ºF (180ºC). Grease and flour a 24-serving mini muffin pan.* Do not use muffin liners. (The muffins need to form an outer crust. This prevents them from absorbing too much melted butter later in the recipe.)
In a medium-size bowl, whisk together the flour, baking powder, salt, cinnamon, ginger and nutmeg until well combined.
Transfer the batter to the prepared pan, filling the muffin cups about 2/3 full. (I ended up with 22 muffins.)
Bake until toothpick inserted into the muffins comes out clean, about 10-13 minutes. Do not over bake! Be diligent, since over baking can happen very quickly with mini muffins. Let the muffins cool in the pan for 5 minutes. Turn the muffins out and place on a cooling rack.
Topping
Whisk the sugar and cinnamon together in a shallow bowl until well combined.
Briefly dunk the warm muffins in melted butter, then roll in cinnamon sugar.
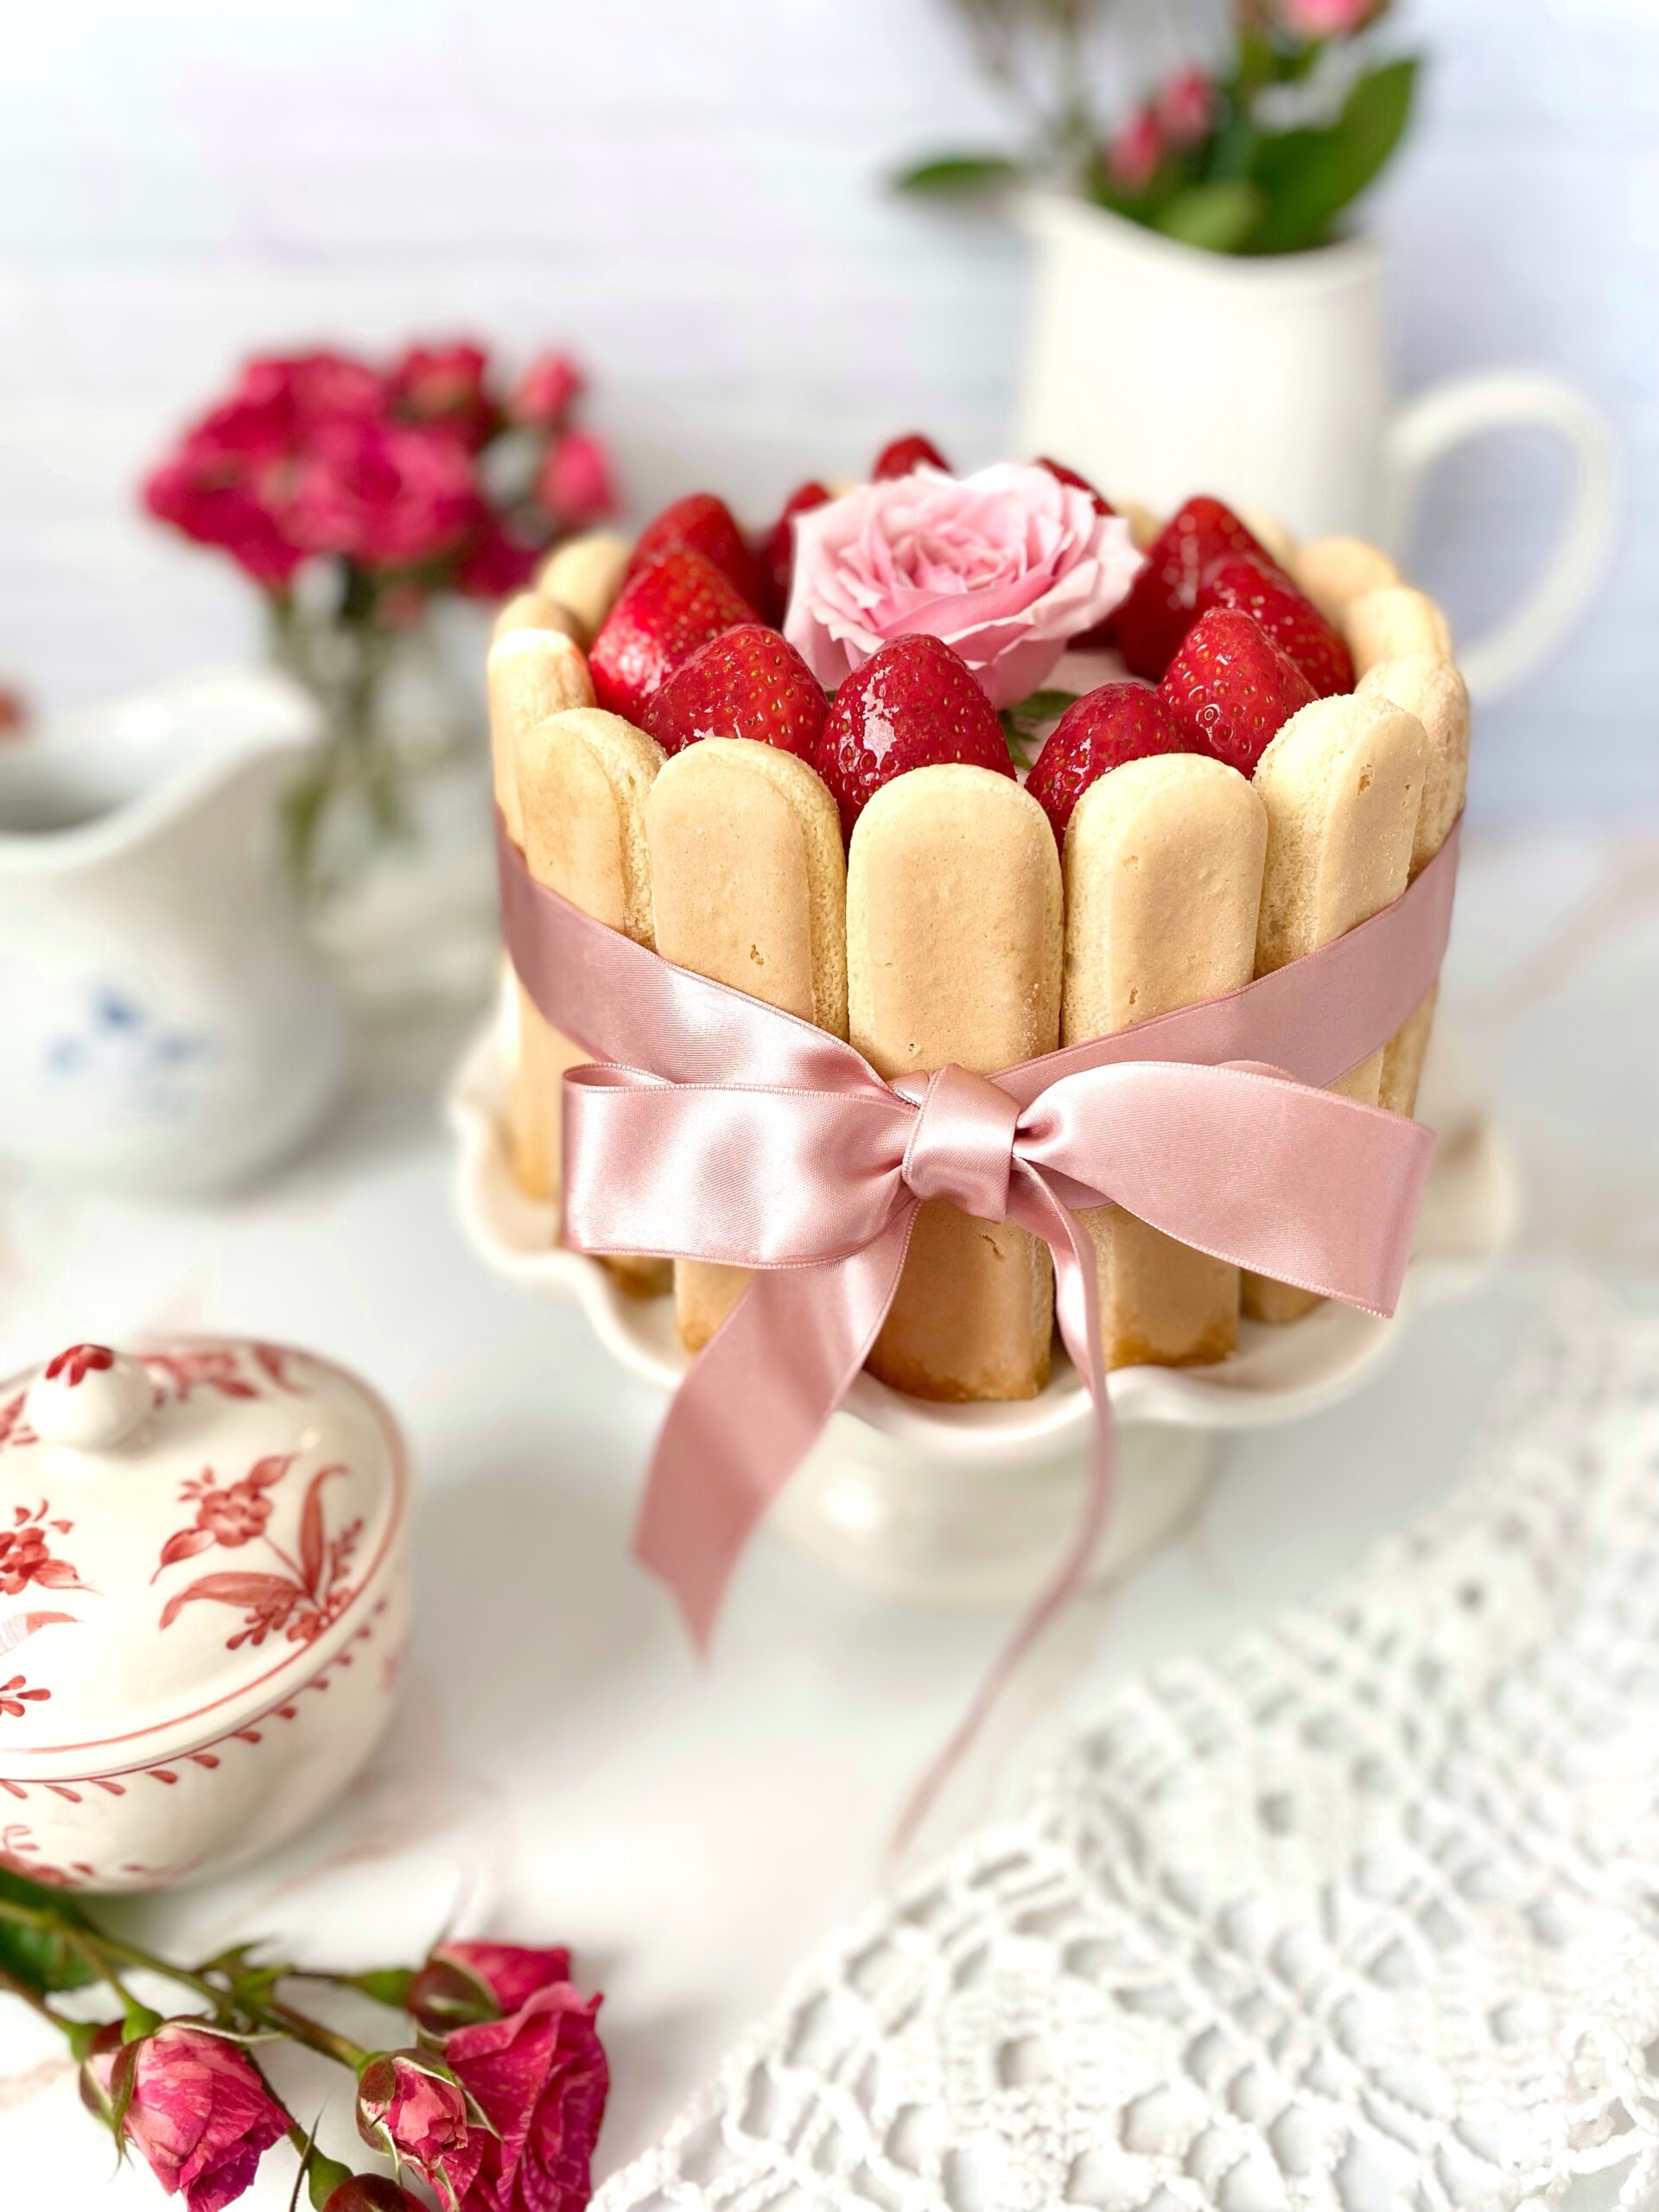
Meet Little Strawberry Charlotte. She brings romance with her wherever she goes. Whether it’s a tea party, a birthday celebration or a romantic dinner, you’ll gaze at her beauty and sigh. This lovely Charlotte has luscious strawberry mascarpone cream filling layered with lady fingers and topped with fresh strawberries. I used store bought lady fingers to make life easier but you can certainly bake your own if you wish. I typically make this in spring or summer when the weather is warm and strawberries are plentiful. But since my local stores start carrying an abundance of strawberries around Valentine’s Day, I thought it would be a perfect time to make this pretty little Charlotte.
Little Strawberry Charlotte
A pretty no-bake dessert layered with strawberry mascarpone cream filling and lady fingers and topped with fresh strawberries.
In a separate large bowl, whip the heavy cream with an electric mixer on medium-high speed until medium peaks form, being careful not to over whip. Fold the whipped cream into mascarpone mixture.
Slice one round end off of 16 ladyfingers. Dunk them briefly in the simple syrup then line them up along the inner sides of a 7-inch by 3 inch deep springform pan.* Typically you would line them smooth side in facing the filling, but I placed mine smooth side out which gives a smooth look on the outside and it makes removal from the pan easier. (You can also line the bottom of the pan with a cake board** if you don't want to serve the dessert from the base.)
Line the bottom snuggly with ladyfingers, cutting to fit where necessary. Top with half of the filling, about 2 cups. Then top with a layer of ladyfingers, cutting to fit. Top with the remaining filling. Smooth the top with a small offset spatula. Cover with plastic wrap and chill in refrigerator at least 4 hours.
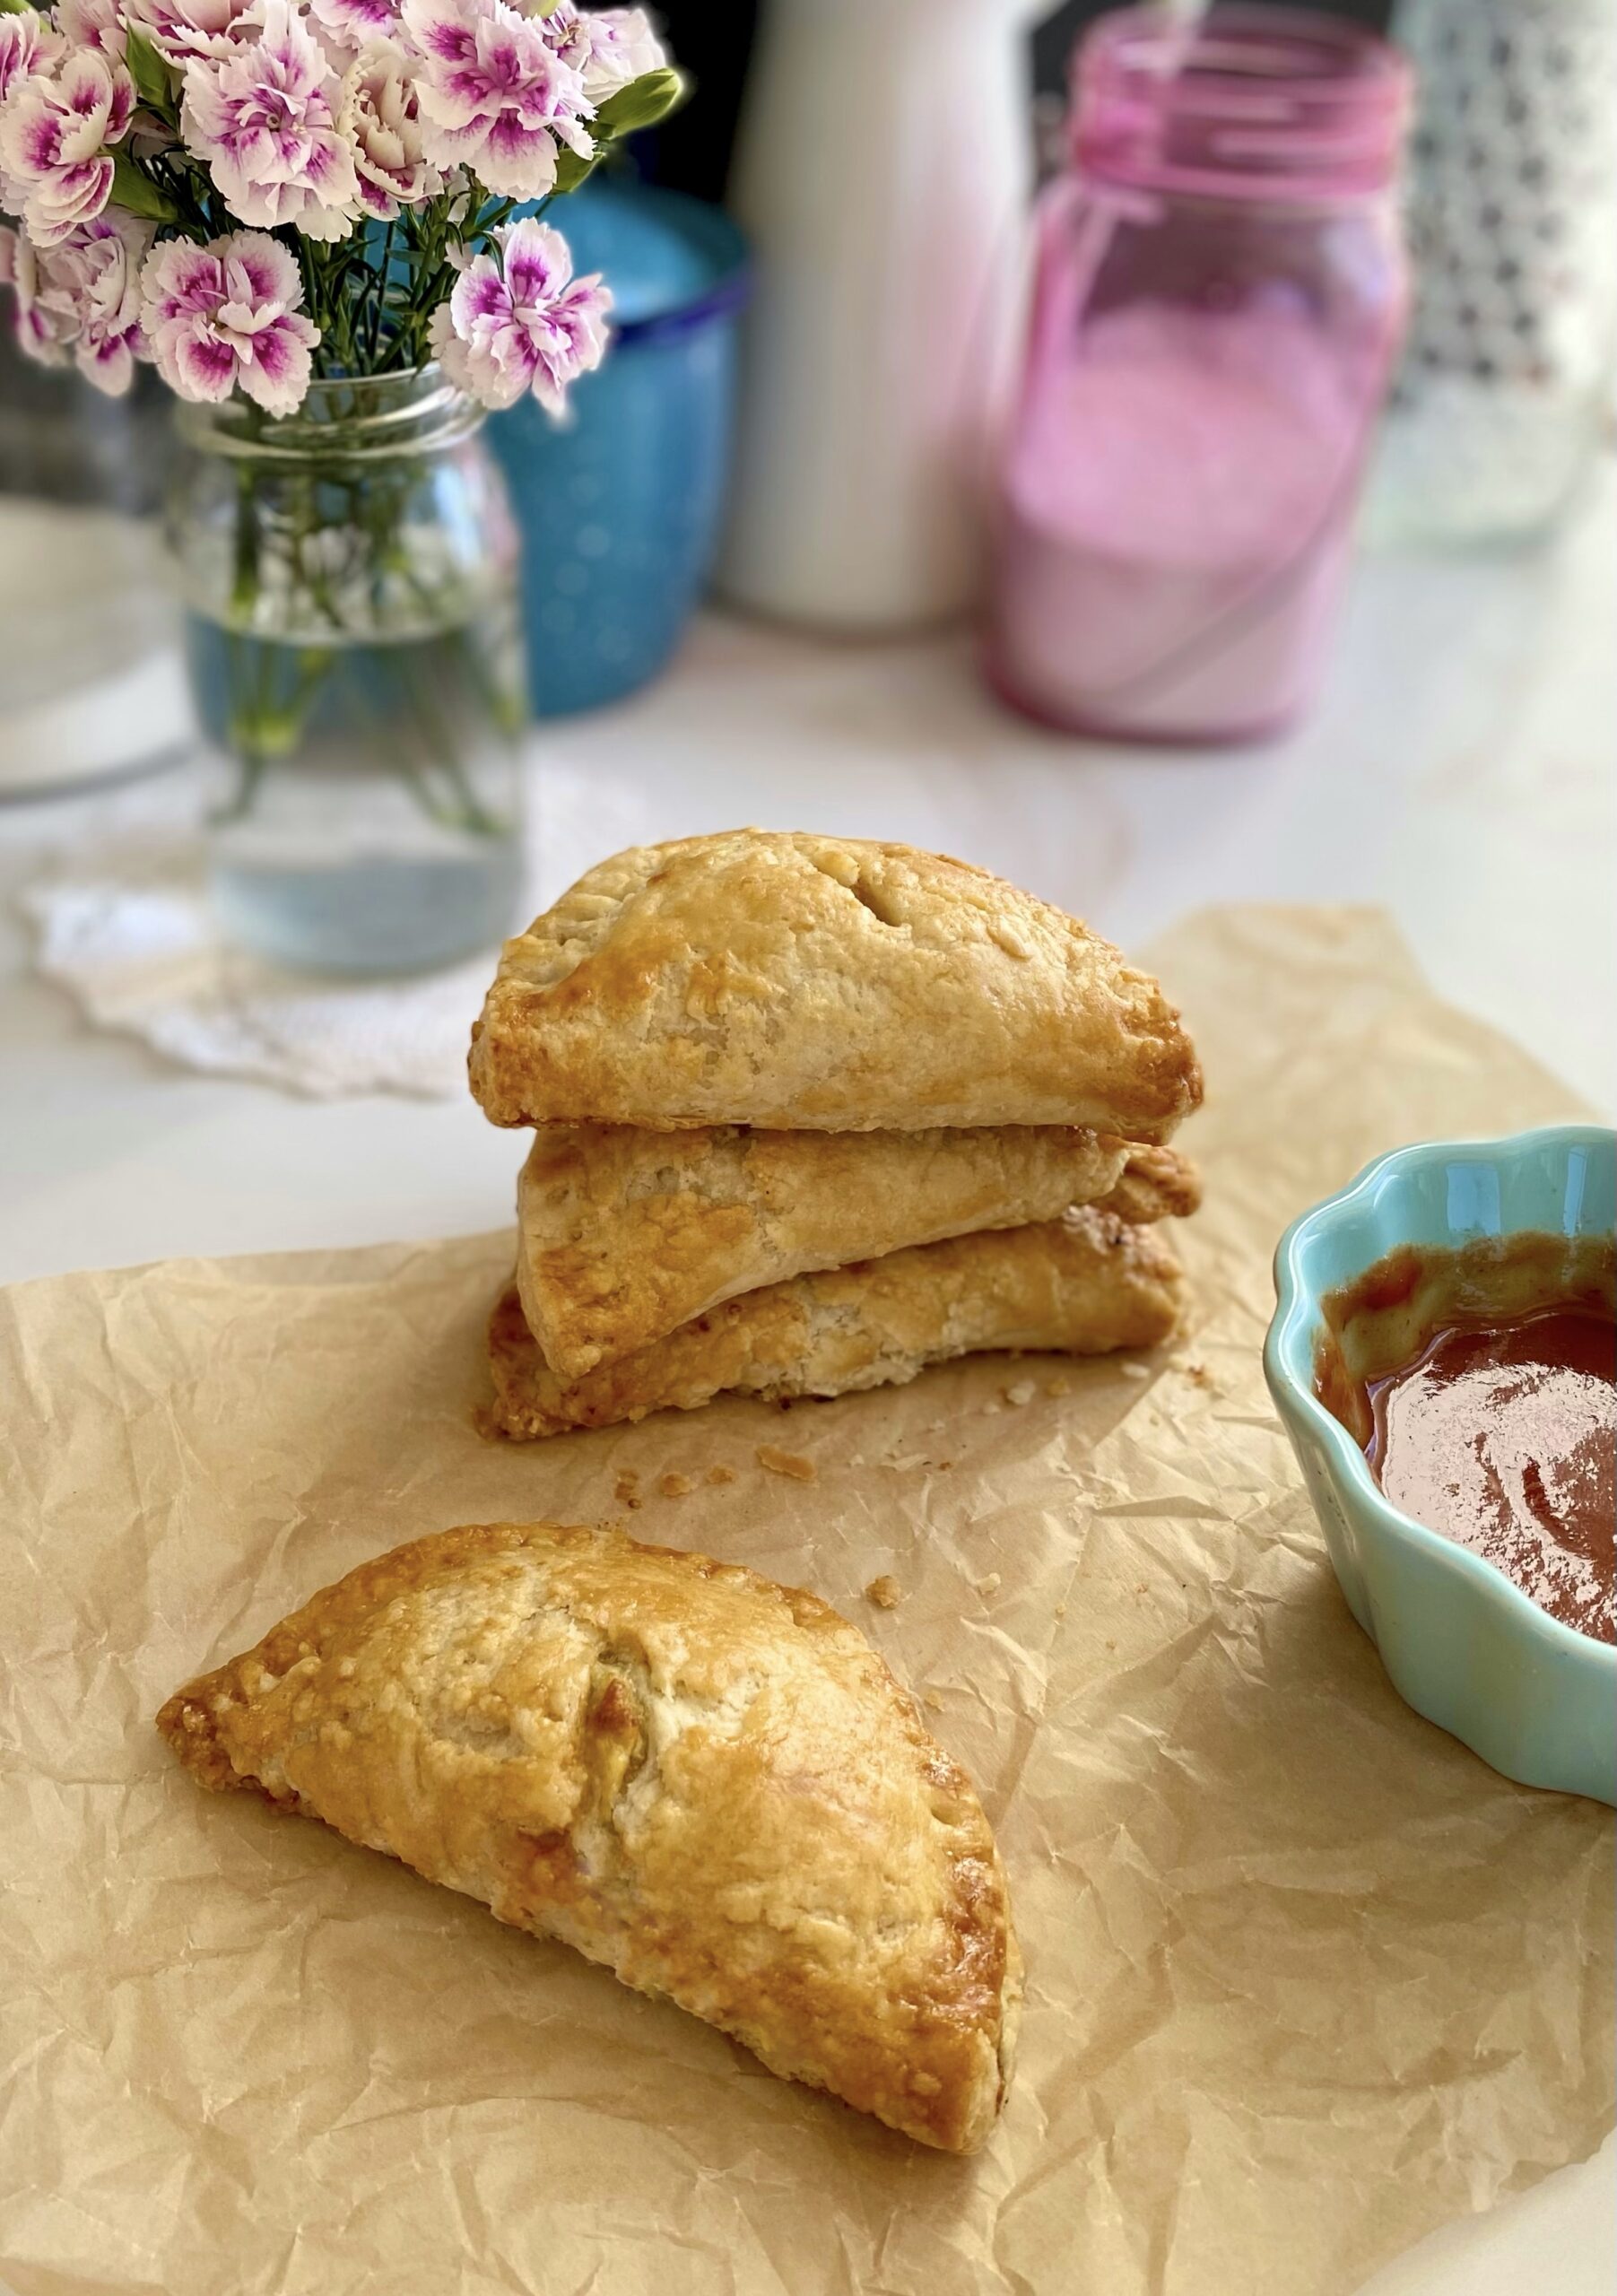
Italian Easter Pie, also known as Pizza Rustica is a rich, delicious, savory pie, similar to a quiche. When I was growing up, my family enjoyed this pie at Easter time, but it’s delicious and comforting any time of the year. Easter Pie typically contains meats and cheeses. We made ours with sausage, cheese and spinach. I started making these small, handheld versions years ago for my kids. They love dipping them in pizza sauce. I included the recipe for the homemade pie crust below, but you can streamline the recipe by making the pie dough the night before or using store bought 2-crust pie dough if you wish.
Italian Easter Pocket Pies
Golden handheld pies filled with Italian sausage, spinach, ricotta and mozzarella cheese
¾cup (about 1 link)cooked, crumbled Italian turkey sausageor any sausage of your choice
1 cup (38g)chopped fresh spinach
1cup (113g)shredded mozarella cheese
¼cup (57g)ricotta cheese
¼teaspoonfine sea salt
¼teaspoon Italian seasoning
â…›teaspoongarlic powder
â…›teaspoonpepper
Instructions
Pie Crust
Whisk together the flour, sugar, and salt in a large bowl. Work the shortening into the flour mixture with your fingertips until evenly distributed. Work the butter into the flour mixture until flat, dime size pieces are formed.
In a small bowl combine the ice water and vinegar. Sprinkle the ice water mixture over the flour mixture a little at a time and mix just until the dough comes together. You may not need all of the water, depending on your climate. On a lightly floured surface, fold the dough over onto itself a couple of times. Form the dough into two disks. Wrap the disks in plastic wrap. Refrigerate at least two hours or up to overnight.
Filling and Assembly
Preheat the oven to 375ºF (190ºC). Line a large baking sheet with parchment paper.
Combine the sausage, spinach, cheeses and seasonings in a medium bowl and mix well.
Roll out the pie dough to 1/8-inch thickness. Cut into ten 5-inch rounds. Place the rounds on the prepared baking sheet.
Brush the edges of the rounds with egg wash. Place about 3 tablespoons of filling into the center of each round. Fold the dough over and press the edges to seal. Crimp the edges with a fork. Brush the pies with egg wash. Cut a 3/4-inch ventilation slit on the top of each pie.
Bake until golden brown, about 25-30 minutes. Serve with pizza sauce or marinara if desired.
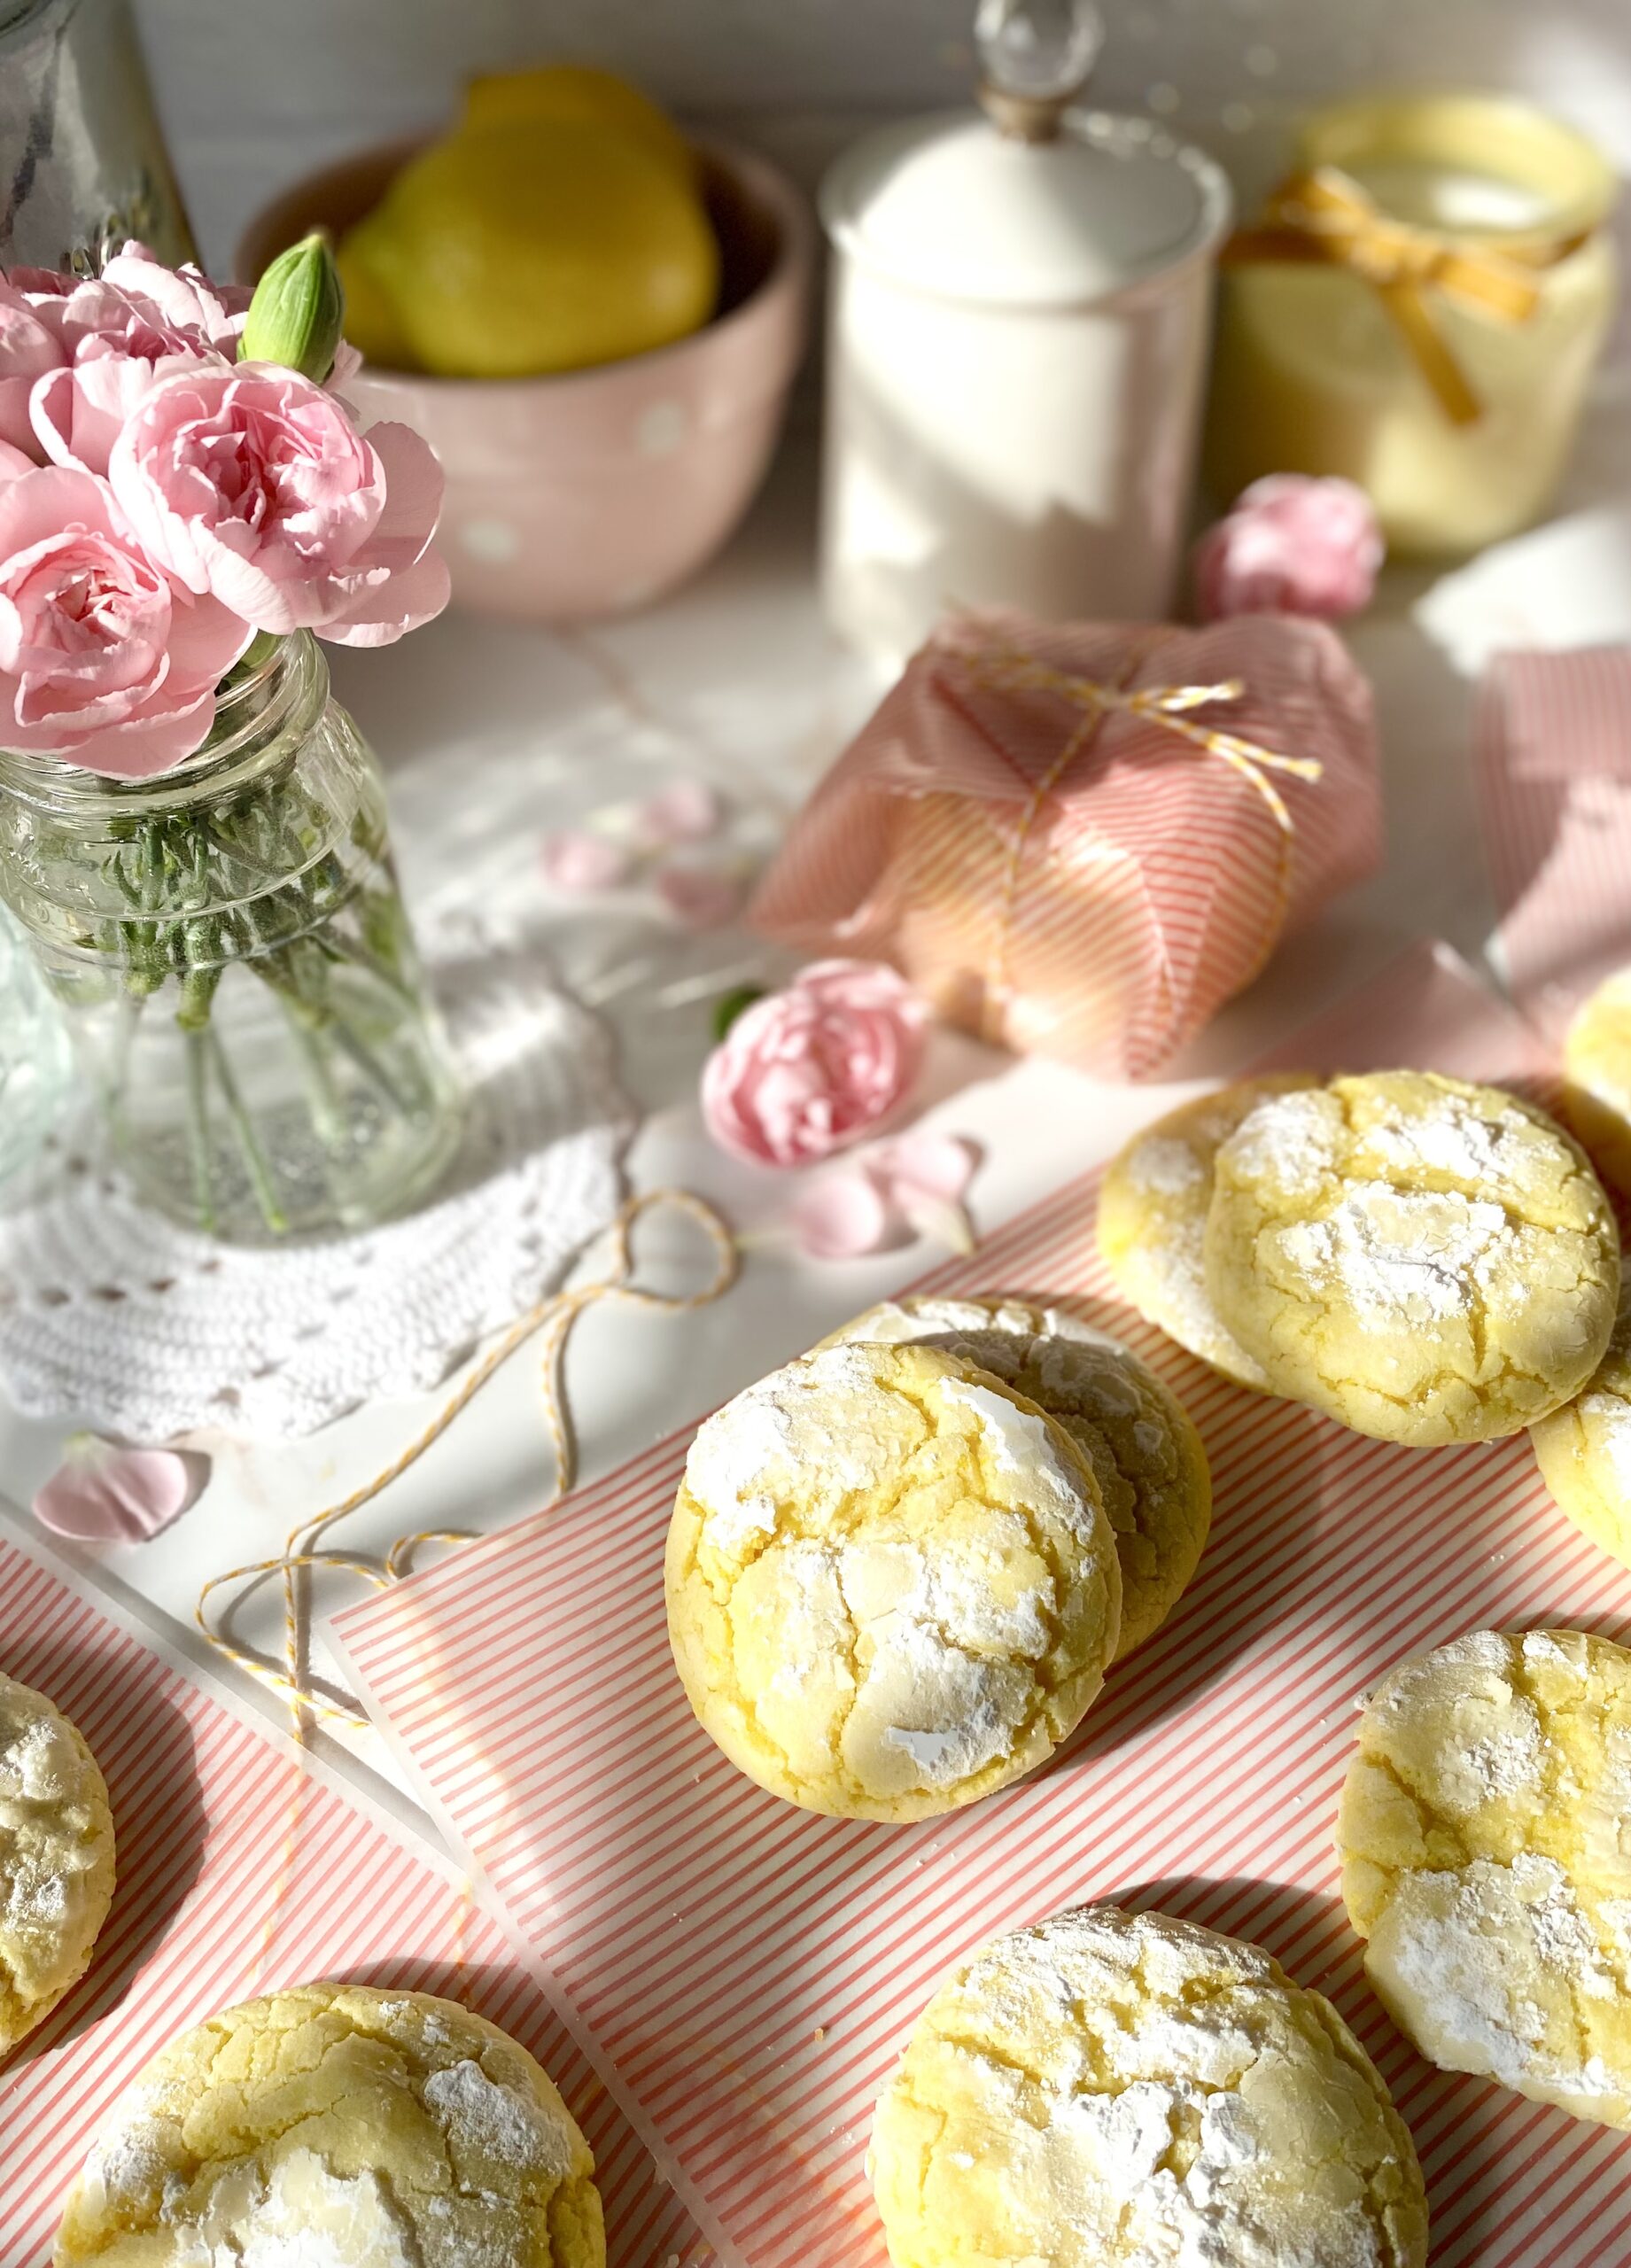
Crinkle cookies, also known as crackle cookies, have been around for a very long time. The pretty, crispy, cracked exterior and the soft, moist interior are what we love about them! There’s definitely no shortage of recipes for crinkles out there, everything from chocolate to red velvet. I even saw an audacious cookie company selling lemon crinkles for twelve dollars each, more money than it will cost for this entire batch! So many of the recipes I tried were disappointing, especially the ones made with cake mix. So I created my own version which happened to go viral! Here’s to making sure delicious lemon crinkle cookies are available for all to enjoy.
This recipe requires a bit of chilling, which I know many people don’t like because they’re impatient. I happen to be one of those people. Old fashioned crinkle cookies require about 3 hours of chilling. My recipe has the addition of cornstarch, which helps prevent spreading and allows for a shorter chilling time. As an added bonus, cornstarch makes the cookies more tender. Win win!
Fresh lemon zest and lemon juice in these cookies is crucial to the best lemon flavor. A bit of pure lemon extract is added to enhance that flavor. Don’t be tempted to use imitation extracts. The flavor will disappoint you. I added two drops of lemon yellow food color, which made them so pretty they look like pure sunshine!
Â
Lemon Crinkle Cookies
Lemon cookies with a crackled, crispy exterior and a soft, tender interior
1-2dropsyellow gel food coloring (optional)*I used Americolor lemon yellow
½cup (60g)powdered sugar
Instructions
In a medium-sized bowl, whisk together the flour, cornstarch, baking powder, salt and baking soda until well blended.
In a large bowl, beat the butter, sugar and lemon zest together until pale and fluffy. Beat in the egg until well incorporated. Mix in the lemon juice, extracts and food coloring until well combined. Add the flour mixture and mix just until combined.
Refrigerate the cookie dough for 30 minutes to one hour.
Meanwhile, preheat the oven to 350ºF (180ºC). Line two large cookie sheets with parchment paper.
Roll the dough into balls, about 2 tablespoons each. I used a #30 portion scoop*. Roll the dough balls generously in powdered sugar.
Place the dough balls about 2 inches apart onto the prepared baking sheets.
Bake until the cookies are set, about 10-12 minutes. Let them cool on the cookie sheet for 1 minute then transfer to a cooling rack.
Notes
*To find Americolor lemon yellow gel food color, click here.**To find a #30 cookie scoop, click here.To find the striped wax paper pictured above, click here.
Once upon a time, there was a little black bear who woke up from a long nap. As she stretched, she felt her tummy growl. She ventured into the morning sunshine and smelled something sweet. She sniffed the air, following the sweet fragrance until she came upon a beautiful purple tree. She climbed up to a comfy branch and ate the tender, purple blossoms to her heart’s content.
Bears, butterflies and bees know something good when they see it. We humans can also enjoy lilacs. I knew lilacs were edible, but I hadn’t tasted them until recently. The flavor reminds me of beets, slightly sweet with a vegetable aftertaste. I really wanted to try lilac syrup after seeing so many photos of pretty purple syrup online. I discovered that lilac syrup is not purple. It’s more of a dull, brownish blue-green. Many people use food coloring or blueberries to color their syrup. I also discovered that lilac syrup will turn a pretty shade of mauve by adding a small amount of lemon juice to the finished syrup. Since I would be using my lilac syrup inside of cake layers, I let it remain its natural color. I made a simple syrup with lilac blossoms and let them steep for a couple of hours. It was just long enough to give a subtle lilac flavor without being too floral. If you want a stronger lilac flavor, I suggest using more lilac blossoms rather than steeping longer to avoid bitterness.
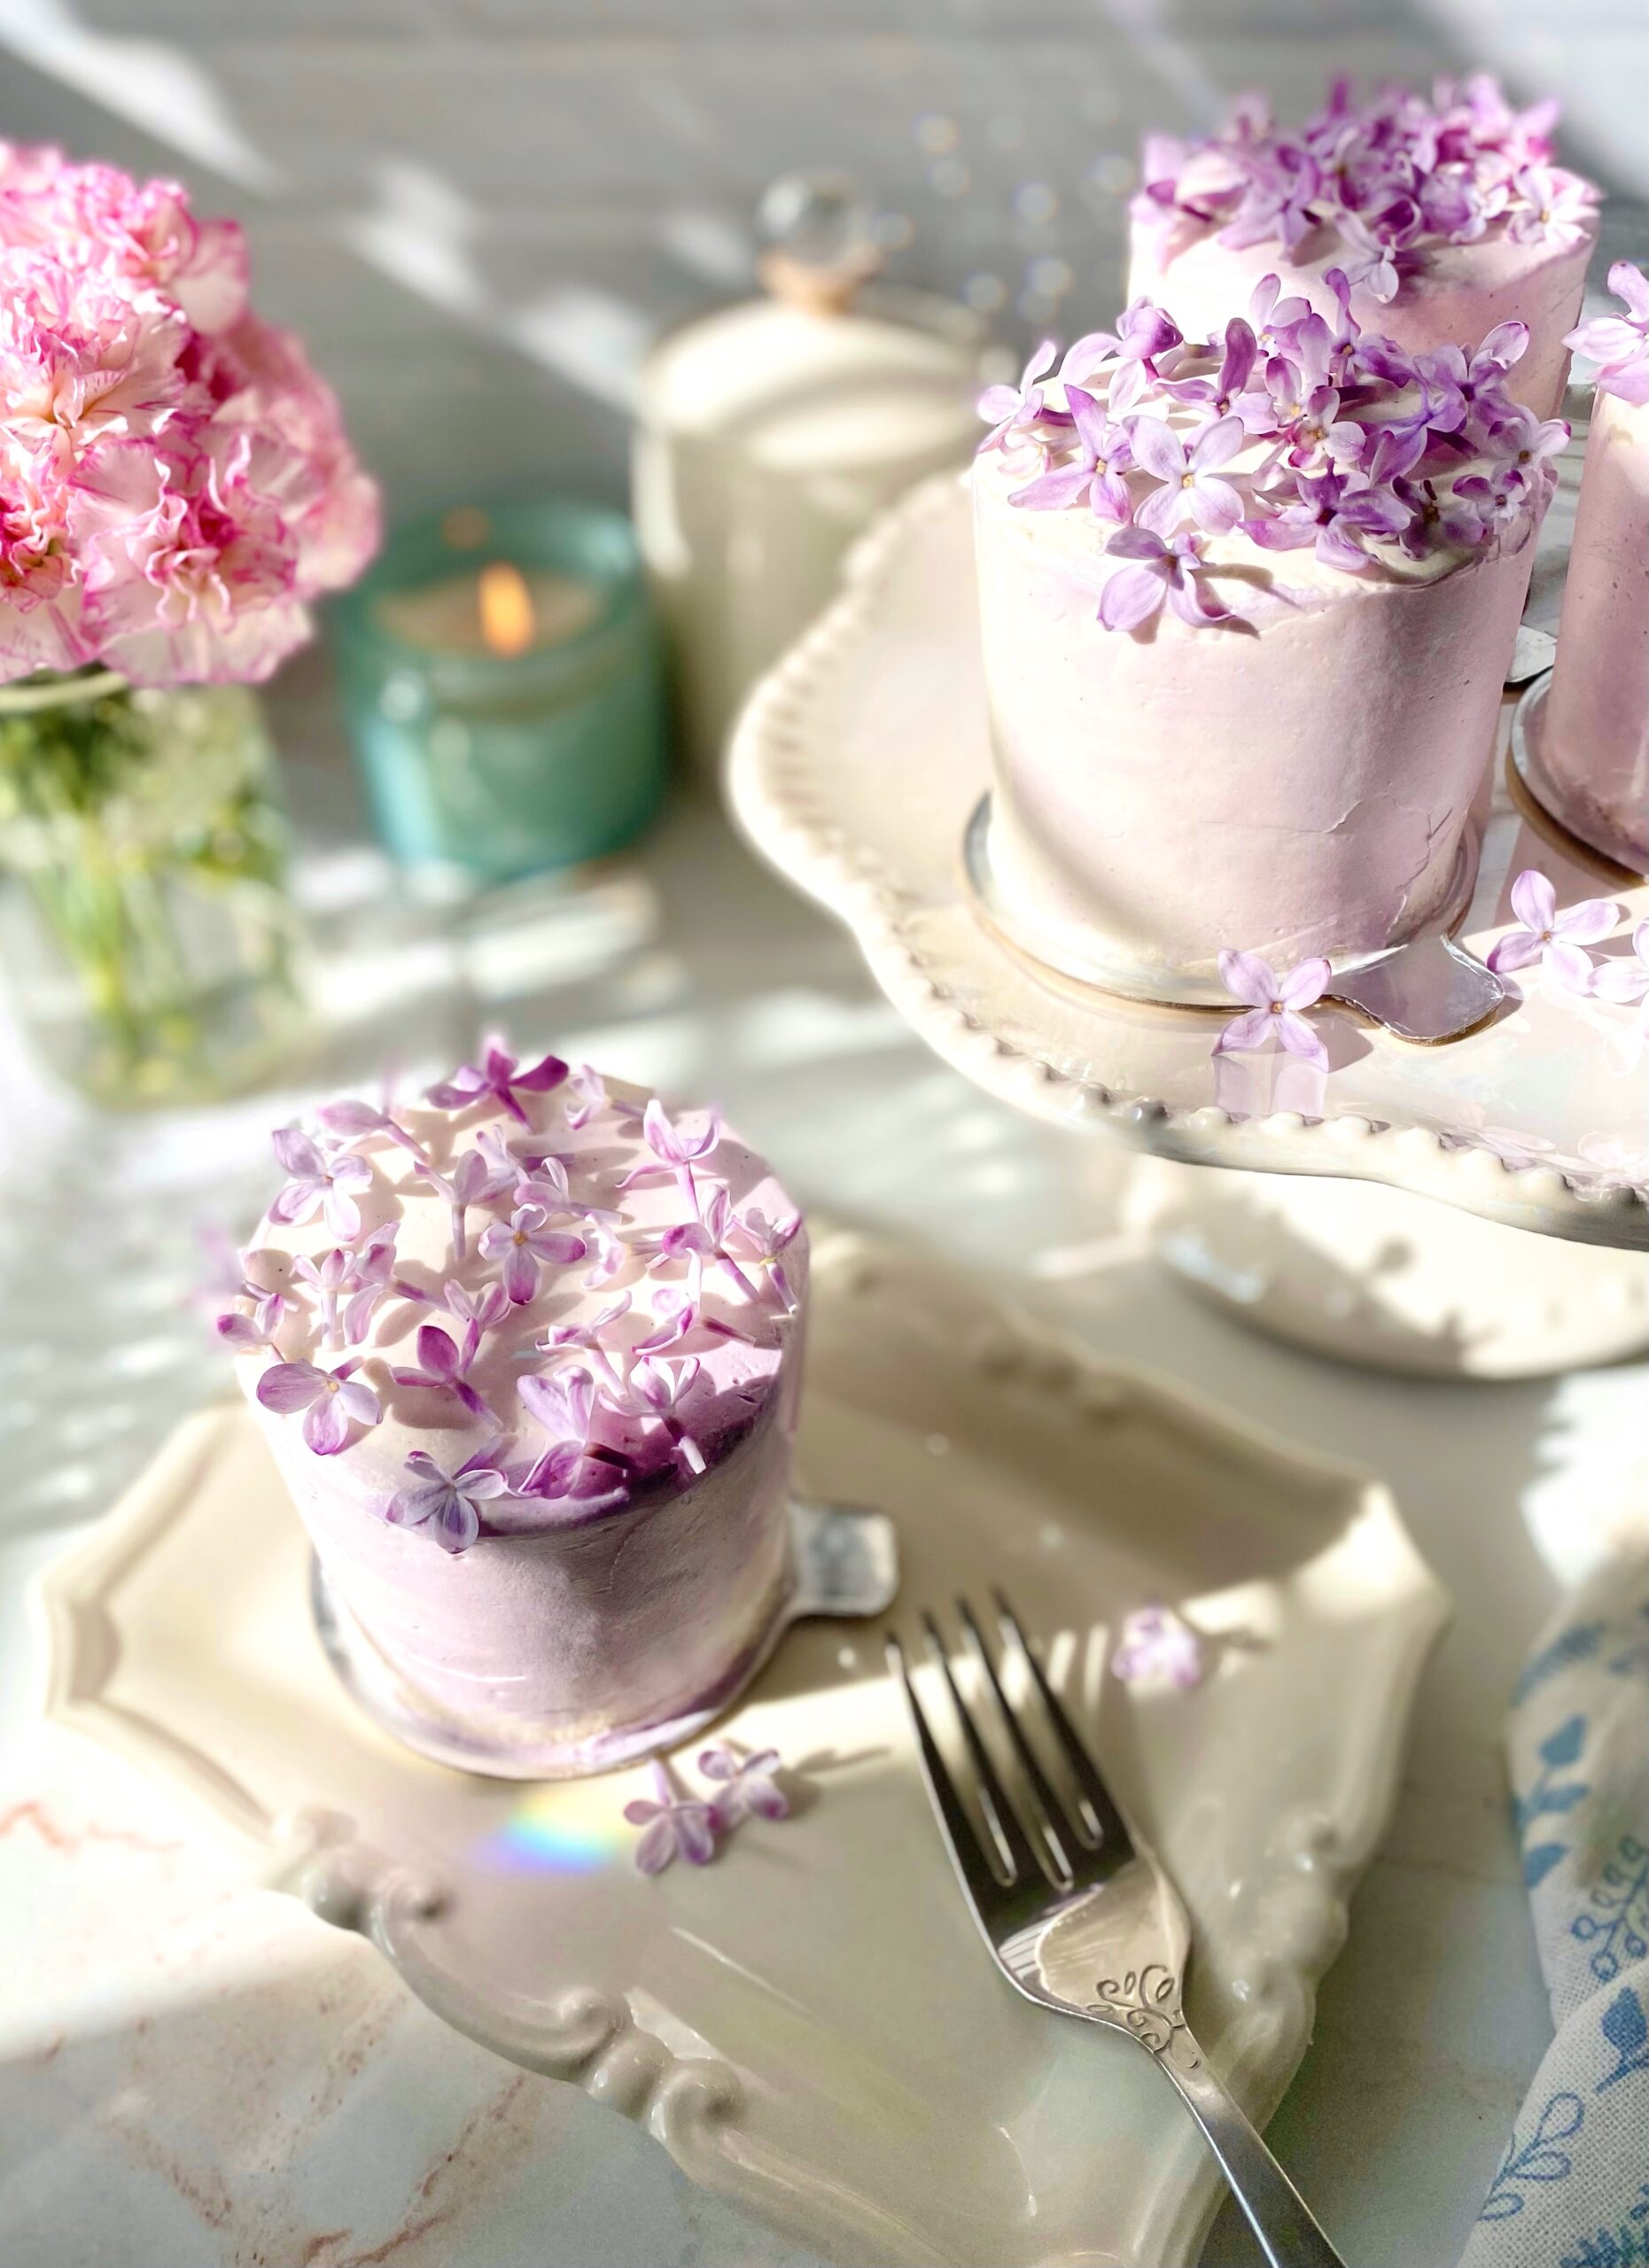
I paired the lilac syrup with this soft, fluffy vanilla cake and silky Swiss meringue buttercream. If you aren’t a fan of lilac syrup, feel free to use vanilla simple syrup instead and just use the lilac blossoms to decorate your cakes. They look stunning on any cake or cupcakes.
Â
Lilac Vanilla Mini Cakes
by Mari Vasseur
Soft, fluffy mini white vanilla cakes with lilac syrup and vanilla Swiss meringue buttercream, topped with lilac blossoms
½ cup (7g)lilac blossoms, rinsed and all stems removed
1teaspoonfresh lemon juiceoptional
White Vanilla Cake
2 ¾cups (319g))cake flour, sifted
2teaspoonsbaking powder
1teaspoonfine sea salt
½cup (113g)unsalted butter, softened
1 ¾cups (350g)ultra fine granulated sugar*Not powdered sugar
¼cup (2 oz or 57ml)vegetable oil or neutral oil of your choice
2teaspoonsvanilla bean paste or pure vanilla extract
4largeegg whites, room temperature
1largeegg, room temperature
½cup (118ml)sour cream, room temperature
1cup (237ml)whole milk, room temperature
Swiss Meringue Buttercream
4largeegg whites
1 â…“cups (265g)ultra fine granulated sugar*Not powdered sugar
1 ½ cups (340g)softened, unsalted butter, cubed
1teaspoonvanilla bean paste or pure vanilla extract
¼teaspoon fine sea salt
1-2dropslilac gel good colorSee notes below
1dropviolet gel food colorSee notes below
Assembly
63-inch mini cake boards****See notes below
Lilac blossoms, rinsed and all stems removed
Instructions
Lilac Syrup
In a small saucepan combine the sugar and water. Bring to a boil over medium heat, stirring gently to dissolve the sugar. Add the the lilac blossoms and stir gently. Turn the heat down and simmer for 5 minutes.
Remove from heat and allow the lilac blossoms to steep for 2 hours. Pass the lilac syrup through a mesh sieve.
White Vanilla Cake
Preheat the oven to 350ºF (180ºC). Grease and flour two 9-inch round cake pans and line the bottoms with parchment paper.
In a medium-sized bowl, whisk together the cake flour, baking powder and salt until well blended.
In a large bowl, beat the butter, sugar, oil and vanilla bean paste with an electric mixer at medium speed, until pale and fluffy, about 3 minutes.
On medium speed, beat in the egg whites in two additions, then beat in the egg until incorporated. On low speed, beat in one third of the flour mixture, then beat in the sour cream just until combined. Beat in the remaining flour mixture in two additions, alternating with milk. Beat just until combined.
Transfer the batter to prepared cake pans. Bake until the tops of the cakes are light golden brown and a toothpick inserted in center comes out clean, about 28-33 minutes. Do not over bake.
Allow the cakes to cool in the pans for 10 minutes, then remove from the pans and transfer to a cooling rack.
Cut each cake into four 2 3/4-inch rounds using a cookie or biscuit cutter.
Using a pastry brush, brush the mini cakes generously with lilac syrup or vanilla simple syrup.
Swiss Meringue Buttercream
Combine the egg whites and sugar in a large heatproof bowl. Set over a pan of gently simmering water, making sure the water doesn't touch the bottom of the bowl.
Whisk constantly until the sugar is dissolved and a temperature of 160ºF (71ºC) is reached.
Transfer the mixture to the bowl of a stand mixer with a whisk attachment. Whisk on low speed, gradually increasing to medium-high speed. Whisk until glossy, stiff peaks form and the mixture reaches room temperature.
Turn the mixer to medium-low speed. Add the butter, a few pieces at a time, allowing it to fully incorporate before adding more. If the mixture looks curdled, keep mixing and it will correct itself.
Switch to a paddle attachment. On low speed, mix in the vanilla bean paste and salt. Continue mixing on low speed for a few minutes until smooth.
Remove about 3/4 cup of frosting and transfer it to a small bowl. Using a toothpick, place two tiny drops of lilac gel food color and one tiny drop of violet gel food color into the bowl. Mix with a spatula until well combined.
Assembly
Smear a bit of frosting on each mini cake board. Top each one with a cake round, a layer of frosting, then a second cake round. Frost with a crumb coat if desired. Refrigerate of 15 minutes. Frost the mini cakes with white Swiss meringue buttercream, then smear small amounts of lilac Swiss meringue buttercream around the sides and top. Smooth frosting with a bench scraper and smooth the tops with a small offset spatula. Decorate with lilac blossoms.
Vanilla Simple Syrup (optional)
Combine 1/2 cup sugar and 1/2 cup water in a small saucepan. Bring to a boil over medium heat, stirring gently to dissolve the sugar. When the sugar has dissolved, remove from heat and stir in 1 teaspoon vanilla bean paste or pure vanilla extract.
Notes
*If you can't find ultra fine granulated sugar, it's okay to substitute with regular granulated sugar.**To find the lilac gel food color I used, click here.***To find the violet gel food color I used, click here.****To find 3-inch mini cake boards, click here.
I don’t think I’ve ever created a recipe that delighted all of my senses as much as these cookies. I used dried rosebuds in the cookie dough, but you can also use dried rose petals. Whether you purchase dried rose petals or make them yourself, they’re pleasantly fragrant with a subtle flavor. To find dried rose petals, click here. To find dried rosebuds, click here. I pinched the calyx and stem off of the rosebuds to avoid large crunchy bits in the cookies, then I crushed the roses with a mortar and pestle. You’ll hear the satisfying crunch of the delicate, dried rose petals. You can also place them in a plastic bag and roll over them gently with a rolling pin.
The finished cookies have a rustic, almost shabby chic look with their cracks, rose-speckled dough and beautifully imperfect dried roses. And of course, you’ll want to sample a warm cookie. The cookies will taste tender and slightly sweet with a hint of rose. I like a more subtle rose flavor in my baked goods. But if you prefer a stronger rose flavor, feel free to add a small amount of rose water to your dough. Start with 1/4 teaspoon, because a little goes a long way.
If you’re like me, you’ll taste a spoonful of the raspberry ganache because you can and should. For the raspberry ganache, please use a good quality white chocolate! In some recipes, it’s fine to use white chocolate chips or candy melts if you prefer, but NOT this one. In my humble, yet educated opinion, you should never use chocolate chips to make ganache. I studied chocolate in culinary school with a master chocolatier. I never use chocolate chips for ganache because they contain stabilizers that keep them from melting completely, which prevents you from having the smoothest ganache possible. They also contain less cocoa butter and tend to have a waxy mouth feel.
For this recipe, when it comes to butter, you should also be a little bit picky for successful baking. Low quality butter tends to contain more water and your cookies may spread too much. So make sure to use good butter. Your butter should be room temperature, but not warm. If the butter is shiny, it’s too warm. Don’t try to speed up the softening of butter with your microwave. That’s not a hack, in spite of what you may hear on the internet. Microwaves heat unevenly and will potentially melt your butter. The best way to speed up the softening of your butter is to simply cut it into cubes. By the time you get the rest of your ingredients ready, the butter should be soft enough to use. My last, but most important success tip, is to weigh your ingredients.
You’ll find this recipe and more delightful bakes, in my cookbook “Enchanted Baking.” Click here for more info.
Â
Raspberry Rose Shortbread Cookies
Mari Vasseur
Rose petal shortbread cookies filled with white chocolate raspberry ganache
3ounces (or 85g)white chocolate, finely choppedDo not use white chocolate chips
30dried rosebuds for decorationoptional
Instructions
Cookies
Preheat the oven to 350ºF (180ºC). Line two large baking sheets with parchment paper
In a large bowl, beat the butter, with an electric mixer on medium speed, until smooth. Add the rose petals and beat on low speed until combined.
Add the powdered sugar, vanilla extract and salt. Beat until well combined.
On low speed, mix in the flour in two additions. Beat just until combined.
Roll the dough into 1 1/4-inch balls, about 1/2 ounce (14g) each. Place the dough balls about 2 inches apart onto the prepared baking sheets.
Bake for 7 minutes, then remove from the oven. Press indentations into each cookie with a 1-inch diameter pastry tamper or with the flat top of a 1-inch diameter bottle cap.
Return the cookies to the oven and continue baking until the edges are light golden brown, about 5-6 more minutes.
If the indentations in your cookies lose definition, press again with the tamper or bottle cap while the cookies are still hot on the baking sheet.
Transfer the cookies to a cooling rack to cool completely.
Place the white chocolate in a medium heat safe bowl and set aside.
In a small saucepan over medium heat, bring the heavy cream to a simmer, just until bubbles form around the edges. Do not boil. Stir in the raspberry reduction and heat just to a simmer again. Do not boil.
Pour the hot cream mixture over the white chocolate, making sure all of the white chocolate is submerged. Let it sit for 3 minutes, then stir with a spatula until smooth. Let the ganache cool until slightly thickened. Spoon about 1/2 teaspoon into the indentation of each cookie. The ganache will continue to firm up as it sits.
When the ganache in the cookies has firmed up, decorate with dried rosebud or rose petals, if desired.