Pumpkin Cinnamon Roll Cakes

Summer was such a happy season for me as a child that I didn’t want it to end. I still love summer, but now that I’m an adult, I begin to anticipate fall right around the time when I’m tired of harsh, hot temperatures, rumbling air conditioners and flies buzzing around at cookouts. Now is that time for me. It’s so hot where I live right now, that I’m welcoming the cool, crisp fall weather and all it brings.

The beautiful warm flavors of fall are perfectly captured in these Pumpkin Cinnamon Roll Cakes. The moist, perfectly spiced cakes are topped with a cinnamon swirl which is basically cinnamon roll filling. I topped them with Vanilla Bean Icing, but you can also make it cream cheese icing by swapping out 1 tablespoon of the melted butter for 1 tablespoon of softened cream cheese, if you prefer. The optional addition of meringue powder helps the icing set up and gives it that crunch we love on glazed donuts. To find meringue powder, click here.

I used a shallow jumbo muffin pan to make these cakes. The muffin cups are 4 inches wide and 1 inch deep. A hamburger bun pan for 4-inch buns or six 4-inch cake pans will also work. To find the pan I used, click here.

Pumpkin Cinnamon Roll Cakes

Moist pumpkin cakes with cinnamon swirls and vanilla bean icing
Course Breakfast, Brunch, Dessert
Servings 6 4-inch cakes

Ingredients
  

Pumpkin Cakes

  • 1 cup (4 1/2 oz or 128g) all purpose flour, sifted
  • 1 teaspoon baking powder
  • ½ teaspoon baking soda
  • ½ teaspoon fine sea salt
  • 1 teaspoon ground cinnamon
  • ½ teaspoon ground ginger
  • ¼ teaspoon ground nutmeg preferably freshly ground
  • 1 cup (7 oz or 200g) sugar
  • â…” cup (4 5/8 oz or 145ml) vegetable oil or neutral oil of your choice
  • 2 large eggs
  • 1 teaspoon pure vanilla extract
  • 1 cup (8 1/4 oz or 234g) pure pumpkin purée (not pumpkin pie filling)

Cinnamon Swirl

  • ½ cup (3 1/2 oz or 100g) packed brown sugar
  • 1 tablespoon all purpose flour
  • 2 ½ teaspoons ground cinnamon
  • pinch fine sea salt
  • ¼ cup (2 oz or 57g) unsalted butter, melted

Vanilla Bean Icing

  • 2 tablespoons (1 oz or 28g) unsalted butter, melted
  • ½ teaspoon vanilla bean paste
  • ½ cup (2 1/8 oz or 60g) powdered sugar
  • ½ teaspoon meringue powder optional
  • pinch fine sea salt
  • 2-3 tablespoons (30-45ml) whole milk

Instructions
 

Pumpkin Cakes

  • Preheat the oven to 350ºF (180ºC). Line a 6-serving shallow jumbo muffin pan with jumbo muffin liners.* (The liners will fit by pressing them in around the inside bottom edges.) The muffin pan I used has cups that are 4-inches across by 1-inch deep. A hamburger bun pan for 4-inch buns or six 4-inch cake pans will also work.
  • In a medium-size bowl, whisk together the flour, baking powder, baking soda, salt, cinnamon, ginger and nutmeg until well combined.
  • In a large bowl, whisk together the sugar, oil, eggs and vanilla until smooth and well combined. Mix in the pumpkin purée. Stir in the flour in two additions, just until combined.
  • Transfer the batter to the muffin cups, evenly dividing the batter among the cups. Pipe the cinnamon swirl mixture in a spiral on the top of the batter of each one.
  • Bake until a toothpick inserted into the center of the cake part comes out clean, about 23-27 minutes. Let the cakes cool in the pan for 5 minutes, then transfer to a cooling rack.

Cinnamon Swirl

  • In a small bowl, whisk together the brown sugar, flour, cinnamon and salt. Add the melted butter and whisk until well combined.
  • Transfer the mixture to a piping bag fitted with a 1/4-inch wide round tip.

Vanilla Bean Icing

  • In a small bowl, whisk together the butter, vanilla bean paste, powdered sugar, meringue powder, salt and 1 tablespoon (15ml) of milk until well combined. Whisk in more milk as needed to reach your desired consistency.
  • Brush the icing on the cooled cakes with a small pastry brush or make the icing a little thinner and drizzle the icing on if you prefer.
Notes

*To find jumbo muffin liners, click here.
To find the baking pan I used, click here.
To find 4-inch cake pans, click here.
To find meringue powder click here.
Keyword cake, pumpkin cinnamon roll

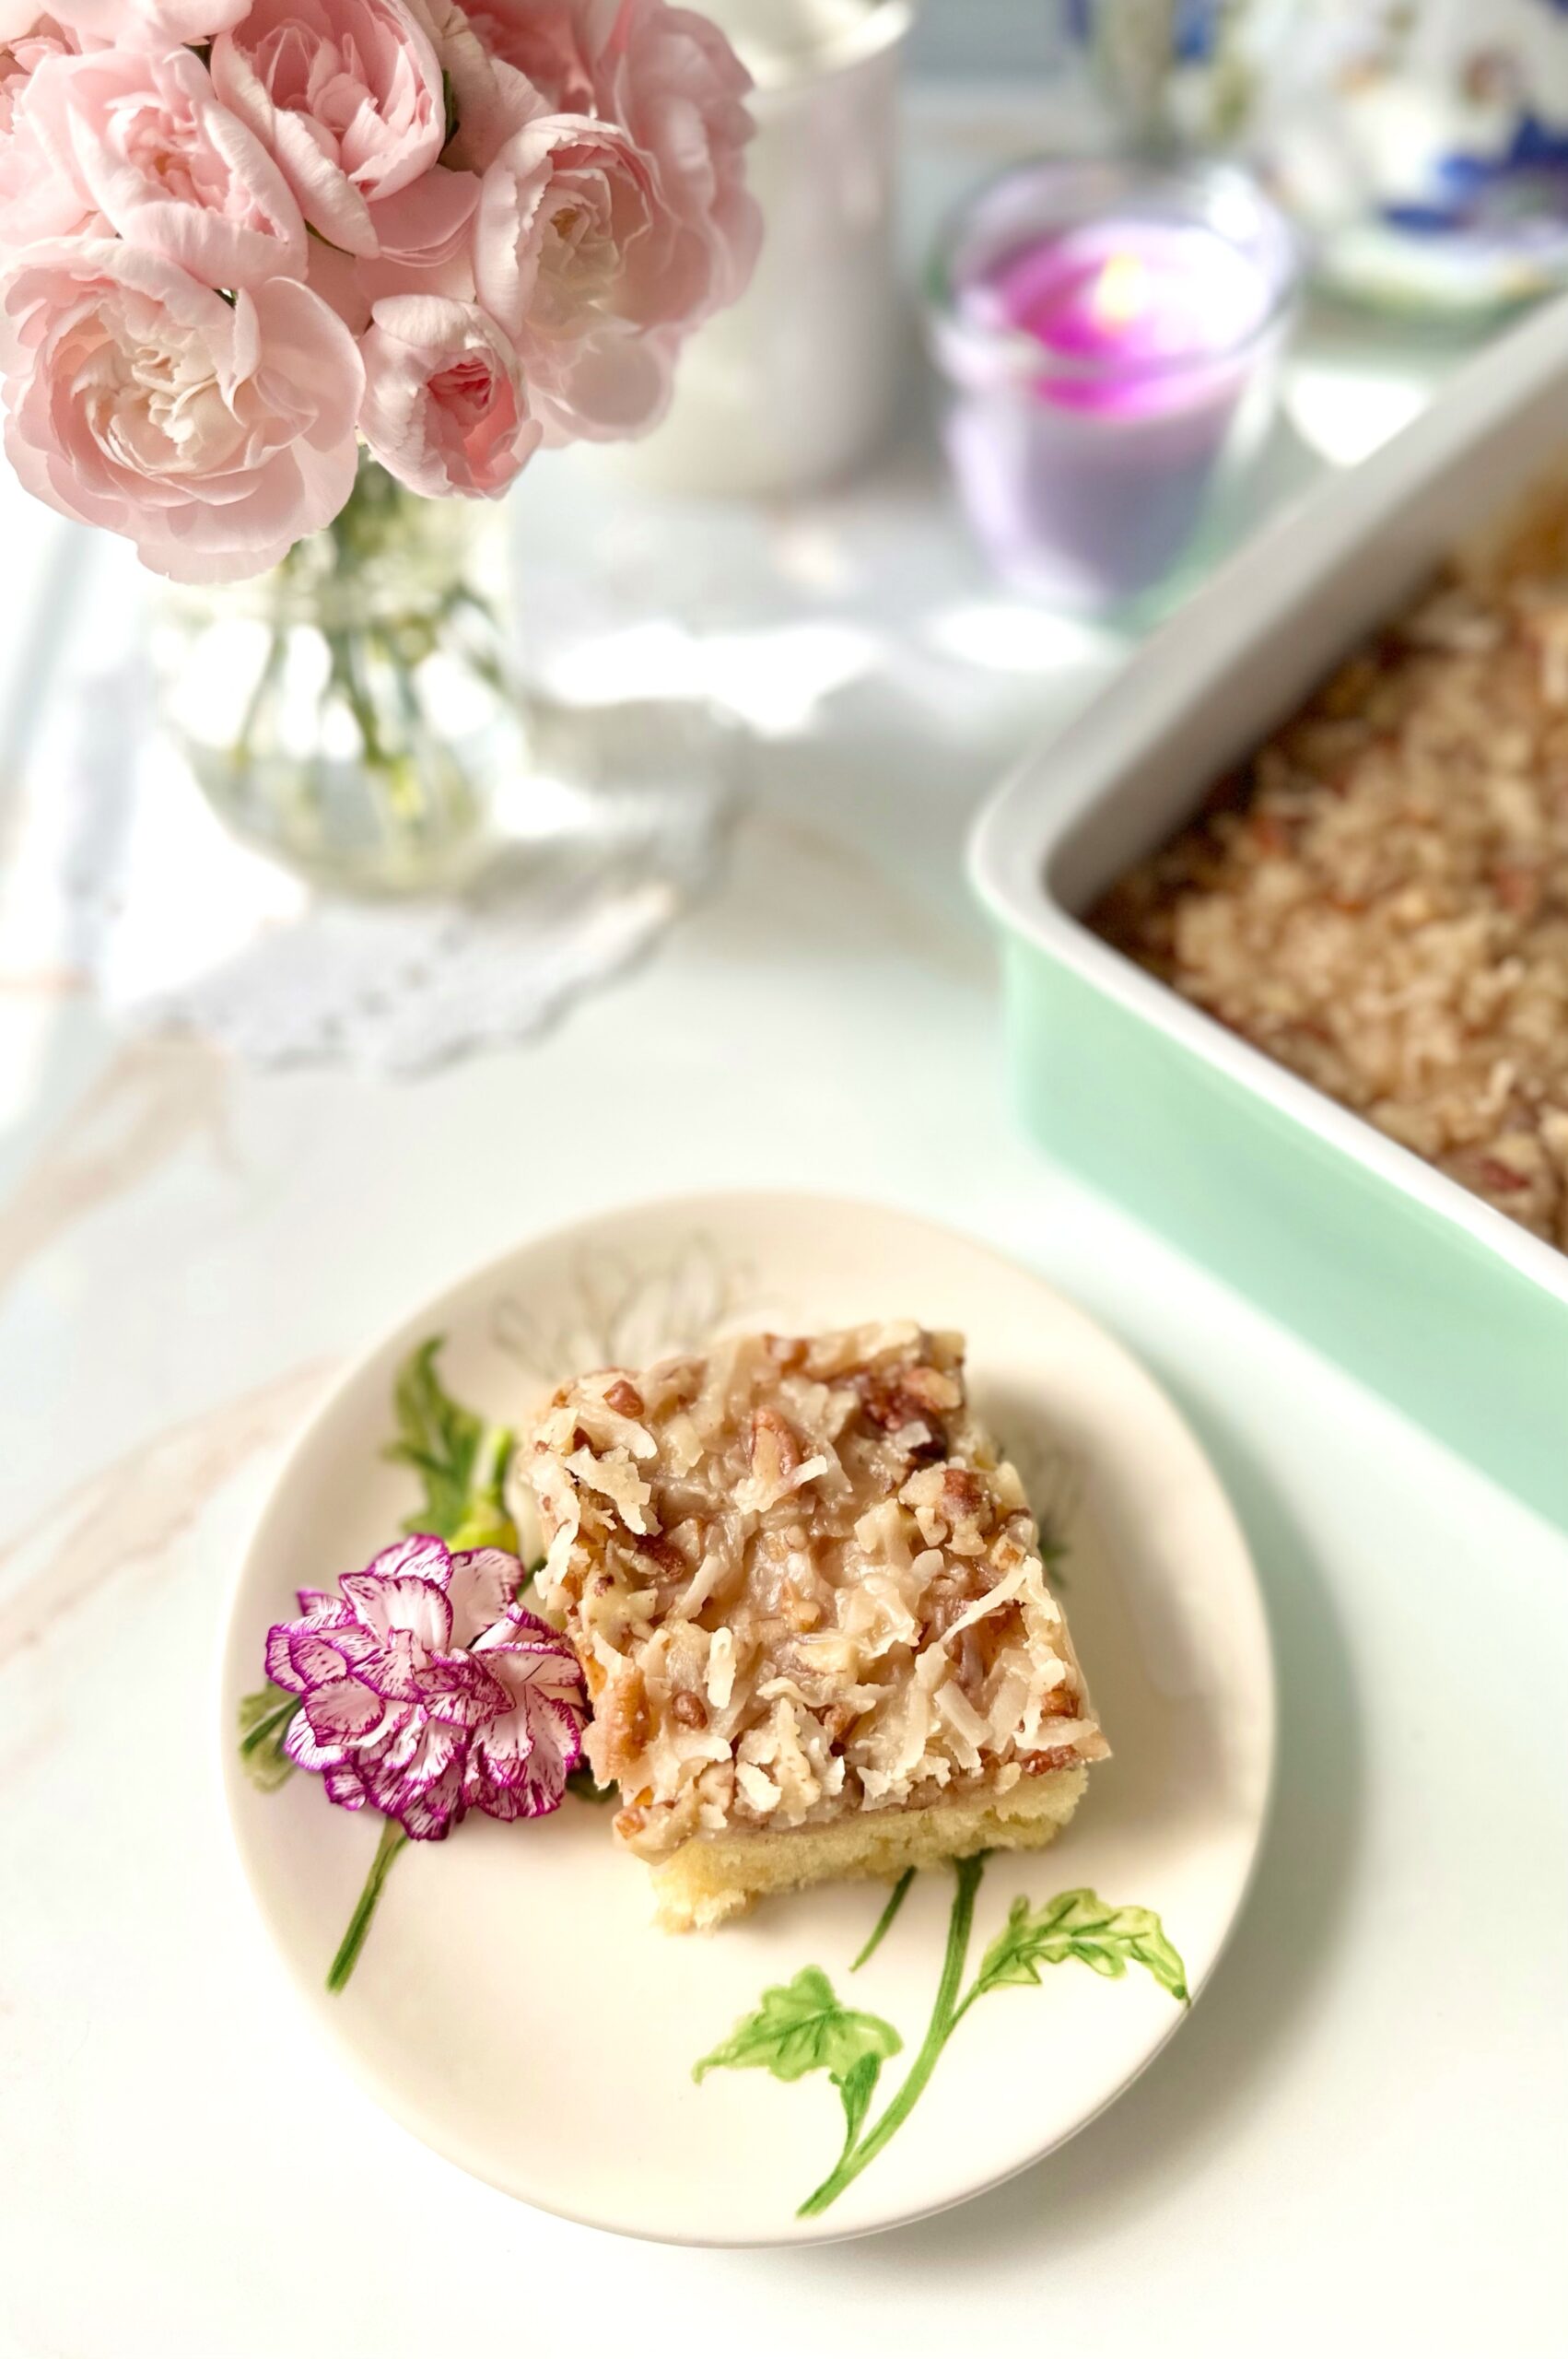
Pineapple Coconut Cake Bars

Pineapple Coconut Cake

If you like tropical flavors, you’ll love this spring dessert from my childhood. We used to call it Pineapple Coconut Snack Cake, but I would consider it more of a cake bar, so I changed the name to Pineapple Coconut Cake Bars. We would typically enjoy it on Easter or Mother’s Day because it was my mom’s favorite. It’s buttery, moist and rich. It’s also kind of addicting, because everyone always asks for seconds. You can double the recipe if you need to.


Pineapple Coconut Cake Bars

by Mari Vasseur
Soft, ultra-moist pineapple cake topped with a buttery toasted coconut topping
Course Dessert
Servings 9

Ingredients
  

Cake

  • 1 cup plus 2 tablespoons (142g ) all purpose flour, sifted
  • 1 ½ teaspoons baking powder
  • ¼ teaspoon fine sea salt
  • ¼ cup (57g) unsalted butter, melted
  • 1 cup (200g) sugar
  • 1 large egg
  • 1 large egg yolk
  • 1 8 oz (227g) can crushed pineapple in juice, undrained
  • ½ teaspoon pure vanilla extract

Topping

  • ¼ cup (57g) unsalted butter
  • ¼ cup (50g) granulated sugar
  • ¼ cup (50g) packed brown sugar
  • â…› teaspoon fine sea salt
  • â…“ cup (78ml) heavy cream
  • 1 cup (75g) sweetened coconut flakes
  • ½ cup (50g) chopped toasted pecans
  • ½ teaspoon pure vanilla extract

Instructions
 

Cake

  • Preheat the oven to 350ºF (180ºC). Grease an 8-inch square baking pan.
  • In a medium-sized bowl, whisk together the flour, baking powder and salt until well blended.
  • In a large bowl, whisk the melted butter, sugar, egg, egg yolk and vanilla until smooth & creamy. tir in the pineapple until incorporated. Stir in the flour mixture just until combined.
  • Transfer the batter to the prepared baking pan. Bake until the top is golden brown and a toothpick inserted into center of cake comes out clean, about 20-25 minutes.

Topping

  • In a medium-sized saucepan over medium heat, melt the butter with the granulated sugar, brown sugar and salt. Whisk in the heavy cream.
  • When the mixture starts to bubble, turn the heat down to low and simmer until thickened, about 3 minutes.
  • Remove from heat and stir in the coconut, pecans and vanilla. Spread over the warm cake. Let cool at least 15 minutes before cutting the cake.
Keyword cake, pineapple coconut

Pink m&m’s Chocolate Cookies

Pink m&m's Chocolate Cookies

Chocolate cookies with pink m&m's candies
Course Dessert
Servings 13 cookies

Ingredients
  

  • 1 cup plus 2 tablespoons (5 oz or 142g) all purpose flour, sifted
  • ¼ cup (3/4 oz or 21g) unsweetened cocoa powder
  • ½ teaspoon baking soda
  • ¼ teaspoon fines sea salt
  • ½ cup (4 oz or 113g) unsalted butter, softened
  • ¼ cup (1 3/4 oz or 50g) sugar
  • ¼ cup plus 2 tablespoons (2 5/8 oz or 75g) packed brown sugar
  • 1 large egg
  • ½ teaspoon pure vanilla extract
  • 1 cup (7 oz or 200g) pink m&m's candies plus extra for tops

Instructions
 

  • Preheat oven to 350ºF. Line two cookie sheets with parchment paper.
  • In a medium bowl, whisk together flour, cocoa powder, baking soda and salt.
  • In a large bowl, cream butter with sugar and brown sugar until light and fluffy.
  • Add egg and vanilla in separate additions and beat until well incorporated.
  • Add flour mixture and beat just until combined.
  • Gently fold in m&m's.
  • Place 2-tablespoon size portions, about 2 inches apart, onto prepared cookie sheets. I used a #30 portion scoop.**
  • Add a few more m&m's to the top of each cookie.
  • Bake until edges are set and tops puff slightly, about 8-10 minutes. Let cookies cool on cookie sheet for 1 minute, then transfer to cooling rack.

Notes

*To find pink m&m's, click here.
**To find the portion scoop I used, click here.
Keyword chocolate, cookies

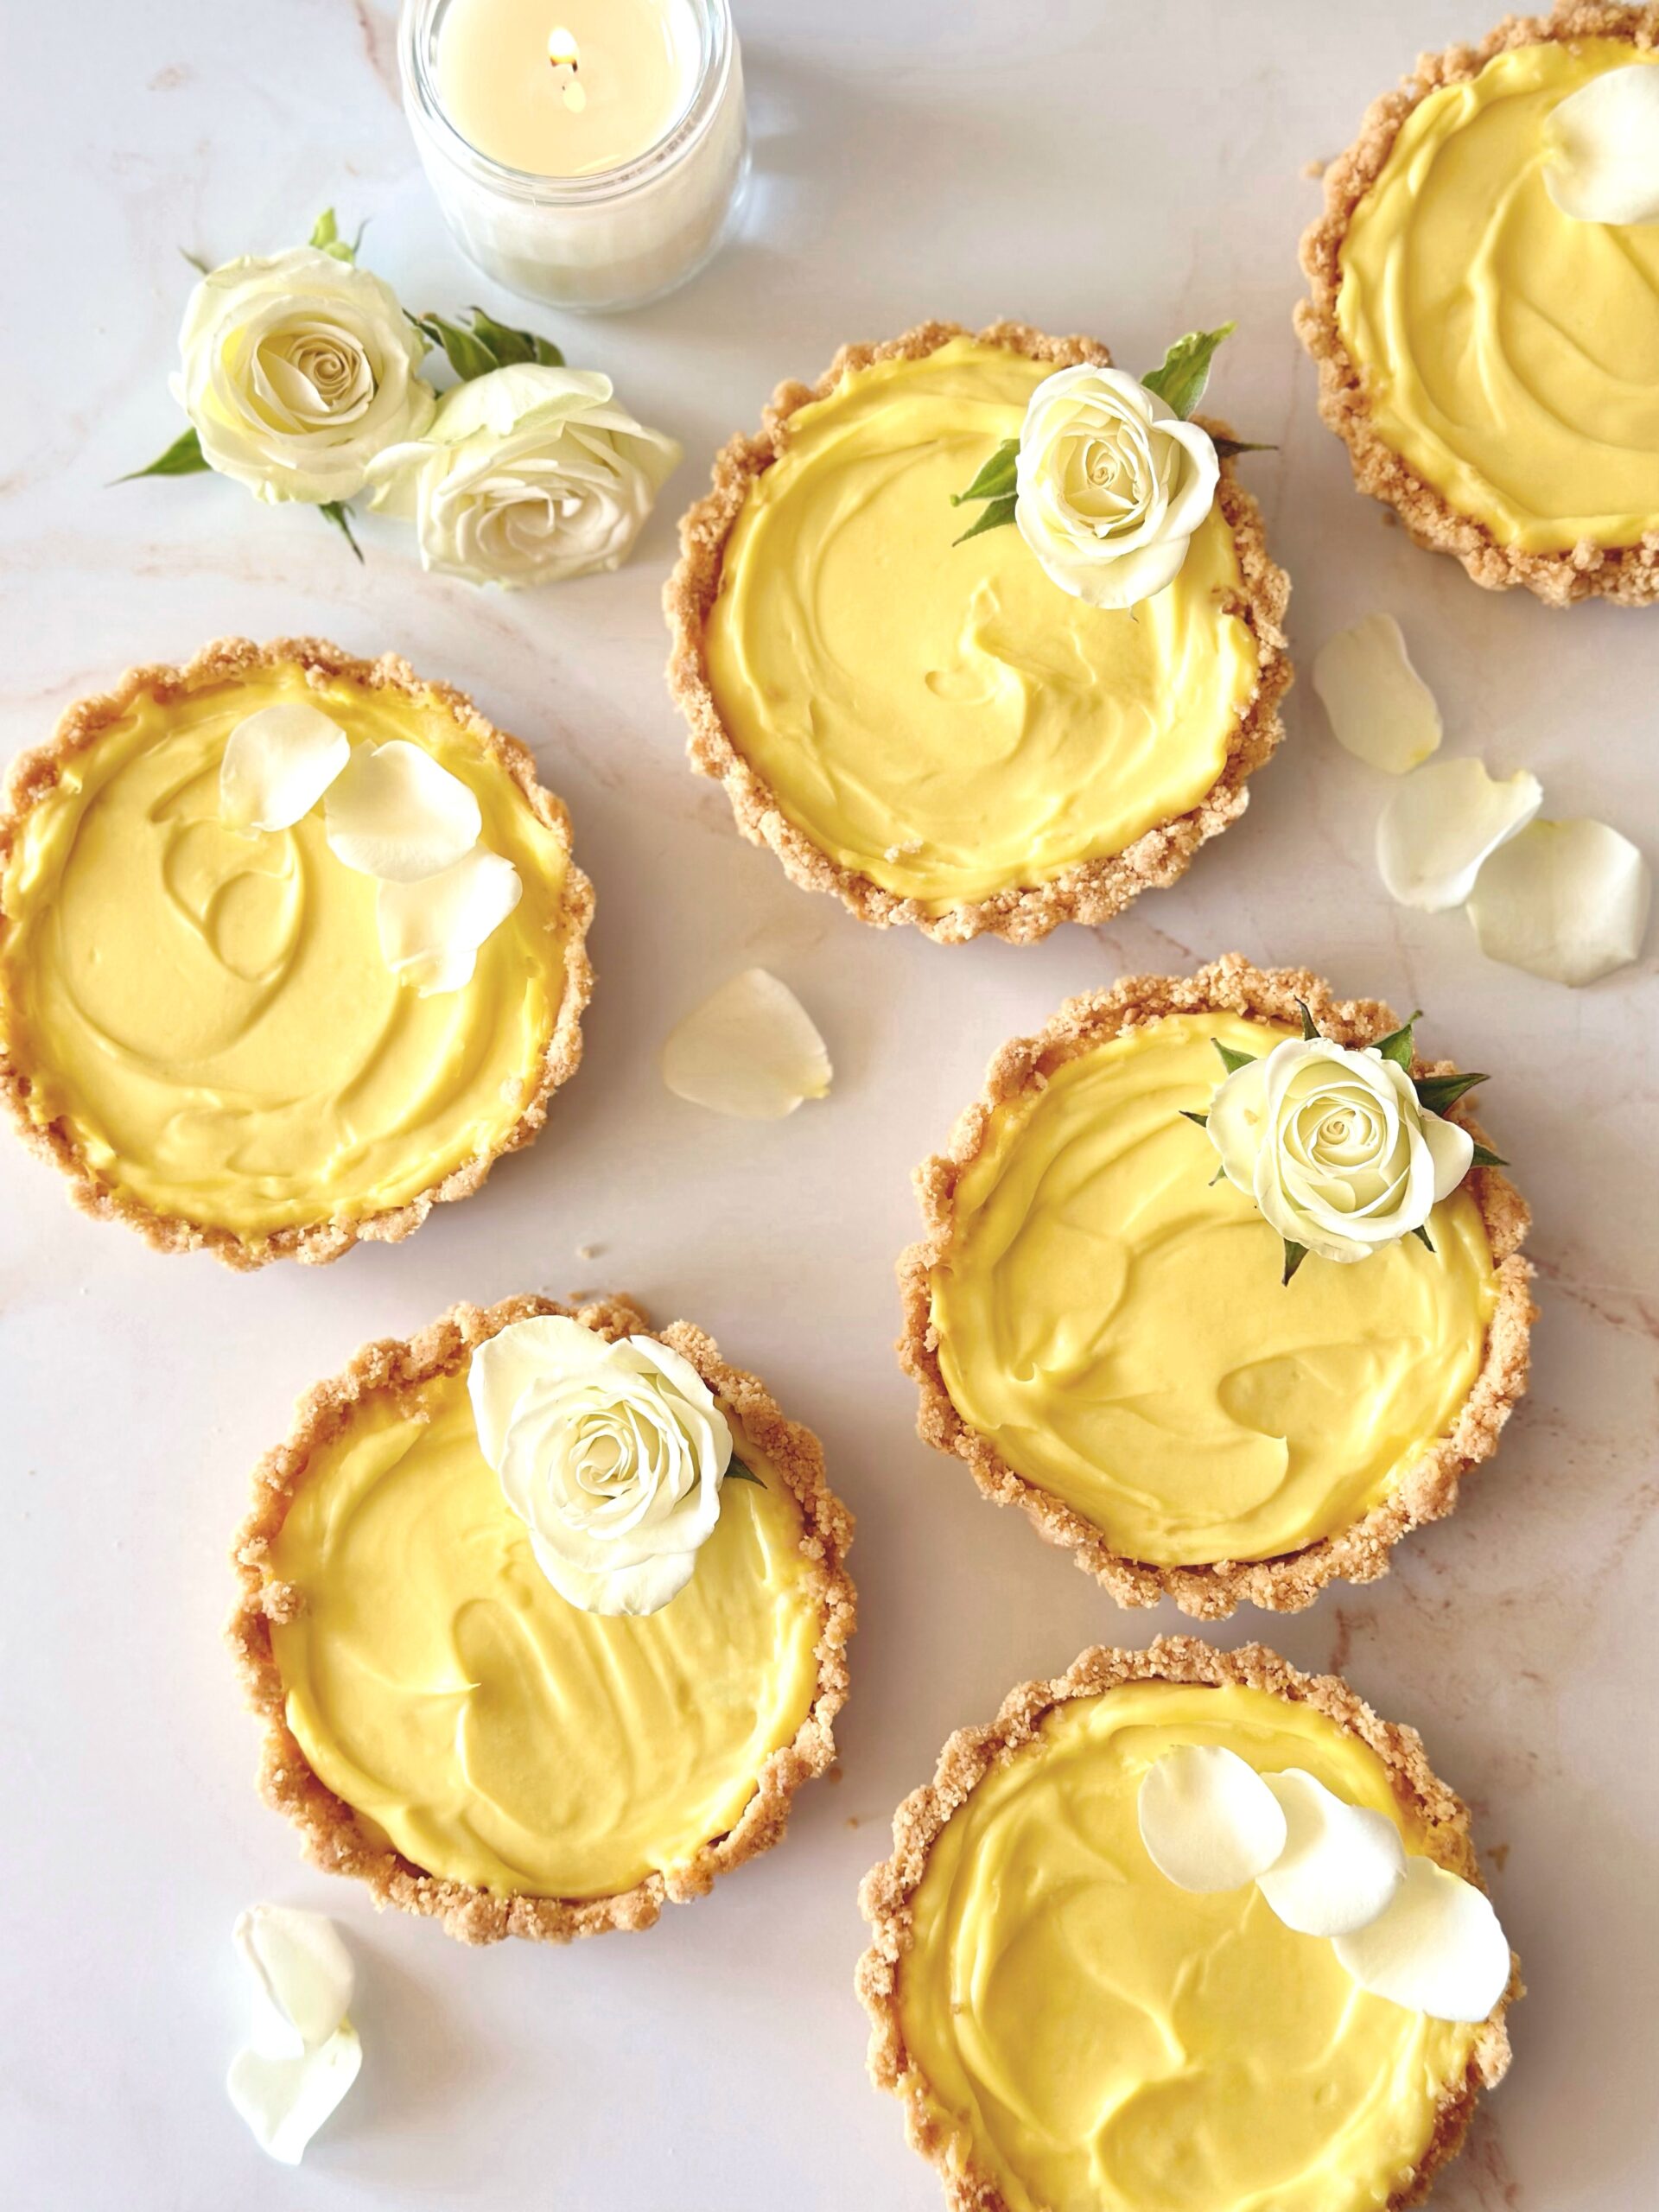
Creamy Lemon Tarts

Creamy Lemon Tarts

One of the reasons I love baking is because of the joy it brings. In this case it’s joy and sunshine. These vibrant, lemon tarts are pure sunshine. With only four ingredients, they’re so easy to make that you’ll be surprised at how silky and delicious they are.

Creamy Lemon Tarts

Course Dessert
Servings 6 tarts

Ingredients
  

  • 22 vanilla sandwich cookies, finely crushed (including the filling) I used Golden Oreos.
  • 3 tablespoons melted butter
  • 1 ½ cups (12 oz or 340g) mascarpone cheese, softened
  • 1 cup (10 oz or 283g) lemon curd, homemade or store bought
  • whipped cream optional

Instructions
 

  • Preheat oven to 350ºF. Place six 4-inch tart pans with removable bottoms* on a baking sheet.
  • In a medium bowl, mix crushed cookies with melted butter until well combined.
  • Press crumb mixture firmly into tart pans with the back of a spoon or the bottom of a small cup. It's important to press firmly, especially on the sides.
  • Bake tart shells for 8 minutes. Let cool completely.
  • In a medium bowl, stir mascarpone cheese with a spatula until smooth. Fold in lemon curd until well combined.
  • Fill cooled tart shells with mascarpone mixture. Refrigerate tarts until set, about 2 hours.
  • Carefully remove tarts from tart pans. Serve with a dollop of whipped cream if desired.

Notes

To find 4-inch tart pans, click here.
Keyword lemon, tarts

Pink Velvet Cookies

Pink Velvet Cookies

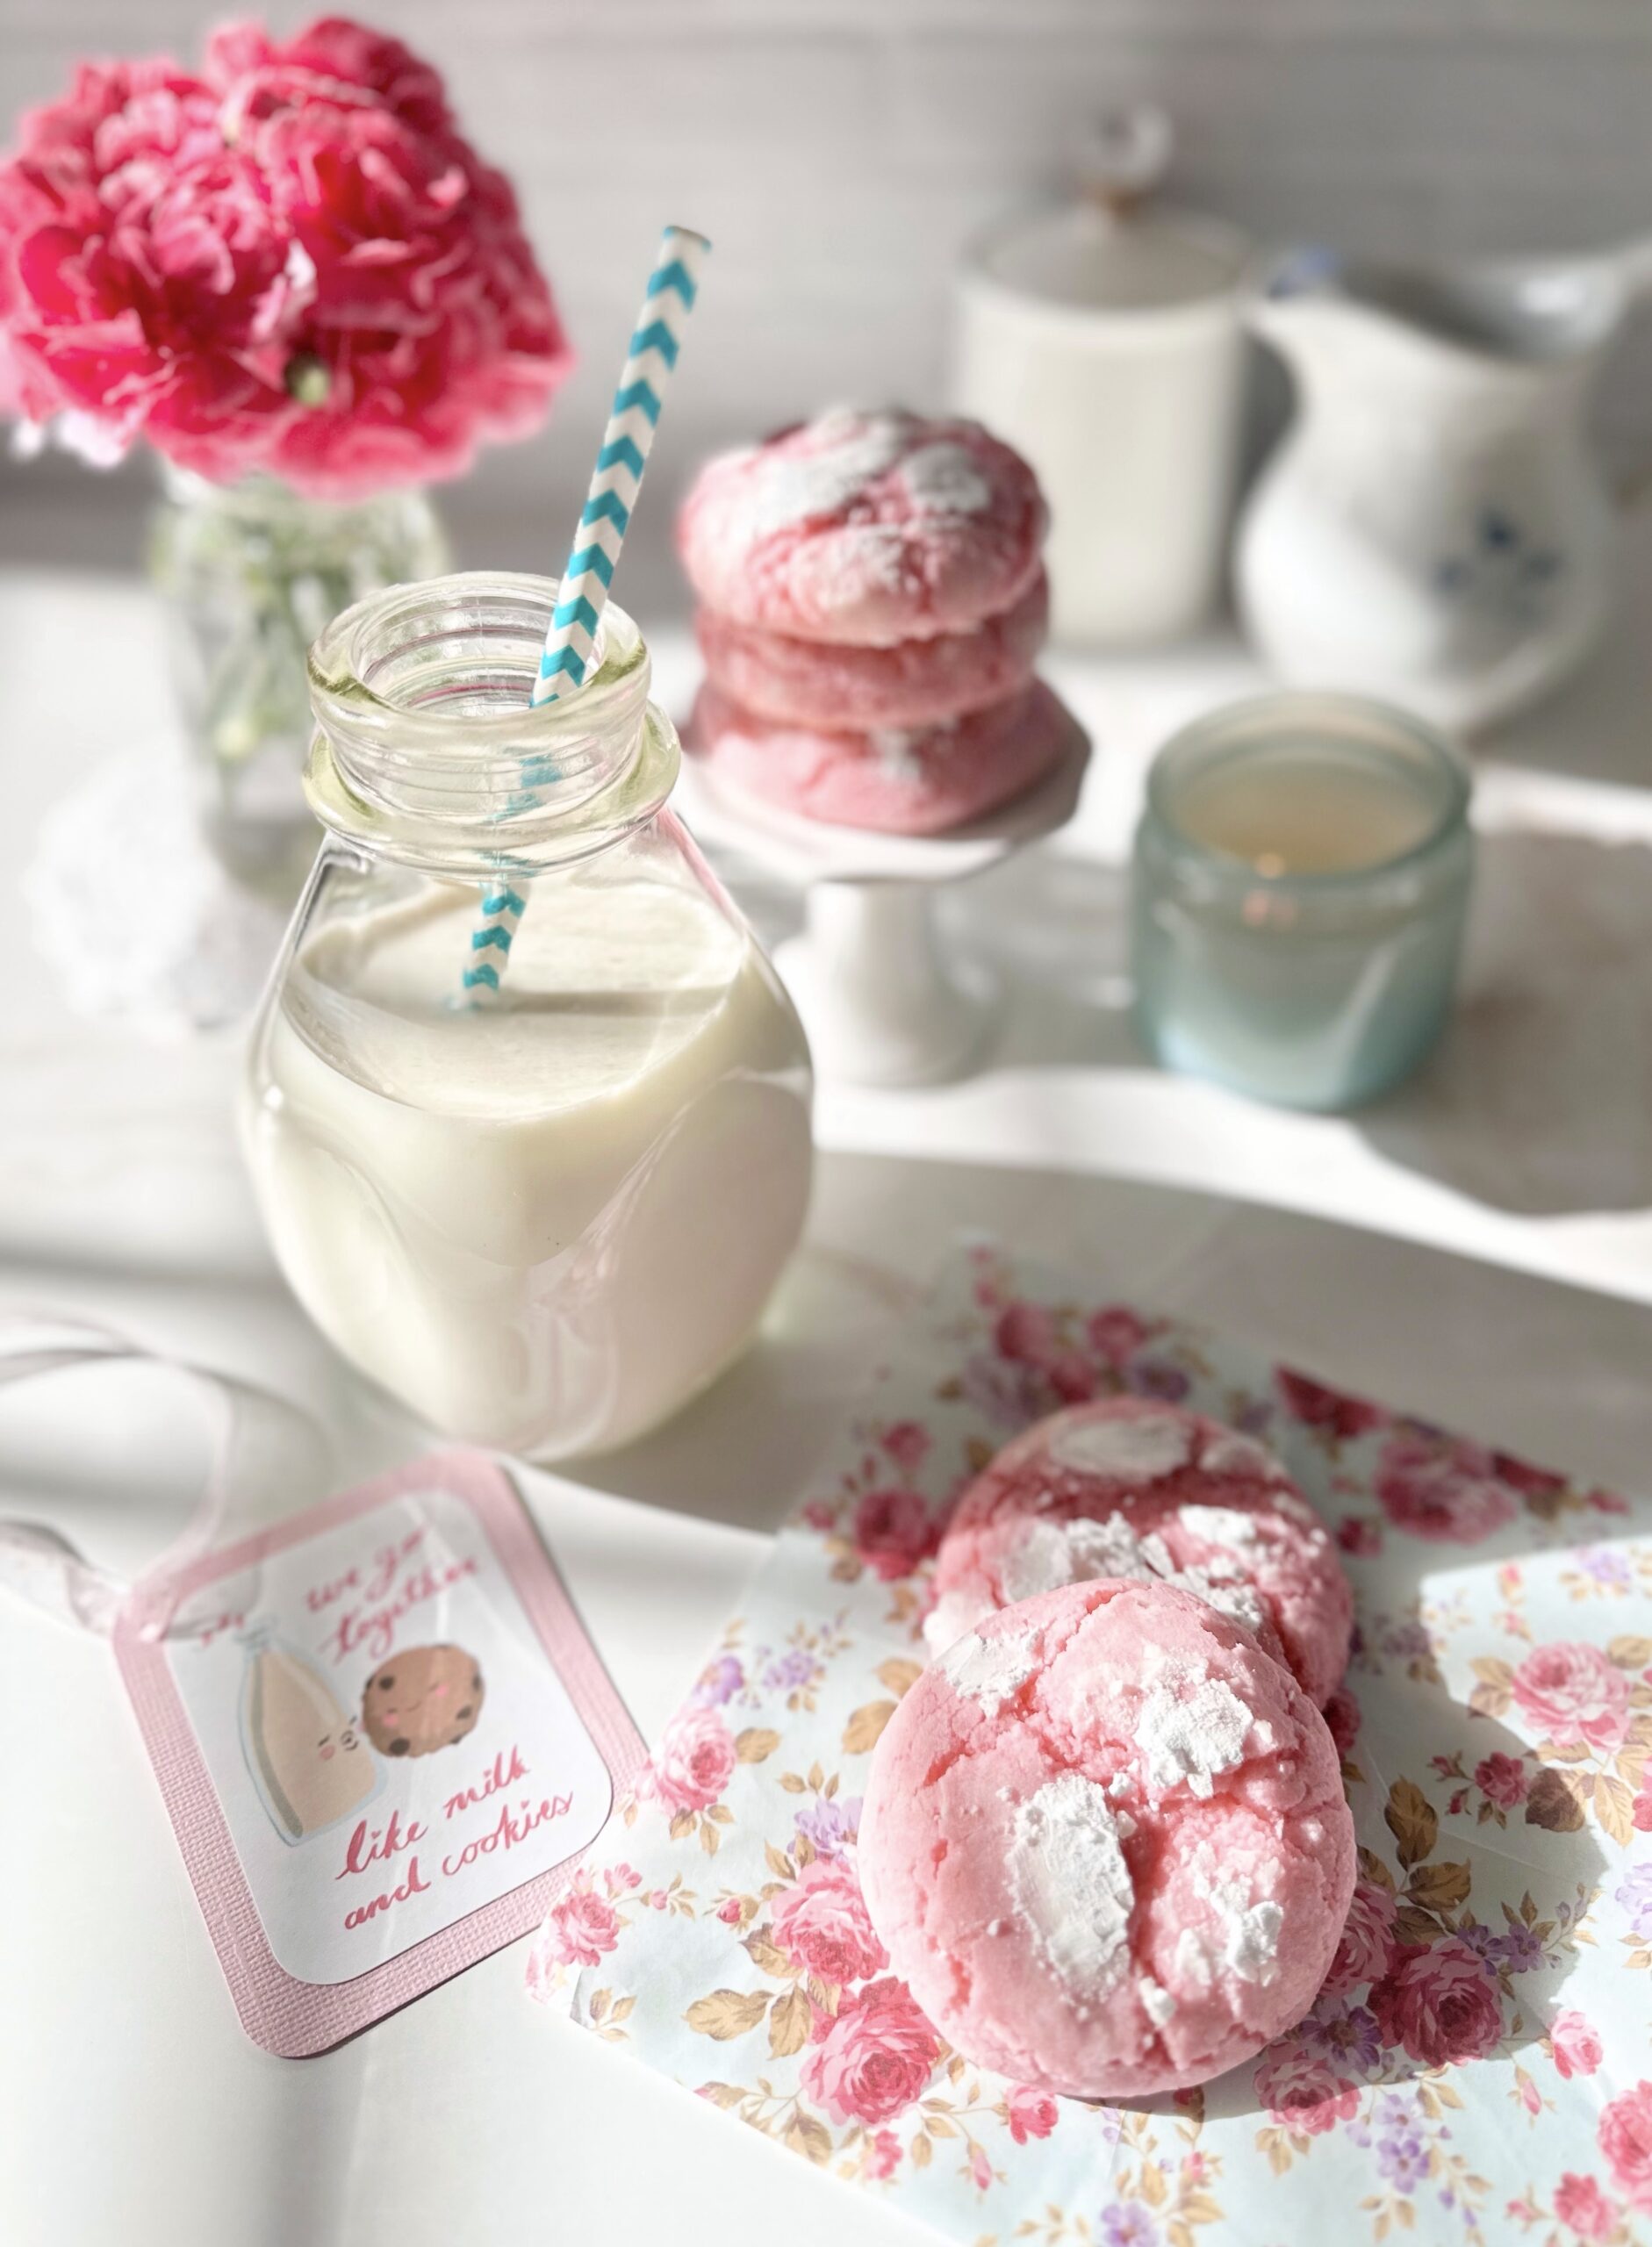
Whenever I walk into a bakery, my eyes are always drawn to anything pink. Pink cupcakes, cookies, donuts or anything with pink icing will inevitably come home with me. This probably started in childhood. Most bakeries back then, including the bakery my aunt always took me to, had pink boxes, so I associate it with delicious, freshly baked treats. Maybe pink desserts do taste better or maybe our minds just tell us that. Either way, if you love pink treats, you’ll love these cookies.

Pink velvet is similar to red velvet, but without the cocoa powder and red food color. The texture should be somewhat velvety, like red velvet cake. I have yet to taste a velvety red velvet cookie, but I think the texture of these cookies is pretty velvety as long as they’re not over baked. Pink velvet desserts are typically vanilla flavored. I upgraded the flavor by adding a touch of cherry flavoring. It’s not enough to give you cherry flavored cookies, but it will add depth to vanilla flavored treats. It’s an old bakery trick that I learned years ago that adds a fruity note in the background.

For best baking results, I recommend using a scale to weigh your ingredients, especially your dry ingredients. If you love baking, you should invest in a food scale if you don’t already have one.

To watch the Pink Velvet Cookies TikTok video, click here. To watch the Pink Velvet Cookies Instagram video, click here.

Pink Velvet Cookies

Pink vanilla flavored crinkle cookies with chewy exteriors and soft, velvety centers
Course Dessert
Servings 14 cookies

Ingredients
  

  • 1 ¾ cups (7 7/8 ounces) all purpose flour, sifted
  • 3 tablespoons (1/2 ounce) cornstarch
  • 1 teaspoon baking powder
  • scant ½ teaspoon fine sea salt
  • ½ cup (4 ounces) unsalted butter, softened
  • 1 cup (7 ounces) sugar
  • 1 tablespoon vegetable oil or neutral oil of your choice
  • 2 large egg whites
  • 1 teaspoon pure vanilla extract
  • ½ teaspoon natural cherry flavoring See notes below*
  • 1 small pea size drop pink gel food color I used Americolor deep pink**

Optional

  • ½ cup white chocolate chips

Instructions
 

  • Preheat oven to 350ºF. Line two large cookie sheets with parchment paper.
  • In a medium bowl, whisk together flour, cornstarch, baking powder, and salt.
  • In a large bowl, cream butter, sugar and oil until light and fluffy.
  • Beat egg whites into butter mixture in two addition, until well combined.
  • Beat in extracts until well combined.
  • Add gel food color, a little at a time with a toothpick, until desired shade of pink is reached. (Adding remaining ingredients will lighten the color slightly.) Beat until evenly distributed.
  • Add flour mixture to batter and beat just until combined. Mix in white chocolate chips if using.
  • Roll dough into balls, about 2 tablespoons each. I used a #30 portion scoop.*** Roll dough very generously in powdered sugar. Place two inches apart onto prepared cookie sheets.
  • Bake until cookies are puffed and tops are set, about 11-13 minutes. Transfer cookies to a cooling rack.

Notes

*The cherry flavoring in this recipe is not intended to make a cherry flavored cookie. The addition of cherry flavoring adds a subtle fruity note. You can also use pure cherry extract. Use a bit less (scant 1/2 teaspoon)  because extracts tend to be stronger than flavorings. DO NOT use imitation cherry extract. It has a medicinal flavor that will disappoint you. If you want your cookies to be cherry or strawberry flavor, reduce vanilla extract to 1/2 teaspoon and  use 1- 1 1/2 teaspoons of natural cherry or strawberry flavoring.
**To find the pink gel food color I used, click here.
***To find the portion scoop I used, click here.
This recipe was updated on 2/14/23.
Keyword cookies, pink velvet

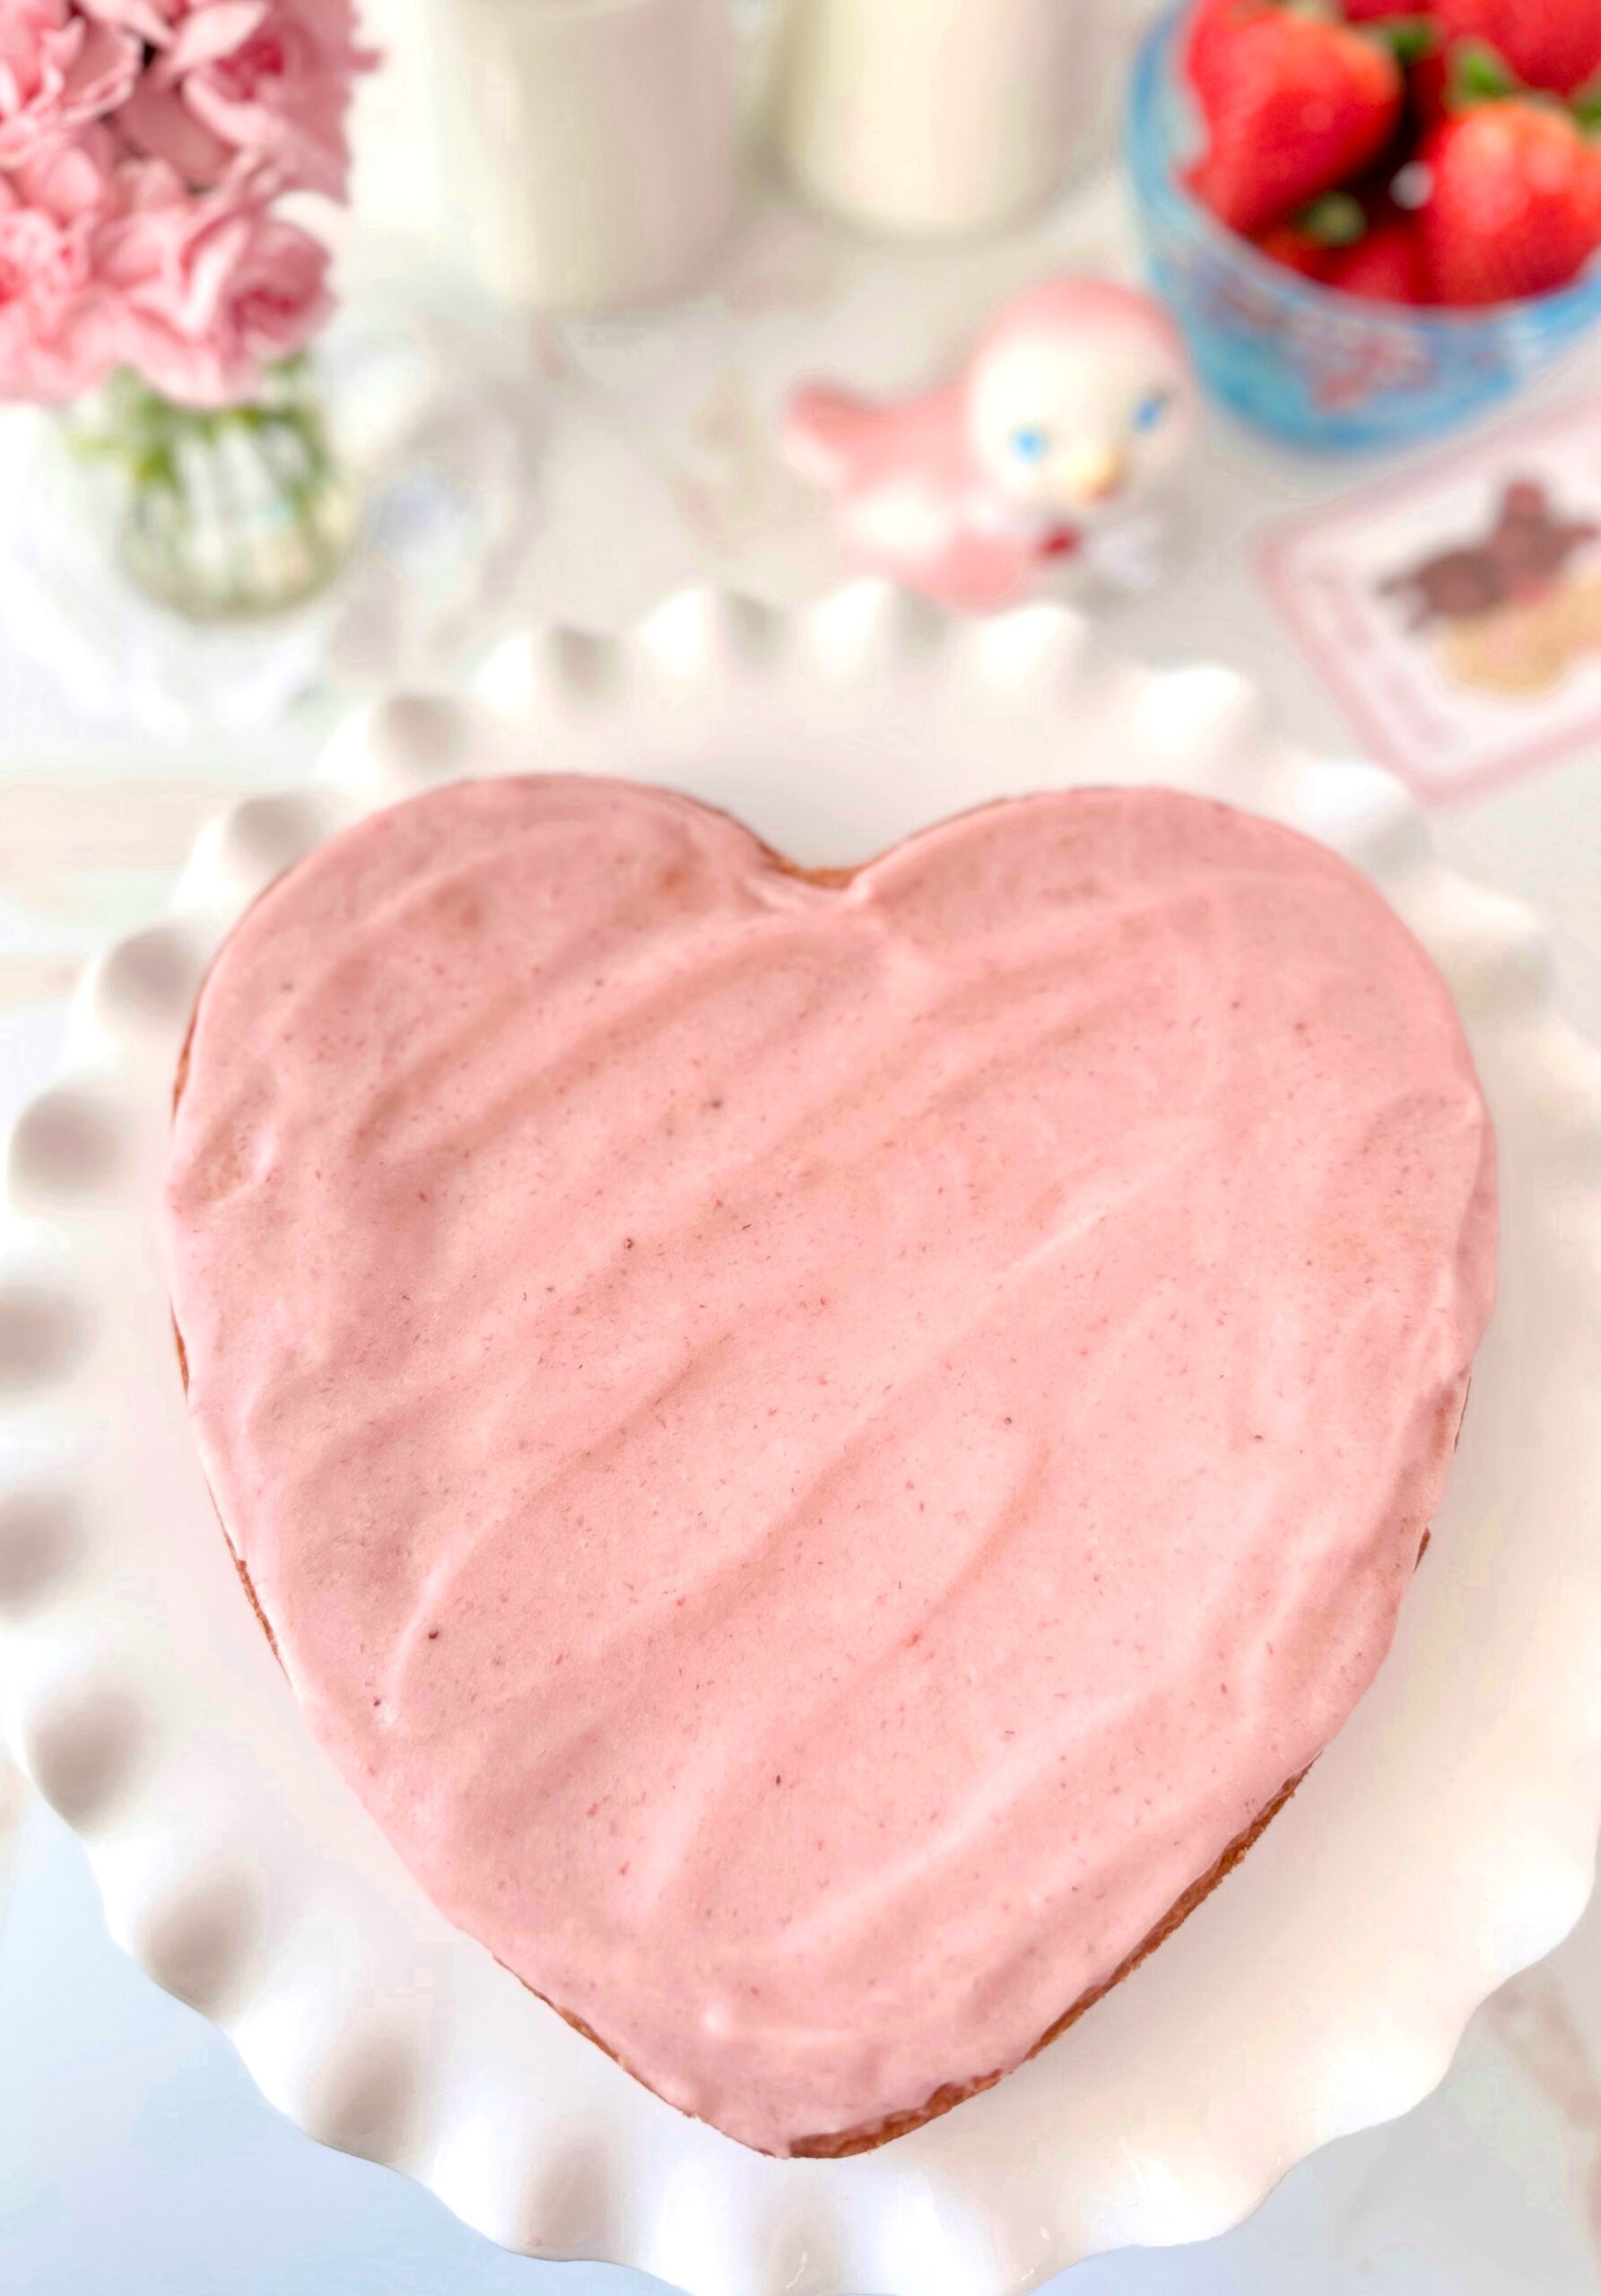
Little Strawberry Heart Cake

A cute little, stress-free, perfectly pink heart cake is my gift to you for Valentine’s Day. The vanilla cake is soft and fluffy. The frosting is super easy and delicious, with only two ingredients. It all comes together with fresh strawberries and it’s so good, you won’t want to share.

Little Strawberry Heart Cake

A six inch heart shaped vanilla cake with fresh strawberries and two-ingredient frosting
Course Dessert

Ingredients
  

  • ½ cup chopped strawberries
  • 2 teaspoons sugar
  • 1 cup (4 ounces) cake flour, sifted
  • ½ teaspoon baking powder
  • ¼ teaspoon fine sea salt
  • 3 tablespoons (1 1/2 ounces) unsalted butter, softened
  • ½ cup (3 1/2 ounces) sugar
  • 1 tablespoon vegetable oil or neutral oil of your choice
  • 1 large egg
  • ½ teaspoon pure vanilla extract
  • â…“ cup whole milk, room temperature
  • 3 tablespoons sour cream, room temperature
  • 8 ounces cream cheese, softened
  • 1 7.5 ounce jar Marshmallow Fluff
  • tiny drop pink gel food color I used Americolor deep pink*

Optional Decor

  • strawberries
  • meringue powder** or pasteurized egg whites
  • sugar

Instructions
 

  • In a small bowl, combine strawberries and 2 teaspoons sugar. Set aside to macerate for about 30 minutes.
  • Preheat oven to 350ºF. Line the bottom of a 6-inch heart shaped cake pan*** with parchment paper. Grease and flour the sides.
  • In a medium bowl, whisk together flour, baking powder and salt.
  • In a large bowl, cream butter, sugar and oil with an electric mixer, until light and fluffy.
  • Beat in egg and vanilla in two separate additions until well combined.
  • In a small bowl, whisk together milk and sour cream.
  • Beat flour mixture into batter in two additions, alternating with milk mixture.
  • Transfer batter to prepared cake pan. Bake until toothpick inserted in the center comes out clean, about 25-30 minutes. Let cake cool in pan 10 minutes then turn out onto a cooling rack to cool.
  • In a large bowl, stir cream cheese with a spatula to smooth out lumps.
  • Add marshmallow fluff and beat until well combined. Add food gel color with a toothpick and beat until evenly distributed.
  • Split cake into two layers. Top the bottom layer with frosting. Drain strawberries and spoon onto cake. Top with second layer, then more frosting.

Optional Decor

  • To make sugared strawberries, mix 1 part meringue powder with 3 parts water. Dip strawberries in meringue mixture, cover with sugar, then let dry. Alternately you can dip the strawberries in pasteurized egg whites, cover with sugar, then let dry.

Notes

*To find the gel food color I used, click here.
**To find meringue powder, click here.
***To find the heart cake pan I used, click here.
 
Keyword cake, strawberry

Strawberry Sweetheart Brownies

Strawberry Sweetheart Brownies

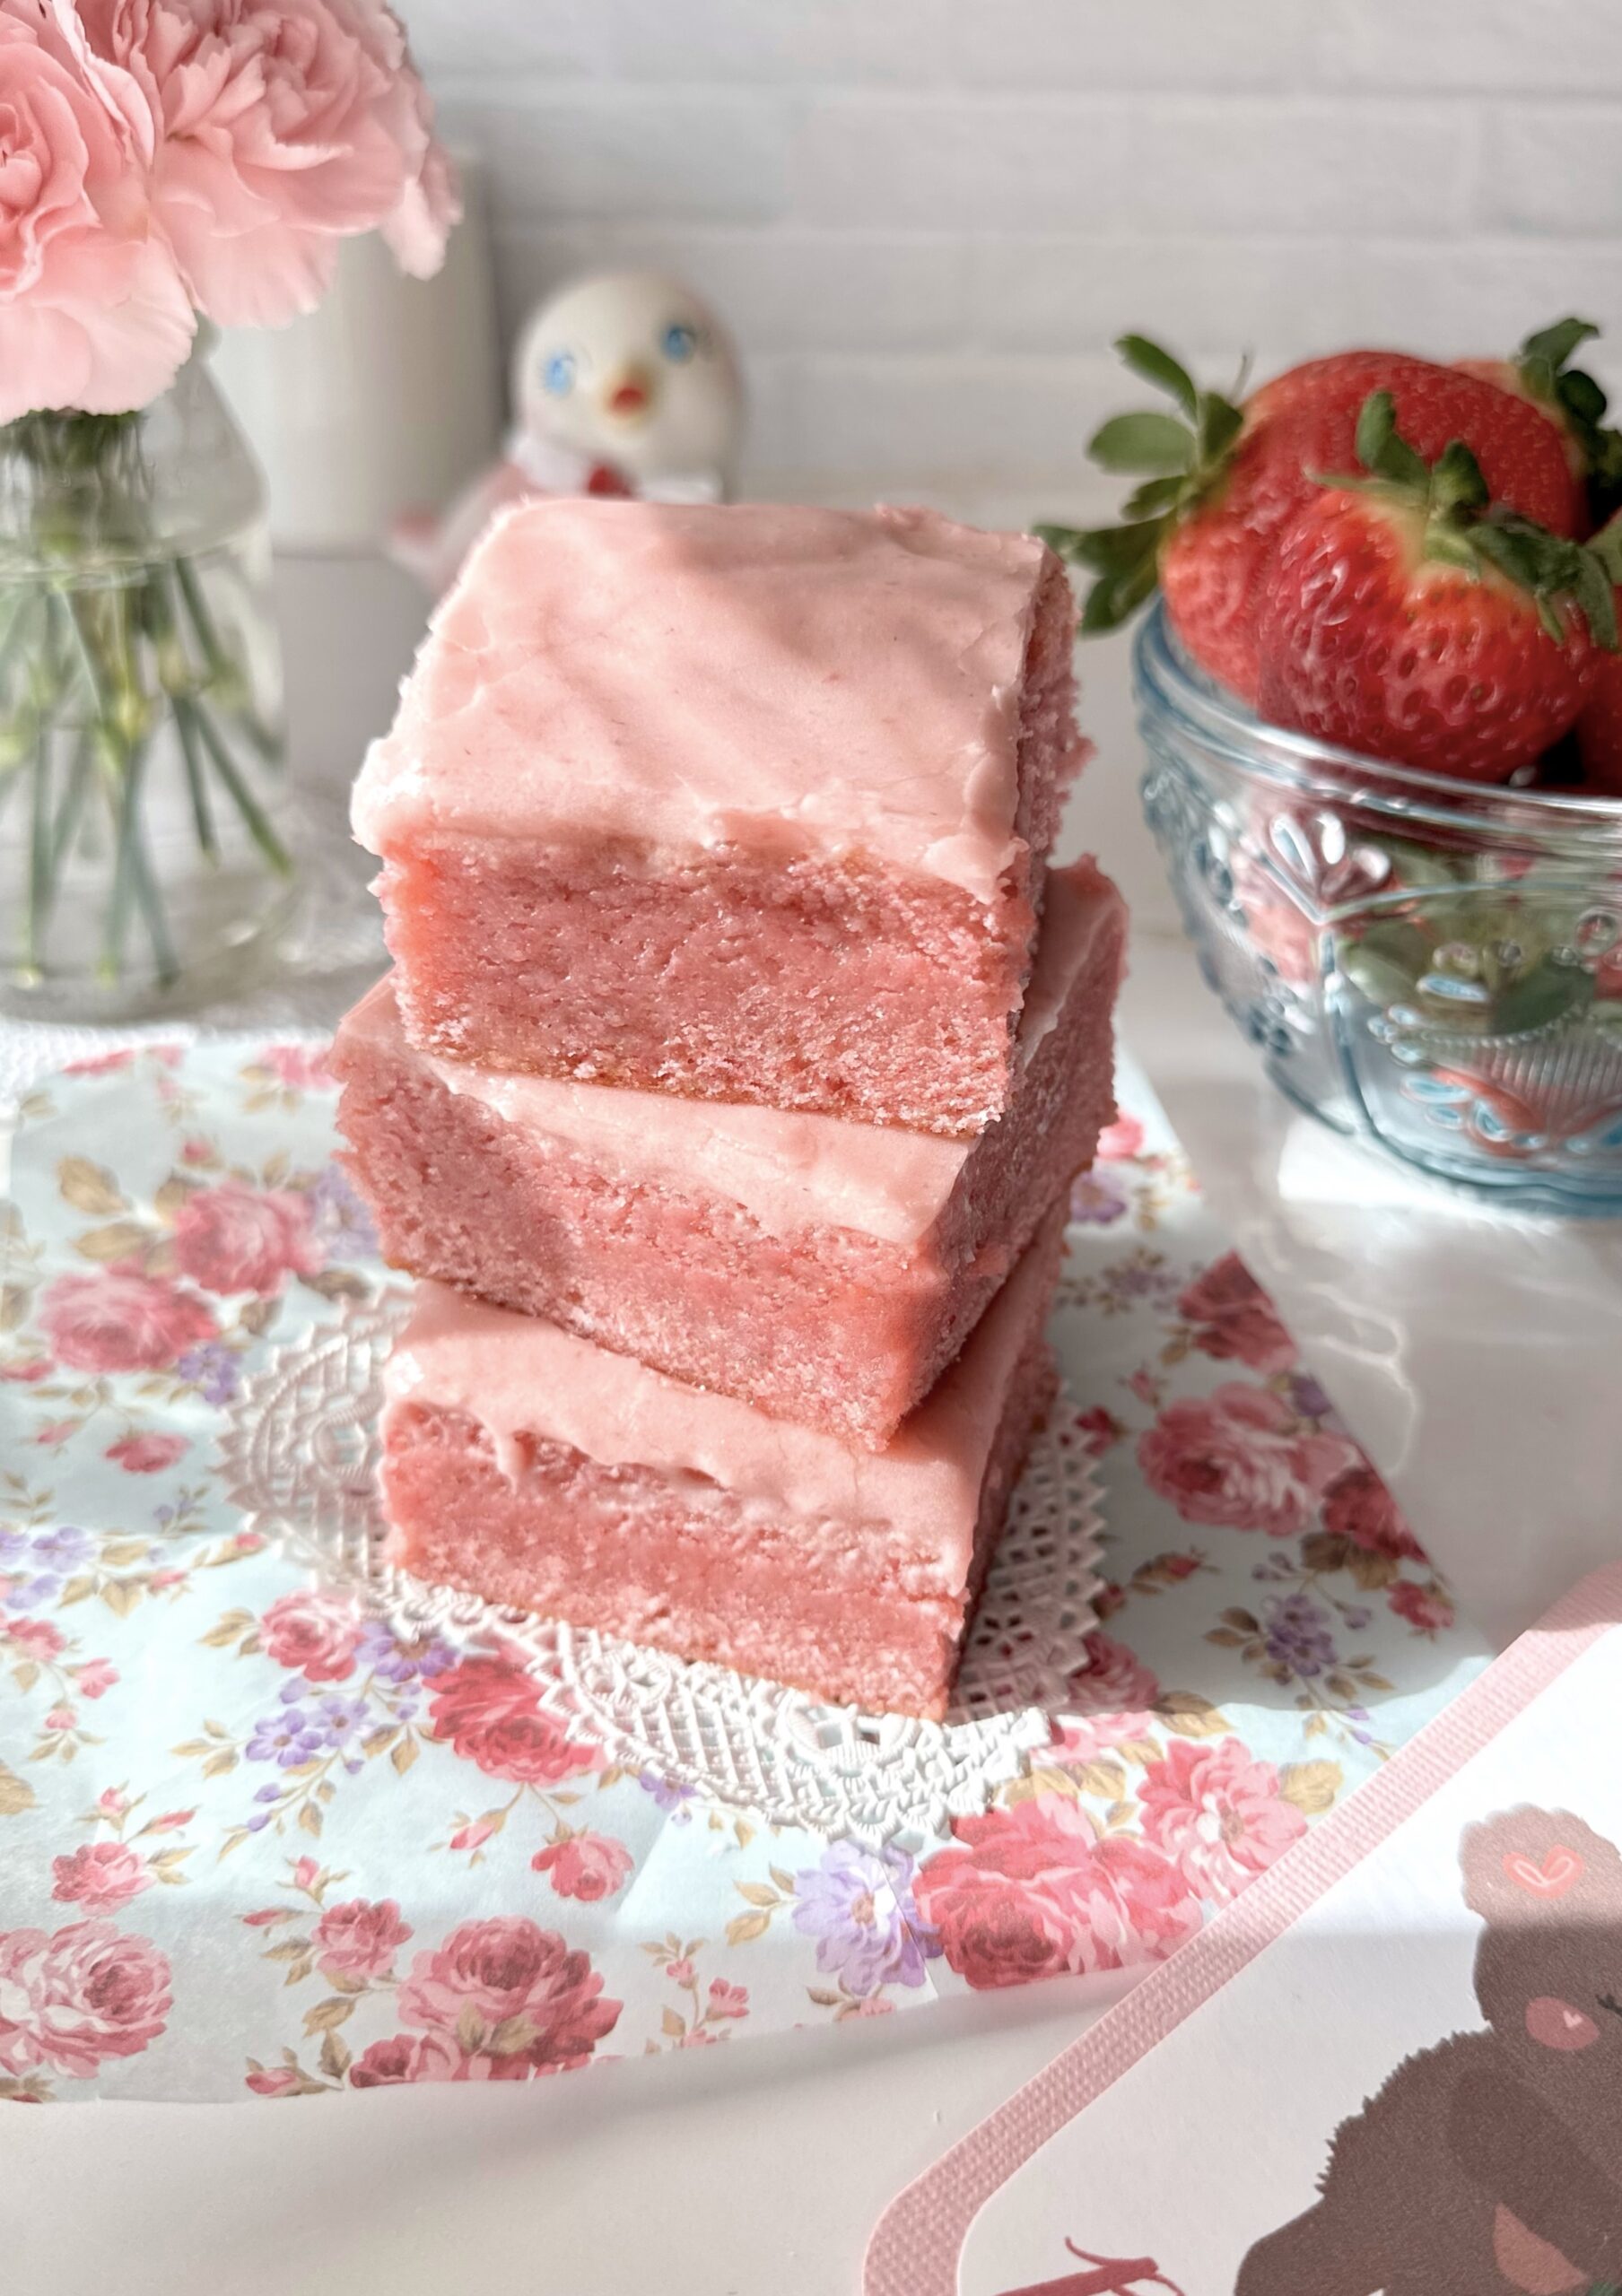
At the Brownie Mischief website, all types of brownies are welcome. We all know and love chocolate brownies. But there are other less common brownies in the universe, that deserve to shine too. Let me introduce you to Strawberry Sweetheart Brownies. These lovely pink creations aren’t strawberry cake or strawberry blondies. They contain white chocolate and they’re made with the same baking method as brownies. When you bake chocolate brownies, you want to be careful not to over bake them, to achieve the rich, fudgy texture. The same is true for these strawberry brownies. When you test for doneness, the toothpick should have a few moist crumbs attached to it. If the toothpick is clean, the brownies have baked too long and will likely be a little dry and cakey, although still edible. So make sure to test for doneness well before the end of the baking time!

The baking temperature for this recipe is 325ºF. I noticed that when baking in a heart shaped cake pan, things tend to bake unevenly because of the shape. So I used a lower temperature to help with even baking. If you don’t have an 8-inch heart shaped cake pan, you can also use an 8-inch round cake pan. To find the cake pan I used, click here.

Strawberry Sweetheart Brownies

To watch the Strawberry Sweetheart Brownies Instagram video, click here.

Strawberry Sweetheart Brownies

A heart shaped strawberry brownie made with fresh strawberries topped with strawberry icing.
Course Dessert
Servings 8

Ingredients
  

Strawberry Brownies

  • 7 tablespoons (3 1/2 ounces) unsalted butter, cubed
  • 6 ounces white chocolate, finely chopped
  • ¾ cup (5 1/4 ounces) sugar
  • ¼ teaspoon fine sea salt
  • 1 large egg
  • 2 large egg yolks
  • ½ cup (4 ounces) strawberry purée, divided
  • ½ teaspoon pure vanilla extract
  • ½ teaspoon pure strawberry extract
  • 1 petite pea size drop pink gel food color (optional) I used Americolor Deep Pink**
  • 1 ½ cups (6 3/4 ounces) all purpose flour, sifted

Strawberry Icing

  • ¾ cup (3 ounces) powdered sugar, sifted
  • 1 tablespoon unsalted butter, melted
  • 2 tablespoons reserved strawberry purée
  • ¼ teaspoon pure vanilla extract
  • ¼ teaspoon pure strawberry extract
  • dash fine sea salt

Instructions
 

Strawberry Brownies

  • Preheat oven to 325ºF. Line the bottom of an 8-inch heart shaped cake pan*** with parchment paper. Spray the insides with nonstick spray.
  • In a large heat safe bowl, melt butter and white chocolate together on the stovetop over a pan of barely simmering water or in the microwave for 20 seconds at time, stirring at each interval. White chocolate overheats easily, so be vigilant.
  • Add the sugar and salt to the butter mixture and mix until well combined.
  • Add egg and egg yolks. Whisk until smooth.
  • Pass strawberry purée through a sieve to remove seeds. Set aside 2 tablespoons of strawberry purée for icing. Add remaining purée to batter. Mix until well combined.
  • Add extracts and food color. Mix until combined.
  • Stir in flour until combined, scraping bowl as needed.
  • Transfer batter to prepared pan. Bake until toothpick inserted in center has a few moist crumbs on it, (not batter), about 25-30 minutes. Do not over bake. Let cool in pan. Remove from pan and top with strawberry icing.

Strawberry Icing

  • Whisk all icing ingredients together until smooth and well combined.

Notes

*To make strawberry purée:   Purée clean, hulled and quartered strawberries in a blender or food processor. **To find the food color I used, click here. **To find the heart cake pan I used, click here.
This recipe was updated on January 24th, 2023
Keyword brownies, strawberry

Luxury Hot Chocolate

Luxury Hot Chocolate

Course Brunch, Dessert
Servings 1 serving

Ingredients
  

  • ¾ cup whole milk
  • 2 tablespoons heavy cream
  • 2 ounces good quality bittersweet chocolate 70-72%, finely chopped
  • â…› teaspoon vanilla bean paste
  • 1 teaspoon Manuka honey or honey of your choice
  • tiny dash fine sea salt optional
  • homemade marshmallows or whipped cream optional

Instructions
 

  • In a small saucepan, heat the milk and cream over medium-low heat just until bubbles form around the edges. Do not boil.
  • Turn the heat off. Whisk in the honey and vanilla bean paste.
  • Add the chocolate and stir gently until the chocolate is melted. Strain the hot chocolate through a sieve into a teacup or mug.

Notes

For a dairy free version, replace the milk and cream with unsweetened almond milk. Replace the chocolate with vegan chocolate.
Keyword drinks, hot chocolate

Chocolate Gingerbread

Chocolate Gingerbread

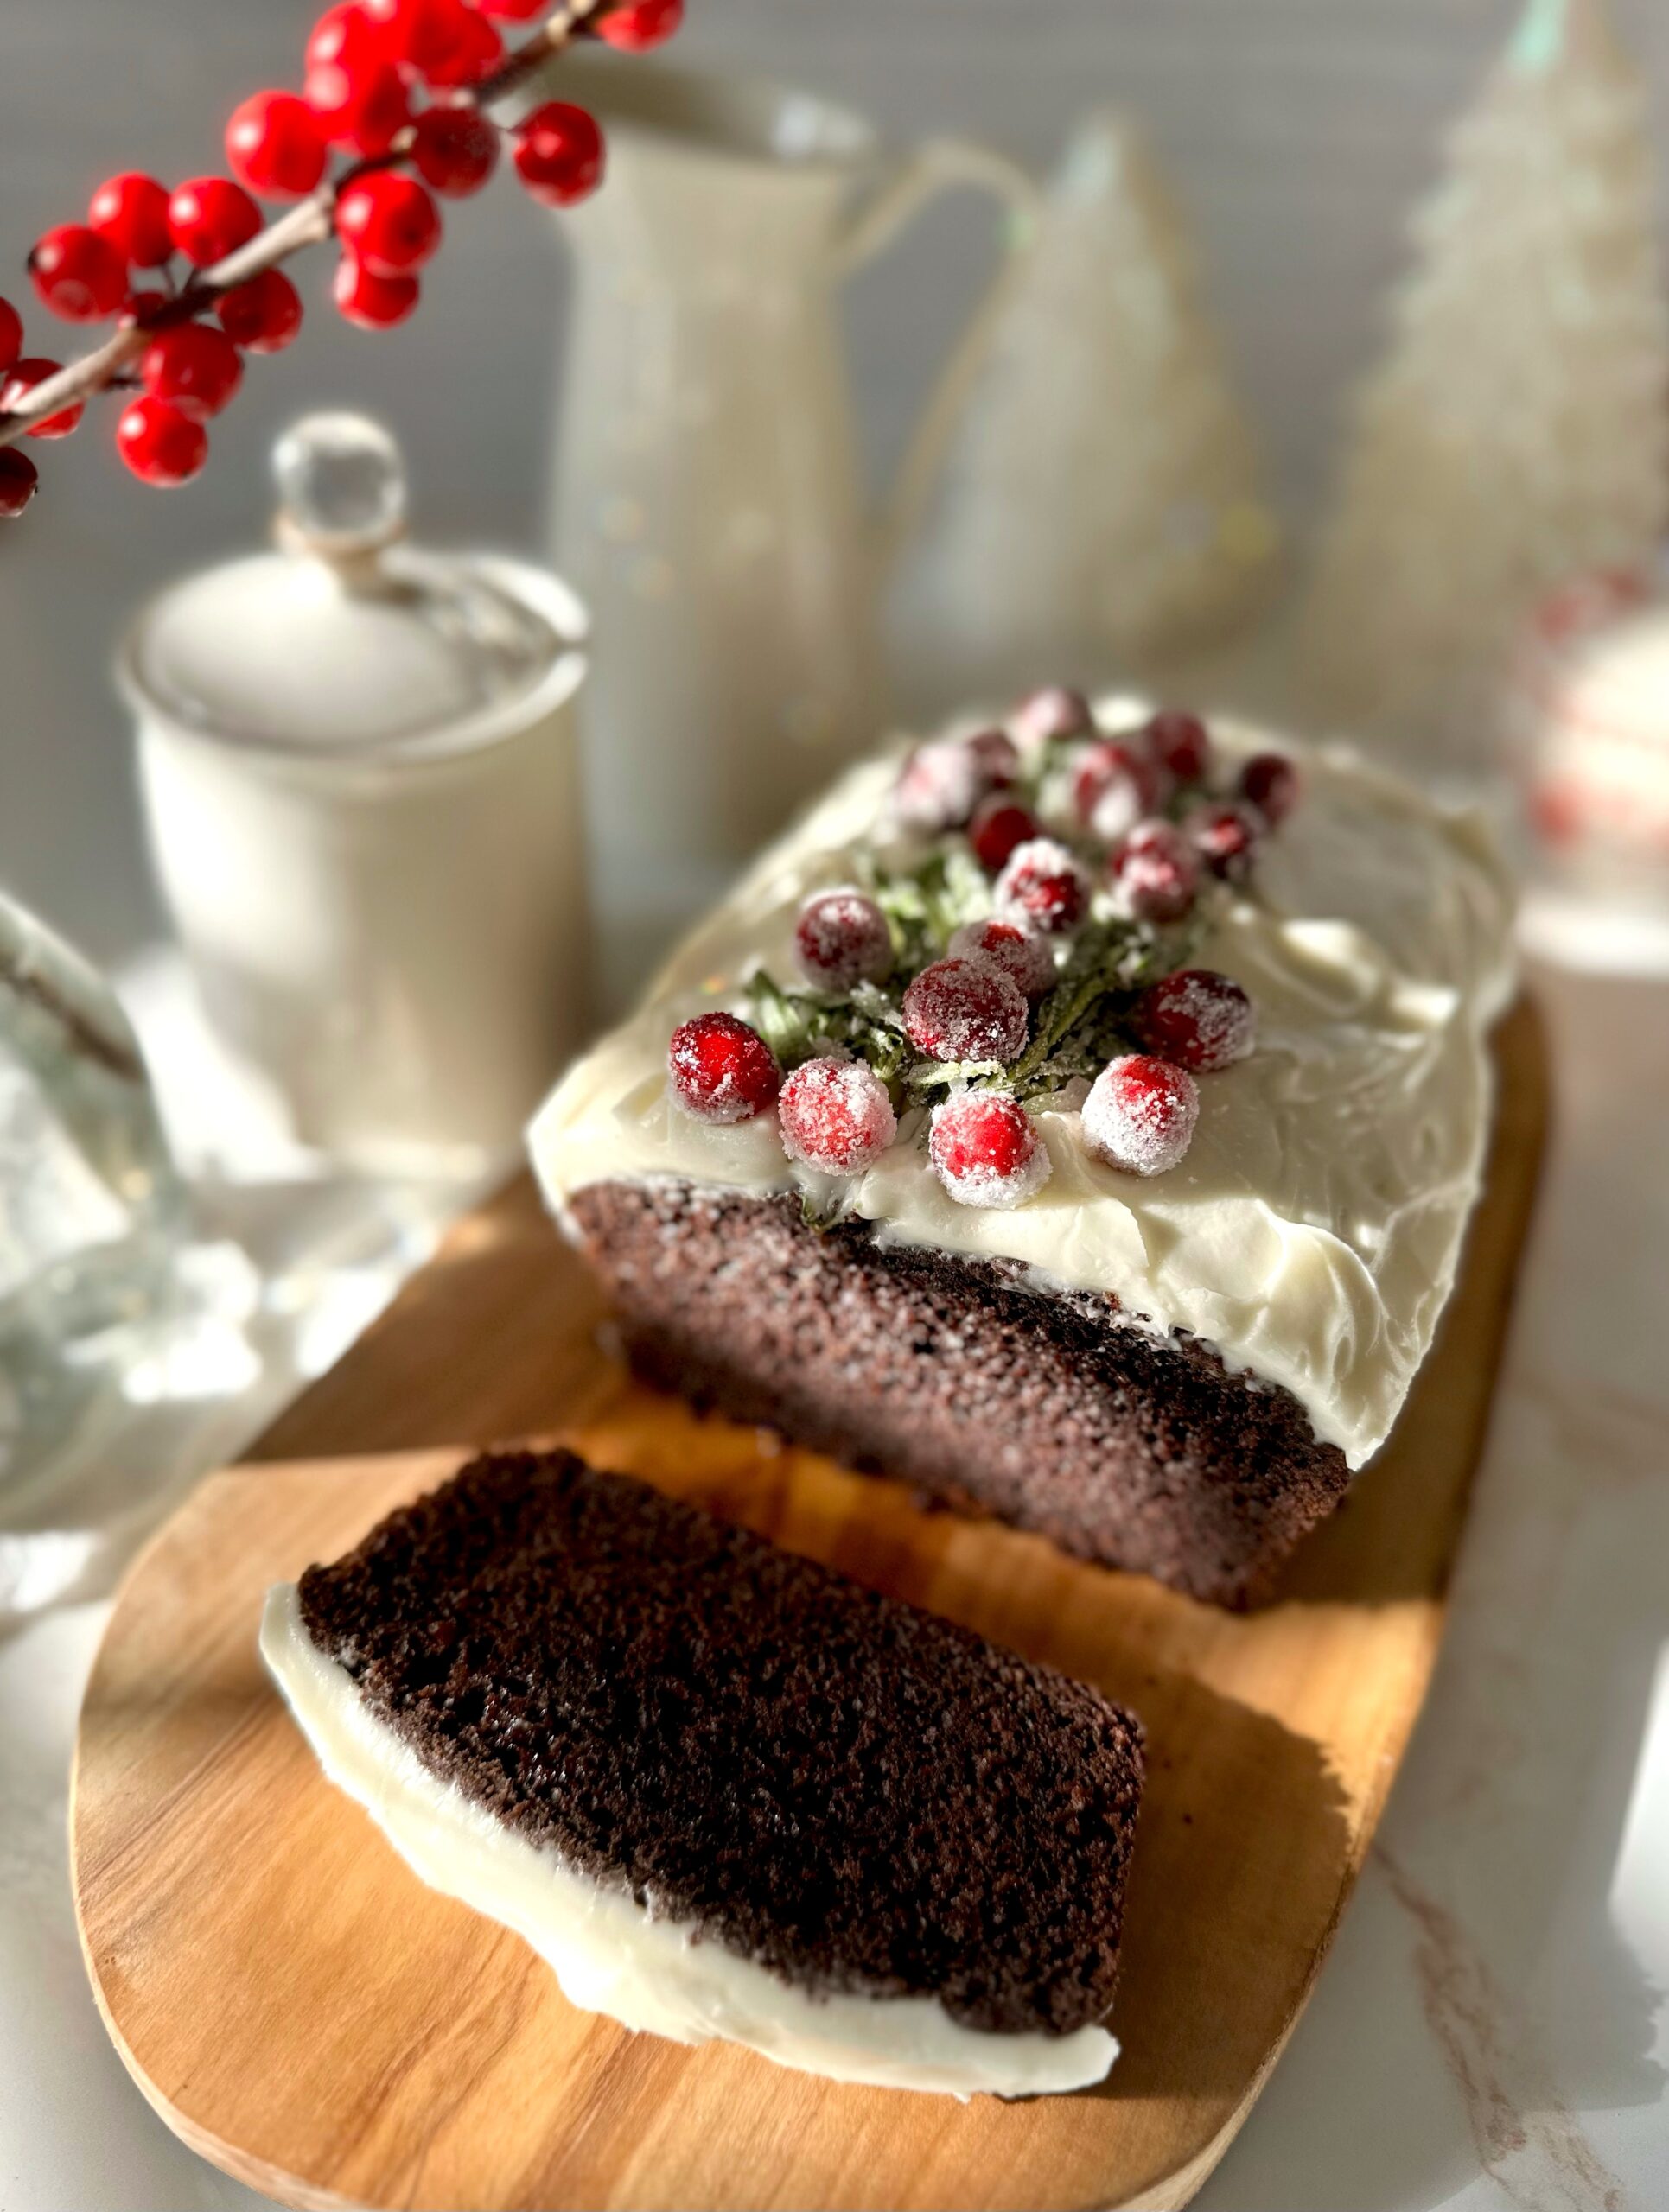
Chocolate gingerbread is gingerbread’s elegant sister. It has the warm spices we love in gingerbread combined with the earthy depth of chocolate. Topping this rich, tender loaf with silky cream cheese frosting is the best possible choice to take it over the top. It’s a lovely loaf to enjoy during the holiday season and beyond. Enjoy it with a hot drink for a cozy, comforting winter treat.

Make sure to check out my method for making sugared cranberries below. No raw eggs required!

Chocolate Gingerbread

Course Dessert
Servings 1 loaf

Ingredients
  

Chocolate Gingerbread

  • 1 ¼ cups (156g) all purpose flour, sifted plus extra for dusting the pan
  • â…“ cup (28g) Dutch process unsweetened cocoa powder, sifted plus extra for dusting the pan
  • 2 teaspoons ground cinnamon
  • 2 teaspoons ground ginger
  • 1 teaspoon baking powder
  • ½ teaspoon baking soda
  • ½ teaspoon fine sea salt
  • ¼ teaspoon ground nutmeg, preferably freshly ground
  • â…› teaspoon ground cloves
  • 1 cup (200g) packed dark brown sugar
  • ½ cup (115ml) vegetable oil or neutral oil of your choice
  • 2 large eggs, room temperature
  • 1 teaspoon pure vanilla extract
  • ½ cup (113g) sour cream, room temperature
  • ½ cup (118ml) whole milk, room temperature

Cream Cheese Frosting

  • ¼ cup (57g) cream cheese, softened
  • 2 tablespoons (28g) unsalted butter, softened
  • 2 cups (234g) powdered sugar, sifted
  • 2-3 tablespoons (30-45ml) whole milk, room temperature
  • ¼ teaspoon pure vanilla extract
  • 1 pinch fine sea salt

Instructions
 

Chocolate Gingerbread

  • Preheat oven go 350ºF (180ºC). Line the bottom of a 9 x 5-inch loaf pan with parchment paper. Grease the insides and dust with a mixture of equal parts flour and cocoa powder.
  • In a medium-size bowl, whisk together the flour, cocoa powder, cinnamon, ginger, baking powder, baking soda, salt, nutmeg, and cloves until well blended
  • In a large bowl, beat the brown sugar, oil, eggs and vanilla together until smooth.
  • In a small bowl, whisk together the sour cream and milk.
  • Add flour the mixture to the batter in two additions, alternating with the milk mixture, beating just until combined.
  • Transfer the batter to the prepared pan. Bake until a toothpick inserted into the center comes out clean, about 38-45 minutes.
  • Cool the loaf in the pan for 10 minutes, then turn the loaf out onto a cooling rack to cool completely. Frost with cream cheese frosting.

Cream Cheese Frosting

  • In a medium bowl, beat the butter and cream cheese together until smooth.
  • Add the powdered sugar, 2 tablespoons (30 ml) of milk, the vanilla and salt. Beat until smooth. Add additional milk, if needed, until your desired consistency is reached.

Notes

To make sugared cranberries and rosemary for garnish:  Mix 1 teaspoon of meringue powder* with 1 tablespoon of water. Place 1 cup of fresh cranberries in a bowl and coat them in the meringue powder mixture. Drain any excess liquid then coat the cranberries with granulated sugar.  Place them on a parchment lined baking sheet to dry at room temperature for at least 1 hour. Use the same method for sprigs of rosemary.
*To find meringue powder, click here.
Keyword cake, chocolate gingerbread

Chocolate Peppermint Crinkle Cookies

Chocolate Peppermint Crinkle Cookies

Fudgy chocolate peppermint crinkle cookies
Course Dessert
Servings 15 cookies

Ingredients
  

  • 1 â…“ cups (170g) all purpose flour, sifted
  • 2 tablespoons (12g) unsweetened Dutch process cocoa powder
  • 1 ½ teaspoons baking powder
  • ½ teaspoon fine sea salt
  • â…“ cup (75g) unsalted butter, softened
  • 2 ½ cups (340g) powdered sugar, sifted and divided
  • 2 large eggs
  • ½ teaspoon pure vanilla extract
  • ½ teaspoon pure peppermint extract
  • 2 ounces (57g) unsweetened chocolate, melted and cooled to room temperature

Instructions
 

  • In a medium bowl, whisk together the flour, cocoa powder, baking powder and salt.
  • In a large bowl, beat the butter with an electric mixer at medium speed, until light and fluffy. Gradually beat in 2 cups (227g) powdered sugar until well combined. Set aside the remaining 1/2 cup (113g) of powdered sugar in a shallow dish.
  • Beat in eggs in two separate additions, making sure each one is incorporated before adding the next. Add the extracts and the melted chocolate and beat until well combined. Beat in the flour mixture just until combined.
  • Cover and refrigerate the dough for at least 2 hours or up to overnight.
  • Preheat the oven to 350ºF (180ºC). Line two large cookie sheets with parchment paper.
  • Roll the dough into 15 2-tablespoon size balls, 1 1/4 ounce (35g) each. Roll the dough balls generously in the reserved 1/2 cup of powdered sugar.
  • Place the dough balls 3 inches apart onto the prepared cookie sheets. Bak until the cookies puff and the tops are set, about 10-12 minutes. Transfer the cookies to a cooking rack to cool.
Keyword cookies

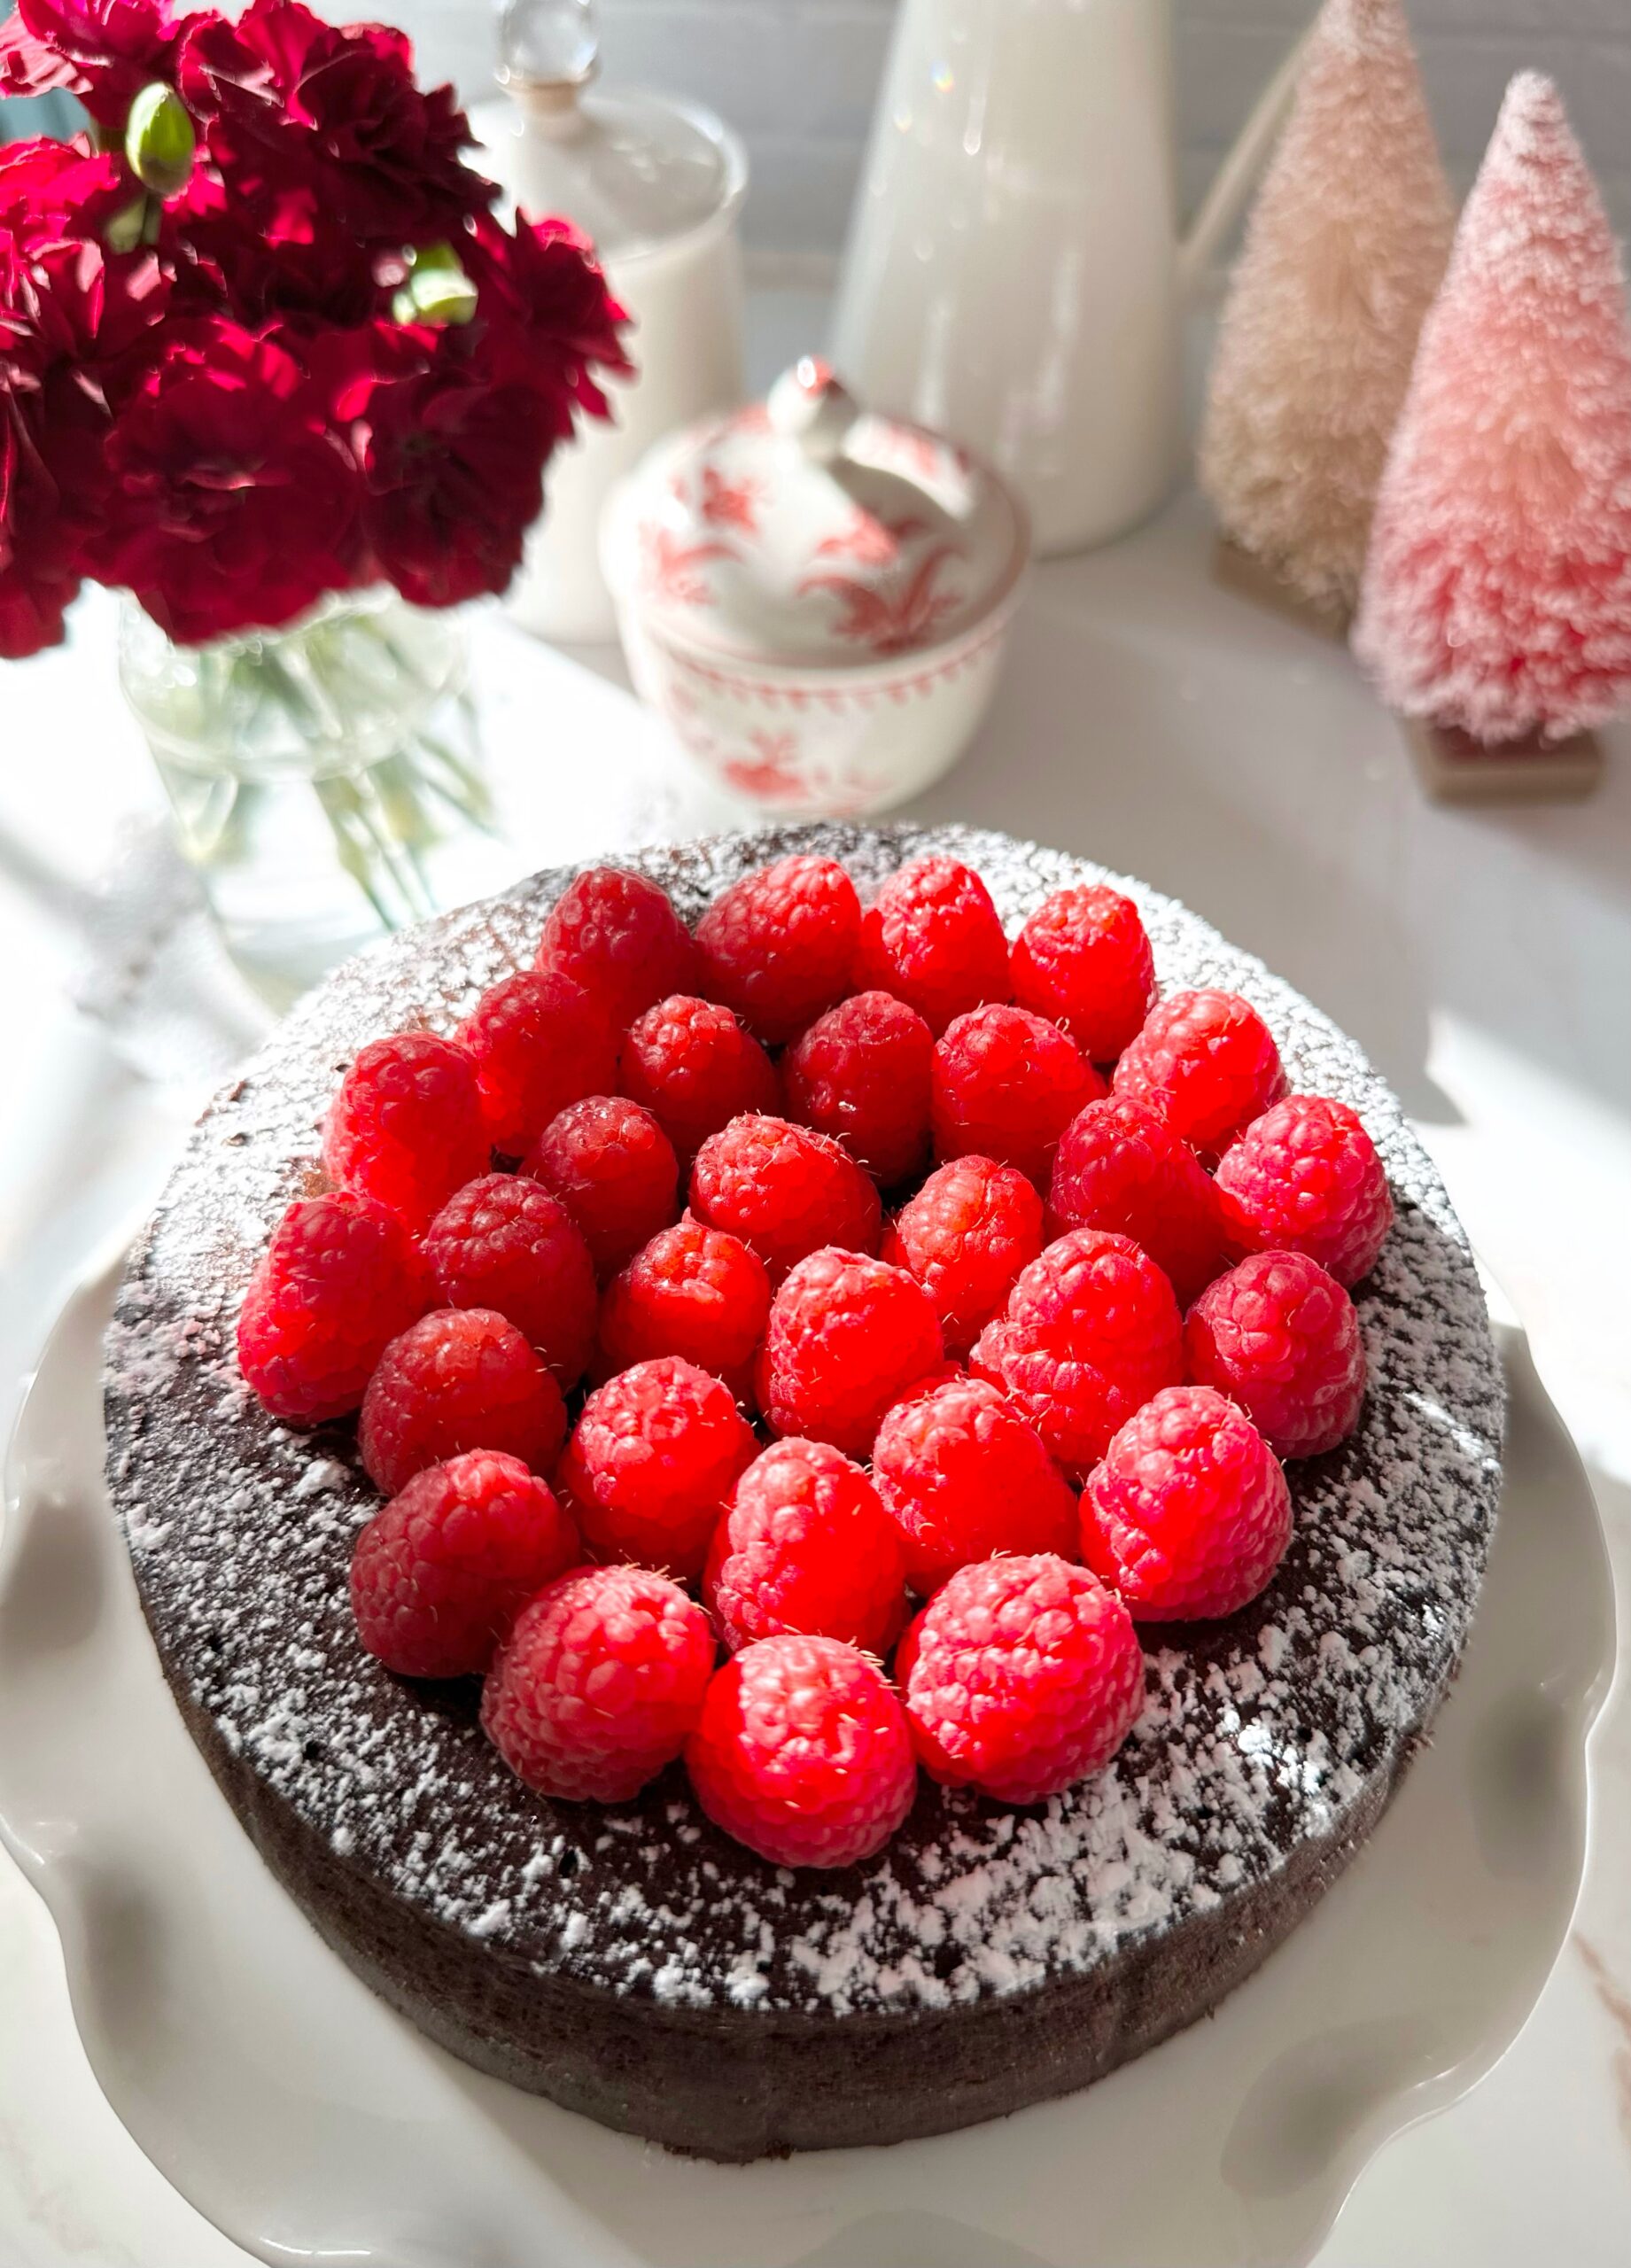
Flourless Chocolate Cake with Raspberry Sauce

Flourless Chocolate Cake with Raspberry Sauce

This cake story has a happy ending. Once, many years ago, someone gave my grandparents’ neighbor a flourless chocolate cake. The neighbor had a slice and couldn’t finish it because it was too rich. She brought the cake over to my grandparents and they each had a slice and couldn’t finish them, because they were too rich. I had a slice and I couldn’t finish mine either and, well…you can guess why. So my grandparents, not wanting to be wasteful, put the cake in the freezer and forgot about it for a very long time. Whenever I opened the freezer and saw it, I wondered why none of us could eat more than a few bites of that rich cake. Although I don’t know for sure, it was probably because the ratio of chocolate to butter was off. But I do know that serving it with something acidic, like berries or raspberry sauce, would have helped immensely.

The happy ending to this story is that this flourless chocolate cake was created to be enjoyed to the last bite. It’s decadent, but not overly rich. It has a good balance, not too sweet or too bitter. The raspberry sauce and fresh raspberries compliment it perfectly. This luscious cake is also delicious with strawberries or any combination of berries you like. It’s also delicious served with salted caramel sauce. I wish my grandparents were still around to give my version of a flourless chocolate cake a try. I think they would have loved this cake and finished every last bite!

Flourless Chocolate Cake with Raspberry Sauce

Servings 8

Ingredients
  

Flourless Chocolate Cake

  • 8 ounces semisweet chocolate, chopped
  • 4 ounces bittersweet chocolate, chopped
  • 6 ounces unsalted butter, cubed
  • 6 large eggs, chalazae* removed
  • 1 teaspoon pure vanilla extract
  • ¼ teaspoon fine sea salt
  • boiling water
  • powdered sugar for sprinkling
  • fresh raspberries for top
  • raspberry sauce (Recipe below)

Raspberry Sauce

  • 3 cups (12 ounces) fresh raspberries
  • 2 teaspoons lemon juice
  • 1/4-1/3 cup (1 3/4-2 3/8 ounces) sugar
  • 1 tablespoon water
  • 1 teaspoon cornstarch

Instructions
 

Flourless Chocolate Cake

  • Preheat oven to 325ºF. Line a 6-inch springform pan** with parchment paper. Spray the parchment paper with nonstick spray. Wrap the bottom two inches of the pan tightly with aluminum foil. Set pan in a baking pan.
  • Combine chocolate and butter in a large stainless steel bowl set over a pot of barely simmering water. Stir until melted and smooth. Remove bowl from heat.
  • In a large bowl, beat eggs with an electric mixer until doubled in size, about 5 minutes. Beat in vanilla extract and salt.
  • With a large spatula, gently fold beaten eggs into chocolate mixture in three additions until no streaks of egg remain. Transfer batter to prepared pan. Smooth top of batter with a small offset spatula.
  • Pour 1 1/2 inches of boiling water into baking pan. Bake until top is set and internal temperature*** reaches 140ºF, about 28-37 minutes.
  • Remove cake pan from water bath. Cool to room temperature then cover and refrigerate for at least 4 hours (or up to overnight, but cake is best served the day it's made).
  • Remove cake from pan when chilled and set. Top with powdered sugar and fresh raspberries.
  • To serve, remove cake from refrigerator at least 30 minutes before serving and serve at room temperature for best texture. Serve with raspberry sauce.

Raspberry Sauce

  • Purée raspberries in blender or food processor. Pass purée through a fine mesh sieve**** to remove seeds.
  • In a small bowl, whisk together water and cornstarch.*****
  • In a small saucepan, heat raspberry purée with sugar and cornstarch slurry to a boil over medium heat. Turn heat down to low and simmer until slightly thickened, about 2-3 minutes.

Notes

*Chalazae are the opaque chords of egg white. Removing them is optional, but they do show up as white spots in the cake after baking.
**To find the 6-inch springform pan I used, click here.
***To find an instant read thermometer, click here.
****To find a fine mesh sieve, click here.
*****To find a mini whisk for whisking small amounts, click here.
Keyword cake, chocolate

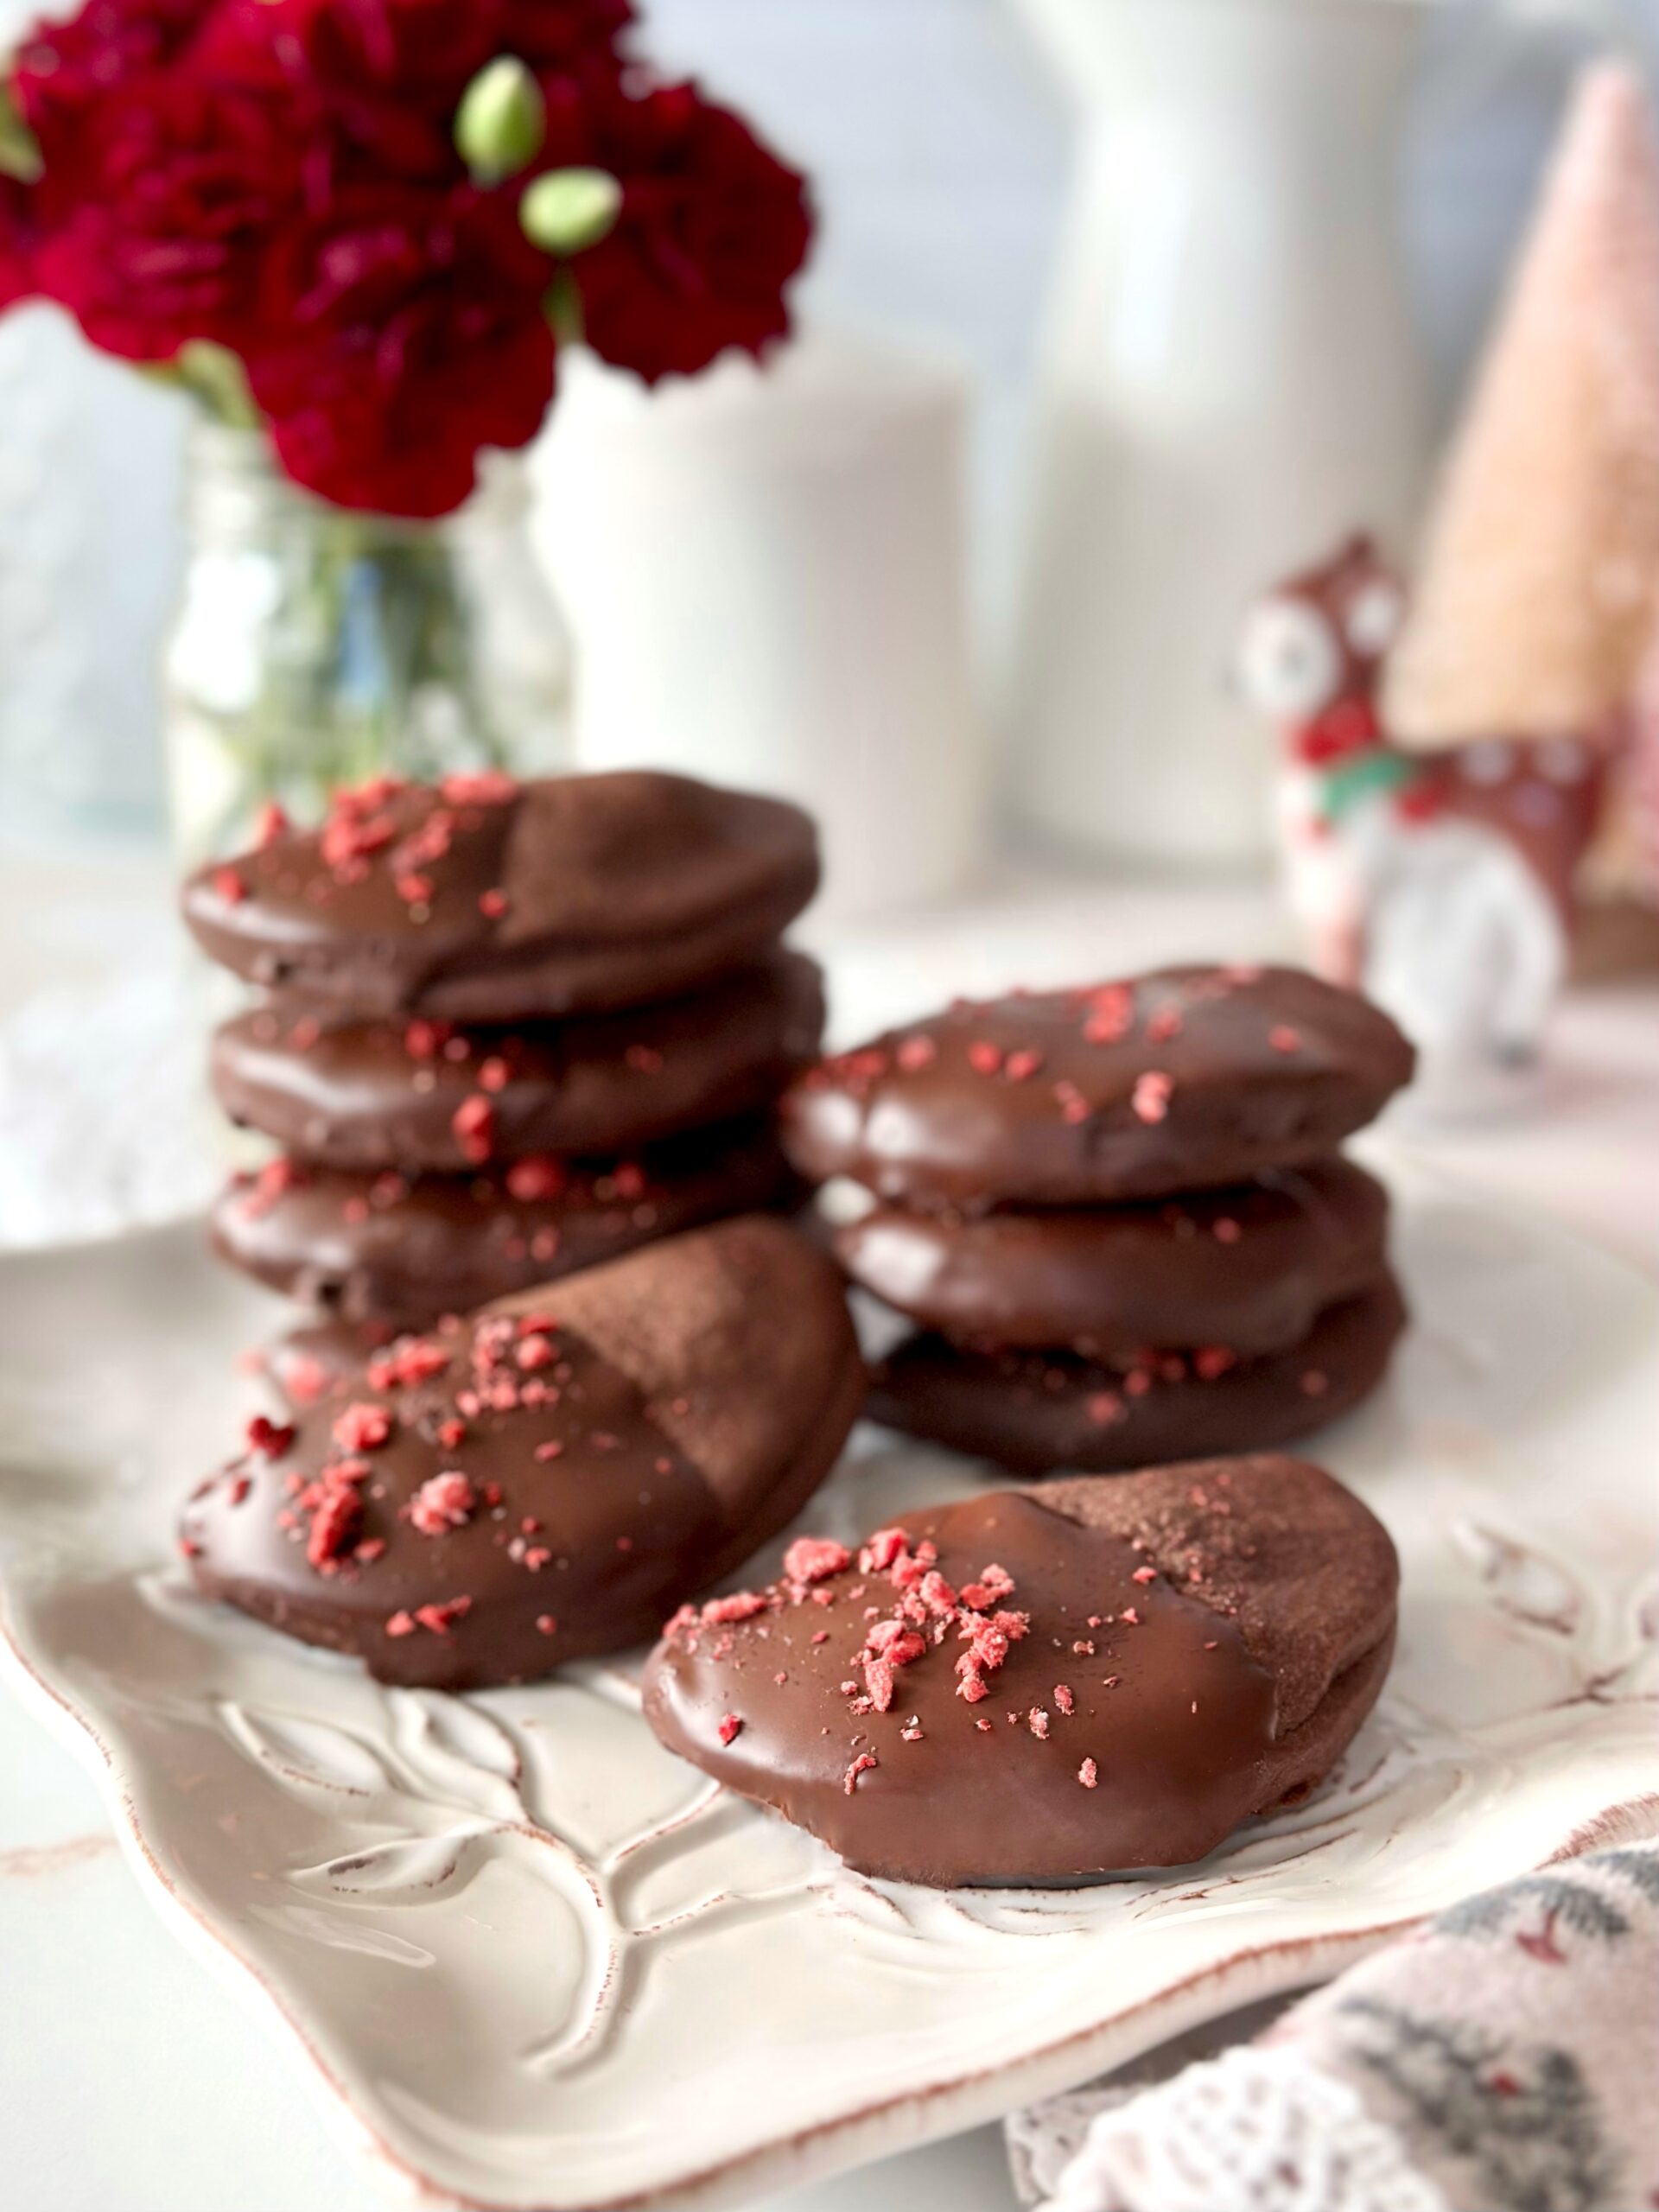
Chocolate Raspberry Cookie Tartlets

Chocolate Raspberry Cookie Tartlets

My fascination with Christmas cookies started as a child when my elderly neighbor used to bring over a tray of her homemade Christmas cookies every year. I loved the moment where I got to choose a cookie from the beautiful, interesting selection. In my humble opinion, I think a holiday cookie should be something special. It should be something that you don’t eat on a regular basis, maybe because it seems fancy or requires a little extra work to make. Or maybe it has a special meaning or a fond memory. These Chocolate Raspberry Cookie Tartlets check all the boxes for me. They have that something special a cookie needs to be the star of the holiday cookie tray…tender jam-filled chocolate dough, dipped in shiny chocolate with a pretty pop of red.

Chocolate Raspberry Cookie Tartlets

Servings 20 cookies

Ingredients
  

  • 1 ½ cups (6 ounces) powdered sugar
  • â…“ cup (1 ounce) unsweetened Dutch process cocoa powder
  • ½ teaspoon baking powder
  • ¼ teaspoon fine sea salt
  • ½ cup (4 ounces) unsalted butter, softened
  • 3 ounces cream cheese, softened
  • 1 large egg
  • 1 teaspoon pure vanilla extract
  • 2 cups (9 ounces) all purpose flour, sifted
  • ½ cup (5 ounces) raspberry jam or or fruit spread
  • 4 ounces melted semisweet or bittersweet chocolate
  • 1 teaspoon melted coconut oil or vegetable shortening
  • crushed freeze dried raspberries or sprinkles of your choice Optional

Instructions
 

  • In a medium bowl, sift together powdered sugar, cocoa powder, baking powder and salt.
  • In a large bowl, beat butter and cream cheese, with an electric mixer on medium speed, until smooth.
  • Add powdered sugar mixture and beat until well combined.
  • Beat in egg and vanilla until well combined.
  • On low speed, beat in flour just until combined.
  • Divide dough into two equal portions. Wrap with plastic wrap and form into disks. Refrigerate at least two hours or overnight.
  • Preheat oven to 375ºF. Line two baking sheets with parchment paper.
  • Roll dough between two sheets of wax paper to 1/8-inch thickness. Cut dough into 3-inch rounds, re-rolling scraps as necessary. If dough becomes too soft at any point, chill in the refrigerator for 10-15 minutes then continue with recipe.
  • Place rounds on prepared baking sheets. Top each round with a teaspoon of jam.
  • With a small food safe brush or with your finger, apply a small amount of water to the edge of half of each round. Fold over and press edges to seal.
  • Bake until tops of cookies look set, about 9-11 minutes. Transfer cookies to a cooling rack and let cool completely.
  • In a small bowl, mix melted chocolate with coconut oil until smooth.
  • Dip cookies about 1/3 of the way into melted chocolate. Top with freeze dried fruit or sprinkles.

Notes

*To find freeze dried raspberries, click here.
To find the cookie cutter I used, click here.
To find food safe brushes, click here.
Keyword chocolate raspberry, cookies