If you’re a fan of the movie, My Neighbor Totoro, you’ll love these cute little tarts with bellies full of blueberry filling. I watched this movie multiple times over my break from Christmas to New Year’s Day. 2024 was such a roller coaster, that I needed something that brings happiness and comfort. I hope these yummy little cuties will bring you happiness too!
I shared my flaky pie crust recipe below along with the filling. If you want to streamline the process, you can certainly use store bought pie crust. But I must say that that I’ve made them both ways and the homemade crust tastes so much better! You can use a 4 1/2-inch Totoro cookie cutter* to make the pies or you can use the free printable pattern** I provided below. For best results, make sure your dough is nice and cold when cutting it out. You can also use any leftover pie scraps to make tiny Chibi Totoros if you like. Brush them with egg wash and sprinkle with coarse sugar. Bake for a few minutes until light golden brown.
Totoro Inspired Blueberry Tarts
Ingredients
Crust
- 2 ¾ cups (351g) all purpose flour
- 1 tablespoon (14g) sugar
- ½ teaspoon fine sea salt
- ¼ cup (46g) vegetable shortening
- ¾ cup (170g) cold, unsalted butter, cubed
- ½ cup (118ml) ice water
- 1 tablespoon (15ml) apple cider vinegar
Filling
- 2 ½ cups (312-340g) blueberries, fresh or frozen, divided
- 1 teaspoon lemon juice
- 6 tablespoons (75g) sugar
- 4 teaspoons (13g) cornstarch
- 1 dash fine sea salt
- ½ teaspoon pure vanila extract
Icing
- 1 ½ cups (180g) powdered sugar, sifted
- 1 ½ tablespoons (21g) unsalted butter, melted
- 2-3 tablespoons (30-45ml) milk
- ½ teaspoon pure vanilla extract
- 1 dash fine sea salt
Decor
- 1 tablespoon (11g) chopped semisweet chocolate or mini chocolate chips, melted
Instructions
Crust
- In a large bowl, whisk together the flour, sugar and salt. Work the shortening into the flour mixture with your fingertips until it's evenly distributed. Work in the butter until flat, dime-size pieces are formed.
- In a glass measuring cup, stir the ice water and the vinegar together. Sprinkle it over the flour mixture a little at a time, stirring the dough until it comes together. You may not need all of the liquid, depending on your climate.
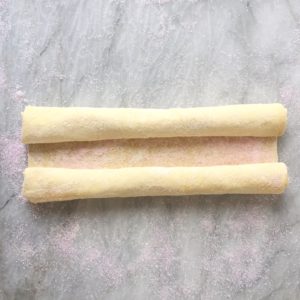
- Turn the dough out onto a lightly floured surface. Fold the dough over onto itself a few times. Do not over work the dough. Divide the dough into 2 equal portions. Use a kitchen scale for accuracy. Form the portions into disks, wrap them in plastic wrap and refrigerate until firm, at least 2 hours or up to overnight.
Filling & Assembly
- Set aside 1/2 cup of blueberries. In a medium-size saucepan, over medium heat, stir together 2 cups of blueberries and the lemon juice. Add the sugar, cornstarch and salt. Stir gently until the sugar melts and the mixture starts to bubble. Let the mixture simmer gently until thickened, about 3-5 minutes. Transfer the mixture to a shallow bowl. Stir in the reserved 1/2 cup of blueberries and the vanilla extract. Let cool to room temperature.
- Preheat the oven to 375ºF (190ºCº). Line two baking sheets with parchment paper.
- On a lightly floured surface, roll the dough to 1/8-inch thickness. Cut out 9-10 Totoro shapes out of each dough portion using a 4 1/2-inch Totoro cookie cutter* or cut with a paring knife using the provided pattern.** You should get 20 Totoro cut-outs out of the homemade dough, only re-rolling the dough scraps once. Store bought dough will yield about 18 cut-outs, re-rolling the scraps once. (Let the re-rolled dough scraps rest in the refrigerator until firm before cutting.) Place half of the Totoro cut-outs, about 2 inches apart, onto the baking sheets.
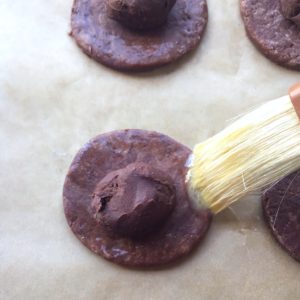
- Brush the edges of the Totoro cut-outs with egg wash, using your finger or a small pastry brush. Place about 2 tablespoons of the filling in the center of each one. Place a second cut-out over each one. Press the edges together with your fingers, beginning at the bottom and working your way up the sides. Wipe up any excess blueberry drips with a paper towel. Crimp the edges with a small fork. Brush the pies with egg wash. Cut a small ventilation slit into the center of each tart. Bake until the crust is golden brown and the filling starts to bubble, about 23-28 minutes. (If the ears start to brown too fast, you can cover them with small pieces of aluminum foil during the last few minutes of baking.) Transfer the tarts to a cooling rack.
Icing & Decor
- In a medium bowl, whisk together the powdered sugar, butter, 1 tablespoon of milk, the vanilla and salt until well combined. Add additional milk as needed to achieve the desired consistency. Whisk until smooth. Spread the icing onto the bellies of the cooled Totoro tarts. Pipe dots for the eyes. When the icing has dried, you can use melted chocolate to make the eyeballs, noses and decorate the bellies.