Raspberry White Chocolate Scones

Raspberry White Chocolate Scones

A good scone has a way of making you feel elegant, especially if you pronounce it ‘skon’ instead of ‘skōne’. I went to a lovely tea recently where scones were served, along with an array of dainty tea sandwiches and desserts. The scones were round with pink sugar sprinkled on top. Pretty pink food is always so promising. Unfortunately, the scones were hard, dry and bland. No amount of clotted cream slathered on them could help. There’s nothing elegant about a dry, hard bite of a scone that you have to struggle to choke down. Scones should be dense and slightly dry and crumbly, but there’s no reason we can’t make them more delicious. It’s fun to add fruit, chocolate, herbs, nuts or whatever you like to make them more delightful. These Raspberry White Chocolate Scones are tender and buttery with bursts of flavor from the fresh raspberries and white chocolate. I added pink sparkling sugar for texture and, of course, to make them look pretty!


Raspberry White Chocolate Scones

by Mari Vasseur
Tender scones with fresh raspberries and white chocolate, topped with crunchy sparkling sugar.
Course Breakfast, Brunch
Servings 8 scones

Ingredients
  

  • 1 ¾ cups (226g) all purpose flour, sifted
  • 1 tablespoon baking powder
  • ½ teaspoon fine sea salt
  • 7 tablespoons (100g) cold, unsalted butter, cubed
  • ½ cup (118 ml) cold heavy cream plus extra for the tops of the scones
  • ¼ cup (57g) cold sour cream
  • 1 teaspoon pure vanilla extract
  • ¾ cup (128g) white chocolate chips or chunks Not chopped white chocolate
  • ¾ cup (113g) fresh or frozen raspberries
  • Pink or white coarse sparkling sugar

Instructions
 

  • Line a large baking sheet with parchment paper.
  • In a large bowl, whisk the flour, baking powder and salt together until well combined. Work the butter into the flour mixture with your fingertips or with a pastry blender until pea size pieces form.
  • In a small bowl, whisk together the heavy cream, sour cream and vanilla until well blended. Stir the cream mixture into the flour mixture until a shaggy dough forms. Gently fold in the white chocolate chips and raspberries.
  • Turn the dough out onto a lightly floured surface. Form the dough into a 1-inch thick round, about 6 1/2 inches in diameter. Cut the dough into 8 wedges.
  • Place scones 2 inches apart on the prepared baking sheet. Chill the scones in the refrigerator for 20 minutes.
  • Meanwhile, preheat the oven to 375ºF (190ºC). Brush the tops of the scones with heavy cream. Sprinkle with coarse sugar.
  • Bake until the edges look golden brown, about 20-24 minutes. Transfer the scones to a cooling rack.

Notes

*To find pink sparkling sugar, click here.  
This recipe was updated on 3/23/2023.
Keyword raspberry white chocolate, scones

Lavender White Chocolate Scones

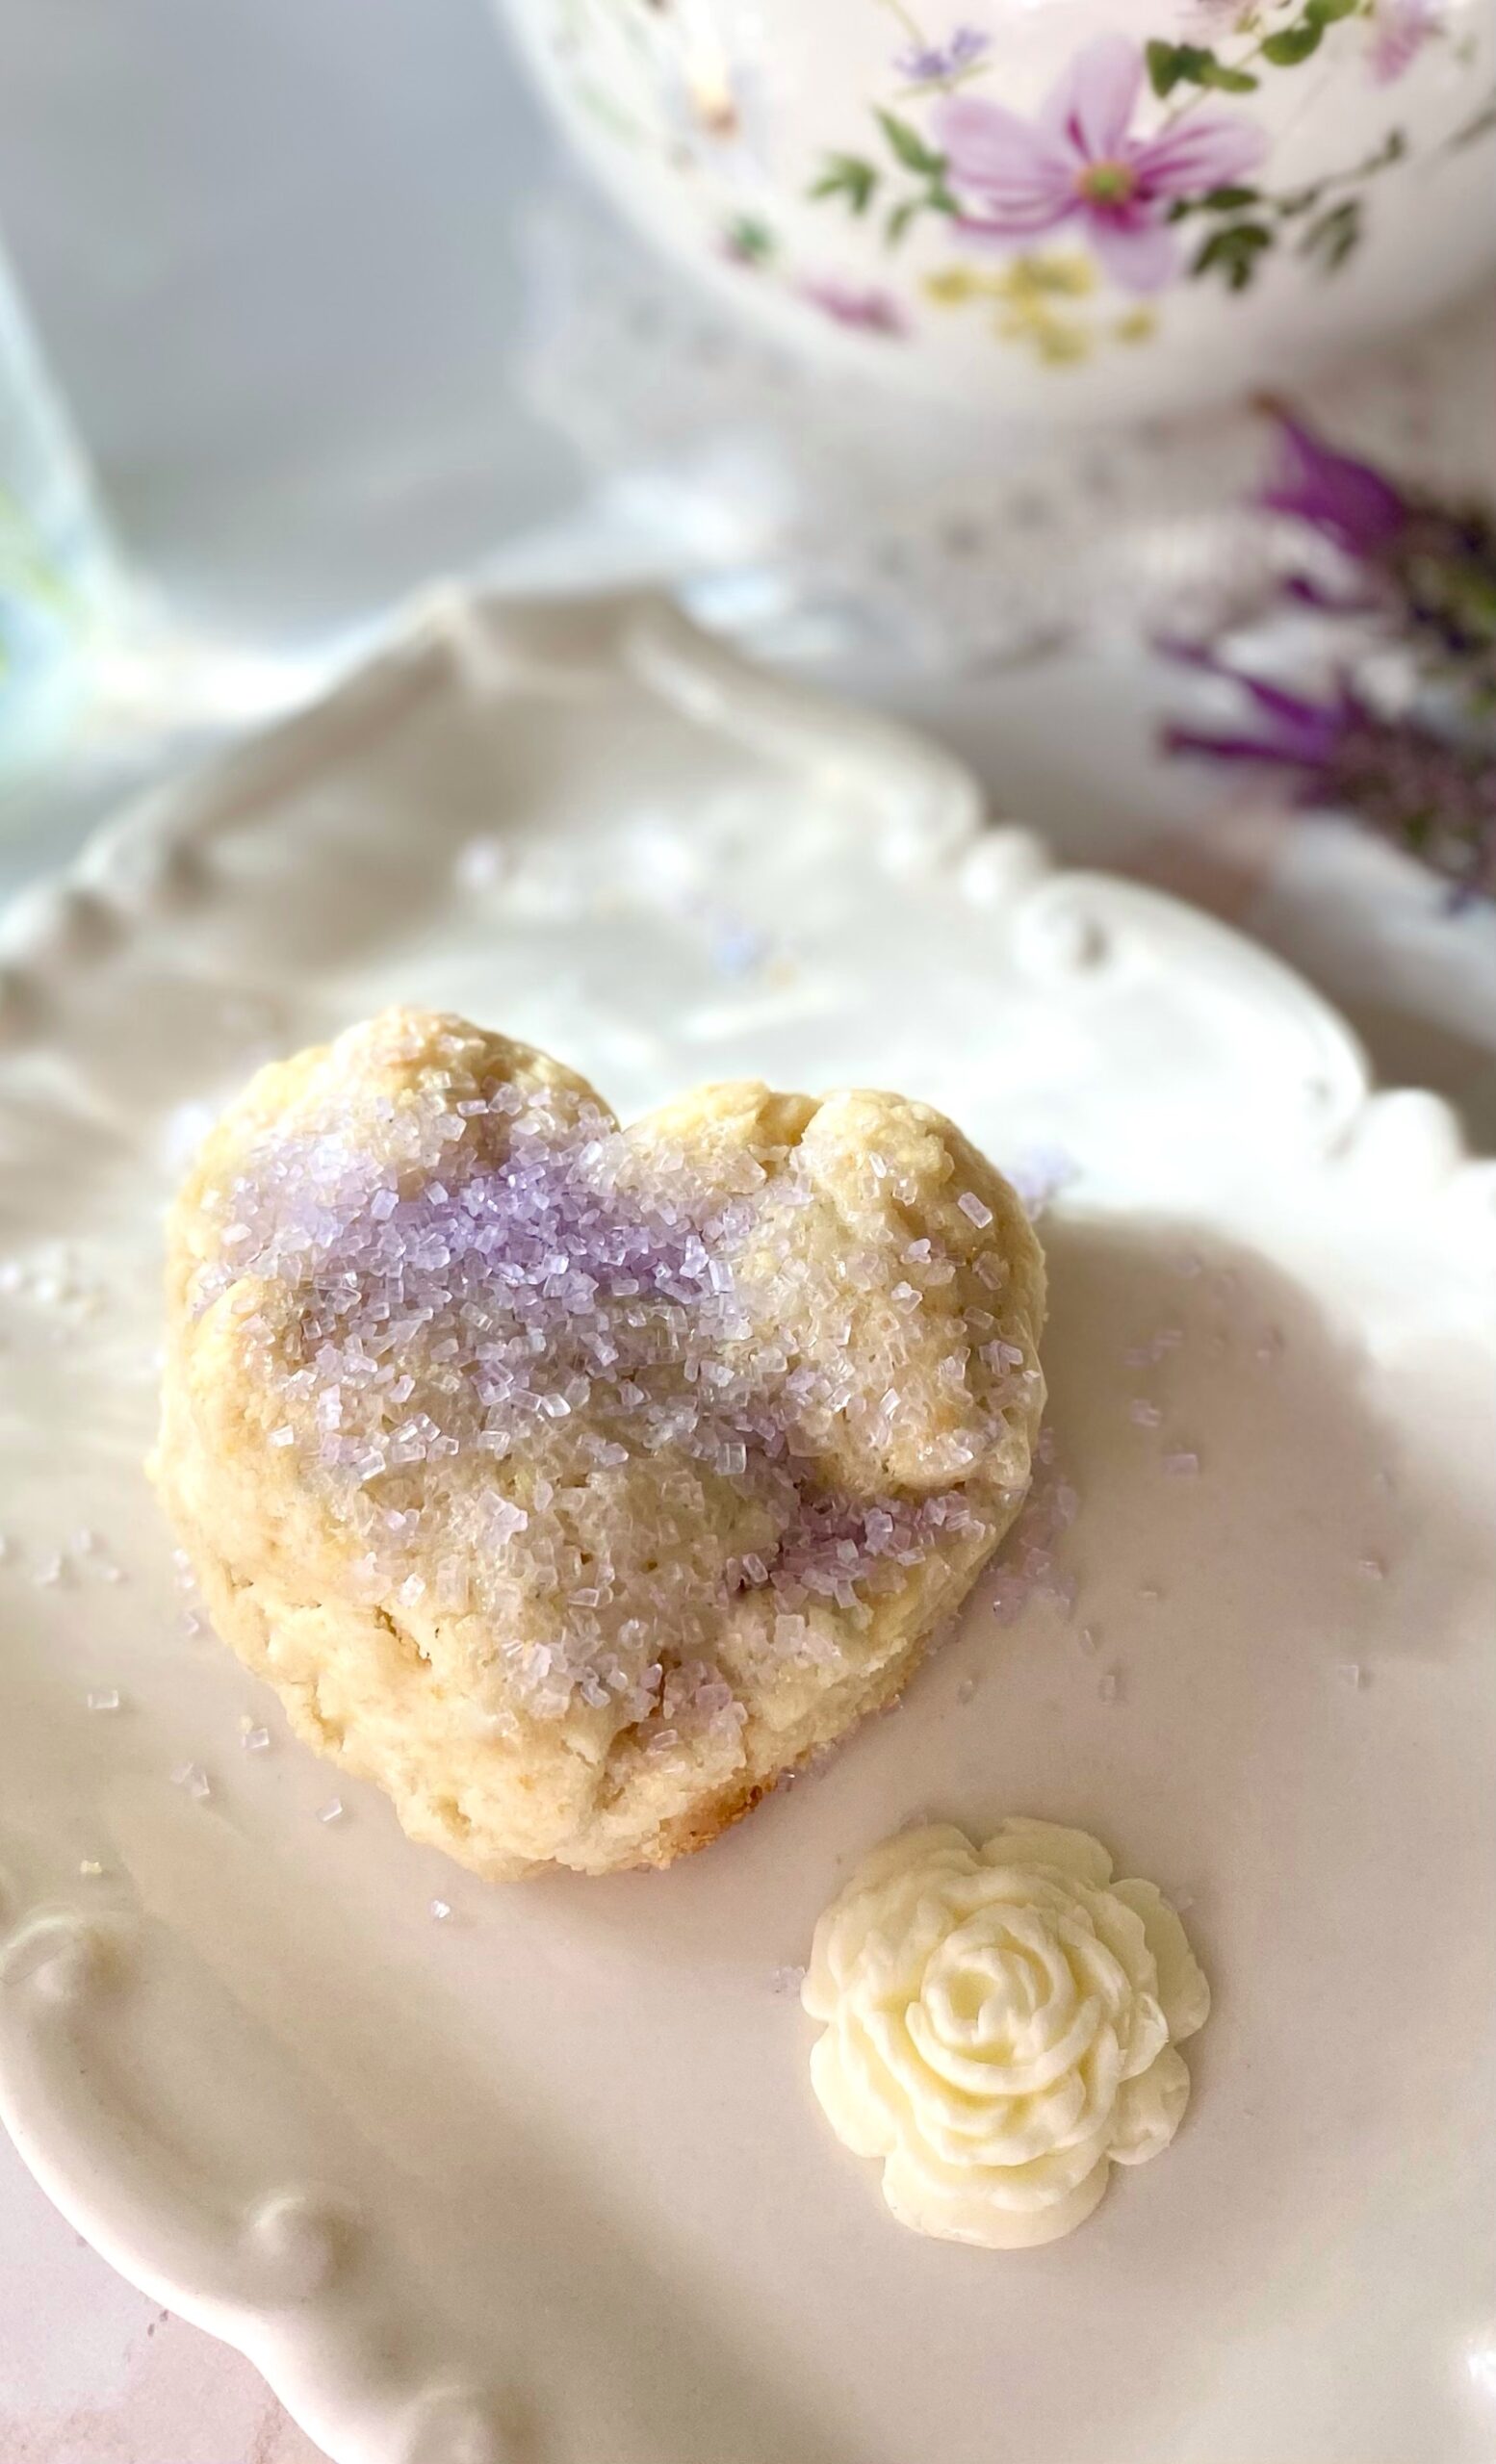
Lavender white chocolate scone
Click here to watch the video of Lavender White Chocolate Scones

These lovely Lavender White Chocolate Scones are soft and tender on the inside with crisp golden exteriors. The pretty, lilac coarse sugar gives them a subtle crunch. The sweet, melted white chocolate is the perfect contrast to the fragrant, earthy notes from the lavender.

Now, let’s talk a little bit about lavender. I used one teaspoon of lavender in these scones, which I think is the perfect amount to give a hint of lavender, without tasting too floral. You can adjust the amount to your preference. Just taste the cream before adding it to the scones. You can use any culinary lavender in this recipe. English lavender is usually used for culinary purposes. Spanish and French varieties tend to be too strong. People are enchanted by lavender because of its beauty and soothing scent. A little touch of lavender makes these scones magical.


Lavender White Chocolate Scones

by Mari Vasseur
Tender, soft heart-shaped scones with crisp, golden edges topped with coarse sugar
Course Breakfast, Brunch
Servings 9 scones

Ingredients
  

  • ¾ cup (177ml) heavy cream
  • 1 teaspoon culinary lavender *
  • 1 ¾ cups (223g) all purpose flour, sifted
  • 1 tablespoon baking powder
  • ½ teaspoon fine sea salt
  • 7 tablespoons (99g) cold, unsalted butter, cubed
  • ¼ cup (57g) cold sour cream
  • 1 cup (170g) white chocolate chunks or chips (not chopped white chocolate)
  • Lavender or lilac coarse sparkling sugar**

Instructions
 

  • In a small saucepan, heat the heavy cream and lavender over medium heat, just until bubbles form around the edges. Turn the heat to low and simmer gently for 1 minute. Strain the lavender cream into a small bowl. Cover and refrigerate until chilled, about 1 hour.
  • Heat the oven to 375ºF (190ºC). Line a large baking sheet with parchment paper.
  • In a large bowl, whisk together flour, baking powder and salt until well blended. Work the butter into the flour mixture with your fingertips or with a pastry blender until pea size chunks form.
  • Whisk together 1/2 cup (118ml) of the chilled lavender cream with the sour cream. Stir this mixture into the flour mixture until a shaggy dough is formed. If your dough seems too dry, add 1-2 more teaspoons of heavy cream. Fold in the white chocolate chunks.
  • Turn the dough out onto a lightly floured surface. Fold the dough over onto itself a couple of times. Do not overwork the dough! Pat or roll the dough into an 8-inch round, about 3/4 inch thick. I used 2 3/4-inch heart biscuit cutter*** to cut out 9 scones.
  • Place the scones about 2 inches apart onto the prepared baking sheet. Brush the scones with the remaining cream. Sprinkle with sparkling sugar. Bake until golden, about 15-17 minutes.

Notes

*To find culinary lavender click here
** To find the sparkling sugar I used click here
***To find the heart shape biscuit cutter I used click here
Keyword lavender white chocolate, scones

Cheddar Ham Biscuits

Have you ever had one of those mornings where you wake up starving? It typically happens to me when I skip dinner the night before. So one morning that happened. My family and I were really hungry, there was a bit of leftover holiday ham in the fridge and these fluffy, satisfying biscuits were born. I think these biscuits need to be included in all lumberjack breakfasts from now on.

If you love ham and cheese anything, you’ll love these biscuits. You can also add fresh chives or swap out the ham for bacon if you like. I love baking them in a cast iron skillet because of the rustic, crispy sides and bottoms you get from the high heat conductivity of cast iron. To find the cast iron pan I used, click here. You can also bake them in a 9-inch cake pan or pie plate.

Cheddar Ham Biscuits

Course Breakfast, Brunch
Servings 8 biscuits

Ingredients
  

  • 2 cups (9 ounces) all purpose flour
  • 1 tablespoon baking powder
  • 1 tablespoon sugar
  • 1 teaspoon fine sea salt
  • ½ cup (4 ounces) cold, unsalted butter, cubed
  • ¾ cup (3 ounces) shredded cheddar cheese, preferably sharp cheddar
  • ½ cup (2 3/4 ounces) diced cooked ham (1/4-inch pieces) Pat dry with paper towel.
  • cup cold buttermilk
  • 1 tablespoon melted butter

Instructions
 

  • Preheat oven to 425ºF. Butter a 9-inch cast iron skillet*
  • In a large bowl, sift together flour, baking powder, sugar and salt.
  • Work butter into flour mixture with your fingertips, until flat dime size pieces are formed.
  • Gently stir in cheese and ham.
  • Stir in buttermilk a little at a time until a shaggy dough is formed.
  • Turn dough out onto a lightly floured surface.
  • Fold dough over onto itself a few times. Form dough into a 7-inch diameter 3/4-inch thick round.
  • Using a 2 1/2-inch biscuit cutter, cut dough into seven biscuits. Press the scraps together and cut one more biscuit. If dough becomes warm at any point, chill in the refrigerator for 10-15 minutes, then proceed with recipe.
  • Transfer biscuits to prepared pan. Brush with melted butter.
  • Bake until biscuits are puffy and tops are golden brown, about 22-25 minutes.
  • Serve immediately.

Notes

To find the skillet I used, click here.

The Nutcracker Land of Sweets Cupcakes

Nutcracker Land of Sweets Cupcakes

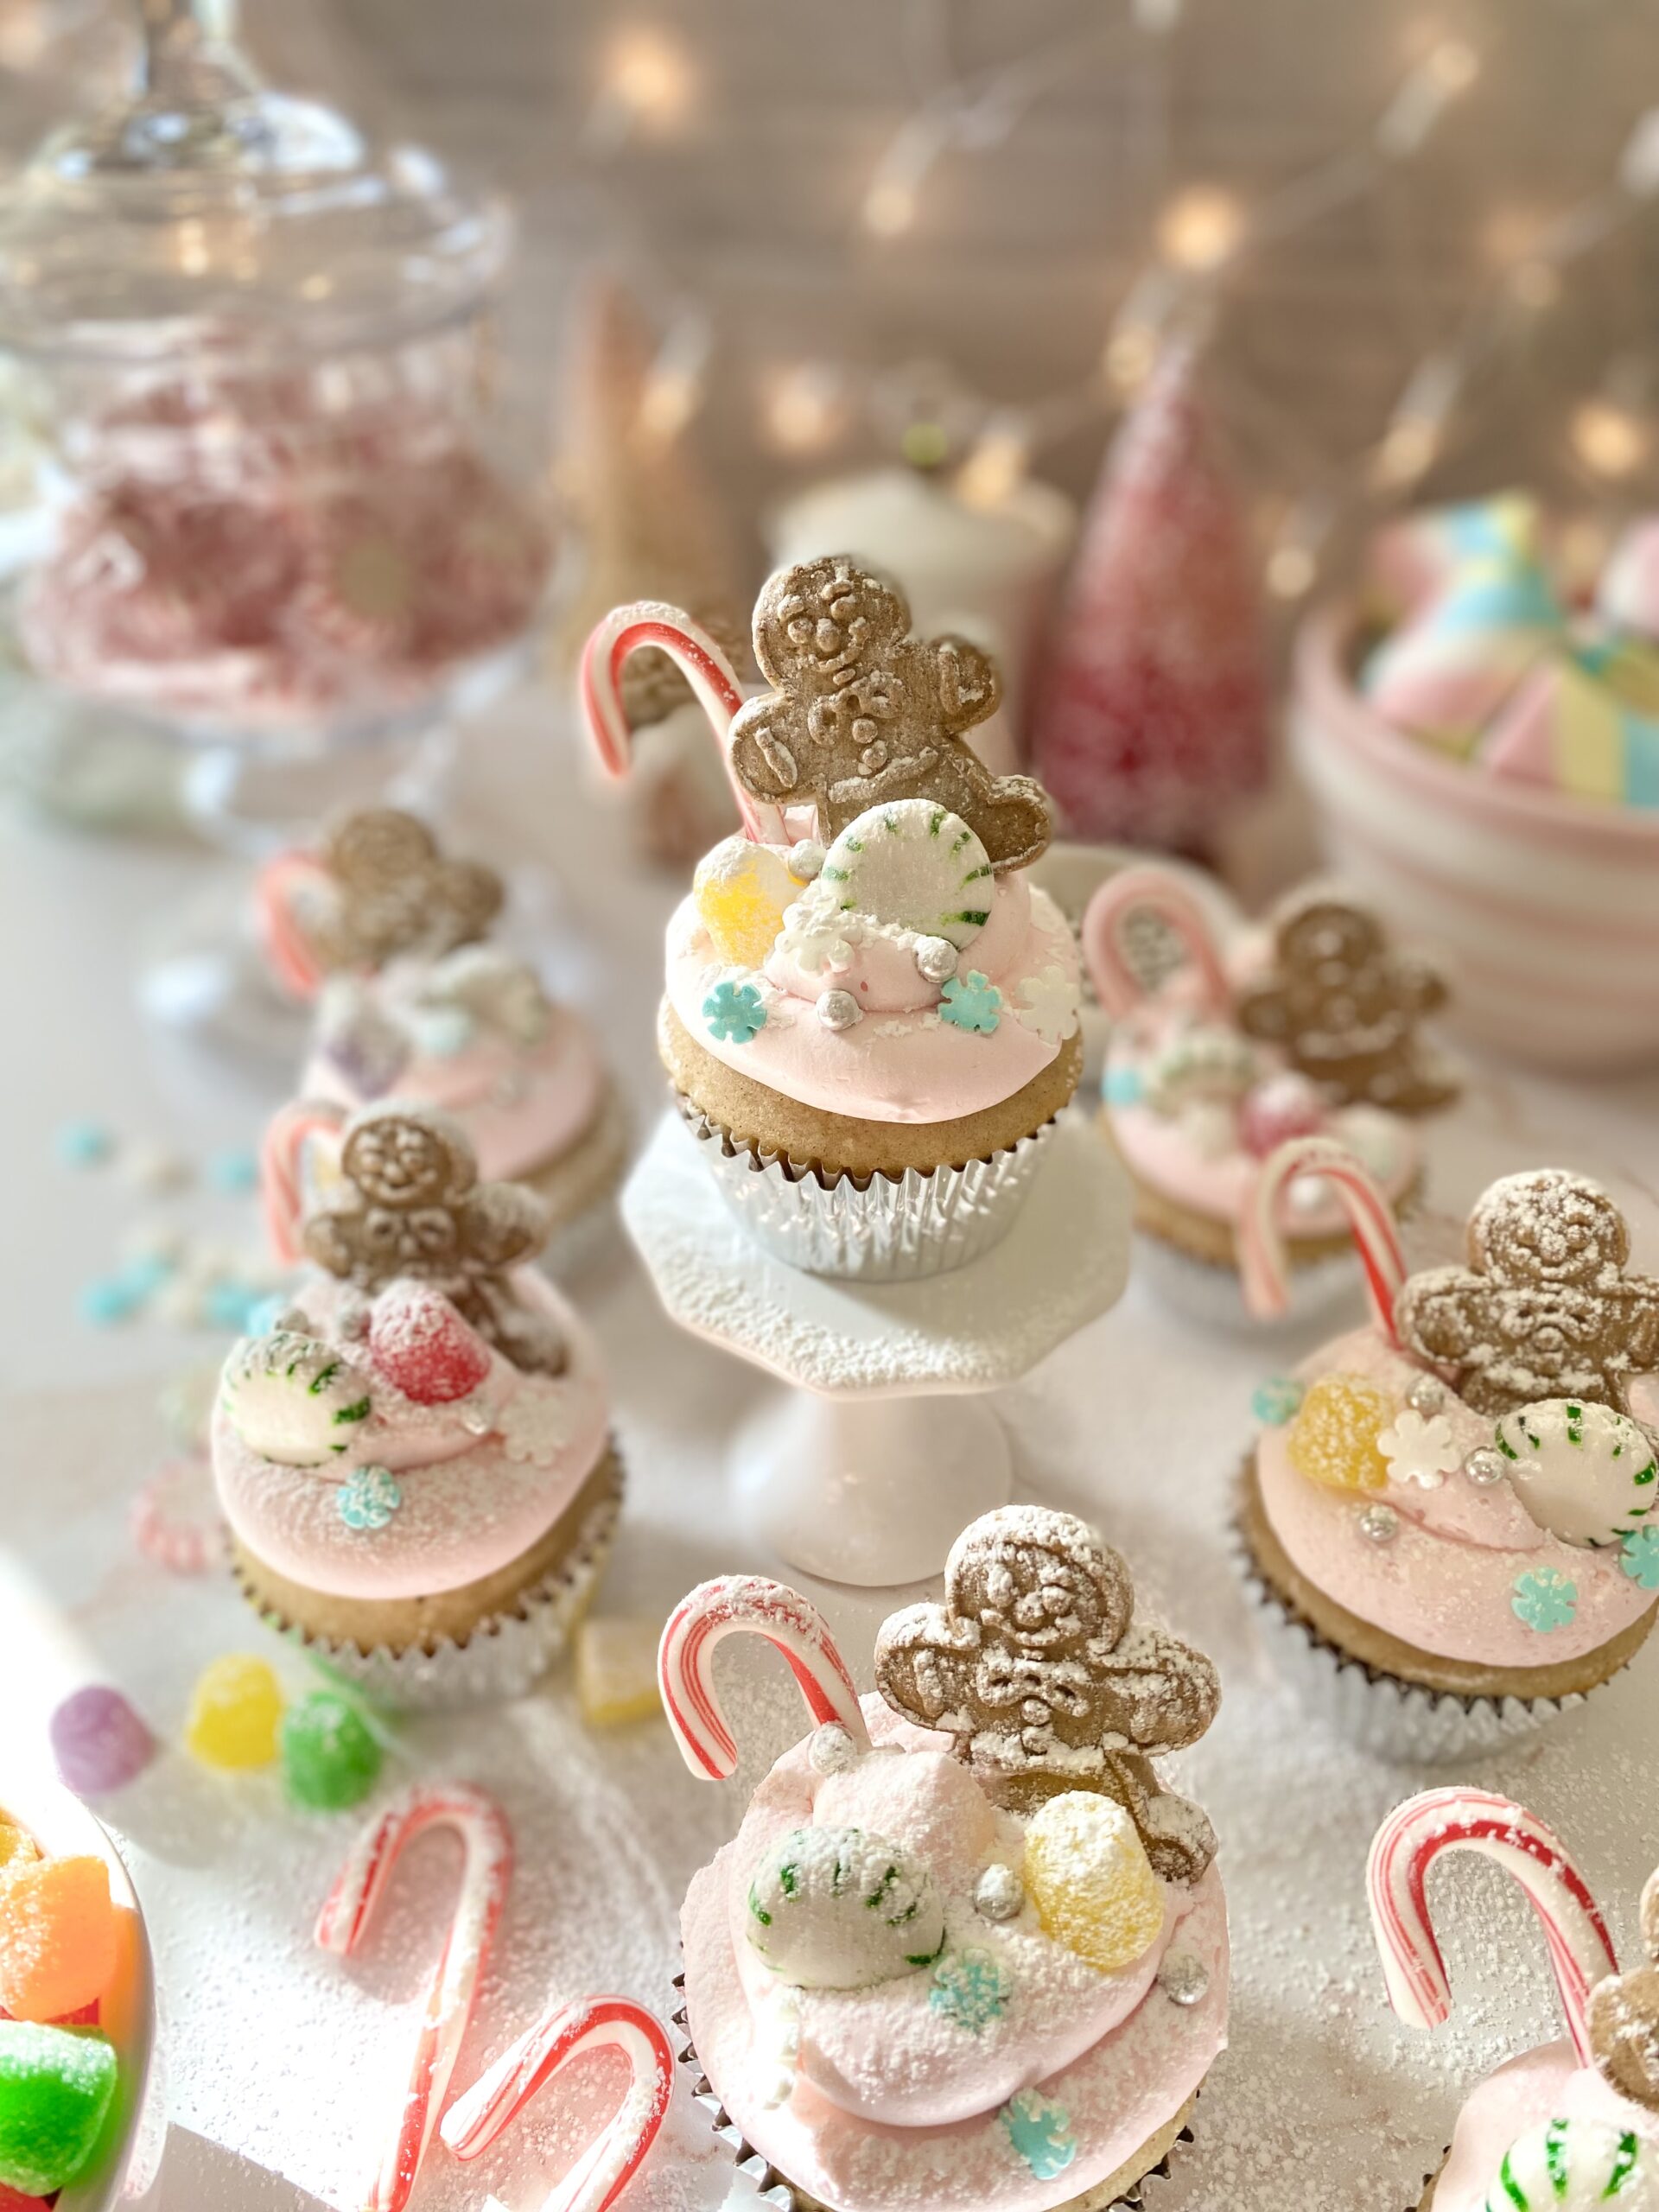
The tradition of enjoying the Nutcracker Ballet at Christmastime has been in my family for over 20 years. The Nutcracker Land of Sweets is a magical theme that has me mesmerized. Gingerbread, candy canes, gumdrops and billowy clouds of pink frosting are what dreams are made of. And that’s exactly what these dreamy cupcakes are made of. The cupcake flavor is a subtle spice cake. The recipe is adapted from a Martha Stewart cake recipe I made last summer. The original cake was paired with blackberry jam, but I knew plum jam would be perfect for these cupcakes. I topped them with a mildly sweet, fluffy Swiss meringue buttercream.

Part of the fun of making these cupcakes began at the store as I collected the sweets to decorate the cupcakes. Another perk of the job is taste testing the candy. I discovered that purple spice drops are licorice flavored and red spice drops are cinnamon. Who knew?

You might also like my Nutcracker Land of Sweets inspired candy bark. It’s a delightful holiday bark I designed that is often imitated. To view it, click here.

The Nutcracker Land of Sweets Cupcakes

Spice cupcakes filled with plum jam, topped with fluffy pink frosting, gingerbread men and Christmas candy, and dusted with sugar snow
Course Dessert
Servings 12 cupcakes

Ingredients
  

Spice cupcakes

  • ¾ cups (3 1/4 ounces) all purpose flour, sifted
  • ¾ cups (3 ounces) cake flour, sifted
  • 1 ½ teaspoons baking powder
  • ½ teaspoon ground cinnamon
  • ¼ teaspoon ground nutmeg
  • small pinch ground cloves
  • ¼ teaspoon fine sea salt
  • ½ cup (4 ounces) unsalted butter, softened
  • ¾ cup plus 2 tablespoons (6 1/8 ounces) fine granulated sugar or regular granulated sugar
  • 1 large egg
  • 1 large egg white
  • 1 teaspoon vanilla bean paste or pure vanilla extract
  • cup whole milk
  • ¾ cup plum jam I used red plum jam

Pink Vanilla Swiss Meringue Buttercream

  • 4 large egg whites
  • 1 ⅓ cups (9 3/8 ounces) fine granulated sugar or regular granulated sugar
  • 1 ½ cups (12 ounces) softened, unsalted butter, cubed
  • 1 teaspoon clear vanilla extract or pure vanilla etract
  • ¼ teaspoon fine sea salt
  • 2 drops pink gel food color I used Americolor deep pink

Decorations

  • small gingerbread cookies
  • mini candy canes
  • assorted candies such as spice drops, gumdrops, peppermints,
  • sprinkles or sugar pearls
  • powdered sugar

Instructions
 

Spice Cupcakes

  • Preheat oven to 350ºF. Line a 12 serving muffin pan with disposable baking cups. (I used silver foil liners.)
  • In a medium bowl, whisk together flours, baking powder, spices and salt. Set aside.
  • In a large bowl, cream butter and sugar together with an electric mixer until light and fluffy.
  • Add egg, egg white, and vanilla, one at a time, mixing until well combined.
  • Add flour mixture in two additions, alternating with milk. Mix until combined.
  • Divide batter evenly into wells of prepared muffin pan, filling about 2/3 full.
  • Bake until light golden and toothpick inserted comes out clean, about 16-18 minutes.
  • Let cool in muffin pan for 5 minutes. Gently transfer cupcakes to cooling rack to cool completely.
  • Core the center of each cupcake, removing a 3/4-inch deep circle. Fill with jam and replace the circle top.
  • Frost cupcakes with pink Swiss meringue buttercream. Decorate with cookies and candies. Lightly sprinkle with powdered sugar.

Pink Vanilla Swiss Meringue Buttercreamgue Buttercream

  • Combine egg whites and sugar in a heatproof bowl. Set over a pan of gently simmering water.
  • Whisk constantly until sugar is dissolved and temperature of 160ºF is reached.
  • Transfer mixture to the bowl of a stand mixture with a whisk attachment. Whisk on low speed, gradually increasing to medium-high speed. Whisk until glossy, stiff peaks form and mixture reaches room temperature.
  • Turn mixer to medium-low speed. Add butter, a few pieces at a time, allowing the butter to fully incorporate each time before adding more.
  • Switch to paddle attachment. On low speed, mix in vanilla, salt and food color. Continue mixing on low speed for a few minutes until smooth.

Notes

Recipe adapted from Martha Stewart Spice Cake
Keyword cupcakes

Pumpkin Spice Muffins with Caramel Filling

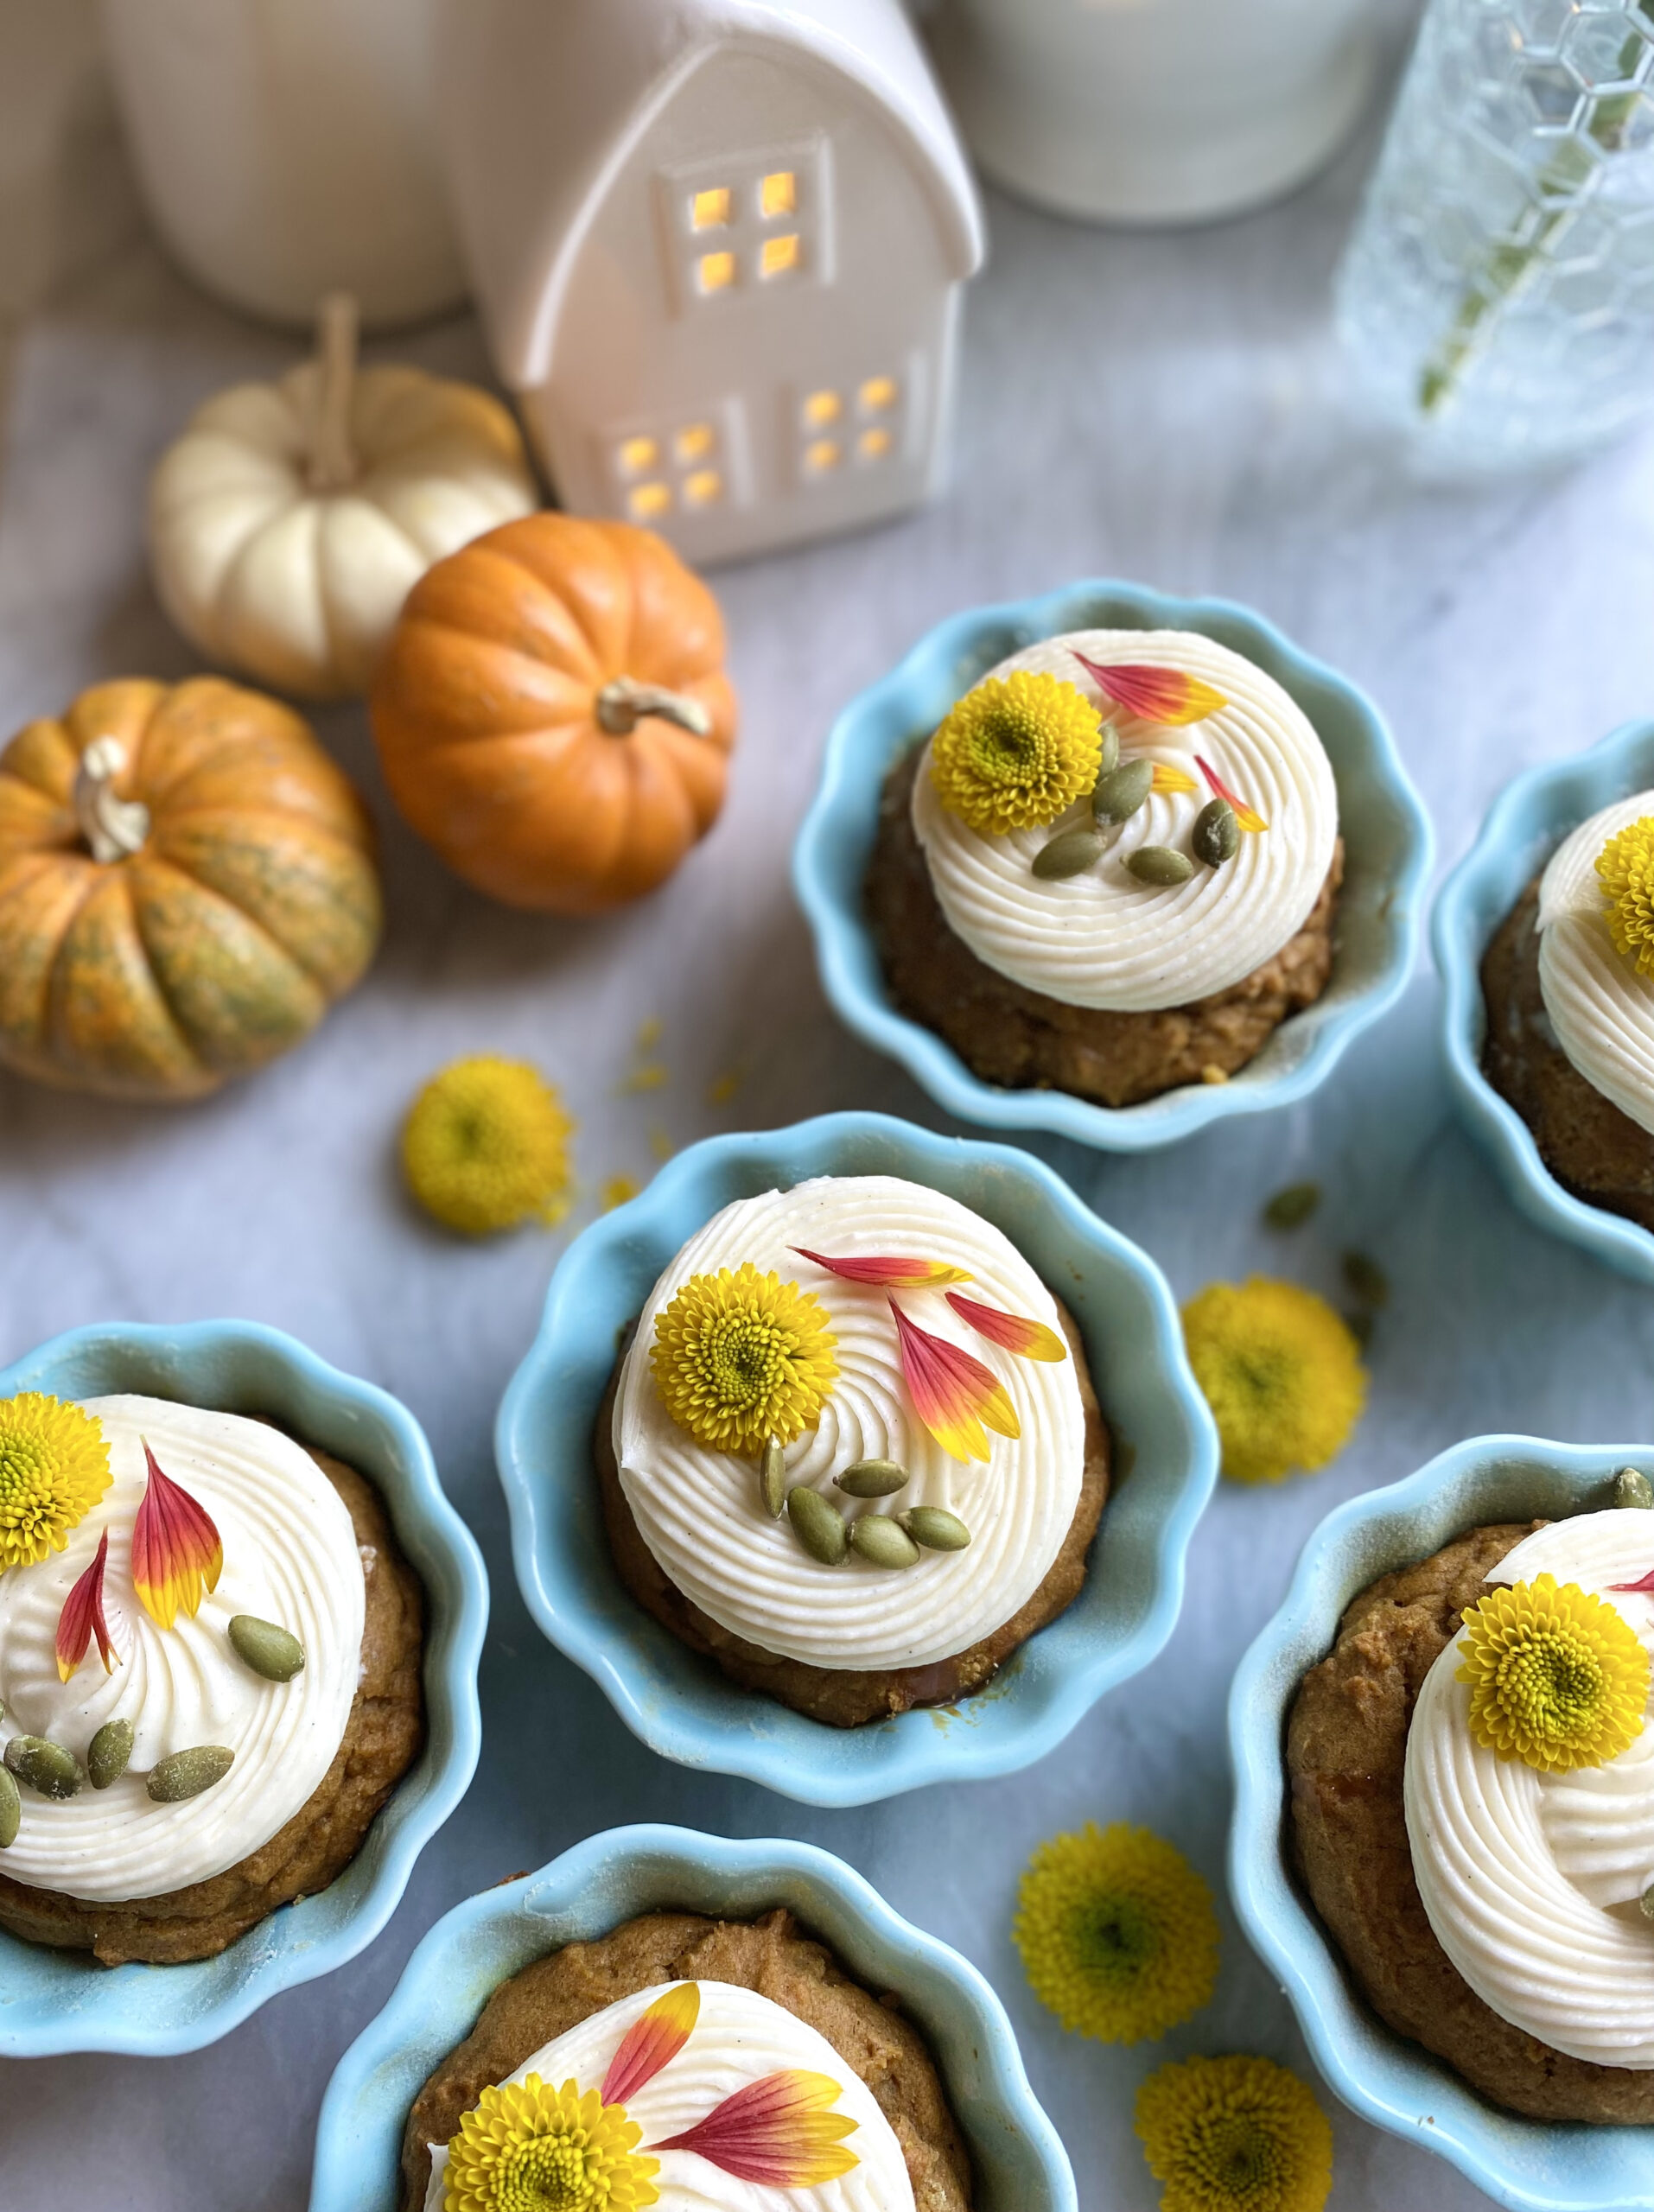
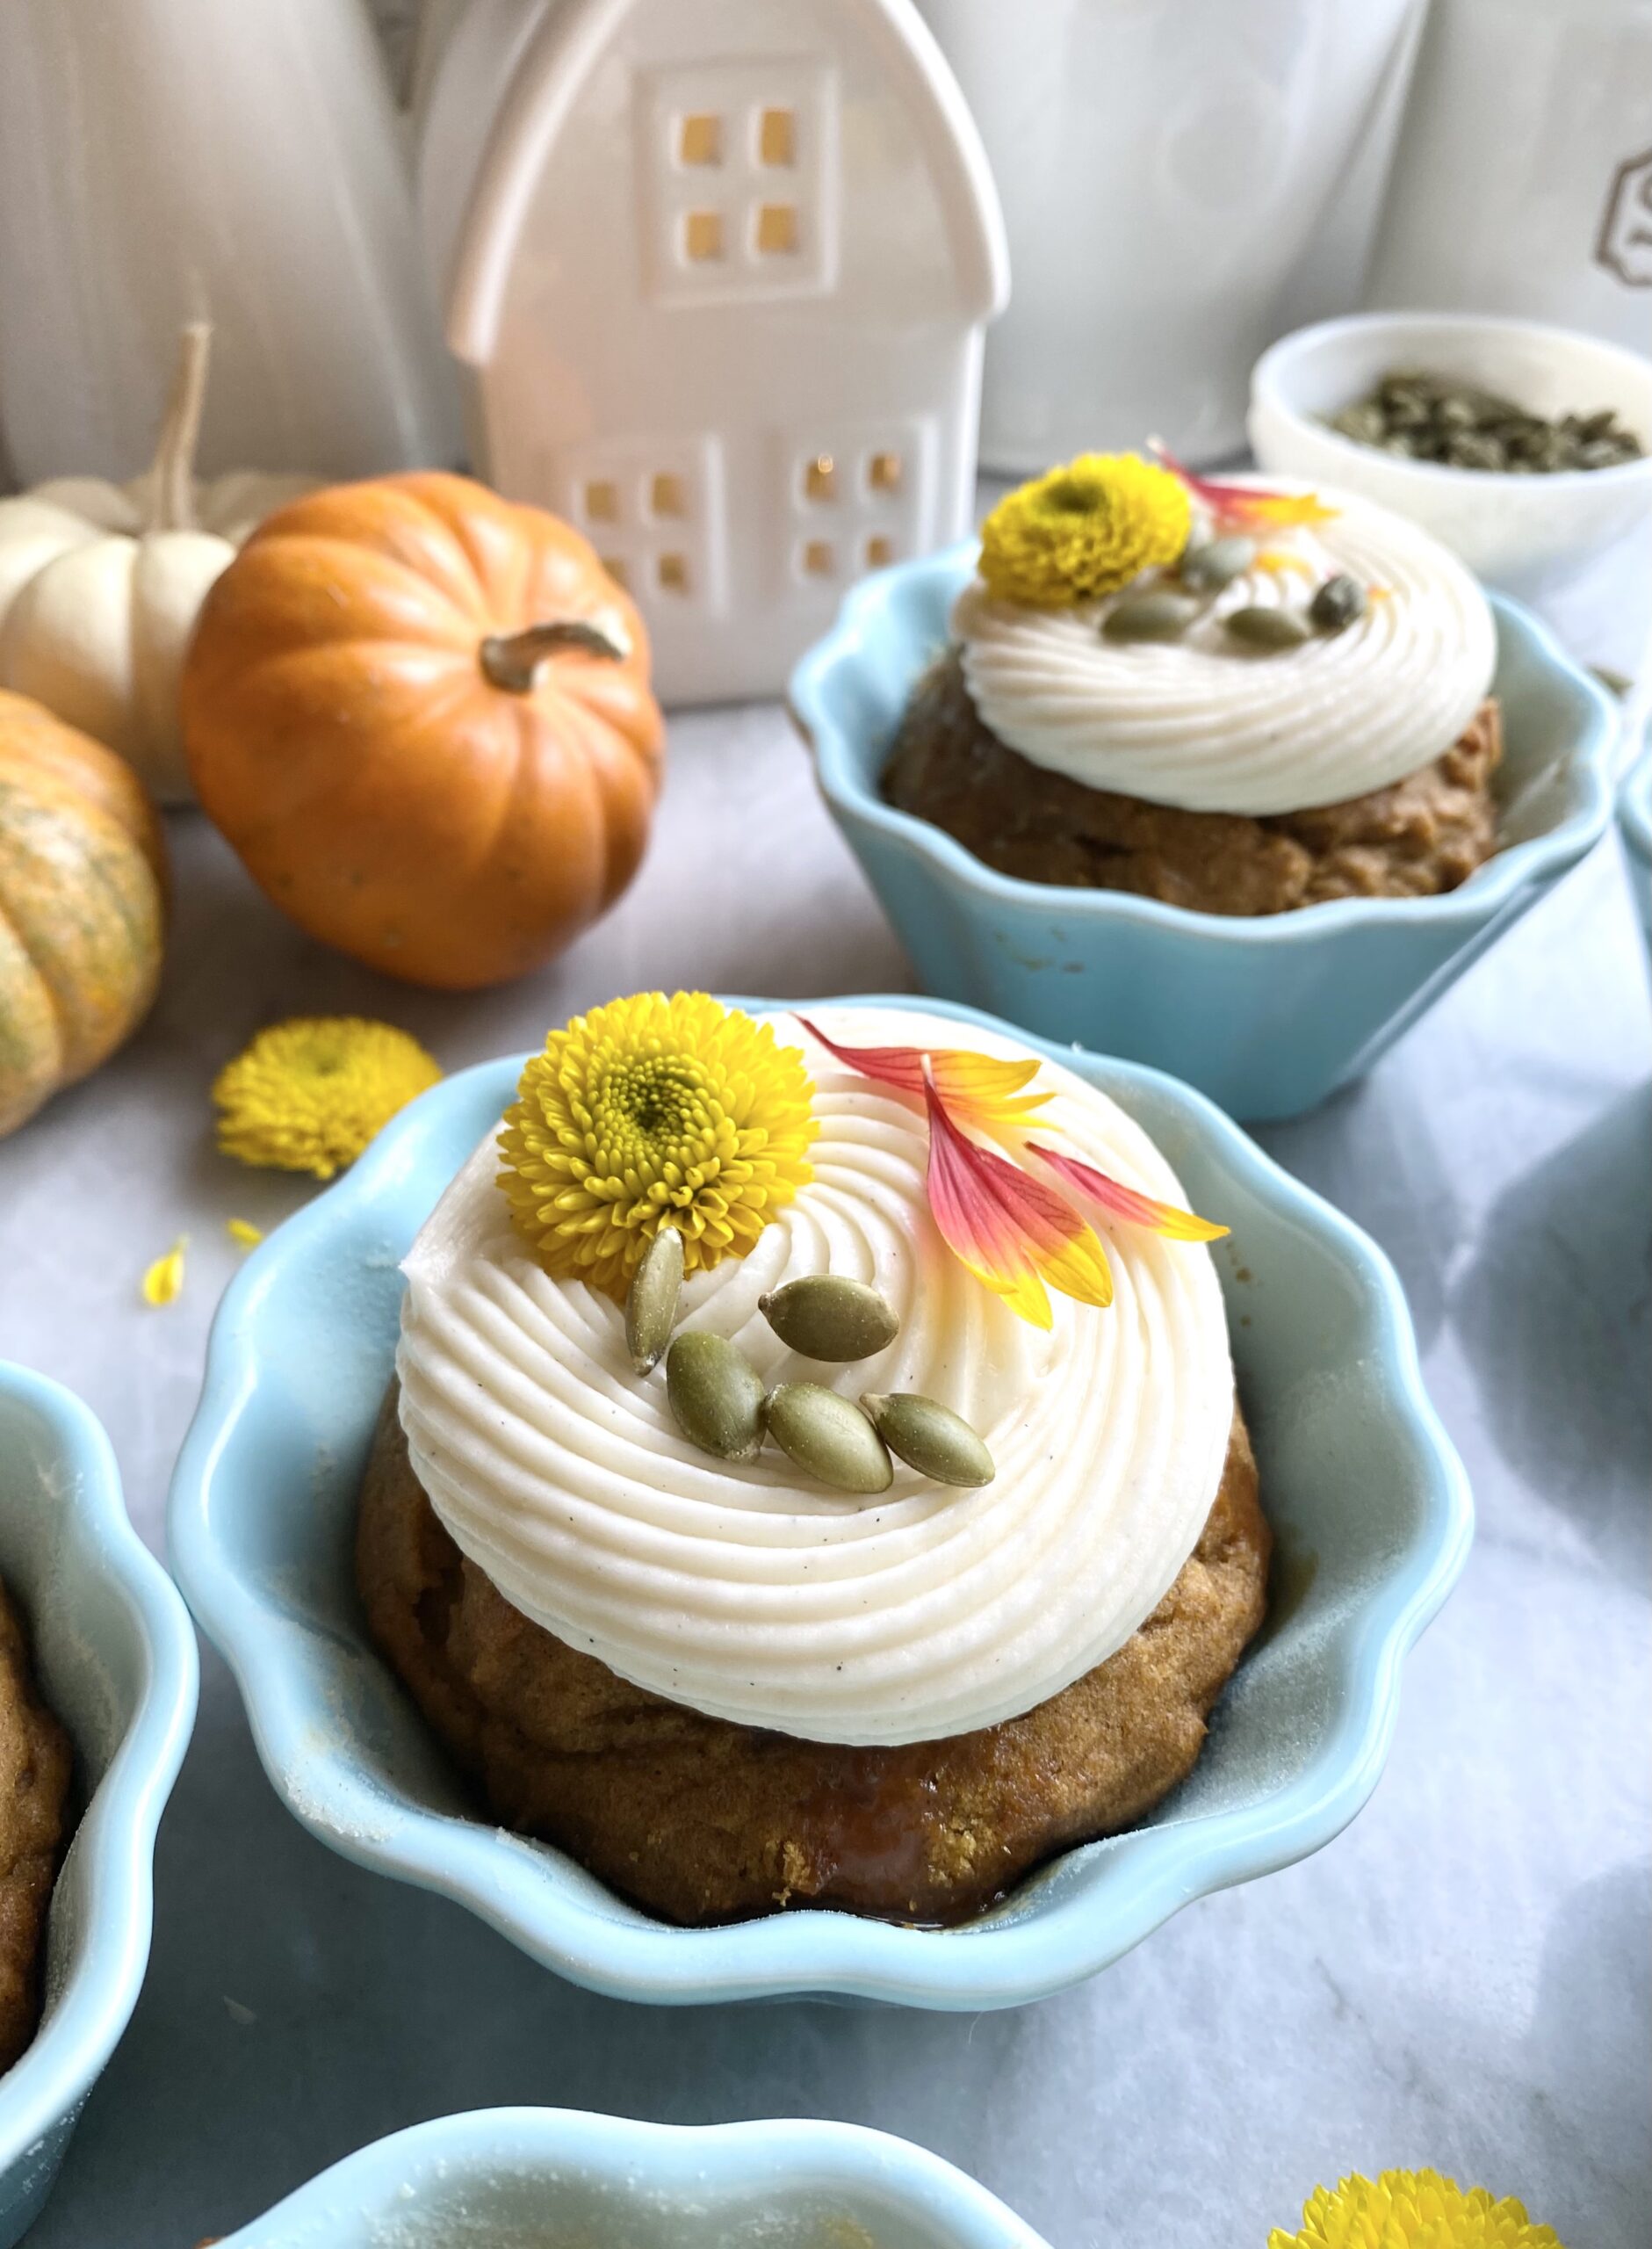
pumpkin spices mini loaves with caramel filling

In early September, I saw someone announce the fall season on social media. In addition to people pointing out that it was too early for the announcement, the word police corrected the person with the word autumn. Since both terms are correct, we can call the season whatever we prefer. I think autumn is a pleasant sounding word, so I’ll use it for the rest of this post. Whatever you call it, these Pumpkin Spice Muffins are a perfect little celebration of the season. They have just the right amount of warm spices, making them so fragrant that your kitchen will smell like cozy autumn heaven.

pumpkin spices mini loaves with caramel filling

I originally made them in mini loaf pans, but I thought they would be cute as muffins too. They’re so cute and delicious that I often give them as holiday gifts. This year I decided to try them in ramekins and I loved the results! I used 6-ounce ramekins, but you can use 8-ounce ramekins, any size mini loaf pans, a muffin pan or even an 8 or 9-inch loaf pan. Keep in mind that baking times will differ. To find the ramekins I used, click here.

Pumpkin Spice Muffins with Caramel Filling

by Mari Vasseur
Tender pumpkin spice muffins with caramel filling and luscious cream cheese frosting
Course Breakfast, Brunch, Dessert
Servings 7 muffins

Ingredients
  

Pumpkin Spice Mini Loaves

  • 1 ½ cups (191g) all purpose flour, sifted
  • 1 ¼ teaspoons ground cinnamon
  • 1 teaspoon baking powder
  • 1 teaspoon baking soda
  • ¾ teaspoon fine sea salt
  • ½ teaspoon ground ginger
  • teaspoon ground nutmeg preferably freshly ground
  • 1 pinch ground cloves
  • ½ cup (113g) unsalted butter, softened
  • 1 cup (200g) brown sugar
  • 2 large eggs
  • 1 cup (225g) pure pumpkin purée
  • 1 teaspoon pure vanilla extract
  • cup (100g) caramel sauce, purchased or homemade
  • ¼ cup (28g) roasted, salted shelled pumpkin seeds

Cream Cheese Frosting

  • 3 ounces (85g) cream cheese, softened
  • 6 tablespoons (85g) unsalted butter, softened
  • ½ teaspoon pure vanilla extract
  • 1 pinch fine sea salt
  • 2 cups (240g) powdered sugar, sifted
  • 1-2 teaspoons heavy cream, room temperature

Instructions
 

Pumpkin Spice Mini Loaves

  • Preheat the oven to 350ºF (180ºC). Grease and flour seven 6-ounce ramekins or six 8-ounce ramekins or any mini loaf pans of your choice.
  • In a large bowl, sift together the flour, cinnamon, baking powder, baking soda, salt, ginger, nutmeg and cloves until well blended.
  • In a separate large bowl, beat the butter and brown sugar together, with an electric mixer at medium speed, until pale and fluffy. Beat in the eggs, one at a time, until incorporated. Beat in the pumpkin purée and vanilla extract until well blended. Stir in the flour mixture just until combined.
  • Divide the batter evenly into the prepared ramekins. Bake for 15-25 minutes or until golden brown and a toothpick inserted in the center comes out clean. Do not overbake.
  • Cool completely if serving in ramekins or remove from pans after cooling for 10 minutes. Continue to cool on wire rack.
  • Make 3/4-inch wells in the center of each muffin. Fill with caramel sauce. (For loaves, poke multiple holes with a skewer. Fill with caramel sauce.) Top with cream cheese frosting and pumpkin seeds

Cream Cheese Frosting

  • In a large bowl, beat the cream cheese and butter together, with an electric mixer at medium speed until smooth and well blended. Do not over beat.
  • Add the vanilla extract and salt and beat until combined. On low speed, gradually beat in the powdered sugar incorporated. Add the heavy cream and continue beating at low speed smooth. Remove any bubbles by gently stirring with a spatula.
Keyword muffins, pumpkin, pumpkin spice

Peaches & Cream Scones with Caramel Icing

Peaches & Cream Scones with Caramel Icing

Tender scones with fresh peaches, topped with a quick caramel icing
Course Breakfast, Brunch
Servings 8

Ingredients
  

Scones

  • 1 ¾ cups (7 7/8 oz or 223g) all purpose flour, sifted
  • 1 tablespoon baking powder
  • ½ teaspoon fine sea salt
  • ½ teaspoon ground cinnamon
  • 7 tablespoons (3 1/2 oz or 100g) cold, unsalted butter, cubed
  • ½ cup (4 oz or (118 ml) cold sour cream
  • ¼ cup (2 oz or 59ml) cold heavy cream Plus more for tops
  • 1 teaspoon pure vanilla extract
  • 1 cup (about 7 oz or 200g) chopped fresh peaches, patted dry Peaches should be ripe but still firm, not over ripe.
  • egg wash (optional) 1 egg whisked with 1 tablespoon of water

Icing

  • ¼ cup (2 oz or 57g) salted butter
  • ½ cup (3 1/2 oz or 100g) packed brown sugar
  • cup (2 5/8 oz or 78 ml) heavy cream

Instructions
 

  • Preheat the oven to 375ºF. Line a large baking sheet with parchment paper.
  • In a large bowl, whisk together the flour, baking powder, salt and cinnamon.
  • Work the butter into the flour mixture with a pastry blender or with your fingertips until pea size pieces form.
  • In a medium bowl, whisk together the sour cream, heavy cream and vanilla.
  • Mix the sour cream mixture into the flour mixture until a shaggy dough forms. Fold in the peaches.
  • Turn dough out onto a lightly floured surface. Press the dough together and fold it over onto itself a couple of times.
  • Pat or roll dough into a 7-inch round. Cut dough into 8 wedges. Transfer to the prepared baking pan. Brush the scones lightly with egg wash or heavy cream.
  • Bake until golden brown, about 18-22 minutes. Transfer the scones to a cooling rack.

Caramel Icing

  • Melt the butter a small saucepan over medium heat. Whisk in the brown sugar until smooth, about 2 minutes.
  • Whisk in the heavy cream and heat until bubbly. Remove from heat. Set aside to cool slightly. Drizzle or spoon the icing over the cooled scones.
Keyword peach, scones

Fairy Puffs

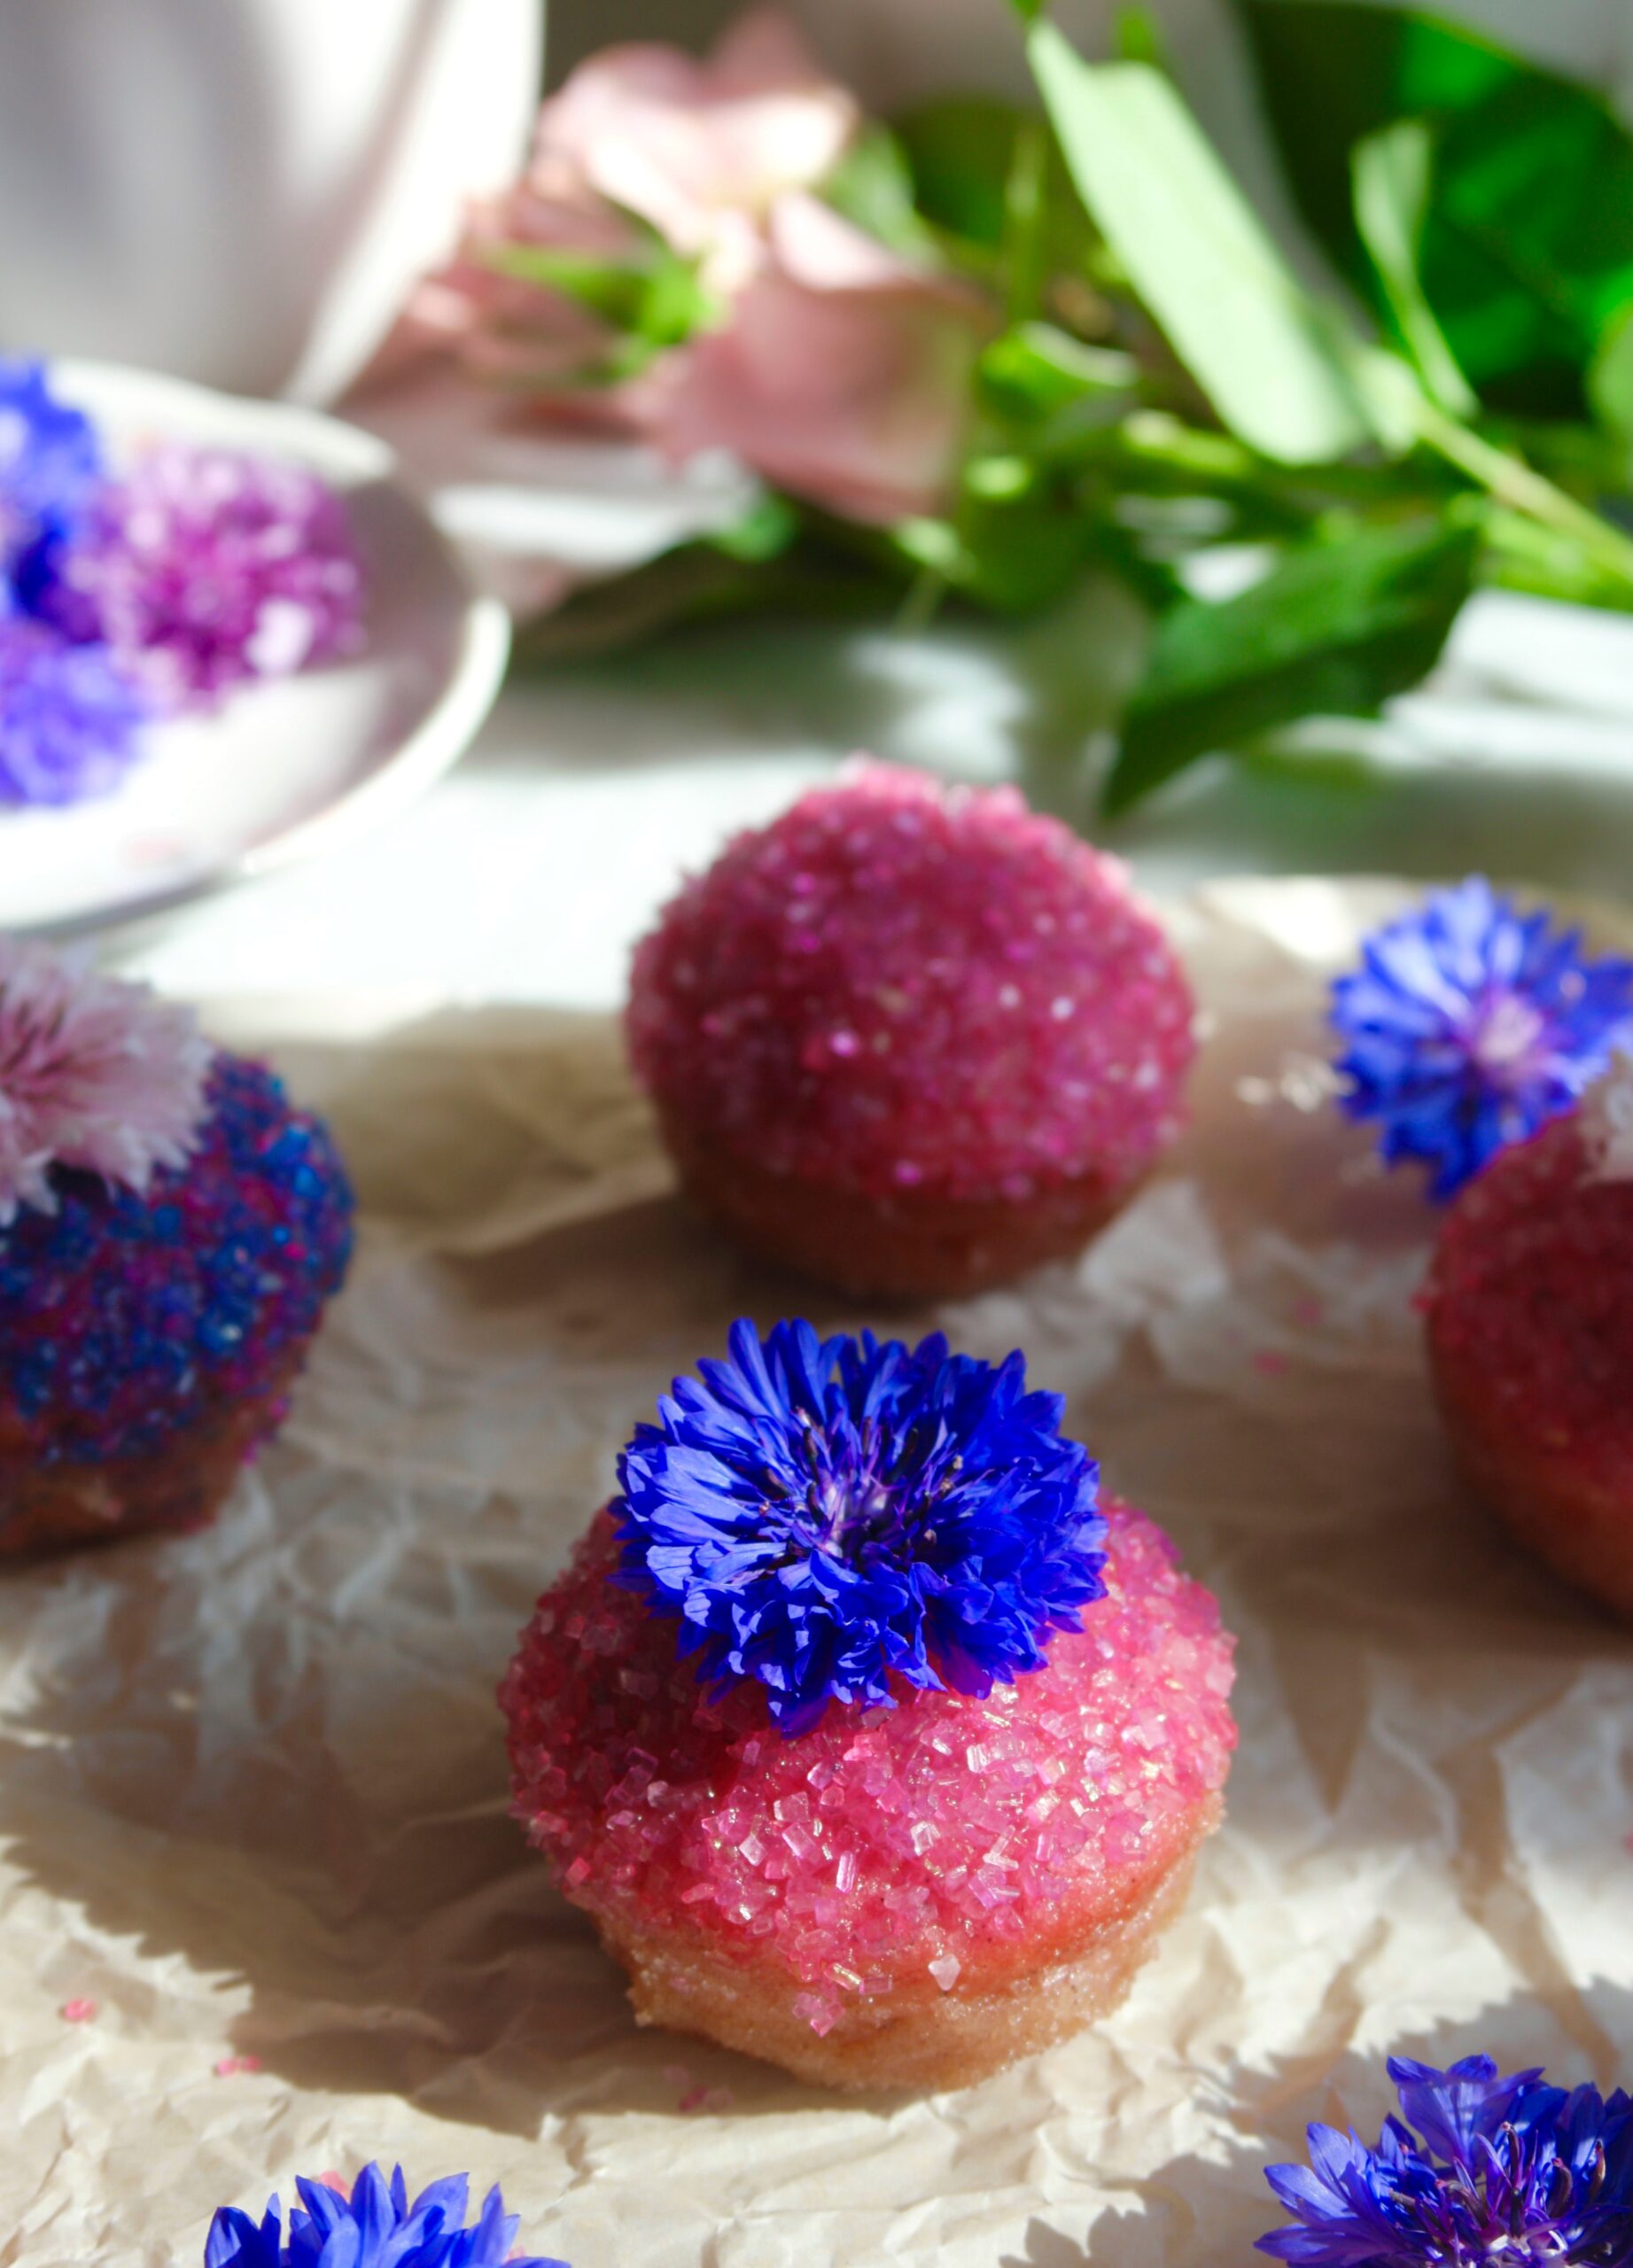
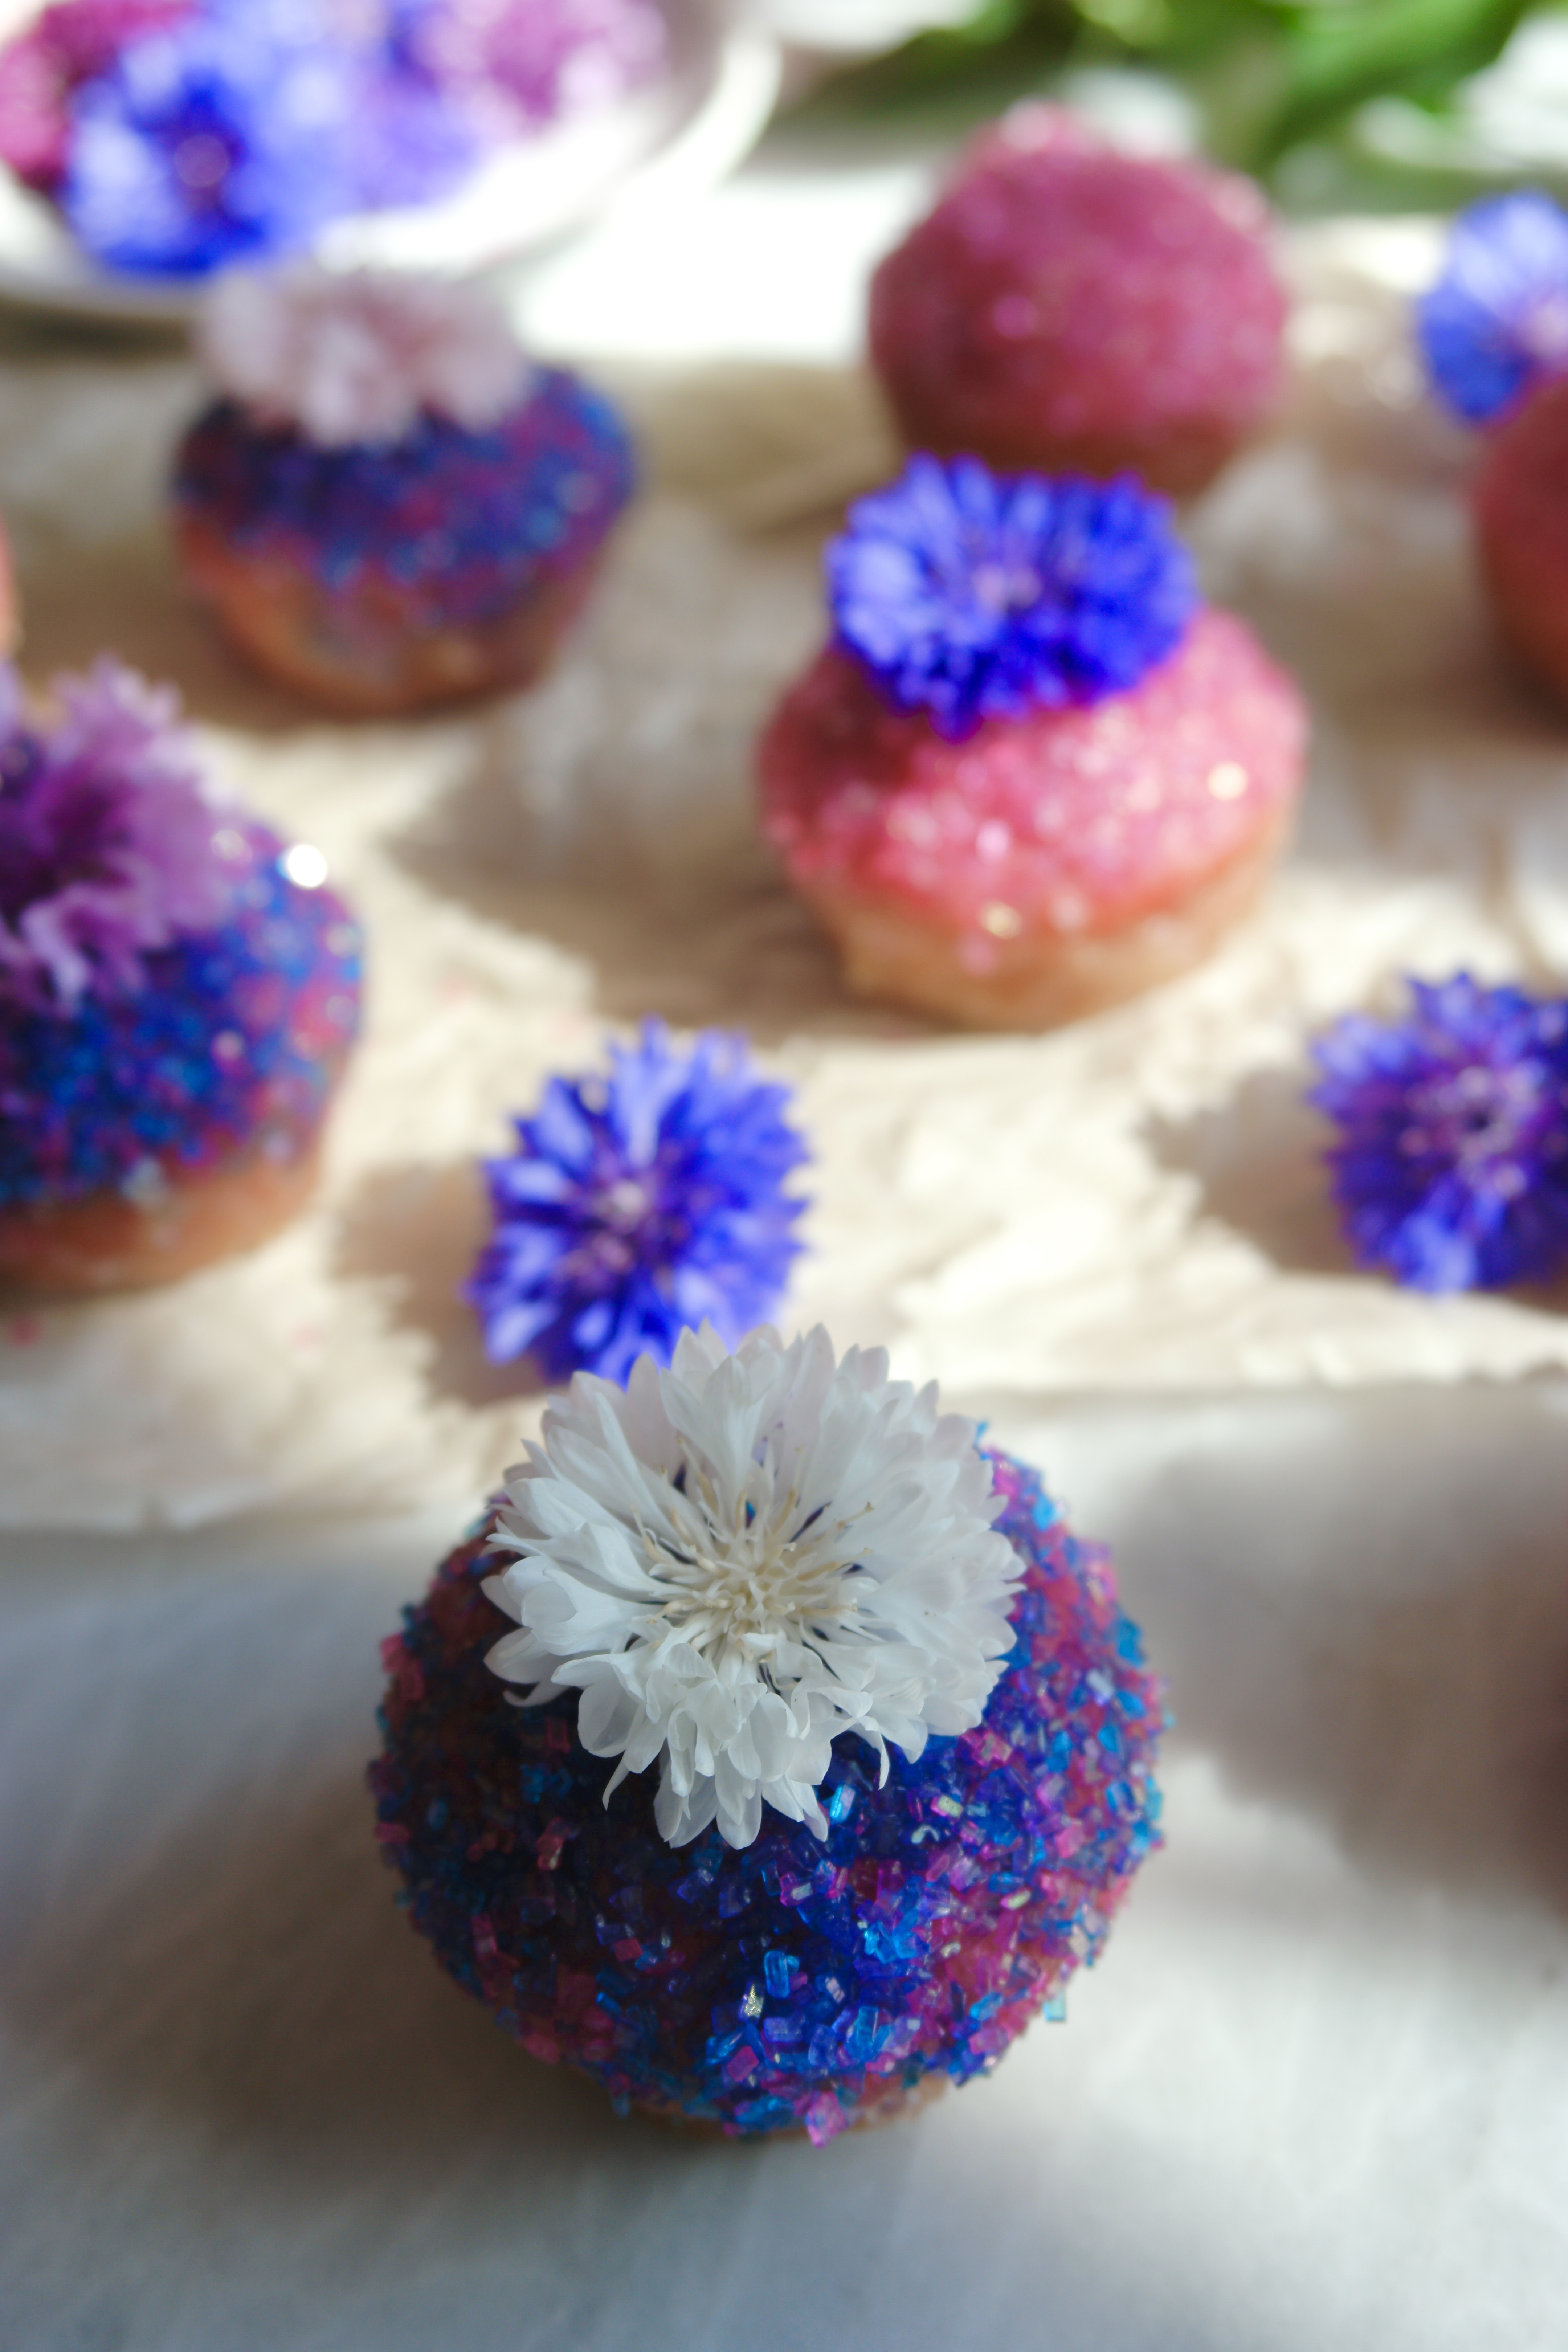
Fairy Puffs sugared mini muffins wtih edible flowers

My dad used to take me on walks in the woods to look for fairy rings when I was a child. I wanted to see a real fairy so badly! I read a book about fairies, hoping to learn more about them. Fairies love little cakes, milk, honey and butter so I’m sure these Fairy Puffs would be fairy approved.

My Fairy Puffs recipe is loosely based on an old favorite mini muffin recipe. I tweaked it quite a bit, including the addition of pink dragonfruit powder. Dragonfruit has a subtle flavor, so the bright fuchsia powder is mostly for color. But oh what a beautiful color it is! You can find dragonfruit powder in healthy food stores or online. To find the dragonfruit powder, also known as pink pitaya powder, I used, click here.

fairy puff muffins

Decorating these little cuties was so entertaining! After sampling multiple variations of sparkling sugar and cinnamon sugar, I decided that dipping the bottoms of the muffins in butter and cinnamon sugar, then dipping the tops in butter and sparkling sugar gave them the perfect balance of sugar and spice. I had purchased some edible flowers a couple of days prior, and they added a pretty, magical touch. The flowers I used are called bachelor’s buttons and I got them at a local gourmet flower seller.

sugared mini muffins with edible flowers

Fairy Puffs

Course Breakfast, Brunch
Servings 24 mini muffins

Ingredients
  

Fairy Puffs

  • 1 ⅓ cups (6 oz or 99g) all purpose flour, sifted
  • 3 tablespoons dragonfruit powder *See note below
  • 1 ½ teaspoons baking powder
  • ¼ teaspoon ground nutmeg
  • Scant ½ teaspoon fine sea salt
  • cup (2 5/8 oz or 75g) unsalted butter, softened
  • ½ cup (3 1/2 oz or 100g) granulated sugar
  • 1 large egg
  • ½ cup (4 oz or 118ml) whole milk

Topping

  • ½ cup (4 oz or 113g) unsalted butter, melted
  • ½ cup (3 1/2 oz or 100g) granulated sugar
  • ½ teaspoon ground cinnamon
  • ½ cup (3 1/2 oz or 100g) sparkling sugar crystals **I used combinations of white, pink, purple & blue
  • edible flowers (optional)

Instructions
 

Fairy Puffs

  • Preheat oven to 350ºF. Grease and flour a 24 serving mini muffin pan.
  • In a medium bowl, whisk together flour, dragonfruit powder, baking powder, salt and nutmeg. Set aside.
  • In a large bowl, cream butter and sugar with an electric mixer until light and fluffy.
  • Add egg and beat until smooth.
  • Add flour mixture and milk alternately in two additions and mix just until combined.
  • Transfer batter to prepared muffin pan, filling muffin cups about 3/4 full.
  • Bake until toothpick inserted in center of muffins comes out clean, about 12-14 minutes. (Be careful not to over bake. Check a few minutes early. Small muffins can dry out easily.)
  • Let cool in pan for 5 minutes. Remove puffs from pan and transfer to cooling rack. (Loosen puffs with a small offset spatula or butter knife if necessary.)

Topping

  • Combine granulated sugar and cinnamon in a shallow bowl.
  • Place colored sparkling sugar crystals in another shallow bowl.
  • Dip the bottoms of each puff in melted butter, then into cinnamon sugar mixture.
  • Dip the tops of each puff in melted butter, then into sparkling sugar.
  • Decorate with edible flowers if desired.

Notes

*To purchase dragonfruit powder, click here.
 **To purchase pink sparkling sugar crystals, click here.
 
Keyword cake, muffins

Strawberry Shortcake Crumble Muffins

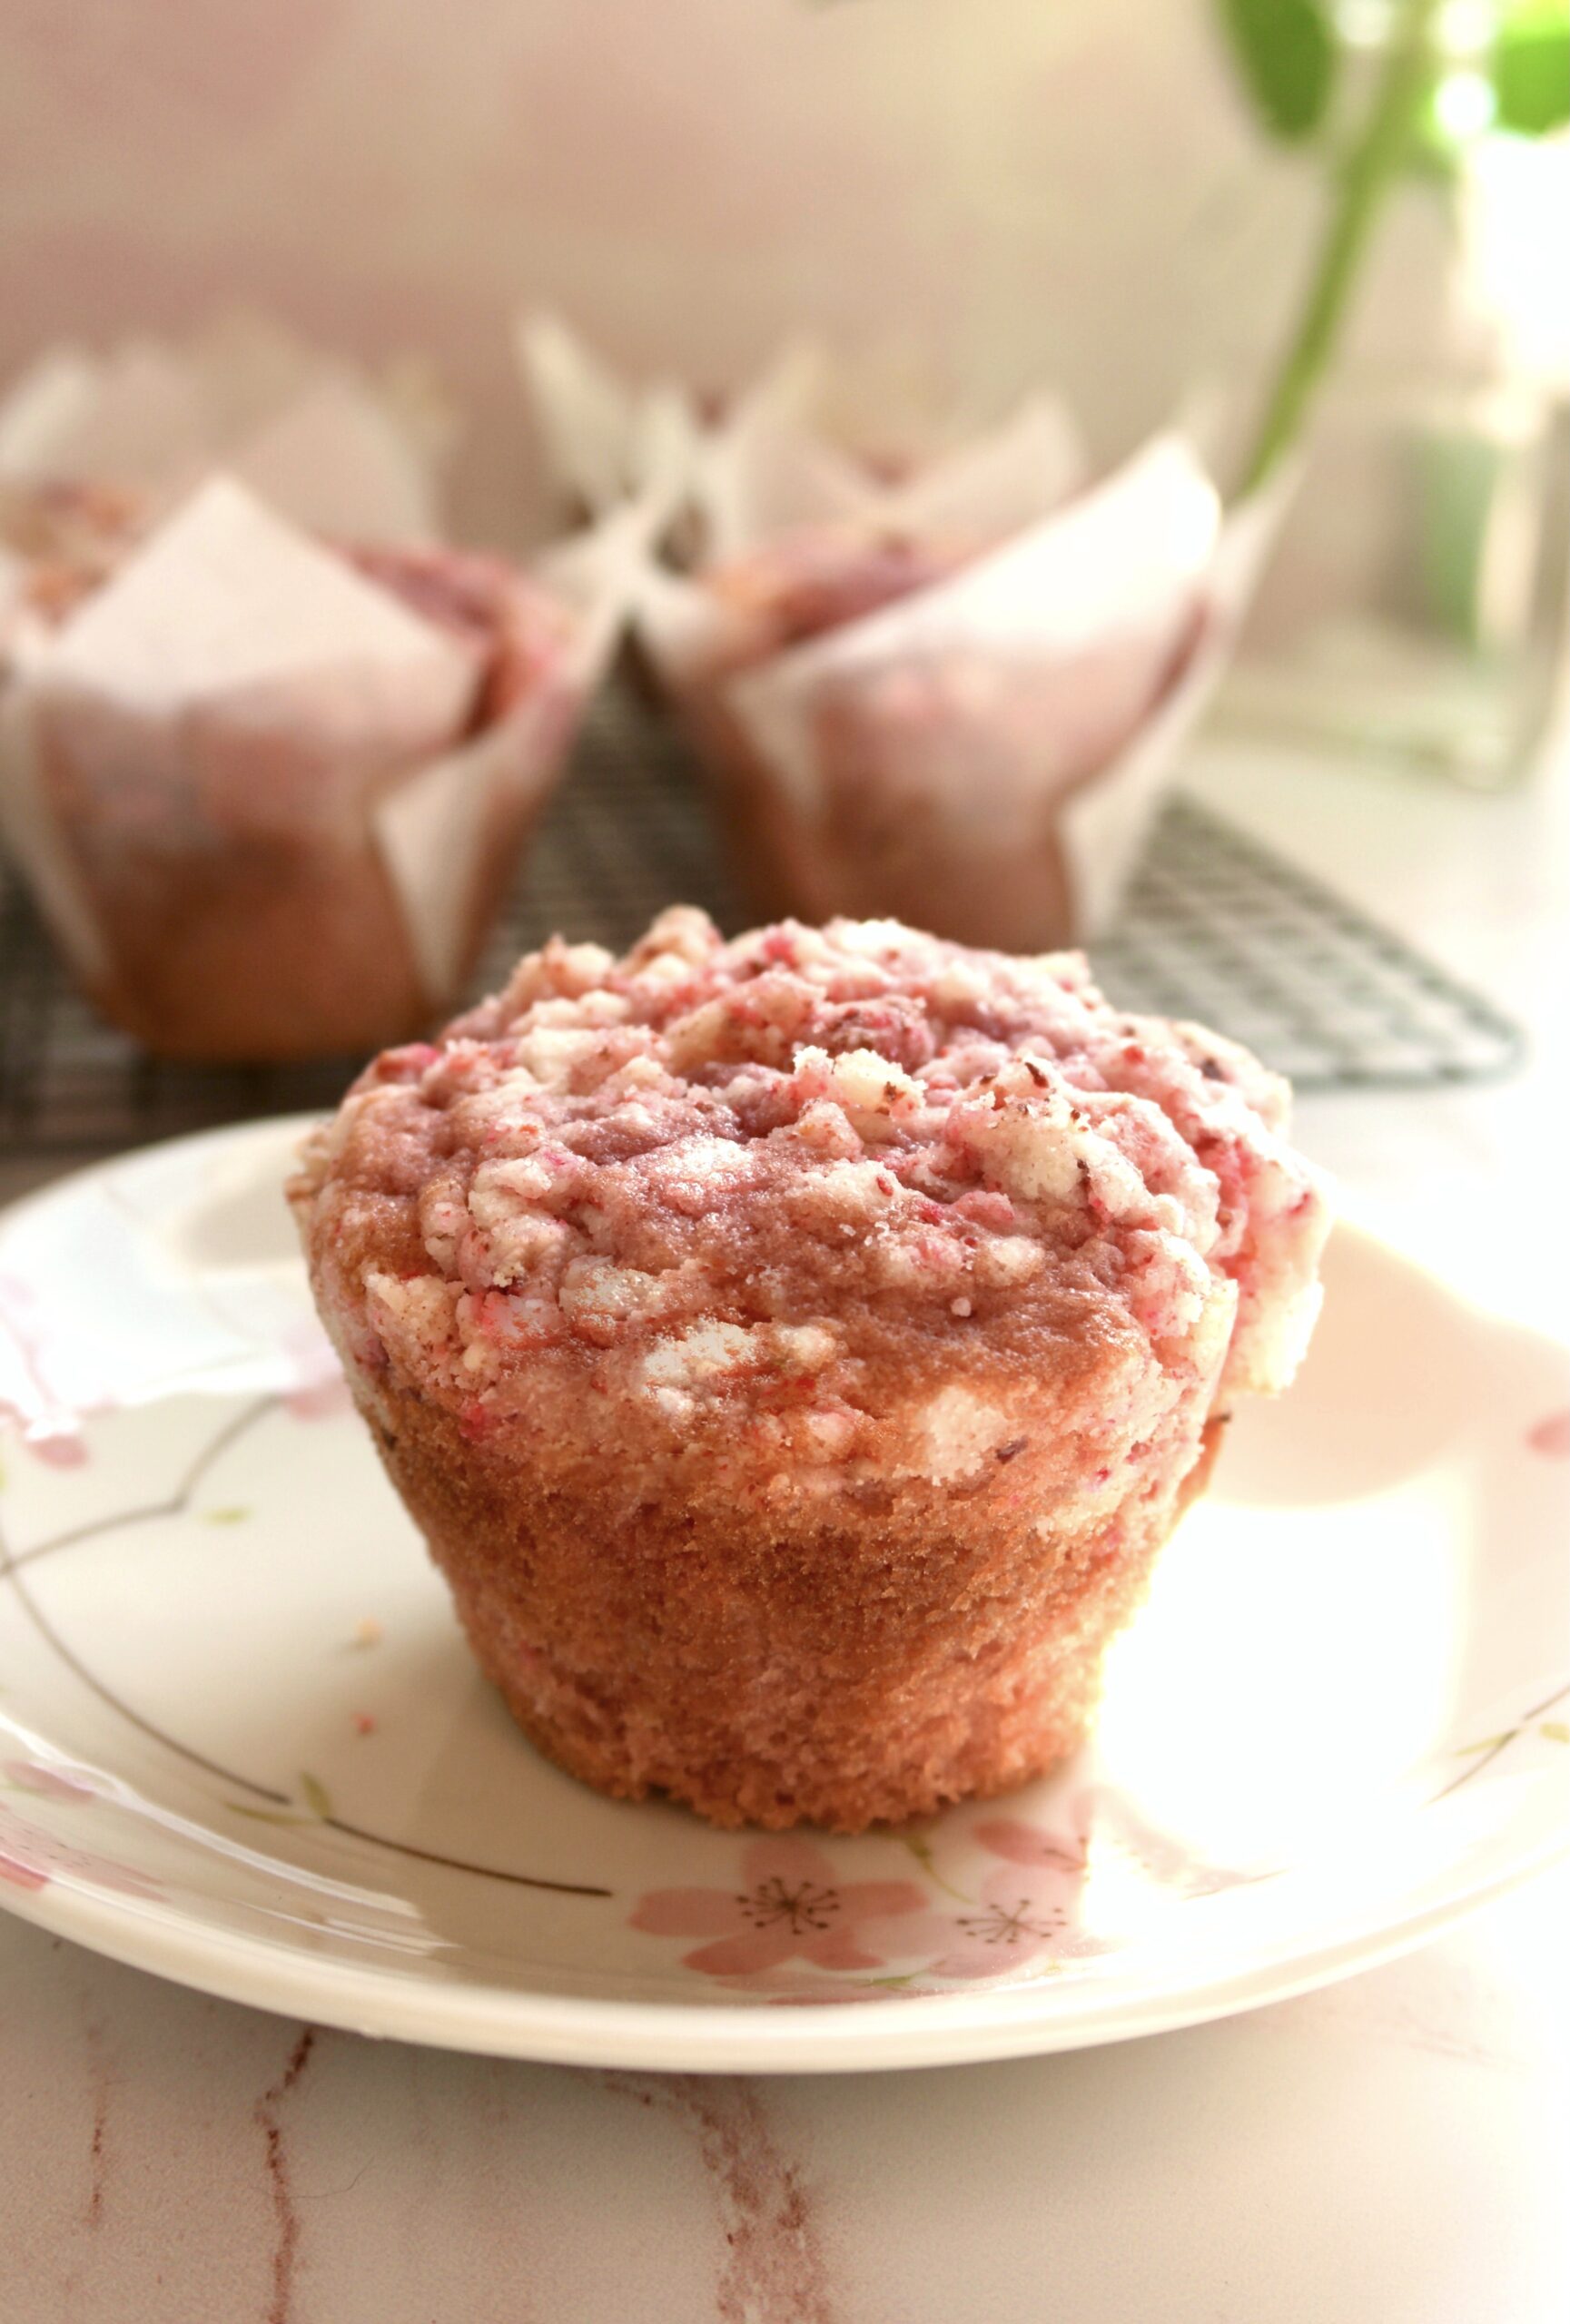
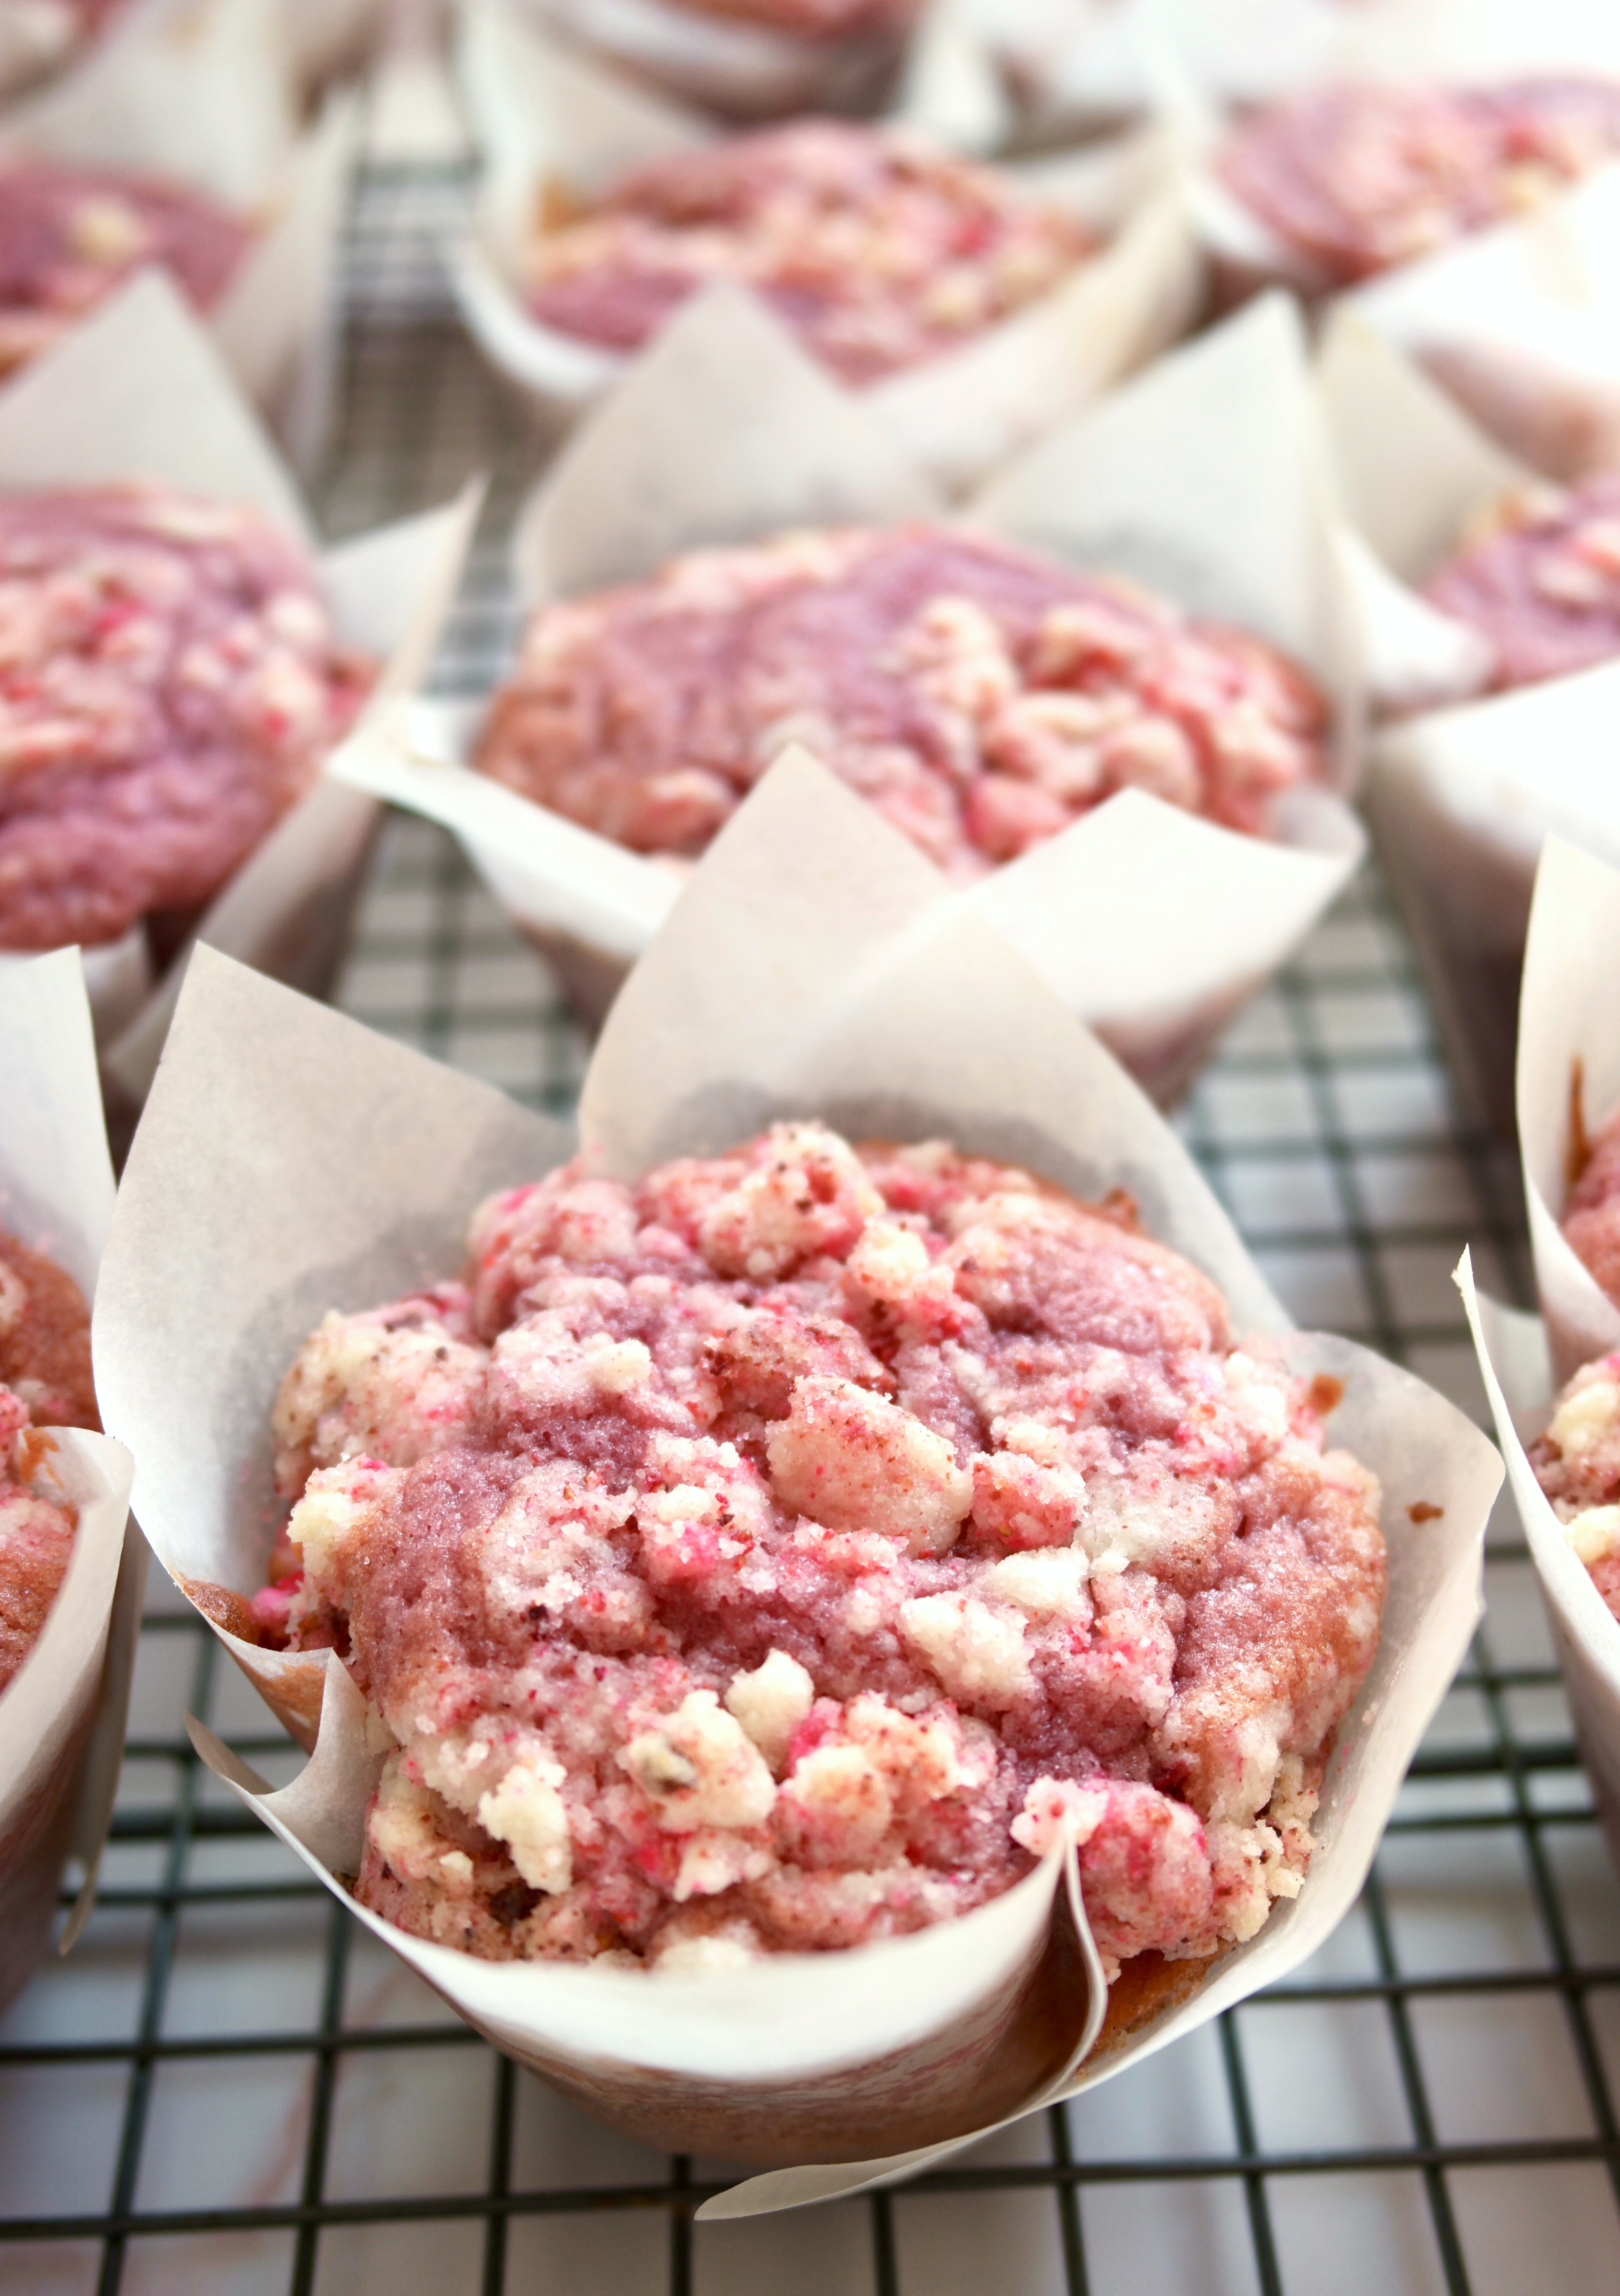
strawberrry shortcake crumble muffins

Have you noticed the strawberry shortcake crumble topping trend? I noticed many people sharing various versions of the crumble recipe all over Tiktok. I’ve seen the topping on cake, cupcakes and countless other desserts. Most people seem to make it using strawberry gelatin mix and vanilla pudding mix. The version I’m sharing here uses freeze dried strawberries instead. I’m not opposed to using gelatin mix, I just seriously love the tart, natural flavor of freeze dried strawberries.

This topping is irresistible on these tender strawberry muffins. I wanted to pile on as much crumble topping as possible so I used tulip baking cups. They’re made of grease-proof parchment paper squares. You can buy them online or make them yourself with squares of parchment. You can use the link provided at the end of the recipe to find the ones I used. Keep in mind, if you use standard muffin liners, you’ll use less batter and topping for each muffin, so you’ll end up with a few more muffins.

I used fresh strawberries for the puree in the muffins, but feel free to use frozen, defrosted strawberries if you cant get fresh ones.

Strawberry shortcake crumble muffins


Strawberry Shortcake Crumble Muffins

by Mari Vasseur
Strawberry muffins topped with strawberry shortcake crumble
Course Breakfast, Brunch, Dessert
Servings 12 muffins

Ingredients
  

Strawberry Shortcake Crumble Topping

  • 1 cup (128g) all purpose flour
  • ½ cup (100g) sugar
  • ¼ teaspoon salt
  • ½ cup (113g) cold, unsalted butter, cubed
  • 1 cup (14g) freeze-dried strawberries, finely crushed* (weigh or measure before crushing the strawberries)

Strawberry Muffins

  • 2 ¼ cups (287g) all purpose flour, sifted
  • 2 teaspoons baking powder
  • ½ teaspoon baking soda
  • ¾ teaspoon salt
  • ¾ cup (170g) unsalted butter, softened
  • 1 ⅛ cups (225g) sugar
  • 2 large eggs
  • 1 teaspoon strawberry extract
  • ½ cup (118ml) buttermilk
  • ½ cup (118ml) strawberry purée
  • 1-2 drops pink or red gel food coloring optional

Instructions
 

Strawberry Shortcake Crumble Topping

  • In a medium-sized bowl, combine the flour, sugar and salt until well blended. Work the butter into the flour mixture with your fingertips until it looks like sandy, with no large pieces of butter remaining.
  • Place half of crumble mixture into another medium-sized bowl and combine it with the crushed freeze dried strawberries. Mix well and press it together with your fingers to form pea sized pieces. Gently combine the two bowls of crumble together. Set aside in refrigerator while preparing the muffin batter.

Strawberry Muffins

  • Preheat the oven to 375ºF (190ºC). Line a 12 serving muffin pan with tulip baking liners or parchment squares.
  • In a medium-sized bowl, whisk together the flour, baking powder, baking soda and salt until well combined.
  • In a large bowl, beat the butter and sugar, with an electric mixer on medium speed, until pale and fluffy.
  • Beat in the eggs one at a time until incorporated. Beat in the extract until well combined. Add the flour mixture and beat on low speed, just until combined. Add the buttermilk, strawberry puree and food coloring. Beat on low speed, just until combined.
  • Divide batter evenly into the tulip muffin liners. (If using standard muffin liners, fill them 2/3 full.) Sprinkle crumble topping evenly over the batter.
  • Bake at 375ºF (190ºC) for 5 minutes, then turn oven temperature down to 350ºF (180º) and continue baking until topping is golden and a toothpick inserted in center is clean, about 12-17 more minutes. (If your topping starts to brown too quickly, you can cover the muffins with a bit of aluminum foil.) Let the muffins cool in the pan for 5 minutes, then transfer them to a cooling rack.

Notes

* A small food processor or a clean spice grinder is helpful to pulverize the freeze-dried strawberries. Pass the crushed strawberries through a sieve to remove seeds if desired.
To find tulip baking cups, click here
To find floral tulip baking cups, as seen on TikTok, click here
 
Keyword muffins, strawberry

(118ml)

Orange Vanilla Bean Donut Holes

Orange Vanilla Bean Donut Holes

During citrus season, in the heart of winter, my backyard orange tree is brimming over with fresh oranges. So I love bringing some fresh-picked sunshine to my family with these fluffy Orange Vanilla Bean Donut Holes from my childhood. When I was a child, my parents used to love taking our family to a smorgasbord. The owner would always come out from the kitchen and say hello to my parents. He made delicious fried donut holes that my brother and I looked forward to at the end of our meal. At home we duplicated the donut holes using a recipe from an old cookbook. Unfortunately the cookbook is lost, but this recipe is pretty close to the original. Tossing the little donuts in vanilla sugar makes them even more fragrant and delicious. The vanilla sugar can be used immediately, but for the best flavor, make it in advance.

The original recipe had vanilla and nutmeg in it, which are classic cake donut flavors. The addition of fresh orange zest and juice makes them vibrant and flavorful. I love making different flavors of these donut holes. To view Blueberry Donut Holes, click here.


Orange Vanilla Bean Donut Holes

by Mari Vasseur
Orange & vanilla donut holes, fluffy & fragrant on the inside, crisp & sugary on the outside
Course Breakfast, Brunch, Dessert
Servings 24 donut holes

Ingredients
  

Donut Holes

  • 2 cups (255g) all purpose flour, sifted
  • 2 teaspoons baking powder
  • ¼ teaspoon fine sea salt
  • 2 large eggs
  • ½ cup (100g) sugar
  • Zest of 1 large orange
  • 2 tablespoons (28g) melted butter
  • ½ cup (118ml) orange juice
  • 1 ½ teaspoons vanilla bean paste
  • ½ cup (100g) vanilla sugar Recipe below
  • Oil for frying

Vanilla Sugar

  • ½ split vanilla bean
  • ½ cup (100g) sugar

Instructions
 

Donut Holes

  • In a large, whisk together the flour, baking powder and salt until well blended.
  • In a medium-sized bowl, whisk the eggs, sugar, orange zest, melted butter, orange juice and vanilla bean paste until creamy and well combined. Add this mixture to the flour mixture and mix just until combined. Do not over mix. A few small lumps are okay.
  • In a heavy saucepan, heat 1 1/2 inches of oil to 340ºF (170ºC). Place the vanilla sugar in a medium-sized bowl.
  • Drop tablespoon-sized portions of batter into the hot oil. (I used a #60 portion scoop**) Don't over crowd the pan.
  • Fry the donut holes until golden brown on all sides, about 2-4 minutes, flipping halfway through. If the donut holes cook too quickly on the outside, turn heat down a bit.
  • Briefly drain the donut holes on paper towels, then toss them in vanilla sugar. Serve warm.

Vanilla Sugar

  • With the dull side of a knife, scrape the seeds out of the vanilla bean.
  • In a small bowl, whisk the vanilla seeds together with sugar, breaking up any clumps. Use immediately or make in advance and let the flavor develop 1-2 weeks in a covered container.

Notes

**To find vanilla beans, click here.
*To find the scoop I used, click here.
 
Keyword donuts, orange vanilla

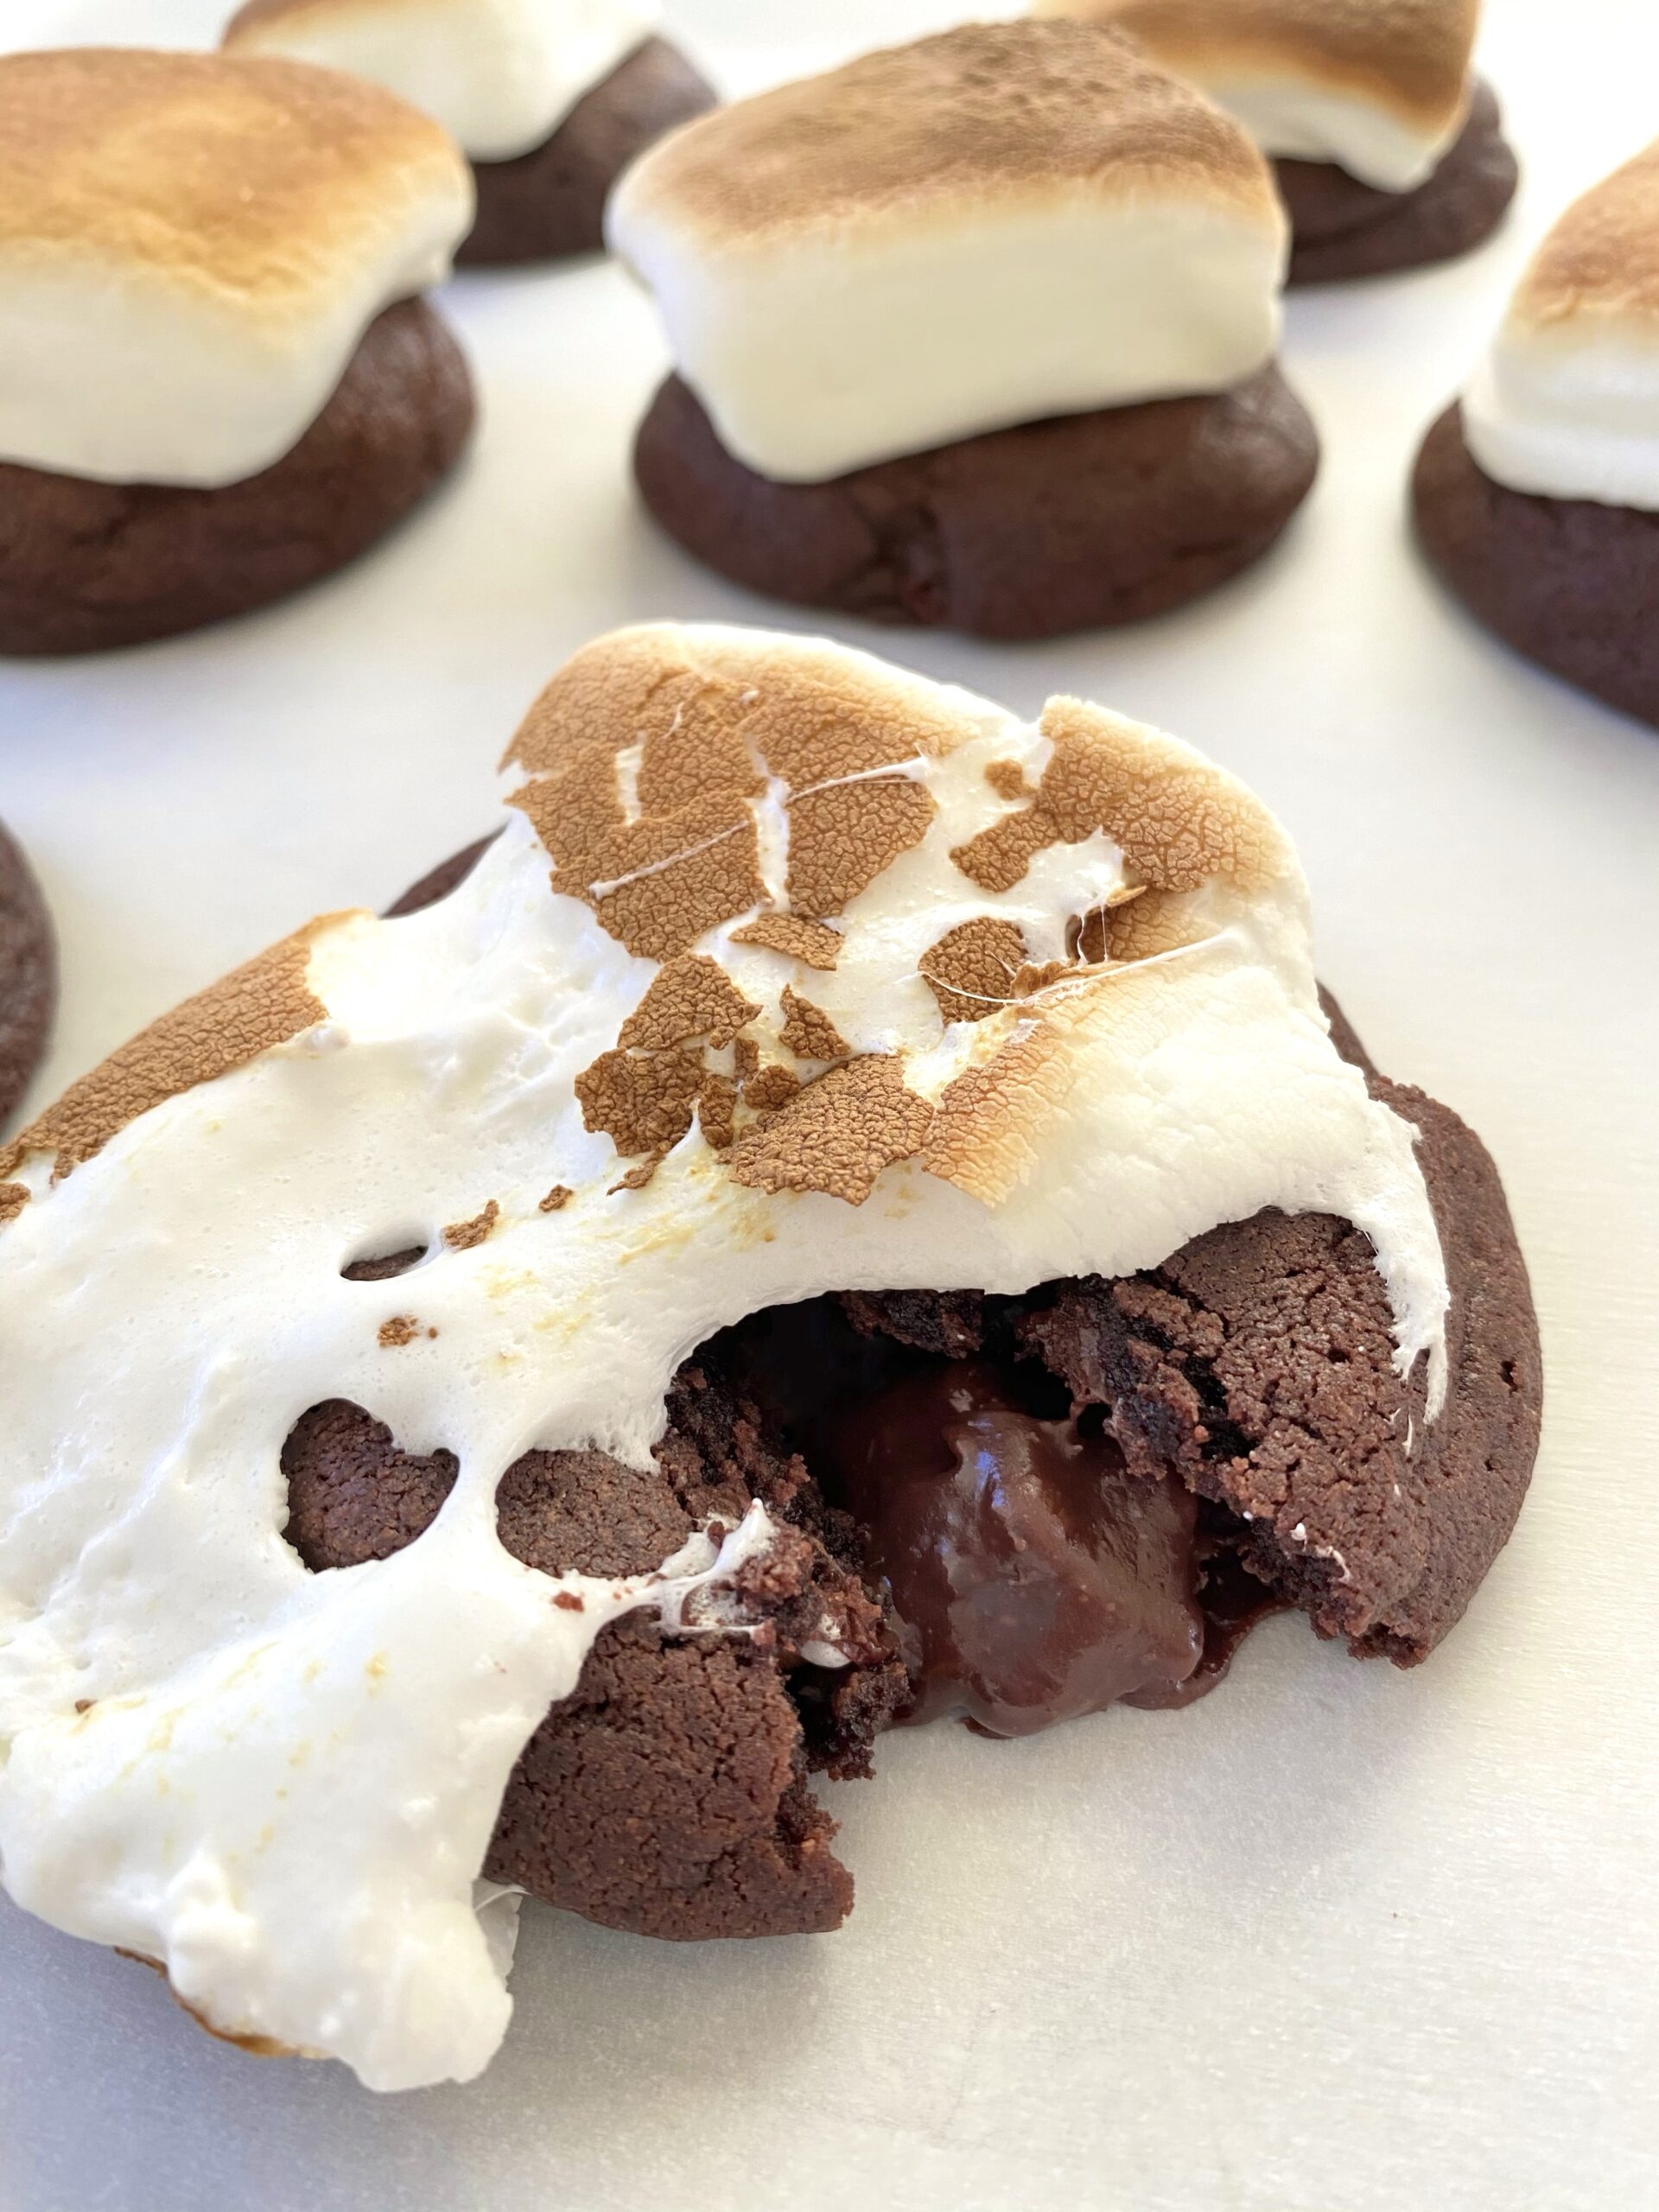
Marshmallow Mudslide Cookies

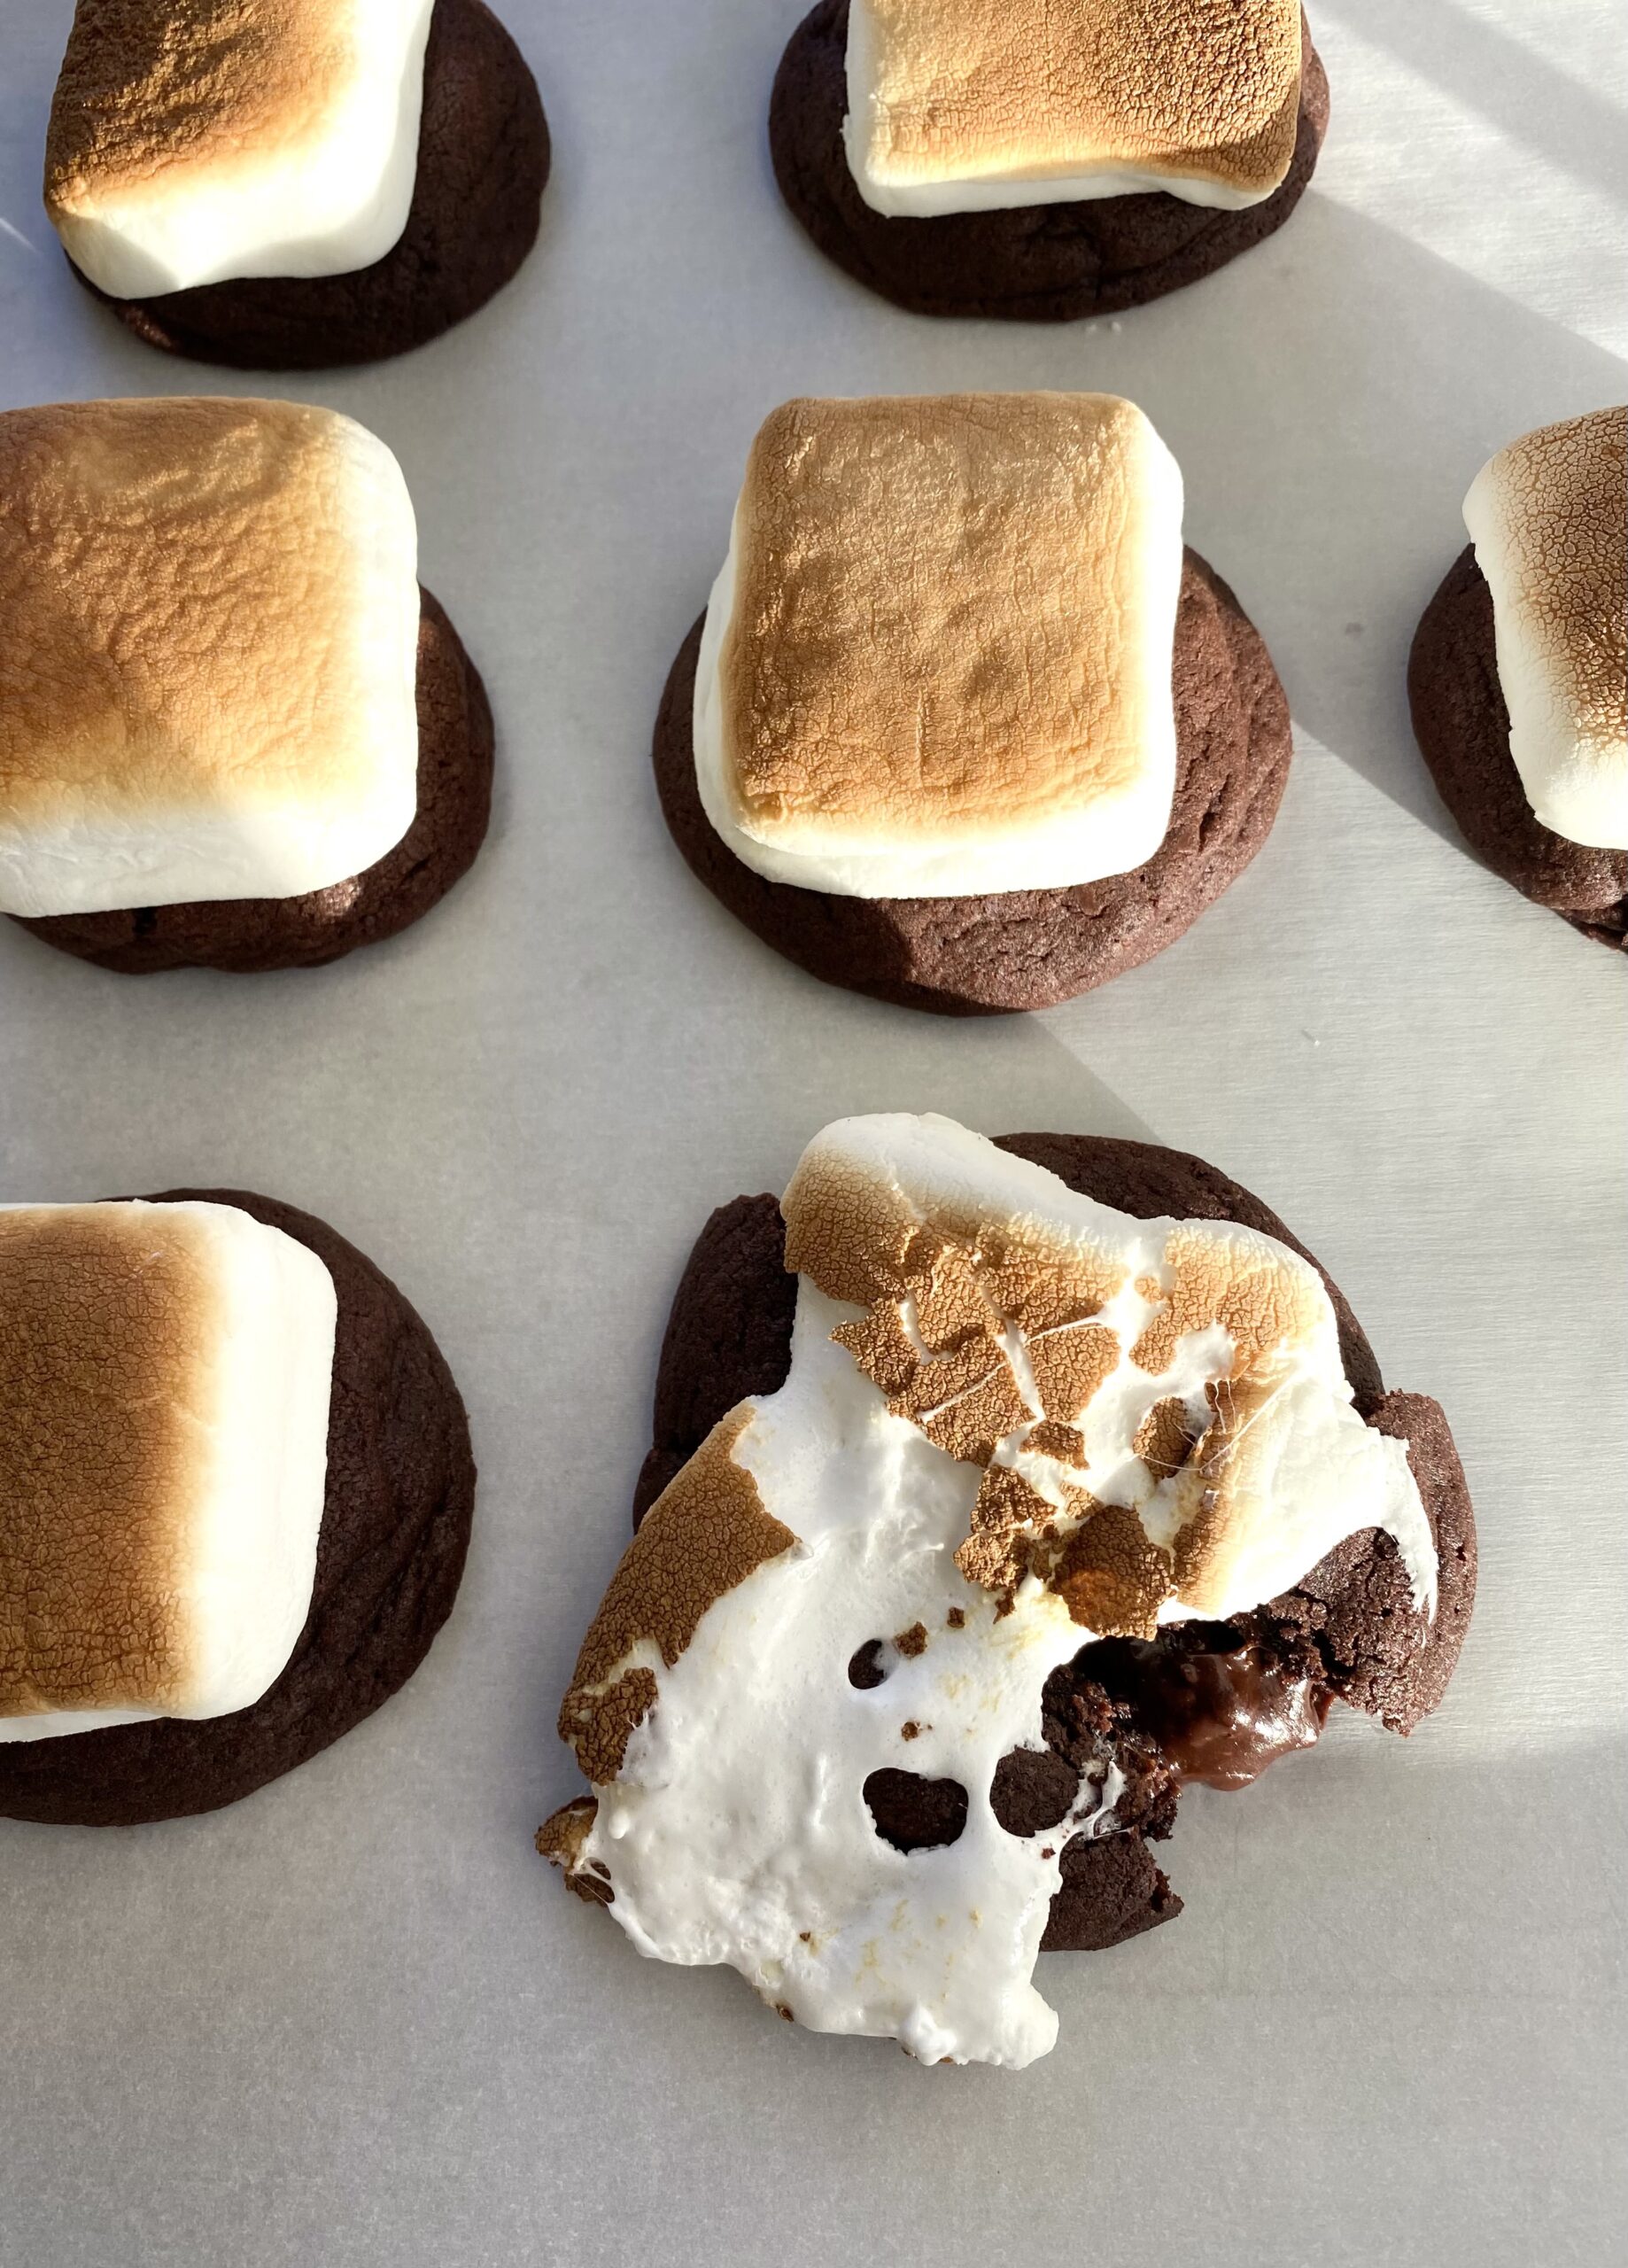
marshmallow mudslide cookies

Have you ever had mudslide cake? It’s a deliciously messy chocolate cake with chocolate frosting and marshmallows, also known as Mississippi mud cake. I saw one covered in a layer of marshmallow fluff and it made its way into my dreams. I woke up with the inspiration to make a cookie version of the gooey mudslide cake.

I saw a few mudslide cookie recipes out there that used standard size marshmallows and chocolate chips mixed into the cookie dough. If you’ve ever baked with marshmallows, you know that they nearly disappear during the baking process. Chocolate chips melt beautifully into little pools of chocolate, but then harden once cooled to room temperature. I happily volunteered to address these challenges! After some trial and error, I created a satisfying cookie with plenty of gooey marshmallow goodness and a rich fudge filling that stays soft at room temperature. Dreams do come true!

marshmallow mudslide cookies


Marshmallow Mudslide Cookies

by Mari Vasseur
Chocolate fudge-filled cookies topped with toasted marshmallows
Course Dessert
Servings 22 cookies

Ingredients
  

Fudge filling

  • 1 ⅓ cup (227g) semisweet chocolate chips
  • 1 cup (310g) sweetened condensed milk
  • cup (74g) chopped toasted pecans or walnuts optional

Cookies

  • 2 ¼ cups (287g) all purpose flour, sifted
  • ½ cup (45g) unsweetened Dutch Process cocoa powder, sifted preferably dark
  • ½ teaspoon baking powder
  • ½ teaspoon baking soda
  • ¼ teaspoon fine sea salt
  • 1 cup (227g) unsalted butter, softened
  • 2 large eggs
  • 1 teaspoon pure vanilla extract
  • 1 cup (200g) granulated sugar
  • ¼ cup (50g) packed brown sugar
  • 22-24 S'mores marshmallows or jumbo marshmallows* I used Kraft Jet-Puffed S'moreMallows

Instructions
 

Fudge filling

  • Melt the chocolate chips and sweetened condensed milk together in a double boiler or in the microwave in a medium-sized microwave safe bowl.** Stir gently until smooth.
  • Stir in the chopped nuts if using. Set aside to cool to room temperature.

Cookies

  • Preheat the oven to 350º (180ºC). Line 2 large cookie sheets with parchment paper.
  • In a medium-sized bowl, sift together the flour, cocoa powder, baking powder, baking soda, and salt until well blended.
  • In a large bowl, beat the butter, granulated sugar and brown sugar with an electric mixer at medium speed, until pale and fluffy. Mix in the eggs and the vanilla in 3 separate additions, making sure each addition is incorporated before adding the next. On low speed, mix in the flour mixture in 2 additions, just until combined.
  • Roll the fudge filling into 1-tablespoon-sized balls. Roll the cookie dough into 2-tablespoon-sized balls then flatten them into disks. Place a ball of fudge filling in the middle of each disk. Wrap the cookie dough around the ball of filling, sealing it completely.
  • Place the cookies about 2 inches apart onto the prepared cookie sheets. Bake until the tops of the cookies are set, about 9-11 minutes. Remove from oven.
  • Place a marshmallow on top of each cookie. Use a kitchen torch to toast the marshmallows or toast them in the broiler: Turn on the broiler. Transfer the cookies to an aluminum foil-lined cookie sheet. Broil the cookies until the marshmallows are toasted. This takes about 1 minute. WARNING: Use extreme caution and watch the cookies carefully when broiling. They can go from done to burnt in the blink of an eye!

Notes

*I used Kraft Jet-Puffed S'moreMallows, but if you're unable to find them, use jumbo marshmallows. Cut them in half with kitchen shears. Place them on the cookies cut side down.
**To melt the fudge filling in microwave, heat for 20 seconds. Stir, then microwave for 10 second bursts, stirring until melted and smooth.
Keyword chocolate, cookies

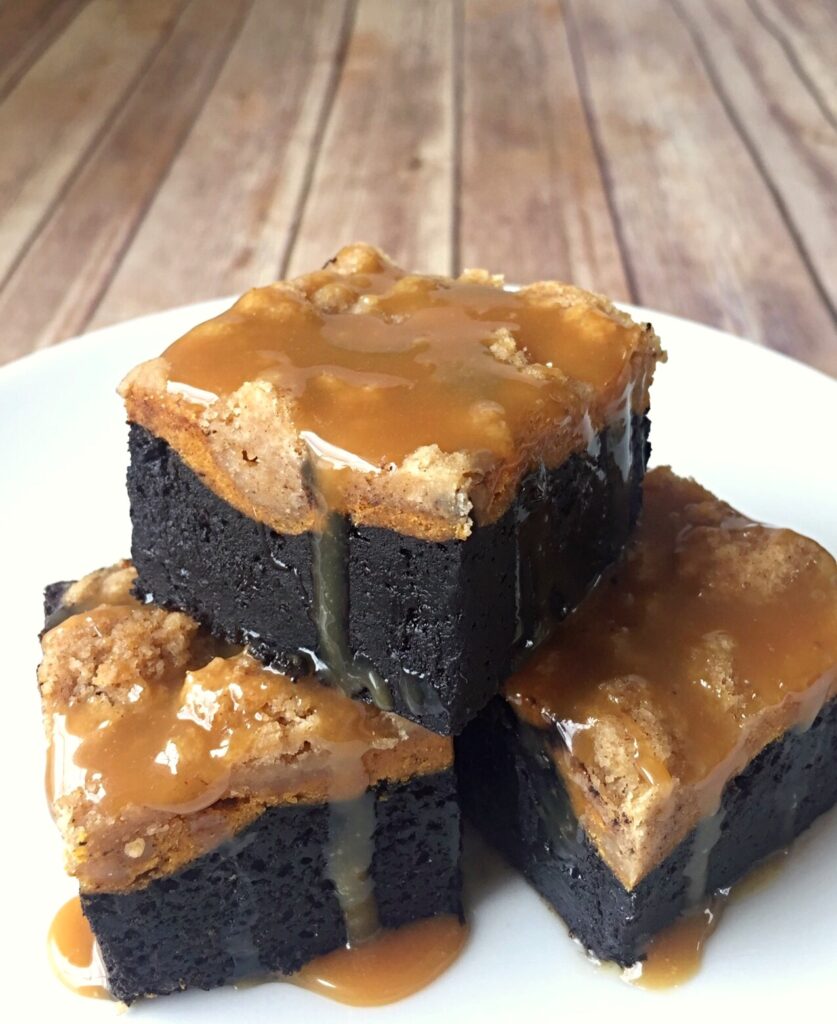
Pumpkin Cheesecake Crumble Brownies

pumpkin cheesecake crumble brownies

It’s Fall 2020. We need chocolate! We need pumpkin spice! And we need it drenched with caramel! These satisfying brownies check all of the boxes with multiple layers of comfort. A rich chocolate brownie is the base. The next layer is heavenly pumpkin cheesecake. The topping is a buttery crumble that rivals the best crumb cake. Finally, as if that isn’t enough, it’s drizzled with caramel sauce!

If it sounds complicated, don’t worry, it’s not. Each layer is super easy to make. You can use your favorite store bought caramel sauce to top it with. Vanilla ice cream and/or whipped cream are optional, but highly recommended toppings also. Just saying.

The layers go unexpectedly well together and make the perfect dessert for Halloween or Thanksgiving. I’m even going to add these beauties to my Christmas dessert table this year. Enjoy! You deserve it.

Pumpkin Cheesecake Crumble Brownies

Chocolate brownies with pumpkin cheesecake and crumb topping, topped with caramel sauce.
Course Dessert
Servings 12

Ingredients
  

Crumb Topping

  • 1 ½ cups (6 3/4 ounces) all purpose flour
  • ½ cup (3 1/4 ounces) brown sugar
  • 1 ½ teaspoons ground cinnamon
  • ½ teaspoon salt
  • ¾ cup (1 1/2 sticks) unsalted butter

Pumpkin Cheesecake Layer

  • ¾ cup (6 ounces) cream cheese, softened
  • 1 cup (8 ounces) canned pumpkin
  • 2 eggs
  • 6 tablespoons sugar
  • 1 ½ teaspoons ground cinnamon
  • ¼ teaspoon ground ginger
  • ¼ teaspoon ground nutmeg

Brownie Layer

  • ½ cup (1 stick) unsalted butter
  • 1 ⅛ cup (8 ounces) granulated sugar
  • ½ cup (2 1/8 ounces) Dutch-Process cocoa powder
  • 1 teaspoon vanilla extract
  • ½ teaspoon baking powder
  • ¼ teaspoon salt
  • 3 eggs
  • ¾ cup (3 3/8 ounces) all purpose flour
  • ½ cup caramel sauce, purchased or homemade warmed if desired

Instructions
 

Crumb Topping

  • In a medium bowl, combine flour, brown sugar, cinnamon and salt.
  • Cut in butter using a pastry blender or your fingers until well-combined and crumbles are pea-sized. Press crumbles together to make large quarter-sized chunks.
  • Set aside in refrigerator.

Pumpkin Cheesecake Layer

  • Preheat oven to 350º. Line a 9-inch square baking pan with parchment paper.
  • In a medium bowl, beat cream cheese with an electric mixer until smooth.
  • Add pumpkin, eggs, sugar, cinnamon, ginger and nutmeg and beat until well combined. Set aside.

Brownie Layer

  • Melt 1 stick of butter in a large microwaveable bowl.
  • Stir in sugar until combined
  • Stir in cocoa powder, vanilla, baking powder and salt.
  • Add the eggs and beat until smooth
  • Add the flour and mix until just combined.
  • Spread brownie batter into prepared baking pan. Smooth with a spatula.
  • Spread pumpkin cheesecake batter over the top of brownie batter. Smooth with a spatula.
  • Sprinkle crumb topping evenly over the top of pumpkin cheesecake layer.
  • Bake for 40-50 minutes until a toothpick inserted into pumpkin cheesecake layer comes out clean.
  • Let cool completely. Cut into squares and serve with caramel sauce.

Honeydukes Inspired Pink Coconut Ice Cake

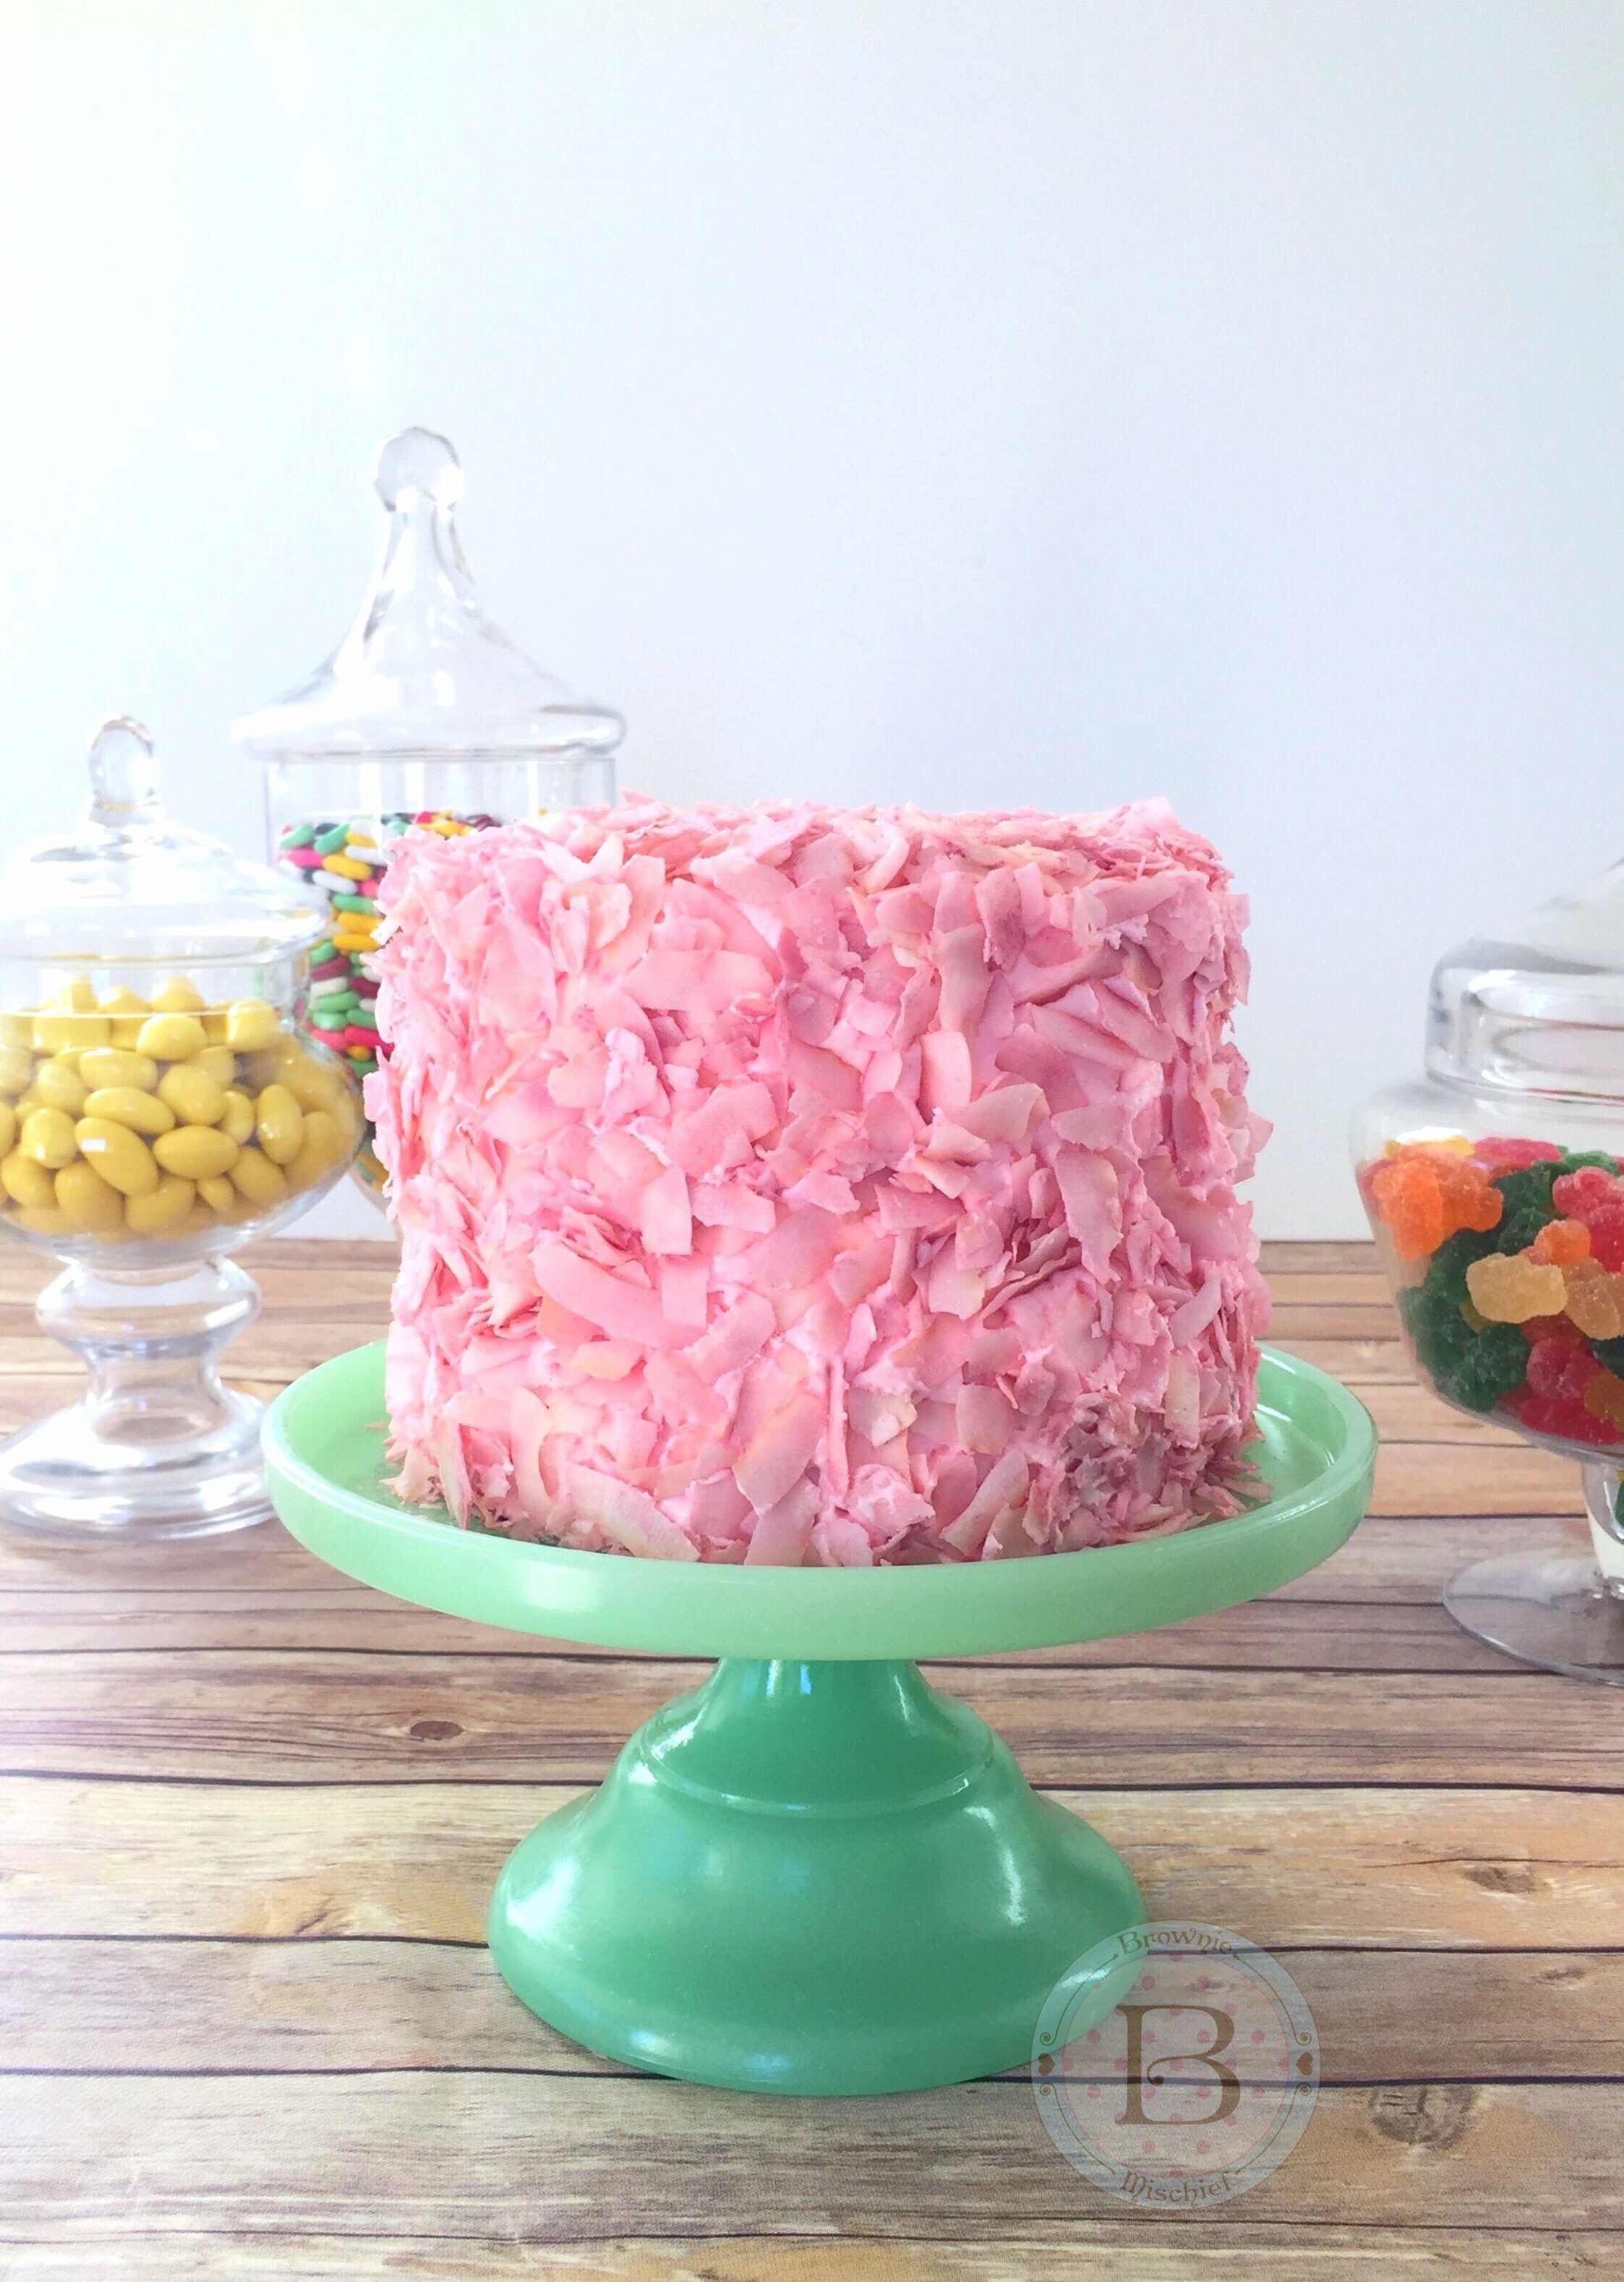
Honeydukes Inspired Pink Coconut Ice Cake by Brownie Mischief

I recently enjoyed a girls’ day out at Universal Studios Hollywood. My daughter is a Harry Potter fan, so of course we beelined straight to the Wizarding World of Harry Potter upon arrival at the theme park. We were spellbound by the ominous looking Hogwart’s Castle and the sparkling snow-topped shops of Hogsmeade. My daughter was in Harry Potter fan heaven, flitting around Hogsmeade, testing out her interactive wand and sipping some refreshing Butter Beer. It’s definitely a must-try

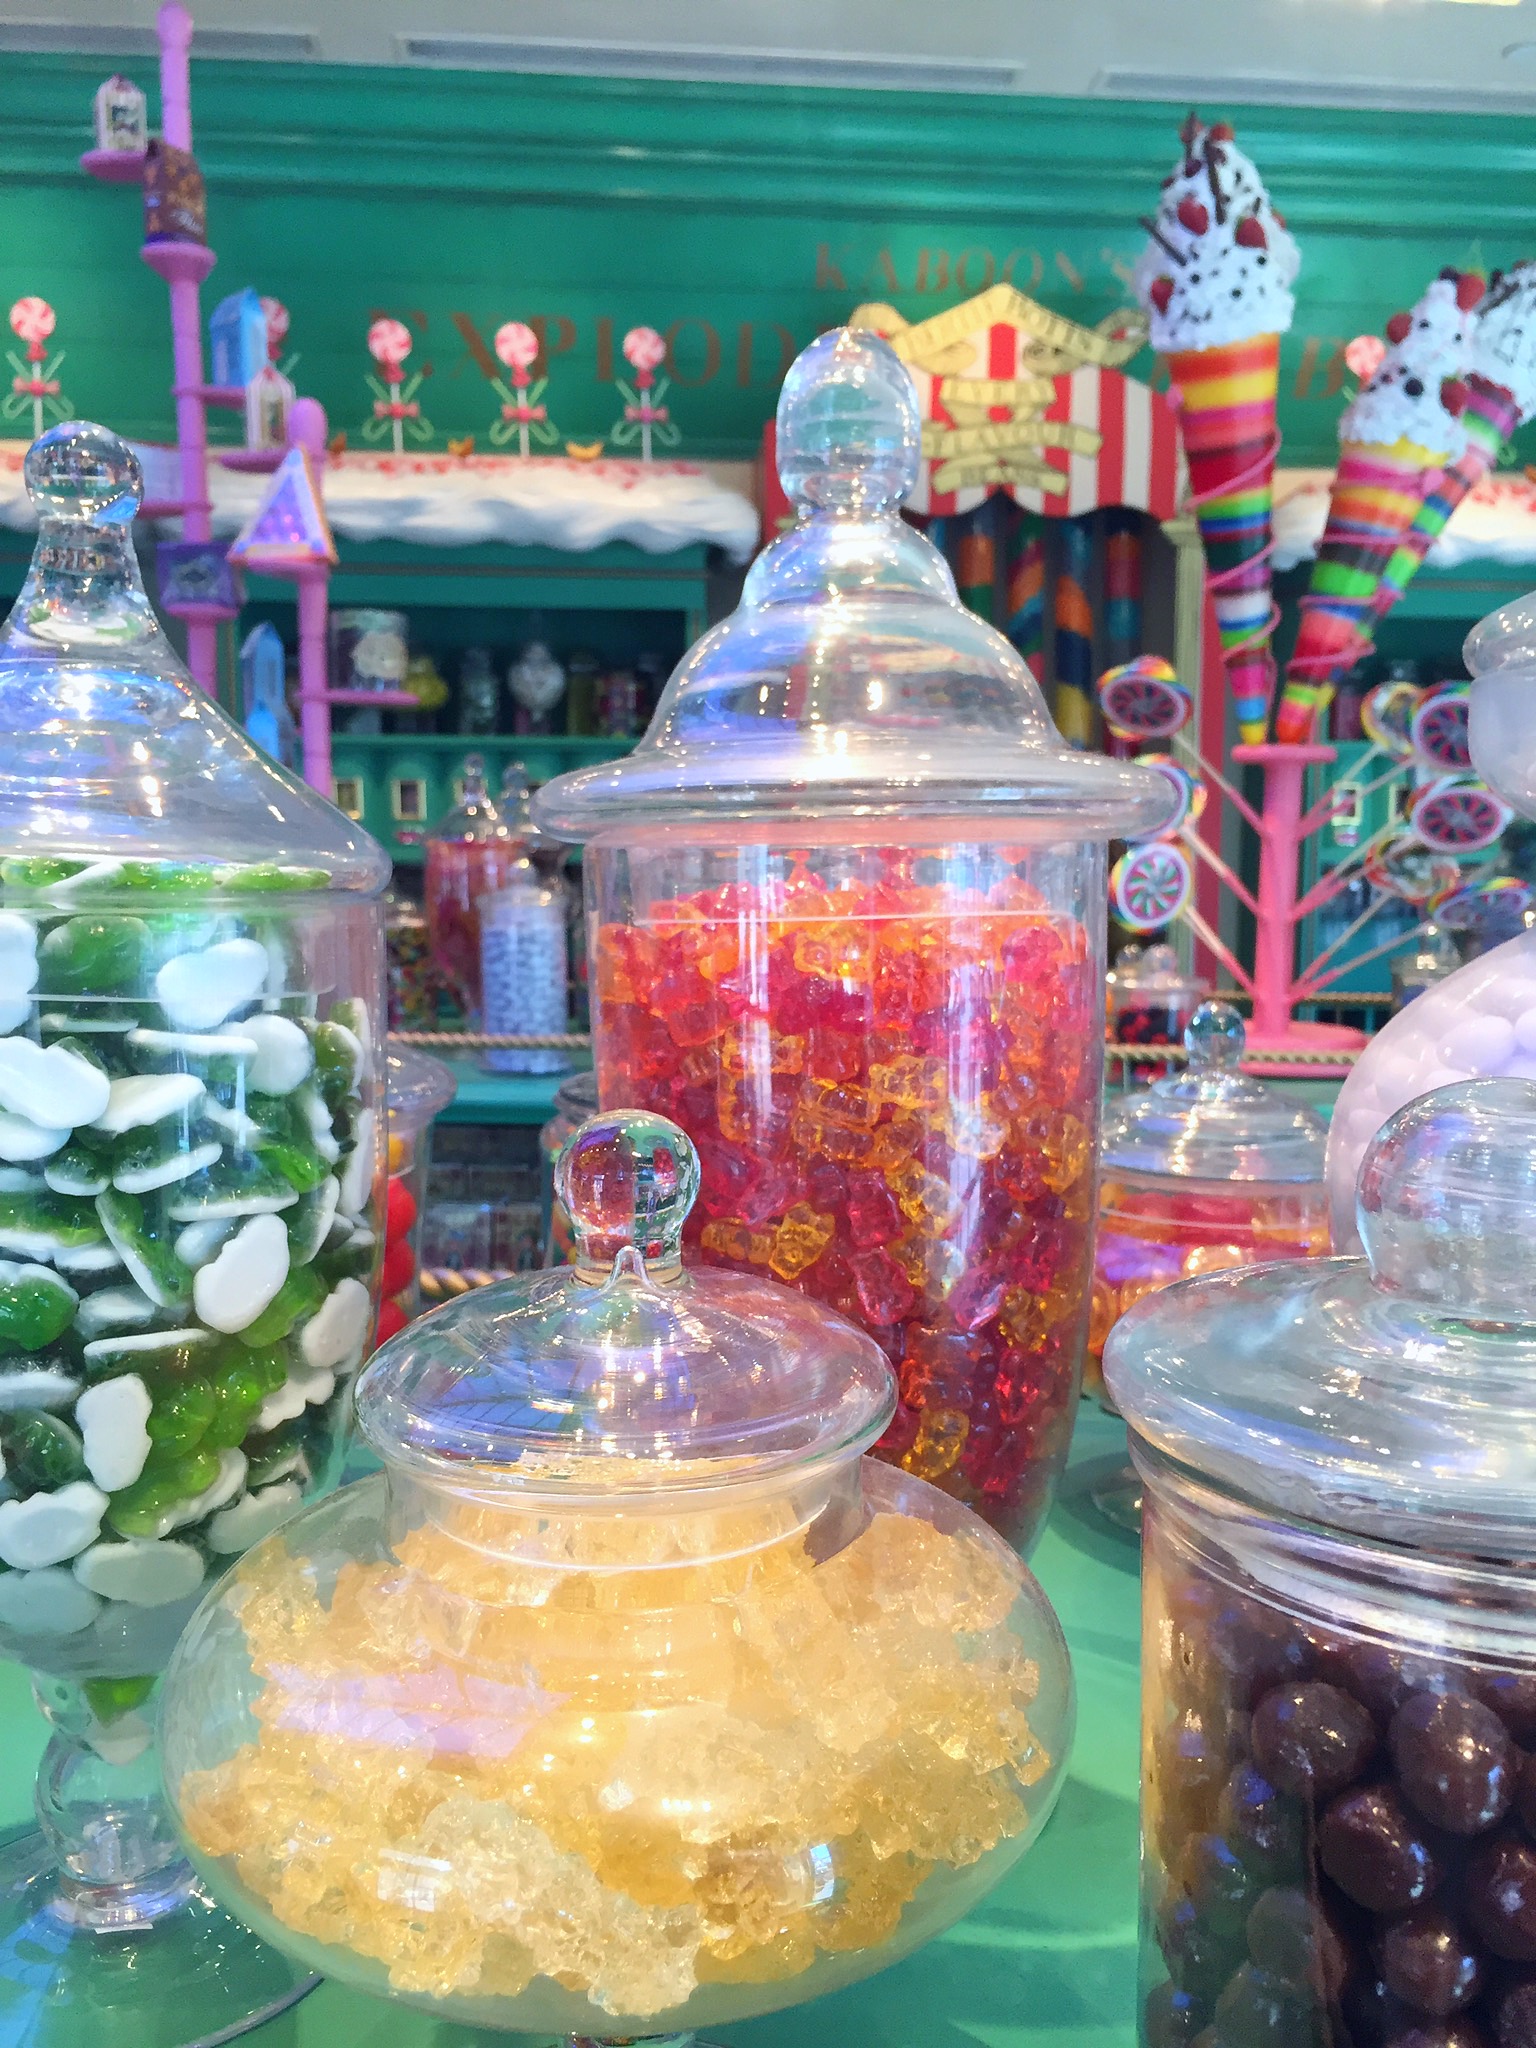
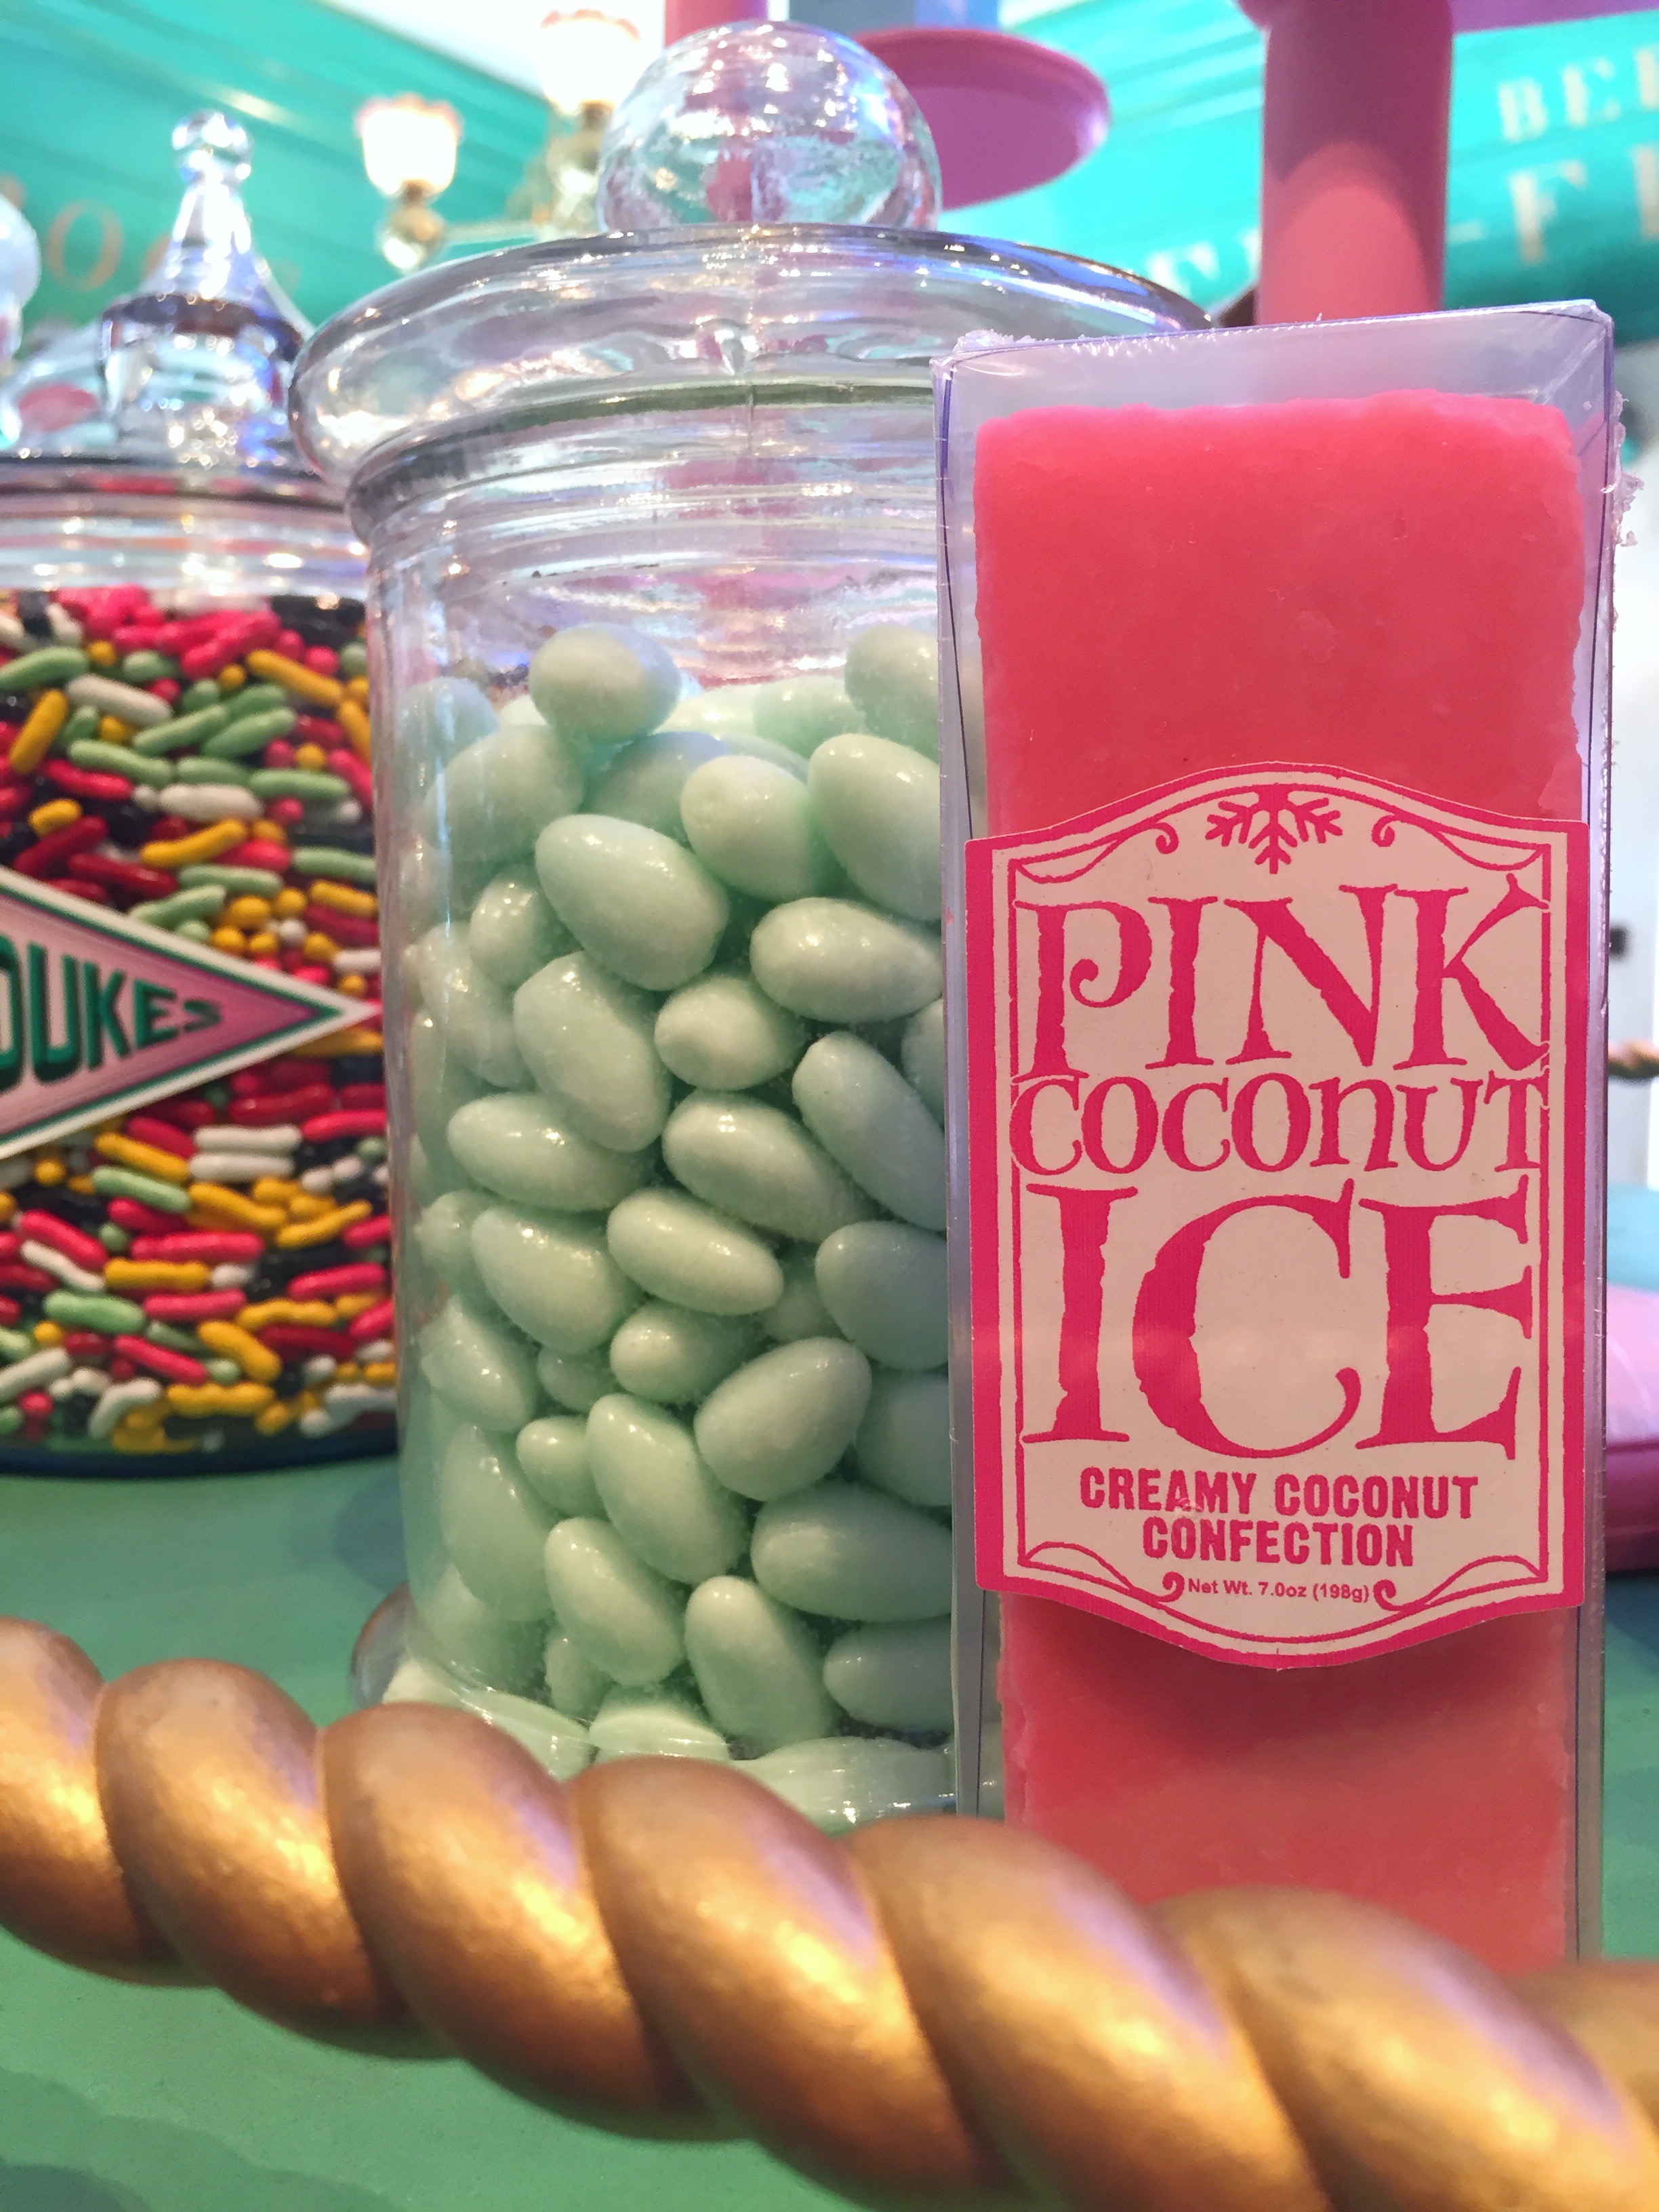
Our favorite shop was Honeydukes sweet shop, where anyone with a sweet tooth can get his or her candy wishes fulfilled. The candy selection was nothing short of magical. We picked up some Chocolate Flies, a Chocolate Frog and some Pink Coconut Ice candy.
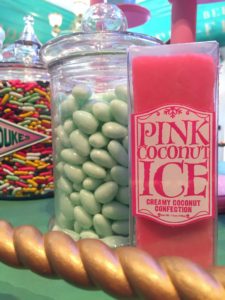
Honeydukes Candy                   Pink Coconut Ice Candy

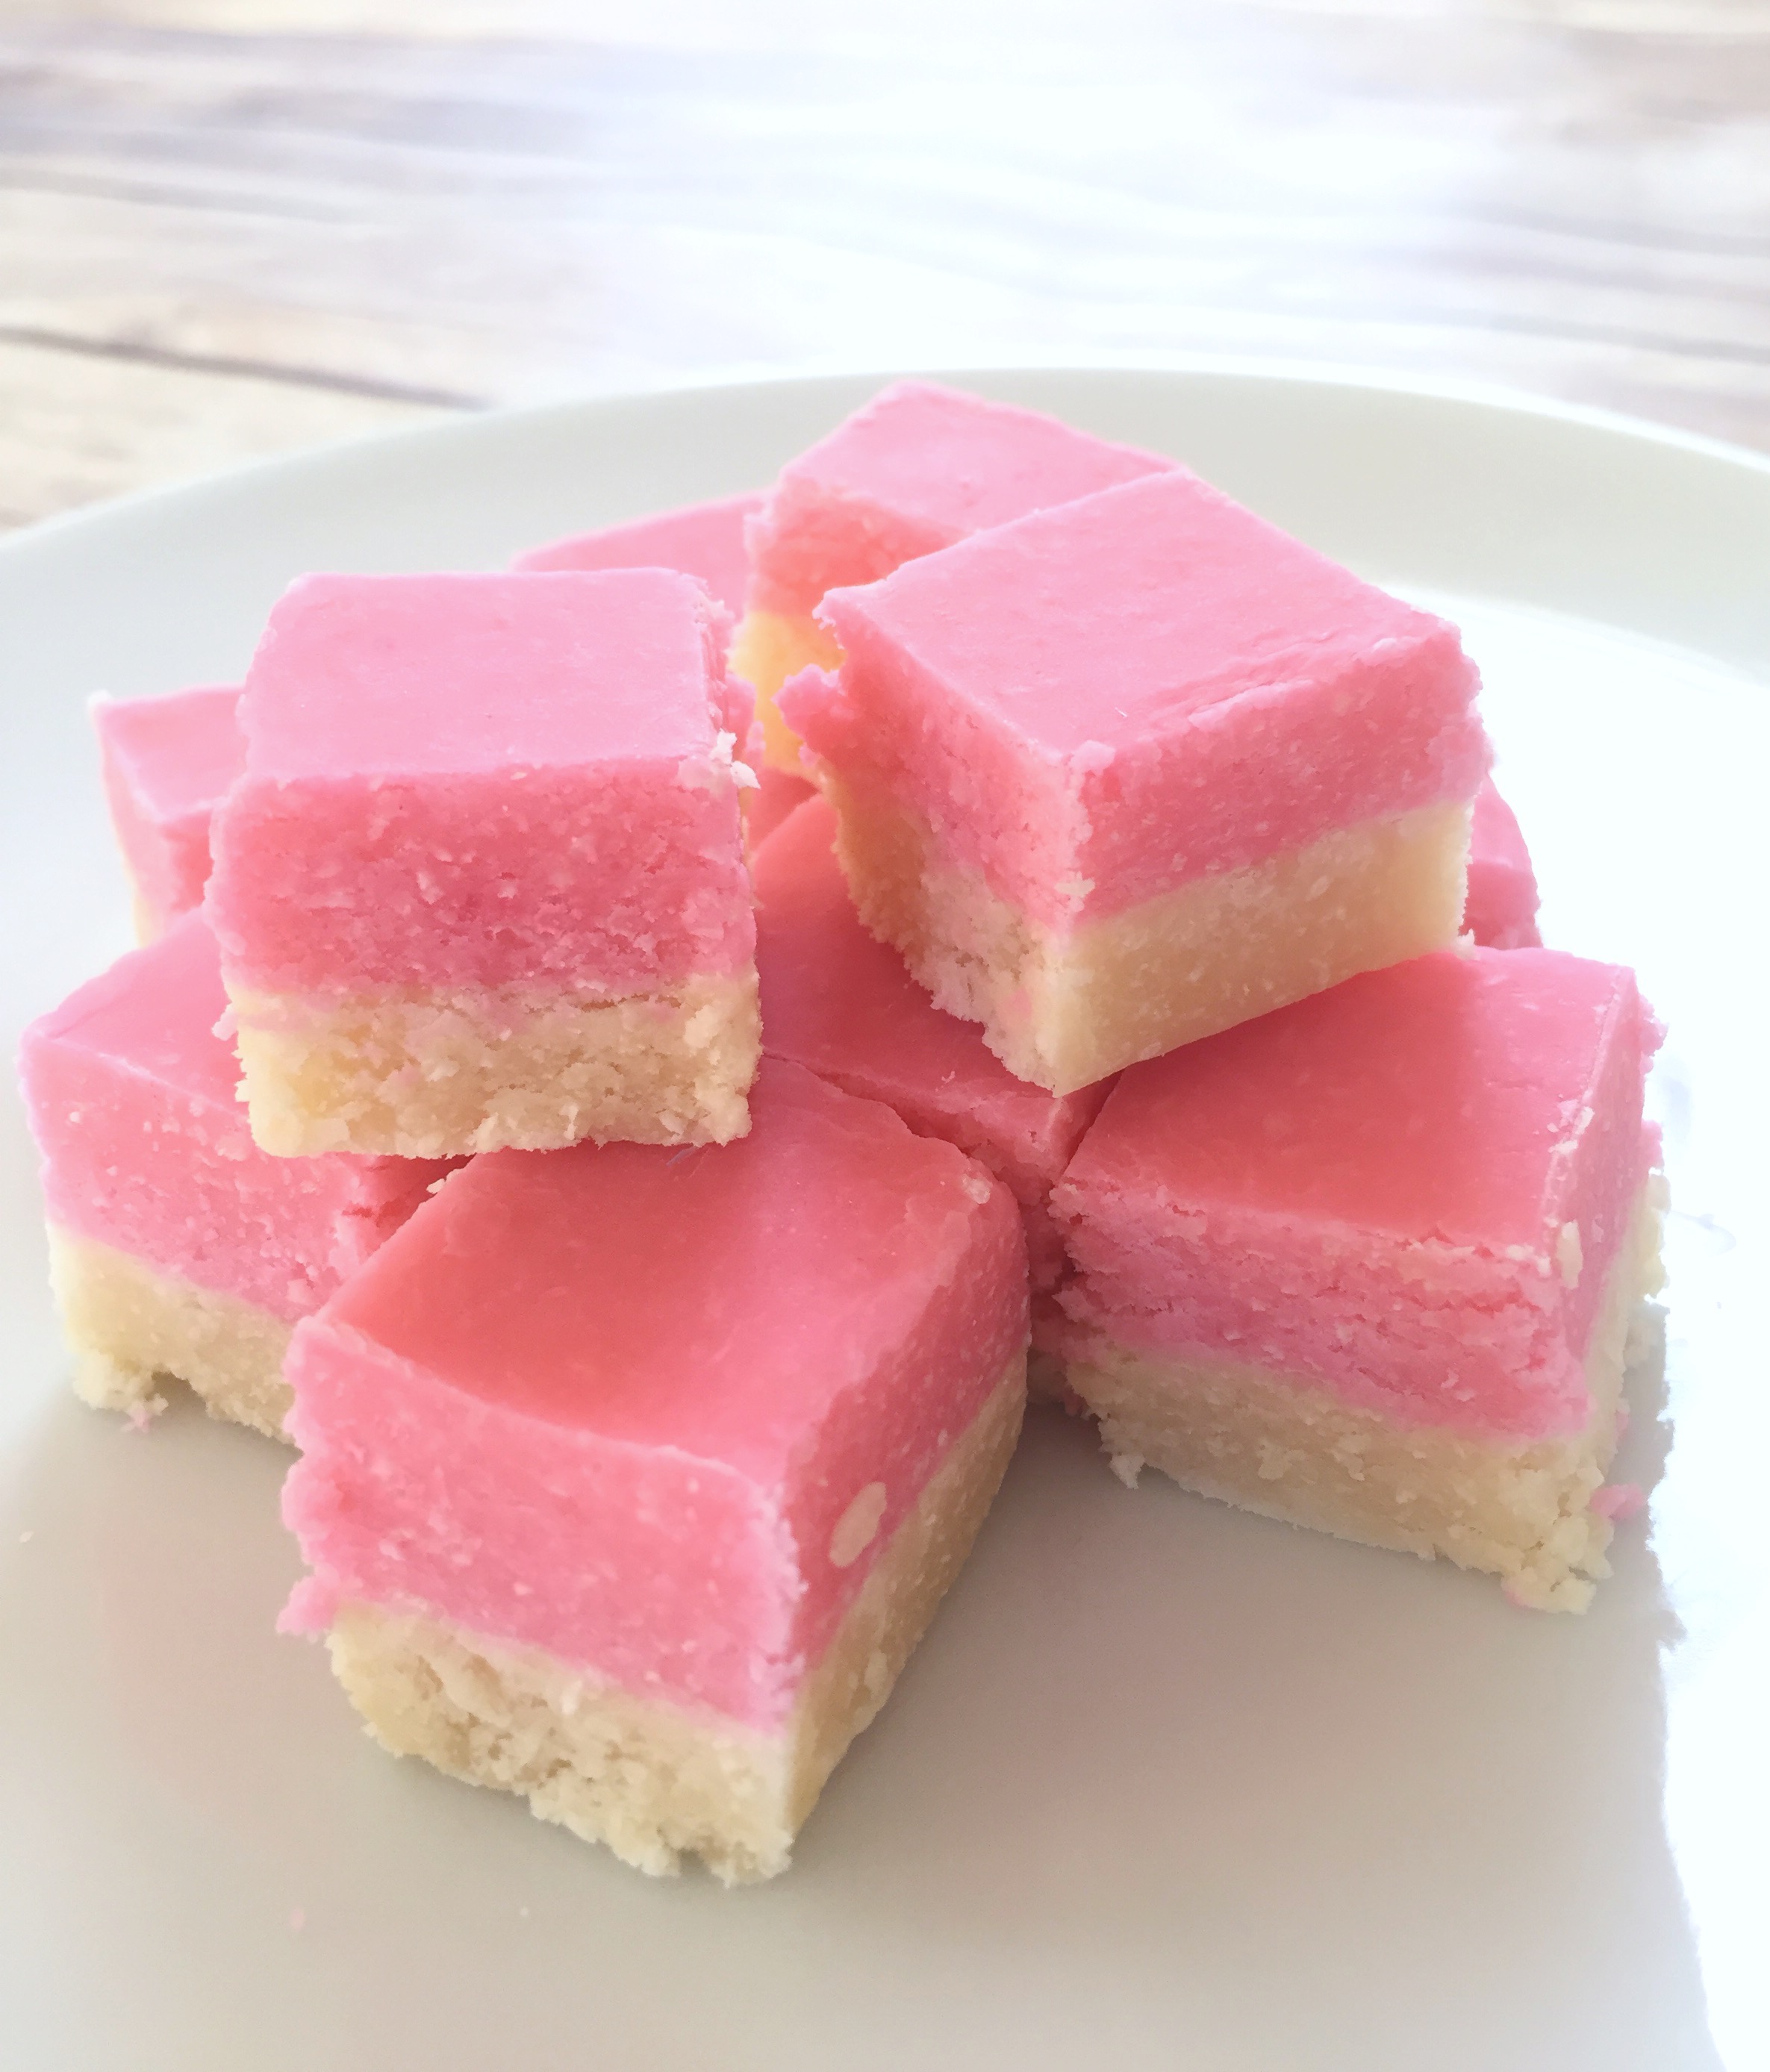
I was most excited to try the Pink Coconut Ice. I’ve been intrigued by the thought of this candy ever since it was mentioned in the book, Harry Potter and the Prisoner of Azkaban by J.K. Rowling. The Pink Coconut Ice candy is similar to a stiff fudge. It’s very sweet, so you can cut it into small squares and have plenty to share with friends.
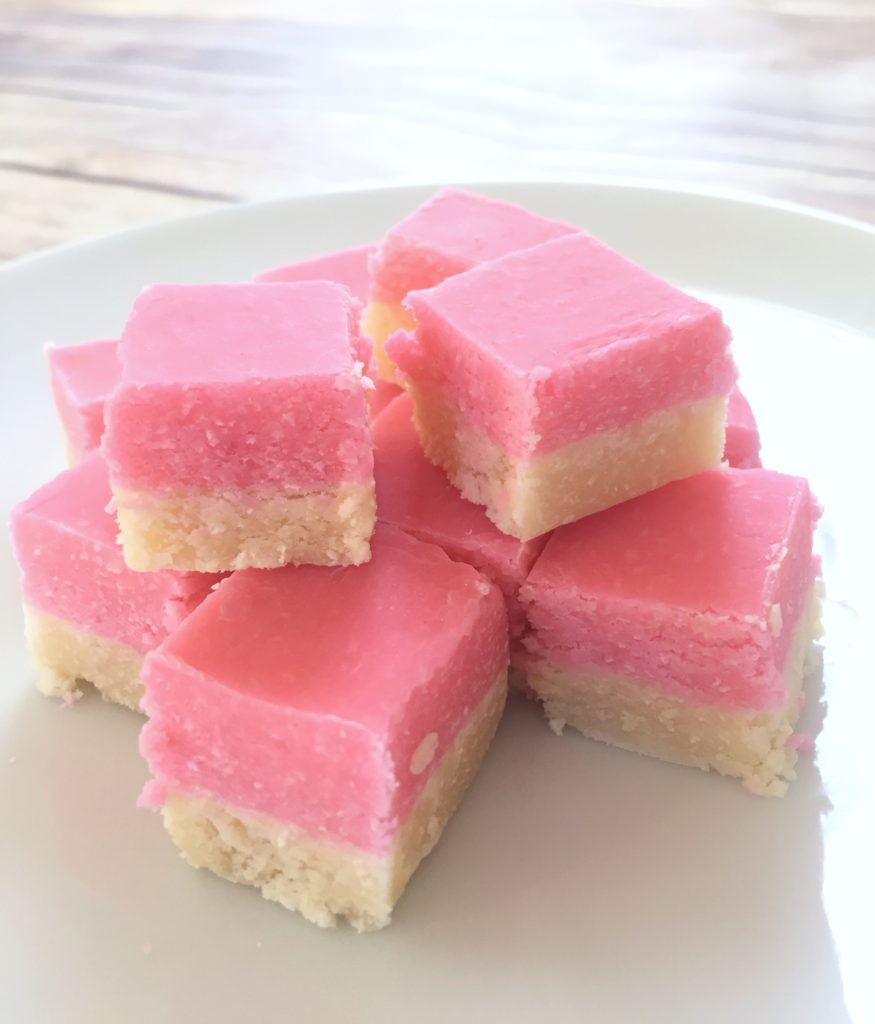
Pink Coconut Ice Candy

I imagined the “shimmery pink squares” a little differently so, I decided to build on my imagined version of the coconut candy by making a shimmery pink coconut cake. I used my favorite coconut cake recipe and pink coconut buttercream. I tinted my buttercream with Americolor gel food color soft pink. I covered my cake in large flakes of unsweetened coconut. To find unsweetened coconut flakes, click here. I think the large flakes look more whimsical and add texture, but feel free to use whatever kind of coconut you prefer. I colored my coconut a shimmery, soft pink. Click here to see how I colored my coconut flakes.
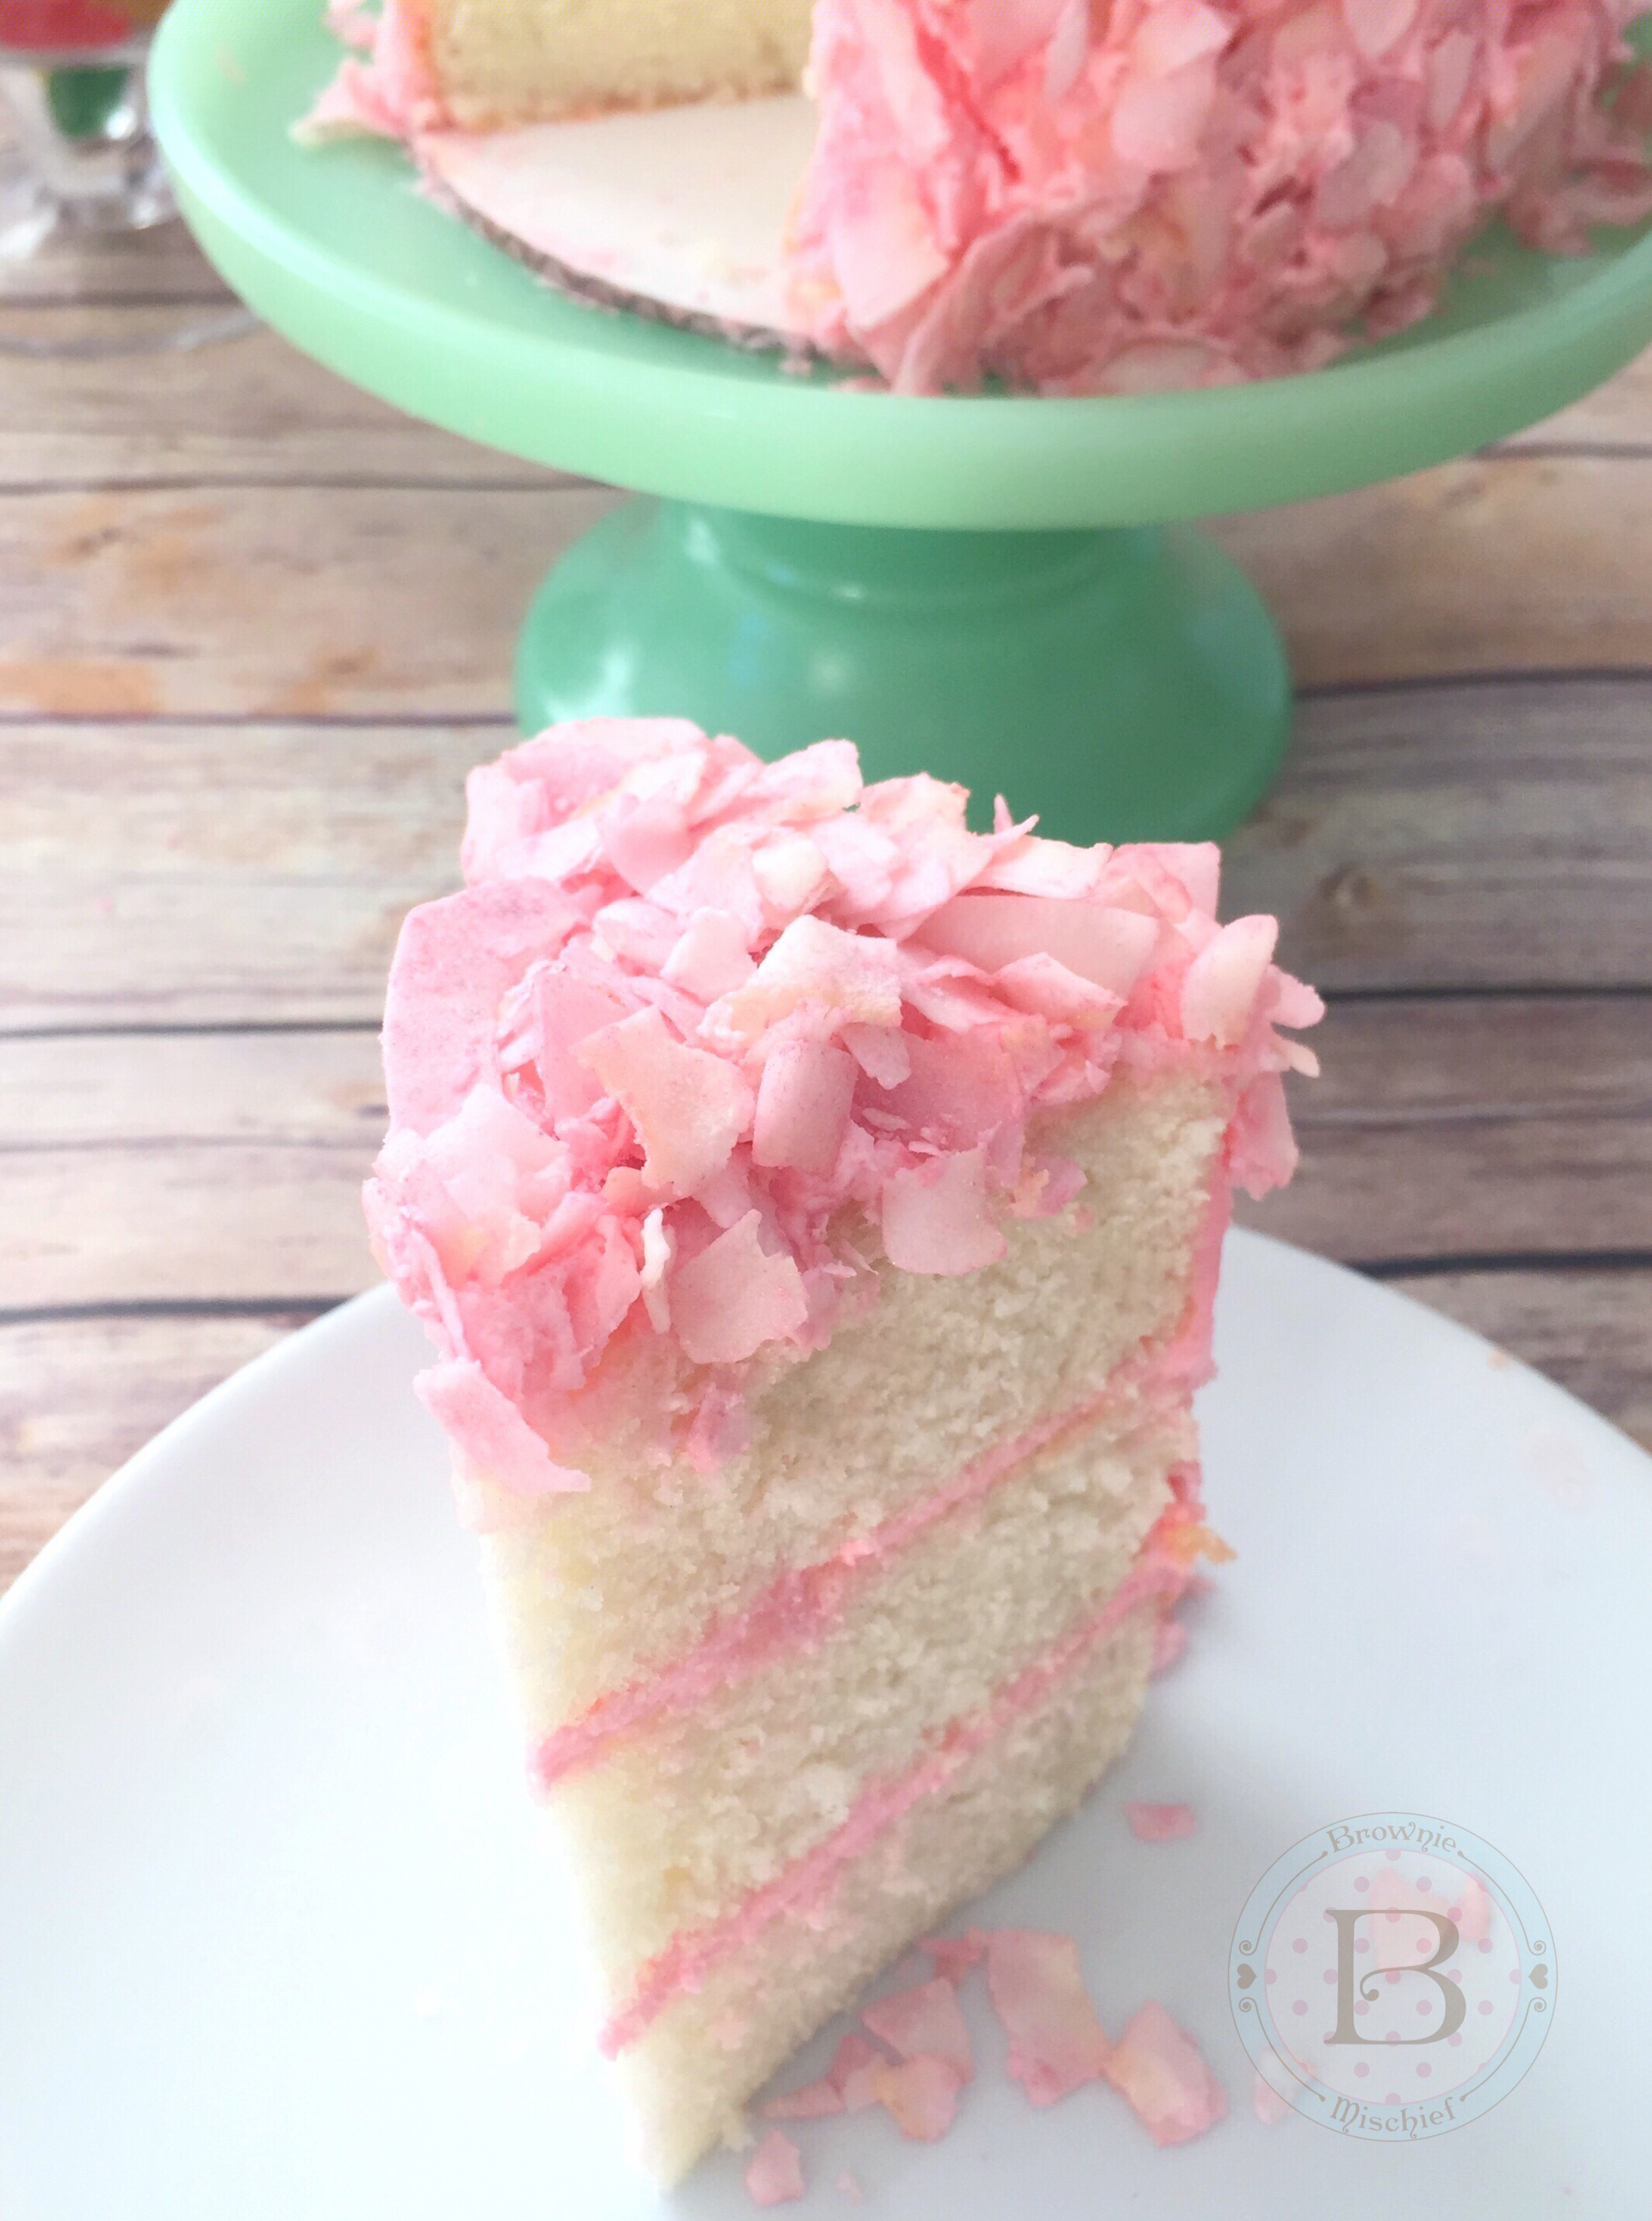
Honeydukes Inspired Pink Coconut Ice Cake by Brownie Mischief

You don’t have to be a Harry Potter fan to appreciate this pink, fluffy, coconut-covered cake. I can imagine this pretty cake at any party or event with a pink theme. I hope you enjoy this perfectly Pink Coconut Ice Cake as much as we did!

Pink Coconut Ice Cake

by Mari Vasseur
Moist, fluffy coconut cake with pink buttercream and coconut flakes
Course Dessert
Servings 1 6-inch cake (serves 6)

Ingredients
  

Coconut Cake

  • 2 ¾ cups (326g) cake flour, sifted
  • 2 teaspoons baking powder
  • 1 teaspoon fine sea salt
  • ½ cup (113g) unsalted butter, softened
  • 1 ¾ cups (350g) granulated sugar preferably ultra fine
  • ¼ cup (58ml) vegetable oil or neutral oil of your choice
  • 2 teaspoons natural coconut extract *see note below
  • 6 large egg whites
  • 1 ½ cups (400ml) canned light coconut milk **see note below

Pink Coconut Buttercream

  • 1 cup (227g) unsalted butter, softened
  • teaspoon fine sea salt
  • 3 ¾ cups (454g) powdered sugar, sifted
  • ¼ cup (65ml) canned light coconut milk
  • ½ teaspoon natural coconut extract
  • Pink gel food color I used Americolor soft pink (link below)

Pink Coconut Flakes

  • 3 cups unsweetened coconut flakes
  • 1 tablespoon powdered sugar
  • Edible pink petal dust I used Rosie Sterling Pearl Dust by GSA (link below)

Instructions
 

Coconut Cake

  • Preheat the oven to 350ºF (180ºC). Line the bottoms of three 6-inch cake pans with parchment paper. Grease and flour the insides.
  • In a large bowl, whisk together the flour, baking powder and salt until well blended.
  • In a large bowl, beat the butter, sugar and oil and coconut extract together with an electric mixer at medium speed, until pale and fluffy, about 2-3 minutes. Gradually beat in egg whites until the mixture is smooth and creamy, stopping to scrape the sides of the bowl as needed.
  • On low speed, beat in flour mixture in 3 additions, alternating with the coconut milk after each addition.
  • Pour batter into the prepared pans, evenly distributing batter among the pans. Bake for 28-32 minutes, until a toothpick inserted into the center of the cakes comes out clean.
  • Cool the cakes for 10 minutes. Remove the cakes from pans and transfer them to a cooling rack.

Pink Coconut Buttercream

  • In a large bowl, beat the butter with an electric mixer on medium speed, until pale and fluffy.
  • Turn off the mixer. Add the powdered sugar and salt. Mix on low speed until the sugar is moistened, then turn the mixer up to medium speed and beat until combined. Add coconut extract, then add the coconut milk a little at a time, until the desired consistency is reached. Continue mixing on low speed until the buttercream is smooth.
  • Add the food coloring with a toothpick, a little at a time, until desired consistency is reached. Beat at low speed until well blended. Fill and frost the cake.

Pink Coconut Flakes

  • Place the powdered sugar in a small bowl. Add a small amount of petal dust. Whisk together with a small whisk. Add additional petal dust until the desired color is reached.
  • Spread the coconut flakes out onto a large shallow dish. Sprinkle powdered sugar mixture over coconut with a small sieve. Toss gently with gloved hands.
  • Place the cake on a baking sheet to catch excess coconut. Gently press the colored coconut onto the sides and the top of cake.

Notes

For best results weigh your dry ingredients.
*Use natural coconut extract. Imitation coconut flavorings may give your baked goods an unpleasant flavor.
**If your coconut milk is separated when you open the can, simply place it in a blender to emulsify before using.
To find my favorite 6-inch cake pans, click here. To find the gel food color I used, click here. To find unsweetened coconut flakes, click here. To find the edible pearl dust I used, click here.