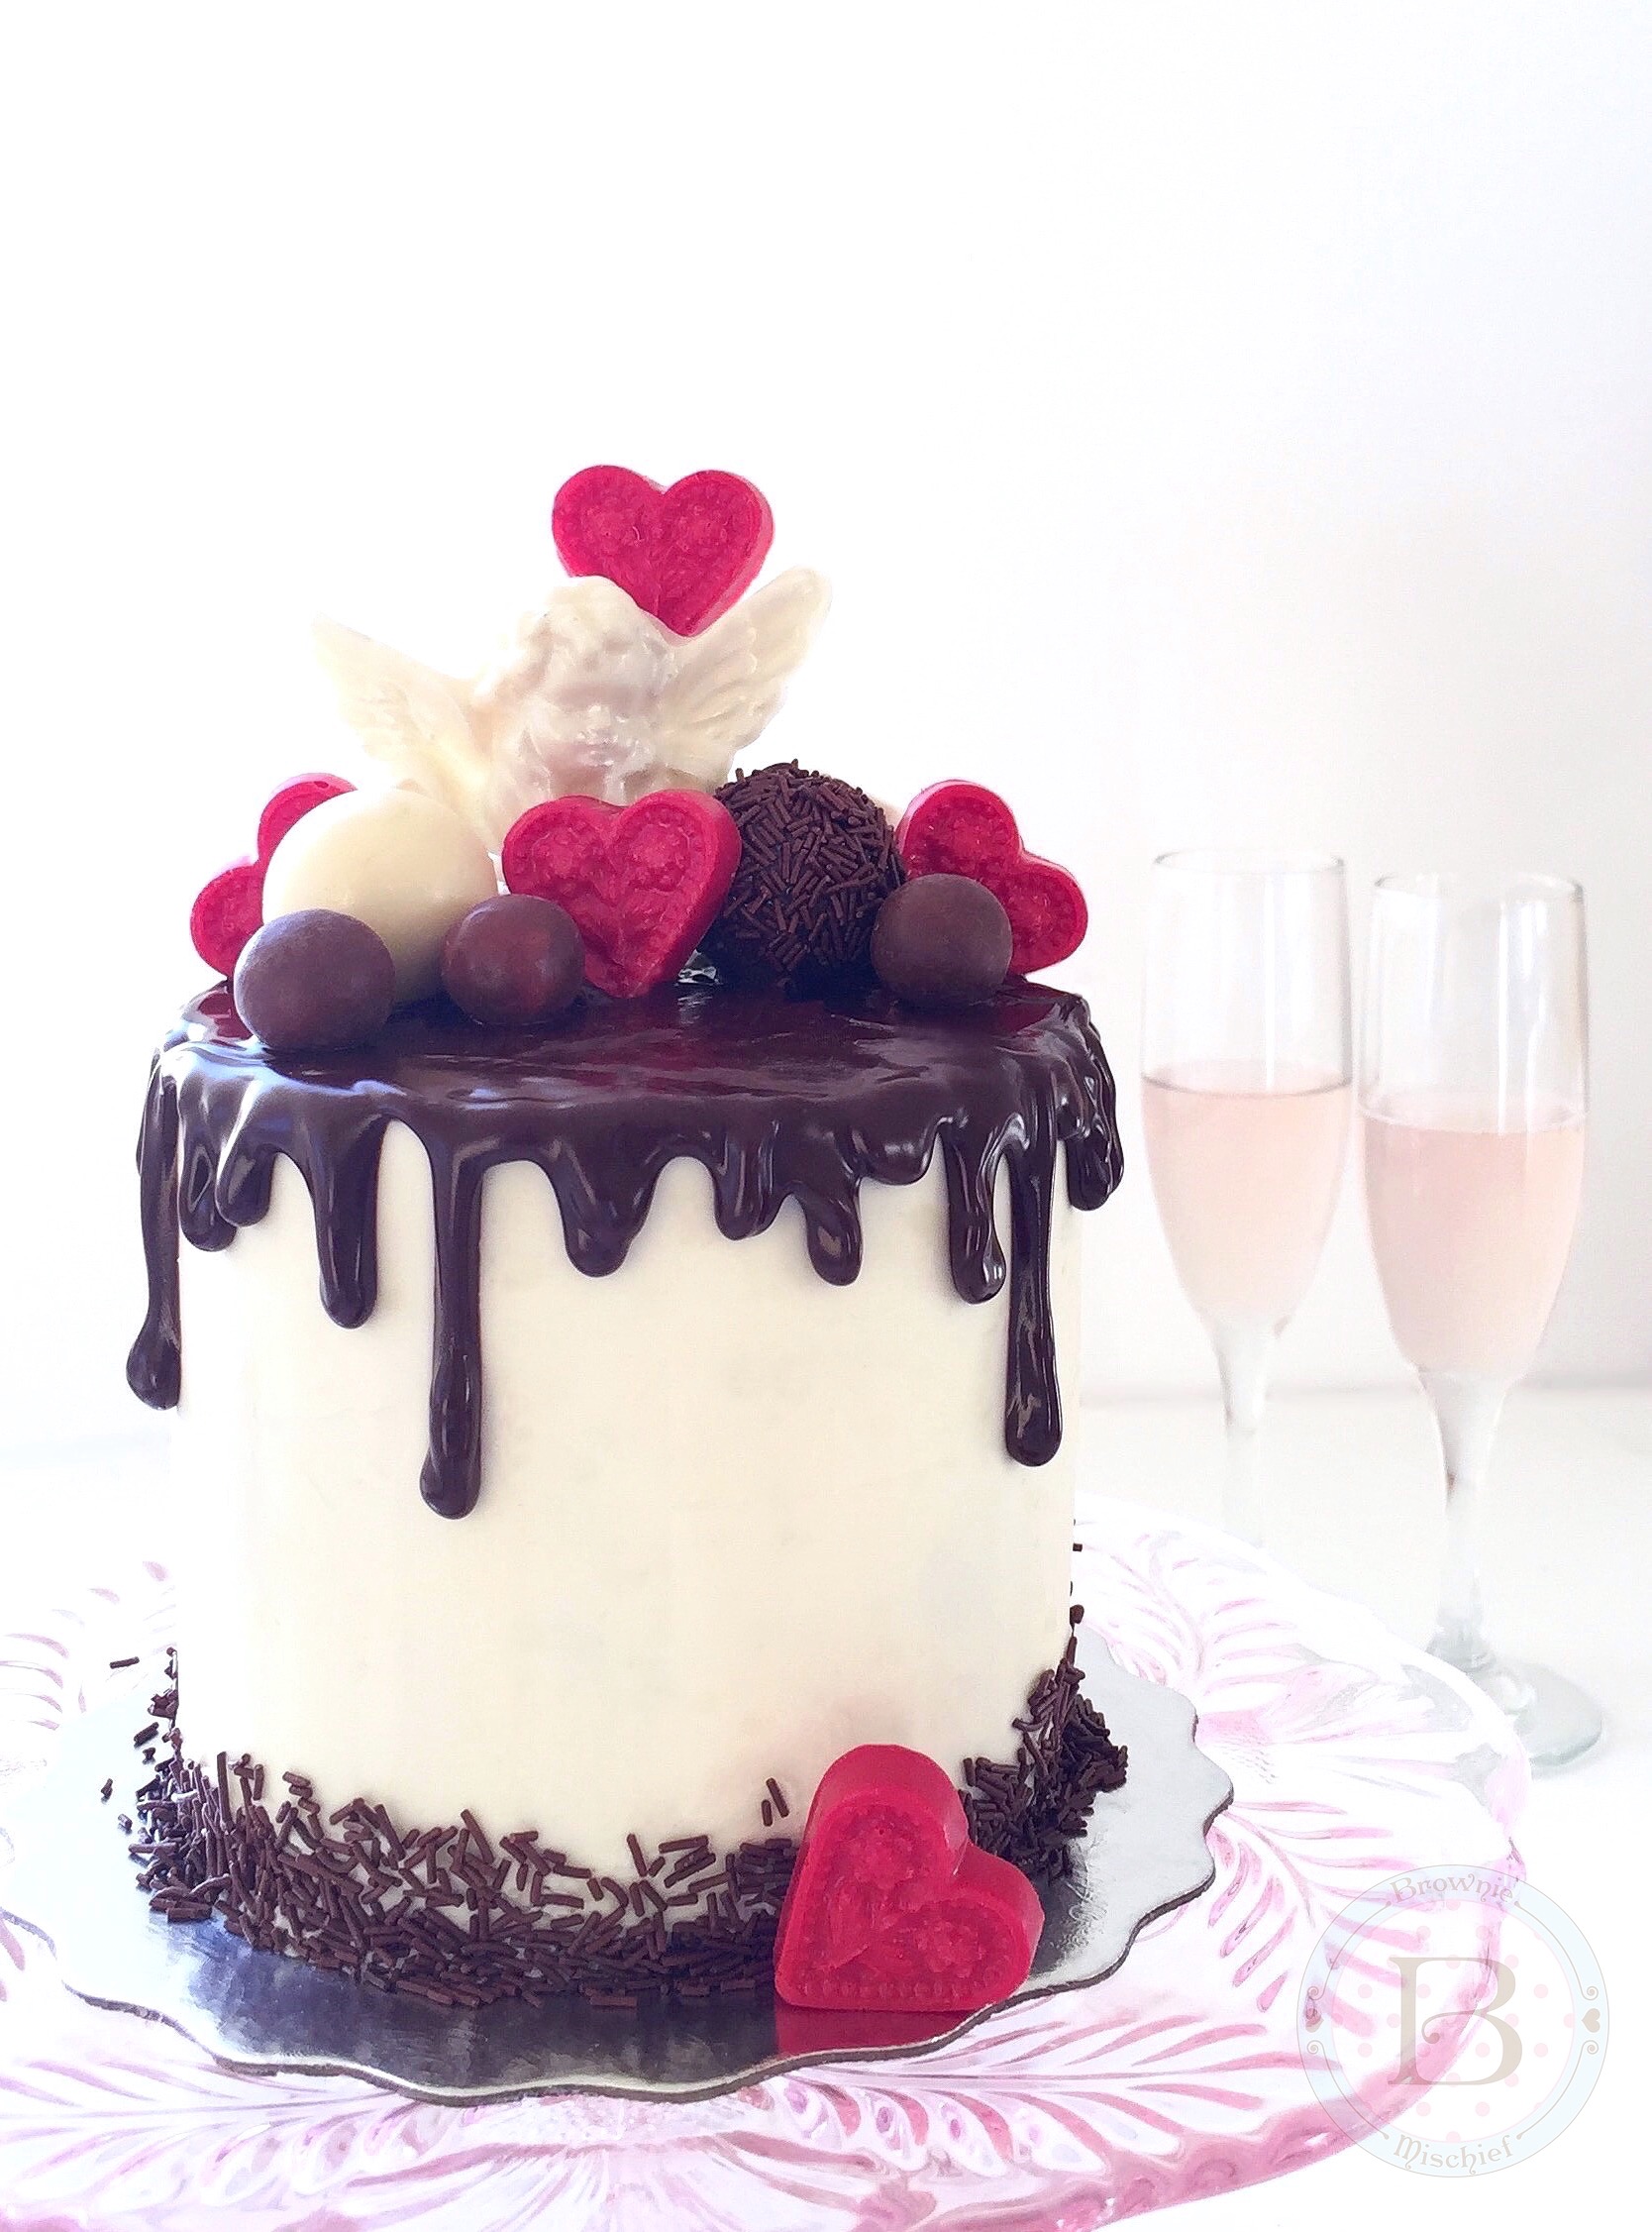
Chocolate Lovers’ Valentine Cake for Two

Chocolate Lovers' Valentine Drip Cake for Two

My relationship with Valentine’s Day has transformed over the years. When I was a child, I joyfully skipped home from school with my bounty of tiny Valentine cards, candy hearts and a cupcake someone’s mother baked. As I grew older, I was hot and cold towards Valentine’s Day, depending on the state of my love life at the time. After having kids, Valentine’s Day became about red construction paper, doily hearts and glue sticks. I happily cleaned up sprinkles and kissed chubby, frosting-stained cheeks. Now I think of Valentine’s Day as simply a day to celebrate love. I embrace Valentine’s Day and all the hearts, roses and chocolates that go with it! Show your loved ones that you love them on Valentine’s Day, but more importantly, show them throughout the year, by loving, respecting and accepting them for who they are every day.

If your heart beats for a chocolate lover, then this Valentine cake for two will have them swooning. It’s small in size, but grand in chocolate indulgence. It has three layers of moist chocolate cake, rich, white chocolate buttercream and a silky chocolate glaze. As if that isn’t enough, I loaded the top with chocolate candy! Some of the candy is store bought and some I made with candy melts and chocolate molds. Click here to find the cherub mold. Click here to find the heart mold.
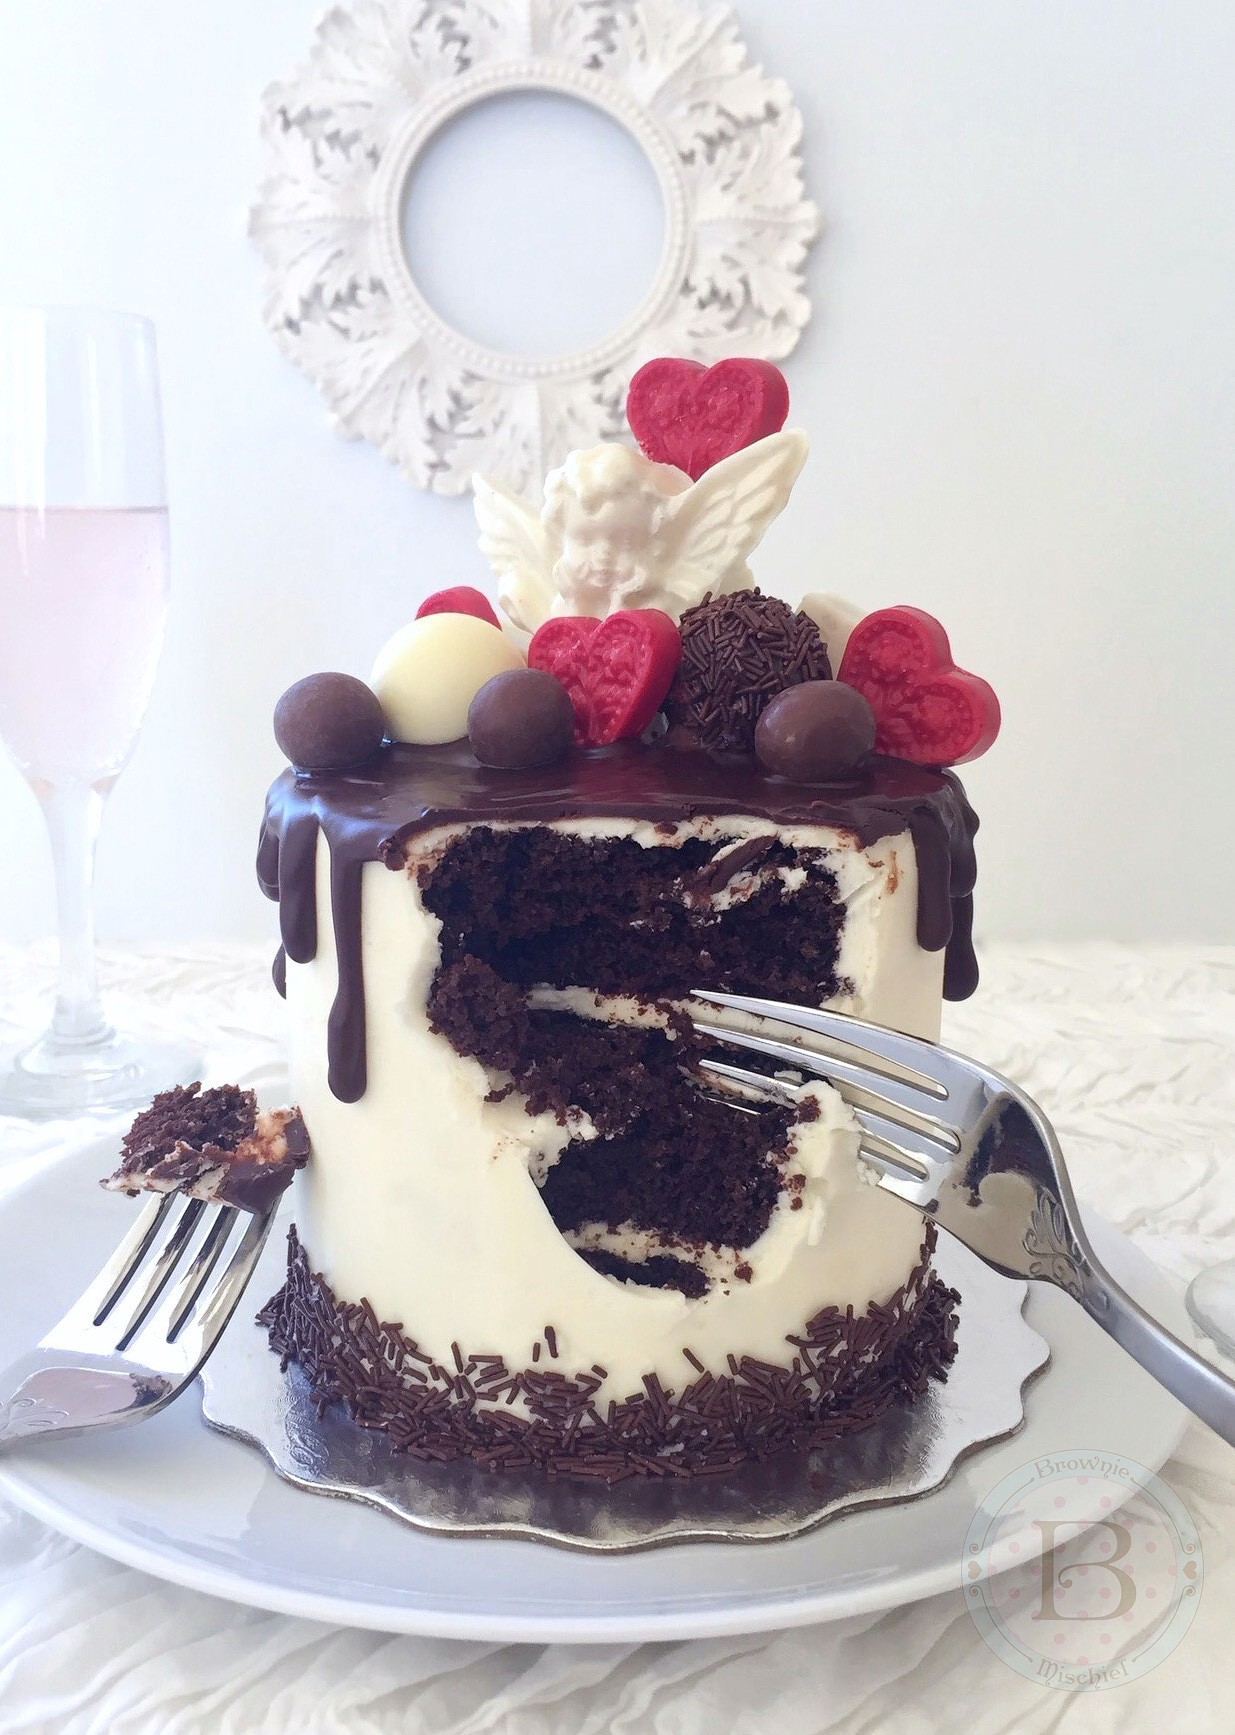
Chocolate Lovers' Valentine Drip Cake for Two

I hope you share this Valentine cake with someone you love! However you celebrate the day and whoever you love, have a happy one!

Chocolate Lovers' Valentine Cake for Two

A mini chocolate cake with white chocolate buttercream, topped with chocolate glaze and chocolate Valentine candy. Perfect for sharing!
Prep Time 1 hour
Cook Time 30 minutes
Total Time 2 hours 30 minutes
Course Dessert
Servings 2

Ingredients
  

Chocolate Cake for Two

  • â…” cup (3 ounces) all purpose flour
  • â…“ cup (1 ounce) unsweetened cocoa powder
  • ½ teaspoon baking powder
  • ½ teaspoon baking soda
  • ¼ plus â…› teaspoons salt
  • ¾ cup (5.25 ounces) sugar
  • 1 small egg
  • â…“ cup buttermilk
  • 3 tablespoons vegetable oil
  • ¾ teaspoon vanilla extract
  • ½ cup hot coffee

White Chocolate Buttercream

  • 6 ounces white chocolate, chopped
  • 1 ½ sticks (6 ounces) unsalted butter, softened
  • ½ teaspoon vanilla extract
  • pinch salt
  • â…” cup (3 ounces) powdered sugar, sifted

Chocolate Drip Glaze

  • 3 ounces semi-sweet chocolate, chopped
  • 2 tablespoons unsalted butter
  • 1 teaspoon corn syrup or honey

Cake Decorating Supplies

  • cake board
  • piping bag
  • chocolate sprinkles
  • assorted chocolate candy

Instructions
 

Chocolate Cake for Two

  • Preheat oven to 350°F. Grease & flour three 4-inch cake pans. *See note below.
  • Sift flour, cocoa powder, baking powder, baking soda and salt together in a medium bowl. Add sugar and stir to combine.
  • Combine egg, buttermilk, vegetable oil and vanilla extract in a small bowl. Whisk lightly to combine.
  • Add egg mixture to dry ingredients and mix on low speed with a handheld electric mixer, until combined. Stop mixer. Scrape sides of bowl with spatula. Turn mixer up to medium speed and beat for 1 minute.
  • Add hot coffee and stir until incorporated.
  • Pour batter into prepared cake pans, dividing batter evenly between the pans. Bake for 20-25 minutes or until a toothpick inserted into the center of the cake comes out clean.
  • Cool cakes in pans 10 minutes, then invert onto a wire rack to cool.

White Chocolate Buttercream

  • Melt white chocolate in a double boiler over gently simmering water. (Alternately, you can melt the white chocolate in the microwave. In a small microwaveable bowl, heat the white chocolate for 30 seconds, then stir. Heat again for 10 second intervals, stirring until melted, being very careful not to overheat it.)
  • Set white chocolate aside to cool until lukewarm and still soft.
  • In a medium bowl, beat butter with an electric mixer at medium speed until pale and creamy.
  • Add vanilla extract, salt and melted white chocolate. Beat at low speed until combined. Stop mixer. Scrape sides of bowl with spatula.
  • Add powdered sugar. Beat at low speed, until powdered sugar is combined. Beat at medium speed until buttercream is smooth, stopping to scrape the bowl occasionally. Keep covered at room temperature until ready to use.

Cake Assembly

  • When cakes have cooled completely, trim the cake layers to 1-inch tall.
  • Attach one of the layers to a cake board with some of the white chocolate buttercream. Apply 1/4-inch thick layer of buttercream to the top of the cake layer, followed by the second cake layer, another 1/4-inch thick layer of buttercream, then the final cake layer.
  • Apply a crumb coat (thin layer) of buttercream to the cake. Chill the cake in the refrigerator for 20 minutes.
  • Frost the cake with the remaining buttercream. Apply chocolate sprinkles to the bottom edge of the cake.
  • Melt chocolate drip glaze ingredients together in a double boiler over gently simmering water. Let cool slightly.
  • Spoon chocolate glaze into a piping bag. Snip off the end of the bag with kitchen scissors. Drizzle chocolate glaze along the edges of the perimeter of the cake, then fill in the middle. Smooth top with a small offset spatula.
  • Top cake with assorted chocolate candy. If desired, you can stack some of the candy and adhere them with melted chocolate to give some variation in height.
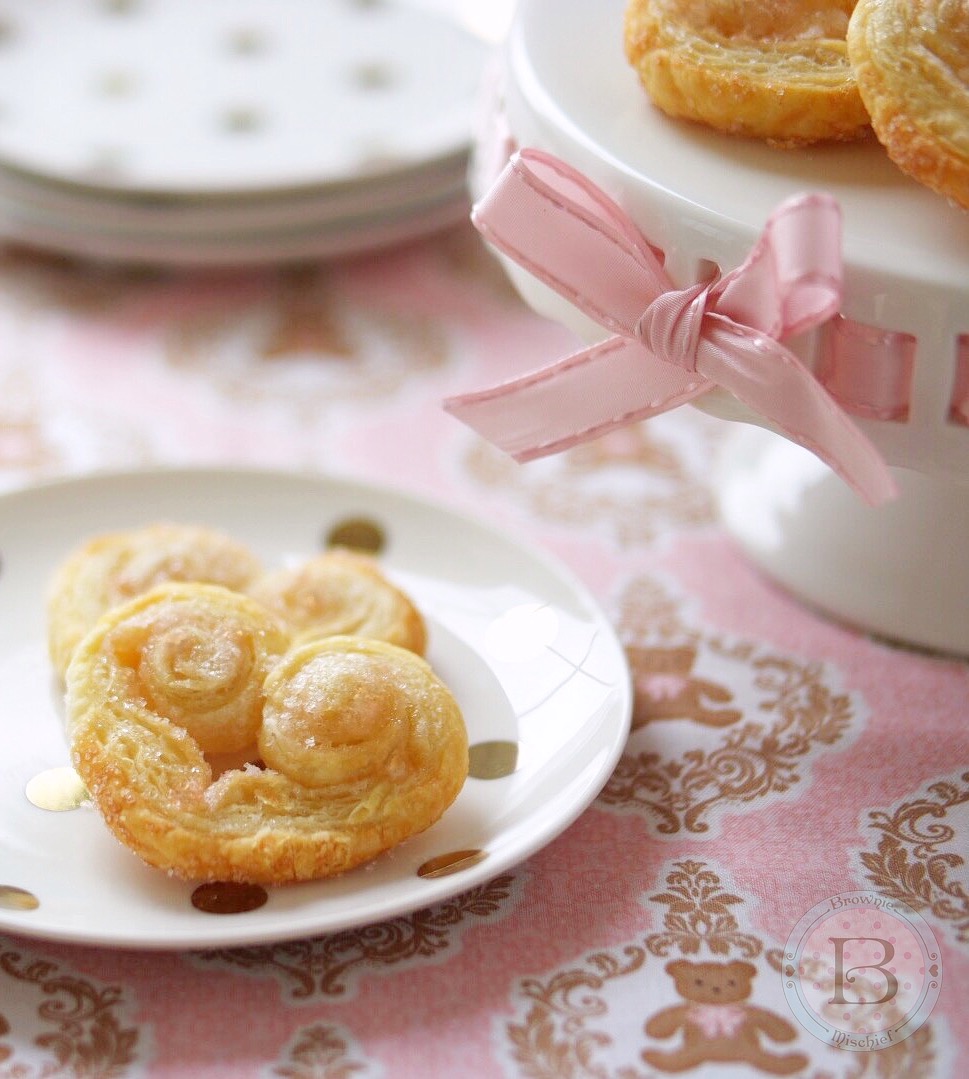
Sparkling Sweetheart Palmiers

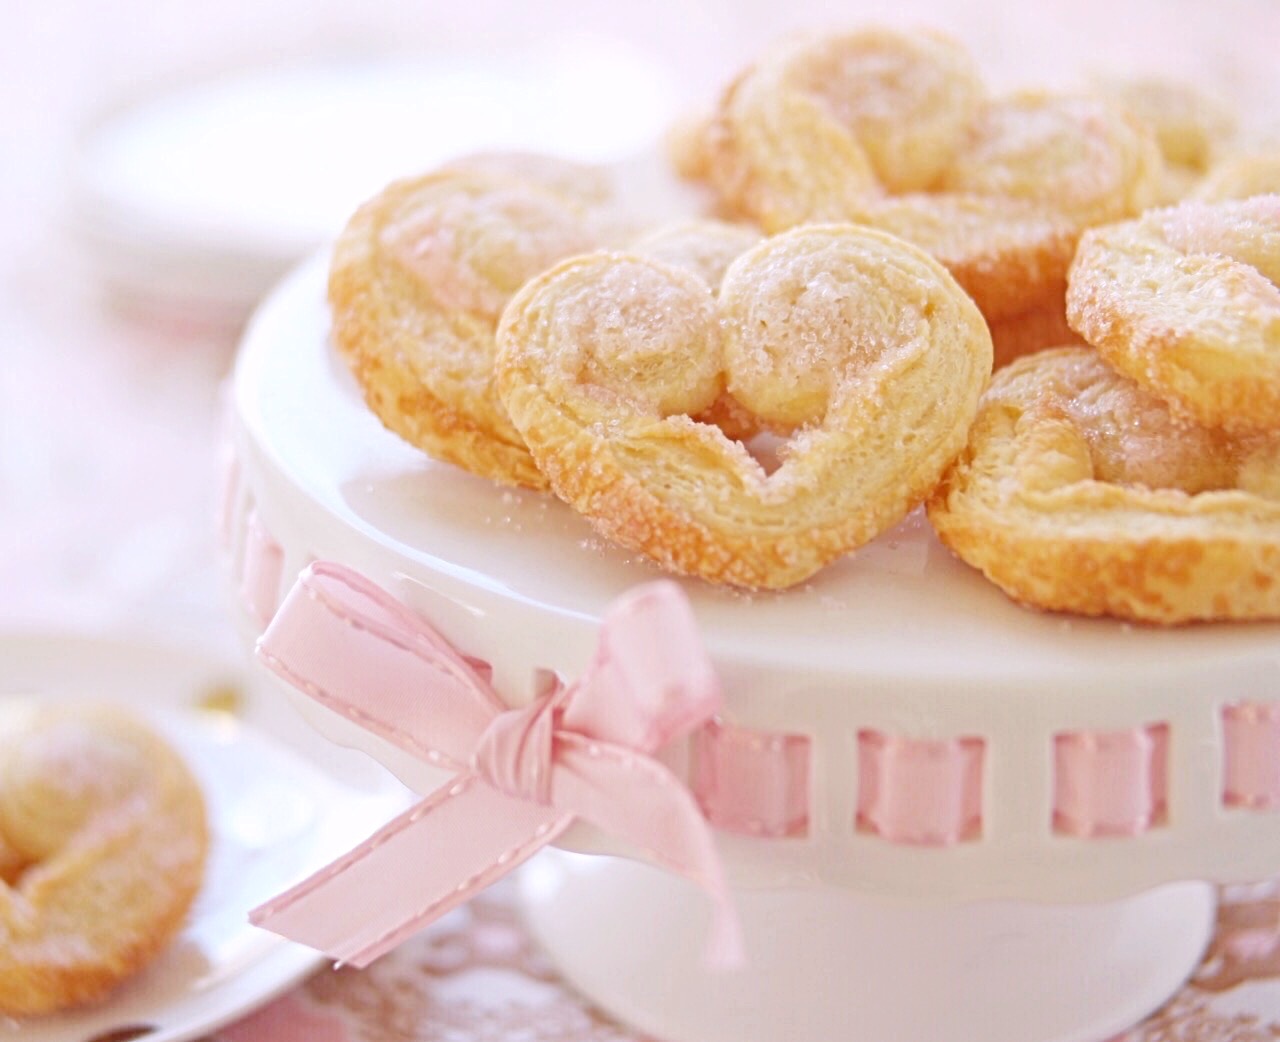
Sparkling Sweetheart Palmier Cookies

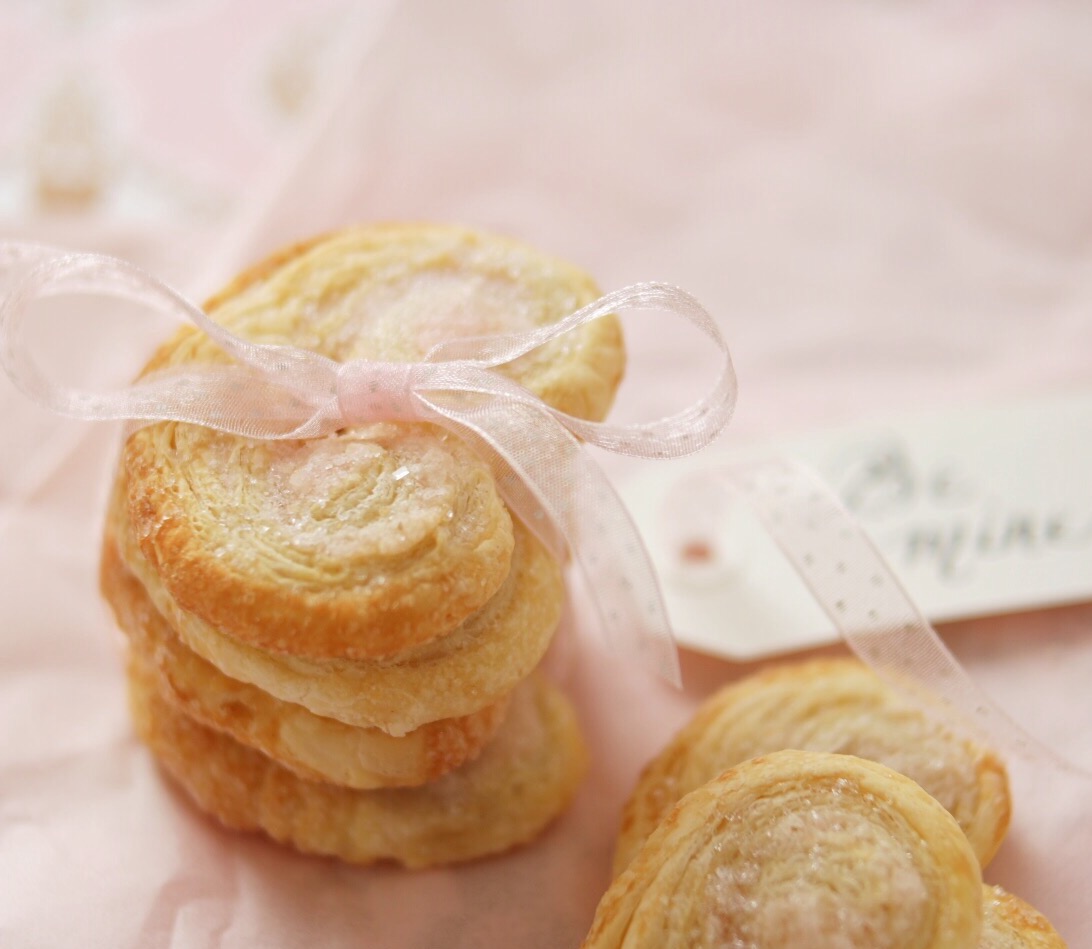
Crisp, delicate French palmiers, also known as elephant ears, are the perfect ladylike pastries to enjoy with hot cocoa, tea or coffee. There’s certainly no shortage of palmier recipes out there, but if you’re in the mood for simplicity, this is the recipe for you! This version is very easy to make and only requires two ingredients. Puff pastry dough and sparkling sugar, that’s it! Pretty stress-free, right? Since Valentine’s Day is coming soon, I formed the palmiers into hearts, rather than the traditional palm shape. I used some pale pink sparkling sugar that I had on hand, but feel free to use any color you like.

Sparkling Sweetheart Palmier Cookies

These palmier cookies are as delicious as they are lovely. Wouldn’t they be the perfect addition to a bridal or baby shower sweets table? I also envision them as a simple, but elegant Valentine’s Day breakfast or a sweet, homemade Valentine’s Day gift wrapped in tissue paper and ribbon. Most people love receiving sweet treats, I know I do! (Hint…hint…Hubby if you’re reading this!) I hope this simple recipe provides you with a bit of inspiration. I’ll be sharing more heart-shaped inspiration in the days ahead, so stop by again soon!

Sparkling Sweetheart Palmier Cookies

Sparkling Sweetheart Palmiers

by Mari Vasseur
Sweet, crisp, flaky puff pastry cookies.
Prep Time 15 minutes
Cook Time 15 minutes
Total Time 1 hour
Course Dessert
Servings 28 palmiers

Ingredients
  

  • 1 1 lb. (454g) package (two sheets) frozen puff pastry, thawed
  • ½ cup (100g) sparkling sugar, divided

Instructions
 

  • Sprinkle 2 tablespoons (25g) of sparkling sugar on your work surface. Place 1 puff pastry sheet on the sugared surface. Sprinkle evenly with 2 tablespoons (25g)of sparkling sugar. Roll gently with a rolling pin, pressing the sugar into the dough.
    Sparkling Sweetheart Palmier Tutorial
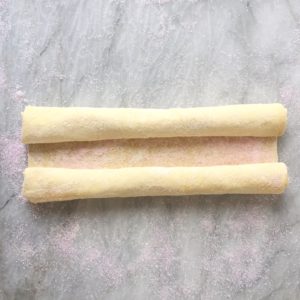
  • Roll the short ends of the puff pastry sheet in towards the center, jelly roll style, leaving a 1-inch gap in the center. Repeat the steps with the remaining puff pastry sheet. Transfer the puff pastry rolls to a tray. Cover with plastic wrap and chill in the refrigerator for 30 minutes.
  • Preheat the oven to 400°F (205ºC). Line 2 large baking sheets with parchment paper.
  • Slice each roll into 1/2-inch slices. Place the slices 2 inches apart onto the prepared baking sheets, cut side down, forming into heart shapes. Sprinkle any remaining sparkling sugar over the hearts.
    Sparkling Sweetheart Palmiers Tutorial
  • Bake until 15-17 minutes, until golden brown. Transfer to a cooling rack to cool before serving.

Notes

Palmiers are best served the day they are made. Store in an airtight container for up to a few days.

Rainbow Marble Mini Cake with a Unicorn Cookie Topper

Rainbow Marble Mini Cake with Unicorn Cookie Topper by Brownie Mischief

Here we are! We’ve landed safely in 2017. That year that we left behind was a bumpy ride. Glad that’s over! I’m so hopeful about the New Year that I’m sprinkling good wishes around like confetti! Let’s forget all of our problems today and skip around amongst the unicorns and rainbows!

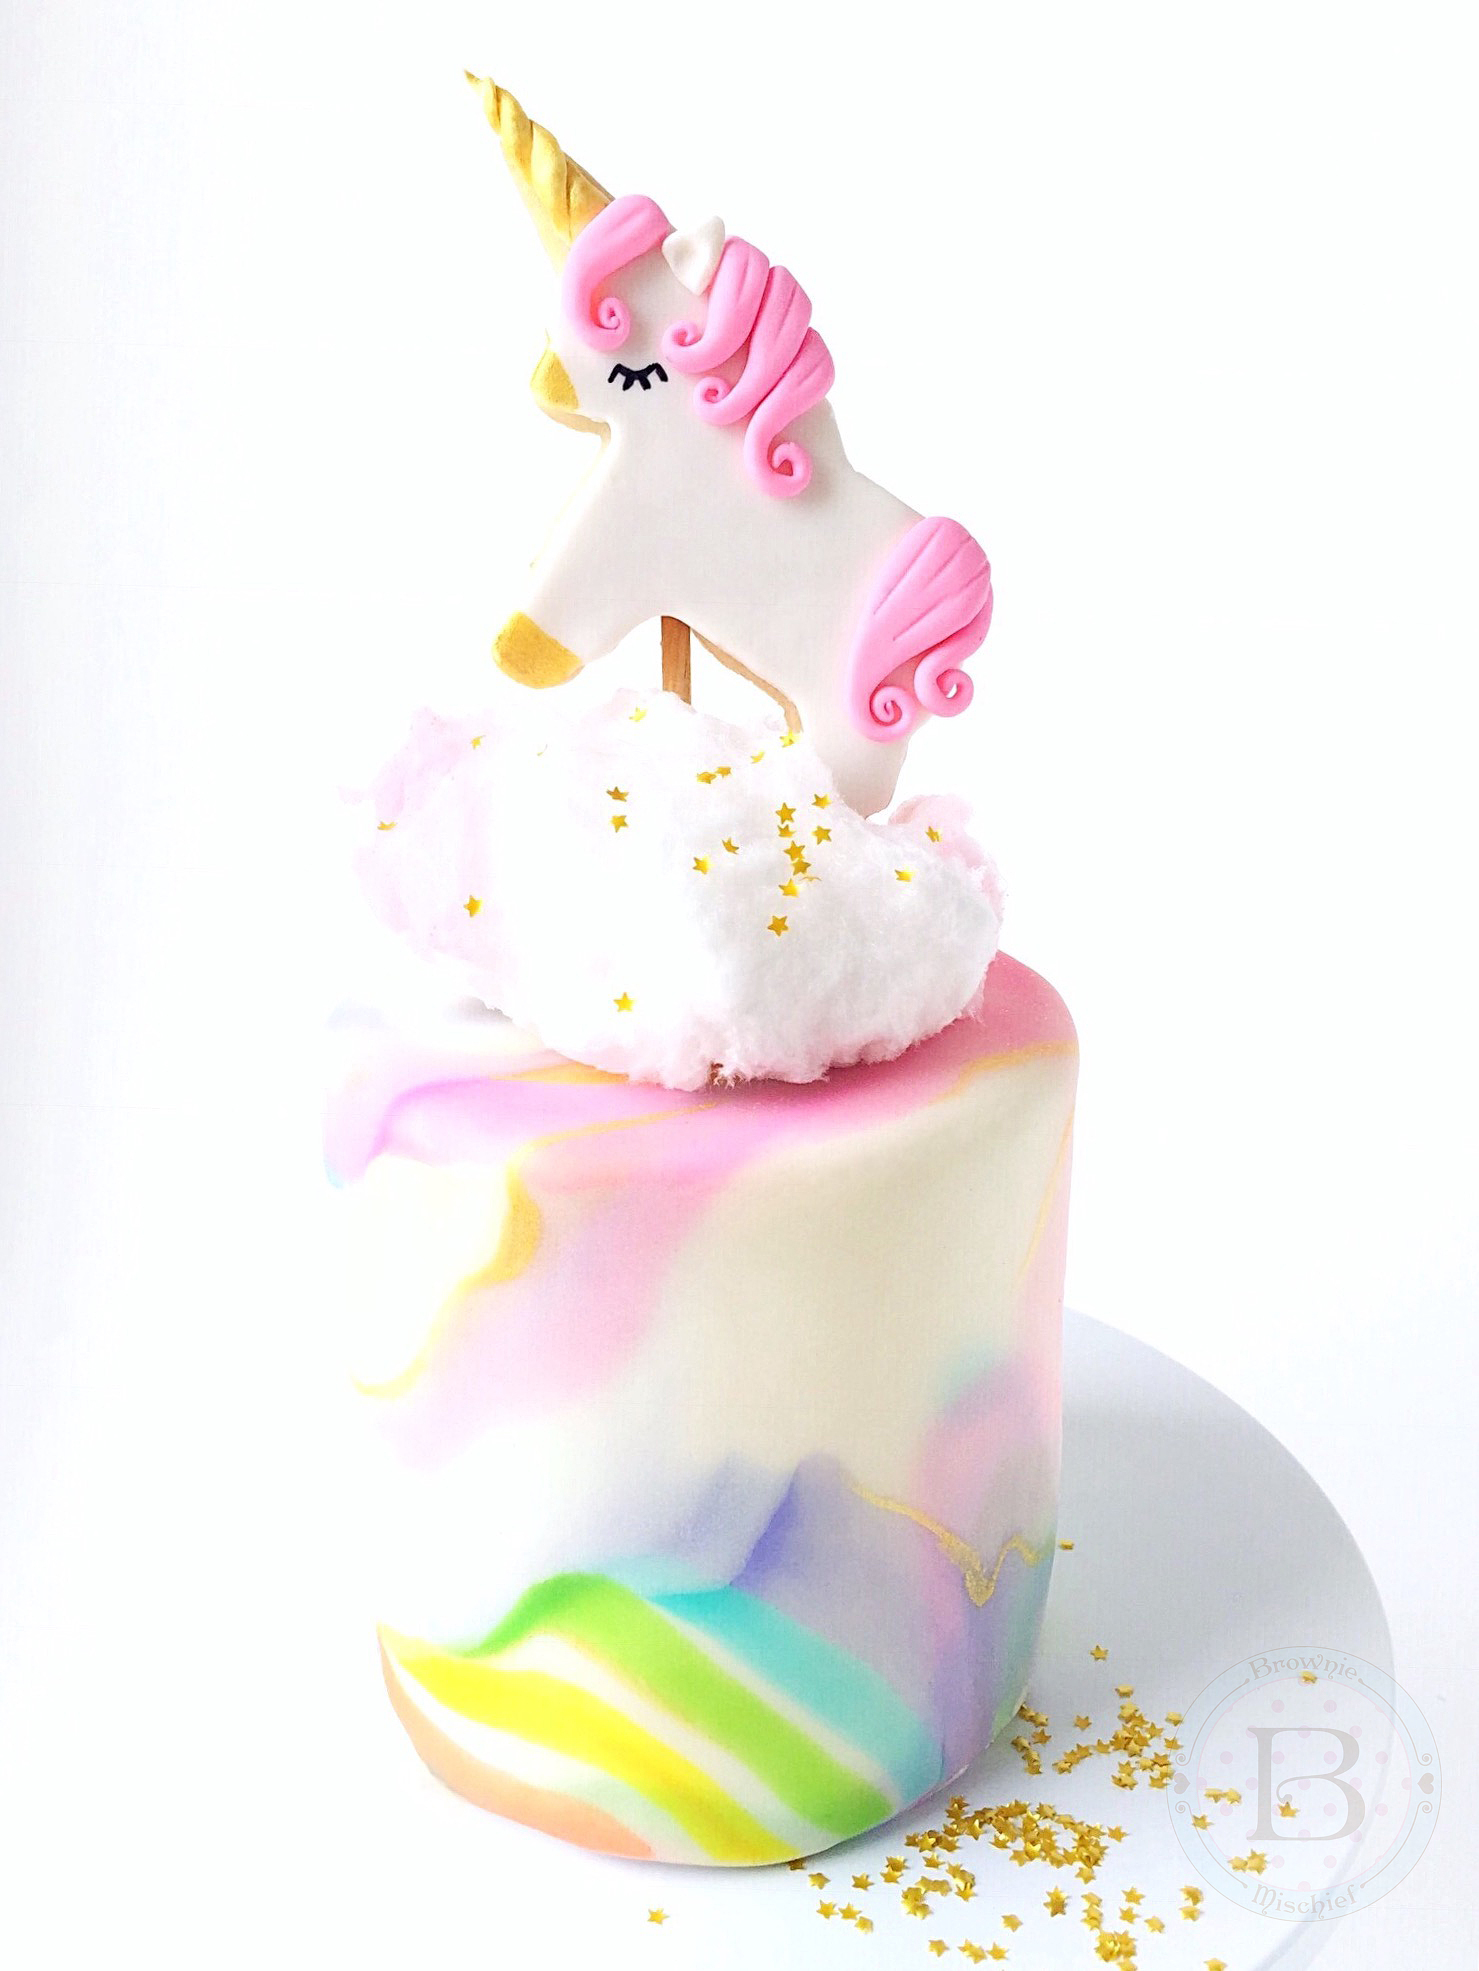
I’ve been experimenting with marbleized fondant lately, so, based on my current mood, I inevitably ended up with rainbow marble fondant. It looked so pretty on my little four inch cake, but it was screaming for a unicorn. By the way, did you know a group of unicorns is called a blessing? I made a batch, I mean a blessing, of Unicorn Cookie Cake Toppers using a small unicorn cookie cutter. They’re decorated with fondant, which is yummier than royal icing and doesn’t require any special skills. There’s no piping involved. (Phew!) These unicorn cookies are so cute and angelic, I imagine they would prance around in the clouds. If only I had some cotton candy for my unicorn to prance around on! Then, magically, I stumbled upon some cotton candy at my local discount store. Thanks Universe!

This colorful little cake will certainly brighten anyone’s day! It would be perfect for a birthday or to give to a special person “just because”. Thanks for spending a few minutes here in my happy place. Wishing you a blessing of unicorns in 2017!


*A note about working with cotton candy:  Apply cotton candy to your cake right before serving. When cotton candy is exposed to air, it will start to shrivel after an hour or so. If you don’t have cotton candy, a fluffy dollop of whipped buttercream would also be pretty!

To view Unicorn Cookie Cake Toppers instructions click here.

To view Rainbow Marble Fondant instructions click here.


Cocoa Meringue Brownies

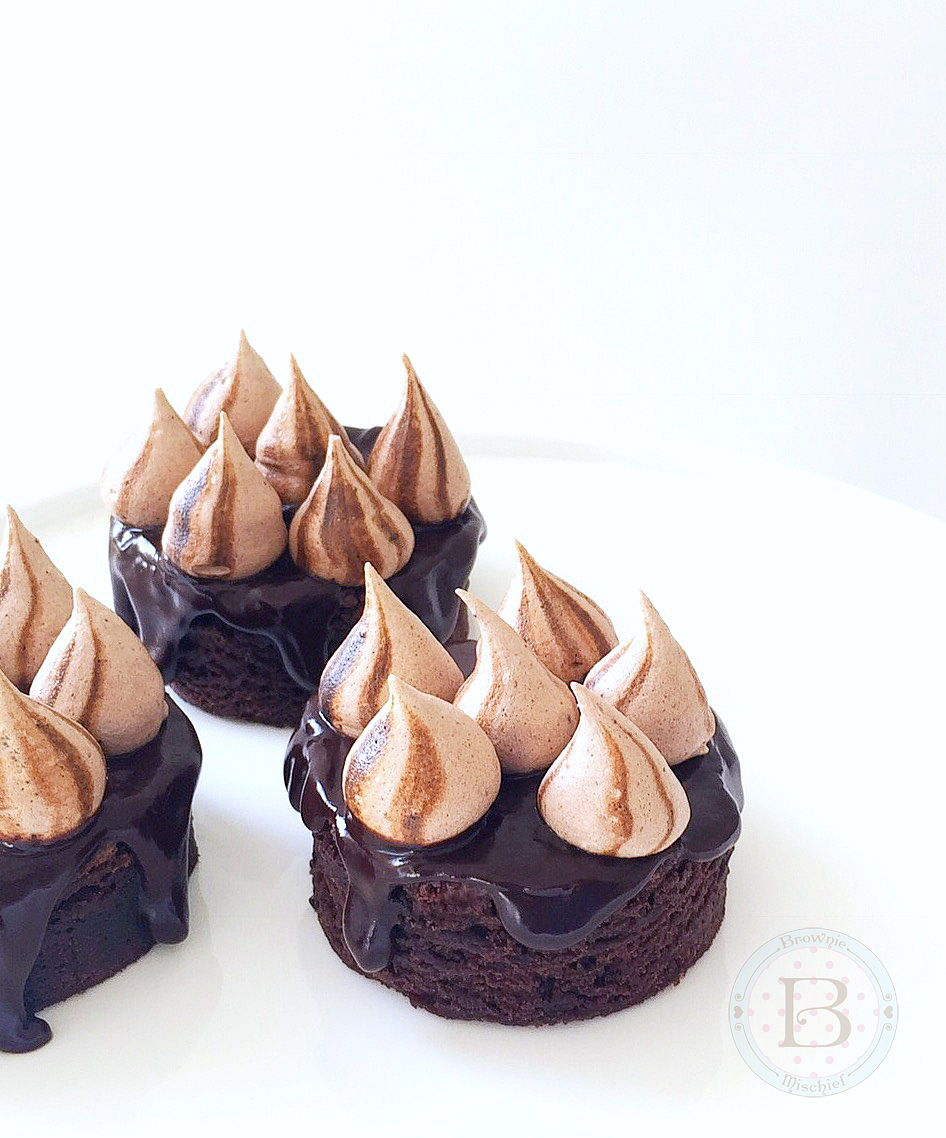
One of my favorite things to top desserts with are meringue cookies. They’re as light as air and they look so pretty and whimsical! The color and flavor combinations are endless, so you can really have some fun getting creative. I decided to whip some up, especially for placing on top of my favorite brownies. They take even the most humble brownies to a new level. You can use your favorite brownie recipe or even a boxed brownie mix. I won’t judge! I like to make the meringues a day or two ahead since they take quite a while to bake in the oven. While they bake, a subtle chocolate scent will waft through your kitchen, reminding you of the smell of hot cocoa. They even taste like hot cocoa! You can make your brownies a few hours ahead or the night before. I cut mine into rounds with a 2 1/2-inch cutter. I cut 12 rounds of this size from a 13 x 9-inch batch of brownies. Right before serving, spoon some thick, glossy chocolate ganache on the brownies, then top them with your pretty meringues! To make these little bits of chocolate heaven, you’ll need:

  • 1 batch Cocoa Meringues (recipe below)
  • 1 batch of your favorite brownies
  • 1 batch chocolate ganache (see notes)

Cocoa Meringues

Pretty, light and crispy treats that taste like hot cocoa!
Prep Time 30 minutes
Cook Time 2 hours
Total Time 4 hours 30 minutes
Course Dessert
Servings 1 batch

Ingredients
  

  • 4 large egg whites, room temperature
  • â…› teaspoon cream of tartar
  • â…› teaspoon fine sea salt
  • â…“ cup (67g) fine granulated sugar
  • ½ cup (60g) powdered sugar
  • ¼ cup (25g) unsweetened cocoa powder, sifted
  • Brown gel food coloring *optional

Instructions
 

  • Preheat oven to 200ºF (95ºC). Line two baking sheets with parchment paper.
  • Sift together the powdered sugar and cocoa powder in a medium-sized bowl and whisk until well blended.
  • Place the egg whites in a large bowl. Whip the egg whites with the whip attachment of an electric mixer, at medium speed, until foamy.
  • Add the cream of tartar and salt to the egg whites. Whip at medium-high speed until soft peaks form.
  • Gradually add the granulated sugar and continue whipping, at medium-high speed until stiff, glossy peaks form.
  • Stop the mixer. Sprinkle the powdered sugar and cocoa mixture over the egg whites and whip at low speed until incorporated, about 10 seconds.
  • *This step is optional. Place a large, disposable pastry bag, fitted with a round piping tip, into a tall drinking glass. (I used a Wilton tip #12.) Fold the top third of the bag over the glass, forming a cuff. Using a small, clean paintbrush, paint thin, vertical stripes of food coloring on the inside of the bag, from the piping tip to the edge of the fold.
  • Spoon the egg white mixture into the pastry bag. Pipe small kisses, 1 inch apart, onto the prepared baking sheets. (I made mine about 3/4-inch to 1-inch in diameter. If you'd like larger kisses, use a larger size piping tip.)
  • Bake for 1 1/2 hours. Turn off the oven and leave the meringues in oven to cool and continue drying out for an additional 2 hours. Store tightly covered at room temperature for up to 3 days.

Notes

To make the chocolate ganache, I used a ratio of two parts semi-sweet chocolate to one part heavy cream. (Weighing the ingredients will give you the most accurate ratio.) Place 8 ounces. (227g) of chopped semi-sweet chocolate into a medium bowl. Heat 1/2 cup (4 oz/ 118ml) of heavy cream in a small saucepan over medium heat. Bring the cream just to a boil. Pour the hot cream over the chocolate, making sure to cover it completely. Let sit for 2 minutes, then stir gently until smooth.

Easy Caramel Sauce

Easy Caramel Sauce

Course Dessert

Ingredients
  

  • 15 soft caramel candies I used Werther's
  • 3 tablespoons (45ml) heavy cream
  • â…› teaspoon fine sea salt or too taste

Instructions
 

  • Combine the caramel candies and the heavy cream in a small saucepan over medium heat. Stir gently until melted and smooth. Stir in the salt.
Keyword caramel sauce, condiments

Homemade Caramel Sauce

Homemade Caramel Sauce

Course Dessert

Ingredients
  

  • 1 cup (200g) granulated sugar
  • â…› teaspoon cream of tartar
  • 6 tablespoons (85g) unsalted butter, cubed
  • ½ cup (118ml) heavy whipping cream, room temperature
  • 1 teaspoon vanilla bean paste
  • 1/2 teaspoon fine sea salt or to taste

Instructions
 

  • In a medium-size stainless steel saucepan, stir the sugar and cream of tartar together with 2 tablespoons (30ml) of water. Turn the heat on to medium and cook, without stirring, until the mixture melts. Swirl the pan gently to move the sugar around to prevent hot spots as it cooks. When the sugar is melted and has turned deep golden, turn off the heat and whisk in the butter. The butter will bubble. Keep whisking until melted, smooth and well combined. Gradually whisk in the heavy cream until smooth. Pass the caramel through a fine mesh sieve into a bowl. Stir in the vanilla and salt. The sauce will thicken as it cools.

Notes

Store in a covered container in the refrigerator for up to a couple of weeks.
Keyword caramel sauce, condiments