Blackberry Cornbread

This sweet Blackberry Cornbread is super easy to make. It makes a delicious breakfast, brunch or side dish. It’s so good served with Blackberry Honey Butter. I love baking my cornbread in a cast iron skillet. It gives the cornbread a crisp, rustic crust. You can also use a cake pan if you prefer. (The baking time may vary.) Make sure not to over bake your cornbread since overtaking will dry it out. Use fresh, ripe blackberries when they’re in season. You can also use frozen blackberries or fresh or frozen blueberries. Skip the macerating step if you’re using blueberries or frozen berries.

Print Recipe
Blackberry Cornbread
Sweet cornbread studded with ripe blackberries
Cuisine American
Servings
Ingredients
Cuisine American
Servings
Ingredients
Instructions
  1. Preheat the oven to 350°F (180°C). Grease an 8” cast iron skillet* or an 8” round cake pan.
  2. In a large bowl, whisk together the flour, sugar, cornmeal, baking powder and salt.
  3. In a separate bowl, whisk together the eggs, sour cream, oil and melted butter until smooth. Add the egg mixture to the flour mixture. Mix just until combined. A few lumps are okay. In a small bowl, gently toss one 1 cup (136g) of the blackberries with 1 tsp of flour. Gently fold the berries into the batter.
  4. Transfer the batter to the skillet. Top with the remaining blackberries. Bake until the top is golden brown and toothpick inserted into the center comes out clean, about 35-43 min. Let cool in the pan 10 min. Serve with Blackberry Honey Butter** or honey if desired
Recipe Notes

*To find an 8-inch cast iron skillet, click here.  

**To find the Blackberry Honey Butter Recipe, click here.


Perfect Pumpkin Cake

Pumpkin Cake

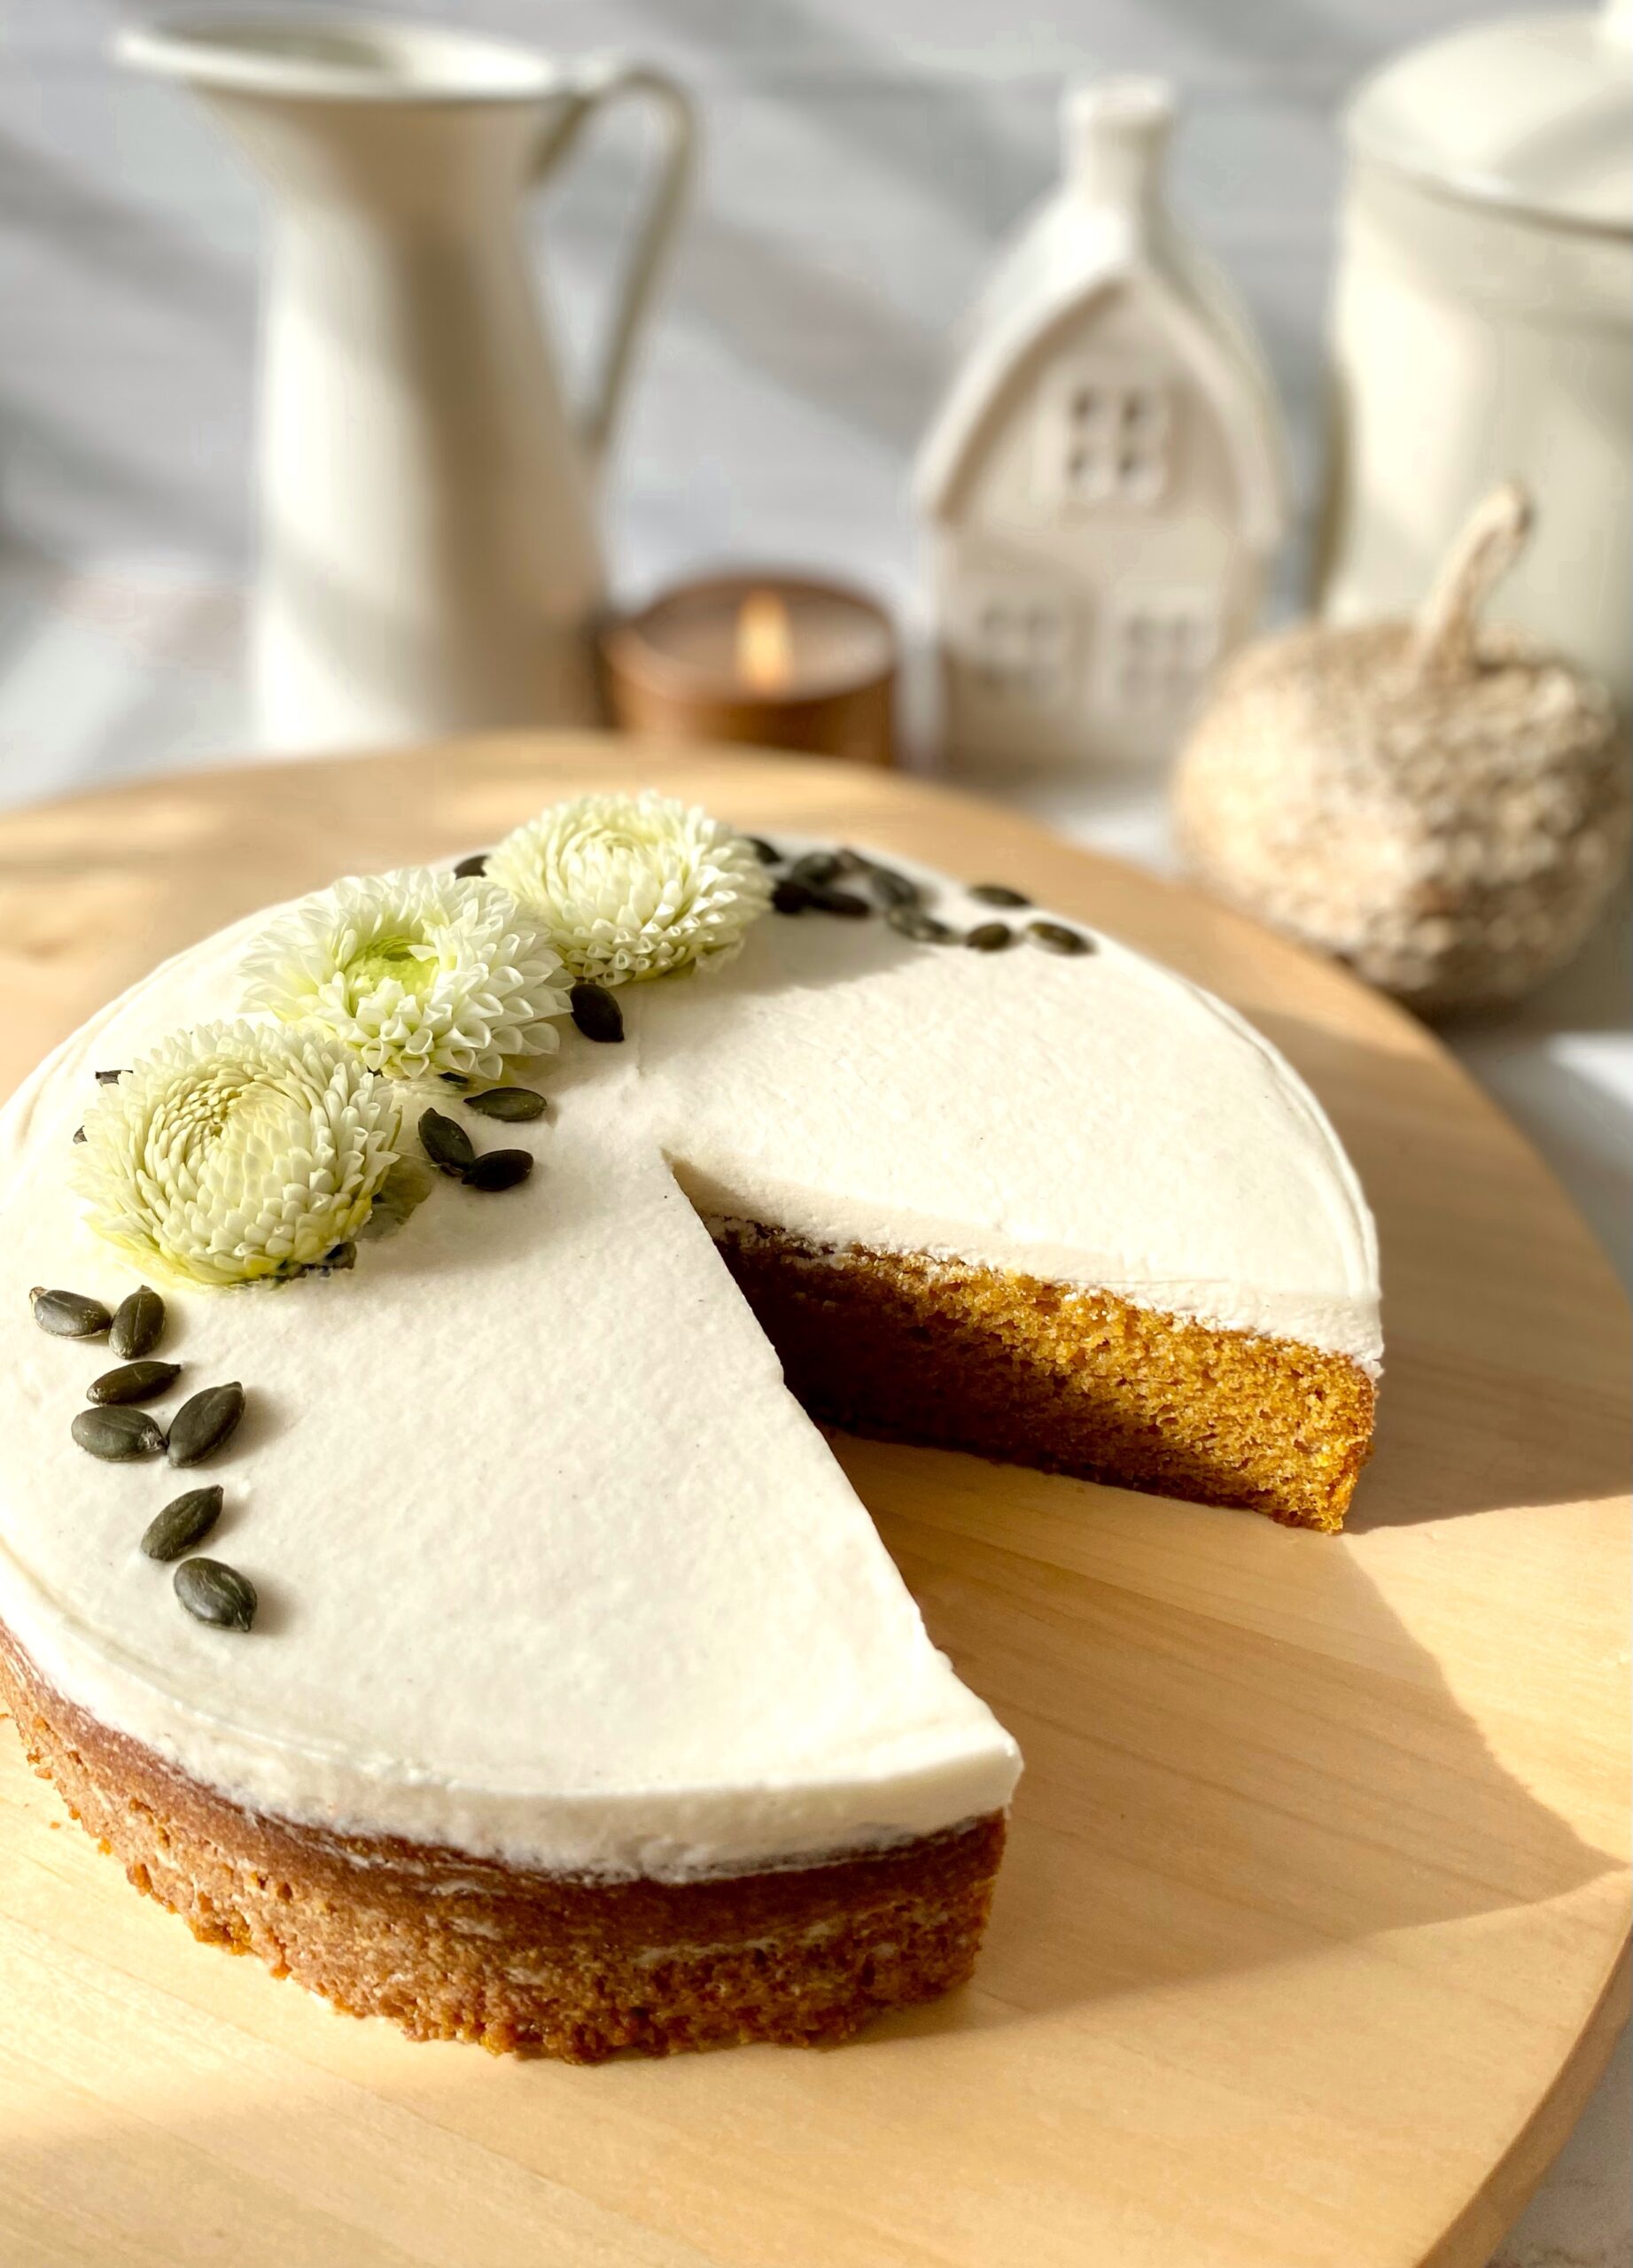
This Perfect Pumpkin cake brings back memories. The tender, moist texture reminds me of the pumpkin cake bars I used to make in junior high. I got the treasured bar recipe from an old children’s cookbook. I lent the cookbook to a neighbor and never saw the book or the recipe again. Through trial and error, I came up with this perfectly spiced, soft fluffy cake, which I think is even better! It’s so delicious it doesn’t need frosting, but the classic pairing with cream cheese frosting takes it over the top.

Print Recipe
Perfect Pumpkin Cake
Course Dessert
Keyword cake, pumpkin
Servings
Ingredients
Pumpkin Cake
Cream Cheese Frosting
Course Dessert
Keyword cake, pumpkin
Servings
Ingredients
Pumpkin Cake
Cream Cheese Frosting
Instructions
Pumpkin Cake
  1. Preheat the oven to 325ºF (165ºC). Line the bottom of an 8-inch round cake pan* with parchment paper**. Grease and flour the insides.
  2. In a medium-size bowl, whisk together the flour, baking powder, baking soda, salt, cinnamon, ginger and nutmeg until well combined.
  3. In a large bowl, beat the sugar, oil, eggs, vanilla and pumpkin purée with an electric mixer or by hand with a whisk, until smooth and well blended. Stir in the flour mixture, just until combined.
  4. Transfer the batter to the prepared cake pan. Bake until a toothpick inserted into the center of the cake comes out clean, about 38-43 minutes. Cool the cake in pan for 10 minutes. Remove the cake from pan and transfer to a cooling rack.
Cream Cheese Frosting
  1. In a large bowl, beat the cream cheese and butter together with an electric mixer, until creamy. Beat in the vanilla extract and salt until well combined. On low speed, beat in the powdered sugar. Keeping the mixture at low speed, beat in the heavy cream a little at a time until your desired consistency is reached. Stir with a spatula to smooth out any bubbles.
Recipe Notes

*To find the cake pan I used, click here.

**To find the parchment rounds I used, click here.

Pumpkin Cinnamon Mini Muffins

Pumpkin Cinnamon Mini Muffins

My mom had a cupboard in the kitchen containing a few old cookbooks that she rarely used. As a child, I used to enjoy perusing them and looking at the baked treats. Some of the cookbooks were so old, they had black and white photos or even just drawings of the food. The ones with drawings interested me because they often depicted smiling children enjoying the treats.

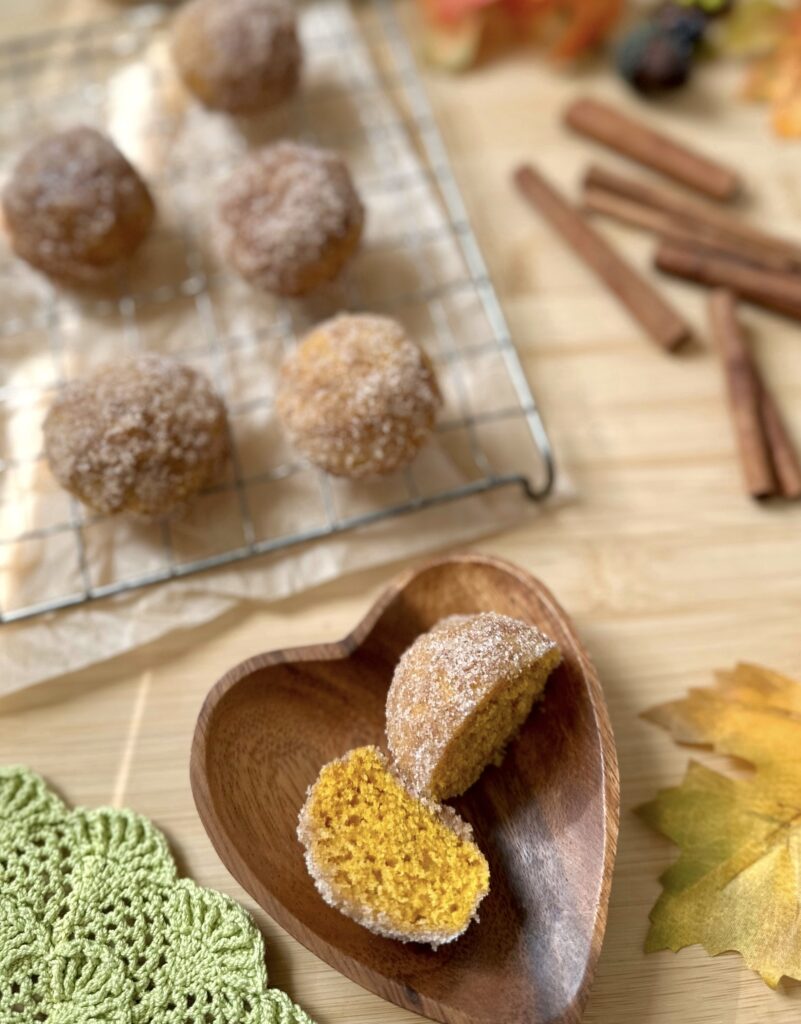
When I started learning to bake, I found a recipe for French Breakfast Puffs in one of those old books. The title sounded so fancy, but they were really just simple muffins dunked in butter and rolled in cinnamon sugar. I have no idea what the name of the cookbook was or what happened to it, but the delicious muffin recipe stuck around for a while. I’ve tweaked the recipe so many times over the years, and most recently, I added pumpkin to it. These Pumpkin Cinnamon Mini Muffins are one of the best versions I’ve created. The inside texture of the muffins is soft and moist and it contrasts nicely with the slight crunch you get from the cinnamon sugar on the outside. They look so cute too, like little pumpkins, and they definitely make children smile!

To watch the Instagram video of these mini muffins being made, click here.

Print Recipe
Pumpkin Cinnamon Mini Muffins
Soft, tender pumpkin mini muffins rolled in cinnamon sugar
Servings
mini muffins
Ingredients
Muffins
Topping
Servings
mini muffins
Ingredients
Muffins
Topping
Instructions
Muffins
  1. Preheat the oven to 350ºF (180ºC). Grease and flour a 24-serving mini muffin pan.* Do not use muffin liners. (The muffins need to form an outer crust. This prevents them from absorbing too much melted butter later in the recipe.)
  2. In a medium-size bowl, whisk together the flour, baking powder, salt, cinnamon, ginger and nutmeg until well combined.
  3. In a large bowl, whisk together the sugar, oil, egg and pumpkin purée until smooth and well combined. Stir in the flour mixture just until combined. The batter will be thick.
  4. Transfer the batter to the prepared pan, filling the muffin cups about 2/3 full. (I ended up with 22 muffins.)
  5. Bake until toothpick inserted into the muffins comes out clean, about 10-13 minutes. Do not over bake! Be diligent, since over baking can happen very quickly with mini muffins. Let the muffins cool in the pan for 5 minutes. Turn the muffins out and place on a cooling rack.
Topping
  1. Whisk the sugar and cinnamon together in a shallow bowl until well combined.
  2. Briefly dunk the warm muffins in melted butter, then roll in cinnamon sugar.
Recipe Notes

To find the mini muffin pan I used, click here.

Blueberry Nectarine Cobbler

Many families have an old favorite recipe for cobbler. I’m sharing my dad’s recipe with you and it’s definitely comfort food. It took awhile to get the ingredient amounts right because he never measured them. He used whichever fruit was available and plopped the dough on top haphazardly with a big spoon. But it was always delicious and came from the heart and that’s what mattered.

This recipe is so easy and versatile. Feel free to use peaches instead or use the berries of your choice. Make sure to enjoy it warm with a scoop of vanilla ice cream.

Print Recipe
Blueberry Nectarine Cobbler
Vintage fruit cobbler
Servings
Ingredients
Servings
Ingredients
Instructions
  1. Preheat the oven to 400ºF (200ºC). Grease a 2 quart baking dish.
  2. In a large bowl, toss the nectarines with the lemon juice. Add the vanilla, brown sugar, cornstarch and cinnamon. Stir gently to combine. Fold in the blueberries.
  3. Transfer the fruit mixture to the prepared baking dish. Bake for 10 minutes.
  4. Meanwhile, in a medium bowl, whisk together the flour, granulated sugar, baking powder and salt. Work the butter into the flour mixture with your fingertips or with a pastry blender until pea size pieces from. Stir in the sour cream and milk just until a shaggy dough forms.
  5. Remove the baking dish from the oven. Top the fruit with 2-tablespoon size portions of dough. Sprinkle the dough with coarse sugar.
  6. Return the baking dish to the oven and continue baking until the topping is deep golden brown, about 25 minutes. Let cool at least 15 minutes before serving, to allow the sauce to thicken.

Peaches and Cream Loaf Cake

Every peach season, I get excited by the abundance of peaches at my local farmers market and I end up buying way too many. So if you’re like me and you have ripe peaches sitting on your counter, turn them into peach purée. I love adding peach purée to my iced tea or adding it to desserts like this moist, tender cake. This is one of my most popular cake recipes on social media, and for good reason. It does not disappoint! To watch the TikTok video, click here.

Print Recipe
Peaches and Cream Loaf Cake
Moist, tender peach cake with peach cream cheese icing
Keyword cake, peach
Servings
loaf
Ingredients
Cake
Icing
Keyword cake, peach
Servings
loaf
Ingredients
Cake
Icing
Instructions
Cake
  1. Preheat oven to 350ºF. Line the bottom of an 8 x 4-inch loaf pan with parchment paper. Grease and flour the sides.
  2. In a medium bowl, whisk together flour, baking powder, baking soda, salt, cinnamon and nutmeg.
  3. Set aside 2 tablespoons peach purée for icing.
  4. In a large bowl, beat sugar, oil, eggs, remaining peach purée and extracts until smooth.
  5. Add flour mixture and beat just until combined.
  6. Transfer batter to prepared baking pan. Bake until toothpick inserted into center comes out clean, about 38-45 minutes.
  7. Let cake cool in pan for 10 minutes, then turn out onto a cooling rack to cool completely. Spread icing on cooled cake.
Icing
  1. In a medium bowl, beat cream cheese and butter together until smooth.
  2. Add powdered sugar, salt, vanilla extract and 1 tablespoon of peach purée. Beat until smooth. Add additional peach purée, if needed, until desired consistency is reached. Fold in diced peaches.

Pineapple Scones with Cream Cheese Icing

Pineapple Scones with Cream Cheese Icing

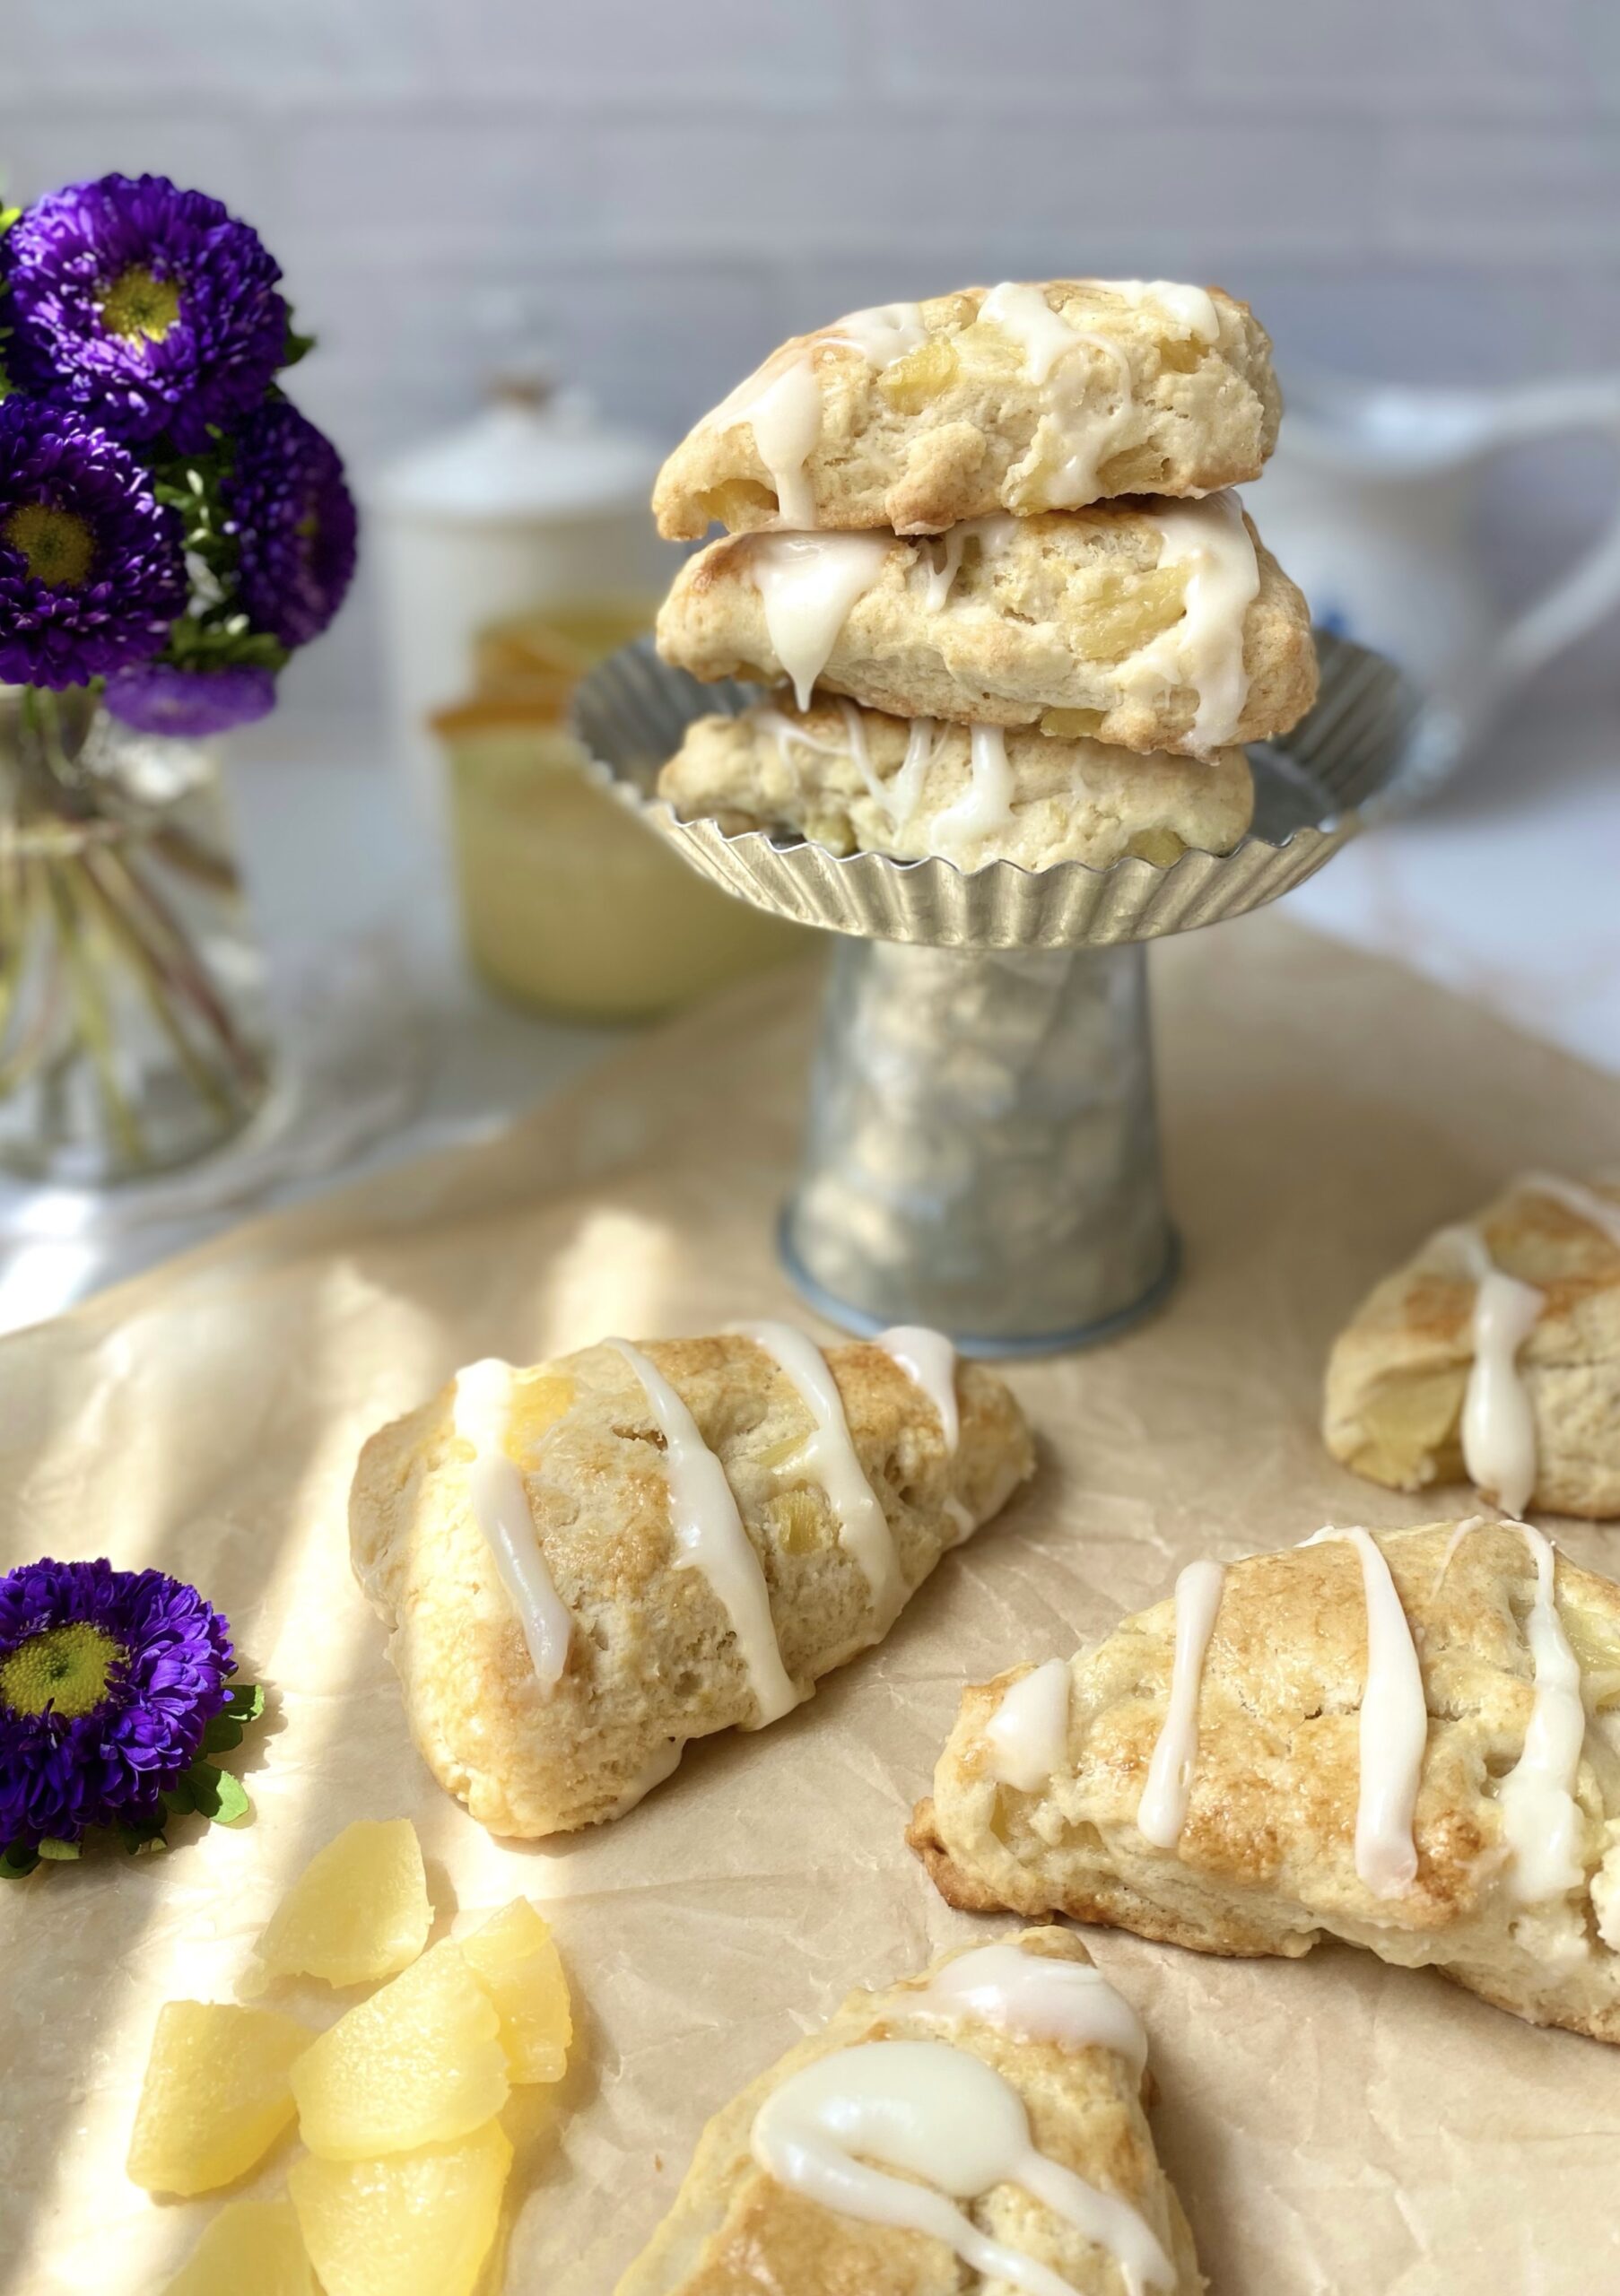
I had pineapple smoothies two days in a row. There’s something so vibrant and refreshing about pineapple. It feels sunny and tropical. Should scones ever feel sunny and tropical? I’m going to say yes, why not? Scones deserve a vacation too. They can take a break from tea parties and coffee shops and enjoy a little sunny picnic with iced tea or a beachfront breakfast or brunch with mimosas.

You’ll be pleasantly surprised when you experience your first bite of a scone with a burst of pineapple flavor. I immediately thought, “Why isn’t this a thing?” There are probably other pineapple scones out there in the universe, but they’re definitely not well known, like the very popular blueberry scone for example. I’m going to go so far as to say, pineapple scones are better than blueberry scones. And this is coming from a person who loves blueberries!

Print Recipe
Pineapple Scones with Cream Cheese Icing
Servings
scones
Ingredients
Pineapple Scones
Cream Cheese Icing
Servings
scones
Ingredients
Pineapple Scones
Cream Cheese Icing
Instructions
Pineapple Scones
  1. Preheat the oven to 375ºF. (190ºC). Line a baking sheet with parchment paper.
  2. In a large bowl, whisk together the flour, sugar, baking powder and salt until well combined. Work the butter into the flour mixture with your fingertips or with a pastry blender until pea size pieces form.
  3. In a small bowl, whisk together the heavy cream, pineapple juice and vanilla. Stir the heavy cream mixture into the flour and butter mixture until a shaggy dough is formed. Gently stir in the pineapple.
  4. Turn the dough out onto a lightly floured surface. Fold the dough over onto itself a few times. Do not overwork the dough. Pat or roll the dough into a 7-inch round. Cut the dough into 8 wedges.
  5. Place the scones about 2 inches apart onto the prepared baking sheet. Brush the scones with egg wash. Bake until golden brown, about 18-22 minutes. Transfer the scones to a cooling rack.
Cream Cheese Icing
  1. In a medium-size bowl, stir the cream cheese with a spatula until smooth. Add the butter and beat until smooth and well combined. Whisk in the powdered sugar and pineapple juice until smooth. Drizzle the icing over the cooled scones.

Lemon Scones

Lemon Scones

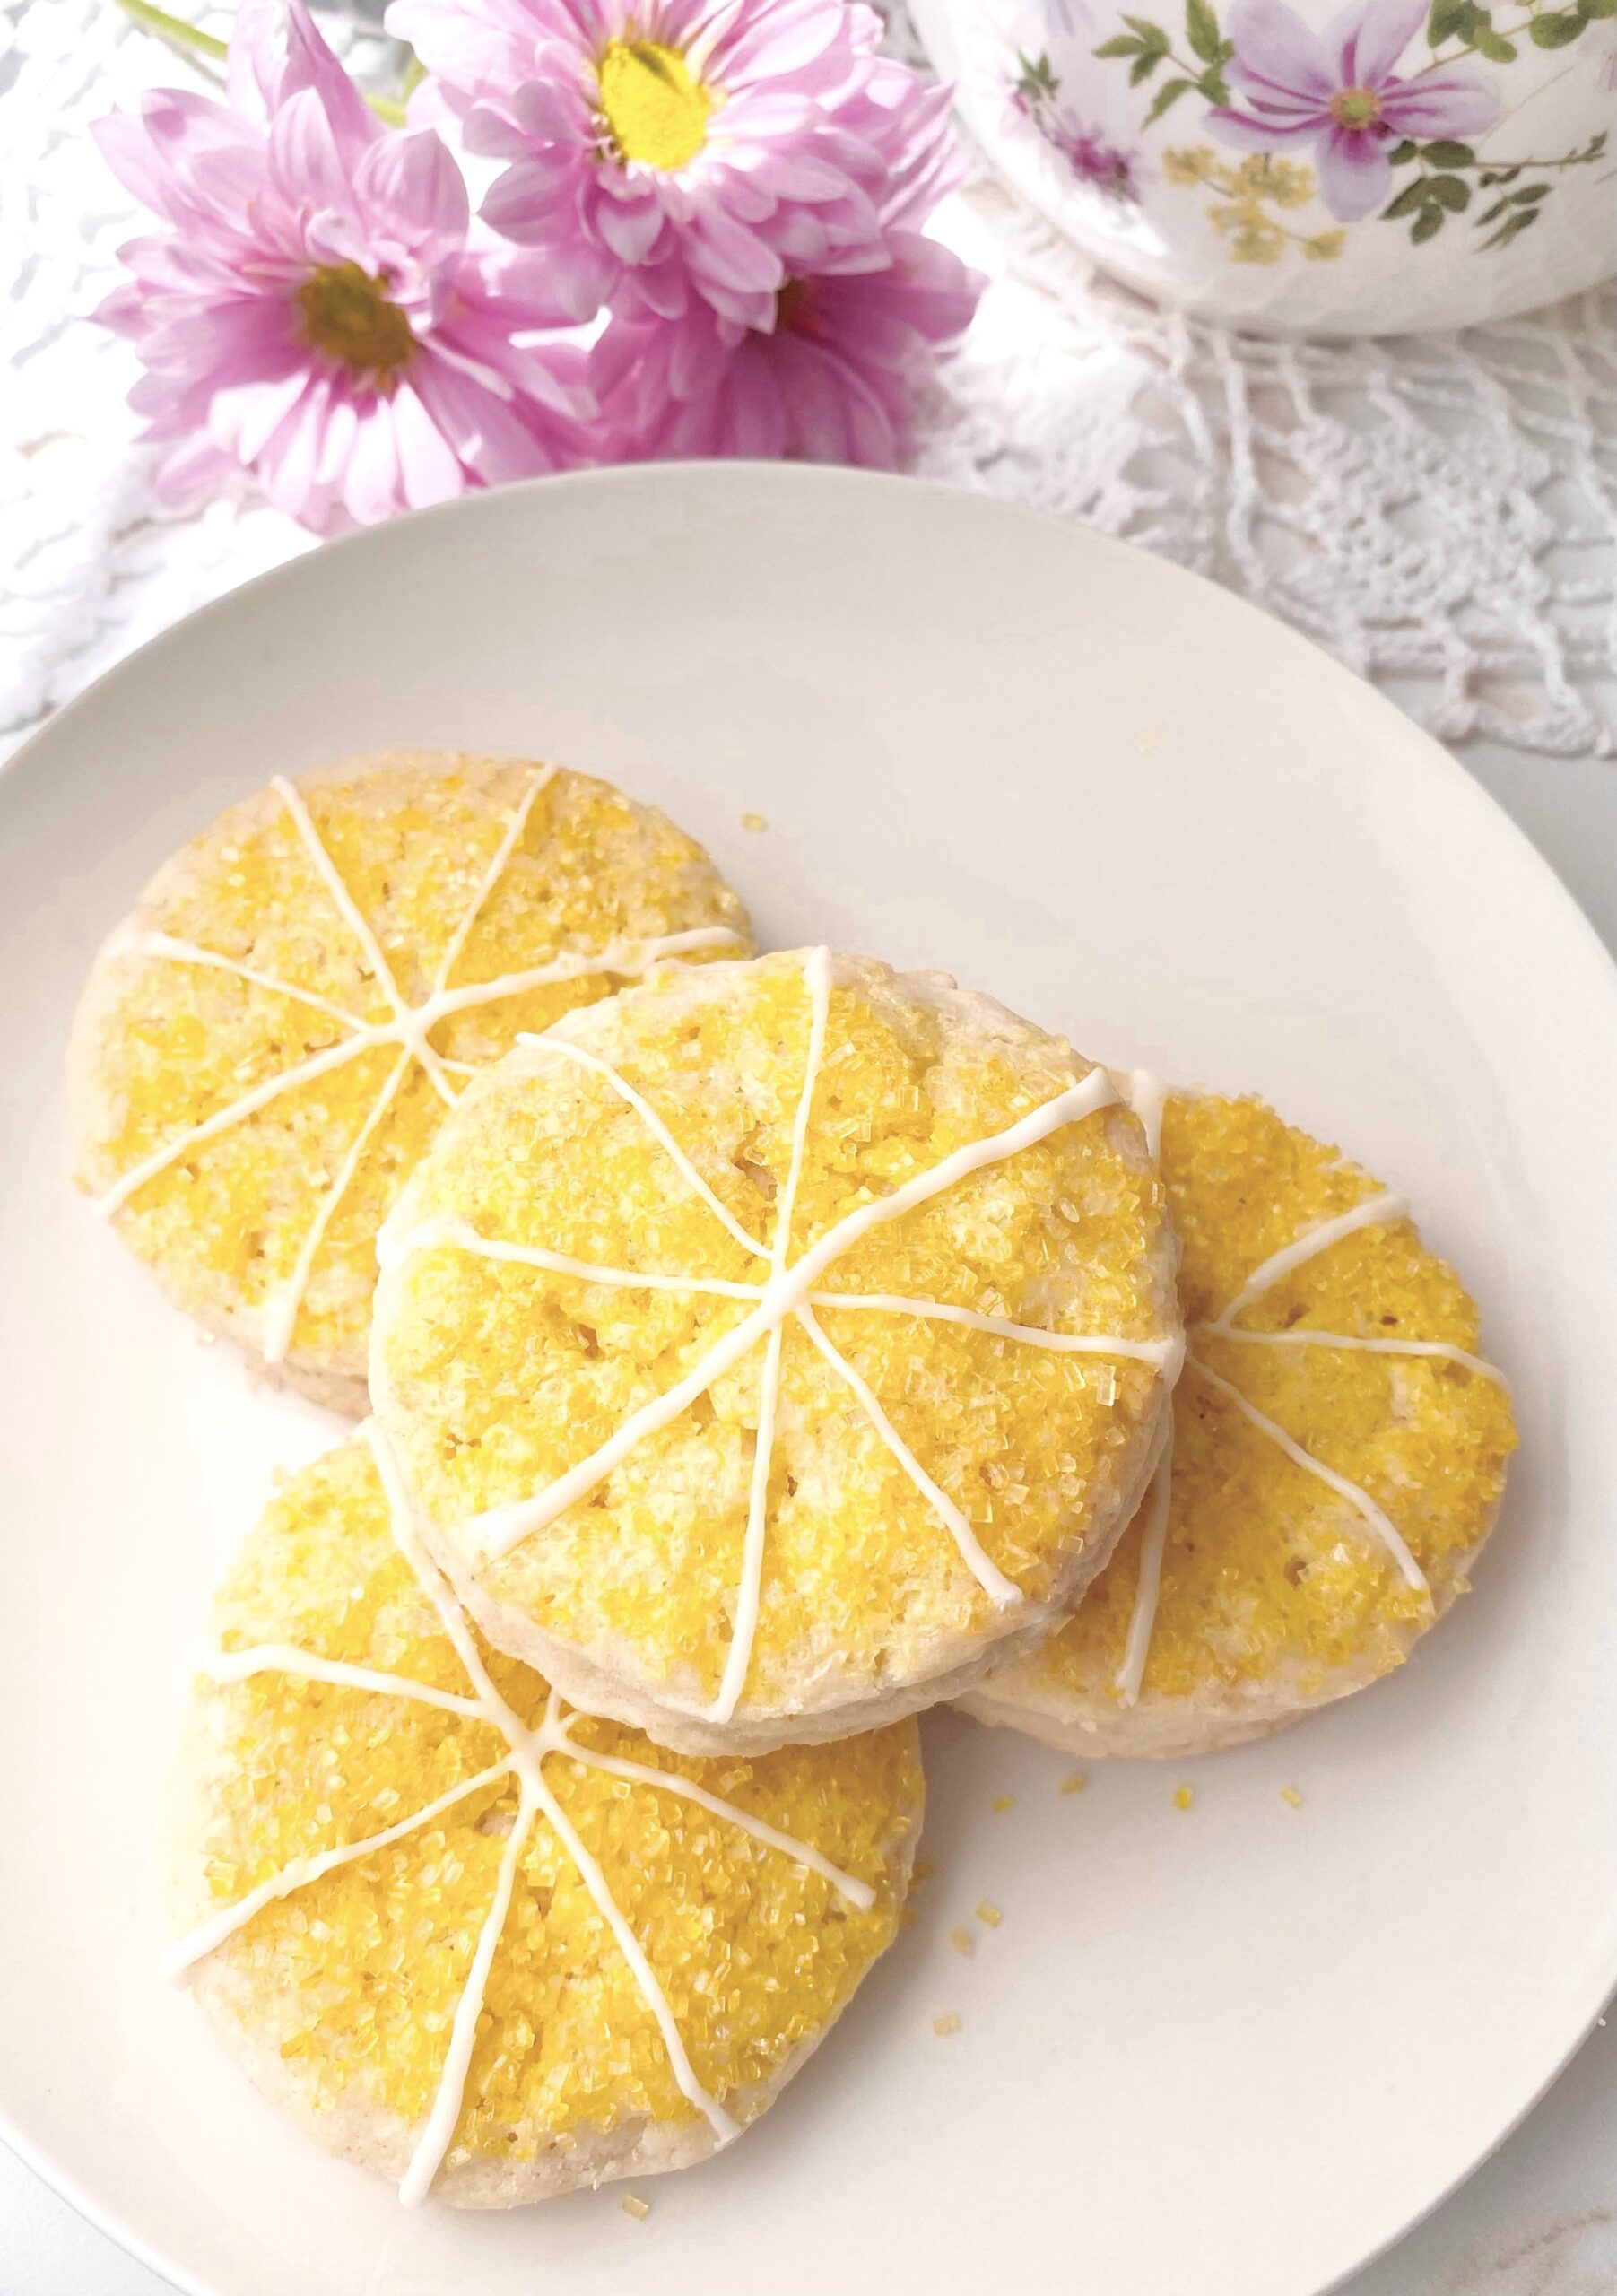
Yellow is the color of happiness and sunshine. These adorable Lemon Scones will bring you a burst of lemony brightness even on the grayest day. The pretty, vibrant yellow sparkling sugar adds a pleasant crunch to the tops. It’s a nice contrast to the soft, tender interior of the scones. These little gems would shine on any breakfast or brunch table. I served them with blueberry jam and green tea, which was so delightful, I’m still smiling.

Print Recipe
Lemon Scones
Course Breakfast, Brunch
Keyword lemon, scones
Servings
scones
Ingredients
Lemon Scones
Icing
Course Breakfast, Brunch
Keyword lemon, scones
Servings
scones
Ingredients
Lemon Scones
Icing
Instructions
Lemon Scones
  1. Preheat the oven to 375ºF (190ºC). Line a baking sheet with parchment paper.
  2. In a large bowl, whisk together the flour, baking powder, salt and sugar.
  3. Work the butter and lemon zest into the flour mixture with your fingers or with a pastry blender until pea size chunks form.
  4. Stir in the heavy cream and lemon juice until a shaggy dough is formed. If your dough seems too dry, you can add 1-2 more teaspoons of heavy cream.
  5. Turn the dough out onto a lightly floured surface. Knead briefly, by folding dough over onto itself a few times. Do not overwork the dough.
  6. Pat or roll the dough into an 8-inch round, about 3/4-inch thick. Cut out rounds using a 2" or 2 1/4" inch round cutter.**
  7. Place scones about 2 inches apart on prepared baking sheet. Brush scones with heavy cream. Sprinkle generously with sparkling sugar.
  8. Bake until edges are golden brown, about 16-19 minutes.
  9. Cool completely on a wire rack. Decorate with icing.
Icing
  1. In a small bowl, whisk together the powdered sugar, heavy cream and enough lemon juice to form a stiff icing.
  2. Transfer icing to a piping bag or a plastic zip bag. Snip off the tip of the bag. Pipe lines in a spoke pattern onto the scones.
Recipe Notes

*To find the sparkling sugar I used, click here.

**To find the cutter I used, click here.

Lemon Blueberry Cloud Cookies

Once, some time ago, I made some soft, melt-in-your mouth cookies and posted them on the internet. A viewer got triggered and insisted that cookies must be crunchy. I have to disagree! Cookies can be crunchy, crisp, soft, chewy, sandy or anything your heart desires. These soft, pillowy cookies are light and airy like little clouds. They could almost be called little cakes. The texture is similar to whoopee pies, but not as sticky. They’re delightfully delicious and have been well-loved by my family for two generations. They’re perfect for a spring teatime treat or alongside a glass of lemonade at a picnic.

Print Recipe
Lemon Blueberry Cloud Cookies
Soft, pillowy cookies made with ricotta cheese and fresh blueberries, topped with a tangy lemon icing
Course Dessert
Servings
cookies
Ingredients
Cookies
Icing
Course Dessert
Servings
cookies
Ingredients
Cookies
Icing
Instructions
Cookies
  1. Preheat the oven to 350ºF (180ºC). Line two cookie sheets with parchment paper.
  2. In a medium-size bowl, whisk together the flour, baking powder and salt until well combined.
  3. In a large bowl, beat the butter, with an electric mixer on medium speed, until smooth Add the ricotta cheese, sugar and lemon zest. Beat until well combined. Beat in the egg and vanilla until incorporated. On low speed, gradually mix in the flour mixture, just until combined. Fold in the blueberries.
  4. Place rounded tablespoon-size portions of dough about 2 inches apart onto the cookie sheets. Top the cookies with additional blueberries. (If your cookie dough is sticky and hard to work with, refrigerate it just until it's easier to work with, about 30 minutes to 1 hour.)
  5. Bake until the bottom edges of the cookies are lightly browned, about 11-13 minutes. Transfer the cookies to a cooling rack. Top the cooled cookies with icing. Best eaten the day they're made.
Icing
  1. In a medium-size bowl, whisk together the powdered sugar, melted butter, salt and 1 tablespoon (15ml) of lemon juice until well combined. Add additional lemon juice as needed to achieve the desired consistency. Whisk until smooth.

Strawberry Rose Pancakes


Print Recipe


Strawberry Rose Pancakes

Pink pancakes made with strawberry purée and rose petals, topped with strawberry syrup and pink whipped cream

Course Breakfast, Brunch
Keyword pancakes, strawberry

Servings


Ingredients
Strawberry Syrup

Pink Whipped Cream

Strawberry Rose Pancakes

Course Breakfast, Brunch
Keyword pancakes, strawberry

Servings


Ingredients
Strawberry Syrup

Pink Whipped Cream

Strawberry Rose Pancakes


Instructions
Strawberry Syrup
  1. Purée the strawberries in a blender or small food processor. Pass the purée through a mesh sieve into a small saucepan. Stir in the sugar and 1/2 cup (118ml) of water. Bring the mixture to a boil over medium heat. Turn the heat down to low and simmer until the sugar has dissolved and the syrup thickens, about 10 minutes. Set aside to cool. Serve warm or at room temperature.

Pink Whipped Cream
  1. In a large bowl, beat the whipped cream to soft peaks with an electric mixer at high speed. Add the powdered sugar, strawberry extract and food coloring in 3 separate additions. Continue beating just until stiff peaks are formed. Set aside in the refrigerator until ready to use.

Strawberry Rose Pancakes
  1. In a large bowl, whisk the flour, sugar, baking powder and salt together until well combined. Set aside.

  2. Purée the strawberries in a blender or small food processor. Pass the purée through a mesh sieve into a medium bowl. Add the egg, milk, melted butter, vanilla extract and food coloring (if using) and whisk until well combined. Stir this mixture into the flour mixture just until combined. A few lumps are okay. Stir in the rose petals.

  3. For each pancake, scoop 3-4 tablespoons of batter onto a hot oiled griddle. Flip the pancakes when bubbles form on the surface. Continue cooking until the pancakes puff and are lightly browned.


Recipe Notes

*To find the gel food coloring I used, click here.

**To find culinary dried rose petals, click here.


Pink Lemonade Cake

This cheerful little loaf cake feels like a spring or summer picnic with lemonade and sunshine. It’s similar to a pink lemonade cake that my elderly neighbor used to make when I was growing up. She made it for all the neighborhood kids and we always gobbled it up. When I was about ten years old she taught my friend and me how to make it. She used a yellow cake mix in a large baking pan and poked holes all over the cake, then drenched it in a pink, sugary lemon icing. I transformed that happy pink lemonade memory into a delightful loaf cake made from scratch.

To watch the TikTok video, click here.

Print Recipe
Pink Lemonade Cake
A tender, moist loaf cake that tastes just like pink lemonade
Course Brunch, Dessert
Keyword cake, pink lemonade
Servings
8 x 4-inch loaf
Ingredients
Pink Lemonade Cake
Lemon Syrup
Icing
Course Brunch, Dessert
Keyword cake, pink lemonade
Servings
8 x 4-inch loaf
Ingredients
Pink Lemonade Cake
Lemon Syrup
Icing
Instructions
Pink Lemonade Cake
  1. Preheat oven to 325ºF (163ºC). Line the bottom of an 8 X 4-inch loaf pan with parchment paper. Grease and flour the sides.
  2. In a medium bowl, whisk together the flour, baking powder, salt and baking soda.
  3. In a small bowl, whisk together the milk and sour cream.
  4. In a large bowl, beat the sugar, oil, eggs, lemon zest and strawberry extract until smooth.
  5. Stir in the flour mixture in two additions, alternating with the milk mixture. Stir just until combined. Stir in food color a little at time until your desired shade is achieved.
  6. Transfer the batter to the prepared baking pan. Bake until a toothpick inserted into center of the loaf comes out clean, about 45-50 minutes. Meanwhile, prepare lemon syrup.
  7. Let the cake cool in the pan for 10 minutes, then remove from pan and transfer to a cooling rack. Poke holes all over the top of cake with a skewer.
  8. Brush the warm cake generously with the lemon syrup. Let the cake cool completely, then top with icing.
Lemon Syrup
  1. In a small saucepan, combine the juice of one lemon with enough water to equal 1/4 cup. Add sugar and stir over medium-low heat until sugar is dissolved. Remove from heat.
Icing
  1. In a medium bowl, beat the butter, powdered sugar, 1 tablespoon lemon juice, the strawberry extract and a pinch of salt, until smooth. Add more lemon juice until your desired consistency is reached. Mix in gel food color.
Recipe Notes

*To find the gel food color I used, click here.

Blueberry Donut Holes with Homemade Blueberry Sugar

Blueberry Donut Holes with Homemade Blueberry Sugar

If you landed here from one of my social media accounts, welcome! I’m really glad you’re here. I love to create fun, pretty and sweet treats like these delicious blueberry donut holes! The thing that really makes these special is the homemade blueberry sugar, which adds a burst of blueberry flavor. Freeze dried blueberries are combined with sugar to create a beautiful, flavorful sugar that you can use for many other things. It can also be used in tea, lattes, lemonade, cocktails or sprinkled on cookies or scones. Keep in mind that freeze dried blueberries are not the same as dried blueberries. Dried blueberries still contain some moisture, so they won’t work for this purpose.

The donut hole batter comes together quickly and easily. The most challenging part for me is frying them. I found that using a thermometer and testing one donut hole first, helps you determine the perfect oil temperature. Using a small portion scoop helps you get uniform donut holes. Make sure the outside of the scoop is clean between each donut to help them keep the round shape and avoid pointy tails.

Print Recipe
Blueberry Donut Holes with Homemade Blueberry Sugar
Course Breakfast, Dessert
Servings
donut holes
Ingredients
Blueberry Sugar
Blueberry Donut Holes
Course Breakfast, Dessert
Servings
donut holes
Ingredients
Blueberry Sugar
Blueberry Donut Holes
Instructions
Blueberry Sugar
  1. Process freeze dried blueberries and sugar in a food processor or a clean spice grinder until finely ground. Be careful not to over process or you may end up with powdered sugar.
Blueberry Donut Holes
  1. In a medium bowl, whisk together flour, baking powder, nutmeg and salt. Set aside.
  2. In a large bowl, beat sugar, eggs, melted butter, milk and vanilla extract until well combined.
  3. Add flour mixture and mix just until combined. Do not over mix. A few lumps are okay.
  4. Fold in chopped blueberries.
  5. In a heavy saucepan, heat 1 1/2 inches of oil to 340ºF.
  6. Drop tablespoon size portions of batter into hot oil. I used a #60 portion scoop.** Don't overcrowd the pan.
  7. Cook donut holes until golden brown on all sides, about 2-4 minutes, flipping halfway through. If donut holes cook too quickly on the outside, turn heat down.
  8. Briefly drain donut holes on paper towels, then toss warm donut holes in blueberry sugar. Serve immediately.
Recipe Notes

Success tips: Use a small ice cream scoop sprayed with nonstick spray to drop donut holes into oil. Make sure the outside of scoop is clean between each donut hole to keep the round shape and avoid tails on your donut holes.

*To find freeze dried blueberries, click here.

**To find the portion scoop I used, click here.

Little Spring Vegetable Pot Pies

These little veggie pot pies are so cute and comforting. The crust is incredibly flaky and the filling is so versatile. I used asparagus, carrots and peas for the filling, but feel free to use your favorite vegetables. The possibilities are endless! The small size bakes up quickly and is perfect for lunch or a light dinner. I typically serve these with some fresh fruit or salad greens on the side.

I used vegetable shortening for the crust because it makes the flakiest crust ever and also because the pies can easily be a vegetarian dish. If you’re trying to avoid trans fats, then choose a brand of vegetable shortening that doesn’t contain trans fat or replace some of the vegetable shortening with butter.* Keep in mind that if you replace all of the vegetable shortening with butter, your crust won’t be nearly as flaky.

Print Recipe
Little Spring Vegetable Pot Pies
Servings
Mini pot pies
Ingredients
Pie Crust
Servings
Mini pot pies
Ingredients
Pie Crust
Instructions
Pie Crust
  1. In a large bowl, whisk together the flour, baking powder and salt. Work the shortening into the flower with your fingertips until flat dime size pieces are formed.
  2. In a small bowl, combine the ice water and vinegar. Sprinkle over the flour mixture a little at a time, mixing just until the dough comes together. You may not need all of the liquid, depending on your climate.
  3. Turn the dough out onto a lightly floured surface. Fold the dough over onto itself a few times. Do not over work the dough. Form the dough into a disc. Wrap in plastic wrap and refrigerate for 1-2 hours or up to overnight.
Filling
  1. Preheat the oven to 400ºF. (200ºC). Grease four 6-oz ramekins.*** Place the ramekins on a baking sheet.
  2. In a medium saucepan, melt the butter over medium heat. Sauté the onions, carrots and asparagus for a few minutes until the onions are translucent.
  3. Sprinkle the vegetables with flour. Cook 1-2 minutes. Stir in the broth and simmer until thickened. Add the milk, parsley and seasonings. Make sure to taste your sauce to adjust the seasonings to your preference. Stir in the peas. Transfer the filling to the greased ramekins.
  4. On a lightly floured surface, roll the pie dough to 1/4-inch thickness. Cut out 4 rounds of dough about an inch larger than the tops of your ramekins. Brush the top edges of the ramekins with a bit of egg wash. Place the rounds of dough on the ramekins, overlapping a bit. Crimp the edges of the dough with your fingers or with a fork. Brush the pies with egg wash. Cut a 3/4-inch ventilation slit in the top of each pie. Bake until golden brown, about 30-35 minutes.
Recipe Notes

*To replace part of the shortening with butter, use 1/4 cup (48g) shortening and 1/4 cup (57g) butter.

**For a vegetarian version, you can substitute the egg wash by brushing the tops of the pies lightly with olive oil.

***To find the ramekins I used, click here.