Butterscotch Bread

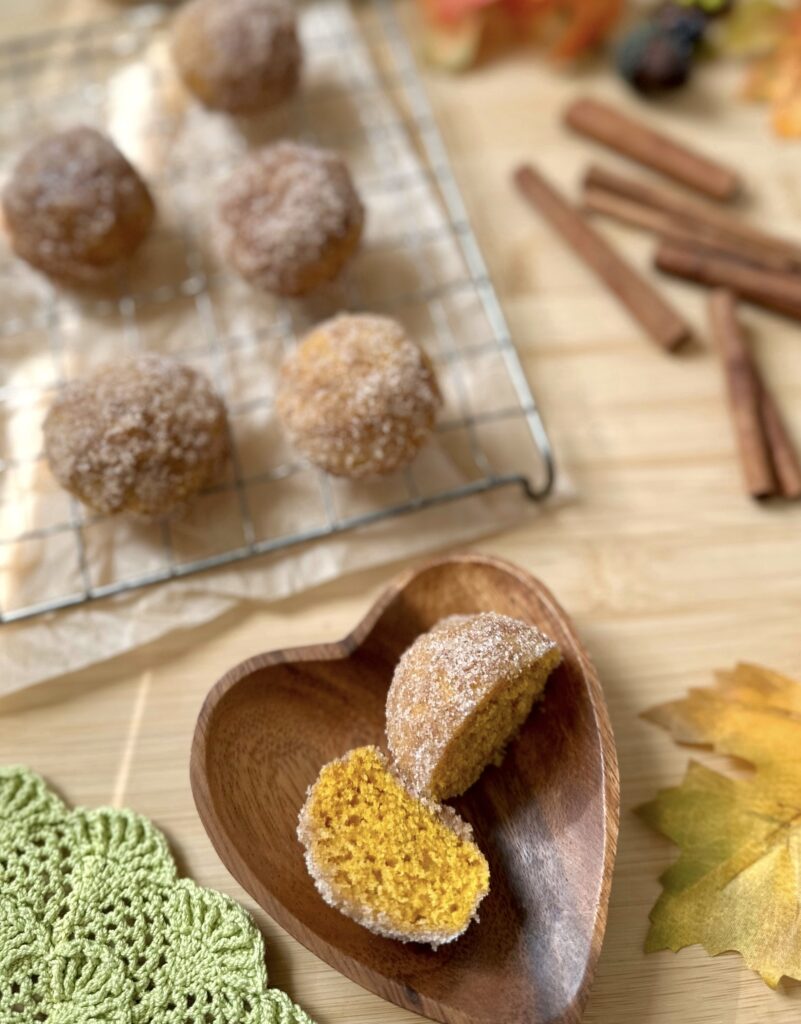
What’s better than the smell of chocolate chip cookies baking or of fresh coffee brewing? The aroma of this warm, sweet buttery loaf of Butterscotch Bread is so heavenly that I’m convinced that angel grandmothers bake this on a regular basis in heaven. The rich scent is accompanied by a soft, tender bread topped with a silky butterscotch glaze.

It all starts with browning your butter first. It adds a nutty, deep butter flavor. When browning your butter, use a light colored saucepan so you can see the visual clues. You’ll see it start to foam and brown specks will collect on the bottom of the pan. It will smell nutty and fragrant. Keep a close eye on it. It can go from brown to burnt in a quick second. When your brown butter has cooled to room temperature, the rest of the recipe comes together quickly. You can also brown your butter a day ahead and keep it in the refrigerator. Bring it to room temperate before using.

This delightful bread goes well with coffee or tea and is just as delicious the next day. Store covered at room temperature.


Butterscotch Bread

by Mari Vasseur
Course Breakfast, Brunch, Dessert
Servings 1 loaf

Ingredients
  

Butterscotch Bread

  • ½ cup (113g) unsalted butter
  • 1 ¾ cups (220g all purpose flour, sifted
  • 1 teaspoon baking powder
  • ½ teaspoon baking soda
  • ½ teaspoon fine seat salt
  • 1 cup (200g) brown sugar
  • 2 large eggs
  • 2 teaspoons pure vanilla extract
  • ¾ cup (177ml) buttermilk

Butterscotch Glaze

  • ¼ cup (57g) unsalted butter
  • ½ cup (100g) packed brown sugar
  • teaspoon fine sea salt
  • ¼ cup (59ml) heavy whipping cream
  • ½ teaspoon pure vanilla extract

Instructions
 

Butterscotch Bread

  • In a small saucepan, cook the butter over medium heat until brown and fragrant. When brown specks begin to form at the bottom of the pan, immediately transfer the butter to a small bowl. Let cool to room temperature.
  • Preheat the oven to 350ºF (180ºC). Line the bottom of an 8 x 4-inch baking pan with parchment paper. Grease and flour the insides.
  • In a medium-sized bowl, beat the brown butter, brown sugar, eggs, vanilla and buttermilk until smooth and creamy. Stir in the flour mixture in two additions. Mix just until combined.
  • Transfer the batter to prepared baking pan. Bake until the top is deep golden brown and a toothpick inserted into center comes out clean, about 38-43 minutes.
  • Let the bread cool in pan for 10 minutes, them turn it out onto a cooling rack to cool completely. Top the cooled cake with two coats of butterscotch glaze.

Butterscotch Glaze

  • Melt the butter in a small saucepan over medium heat. Stir in the brown sugar and salt. Continue stirring over medium heat until the mixture comes to a boil. Boil for two minutes.
  • Turn the heat down and slowly stir in the heavy cream. Keep stirring until mixture is smooth. Remove from heat and stir in the vanilla extract.
  • Transfer the butterscotch glaze to a small bowl and let cool until thickened.
Keyword butterscotch, cake, loaf

Blueberry Crumble Bars

Crumb bars with fruit are classic, rustic bars that are easy to make and so delicious. These Blueberry Crumble Bars happen to be the best I’ve ever tasted! With a tender, almost addicting shortbread crust, the filling is perfectly sweet and blanketed with plenty of crisp crumb topping. They’re perfect to pack in a lunch, take on a family picnic or as an addition to a backyard cookout. Everyone who tries these comes back for seconds!


Blueberry Crumble Bars

by Mari Vasseur
The best Blueberry Crumble Bars ever! Tender shortbread crust topped with sweet blueberry filling and generous crumb topping
Course Dessert
Servings 12

Ingredients
  

Crumb Topping

  • 1 cup (128g) all purpose flour
  • cup (66g) packed brown sugar
  • 3 tablespoons (38g) granulated sugar
  • ¼ teaspoon cinnamon
  • ¼ teaspoon fine sea salt
  • 6 tablespoons cold, unsalted butter, cubed

Crust

  • 1 ½ cuts (191g) all purpose flour, sifted
  • ¼ cup plus 2 tablespoons (42g) powdered sugar, sifted plus extra for sprinkling on top
  • 1 teaspoon baking powder
  • ¼ teaspoon fine sea salt
  • ¾ cup (170g) unsalted butter, room temperature

Blueberry Filling

  • 3 ½ cups(454-510g) blueberries
  • 1 teaspoon lemon juice
  • cup (131g) granulated sugar
  • 2 teaspoons cornstarch

Instructions
 

Crumb Topping

  • In a medium-sized bowl, whisk together the flour, brown sugar, granulated sugar, cinnamon and salt until well combined. Work the butter into the flour mixture with your fingertips, until it looks sandy, with no large pieces of butter remaining. Press the mixture together to form chunks. Set aside in the refrigerator until ready to use.

Crust

  • Preheat the oven to 350ºF (180ºC). Line an 8-inch square baking pan with parchment paper, overlapping the ends a couple of inches. These will be handles to lift the bars out of the pan.
  • In a medium-sized bowl, whisk together the flour, powdered sugar, baking powder and salt until well combined. In a large bowl, beat the butter until smooth. Add the flour mixture and beat just until combined.
  • Press the dough evenly into the baking pan. Bake until the surface looks light golden brown, about 15-20 more minutes. Meanwhile, prepare the filling.

Blueberry Filling

  • In a large bowl, toss the blueberries with the lemon juice. Mix in the sugar and cornstarch. Pour the blueberry mixture over the warm crust. Top evenly with the crumb topping. Return the pan to the oven and continue baking until the topping is golden brown and the filling starts to bubble, about 28-33 minutes. Let cool completely before removing the bars from the pan. Sprinkle with powdered sugar.
Keyword bars, blueberry crumble

Caramel Apple Blossoms

Caramel Apple Blossoms by Brownie Mischief

Whether you call them apple blossoms, apple dumplings, apple roses or mini apple pies, these are cute, delicious little apple pastries. I made them because I was craving apple pie, but I didn’t have enough apples to bake one. I didn’t invent them, and I don’t know who did, but I’ve had frozen ones and I’ve seen them on restaurant menus. I thought it would be fun to make them, and it was! I could’ve just put some pie dough in muffin cups and made quick little pies, but flower shaped things automatically get extra points for cuteness. And if you know me, you know I love my cute bakes!

Caramel Apple Blossoms

Course Dessert
Servings 12 blossoms

Ingredients
  

Topping

  • 3 tablespoons (38g) packed brown sugar
  • 3 tablespoons (15g) quick oats not instant oats
  • 1 tablespoon (21g) all purpose flour
  • 1 dash fine sea salt
  • 1 tablespoon (14g) unsalted butter, melted
  • teaspoon ground cinnamon

Blossoms

  • 2 cups (198g) peeled, cored diced apples 1/4-inch pieces
  • ½ teaspoon lemon juice
  • ¼ cup (50g) packed brown sugar
  • 2 tablespoons (25g) granulated sugar
  • 1 ½ teaspoons all purpose flour
  • ½ teaspoon ground cinnamon
  • teaspoon fine sea salt
  • 2 crust unbaked pie dough , purchased or homemade
  • egg wash 1 egg whisked with 1 tablespoon of water
  • ¼ cup (82g) caramel sauce, purchased or homemade

Instructions
 

  • In a medium-size bowl, mix together all of the topping ingredients. Set aside in the refrigerator until ready to use.
  • In a large bowl, toss the apples with lemon juice. Add the brown sugar, granulated sugar, melted butter, flour, cinnamon and salt to the apples. Stir until well combined.
  • Line a large baking sheet with parchment paper.
  • On a lightly floured surface, roll the pie dough to 1/8-inch thickness. Cut out twelve 5-inch blossom shapes*, re-rolling the dough scraps as needed.** Lightly mark a 2-inch circle in the center of each blossom. Make cuts between the petals to separate them, just up to the edge of the center circle. Top each blossom with about 2 generous tablespoons of apples.
  • Brush the dough petals with egg wash. Form blossoms by lifting and overlapping each petal 1/2-inch in a spiral pattern similar to a rose. Tuck the last petal under. Press the petals together to seal so the filling won't leak.
  • Top each blossom with a spoonful of topping. Place in the refrigerator to chill for 30 minutes to 1 hour. Don't skip this step. This will help the blossoms keep their shape.
  • Preheat oven to 375ºF (190ºC). Brush the blossom dough all over with egg wash. Wipe any drips off of the parchment paper. Bake until the crust is golden brown and filling is starting to bubble, about 23-28 minutes. Transfer the blossoms to a cooling rack to cool for a few minutes before serving warm or serve at room temperature. Drizzle the blossoms with caramel sauce.

Notes

*I used a 5-inch blossom cutter. To find a blossom cutter, click here.
**If you need to  re-roll your  pie dough scraps, press the scraps together, cover and let rest in the refrigerator for several minutes to help avoid shrinkage.
Keyword pastry

Maple Brown Sugar Madeleines

Maple Brown Sugar Madeleines

I had tea with with a well mannered hedgehog once on a crisp fall day. He brought me a tiny bouquet of flowers, which I placed in a small jam jar filled with water. He said the delightful maple scent of these Madeleines reminded him of his time in the woods, as a young hoglet. When he had his fill of the delicate little cakes, I wrapped some in a tea towel for his journey home.

As cooler weather approaches, I’m always looking for a little something to enjoy with a warm drink and a good book. Although traditional Madeleines typically remind me of spring, these Maple Brown Sugar Madeleines have a cozy fall feeling. They go well with coffee, tea or hot cocoa. If you want to make them for a friend, make the batter and keep it in the refrigerator. Bake the Madeleines right before your friend arrives.

I used a spherical Madeleine pan to make these maple scented little cakes. The Madeleines made in this pan are a little thicker and fluffier than those made in a traditional oval pan. To find the Madeleine pan I used, click here. You can certainly use a traditional pan if you prefer. Keep in mind that the baking time will be shorter and you will end up with about twice as many.

Maple Brown Sugar Madeleines

Course Dessert
Cuisine French
Servings 12

Ingredients
  

Maple Brown Sugar Madeleines

  • 1 cup (4 oz or 113g) cake flour
  • ½ teaspoon baking powder
  • ¼ teaspoon fine sea salt
  • 3 large eggs
  • ½ cup (3 1/2 oz or 100g) packed brown sugar
  • 1 ½ teaspoons pure maple extract or natural maple flavoring
  • ½ cup (4 oz or 113g) unsalted butter, melted and cooled
  • 1 tablespoon pure maple syrup

Maple Icing

  • 1 cup (4 1/4 oz or 120g) powdered sugar, sifted
  • 1 tablespoon unsalted butter, melted
  • ¼ teaspoon pure maple extract or natural maple flavoring
  • 1-2 tablespoons whole milk
  • 1 pinch fine sea salt
  • ¼ cup (1 oz or 28g) finely chopped, toasted pecans or walnuts

Instructions
 

Maple Brown Sugar Madeleines

  • In a medium bowl, sift together the flour, baking powder and salt.
  • In a large bowl, beat the eggs, brown sugar and maple extract, on medium-high speed with an electric mixer, until the batter is voluminous, light in color and holds its shape when you lift the beater, about 8-10 minutes.
  • Combine the melted butter and maple syrup.
  • Gently fold the the flour mixture into the egg mixture in three additions, alternating with the melted butter. Fold just until combined, being careful not to deflate the batter. Make sure to scrape the bottom of the bowl to ensure that all of the flour is combined.
  • Cover and refrigerate for 30-45 minutes.
  • Preheat the oven to 350ºF (177ºC). Grease a spherical Madeleine pan* with nonstick spray or melted butter. Dust the pan with a light coating of flour. Tap out the excess flour.
  • Fill the wells of the Madeleine pan with batter 3/4 full, about 2 tablespoons each, using a scoop**or a spoon. (If you're using a traditional oval Madeleine pan, fill 3/4 full, about a generous tablespoon of batter in each.)
  • Bake until golden brown around the edges and puffed in the center, about 10-12 minutes. (Baking time for oval Madeleine pan will be about 7-8 minutes.) Do not over bake.
  • Cool in the pan for one minute then turn Madeleines out onto a cooling rack to cool completely.

Maple Icing

  • In a small bowl, whisk together the powdered sugar, melted butter, maple extract and one tablespoon of milk. Add additional milk as needed until your desired consistency is reached, Stir in a pinch of salt to taste.
  • Brush icing onto the Madeleines with a pastry brush. Apply nuts to the edges of Madeleines. Serve immediately. Madeleines are best served the day they're baked.

Notes

*To find the Madeleine pan I used, click here.
**To find the scoop I used, click here.
Keyword madeleines, maple

Blackberry Cornbread

This sweet Blackberry Cornbread is super easy to make. It makes a delicious breakfast, brunch or side dish. It’s so good served with Blackberry Honey Butter. I love baking my cornbread in a cast iron skillet. It gives the cornbread a crisp, rustic crust. You can also use a cake pan if you prefer. (The baking time may vary.) Make sure not to over bake your cornbread since overtaking will dry it out. Use fresh, ripe blackberries when they’re in season. You can also use frozen blackberries or fresh or frozen blueberries. Skip the macerating step if you’re using blueberries or frozen berries.

Blackberry Cornbread

Sweet cornbread studded with ripe blackberries
Course Breakfast, Brunch, Dessert
Cuisine American
Servings 6

Ingredients
  

  • ¼ cups (158g) AP flour, sifted (plus one tsp for the blackberriesAP flour, sifted (plus one tsp for the blackberries)
  • cup (132g) sugar
  • ¼ cup (35g) cornmeal
  • 2 teaspoons baking powder
  • ½ teaspoon fine sea salt
  • 2 large eggs
  • ¾ cup (170g) sour cream
  • ¼ cup (57ml) vegetable oil or neutral oil of your choice
  • 2 tablespoons melted butter
  • 1 ¼ cups (6 oz or 170g) ripe blackberries, divided (Cut large berries in half)

Instructions
 

  • Preheat the oven to 350°F (180°C). Grease an 8” cast iron skillet* or an 8” round cake pan.
  • In a large bowl, whisk together the flour, sugar, cornmeal, baking powder and salt.
  • In a separate bowl, whisk together the eggs, sour cream, oil and melted butter until smooth. Add the egg mixture to the flour mixture. Mix just until combined. A few lumps are okay. In a small bowl, gently toss one 1 cup (136g) of the blackberries with 1 tsp of flour. Gently fold the berries into the batter.
  • Transfer the batter to the skillet. Top with the remaining blackberries. Bake until the top is golden brown and toothpick inserted into the center comes out clean, about 35-43 min. Let cool in the pan 10 min. Serve with Blackberry Honey Butter** or honey if desired

Notes

*To find an 8-inch cast iron skillet, click here.  
**To find the Blackberry Honey Butter Recipe, click here.
 
Keyword blackberry, cornbread

Perfect Pumpkin Cake

Pumpkin Cake

This Perfect Pumpkin cake brings back memories. The tender, moist texture reminds me of the pumpkin cake bars I used to make in junior high. I got the treasured bar recipe from an old children’s cookbook. I lent the cookbook to a neighbor and never saw the book or the recipe again. Through trial and error, I came up with this perfectly spiced, soft fluffy cake, which I think is even better! It’s so delicious it doesn’t need frosting, but the classic pairing with cream cheese frosting takes it over the top.

Perfect Pumpkin Cake

Course Dessert
Servings 8

Ingredients
  

Pumpkin Cake

  • 1 cup (128g) all purpose flour, sifted
  • 1 teaspoon baking powder
  • ½ teaspoon baking soda
  • ½ teaspoon fine sea salt
  • 1 teaspoon ground cinnamon
  • ½ teaspoon ground ginger
  • ¼ teaspoon ground nutmeg, preferably freshly ground
  • 1 cup (200g) sugar
  • cup (150ml) avocado oil or neutral oil of your choice
  • 2 large eggs
  • 1 teaspoon pure vanilla extract
  • 1 cup (227g) pure pumpkin purée Not pie filling

Cream Cheese Frosting

  • 6 tablespoons (85g) cream cheese, softened
  • 6 tablespoons (85g) unsalted butter, softened
  • ¾ teaspoon vanilla bean paste or pure vanilla extract
  • 1 pinch fine sea salt
  • 2 cups (240g) powdered sugar, sifted
  • 1-3 teaspoons heavy cream, room temperature

Instructions
 

Pumpkin Cake

  • Preheat the oven to 325ºF (165ºC). Line the bottom of an 8-inch round cake pan* with parchment paper**. Grease and flour the insides.
  • In a medium-size bowl, whisk together the flour, baking powder, baking soda, salt, cinnamon, ginger and nutmeg until well combined.
  • In a large bowl, beat the sugar, oil, eggs, vanilla and pumpkin purée with an electric mixer or by hand with a whisk, until smooth and well blended. Stir in the flour mixture, just until combined.
  • Transfer the batter to the prepared cake pan. Bake until a toothpick inserted into the center of the cake comes out clean, about 38-43 minutes. Cool the cake in pan for 10 minutes. Remove the cake from pan and transfer to a cooling rack.

Cream Cheese Frosting

  • In a large bowl, beat the cream cheese and butter together with an electric mixer, until creamy. Beat in the vanilla extract and salt until well combined. On low speed, beat in the powdered sugar. Keeping the mixture at low speed, beat in the heavy cream a little at a time until your desired consistency is reached. Stir with a spatula to smooth out any bubbles.

Notes

*To find the cake pan I used, click here.
**To find the parchment rounds I used, click here.
Keyword cake, pumpkin

Harry Potter Inspired Pumpkin Pasties

Pumpkin Pasties

Even though the weather is warm where I live at the moment, I’m dreaming about all the delicious fall treats I’ll be baking this year. Let’s look forward to cool, crisp weather, the smell of pumpkin or apples baking, and sipping a warm mug of something spicy while we wait for our bakes to come out of the oven.

Inevitably, every fall, the Harry Potter movies come on at my house and it’s nice to have some popcorn and sweet treats to enjoy while watching the movies. And these Harry Potter Inspired Pumpkin Pasties are perfect for that! If you’ve read the Harry Potter books, you may remember the Pumpkin Pasties being mentioned. There are many interpretations out there, but I imagined them to be crispy and flaky on the outside with a sweet pumpkin filling. I included a delicious flaky pie crust recipe here, but feel free to use store bought pie dough if you want to streamline the process. I sprinkled mine with raw turbinado sugar before baking which provides a sweet delicious crunch. You can also use maple sugar or sparkling sugar. To find the sugar I used, click here. And as a magical touch, I added some edible gold star glitter. To find the edible gold stars, click here.

Pumpkin Pasties

Harry Potter inspired sweet pumpkin filled hand pies
Course Dessert
Servings 12 hand pies

Ingredients
  

Pie Crust

  • 2 ⅔ cup (340g) all purpose flour, sifted
  • 2 tablespoons (25g) sugar
  • ½ teaspoon fine sea salt
  • ¼ cup (50g) vegetable shortening
  • ¾ cup (170g) cold, unsalted butter, cubed
  • ½ cup (118ml) ice water
  • 1 tablespoon (15ml) apple cider vinegar

Pumpkin Filling

  • ¾ cup (170g) canned pure pumpkin purée Not pie filling
  • cup (66g) sugar
  • 1 large egg
  • 2 tablespoons (30ml) heavy cream
  • ½ teaspoon ground cinnamon
  • ¼ teaspoon ground ginger
  • teaspoon ground nutmeg preferably freshly ground

Assembly

  • egg wash 1 egg beaten with 1 tablespoon (15ml) of water
  • coarse sugar

Instructions
 

Pie Crust

  • In a large bowl, whisk together the flour, sugar and salt. Work the shortening into the flour mixture with your fingertips until evenly dispersed throughout.
  • Work the butter into the flour mixture with your fingertips, creating flat dime size pieces.
  • Mix the ice water and vinegar together. Sprinkle over the flour mixture a little at a time, stirring until dough comes together. You may not need all of the water depending on your climate.
  • Turn the dough out onto a lightly floured surface. Fold the dough over onto itself a few times. Do not overwork the dough! Form the dough into two disks. Cover with plastic wrap and refrigerate at least two hours or up to overnight.

Pumpkin Filling

  • In a medium-size bowl, mix together the pumpkin purée, sugar, egg, heavy cream, cinnamon, ginger and nutmeg until well combined.

Assembly

  • Preheat the oven to 400ºF (200ºC). Line two baking sheets with parchment paper.
  • On a lightly floured surface, roll the dough to 1/8-inch thickness. Cut the dough into twelve 5-inch* rounds, re-rolling the scraps as needed. Place the dough rounds a couple of inches apart onto the prepared baking sheets.
  • Place about 2 tablespoons of filling on each round, leaving a half-inch border. Apply egg wash to the edges of the rounds.
  • Fold the dough over and press the edges together. Crimp the edges with a fork. If any filling oozes out, wipe it up with a paper towel or it will burn.
  • Brush the pasties with egg wash. Cut a half-inch slit into the top of each pastie. Sprinkle with coarse sugar.
  • Bake until golden brown, about 18-20 minutes. Transfer to a cooling rack.

Notes

*To find a 5-inch round cutter, click here.
Keyword pastry

Pumpkin Cinnamon Mini Muffins

Pumpkin Cinnamon Mini Muffins

My mom had a cupboard in the kitchen containing a few old cookbooks that she rarely used. As a child, I used to enjoy perusing them and looking at the baked treats. Some of the cookbooks were so old, they had black and white photos or even just drawings of the food. The ones with drawings interested me because they often depicted smiling children enjoying the treats.

When I started learning to bake, I found a recipe for French Breakfast Puffs in one of those old books. The title sounded so fancy, but they were really just simple muffins dunked in butter and rolled in cinnamon sugar. I have no idea what the name of the cookbook was or what happened to it, but the delicious muffin recipe stuck around for a while. I’ve tweaked the recipe so many times over the years, and most recently, I added pumpkin to it. These Pumpkin Cinnamon Mini Muffins are one of the best versions I’ve created. The inside texture of the muffins is soft and moist and it contrasts nicely with the slight crunch you get from the cinnamon sugar on the outside. They look so cute too, like little pumpkins, and they definitely make children smile!

To watch the Instagram video of these mini muffins being made, click here.

Pumpkin Cinnamon Mini Muffins

Soft, tender pumpkin mini muffins rolled in cinnamon sugar
Course Breakfast, Brunch, Dessert
Servings 22 mini muffins

Ingredients
  

Muffins

  • 1 ½ cups (190g) all purpose flour, sifted
  • 1 ½ teaspoons baking powder
  • ½ teaspoon fine sea salt
  • 1 teaspoon ground cinnamon
  • ½ teaspoon ground ginger
  • ¼ teaspoon ground nutmeg, preferably freshly ground
  • ½ cup (100g) granulated sugar
  • cup (80ml) vegetable oil or neutral oil of your choice
  • 1 large egg
  • ½ cup (113g) canned pure pumpkin purée Not pie filling

Topping

  • cup (132g) granulated sugar
  • 1 ½ teaspoons ground cinnamon
  • 6 tablespoons (85g) melted butter

Instructions
 

Muffins

  • Preheat the oven to 350ºF (180ºC). Grease and flour a 24-serving mini muffin pan.* Do not use muffin liners. (The muffins need to form an outer crust. This prevents them from absorbing too much melted butter later in the recipe.)
  • In a medium-size bowl, whisk together the flour, baking powder, salt, cinnamon, ginger and nutmeg until well combined.
  • In a large bowl, whisk together the sugar, oil, egg and pumpkin purée until smooth and well combined. Stir in the flour mixture just until combined. The batter will be thick.
  • Transfer the batter to the prepared pan, filling the muffin cups about 2/3 full. (I ended up with 22 muffins.)
  • Bake until toothpick inserted into the muffins comes out clean, about 10-13 minutes. Do not over bake! Be diligent, since over baking can happen very quickly with mini muffins. Let the muffins cool in the pan for 5 minutes. Turn the muffins out and place on a cooling rack.

Topping

  • Whisk the sugar and cinnamon together in a shallow bowl until well combined.
  • Briefly dunk the warm muffins in melted butter, then roll in cinnamon sugar.

Notes

To find the mini muffin pan I used, click here.
Keyword muffins, pumpkin, pumpkin spice

Blueberry Nectarine Cobbler

Many families have an old favorite recipe for cobbler. I’m sharing my dad’s recipe with you and it’s definitely comfort food. It took awhile to get the ingredient amounts right because he never measured them. He used whichever fruit was available and plopped the dough on top haphazardly with a big spoon. But it was always delicious and came from the heart and that’s what mattered.

This recipe is so easy and versatile. Feel free to use peaches instead or use the berries of your choice. Make sure to enjoy it warm with a scoop of vanilla ice cream.


Blueberry Nectarine Cobbler

Vintage fruit cobbler with blueberries & nectarines or peaches
Course Brunch, Dessert
Servings 6

Ingredients
  

  • 6 medium ripe nectarines or peaches, peeled and thickly sliced about 2 1/4 lbs (1 kg)
  • 2 teaspoons lemon juice
  • ½ teaspoon pure vanilla extract
  • cup (67g) packed brown sugar
  • 1 tablespoon (8g) corn starch
  • ¼ teaspoon ground cinnamon
  • 1 ½ cups (227g) blueberries
  • 1 cup (113g) all purpose flour
  • ½ cup (100g) granulated sugar
  • 1 ½ teaspoons baking powder
  • ¼ teaspoon fine sea salt
  • 5 tablespoons (70g) cold butter, cubed
  • cup (75g) cold sour cream
  • 1 tablespoon (15ml) cold milk
  • 1 tablespoon (13g) coarse sugar for sprinkling

Instructions
 

  • Preheat the oven to 400ºF (200ºC). Grease a 2 quart baking dish.
  • In a large bowl, toss the nectarines with the lemon juice. Add the vanilla, brown sugar, cornstarch and cinnamon. Stir gently to combine. Fold in the blueberries.
  • Transfer the fruit mixture to the prepared baking dish. Bake for 10 minutes.
  • Meanwhile, in a medium-sized bowl, whisk together the flour, granulated sugar, baking powder and salt until well blended. Work the butter into the flour mixture with your fingertips or with a pastry blender until pea size pieces from. Stir in the sour cream and milk just until a shaggy dough forms.
  • Remove the baking dish from the oven. Top the fruit with 2-tablespoon-sized portions of dough. Sprinkle the dough with coarse sugar.
  • Return the baking dish to the oven and continue baking until the topping is deep golden brown, about 25 minutes. Let cool at least 15 minutes before serving, to allow the sauce to thicken.
Keyword blueberry nectarine, cobbler

Chocolate Turtle Drop Cookies

A chocolate turtle is a confection made with caramel and pecans. The shape resembles a turtle, which is how it got the name. This is my version of a turtle cookie, loaded with plenty of delicious add-ins.

Chocolate Turtle Drop Cookies

Chocolate cookies loaded with chopped chocolate, caramel chips, and toffee bits, topped with pecans.
Course Dessert
Servings 20 cookies

Ingredients
  

  • 2 cups (9 oz or 255g) all purpose flour, sifted
  • ½ cup (1 1/2 oz or 43g) unsweetened cocoa powder, preferably Dutch process
  • ½ teaspoon baking soda
  • ½ teaspoon fine sea salt
  • ½ cup (4 oz or 113g) unsalted butter, softened
  • ½ cup (3 1/2 oz or 100g) granulated sugar
  • ¾ cup 5 1/4 oz or 150g) packed brown sugar
  • 2 large eggs
  • 1 teaspoon pure vanilla extract
  • 1 cup (6 oz or 170g) coarsely chopped dark or semi-sweet chocolate (not chips)
  • 1 cup (6 oz or (170g) caramel chips (not bits)
  • 1 cup (6 oz or 170g) toffee bits or chopped candied pecans
  • 20 pecan halves

Instructions
 

  • Preheat the oven to 350ºF (180ºC). Line two large cookie sheets with parchment paper.
  • In a large bowl, whisk together the flour, cocoa powder, baking soda and salt.
  • In a separate large bowl, cream the butter, granulated sugar and brown sugar together with an electric mixer at medium speed, until light and fluffy.
  • Beat in the eggs and vanilla in three separate additions, making sure each addition is incorporated before adding the next. Beat in the flour mixture just until combined.
  • Set aside 20 chunks of the chopped chocolate. Fold the remaining chopped chocolate, the caramel chips and the toffee bits into the dough.
  • Place twenty 2-inch size portions of dough about 2-inches apart onto the prepared cookie sheets. (I used a #24 portion scoop*)
  • Top each cookie with a chunk of the reserved chocolate and a pecan half. Bake until the surface of the cookies is set, about 10-11 minutes. Let cool on the baking sheet for 1 minute then transfer to a cooling rack.

Notes

To find the portion scoop I used, click here.
Keyword chocolate, cookies

Peaches and Cream Loaf Cake

Every peach season, I get excited by the abundance of peaches at my local farmers market and I end up buying way too many. So if you’re like me and you have ripe peaches sitting on your counter, turn them into peach purée. I love adding peach purée to my iced tea or adding it to desserts like this moist, tender cake. This is one of my most popular cake recipes on social media, and for good reason. It does not disappoint! To watch the TikTok video, click here.

Peaches and Cream Loaf Cake

Moist, tender peach cake with peach cream cheese icing
Course Breakfast, Brunch, Dessert
Servings 1 loaf

Ingredients
  

Cake

  • 1 ¼ cups (5 1/2 ounces) all purpose flour, sifted
  • 1 teaspoon baking powder
  • ½ teaspoon baking soda
  • ½ teaspoon fine sea salt
  • ½ teaspoon ground cinnamon
  • teaspoon ground nutmeg, preferably freshly ground
  • 1 cup (7 ounces) granulated sugar
  • cup vegetable oil or neutral oil of your choice
  • 2 large eggs
  • 1 cup peach purée, divided (About 1 1/3 cups peeled, sliced peaches puréed in a food processor or blender)
  • ½ teaspoon pure vanilla extract
  • teaspoon pure almond extract

Icing

  • 2 tablespoons cream cheese, softened
  • 1 tablespoon unsalted butter, softened
  • 1 cup (4 ounces) powdered sugar, sifted
  • ¼ teaspoon pure vanilla extract
  • pinch fine sea salt
  • 1-2 tablespoons reserved peach puree
  • 2 tablespoons diced peaches

Instructions
 

Cake

  • Preheat oven to 350ºF. Line the bottom of an 8 x 4-inch loaf pan with parchment paper. Grease and flour the sides.
  • In a medium bowl, whisk together flour, baking powder, baking soda, salt, cinnamon and nutmeg.
  • Set aside 2 tablespoons peach purée for icing.
  • In a large bowl, beat sugar, oil, eggs, remaining peach purée and extracts until smooth.
  • Add flour mixture and beat just until combined.
  • Transfer batter to prepared baking pan. Bake until toothpick inserted into center comes out clean, about 38-45 minutes.
  • Let cake cool in pan for 10 minutes, then turn out onto a cooling rack to cool completely. Spread icing on cooled cake.

Icing

  • In a medium bowl, beat cream cheese and butter together until smooth.
  • Add powdered sugar, salt, vanilla extract and 1 tablespoon of peach purée. Beat until smooth. Add additional peach purée, if needed, until desired consistency is reached. Fold in diced peaches.
Keyword cake, peach

Cherry Cutie Pies

Cherry Cutie Pies

Cherry season is highly anticipated at my house. We love enjoying a bowl of fresh cherries during the summer. We also love fresh cherry desserts. These cute little hand pies are a family favorite. They have the most delicious fresh cherry filling, surrounded with buttery, flaky crust and topped with vanilla icing. The small size makes them perfect for sharing or taking them along in a picnic lunch. I like to make the crust and the filling the day before, which makes them come together quicker on baking day. I decorated mine with bright red maraschino cherries for the photo, but my favorite cherries to top them with are Italian-style maraschino cherries.


Cherry Cutie Pies

by Mari Vasseur
3-inch cherry hand pies with flaky crust, topped with vanilla icing
Course Dessert
Cuisine American
Servings 20 hand pies

Ingredients
  

Pie Crust

  • 2 ⅔ cups (340g) all purpose flour, sifted
  • 2 tablespoons (25g) sugar
  • ½ teaspoon fine sea salt
  • ¼ cup (48g) vegetable shortening
  • ¾ cup (170g) cold, unsalted butter, cubed
  • ½ cup (118ml) cold ice water
  • 1 tablespoon (15ml) apple cider vinegar

Cherry Filling

  • 12 ounces (340g) fresh cherries, pitted, halved and stems removed (about 1 3/4 cups after prep)
  • cup (66g) sugar
  • 1 tablespoon (10g) cornstarch
  • teaspoon almond extract
  • Egg wash: 1 egg beaten with 1 tablespoon (15 ml) of water

Icing

  • 1 ¼ cups (150g) powdered sugar, sifted
  • ½ teaspoon meringue powder (optional)
  • 2-3 tablespoons (30-45ml) whole milk
  • ¼ teaspoon pure vanilla extract
  • 1 dash fine sea salt
  • Pitted cherries for garnish (optional)

Instructions
 

Pie Crust

  • In a large bowl, whisk together the flour, sugar and salt. Work the shortening into the flour with your fingertips until it's evenly dispersed throughout. Work the butter into the flour mixture, creating flat dime size pieces.
  • In a glass measuring cup, mix the ice water and vinegar together. Sprinkle the liquid over the flour mixture a little at a time, stirring until the dough comes together. You may not need all of the liquid depending on your climate.
  • Turn the dough out onto a lightly floured surface. Fold the dough over onto itself a couple of times. Do not overwork the dough. Divide the dough into 2 equal portions and form into disks. Wrap them in plastic wrap and refrigerate until firm, at least 2 hours or up to overnight.

Cherry Filling

  • In a medium-sized saucepan, combine the cherries, sugar and cornstarch. Simmer over low heat, stirring occasionally, until the cherries start to soften and the juices are thickened, about 5 minutes. Transfer the cherries to a bowl. Stir in the almond extract. Set aside to cool completely.

Icing

  • In a medium-sized bowl, whisk together the powdered sugar, meringue powder, 1 1/2 tablespoons (22ml) of milk, the salt and the vanilla extract. Add additional milk as needed to achieve the desired consistency. (If you decide to omit the meringue powder, you'll need less milk.)

Assembly

  • Preheat oven to 375°F (190°). Line a large baking sheet with parchment paper.
  • On a lightly floured surface, roll dough to about 1/8-inch (.3cm) thickness. Cut out 20-22 3-inch (7.6cm) rounds. Transfer half of the rounds to a baking sheet, placing them about 2 inches (5cm) apart. Using a slotted spoon, place the filling onto rounds to within 1/2-inch (1.3cm) of the edges. Using a small pastry brush or your finger, apply egg wash to the edges. Top with the remaining rounds. Press the edges to seal & crimp with a fork. Brush the pies with egg wash. Cut a small x in the top of each pie.
  • Bake until golden, about 18-24 min. Transfer the pies to a cooling rack to cool completely. Brush icing on the cooled pies with a pastry brush. When the icing is almost set, top the pies with pitted cherries if desired.
Keyword cherry, pastry, pie