Lemon Bundt Cakes with Blueberry Cream Cheese Icing

Lemon Bundt Cakes with Blueberry Cream Cheese Icing

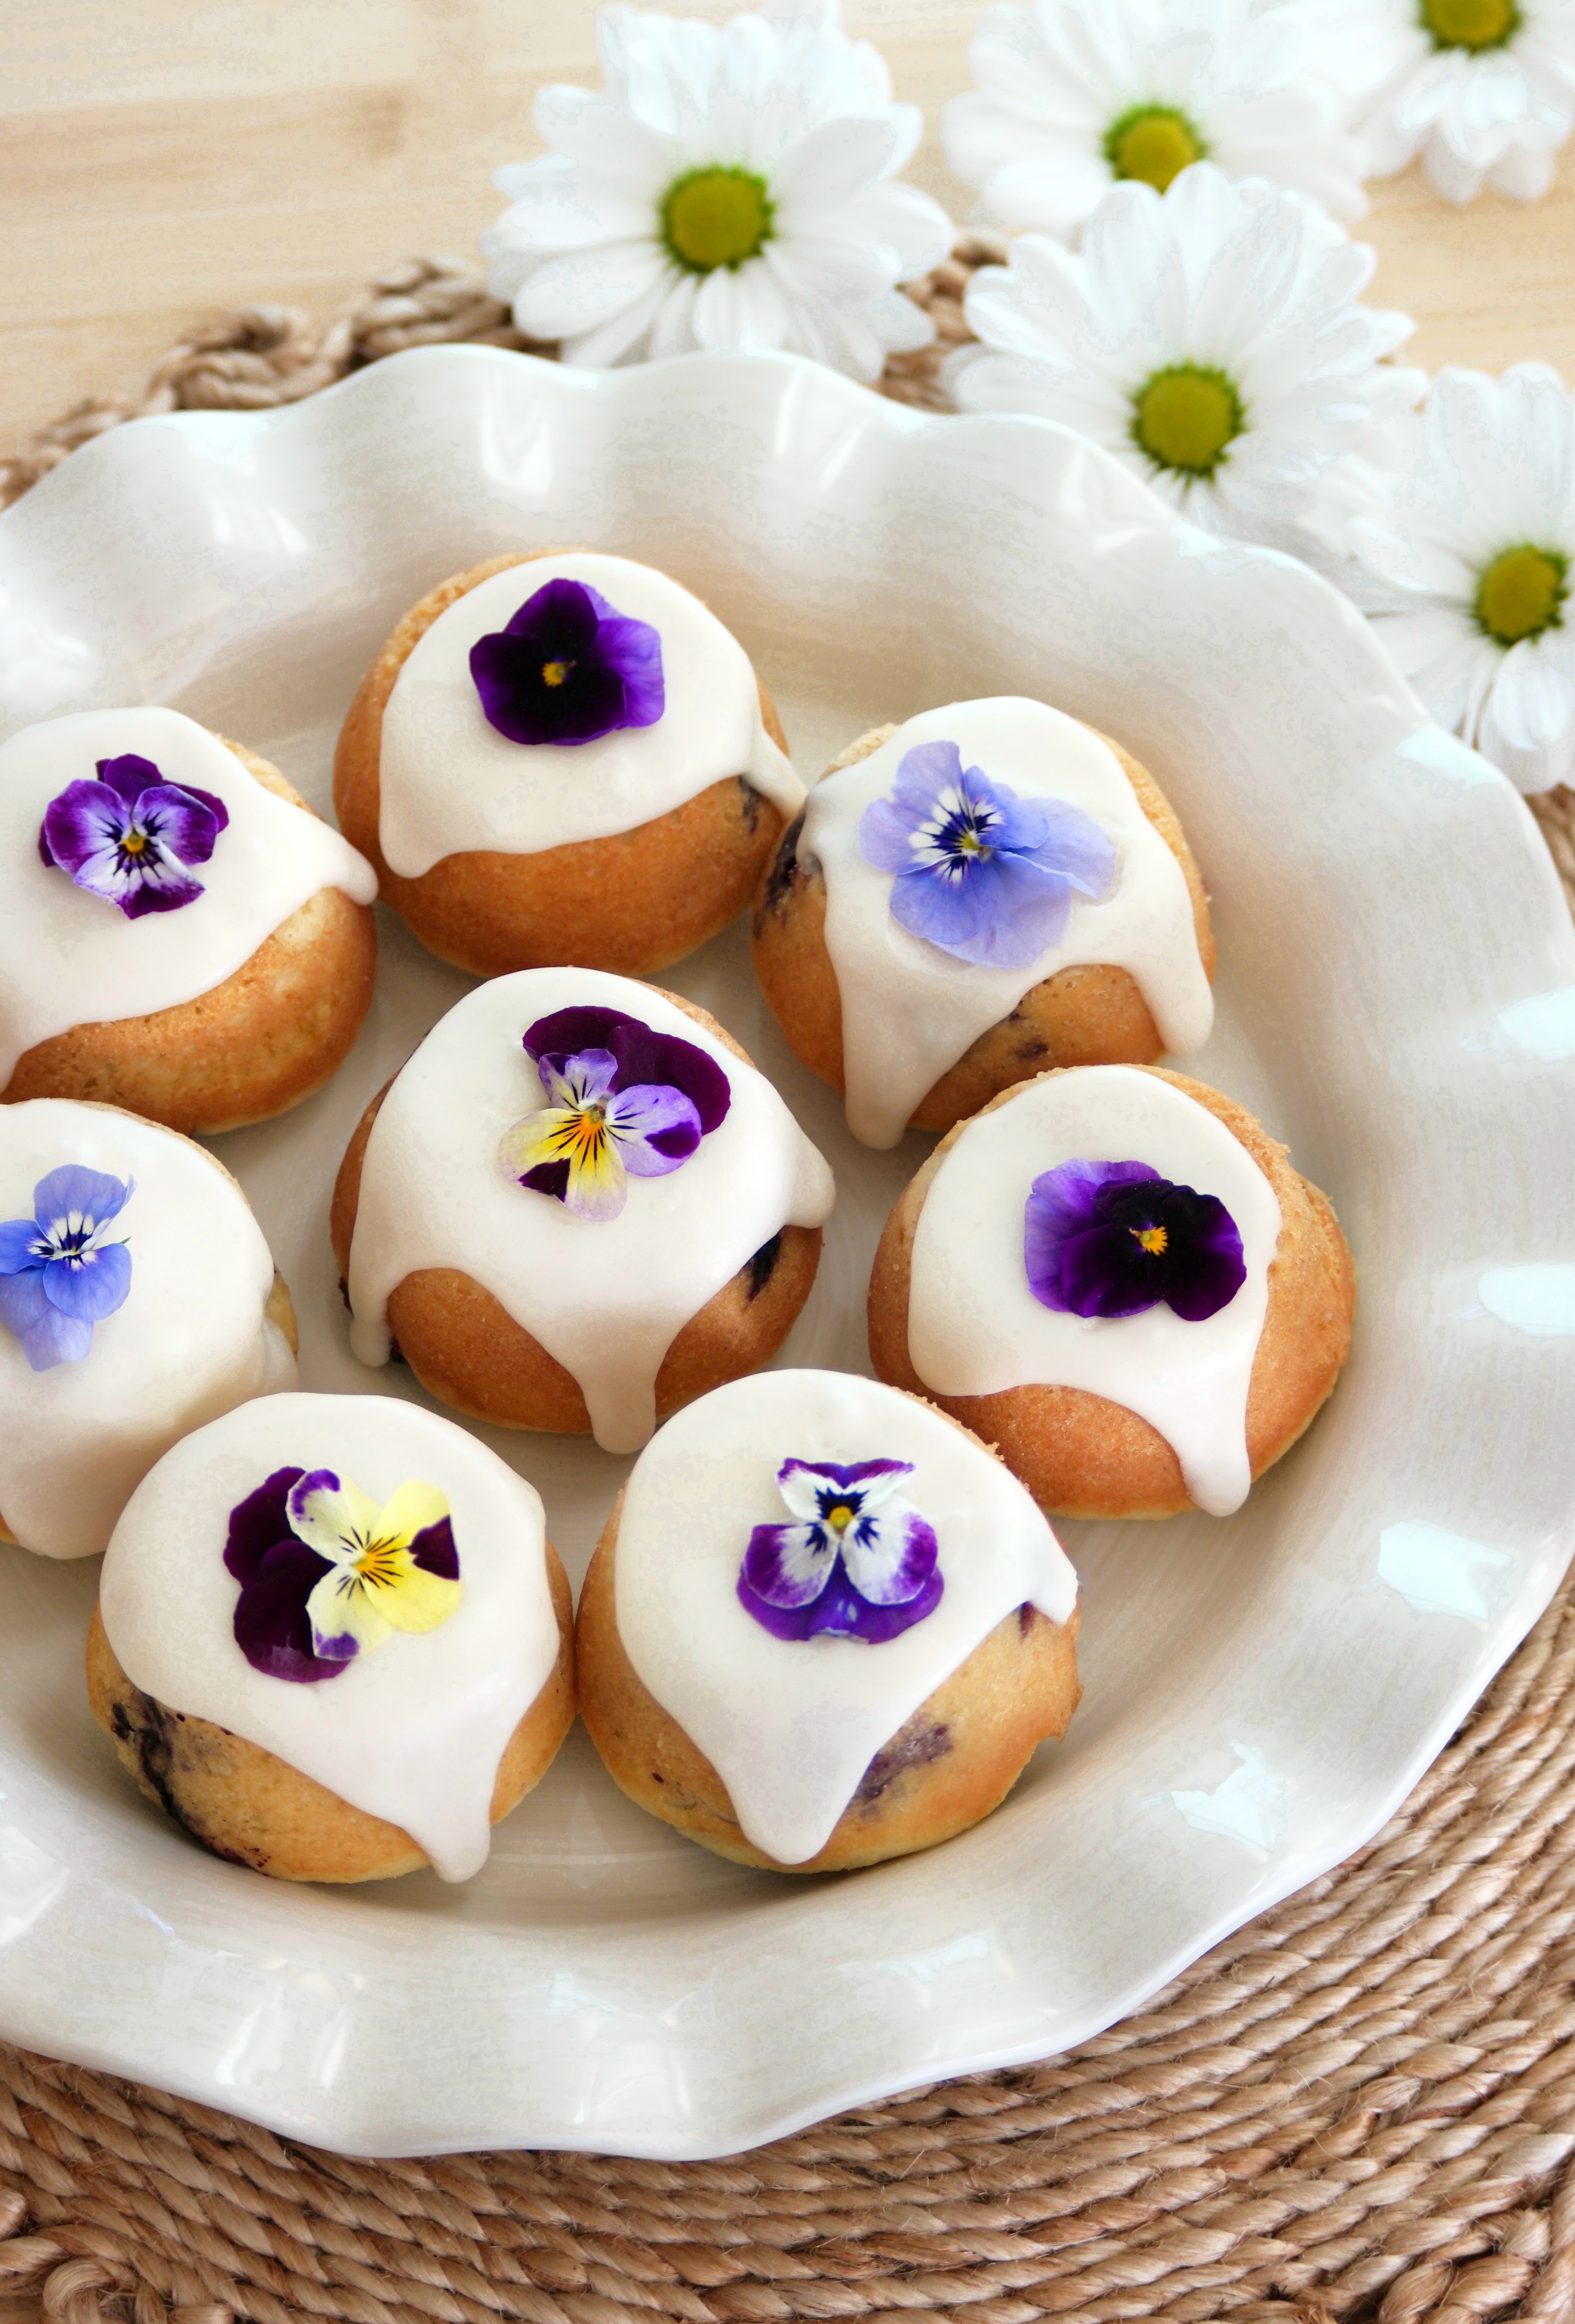
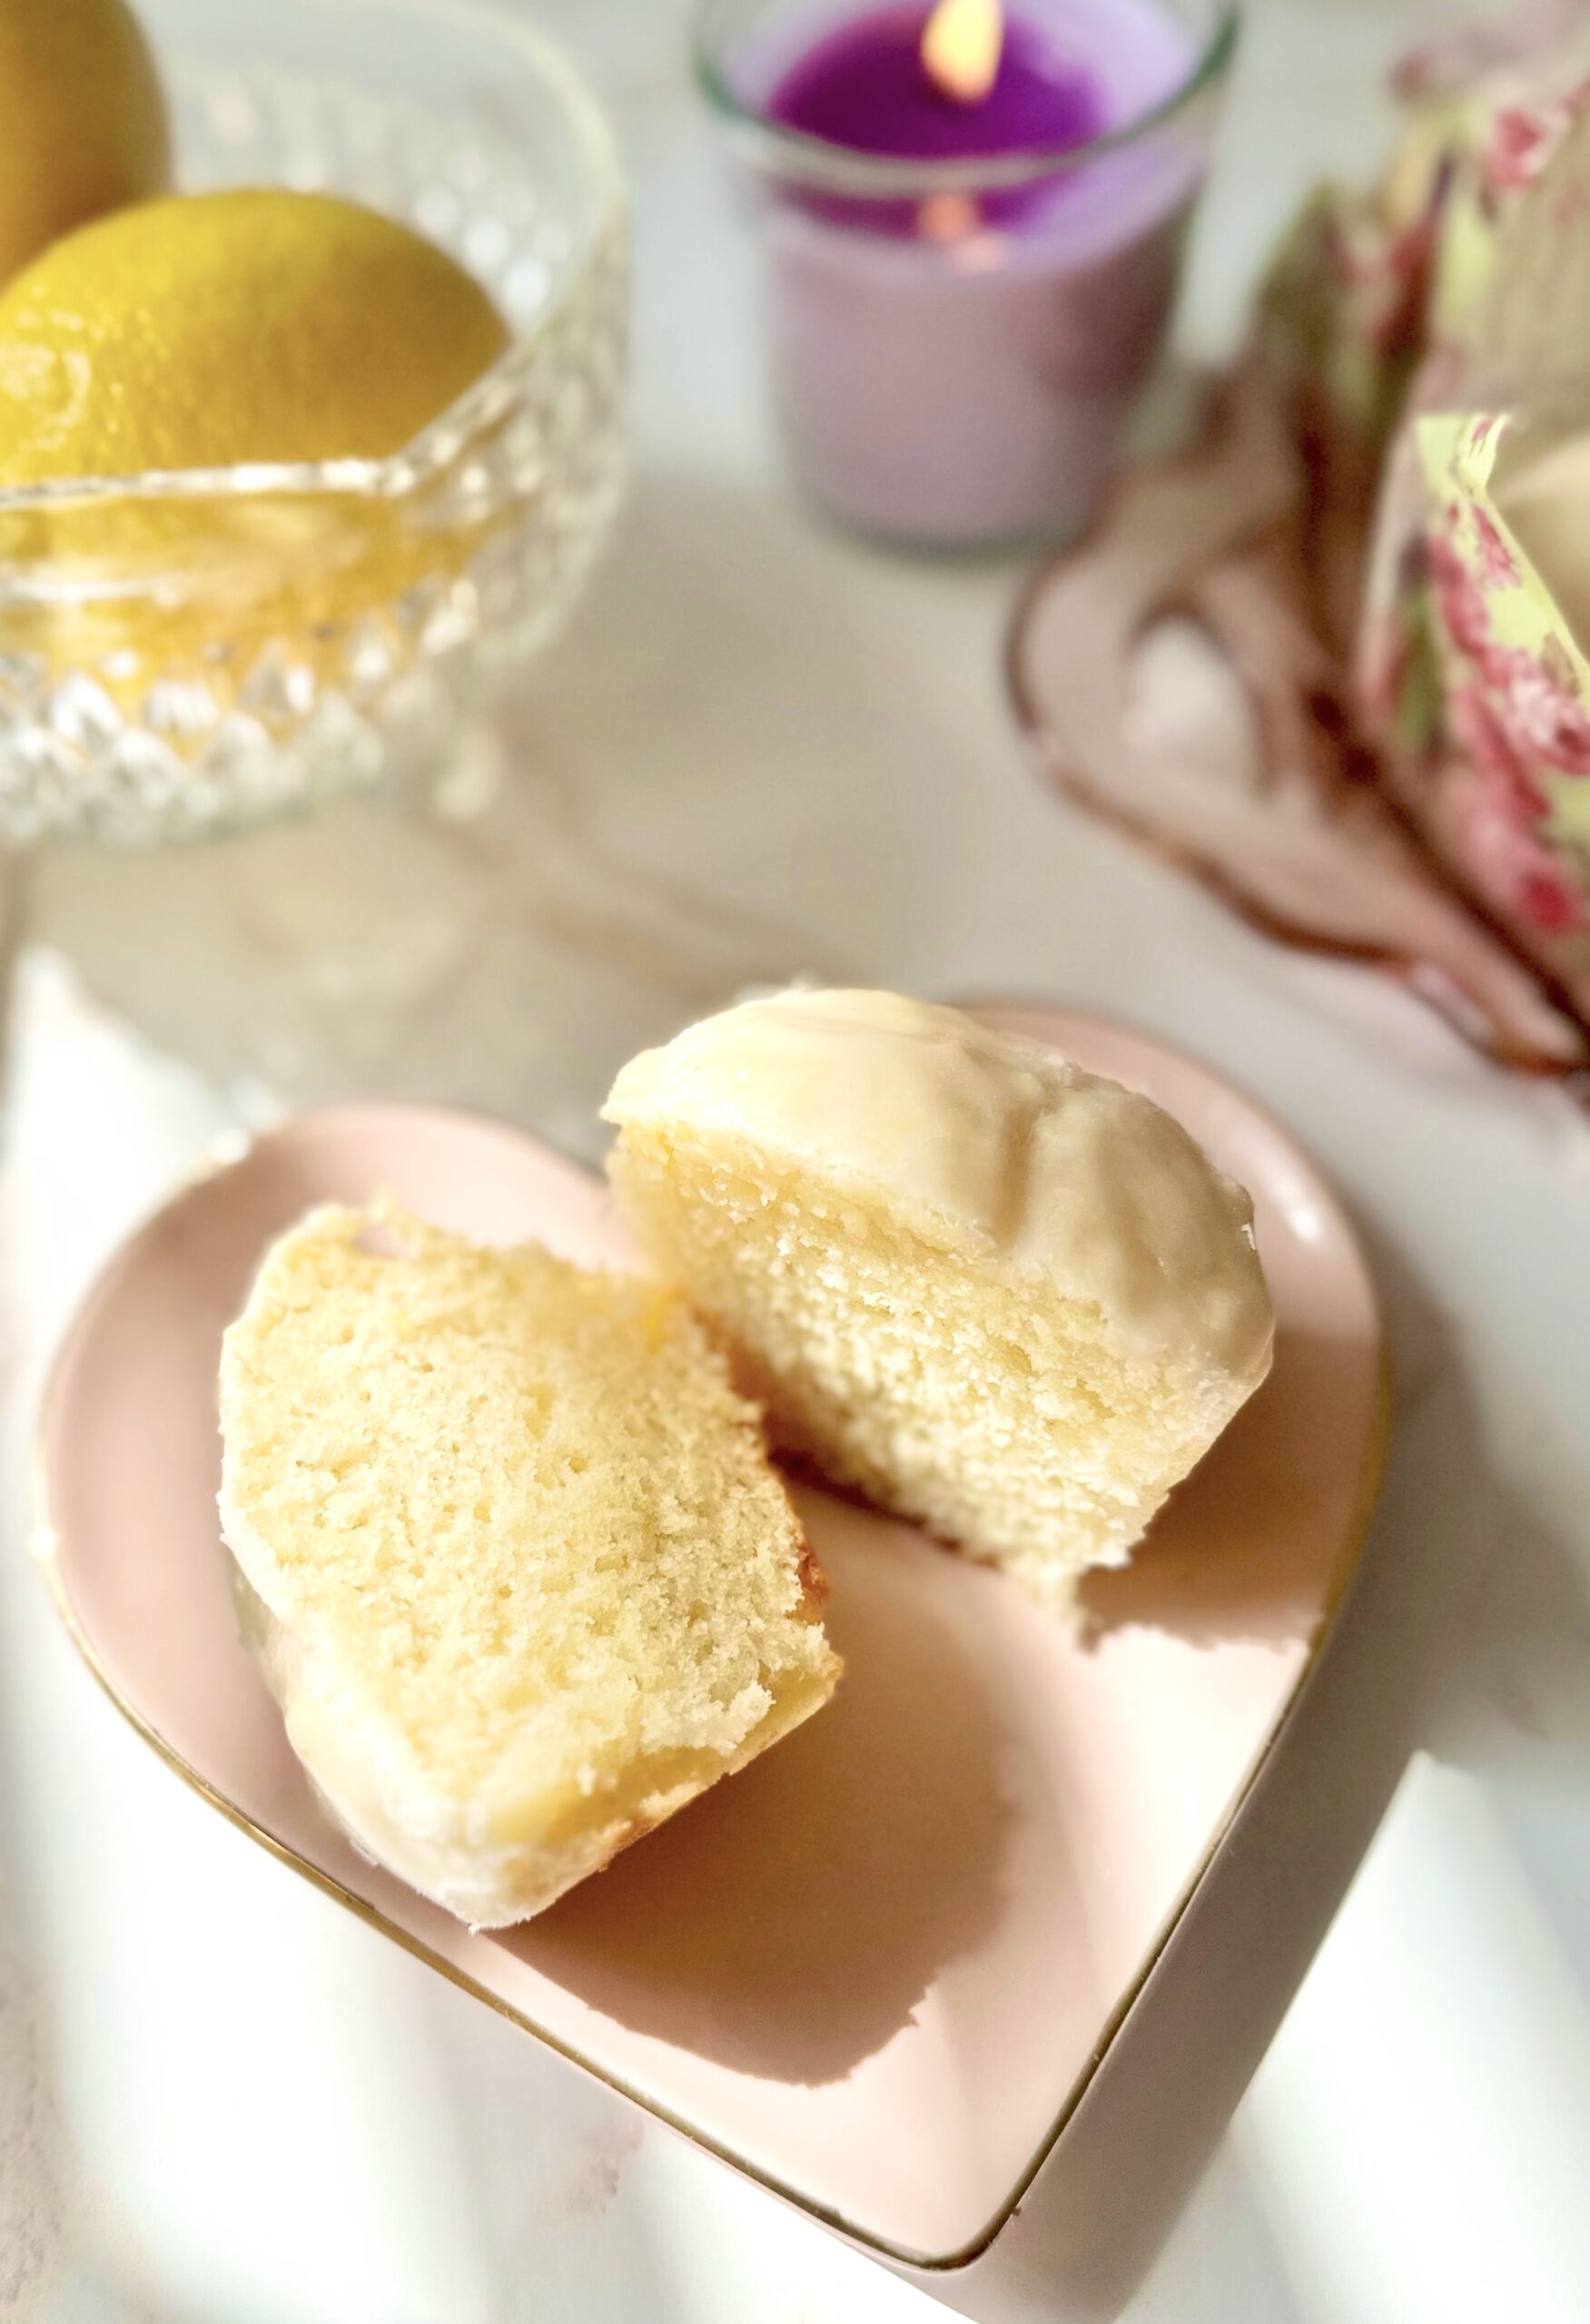
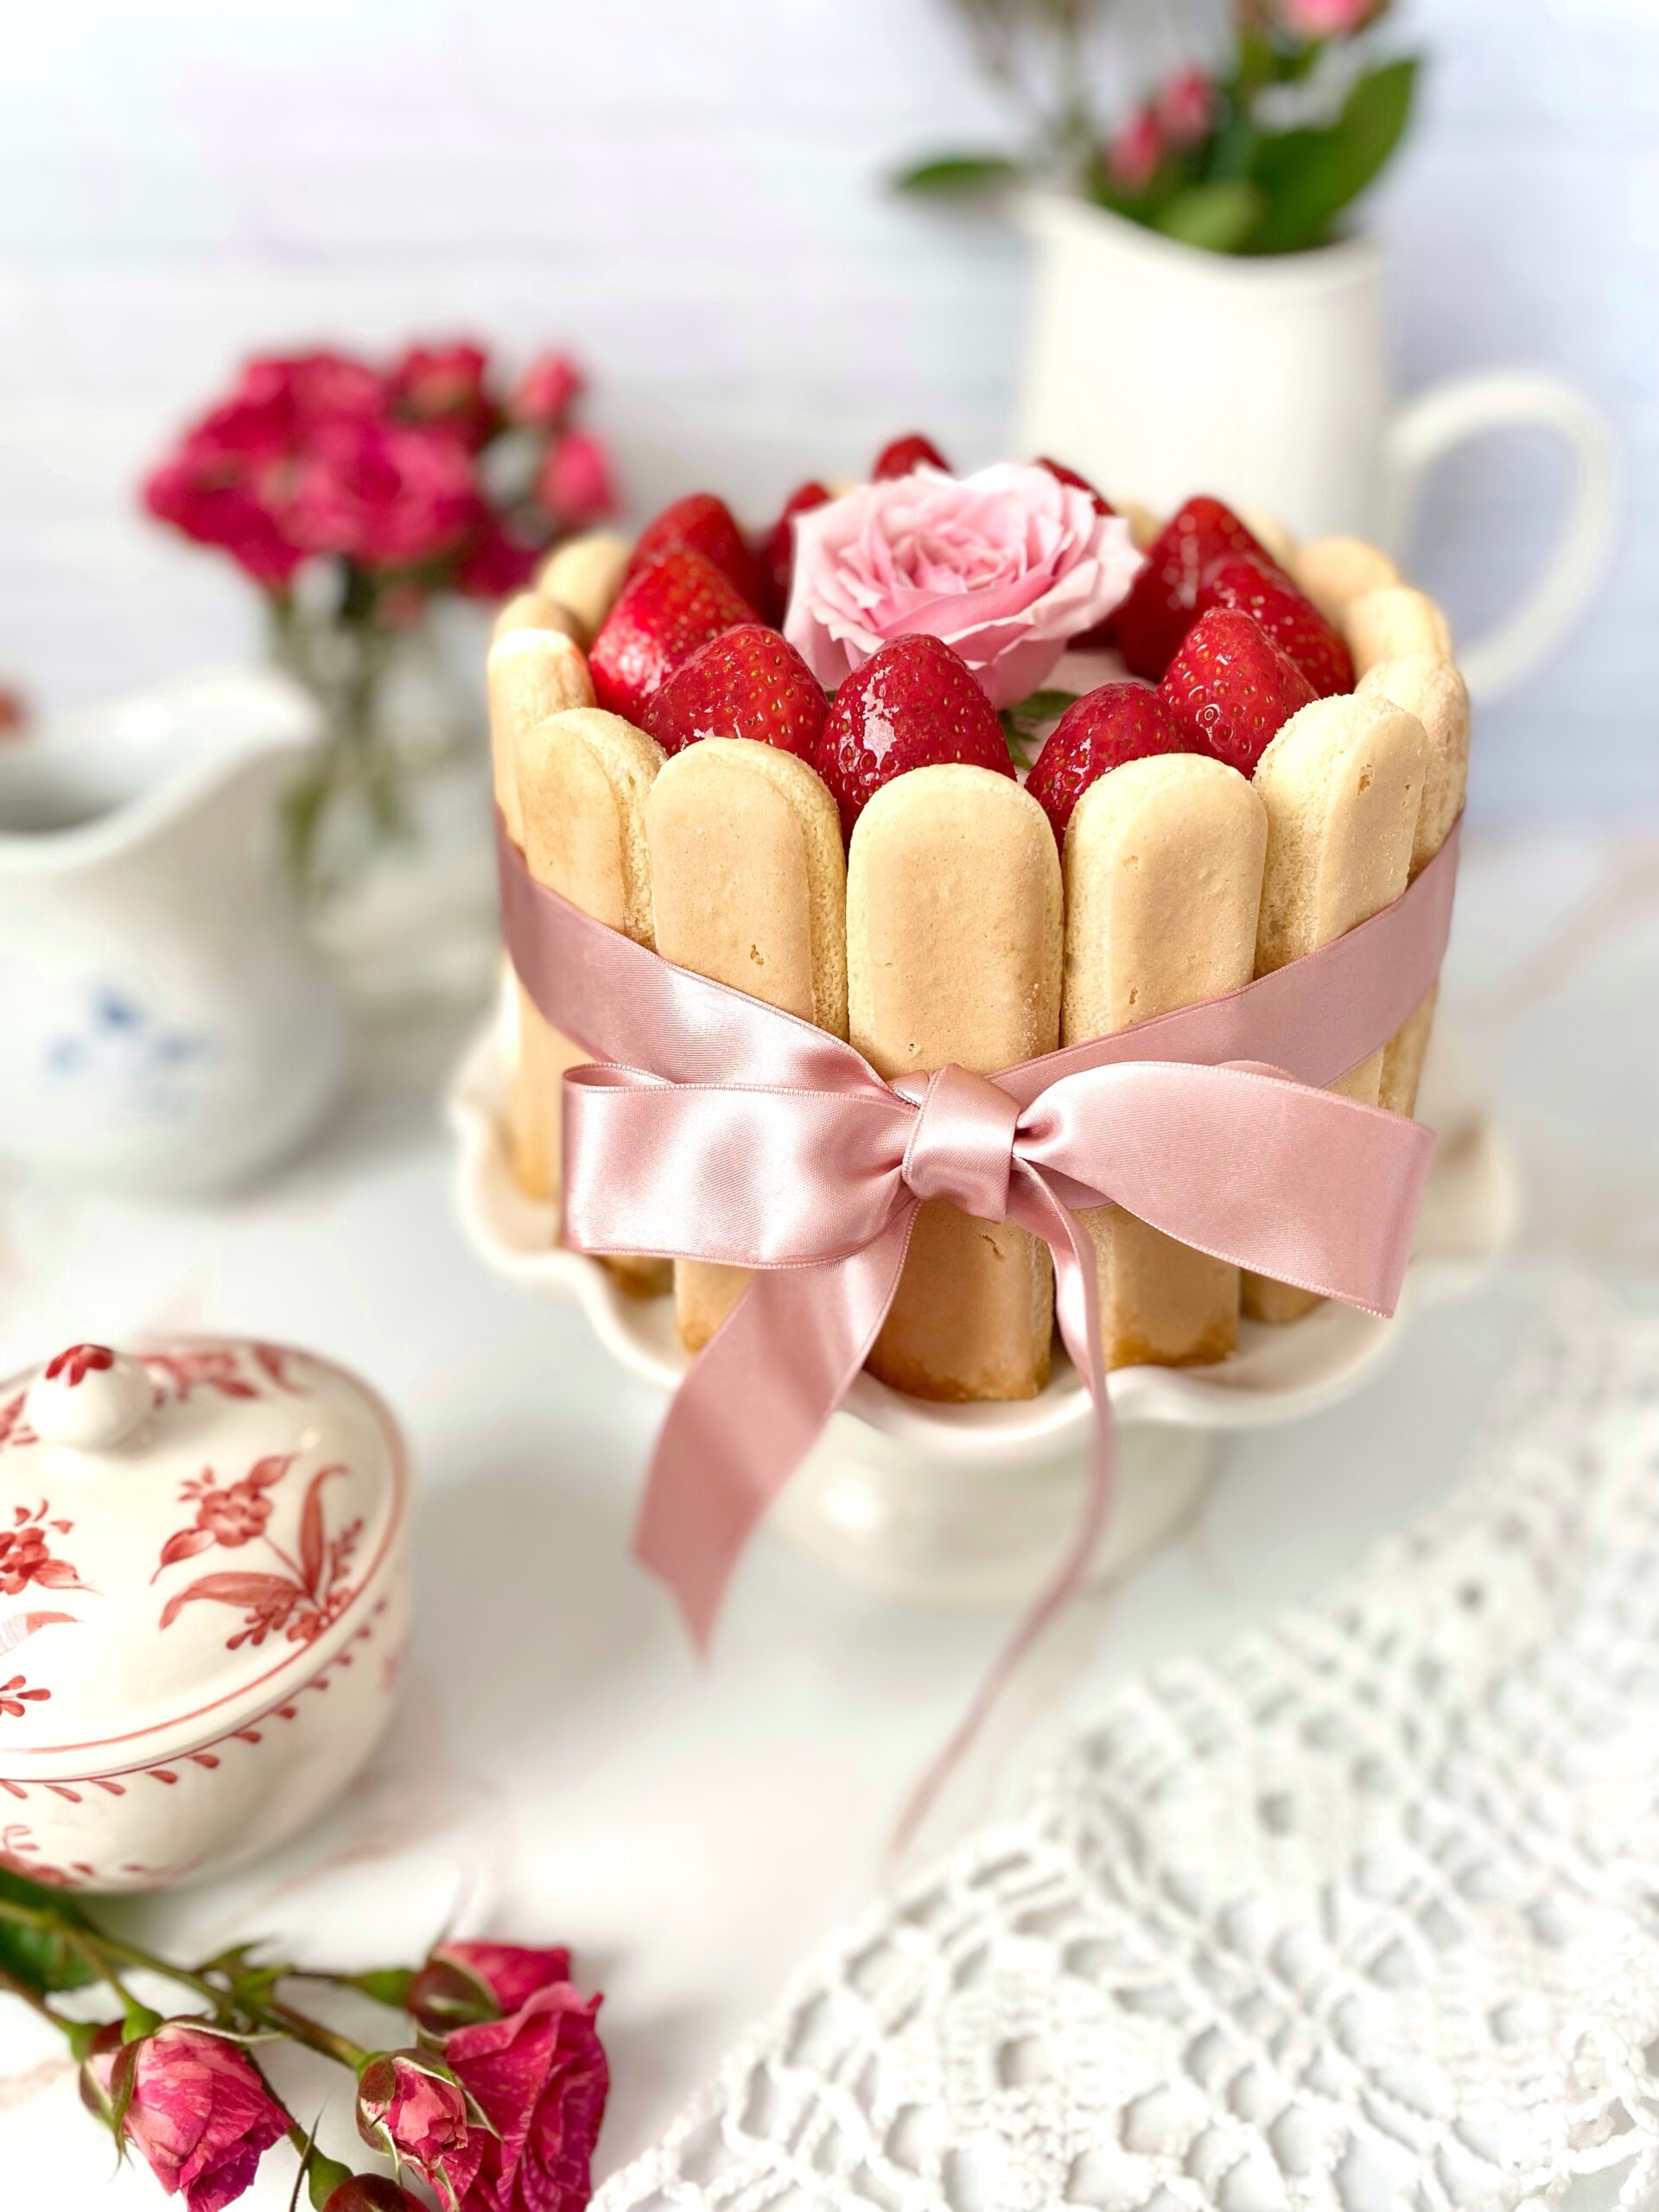
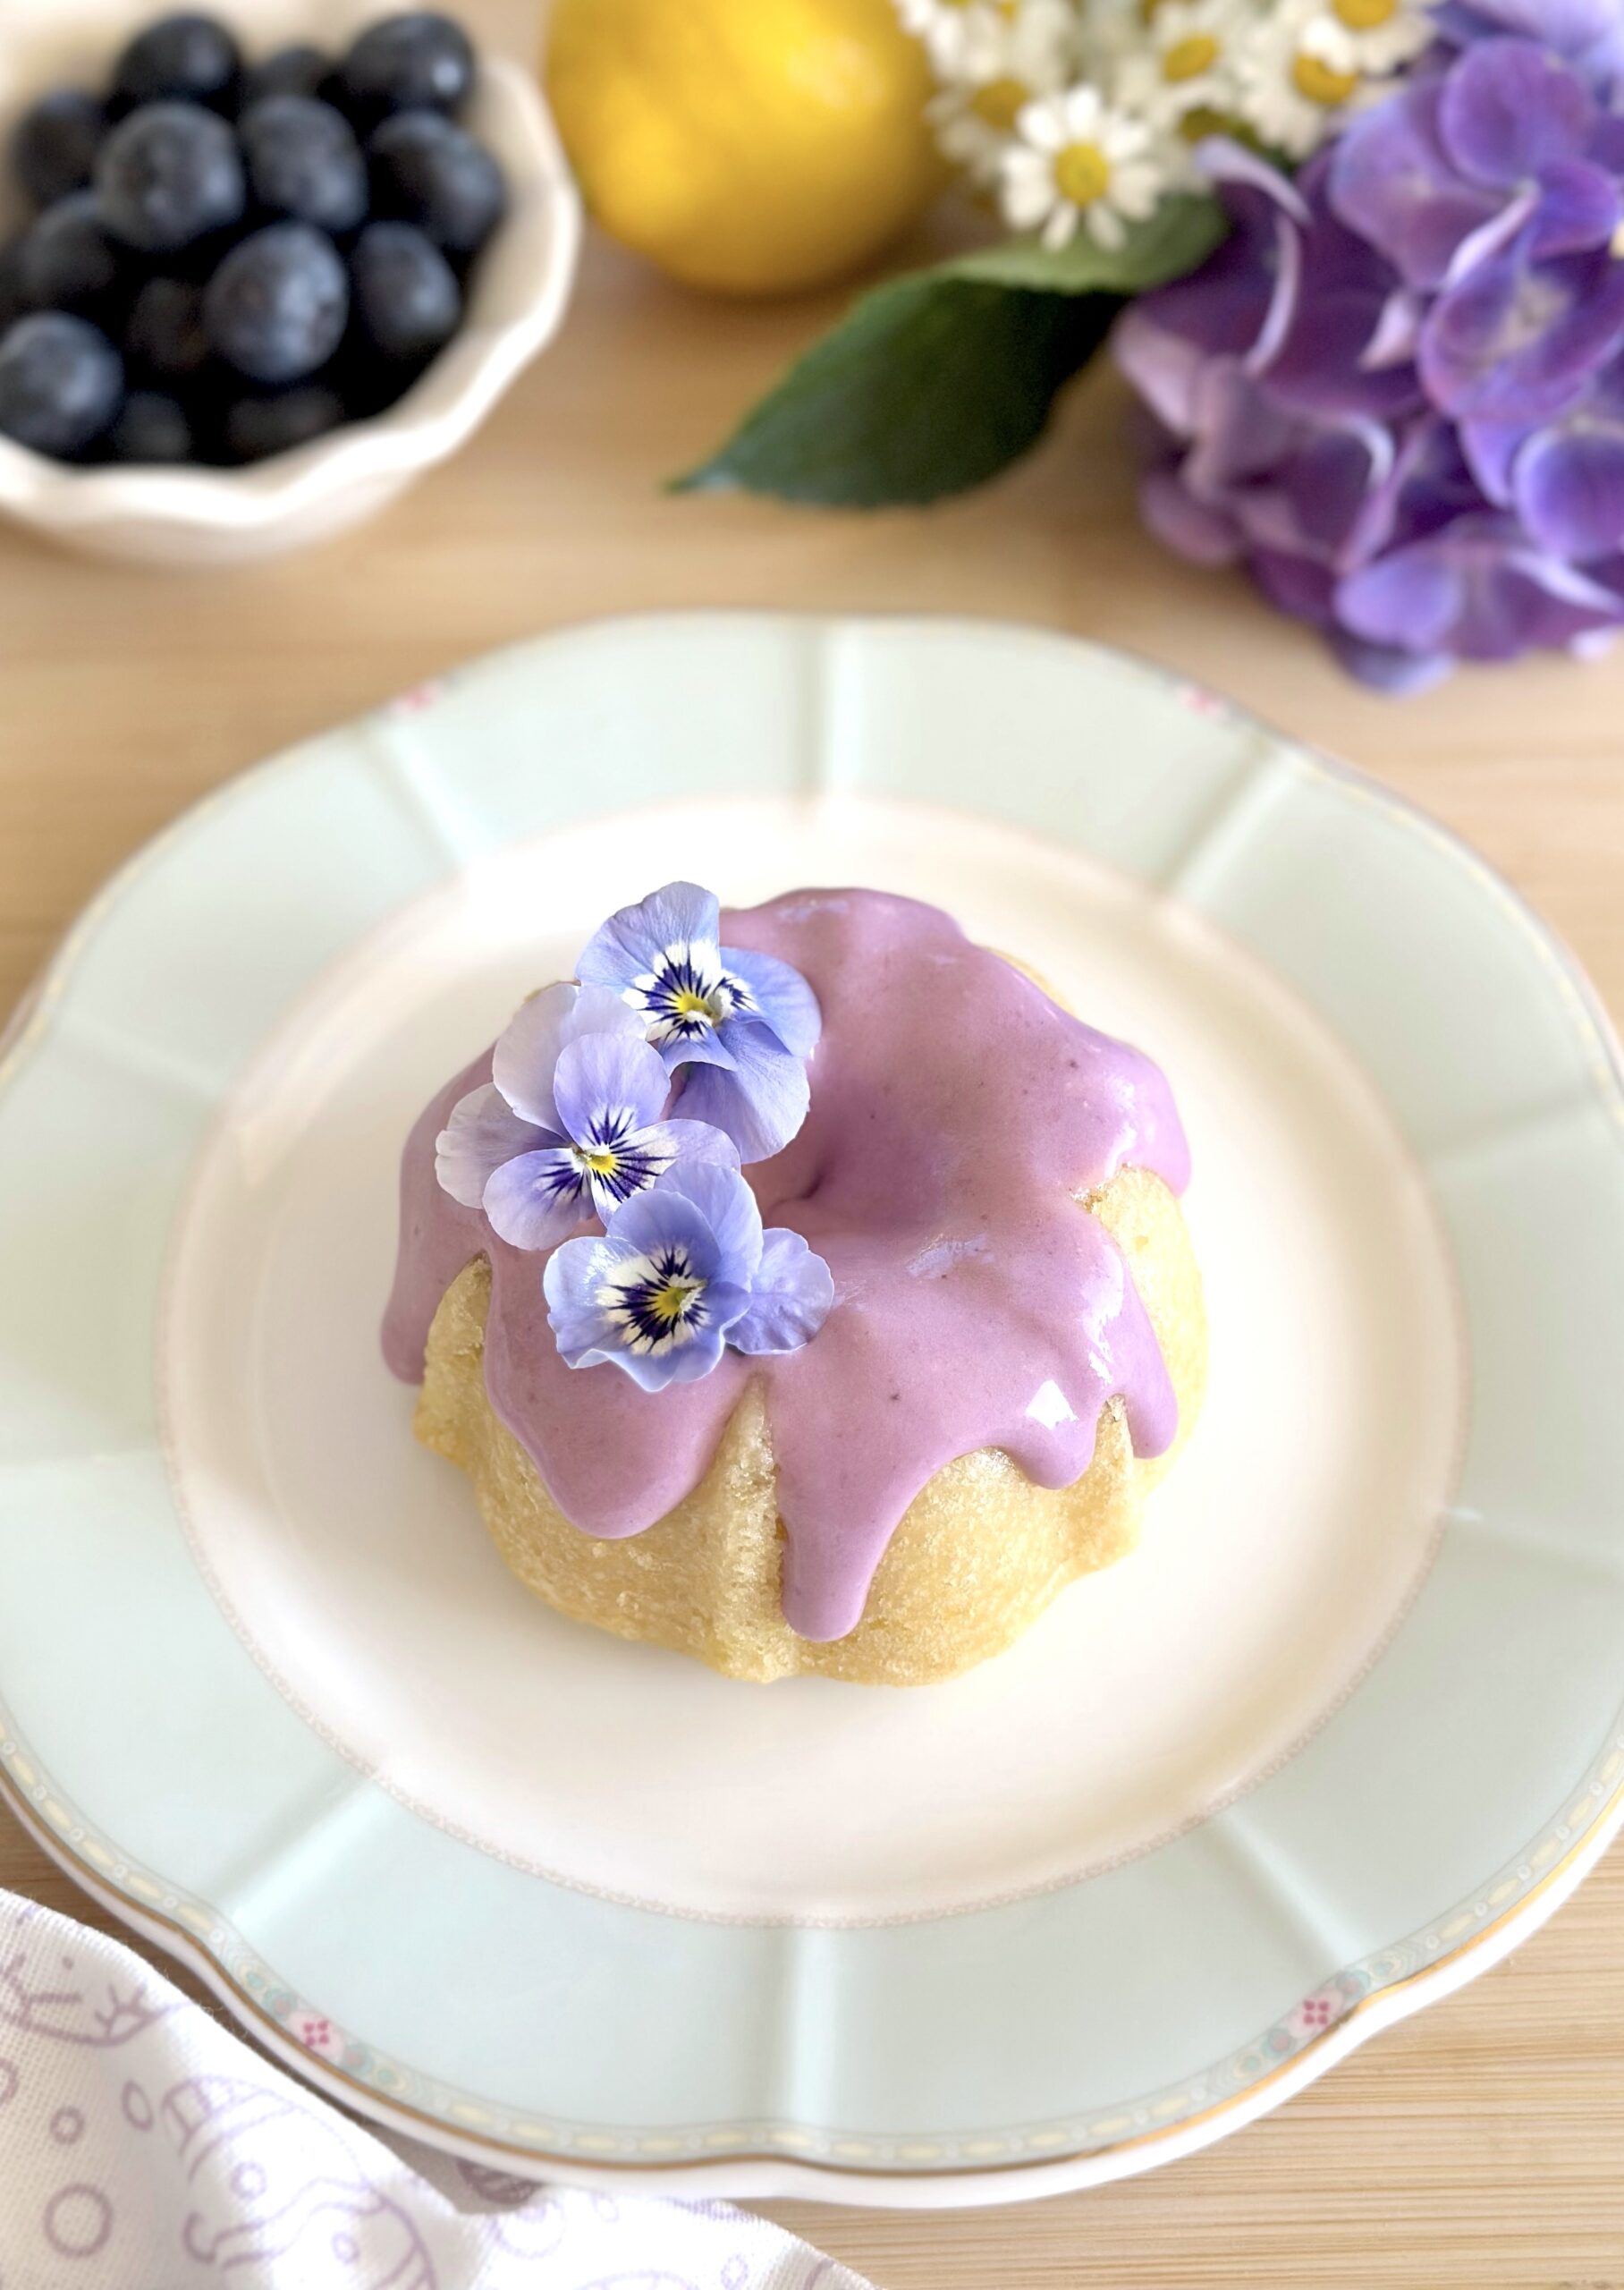
Say hello to springtime in cake form. These soft, fluffy, little lemon bundt cakes are bursting with lemon flavor and topped with a beautiful, delicious blueberry cream cheese icing. The icing gets it’s natural beauty from fresh blueberries. The colors and flavors of these cakes remind me of sunshine and spring blooms. I decorated my cakes with tiny blue violas from my garden. They would also look pretty topped with fresh chamomile flowers.

I used a bundtlette pan with six 1-cup servings. To find the pan I used, click here. This recipe also works as cupcakes using a standard muffin pan. The baking time will be a bit shorter. If you’re not a fan of blueberry icing, you can glaze the cakes with lemon icing instead. To find my lemon icing recipe, click here.

Lemon Bundt Cakes with Blueberry Cream Cheese Icing

by Mari Vasseur
Soft, fluffy lemon bundtlette cakes topped with blueberry cream cheese icing
Course Dessert
Servings 6 Bundtlette cakes

Ingredients
  

Lemon Simple Syrup

  • ¼ cup (50g) granulated sugar
  • Juice of one medium lemon plus enough water to make 1/4 cup (59ml)

Lemon Bundt Cakes

  • 1 ¼ cups (142g) cake flour, sifted
  • 1 teaspoon baking powder
  • ½ teaspoon baking soda
  • ½ teaspoon fine sea salt
  • ¾ cup (150g) granulated sugar preferably fine granulated sugar (not powdered sugar)
  • Zest of 2 medium lemons
  • ½ cup (107 ml) vegetable oil or neutral oil of your choice
  • 2 large eggs room temperature
  • ½ teaspoon pure vanilla extract
  • ¼ cup (59 ml) whole milk room temperature
  • ¼ cup (57g) sour cream room temperature

Blueberry Cream Cheese Frosting

  • cup (57g) blueberries
  • 2 teaspoons granulated sugar
  • 1 teaspoon fresh lemon juice
  • ½ cup (113g) cream cheese, softened
  • 2 tablespoons (28g) unsalted butter, softened
  • ½ teaspoon pure vanilla extract
  • ½ cup (60g) powdered sugar, sifted
  • 2-4 tablespoons (30-59 ml) whole milk room temperature

Instructions
 

Lemon Simple Syrup

  • In a small saucepan, combine the sugar, lemon juice, and water over medium-low heat. Cook and stir gently just until the sugar is dissolved. Set aside to cool.

Lemon Bundt Cakes

  • Preheat the oven to 350ºF (180ºC). Grease and flour a bundtlette pan with six 1-cup servings. Make sure to thoroughly grease and flour all of the crevices. (To find the pan I used, see note below.*)
  • In a medium-sized bowl, whisk together the flour, baking powder, baking soda and salt until well blended.
  • In a large bowl whisk together the sugar and lemon zest until well combined. Add the oil, eggs, and vanilla extract and whisk until smooth and creamy.
  • In a small bowl, whisk together the milk and sour cream. Stir the flour mixture into the batter in 2 additions, followed by half of the milk mixture after each addition. Stir just until combined.
  • Fill the cake pan wells half full with the batter. (If using a standard muffin pan, fill the wells 2/3 full.) Bake until the tops are springy and a toothpick inserted in the centers of the cakes comes out clean or with a few crumbs attached, about 14-16 minutes. Check for doneness a couple of minutes early to avoid over baking. (Baking time is shorter for a standard muffin pan.) Cool the cakes in the pan for 8 minutes, then turn the cakes out onto a cooling rack. Brush the warm cakes generously with lemon simple syrup.

Blueberry Cream Cheese Icing

  • In a small saucepan, combine the blueberries, sugar and lemon juice. Stir occasionally over medium heat, until the blueberries start to soften and the mixture starts to bubble. Smash the blueberries with a potato masher or the back of a spoon. Let the mixture simmer gently until thickened to a jam consistency, about 2-3 minutes. Strain the cooked blueberries through a mesh sieve for a smooth consistency. You can skip this step if you prefer a chunky consistency. Set aside to cool to room temperature.
  • In a medium-sized bowl, beat the cream cheese and butter together until smooth. Don't over beat. Cream cheese tends to curdle if beaten too much.
  • Add the powdered sugar, vanilla and 2 tablespoons (30ml) of milk and beat until smooth and well blended. Stir in the cooled blueberries until combined. Stir in more milk as needed to achieve the desired consistency. Spoon or drizzle the icing onto the cooled lemon cakes.

Notes

To find the bundt cake pan I used, click here.
Keyword cake, lemon bundts

Blueberry Cornmeal Tea Cakes with Honey Butter Icing

Blueberry Cornmeal Tea Cakes with Honey Butter Icing

If you’re looking forward to spring as much as I am, you’ll love these tender, fluffy Blueberry Cornmeal Tea Cakes. They taste like soft, sweet cornbread with the added freshness of juicy blueberries. The Honey Butter Icing adds the perfect, sweet finish. Who doesn’t love cornbread slathered with honey and butter? It’s a match made in heaven and it works so well on these delightful tea cakes.

I placed them upside down because they look more pretty and elegant that way. I added some fresh, pesticide free violas to the tops. They would also be cute decorated with fresh blueberries or chamomile flowers.

This versatile recipe can also be made into muffins by filling the muffin pan cups 2/3 full instead of 1/2 full. The baking time may be a little longer. Place the muffins right side up on the cooling rack.

To see the inside of the tea cakes, watch the TikTok video. Click here.

Blueberry Cornmeal Tea Cakes with Honey Butter Icing

Sweet, soft cornbread cakes with blueberries, topped with honey butter icing
Course Breakfast, Brunch, Dessert
Servings 12

Ingredients
  

Blueberry Cornmeal Tea Cakes

  • 1 ¼ cups (159g) all purpose flour, sifted
  • ½ cup plus 2 1/2 tablespoons (130g) granulated sugar
  • ¼ cup (36g) cornmeal
  • 2 teaspoons baking powder
  • ½ teaspoon fine sea salt
  • 2 large eggs
  • ¾ cup (170g) sour cream
  • ¼ cup (57ml) vegetable oil or neutral oil of your choice
  • 2 tablespoons (28g) unsalted butter, melted
  • ¾ teaspoon pure vanilla extract
  • Zest of 1 small lemon
  • 1 cup (170g) blueberries

Honey Butter Icing

  • 1 cup (120g) powdered sugar, sifted
  • 2 tablespoons (28g) unsalted butter, melted
  • 1 tablespoon honey
  • Pinch fine sea salt
  • 1-2 tablespoons whole milk or half and half

Instructions
 

Blueberry Cornmeal Tea Cakes

  • Preheat the oven to 350ºF (180ºC). Grease and flour a 12-serving muffin pan*.
  • In a large bowl, whisk together the flour, sugar, cornmeal, baking powder and salt.
  • In a medium bowl, whisk together the eggs, sour cream, oil, butter, vanilla and lemon zest until smooth.
  • Stir the wet ingredients into the dry ingredients until combined. Don't over mix. A few lumps are okay. Fold in the blueberries.
  • Fill the muffin cups half full. Bake until the tops of the cakes are light golden, the tops are springy and a toothpick inserted into the center of the cakes comes out clean, about 14-16 minutes.
  • Cool the cakes in the pan for 5 minutes, then remove them from the pan and place them upside down on a cooling rack. Top the cooled cakes with Honey Butter Icing.

Honey Butter Icing

  • In a medium bowl, whisk together the powdered sugar, butter, honey, salt and 1 tablespoon of milk. Add additional milk as needed to achieve your desired consistency. Whisk until smooth.

Notes

To find the muffin pan I used, click here.
Keyword blueberry, cake, cornbread

Strawberry Crumb Cake

Strawberry Crumb Cake

Tender vanilla crumb cake topped with fresh strawberries, plenty of crumb topping and fresh strawberry icing
Course Breakfast, Brunch, Dessert
Servings 8

Ingredients
  

Crumb Topping

  • ¾ cup (96g) all purpose flour
  • cup (66g) granulated sugar
  • 2 tablespoons (25g) packed brown sugar
  • teaspoon fine sea salt
  • 4 ½ tablespoons (64g) cold, unsalted butter, cubed

Cake

  • 1 ¼ cups (160g) all purpose flour, sifted
  • 1 ½ teaspoons baking powder
  • teaspoon fine sea salt
  • 6 tablespoons (85g) unsalted butter, softened
  • ¾ cup (150g) granulated sugar
  • 1 large egg
  • 1 large egg yolk
  • 1 ½ teaspoons pure vanilla extract
  • cup (78ml) whole milk
  • ¼ cup (57g) sour cream
  • 1 cup (142g) chopped strawberries (1/2-inch pieces)
  • fresh strawberries for garnish optional

Fresh Strawberry Icing

  • ¾ cup (90g) powdered sugar, sifted
  • 2 tablespoons puréed strawberries
  • 1 tablespoon half and half

Instructions
 

Crumb Topping

  • In a medium bowl, whisk the flour, sugar , brown sugar and salt together.
  • Work in the butter with your fingertips until the mixture looks like wet sand. Press it together to form chunks. Set aside in the refrigerator until ready to use.

Cake

  • Preheat the oven to 350ºF (180ºC). Line the bottom of an 8-inch cake pan with a removable bottom or an 8-inch springform pan, with parchment paper. Grease and flour the insides or line with a strip of parchment paper.
  • In a medium bowl, whisk together the flour, baking powder and salt. Set aside.
  • In a large bowl, cream the butter and sugar with an electric mixer on medium speed, until light and fluffy.
  • Beat the egg, egg yolk and vanilla into the butter mixture in 3 separate additions, making sure each addition is incorporated before adding the next.
  • In a small bowl, whisk the milk and sour cream together. On low speed, mix the flour mixture into the batter in two additions alternating with half of the milk mixture. Beat just until combined.
  • Transfer the batter to the prepared pan. Smooth the batter with a spatula. Place the strawberries evenly on top of the batter. Sprinkle the crumb topping over the top.
  • Bake until the topping is golden brown and a toothpick inserted into the center of the cake comes out clean, about 48-55 minutes. Do not over bake. Let the cake cool in the pan for 10 minutes, then remove it from the pan and transfer it to a cooling rack.

Fresh Strawberry Icing

  • In a medium bowl, whisk together the powdered sugar and puréed strawberries. Add the half & half a little at a time until your desired consistency is achieved. Whisk until smooth. Drizzle over the cooled cake.

Notes

To find the cake pan I used, click here.
Keyword cake, strawberry

Pineapple Coconut Cake Bars

Pineapple Coconut Cake

If you like tropical flavors, you’ll love this spring dessert from my childhood. We used to call it Pineapple Coconut Snack Cake, but I would consider it more of a cake bar, so I changed the name to Pineapple Coconut Cake Bars. We would typically enjoy it on Easter or Mother’s Day because it was my mom’s favorite. It’s buttery, moist and rich. It’s also kind of addicting, because everyone always asks for seconds. You can double the recipe if you need to.


Pineapple Coconut Cake Bars

by Mari Vasseur
Soft, ultra-moist pineapple cake topped with a buttery toasted coconut topping
Course Dessert
Servings 9

Ingredients
  

Cake

  • 1 cup plus 2 tablespoons (142g ) all purpose flour, sifted
  • 1 ½ teaspoons baking powder
  • ¼ teaspoon fine sea salt
  • ¼ cup (57g) unsalted butter, melted
  • 1 cup (200g) sugar
  • 1 large egg
  • 1 large egg yolk
  • 1 8 oz (227g) can crushed pineapple in juice, undrained
  • ½ teaspoon pure vanilla extract

Topping

  • ¼ cup (57g) unsalted butter
  • ¼ cup (50g) granulated sugar
  • ¼ cup (50g) packed brown sugar
  • teaspoon fine sea salt
  • cup (78ml) heavy cream
  • 1 cup (75g) sweetened coconut flakes
  • ½ cup (50g) chopped toasted pecans
  • ½ teaspoon pure vanilla extract

Instructions
 

Cake

  • Preheat the oven to 350ºF (180ºC). Grease an 8-inch square baking pan.
  • In a medium-sized bowl, whisk together the flour, baking powder and salt until well blended.
  • In a large bowl, whisk the melted butter, sugar, egg, egg yolk and vanilla until smooth & creamy. tir in the pineapple until incorporated. Stir in the flour mixture just until combined.
  • Transfer the batter to the prepared baking pan. Bake until the top is golden brown and a toothpick inserted into center of cake comes out clean, about 20-25 minutes.

Topping

  • In a medium-sized saucepan over medium heat, melt the butter with the granulated sugar, brown sugar and salt. Whisk in the heavy cream.
  • When the mixture starts to bubble, turn the heat down to low and simmer until thickened, about 3 minutes.
  • Remove from heat and stir in the coconut, pecans and vanilla. Spread over the warm cake. Let cool at least 15 minutes before cutting the cake.
Keyword cake, pineapple coconut

Creamy Lemon Tarts

Creamy Lemon Tarts

One of the reasons I love baking is because of the joy it brings. In this case it’s joy and sunshine. These vibrant, lemon tarts are pure sunshine. With only four ingredients, they’re so easy to make that you’ll be surprised at how silky and delicious they are.

Creamy Lemon Tarts

Course Dessert
Servings 6 tarts

Ingredients
  

  • 22 vanilla sandwich cookies, finely crushed (including the filling) I used Golden Oreos.
  • 3 tablespoons melted butter
  • 1 ½ cups (12 oz or 340g) mascarpone cheese, softened
  • 1 cup (10 oz or 283g) lemon curd, homemade or store bought
  • whipped cream optional

Instructions
 

  • Preheat oven to 350ºF. Place six 4-inch tart pans with removable bottoms* on a baking sheet.
  • In a medium bowl, mix crushed cookies with melted butter until well combined.
  • Press crumb mixture firmly into tart pans with the back of a spoon or the bottom of a small cup. It's important to press firmly, especially on the sides.
  • Bake tart shells for 8 minutes. Let cool completely.
  • In a medium bowl, stir mascarpone cheese with a spatula until smooth. Fold in lemon curd until well combined.
  • Fill cooled tart shells with mascarpone mixture. Refrigerate tarts until set, about 2 hours.
  • Carefully remove tarts from tart pans. Serve with a dollop of whipped cream if desired.

Notes

To find 4-inch tart pans, click here.
Keyword lemon, tarts

Glazed Lemon Muffins

Glazed Lemon Muffins

However your day is going today, it’s about to get better. I can confidently say these lemon muffins are some of the best you will ever taste. Follow the recipe exactly, weigh your ingredients and you’ll be enjoying these soft, tender muffins in no time. These delightful muffins are perfect for breakfast, brunch or an anytime snack. I love enjoying one with a cup of strawberry green tea or chamomile tea.

Glazed Lemon Muffins

Soft, tender lemon muffins glazed with lemon icing
Course Breakfast, Brunch
Servings 12 muffins

Ingredients
  

Muffins

  • 2 ¼ cups (288g) all purpose flour, sifted
  • 2 teaspoons baking powder
  • ½ teaspoon baking soda
  • ½ teaspoon fine sea salt
  • ¾ cup (170g) unsalted butter, softened
  • 1 cup (198g) sugar
  • Zest of 2 medium lemons
  • 2 large eggs, room temperature
  • ½ teaspoon pure vanilla extract
  • ½ teaspoon pure lemon extract
  • 1 cup (8 oz or 227g) sour cream, room temperature

Icing

  • 1 cup (120g) powdered sugar, sifted
  • 1 tablespoon (14g) melted butter
  • 2-3 tablespoons (15-45ml) fresh lemon juice

Instructions
 

Muffins

  • Preheat the oven to 375ºF (190ºC). Line a 12-serving muffin pan with tulip baking liners.* (You can also use standard muffin liners. They hold less batter so you may end up with a couple of extra muffins.)
  • In a medium-size bowl, whisk together the flour, baking powder, baking soda and salt until well combined.
  • In a large bowl, cream the butter, sugar and lemon zest, with an electric mixer, until light and fluffy. Add the eggs one at a time and beat until well incorporated. Add the extracts and beat until combined.
  • On low speed, mix in the flour mixture in two additions, alternating with half of sour cream after each addition. Mix just until combined. The batter will be thick.
  • Divide the batter evenly into muffin liners. (If using standard muffin liners, fill 3/4 full.) Bake at 375ºF (190ºC) for 5 minutes. Turn the oven heat down to 350ºF (180ºC) and continue baking the muffins until a toothpick inserted into the centers comes out clean, about 12-16 more minutes. Do not over bake.
  • Transfer the muffins to a cooling rack to cool completely. Brush icing onto the muffin tops with a small pastry brush.

Icing

  • Whisk the powdered sugar, melted butter, and 1 tablespoon (15ml) of lemon juice together until smooth. Add additional lemon juice until your desired consistency is reached.

Notes

*To find  tulip muffin liners, click here.
To find floral tulip muffin liners, click here.
Keyword lemon, muffins

Little Strawberry Charlotte

Little Strawberry Charlotte

Meet Little Strawberry Charlotte. She brings romance with her wherever she goes. Whether it’s a tea party, a birthday celebration or a romantic dinner, you’ll gaze at her beauty and sigh. This lovely Charlotte has luscious strawberry mascarpone cream filling layered with lady fingers and topped with fresh strawberries. I used store bought lady fingers to make life easier but you can certainly bake your own if you wish. I typically make this in spring or summer when the weather is warm and strawberries are plentiful. But since my local stores start carrying an abundance of strawberries around Valentine’s Day, I thought it would be a perfect time to make this pretty little Charlotte.

Little Strawberry Charlotte

A pretty no-bake dessert layered with strawberry mascarpone cream filling and lady fingers and topped with fresh strawberries.
Course Dessert
Servings 6

Ingredients
  

Simple Syrup

  • cup (67g) granulated sugar
  • cup (78ml) water
  • ½ teaspoon strawberry or vanilla extract

Strawberry Charlottte

  • 12 ounces (340g) strawberries, hulled and sliced about 2 cups after slicing
  • ¾ cup (150g)) granulated sugar
  • ¼ cup (59ml) cold water
  • 1 tablespoon unsweetened gelatin powder
  • 1 teaspoon pure strawberry extract
  • ½ teaspoon pure vanilla extract
  • 1 ¾ cups (397g) mascarpone cheese, softened
  • cup (156ml) cold heavy whipping cream
  • 28 ladyfingers
  • 10-12 fresh strawberries for garnish
  • Clean pesticide free rose for garnish optional
  • Clean ribbon for garnish

Instructions
 

Simple Syrup

  • Combine the sugar and water in a small saucepan over medium-low heat. Heat and stir until sugar is dissolved. Do not boil.
  • Remove from heat and transfer to a small shallow bowl or dish wide enough to dip the ladyfingers. Stir in the extract.

Strawberry Charlotte

  • In a blender or food processor, purée the strawberries. Pass through a mesh sieve to strain out the seeds.
  • In a medium-size saucepan, combine the strawberry puree and sugar. Cook over medium heat until the sugar is dissolved, about 3-5 minutes. Remove from heat. Set aside two tablespoons of the strawberry purée mixture then cover it and refrigerate until ready to use.
  • Place the water in a small bowl and sprinkle with gelatin powder. Whisk together and let sit until dissolved, about 5 minutes. Add the gelatin mixture to the warm strawberry purée mixture and whisk until thoroughly combined. Set aside to cool.
  • In a large bowl, beat the mascarpone cheese with an electric mixer on low speed, until smooth. Add the strawberry purée mixture and the extracts. Beat just until well combined.
  • In a separate large bowl, whip the heavy cream with an electric mixer on medium-high speed until medium peaks form, being careful not to over whip. Fold the whipped cream into mascarpone mixture.
  • Slice one round end off of 16 ladyfingers. Dunk them briefly in the simple syrup then line them up along the inner sides of a 7-inch by 3 inch deep springform pan.* Typically you would line them smooth side in facing the filling, but I placed mine smooth side out which gives a smooth look on the outside and it makes removal from the pan easier. (You can also line the bottom of the pan with a cake board** if you don't want to serve the dessert from the base.)
  • Line the bottom snuggly with ladyfingers, cutting to fit where necessary. Top with half of the filling, about 2 cups. Then top with a layer of ladyfingers, cutting to fit. Top with the remaining filling. Smooth the top with a small offset spatula. Cover with plastic wrap and chill in refrigerator at least 4 hours.
  • Carefully remove the springform pan ring from the base. Separate the base from the cake board, if using. Garnish with fresh strawberries. Brush the strawberries with reserved strawberry purée mixture. Tie the ribbon around the finished Charlotte.

Notes

*To find a 7-inch springform pan, click here.
**To find a 7-inch cake board, click here.
Keyword cake, strawberry

Lemon Scones

Lemon Scones

Yellow is the color of happiness and sunshine. These adorable Lemon Scones will bring you a burst of lemony brightness even on the grayest day. The pretty, vibrant yellow sparkling sugar adds a pleasant crunch to the tops. It’s a nice contrast to the soft, tender interior of the scones. These little gems would shine on any breakfast or brunch table. I served them with blueberry jam and green tea, which was so delightful, I’m still smiling.


Lemon Scones

by Mari Vasseur
Course Breakfast, Brunch
Servings 12 scones

Ingredients
  

Lemon Scones

  • 1 ¾ cups (223g) all purpose flour, sifted
  • 1 tablespoon baking powder
  • ½ teaspoon fine sea salt
  • ¼ cup (50g) sugar
  • 7 tablespoons (99g) cold, unsalted butter, cubed
  • Zest of 2 medium lemons
  • cup (156ml) cold heavy cream plus more for tops
  • 2 tablespoons (30ml) lemon juice
  • Yellow sparkling sugar*

Icing

  • cup (40g) powdered sugar, sifted
  • 1 teaspoon heavy cream
  • 1-2 teaspoons lemon juice

Instructions
 

Lemon Scones

  • Preheat the oven to 375ºF (190ºC). Line a large baking sheet with parchment paper.
  • In a large bowl, whisk together the flour, baking powder, salt and sugar until well blended
  • Work the butter and lemon zest into the flour mixture with your fingertips or with a pastry blender until pea size chunks form.
  • Stir in the heavy cream and lemon juice until a shaggy dough is formed. If your dough seems too dry, you can add 1-2 more teaspoons of heavy cream.
  • Turn the dough out onto a lightly floured surface. Fold the dough over onto itself a couple of times. Do not overwork the dough.
  • Pat or roll the dough into an 8-inch round, about 3/4-inch thick. Cut out rounds using a 2" or 2 1/4" inch round cutter.**
  • Place the scones about 2 inches apart onto the prepared baking sheet. Brush the scones with heavy cream. Sprinkle generously with sparkling sugar.
  • Bake until the edges are golden brown, about 16-19 minutes.
  • Cool completely on a wire rack. Decorate with icing.

Icing

  • In a small bowl, whisk together the powdered sugar, heavy cream and enough lemon juice to form a stiff icing.
  • Transfer the icing to a piping bag or a plastic zip bag. Snip off the tip of the bag. Pipe lines in a spoke pattern onto the scones.

Notes

*To find the sparkling sugar I used, click here.
**To find the cutter I used, click here.
Keyword lemon, scones

Lavender Shortbread Sandwich Cookies with Honey Buttercream

Lavender Shortbread Sandwich Cookies with Honey Buttercream

Lavender and honey go so well together. Bees know it, fairies know it, princesses know it. The flavor combination is so delightful in these cookies, that I decided to share them with you. In addition to delicious, compatible flavors, these cookies have a divine texture combination. The shortbread cookies have a tender, melt-in-your-mouth texture. Together with the silky, smooth honey buttercream, they’ll make you feel fancy and regal. You’ll hold your head up higher, ring for your tea and declare that you do indeed deserve fine things!

Some people are nervous about baking with lavender because they don’t want their baked goods to taste like soap or perfume. That can be a concern if the lavender flavor is too pronounced. However, if you don’t use enough you won’t be able to taste it at all. There’s a fine balance. If you use the right amount, it will taste pleasant and have sweet undertones. I used two teaspoons of culinary lavender in these cookies, but you can adjust the amount to your tastes. You can start out with one teaspoon, bake a small sample of dough and taste it, to customize the flavor.

Speaking of tasting, my grandmother always said, “taste as you go.” This is also helpful when making the honey buttercream. Typically, when making other flavors of buttercream, you add more powdered sugar if your buttercream is too thin. In this case, adding more powdered sugar can make the buttercream too sweet. Once you have added the amount of honey that tastes good to you, you can add a little cornstarch if you need to stiffen it up a bit.

Lavender Shortbread Sandwich Cookies with Honey Buttercream

Tender lavender scented cookies with silky honey buttercream filling
Servings 18

Ingredients
  

Lavender Shortbread Cookies

  • 2 cups (9 oz or 255g) all purpose flour
  • ½ cup (2 1/4 oz or 64g) powdered sugar
  • ½ teaspoon fine sea salt
  • 1 cup (8 oz or 227g) unsalted butter, softened
  • 2 teaspoons culinary lavender

Honey Buttercream

  • ¾ cup (6 oz or 170g) unsalted butter, softened
  • ½ cup (2 1/4 or 64g) powdered sugar, sifted
  • 2-3 tablespoons honey
  • pinch fine sea salt
  • 1 tablespoon cornstarch optional

Instructions
 

Lavender Shortbread Cookie

  • In a large bowl, sift together the flour, sugar and salt.
  • In a separate large bowl, beat the butter with an electric mixer until smooth. Mix in the lavender. Beat in the flour mixture on low speed, just until combined.
  • Divide the dough into two discs. Wrap in plastic wrap and refrigerate for at least 1 hour, but not more than 8 hours.
  • Line 2 large baking sheets with parchment paper. On a lightly floured surface, roll the dough to 1/4-inch thickness. Cut into 2-inch circles. Place two inches apart on prepared cookie sheets. Refrigerate cut cookies for 30 minutes to 1 hour.
  • Preheat oven to 325ºF (165ºC). Bake cookies until the bottom edges are light golden brown, about 12-14 minutes.
  • Transfer cookies to a cooking rack to cool completely.
  • Pipe or spread about 1/2 tablespoon of buttercream on the bottom of half of the cookies. Top with remaining cookies.

Honey Buttercream

  • In a medium bowl, beat butter and sugar together until smooth. Add honey, one tablespoon at a time until desired sweetness and consistency is reached.
  • Mix in a pinch of salt to taste.
  • Mix in cornstarch, if necessary, to firm up buttercream. *See notes below.

Notes

*The addition of cornstarch helps to firm up buttercream without adding additional sweetness.
To find culinary lavender, click here.
Keyword cookies

Lemon Blueberry Cloud Cookies

Once, some time ago, I made some soft, melt-in-your mouth cookies and posted them on the internet. A viewer got triggered and insisted that cookies must be crunchy. I have to disagree! Cookies can be crunchy, crisp, soft, chewy, sandy or anything your heart desires. These soft, pillowy cookies are light and airy like little clouds. They could almost be called little cakes. The texture is similar to whoopee pies, but not as sticky. They’re delightfully delicious and have been well-loved by my family for two generations. They’re perfect for a spring teatime treat or alongside a glass of lemonade at a picnic.

Lemon Blueberry Cloud Cookies

Soft, pillowy cookies made with ricotta cheese and fresh blueberries, topped with a tangy lemon icing
Course Dessert
Servings 36 cookies

Ingredients
  

Cookies

  • 2 cups (255g) all purpose flour, sifted
  • 1 teaspoon baking powder
  • ¼ teaspoon fine sea salt
  • ½ cup (113g) unsalted butter, softened
  • 1 cup (240g) ricotta cheese, room temperature
  • Zest of 1 large lemon
  • 1 cup (200g) granulated sugar
  • 1 large egg, room temperature
  • 1 teaspoon pure vanilla extract
  • 1 cup (142g) blueberries plus extra for the tops

Icing

  • 1 ½ cups (181g) powdered sugar, sifted
  • 1 tablespoon (14g) unsalted butter, melted
  • 1 dash fine sea salt
  • 2-3 tablespoons (30-45ml) lemon juice

Instructions
 

Cookies

  • Preheat the oven to 350ºF (180ºC). Line two cookie sheets with parchment paper.
  • In a medium-size bowl, whisk together the flour, baking powder and salt until well combined.
  • In a large bowl, beat the butter, with an electric mixer on medium speed, until smooth Add the ricotta cheese, sugar and lemon zest. Beat until well combined. Beat in the egg and vanilla until incorporated. On low speed, gradually mix in the flour mixture, just until combined. Fold in the blueberries.
  • Place rounded tablespoon-size portions of dough about 2 inches apart onto the cookie sheets. Top the cookies with additional blueberries. (If your cookie dough is sticky and hard to work with, refrigerate it just until it's easier to work with, about 30 minutes to 1 hour.)
  • Bake until the bottom edges of the cookies are lightly browned, about 11-13 minutes. Transfer the cookies to a cooling rack. Top the cooled cookies with icing. Best eaten the day they're made.

Icing

  • In a medium-size bowl, whisk together the powdered sugar, melted butter, salt and 1 tablespoon (15ml) of lemon juice until well combined. Add additional lemon juice as needed to achieve the desired consistency. Whisk until smooth.
Keyword cookies, lemon blueberry

Little Spring Vegetable Pot Pies

These little veggie pot pies are so cute and comforting. The crust is incredibly flaky and the filling is so versatile. I used asparagus, carrots and peas for the filling, but feel free to use your favorite vegetables. The possibilities are endless! The small size bakes up quickly and is perfect for lunch or a light dinner. I typically serve these with some fresh fruit or salad greens on the side.

I used vegetable shortening for the crust because it makes the flakiest crust ever and also because the pies can easily be a vegetarian dish. If you’re trying to avoid trans fats, then choose a brand of vegetable shortening that doesn’t contain trans fat or replace some of the vegetable shortening with butter.* Keep in mind that if you replace all of the vegetable shortening with butter, your crust won’t be nearly as flaky.

Little Spring Vegetable Pot Pies

Course Dinner, Main Dish
Cuisine American
Servings 4 Mini pot pies

Ingredients
  

Pie Crust

  • 1 ⅓ cups (170g) all purpose flour
  • ½ teaspoon baking powder
  • ¼ teaspoon fine sea salt
  • ½ cup (96g) vegetable shortening
  • ¼ cup (59ml) ice water
  • 2 teaspoons white vinegar

Filling

  • ¼ cup (57g) butter or vegan butter
  • cup (38g) diced onions
  • 1 cup (128g) sliced fresh carrots
  • ¾ cup (96g) chopped asparagus, celery or green beans
  • ¼ cup (32g) all purpose flour
  • 2 cups (473ml) vegetable broth
  • ¼ cup (59ml) whole milk or oat milk
  • 2 tablespoons chopped fresh Italian parsley
  • ½ teaspoon fine sea salt (or to taste)
  • ½ teaspoon pepper (or to taste)
  • ¼ teaspoon ground sage
  • ¾ cup (100g) frozen peas
  • Egg wash: 1 egg beaten with 1 tablespoon of water See note below**

Instructions
 

Pie Crust

  • In a large bowl, whisk together the flour, baking powder and salt. Work the shortening into the flower with your fingertips until flat dime size pieces are formed.
  • In a small bowl, combine the ice water and vinegar. Sprinkle over the flour mixture a little at a time, mixing just until the dough comes together. You may not need all of the liquid, depending on your climate.
  • Turn the dough out onto a lightly floured surface. Fold the dough over onto itself a few times. Do not over work the dough. Form the dough into a disc. Wrap in plastic wrap and refrigerate for 1-2 hours or up to overnight.

Filling

  • Preheat the oven to 400ºF. (200ºC). Grease four 6-oz ramekins.*** Place the ramekins on a baking sheet.
  • In a medium saucepan, melt the butter over medium heat. Sauté the onions, carrots and asparagus for a few minutes until the onions are translucent.
  • Sprinkle the vegetables with flour. Cook 1-2 minutes. Stir in the broth and simmer until thickened. Add the milk, parsley and seasonings. Make sure to taste your sauce to adjust the seasonings to your preference. Stir in the peas. Transfer the filling to the greased ramekins.
  • On a lightly floured surface, roll the pie dough to 1/4-inch thickness. Cut out 4 rounds of dough about an inch larger than the tops of your ramekins. Brush the top edges of the ramekins with a bit of egg wash. Place the rounds of dough on the ramekins, overlapping a bit. Crimp the edges of the dough with your fingers or with a fork. Brush the pies with egg wash. Cut a 3/4-inch ventilation slit in the top of each pie. Bake until golden brown, about 30-35 minutes.

Notes

*To replace part of the shortening with butter, use 1/4 cup (48g) shortening and 1/4 cup (57g) butter.
**For a vegetarian version, you can substitute the egg wash by brushing the tops of the pies lightly with olive oil.
***To find the ramekins I used, click here.
Keyword pastry, pie, vegetable pot pies

Raspberry White Chocolate Scones

Raspberry White Chocolate Scones

A good scone has a way of making you feel elegant, especially if you pronounce it ‘skon’ instead of ‘skōne’. I went to a lovely tea recently where scones were served, along with an array of dainty tea sandwiches and desserts. The scones were round with pink sugar sprinkled on top. Pretty pink food is always so promising. Unfortunately, the scones were hard, dry and bland. No amount of clotted cream slathered on them could help. There’s nothing elegant about a dry, hard bite of a scone that you have to struggle to choke down. Scones should be dense and slightly dry and crumbly, but there’s no reason we can’t make them more delicious. It’s fun to add fruit, chocolate, herbs, nuts or whatever you like to make them more delightful. These Raspberry White Chocolate Scones are tender and buttery with bursts of flavor from the fresh raspberries and white chocolate. I added pink sparkling sugar for texture and, of course, to make them look pretty!


Raspberry White Chocolate Scones

by Mari Vasseur
Tender scones with fresh raspberries and white chocolate, topped with crunchy sparkling sugar.
Course Breakfast, Brunch
Servings 8 scones

Ingredients
  

  • 1 ¾ cups (226g) all purpose flour, sifted
  • 1 tablespoon baking powder
  • ½ teaspoon fine sea salt
  • 7 tablespoons (100g) cold, unsalted butter, cubed
  • ½ cup (118 ml) cold heavy cream plus extra for the tops of the scones
  • ¼ cup (57g) cold sour cream
  • 1 teaspoon pure vanilla extract
  • ¾ cup (128g) white chocolate chips or chunks Not chopped white chocolate
  • ¾ cup (113g) fresh or frozen raspberries
  • Pink or white coarse sparkling sugar

Instructions
 

  • Line a large baking sheet with parchment paper.
  • In a large bowl, whisk the flour, baking powder and salt together until well combined. Work the butter into the flour mixture with your fingertips or with a pastry blender until pea size pieces form.
  • In a small bowl, whisk together the heavy cream, sour cream and vanilla until well blended. Stir the cream mixture into the flour mixture until a shaggy dough forms. Gently fold in the white chocolate chips and raspberries.
  • Turn the dough out onto a lightly floured surface. Form the dough into a 1-inch thick round, about 6 1/2 inches in diameter. Cut the dough into 8 wedges.
  • Place scones 2 inches apart on the prepared baking sheet. Chill the scones in the refrigerator for 20 minutes.
  • Meanwhile, preheat the oven to 375ºF (190ºC). Brush the tops of the scones with heavy cream. Sprinkle with coarse sugar.
  • Bake until the edges look golden brown, about 20-24 minutes. Transfer the scones to a cooling rack.

Notes

*To find pink sparkling sugar, click here.  
This recipe was updated on 3/23/2023.
Keyword raspberry white chocolate, scones