Every peach season, I get excited by the abundance of peaches at my local farmers market and I end up buying way too many. So if you’re like me and you have ripe peaches sitting on your counter, turn them into peach purée. I love adding peach purée to my iced tea or adding it to desserts like this moist, tender cake. This is one of my most popular cake recipes on social media, and for good reason. It does not disappoint! To watch the TikTok video, click here.
Peaches and Cream Loaf Cake
Moist, tender peach cake with peach cream cheese icing
1cuppeach purée, divided(About 1 1/3 cups peeled, sliced peaches puréed in a food processor or blender)
½teaspoonpure vanilla extract
⅛teaspoonpure almond extract
Icing
2tablespoonscream cheese, softened
1tablespoonunsalted butter, softened
1cup (4 ounces)powdered sugar, sifted
¼teaspoon pure vanilla extract
pinchfine sea salt
1-2tablespoonsreserved peach puree
2tablespoonsdiced peaches
Instructions
Cake
Preheat oven to 350ºF. Line the bottom of an 8 x 4-inch loaf pan with parchment paper. Grease and flour the sides.
In a medium bowl, whisk together flour, baking powder, baking soda, salt, cinnamon and nutmeg.
Set aside 2 tablespoons peach purée for icing.
In a large bowl, beat sugar, oil, eggs, remaining peach purée and extracts until smooth.
Add flour mixture and beat just until combined.
Transfer batter to prepared baking pan. Bake until toothpick inserted into center comes out clean, about 38-45 minutes.
Let cake cool in pan for 10 minutes, then turn out onto a cooling rack to cool completely. Spread icing on cooled cake.
Icing
In a medium bowl, beat cream cheese and butter together until smooth.
Add powdered sugar, salt, vanilla extract and 1 tablespoon of peach purée. Beat until smooth. Add additional peach purée, if needed, until desired consistency is reached. Fold in diced peaches.
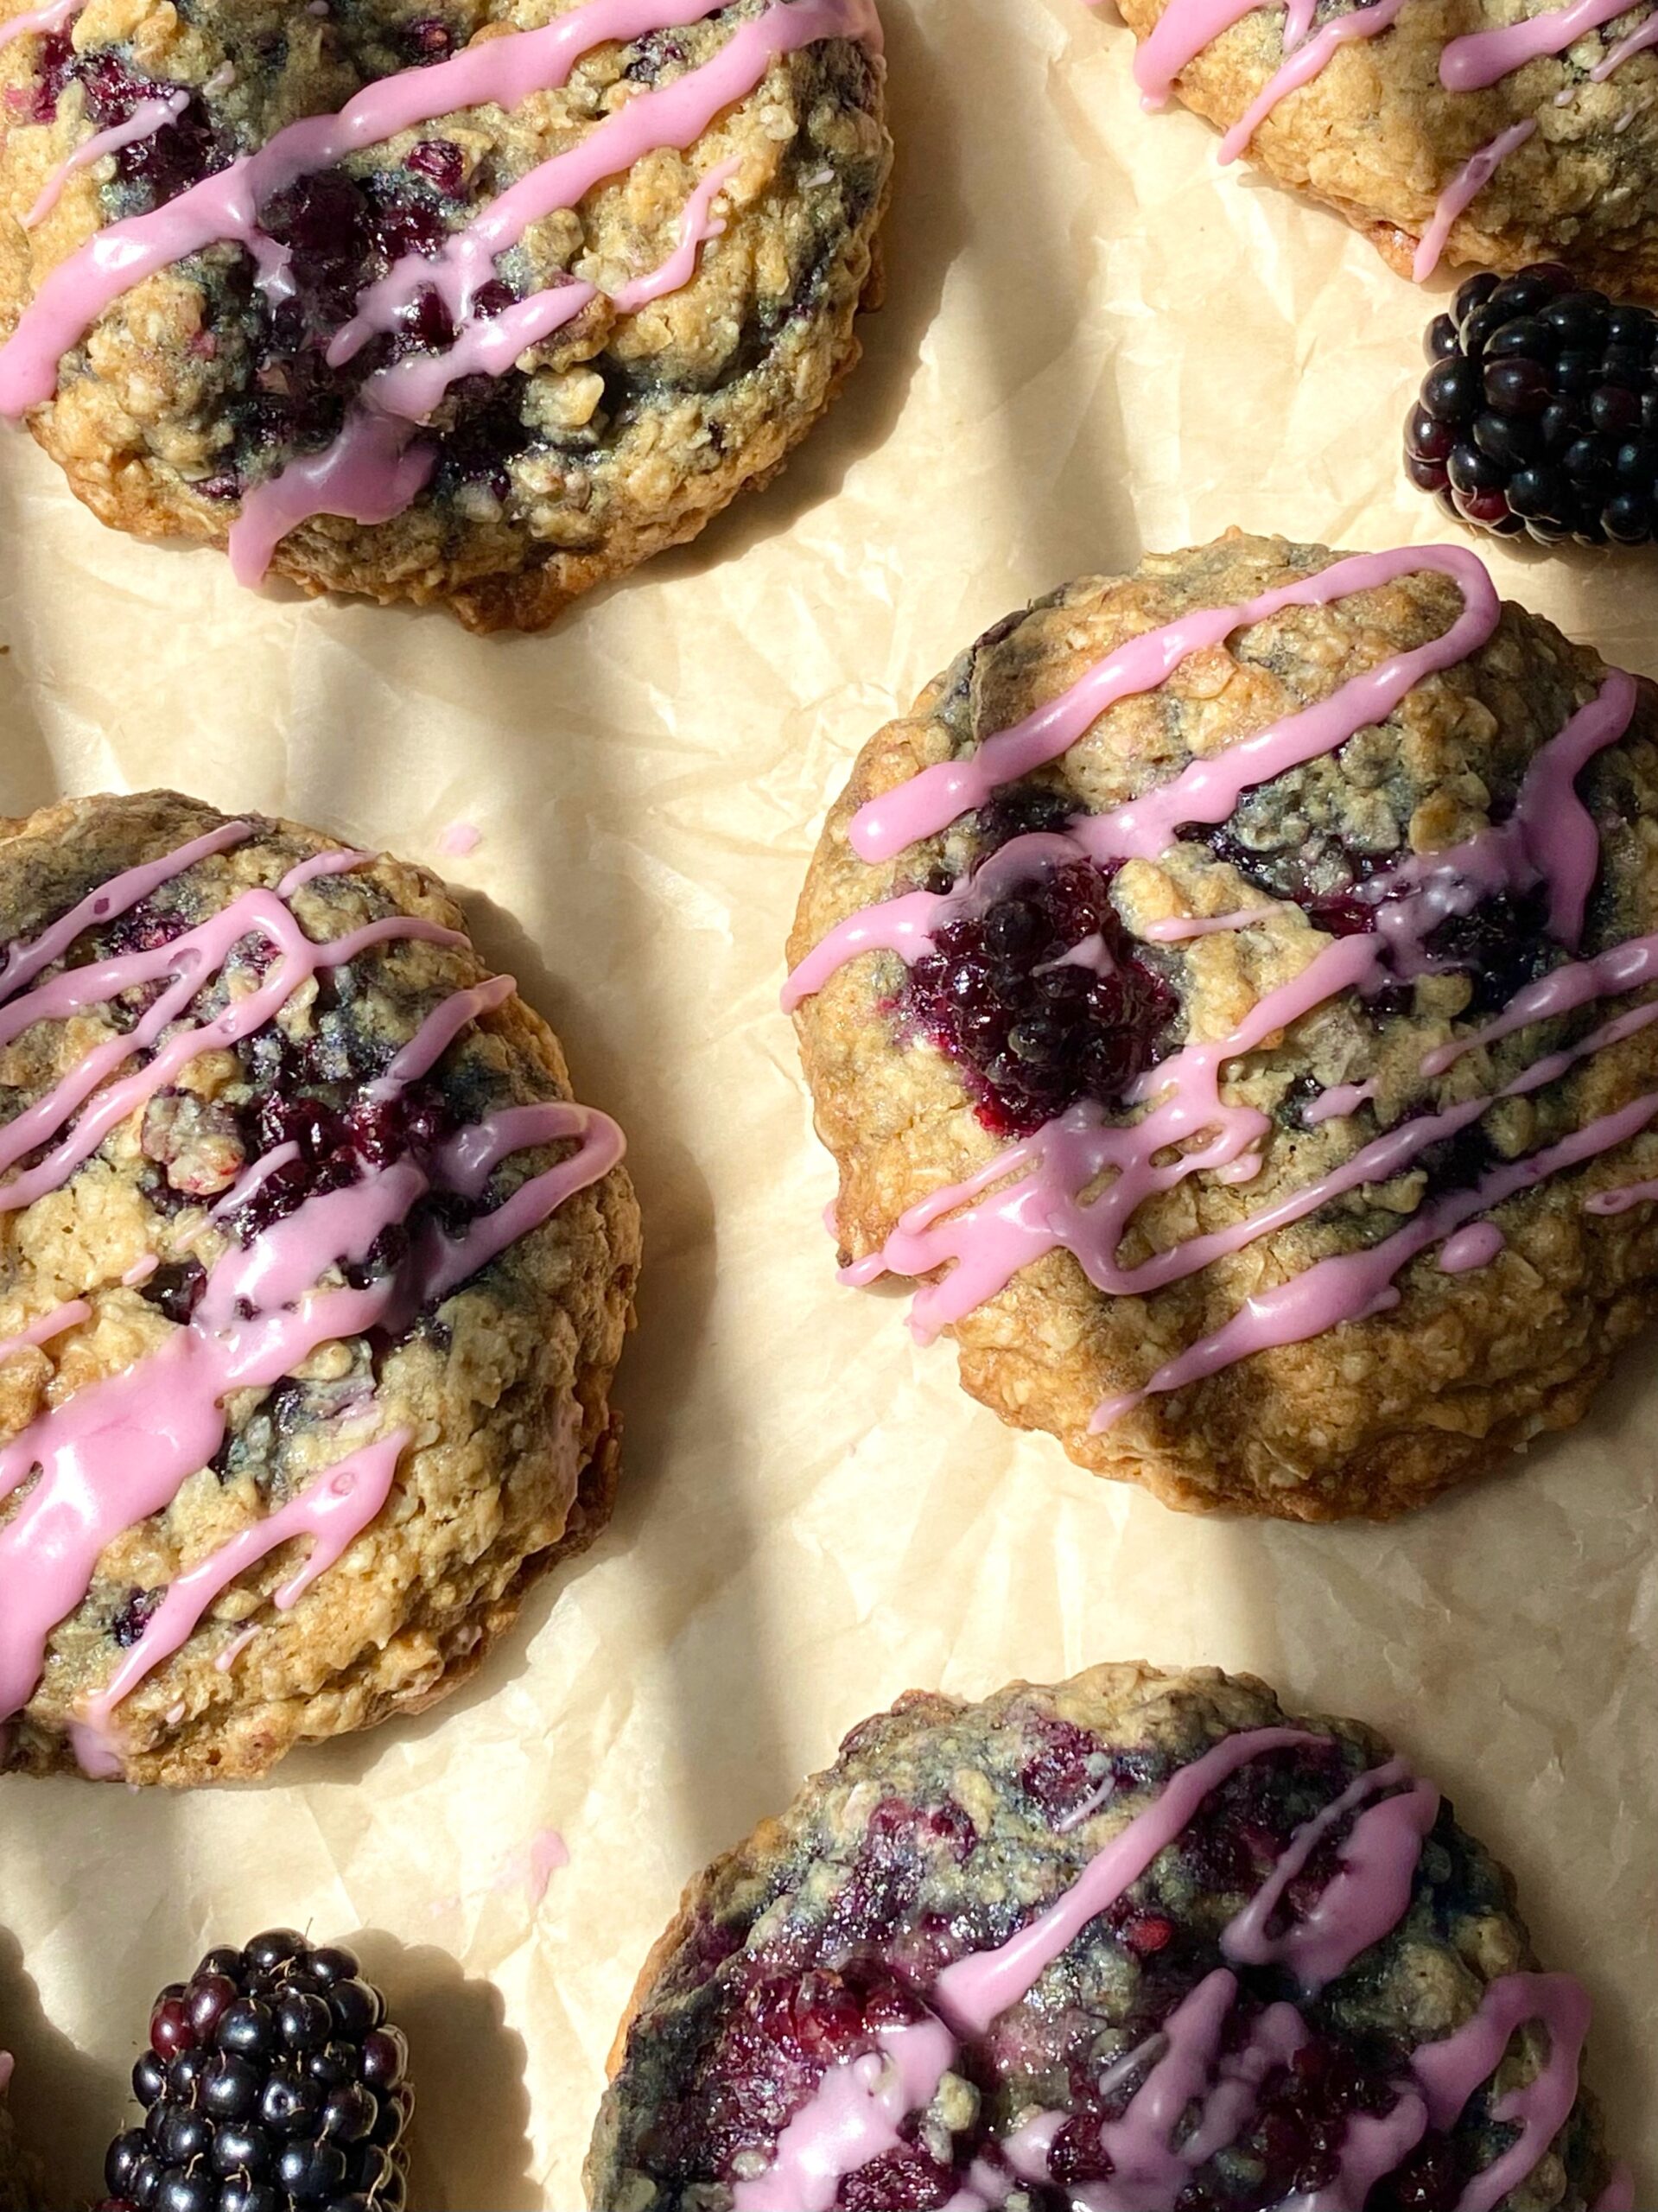
We’ve all heard our parents telling their childhood stories of walking miles to school and suffering worse hardships than we ever had to. My mom used to tell me stories like that, but she had a sense of humor, so her stories were always fun to listen to. She used to tell me about her friend’s mother, who would make big, delicious oatmeal cookies. My mom would trade her baloney sandwich nearly every day to get one of those cookies from her friend. She reminisced about those cookies so much, that I set out to make her some when I learned to bake. She and my grandmother would taste test batch after batch of my cookies over the years. I have probably baked enough oatmeal cookies to circle the earth. Okay that’s an exaggeration, but seriously I have baked quite a few. Of all the oatmeal cookies I’ve baked, these are one of my favorites!
Most of the time when you see fruit added to an oatmeal cookie, it’s dried fruit, like raisins or cranberries. That’s mostly because if you just dump fruit into your cookie dough, the fruit releases water, leaving soggy spots in your cookies. To solve that issue, for this recipe, I macerate the blackberries before baking. The purple blackberry juice that’s released from the berries is used to make a beautiful lilac icing to drizzle over the cookies.
2cups (about 8-10 oz or 227-283g)fresh blackberriesCut large berries in half
2tablespoons (25g)granulated sugar
Oatmeal Cookies
1 ¾cups (7 7/8 oz or 223g)all purpose flour, sifted
1 teaspoonbaking soda
1teaspoonfine sea salt
½teaspoonground cinnamon
½cup (4 or 113g)unsalted butter, softened
1 ¼cups (8 3/4 oz or 250g)packed brown sugar
2 largeeggs
1 ½teaspoonspure vanilla extract
3cups (10 oz or 283g)quick oatsNot instant oats
Icing
¾cup (3 oz or 85g)powdered sugar, sifted
1tablespoon heavy cream
2-3tablespoonsreserved juice from blackberries
Instructions
In a small, light colored saucepan, melt 1/2 cup (4 oz or 113g) of butter over medium heat, stirring occasionally, until deep golden and fragrant. Keep a close eye on it. It can go from toasted to burned very quickly. When you see brown particles form, remove from heat and immediately transfer the butter, including the particles, to a small bowl. Refrigerate until solid, about one hour.
Place the blackberries in a medium-size bowl. Sprinkle with granulated sugar and toss to coat. Let sit for 30 minutes until the berries release their juices.
Drain the blackberries and reserve the juices.
Preheat oven to 350ºF (180ºC). Line two large cookie sheets with parchment paper.
In a separate medium-size bowl, whisk together the flour, baking soda, salt and cinnamon. Set aside.
In a large bowl, beat the brown butter, softened butter and brown sugar until light and fluffy.
Add the eggs and vanilla extract in three separate additions and beat until well combined.
Stir in the flour mixture just until combined. Stir in the oats just until combined. Gently fold in the blackberries.
Scoop 1/4 cup sized portions of dough, about 2 inches apart, onto the prepared cookie sheets. *I used a #16 2-ounce scoop.
Bake until the cookie tops are set and the edges are golden brown, about 13-15 minutes. Transfer the cookies to a cooling rack to cool completely.
Pass reserved blackberry juice through a sieve to remove the seeds.
In a small bowl, whisk together the powdered sugar, heavy cream and one tablespoon of the reserved blackberry juice until smooth. Add more blackberry juice, a little at a time, until the desired consistency is reached. Drizzle the icing over the cooled cookies.
This cheerful little loaf cake feels like a spring or summer picnic with lemonade and sunshine. It’s similar to a pink lemonade cake that my elderly neighbor used to make when I was growing up. She made it for all the neighborhood kids and we always gobbled it up. When I was about ten years old she taught my friend and me how to make it. She used a yellow cake mix in a large baking pan and poked holes all over the cake, then drenched it in a pink, sugary lemon icing. I transformed that happy pink lemonade memory into a delightful loaf cake made from scratch.
1cup plus 2 tablespoons (5 oz or 142g)all purpose flour, sifted
1teaspoon baking powder
½teaspoonfine sea salt
¼teaspoonbaking soda
¼cup (2 oz or 59ml)whole milk
¼cup (2 oz or 59ml)sour cream
1cup (7 oz or 200g)sugar
½cupvegetable oil or neutral oil of your choice
2largeeggs
1tablespoonlemon zest
1 ½teaspoons strawberry extract
1-2dropspink gel food colorI used Americolor deep pink*
Lemon Syrup
juice of one lemon
¼cup (1 3/4 oz or 50g)sugar
Icing
2tablespoons (1 oz or 28g)unsalted butter, softened
1cup (4 oz or 113g)powdered sugar, sifted
2-2 ½tablespoonslemon juice
½teaspoonstrawberry extract
pinchfine sea salt
1tiny droppink gel food colorI used Americolor deep pink*
Instructions
Pink Lemonade Cake
Preheat oven to 325ºF (163ºC). Line the bottom of an 8 X 4-inch loaf pan with parchment paper. Grease and flour the sides.
In a medium bowl, whisk together the flour, baking powder, salt and baking soda.
In a small bowl, whisk together the milk and sour cream.
In a large bowl, beat the sugar, oil, eggs, lemon zest and strawberry extract until smooth.
Stir in the flour mixture in two additions, alternating with the milk mixture. Stir just until combined. Stir in food color a little at time until your desired shade is achieved.
Transfer the batter to the prepared baking pan. Bake until a toothpick inserted into center of the loaf comes out clean, about 45-50 minutes. Meanwhile, prepare lemon syrup.
Let the cake cool in the pan for 10 minutes, then remove from pan and transfer to a cooling rack. Poke holes all over the top of cake with a skewer.
Brush the warm cake generously with the lemon syrup. Let the cake cool completely, then top with icing.
Lemon Syrup
In a small saucepan, combine the juice of one lemon with enough water to equal 1/4 cup. Add sugar and stir over medium-low heat until sugar is dissolved. Remove from heat.
Icing
In a medium bowl, beat the butter, powdered sugar, 1 tablespoon lemon juice, the strawberry extract and a pinch of salt, until smooth. Add more lemon juice until your desired consistency is reached. Mix in gel food color.
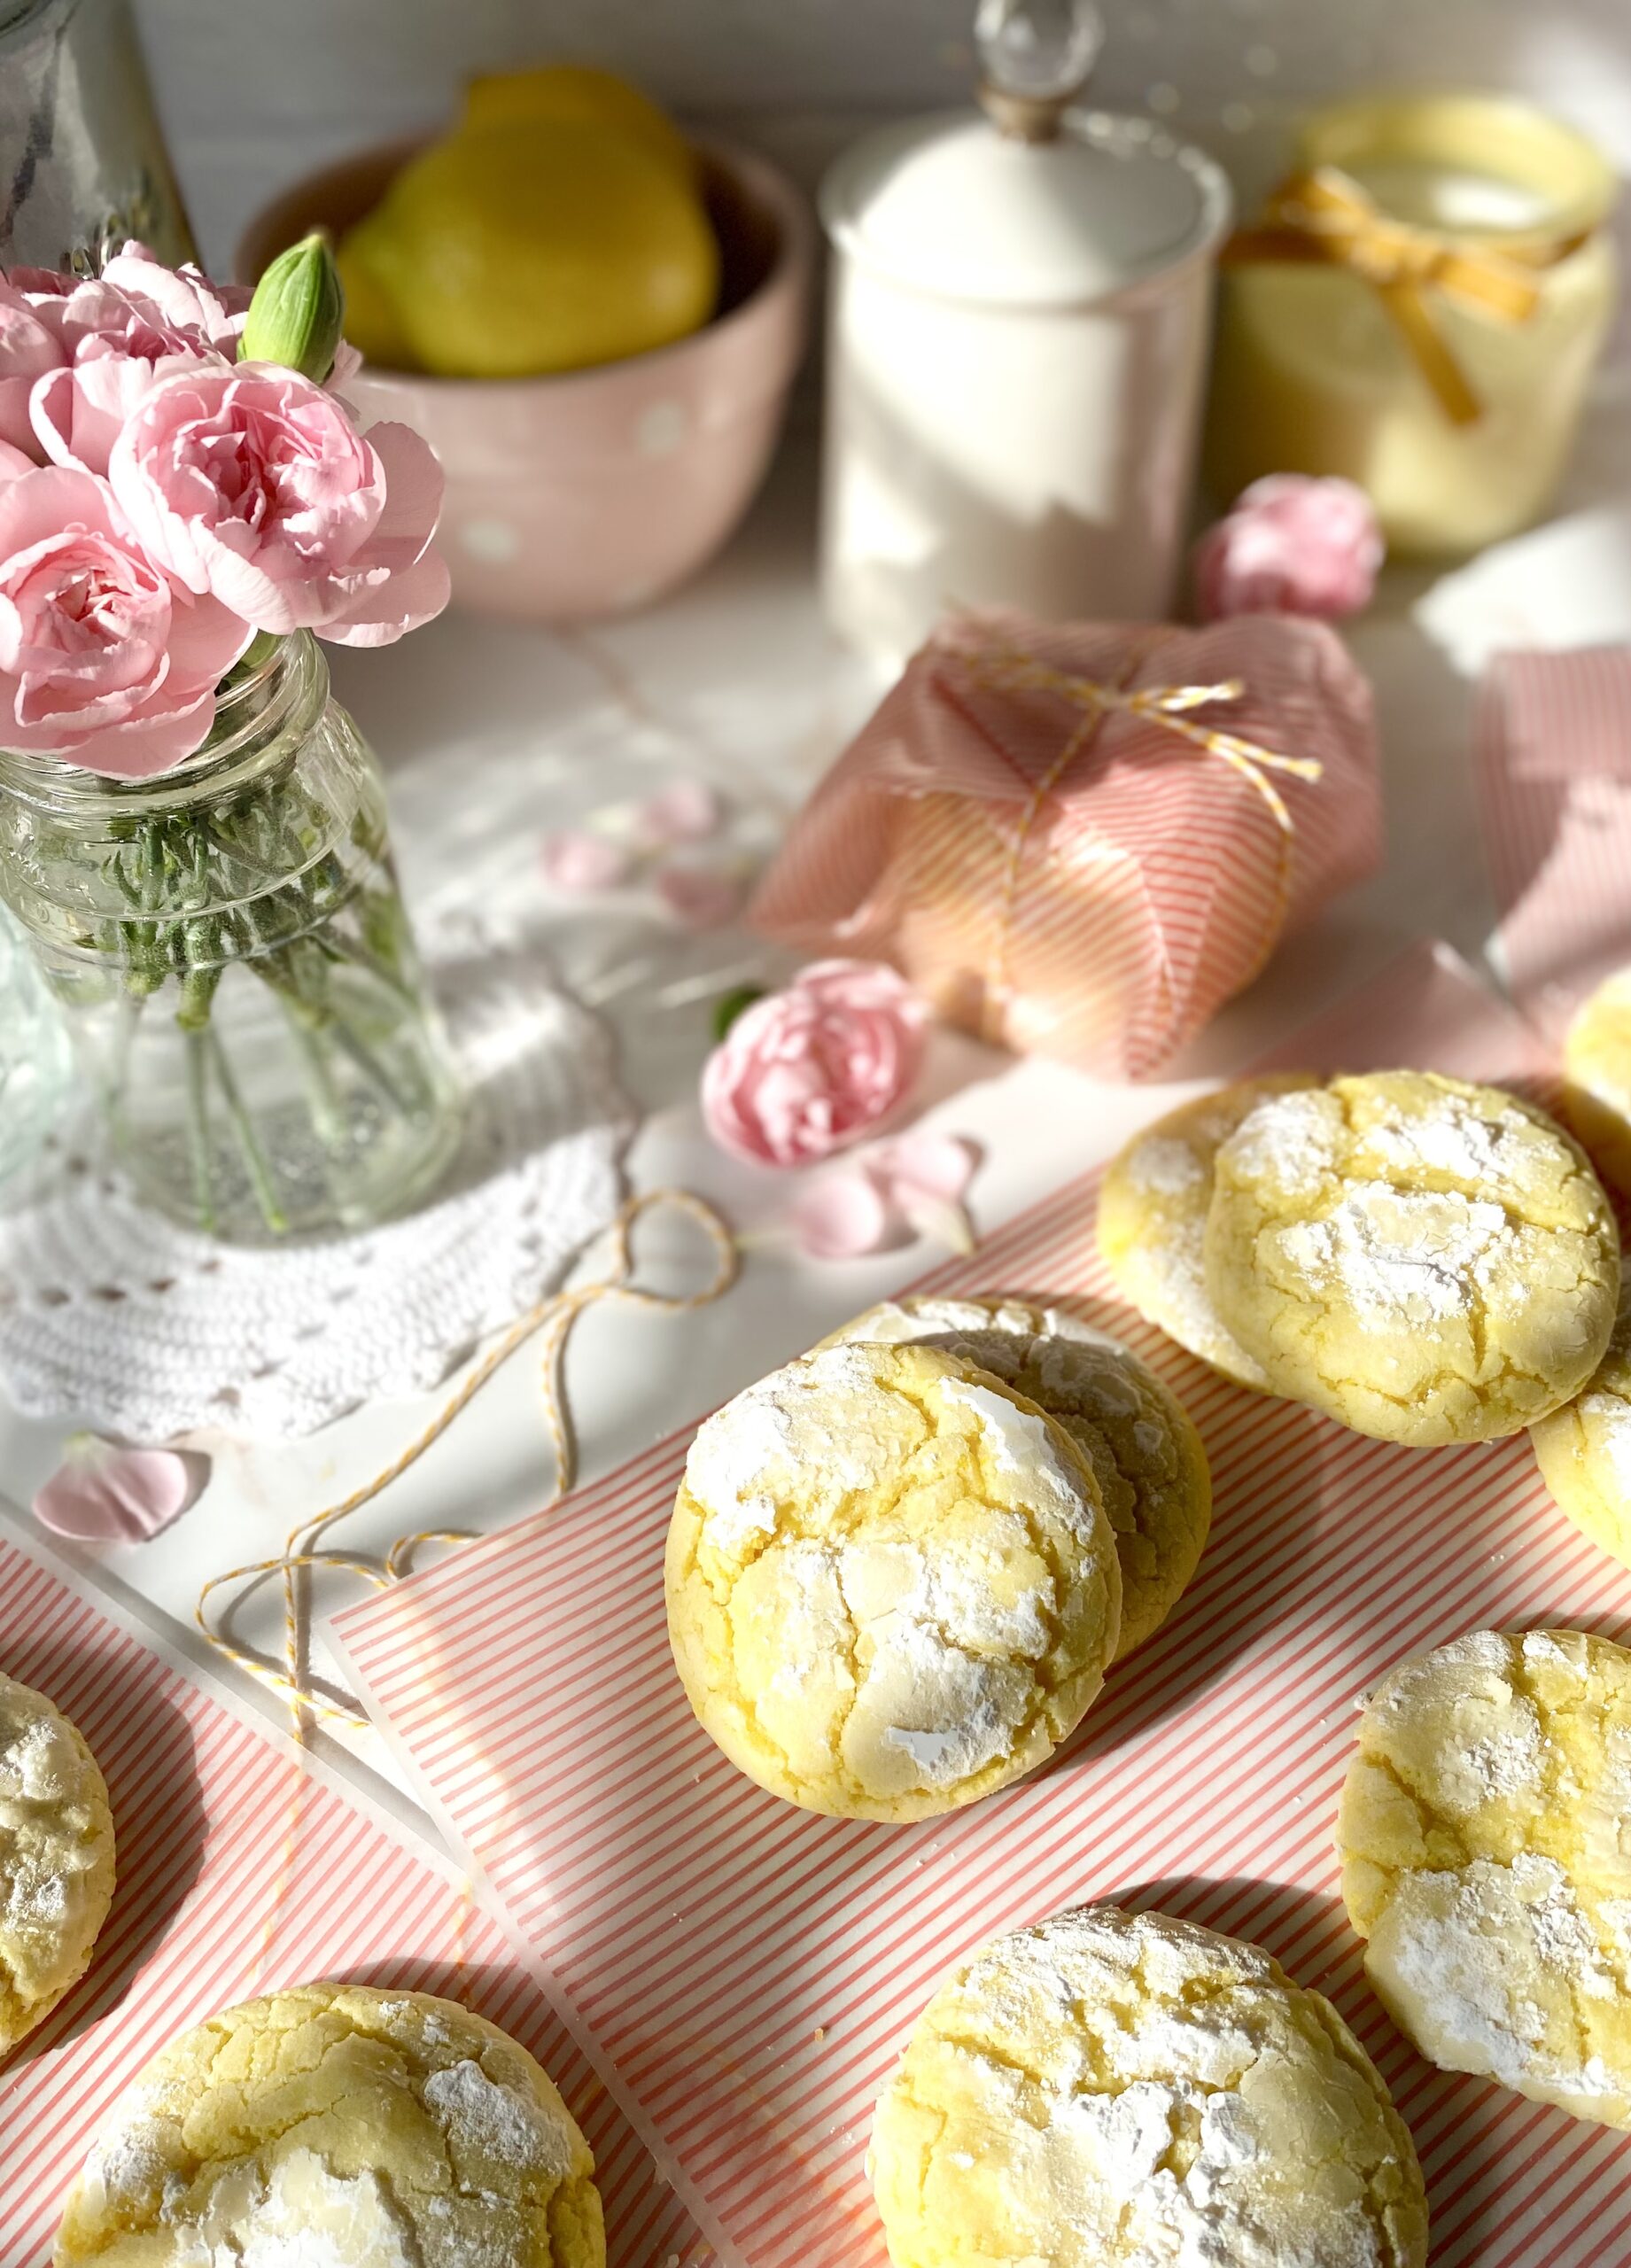
Crinkle cookies, also known as crackle cookies, have been around for a very long time. The pretty, crispy, cracked exterior and the soft, moist interior are what we love about them! There’s definitely no shortage of recipes for crinkles out there, everything from chocolate to red velvet. I even saw an audacious cookie company selling lemon crinkles for twelve dollars each, more money than it will cost for this entire batch! So many of the recipes I tried were disappointing, especially the ones made with cake mix. So I created my own version which happened to go viral! Here’s to making sure delicious lemon crinkle cookies are available for all to enjoy.
This recipe requires a bit of chilling, which I know many people don’t like because they’re impatient. I happen to be one of those people. Old fashioned crinkle cookies require about 3 hours of chilling. My recipe has the addition of cornstarch, which helps prevent spreading and allows for a shorter chilling time. As an added bonus, cornstarch makes the cookies more tender. Win win!
Fresh lemon zest and lemon juice in these cookies is crucial to the best lemon flavor. A bit of pure lemon extract is added to enhance that flavor. Don’t be tempted to use imitation extracts. The flavor will disappoint you. I added two drops of lemon yellow food color, which made them so pretty they look like pure sunshine!
Lemon Crinkle Cookies
Lemon cookies with a crackled, crispy exterior and a soft, tender interior
1-2dropsyellow gel food coloring (optional)*I used Americolor lemon yellow
½cup (60g)powdered sugar
Instructions
In a medium-sized bowl, whisk together the flour, cornstarch, baking powder, salt and baking soda until well blended.
In a large bowl, beat the butter, sugar and lemon zest together until pale and fluffy. Beat in the egg until well incorporated. Mix in the lemon juice, extracts and food coloring until well combined. Add the flour mixture and mix just until combined.
Refrigerate the cookie dough for 30 minutes to one hour.
Meanwhile, preheat the oven to 350ºF (180ºC). Line two large cookie sheets with parchment paper.
Roll the dough into balls, about 2 tablespoons each. I used a #30 portion scoop*. Roll the dough balls generously in powdered sugar.
Place the dough balls about 2 inches apart onto the prepared baking sheets.
Bake until the cookies are set, about 10-12 minutes. Let them cool on the cookie sheet for 1 minute then transfer to a cooling rack.
Notes
*To find Americolor lemon yellow gel food color, click here.**To find a #30 cookie scoop, click here.To find the striped wax paper pictured above, click here.
This moist, flavorful banana bread is my favorite banana bread recipe to date. It has the perfect texture. Not mushy or gummy like so many banana bread recipes out there. I like to add chocolate chips and/or toasted pecans to make it extra delicious.
Favorite Banana Bread
by Mari Vasseur
Moist, flavorful banana bread with chocolate chips and optional pecans
1 ½cups (191g)all purpose flour, sifted, plus 1 teaspoon for the chocolate chips
1teaspoon baking powder
½teaspoonbaking soda
½teaspoon fine sea salt
½teaspooncinnamon
¼teaspoonground nutmeg, preferably freshly ground
1cup (200g)packed brown sugar
⅓cup (70ml)avocado oil or neutral oil of your choice
2largeeggs, room temperature
½cup (113g)sour cream or full fat Greek yogurt, room temperature
1 ½teaspoonspure vanilla extract
¾cup (170g)mashed bananas(about 2 medium bananas)
½cup (60g)coarsely chopped toasted pecansoptional
2tablespoons (15g)chopped pecansoptional
1 ¼cups (213g)semisweet chocolate chips, divided
Instructions
Preheat the oven to 350ºF (165ºC). Line the bottom an 8 x 4-inch or a 9 x 5-inch loaf pan with parchment paper. Grease and flour the insides.
In a medium-sized bowl, whisk together the flour, baking powder, baking soda, salt, cinnamon and nutmeg until well blended.
In a large bowl, whisk together the brown sugar, oil, eggs, sour cream and vanilla until creamy and well blended. Stir in the bananas until incorporated. Mix in the flour mixture just until combined. Do not over mix. Stir in the 1/2 cup of pecans if using. If using chocolate chips, set aside 1/4 cup (43g) for the top and toss the remaining 1 cup (170g) of chocolate chips with 1 teaspoon of flour, then mix them into the batter.
Transfer the batter to the prepared loaf pan. Sprinkle the loaf with the chopped pecans or 1/4 cup (43g) of chocolate chips. Bake until a toothpick inserted into the center of the loaf comes out clean, about 40-50 minutes. Cool in the pan for 10 minutes, then remove the loaf from the pan and transfer it to a cooling rack to cool completely.
Ever since a certain celebrity cut a hole from the middle of her favorite olive oil cake back in 2020, the internet has been obsessed with olive oil cakes. I must confess that I was a fan of olive oil cakes long before that. I first tasted one at a restaurant years ago and fell in love. The flavor and texture was so delightful, that all it needed was a dusting of powdered sugar on top. Now that the dust has settled, I’m sharing my favorite orange olive oil cake recipe. Not because it’s trendy, but because it’s a really delicious recipe that tastes like spring.
I made cute little orange scented, personal cakes that are really just elegant cupcakes. The recipe is easily adapted to your tastes. You can switch up the orange flavor and substitute with lemon or any citrus of your choice. Even if you don’t like olive oil, you’ll still like these little cakes. I used light olive oil, rather than extra virgin olive oil, for a more subtle olive oil flavor. It’s also able to withstand higher temperatures. Feel free to use your favorite olive oil or replace it with the oil you prefer. Grape seed, avocado, canola and vegetable oil are some examples of oils you can use as a replacement.
This recipe contains almond flour. It helps with texture and flavor, so it’s a necessary ingredient. Almond flour can be pricey, but it’s good to have on hand. Adding it to your baked goods will make them more moist and tender. To find almond flour click here,
Mini Orange Olive Oil Cakes
Mari Vasseur
Soft, tender mini orange cakes brushed with orange syrup & dusted with powdered sugar
Heat the oven to 350ºF (180ºC). Grease and flour a 12 serving muffin pan.
In a medium-sized bowl, whisk together the cake flour, almond flour, baking powder, baking soda and salt until well blended.
In a large bowl, beat the sugar, eggs, orange zest and vanilla extract together until smooth. Gradually mix in the olive oil and beat until creamy and well blended.
Stir in the dry ingredients in two additions, alternating with the milk and orange juice. Stir just until combined. Do not over mix.
Fill the prepared muffin pan cups 2/3 full with batter. Do not overfill or cakes will be more difficult to remove.
Bake for 10-12 minutes or until the tops look light golden, but still moist and a toothpick inserted comes out clean. They bake very quickly, so check them a few minutes early to avoid over baking.
Cool the cakes in pan for 5 minutes. Remove them from pan and transfer to a cooling rack. Brush the warm cakes with orange simple syrup and allow to cool completely. When the cakes have cooled, dust with powdered sugar.
Orange Simple Syrup
In a small saucepan, stir together the sugar, orange juice, lemon juice, and orange zest. Cook over low heat, stirring occasionally, just until the sugar is dissolved.
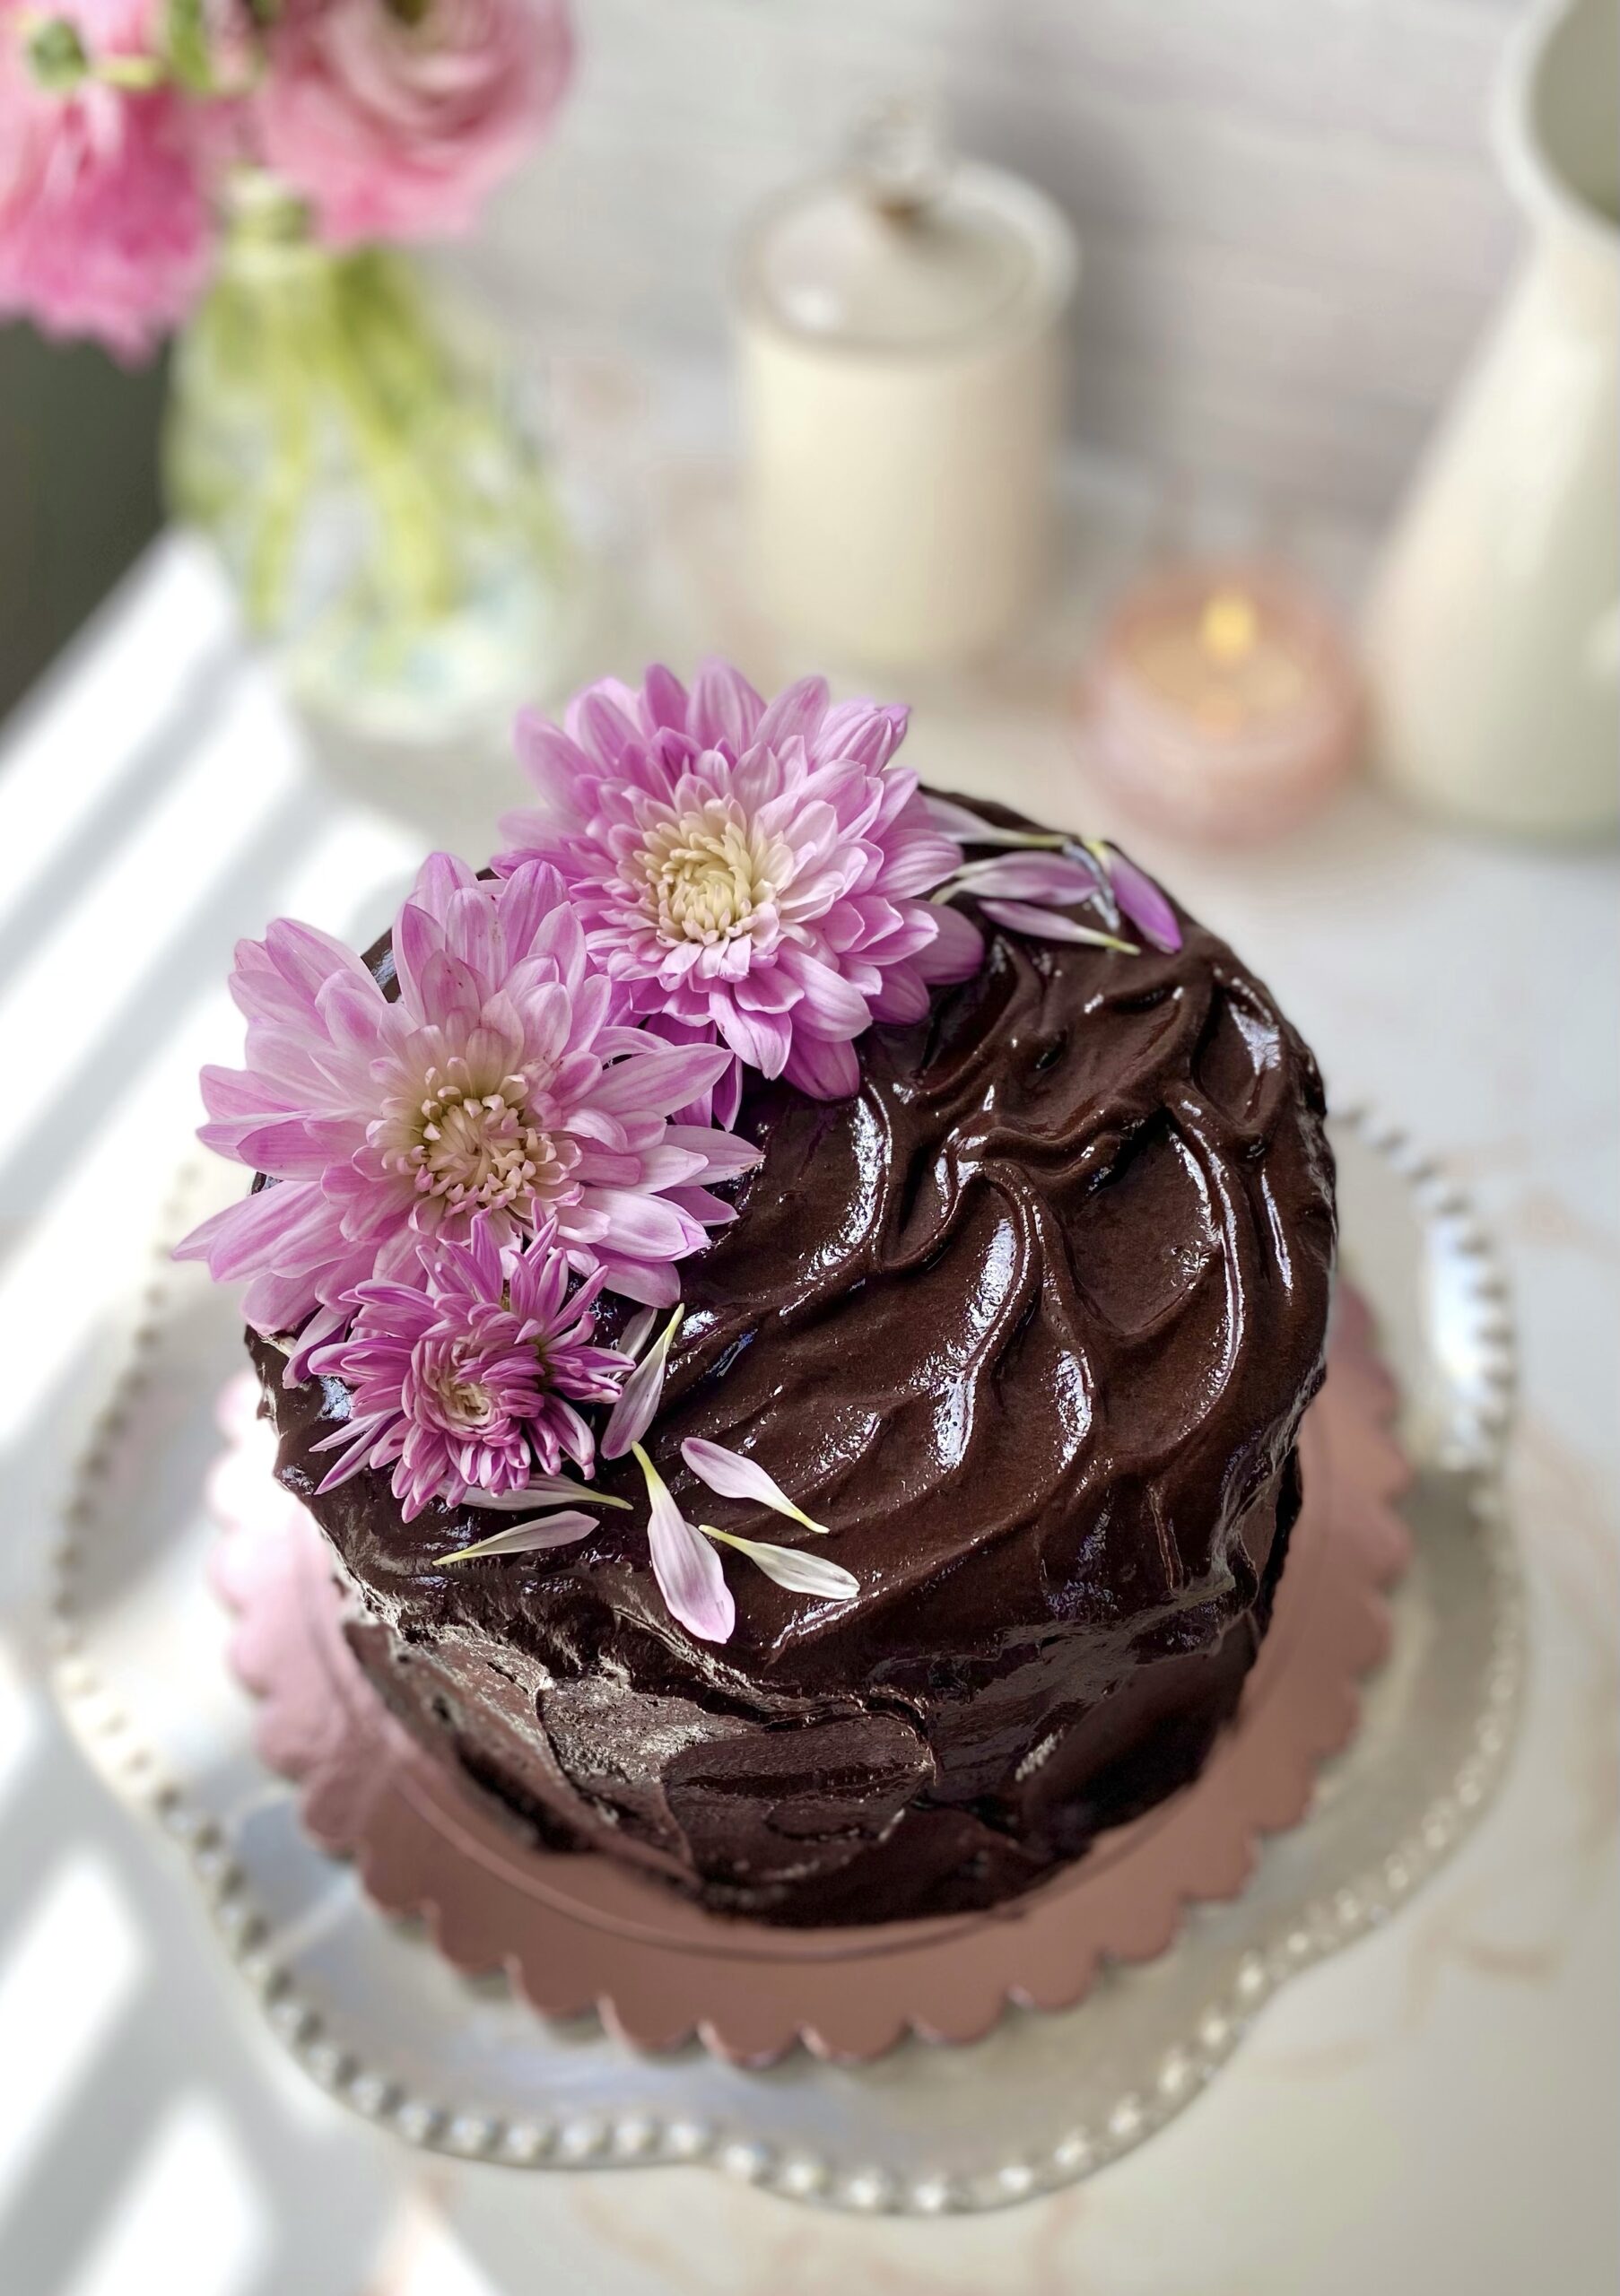
If you love chocolate cake, this is the post for you! Chocolate cake is one of the best comfort foods there is. I’ve tasted many over the years, but my all time favorite was one I had growing up. I’ve spent years trying to duplicate the moist, nostalgic cake from my childhood. I noticed that nearly every chocolate cake recipe on the internet is a variation of the century-old recipe from the Hershey’s Cocoa tin. I think many people have passed it down as a family recipe, each grandmother adding her own personal touch. Even some celebrity chefs have claimed it as their own. It’s an easy, delicious, moist recipe and its popularity is well deserved. You can tweak the flavor additions a bit to make it your own too. It’s a recipe that’s hard to mess up.
This cake is topped with the ultimate silky, smooth, deeply chocolate frosting. I developed this recipe mostly because I couldn’t find a chocolate frosting recipe that didn’t taste gritty and/or look speckled from the cocoa powder. Swiss meringue buttercream with melted chocolate added is one alternative. But, while it is smooth, silky and perfect for piping, it’s missing that deep chocolate richness. Another option is chocolate ganache. It looks rich and creamy in those viral videos, but it’s a little too rich and overpowering to use as frosting in my opinion.
I think this frosting is the one! It has the best of both worlds, velvety but not too rich. You’ll notice that this frosting contains maple syrup. The syrup gives it a very subtle maple flavor in the background, but mostly, it helps to make the frosting silky and gives it shine. You can adjust the sweetness level of the frosting by choosing the chocolate you prefer. I used bittersweet chocolate, which I think is just right. This recipe makes enough frosting to frost a 2-layer 6-inch cake. You can easily double the recipe for larger cakes.
Vintage Chocolate Cake
by Mari Vasseur
Rich moist classic chocolate cake with silky chocolate buttercream frosting
1 ⅛cup (145g)all purpose flour, siftedPlus more for dusting the pans
½cup (45g)unsweetened cocoa powder, siftedPlus more for dusting the pans
1teaspoonbaking powder
½teaspoonbaking soda
¾teaspoonfine sea salt
1 ⅓cups (265g)sugar
1largeegg
1largeegg yolk
⅔cup (155ml)buttermilk
⅓cup (70ml)vegetable oil
1 ½teaspoonspure vanilla extract
⅔cup (155ml)hot coffee or espresso
Chocolate Buttercream Frosting
½cup (148ml)pure maple syrup
3tablespoons (45ml)water
¾cup (67g)unsweetened Dutch process or dark cocoa powder, sifted
½teaspoonespresso powderoptional
1 ¼cups (283g)unsalted butter, softened
1cup (113g)powdered sugar, sifted
⅛teaspoonfine sea salt
8oz (227g)dark, bittersweet or semi-sweet chocolate, chopped*not chocolate chips
Instructions
Chocolate Cake
Preheat the oven to 350ºF (180ºC). Line the bottoms of two 6-inch cake pans with parchment paper. Grease the insides and dust with a mixture of equal parts flour and cocoa powder. Wrap the cake pans with damp cake strips if you have them.
Sift the flour, cocoa powder, baking powder, baking soda and salt together in a medium-sized bowl. Add the sugar and stir until well blended.
Combine the the egg, egg yolk, buttermilk, vegetable oil and vanilla extract in a small bowl. Whisk lightly to combine.
Add the egg mixture to the dry ingredients and beat, on low speed with an electric mixer, until combined. Stop the mixer. Scrape the sides and the bottom of the bowl with a spatula. Turn the mixer up to medium speed and beat for 30 seconds. Add the hot coffee and stir until well combined.
Pour the batter into the prepared cake pans, dividing batter evenly between the pans. Bake until a toothpick inserted into the center of the cakes comes out clean, about 25-28 minutes without cake strips or about 28-32 minutes with cake strips.
Let the cakes cool in the pans for 10 minutes then remove the cakes from the pans and transfer to a cooling rack.
Trim the cake layers to your desired thickness, from 1-inch to 1 1/2-inches thick. Fill and frost with chocolate buttercream frosting.
Chocolate Buttercream Frosting
In a small saucepan over low heat, whisk together the maple syrup, water, cocoa powder and espresso powder until smooth. Set aside to cool to room temperature.
Melt the chocolate in a medium-sized heat safe bowl set over a pan of gently simmering water, making sure the water doesn't touch the bottom of the bowl. Remove from heat and set aside to cool to lukewarm.
In a large bowl, beat the butter with an electric mixer at medium speed, until smooth and pale. Add the powdered sugar and salt and continue beating until smooth and well combined. Gradually add the the cooled maple syrup mixture and beat on low speed until combined. Stir in the melted chocolate until well blended. Smooth out any air bubbles by stirring gently with a rubber spatula.
Notes
*For smoothest results, use chopped bar chocolate and make sure chocolate is completely melted. Do not use chocolate chips. Chocolate chips do not melt completely and can make your frosting lumpy.
Sending sunshine your way with these cute, delicious bite-size mini cakes. Lemon Buttermilk Cakelets are tender and moist with a burst of fresh lemon flavor. They’re easy to make and they bake up quickly. They make an adorable addition to a spring teatime, baby shower or summer picnic.
½cup (115ml)vegetable oil or neutral oil of your choice
2largeeggs
2teaspoons lemon zest
½teaspoonpure vanilla extract
½teaspoon pure lemon extract
½cup (118ml)buttermilk
Icing
1 ½cups (180g)powdered sugar, sifted
1tablespoon (14g)unsalted butter, melted
3-4tablespoons (45-60ml)fresh lemon juice
Instructions
Lemon Simple Syrup
Measure the juice of 1 lemon. Add enough water to equal 1/4 cup (89ml). In a small saucepan, simmer the lemon juice and water mixture with the sugar and lemon zest, stirring occasionally, until the sugar is dissolved. Set aside to cool, then strain out the lemon zest.
Cakelets
Preheat the oven to 350ºF (180ºC). Grease and flour a 24-serving mini muffin pan* or use liners.
In a medium-sized bowl, whisk the flour, baking powder, baking soda and salt together until well blended.
In a large bowl, whisk the sugar, oil, eggs, lemon zest and extracts together until smooth and well blended. Mix in the flour mixture in 2 additions alternating with half of the buttermilk after each addition. Stir just until combined. Do not over mix.
Fill the muffin cups 2/3 full. (I used a portion scoop). Bake until a toothpick inserted into the center of the cakes comes out clean, about 8-10 minutes. Be careful not to over bake to avoid drying out the cakes. Let the cakes cool in the pan for 5 minutes, then remove them from the pan and transfer them to a cooling rack. (Repeat with any remaining batter.)
Icing
In a medium-sized bowl, whisk together the powdered sugar, melted butter and 3 tablespoons of lemon juice. Add additional lemon juice as needed to achieve the desired consistency. Whisk until smooth. Spoon the icing over the cooled cakes.
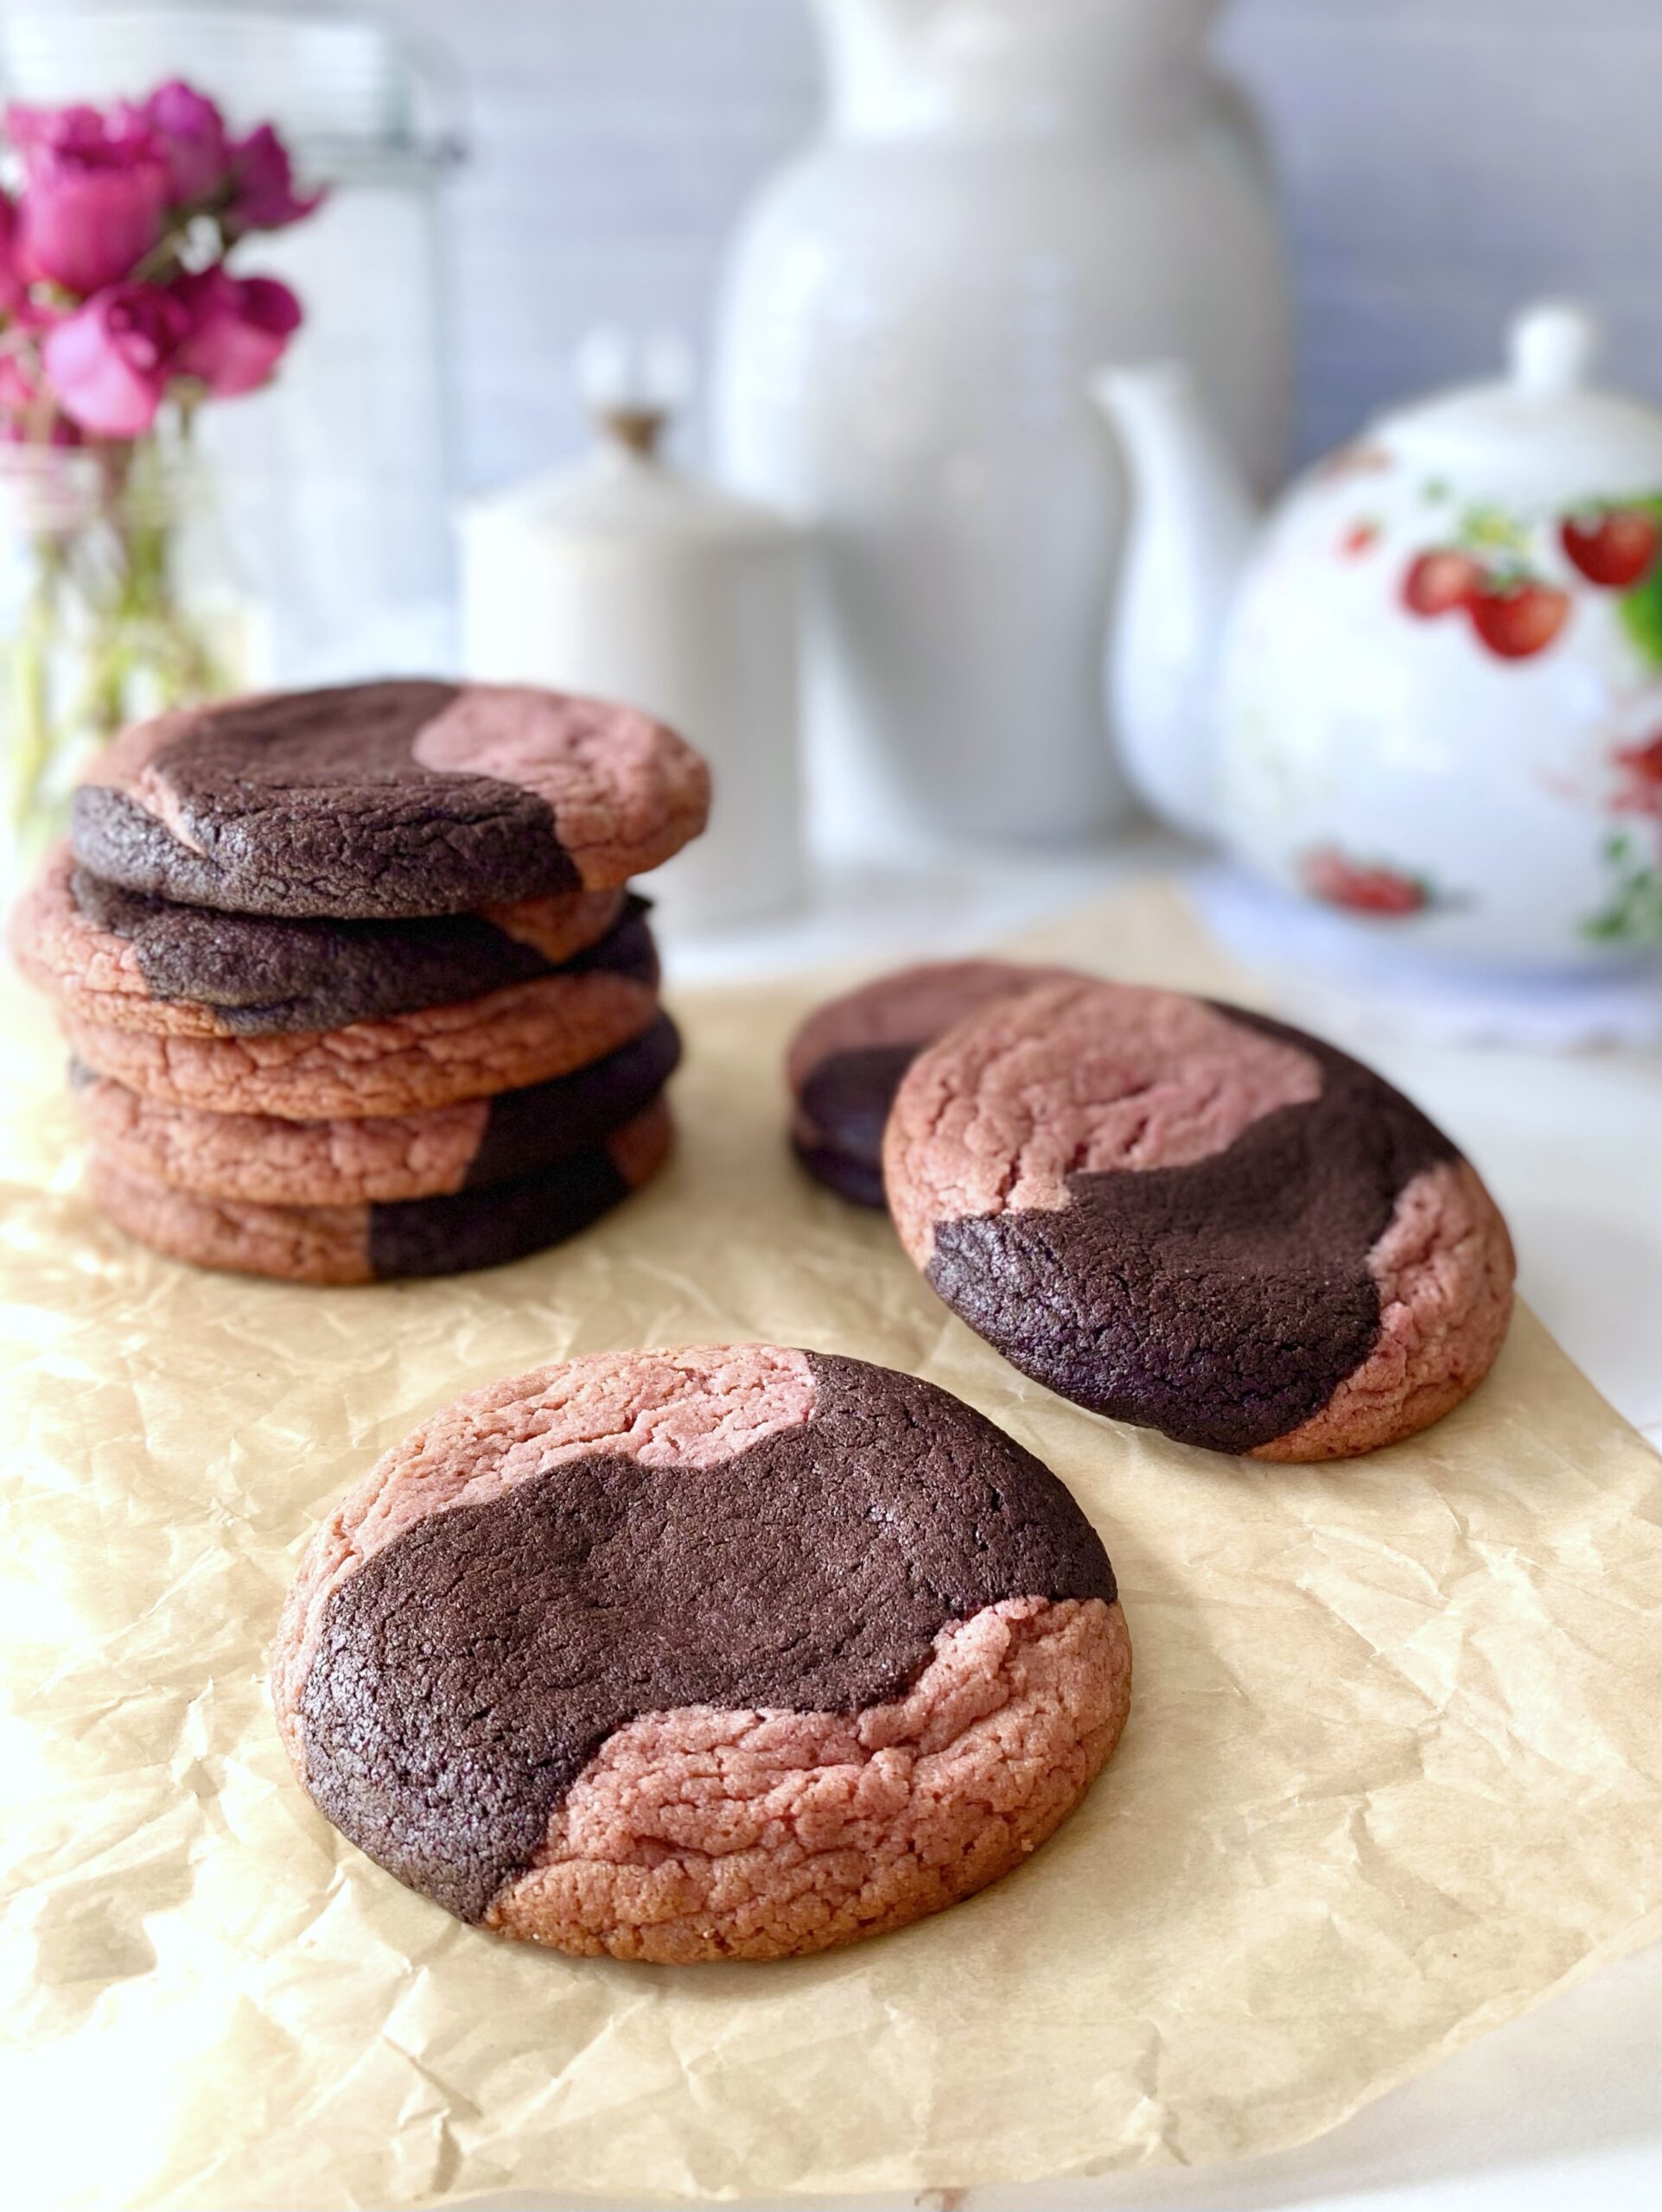
To the indecisive German baker who invented marble cake, I thank you! Marble cake, sampler platters and tasting flights are the perfect solution for those times when you just can’t decide. Let’s take one more decision off the table. No longer will we have to decide between chocolate and strawberry cookies. These marble cookies are the best of both worlds. Chocolate and strawberry are opposites in many ways, but complement each other so well. After all, who doesn’t love chocolate covered strawberries?
The dark chocolate cocoa powder gives these cookies a deep chocolate flavor. Freeze dried strawberries provide the sweet strawberry flavor and color. I crushed the strawberries with a mini food processor, but you can also use a mortar and pestle, a clean spice grinder or a sturdy plastic bag and a rolling pin. When you crush the 1 1/2 cups of freeze dried strawberries called for in the recipe, you’ll end up with about 1/3 cup of strawberry powder. To find freeze dried strawberries, click here.
This recipe makes about eighteen cookies but you can also make nine large cookies. Follow the instructions in parentheses for large cookies.
1 ½cups (35g)freeze-dried strawberries, finely crushed to a powder(1 1/2 cups before crushing)
⅓cup (28g)dark unsweetened cocoa powder
Instructions
In a medium-sized bowl, whisk together the flour, baking soda and salt until well blended.
In a large bowl, beat the butter, granulated sugar and brown sugar, with an electric mixer at medium speed, until pale and fluffy.
Beat in the eggs and vanilla extract in three separate additions, making sure each addition is incorporated before adding the next. On low speed, mix in flour mixture just until combined.
Divide the dough in half. Leave half of dough in the bowl and place the other half in a separate bowl.
Add the freeze dried strawberries to half of the dough and mix just until combined. Add the cocoa powder to the other half of the dough and mix just until combined.
Roll the dough into 1 1/2 teaspoon size balls. (For large cookies, roll the dough into tablespoon size balls.) To form the cookies, place two chocolate dough balls and two strawberry dough balls in your hand in a checkerboard pattern. Roll into a ball. Repeat with the remaining dough balls and refrigerate for 30 minutes.
Preheat oven to 350ºF (180ºC). Line two large cookie sheets with parchment paper.
Place the dough balls about two inches apart on the prepared cookie sheets. Bake 10-12 minutes, until cookies are set and edges are golden. (For large cookies, bake 14-15 minutes.) Transfer to cooling rack. (For large cookies, cool on cookie sheet one minute, then transfer to cooling rack.
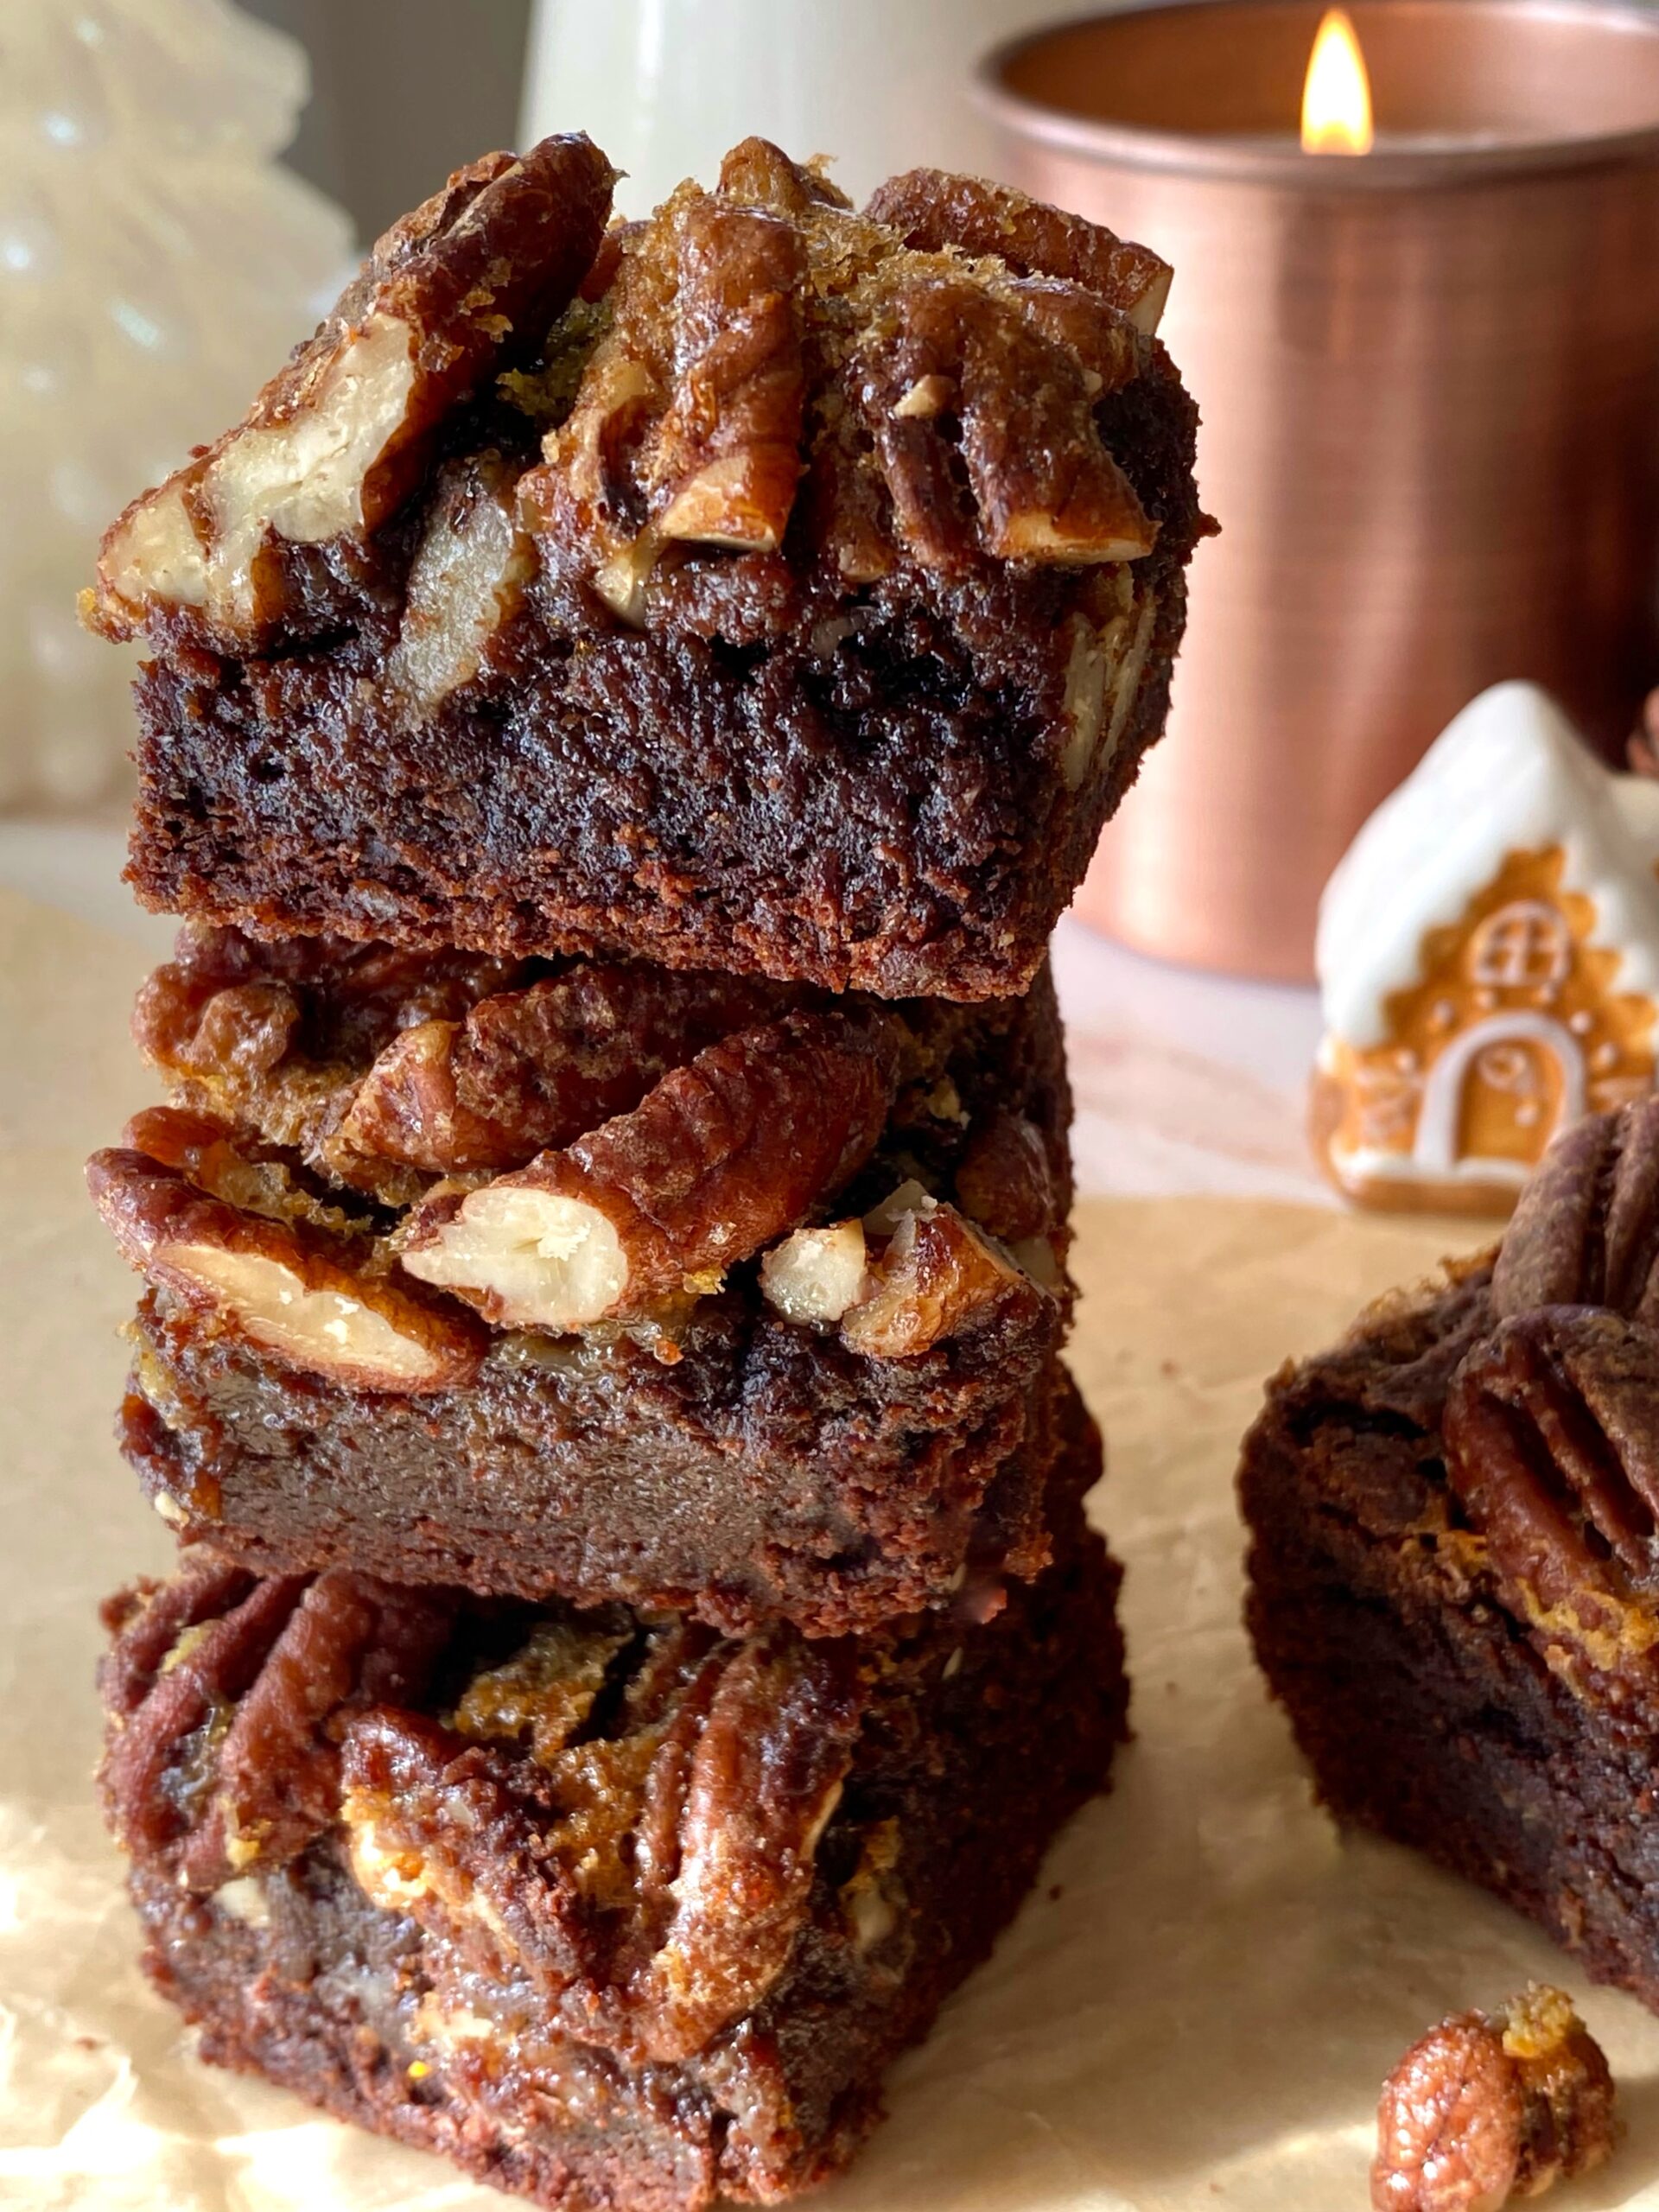
Pecan pie was my mom’s favorite, but she didn’t bake pies, so I always used to bake her one for Thanksgiving. One year, I made a chocolate version. It was delicious, but let’s just say it wasn’t user friendly. It was gooey and hard to serve. Over the years, it eventually morphed into these Maple Pecan Brownies. The brownie version is still delicious, rich and gooey with toasty pecans, but much more user friendly.
Enjoying Maple Pecan Brownies with a glass of milk or a cup of coffee is a must. Thinking of it brings back memories. I can practically smell my dad brewing the coffee to go with these brownies.
Maple Pecan Brownies
Rich, gooey brownies topped with pecan pie filling
Preheat oven to 350ºF. Line a 9-inch square baking pan with parchment paper, overlapping the sides an inch or two. Spray parchment paper with nonstick cooking spray.
In a large bowl, stir together melted butter, granulated sugar and brown sugar until well combined.
Mix in eggs and vanilla, one at a time, until well combined.
Mix in cocoa powder, baking soda and salt until well combined.
Stir in flour just until combined.
Spread batter into prepared baking pan. Bake just until top is set, about 25 minutes.
Meanwhile, prepare pecan topping.
When brownie top is set, remove from oven. Gently pour pecan topping around the outer perimeter of brownies, to avoid making brownies sink in the middle. Evenly distribute the pecan topping over the top gently with a spoon.
Return the brownies to the oven and continue baking until the topping is set, about 20-25 minutes. Brownies will stop jiggling and topping will look deep golden brown. Toothpick inserted inside will have a few moist crumbs on it. (If your topping starts to brown too much on the edges before the inside is done, apply aluminum foil around the edges as you would with a pie.)
Remove from oven and cool completely before cutting, about 2- 2 1/2 hours.
Cut into squares, wiping knife between cuts.
Pecan Topping
In a medium bowl, stir together maple syrup, butter, brown sugar, egg, maple extract and salt until well combined.
Stir in pecans until well coated with maple syrup mixture.
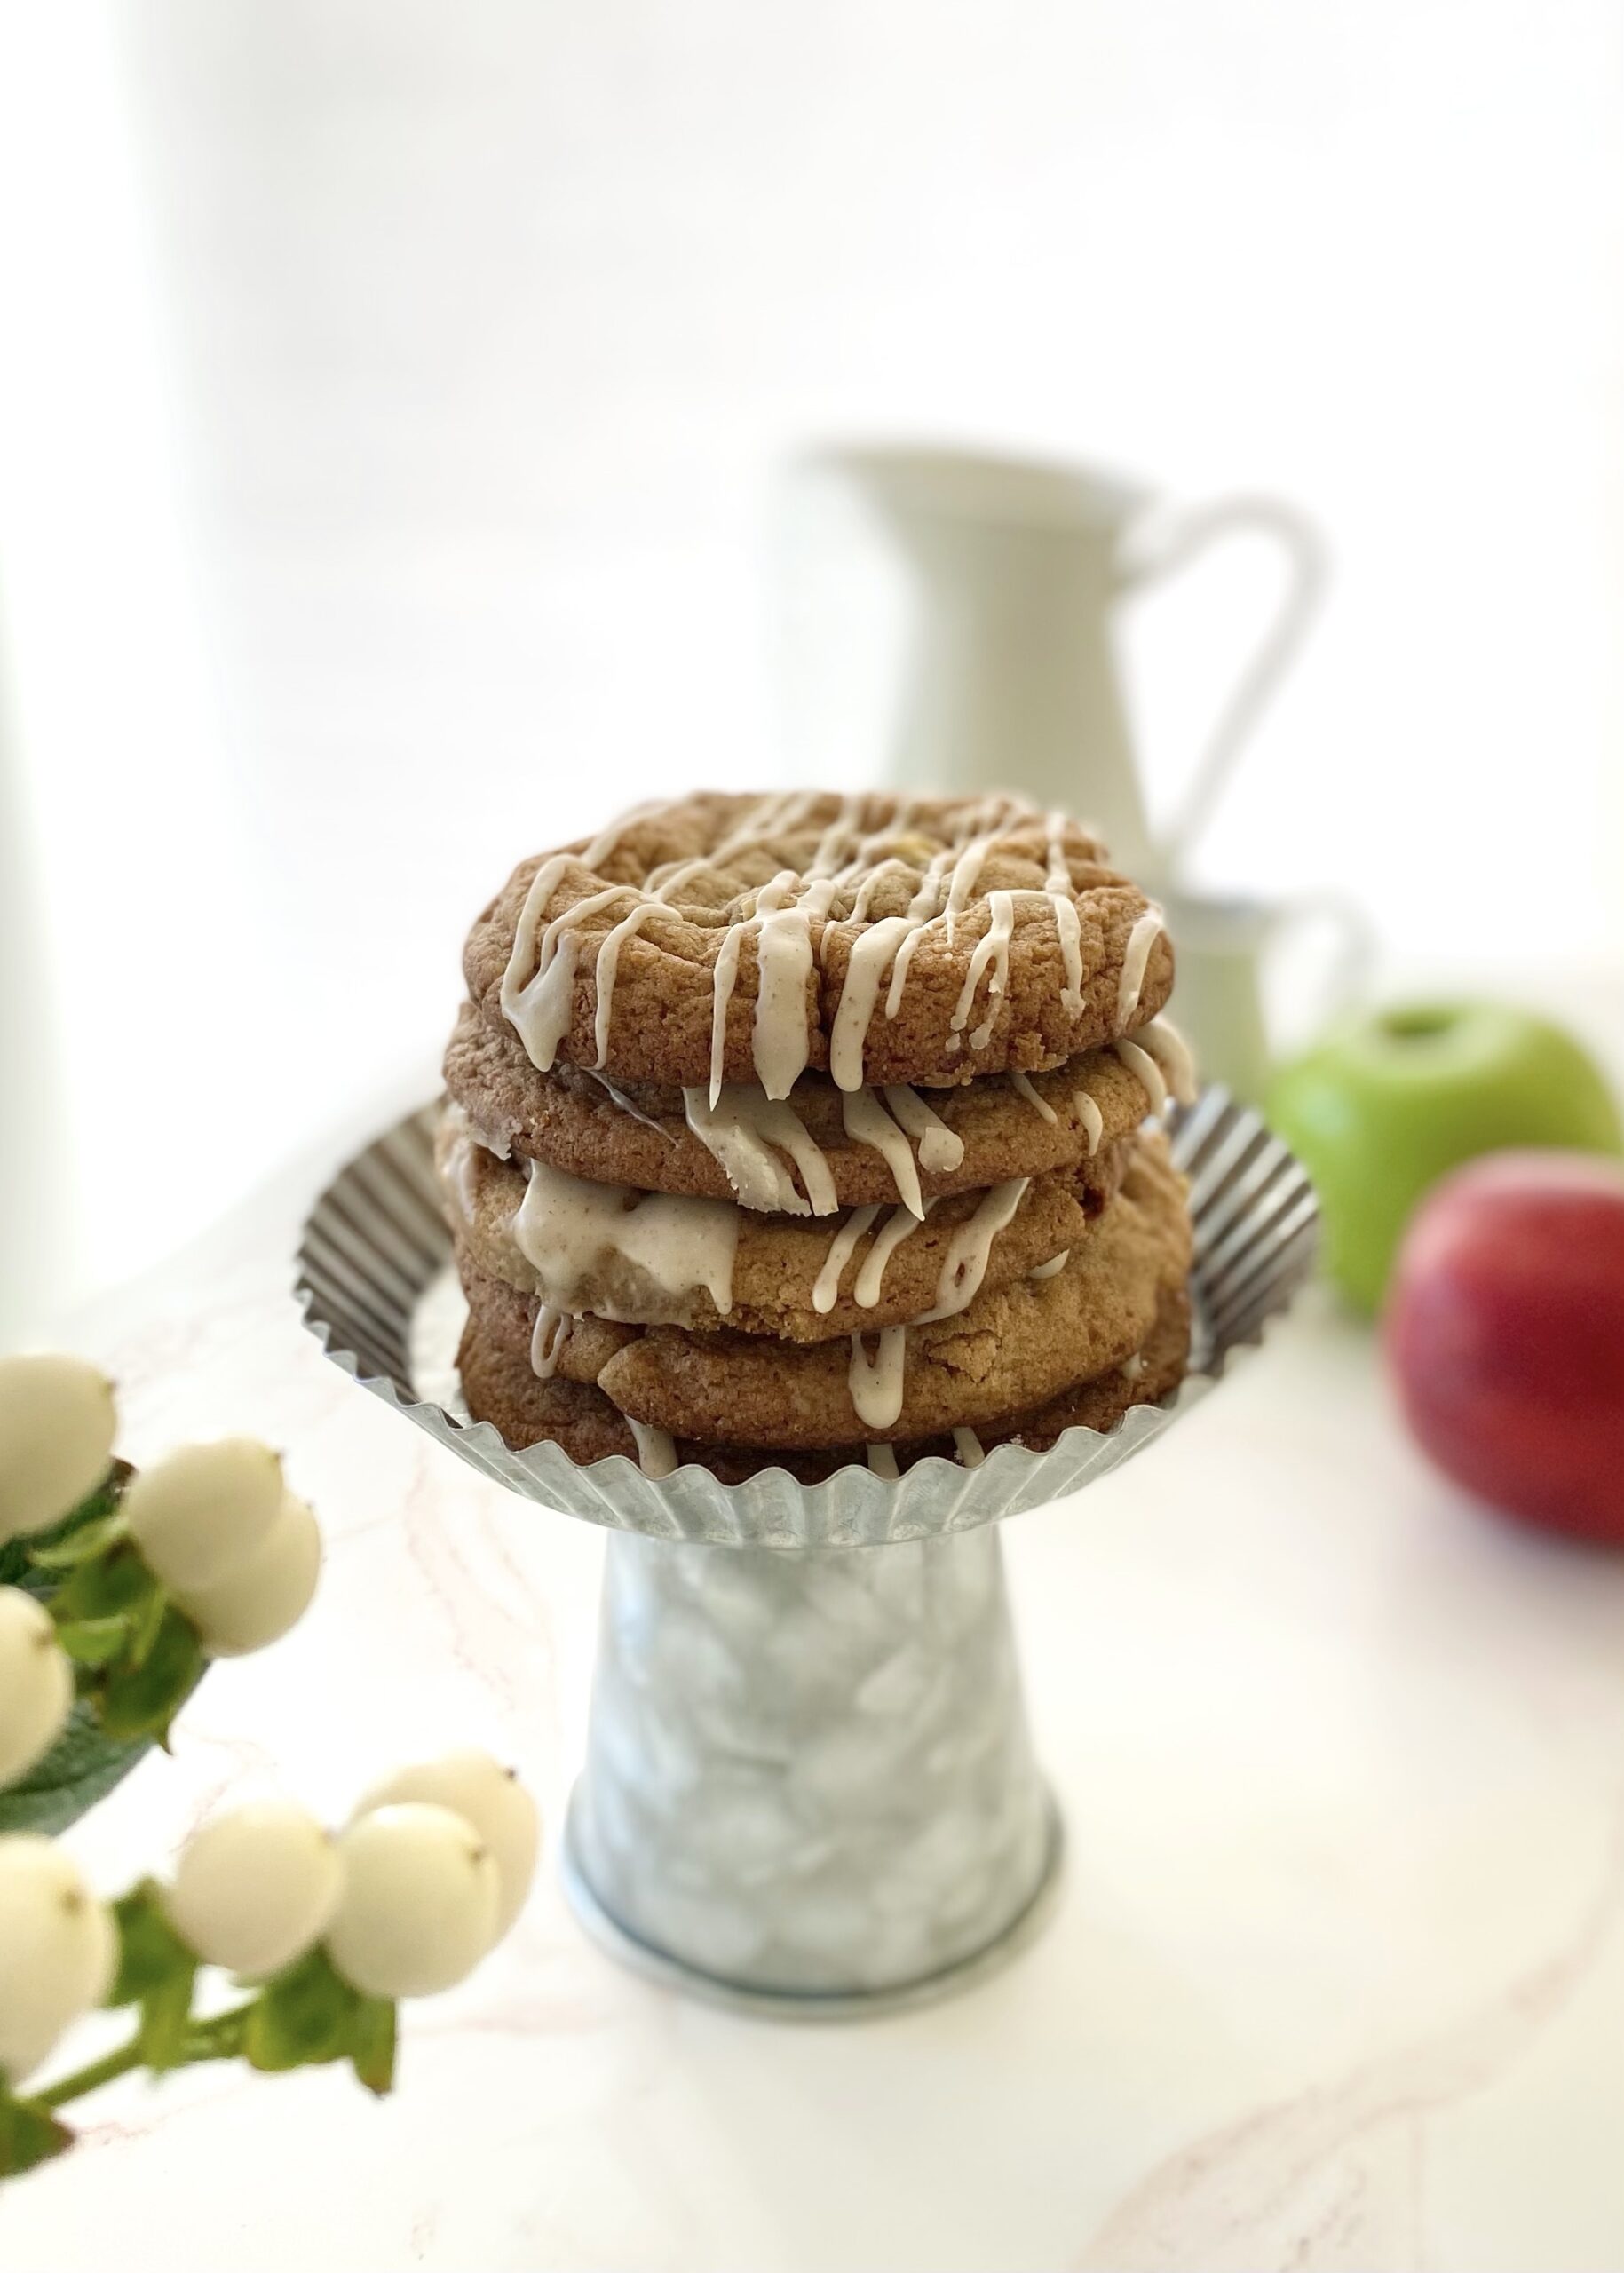
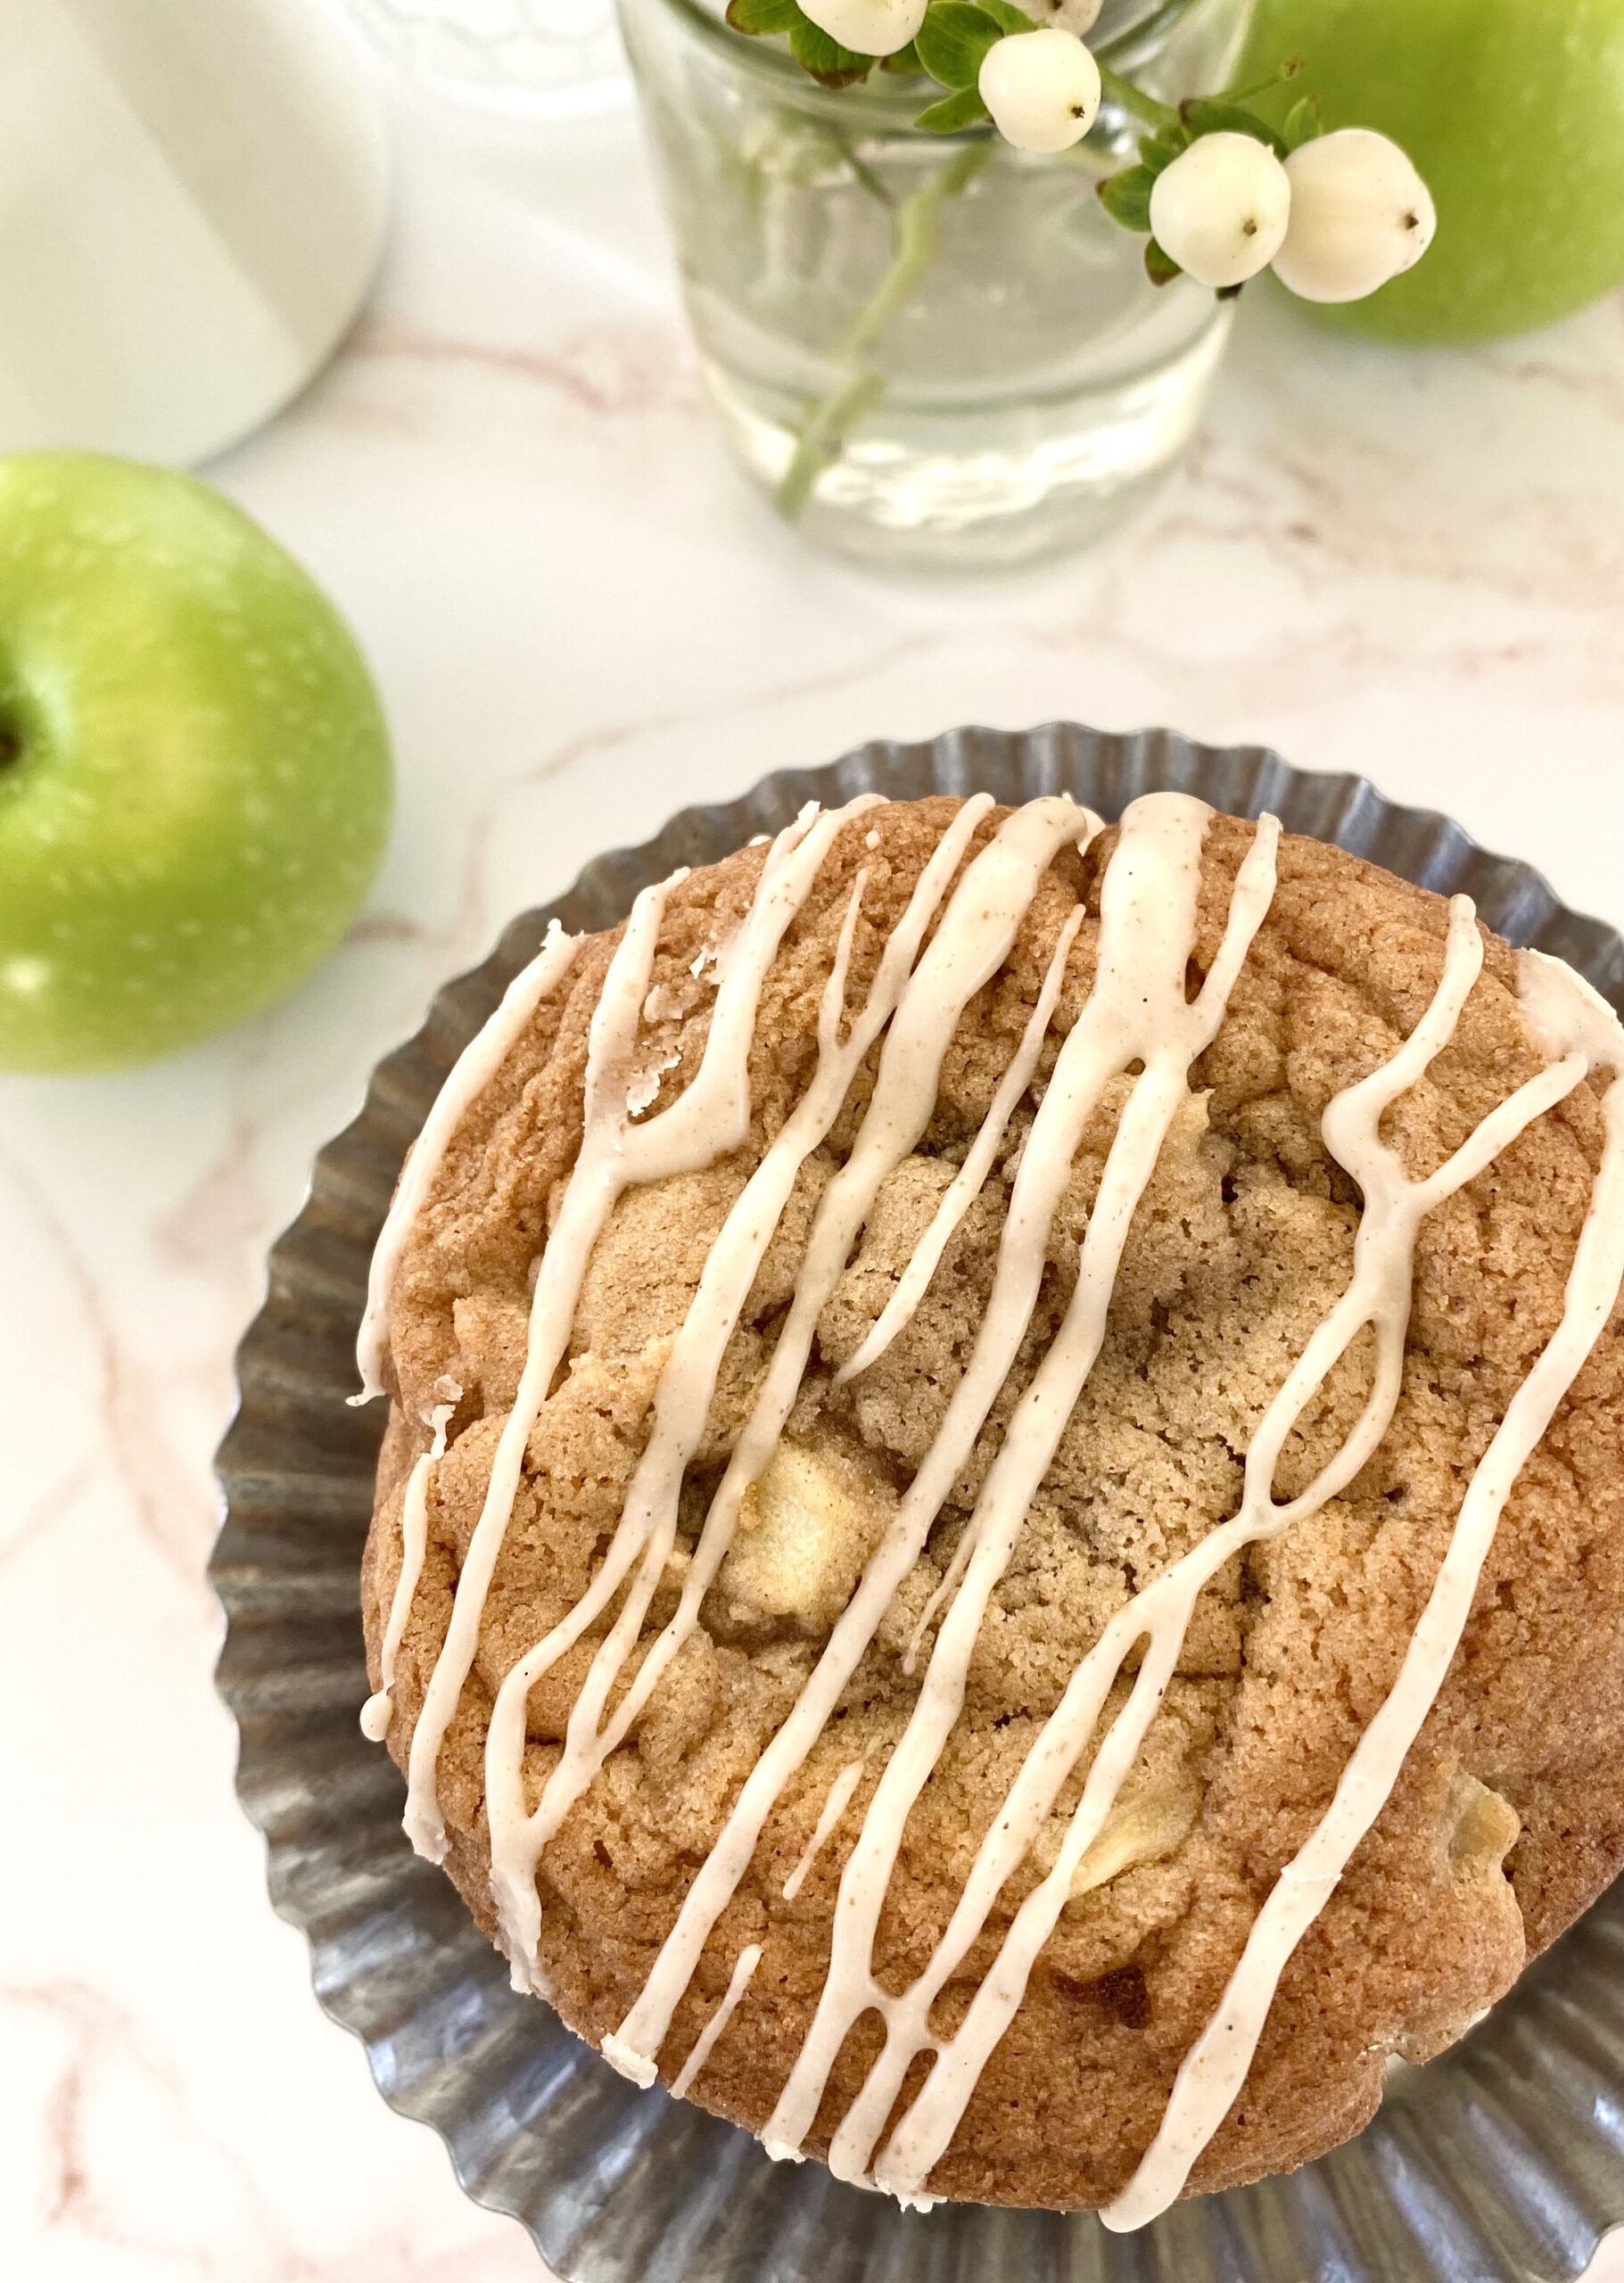
These Apple Spice Cookies were one of my most popular cookies last fall so I decided to bring them back a little early this year. The combination of cinnamon, nutmeg and vanilla in this cookie dough will remind you of cinnamon rolls and apple pie and inspire you look forward to fall.
The apples in this recipe are cooked briefly on the stovetop to bring out the flavor and create the perfect texture. Dropping raw apple chunks into cookie dough or cake batter is usually not a good idea. If you’ve ever baked an apple pie, you know that apples release liquid as they cook and that liquid will end up in your baked cookies, creating soggy spots. So definitely don’t skip this step!
These gorgeous, golden brown cookies are perfectly delicious on their own, but extra credit goes to the Brown Butter Icing for taking them over the top!
Make sure to head over to Instagram to watch the video of these Apple Spice Cookies being created: Click here
Apple Spice Cookies with Brown Butter Icing
Spice cookies with fresh apples and brown butter icing
1 cup (4 oz or 113g)chopped apples (1/4-inch pieces)I used one large Granny Smith apple
1tablespoonsugar
¼teaspoonground cinnamon
Apple Spice Cookie Dough
1 ½cups (6 3/4 oz or 191g)all purpose flour, sifted
½teaspoonbaking soda
½teaspoonsalt
1teaspoonground cinnamon
¼teaspoonground nutmeg
½cup (4 oz 113g)unsalted butter, softened
1cup (7 oz or 200g)packed brown sugar
1 largeegg
1 largeegg yolk
½teaspooonpure vanilla extract
Brown Butter Icing
2tablespoonsunsalted butter
½cup (2 oz or 57g)powdered sugar, sifted
½teaspoonpure vanilla extract
pinchfine sea salt
1-2tablespoonswhole milk
Instructions
Cooked Apples
Melt the butter in a small skillet over medium heat. Add apples, sugar and cinnamon to the skillet.
Cook, stirring occasionally, until the apples are tender, about 4-5 minutes.
Remove from heat and let cool completely. Drain any excess liquid from the cooled apples.
Apple Spice Cookies
Preheat the oven to 375ºF (190ºC). Line two large baking sheets with parchment paper.
In a medium bowl, whisk together the flour, baking soda, salt, cinnamon and nutmeg. Set aside.
In a large bowl, beat the butter and brown sugar with an electric mixer at medium speed until light and fluffy.
Beat in the egg, egg yolk and vanilla extract, one at a time, until well combined
Stir in the flour mixture, just until combined.
Fold the the cooled apples into the cookie dough.
Divide the dough into 12 equal golf ball size portions and place them 3 inches apart on the prepared baking sheets.
Bake until golden brown, about 11-13 minutes. Let cool 1 minute on the baking sheet, then transfer to a cooling rack to cool completely.
Brown Butter Icing
In a small saucepan, cook the butter over medium heat until golden brown and fragrant. When brown specks start to form in the bottom of the pan, remove from heat.
Immediately transfer the browned butter to a small bowl. Whisk in the the powdered sugar, vanilla extract, salt and 1 tablespoon milk. Add more milk as needed to reach desired consistency.
Drizzle the icing over the cooled cookies.
Notes
NOTE: If your cookies spread too much when baking, refrigerate dough for 30 minutes, then bake as directed.
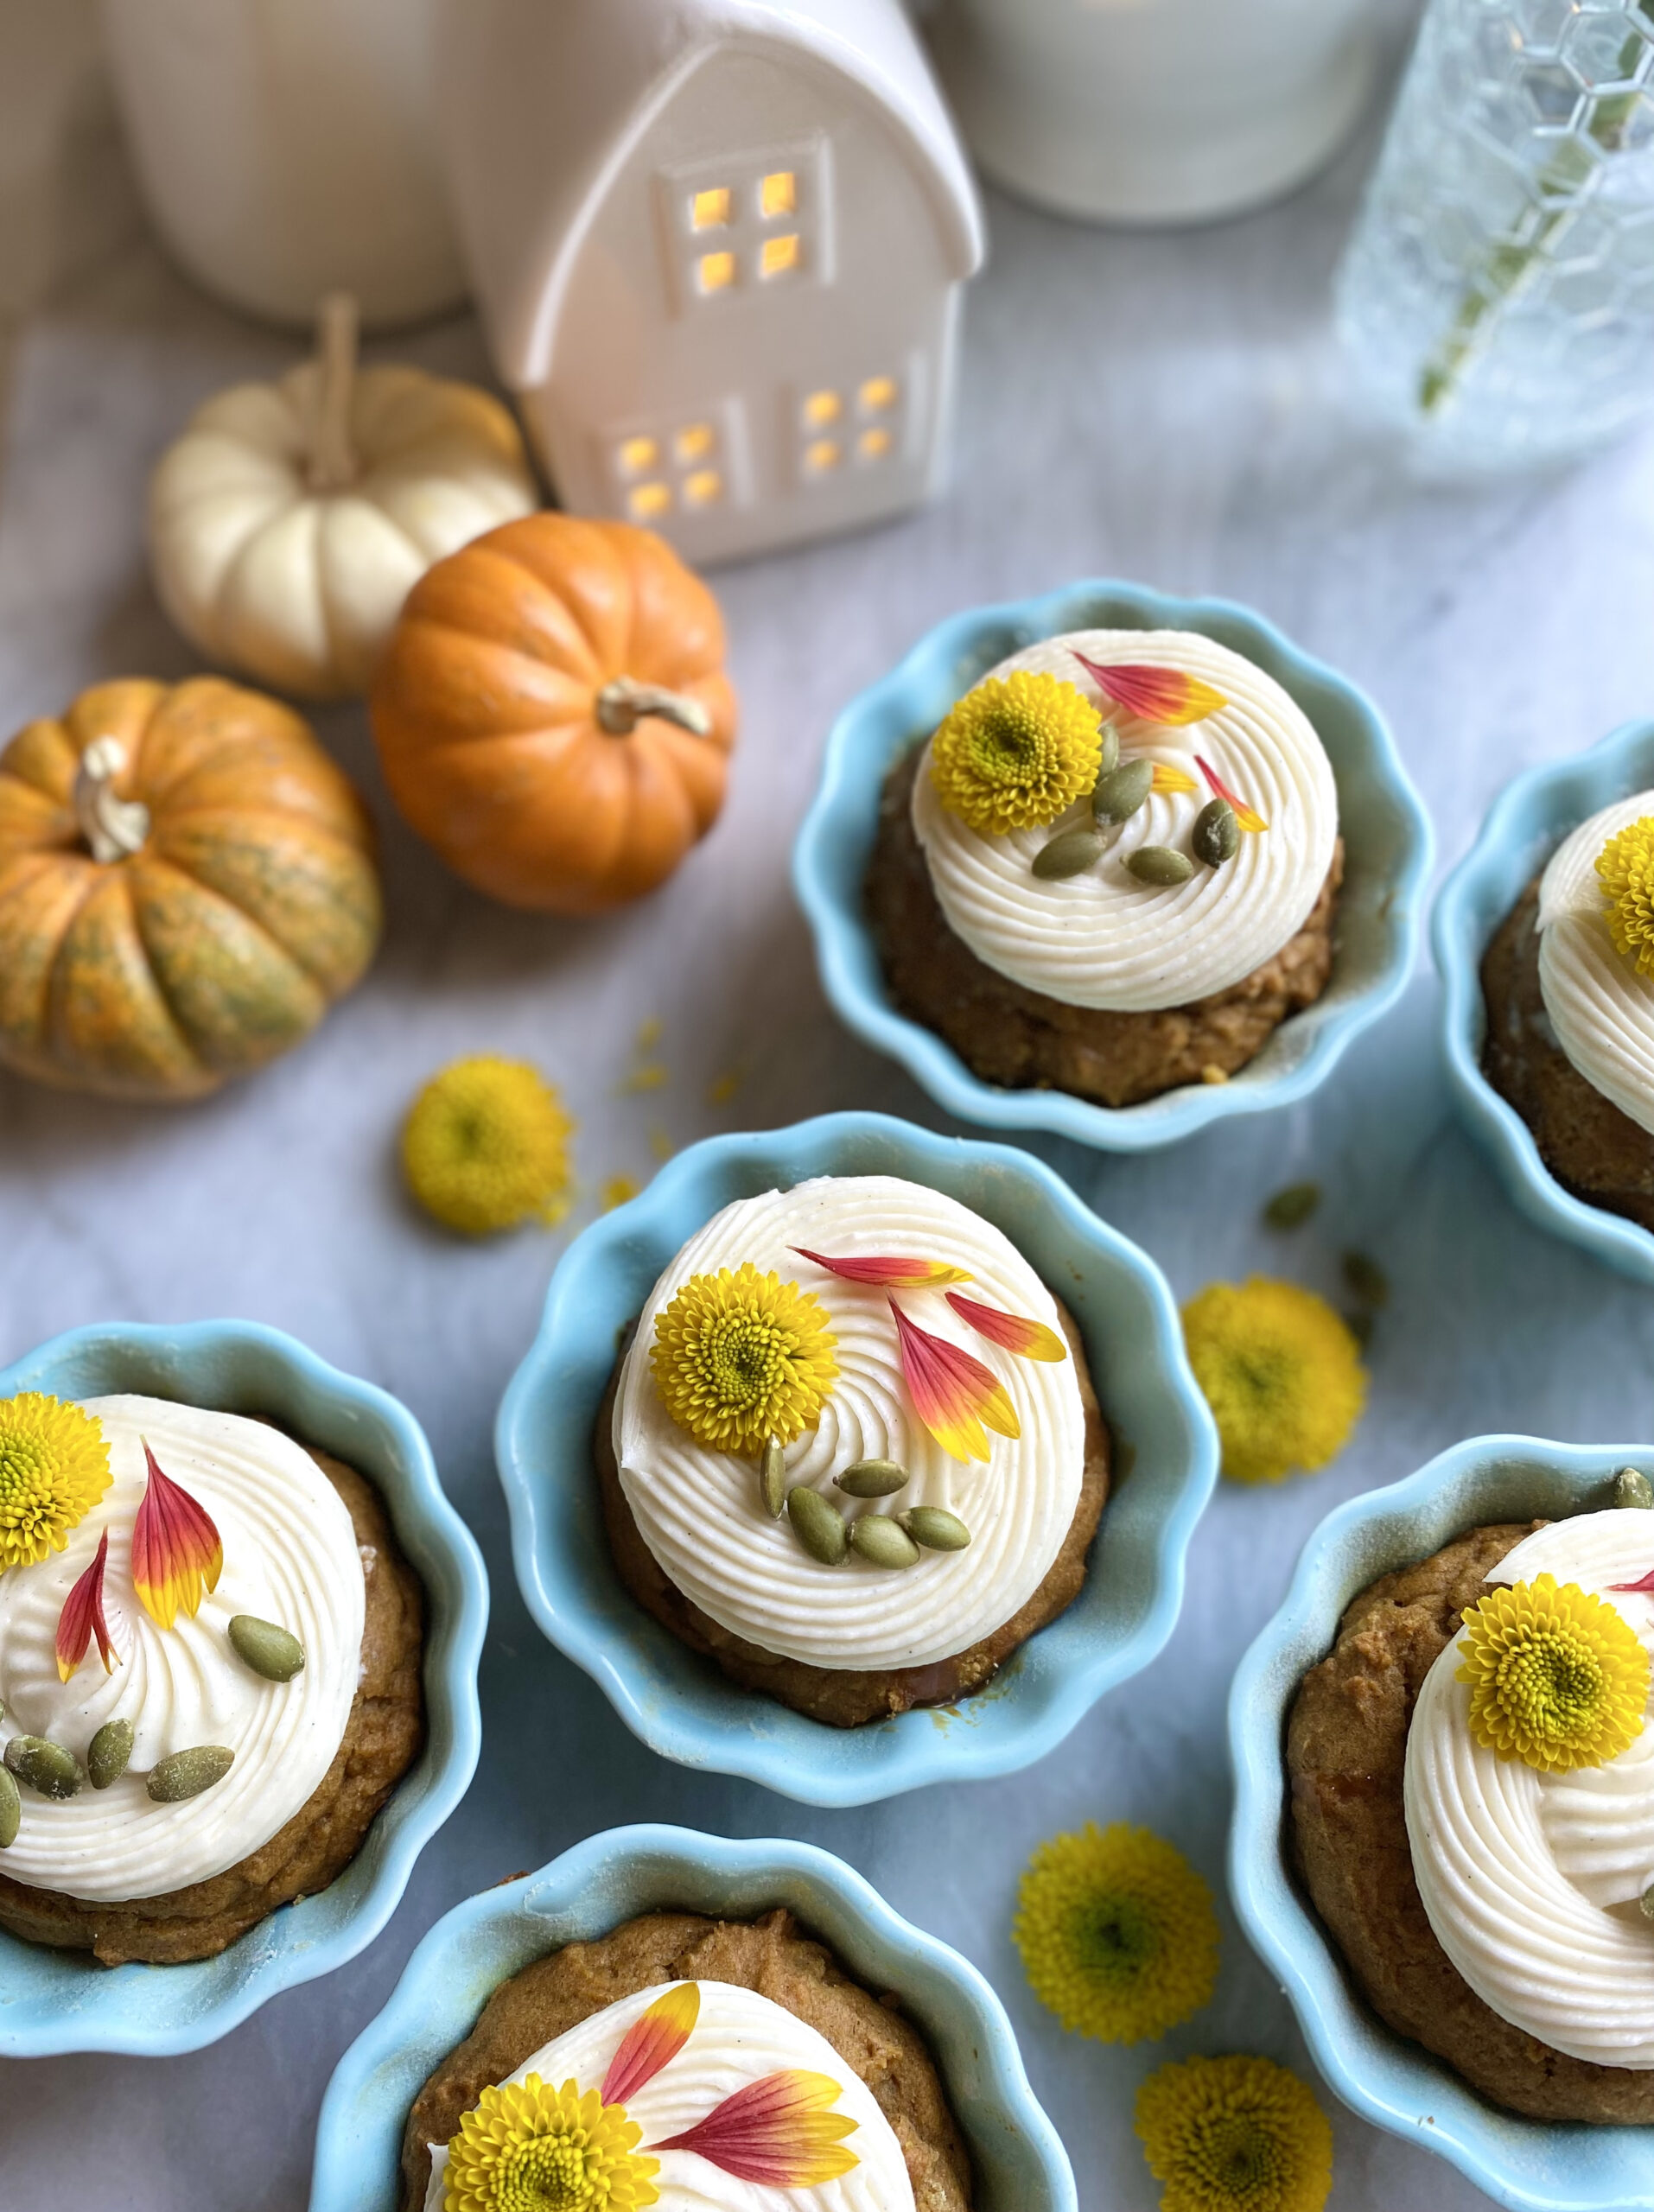
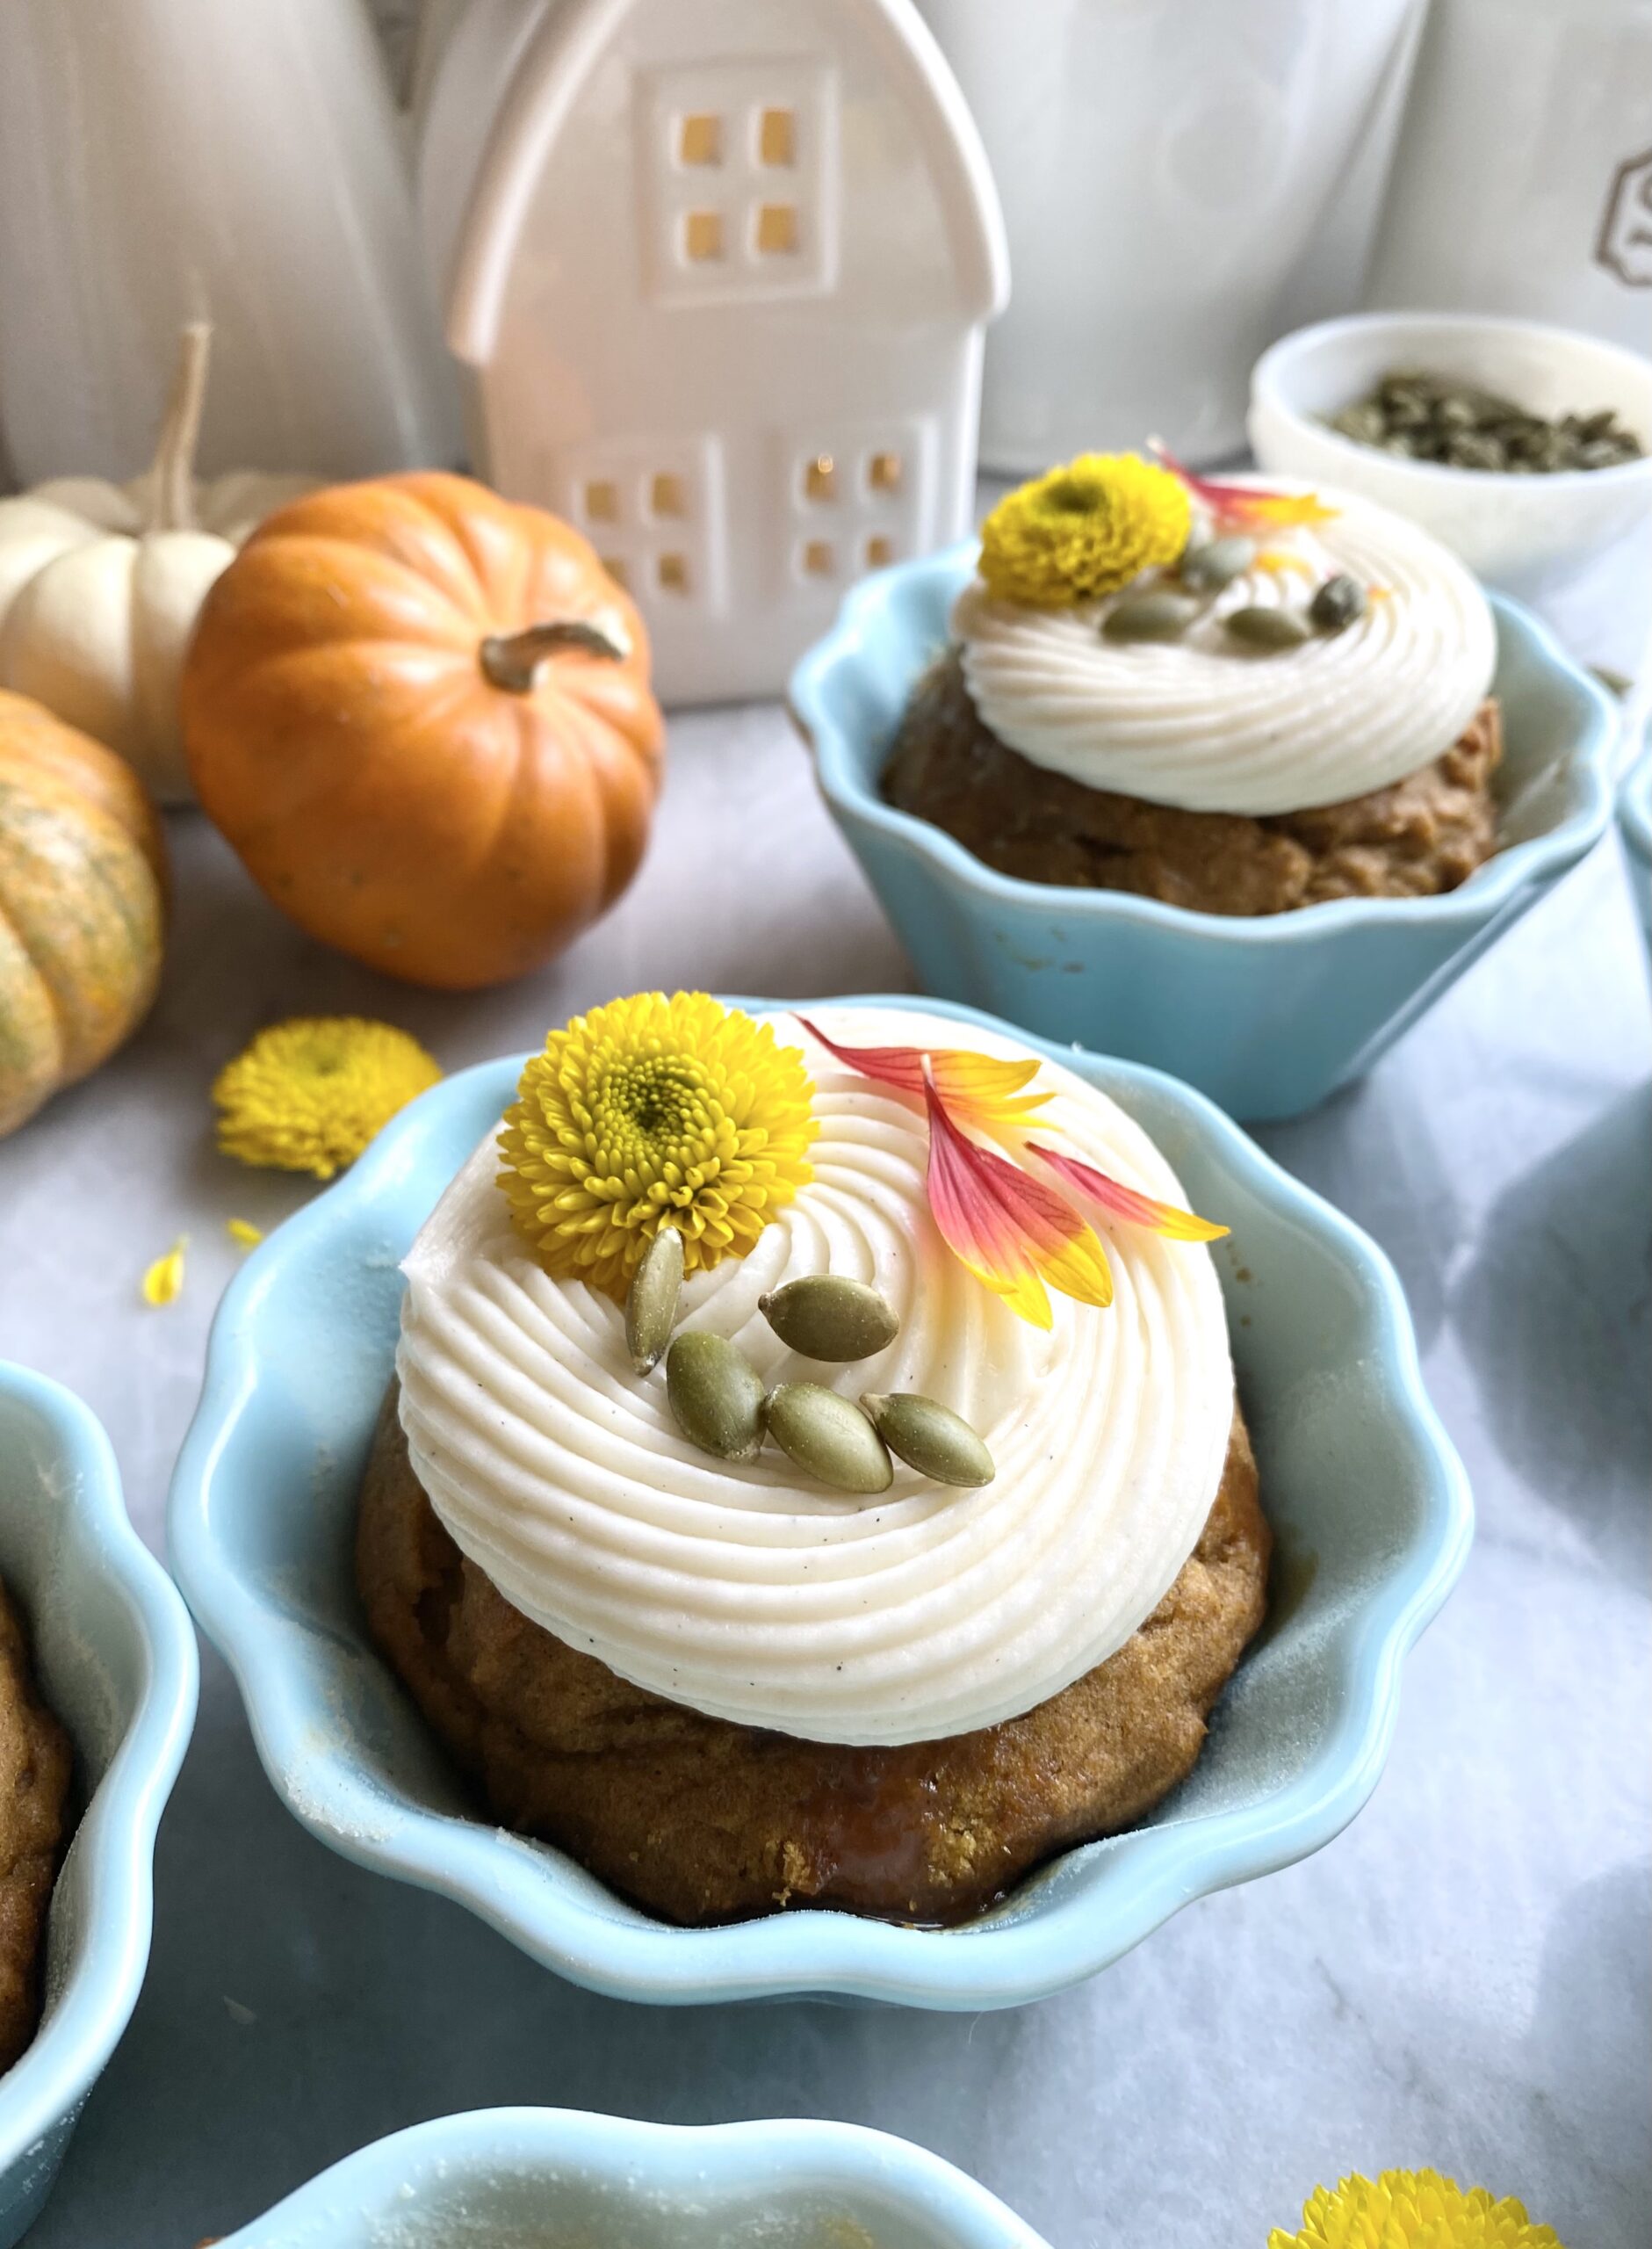
In early September, I saw someone announce the fall season on social media. In addition to people pointing out that it was too early for the announcement, the word police corrected the person with the word autumn. Since both terms are correct, we can call the season whatever we prefer. I think autumn is a pleasant sounding word, so I’ll use it for the rest of this post. Whatever you call it, these Pumpkin Spice Muffins are a perfect little celebration of the season. They have just the right amount of warm spices, making them so fragrant that your kitchen will smell like cozy autumn heaven.
I originally made them in mini loaf pans, but I thought they would be cute as muffins too. They’re so cute and delicious that I often give them as holiday gifts. This year I decided to try them in ramekins and I loved the results! I used 6-ounce ramekins, but you can use 8-ounce ramekins, any size mini loaf pans, a muffin pan or even an 8 or 9-inch loaf pan. Keep in mind that baking times will differ. To find the ramekins I used, click here.
Pumpkin Spice Muffins with Caramel Filling
by Mari Vasseur
Tender pumpkin spice muffins with caramel filling and luscious cream cheese frosting
Preheat the oven to 350ºF (180ºC). Grease and flour seven 6-ounce ramekins or six 8-ounce ramekins or any mini loaf pans of your choice.
In a large bowl, sift together the flour, cinnamon, baking powder, baking soda, salt, ginger, nutmeg and cloves until well blended.
In a separate large bowl, beat the butter and brown sugar together, with an electric mixer at medium speed, until pale and fluffy. Beat in the eggs, one at a time, until incorporated. Beat in the pumpkin purée and vanilla extract until well blended. Stir in the flour mixture just until combined.
Divide the batter evenly into the prepared ramekins. Bake for 15-25 minutes or until golden brown and a toothpick inserted in the center comes out clean. Do not overbake.
Cool completely if serving in ramekins or remove from pans after cooling for 10 minutes. Continue to cool on wire rack.
Make 3/4-inch wells in the center of each muffin. Fill with caramel sauce. (For loaves, poke multiple holes with a skewer. Fill with caramel sauce.) Top with cream cheese frosting and pumpkin seeds
Cream Cheese Frosting
In a large bowl, beat the cream cheese and butter together, with an electric mixer at medium speed until smooth and well blended. Do not over beat.
Add the vanilla extract and salt and beat until combined. On low speed, gradually beat in the powdered sugar incorporated. Add the heavy cream and continue beating at low speed smooth. Remove any bubbles by gently stirring with a spatula.