1/4-1/3cup (50-66g)sugardepending on the sweetness of your raspberries
Instructions
Purée the raspberries with the lemon juice in a blender or food processor. Pass the purée through a fine mesh sieve* to remove the seeds.
In a small bowl, whisk together the water and cornstarch.**
In a small saucepan, heat the raspberry purée with the sugar and cornstarch slurry to a boil over medium heat. Turn the heat down to low and simmer until slightly thickened, about 2-3 minutes.
Notes
*To find a fine mesh sieve, click here.**To find a mini whisk for whisking small amounts, click here.
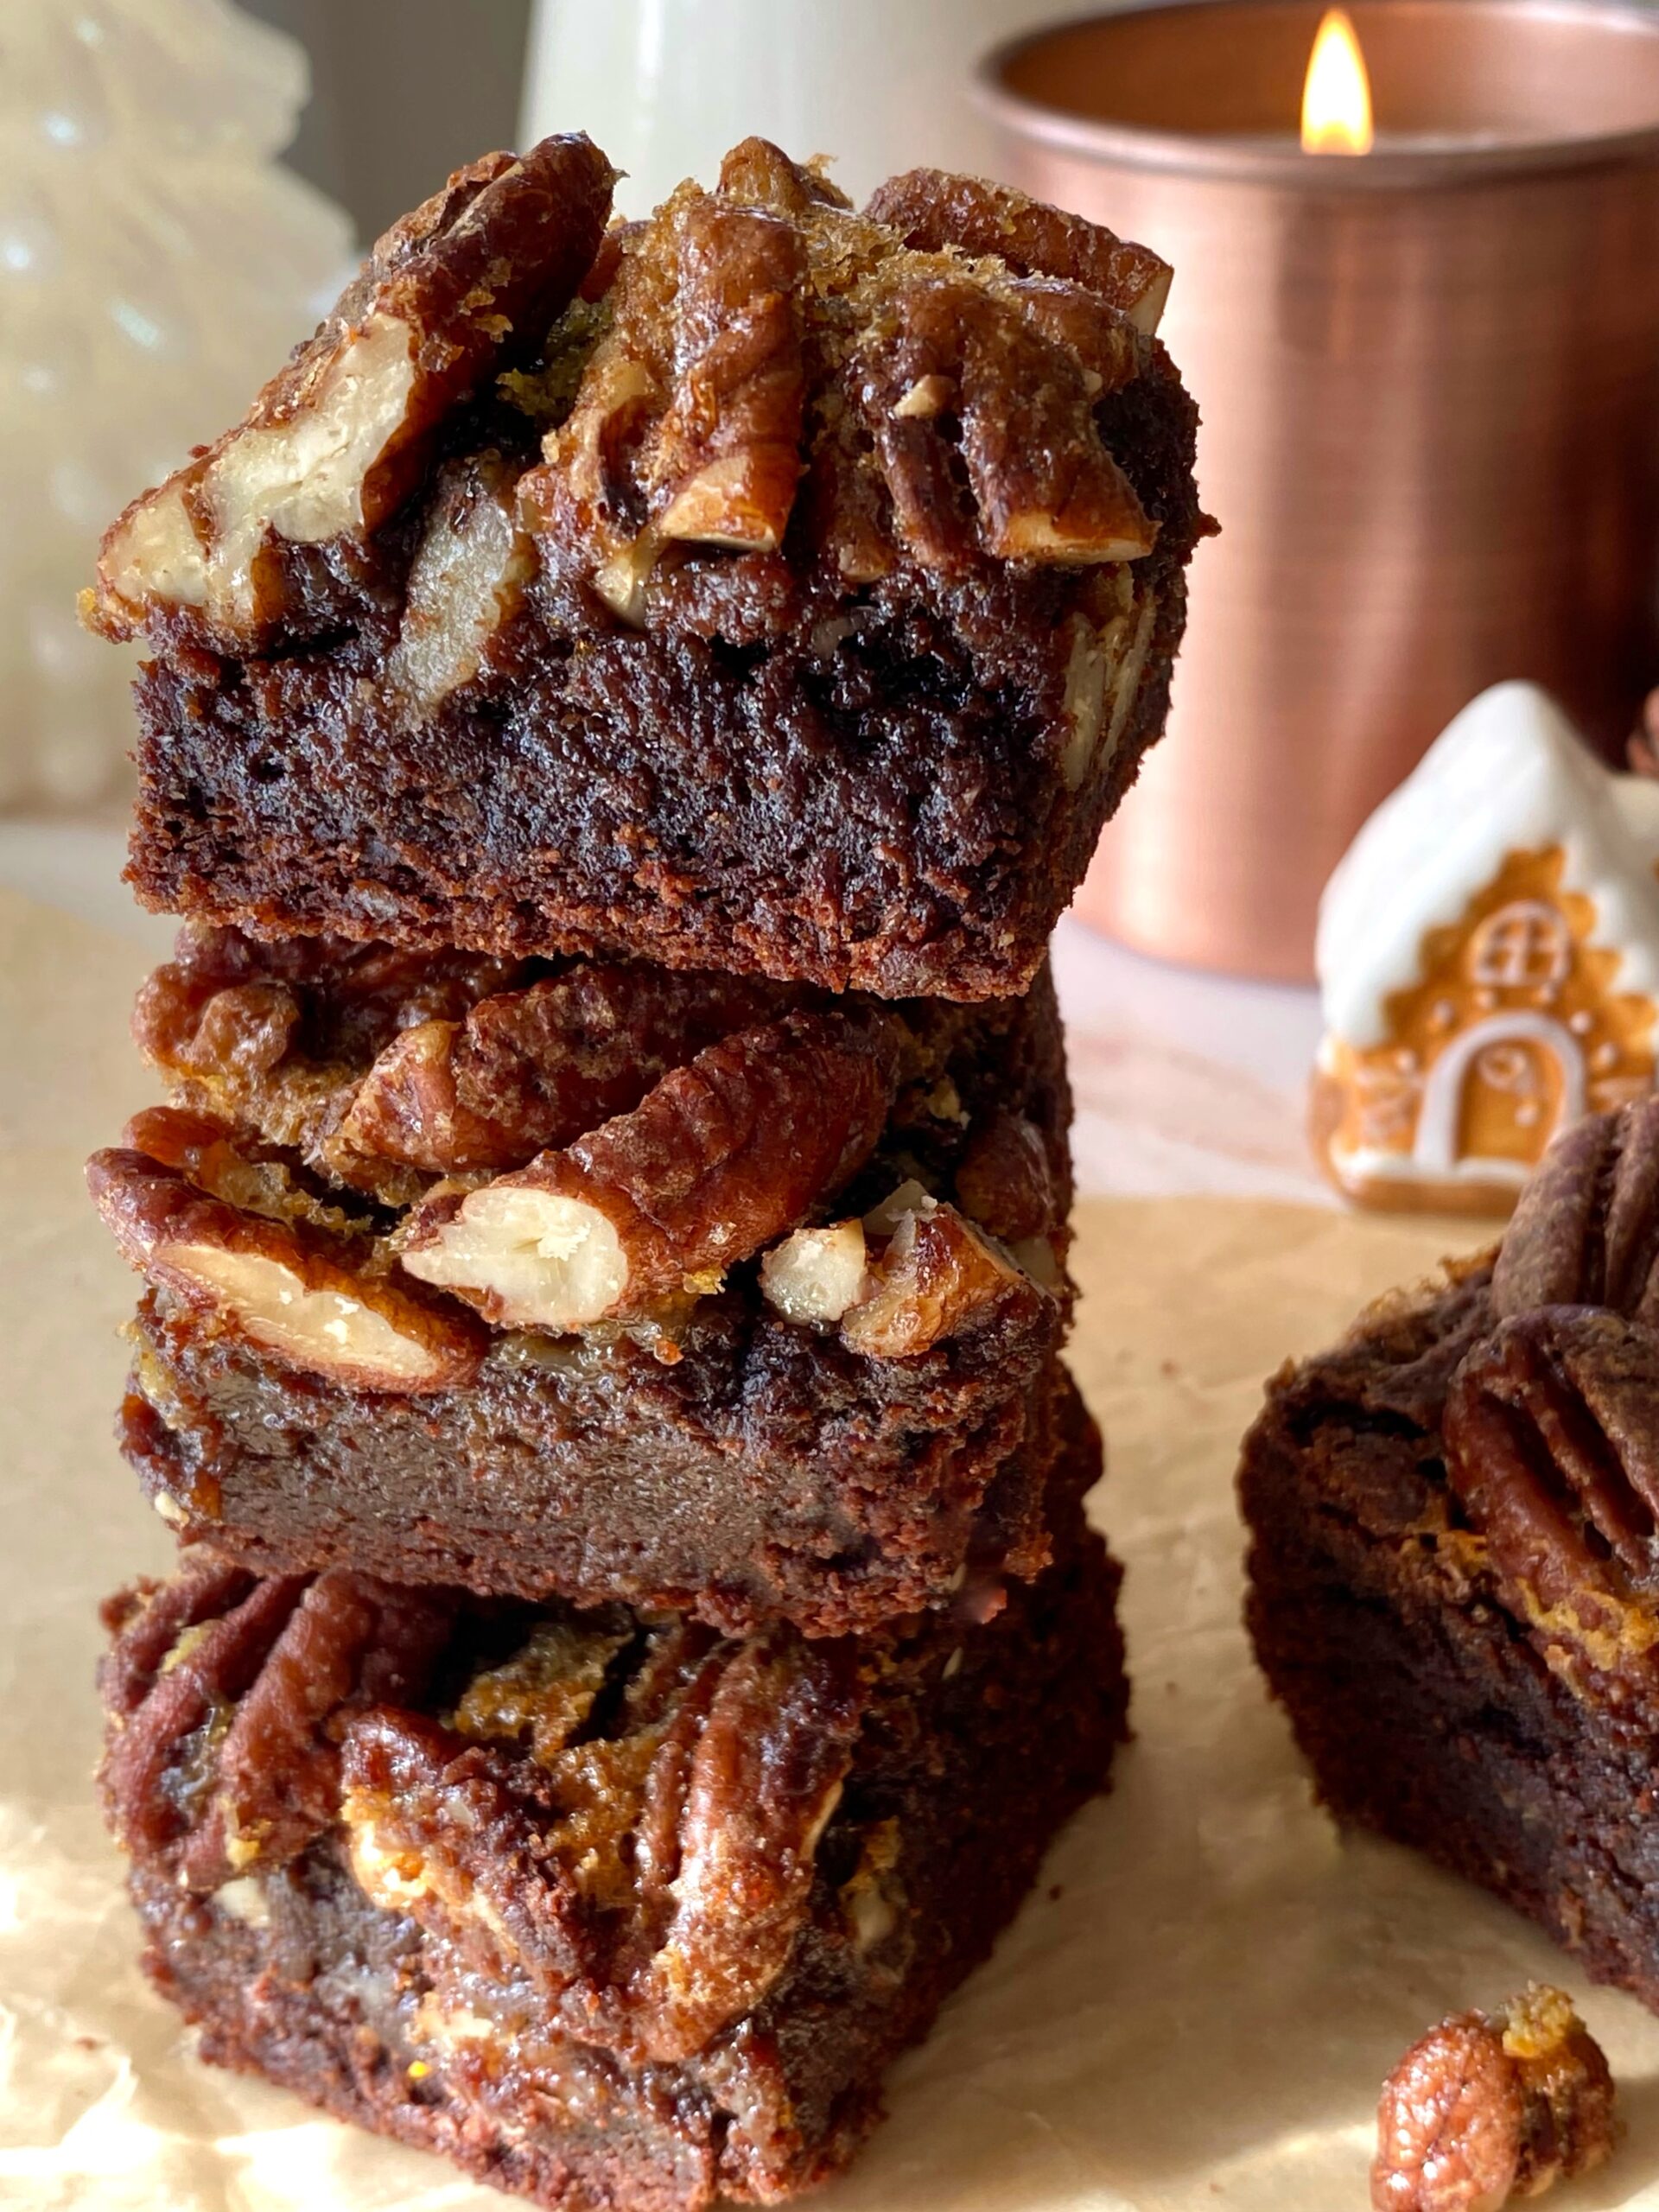
Pecan pie was my mom’s favorite, but she didn’t bake pies, so I always used to bake her one for Thanksgiving. One year, I made a chocolate version. It was delicious, but let’s just say it wasn’t user friendly. It was gooey and hard to serve. Over the years, it eventually morphed into these Maple Pecan Brownies. The brownie version is still delicious, rich and gooey with toasty pecans, but much more user friendly.
Enjoying Maple Pecan Brownies with a glass of milk or a cup of coffee is a must. Thinking of it brings back memories. I can practically smell my dad brewing the coffee to go with these brownies.
Maple Pecan Brownies
Rich, gooey brownies topped with pecan pie filling
Preheat oven to 350ºF. Line a 9-inch square baking pan with parchment paper, overlapping the sides an inch or two. Spray parchment paper with nonstick cooking spray.
In a large bowl, stir together melted butter, granulated sugar and brown sugar until well combined.
Mix in eggs and vanilla, one at a time, until well combined.
Mix in cocoa powder, baking soda and salt until well combined.
Stir in flour just until combined.
Spread batter into prepared baking pan. Bake just until top is set, about 25 minutes.
Meanwhile, prepare pecan topping.
When brownie top is set, remove from oven. Gently pour pecan topping around the outer perimeter of brownies, to avoid making brownies sink in the middle. Evenly distribute the pecan topping over the top gently with a spoon.
Return the brownies to the oven and continue baking until the topping is set, about 20-25 minutes. Brownies will stop jiggling and topping will look deep golden brown. Toothpick inserted inside will have a few moist crumbs on it. (If your topping starts to brown too much on the edges before the inside is done, apply aluminum foil around the edges as you would with a pie.)
Remove from oven and cool completely before cutting, about 2- 2 1/2 hours.
Cut into squares, wiping knife between cuts.
Pecan Topping
In a medium bowl, stir together maple syrup, butter, brown sugar, egg, maple extract and salt until well combined.
Stir in pecans until well coated with maple syrup mixture.
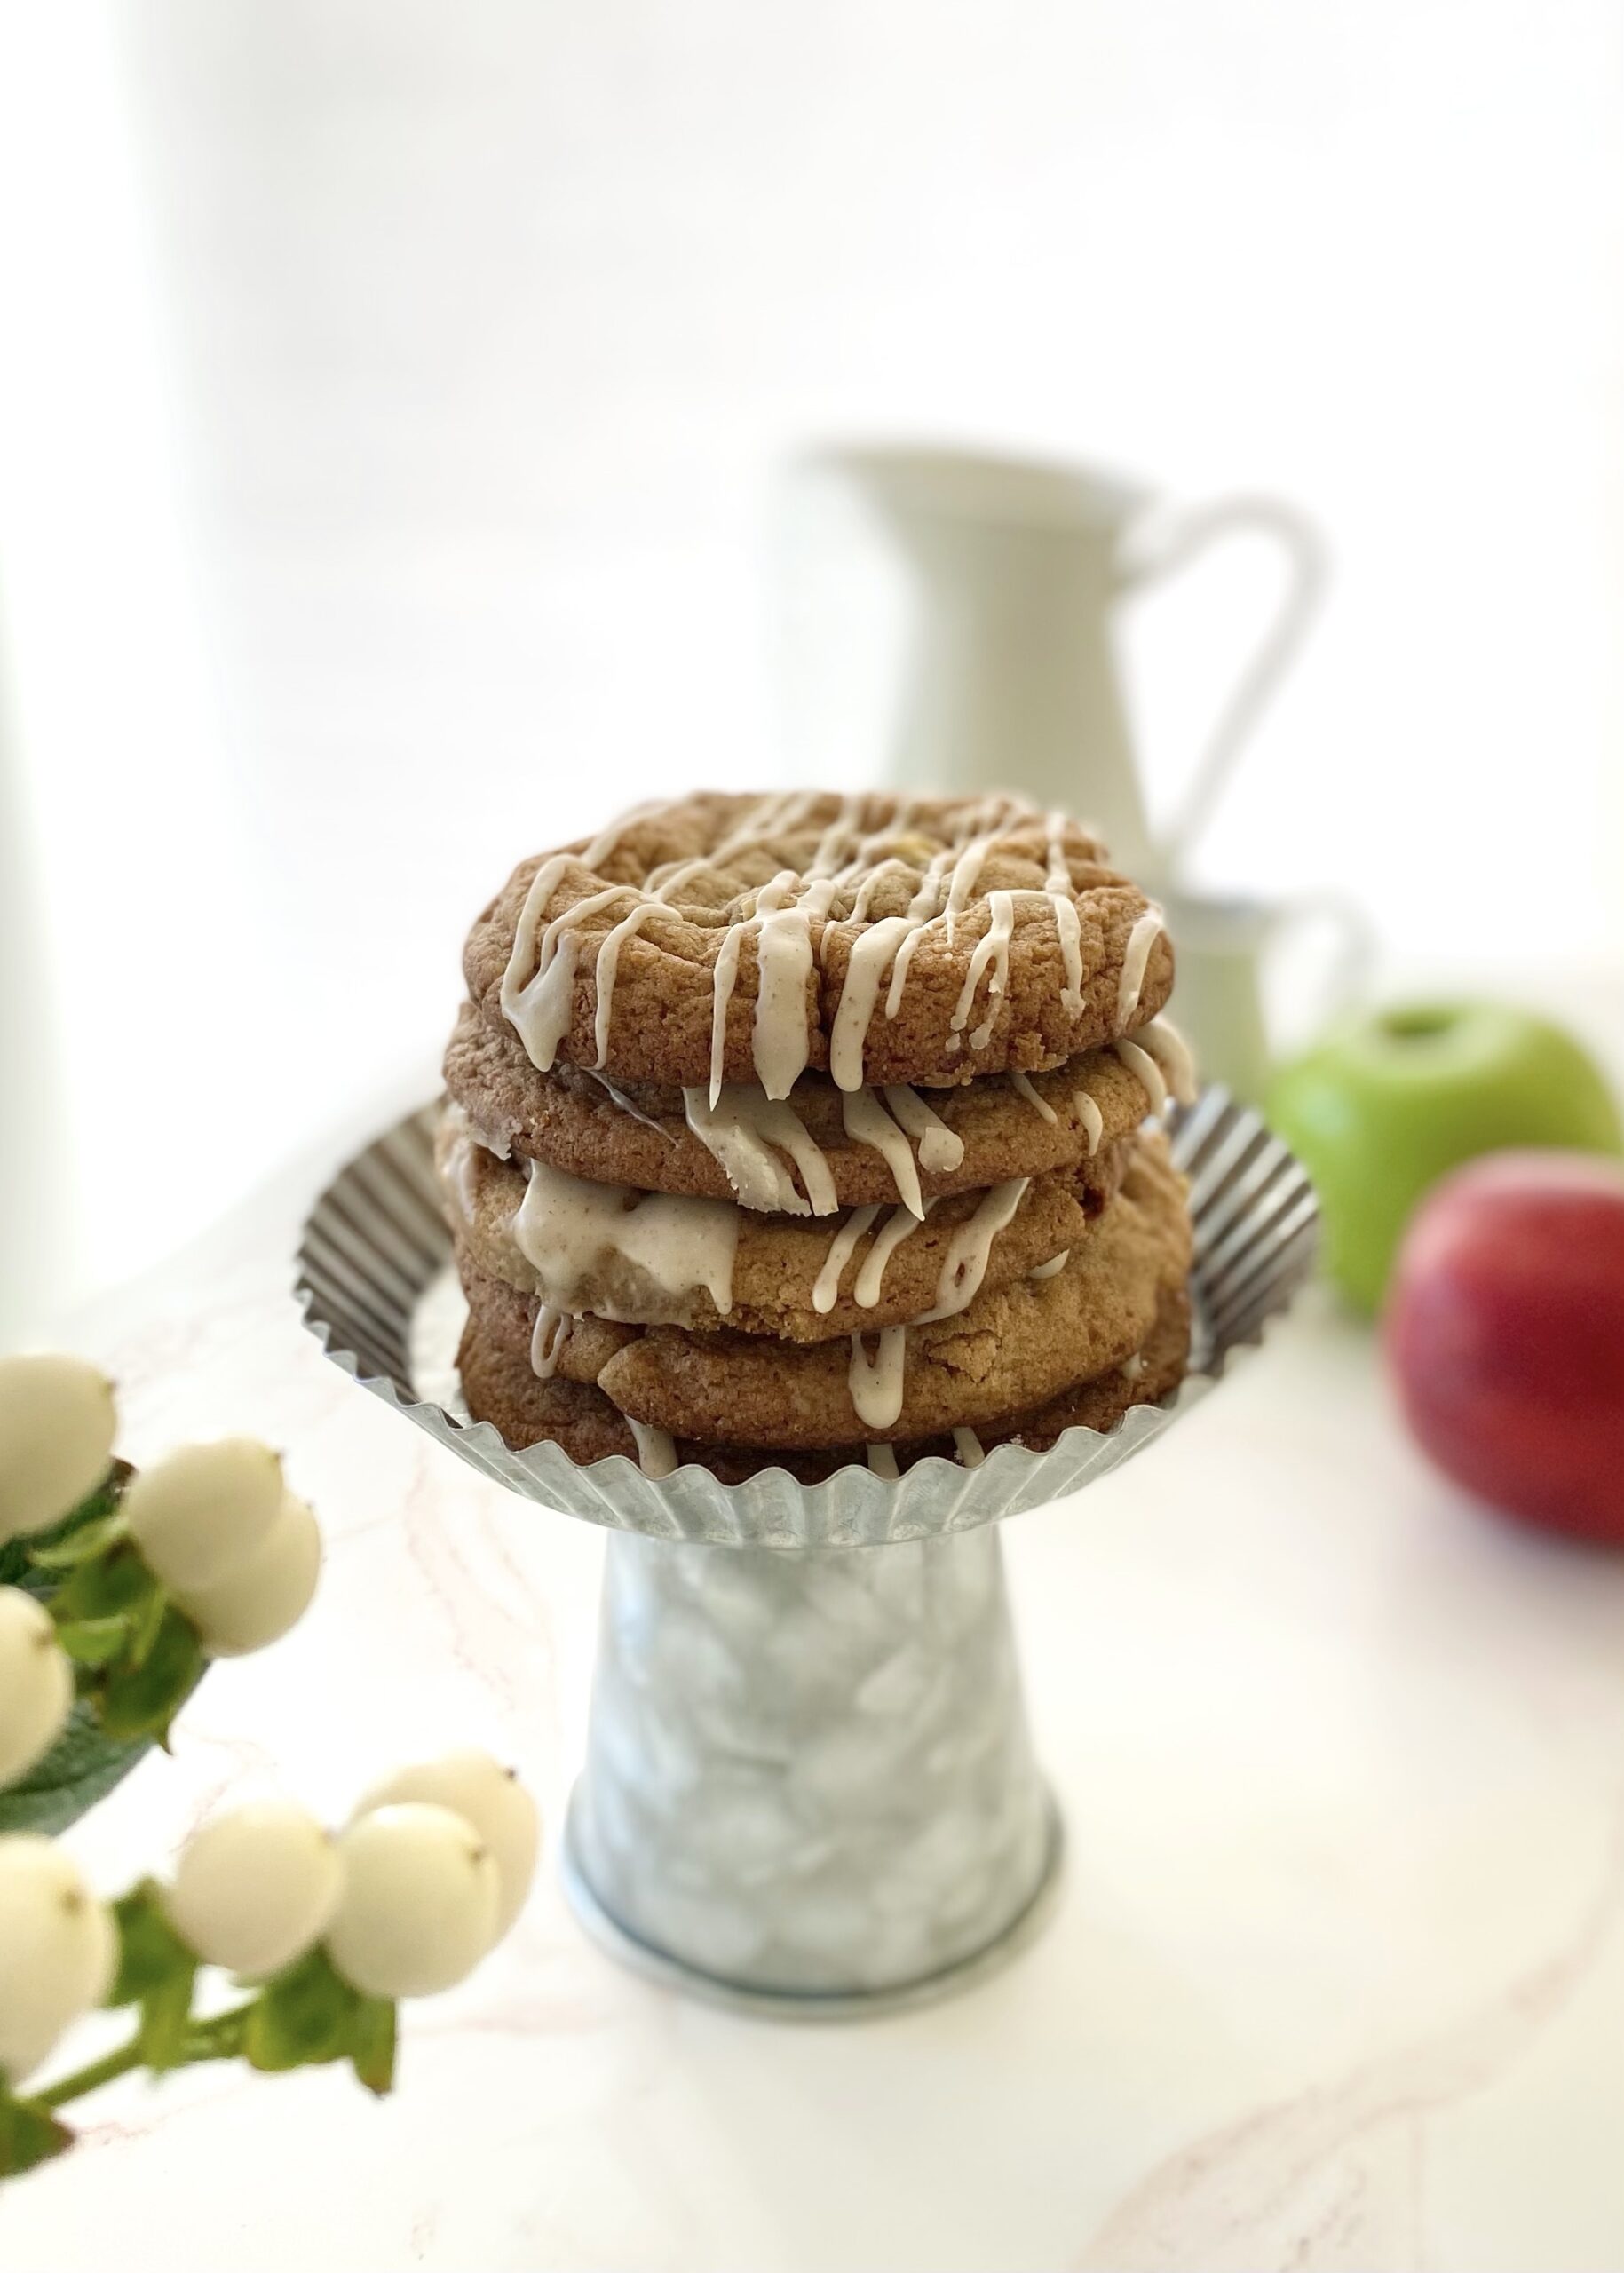
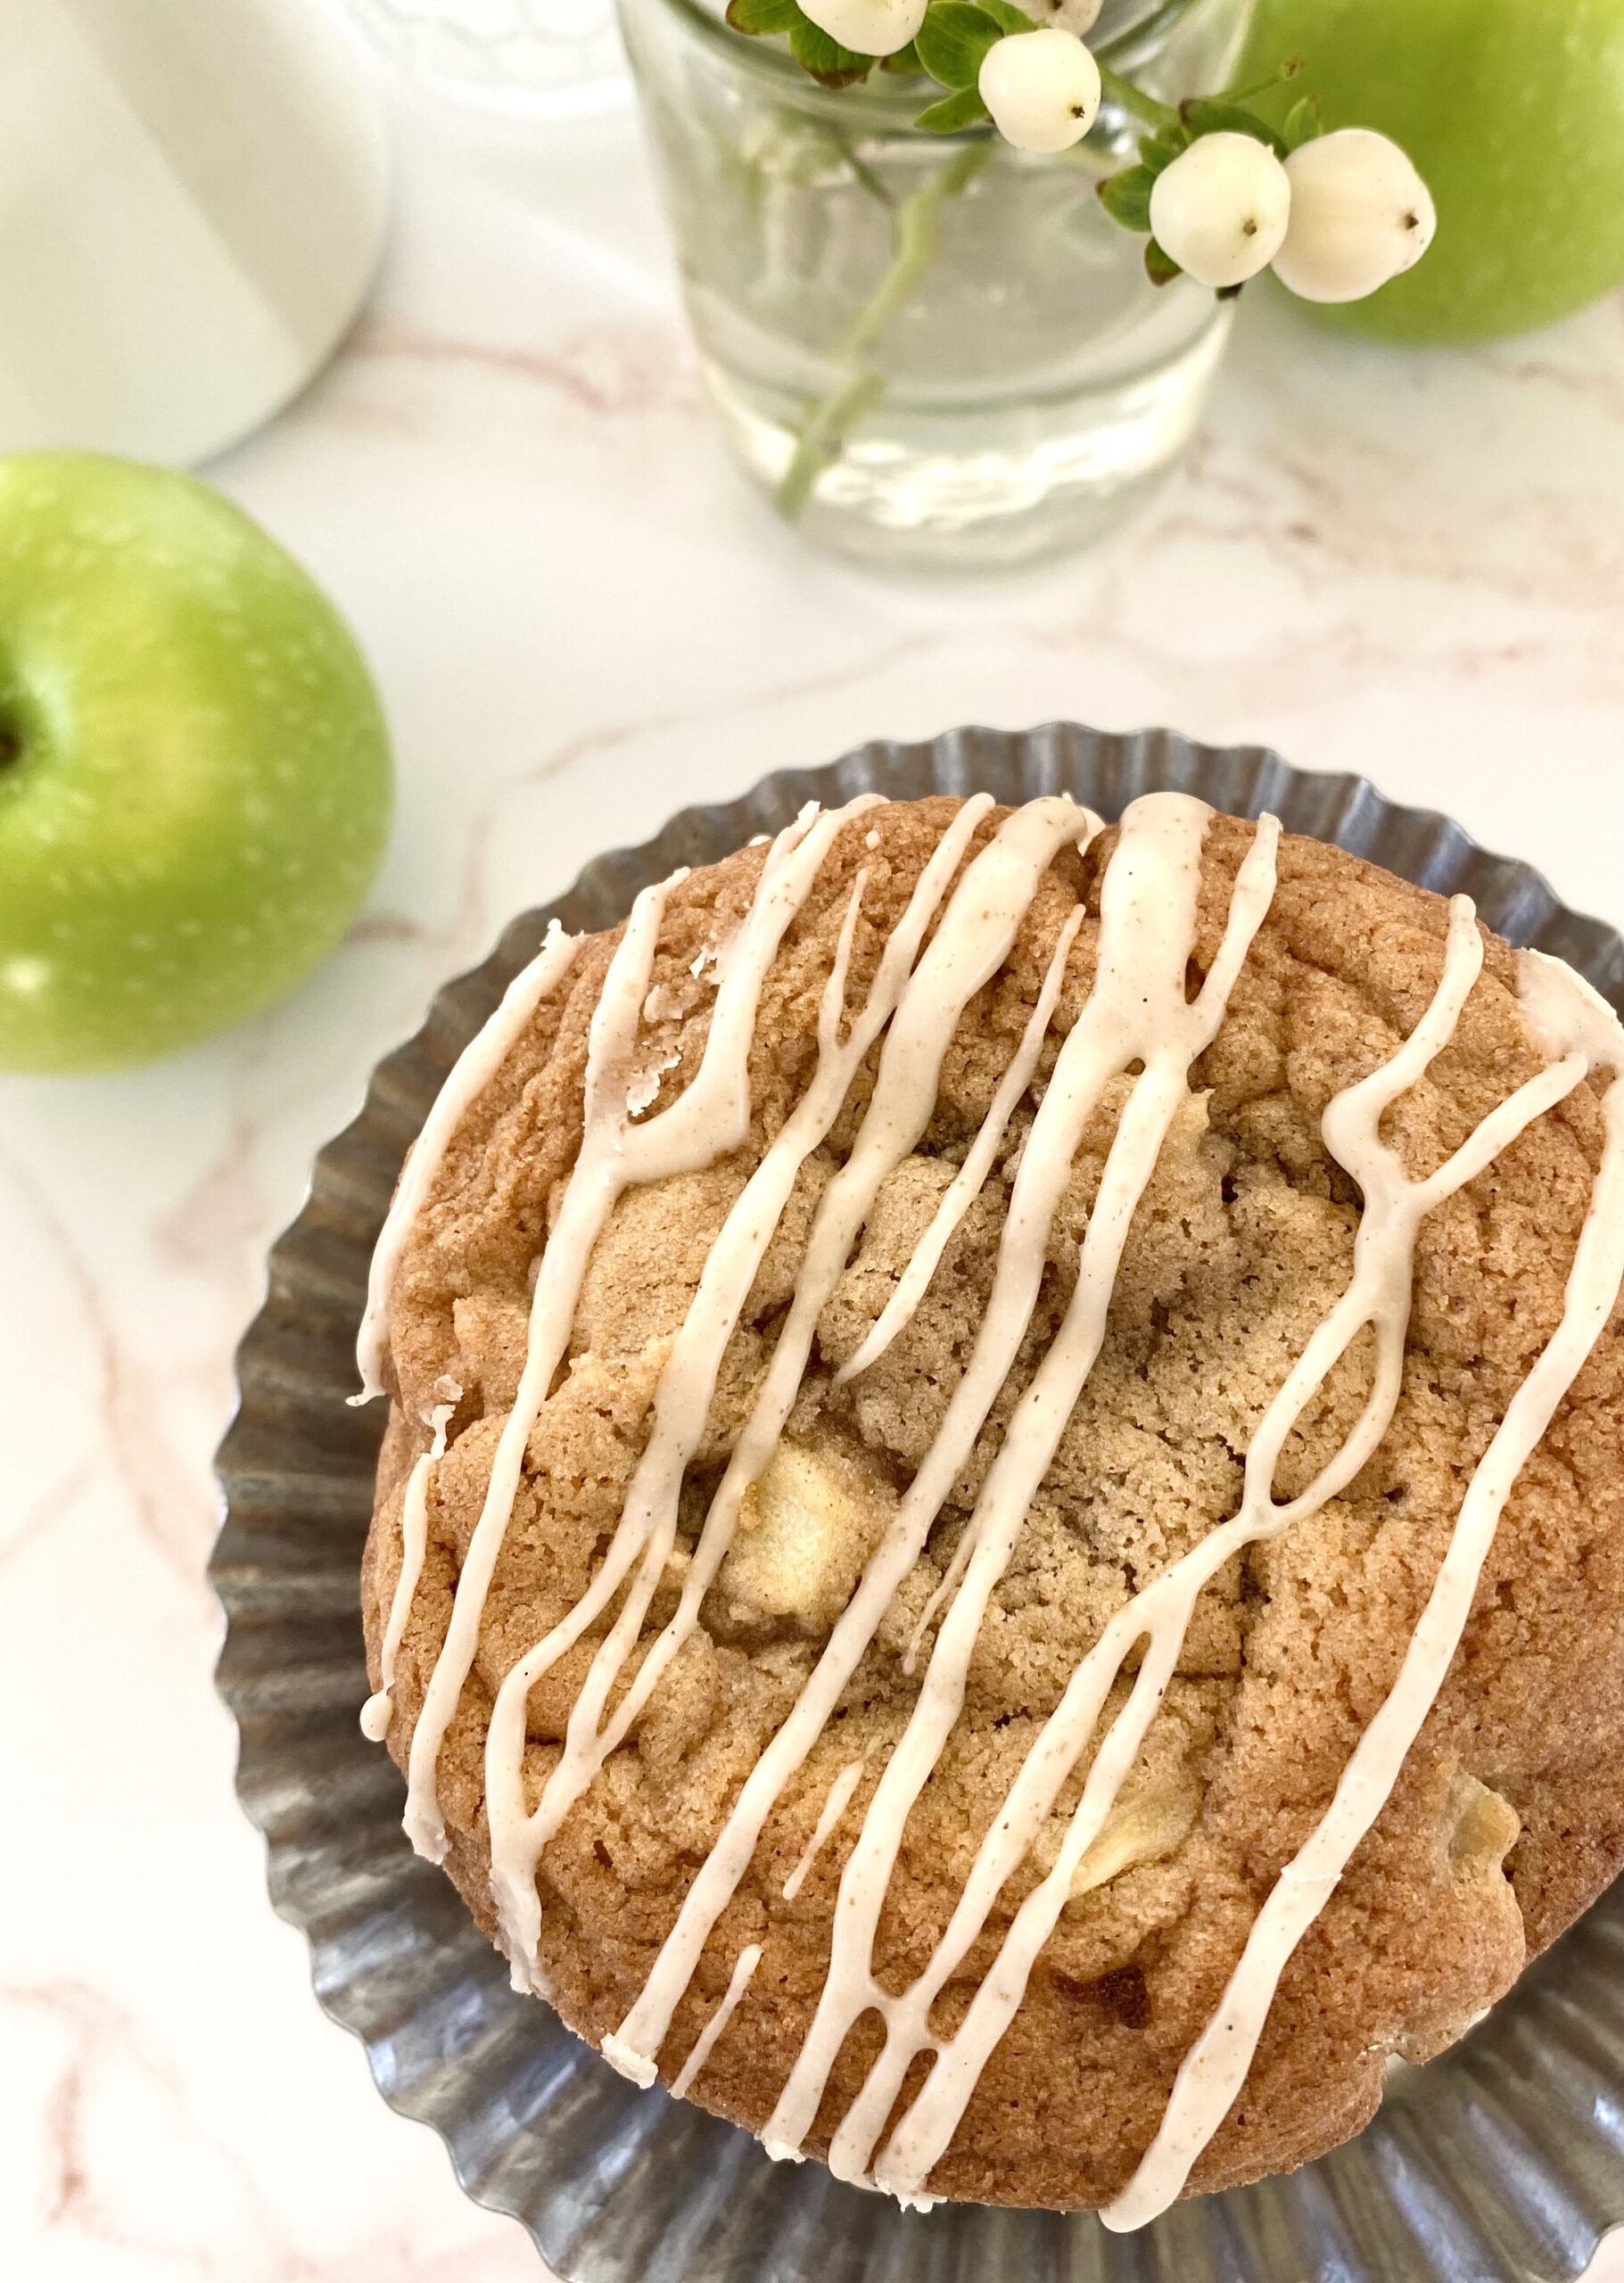
These Apple Spice Cookies were one of my most popular cookies last fall so I decided to bring them back a little early this year. The combination of cinnamon, nutmeg and vanilla in this cookie dough will remind you of cinnamon rolls and apple pie and inspire you look forward to fall.
The apples in this recipe are cooked briefly on the stovetop to bring out the flavor and create the perfect texture. Dropping raw apple chunks into cookie dough or cake batter is usually not a good idea. If you’ve ever baked an apple pie, you know that apples release liquid as they cook and that liquid will end up in your baked cookies, creating soggy spots. So definitely don’t skip this step!
These gorgeous, golden brown cookies are perfectly delicious on their own, but extra credit goes to the Brown Butter Icing for taking them over the top!
Make sure to head over to Instagram to watch the video of these Apple Spice Cookies being created: Click here
Apple Spice Cookies with Brown Butter Icing
Spice cookies with fresh apples and brown butter icing
1 cup (4 oz or 113g)chopped apples (1/4-inch pieces)I used one large Granny Smith apple
1tablespoonsugar
¼teaspoonground cinnamon
Apple Spice Cookie Dough
1 ½cups (6 3/4 oz or 191g)all purpose flour, sifted
½teaspoonbaking soda
½teaspoonsalt
1teaspoonground cinnamon
¼teaspoonground nutmeg
½cup (4 oz 113g)unsalted butter, softened
1cup (7 oz or 200g)packed brown sugar
1 largeegg
1 largeegg yolk
½teaspooonpure vanilla extract
Brown Butter Icing
2tablespoonsunsalted butter
½cup (2 oz or 57g)powdered sugar, sifted
½teaspoonpure vanilla extract
pinchfine sea salt
1-2tablespoonswhole milk
Instructions
Cooked Apples
Melt the butter in a small skillet over medium heat. Add apples, sugar and cinnamon to the skillet.
Cook, stirring occasionally, until the apples are tender, about 4-5 minutes.
Remove from heat and let cool completely. Drain any excess liquid from the cooled apples.
Apple Spice Cookies
Preheat the oven to 375ºF (190ºC). Line two large baking sheets with parchment paper.
In a medium bowl, whisk together the flour, baking soda, salt, cinnamon and nutmeg. Set aside.
In a large bowl, beat the butter and brown sugar with an electric mixer at medium speed until light and fluffy.
Beat in the egg, egg yolk and vanilla extract, one at a time, until well combined
Stir in the flour mixture, just until combined.
Fold the the cooled apples into the cookie dough.
Divide the dough into 12 equal golf ball size portions and place them 3 inches apart on the prepared baking sheets.
Bake until golden brown, about 11-13 minutes. Let cool 1 minute on the baking sheet, then transfer to a cooling rack to cool completely.
Brown Butter Icing
In a small saucepan, cook the butter over medium heat until golden brown and fragrant. When brown specks start to form in the bottom of the pan, remove from heat.
Immediately transfer the browned butter to a small bowl. Whisk in the the powdered sugar, vanilla extract, salt and 1 tablespoon milk. Add more milk as needed to reach desired consistency.
Drizzle the icing over the cooled cookies.
Notes
NOTE: If your cookies spread too much when baking, refrigerate dough for 30 minutes, then bake as directed.
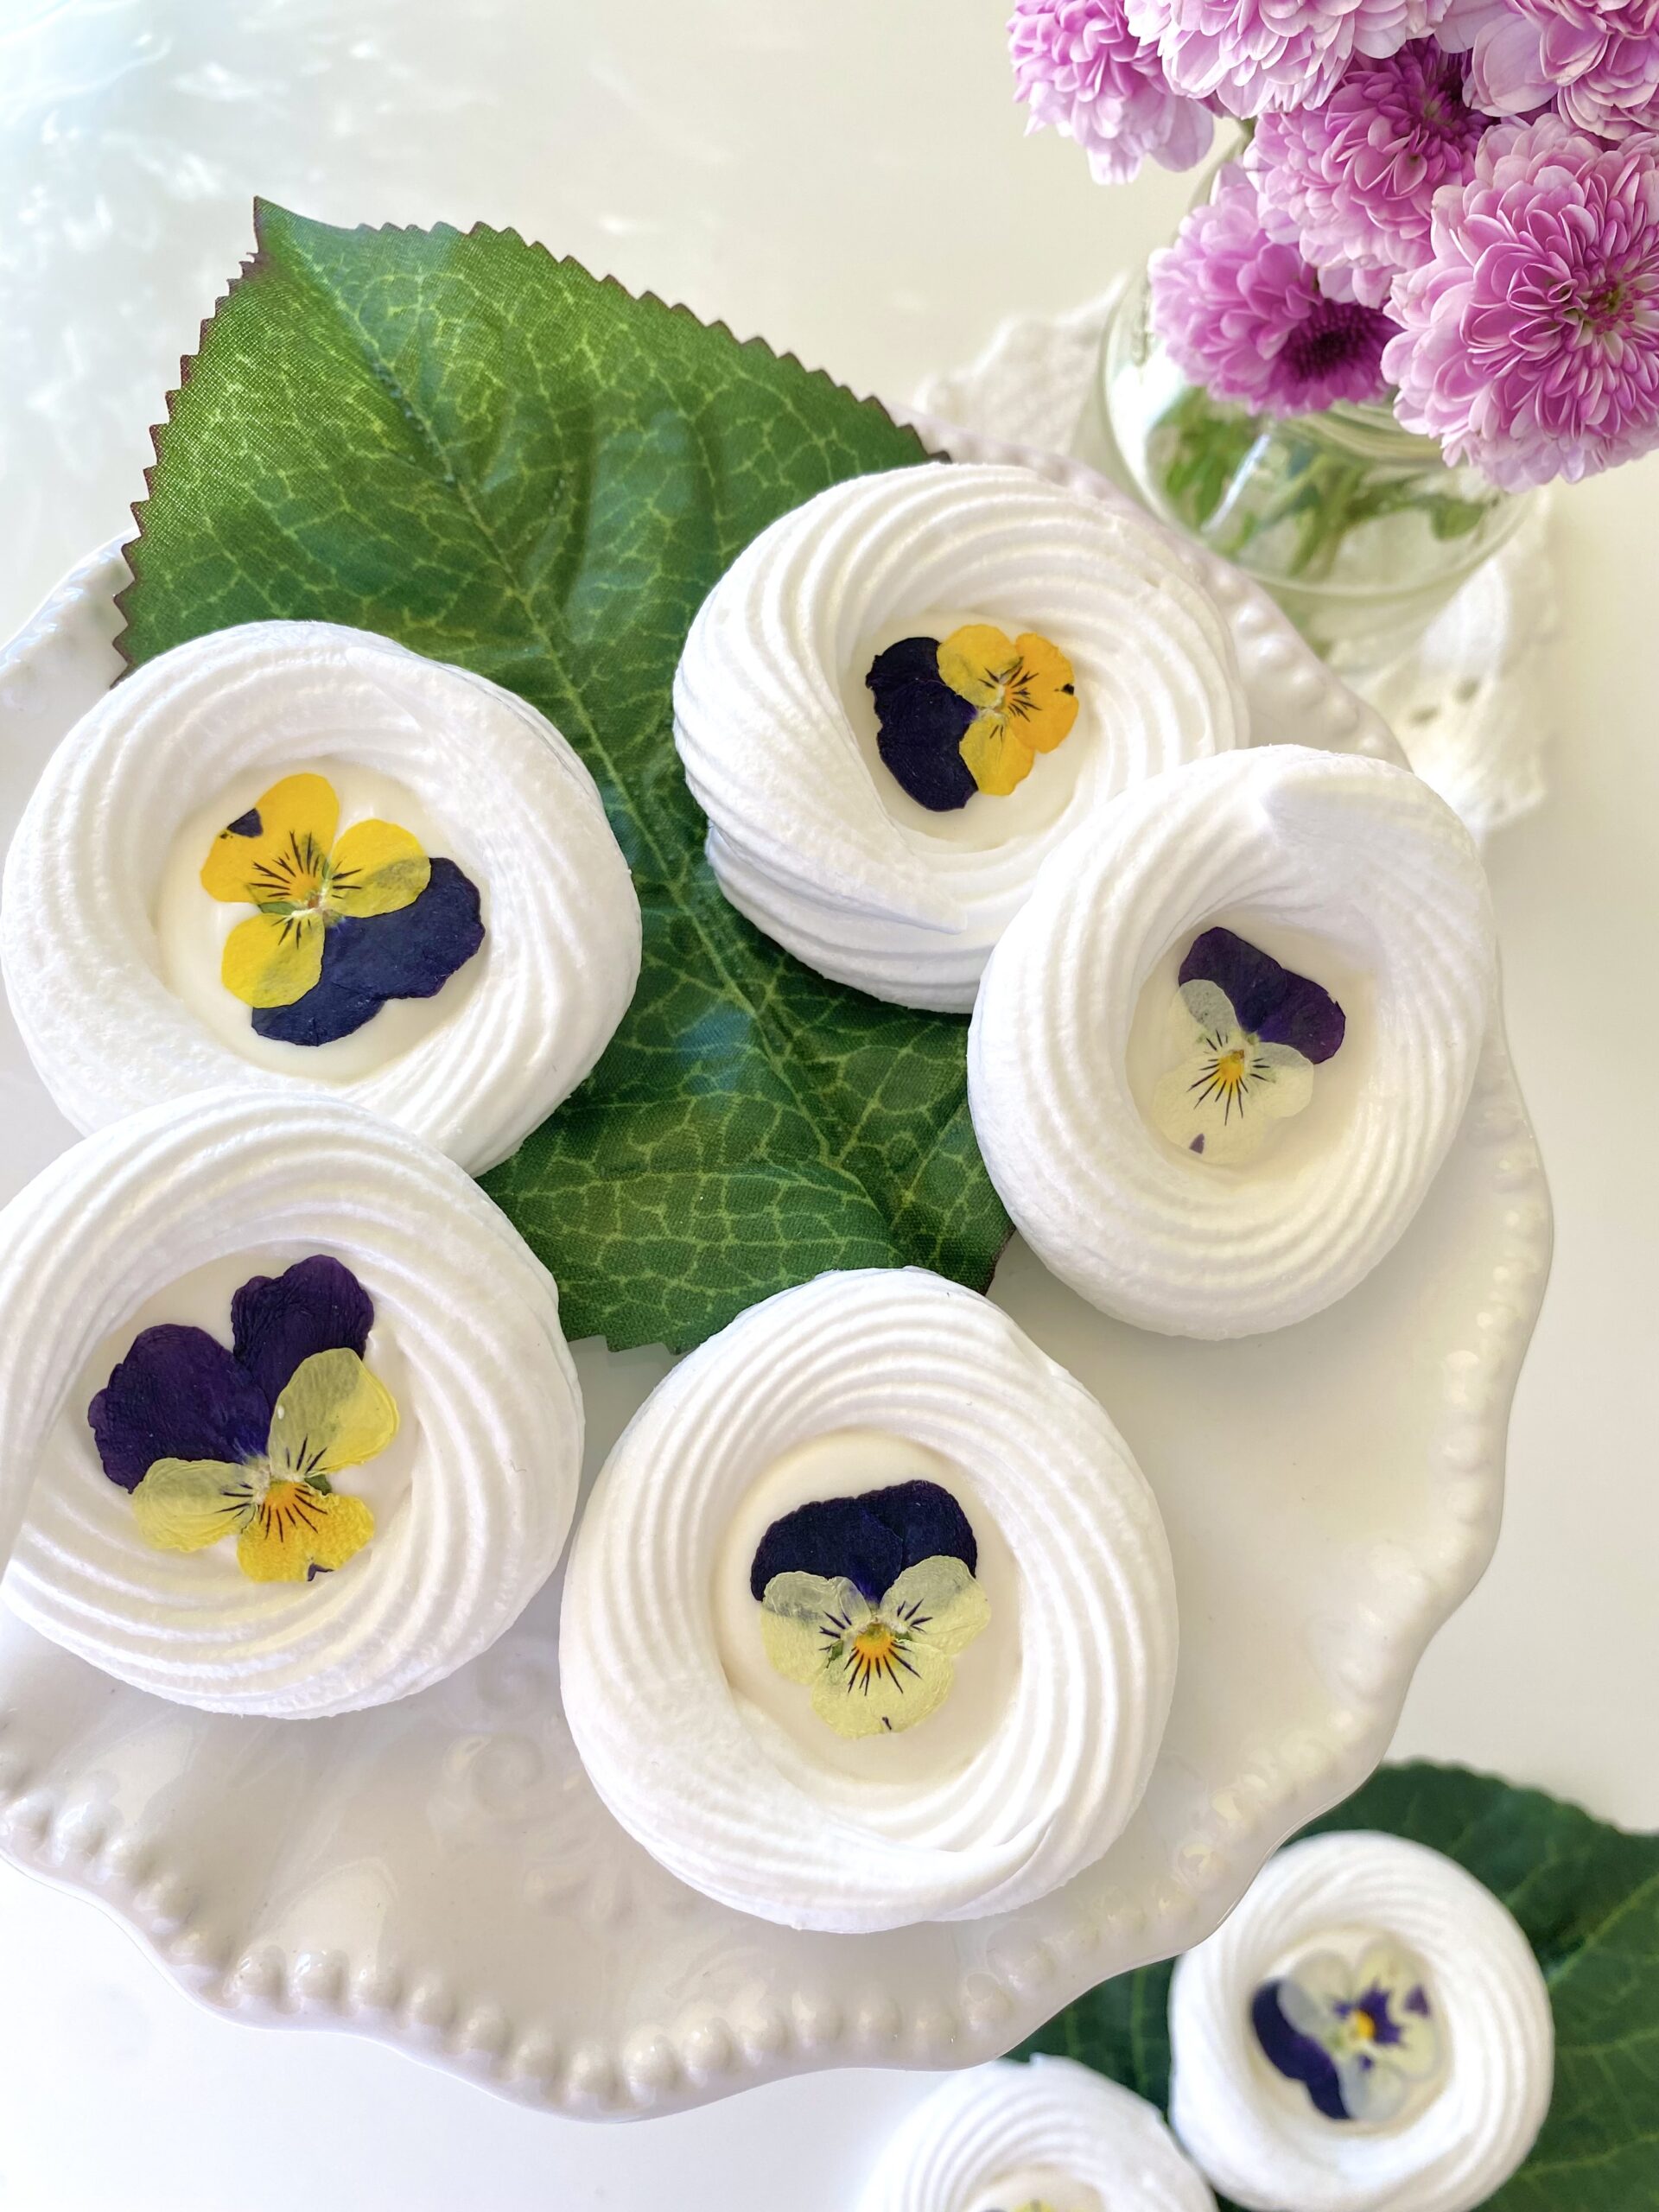
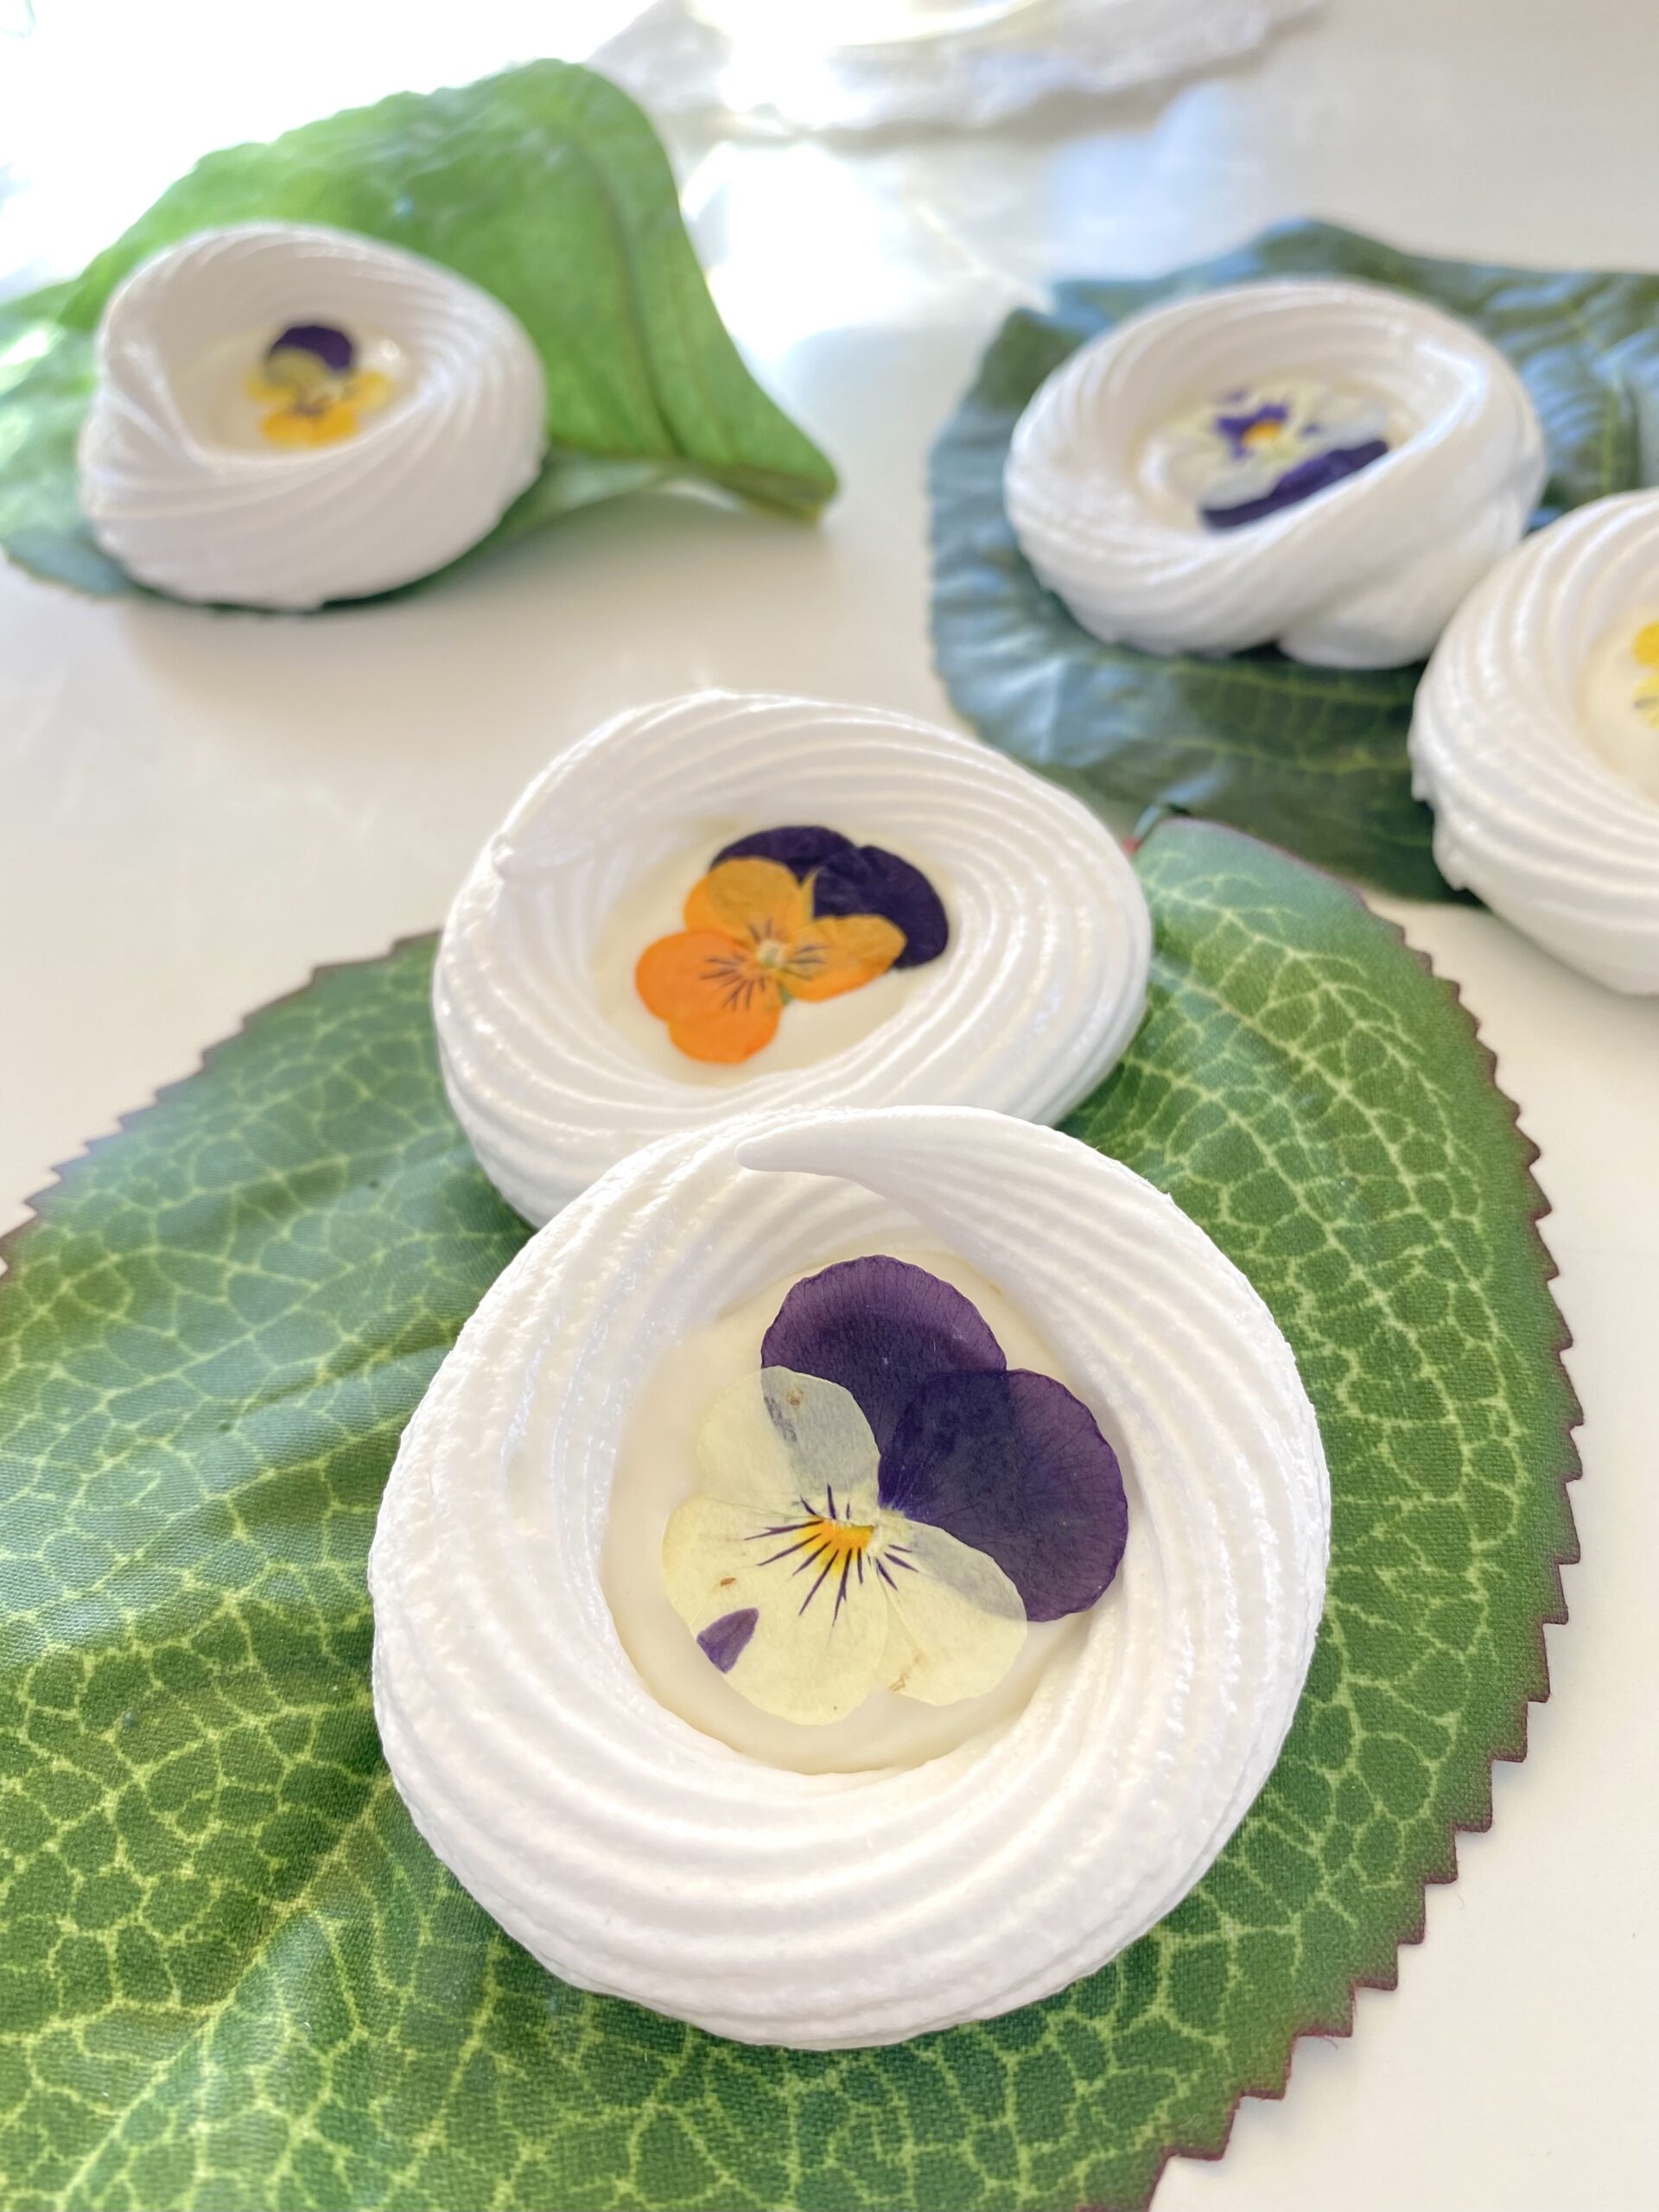
Sometimes we need a little magic in our lives. These pretty, dainty meringue cookies sparked a bit of magic in my life that I want to share with you. It started when I washed some beautiful little violas. Watching them float in a bowl of clear water was positively therapeutic. After pressing and weighing them down with a heavy book overnight, the reveal of perfectly flat, delicate blossoms was so satisfying. The process of making meringue is also very satisfying for me. I love the moment when the frothy egg and sugar mixture magically turns to glossy, billowy sweetness.
Piping the meringue circles was fun! I traced circles on the bottom of the parchment paper to use as a guide for stress-free piping. I used white chocolate to fill the center of the meringue circles, but you can also use white chocolate chips or candy melts. You can use any small edible flowers or flower petals. Feel free to express your creativity! Try using sprinkles, edible glitter or tint the meringue mixture with a few drops of gel food color.
Fairy Tale Meringues
by Mari Vasseur
Meringue cookies filled with white chocolate and topped with pressed edible flowers
1cup (170g)chopped white chocolateor white chocolate chips
Instructions
Pressed edible flowers
Gently wash the edible flowers. Pat dry with paper towels.
Press between parchment paper. Weigh down with a heavy book for at least 24 hours.
Meringue cookies
Beat the egg whites, with an electric mixer at medium speed, until frothy. Add the cream of tartar and beat to soft peaks. Continue beating and gradually add thensugar and almond extract.
Turn mixer to up to high speed and beat to glossy, stiff peaks.
Preheat oven to 200ºF (95ºC. Line two large baking sheets with parchment paper.
Transfer the whipped meringue to a piping bag fitted with a large star tip. I used Ateco #864*
Pipe 2-inch circles about an inch apart onto prepared baking sheets.
Bake for one hour. Turn off the oven and let the meringues cool in oven.
In a microwave safe container, microwave white chocolate for 10 second intervals until melted or melt on the stovetop in a double boiler.
Transfer the melted white chocolate to a squeeze bottle or a piping bag. Fill the centers of the meringue circles with white chocolate. Top each one with a pressed flower. Let chocolate set at room temperature. Do not refrigerate.
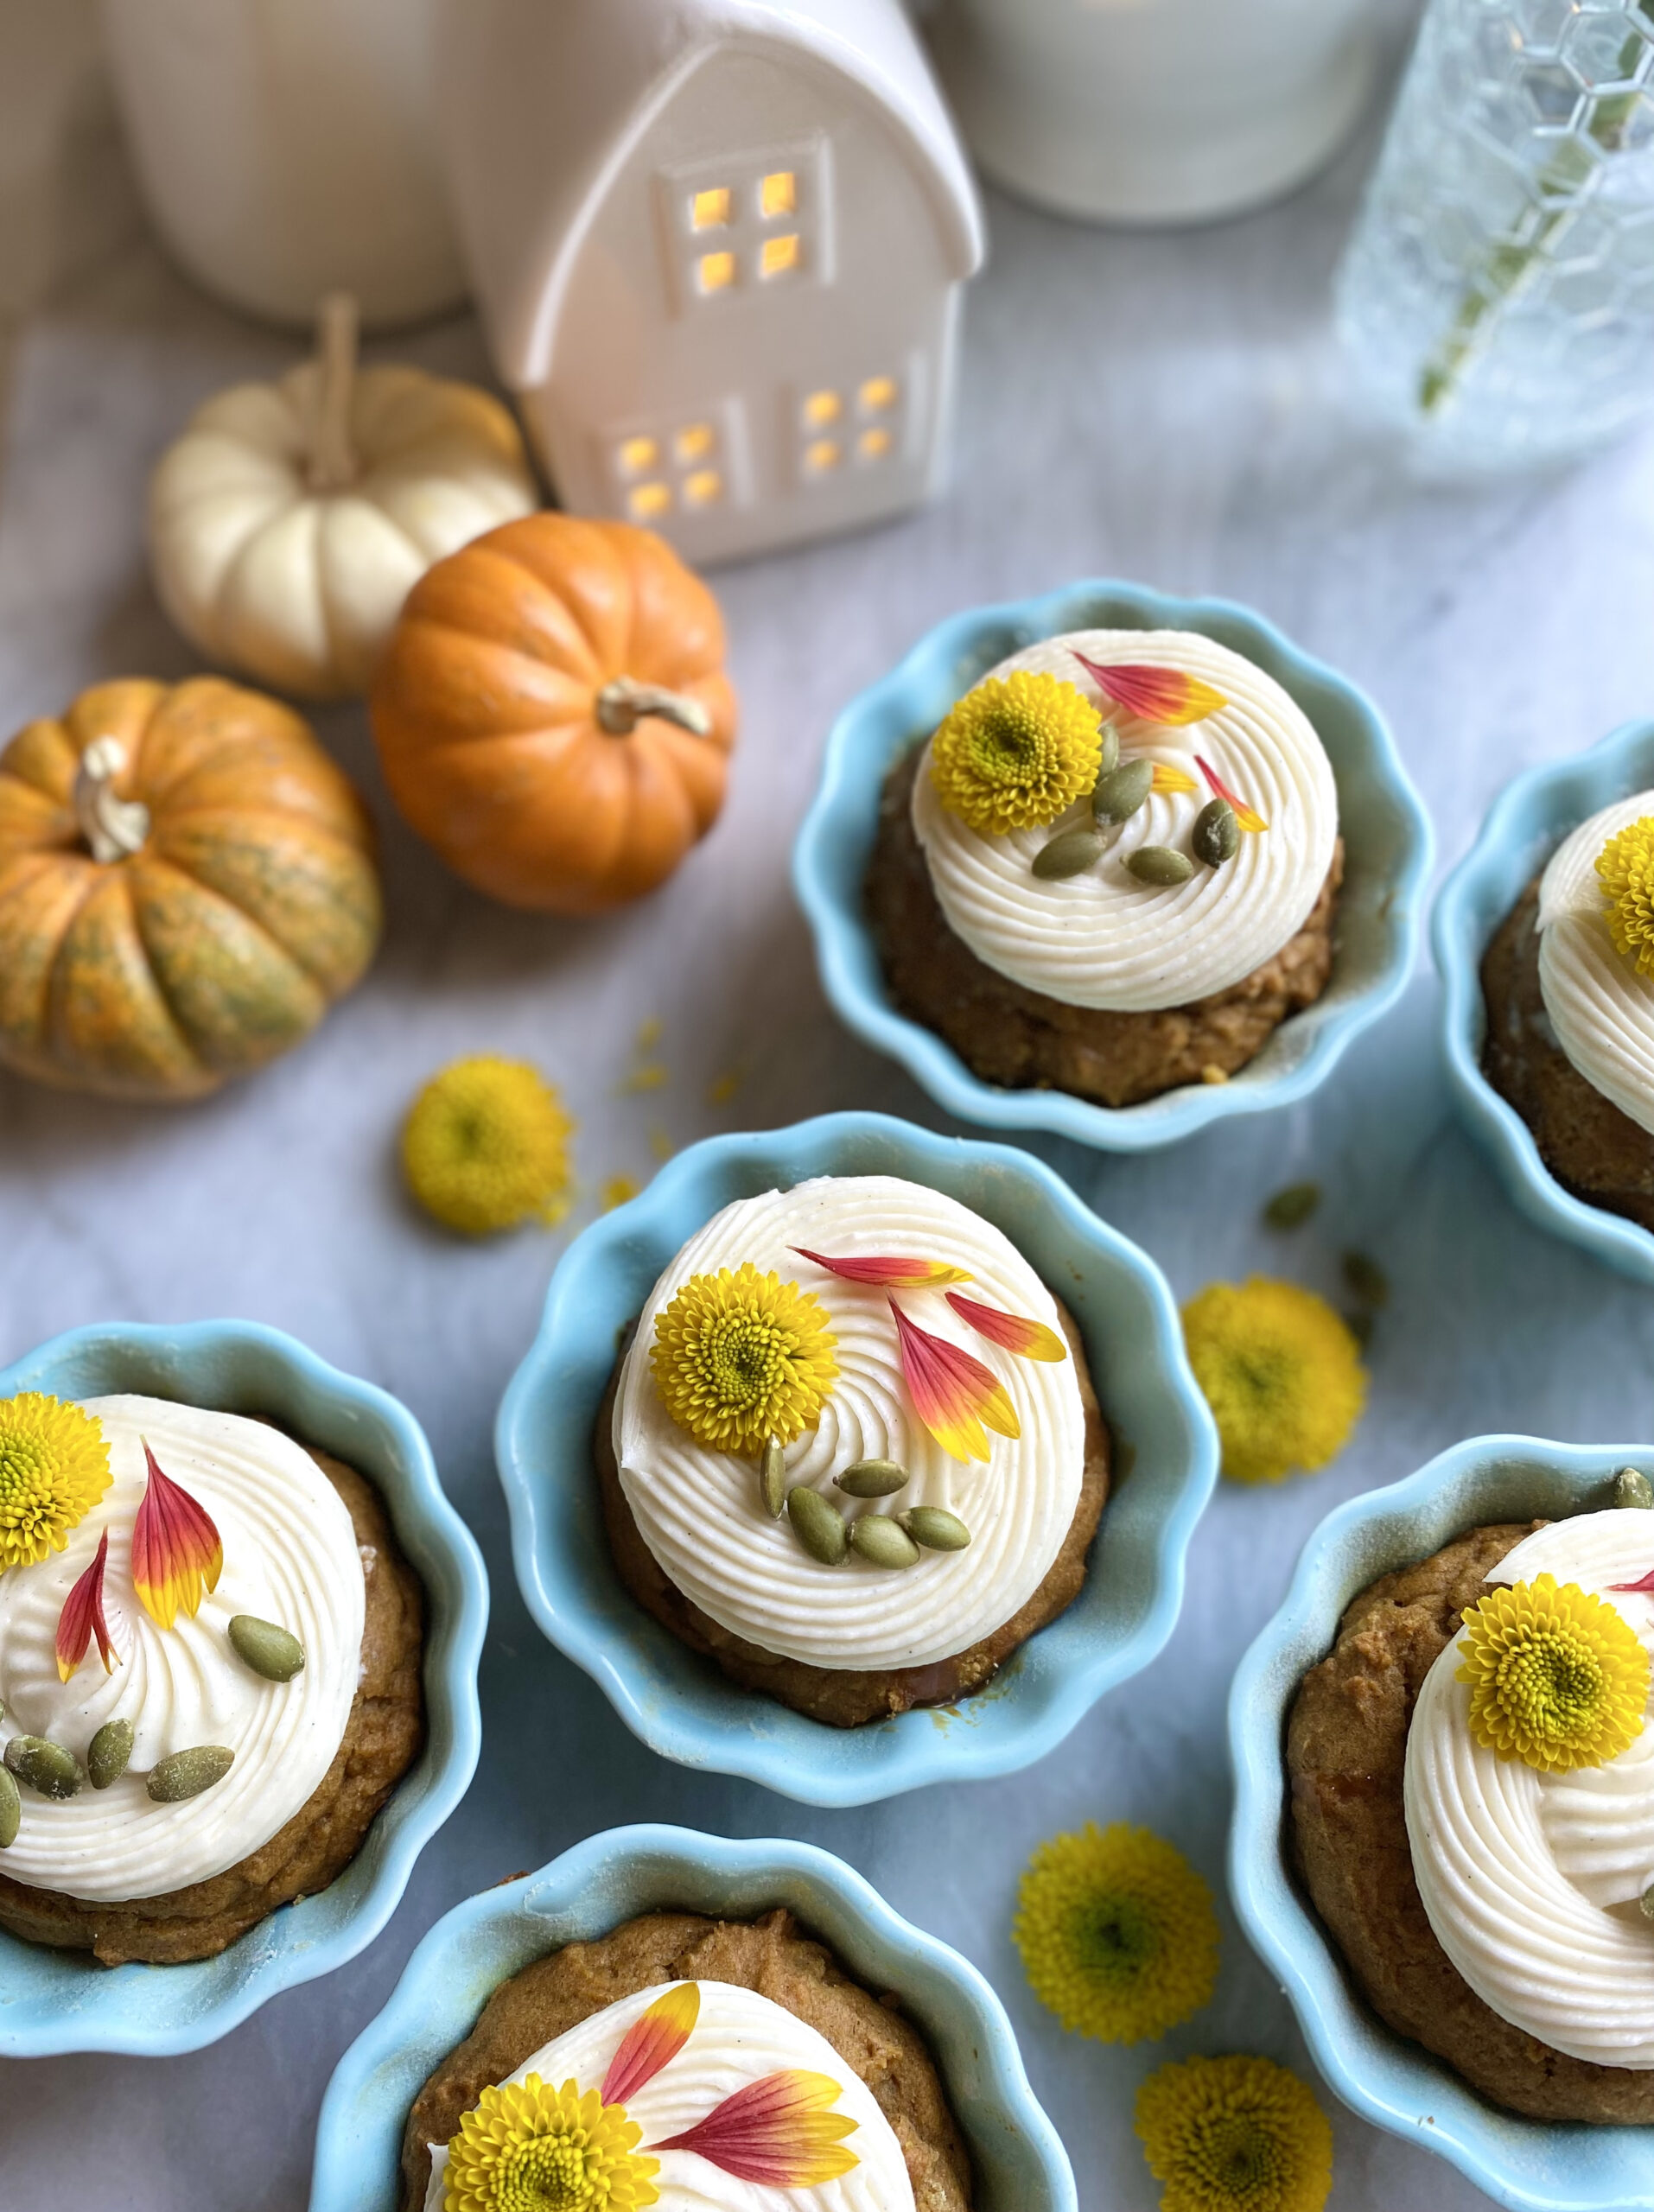
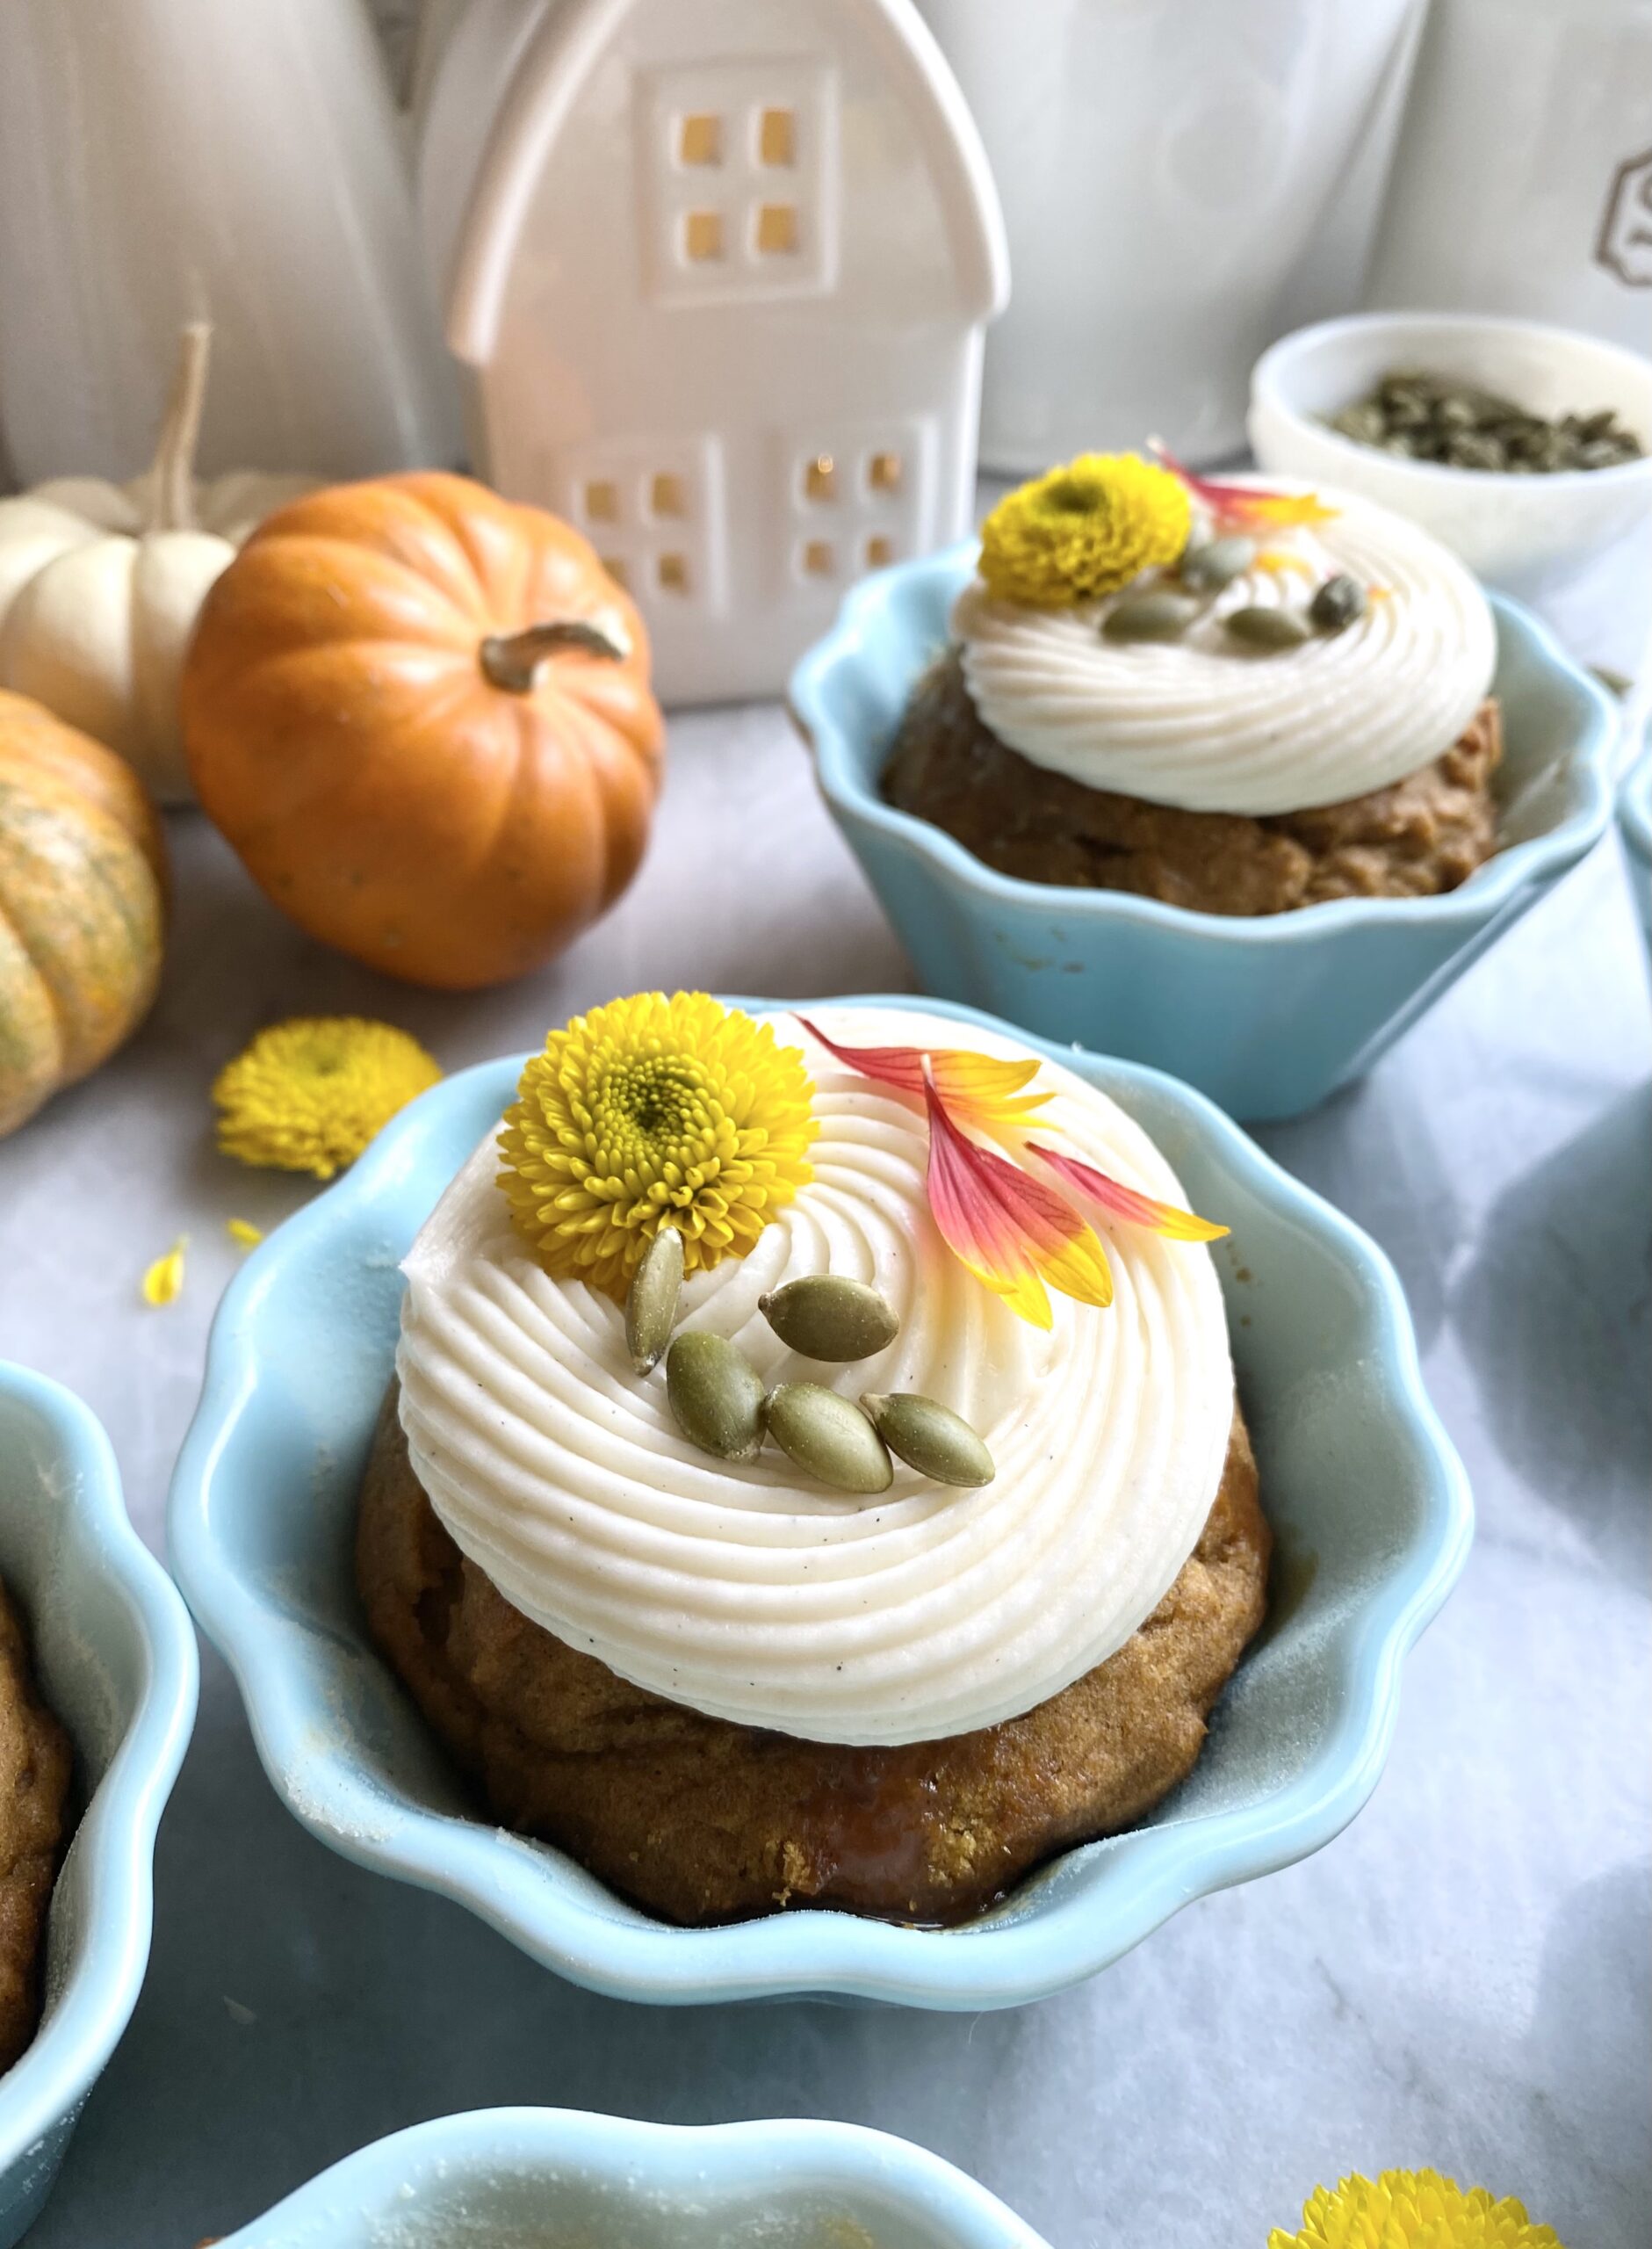
In early September, I saw someone announce the fall season on social media. In addition to people pointing out that it was too early for the announcement, the word police corrected the person with the word autumn. Since both terms are correct, we can call the season whatever we prefer. I think autumn is a pleasant sounding word, so I’ll use it for the rest of this post. Whatever you call it, these Pumpkin Spice Muffins are a perfect little celebration of the season. They have just the right amount of warm spices, making them so fragrant that your kitchen will smell like cozy autumn heaven.
I originally made them in mini loaf pans, but I thought they would be cute as muffins too. They’re so cute and delicious that I often give them as holiday gifts. This year I decided to try them in ramekins and I loved the results! I used 6-ounce ramekins, but you can use 8-ounce ramekins, any size mini loaf pans, a muffin pan or even an 8 or 9-inch loaf pan. Keep in mind that baking times will differ. To find the ramekins I used, click here.
Pumpkin Spice Muffins with Caramel Filling
by Mari Vasseur
Tender pumpkin spice muffins with caramel filling and luscious cream cheese frosting
Preheat the oven to 350ºF (180ºC). Grease and flour seven 6-ounce ramekins or six 8-ounce ramekins or any mini loaf pans of your choice.
In a large bowl, sift together the flour, cinnamon, baking powder, baking soda, salt, ginger, nutmeg and cloves until well blended.
In a separate large bowl, beat the butter and brown sugar together, with an electric mixer at medium speed, until pale and fluffy. Beat in the eggs, one at a time, until incorporated. Beat in the pumpkin purée and vanilla extract until well blended. Stir in the flour mixture just until combined.
Divide the batter evenly into the prepared ramekins. Bake for 15-25 minutes or until golden brown and a toothpick inserted in the center comes out clean. Do not overbake.
Cool completely if serving in ramekins or remove from pans after cooling for 10 minutes. Continue to cool on wire rack.
Make 3/4-inch wells in the center of each muffin. Fill with caramel sauce. (For loaves, poke multiple holes with a skewer. Fill with caramel sauce.) Top with cream cheese frosting and pumpkin seeds
Cream Cheese Frosting
In a large bowl, beat the cream cheese and butter together, with an electric mixer at medium speed until smooth and well blended. Do not over beat.
Add the vanilla extract and salt and beat until combined. On low speed, gradually beat in the powdered sugar incorporated. Add the heavy cream and continue beating at low speed smooth. Remove any bubbles by gently stirring with a spatula.
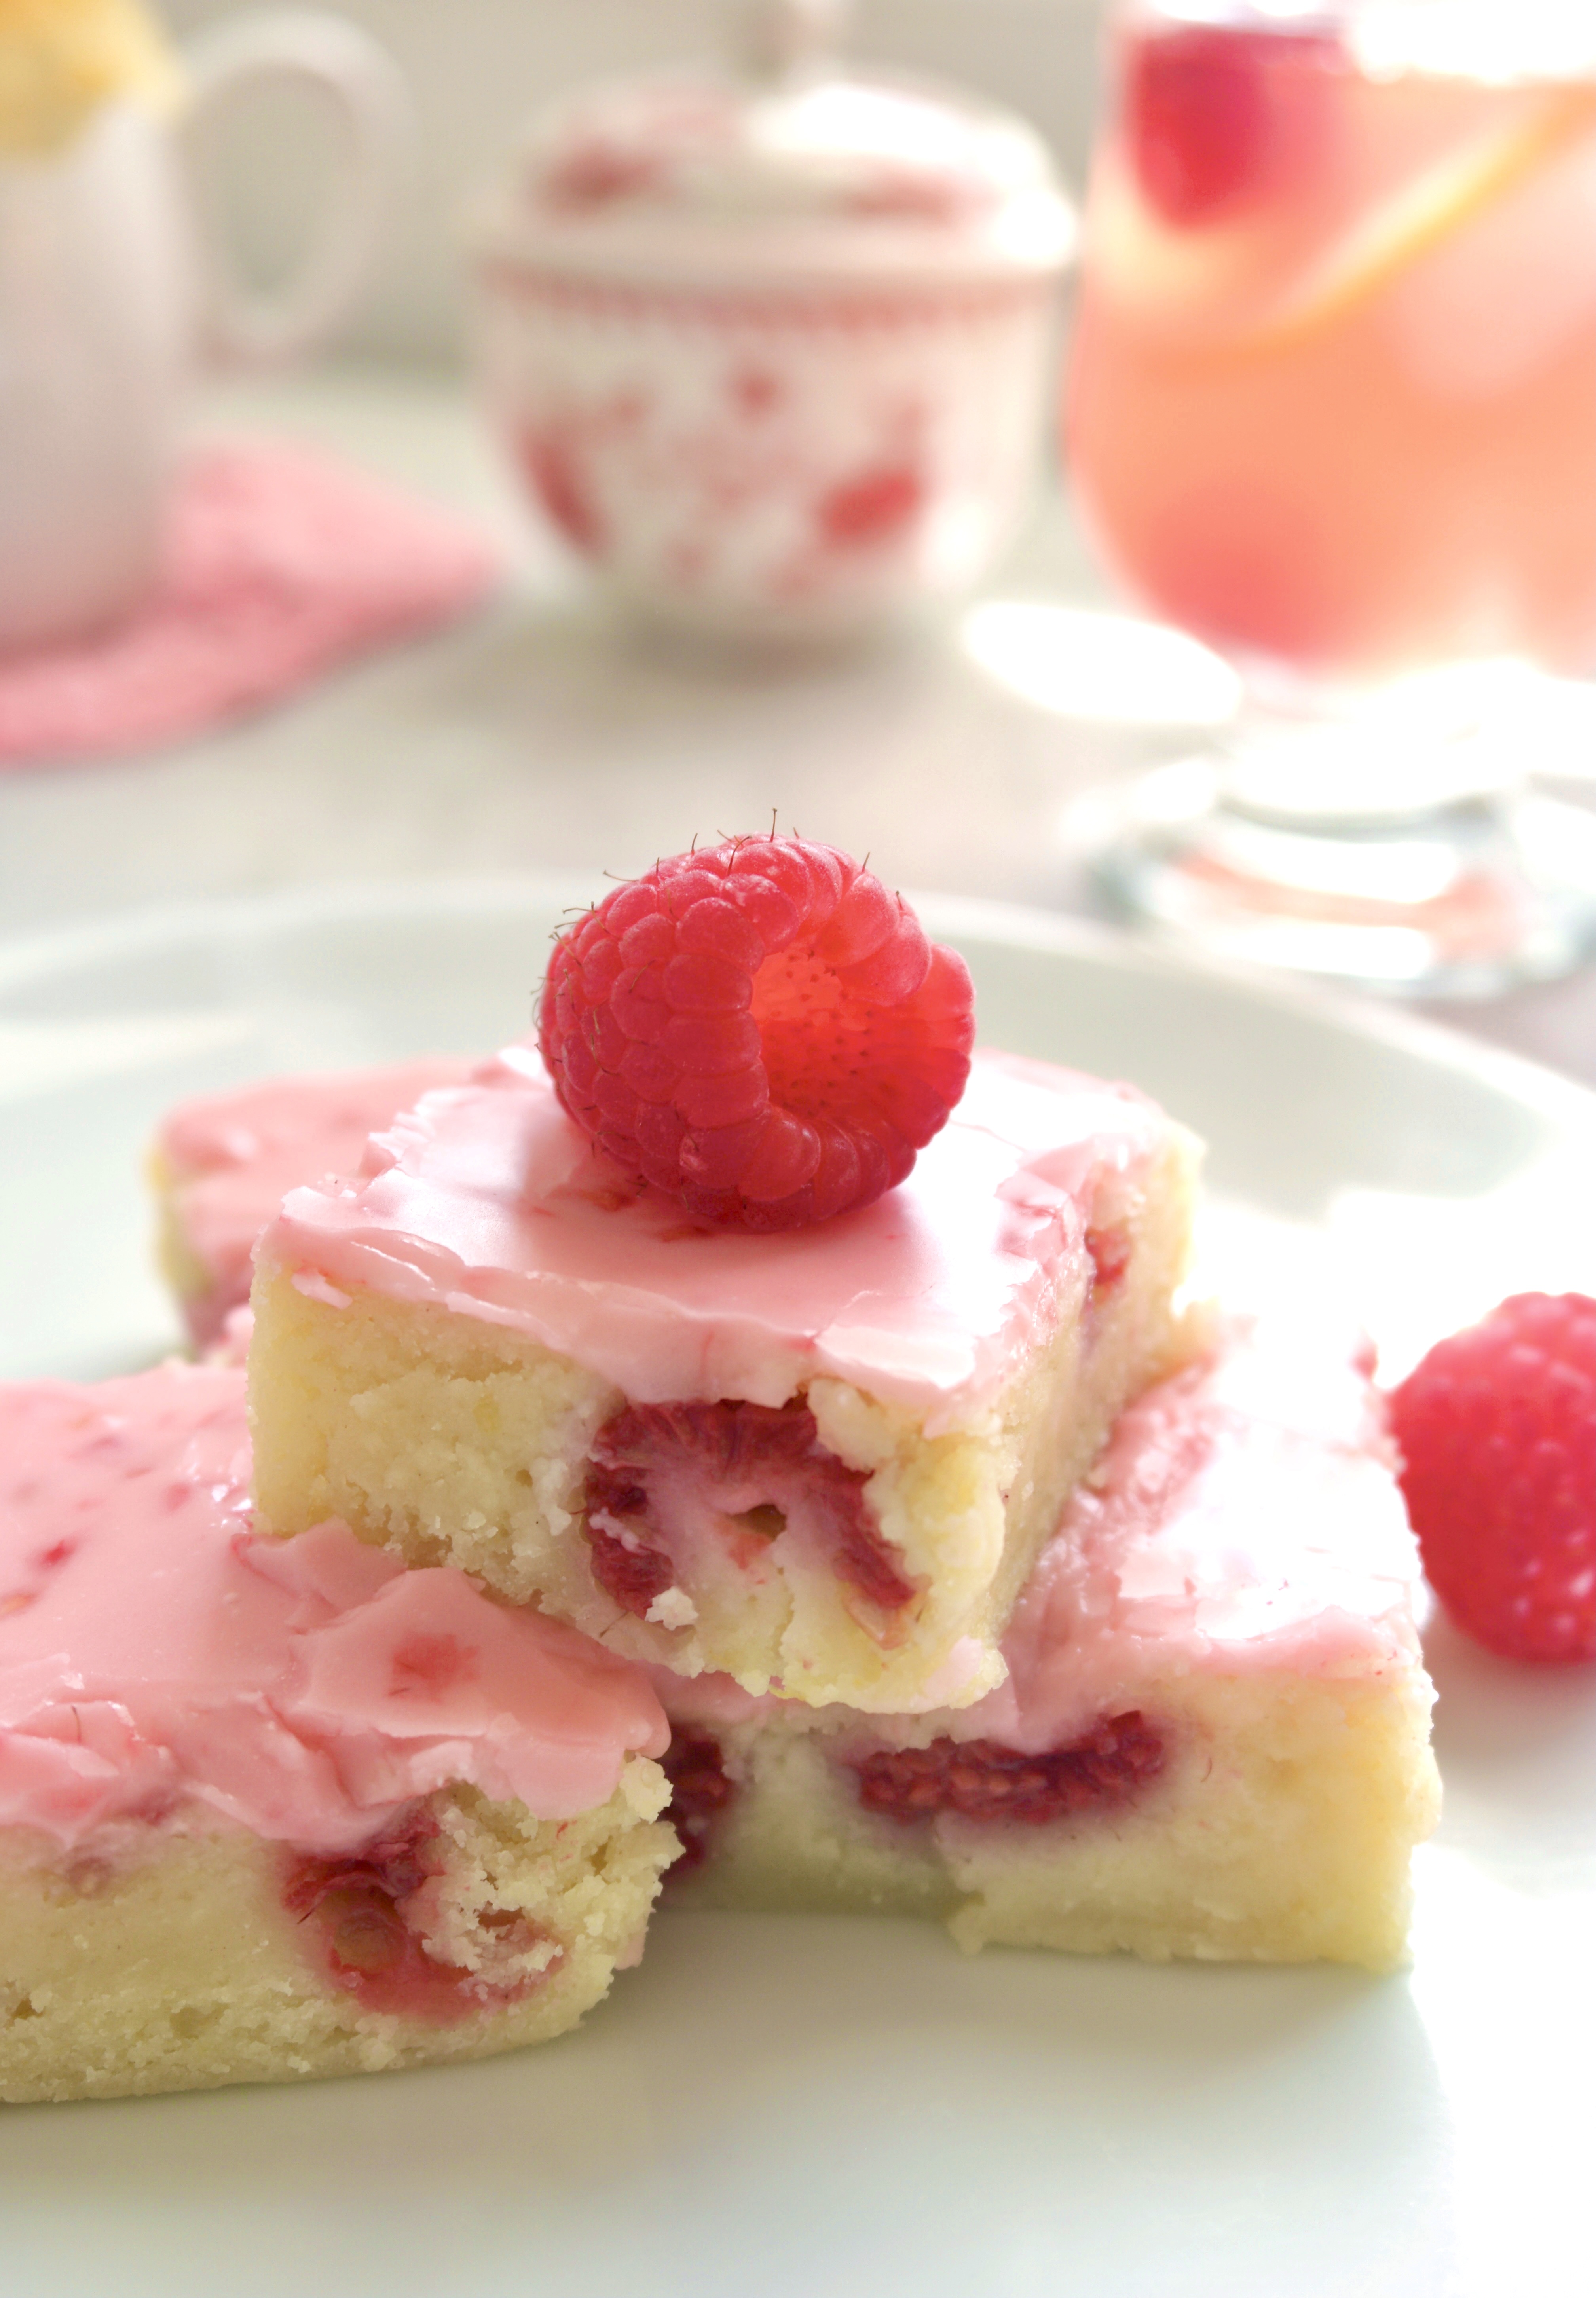
Raspberry Lemonade Brownies are the perfect easy recipe for spring and summer. They’re so pretty and delightfully delicious! The fudgy lemon batter is brightened with fresh lemon zest and raspberries, then topped with a sweet-tart burst of flavor and color from fresh raspberries. The icing contains no food coloring. Just three raspberries will give you that luscious shade of pink!
I want to clarify that lemon brownies are not lemon bars. We all know what a lemon bar is. The one we all know and love has a lemon curd filling on a shortbread crust, possibly drizzled with lemon icing or sprinkled with powdered sugar. The lemon brownie is a whole different animal. Don’t mistake lemon brownies for lemon cake either. Lemon brownies contain white chocolate which gives them a rich, fudgy texture like their chocolate cousins. We may be tempted to call them blondies, but blondies have a butterscotch flavor and typically don’t contain chocolate. Now that we got that straightened out, we can sleep peacefully tonight.
1cup (170g)raspberriesplus extra for serving, if desired
Raspberry Lemonade Icing
3raspberries
1 ¼cups (142g)powdered sugar, sifted
1tablespoon (14g)melted butter
2-3tablespoons (30-45ml)fresh lemon juice
Instructions
Raspberry Lemonade Bownies
Preheat the oven to 325ºF (165ºC). Line an 8-inch square baking pan* with parchment paper.
In a medium microwaveable bowl, melt the white chocolate and butter in the microwave for 20 second bursts, stirring after each one. Alternately, melt the white chocolate and butter on the stovetop in a heat safe bowl set over a pan of barely simmering water. Stir gently until smooth.
In a large bowl, whisk together the sugar, eggs, egg yolk, lemon juice, zest and salt until smooth and well combined. Stir in the melted white chocolate mixture. Add the flour and mix just until combined. Gently stir in the raspberries.
Transfer the batter to the prepared baking pan. Bake until the top is set, the edges are light golden brown and a toothpick inserted into the center comes out with a few moist crumbs on it, about 23-28 minutes. Let the brownies cool in the pan.
Raspberry Lemonade Icing
In a medium-size bowl, smash the raspberries with a fork.
Add the powdered sugar, melted butter and 1 tablespoon of lemon juice. Whisk until smooth, adding more lemon juice as needed. Spread the icing over the cooled brownies.
Cut into 2-inch squares and serve with additional raspberries, if desired.
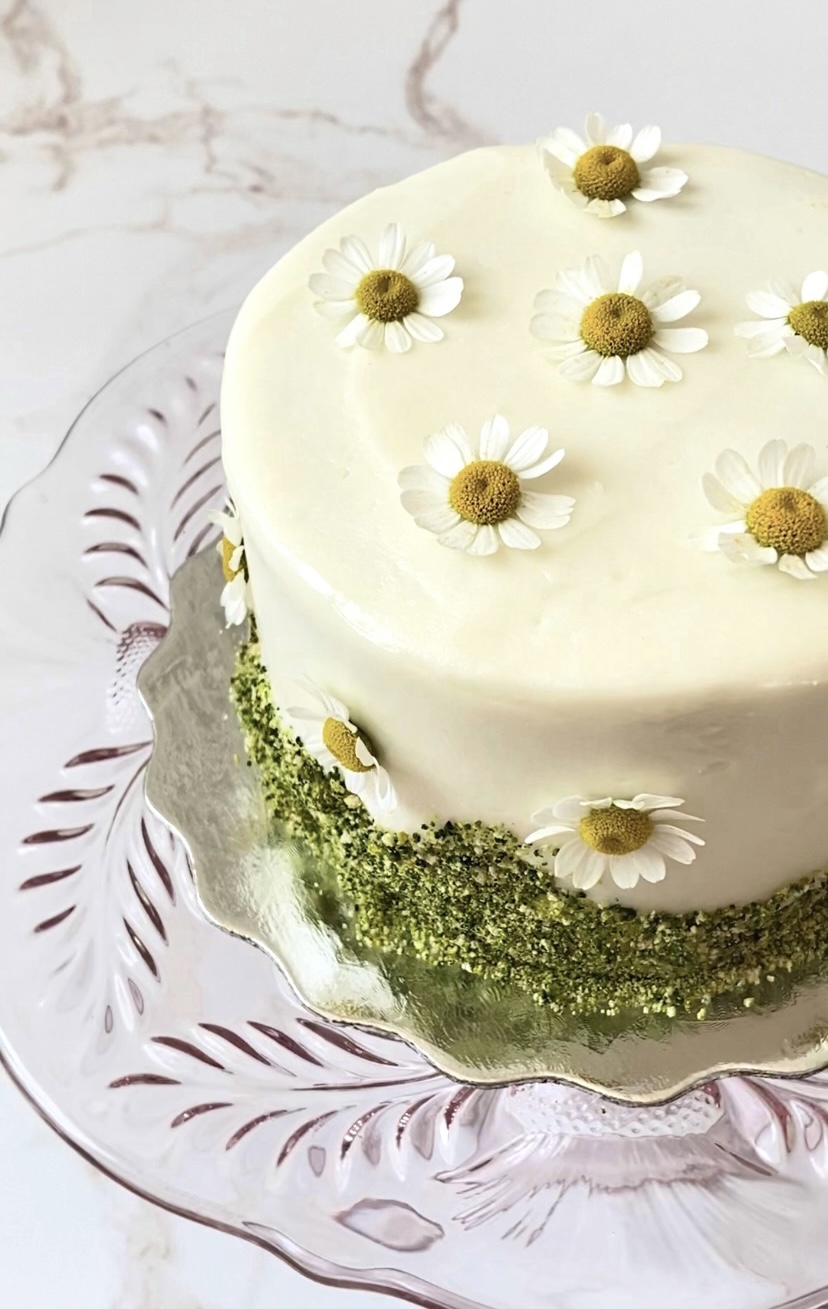
If you haven’t noticed already, I love little cakes. Mini cakes are not only cute and charming, they’re likely to make you very popular. This recipe makes two darling Mini Hummingbird Cakes, one to keep and one to share. Hummingbird Cake is a delightful way to use your ripe bananas. The version I’m sharing here also contains pineapple, pecans and coconut. This fruity, nutty combination reminds me of spring and would be perfect for Easter or a spring picnic.
Mini Hummingbird Cake
by Mari Vasseur
Hummingbird Cakes filled with bananas, pineapple, pecans and coconut, topped with cream cheese frosting and decorated with graham cracker crumb moss and fresh chamomile flowers.
Green gel food colorI used Americolor avocado green**
Yellow gel food coolI used Americolor lemon yellow***
Vodka
6graham crackers (two squares each), crushed
Fresh pesticide free chamomile flowers
Instructions
Hummingbird Cakes
Preheat oven to 350ºF (180ºC). Line the bottoms of four 4-inch cake pans**** with parchment paper. Grease and flour the insides.
In a medium-sized bowl, whisk together the flour, baking soda, salt and cinnamon until well blended.
In a large bowl, beat the butter, sugar, brown sugar and oil with an electric mixer, until pale and fluffy. Beat in the egg, egg yolk, and vanilla extract in three separate additions, making sure each one is incorporated before adding the next. Stir in the bananas, pineapple, pecans and coconut until combined.
Transfer the batter to prepared cake pans, about 1 cup of batter in each pan. Place the filled cake pans on a baking sheet.
Bake until toothpick inserted in centers comes out clean, about 25-28 minutes. Cool the cakes in pans 10 minutes then turn the cakes out onto a cooling rack.
Trim the cakes to 1-inch thickness. Fill, stack and frost the cakes with cream cheese frosting.
Cream Cheese Frosting
In a large bowl, beat the butter with an electric mixer until smooth and pale. Beat 1 tablespoon (15ml)of heavy cream, the vanilla extract and salt into the butter until well combined. On low speed, beat in the powdered sugar a half cup at a time, until well combined.
In a medium-sized bowl, mix cream the cheese with remaining 1 tablespoon (15ml) heavy cream, with a spatula until smooth. On low speed, beat the cream cheese mixture into the butter mixture until smooth and well blended. Smooth out any bubbles by stirring by hand with a spatula.
Decor
To make the graham cracker crumb moss: In two small bowls, dilute 1/8 teaspoon of each gel food color with a few drops of vodka. (Vodka will dissipate as the crumbs dry.) Place the graham cracker crumbs in a plastic food bag. Add diluted food colors a little at a time and seal the bag. Shake the bag and gently massage it to distribute the color. Add more diluted food color as needed until desired your shade of green is reached. Spread the crumbs out onto a parchment lined baking sheet to dry. Apply the crumbs to bottom edges of the frosted cakes.
Notes
*Chop the coconut flakes to achieve a finer texture. This step is optional.**To find the avocado green food color gel I used, click here.***To find the lemon yellow food color gel I used, click here.****To find the 4-inch cake pans I used, click here.
We’ve all needed a little cheering up at times, especially this past past year. These cute, happy tarts won’t take your problems away, but they can certainly make you smile, especially if you make them for someone else. They’re super easy to make and they taste better than the ones in the box we ate as kids. You can use store bought pie dough if you want to streamline the process. Any flavor of jam or preserves you have on hand works too!
Feel free to have fun decorating these little cuties. The possibilities are endless. You can use edible glitter, purchased candy eyes or even add mustaches. Happy baking!
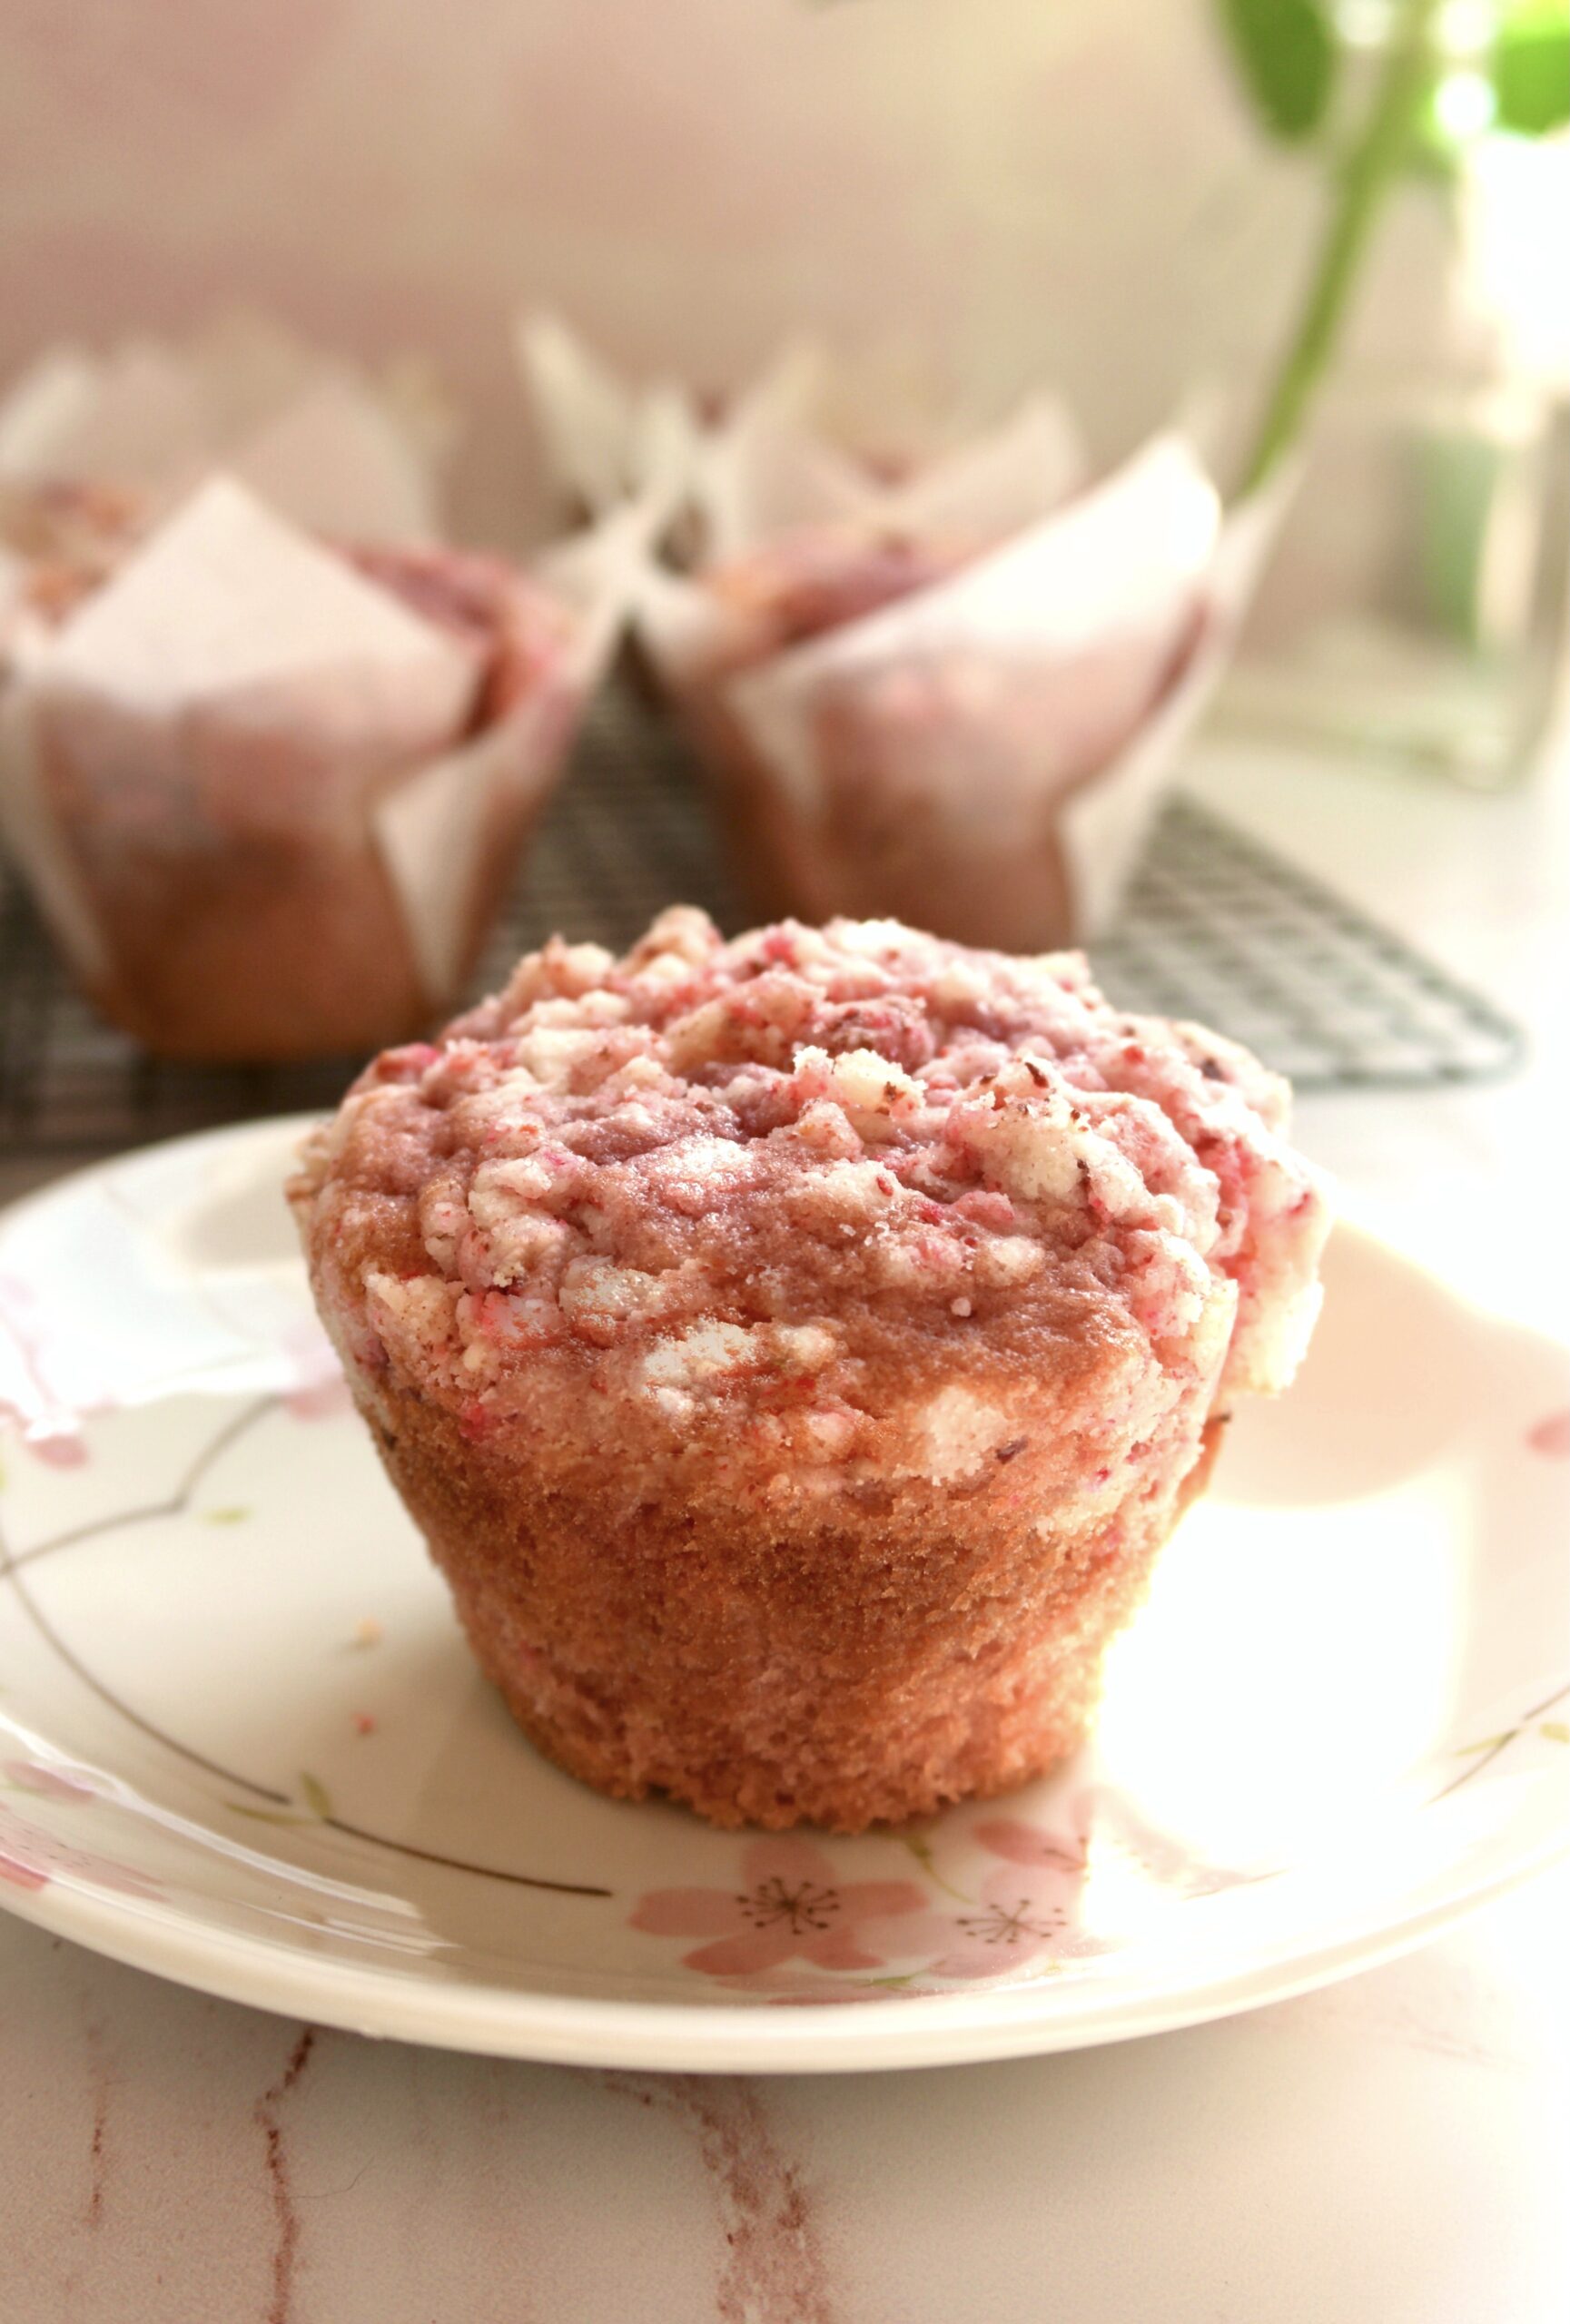
Have you noticed the strawberry shortcake crumble topping trend? I noticed many people sharing various versions of the crumble recipe all over Tiktok. I’ve seen the topping on cake, cupcakes and countless other desserts. Most people seem to make it using strawberry gelatin mix and vanilla pudding mix. The version I’m sharing here uses freeze dried strawberries instead. I’m not opposed to using gelatin mix, I just seriously love the tart, natural flavor of freeze dried strawberries.
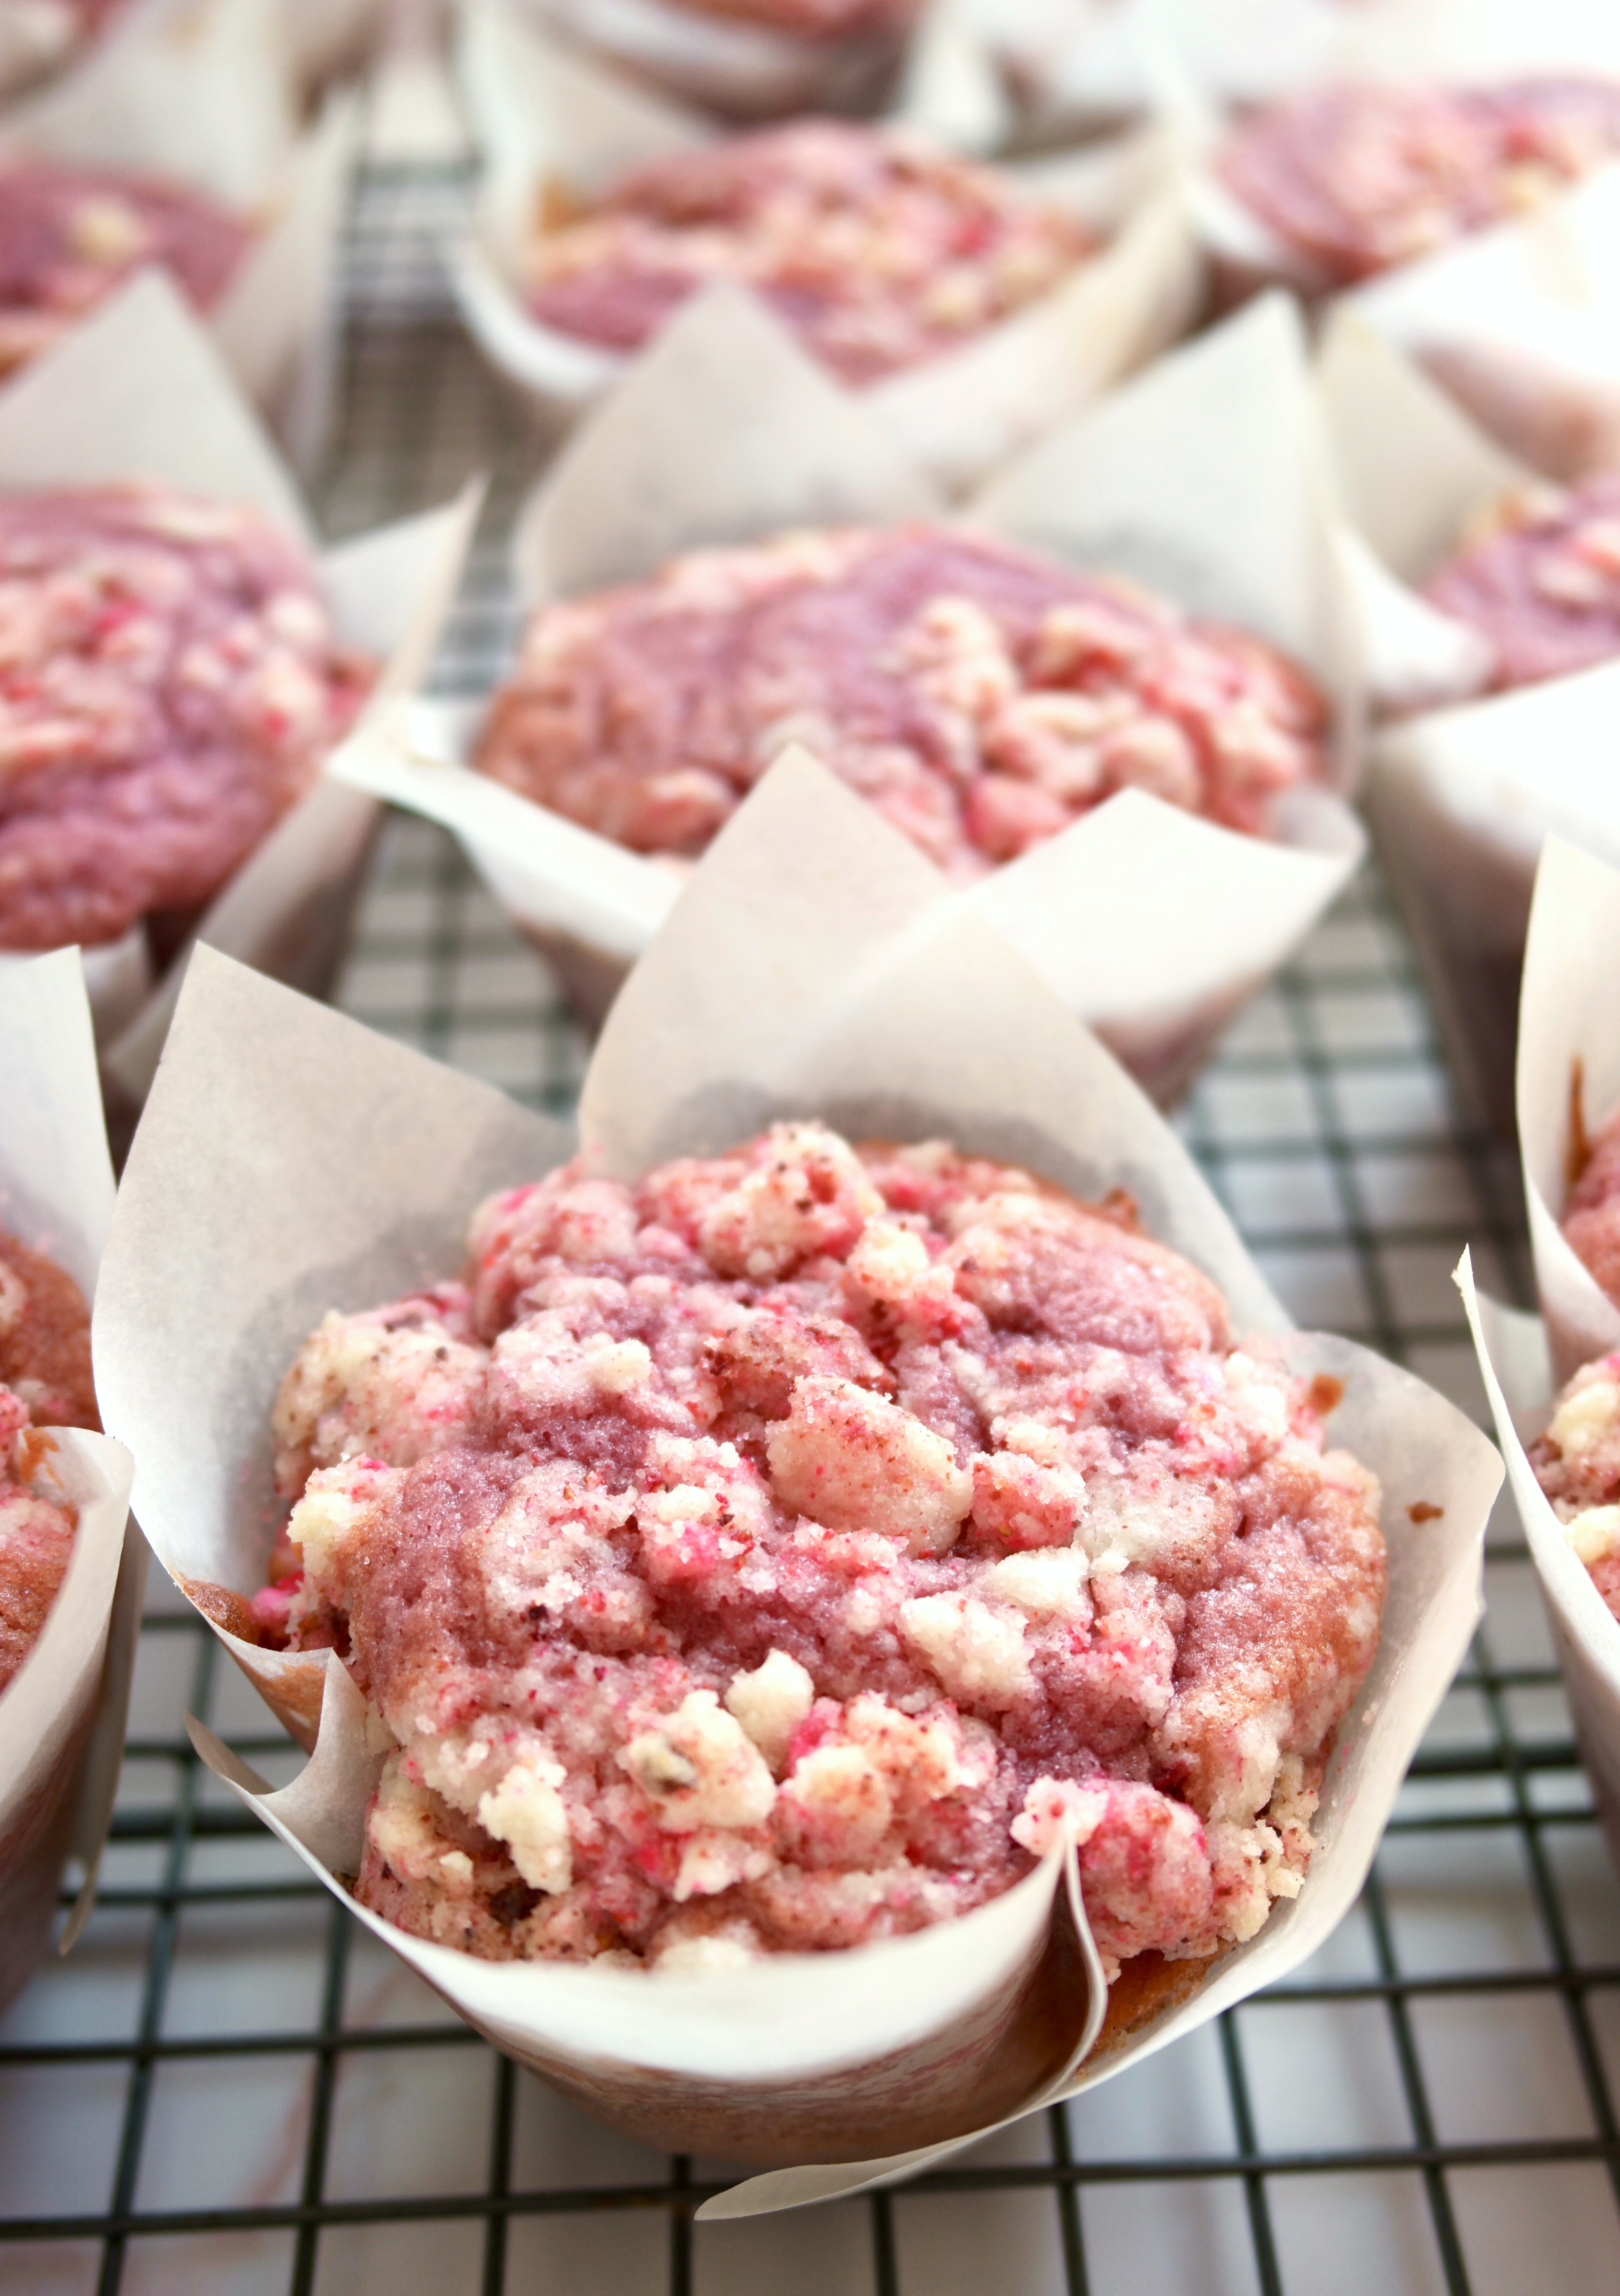
This topping is irresistible on these tender strawberry muffins. I wanted to pile on as much crumble topping as possible so I used tulip baking cups. They’re made of grease-proof parchment paper squares. You can buy them online or make them yourself with squares of parchment. You can use the link provided at the end of the recipe to find the ones I used. Keep in mind, if you use standard muffin liners, you’ll use less batter and topping for each muffin, so you’ll end up with a few more muffins.
I used fresh strawberries for the puree in the muffins, but feel free to use frozen, defrosted strawberries if you cant get fresh ones.
Strawberry Shortcake Crumble Muffins
by Mari Vasseur
Strawberry muffins topped with strawberry shortcake crumble
1cup (14g)freeze-dried strawberries, finely crushed*(weigh or measure before crushing the strawberries)
Strawberry Muffins
2 ¼cups (287g)all purpose flour, sifted
2teaspoonsbaking powder
½teaspoonbaking soda
¾teaspoonsalt
¾cup (170g)unsalted butter, softened
1 ⅛cups (225g)sugar
2largeeggs
1teaspoonstrawberry extract
½cup (118ml)buttermilk
½cup (118ml)strawberry purée
1-2dropspink or red gel food coloringoptional
Instructions
Strawberry Shortcake Crumble Topping
In a medium-sized bowl, combine the flour, sugar and salt until well blended. Work the butter into the flour mixture with your fingertips until it looks like sandy, with no large pieces of butter remaining.
Place half of crumble mixture into another medium-sized bowl and combine it with the crushed freeze dried strawberries. Mix well and press it together with your fingers to form pea sized pieces. Gently combine the two bowls of crumble together. Set aside in refrigerator while preparing the muffin batter.
Strawberry Muffins
Preheat the oven to 375ºF (190ºC). Line a 12 serving muffin pan with tulip baking liners or parchment squares.
In a medium-sized bowl, whisk together the flour, baking powder, baking soda and salt until well combined.
In a large bowl, beat the butter and sugar, with an electric mixer on medium speed, until pale and fluffy.
Beat in the eggs one at a time until incorporated. Beat in the extract until well combined. Add the flour mixture and beat on low speed, just until combined. Add the buttermilk, strawberry puree and food coloring. Beat on low speed, just until combined.
Divide batter evenly into the tulip muffin liners. (If using standard muffin liners, fill them 2/3 full.) Sprinkle crumble topping evenly over the batter.
Bake at 375ºF (190ºC) for 5 minutes, then turn oven temperature down to 350ºF (180º) and continue baking until topping is golden and a toothpick inserted in center is clean, about 12-17 more minutes. (If your topping starts to brown too quickly, you can cover the muffins with a bit of aluminum foil.) Let the muffins cool in the pan for 5 minutes, then transfer them to a cooling rack.
Notes
* A small food processor or a clean spice grinder is helpful to pulverize the freeze-dried strawberries. Pass the crushed strawberries through a sieve to remove seeds if desired.To find tulip baking cups, click hereTo find floral tulip baking cups, as seen on TikTok, click here
Each spring, I look forward to the sight and fragrance of beautiful botanical blooms, especially cherry blossoms. We often think of cherry blossoms as something unique to Washington D.C. or Japan, but cherry blossoms can be found in many regions of the United States. Georgia has many thousands of the beautiful pink trees. They can also be found in my home state, California. Here in California we also have many other types of beautiful blossoming fruit trees.
Inspired by the beautiful pink blossoms, I baked some cherry blossom cookies. There are many varieties of the blossoming pink trees. The Yoshino variety that we love to admire is not the same as the trees that produce cherries that we typically eat, but I decided to make the cookies cherry flavor. Cherry extract is more accessible, but it’s also possible to make the cookies sakura blossom flavor if you prefer. You can purchase culinary sakura blossoms or sakura powder and flavor the cookies with it.
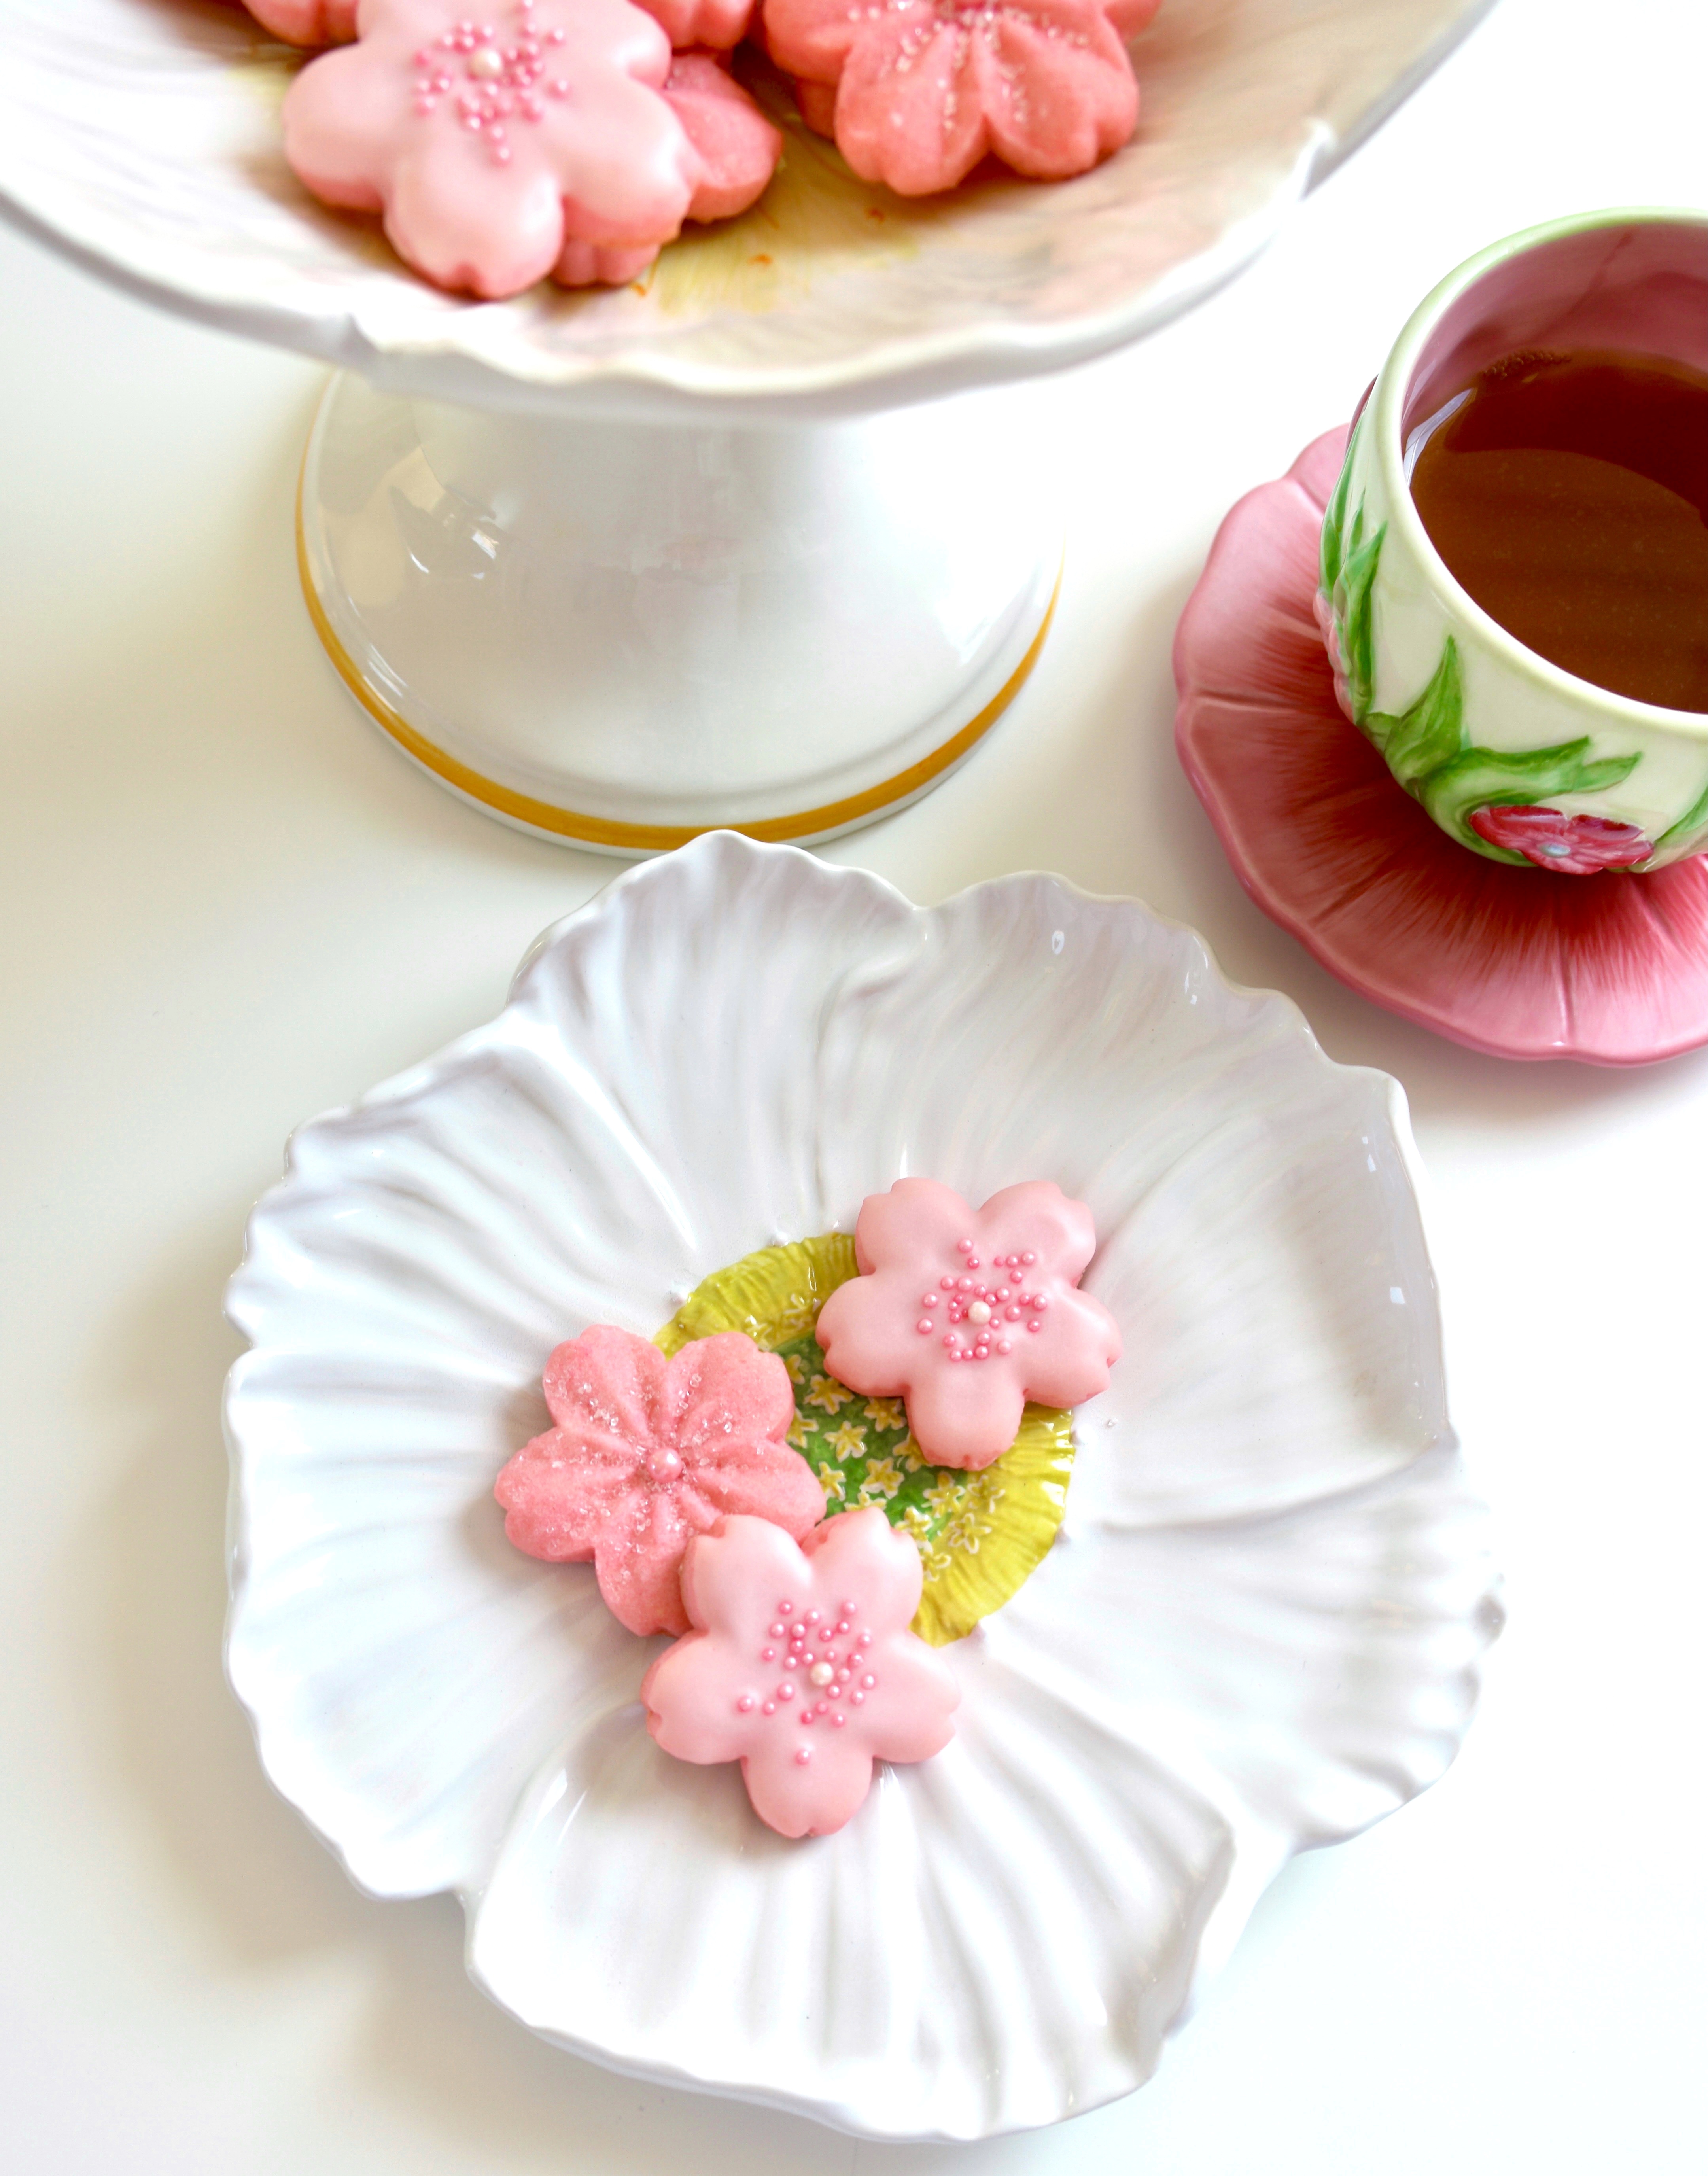
These perfectly pretty, pink cookies are easy to make and fun to decorate. You can sprinkle sparkling sugar on them before baking and call it a day or you can make some pink cherry icing and add sugar pearls or sprinkles. Either way, they look beautiful and taste delicious!
Cherry Blossom Cookies
by Mari Vasseur
Pink cherry flavored sugar cookies with cherry icing
1teaspoonpure cherry extract or natural cherry flavoring*see note below
⅛teaspoonpure almond extract
3cups (383g)all purpose flour, sifted
Pink gel food color**see note below
Cherry Icing
1cup (120g)powdered sugar
1pinchfine sea salt
4-5tablespoons (59-67ml) whole milk
½teaspoonpure cherry extract or natural cherry flavoring
Pink gel food color
Optional Cookie Decorations
White sparkling sugar
Pink sugar pearls
Pink nonpareils
Instructions
Cherry Blossom Cookies
In a large bowl, beat the butter and cream cheese together with an electric mixer on medium speed, just until smooth and well blended.
Add the sugar and salt. Beat on medium speed until pale and fluffy. Mix in the egg, then the extracts until incorporated.
On low speed, mix in the flour in two additions, just until combined.
Mix in the food coloring, a tiny bit at a time, until the desired shade is achieved.
Divide the dough into two disks. Wrap them in plastic wrap and refrigerate until firm, about 2 hours or up to overnight.
Preheat the oven to 375ºF (190ºC). Line two large cookie sheets with parchment paper.
On a lightly floured surface, roll the dough to 1/8" thickness. Cut out cookies with a 2-inch blossom cutter..***
Place the cookies about 2 inches apart onto the prepared baking sheets. Sprinkle with sparkling sugar if using.
Bake for 7-9 minutes until the bottom edges are lightly browned. Remove from the oven and transfer the cookies to a cooling rack.
Cool completely then ice with cherry icing, if desired. Decorate with sugar pearls or sprinkles before the icing sets.
Cherry Icing
In a small bowl, whisk together the powdered sugar, salt, 3 tablespoons (45ml) of milk and the cherry extract. Add additional milk until the desired consistency is reached. Whisk together until smooth.
Mix in pink gel food color, a tiny bit at a time, until the desired shade is achieved.
Notes
*Do not use imitation cherry flavoring or extract. Imitation extracts may make your cookies taste medicinal. ** I used Wilton gel food color in shade rose. Click here to find it. *** Use your favorite blossom cookie cutter or click here to find the blossom cutters I used.
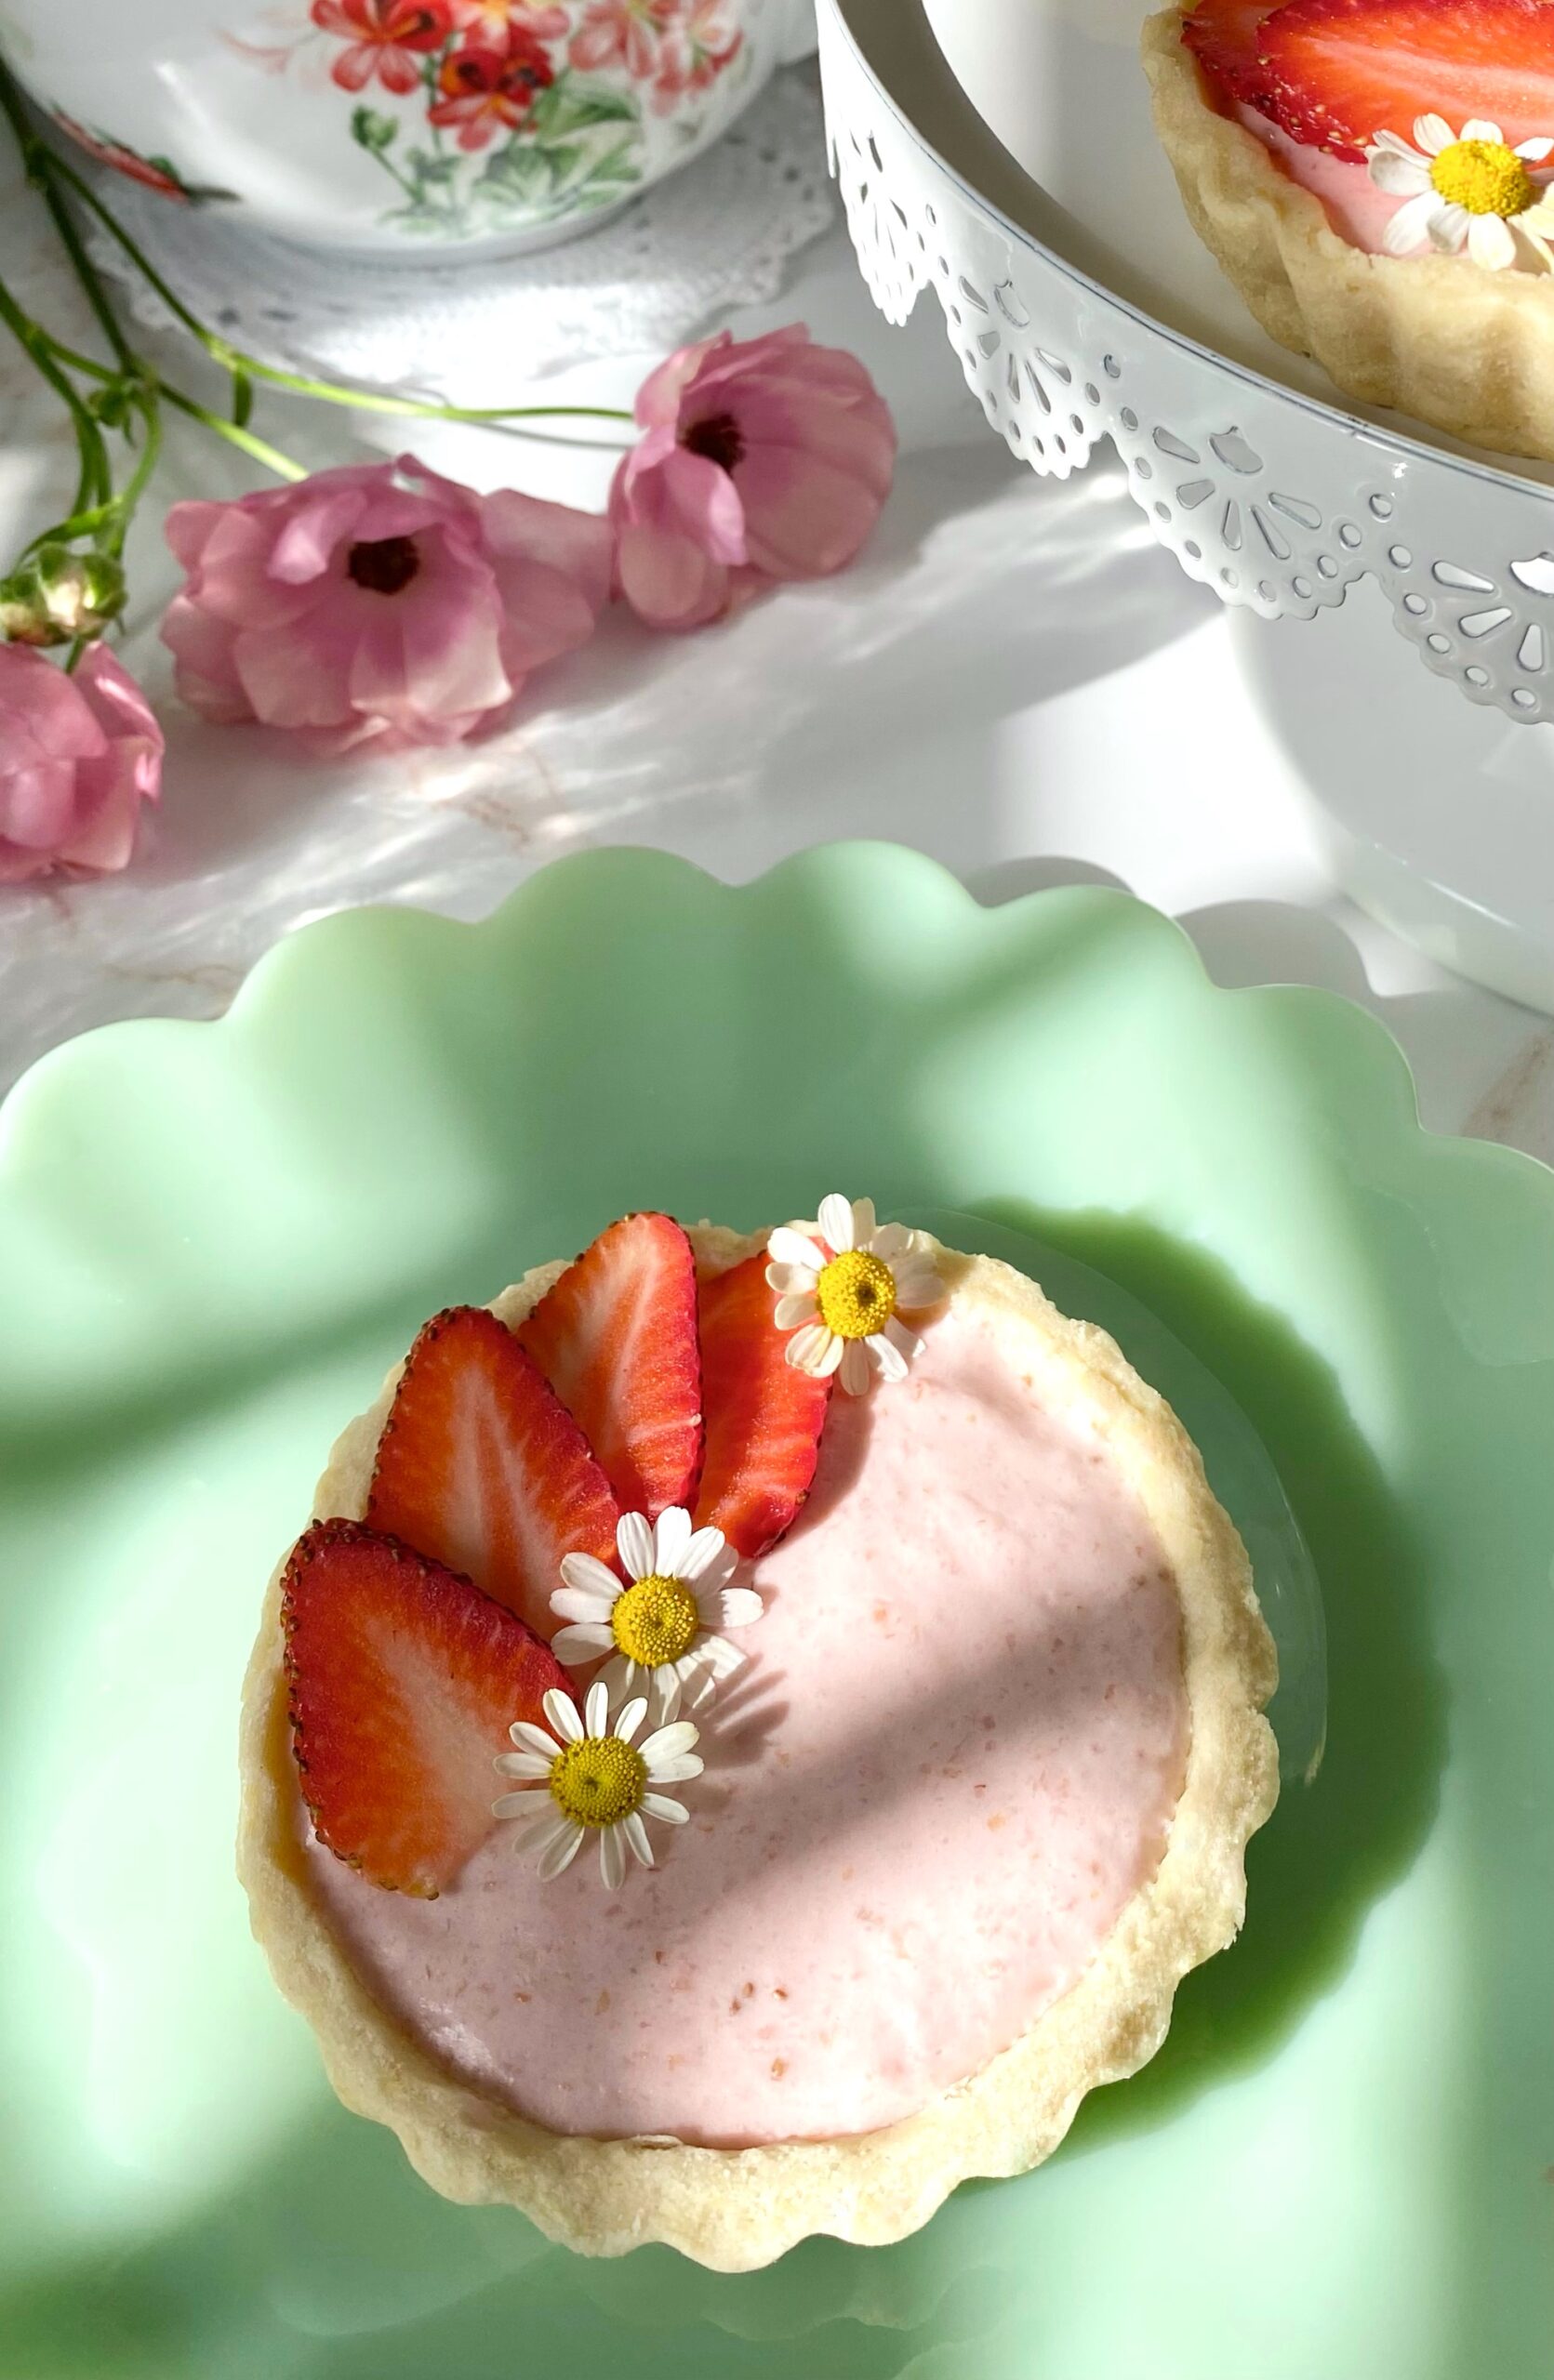
May is when I get to pull out all of my summery recipes. These pretty little Strawberries & Cream Tarts remind me of a summer day. The kind of day when you’re outside enjoying the sunshine and you’re craving a cool, refreshing dessert. This strawberry cream filling alone is so delicious that I could just eat the entire bowl with a spoon. But since I’m extra, I had to create an aesthetic dessert with it.
I used my favorite tart shells for this recipe, but this would also be delicious with those little pre-made graham cracker pie crusts if you want to take a shortcut. The reason I love this tart crust recipe so much though, is that it actually tastes delicious. Once, a few years ago, I purchased a beautiful, small fruit tart from a famous bakery. The fruit was vibrant and glistening and the pastry cream filling was sweet and silky. Now we need the sound of a mic drop, because the tart crust was hard and flavorless, like cardboard! Ever since then, I knew I would settle for nothing less than a delicious tart crust.
2cups (16 ounces)strawberry pureePlus more for garnish
½cup (3.5 ounces)granulated sugar
3tablespoonswater
2teaspoonsunflavored gelatin powder
½cup (4 ounces)cream cheese, softened
½teaspoonstrawberry extract
½teaspoonvanilla extract
½cup (4 ounces)cold heavy whipping cream
Instructions
Tart Crust
In a bowl, whisk together flour, powdered sugar and salt. Set aside.
Work in butter and egg yolk with a pastry blender or with your fingers, until pea size pieces are formed.
Add ice water, one tablespoon at a time, until dough comes together.
Form dough into a disc. Wrap in plastic and refrigerate for one hour.
On a lightly floured surface, roll dough to a scant 1/4-inch thickness
Cut dough into six 5-inch rounds. Press rounds into six 4-inch or 4 1/4-inch tart pans.*
Dock the bottoms of pie crusts with a fork. Freeze for 30 minutes.
Heat oven to 375ºF. Place tart pans on a large baking sheet.
Line tart shells with six 6-inch parchment rounds. Fill with pie weights. (You can use dried beans or rice if you don't have pie weights.)
Bake tart shells for 12 minutes. Remove parchment paper and pie weights. Continue baking until tart shells are light golden brown, about 4-6 more minutes.
Transfer to cooling rack to cool completely.
Strawberry Cream Filling
Pass the strawberry purée through a mesh sieve to remove large seeds.
In a medium saucepan, simmer the strawberry purée until it's reduced by half. Stir in the sugar and continue cooking over medium heat, until the sugar is dissolved. Transfer to a medium bowl.
Meanwhile, place 3 tablespoons of water into a small bowl. Sprinkle gelatin powder over the top of water. Let sit until water is absorbed, about 5 minutes.
Pour the gelatin mixture into the warm strawberry reduction mixture and stir until fully incorporated.
In a large bowl, beat cream cheese on low speed with an electric mixer until smooth.
Add extracts and beat until combined.
Add the strawberry reduction mixture to the cream cheese a little at time. Beat until well combined.
In a medium bowl, beat heavy whipping cream with an electric mixer at high speed until stiff peaks form.
Fold whipped cream into strawberry mixture.
Spoon into cooled tart shells. Smooth tops with a small offset spatula. Refrigerate for two hours. Garnish with sliced, fresh strawberries.
During citrus season, in the heart of winter, my backyard orange tree is brimming over with fresh oranges. So I love bringing some fresh-picked sunshine to my family with these fluffy Orange Vanilla Bean Donut Holes from my childhood. When I was a child, my parents used to love taking our family to a smorgasbord. The owner would always come out from the kitchen and say hello to my parents. He made delicious fried donut holes that my brother and I looked forward to at the end of our meal. At home we duplicated the donut holes using a recipe from an old cookbook. Unfortunately the cookbook is lost, but this recipe is pretty close to the original. Tossing the little donuts in vanilla sugar makes them even more fragrant and delicious. The vanilla sugar can be used immediately, but for the best flavor, make it in advance.
The original recipe had vanilla and nutmeg in it, which are classic cake donut flavors. The addition of fresh orange zest and juice makes them vibrant and flavorful. I love making different flavors of these donut holes. To view Blueberry Donut Holes, click here.
Orange Vanilla Bean Donut Holes
by Mari Vasseur
Orange & vanilla donut holes, fluffy & fragrant on the inside, crisp & sugary on the outside
In a large, whisk together the flour, baking powder and salt until well blended.
In a medium-sized bowl, whisk the eggs, sugar, orange zest, melted butter, orange juice and vanilla bean paste until creamy and well combined. Add this mixture to the flour mixture and mix just until combined. Do not over mix. A few small lumps are okay.
In a heavy saucepan, heat 1 1/2 inches of oil to 340ºF (170ºC). Place the vanilla sugar in a medium-sized bowl.
Drop tablespoon-sized portions of batter into the hot oil. (I used a #60 portion scoop**) Don't over crowd the pan.
Fry the donut holes until golden brown on all sides, about 2-4 minutes, flipping halfway through. If the donut holes cook too quickly on the outside, turn heat down a bit.
Briefly drain the donut holes on paper towels, then toss them in vanilla sugar. Serve warm.
Vanilla Sugar
With the dull side of a knife, scrape the seeds out of the vanilla bean.
In a small bowl, whisk the vanilla seeds together with sugar, breaking up any clumps. Use immediately or make in advance and let the flavor develop 1-2 weeks in a covered container.