Peach Crumble Pie Cookies

Peach Crumble Pie Cookies

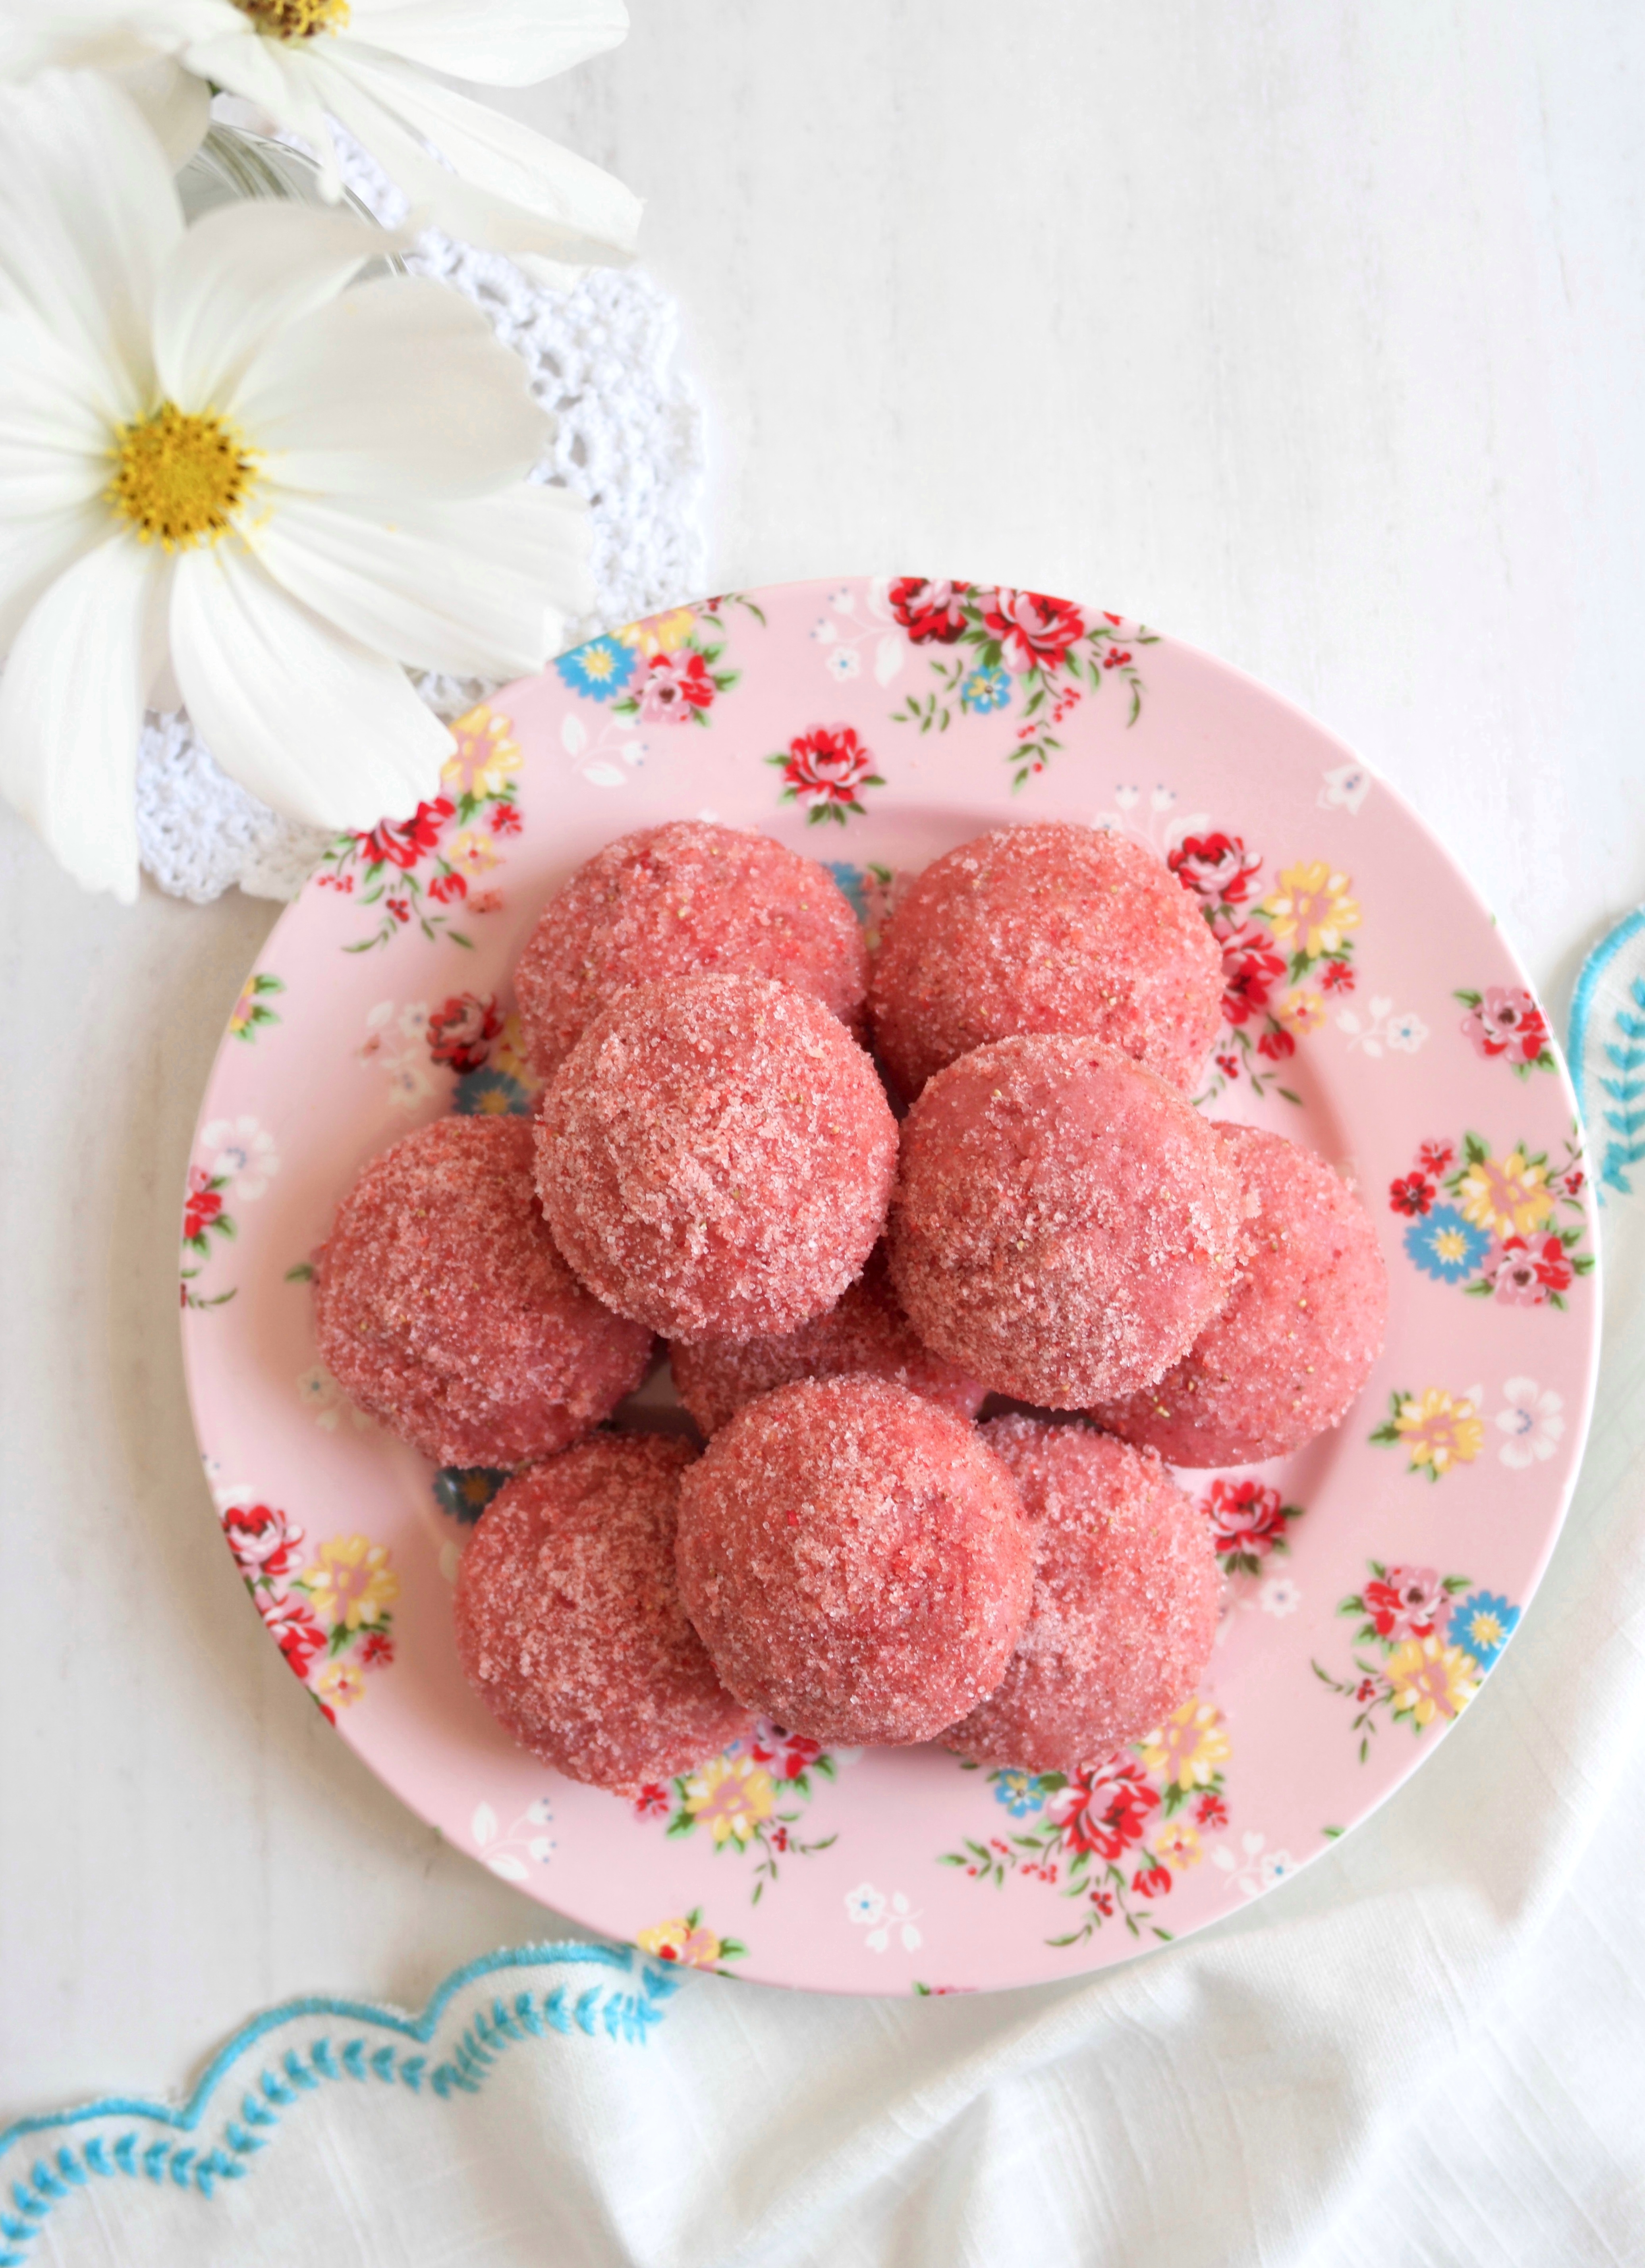
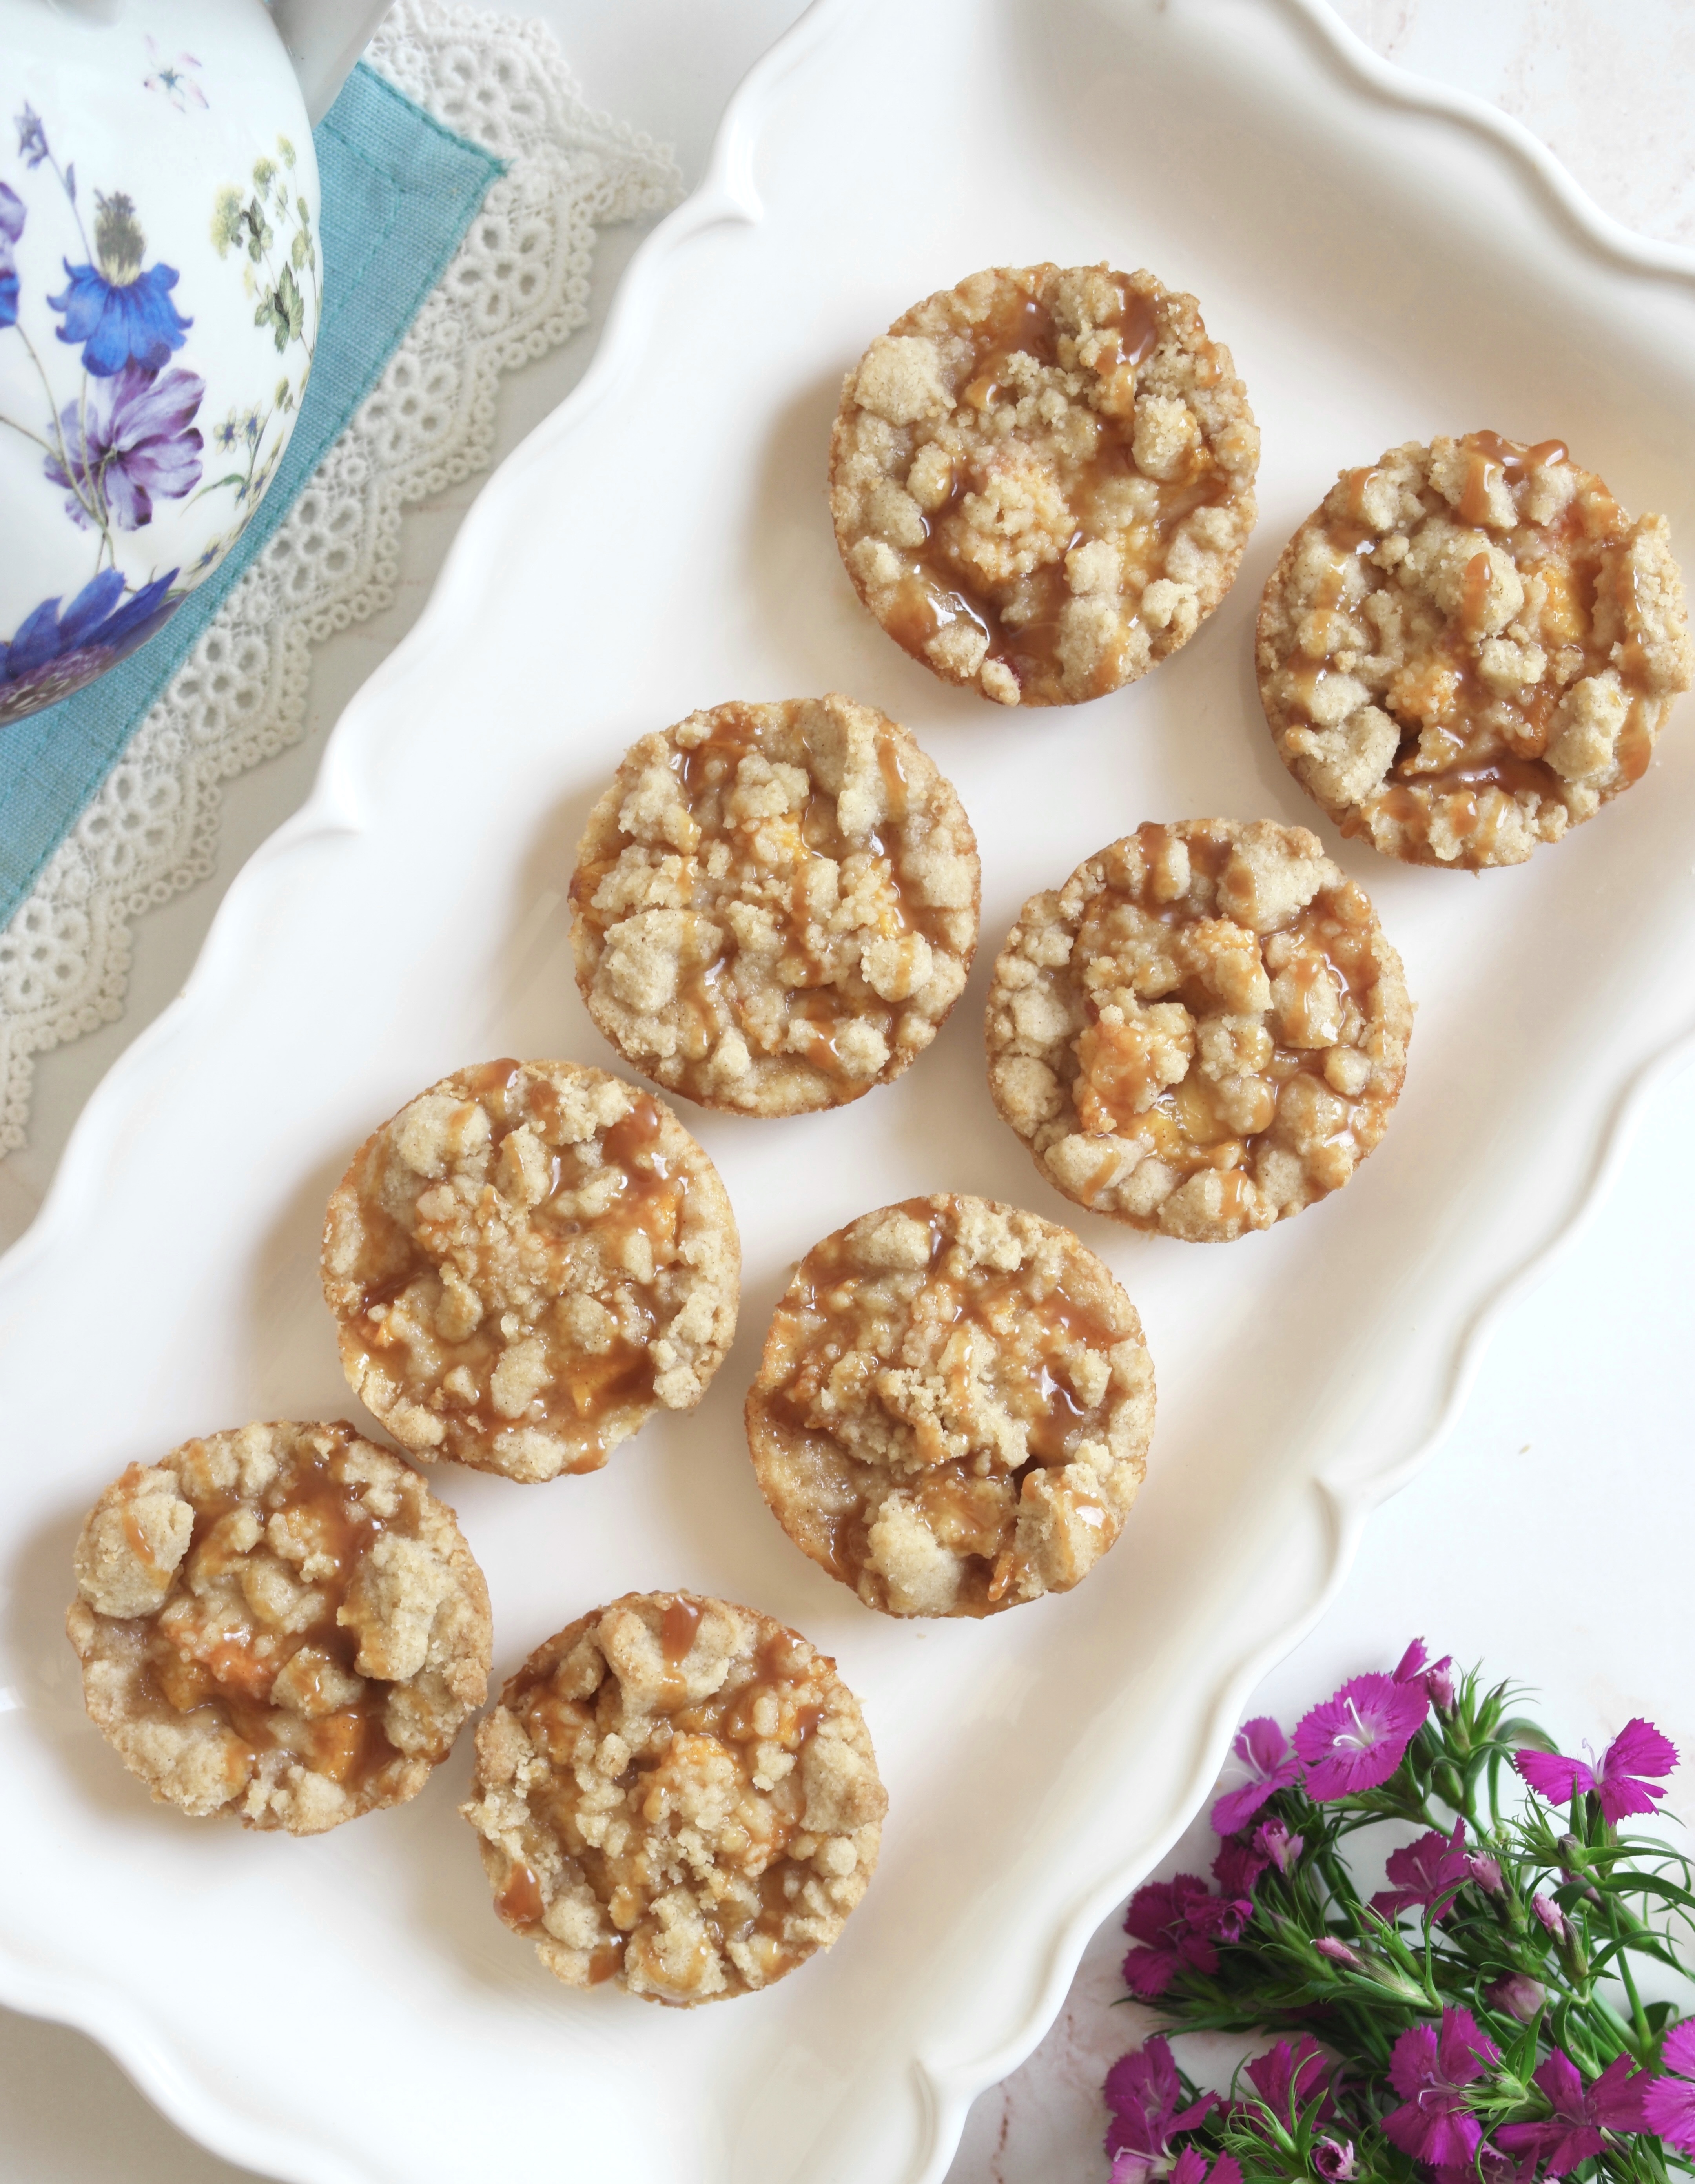
I couldn’t decide whether to call these cookies or pies, so I made a compromise. They’re about the size of cookies, but they taste like little peach crumble pies. The base is tender like shortbread or pie crust and the filling is made with fresh peaches. I’ve seen people make something similar with jam and call them cookies, but since I used fresh fruit for these, they deserve to be elevated to pie status.

The peaches are macerated to draw out the excess juices, to help avoid making your cookies soggy. If you’re impatient, don’t be tempted to skip this step. It’ll go by fast as you prep the crumb topping and the remaining ingredients.

When I first made these, I used cupcake liners because I was worried that they might stick to the pan. It turns out that they stick to the cupcake liners more than the pan. So the next time I made them, I opted to lightly spray the pan with nonstick spray instead of using liners. I ran a small thin offset spatula around the perimeter of the cookies to loosen them from the pan and they popped out nicely.

I love topping these little peach delights with caramel sauce. Salted caramel is also a delicious addition. Or you can simply sprinkle them with powdered sugar if you prefer.

Peach Crumble Pie Cookies

Tender, peach-filled cookies with crumble topping and caramel drizzle
Servings 12 cookie tarts

Ingredients
  

Macerated Peaches

  • 1 ¼ cups (213g) chopped peaches
  • ¾ teaspoon lemon juice
  • ¼ cup (50g) packed brown sugar
  • ¼ teaspoon ground cinnamon
  • ¾ teaspoon cornstarch

Crumble Topping

  • ½ cup (64g) all purpose flour
  • 2 tablespoons sugar
  • 2 tablespoons packed brown sugar
  • ¼ teaspoon ground cinnamon
  • â…› teaspoon fine sea salt
  • 2 ½ tablespoons (35g) cold, unsalted butter, cubed

Cookies

  • 1 cup (128g) all purpose flour
  • ½ teaspoon baking powder
  • â…› teaspoon fine sea salt
  • 7 tablespoons ( 99g) unsalted butter, softened
  • ¼ cup (28g) powdered sugar

Topping

  • 3-4 tablespoons caramel sauce, purchased or homemade

Instructions
 

Macerated Peaches

  • In a medium bowl, toss the peaches with lemon juice. Add the brown sugar and cinnamon. Stir gently to combine. Let stand 30 minutes.
  • Drain the peaches, reserving 1 tablespoon of the juices. In a small bowl, whisk together the reserved peach juice with the corn starch. Mix with the drained peaches.

Crumble Topping

  • In a medium bowl, whisk together the flour, sugar, brown sugar, cinnamon and salt.
  • With your fingertips, work the butter into the flour mixture until it looks like wet sand. Press the mixture together to form chunks.

Cookies

  • Preheat the oven to 350ºF (180ºC). Lightly spray a 12-serving muffin pan with nonstick spray. (If you're concerned about the cookies sticking to the pan, see notes below.*)
  • In a medium bowl, whisk together the flour, baking powder and salt.
  • In a large bowl, beat the butter and powdered sugar with an electric mixer until light and fluffy.
  • Mix in the flour mixture on low speed or by hand, just until combined.
  • Press generous tablespoon size (about 20g each) portions of dough into the bottoms of the muffin pan cups with a pastry tamper dipped in flour. You can also use the bottom of a flat shot glass.
  • Top with the peaches, then the crumble topping mixture. Bake until the cookies are set and the topping is golden brown, about 15-17 minutes.
  • Cool the cookies completely in the pan. Once cool, remove the cookies from the pan by running a small offset spatula or paring knife around the inside perimeter of the muffin cups to loosen them. Drizzle with caramel sauce.

Notes

*You can line the bottoms of the muffin cups with 2-inch parchment circles to make sure your cookies release. I don't recommend cupcake liners because the cookies stick to the ridges of the liners. You can, however, cut the circles from the bottom of the cupcake liners if you don't have parchment paper.
Keyword cookies, peach

White Chocolate Peach Muffins

I have strong opinions about muffins. Maybe a little controversial too. When baked correctly, muffins should be soft, fluffy and tender. I get a little sad and disappointed when I buy a big, domed bakery muffin and the inside is rubbery. Many of the pretty muffins I see on social media are painfully rubbery too, as the creators break open a muffin in a dramatic moment of triumph. The muffin recipe I’m sharing here is tender and delicious if baked correctly.

One of the most important ways to achieve tender muffins is by not over mixing your batter once the flour is added. Muffins are technically cake, not bread, so we don’t want gluten formation. Another way to get tender muffins is to use an acidic ingredient such as sour cream, yogurt or buttermilk. Lastly, and very importantly, don’t over bake or under bake your muffins. Baking times in recipes are a guide and not necessarily exact because everyone’s ovens and baking pans are different. Keep an eye on your muffins and test them for doneness with a cake tester or a toothpick. My grandma used to say that when you start to smell them, they’re probably done or close to being done.

Soggy muffins also make me run the other way. Muffins loaded with too much fruit or fruit that hasn’t been macerated can make your muffins soggy or dense. In this recipe, I macerated the peaches to draw out some of the moisture, so it helps to avoid creating soggy spots in your muffins. The waiting time goes by fast as you prep the rest of your ingredients.

White Chocolate Peach Muffins

Tender muffins with white chocolate chips and chunks of fresh peaches.
Course Breakfast, Brunch
Servings 12 muffins

Ingredients
  

Macerated Peaches

  • 8 ounces (227g) chopped, ripe but firm peaches (about 1 1/3 cups)
  • 1 teaspoon lemon juice
  • 1 tablespoon packed brown sugar
  • ¼ teaspoon ground cinnamon
  • 1 teaspoon all purpose flour

Crumb Topping

  • ½ cup (2 1/4 oz or 64g) all purpose flour
  • 2 tablespoons sugar
  • 2 tablespoons packed brown sugar
  • â…› teaspoon ground cinnamon
  • â…› teaspoon fine sea salt
  • 2 ½ tablespoons cold, unsalted butter, cubed

Muffins

  • 2 ¼ cups (10 1/8 oz or 287g) all purpose flour, sifted, plus 1/2 teaspoon for the chips
  • 2 teaspoons baking powder
  • ½ teaspoon baking soda
  • ¾ teaspoon fine sea salt
  • â…œ teaspoon ground cinnamon
  • â…› teaspoon ground nutmeg, preferably freshly ground
  • ¾ cup (6 oz or 170g) unsalted butter, softened
  • 1 â…› cups (8 oz or 227g) sugar
  • 2 large eggs, room temperature
  • 1 teaspoon pure vanilla extract
  • ½ teaspoon pure almond extract
  • 1 cup (8 oz or 237ml) sour cream, room temperature
  • ¾ cup (4 1/2 oz or 128g) white chocolate chips
  • 1 or 2 squares white chocolate, broken into pieces optional

Instructions
 

Macerated Peaches

  • In a medium bowl, toss the peaches with lemon juice. Add the brown sugar and cinnamon and stir to combine. Let stand 30 minutes.
  • Drain the peaches well and toss with flour. Reserve 1/4 cup of peaches for the muffin tops.

Crumb Topping

  • In a medium bowl, whisk together the flour, sugar, brown sugar, cinnamon and salt.
  • With a pastry blender, or with your fingertips, work the butter into the flour mixture until it looks like wet sand. Press together to form chunks. Set aside in the refrigerator until ready to use.

Muffins

  • Preheat the oven to 375ºF (190ºC). Line a 12-serving muffin pan with tulip muffin liners.* (Tulip muffin liners are preferable because they hold more batter, but you can also use standard muffin liners.)
  • In a medium bowl, whisk together the flour, baking powder, baking soda, salt, cinnamon and nutmeg.
  • In a large bowl, beat the butter and sugar together until light and fluffy. Beat in the eggs and extracts in 3 separate additions, making sure each one is incorporated before adding the next.
  • Mix in the flour mixture with a wooden spoon or spatula, in two additions, followed by half of the sour cream after each addition. Mix just until combined. The batter will be thick.
  • Toss the white chocolate chips with flour, then fold them into the batter. Gently fold in the drained peaches.
  • Transfer batter to the prepared muffin pan, equally dividing the batter among the muffin cups. (If you're using standard muffin liners, fill them 2/3 full.) Top with the reserved peaches and the crumb topping. Optional: Top each muffin with a piece of white chocolate.
  • Bake muffins for 5 minutes. Turn down the oven heat to 350ºF (180ºC). Continue baking until the muffins are light golden brown and a toothpick inserted into the centers of the muffins comes out clean, about 15-20 more minutes. Cool in the pan for 5 minutes, then remove the muffins from the pan and continue cooling on a cooling rack.

Notes

*To find tulip muffin liners, click here.
 
Keyword muffins, white chocolate peach

Double Strawberry Mini Muffins

Double Strawberry Mini Muffins

These cute little pink muffins are the strawberriest muffins ever. I had to use a word that’s not even in the dictionary to describe them because these little gems are bursting with strawberry flavor. They’re made with fresh strawberry purée and finished with homemade strawberry sugar. The strawberry purée helps to make the muffins soft and moist on the inside and the strawberry sugar gives a nice crunchy texture and a bright strawberry flavor on the outside.

The strawberry sugar is made by pulverizing freeze dried strawberries together with sugar. Freeze dried strawberries are not the same as dried strawberries. You can find freeze dried strawberries at grocery markets, gourmet stores and online. They’re typically located near the nuts and dried fruit in most markets.

To watch the Instagram video of Double Strawberry Mini Muffins click here.

Double Strawberry Mini Muffins

by Mari Vasseur
Strawberry Mini Muffins Coated in Homemade Strawberry Sugar
Servings 24 mini muffins

Ingredients
  

  • 1 cup plus 2 tablespoons (225g) sugar, divided
  • ½ cup (14g) freeze dried strawberries not dried
  • 1 ½ cups (190g) all purpose flour, sifted
  • 1 ½ teaspoons baking powder
  • ½ teaspoon fine sea salt
  • â…“ cup (74ml) vegetable oil or any neutral oil of your choice
  • 1 large egg
  • 1 teaspoon pure vanilla extract
  • ½ teaspoon pure strawberry extract
  • ½ cup (118ml) strawberry puree
  • 2 pea size drops pink gel food color optional
  • 6 tablespoons (85g) butter, melted

Instructions
 

  • Combine the freeze dried strawberries and 2 tablespoons (25g) of sugar in a small food processor or a clean spice grinder. Process until finely ground. Add 1/2 cup (100g) of sugar and pulse a few times until well combined. Place the strawberry sugar in a shallow bowl and set aside.
  • Preheat the oven to 350ºF (180ºC). Grease and flour a 24-serving mini muffin pan.** Do not skip this step and do not use liners. The muffins need to form a crust on the outside so they don't soak up too much butter in the final step.
  • In a medium-sized bowl, whisk together the flour, baking powder and salt until well blended.
  • In a large bowl, whisk together the remaining 1/2 cup (100g) of sugar with the oil, egg and extracts until smooth & creamy. Whisk in the strawberry purée until well combined. Stir in the flour mixture with a rubber spatula, just until combined. The batter will be thick.
  • Transfer the batter to the muffin pan, filling the wells about 3/4 full.
  • Bake until a toothpick inserted into the center of the muffins comes out clean, about 10-12 minutes. Do not over bake! Be diligent, since over baking can happen very quickly with mini muffins.
  • Let the muffins cool in the pan for 5 minutes. Turn the muffins out onto a cooling rack. Place the melted butter in a small bowl. Dunk the warm muffins briefly in the melted butter or brush the butter on with a pastry brush, then roll them in the strawberry sugar.

Notes

To find the gel food color I used, click here.
To find the mini muffin pan I used, click here.
Keyword muffins, strawberry

Blueberry Lemon Crumb Cakes

Blueberry Lemon Crumb Cakes

The texture and flavor of these cute Blueberry Lemon Crumb Cakes is immaculate. You’ll love them so much, you won’t want to share, but this recipe makes six 4-inch personal crumb cakes, so you’ll have one all to yourself. You’ll understand once you taste the soft, fluffy lemon scented cake with juicy blueberries, a generous amount of sweet crumb topping and a lemony cream cheese icing. I was a bit hesitant to share this recipe. But I was taught to share recipes by my two grandmothers who were amazing cooks and bakers. They shared their knowledge and recipes with anyone who asked. Recipes are a legacy that should be passed on to family and friends. If you’re reading this, I consider you a friend. So enjoy this recipe that’s especially dear to me, because it’s based on my Grandma’s Apple Crumb Cake recipe.

I used a six serving shallow jumbo muffin pan to bake the cakes. The muffin cups are 4 inches across by 1 inch deep. To find the pan, click here. A hamburger bun pan for 4-inch buns will work too. If you happen to have six 4-inch cake pans, those work nicely. I used jumbo muffin liners to line the muffin cups, which fit perfectly by pressing them in around the inside bottom edges.

Blueberry Lemon Crumb Cakes

Fluffy, soft lemon cakes with blueberries, crumb topping and lemon cream cheese icing
Course Breakfast, Brunch, Dessert
Servings 6 4-inch crumb cakes

Ingredients
  

Crumb Topping

  • ¾ cup (96g) all purpose flour
  • â…“ cup (66g) granulated sugar
  • 2 tablespoons (25g) packed brown sugar
  • â…› teaspoon fine sea salt
  • 4 ½ tablespoons (64g) cold, unsalted butter, cubed

Crumb Cakes

  • 1 ¼ cups (159g) all purpose flour, sifted
  • 1 ½ teaspoons baking powder
  • â…œ teaspoon fine sea salt
  • 6 tablespoons (85g) unsalted butter, softened
  • ¾ cup (150g) granulated sugar
  • Zest of two medium lemons
  • 1 large egg, room temperature
  • 1 large egg yolk, room temperature
  • 1 teaspoon pure vanilla extract
  • ½ teaspoon pure lemon extract
  • â…“ cup (78ml) whole milk, room temperature
  • ¼ cup (57g) sour cream, room temperature
  • 1 cup (170g) blueberries
  • 1 teaspoon all purpose flour for blueberries

Cream Cheese Icing

  • 1 tablespoon (14g) cream cheese, softened
  • 1 tablespoon (14g) unsalted butter, melted
  • ¾ cup (85g) powdered sugar, sifted
  • 1 pinch fine sea salt
  • 2-3 tablespoons (30-45ml) fresh lemon juice

Instructions
 

Crumb Topping

  • In a medium bowl, whisk the flour, sugar, brown sugar and salt together.
  • Work in the butter with your fingertips until the mixture looks like the consistency of wet sand. Press the mixture together to make chunks. Set aside in the refrigerator until ready to use.

Crumb Cakes

  • Preheat the oven to 350ºF (180ºC). Line a 6-serving shallow jumbo muffin pan* with jumbo muffin liners.** Jumbo muffin liners will fit by pressing them around the inside bottom edges.
  • In a medium bowl, whisk together the flour, baking powder and salt.
  • In a large bowl, cream the butter, sugar and lemon zest with an electric mixer on medium speed, until light and fluffy.
  • Beat the egg and egg yolk into the butter mixture in 2 separate additions, making sure each addition is incorporated before adding the next. Beat in the extracts until combined.
  • In a small bowl, whisk the milk and sour cream together.
  • On low speed, mix the flour mixture into the batter in 2 additions alternating with half of the milk mixture after each addition. Beat just until combined.
  • Transfer the batter to the prepared baking pan, evenly distributing the batter and filling the cups about half full.
  • In a medium bowl, toss the blueberries with 1 teaspoon of flour and place them into the cups on top of the batter, about 1 ounce (28g) in each. Top each one with crumb topping.
  • Bake until a toothpick inserted into the center of the cakes comes out clean, about 25-30 minutes. Let the cakes cool in the pan for 5 minutes, then transfer them to a cooling rack to cool completely.

Cream Cheese Icing

  • In a medium bowl, whisk together the cream cheese, melted butter, powdered sugar, salt and 1 tablespoon (30ml) of lemon juice. Add additional lemon juice, a little at a time until your desired consistency is reached. Drizzle over the cooled cakes.

Notes

*To find the muffin pan I used, click here.
**To find jumbo muffin liners, click here. To find 4-inch cake pans, click here.
Keyword blueberry lemon, cake

Blueberry Lavender Cookies

Blueberry Lavender Cookies

Blueberry cookies remind me of a time when I was little. Every year my family would take a road trip up to Northern California. My parents loved stopping at roadside stands to buy fresh produce on the way back. One year my dad bought an enormous box of blueberries. When we got home, for the next couple of weeks, we ate far too many blueberry pancakes. My dad also used the blueberries in his famous cobbler, which was delightful. Then he made biscuits which turned out like rocks and we all laughed. My favorite blueberry creations that year were the blueberry shortcake and blueberry cookies. I’m sharing my version of the blueberry cookies, with the addition of lavender to make them a little more special.

My Blueberry Lavender Cookies start with butter and homemade lavender sugar. The original cookies had fresh blueberries plopped into the dough, which is perfectly fine if you’re making muffins. To reduce the soggy spots that form as the fruit releases its juices while baking, I typically macerate or cook fruit before it’s added to many of my recipes. The extra step makes a big difference. A quick, cooked blueberry compote is folded into the batter of these cookies, making pretty blueberry swirls. I finished these cookies with a sprinkle of sparkly sanding sugar in a lilac shade. This is optional, but very pretty. You can also make extra lavender sugar to use for sprinkling on your cookies. Sprinkle the sugar on before baking or after the cookies bake, while they’re still warm.

Blueberry Lavender Cookies

by Mari Vasseur
Chewy lavender scented sugar cookies with crisp exteriors and swirls of blueberry compote.
Course Dessert
Servings 16 cookies

Ingredients
  

Blueberry Compote

  • ½ teaspoon corn starch
  • 2 tablespoons (30ml) water, divided
  • ¾ cup (113g) blueberries, fresh or frozen
  • 2 teaspoons lemon juice

Lavender Sugar

  • 1 cup plus 2 tablespoons (225g) sugar
  • 1 ¼ teaspoons dried culinary lavender*

Blueberry Lavender Cookies

  • 2 cups (255g) all purpose flour, sifted
  • 2 tablespoons (18g) corn starch
  • ½ teaspoon baking powder
  • ½ teaspoon fine sea salt
  • 10 tablespoons (142g) unsalted butter, softened
  • 1 large egg white, room temperature
  • 1 teaspoon pure vanilla extract
  • Lilac, lavender or purple decorative sanding sugar optional

Instructions
 

Blueberry Compote

  • In a small bowl, whisk together the cornstarch with 1 tablespoon (15ml) of water.
  • In a small saucepan over medium heat, combine the blueberries, lemon juice and the remaining 1 tablespoon (15ml) of water, stirring until the blueberries soften and start to release their juices. Smash the blueberries slightly with the back of the spoon. Stir in the cornstarch mixture. Bring to a boil, then turn the heat down to low. Simmer until thickened to a jam consistency, about 1-2 minutes. Transfer the blueberry compote to a small bowl and set aside to cool to room temperature.

Lavender Sugar

  • In a small food processor or a clean spice grinder, combine 1/4 cup (50g) of the sugar with the lavender. Pulse a few times to chop the lavender into smaller bits. Add the remaining sugar and pulse a few more times to combine.

Blueberry Lavender Cookies

  • Preheat your oven to 350ºF (180ºC) Line two large cookie sheets with parchment paper.
  • In a medium-sized bowl, whisk together the flour, cornstarch, baking powder and salt until well blended.
  • In a large bowl, beat the butter and lavender sugar with an electric mixer on medium speed, until pale and fluffy. Add the the egg white and the vanilla extract and beat until well combined. On low speed, add the flour mixture in two additions and mix just until combined.
  • Add dollops of the blueberry compote to the cookie dough. Fold it in gently, but don't over mix it. You want to see swirls of blueberry.
  • Place 2-tablespoon size portions of dough about 2 inches apart onto the prepared cookie sheets. I used a #30 portion scoop.*** Sprinkle with decorative sugar if desired.
  • Bake until the tops of the cookies are set and the bottom edges turn light golden brown, about 10-14 minutes. Transfer the cookies to a cooling rack. Do not over bake your cookies or they will become dry & crumbly. Test one cookie before baking the entire batch if you are unsure about how to determine the doneness of cookies.

Notes

*To find culinary lavender, click here.
**To find the decorative sanding sugar I used, click here.
***To find the scoop I used, click here.
Keyword blueberry lavender, cookies

Caramel Latte Brownies

These rich, fudgy, coffee scented brownies, with caramel and whipped cream topping are inspired by one of my favorite coffee shop drinks, a caramel latte. I was thinking about how to get the caramel inside the brownies. With some methods, the caramel ends up over baked and chewy. Then I remembered poke cakes from my childhood. You poke holes all over a baked cake and pour whatever you like on top to soak into the holes. It worked beautifully with these brownies. To finish them off, I topped them with fluffy cream cheese whipped cream and a drizzle of caramel.

Caramel Latte Brownies

Rich, moist coffee scented brownies soaked with caramel, topped with fluffy cream cheese whipped cream and drizzled with more caramel.
Course Dessert
Servings 9

Ingredients
  

  • ¾ cup (6 oz or 170g) unsalted butter, cubed
  • 6 oz (170g) bittersweet chocolate (70-72%), finely chopped
  • 2 tablespoons unsweetened cocoa powder, preferably Dutch process or dark
  • 2 tablespoons hot water
  • 1 tablespoon espresso powder
  • 1 ½ cups (10 1/2 oz or 300g) sugar
  • ½ teaspoon fine sea salt
  • 3 large eggs
  • 1 large egg yolk
  • 1 ½ teaspoons pure vanilla extract, divided
  • 1 cup (4 1/2 oz or 128g) all purpose flour, sifted
  • â…“ cup (3 5/8 oz or 107ml) caramel sauce, purchased or homemade
  • 3 oz (85g) cream cheese, softened
  • 6 tablespoons (1 1/2 oz or 46g) powdered sugar, sifted
  • ¾ cup (6 oz or 177ml) cold heavy whipping cream

Instructions
 

  • Preheat your oven to 325ºF. Line an 8-inch square baking pan with parchment paper, leaving a couple of inches of overhang.
  • In a large heat safe bowl, melt the butter together with the chocolate, in the microwave or on the stovetop over a pan of barely simmering water. Stir until smooth.
  • In a small bowl, whisk together the cocoa powder, hot water and espresso powder until smooth.
  • Whisk the cocoa powder mixture, sugar and salt into the warm melted chocolate mixture until well combined.
  • Add the eggs, egg yolk and 1 teaspoon of vanilla to the chocolate mixture and whisk until smooth.
  • Stir in the flour just until combined, scraping the bottom of the bowl as needed.
  • Transfer the batter to the prepared baking pan. Bake until a toothpick inserted into the center of the brownies comes out with moist crumbs on it, about 25-28 minutes. Do not over bake. Let cool completely.
  • Once cool, remove the brownies from the pan and place on a serving platter. Using a chopstick, poke holes in the brownies, about 1 inch apart, to within 1 inch from the edges.
  • Spread caramel sauce over the surface of the brownies with a small offset spatula.
  • In a large bowl, beat the cream cheese, powdered sugar and 1/2 teaspoon of vanilla, with an electric mixer, until smooth. Gradually add the heavy cream and beat to stiff peaks.
  • Spread or pipe the whipped cream onto the brownies. Drizzle with additional caramel sauce.
Keyword brownies, caramel latte, chocolate

Pineapple Coconut Cake Bars

Pineapple Coconut Cake

If you like tropical flavors, you’ll love this spring dessert from my childhood. We used to call it Pineapple Coconut Snack Cake, but I would consider it more of a cake bar, so I changed the name to Pineapple Coconut Cake Bars. We would typically enjoy it on Easter or Mother’s Day because it was my mom’s favorite. It’s buttery, moist and rich. It’s also kind of addicting, because everyone always asks for seconds. You can double the recipe if you need to.


Pineapple Coconut Cake Bars

by Mari Vasseur
Soft, ultra-moist pineapple cake topped with a buttery toasted coconut topping
Course Dessert
Servings 9

Ingredients
  

Cake

  • 1 cup plus 2 tablespoons (142g ) all purpose flour, sifted
  • 1 ½ teaspoons baking powder
  • ¼ teaspoon fine sea salt
  • ¼ cup (57g) unsalted butter, melted
  • 1 cup (200g) sugar
  • 1 large egg
  • 1 large egg yolk
  • 1 8 oz (227g) can crushed pineapple in juice, undrained
  • ½ teaspoon pure vanilla extract

Topping

  • ¼ cup (57g) unsalted butter
  • ¼ cup (50g) granulated sugar
  • ¼ cup (50g) packed brown sugar
  • â…› teaspoon fine sea salt
  • â…“ cup (78ml) heavy cream
  • 1 cup (75g) sweetened coconut flakes
  • ½ cup (50g) chopped toasted pecans
  • ½ teaspoon pure vanilla extract

Instructions
 

Cake

  • Preheat the oven to 350ºF (180ºC). Grease an 8-inch square baking pan.
  • In a medium-sized bowl, whisk together the flour, baking powder and salt until well blended.
  • In a large bowl, whisk the melted butter, sugar, egg, egg yolk and vanilla until smooth & creamy. tir in the pineapple until incorporated. Stir in the flour mixture just until combined.
  • Transfer the batter to the prepared baking pan. Bake until the top is golden brown and a toothpick inserted into center of cake comes out clean, about 20-25 minutes.

Topping

  • In a medium-sized saucepan over medium heat, melt the butter with the granulated sugar, brown sugar and salt. Whisk in the heavy cream.
  • When the mixture starts to bubble, turn the heat down to low and simmer until thickened, about 3 minutes.
  • Remove from heat and stir in the coconut, pecans and vanilla. Spread over the warm cake. Let cool at least 15 minutes before cutting the cake.
Keyword cake, pineapple coconut

Little Coconut Bundt Cakes

These little personal-sized coconut cakes are soft, moist and so plush! They’re perfect for Mother’s Day or any springtime or summer celebration. I love topping them with cherries for a super cute, vintage look. They’re also lovely topped with fresh flowers.


Little Coconut Bundt Cakes

by Mari Vasseur
Soft, moist personal-sized coconut bundt cakes with coconut buttercream & shredded coconut
Course Dessert
Servings 6 mini bundt cakes

Ingredients
  

Coconut Bundt Cakes

  • 1 cup plus 2 tablespoons (124g) cake flour, sifted
  • ¾ cup plus 2 tablespoons (175g) granulated sugar
  • 2 teaspoons baking powder
  • ½ teaspoon fine sea salt
  • ½ cup (113 g) unsalted butter, room temperature
  • 3 large egg whites, room temperature
  • ½ cup (118 ml) canned coconut milk*
  • 1 tablespoon avocado oil or any neutral oil of your choice
  • 1 teaspoon pure coconut extract or natural flavoring
  • ½ teaspoon pure vanilla extract
  • 2 cups (150g) sweetened coconut flakes
  • Maraschino cherries with stems or fresh, pesticide free edible flowers optional

Coconut Frosting

  • ½ cup (113g) unsalted butter, softened
  • 3 ¾ cups (454g) powdered sugar, sifted
  • 5 tablespoons (74ml) coconut milk or whole milk
  • ½ teaspoon pure coconut extract or flavoring
  • ½ teaspoon pure vanilla extract
  • â…› teaspoon fine sea salt

Instructions
 

Coconut Bundt Cakes

  • Preheat the oven to 325ºF (165ºC). Grease and flour a bundtlette pan with six 1-cup servings.
  • In a large bowl, whisk together the flour, sugar, baking powder and salt until well blended. Add the butter and mix, with an electric mixer, on low speed, until the mixture looks sandy.
  • In a medium-sized bowl, whisk the egg whites, coconut milk, oil and extracts together until smooth and creamy.
  • On low speed, gradually add the egg mixture to the flour mixture. Turn mixer up to medium speed and beat for 1 or 2 more minutes, just until the batter is smooth.
  • Transfer batter to the prepared baking pan, dividing the batter equally among the cups. Bake until a toothpick inserted in the center of the cakes comes out clean, about 18-22 minutes. Do not over bake.
  • Let cakes the cool in pan for 10 minutes, then remove them from the pan and transfer them to a cooling. Frost the cooled cakes and cover with coconut. Top with maraschino cherries or fresh flowers if desired.

Coconut Frosting

  • In a large bowl, beat the butter with an electric mixer on medium speed, until pale and smooth.
  • On low speed, gradually add the powdered sugar and beat until well combined. Add the coconut milk a little at a time, until the desired consistency is reached. Add the extracts and salt and beat on low speed until smooth.

Notes

*If your coconut milk is separated, re-emulsify it with a blender or whisk it vigorously with a whisk before using.
 
**Do not use imitation coconut flavoring. It tastes very artificial.
 
***To find the mini bundt pan I used, click here.
Keyword bundts, cake, coconut

Chocolate Chip Cookie Bread

Chocolate Chip Cookie Bread

This is the ultimate chocolate chip bread! There are no cookies in this recipe, but it tastes so much like freshly baked chocolate chip cookies that Chocolate Chip Cookie Bread is the perfect name for it. Brown sugar, vanilla and semisweet chocolate chips really help to mimic that beloved chocolate chip cookie flavor. I love the big pockets of chocolate that come from using jumbo chocolate chips, but of course you can use regular or mini chocolate chips if you prefer.

I typically wait until a loaf is cooled off before slicing it, but in this case, I wanted to capture the melted pools of chocolate for the video. The fresh baked chocolate chip aroma was so heavenly, that it took all of my willpower not to immediately devour the entire loaf! It’s easier to slice a fresh baked loaf when it’s cooled off. But if you want to experience the melty chocolate chips, warm your slice in the microwave for 8-10 seconds.

Chocolate Chip Cookie Bread

A moist, tender loaf cake with brown sugar and chocolate chips that tastes just like chocolate chip cookies
Course Breakfast, Brunch, Dessert
Servings 1 loaf

Ingredients
  

  • 1 ¾ cups (223g) all purpose flour, sifted
  • 1 teaspoon baking powder
  • ½ teaspoon baking soda
  • ½ teaspoon fine sea salt
  • ½ cup (113g) unsalted butter, room temperature
  • 1 cup (200g) packed brown sugar
  • 1 large egg, room, temperature
  • 1 large egg yolk, room temperature
  • 2 teaspoons pure vanilla extract
  • ½ cup (118ml) whole milk, room temperature
  • ½ cup (113g) sour cream, room temperature
  • 1 ½ cups (9 oz or 255g) semisweet chocolate chips
  • 1 teaspoon all purpose flour

Instructions
 

  • Preheat oven to 375ºF (190ºC). Line the bottom of a 9 x 5-inch loaf pan with parchment paper. Grease and flour the insides.
  • In a medium-size bowl, whisk together the 1 3/4 cups (223g) flour, baking powder, baking soda and salt.
  • In a large bowl, cream the butter and brown sugar until light and fluffy. Beat in the egg, egg yolk and vanilla in 3 separate additions, making sure each one is fully incorporated before adding the next.
  • In a small bowl, whisk the milk and sour cream together.
  • Add the flour mixture to the batter in two additions, alternating with half of the milk mixture after each addition. Beat just until combined. Do not over mix.
  • Set aside a handful of chocolate chips for the top of the loaf. In a small bowl, toss the remaining chips with 1 teaspoon flour, making sure to coat them all, then fold them into the batter. This will help to prevent them from sinking. Transfer the batter to the prepared loaf pan. Top with the reserved chocolate chips.
  • Bake for 10 minutes. Turn the oven temperature down to 325ºF (165ºC) and continue baking until the loaf is golden brown and a toothpick inserted in center comes out clean, about 45-50 more minutes. Cool the loaf in pan for 10 minutes then turn the loaf out onto a cooling rack.

Notes

*If you want to use mini chocolate chips, use one cup (6 oz or 170g)
Keyword cake, chocolate chip

Blueberry Ripple Scones

Blueberry Ripple Scones

Once there was a blueberry scone. She was good and reliable. One day she felt bored and tired of her soggy blueberries. She thought about her friend, the other blueberry scone. The one with the dried blueberries. The shriveled up blueberries reminded her of raisin bran. “It’s time for a change,” she thought. So she grabbed her friend, and they headed over to Brownie Mischief for a makeover.

That’s how Blueberry Ripple Scones were born, at least in my imagination. These scones are the new and improved, elevated version of blueberry scones. They have a ribbon of sweet blueberry compote swirling through the tender vanilla dough, making them look beautiful and taste delicious. Although the blueberry compote is quick to make, it requires a little more effort than simply folding blueberries into the dough. But it’s definitely worth it. I like to make my compote the night before, then it’s ready to go when I make my scones in the morning.

Blueberry Ripple Scones

Vanilla scones with ribbons of sweet blueberry compote and crunchy sugar topping
Course Breakfast, Brunch
Servings 8 scones

Ingredients
  

Scones

  • 1 ¾ cups (7 7/8 oz or 226g) all purpose flour, sifted
  • 2 tablespoons sugar
  • 1 tablespoon baking powder
  • ½ teaspoon fine sea salt
  • 7 tablespoons (3 1/2 oz or 100g) cold, unsalted butter, cubed
  • ½ cup (4 oz or 113g) cold heavy cream Plus more for tops
  • ¼ cup (2 oz or 57g) cold sour cream
  • ¾ teaspoon pure vanilla extract
  • â…“ cup (3 1/2 oz or 100g) blueberry compote Recipe below
  • coarse sugar for tops

Blueberry Compote

  • ¾ cup (4 oz or 113g) blueberries
  • 3 tablespoons sugar
  • 1 teaspoon cornstarch
  • 1 teaspoon lemon juice

Instructions
 

Scones

  • Line a large baking sheet with parchment paper.
  • In a large bowl, whisk together the flour, sugar, baking powder and salt.
  • Work the butter into the flour with your fingertips or with a pastry blender, until pea size pieces form.
  • In a small bowl whisk together the heavy cream, sour cream and vanilla.
  • Stir the cream mixture into flour mixture until a shaggy dough is formed.
  • Turn the dough out onto a lightly floured surface. Pat the dough into an oval. Spoon dollops of blueberry compote onto the dough. Fold the dough over onto itself 3 times.
  • Form the dough into a 1-inch thick round, about 6 1/2-inches in diameter. Cut the dough into 8 wedges.
  • Place the scones 2 inches apart on the prepared baking sheet. Chill the scones in refrigerator for 20 minutes.
  • Heat your oven to 375ºF. Brush the tops of scones with heavy cream. Sprinkle with coarse sugar.
  • Bake until the edges look golden brown, about 18-22 minutes.

Blueberry Compote

  • In a small saucepan over medium heat, cook the blueberries, sugar, cornstarch and lemon juice, stirring until the sugar is dissolved and the blueberries start to release their juices.
  • Turn the heat down to low and simmer, stirring occasionally, until thick and jammy, about 3-4 minutes. Remove from heat and let cool completely. Cover and store in refrigerator until ready to use.

Notes

*To find coarse sugar, click here.
To find purple coarse sugar, click here.
Keyword blueberry, scones

Glazed Lemon Muffins

Glazed Lemon Muffins

However your day is going today, it’s about to get better. I can confidently say these lemon muffins are some of the best you will ever taste. Follow the recipe exactly, weigh your ingredients and you’ll be enjoying these soft, tender muffins in no time. These delightful muffins are perfect for breakfast, brunch or an anytime snack. I love enjoying one with a cup of strawberry green tea or chamomile tea.

Glazed Lemon Muffins

Soft, tender lemon muffins glazed with lemon icing
Course Breakfast, Brunch
Servings 12 muffins

Ingredients
  

Muffins

  • 2 ¼ cups (288g) all purpose flour, sifted
  • 2 teaspoons baking powder
  • ½ teaspoon baking soda
  • ½ teaspoon fine sea salt
  • ¾ cup (170g) unsalted butter, softened
  • 1 cup (198g) sugar
  • Zest of 2 medium lemons
  • 2 large eggs, room temperature
  • ½ teaspoon pure vanilla extract
  • ½ teaspoon pure lemon extract
  • 1 cup (8 oz or 227g) sour cream, room temperature

Icing

  • 1 cup (120g) powdered sugar, sifted
  • 1 tablespoon (14g) melted butter
  • 2-3 tablespoons (15-45ml) fresh lemon juice

Instructions
 

Muffins

  • Preheat the oven to 375ºF (190ºC). Line a 12-serving muffin pan with tulip baking liners.* (You can also use standard muffin liners. They hold less batter so you may end up with a couple of extra muffins.)
  • In a medium-size bowl, whisk together the flour, baking powder, baking soda and salt until well combined.
  • In a large bowl, cream the butter, sugar and lemon zest, with an electric mixer, until light and fluffy. Add the eggs one at a time and beat until well incorporated. Add the extracts and beat until combined.
  • On low speed, mix in the flour mixture in two additions, alternating with half of sour cream after each addition. Mix just until combined. The batter will be thick.
  • Divide the batter evenly into muffin liners. (If using standard muffin liners, fill 3/4 full.) Bake at 375ºF (190ºC) for 5 minutes. Turn the oven heat down to 350ºF (180ºC) and continue baking the muffins until a toothpick inserted into the centers comes out clean, about 12-16 more minutes. Do not over bake.
  • Transfer the muffins to a cooling rack to cool completely. Brush icing onto the muffin tops with a small pastry brush.

Icing

  • Whisk the powdered sugar, melted butter, and 1 tablespoon (15ml) of lemon juice together until smooth. Add additional lemon juice until your desired consistency is reached.

Notes

*To find  tulip muffin liners, click here.
To find floral tulip muffin liners, click here.
Keyword lemon, muffins

Roasted Tomato Mac & Cheese

Roasted Tomato Mac & Cheese

Cheesy, comforting mac and cheese with roasted tomatoes, bacon and fresh herbs. Serves 2 as a main dish or 3-4 as a side dish.
Course Dinner, Main Dish
Servings 3 Servings

Ingredients
  

  • 1 pint cherry tomatoes or grape tomatoes
  • olive oil
  • fine sea salt
  • pepper
  • 6 ounces (170g) cellentani, cavatappi pasta or large elbow macaroni (about 2 1/4 cups)
  • 1 tablespoon (14g) butter
  • 1 tablespoon (8g) all purpose flour
  • 1 cup (237ml) whole milk, room temperature
  • ¾ cup (177ml) heavy cream, room temperature
  • 4 ounces (113g) shredded cheddar cheese, divided (about 1 cup, packed)
  • 4 ounces (113g) shredded Gruyére cheese, divided (about 1 cup packed)
  • 2 slices cooked bacon, chopped
  • 2 teaspoons minced fresh Italian parsley, divided
  • 2 teaspoons minced fresh chives, divided

Instructions
 

  • Preheat the oven to 400ºF (200ºC). Place the tomatoes on a baking sheet. Gently toss with a drizzle of olive oil. Season with salt and pepper.
  • Roast until the tomatoes are blistered, about 15-25 minutes, depending on the size of your tomatoes.
  • Turn the oven down to 350ºF (180ºC). Cook and drain the pasta according to the package directions.
  • Set aside 1/4 cup (28g) of each of the cheeses for the top. In a small bowl, whisk the milk and heavy cream together.
  • In a 2-quart oven safe pot,* melt the butter over medium heat. Stir in the flour and cook for 1 minute.
  • Slowly whisk in the milk and cream. Heat until thickened, whisking out any lumps. Season with salt and pepper to taste. (I used 1/2 teaspoon salt and 1/4 teaspoon pepper.)
  • Remove from heat. Gradually stir in 3/4 cup (85g) each cheddar and Gruyere cheeses. Taste the sauce and season with more salt or pepper if necessary.
  • Fold in the cooked pasta, roasted tomatoes, bacon, 1 teaspoon of parsley and 1 1/2 teaspoons of chives. Top with remaining cheese.
  • Bake in top third of the oven, just until cheese is melted, about 7-10 minutes. Sprinkle with the remaining parsley and chives.

Notes

If you watched the video on Instagram or TikTok, you may have noticed I  baked my mac & cheese in a heart-shaped Dutch oven. To find a similar pink heart  Dutch oven, click here. To find a  blue heart Dutch oven , click here,
Keyword mac & cheese, pasta