Dainty pink sparkly cookies are for fairies, princesses and charming people who love pretty, petite treats. These pink shortbread hearts are as cute as a button and so tender and delicious. They’re very simple to make and go perfectly with tea or lemonade. They also make a nice gift for Mother’s Day, baby showers, and especially for Valentine’s Day and Galentine celebrations.
Dainty Pink Shortbread Hearts
by Mari Vasseur
Tender, buttery mini shortbread cookies with sparkling sugar
In a medium-sized bowl, whisk the flour and powdered sugar together until well blended.
In a large bowl, beat the butter, with an electric mixer on medium speed, until pale and fluffy. Beat in the extracts until well combined. Add the flour mixture and beat just until incorporated. The dough may seem crumbly at first, but it will come together.
Divide the dough into 2 portions. Roll the dough between 2 sheets of parchment paper to 1/4-inch thickness. Place the parchment-covered dough onto trays and chill in the refrigerator for at least 1 hour or up to overnight.
Preheat the oven to 350ºF (180ºC). Line 2 cookie sheets with parchment paper.
Cut out 36 heart shapes with a 1 1/2-inch cookie cutter. Place the hearts about 2 inches apart onto the cookie sheets. Sprinkle the cookies with sparkling sugar. Bake until the edges start to turn light golden brown, about 8-9 minutes. Transfer the cookies to a cooling rack.
Have you seen those cute Teddy bear cookies on social media with the bear holding an almond or a heart? I’m not sure where they originated but they’re sometimes called Pinterest cookies because so many people have found them there. I had an idea to have the Teddy bears hold baby bear cookies instead of nuts and I was going to save them for Mother’s Day. But then I thought they would also be so cute for Valentine’s Day. I made them in three different flavors and I just know that you’ll love them beary much!
Teddy Bear Sugar Cookies
by Mari Vasseur
Teddy bear cookies with baby bear cookies in vanilla, cinnamon and chocolate variations
¼ cup plus 2 tablespoons (85g)cream cheese, softened
½cup (100g)granulated sugar
¼cup (50g)packed brown sugar
½teaspoonfine sea salt
1largeegg
1 ½teaspoons pure vanilla extract
¼teaspoonpure almond extract
3cups (383g)all purpose flour, sifted
½teaspooncinnamon
1tablespoonunsweetened cocoa powder
Black gel food coloring
Pink edible luster dust
Small candy hearts
Icing or melted chocolate
Instructions
In a large bowl, beat the butter and cream cheese together, with an electric mixer on low speed, until smooth. Add both sugars and the salt and beat on medium speed until pale and fluffy. Beat in the egg until well incorporated, then beat in the extracts. On low speed, beat in the flour just until combined.
Divide the dough into 3 equal portions, using a kitchen scale for accuracy. Mix the cinnamon into one portion of dough. Mix the cocoa powder into another portion of dough. Form the dough portions into disks, wrap them with plastic wrap and refrigerate for at least 2 hours or up to overnight.
Line 2 large cookie sheets with parchment paper. Roll the dough to a scant 1/4-inch thickness. Cut out 24 bears using a 3 1/2-inch cookie cutter* and 24 mini bears using a 1 3/4-inch or smaller cookie cutter.** (Re-roll the dough scraps as needed, letting the dough rest in the refrigerator until chilled before cutting again.) Place the bears onto the cookie sheets about 2 inches apart. Top each one with a mini bear. Fold over one or both arms of each bear. Chill in the refrigerator until firm, about 20 minutes.
Meanwhile, preheat the oven to 350ºF (180ºC). Bake the cookies until set and the edges barely start to brown, about 9-11 minutes. Let the cookies cool on the baking sheet for 2-3 minutes then transfer them to a cooling rack.
Using food coloring and a toothpick, draw the bears faces. With a small food safe paintbrush apply luster dust to make rosy cheeks. Use a dab of icing or melted chocolate to apply the candy hearts.
Notes
*To find the bear cookie cutter I used, click here.**To find mini bear cookie cutters click here.
I don’t think I’ve ever created a recipe that delighted all of my senses as much as these cookies. I used dried rosebuds in the cookie dough, but you can also use dried rose petals. Whether you purchase dried rose petals or make them yourself, they’re pleasantly fragrant with a subtle flavor. To find dried rose petals, click here. To find dried rosebuds, click here. I pinched the calyx and stem off of the rosebuds to avoid large crunchy bits in the cookies, then I crushed the roses with a mortar and pestle. You’ll hear the satisfying crunch of the delicate, dried rose petals. You can also place them in a plastic bag and roll over them gently with a rolling pin.
The finished cookies have a rustic, almost shabby chic look with their cracks, rose-speckled dough and beautifully imperfect dried roses. And of course, you’ll want to sample a warm cookie. The cookies will taste tender and slightly sweet with a hint of rose. I like a more subtle rose flavor in my baked goods. But if you prefer a stronger rose flavor, feel free to add a small amount of rose water to your dough. Start with 1/4 teaspoon, because a little goes a long way.
If you’re like me, you’ll taste a spoonful of the raspberry ganache because you can and should. For the raspberry ganache, please use a good quality white chocolate! In some recipes, it’s fine to use white chocolate chips or candy melts if you prefer, but NOT this one. In my humble, yet educated opinion, you should never use chocolate chips to make ganache. I studied chocolate in culinary school with a master chocolatier. I never use chocolate chips for ganache because they contain stabilizers that keep them from melting completely, which prevents you from having the smoothest ganache possible. They also contain less cocoa butter and tend to have a waxy mouth feel.
For this recipe, when it comes to butter, you should also be a little bit picky for successful baking. Low quality butter tends to contain more water and your cookies may spread too much. So make sure to use good butter. Your butter should be room temperature, but not warm. If the butter is shiny, it’s too warm. Don’t try to speed up the softening of butter with your microwave. That’s not a hack, in spite of what you may hear on the internet. Microwaves heat unevenly and will potentially melt your butter. The best way to speed up the softening of your butter is to simply cut it into cubes. By the time you get the rest of your ingredients ready, the butter should be soft enough to use. My last, but most important success tip, is to weigh your ingredients.
You’ll find this recipe and more delightful bakes, in my cookbook “Enchanted Baking.” Click here for more info.
Raspberry Rose Shortbread Cookies
Mari Vasseur
Rose petal shortbread cookies filled with white chocolate raspberry ganache
3ounces (or 85g)white chocolate, finely choppedDo not use white chocolate chips
30dried rosebuds for decorationoptional
Instructions
Cookies
Preheat the oven to 350ºF (180ºC). Line two large baking sheets with parchment paper
In a large bowl, beat the butter, with an electric mixer on medium speed, until smooth. Add the rose petals and beat on low speed until combined.
Add the powdered sugar, vanilla extract and salt. Beat until well combined.
On low speed, mix in the flour in two additions. Beat just until combined.
Roll the dough into 1 1/4-inch balls, about 1/2 ounce (14g) each. Place the dough balls about 2 inches apart onto the prepared baking sheets.
Bake for 7 minutes, then remove from the oven. Press indentations into each cookie with a 1-inch diameter pastry tamper or with the flat top of a 1-inch diameter bottle cap.
Return the cookies to the oven and continue baking until the edges are light golden brown, about 5-6 more minutes.
If the indentations in your cookies lose definition, press again with the tamper or bottle cap while the cookies are still hot on the baking sheet.
Transfer the cookies to a cooling rack to cool completely.
Filling
In a small saucepan, bring the pureéd raspberries to a simmer over medium heat. Simmer until the purée is reduced by half, about 5 minutes. Transfer the raspberry reduction to a small bowl and set aside.
Place the white chocolate in a medium heat safe bowl and set aside.
In a small saucepan over medium heat, bring the heavy cream to a simmer, just until bubbles form around the edges. Do not boil. Stir in the raspberry reduction and heat just to a simmer again. Do not boil.
Pour the hot cream mixture over the white chocolate, making sure all of the white chocolate is submerged. Let it sit for 3 minutes, then stir with a spatula until smooth. Let the ganache cool until slightly thickened. Spoon about 1/2 teaspoon into the indentation of each cookie. The ganache will continue to firm up as it sits.
When the ganache in the cookies has firmed up, decorate with dried rosebud or rose petals, if desired.
Each spring, I look forward to the sight and fragrance of beautiful botanical blooms, especially cherry blossoms. We often think of cherry blossoms as something unique to Washington D.C. or Japan, but cherry blossoms can be found in many regions of the United States. Georgia has many thousands of the beautiful pink trees. They can also be found in my home state, California. Here in California we also have many other types of beautiful blossoming fruit trees.
Inspired by the beautiful pink blossoms, I baked some cherry blossom cookies. There are many varieties of the blossoming pink trees. The Yoshino variety that we love to admire is not the same as the trees that produce cherries that we typically eat, but I decided to make the cookies cherry flavor. Cherry extract is more accessible, but it’s also possible to make the cookies sakura blossom flavor if you prefer. You can purchase culinary sakura blossoms or sakura powder and flavor the cookies with it.
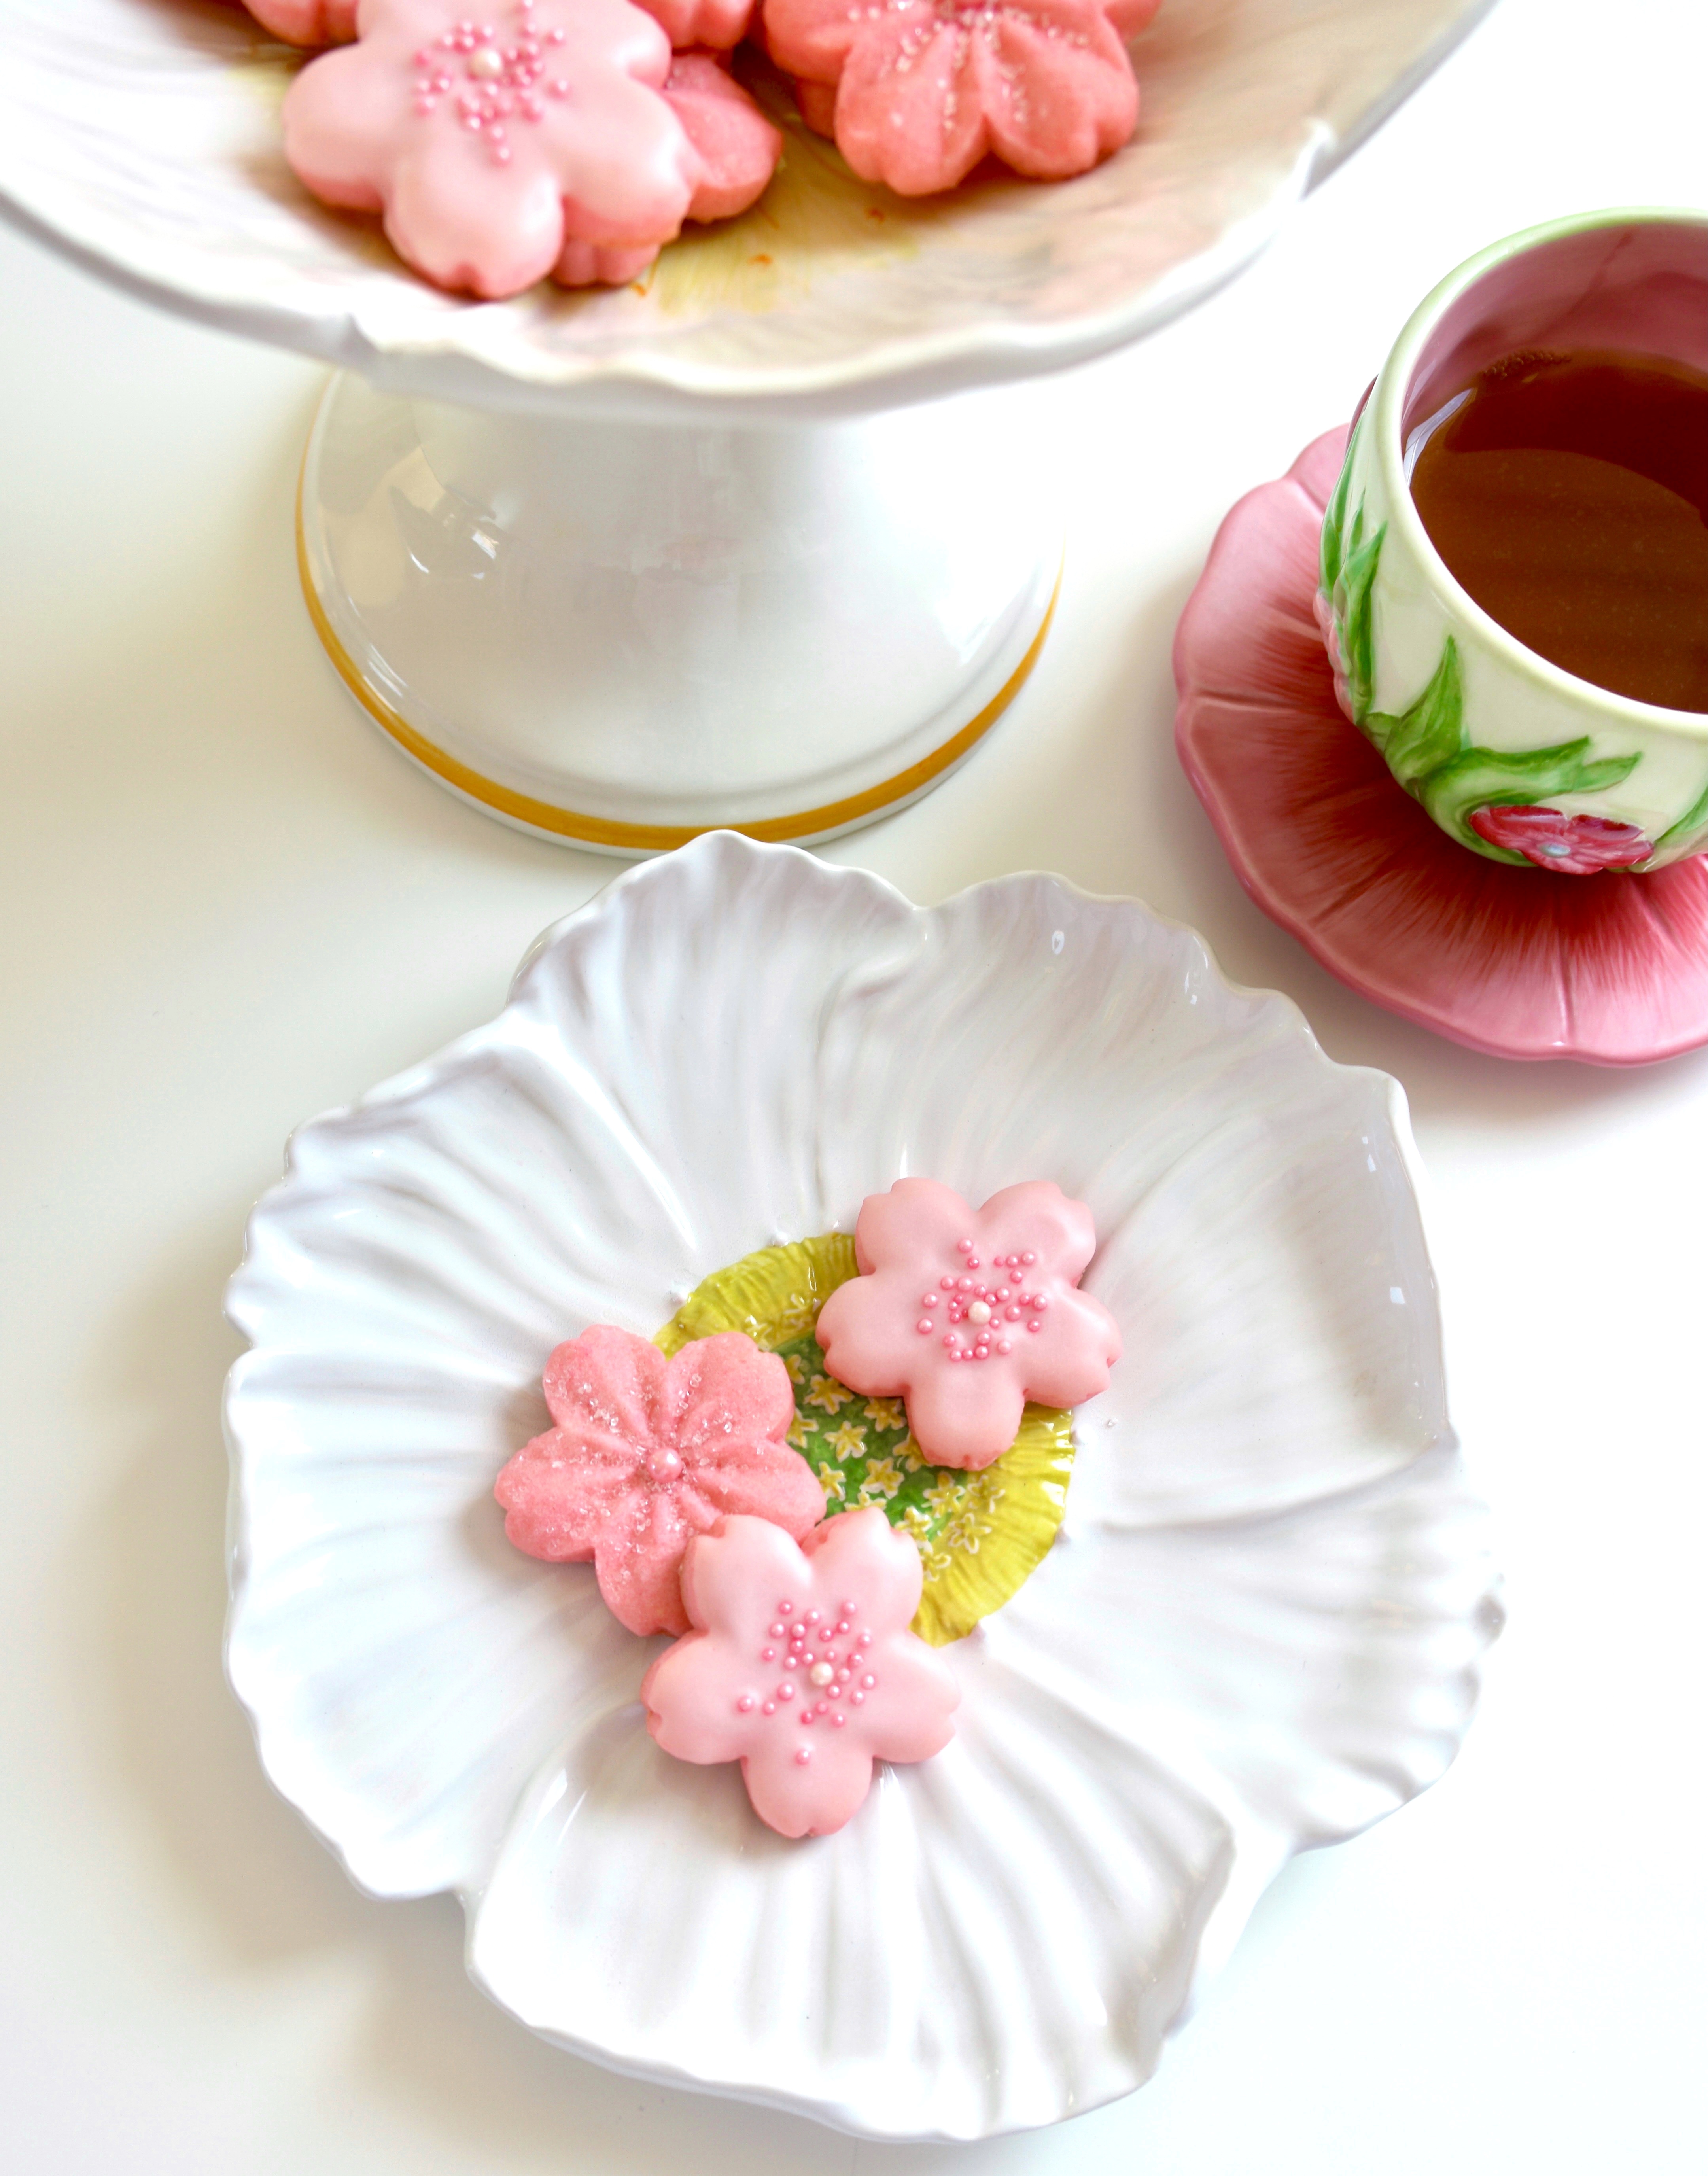
These perfectly pretty, pink cookies are easy to make and fun to decorate. You can sprinkle sparkling sugar on them before baking and call it a day or you can make some pink cherry icing and add sugar pearls or sprinkles. Either way, they look beautiful and taste delicious!
Cherry Blossom Cookies
by Mari Vasseur
Pink cherry flavored sugar cookies with cherry icing
1teaspoonpure cherry extract or natural cherry flavoring*see note below
⅛teaspoonpure almond extract
3cups (383g)all purpose flour, sifted
Pink gel food color**see note below
Cherry Icing
1cup (120g)powdered sugar
1pinchfine sea salt
4-5tablespoons (59-67ml) whole milk
½teaspoonpure cherry extract or natural cherry flavoring
Pink gel food color
Optional Cookie Decorations
White sparkling sugar
Pink sugar pearls
Pink nonpareils
Instructions
Cherry Blossom Cookies
In a large bowl, beat the butter and cream cheese together with an electric mixer on medium speed, just until smooth and well blended.
Add the sugar and salt. Beat on medium speed until pale and fluffy. Mix in the egg, then the extracts until incorporated.
On low speed, mix in the flour in two additions, just until combined.
Mix in the food coloring, a tiny bit at a time, until the desired shade is achieved.
Divide the dough into two disks. Wrap them in plastic wrap and refrigerate until firm, about 2 hours or up to overnight.
Preheat the oven to 375ºF (190ºC). Line two large cookie sheets with parchment paper.
On a lightly floured surface, roll the dough to 1/8" thickness. Cut out cookies with a 2-inch blossom cutter..***
Place the cookies about 2 inches apart onto the prepared baking sheets. Sprinkle with sparkling sugar if using.
Bake for 7-9 minutes until the bottom edges are lightly browned. Remove from the oven and transfer the cookies to a cooling rack.
Cool completely then ice with cherry icing, if desired. Decorate with sugar pearls or sprinkles before the icing sets.
Cherry Icing
In a small bowl, whisk together the powdered sugar, salt, 3 tablespoons (45ml) of milk and the cherry extract. Add additional milk until the desired consistency is reached. Whisk together until smooth.
Mix in pink gel food color, a tiny bit at a time, until the desired shade is achieved.
Notes
*Do not use imitation cherry flavoring or extract. Imitation extracts may make your cookies taste medicinal. ** I used Wilton gel food color in shade rose. Click here to find it. *** Use your favorite blossom cookie cutter or click here to find the blossom cutters I used.