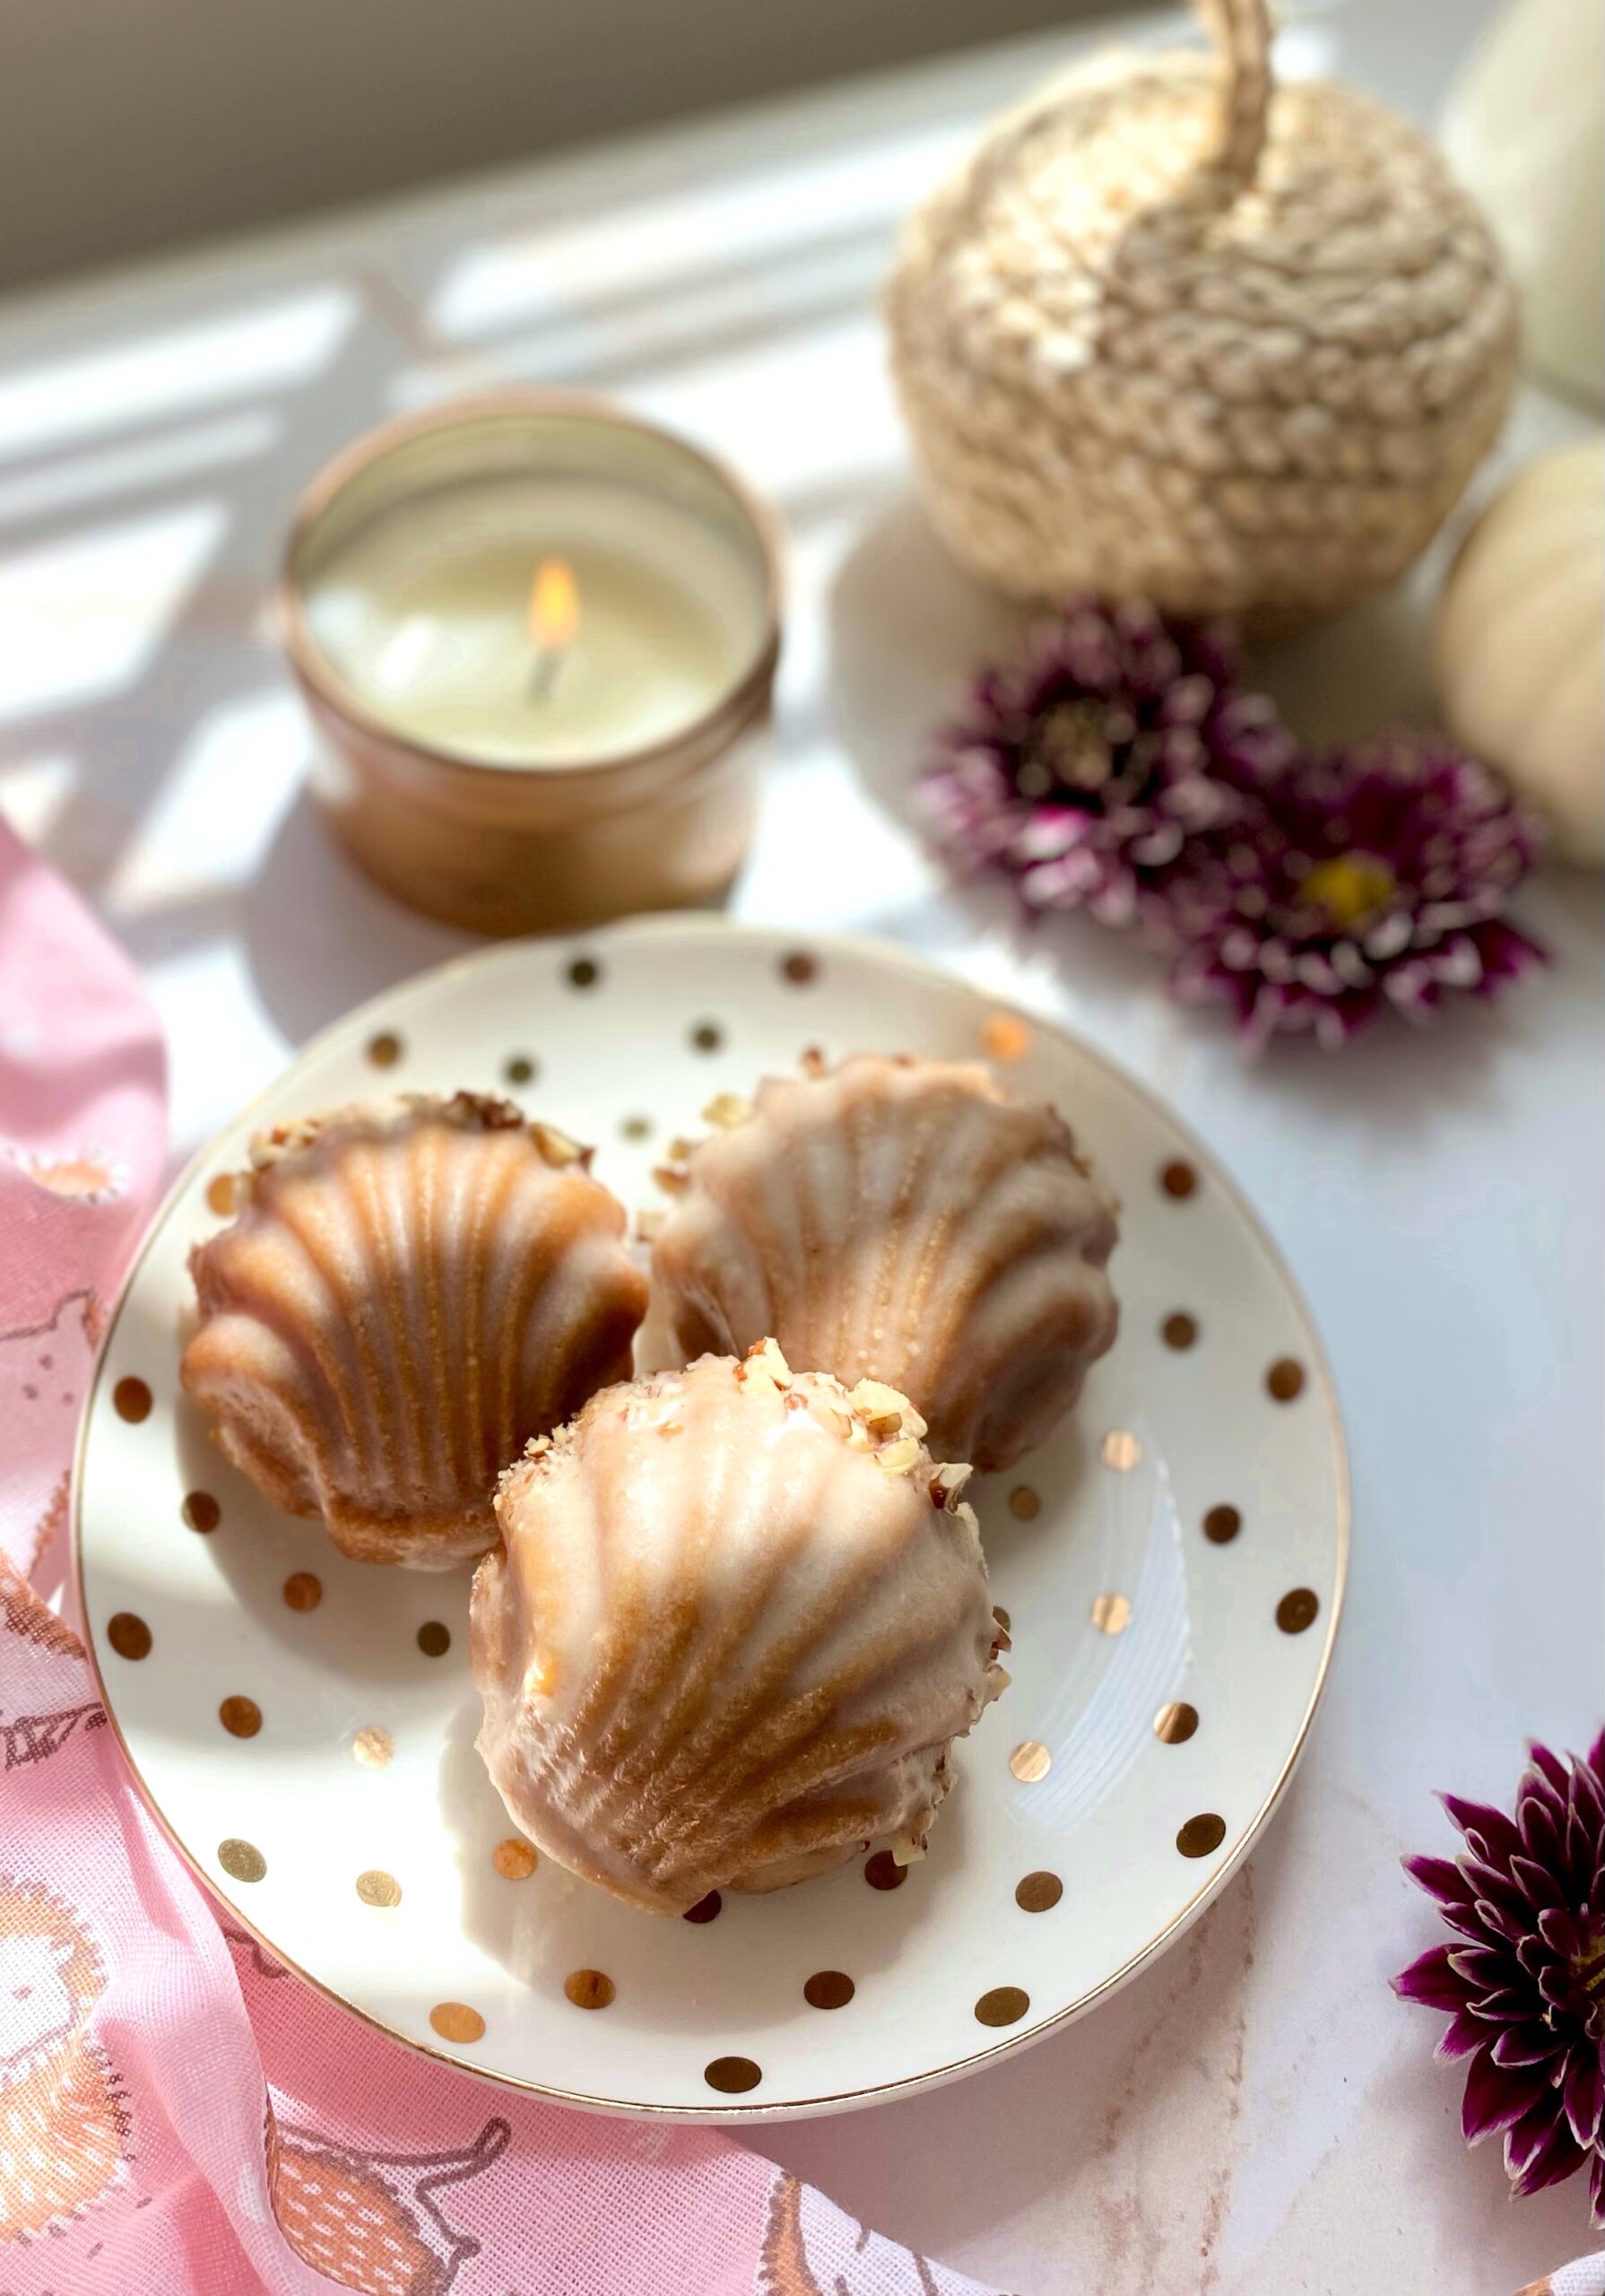
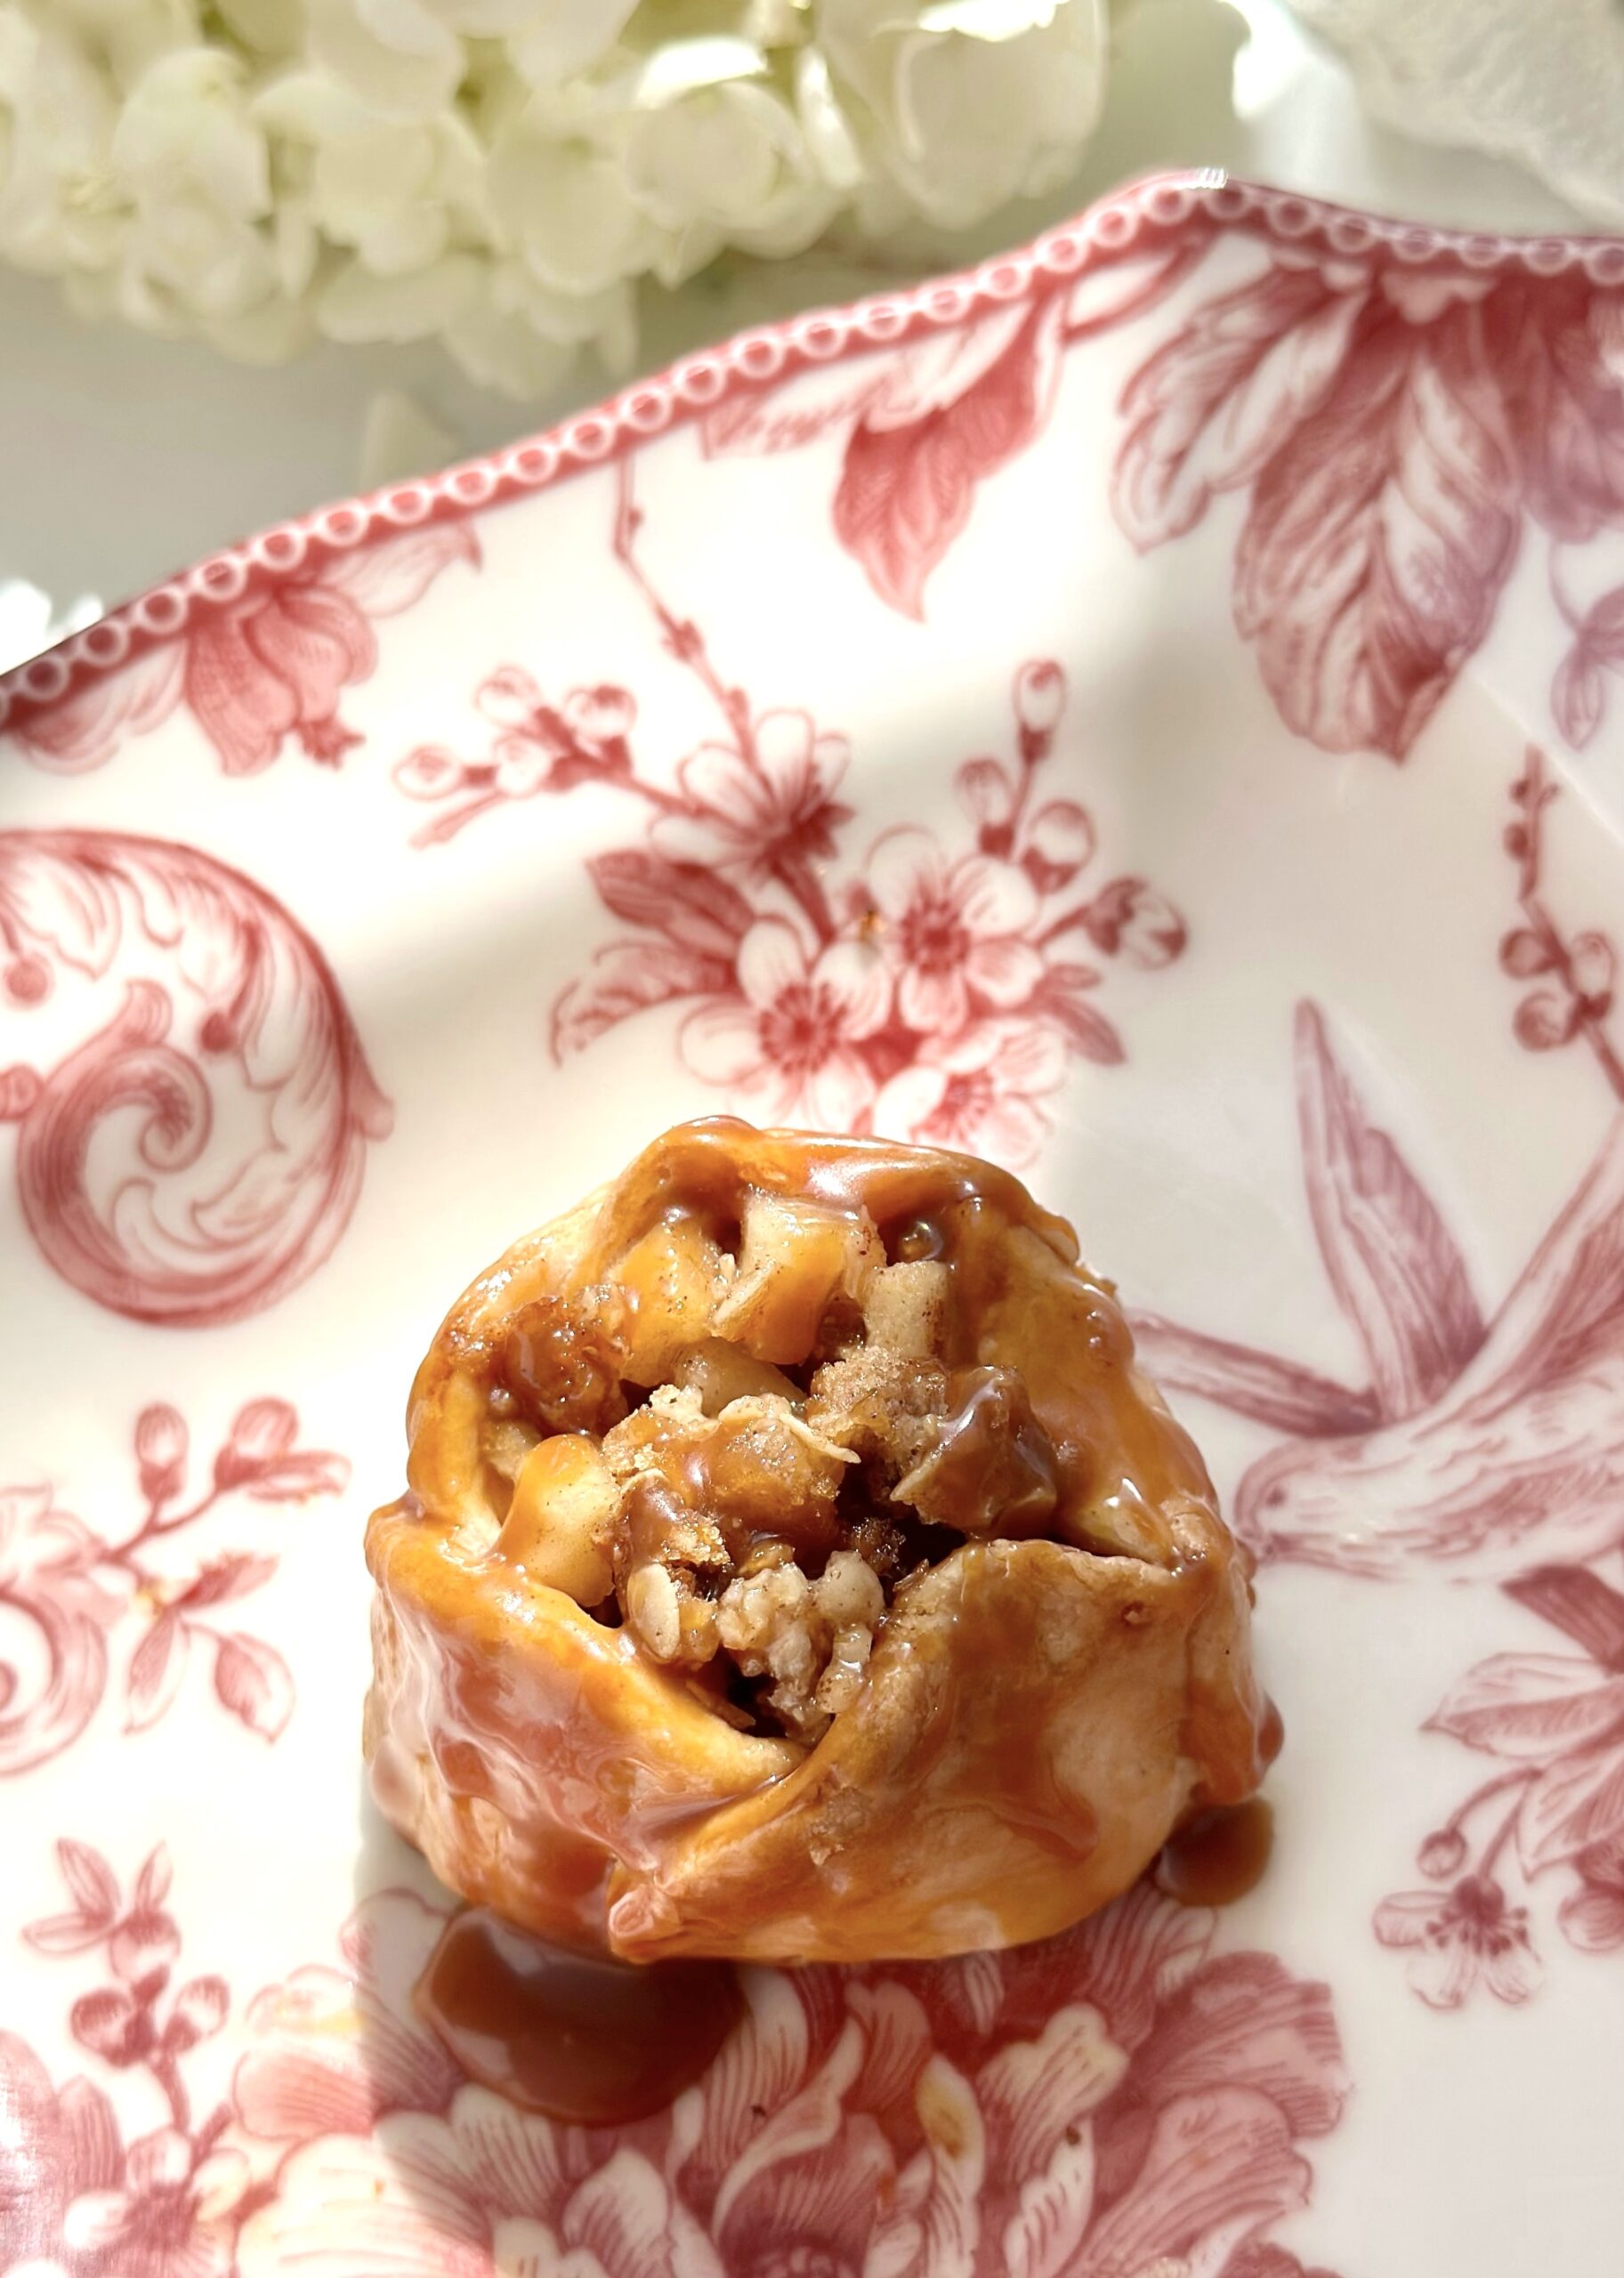
Chocolate Peanut Butter Tarts

Does anyone else remember those old peanut butter cup commercials where two people on the street would collide and a chocolate bar would miraculously end up inside of a jar of peanut butter? Then the person carrying the open jar of peanut butter would say, “Hey you got chocolate in my peanut butter!” and they would suddenly discover it’s a delicious combination. The real question is, why was anyone walking around outside with an open jar of peanut butter? I miss those silly commercials.

If you love chocolate and peanut butter together, you’ll absolutely love these tarts. The creamy peanut butter filling and the silky chocolate ganache topping are perfect together. The chocolate cookie crust adds a nice crunch. I used heart shaped tart pans to make the tarts a little more special for Valentine’s Day. To find the tart pans I used, click here. You can also use round tart pans if you prefer.

To watch the Instagram video, click here.

Print Recipe
Chocolate Peanut Butter Tarts
Instructions
Crust
  1. Preheat oven to 350ºF. Place four 4-inch tart pans with removable bottoms* on a baking sheet.
  2. in a medium bowl, mix crushed sandwich cookies with melted butter until well combined. Press crumb mixture into tart pans.
  3. Bake for 8 minutes. Let cool completely.
Filling
  1. In a medium bowl, beat peanut butter and softened butter until smooth.
  2. Add remaining filling ingredients and beat until smooth and well combined.
  3. Fill cooled tart shells with filling. Refrigerate tarts until set, at least 2 hours.
Topping
  1. Place chopped chocolate in a small bowl.
  2. In a small saucepan, heat heavy cream over medium-low heat just until bubble form around the edges. Do not boil.
  3. Pour hot cream over chocolate. Let sit two minutes then stir until smooth.
  4. Spoon over peanut butter filling. Add toppings if desired. Refrigerate until chocolate is set. Carefully remove tarts from pans.
Recipe Notes

To find the tart pans I used, click here.

Maple Pecan Brownies

maple pecan brownies

Pecan pie was my mom’s favorite, but she didn’t bake pies, so I always used to bake her one for Thanksgiving. One year, I made a chocolate version. It was delicious, but let’s just say it wasn’t user friendly. It was gooey and hard to serve. Over the years, it eventually morphed into these Maple Pecan Brownies. The brownie version is still delicious, rich and gooey with toasty pecans, but much more user friendly.

Enjoying Maple Pecan Brownies with a glass of milk or a cup of coffee is a must. Thinking of it brings back memories. I can practically smell my dad brewing the coffee to go with these brownies.

Print Recipe
Maple Pecan Brownies
Rich, gooey brownies topped with pecan pie filling
Servings
brownies
Ingredients
Brownies
Pecan Topping
Servings
brownies
Ingredients
Brownies
Pecan Topping
Instructions
Brownies
  1. Preheat oven to 350ºF. Line a 9-inch square baking pan with parchment paper, overlapping the sides an inch or two. Spray parchment paper with nonstick cooking spray.
  2. In a large bowl, stir together melted butter, granulated sugar and brown sugar until well combined.
  3. Mix in eggs and vanilla, one at a time, until well combined.
  4. Mix in cocoa powder, baking soda and salt until well combined.
  5. Stir in flour just until combined.
  6. Spread batter into prepared baking pan. Bake just until top is set, about 25 minutes.
  7. Meanwhile, prepare pecan topping.
  8. When brownie top is set, remove from oven. Gently pour pecan topping around the outer perimeter of brownies, to avoid making brownies sink in the middle. Evenly distribute the pecan topping over the top gently with a spoon.
  9. Return the brownies to the oven and continue baking until the topping is set, about 20-25 minutes. Brownies will stop jiggling and topping will look deep golden brown. Toothpick inserted inside will have a few moist crumbs on it. (If your topping starts to brown too much on the edges before the inside is done, apply aluminum foil around the edges as you would with a pie.)
  10. Remove from oven and cool completely before cutting, about 2- 2 1/2 hours.
  11. Cut into squares, wiping knife between cuts.
Pecan Topping
  1. In a medium bowl, stir together maple syrup, butter, brown sugar, egg, maple extract and salt until well combined.
  2. Stir in pecans until well coated with maple syrup mixture.
  3. Set aside until brownies are partially baked.

Fairy Puffs

Fairy Puffs sugared mini muffins wtih edible flowers

My dad used to take me on walks in the woods to look for fairy rings when I was a child. I wanted to see a real fairy so badly! I read a book about fairies, hoping to learn more about them. Fairies love little cakes, milk, honey and butter so I’m sure these Fairy Puffs would be fairy approved.

My Fairy Puffs recipe is loosely based on an old favorite mini muffin recipe. I tweaked it quite a bit, including the addition of pink dragonfruit powder. Dragonfruit has a subtle flavor, so the bright fuchsia powder is mostly for color. But oh what a beautiful color it is! You can find dragonfruit powder in healthy food stores or online. To find the dragonfruit powder, also known as pink pitaya powder, I used, click here.

fairy puff muffins

Decorating these little cuties was so entertaining! After sampling multiple variations of sparkling sugar and cinnamon sugar, I decided that dipping the bottoms of the muffins in butter and cinnamon sugar, then dipping the tops in butter and sparkling sugar gave them the perfect balance of sugar and spice. I had purchased some edible flowers a couple of days prior, and they added a pretty, magical touch. The flowers I used are called bachelor’s buttons and I got them at a local gourmet flower seller.

sugared mini muffins with edible flowers

Print Recipe
Fairy Puffs
Course Breakfast, Brunch
Keyword cake, muffins
Servings
mini muffins
Ingredients
Fairy Puffs
Topping
Course Breakfast, Brunch
Keyword cake, muffins
Servings
mini muffins
Ingredients
Fairy Puffs
Topping
Instructions
Fairy Puffs
  1. Preheat oven to 350ºF. Grease and flour a 24 serving mini muffin pan.
  2. In a medium bowl, whisk together flour, dragonfruit powder, baking powder, salt and nutmeg. Set aside.
  3. In a large bowl, cream butter and sugar with an electric mixer until light and fluffy.
  4. Add egg and beat until smooth.
  5. Add flour mixture and milk alternately in two additions and mix just until combined.
  6. Transfer batter to prepared muffin pan, filling muffin cups about 3/4 full.
  7. Bake until toothpick inserted in center of muffins comes out clean, about 12-14 minutes. (Be careful not to over bake. Check a few minutes early. Small muffins can dry out easily.)
  8. Let cool in pan for 5 minutes. Remove puffs from pan and transfer to cooling rack. (Loosen puffs with a small offset spatula or butter knife if necessary.)
Topping
  1. Combine granulated sugar and cinnamon in a shallow bowl.
  2. Place colored sparkling sugar crystals in another shallow bowl.
  3. Dip the bottoms of each puff in melted butter, then into cinnamon sugar mixture.
  4. Dip the tops of each puff in melted butter, then into sparkling sugar.
  5. Decorate with edible flowers if desired.
Recipe Notes

*To purchase dragonfruit powder, click here.

 **To purchase pink sparkling sugar crystals, click here.


Lemon Buttermilk Donuts with Honey Cream Cheese Icing

Lemon Buttermilk Donuts with Honey Cream Cheese Icing by Brownie Mischief

I was seriously happy when I started seeing donuts appearing at weddings, bridal showers and occasions other than work meetings. I’ve always felt those sweet, fluffy rings of dough had a higher calling. They had such potential! And honestly who doesn’t love donuts? They’re delicious, but they can also be beautiful. These Lemon Buttermilk Donuts could certainly win a beauty contest. They would make a gorgeous edition to any breakfast, brunch or dessert table. The fresh lemon zest and the earthy flavor of honey will bring springtime right into your kitchen.

Lemon Buttermilk Donuts with Honey Cream Cheese Frosting by Brownie Mischief

If you’re on the lookout for a Mother’s Day recipe, any mom will love these pretty, fragrant treats. This is a very easy recipe and the donuts bake up quickly, so you’ll have time to fix mom a cup of her favorite tea. If you don’t have a donut pan, and you’ve been reluctant to buy one, I can honestly say I love mine. It was very affordable and I’m pleased with the performance and ease of clean up with the pan I purchased. To find the donut pan click here.

In keeping with the springtime feel, I decorated my donuts with pesticide-free edible flowers. I used pansies, but if you’re unable to find them, you can substitute pesticide-free rose petals. I found these edible pansies at my local food market in the produce department, near the fresh herbs. You can also find edible flowers at farmers’ markets and online. For a list of edible flowers, click here.  Note:  The above pictured orange ranunculus flowers on the table are not edible.  

Lemon Buttermilk Donuts with Honey Cream Cheese Icing by Brownie Mischief


Print Recipe


Lemon Buttermilk Donuts with Honey Cream Cheese Icing

Prep Time 20 minutes
Cook Time 7 minutes

Servings


Ingredients
Lemon Buttermilk Donuts

Honey Cream Cheese Icing

Prep Time 20 minutes
Cook Time 7 minutes

Servings


Ingredients
Lemon Buttermilk Donuts

Honey Cream Cheese Icing


Instructions
Lemon Buttermilk Donuts
  1. Preheat oven to 375ºF. Spray the wells of a ***donut pan with non-stick cooking spray.

  2. In a medium bowl, whisk together cake flour, sugar, baking powder and salt.

  3. In a small bowl, whisk buttermilk, egg, melted butter, and lemon zest together. Add to flour mixture and stir until combined.

  4. Transfer batter to a piping bag or plastic zip bag. Snip off the tip of the bag and pipe batter into prepared donut pan, filling the wells 2/3 full.

  5. Bake for 7-8 minutes or until toothpick inserted into donuts comes out clean. Let cool in pan for 5 minutes, then remove donuts to a rack to cool completely.

  6. Prepare Honey Cream Cheese Icing while donuts are cooling.

  7. Dip tops of donuts into icing and decorate as desired. Serve immediately.

Honey Cream Cheese Icing
  1. In a medium bowl, beat cream cheese and butter with an electric mixer at medium speed until smooth.

  2. Add vanilla extract and salt. Mix until combined.

  3. Add powdered sugar and mix on low speed until moistened. Turn mixer up to medium speed and mix until combined.

  4. Add honey and beat on medium speed until smooth. Add milk, a little at a time until desired consistency is reached. Beat until smooth.
    Lemon Buttermilk Donuts with Honey Cream Cheese Frosting by Brownie Mischief